hpnonstoprdfsystemmanagement manualforj …nonstoptools.com/manuals/rdf-management.pdf ·...
TRANSCRIPT

HP NonStop RDF System ManagementManual for J-series and H-series RVUs (RDF1.9)
HP Part Number: 529826-006Published: June 2009Edition: J06.03 and subsequent J-series RVUs and H06.03 and subsequent H-series RVUs

© Copyright 2009 Hewlett-Packard Development Company, L.P.
Legal Notice
Confidential computer software. Valid license from HP required for possession, use or copying. Consistent with FAR 12.211 and 12.212, CommercialComputer Software, Computer Software Documentation, and Technical Data for Commercial Items are licensed to the U.S. Government undervendor’s standard commercial license.
The information contained herein is subject to change without notice. The only warranties for HP products and services are set forth in the expresswarranty statements accompanying such products and services. Nothing herein should be construed as constituting an additional warranty. HPshall not be liable for technical or editorial errors or omissions contained herein.
Export of the information contained in this publication might require authorization from the U.S. Department of Commerce.
Microsoft, Windows, and Windows NT are U.S. registered trademarks of Microsoft Corporation.
Intel, Pentium, and Celeron are trademarks or registered trademarks of Intel Corporation or its subsidiaries in the United States and othercountries.
Java is a U.S. trademark of Sun Microsystems, Inc.
Motif, OSF/1, UNIX, X/Open, and the "X" device are registered trademarks, and IT DialTone and The Open Group are trademarks of The OpenGroup in the U.S. and other countries.
Open Software Foundation, OSF, the OSF logo, OSF/1, OSF/Motif, and Motif are trademarks of the Open Software Foundation, Inc. OSF MAKESNO WARRANTY OF ANY KIND WITH REGARD TO THE OSF MATERIAL PROVIDED HEREIN, INCLUDING, BUT NOT LIMITED TO, THEIMPLIED WARRANTIES OF MERCHANTABILITY AND FITNESS FOR A PARTICULAR PURPOSE. OSF shall not be liable for errors containedherein or for incidental consequential damages in connection with the furnishing, performance, or use of this material.
© 1990, 1991, 1992, 1993 Open Software Foundation, Inc. The OSF documentation and the OSF software to which it relates are derived in partfrom materials supplied by the following:© 1987, 1988, 1989 Carnegie-Mellon University. © 1989, 1990, 1991 Digital Equipment Corporation. ©1985, 1988, 1989, 1990 Encore Computer Corporation. © 1988 Free Software Foundation, Inc. © 1987, 1988, 1989, 1990, 1991 Hewlett-PackardCompany. © 1985, 1987, 1988, 1989, 1990, 1991, 1992 International Business Machines Corporation. © 1988, 1989 Massachusetts Institute ofTechnology. © 1988, 1989, 1990 Mentat Inc. © 1988 Microsoft Corporation. © 1987, 1988, 1989, 1990, 1991, 1992 SecureWare, Inc. © 1990, 1991Siemens Nixdorf Informationssysteme AG. © 1986, 1989, 1996, 1997 Sun Microsystems, Inc. © 1989, 1990, 1991 Transarc Corporation.OSF softwareand documentation are based in part on the Fourth Berkeley Software Distribution under license from The Regents of the University of California.OSF acknowledges the following individuals and institutions for their role in its development: Kenneth C.R.C. Arnold, Gregory S. Couch, ConradC. Huang, Ed James, Symmetric Computer Systems, Robert Elz. © 1980, 1981, 1982, 1983, 1985, 1986, 1987, 1988, 1989 Regents of the Universityof California.

Table of Contents
About This Document.......................................................................................................23Supported Release Version Updates (RVUs)........................................................................................23Intended Audience................................................................................................................................23New and Changed Information in This Edition...................................................................................23
New features in the RDF 1.9 manual...............................................................................................23Updates in the RDF 1.9 manual.......................................................................................................24
Document Organization.......................................................................................................................24Notation Conventions...........................................................................................................................26
General Syntax Notation.................................................................................................................26Notation for Messages.....................................................................................................................28
Related Information..............................................................................................................................29Publishing History................................................................................................................................30HP Encourages Your Comments..........................................................................................................30
1 Introducing RDF............................................................................................................31RDF Subsystem Overview....................................................................................................................32
Unplanned Outages With ZLT........................................................................................................34Unplanned Outages Without ZLT...................................................................................................34Planned Outages..............................................................................................................................35Features............................................................................................................................................35
User Interfaces......................................................................................................................................38RDFCOM for Subsystem Management and Operations.................................................................38Scanning the EMS Event Log...........................................................................................................38
RDF Tasks..............................................................................................................................................39RDF Processes.......................................................................................................................................40
Primary System Processes...............................................................................................................41Backup System Processes................................................................................................................42
RDF Operations....................................................................................................................................42Monitor Process...............................................................................................................................42Extractor Process.............................................................................................................................42Receiver Process..............................................................................................................................44
Sorted Image Trails.....................................................................................................................45RDF Control Points....................................................................................................................46
RDFNET Process.............................................................................................................................46Updater Processes............................................................................................................................46
Audited Database Files..............................................................................................................47REDO Pass..................................................................................................................................48UNDO Pass.................................................................................................................................48Restart Information....................................................................................................................48Partitioned Files, Alternate Key Files, and Indexes...................................................................48File System Errors Involving Data Files.....................................................................................49RTD Times..................................................................................................................................49
Purger Process.................................................................................................................................49Reciprocal and Chain Replication Require Mutually Exclusive Datavols.................................50
Available Types of Replication to Multiple Backup Systems...............................................................52RDF Control Subvolume.................................................................................................................53
Other RDF Features..............................................................................................................................53Triple Contingency..........................................................................................................................53Loopback Configuration (Single System)........................................................................................53Online Product Initialization...........................................................................................................54
Table of Contents 3

Online Database Synchronization...................................................................................................54Online Dumps of the Backup Database..........................................................................................54Subvolume-Level and File-Level Replication..................................................................................54Shared Access DDL Operations......................................................................................................54Configurable Software Location......................................................................................................54EMS Support....................................................................................................................................55SMF Support....................................................................................................................................55RTD Warning Thresholds................................................................................................................55Process-Lockstep Operation............................................................................................................55Support for Network Transactions..................................................................................................55RDF and NonStop SQL/MX.............................................................................................................56Zero Lost Transactions (ZLT)..........................................................................................................56Monitoring RDF Entities With ASAP..............................................................................................56
2 Preparing the RDF Environment..................................................................................57Configuring Hardware for RDF Operations.........................................................................................57
Primary System Configuration........................................................................................................57Backup System Configuration.........................................................................................................57Disk Volume Limit...........................................................................................................................58Volume-to-Volume Mapping...........................................................................................................58Subvolume-to-Subvolume Name Mapping....................................................................................58Expand (Data Communication) Resources.....................................................................................58
Preparing Software and Database Files for RDF Operations...............................................................59Configuring TMF for RDF Operations on the Primary System......................................................60
AUDITTRAIL BUFFER..............................................................................................................60TMF Configuration With Dump Process on the Primary System.............................................61TMF Configuration Without Dump Process on the Primary System........................................61
Configuring TMF for RDF Operations on the Backup System.......................................................61Preparing Databases for RDF Protection.........................................................................................62
Audited Files Per Volume on Primary System..........................................................................62Audited Backup Database Files.................................................................................................62
Reload of Backup Database...................................................................................................62Disk Process Pins on Database Volumes..............................................................................62
DSM Catalogs and File Code 900...............................................................................................63Views on the Backup System.....................................................................................................63Partitioned Tables and Files.......................................................................................................63Database Block Sizes and Cache on the Backup System............................................................63
Specifying System Generation Parameters for an RDF Environment.............................................63Designing Transactions for RDF Protection....................................................................................64
Replicating Database Operations...............................................................................................64NonStop SQL DDL Operations............................................................................................64Enscribe File-Label Modifications.........................................................................................64Purge Operations..................................................................................................................64Partitioned Files....................................................................................................................65Temporary Disk Files............................................................................................................65
Using SMF With RDF............................................................................................................................65Configuring an SMF Environment on the Primary System............................................................66Configuring an SMF Environment on the Backup RDF System.....................................................66
3 Installing and Configuring RDF..................................................................................69Preparing the Primary System..............................................................................................................69
Stopping the Software.....................................................................................................................69Preparing the Tables and Files.........................................................................................................69
4 Table of Contents

Separating NonStop SQL Tables................................................................................................70Compressing Audit Data for Tables and Files...........................................................................70
Preparing the Backup System...............................................................................................................70Synchronizing the Primary and Backup Databases........................................................................71
Re-Creating an Empty Database With an OBEY Command.....................................................71Synchronizing Databases With SQLCI Commands...................................................................72Synchronizing Databases With BACKUP and RESTORE Utilities............................................73Synchronizing Databases With FUP..........................................................................................74Synchronizing Partitioned Files.................................................................................................74
Backing Up Application Programs and Files..................................................................................74Cache for RDF IMAGETRAILS and UPDATER UPDATEVOLUMES............................................74
Installing RDF.......................................................................................................................................75RDF/IMP (T0346) Product Components..........................................................................................75RDF/IMPX (T0347) Product Components.......................................................................................75RDF/ZLT (T0618) Product Components..........................................................................................76Process-Lockstep Gateway (T1226) Product Components..............................................................76Component Licensing......................................................................................................................76Security Guidelines..........................................................................................................................76Using the OWNER Attribute to Allow Super Group Users to Start, Stop, and Manage RDF........78
Initializing and Configuring TMF........................................................................................................78TMF Subsystem Not Running Previously.......................................................................................78TMF Subsystem Running Previously..............................................................................................79
Initializing and Configuring RDF.........................................................................................................79Initializing RDF...............................................................................................................................79
Initializing RDF To a TMF Shutdown Timestamp.....................................................................80Initializing RDF Without any Timestamp Option.....................................................................80
Initializing RDF Without Stopping TMF (Using INITTIME Option)..............................................80Determining a Valid inittime Value.......................................................................................81Special Considerations...............................................................................................................81
Enscribe Create Records.......................................................................................................81Stop-RDF-Updater Records..................................................................................................81TMF Shutdown Records.......................................................................................................82
Online Installation and Initialization Without Stopping RDF........................................................82Disaster Points............................................................................................................................83Considerations............................................................................................................................83
Configuring RDF.............................................................................................................................84Setting Global Attributes............................................................................................................85
LOGFILE Attribute...............................................................................................................85UPDATERDELAY Attribute.................................................................................................85UPDATERTXTIME Attribute................................................................................................86UPDATERRTDWARNING Attribute...................................................................................86UPDATEROPEN Attribute...................................................................................................86SOFTWARELOC Attribute...................................................................................................86NETWORK Attribute............................................................................................................87NETWORKMASTER Attribute.............................................................................................87UPDATEREXCEPTION Attribute........................................................................................87LOCKSTEPVOL Attribute....................................................................................................87REPLICATEPURGE Attribute..............................................................................................87REMOTE MIRROR Attribute................................................................................................87REMOTE STANDBY Attribute.............................................................................................88OWNER Attribute.................................................................................................................88
Setting Image Trail Attributes....................................................................................................88Dedicated Image Trails or Image Trails on UpdateVolumes................................................89
Setting Trigger Attributes...........................................................................................................89Setting Network Configuration Record Attributes....................................................................90
Table of Contents 5

PRIMARYSYSTEM Attribute................................................................................................90BACKUPSYSTEM Attribute.................................................................................................91REMOTECONTROLSUBVOL Attribute..............................................................................91PNETTXVOLUME Attribute................................................................................................91
Setting Individual Process Attributes........................................................................................91RDFNET Process...................................................................................................................91Monitor Process....................................................................................................................91Extractor Process...................................................................................................................92Receiver Process....................................................................................................................93Purger Process.......................................................................................................................94Updater Processes.................................................................................................................95
Creating a Configuration Command File........................................................................................96Configuration File Compatibility....................................................................................................96
Enabling RDF Operations.....................................................................................................................97Starting TMF....................................................................................................................................97Starting RDF....................................................................................................................................97Restarting the Applications.............................................................................................................98
4 Operating and Monitoring RDF.................................................................................99Running RDFCOM...............................................................................................................................99
Command Syntax for Starting an RDFCOM Session......................................................................99Using RDFCOM Interactively.......................................................................................................100
Starting a Session......................................................................................................................100Ending a Session.......................................................................................................................101Interrupting Command Processing..........................................................................................101
Using RDFCOM Noninteractively (without an IN File)...............................................................102Using RDFCOM From a Command File (IN file)..........................................................................102Using Scripts for Easy and Fast RDF Initialization and Configuration........................................103Managing Multiple RDF Environments from One RDFCOM Session.........................................104Controlling Multiple RDF Environments Running on Different Nodes with a Single ObeyFile..................................................................................................................................................104Using RDFCOM Commands.........................................................................................................105
Configuration Commands........................................................................................................105Operational Commands...........................................................................................................106Utility Commands....................................................................................................................106Entering Commands................................................................................................................107
Requesting Online Help................................................................................................................107Help for Command Syntax......................................................................................................107Help for RDF Error Messages..................................................................................................108
Running RDFSCAN............................................................................................................................109Command Syntax for Starting an RDFSCAN Session...................................................................109Using RDFSCAN...........................................................................................................................109
Starting a Session......................................................................................................................109Ending a Session.......................................................................................................................110
Using RDFSCAN Commands........................................................................................................110Requesting Online Help................................................................................................................111
Help for Command Syntax......................................................................................................111Introductory Usage Information..............................................................................................112
Performing Routine Operational Tasks...............................................................................................112Displaying Current Operating Statistics and Configuration Information....................................112
RDF States.................................................................................................................................113Main STATUS RDF Display......................................................................................................114Using RDF Status Data to Control TMF Audit Dumping........................................................116
Changing Configuration Attributes..............................................................................................116
6 Table of Contents

Process Priority.........................................................................................................................117EMS Logs (Collectors)..............................................................................................................117RETAINCOUNT.......................................................................................................................117PURGETIME.............................................................................................................................117UPDATERDELAY.....................................................................................................................117UPDATEROPEN......................................................................................................................117
Reading Log Messages..................................................................................................................118Examining RDF Messages........................................................................................................118
ASAP...................................................................................................................................................120
5 Critical Operations, Special Situations, and Error Conditions.............................121Recovering From File System Errors..................................................................................................121Handling Disk Space Problems..........................................................................................................124Exceeding the Maximum Number of Concurrent File Opens............................................................125Responding to Operational Failures...................................................................................................125
Communication Line Failures.......................................................................................................126System Failures..............................................................................................................................126Processor Failures..........................................................................................................................127
Extractor Failure.......................................................................................................................127Receiver Failure........................................................................................................................127Updater Failure........................................................................................................................127Purger Failure...........................................................................................................................128RDFNET Failure.......................................................................................................................128RDF State Transition Failure....................................................................................................128
Problems Involving TMF...............................................................................................................128TMF Audited Volume Failure..................................................................................................128TMF Subsystem Failure on the Primary System......................................................................128TMF Subsystem Failure on the Backup System.......................................................................129
Volume Recovery Processing..............................................................................................129Volume Recovery Failure....................................................................................................129
File Recovery on the Primary System............................................................................................130File Recovery on the Backup System.............................................................................................130TMFCOM ABORT TRANSACTION With AVOIDHANGING Option on Primary System........131Audit Trails Pinned by RDF on the Primary System.....................................................................131
Stopping RDF......................................................................................................................................132Stopping RDF by Stopping TMF...................................................................................................133Stopping RDF From the Primary System......................................................................................134Stopping RDF From the Backup System.......................................................................................134Stopping RDF Using STOP RDF, DRAIN......................................................................................135Stopping RDF using STOP RDF, REVERSE Operation.................................................................135
Restarting RDF....................................................................................................................................136Carrying Out a Planned Switchover...................................................................................................136
Standard Configurations...............................................................................................................136Using STOP RDF, REVERSE and the REVERSE Trigger...............................................................137Reciprocal Configurations and Switchover...................................................................................137
Takeover Operations...........................................................................................................................139The RDF Takeover Operation........................................................................................................139
Phase One Undo Pass...............................................................................................................139Phase Two Undo Pass...............................................................................................................140Phase Three Undo Pass............................................................................................................140
Issuing the TAKEOVER Command...............................................................................................140Issuing the TAKEOVER Command in an Obey File.....................................................................142Monitoring Takeover Outcome......................................................................................................142Takeover Failure............................................................................................................................143
Table of Contents 7

Monitor Considerations...........................................................................................................143Updater Considerations...........................................................................................................143
Takeover and Triple Contingency..................................................................................................143Checking Exception Files for Uncommitted Transactions............................................................143How to Plan for the Fastest Movement of Business Operations to Your Backup System AfterTakeover.........................................................................................................................................144Restoring the Primary System.......................................................................................................147
Online Method of Resynchronizing the Primary Database.....................................................148Offline Method of Resynchronizing the Primary Database.....................................................148
Reading the Backup Database (BROWSE versus STABLE Access)....................................................149Near Real Time Read Access to Updates on the Primary System......................................................149Access to Backup Databases with Stable Access................................................................................150
Stopping TMF on the Primary System..........................................................................................150Using the STOP RDF, DRAIN Command.....................................................................................150STOP UPDATE to a Timestamp....................................................................................................150
RDF and NonStop SQL DDL Operations...........................................................................................151Performing Nonshared Access DDL Operations..........................................................................152Performing Shared Access DDL Operations.................................................................................152
Network Configurations and Shared Access NonStop SQL DDL Operations........................153RDF and NonStop SQL/MX Operations.............................................................................................153Backing Up Image Trail Files..............................................................................................................153TMF and Online Dumps on the Backup System................................................................................154Doing FUP RELOAD Operations With Updaters Running...............................................................155Exception File Optimization...............................................................................................................155Switching Disks on Updater UPDATEVOLUMES.............................................................................155Online Remirroring of Updater SUBVOLUMES................................................................................156
6 Maintaining the Databases......................................................................................157Understanding Database States..........................................................................................................157Making Changes to Database Structures............................................................................................159
NonStop SQL/MP or NonStop SQL/MX Databases......................................................................160Catalog Changes.......................................................................................................................160DDL Operations.......................................................................................................................160
With Shared Access.............................................................................................................160Without Shared Access.......................................................................................................161Adding a New Column.......................................................................................................161Guidelines for Create Index and Alter Table Move Operations.........................................162Example for CREATE INDEX With Shared Access............................................................162Multiple Indexes on a Single Base Table.............................................................................162
Partition Key Changes..............................................................................................................163Table Purges.............................................................................................................................163
Enscribe Databases........................................................................................................................164The STOP TMF Method............................................................................................................164The STOP RDF DRAIN Method...............................................................................................164
Resynchronizing Databases................................................................................................................164Resynchronizing Entire Databases Offline....................................................................................165Resynchronizing Individual Volumes, Tables, and Files Offline..................................................165Resynchronizing Individual Tables or Files Offline......................................................................166
7 Online Database Synchronization...........................................................................167Overview.............................................................................................................................................167Synchronizing Entire Databases Online.............................................................................................168
Considerations When Synchronizing Entire Databases................................................................169
8 Table of Contents
Duration and Preparation Issues..............................................................................................170SYNCHDBTIME Issues............................................................................................................170
Enscribe Create Records......................................................................................................170Stop-RDF-Updater Records................................................................................................170TMF Shutdown Records.....................................................................................................171
CREATE/LOAD Issues (Step 4, Method 1)...............................................................................171General Considerations for Enscribe Files..........................................................................171Special Consideration for Enscribe Files.............................................................................172General Considerations for NonStop SQL Tables...............................................................172
Enscribe Queue File Issues.......................................................................................................172Different NonStop SQL Product Versions................................................................................173Moving Duplicated Tables and Files to the Backup System....................................................173
Example of Synchronizing An Entire Database Online................................................................174Synchronizing Selected Database Portions Online.............................................................................176
Overview........................................................................................................................................176Example #1 – Staged Synchronization of an Entire Database..................................................176Example #2 – Synchronization of an Individual Volume.........................................................176Example #3 – Synchronization of an Individual File or Partition on a Volume.......................176
Partial Database Synchronization Issues.......................................................................................177Enscribe Files Without Partitions.............................................................................................177
Key-Sequenced and Relative Files......................................................................................177Entry-Sequenced Files.........................................................................................................177
Enscribe Files With Partitions...................................................................................................177Key-Sequenced Files with Create/Load (Step 4, Method 1)...............................................177Key-Sequenced Files with FRNL (Step 4, Method 2)..........................................................178Relative Files with Create/Load (Step 4, Method 1)...........................................................178Relative Files with FRNL (Step 4, Method 2)......................................................................178Entry-Sequenced Files.........................................................................................................178
NonStop SQL/MP and NonStop SQL/MX Tables Without Partitions.....................................178Tables with SYSKEY or Clustering Keys.............................................................................178Tables without SYSKEY and Clustering Keys....................................................................178
NonStop SQL/MP and NonStop SQL/MX Tables With Partitions...........................................179Requirements for Synchronization of Individual Partitions...............................................179Key-Sequenced Tables.........................................................................................................180Relative Tables.....................................................................................................................181
NonStop SQL/MP and NonStop SQL/MX Indexes (With or Without Partitions)...................183Phases of Online Database Synchronization.......................................................................................183
Extractor Phases.............................................................................................................................183Phase 1, Part 1...........................................................................................................................183Phase 1, Part 2...........................................................................................................................183Phase 1, Part 3...........................................................................................................................183Phase 2......................................................................................................................................184
Updater Phase 2.............................................................................................................................184Extractor Restart Considerations During Online Database Synchronization....................................184Determining When Online Database Synchronization Is Complete..................................................184
Extractor Messages........................................................................................................................184Updater Messages..........................................................................................................................184
8 Entering RDFCOM Commands................................................................................187Elements of RDFCOM Command Descriptions.................................................................................187
Purpose, Syntax, and Attributes....................................................................................................187Where Issued.................................................................................................................................187Security Restrictions......................................................................................................................187RDF State Requirement.................................................................................................................188
Table of Contents 9
Usage Guidelines...........................................................................................................................188Output Displayed..........................................................................................................................190Examples........................................................................................................................................190
RDFCOM-Related Filenames and Process Identifiers........................................................................190Reserved File Names.....................................................................................................................191Disk File Names.............................................................................................................................191Nondisk Device Names.................................................................................................................191Process File Names........................................................................................................................192
RDFCOM Commands.........................................................................................................................192ADD...............................................................................................................................................193
Where Issued............................................................................................................................193Security Restrictions.................................................................................................................193RDF State Requirement............................................................................................................193Usage Guidelines......................................................................................................................194Examples..................................................................................................................................194
ALTER............................................................................................................................................195Where Issued............................................................................................................................196Security Restrictions.................................................................................................................196RDF State Requirement............................................................................................................196Usage Guidelines......................................................................................................................196Examples..................................................................................................................................196
COPYAUDIT..................................................................................................................................197Where Issued............................................................................................................................197Security Restrictions.................................................................................................................197RDF State Requirement............................................................................................................197Usage Guidelines......................................................................................................................197COPYAUDIT Restartability......................................................................................................198Example....................................................................................................................................199
DELETE..........................................................................................................................................199Where Issued............................................................................................................................199Security Restrictions.................................................................................................................200RDF State Requirement............................................................................................................200Usage Guidelines......................................................................................................................200Examples..................................................................................................................................200
EXIT...............................................................................................................................................201Where Issued............................................................................................................................201Security Restrictions.................................................................................................................201RDF State Requirement............................................................................................................201Usage Guidelines......................................................................................................................201Example....................................................................................................................................201
FC...................................................................................................................................................201Where Issued............................................................................................................................202Security Restrictions.................................................................................................................202RDF State Requirement............................................................................................................202Usage Guidelines......................................................................................................................202Examples..................................................................................................................................202
HELP..............................................................................................................................................203Where Issued............................................................................................................................203Security Restrictions.................................................................................................................203RDF State Requirement............................................................................................................204Usage Guidelines......................................................................................................................204Examples..................................................................................................................................204
HISTORY.......................................................................................................................................205Where Issued............................................................................................................................205Security Restrictions.................................................................................................................205
10 Table of Contents

RDF State Requirement............................................................................................................205Examples..................................................................................................................................205
INFO..............................................................................................................................................206Where Issued............................................................................................................................207Security Restrictions.................................................................................................................207RDF State Requirements...........................................................................................................207Usage Guidelines......................................................................................................................207Output Displayed.....................................................................................................................208Examples..................................................................................................................................208
INFO * Command...............................................................................................................208INFO EXTRACTOR Command..........................................................................................209INFO EXTRACTOR Command With OBEYFORM Option...............................................209INFO MONITOR Command..............................................................................................210INFO RDF Command.........................................................................................................210INFO VOLUME Command................................................................................................210INFO PURGER Command..................................................................................................211INFO TRIGGER Command................................................................................................211INFO TRIGGER Command With OBEYFORM Option......................................................212INFO RDFNET Command..................................................................................................212INFO NETWORK Command.............................................................................................212
INITIALIZE RDF...........................................................................................................................212Where Issued............................................................................................................................215Security Restrictions.................................................................................................................215RDF State Requirement............................................................................................................215Usage Guidelines......................................................................................................................215Examples..................................................................................................................................217
OBEY..............................................................................................................................................217Where Issued............................................................................................................................217Security Restrictions.................................................................................................................217RDF State Requirement............................................................................................................217Usage Guidelines......................................................................................................................218Example....................................................................................................................................218
OPEN.............................................................................................................................................218Where Issued............................................................................................................................218Security Restrictions.................................................................................................................218RDF State Requirement............................................................................................................218Usage Guidelines......................................................................................................................218Examples..................................................................................................................................219
OUT................................................................................................................................................219Where Issued............................................................................................................................220Security Restrictions.................................................................................................................220RDF State Requirement............................................................................................................220Usage Guidelines......................................................................................................................220Examples..................................................................................................................................220
RESET............................................................................................................................................220Where Issued............................................................................................................................221Security Restrictions.................................................................................................................221RDF State Requirement............................................................................................................221Usage Guidelines......................................................................................................................221Examples..................................................................................................................................222
SET EXTRACTOR..........................................................................................................................222Where Issued............................................................................................................................223Security Restrictions.................................................................................................................223RDF State Requirements...........................................................................................................223Usage Guidelines......................................................................................................................223
Table of Contents 11

Examples..................................................................................................................................223SET IMAGETRAIL.........................................................................................................................224
Usage Guidelines......................................................................................................................224SET MONITOR..............................................................................................................................224
Where Issued............................................................................................................................225Security Restrictions.................................................................................................................225RDF State Requirements...........................................................................................................225Usage Guidelines......................................................................................................................225Example....................................................................................................................................225
SET NETWORK.............................................................................................................................225Where Issued............................................................................................................................226Security Restrictions.................................................................................................................226RDF State Requirements...........................................................................................................226Usage Guidelines......................................................................................................................226Example....................................................................................................................................226
SET PURGER.................................................................................................................................226Where Issued............................................................................................................................228Security Restrictions.................................................................................................................228RDF State Requirements...........................................................................................................228Usage Guidelines......................................................................................................................228Example....................................................................................................................................228
SET RDF.........................................................................................................................................228Where Issued............................................................................................................................231Security Restrictions.................................................................................................................231RDF State Requirements...........................................................................................................231Usage Guidelines......................................................................................................................231
SET RDFNET.................................................................................................................................231Where Issued............................................................................................................................232Security Restrictions.................................................................................................................232RDF State Requirements...........................................................................................................232Usage Guidelines......................................................................................................................232Example....................................................................................................................................232
SET RECEIVER..............................................................................................................................232Where Issued............................................................................................................................234Security Restrictions.................................................................................................................234RDF State Requirements...........................................................................................................234Usage Guidelines......................................................................................................................234Examples..................................................................................................................................234
SET TRIGGER................................................................................................................................235Where Issued............................................................................................................................235Security Restrictions.................................................................................................................236RDF State Requirements...........................................................................................................236Usage Guidelines......................................................................................................................236Example....................................................................................................................................236
SET VOLUME................................................................................................................................236Where Issued............................................................................................................................238Security Restrictions.................................................................................................................238RDF State Requirements...........................................................................................................238Usage Guidelines......................................................................................................................238Examples..................................................................................................................................239
SHOW............................................................................................................................................239Where Issued............................................................................................................................240Security Restrictions.................................................................................................................240RDF State Requirements...........................................................................................................240Usage Guidelines......................................................................................................................240
12 Table of Contents
Output Displayed.....................................................................................................................240Examples..................................................................................................................................240SHOW RDF Command............................................................................................................240SHOW RECEIVER Command..................................................................................................241SHOW PURGER Command.....................................................................................................241SHOW VOLUME Command...................................................................................................241SHOW RDFNET Command.....................................................................................................242SHOW NETWORK Command................................................................................................242SHOW TRIGGER Command...................................................................................................242
START RDF....................................................................................................................................242Where Issued............................................................................................................................243Security Restrictions.................................................................................................................243RDF State Requirement............................................................................................................243Usage Guidelines......................................................................................................................243Examples..................................................................................................................................244
START UPDATE............................................................................................................................244Where Issued............................................................................................................................244Security Restrictions.................................................................................................................244RDF State Requirement............................................................................................................244Usage Guidelines......................................................................................................................244Example....................................................................................................................................244
STATUS..........................................................................................................................................244Where Issued............................................................................................................................245Security Restrictions.................................................................................................................245RDF State Requirement............................................................................................................245Usage Guidelines......................................................................................................................245STATUS RDF Command Output Display................................................................................245RDF Process..............................................................................................................................247Name........................................................................................................................................247RTD Time.................................................................................................................................247Pri..............................................................................................................................................248Volume and Seqnce..................................................................................................................248Cpus..........................................................................................................................................249Error..........................................................................................................................................249Special Messages......................................................................................................................249Examples..................................................................................................................................250
STOP RDF......................................................................................................................................250Where Issued............................................................................................................................250Security Restrictions.................................................................................................................251RDF State Requirement............................................................................................................251Usage Guidelines......................................................................................................................251Examples..................................................................................................................................252
STOP SYNCH................................................................................................................................252Where Issued............................................................................................................................252Security Restrictions.................................................................................................................252RDF State Requirement............................................................................................................252Usage Guidelines......................................................................................................................253Example....................................................................................................................................253
STOP UPDATE..............................................................................................................................253Where Issued............................................................................................................................253Security Restrictions.................................................................................................................253RDF State Requirement............................................................................................................253Usage Guidelines......................................................................................................................254Examples..................................................................................................................................254
TAKEOVER....................................................................................................................................255
Table of Contents 13

Where Issued............................................................................................................................255Security Restrictions.................................................................................................................255Usage Guidelines......................................................................................................................255Limitation.................................................................................................................................257Example....................................................................................................................................257
UNPINAUDIT...............................................................................................................................257Where Issued............................................................................................................................257Security Restrictions.................................................................................................................257RDF State Requirement............................................................................................................258Usage Guidelines......................................................................................................................258Example....................................................................................................................................258
VALIDATE CONFIGURATION....................................................................................................258Where Issued............................................................................................................................258Security Restrictions.................................................................................................................258RDF State Requirement............................................................................................................258Usage Guidelines......................................................................................................................258Example....................................................................................................................................259
9 Entering RDFSCAN Commands...............................................................................261About the EMS Log.............................................................................................................................261Elements of RDFSCAN Command Descriptions................................................................................261RDFSCAN Commands.......................................................................................................................262
AT...................................................................................................................................................262Usage Guidelines......................................................................................................................262Examples..................................................................................................................................262
DISPLAY........................................................................................................................................262Usage Guidelines......................................................................................................................263Examples..................................................................................................................................263
EXIT...............................................................................................................................................263Usage Guidelines......................................................................................................................263Examples..................................................................................................................................264
FILE................................................................................................................................................264Usage Guidelines......................................................................................................................264Examples..................................................................................................................................264
HELP..............................................................................................................................................265Usage Guidelines......................................................................................................................265Examples..................................................................................................................................265
LIST................................................................................................................................................265Usage Guidelines......................................................................................................................265Output Displayed.....................................................................................................................266Examples..................................................................................................................................266
LOG................................................................................................................................................266Usage Guidelines......................................................................................................................267Output Displayed.....................................................................................................................267Examples..................................................................................................................................267
MATCH..........................................................................................................................................267Usage Guidelines......................................................................................................................267Examples..................................................................................................................................268
NOLOG..........................................................................................................................................268Usage Guidelines......................................................................................................................269Examples..................................................................................................................................269
SCAN.............................................................................................................................................269Usage Guidelines......................................................................................................................269Examples..................................................................................................................................269
14 Table of Contents

10 Triple Contingency...................................................................................................271Overview.............................................................................................................................................271Requirements......................................................................................................................................271How Triple Contingency Works.........................................................................................................271Hardware Requirements.....................................................................................................................272Software Requirements.......................................................................................................................272The RETAINCOUNT Configuration Parameter.................................................................................273The COPYAUDIT Command..............................................................................................................274COPYAUDIT Restartability................................................................................................................275Using ZLT to Achieve Triple Contingency Protection for Auxiliary Audit Trails.............................275
Triple Contingency Without ZLT..................................................................................................275Using ZLT to Achieve the same Protection...................................................................................276
Summary.............................................................................................................................................277
11 Subvolume-Level and File-Level Replication...........................................................279INCLUDE Clauses..............................................................................................................................279EXCLUDE Clauses..............................................................................................................................279Wildcard Character (*)........................................................................................................................280
Within Subvolume Names.............................................................................................................280Within Filenames...........................................................................................................................280
INCLUDE/EXCLUDE and RDFCOM In-Memory Table....................................................................280INCLUDE and EXCLUDE Processing................................................................................................281INCLUDEPURGE and EXCLUDEPURGE.........................................................................................281Error Checking....................................................................................................................................282Performance Ramifications.................................................................................................................282Summary Examples............................................................................................................................282
12 Subvolume Name Mapping...................................................................................285Creating a Mapfile to Define the Rules for Subvolume Name Mapping...........................................285Rules for Creating Mapfile Mapping Strings......................................................................................285How an Updater Manages Filename Collisions.................................................................................286Creating a Maplog to Log Subvolume Name Mapping.....................................................................287Adding a Mapfile and Maplog to an Updater's Configuration Record.............................................288Managing Subvolume Name Mapping for Partitioned Files.............................................................288
13 Auxiliary Audit Trails...............................................................................................291Auxiliary Extractor..............................................................................................................................291Auxiliary Receiver...............................................................................................................................291Configuring Extractors and Receivers................................................................................................291
Error conditions.............................................................................................................................291Configuring Image Trails....................................................................................................................292Configuring Updaters.........................................................................................................................292
Error Conditions............................................................................................................................292Ramifications for STOP TMF, Stop-Update-to-Time, and SQL Shared Access DDL Ops..................292Takeover Ramifications.......................................................................................................................293Usage of Master and Auxiliary Audit Trails.......................................................................................293Using Expand Multi-CPU Paths.........................................................................................................293
14 Network Transactions..............................................................................................295Configuration Changes.......................................................................................................................295
NETWORK Attribute.....................................................................................................................295
Table of Contents 15

NETWORKMASTER Attribute.....................................................................................................296Network Configuration Record.....................................................................................................296
PRIMARYSYSTEM Network Attribute....................................................................................296BACKUPSYSTEM Network Attribute.....................................................................................296REMOTECONTROLSUBVOL (RCSV) Network Attribute.....................................................297PNETTXVOLUME Network Attribute....................................................................................297Adding the Network Record....................................................................................................297
RDF Network Synchronizer (RDFNET) Process...........................................................................297RDF Network Control Files................................................................................................................297Normal RDF Processing Within a Network Environment.................................................................297RDF Takeovers Within a Network Environment................................................................................298
Takeover Phase 1 – Local Undo.....................................................................................................298Takeover Phase 2 – File Undo........................................................................................................298Takeover Phase 3 – Network Undo...............................................................................................298Takeover Phase 3 Performance......................................................................................................299Communication Failures During Phase 3 Takeover Processing....................................................299Takeover Delays and Purger Restarts............................................................................................299Takeover Restartability..................................................................................................................299Takeover and File Recovery...........................................................................................................300The Effects of Undoing Network Transactions..............................................................................300Takeover and the RETAINCOUNT Value.....................................................................................302
Network Configurations and Shared Access NonStop SQL/MP DDL Operations............................303Network Validation and Considerations............................................................................................303RDF Reinitialization in a Network Environment...............................................................................303
Network Master Subsystem Initialization.....................................................................................303Non-Network Master Subsystem Initialization............................................................................303
RDF Networks and ABORT or STOP RDF Operations......................................................................304RDF Networks and Stop-Update-to-Time Operations.......................................................................304Sample Configurations.......................................................................................................................305
Sample Network Master Configuration........................................................................................305Sample Non-Network Master Configuration................................................................................306
RDFCOM STATUS Display.................................................................................................................307
15 Process-Lockstep Operation....................................................................................309Starting a Lockstep Operation............................................................................................................309The DoLockstep Procedure.................................................................................................................310
Including the DoLockstep in COBOL85 Applications..................................................................310Invoking DoLockStep by Way of TAL...........................................................................................310DoLockStep Execution...................................................................................................................310
The Lockstep Transaction....................................................................................................................311RDF Lockstep File...............................................................................................................................311Multiple Concurrent Lockstep Operations.........................................................................................312Lockstep and Auxiliary Audit Trails..................................................................................................312The Lockstep Gateway Process...........................................................................................................312
NAME............................................................................................................................................312PROGRAM....................................................................................................................................312STARTUPMSG...............................................................................................................................313AUTORESTART.............................................................................................................................313
Disabling Lockstep..............................................................................................................................313Reenabling Lockstep...........................................................................................................................313Lockstep Performance Ramifications..................................................................................................313Lockstep and Auxiliary Audit Trails..................................................................................................314Lockstep and Network Transactions...................................................................................................314Lockstep Gateway Event Messages....................................................................................................314
16 Table of Contents

16 NonStop SQL/MX and RDF...................................................................................323Including and Excluding SQL/MX Objects.........................................................................................323Creating NonStop SQL/MX Primary and Backup Databases.............................................................323Creating a NonStop SQL/MX Backup Database From an Existing Primary Database......................326Online Database Synchronization With NonStop SQL/MX Objects..................................................328
Creating the Fuzzy Copy on the Primary System.........................................................................328Creating the Fuzzy Copy on the Backup System..........................................................................330
Offline Synchronization for a Single Partition....................................................................................330Directly From the Primary to the Backup......................................................................................330Indirectly From the Primary to the Backup By Way of a Temporary File.....................................331Backup Partition Does Not Already Exist.....................................................................................331
Online Synchronization for a Single Partition....................................................................................331Correcting Incorrect NonStop SQL/MX Name Mapping...................................................................332
Primary and Backup ANSI Catalog Are the Same........................................................................332Primary and Backup ANSI Schema Names Are Not the Same.....................................................332Schema Subvolume Names Are Not the Same..............................................................................332Guardian Filename Is Incorrect for Partition.................................................................................332
Consideration for Creating Backup Tables.........................................................................................333Restoring to a Specific Location..........................................................................................................333
Example.........................................................................................................................................333Comparing NonStop SQL/MX Tables.................................................................................................335
17 Zero Lost Transactions (ZLT).....................................................................................337How It Works......................................................................................................................................337Using CommitHoldMode...................................................................................................................340Hardware Setup..................................................................................................................................340Assigning CPUs on the Standby System............................................................................................340RDF Configuration Attributes............................................................................................................341
RDF Remote Mirror Configuration...............................................................................................341RDF Remote Standby Configuration.............................................................................................341RDF Configuration Record Validation..........................................................................................341Extractor Audit-Trail Configuration..............................................................................................341ALTER RDF Remote Mirror Configuration...................................................................................342
ZLT Takeover Operations...................................................................................................................342Phase 1 (ZLT Processing)...............................................................................................................342
The Audit-Fixup Process..........................................................................................................343Phase 2 (Takeover Processing).......................................................................................................343ZLT Events.....................................................................................................................................343Error Conditions............................................................................................................................343STATUS RDF..................................................................................................................................343RDFCOM INFO and SHOW Commands......................................................................................344Old Audit-Trail Files......................................................................................................................344
Recovering the Primary System After an RDF ZLT Takeover............................................................344ZLT and RDF Networks......................................................................................................................346STOP TMF Operations........................................................................................................................346
During Normal Operations...........................................................................................................346During ZLT Takeover Processing..................................................................................................346
SQL Shared Access DDL Operations..................................................................................................347
A RDF Commands Quick Reference............................................................................349RDFCOM Run Syntax.........................................................................................................................349RDFCOM Commands Quick Reference.............................................................................................349
ADD...............................................................................................................................................349
Table of Contents 17

ALTER............................................................................................................................................349COPYAUDIT..................................................................................................................................350DELETE..........................................................................................................................................350EXIT...............................................................................................................................................350FC...................................................................................................................................................350HELP..............................................................................................................................................350HISTORY.......................................................................................................................................350INFO..............................................................................................................................................351INITIALIZE RDF...........................................................................................................................351OBEY..............................................................................................................................................351OPEN.............................................................................................................................................351OUT................................................................................................................................................351RESET............................................................................................................................................352SET EXTRACTOR..........................................................................................................................352SET IMAGETRAIL.........................................................................................................................352SET MONITOR..............................................................................................................................352SET NETWORK.............................................................................................................................353SET PURGER.................................................................................................................................353SET RDF.........................................................................................................................................353SET RDFNET.................................................................................................................................354SET RECEIVER..............................................................................................................................354SET TRIGGER................................................................................................................................354SET VOLUME................................................................................................................................354SHOW............................................................................................................................................355START RDF....................................................................................................................................355START UPDATE............................................................................................................................355STATUS..........................................................................................................................................355STOP RDF......................................................................................................................................356STOP SYNCH................................................................................................................................356STOP UPDATE..............................................................................................................................356TAKEOVER....................................................................................................................................356UNPINAUDIT...............................................................................................................................356VALIDATE CONFIGURATION....................................................................................................356
RDFSCAN Commands Quick Reference............................................................................................357AT...................................................................................................................................................357DISPLAY........................................................................................................................................357EXIT...............................................................................................................................................357FILE................................................................................................................................................357HELP..............................................................................................................................................357LIST................................................................................................................................................357LOG................................................................................................................................................357MATCH..........................................................................................................................................357NOLOG..........................................................................................................................................358SCAN.............................................................................................................................................358
File Names and Process Identifiers.....................................................................................................358Reserved File Names.....................................................................................................................358Disk File Names.............................................................................................................................358Nondisk Device Names.................................................................................................................358Process File Names........................................................................................................................358
B Additional Reference Information.............................................................................359Default Configuration Parameters......................................................................................................359Sample Configuration File..................................................................................................................360RDFSNOOP Utility.............................................................................................................................362
18 Table of Contents

RDF System Files.................................................................................................................................362RDF File Codes....................................................................................................................................364
C Messages...................................................................................................................365About the Message Descriptions........................................................................................................365RDF Messages.....................................................................................................................................365RDFCOM Messages............................................................................................................................413RDFSCAN Messages...........................................................................................................................461
D Operational Limits.....................................................................................................463
E Using ASAP................................................................................................................465Architectural Overview......................................................................................................................465Installation...........................................................................................................................................466Auto Discovery...................................................................................................................................466Monitoring Specific RDF Environments.............................................................................................466Adding and Removing RDF Environments.......................................................................................467Version Compatibility.........................................................................................................................467RDF Metrics Reported by ASAP.........................................................................................................467
Index...............................................................................................................................469
Table of Contents 19

List of Figures1-1 Basic RDF Configuration...............................................................................................................331-2 RDF Topologies.............................................................................................................................371-3 RDF Tasks to Maintain a Copy of a Database...............................................................................401-4 RDF Subsystem Processes.............................................................................................................411-5 Extractor Process Operation..........................................................................................................431-6 Receiver Process Operation...........................................................................................................456-1 Synchronized Databases Before Starting RDF............................................................................1576-2 Synchronized Databases During RDF Operations......................................................................1586-3 Synchronized Databases, No Outstanding Audit.......................................................................1586-4 Synchronized Databases After STOP TMF Command...............................................................1596-5 Unsynchronized Databases.........................................................................................................15910-1 RDFZLT with Triple Contingency...............................................................................................27617-1 ZLT Configuration With a Single Standby/Backup System........................................................33817-2 ZLT Configuration With a Single Standby/Backup System and With the Remote Mirror Located
at an Intermediate Site.................................................................................................................33817-3 ZLT Configuration With Standby and Backup Systems Located at Separate Sites....................339E-1 The RDF/ASAP Environment......................................................................................................466
20 List of Figures

List of Tables1-1 Audit Records at the Time of a Primary System Failure..............................................................342-1 RDF Hardware Requirements.......................................................................................................572-2 Software Requirements.................................................................................................................603-1 RDF Process and Program Security Attributes.............................................................................764-1 RDFCOM Configuration Commands..........................................................................................1054-2 RDFCOM Operational Commands.............................................................................................1064-3 RDFCOM Utility Commands......................................................................................................1074-4 RDFSCAN Commands................................................................................................................1104-5 RDF States....................................................................................................................................1135-1 Recovery From File Modification Failures (RDF Event 700).......................................................1225-2 Recovery From File Open Failures (RDF Event 705)...................................................................1235-3 Recovery From File Creation Failures (RDF Event 739)..............................................................1238-1 Systems for RDFCOM Commands..............................................................................................1888-2 Default User Security for RDFCOM Commands........................................................................1899-1 Pattern Matching Symbols in RDFSCAN....................................................................................268D-1 Operational Limits for RDF/IMP, IMPX, and ZLT......................................................................463E-1 RDF Metrics Reported by ASAP.................................................................................................467
21
List of Examples1-1 Reciprocal Replication...................................................................................................................501-2 Chain Replication..........................................................................................................................511-3 Invalid Chain Replication..............................................................................................................51
22 List of Examples

About This DocumentThe Remote Database Facility (RDF) subsystem enables users at a local (primary) system tomaintain a current, online copy of their database on one or more remote (backup) systems,protecting stored information from damage that might occur at the primary system. RDFaccomplishes this by sending audit trail information, generated at the primary system by theNonStop Transaction Management Facility (TMF) product, over the network to the backupsystem. At the backup system, RDF software uses the transported information to update thebackup database so that it reflects all changes made to the primary database. The backup databaseis usually current within seconds of the primary. If system capability is lost at the primary system,service can be recovered quickly at the backup system using the live backup database.This manual describes the RDF subsystem as implemented in version 1, update 9 (RDF 1.9) forRDF IMP, RDF/IMPX and RDF/ZLT on J-series and H-series RVUs.This manual contains introductory and conceptual information for new users, followed bydirections for installing, configuring, and operating RDF and managing the RDF environment.It covers activities at both the primary and backup sites and fully describes all commands availableto users. It provides complete reference information for these commands, including their syntaxand semantics. Finally, it lists all RDF messages and describes their meaning and any correctiveactions that users must take.
Supported Release Version Updates (RVUs)This manual supports J06.03 and all subsequent J-series RVUs and H06.03 and all subsequentH-series RVUs, until otherwise indicated by its replacement publications.
Intended AudienceThis manual contains information for everyone responsible for RDF installation, management,and operations on HP Integrity NonStop™ systems:• System managers• System operators• Database administrators• System analysts• Application designersBefore reading this manual, you should be familiar with Integrity NonStop system architecture.You should also understand the TMF product on which RDF is based. For information aboutTMF, see the TMF manuals listed in “Related Information”.Additionally, it is essential to note that throughout this manual the phrases NonStop SQL productsand NonStop SQL refer to the NonStop SQL/MP and NonStop SQL/MX product set.
New and Changed Information in This EditionBesides minor corrections and clarifications throughout the manual, the significant new andchanged information contained in this manual are organised in the following manner:
New features in the RDF 1.9 manual.• Added information on the new option of automatic deletion of RDF control files during
initialization in “Initializing RDF” (page 79) and “INITIALIZE RDF” (page 212).• Added new section on“Managing Multiple RDF Environments from One RDFCOM Session”
(page 104).• Added information on altering “UPDATEROPEN” (page 117).
Supported Release Version Updates (RVUs) 23

• Added information on running a TAKEOVER command using an OBEY file/IN File in“Issuing the TAKEOVER Command in an Obey File” (page 142) and “TAKEOVER” (page 255).
• Added information about FASTUPDATEMODE in “Near Real Time Read Access to Updateson the Primary System” (page 149) and “SET RECEIVER” (page 232).
• Added information on support for long filenames in “Process File Names” (page 358).• Added the figure for Triple contingency under “Using ZLT to Achieve the same Protection”
(page 276).• Added information on Subvolume/File Level REPLICATEPURGE option in
Chapter 11 “Subvolume-Level and File-Level Replication”.• Added the section “INCLUDEPURGE and EXCLUDEPURGE” (page 281).• Added a new EMS event 931 that displays the ANSI name of a SQL/MX object on which a
SHARED ACCESS DDL operation was performed.• Added Fast TAKEOVER Guidelines in “How to Plan for the Fastest Movement of Business
Operations to Your Backup System After Takeover” (page 144).
Updates in the RDF 1.9 manual• Updated description of AUDITTRAILBUFFER attribute in “Configuring TMF for RDF
Operations on the Primary System” (page 60).• Updated information on Online dumps and configuration of UPDATEROPEN mode in
“Configuring TMF for RDF Operations on the Backup System” (page 61).• Updated recommended number of Audited files per volume in “Audited Files Per Volume
on Primary System” (page 62).• Updated details on PROTECTED mode in “UPDATEROPEN Attribute” (page 86).• Added the section “Dedicated Image Trails or Image Trails on UpdateVolumes” (page 89).• Added the section “Using Scripts for Easy and Fast RDF Initialization and Configuration”
(page 103).• Added and updated Table 4-5 “RDF States” in “RDF States” (page 113).• Updated “Main STATUS RDF Display” (page 114).• Updated effects and workaround for “Exceeding the Maximum Number of Concurrent File
Opens” (page 125).• Updated significance of audit pinning operation and precautions in “Audit Trails Pinned
by RDF on the Primary System” (page 131).• Added significance of taking TMF and online dumps on backup system with respect to
business continuity in “TMF and Online Dumps on the Backup System” (page 154).• Added the following sections in DDL Operations:
“With Shared Access” (page 160)“Without Shared Access” (page 161)“Adding a New Column” (page 161)
• Updated the STATUS command with description of its elements on (page 244).• Updated the example to reflect new features in “Sample Configuration File” (page 360).• Updated new limits for number of files open per updater in Table D-1 “Operational Limits
for RDF/IMP, IMPX, and ZLT”.• Updated message 733 in Appendix C (page 365).• Added new error messages in “Messages” (page 365).
Document OrganizationThis manual presents three levels of information: introductory and conceptual information(Chapter 1), task-oriented guidelines (Chapters 2 through 7 and Chapters 10 through 14), andreference information (Chapters 8 and 9 and Appendixes A, B, and C). The following table shows
24

where to look for the information you need, based upon the responsibility you have or the kindof tasks you perform at your site:
Chapter/AppendixResponsibility
AllSystem manager
1, 2, 4, 5, 6, 7, 8, 9, 10, 11, 12, 14, 15, 16, 17, A, C, D, ESystem operator
1, 2, 3, 5, 6, 7, 10, 11, 12, 13, 14, 15, 16, 17, A, B, C, D, EDatabaseadministrator
1, 2, 3, 10, 11, 12, 13, 14, 15, 16, 17System analyst
1, 2, 10, 11, 12, 14, 15, 17, A, B, C, DApplication designer
The chapters and appendixes contain this information:• Chapter 1 (page 31) introduces RDF and its goals, features, and capabilities; describes the
main RDF processes and their functions; introduces the RDFCOM and RDFSCAN commandinterfaces used to communicate with the subsystem; and presents an overview of RDFoperation.
• Chapter 2 (page 57) describes how to configure hardware and prepare software for RDFinstallation and operation.
• Chapter 3 (page 69) explains how to install and configure RDF, including how to copydatabases and files from the primary system to the backup system before starting RDF.
• Chapter 4 (page 99) discusses how to operate RDF, including how to issue RDFCOM andRDFSCAN commands and how to display RDF configuration parameters and operatingstatistics, change configuration parameters, and interpret log files.
• Chapter 5 (page 121) explains how to manage the RDF environment, including how to recoverfrom file-system errors, respond to failures, stop and restart the RDF product, direct thebackup system to take over application processing when a disaster occurs at the primarysystem site, and perform other specialized tasks.
• Chapter 6 (page 157)details how to back up altered database structures and how toresynchronize the primary and backup databases.
• Chapter 7 (page 167)describes how to synchronize entire databases or selected databasevolumes online.
• Chapter 8 (page 187) and Chapter 9 (page 261) present the syntax of all RDFCOM andRDFSCAN commands, respectively, and give examples of these commands.
• Chapter 10 (page 271) describes the triple contingency feature.• Chapter 11 (page 279) describes subvolume-level and file-level replication.• Chapter 12 (page 285) describes how to use the mapfile, maplog, and updater configuration
record to support mapping between primary system and backup system subvolumes.• Chapter 13 (page 291) describes support for auxiliary audit trails.• Chapter 14 (page 295) describes support for network transactions.• Chapter 15 (page 309) describes lockstep operation.• Chapter 16 (page 323) describes SQL/MX database setup for RDF.• Chapter 17 (page 337) describes the Zero Lost Transactions (ZLT) functional capability.• Appendix A (page 349) summarizes the syntax of all RDFCOM and RDFSCAN commands.• Appendix B (page 359) provides additional information about RDF, including reserved
words, default values for configuration parameters, and system file descriptions.• Appendix C (page 365) lists all messages that can be generated by the lockstep gateway, RDF
processes, RDFCOM, and RDFSCAN, and their probable causes, effects, and recovery actions.• Appendix D (page 463) lists all the operational limits that apply to the RDF/IMP, IMPX, and
ZLT products.• Appendix E (page 465) describes how to monitor RDF entities using ASAP.
Document Organization 25
Notation Conventions
General Syntax NotationThis list summarizes the notation conventions for syntax presentation in this manual.UPPERCASE LETTERS
Uppercase letters indicate keywords and reserved words. Type these items exactly as shown.Items not enclosed in brackets are required. For example:MAXATTACH
Italic Letters
Italic letters, regardless of font, indicate variable items that you supply. Items not enclosedin brackets are required. For example:filename
Computer Type
Computer type letters indicate:• C and Open System Services (OSS) keywords, commands, and reserved words. Type
these items exactly as shown. Items not enclosed in brackets are required. For example:Use the cextdecs.h header file.
• Text displayed by the computer. For example:Last Logon: 14 May 2006, 08:02:23
• A listing of computer code. For exampleif (listen(sock, 1) < 0){perror("Listen Error");exit(-1);}
Bold Text
Bold text in an example indicates user input typed at the terminal. For example:
ENTER RUN CODE
?123CODE RECEIVED: 123.00
The user must press the Return key after typing the input.[ ] Brackets
Brackets enclose optional syntax items. For example:
TERM [\system-name.]$terminal-name
INT[ERRUPTS]
A group of items enclosed in brackets is a list from which you can choose one item or none.The items in the list can be arranged either vertically, with aligned brackets on each side ofthe list, or horizontally, enclosed in a pair of brackets and separated by vertical lines. Forexample:
FC [ num ] [ -num ] [ text ]
K [ X | D ] address
26

{ } BracesA group of items enclosed in braces is a list from which you are required to choose one item.The items in the list can be arranged either vertically, with aligned braces on each side of thelist, or horizontally, enclosed in a pair of braces and separated by vertical lines. For example:
LISTOPENS PROCESS { $appl-mgr-name } { $process-name }
ALLOWSU { ON | OFF }
| Vertical LineA vertical line separates alternatives in a horizontal list that is enclosed in brackets or braces.For example:
INSPECT { OFF | ON | SAVEABEND }
… EllipsisAn ellipsis immediately following a pair of brackets or braces indicates that you can repeatthe enclosed sequence of syntax items any number of times. For example:
M address [ , new-value ]…
- ] {0|1|2|3|4|5|6|7|8|9}…
An ellipsis immediately following a single syntax item indicates that you can repeat thatsyntax item any number of times. For example:
"s-char…"
PunctuationParentheses, commas, semicolons, and other symbols not previously described must be typedas shown. For example:
error := NEXTFILENAME ( filename ) ;
LISTOPENS SU $process-name.#su-name
Quotation marks around a symbol such as a bracket or brace indicate the symbol is a requiredcharacter that you must type as shown. For example:
"[" repetition-constant-list "]"
Item SpacingSpaces shown between items are required unless one of the items is a punctuation symbolsuch as a parenthesis or a comma. For example:
CALL STEPMOM ( process-id ) ;
If there is no space between two items, spaces are not permitted. In this example, no spacesare permitted between the period and any other items:
$process-name.#su-name
Line SpacingIf the syntax of a command is too long to fit on a single line, each continuation line is indentedthree spaces and is separated from the preceding line by a blank line. This spacingdistinguishes items in a continuation line from items in a vertical list of selections. For example:
ALTER [ / OUT file-spec / ] LINE
[ , attribute-spec ]…
Notation Conventions 27

!i and !oIn procedure calls, the !i notation follows an input parameter (one that passes data to thecalled procedure); the !o notation follows an output parameter (one that returns data to thecalling program). For example:
CALL CHECKRESIZESEGMENT ( segment-id !i , error ) ; !o
!i,oIn procedure calls, the !i,o notation follows an input/output parameter (one that both passesdata to the called procedure and returns data to the calling program). For example:
error := COMPRESSEDIT ( filenum ) ; !i,o
!i:iIn procedure calls, the !i:i notation follows an input string parameter that has a correspondingparameter specifying the length of the string in bytes. For example:
error := FILENAME_COMPARE_ ( filename1:length !i:i , filename2:length ) ; !i:i
!o:iIn procedure calls, the !o:i notation follows an output buffer parameter that has acorresponding input parameter specifying the maximum length of the output buffer in bytes.For example:
error := FILE_GETINFO_ ( filenum !i , [ filename:maxlen ] ) ; !o:i
Notation for MessagesThis list summarizes the notation conventions for the presentation of displayed messages in thismanual.Bold Text
Bold text in an example indicates user input typed at the terminal. For example:
ENTER RUN CODE
?123CODE RECEIVED: 123.00
The user must press the Return key after typing the input.Nonitalic Text
Nonitalic letters, numbers, and punctuation indicate text that is displayed or returned exactlyas shown. For example:Backup Up.
Italic Text
Italic text indicates variable items whose values are displayed or returned. For example:
p-register
process-name
[ ] BracketsBrackets enclose items that are sometimes, but not always, displayed. For example:
Event number = number [ Subject = first-subject-value ]
28
A group of items enclosed in brackets is a list of all possible items that can be displayed, ofwhich one or none might actually be displayed. The items in the list can be arranged eithervertically, with aligned brackets on each side of the list, or horizontally, enclosed in a pair ofbrackets and separated by vertical lines. For example:
proc-name trapped [ in SQL | in SQL file system ]
{ } BracesA group of items enclosed in braces is a list of all possible items that can be displayed, ofwhich one is actually displayed. The items in the list can be arranged either vertically, withaligned braces on each side of the list, or horizontally, enclosed in a pair of braces andseparated by vertical lines. For example:
obj-type obj-name state changed to state, caused by{ Object | Operator | Service }
process-name State changed from old-objstate to objstate{ Operator Request. }{ Unknown. }
| Vertical LineA vertical line separates alternatives in a horizontal list that is enclosed in brackets or braces.For example:
Transfer status: { OK | Failed }
% Percent SignA percent sign precedes a number that is not in decimal notation. The % notation precedesan octal number. The %B notation precedes a binary number. The %H notation precedes ahexadecimal number. For example:
%005400
%B101111
%H2F
P=%p-register E=%e-register
Related InformationThis manual belongs to the NonStop data management library of manuals. It is the only manualthat fully and directly supports RDF. To use this manual effectively, however, you should befamiliar with the information for the TMF product described in the following publications:• TMF Introduction, which provides a general overview of TMF concepts and capabilities for
business professionals, application designers and programmers, and system managers andadministrators.
• TMFPlanning andConfigurationGuide, which provides information on how to plan, configure,and manage a TMF system.
• TMF Operations and Recovery Guide, which describes how to monitor TMF operations,reconfigure TMF, perform online and audit dumps, and respond to a variety of exceptionconditions.
• TMF Reference Manual, which covers the syntax, cautionary considerations, and examplesfor using the TMFCOM command interface to the TMF product.
Another manual in the Data Management Library, Introduction to Data Management, provides anoverview of NonStop data management products, including RDF, and discusses the use of theseproducts in OLTP applications.
Related Information 29

Manuals for other software products that contain information helpful to RDF users include:• SQL/MX Installation and Management Guide and the SQL/MP Installation and Management
Guide, which explain how to install the NonStop SQL/MX and SQL/MP relational databasemanagement systems and how to plan, create, and manage SQL/MX and SQL/MP databasesand applications.
• SQL/MX Reference Manual and the SQL/MP Reference Manual, which describe the commandand statement syntax and usage considerations for the NonStop SQL/MX and SQL/MPrelational database management systems, including interaction with the NonStop SQLproduct for database protection.
• SQL/MP Version Management Guide, which describes version management for differentversions of the NonStop SQL/MP software, catalogs, objects, messages, files, and programs.
• TACL Reference Manual, which discusses operations available in the HP Tandem AdvancedCommand Language (TACL), the standard command interface to the NonStop operatingsystem. This is the interface through which you run RDFCOM and RDFSCAN and managefiles used by them.
• File Utility Program (FUP) Reference Manual, which describes the command syntax and errormessages for the File Utility Program (FUP).
• Operator Messages Manual, which describes various error codes.• Guardian Procedure Errors and Messages Manual, which provides additional details about
understanding and correcting file system errors.
Publishing History
Publication DateProduct VersionPart Number
July 2005NonStop RDF/IMPX 1.6 (T0346 and T0347)NonStop RDF/ZLT 1.6 (T0618)
529826-002
November 2005NonStop RDF/IMPX 1.7 (T0346 and T0347)NonStop RDF/ZLT 1.7 (T0618)
529826-003
August 2007NonStop RDF/IMPX 1.8 (T0346 and T0347) and Lockstep Gateway(T1226)NonStop RDF/ZLT 1.8 (T0618)
529826–004
May 2009NonStop RDF/IMPX 1.9 (T0346 and T0347) and Lockstep Gateway(T1226)NonStop RDF/ZLT 1.9 (T0618)
529826–005
June 2009NonStop RDF/IMPX 1.9 (T0346 and T0347) and Lockstep Gateway(T1226)NonStop RDF/ZLT 1.9 (T0618)
529826–006
HP Encourages Your CommentsHP encourages your comments concerning this document. We are committed to providingdocumentation that meets your needs. Send any errors found, suggestions for improvement, orcompliments to:[email protected] the document title, part number, and any comment, error found, or suggestion forimprovement you have concerning this document.
30

1 Introducing RDFThis manual describes theRemoteDatabase Facility (RDF) subsystem as implemented in version1, update 9 of the HP NonStop RDF/IMP, IMPX, and ZLT independent products. Customerswho install RDF 1.9 can use existing RDF configuration scripts provided the scripts are notmaking use of new functionality.This chapter, which is intended for all readers, discusses these topics:• “RDF Subsystem Overview” (page 32)• “User Interfaces” (page 38)• “RDF Processes” (page 40)• “RDF Operations” (page 42)RDF monitors changes made to a production database on a local (primary) system and maintainsa copy of that database on one or more remote (backup) systems. Because it applies changes tothe backup database as soon as they are detected on the primary system, RDF keeps the backupdatabase continuously up to date with changes made by business applications on the primarysystem. You are able, therefore, to switch your business operations from the primary system tothe backup system with minimal interruption and loss of data in the event of planned orunplanned outages of the primary system. With NonStop RDF/ZLT, the failover involves no lossof data.RDF also allows you to use backup databases as read-only resources to balance the overallworkload and improve response times. Activities at a backup system can include querying thedatabase, processing heavy batch-reporting loads, and consolidating data from multiple sitesinto one central site.Backup systems might be located far from the primary system for protection against regionaldisasters, communicating with the primary system over an Expand network.System managers and operators control RDF through RDFCOM, a utility much like the TMFCOMcommand interpreter used to access TMF.RDF/IMP, IMPX, and ZLT generate fully-tokenized command, event, error, and warning messagesin the Event Management System (EMS) log. System managers and operators can monitor thosemessages online using Viewpoint or whatever other tool they normally use for monitoring $0.In addition, they can use the supplied EMS filter RDFFLTO with an EMS printing distributor toisolate the RDF messages to an entry-sequenced file which they then can peruse using theRDFSCAN utility.RDF works with the Transaction Management Facility (TMF) subsystem.There are three versions of the RDF product:1. RDF/IMP (product number T0346) provides online product initialization, online database
synchronization, triple contingency support, subvolume-level and file-level replication,stop-update-to-time (for quiescing the backup database to a stable state), and many otherfeatures.
2. RDF/IMPX (product numbers T0346 and T0347) provides the same functionality as RDF/IMP,but also replication of auxiliary audit trails, support for network transactions, and lockstepoperation.
3. RDF/ZLT (product number T0618) provides zero lost transaction (ZLT) protection usingmirrored disks.
NOTE: HP NonStop RDF software works with HP NonStop S-Series servers, HP IntegrityNonStop NS-Series servers, and HP Integrity NonStop BladeSystems.
Before reading further in this manual, you should be familiar with the concepts, terminology,and functions of the NonStop TMF product. You should know about the objects on which TMF
31
operates, such as transactions, audit trails, and audit volumes. You should understand howTMF software uses elements like before-images, after-images, and control records. In addition,you should also understand the TMF processes that perform backout, volume recovery, andfile recovery. If you are not familiar with this information, you should read TMF Introduction.
RDF Subsystem OverviewRDF maintains a logically replicated database on one or more backup systems by monitoringchanges made to audited tables and files on designated primary system volumes and applyingthose changes to corresponding volumes on the backup system. Although logically the same asthe primary database, a backup database is not an actual physical copy. For those volumesdesignated to be protected by RDF, the backup database contains the same data for all committedtransactions as in the primary database.On the primary system, RDF extractor processes read audit trails (logs maintained by TMF ofall database transactions that affect audited tables and files), and send all audit records associatedwith volumes protected by RDF to RDF receiver processes on the backup system. Each receiverprocess sorts the audit records and writes it to the appropriate image trail. RDFupdater processeson the backup system read their image trails and apply the changes to the backup database. AnRDF purger process on the backup system interacts with the updaters to determine when imagefiles can be purged.Each volume protected by RDF on the primary system has its own updater process on the backupsystem responsible for applying audit records to the corresponding volume on the backup system.Figure 1-1 illustrates a basic RDF configuration that protects data volumes configured to a MasterAudit Trail (MAT) and an auxiliary audit trail.
32 Introducing RDF
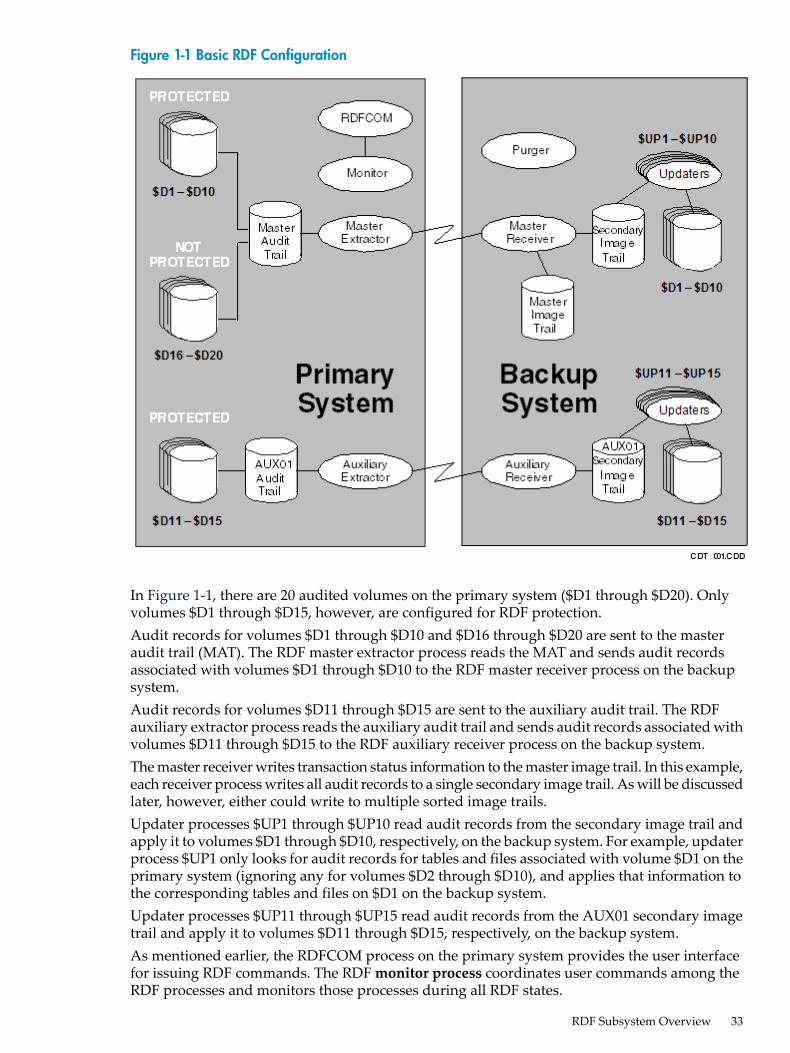
Figure 1-1 Basic RDF Configuration
In Figure 1-1, there are 20 audited volumes on the primary system ($D1 through $D20). Onlyvolumes $D1 through $D15, however, are configured for RDF protection.Audit records for volumes $D1 through $D10 and $D16 through $D20 are sent to the masteraudit trail (MAT). The RDF master extractor process reads the MAT and sends audit recordsassociated with volumes $D1 through $D10 to the RDF master receiver process on the backupsystem.Audit records for volumes $D11 through $D15 are sent to the auxiliary audit trail. The RDFauxiliary extractor process reads the auxiliary audit trail and sends audit records associated withvolumes $D11 through $D15 to the RDF auxiliary receiver process on the backup system.The master receiver writes transaction status information to the master image trail. In this example,each receiver process writes all audit records to a single secondary image trail. As will be discussedlater, however, either could write to multiple sorted image trails.Updater processes $UP1 through $UP10 read audit records from the secondary image trail andapply it to volumes $D1 through $D10, respectively, on the backup system. For example, updaterprocess $UP1 only looks for audit records for tables and files associated with volume $D1 on theprimary system (ignoring any for volumes $D2 through $D10), and applies that information tothe corresponding tables and files on $D1 on the backup system.Updater processes $UP11 through $UP15 read audit records from the AUX01 secondary imagetrail and apply it to volumes $D11 through $D15, respectively, on the backup system.As mentioned earlier, the RDFCOM process on the primary system provides the user interfacefor issuing RDF commands. The RDF monitor process coordinates user commands among theRDF processes and monitors those processes during all RDF states.
RDF Subsystem Overview 33

An unplanned outage typically occurs as the result of a sudden disaster that prevents the databaseon the primary system from being used. The classic purpose of RDF is to make rapid recoveryfrom an unplanned outage possible by maintaining a replicated database on a backup system.When the primary system is unexpectedly affected by a disaster, you can shift operations to thereplicated database on the backup system after having the RDF updaters bring the backupdatabase to a consistent state. You do that by starting RDFCOM on the backup system andinitiating an RDF takeover operation.An RDF takeover operation ensures that all audit records associated with transactions that areknown to have been committed is applied to the backup database
Unplanned Outages With ZLTZero Lost Transactions (ZLT), functionality that is available only with the RDF/ZLT product,ensures that no transactions that commit on the primary system are lost on the RDF backupsystem if that primary system is downed by an unplanned outage. RDF achieves this though theuse of remote mirroring for the relevant TMF audit trail volume(s). That is, one mirror of anaudit trail volume remains local to the primary system, but the other mirror is located at a remotestandby site.When a primary system is downed by some unplanned outage or disaster, there might be someaudit data that the extractor on the primary system was unable to send to the backup systembefore the outage. With ZLT functionality, RDF fetches all remaining audit data from the remotemirror, thereby guaranteeing no loss of committed data during the RDF takeover operation.For information about the ZLT function, see Chapter 17 (page 337).
Unplanned Outages Without ZLTWithout ZLT functionality, it is possible for some committed transactions to be lost during anunplanned outage. When the RDF TAKEOVER command is issued, any transaction whose finaloutcome is unknown on the backup system is backed out of the backup database. One or moretransactions might have committed on the primary system, but, before the extractor could readand send the associated audit data to the backup system, the primary system failed. Loss of auditdata in this manner typically involves no more than a fraction of a second.If the primary system is unexpectedly brought down because of a disaster, the outcome of sometransactions might never be known, as illustrated in Table 1-1.
Table 1-1 Audit Records at the Time of a Primary System Failure
Updates sent to the backup (Sequence in image trail file)Primary database updates (Sequence in master audit trailfile)
TRANS100—Update 1TRANS100—Update 1
TRANS100—Update 2TRANS100—Update 2
..
..
..
TRANS100—Update 10TRANS100—Update 10
TRANS101—Update 1TRANS101—Update 1
TRANS100—Commit record
(Primary system fails)
In the example illustrated in Table 1-1, a disaster has brought down the primary systemimmediately after the commit record for transaction 100 was written to the MAT, but before theRDF extractor process was able to send the commit record to the backup system. For transaction
34 Introducing RDF

101, a single update was logged in the MAT and sent to the backup system, but the primarysystem was brought down before the transaction was completed.When the command for a takeover is issued, the updater processes treat all transactions whoseoutcomes are not known as aborted transactions. In this scenario, only the changes related totransactions known with certainty to have been committed on the primary system are left in thebackup database. Therefore, in the example illustrated in Table 1-1, the audit records associatedwith transactions 100 and 101 is backed out of the backup database.Typically, the extractor process sends audit records to the backup system within a second afterit has been written to the MAT on the primary system, so a minimum number of transactionsare lost when a disaster brings down the primary system.
Planned OutagesRDF can be very useful when a planned shutdown of the primary system is necessary. Forexample, you might need to bring the system down to install new hardware or to perform asystem software upgrade. In such a situation, you might determine it is unacceptable to stopyour business applications for the time required.With RDF, you need only stop the applications momentarily, do a switchover from the primarysystem to the backup system, and then restart the applications on the backup system. When theprimary system is ready for use again, you can use RDF to bring the primary database up-to-datewith changes made to the backup database while the primary system was shut down. After theprimary database is consistent with the backup database, you can perform another switchover,this time from the backup system to the primary system, and then restart the applications on theprimary system. For instructions on how to perform a switchover, see “Carrying Out a PlannedSwitchover” (page 136).
FeaturesIn providing backup protection for online databases, RDF offers many advantages:• Continuous Availability
RDF maintains an online copy of your production database on one or more backup systems.If the primary system should go down, the backup database(s) will be consistent and youcan resume your business processing on a backup system with minimal interruption anddata loss.
• Fault toleranceYou can restart RDF after a system failure. Single processor failures do not bring thesubsystem down. If a double processor failure occurs, RDF goes down, but it can be restartedwith no loss of data (issue a START RDF command after the processors have been restored).
• High performanceRDF can typically replicate data from the primary RDF node as fast as the customerapplication is capable of generating it.
• Flexibility in protectionYou can run RDF with updating on the backup system either enabled or disabled.RDF is also very flexible with regard to system interrelationships and to disk usagerequirements on backup systems. Besides the most basic configuration of a single primarysystem protected by a single backup system, you can have configurations such as these (seeFigure 1-2 (page 37)).— Multiple primary systems protected by one backup system.— Reciprocal protection between two systems, where each is the backup to the other
(different databases on the two systems).
RDF Subsystem Overview 35
— A single primary system whose database changes are replicated to databases on multiplebackup systems. Such an environment makes possible simultaneous read-only accessto all of the backup databases (this is desirable for query-intensive applications such astelephone directory assistance).
— Triple contingency—a special instance of the database replication feature whereby asingle primary system is protected by two identical backup systems. This feature allowsyour applications to resume, with full RDF protection, within minutes after the loss ofyour primary system, provided the two backup systems are not too far behind.
— Loopback configuration—where the primary and backup systems are the same system.This has no value from a disaster protection standpoint, but can be useful for testingpurposes. Data from a set of volumes can be replicated to a different set of volumes onthe same node.
— RDF does not require an identical one-to-one volume relationship between volumes onthe primary system and those on the backup system. Backup volume names do nothave to match primary volume names. The subsystem can direct audit records frommore than one audited volume on the primary system to a single volume on the backupsystem, provided that no more than one partition of a file exists on any backup volume.(For information on partitioned files, see the Guardian User’s Guide.)
• Application independenceRDF is application independent. It can protect through replication any audited NonStopSQL tables and indexes as well as any audited Enscribe key-sequenced, relative, orentry-sequenced files, including partitions, alternate key files, and Queue files. UnstructuredEnscribe files, however, are not supported.
36 Introducing RDF

Figure 1-2 RDF Topologies
• Supports master and auxiliary audit trail protection; RDF can protect all tables and files thatare being audited by TMF, whether they are associated with the Master Audit Trail (MAT)or an auxiliary audit trail.
• Subvolume and file replication In addition to volume replication, the RDF/IMP and IMPXproducts support replication of selected subvolumes and files.
RDF Subsystem Overview 37

• Economical processingRDF conserves resources at both sites. The extractor typically uses 1% of the resources usedby the application on the primary and 4% of the Expand resources. On the backup systemthe cost of an updater process replicating an update operation is typically 15-25% of theoriginal cost to do the operation on the primary system.On the primary system RDF uses just one process (the extractor) per audit trail to read andtransmit audit records to the backup system. The extractor process automatically filters outany audit records not relevant to the backup database.On the backup system RDF stores and applies all audit records without using any primarysystem resources.RDF helps balance the load between the primary and backup systems. For example, to reducethe application load on the primary system, you can perform database queries on the backupsystem; RDF does not, however, guarantee database consistency while changes are beingprocessed for a transaction.
• Access to Consistent Backup DatabasesThere are two ways to quiesce the backup database in a logically consistent state with regardto transaction boundaries: stop TMF on the primary system or use the TIMESTAMP parameterin a STOP UPDATE command (referred to as a stop-update-to-time operation). The latterallows you to do so without stopping TMF, your applications, or the RDF extractor.
• Zero Lost Transactions (ZLT)ZLT is a functional capability that uses mirrored disks to guarantee that no committedtransactions on the primary system will be lost in the event of an RDF takeover by the backupsystem.
User InterfacesTo use RDF, you run two online utilities: RDFCOM and RDFSCAN. Both are interactive commandinterpreters through which you begin a session and enter requests to the subsystem.
RDFCOM for Subsystem Management and OperationsTo manage, operate, and control RDF, use the RDFCOM utility. You can issue commands to:• Configure RDF• Control RDF operation• Obtain status information about RDF regarding database activity on the primary system
and processing on the backup systemTasks and examples using RDFCOM commands appear throughout the manual. Referenceinformation for all commands appears in Chapter 8 (page 187).
Scanning the EMS Event LogRDF writes messages to the EMS event log when any of these events occurs:• RDF is initialized• RDF is started or stopped• Updating is started or stopped• RDF issues an informational, warning, or error message (including RTD warning messages)• An RDF process takeover occurs• Control switches from the primary to the backup database• A NonStop SQL/MP DDL operation using the WITH SHARED ACCESS option is detected• An exception record is written
38 Introducing RDF

You can peruse messages in the EMS log on your terminal screen by using Viewpoint or whateverother tool you normally use for monitoring $0. When you do that, you are dealing with the entireEMS log (not just RDF messages).To isolate RDF messages from the rest of the EMS log, you can use the supplied EMS filterRDFFLTO with an EMS printing distributor to produce an intermediate entry-sequenced filethat you then can scan using the RDFSCAN utility.Using RDFSCAN commands, you can specify:• A starting point for scanning the intermediate RDF message file• How many records to scan• Text to search for in the fileTasks and examples for using RDFSCAN commands appear throughout the manual. Referenceinformation for all commands appears in Chapter 9 (page 261).
RDF TasksTo maintain a duplicate of the primary database on the backup system, RDF performs fourfundamental tasks:• On the primary system, the extractor process captures audit records from the TMF MAT
and, optionally, from auxiliary audit trails.• On the primary system, the extractor process filters out audit records that are not relevant
to the backup database (audit records for volumes or files not protected by RDF) and thentransmits the relevant audit records to the backup system. These audit records have additionalinformation added to them by the extractor and the transformed audit records are thencalled image records.
• On the backup system, the receiver process accepts the buffer of image records sent by theextractor, sorts each record to the correct image trail buffer, and eventually writes thecollection of image trail buffers to the actual image trailson disk.
• On the backup system, each updater process reads the image records it is responsible forout of its image trail and sends the audit portion directly to disk process that manages thevolume where that updater's database files reside. During normal RDF operations, the diskprocess applies the audit to the affected database file or table with the logical REDO operation.During the special RDF Takeover or stop-update-to-time operations, the disk process canalso perform logical UNDO operations for those audit records that need to be backed outof the backup database.
NOTE: Throughout this manual, the terms image records and audit records are usedinterchangeably on the backup system. An image record is just the original audit record with someadditional RDF specific information added to it. When an updater prepares an image record tosend to the disk process, it strips out that added RDF information and sends the original auditrecord.
Figure 1-3 illustrates these tasks as they are performed during normal processing when RDFupdating is enabled. The sequence of events differs when updating is disabled, as explained in“RDF Operations”.
RDF Tasks 39

Figure 1-3 RDF Tasks to Maintain a Copy of a Database
RDF ProcessesTo accomplish its four major tasks, RDF runs different processes on the primary system and thebackup system. These processes (the monitor and extractor on the primary system and thereceiver, updaters, and purger on the backup system) divide these tasks as summarized in thefollowing pages. The relationship of these processes to one another is illustrated in Figure 1-4.More details about their operation appear in“RDF Operations” (page 42) .
40 Introducing RDF

Figure 1-4 RDF Subsystem Processes
Primary System ProcessesOn the primary system:• The monitor process coordinates most RDFCOM commands involving the main RDF
processes (for example, start and stop).• Each extractor process reads an audit trail (the MAT or a particular auxiliary audit trail),
filters out audit records not relevant to the backup database, transforms the audit recordinto an image record, and then transmits the image records to an associated receiver processon the backup system. Some control information for synchronizing the extractor and receiverprocess pair is included each time the extractor process transmits the audit records.
RDF Processes 41
Backup System ProcessesOn the backup system:• There is one receiver process for each configured extractor process. A receiver accepts the
image records from its extractor, sorts them, and then writes them to the appropriate RDFimage trail.
• There is one updater process for each primary system volume being protected by RDF.Updater processes read image records from their RDF image trails and pass them to thedisk process so that the disk process can perform the logical REDO operations. The backupdatabase is updated in cache each time the disk process performs a logical REDO operationrequested by an updater process.
• The purger process interacts with the updaters to determine when image files can be purged,and also determines which transactions updaters must undo for takeover andstop-update-to-time operations.
RDF OperationsRDF can be run with updating of the backup database either enabled or disabled.When updating is enabled, the RDF processes maintain a current, online copy of the primarydatabase on the backup system. By default, the subsystem starts with updating enabled, and theRDF processes continue their updating activities until updating is explicitly disabled or thesubsystem is shut down.When updating is disabled, the extractor process still transmits the TMF audit records from theaudit trails to the backup system, but no changes are applied to the backup database. The receivercontinues to collect audit records from the extractor and writes these records to the image trails.However, the updater processes do not run while updating is disabled.Updating can be explicitly enabled or disabled through RDFCOM commands, as described laterin this manual. If takeover performance is critical, you should run RDF with updating enabled.If updating is disabled, it is possible for the image trails to fill up; also, it may take significanttime for the updaters to apply all audit records when a takeover operation is started.The monitor, extractor, receiver, RDFNET, updater, and purger processes run as process pairs.
Monitor ProcessThe monitor process is a process pair that normally runs on the primary system. This process isresponsible for starting, stopping, and monitoring all other RDF processes on the primary andbackup systems.
Extractor ProcessAn extractor process is a process pair that runs on the primary system. Each extractor processreads an audit trail (the MAT or a particular auxiliary audit trail), filters out audit records notrelevant to the backup database, and then transmits the relevant audit records over the Expandnetwork to an associated receiver process on the backup system, as shown in Figure 1-5.
42 Introducing RDF

NOTE: The discussion and figure that follow are both oriented to the extractor associated withthe MAT. For information about protecting auxiliary audit trails, see Chapter 13 (page 291).
Figure 1-5 Extractor Process Operation
Reading large amounts of data from the MAT, the extractor process stores the following recordsfor subsequent transmission to the backup system:• TMF control records
— All transaction state records— TMP control point records— TMF shutdown records— File-incomplete records— File-complete records— Stop-RDF-Updater records
• Redo audit records for RDF protected files (generated by applications)• Undo audit records for RDF-protected files (generated by TMF undo processing)• Filelabel modifications for the following Enscribe DDL operations
— CREATE— PURGEDATA— ALTER MAXEXTENTS— PURGE (if REPLICATEPURGE is enabled)
• Filelabel modifications for the following NonStop SQL operation— PURGEDATA
NOTE: Except for PURGEDATA, RDF does not replicate NonStop SQL DDL operations onany SQL objects. For more information about NonStop SQL DDL operations and databases ona system protected by the RDF product, see Chapter 6 (page 157) and Chapter 16 (page 323).
The extractor filters out all other records and does not send them to the receiver. Among thosefiltered out are audit records for volumes and files not protected by RDF (and files implicitly or
RDF Operations 43

explicitly excluded by INCLUDE/EXCLUDE lists), most of the physical audit records generatedeither for block splits or during FUP RELOAD operations, and all audits generated by the RDFupdaters.The extractor always tries to fill the buffer to be sent to the receiver. The buffer never containspartial records; if the buffer is nearly full and the next record to be transmitted does not fit in itsentirety, the extractor transmits the current buffer and puts that next record at the beginning ofthe next buffer. The extractor never waits for more than one second to send data to the receiver.If its current buffer is not filled within a second, the extractor transmits the buffer (even thoughit is not filled).Although the extractor runs as a process pair, the primary process does not maintain restartinformation nor checkpoint this information to its backup. Instead, the receiver maintains allrestart information for the extractor, ensuring that the extractor can be restarted without any lossof data. The restart point is based on the MAT position of the last record safely stored in theimage trail on the backup system.Whenever you start RDF, the extractor requests its starting position in the audit trail from thereceiver. Because this position is based on the audit trail position of the last image record safelystored in the image trail by the receiver, this method guarantees that no audit is mistakenlyomitted. If the primary extractor process fails, the backup process requests from the receiver anew starting position in the audit trail, ensuring a correct restart position. This extractor-receiverprotocol also provides protection against messages from the extractor erroneously arrivingout-of-order: if a message arrives out-of-order, the receiver directs the extractor to restart.When the extractor reads from an audit trail file, it pins the file by sending a message to TMF.Once pinned, an audit trail file remains pinned until the extractor unpins it or if you issue theRDFCOM UNPINAUDIT command at the primary system.
CAUTION: Before deleting an RDF configuration, always issue an UNPINAUDIT commandto unpin any audit trail files that might be pinned by the configuration. If you delete theconfiguration without first doing so, then you will be unable to unpin the files afterward.
If you unpin files, RDF cannot be restarted if the files required by the extractor cannot be madeavailable. When you unpin audit trail files, be sure that these files are dumped to disk or tape.If they are not dumped, and the TMP renames the file or files required by the extractor, you willhave to reinitialize RDF and resynchronize the primary and backup databases.In response to the UNPINAUDIT command, RDFCOM issues a prompt asking you to confirmyour request.If the files are unpinned successfully, RDFCOM issues an informational message to that effect.If an error occurs while attempting to unpin the audit trail files, the command is ignored, andRDFCOM issues a message indicating the error.
Receiver ProcessA receiver process is a process pair that runs on the backup system. There is one receiver foreach configured extractor. A receiver process accepts audit records from its extractor, sorts them,and then writes them to the appropriate RDF image trail, as shown in Figure 1-6. (The restartabilityof a receiver ensures the receiver's correctness at process takeover or under any conditionsrequiring resynchronization with its extractor.)A receiver determines which updater will apply a given image record, and it sorts that recordinto the image trail used by that updater. The records in the image trails are subsequently usedby updater processes to update the backup database.Each receiver creates its own image trail files, preallocates extents, initiates rollovers, and managesthem, except for purging, a task performed by the purger process .
44 Introducing RDF

Sorted Image TrailsRDF maintains its image data on disk volumes specified during RDF configuration. On each ofthese volumes, the collection of files that contains image data is known as an image trail; thatis, there is one image trail per individual image trail volume.The standard image trail used by RDF, called the master image trail, contains the transactionstatus records that hold key information about whether a transaction has committed or aborted.The master image trail is stored on the disk volume specified by the master receiver’sRDFVOLUME configuration option. You cannot configure any updaters to the master imagetrail.Secondary image trails primarily contain the audit records that log changes made to the user'sdatabase on the primary system. Updaters read secondary image trails and apply the changesrecorded in the records to the database on the backup system. All updaters must be configuredto secondary image trails. You can configure up to 255 secondary image trails. Each secondaryimage trail is stored on a separate volume, specified by the IMAGETRAIL configuration option.RDF uses multiple sorted image trails. With this feature, the receiver detects which updaters areassociated with which image trails. When it receives a record, the receiver identifies the updaterthat will apply the record to the backup database. The receiver then sorts the record into theimage trail used by the updater responsible for applying the record.
Figure 1-6 Receiver Process Operation
RDF Operations 45

With sorted image trails, the activity of any one image file typically remains so low that it canbe stored on the same disk volumes as the main database with no significant I/O impact. Thisapproach is not recommended, however, if you require very high RDF performance or if RDFis running with the UPDATE option turned off; in this case, the image trails could eventuallyfill the volume; in such cases, it is best to have volumes exclusively dedicated to the image trails.
NOTE: You should keep all image trail files off of the $SYSTEM volume and its controller.Otherwise, if there is a lot of audit data to send from the primary system to the backup system,it could take a while for the updaters to start.
Image trails can be added only after RDF has been initialized but before it has been started.
RDF Control PointsWhen the extractor has no information to send from the audit trail, it transmits a buffer containingno audit images (an empty buffer) to the receiver. When the receiver process receives an emptybuffer, it generates an RDF control-point record in each image trail. Therefore, even when noTMF transactions are generated on the primary system, RDF adds internal control points to theimage trail on the backup system. The file-filling rate for RDF control point records is very slow.A receiver determines which updater will apply each audit record, and sorts the data into theimage trail used by that updater. The records in the image trails are subsequently used by updaterprocesses to update the backup database. Each receiver creates its own image trail files,preallocates extents, initiates rollovers, and manages them, except for purging, a task performedby the purger process .The receiver also adds RDF control points to individual image trails if they have not receivednew audit while other trails have. Thus, the image trails can appear to be growing in size eventhough no transaction activity is taking place on the primary system. The primary importanceof RDF Control Points is that they are used to reflect accurate RTD times for the updaters whennew audit has not been added to their image trails for any period of time. They are also usefulfor the coordination of other special operations.
RDFNET ProcessThe RDFNET process is a process pair that runs only on the primary node of the network masterin an RDF network. The RDFNET process creates synchronization information used only duringRDF takeover.
Updater ProcessesAn updater process is a process pair that runs on the backup system when updating is enabledor during takeover processing. Every volume on the primary system that is protected by RDFhas its own updater process on the backup system.Each updater reads the image trail to which it has been configured, looking for audit records(image records) associated with the data volume it protects (it ignores audit records associatedwith volumes protected by other updaters). When it finds applicable audit records, the updatersends the audit records to the disk process to be applied to the backup database.Each updater performs the following functions:• Reads large blocks of data from the RDF image file and searches for image records associated
with the updater’s volume on the primary system.• Opens and closes database files on the backup system for updating and maintaining the
backup database.• Defines restart points and updates restart information in the context file (named CONTEXT).
For an explanation of restart points, see “Restart Information”.• Sends information to RDFCOM for use in the STATUS RDF command display.
46 Introducing RDF
• Issues a logical REDO request to the disk process (during the normal forward pass over theimage trail) for each update associated with its volume.
• Issues logical UNDO requests to the disk process when backing out changes associated withtransactions that need to be undone during RDF takeover or stop-update-to-timestampoperations.
• Bundles the REDO and UNDO requests into batch TMF transactions, the duration of whichis specified by the UPDATERTXTIME configuration parameter.
• For Enscribe files only, performs the following DDL operations:CREATE, PURGE (if REPLICATEPURGE is enabled), PURGEDATA, ALTER MAXEXTENTS(used only for increasing MAXEXTENTS).
• For NonStop SQL files only, performs the following DDL operation: PURGEDATAAn updater cannot always respond immediately to the STOP UPDATE and STOP RDF commands.If an updater has audit records queued for the disk process, the updater must wait until all ofthat information is processed before it can shut down.You specify the primary and backup CPUs for each updater. If the original backup process hasto take over because the primary CPU failed, this backup process runs by itself. When it determinesthat the primary CPU has come back up, it creates a new backup process in that CPU. When ithas to take over, the original backup process becomes the primary process, and remains so evenafter it creates a new backup process; that is, the updater does not switch back to the originalCPU configuration after the new backup process is created. If you stop the updaters by way ofa STOP RDF or STOP UPDATE command, however, when you restart the updaters, your originalconfiguration is once again used.The updaters will shut down if any of the following occurs:• You issue a STOP RDF or STOP UPDATE command on the primary system.• You issue a STOP RDF command on the backup system when the communications lines
between the two systems are down.• You issue a STOP TMF command on the primary system.• The monitor detects the unexpected termination of any RDF process and sends out abort
RDF messages.• You perform a NonStop SQL DDL operation on the primary system that includes the WITH
SHARED ACCESS option for an RDF-protected file. For more information, see “PerformingShared Access DDL Operations” (page 152).If you perform a NonStop DDL operation WITH SHARED ACCESS on a table or index thatis not configured for RDF protection by your current RDF subsystem, then this current RDFsubsystem does not shut down.
• A takeover operation completes on the RDF backup system.
Audited Database FilesAll database files on the backup system are audited files.Each updater maintains a file status table to keep track of the files it has open. An updater closesany database file that has not been updated recently. Updaters also close database files when aSTOP RDF or STOP UPDATE command is issued, or when the updater restarts because of errorconditions. Additionally, if you alter the updater's OPENMODE while UPDATE is ON, then theupdater closes all its file and then reopens them with the new OPENMODE.An updater process can have up to 3000 files open simultaneously. When it has the maximumnumber of files open and needs to open another file, it first determines if there are any files thathave not been accessed recently and closes just them; if all of the open files have been accessedrecently, then the updater closes all of them before it continues processing. For the SMFramifications of this file limit, see the note in “Using SMF With RDF” (page 65).
RDF Operations 47

Each updater maintains a file status table to keep track of the files it has open. An updater closesany database file that has not been updated recently. Updaters also close database files when aSTOP RDF or STOP UPDATE command is issued, or when the updater restarts because of errorconditions. Additionally, if you alter the updater's OPENMODE while UPDATE is ON, then theupdater closes all its file and then reopens them with the new OPENMODE.An updater process can have up to 3000 files open simultaneously. When it has the maximumnumber of files open and needs to open another file, it first determines if there are any files thathave not been accessed recently and closes just them; if all of the open files have been accessedrecently, then the updater closes all of them before it continues processing. For the SMFramifications of this file limit, see the note in“Using SMF With RDF” (page 65) .
REDO PassUpdaters perform REDO operations during all normal processing. The updater applies eachaudit record as a redo operation, regardless of whether the transaction associated with that auditrecord committed, aborted, or is still in progress on the primary system.The updaters apply all audit records to their data volumes regardless of whether the associatedtransaction has committed, has aborted, or is still in progress. If a transaction commits, eachupdater involved in the transaction applies all audit associated with that transaction and associatedwith its protected volume to its corresponding UpdateVolume on the backup system. If atransaction aborts, the updater applies all application-generated audit followed by all TMFBackout-generated audit - all with REDO operations. For those who are familiar with audit recordformats, updaters always apply the after-images when performing Redo operations.
UNDO PassUpdaters perform an UNDO pass over the image trail during final processing of RDF takeoverand stop-update-to-time operations. This is because data already applied to the backup databasemust be undone if the associated transaction(s) did not commit prior to the start of the takeoveroperation or prior to the specified timestamp.For takeover operations there are three phases of undo: local undo, file undo (if file-incompletesfrom the primary system are still unresolved), and network undo (if you are operating in an RDFnetwork). For stop-update-to-time operations there is only local undo (file-incompletes causeabend, and network undo is not supported).If an updater encounters a multi-block operation on the primary system that aborted, then theupdater also enters a special UNDO pass while it searches for the start of the aborted multi-blockoperation, and it undoes any audit associated with the aborted transaction in order to guaranteeall aspects of the aborted transaction are undone from the backup database.For those familiar with audit record formats, the updater applies before-images when it performsUNDO operations.
Restart InformationRDF has a CONTEXT file in which each updater process maintains a context record. A contextrecord specifies the position (referred to as the restart position) in the image trail where theupdater was at the last context save point. All data for the associated data volume in the backupdatabase prior to the specified restart position is safe on disk (has been applied to the backupdatabase).If an updater detects a restartable error, it restarts. Upon being restarted, an updater reads itscontext record and restarts processing in the image trail at the specified restart position.
Partitioned Files, Alternate Key Files, and IndexesEach updater is responsible for applying audit data to partitions corresponding to the volumeon the primary system that updater is protecting. Updates are applied directly to the specific
48 Introducing RDF

partition, regardless of whether it is a primary or secondary partition. RDF does not use the filesystem for partition mapping.Furthermore, because updates to the backup database are applied by logical REDO/UNDOoperations, alternate key files and NonStop SQL indexes are not affected by an update to a fileor table. Alternate key files or NonStop SQL indexes are updated independently as a consequenceof the individual audit records generated on the primary system by TMF software.
NOTE: You must be sure that volumes on the primary system containing alternate key filesand indexes are protected by RDF. It is not sufficient to protect just the associated data file ortable (particularly in the case of alternate keys). Likewise, if primary partitions reside on volumesprotected by RDF, you must ensure that the secondary partitions are also configured for protection.
File System Errors Involving Data FilesFile system errors can occur when:• A file is created.• A file is opened.• A modify operation is performed on the file. Modify operations are those that the updater
might perform on an open file, such as updating the file (logical REDO/UNDO) or alteringthe owner or security after the replication of a file creation.
Errors encountered are reported in the EMS event log.If an updater process encounters a file-system error, it responds in either of the following ways(depending upon the type of error that occurred):• Restarts and retries the operation again by reprocessing all database updates since the last
restart point. If the updater takes this course of action, it continues to do so until theunderlying problem goes away. This would be the action, for example, if an updater processcannot create a data file on a backup volume because that volume is protected by theSafeguard security management subsystem; in this case, the updater logs error message 739,with an error 48, and restarts.
• Skips the operation. This would be the action, for example, in response to an error 10 (“recordalready exists”).
RTD TimesWrite operations to the various sorted image trails occur asynchronously to one another. Toensure correct operation, the updaters cannot read to the end-of-file. Instead, they can only readas far as the receiver allows (determined by receiver “save” points in the image trail). Thus, ona finely tuned RDF backup node, the RTD time (relative time delay) for an updater can typicallyindicate that the updater is 1 to 15 seconds behind TMF processing on the primary system. This15-second delay does not mean that 15 seconds are needed for the updater to catch up; catchingup typically requires less than a second. See the discussion on RTD Times in “RDF States”(page 113)
Purger ProcessThe purger process is responsible for purging image trail files when they are no longer needed.The purging of redundant image trail files is based on transaction information. Specifically, thereceiver process maintains general information on what transactions might be in each image file.This information is system-wide, not specific to any particular image trail. The reasons for thispertain to performance.First, if the receiver had to maintain specific information about what transactions were actuallyrepresented in each image file on each image trail, the extractor-receiver performance rate wouldbe seriously degraded. Therefore, the receiver keeps general information about all transactionsit has seen across all trails.
RDF Operations 49

Second, because considerable checking must be done across all trails to determine what files canbe purged based on what transactions might be represented in the various files on the variousimage trails, the purger process performs this task.The purger process is a restartable process pair that runs on the backup system (it is startedduring START RDF and runs even when the updaters are stopped; image files are purged,however, only when updating is enabled).No image file in a given image trail can be purged until it is absolutely certain that all updatersconfigured to the trail will no longer require that file for an UNDO pass during a takeover orstop-update-to-time operation. RDF automatically keeps track of which range of transactions isrepresented in each image trail file. The purger process can therefore always determine withconfidence when a particular image trail file can be purged.For example, assume the following:• There are two image trails.• Five updaters are assigned to each trail.• A long-running transaction (T1000) involves all five updaters on one trail, but none on the
other.• T1000 became active when the current image file in each trail was AA000002, and is still
active.• The receiver is currently writing to image file AA000015 in both trails.• All updaters are currently reading audit records from AA000015.Although all the updater restart locations are in AA000015, none of the image files from AA000002through AA000014 can be purged while T1000 is active or aborting because they will be requiredif T1000 needs to be backed out during an RDF takeover or stop-update-to-timestamp operation.This is true for both trails, even though none of the updaters on one trail have ever been involvedwith T1000. If an UNDO pass becomes necessary, all updaters must perform that pass in searchof any audit records associated with T1000 (they must go back in each image trail to the pointwhere T1000 began: AA000002 in this example).The purger process exists to avoid having the receiver keep track of all this information, whichcould impact extractor-receiver throughput significantly. The purger process interacts with theupdaters to determine when image files can be purged.
Reciprocal and Chain Replication Require Mutually Exclusive Datavols
Example 1-1 Reciprocal Replication
System \A System \B
RDF Subsystem 1
Primary DB 1 ---------------------------------> Backup DB 1
RDF Subsystem 2
Backup DB 2 <-------------------------------- Primary DB 2
Thus, you have a primary database for RDF subsystem 1 on system \A (primary DB 1) and aprimary database for RDF subsystem 2 on system \B (primary DB 2).
50 Introducing RDF

Example 1-2 Chain Replication
System \A System \B System \C
RDF Subsystem 1
Primary DB 1 ---------> Backup DB 1
Primary DB 2 ----------> Backup DB 2
RDF Subsystem 2
Thus, system \B is both the backup system in RDF subsystem 1 and the primary system in RDFsubsystem 2.
Example 1-3 Invalid Chain Replication
System \A System \B System \C
RDF Subsystem 1
Primary DB 1 ---------> Backup DB 1
RDF Subsystem 2
Backup DB 1 ---------------> Another Backup DB 1
In Example 1-3 , RDF should not be configured to replicate RDF updater changes to anotherbackup system. You would not get an error in configuring this environment, but replication tothe database on \C would only consist of TMF Backout-generated audit on \B due to updatertransactions that aborted because RDF extractors filter out all updater-generated audit.The updaters generate audit records as they replicate data to the target files and target tables,and these audit records are internally marked as updater-generated audit records. The extractorsfilter out all updater-generated audit. Thus, under normal circumstances, the extractors do notsend updater-generated audit to their backup systems for replication.Consider the following example. Assume that Primary DB 1 and Backup DB 2 are both locatedon $DATA on \A, and assume that Primary DB 2 and Backup DB 1 are also located on $DATAon \B. Using the reciprocal example, suppose your application does an update on \A to PrimaryDB 1 as in Example 1-1 “Reciprocal Replication”. The extractor of RDF Subsystem 1 sees that theupdate was for $DATA and sends that update to \B where the updater applies that update toBackup DB 1. This update generates an audit record that goes into the audit trail on \B and ismarked as updater-generated. The extractor for RDF Subsystem 2 reads the audit trail lookingfor audit associated with $DATA. When it reads the record generated by the updater, it sees theupdate was associated with $DATA, but it also sees that the record was updater-generated,which causes the extractor to filter that record out and not send it to \A. This is correct anddesired behavior.If an updater transaction aborts, the TMF Backout process executes undo for the abortedtransaction, and Backout has no information about what process generated the original audit forthe transaction before it aborted. This can corrupt your primary and backup databases unlessyou take appropriate steps (see further below).Consider the following extension to the example above. After the updater on \B has replicatedthe application's update from \A and before the update can commit its transaction on \B, a CPUfailure causes TMF to abort the transaction. Backout undoes the updater's update. The resultingaudit record is associated with $DATA, but Backout does not know which process generatedthe original update, and the resulting record is not marked as updater-generated. When theextractor for RDF Subsystem 2 reads this record generated by Backout, it sees it was for $DATAand it sees that the record was not updater generated. It therefore sends this record to \A. Now,
RDF Operations 51

when the updater for RDF Subsystem 2 on \A applies this record to Primary DB 1, it therebybacks out the committed update of your application. Additionally, Primary DB 1 and BackupDB 1 are no longer in synch. Even though the updater on \B had its transaction aborted, thatupdater will re-apply the application update to Backup DB 1. When done, Primary DB no longerhas the update, but Backup DB 2 does.Although this example describes a reciprocal configuration, the same basic problem can happenwith chain replication. In the chain case, the extractor for RDF Subsystem 2 would be sending aBackout generated update to \C where the file or table involved in the update does not evenexist. This will cause the updater responsible for $DATA on \C to stall, waiting for you to createthe file or table on \C.The same effect occurs when you set up reciprocal environments or chain environments, whereyou also have the REPLICATEPURGE attribute set. In this case, the updater purges the filethrough the file system, and the resulting audit record does not indicate that it was generatedby an updater. If the extractor sends the audit record for the purge to its backup system, theupdater might purge a file you do not want purged, or it might encounter an error 11.To prevent these problems in a reciprocal configuration or chain configuration, you must ensurethat Backup DB 1 and Primary DB 2 are on mutually exclusive volumes. For example, put PrimaryDB 1 and Backup DB 1 is on $DATA1 and put Primary DB 2 and Backup DB 2 on $DATA2. Thusthe extractor can filter out the audit by volume name and not depend on records being markedas updater generated.Alternatively, if your two databases must share the same disks, then you must explicitly specifywhich files and tables you want replicated by each RDF subsystem. For example, RDF Subsystem1 would INCLUDE only Primary DB 1, and RDF Subsystem 2 would INCLUDE only PrimaryDB 2.
Available Types of Replication to Multiple Backup SystemsRDF allows you to replicate database changes from a single primary system to multiple backupsystems. This makes possible simultaneous read-only access to all of the backup systems, acapability particularly desirable for query-intensive applications where a central database canbe distributed to several remote systems for local query processing.Replication to multiple backup systems is achieved by establishing multiple RDF configurations,each protecting the same database on the primary system. As an example, you might want toreplicate the same data to different backup systems:RDF Configuration #1 \A ---------> \B
RDF Configuration #2 \A ---------> \C
RDF Configuration #3 \A ---------> \D
You can also have two RDF configurations replicating two separate databases (DB1 and DB2)from the same primary system to two different backup systems:RDF Configuration #1, protecting database DB1 \A ---------> \B
RDF Configuration #2, protecting database DB2 \A ---------> \C
As a third possibility, you can also have two RDF configurations replicating two separate databases(DB1 and DB2) from the same primary system to the same backup system:RDF Configuration #1, protecting database DB1 \A ---------> \B
RDF Configuration #2, protecting database DB2 \A ---------> \B
52 Introducing RDF

In the preceding examples, each RDF configuration operates entirely independently of the otherRDF configuration primaried on the same node; that is, each RDF system has its own extractorand monitor process. In this way, Expand problems affecting one configuration might notnecessarily affect the others (depending on the configuration).
RDF Control SubvolumeThe INITIALIZE RDF command includes a control subvolume suffix parameter (SUFFIX char),where char is an alphanumeric character. If you include this parameter, the RDF controlsubvolume on $SYSTEM will be the local (primary) system name without the backslash and withthe specified character appended to it. If you omit this parameter, the RDF control subvolumeon $SYSTEM will merely be the local system name without the backslash.If you want to have several RDF susbsystems configured on the same primary node, the RDFconfiguration for each RDF subsystem must have its own control subvolume and you mustspecify the SUFFIX parameter when you initialize each subsystem. For example, if the name ofyour primary node is \BOSTON, you could specify "1" as the SUFFIX when you configure thefirst RDF subsystem, and its control subvolume will be BOSTON1. If you specify "2" as the SUFFIXfor your second RDF subsystem, then its control subvolume is BOSTON2. Both are located on$SYSTEM, but each RDF subsystem has its own control subvolume.For a description of the files in the control subvolumes on the primary backup systems, see “RDFSystem Files” (page 362) .
Other RDF Features
Triple ContingencyIf you are replicating your database to two backup systems and then lose your primary system,you can perform an RDF takeover on both the backup systems upon loss of the primary systemand continue application processing on the new system within minutes. To proceed with fullRDF protection, however, you must:1. Initiate a takeover on two of the backup systems.2. Synchronize the two databases.3. Configure the two systems as a primary-backup pair.4. Initialize and start RDF on the system that you want to be the new primary system.Depending upon the size of your database, the second step listed, database synchronization,could take days to accomplish without the RDF triple contingency feature. Triple contingency,however, streamlines this step, enabling you to achieve rapid database synchronization after atakeover operation. Triple contingency allows your applications to resume, with full RDFprotection, within minutes after the loss of your primary system, provided that the two systemsare not too far behind.The triple contingency feature builds upon the ability to replicate to multiple backup systems.To use this feature, you establish two essentially identical RDF configurations:RDF Configuration #1 \A ---------> \B
RDF Configuration #2 \A ---------> \C
To achieve Triple Contingency protection, see the various requirements that are outlined in detailin Chapter 10 (page 271).
Loopback Configuration (Single System)A loopback configuration is one where the primary and backup systems are the same system.This configuration is of no use in a disaster protection plan, but can be useful for testing purposes.
Other RDF Features 53
One set of disks can be replicated to another set of target disks to provide a copy of the livedatabase. There are two operational considerations unique to this environment:• The updaters operate in transaction mode, which means you should not stop TMF before
stopping RDF.• The RDF takeover operation cannot be performed unless you manually stop the monitor
and extractor processes before issuing the TAKEOVER command or include the ! option inthe TAKEOVER command.
Online Product InitializationYou can initialize RDF/IMP, IMPX, or ZLT while your applications continue to run. This isparticularly useful for installing new versions of RDF into existing production environmentswhere you cannot afford to stop your applications even briefly to generate a TMF shutdowntimestamp. It is also useful if you encounter a problem for which you would like to reinitializeRDF without stopping your applications.For information about this capability, see:• “Initializing RDF Without Stopping TMF (Using INITTIME Option)” (page 80)• “Online Installation and Initialization Without Stopping RDF” (page 82)• “INITIALIZE RDF” (page 212)
Online Database SynchronizationWith RDF/IMP, IMPX, or ZLT you can synchronize entire databases or selected volumes, files,tables or even partitions while your applications continue to run. For information about thiscapability, see Chapter 7 (page 167).
Online Dumps of the Backup DatabaseWith RDF/IMPX or ZLT, all backup databases are audited by TMF. You can take online dumpsof a backup database at any time, thereby minimizing the amount of time necessary to performany subsequent takeover operation. For information about taking dumps while the updaters arerunning, see Chapter 5 (page 121).
Subvolume-Level and File-Level ReplicationBy default, RDF provides volume-level protection, wherein changes to all audited files and tableson each protected primary-system data volume are replicated to an associated backup-systemdata volume.RDF/IMP, IMPX, and ZLT also support subvolume-level and file-level replication. To use thiscapability, you supply INCLUDE and EXCLUDE clauses when configuring updaters to identifyspecific subvolumes and files you want either replicated or not replicated.For information about subvolume-level and file-level replication, see Chapter 11 (page 279).
Shared Access DDL OperationsRDF includes two event messages (905 and 908) that assist you in the proper performance ofNonStop SQL/MP shared access DDL operations on the backup system. See “Performing SharedAccess DDL Operations” (page 152).
Configurable Software LocationBy default, RDF software resides on $SYSTEM.RDF. You can, however, override this locationwhen you configure RDF. When you configure the general RDF attributes, use the SET RDFSOFTWARELOC command. This can be useful if you have different releases of RDF on yoursystem.
54 Introducing RDF

You should place the RDFCOM component on $SYSTEM.SYSTEM, or you must add the newsoftware location to your TACL search-subvolume list.
EMS SupportRDF/IMP, IMPX, and ZLT all support the Event Management System (EMS). They direct theircommand, event, warning, and error messages to an EMS collector in the form of fully-tokenizedmessages.You can view messages in the EMS log online using Viewpoint or any other tool you normallyuse for monitoring $0. When you do, so you are perusing the entire EMS log. You can, however,use the standard EMS filter RDFFLTO to isolate RDF messages into an entry-sequenced filewhich you then can examine using the RDFSCAN online utility.
SMF SupportRDF supports the use of the NonStop Storage Management Foundation (SMF) product on boththe primary and backup RDF systems. The database on the primary system can reside on SMFvirtual disks, as can the replicated database on the backup system.All combinations of replication from physical disk to virtual disk, virtual disk to physical disk,and virtual disk to virtual disk are supported.There are some issues and restrictions that you should be aware of before using RDF in an SMFenvironment; these are discussed in “Using SMF With RDF” (page 65).
RTD Warning ThresholdsRDF/IMPX and ZLT allow you to designate a pair of RTD warning thresholds: one for theextractor, and another for all of the updaters. Having set those thresholds, you can issue anRDFCOM STATUS RTDWARNING command with a designated repeat interval to displayinformation and statistics for only those processes (the extractor or any updater) that have fallenbehind the configured RTD threshold. For information about setting the RTD threshold, see “SETRDF” (page 228) and “RDF States” (page 113) .
Process-Lockstep OperationProcess-lockstep operation, which is available with the RDF/IMPX and ZLT products, preventsan application from executing further processing based on a committed business transactionuntil all audit associated with that transaction is safely stored in the image trails on the backupsystem.This is accomplished by means of a new procedure, named DoLockstep, that you call immediatelyafter calling EndTransaction. With this lockstep protocol, the business transaction is actuallycommitted on the primary system prior to the start of the DoLockstep operation, but theapplication is not allowed to continue processing until DoLockstep has returned status to theapplication.For information about this capability, see Chapter 15 (page 309).
Support for Network TransactionsThe RDF/IMPX and ZLT products support network transactions: transactions that update dataresiding on more than one RDF primary system.More specifically, the updates for a transaction on one of the two primary systems might havebeen successfully transmitted and applied to the associated backup database, but a disasterbrought down the other primary system before the updates by the transaction on that systemcould be sent to its backup database. After executing RDF takeover operations on both backupsystems, the data from the network transaction would be present in one backup database butnot in the one brought down by the disaster. Thus the distributed backup database is inconsistentwith regard to the affected network transaction.
Other RDF Features 55

For information about this capability, see Chapter 14 (page 295).
RDF and NonStop SQL/MXRDF can replicate NonStop SQL/MX user tables and indexes as well as NonStop SQL/MP objectsand Enscribe files.For information about this capability, see Chapter 16 (page 323).
Zero Lost Transactions (ZLT)Zero Lost Transactions (ZLT), which is available only with the RDF/ZLT product, is a functionalcapability that uses mirrored disks to guarantee that no committed transactions on the primarysystem will be lost in the event of an RDF takeover by the backup system.For information about this capability, see Chapter 17 (page 337).
Monitoring RDF Entities With ASAPASAP (Availability Statistics and Performance) allows many different subsystem entities to bemonitored across a network of NonStop servers. The status and statistics for the entities arecollected on a single system, and are then monitored either through the ASAP command interfaceor through the ASAP graphical user interface PC client.RDF/IMP, IMPX, and ZLT are instrumented to feed state information to ASAP, thus allowingRDF subsystems to be monitored, in an integrated way, alongside all other subsystems supportedby ASAP. The following RDF entities report state and statistical information to ASAP:• Monitor• Extractor• RDFNET (optional)• Receiver• Purger• UpdaterFor information about using ASAP to monitor RDF entities, see Appendix E (page 465).
56 Introducing RDF

2 Preparing the RDF EnvironmentBefore RDF can be run on a NonStop system, the system configurations and user applicationsmust meet certain RDF requirements. This chapter explains how to prepare each system for RDFinstallation and operation, ensuring that all these requirements are met and that you understandthe RDF product’s restrictions. This information, intended for all readers, covers the followingtasks:• “Configuring Hardware for RDF Operations” (page 57), including primary and backup
system configurations, disk volume considerations, and network requirements• “Preparing Software and Database Files for RDF Operations” (page 59), including TMF and
RDF considerations, NonStop SQL database conventions, Enscribe database conventions,and application design factors
• “Using SMF With RDF” (page 65)
Configuring Hardware for RDF OperationsThe RDF hardware requirements are summarized in Table 2-1 and described in detail in the nextfew pages.
Table 2-1 RDF Hardware Requirements
RequirementsHardware
RDF runs on NonStop systems under control of theNonStop operating system. Each RDF primary systemmust be connected through an Expand path to its RDFbackup system.
Primary and Backup Systems
The RDF product transmits data on any Expand datacommunications lines.
Communications
Primary System ConfigurationThe RDF primary system must operate under control of the NonStop operating system, whichis the standard operating system for NonStop systems. This system must be connected over anExpand data communication path to one or more RDF backup systems.
Backup System ConfigurationThe RDF backup system, like the primary system, must operate under control of the NonStopoperating system and be connected over an Expand path to one or more RDF primary systems.In the event of a disaster at the primary site, an identical copy of the primary system’s hardwareconfiguration ensures that the backup system can support your business operations withoutlowering system performance. If the backup system’s configuration is identical to that of theprimary system, your system personnel can adjust more quickly to the backup environmentduring disaster recovery.If you choose not to configure the backup system as an identical copy of the primary system,plan the configuration of the backup system with enough processing power and disk drives toenable RDF to keep the backup database current with the primary database.Because RDF applies database modifications on the backup system through a private low-leveland privileged interface to the disk process, by-passing the file system, the CPU requirementson the backup system when running RDF will typically be lower than the total CPU requirementson the primary system running the applications. Repeated analysis has shown that the cost ofreplication on the backup system is usually 25% or less than the cost on the primary system. Theactual backup CPU requirements depend on many factors, including the RDF configuration, the
Configuring Hardware for RDF Operations 57

rate of audit transmission from the primary system to the backup system, the database updaterate, and whether or not you have copies of your applications installed (in “standby” mode).Sizing the RDF configuration is a complex task that is best carried out by HP personnel. Thosepersonnel can assist you in configuring and sizing your RDF environment using tools and utilitiesdesigned and developed as part of the RDF Professional Service.Contact your service provider for further details.
Disk Volume LimitThe RDF/IMP, IMPX, and ZLT products can protect up to 255 physical or virtual volumes onyour primary system, and the updaters for these volumes replicate to either a single physical orvirtual disk on the backup system.
Volume-to-Volume MappingThe recommended disk drive configuration for RDF products is a one-to-one mapping betweenthe primary volumes and their corresponding backup volumes, with mirrored disks on bothsystems. This one-to-one mapping ensures that each partition of a partitioned file or table ismapped appropriately to a backup volume.Volume names on the backup system can differ from those on the primary system, but the useof identical primary and backup volume names prevents naming conflicts after a takeoveroperation. If the names of the backup volumes are different than those of the correspondingprimary volumes, you must change all volume references before the primary system’s applicationscan start on the backup system.
Subvolume-to-Subvolume Name MappingRDF can replicate data from subvolumes on the primary system to same or differently namedsubvolumes on the backup system. For more information, see Chapter 12 (page 285).
Expand (Data Communication) ResourcesRDF sends filtered audit data from the primary system over the network to the backup system.A communications path between the systems can be any form of Expand linkage. Plan to configuresufficient communications resources between the primary and backup systems so that RDF cando the following:• Handle the peak rate of audit data• Catch up processing in any audit trail if the communications paths go down and are restored
(without RDF reinitialization)If you are using a dedicated Expand path with high throughput, you should setPATHPACKETBYTES to 8192. If you are not using a dedicated Expand path, you should useMultipacket frames with PATHBLOCKBYTES set to 8192. See also “Specifying System GenerationParameters for an RDF Environment” (page 63).RDF is designed to extract audit records from the primary system and transmit it to the backupsystem as quickly as possible. If you are not using the ZLT capability, this limits the number oftransactions that could be lost if a disaster should occur at the primary system. See UnplannedOutages Without ZLT in Chapter 1 (page 31).To estimate the data communications resources needed for RDF, calculate the amount of audittrail data generated per second during peak loads. If your business has seasonal peaks, such asholidays or the ends of calendar quarters, consider the peak rate at those times.The discussion that follows pertains to the Master Audit Trail (MAT). If you are replicatingauxiliary audit trails, you should use the same algorithm for each auxiliary audit trail.Use the following sampling process once an hour for two weeks to establish your needs:
58 Preparing the RDF Environment
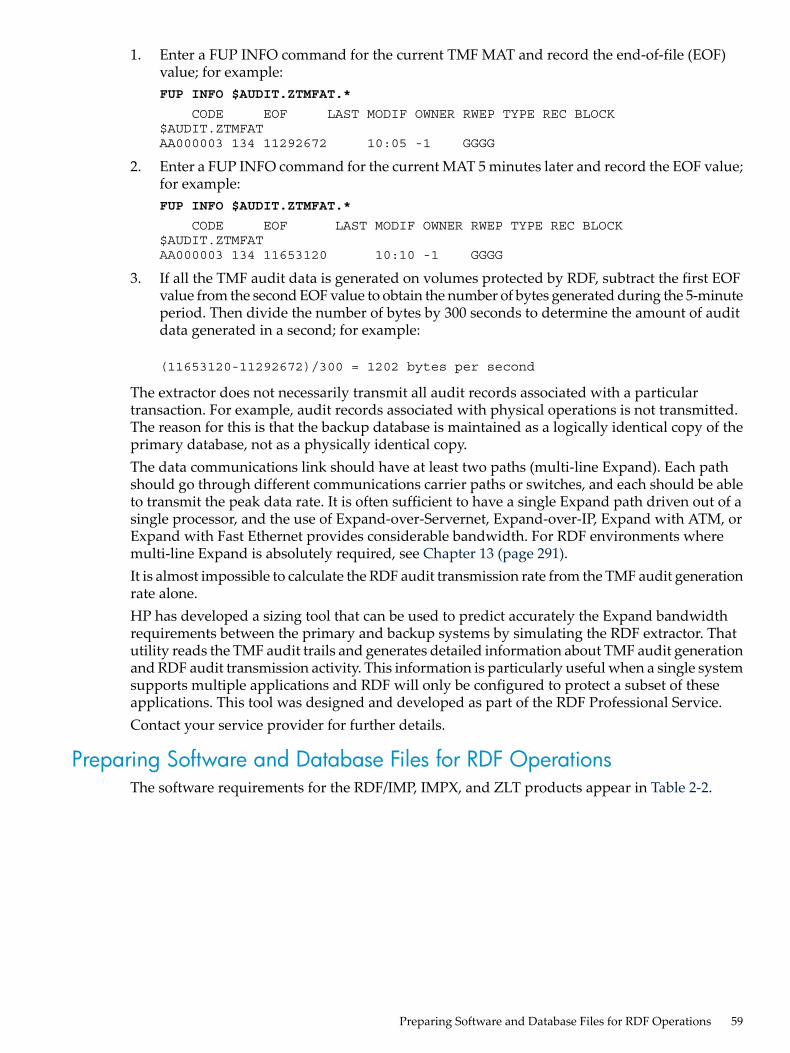
1. Enter a FUP INFO command for the current TMF MAT and record the end-of-file (EOF)value; for example:FUP INFO $AUDIT.ZTMFAT.*
CODE EOF LAST MODIF OWNER RWEP TYPE REC BLOCK$AUDIT.ZTMFATAA000003 134 11292672 10:05 -1 GGGG
2. Enter a FUP INFO command for the current MAT 5 minutes later and record the EOF value;for example:FUP INFO $AUDIT.ZTMFAT.*
CODE EOF LAST MODIF OWNER RWEP TYPE REC BLOCK$AUDIT.ZTMFATAA000003 134 11653120 10:10 -1 GGGG
3. If all the TMF audit data is generated on volumes protected by RDF, subtract the first EOFvalue from the second EOF value to obtain the number of bytes generated during the 5-minuteperiod. Then divide the number of bytes by 300 seconds to determine the amount of auditdata generated in a second; for example:
(11653120-11292672)/300 = 1202 bytes per second
The extractor does not necessarily transmit all audit records associated with a particulartransaction. For example, audit records associated with physical operations is not transmitted.The reason for this is that the backup database is maintained as a logically identical copy of theprimary database, not as a physically identical copy.The data communications link should have at least two paths (multi-line Expand). Each pathshould go through different communications carrier paths or switches, and each should be ableto transmit the peak data rate. It is often sufficient to have a single Expand path driven out of asingle processor, and the use of Expand-over-Servernet, Expand-over-IP, Expand with ATM, orExpand with Fast Ethernet provides considerable bandwidth. For RDF environments wheremulti-line Expand is absolutely required, see Chapter 13 (page 291).It is almost impossible to calculate the RDF audit transmission rate from the TMF audit generationrate alone.HP has developed a sizing tool that can be used to predict accurately the Expand bandwidthrequirements between the primary and backup systems by simulating the RDF extractor. Thatutility reads the TMF audit trails and generates detailed information about TMF audit generationand RDF audit transmission activity. This information is particularly useful when a single systemsupports multiple applications and RDF will only be configured to protect a subset of theseapplications. This tool was designed and developed as part of the RDF Professional Service.Contact your service provider for further details.
Preparing Software and Database Files for RDF OperationsThe software requirements for the RDF/IMP, IMPX, and ZLT products appear in Table 2-2.
Preparing Software and Database Files for RDF Operations 59

Table 2-2 Software Requirements
RequirementSoftware
The RDF/IMP, IMPX, and ZLT products protect only fileson the primary system that are audited by the TMFsubsystem.
Files
The RDF/IMPX and ZLT products support the use of TMFauxiliary audit trails on the primary system (volumesprotected by RDF can store audit data in either the MATor an auxiliary audit trail). The backup database files areaudited, and therefore must also reside on TMF datavolumes.
Auditing
The RDF/IMP, IMPX, and ZLT products use Expandsoftware to connect the primary system to the backupsystem.
Communications
On the primary and backup systems, the installed releaseversion update (RVU) of the operating system must besupported.
Operating System
On both the primary and backup systems, the installedRVU of the TMF subsystem must be compatible with theinstalled RVU of the operating system.
TMF Subsystem
On both the primary and backup systems, the installedRVU of the NonStop SQL product must be compatiblewith the installed RVU of the operating system.
NonStop SQL Products
Configuring TMF for RDF Operations on the Primary SystemTMF attempts to purge old audit trail files each time it rolls over to a new one. The purge isperformed only if the audit trail file is not pinned on behalf of RDF.RDF automatically pins audit trail files. The only ways TMF can purge an old audit trail file thatis still required by RDF are:• If you issue an RDFCOM UNPINAUDIT command while RDF is not running.• If you stop TMF and restart it without restarting RDF. TMF does not retain pinning on behalf
of RDF when TMF is stopped and then restarted. If you must stop and restart TMF, be sureto restart RDF before you restart your applications. This causes RDF to re-pin the audit trailfiles it needs, and thereby prevents TMF from purging the files before RDF has finishedprocessing them.
If you issue an UNPINAUDIT command while audit dumping is disabled and TMF purges anaudit trail that has not yet been processed by RDF, you will have to reinitialize RDF andresynchronize the databases. If you have configured TMF for audit dumping, however, you willnot need to reinitialize RDF or resynchronize the databases (the extractor will wait until theneeded audit trail is restored and then resumes).
AUDITTRAIL BUFFERAfter you have configured your TMF audit trails, for each audit trail disk you should configurethe AUDITTRAILBUFFER ON and configure it with a reasonable value. You do this with theSCF utility program. By default, AUDITTRAILBUFFER has a value of 128 megabytes, and thismay well be a reasonable value for you. By configuring AUDITTRAILBUFFER to at least 128megabytes, you allow the extractor to read the audit trail files from disk cache rather thanphysically from disk. Also, by setting the buffer to a high value, you allow the extractor readsto continue to go to cache instead of to disk even when the extractor has fallen behind. Note, ifthe extractor should fall way behind, for example the communications line to the backup systemfails, and if you have insufficient cache, then the extractor's reads will go to disk until it catchesup to what is in cache. The ability to read from cache is clearly a performance gain for optimal
60 Preparing the RDF Environment

extractor-to-receiver throughput. Please note that altering the value of AUDTITRAILBUFFERcan be done offline or online, but if you do it online your new value will not take effect until youtake the disk down and then bring it back up.
TMF Configuration With Dump Process on the Primary SystemWhen you configure TMF with audit dump on, that subsystem dumps an audit trail file to tapeor disk before purging the audit trail file. This approach is strongly recommended on the primarysystem.Audit trail files are pinned by the RDF extractor and TMF cannot purge pinned files until theextractor has finished processing them. TMF will keep these files pinned on behalf of the RDFextractor even if you stop RDF. Audit trail pinning is lost if you stop TMF. See also the descriptionof the UNPINAUDIT command in Chapter 8 (page 187).You can control when TMF dumps an audit trail by configuring TMF for dump to tape. Forexample, when configured with a tape dump process, TMF issues a prompt for the operator tomount a tape when TMF is ready to dump and purge an old audit trail file. Because TMF cannotexecute the dump and purge of the audit trail file until a tape is mounted, the operator can waituntil the RDF extractor finishes that file before mounting the tape.For more information on configuring TMF, see the TMF Planning and Configuration Guide.
TMF Configuration Without Dump Process on the Primary SystemLong ago, the RDF product required that you configure TMF with a dump process that dumpsto tape. RDF no longer imposes this requirement for the following reasons:• On the primary system, the RDF extractor explicitly pins the audit trail it is currently
processing, thereby preventing TMF from purging it. This explicit pinning remains in effecteven if the extractor process fails or RDF is shut down.If you must unpin one or more audit trail files, you can do so by issuing an RDFCOMUNPINAUDIT command. Later, when RDF is restarted, you can restore the necessary audittrail files from tape.
• TMF includes the functional capability of audit overflow volumes. You should alwaysconfigure them with at least one overflow audit volume.
CAUTION: Although RDF no longer requires you to configure TMF with a dump processthat dumps to tape, you should nevertheless configure TMF for dumping to tape or disk ifyou want to achieve full TMF protection for your primary database. In addition, if the RDFextractor is running behind and you stop the TMF and RDF subsystems before RDF hascaught up to the TMF shutdown point, when you subsequently restart TMF, the TMP mightroll over the files before the RDF extractor can process them.
If you are required to do a takeover, it is recommended that you take online dumps of the backupdatabase before restarting the applications that will use it.
Configuring TMF for RDF Operations on the Backup SystemAs is indicated in Chapter 5 (page 121), you are strongly urged to configure TMF on your RDFbackup system with audit dumping and you are urged to take frequent online dumps of yourbackup database. Performing both of these operations helps ensure fast switching of yourapplication from the primary to the backup system. Online dumps of your backup database canalso be used to recover a volume on the backup system from a complete media failure, but theseonline dumps are not useful for any other type of TMF File Recovery operation on your backupsystem (for example, Recover to First Purge). When you want to take an online dump of yourbackup database, you must change the RDF UPDATEROPEN parameter from Protected (thedefault value) to Shared. When the online dump has completed, you can set the RDFUPDATEROPEN parameter back to Protected. Please note that if you take online dumps of your
Preparing Software and Database Files for RDF Operations 61

backup database, you must also take audit dumps too. For more information see, “SET RDF”command in Chapter 8 (page 187).
Preparing Databases for RDF ProtectionWhen preparing databases on the primary system for RDF protection, you must consider thefollowing system aspects:• Maximum Number of Audited Files Per Volume on Primary System• Copies of files for the backup database• DSM catalog and file code 900 replication• Copies of NonStop SQL views on the backup systems• Placement of partitioned Enscribe files and NonStop SQL tables
Audited Files Per Volume on Primary SystemThe RDF updater process has a limit on the number of database files it can have open concurrentlyon a volume - 3,000. Therefore, when you set up your database on your primary system for RDFprotection, you should ensure that you do not have more than 3,000 audited files on any singlevolume that you want replicated. If you have more, then you should consider moving some ofthese to a different volume. If you fail to do this, in some situations it can cause the updater toslow down in performance. For more information, see Chapter 5 (page 121).
Audited Backup Database FilesThe backup system must have copies of all files that RDF protects. For a successful takeover ofbusiness operations in the event of a primary system failure, the backup system should also havecopies of all the files needed by the primary system applications (including alternate key filesand index files, for example). For each audited data file that resides on the primary protectedvolume, a corresponding audited file must exist on a volume configured for an updater processon the backup system. The volume name on the backup can differ from that on the primary. Forexample, if volume $B on the backup system corresponds to volume $A on the primary system,then all files protected by RDF on volume $A must be present (and in the same subvolumes) on$B.Chapter 3 (page 69) explains how to copy NonStop SQL/MP databases and Enscribe files to thebackup system after stopping both the TMF product and the applications that use that producton the primary system. That is the time to copy any files the applications need to the backupsystem so that the files are identical on both systems before RDF starts running.Chapter 16 (page 323) explains how to copy NonStop SQL/MX databases to the backup systemafter stopping both the TMF product and the applications that use that product on the primarysystem.
Reload of Backup Database.
If you need to reload the backup database, you must change the RDF UPDATEROPEN parameterfrom Protected (the default value) to Shared. When you are done with the reload, you shouldthen change the RDF UPDATEROPEN parameter back to Protected. Previously you needed tostop the updaters before modifying this attribute, but you can now modify it online, withoutstopping the updaters. For more information see, “SET RDF”command in Chapter 8 (page 187).
Disk Process Pins on Database Volumes
To ensure the fastest updater performance, you should configure as many disk process pins aspossible for the volumes on which your backup database resides. This is a particularly importantrequirement if your primary system has really high audit generation rates and you want theRDF updaters to keep up with that audit generation rate.
62 Preparing the RDF Environment

DSM Catalogs and File Code 900All files that have the file code 900 are replicated by the RDF product. These consist of DSM TapeCatalog files as well as some related files. In the case of files having the file code 900, RDFreplication of them to the RDF backup system can provide critical information if you later losethe primary system to a disaster. However, if you also have a DSM Tape Catalog and relatedfiles that specifically pertain to the backup system, you must be careful to place the replicatedfiles in a different location on the backup system. For example, suppose you have a DSM TapeCatalog and related files on $CAT.DSMCAT on the primary system, and you have a differentDSM Tape Catalog and related files on $CAT.DSMCAT on the backup system that specificallypertain to the backup system. In that case you must replicate the DSM Tape Catalog and relatedfiles on the primary system to a different location than $CAT.DSMCAT on the backup system.For example, you might want to replicate $CAT.DSMCAT.* on the primary system to$DATA.DSMCAT.* on the backup system. In that way replication of the DSM Tape Catalog andrelated files from the primary to the backup system does not affect the DSM Tape Catalog andrelated files in $CAT.DSMCAT.* on the backup system.
Views on the Backup SystemIf an application uses any NonStop SQL shorthand or protection views on a volume protectedby RDF, audit data for transactions on the views refers only to the underlying tables and not tothe views. Views and their underlying base tables must be present on the backup system aftera takeover operation so that applications can continue without interruption.All base tables underlying the views must also reside on volumes protected by RDF on theprimary system.
Partitioned Tables and FilesIf any partition of a partitioned NonStop SQL table or Enscribe file exists on a volume protectedby RDF, then all partitions for that file should be on volumes protected by RDF. The partitionsof a file protected by RDF can reside on separate systems, and all of the systems should beprotected by an RDF network. These are not absolute requirements, but if you lose your primarysystem and must takeover on your backup system, you might not have access to the data that isnot protected by RDF.
Database Block Sizes and Cache on the Backup SystemThe block size of a file or table on your backup system must be identical to the correspondingsize of the file or table on the primary system. Failure to set proper block sizes on your backupsystem can lead to unavoidable data corruption and failure. To ensure fastest RDF updaterperformance configure as much cache for the block sizes of your database files as possible.
Specifying System Generation Parameters for an RDF EnvironmentWhen performing system generation:• Use the PATHPACKETBYTES modifier to enable the Expand Variable Packetsize feature
so that Expand will send large packets.• Use the CONGCTRL modifier to enable Expand congestion control.• Use the AUDITTRAILBUFFER parameter to improve RDF extractor performance (set to the
highest value).You might also want to enable the multipacket frame feature, depending upon the type of trafficthat will be passed over the Expand path.For best results, consider using the RDF Professional Service to assist you in defining the Expandrequirements for your RDF environment. Contact your service provider for further details.
Preparing Software and Database Files for RDF Operations 63

Designing Transactions for RDF ProtectionWhen designing applications containing transactions that update databases protected by RDF,you must consider the following restrictions that apply to the subsystem:• The effects of network (distributed) transactions after an RDF takeover operation• Database operations not replicated by RDFThe sections that follow explain these restrictions.
Replicating Database OperationsDatabase administrators preparing to work with RDF should be aware of considerationsconcerning:• NonStop SQL Data Definition Language (DDL) operations• NonStop SQL DDL operations with Shared Access• Enscribe file-label modifications• Purge operations• Partitioned files• Temporary disk files
NonStop SQL DDL Operations
Although RDF replicates NonStop SQL Data Manipulation Language (DML) operations, it doesnot replicate NonStop SQL Data Definition Language (DDL) operations except for PURGEDATA.Excluding PURGEDATA, the database administrator needs to perform all other DDL operations(such as CREATE TABLE or CREATE INDEX) manually on the backup system as well as on theprimary system.User programs should not create audited NonStop SQL tables and write to them withoutcoordinating table creation on the primary system with table creation on the backup system.Recommended procedures for performing NonStop SQL DDL operations in an RDF environmentare described in “NonStop SQL/MP or NonStop SQL/MX Databases” (page 160).
Enscribe File-Label Modifications
In general, RDF does not replicate Enscribe file-label modifications.File-label modifications in Enscribe are similar to DDL operations in NonStop SQL products, inthat the modifications do not manipulate the file itself. Instead, file-label modifications alterattributes of the file, such as the file code, the security, the extent size, and the audit setting.The only file-label modifications that RDF replicates are:
To create an audited Enscribe fileCREATE
To increase the number of extents for an audited Enscribefile
ALTER MAXEXTENTS
To purge data from an audited Enscribe filePURGEDATA
To purge an Enscribe file (if REPLICATEPURGE isenabled)
PURGE
Purge Operations
The two kinds of purge operations are PURGEDATA and PURGE. RDF replicates PURGEDATAoperations for NonStop SQL tables and Enscribe files. RDF replicates PURGE operations forEnscribe files if REPLICATEPURGE is set on.
64 Preparing the RDF Environment

Partitioned Files
All partitions of a partitioned Enscribe file or NonStop SQL table or index must reside on volumesprotected by RDF, or none should. Corresponding partitions on each system must have the samekey values.
CAUTION: For partitioned files, it is essential that the partial key value for Enscribe files orfirst key value for NonStop SQL tables on the backup system exactly match those on the primarysystem. This is the RDF database administrator’s responsibility.
If you are using RDF to replicate the creation of partitioned files and an RDF takeover operationoccurs in the midst of a set of creations, some partitions might have been created while otherswere not, because each partition of a partitioned file is created independently.
Temporary Disk Files
File creation, modification, and updates are not replicated for audited temporary disk files. Allaudit data is filtered out by the extractor on the primary system for file names of the form$volume.#nnnnnnn.A filename that begins with # (pound sign) indicates a temporary disk file; this type of file nameis returned when only the volume name is specified in a call to the file-system CREATE procedureor FILE_CREATE_ procedure.
Using SMF With RDFRDF supports the full use of SMF on both the primary and backup nodes.There are two basic ways to configure SMF logical volumes:• Map many physical disks to a single virtual disk Create SMF pools where each is comprised
of many physical volumes and create SMF virtual disks from these pools. In this configuration,the files on any given virtual disk will be spread across multiple physical disks allowingyou to pool together many physical disks to create a very large virtual disk.
NOTE: A single updater process can only work on 3000 files at any time. If you have avirtual disk that has a number of physical disks in its pool, and if the number of files thatneed to be updated by the updater assigned to that virtual disk exceeds 3000, the updaterwill close some files in order to work on files it does not already have open. If this updatermust regularly work on more than 3000 files, the performance of the updater will be impacted.For optimal updater performance, you should ensure that no single updater has to work onmore than 3000 files on a regular basis. This might mean that you have to reduce the numberof physical disks in a pool.
• Map many virtual disks to a single physical disk Create SMF pools where each is comprisedof a single physical disk and create SMF virtual disks from these pools. In this configuration,all the files on a given virtual disk reside on one physical disk allowing you to have a verylarge physical disk volume subdivided into a number of smaller logical volumes. In thisway it is possible to have multiple partitions of a file residing on a single physical volume,with each partition of the file stored on a different logical volume.
Both of these configurations are supported by RDF. There are some restrictions when using SMFon the backup system which are described in detail later in this chapter.
Using SMF With RDF 65

Configuring an SMF Environment on the Primary SystemWhen configuring an SMF environment on an RDF primary system, make sure that SMF catalogfiles are not replicated by RDF to the backup system. The SMF catalogs on the primary andbackup systems must remain independent of each other. There are three ways to do so:• Place the SMF catalog on a primary system volume that is not protected by RDF.
The extractor ignores any audit generated by disks outside the RDF configuration, and hencewill not replicate any changes to the SMF catalog on the primary system. With this option,you can store the catalog in either the default SMF catalog subvolume or your ownsubvolume.
• Place the SMF catalog in the default SMF catalog subvolume on a volume that is protectedby RDF.The extractor automatically filters out changes to the SMF catalog if the catalog is in thedefault SMF catalog subvolume. If you store the catalog in your own subvolume, the extractorwill try to replicate changes to the catalog, which could have an adverse affect on RDF andany SMF catalogs with the same subvolume name on the backup system.
• Place the SMF catalog in a subvolume that is explicitly excluded from RDF protection.INCLUDE and EXCLUDE clauses are described in Chapter 11 (page 279).
Configuring an SMF Environment on the Backup RDF SystemRDF supports the replication to SMF logical volumes on the backup system, with the followingrestrictions:• When replicating to an SMF logical volume, the logical volume must belong to an SMF pool
that contains 15 or fewer physical volumes, hence each updater can apply audit to up to 15physical disks.
• The RDF/IMP product limits the total number of physical or virtual UPDATE volumes to255. RDF/IMPX and ZLT have no such limitation, other than the limit of 255 updaters andeach updater only being able to work on a maximum of 15 physical volumes.
• Image trail volumes cannot reside on SMF logical volumes.There are no restrictions on the placement of SMF catalog files on the backup system. If thebackup system could ever become a primary (such as after an RDF takeover, for example, or asthe result of a planned switchover), then the restrictions described in the preceding topic forprimary systems also apply.
NOTE: A single updater process only works on 3000 files at any time. If you have a virtual diskthat has many physical disks in its pool, and if the number of files that need to be updated bythe updater assigned to that virtual disk exceeds 3000, the updater will close some files in orderto work on files it does not already have open. If this updater must regularly work on more than3000 files, the performance of the updater is impacted. For optimal updater performance, ensurethat no single updater must work on more than 3000 files on a regular basis. This condition mightmean that you have to reduce the number of physical disks in a pool.
RDF replicates Enscribe file creations when audited Enscribe files are created on RDF protectedvolumes. When the UPDATEVOLUME is a virtual disk, the updater process tells SMF to createthe file and register it in the SMF catalog. When the UPDATEVOLUME is a virtual disk consistingof multiple physical disks, SMF decides which physical disk will store the file. You have nocontrol over where a new Enscribe file is created. For more information about the factors SMFuses to decide on the file placement, see the Storage Management Foundation User's Guide .You can change the physical volume on which files reside in the SMF pool using the FUPRELOCATE command. This command only works on closed files, so the updaters must bestopped before relocating any files.
66 Preparing the RDF Environment
SMF allows physical disks to be added and removed from pools. The RDF updaters must bestopped prior to the addition or deletion of any physical disks from SMF pools on the backupsystem.
Using SMF With RDF 67

68
3 Installing and Configuring RDFAfter preparing your system configurations and user applications to meet RDF requirements,you are ready to install and configure RDF. This chapter, which is intended for system managers,system analysts, and database administrators, describes how to do these tasks.The procedures described in this chapter require that your business applications already beoperational on the primary system, all important database files already be protected by TMF,the necessary Expand lines already exist between the primary and backup systems, and thebackup system includes all necessary disk volumes.Installing and configuring RDF involves these steps:• “Preparing the Primary System” (page 69)• “Preparing the Backup System” (page 70)• “Installing RDF” (page 75)• “Initializing and Configuring TMF” (page 78)• “Initializing and Configuring RDF” (page 79)• “Enabling RDF Operations” (page 97)Typically, this work involves using RDFCOM, TMFCOM (the interactive interface to TMF),SQLCI (the NonStop SQL/MP interactive interface), MXCI (the NonStop SQL/MX interactiveinterface), TACL (the interactive interface to the NonStop operating system), or FUP.
Preparing the Primary SystemBefore installing RDF, you must perform the following operations at the primary system:1. If you are going to do offline initialization or offline database synchronization, stop the
necessary software in this order:a. Stop all applications being protected by TMF.b. Stop TMF.
NOTE: If you are going to use the DBSYNCHTIME parameter (for online databasesynchronization) or the INITTIME parameter (for online initialization), you do not needto stop your applications or TMF. For information about online database synchronization,see Chapter 7 (page 167).
2. Prepare your NonStop SQL tables and Enscribe files for RDF protection:a. Separate the tables to be protected by RDF from the tables not to be protected. (This
step is recommended but not required.)b. Set audit compression (the AUDITCOMPRESS file attribute) ON for all tables and files
to be protected by RDF. Audit compression ON is the creation default for NonStop SQLtables and indexes. Although not required by RDF, audit compression will enhanceRDF performance.
Stopping the SoftwareAfter you stop all applications protected by TMF, stop TMF itself by issuing a STOP TMFcommand through the TMFCOM interactive interface. (You only need to stop your applicationsand TMF if you are going to use the TIMESTAMP parameter of the INIT RDF command or ifyou are going to omit the timestamp parameter in all forms). For information about issuing thisand other TMFCOM commands, see the HP NonStop TMF Reference Manual.
Preparing the Tables and FilesNow prepare your tables and files.
Preparing the Primary System 69

Separating NonStop SQL TablesIt is recommended that you avoid registering NonStop SQL tables protected by RDF in the samecatalogs as tables that are not protected by RDF. Separating protected tables from unprotectedones simplifies the comparison of primary system catalogs with backup system catalogs.
Compressing Audit Data for Tables and FilesAlthough not required by RDF, using the AUDITCOMPRESS file attribute will enhance RDFperformance. TMF compresses the audit data generated for NonStop SQL tables and Enscribefiles for which AUDITCOMPRESS is ON. For applications involving updates of only a few bytesto large existing rows or records, this audit compression greatly reduces both the amount ofaudit records the extractor must read and send to the receiver and the corresponding amount ofRDF traffic on the communications line.For NonStop SQL tables and indexes, AUDITCOMPRESS is the default. If the value has beenchanged to NO AUDITCOMPRESS for a table, you can use an ALTER TABLE command, enteredthrough the NonStop SQL conversational interface, to reset the default value:ALTER TABLE table-name AUDITCOMPRESS;
For Enscribe files, the default for AUDITCOMPRESS is OFF. To turn off the AUDITCOMPRESSattribute for an Enscribe file, use the File Utility Program (FUP) to enter an ALTER command:FUP ALTER filename, AUDITCOMPRESS
Preparing the Backup SystemBefore starting RDF, you need to copy every database, program, and file that the primary systemapplications use to the backup system so that the backup system can take over in the event of aprimary system failure. In the backup copies, you need to change any occurrences of the primarysystem name to the backup system name. RDF replicates the database; you should use theNonStop Autosync product to replicate everything else that is not audited, such as importantapplication files, objects, and scripts.If the names of any volumes or devices that the applications might use on the backup systemare different from the names on the primary system, you must also change any references tothese volumes or devices.It is strongly recommended that the backup system have one volume for every volume protectedby RDF on the primary system and that each backup volume have the same name as thecorresponding primary volume. If the backup volume names are not identical to the primaryvolume names, then you need to update every backup partitioned file and every backup file thathas alternate keys so that each points to the right volume name. Also, if you replicate two ormore volumes on the primary system to a single volume on the backup system, the updatersmight fall behind under very high throughput due to the double workload on the underlyingdisk process.RDF requires that TMF be started on the backup system, the database on the backup systemresides on configured data volumes, the data volumes be physically up, and the files and tablesbe audited. BEGINTRANS should be enabled. SMF disks should be audited. If replicating NonStopSQL Format 2 audit data, be sure the backup system supports it.For NonStop SQL databases, you must create catalogs on the backup system and you need copiesof the following objects on the backup system:• Catalogs in which base tables protected by RDF and objects dependent on those base tables
are registered, preferably with the same names as the primary system catalogs• All base tables that reside on primary system volumes protected by RDF• All views and indexes dependent on base tables protected by RDF• All program files for applications that use any base tables protected by RDF if you want the
applications to run at the backup site after an RDF takeover operation
70 Installing and Configuring RDF

The backup system should also have copies of the following files in case an RDF takeoveroperation is necessary:• OBEY command files and TACL scripts containing NonStop SQL/MP or NonStop SQL/MX
DDL commands that define the database• SQLCI or MXCI report definitionsTo make it easy to compare catalogs on the primary and backup systems, it is stronglyrecommended that you register objects protected by RDF in separate catalogs from objects notprotected by RDF. Either all the tables in a catalog should be protected or none of the tablesshould be protected.Every NonStop SQL object maintained on the backup system must be registered in a catalog,even if the object is not protected by RDF.
Synchronizing the Primary and Backup DatabasesFor databases to be synchronized in an RDF environment, the database on the backup systemmust be logically identical to the database on the primary system. There are two ways tosynchronize your databases: offline and online. This topic covers offline database synchronization.For a description of online database synchronization, see Chapter 7 (page 167).To ensure consistency between the primary and backup databases, you should copy the primarydatabase to the backup system before RDF updating starts. The most effective way to synchronizethe databases follows:1. Stop TMF auditing on the primary system by turning off the applications and stopping TMF.2. Create a copy of the primary database on the backup system.The tools for synchronizing databases on NonStop systems are:• The TACL OBEY command enables you to create the same database structures on the primary
system and the backup system by using commands in an EDIT file to create reusable TACLmacros and routines.
• The SQLCI or MXCI CREATE CATALOG command can re-create NonStop SQL/MP orNonStop SQL/MX catalogs on the backup system.
• The SQLCI or MXCI DUP utility can copy NonStop SQL/MP or NonStop SQL/MX objectsand Enscribe files from one system to another.
• The BACKUP and RESTORE utilities can copy NonStop SQL/MP or NonStop SQL/MXobjects and Enscribe files to and from tape.
• The FUP DUP command can copy Enscribe files from one system to another.• The NonStop Autosync product can replicate all application programs and files other than
your RDF database.Backing up partitioned files requires some extra planning, as explained in “SynchronizingPartitioned Files” (page 74).For a complete discussion of synchronized versus unsynchronized databases and theirramifications, see “Understanding Database States” (page 157).
Re-Creating an Empty Database With an OBEY CommandIf a database on the primary system does not contain any data yet, use either an OBEY commandfile or a TACL macro to re-create the database on the backup system.To create logically identical database structures on the primary and backup systems, first do thefollowing at the primary system:1. Place the database creation commands in either an EDIT (command) file or TACL macro
or routine. See the TACL Reference Manual for more information.2. Through the TACL command interpreter, issue an OBEY filename command or run the
macro to create the primary database.
Preparing the Backup System 71

3. Copy the command file or TACL macro to the backup system.Now do the following on the backup system:• Change any system references in the command file or TACL macro from the primary system
name to the backup system name. If the volume names are different or if you want a differentdatabase layout on the backup system, change volume references as well.
• Through the TACL command interpreter, issue an OBEY filename command or run themacro to create the backup database.
Synchronizing Databases With SQLCI CommandsThis topic only applies to NonStop SQL/MP databases. For instructions on how to synchronizeNonStop SQL/MX databases, see Chapter 16 (page 323).You can use SQLCI commands to synchronize NonStop SQL/MP databases online. For NonStopSQL/MP databases, you create the catalog or catalogs on the backup system and then duplicatethe objects registered in each catalog.For complete information about using SQLCI to copy databases, see the information on movingdatabases in the SQL/MP Installation andManagement Guide. For the syntax of SQLCI commands,see the SQLCI online help or the SQL/MP Reference Manual.The following example shows how you can create a partitioned NonStop SQL/MP table with analternate index on the primary system with the SQLCI CREATE command, and then duplicatethis table on the backup system by using the SQLCI DUP command. In this example, \PRIM isthe primary system and \BACK is the backup system.Notice that the catalog for this NonStop SQL/MP table is created on the backup system beforestarting RDF on the primary system so that RDF will recognize the backup catalog and not reporterrors when attempting to process audit data for this catalog.1. Using SQLCI, enter a CREATE command to create the catalog on the backup system. TMF
must be up for NonStop SQL/MP catalog updating:CREATE CATALOG \BACK.$DATA1.DBCAT;
2. Set up DEFINEs on the primary system to simplify referring to NonStop SQL/MP tables insubsequent SQLCI commands for the primary system:SET DEFMODE ON;ADD DEFINE =EMPLOYEE, CLASS MAP, FILE \PRIM.$DATA1.DB.EMPLOYEE;ADD DEFINE =EMPLPAR2, CLASS MAP, FILE \PRIM.$DATA2.DB.EMPLOYEE;ADD DEFINE =EMPLNAME, CLASS MAP, FILE \PRIM.$DATA2.DB.EMPLNAME;
3. Create the catalog on your primary system and make this the default catalog for all partitions:CREATE CATALOG \PRIM.$TEST.DBCAT;CATALOG \PRIM.$TEST.DBCAT;
4. Enter a CREATE TABLE command to create the partitioned table:CREATE TABLE =EMPLOYEE ( EMPNUM DECIMAL (5) UNSIGNED NO DEFAULT, FIRST_NAME CHARACTER(15) NO DEFAULT, LAST_NAME CHARACTER(20) NO DEFAULT, PRIMARY KEY EMPNUM ) ORGANIZATION KEY SEQUENCED PARTITION ( =EMPLPAR2 FIRST KEY 3000 );
This command creates an audited table with AUDITCOMPRESS on.
5. Enter CREATE CONSTRAINT commands for any constraints that values in particularcolumns of the table must satisfy:
72 Installing and Configuring RDF

CREATE CONSTRAINT EMPNUM_CONSTRNT ON =EMPLOYEE CHECK EMPNUM BETWEEN 1 AND 99999;
6. Create the index for the NonStop SQL/MP table on the primary system:CREATE INDEX =EMPLNAME ON =EMPLOYEE( LAST_NAME, FIRST_NAME );
7. Enter commands to specify the data to be inserted into the table on the primary system:INSERT INTO =EMPLOYEE ( EMPNUM, FIRST_NAME, LAST_NAME ) VALUES ( 826, "Evans", "Joan" );
INSERT INTO =EMPLOYEE ( EMPNUM, FIRST_NAME, LAST_NAME ) VALUES ( 3351, "MacArthur", "Bill" );
INSERT INTO =EMPLOYEE ( EMPNUM, FIRST_NAME, LAST_NAME ) VALUES ( 10809, "Gember", "Tom" );
Now direct your attention to the backup system (\BACK). As you perform the necessarytasks on this system, note these considerations:• DEFINEs cannot be used if you specify MAP NAMES parameter in the DUP command.• The DUP operation moves the entire database, including all partitions and indexes, by
default.• The catalog \BACK.$DATA1.DBCAT is used for all partitions and all indexes.
8. Specify the catalog for the backup system:CATALOG \BACK.$DATA1.DBCAT;
9. Use the SQLCI DUP command to copy the primary system’s database to the backup system:DUP ( *.*.* FROM CATALOG \PRIM.$TEST.DBCAT ), MAP NAMES ( \PRIM.$DATA1.*.* TO \BACK.$DATA1.*.* , \PRIM.$DATA2.*.* TO \BACK.$DATA2.*.* ) SAVEALL ON;
10. After using the SQLCI DUP command, perform a TMF online dump on the primary systemto create a recovery point.
Synchronizing Databases With BACKUP and RESTORE UtilitiesYou can use the BACKUP and RESTORE utilities to synchronize NonStop SQL/MP, NonStopSQL/MX, or Enscribe databases by copying a database to tape on the primary system and restoringthe database from tape on the backup system. This method is preferable when you want a backuptape of the primary system database, or when the database is large.The following example of BACKUP and RESTORE commands shows how to copy a NonStopSQL/MP database from the primary system \PRIM to the magnetic tape device named $TAPEand how to restore the database to volumes of the same name on the backup system \BACK.You must include the AUDITED parameter in both the BACKUP and RESTORE commands.1. Back up the database from \PRIM onto tape:
BACKUP $TAPE, (*.*.* FROM CATALOG \PRIM.$TEST.DBCAT), AUDITED, INDEXES IMPLICIT, LISTALL
2. Restore the database from tape onto \BACK (assuming the catalog was already created):RESTORE $TAPE, *.*.*, AUDITED, MAP NAMES ( \PRIM.$DATA1.*.* TO \BACK.$DATA1.*.* , \PRIM.$DATA2.*.* TO \BACK.$DATA2.*.* ), CATALOG \BACK.$DATA1.DBCAT, INDEXES IMPLICIT, SQLCOMPILE OFF, LISTALL
The next examples of BACKUP and RESTORE commands show how to copy all files from theprimary system volumes $DATA01, $DATA02, $DATA03, and $DATA04 to the magnetic tapedevice named $TAPE and how to restore these files to volumes of the same name on the backup
Preparing the Backup System 73

system. You must include the AUDITED parameter in both the BACKUP and RESTOREcommands.BACKUP $TAPE,($DATA01.*.*,$DATA02.*.*,$DATA03.*.*,$DATA04.*.*), AUDITED
RESTORE $TAPE,($DATA01.*.*,$DATA02.*.*,$DATA03.*.*, $DATA04.*.*), AUDITED
Synchronizing Databases With FUPYou can use the FUP DUP command to copy Enscribe database files from the primary systemto the backup system. If you use FUP DUP, the “FUP ALTER filename , NO AUDIT” commandis performed implicitly for each backup file that corresponds to a primary file protected by RDF.You will therefore need to turn the audit flags back on for all the data volumes on the backupsystem after the FUP DUP operation is complete.
NOTE: For this copy operation to work correctly, do not specify the SAVEALL parameter inthe FUP DUP command.
Synchronizing Partitioned FilesWhen synchronizing partitioned files, you must consider one major difference between NonStopSQL/MP tables and Enscribe files: a NonStop SQL/MP catalog has a description of all indexes ofa table and partitions of a partitioned table, but a partitioned Enscribe file has no associatedcatalog.To ensure the consistency of a NonStop SQL/MP catalog, you must copy all partitions of aNonStop SQL/MP table and its dependent indexes at one time rather than on a partition basis.You can use either the SQLCI DUP command or the BACKUP and RESTORE utilities to copythe partitions.For an Enscribe file, you can use the FUP DUP command or the BACKUP and RESTORE utilitiesto copy the individual indexes and partitions. Then use FUP ALTER to incorporate the otherpartitions and any alternate indexes into the primary partition.If the volume names for partitions on the backup system are different from the volume nameson the primary system, you need to change the volume references for those partitions.
Backing Up Application Programs and FilesTo enable the backup system to take over in the event of a primary system failure, you need toput usable copies of all program files, OBEY command files, and other files your applicationsuse on the backup system. You can do this by using the NonStop Autosync product. After copyingthese files, you might need to change names to reflect the backup system’s naming conventions,and you might need to recompile some programs.The following practices are recommended:• SQL compile all NonStop SQL/MP programs after moving them to the backup system. A
static recompilation reduces the applications’ startup costs after an RDF takeover operation.Alternatively, you can use the late binding feature. To do this, the SIMILARITY CHECKattribute for all referenced tables and protection views must be enabled and the programcompiled with the CHECK INOPERABLE PLANS parameter.
• Use DEFINEs for all NonStop SQL/MP objects where possible; this simplifies the commandsfor your OBEY command files and the commands for your NonStop SQL/MP DDL operations.
Cache for RDF IMAGETRAILS and UPDATER UPDATEVOLUMESWhen you have determined the volumes you wish to use for Imagetrails and Updatevolumes,you should configure several thousand 4k blocks of cache for each volume. This will considerablyincrease the performance of the receiver and updaters.
74 Installing and Configuring RDF

Installing RDFThe RDF/IMP, IMPX, or ZLT software, and all related documentation, is distributed on threeindependent product release compact disks (CDs). After loading a CD, double click on theReadme icon for complete instructions on how to install the RDF/IMP, IMPX, or ZLT software.Before installing this product, use NonStop SPR Scout to obtain access to all applicable softwareproduct revisions (SPRs).
RDF/IMP (T0346) Product ComponentsThe release CD includes these components for the RDF/IMP product:
Documentation for RDFCHEK (an EDIT file)CHEKDOC
The RDF audit-fixup object code fileRDFAFXO
An RDF file comparison utilityRDFCHEK
An RDF file comparison utilityMD5CHEK
The server component of MD5CHEKMD5SRVO
The RDF command interface object code fileRDFCOM
The RDFCOM HELP file (an EDIT file)RDFHELP
The RDF extractor object code fileRDFEXTO
The RDFINST TACL macro (an EDIT file)RDFINST
The RDF monitor object code fileRDFMONO
The RDFNET object code fileRDFNETO
The RDF receiver object code fileRDFRCVO
The RDF purger object code fileRDFPRGO
The RDFSCAN object code fileRDFSCAN
The RDFSCAN HELP file (an EDIT file)RDFSCANH
The RDFSNOOP object code fileRDFSNOOP
The RDF updater object code fileRDFUPDO
A diagnostic tool for analysts that reads undo lists and dumps data intoentry-sequenced files
READLIST
A diagnostic tool for HP analystsRDIMAGE
The software documentation file (an EDIT file)T0346ann
A filter to use with EMSDIST to isolate RDF messagesRDFFLTO
Information about the release CD itselfREADME
Information about component licensingLICENSE
RDF/IMPX (T0347) Product ComponentsThe release CD includes these components for the RDF/IMPX product:
All of the T0346 product components plus the RDF/IMPX enabler moduleRDF/IMPX
The software documentation fileReadme
Installing RDF 75
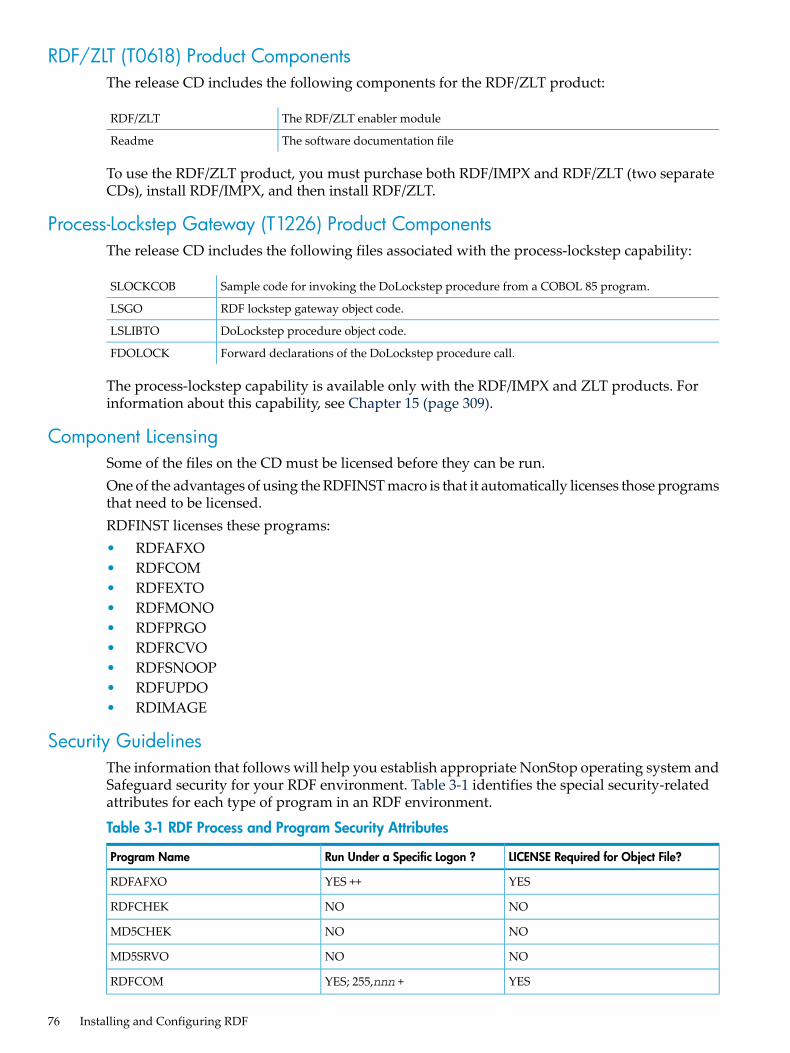
RDF/ZLT (T0618) Product ComponentsThe release CD includes the following components for the RDF/ZLT product:
The RDF/ZLT enabler moduleRDF/ZLT
The software documentation fileReadme
To use the RDF/ZLT product, you must purchase both RDF/IMPX and RDF/ZLT (two separateCDs), install RDF/IMPX, and then install RDF/ZLT.
Process-Lockstep Gateway (T1226) Product ComponentsThe release CD includes the following files associated with the process-lockstep capability:
Sample code for invoking the DoLockstep procedure from a COBOL 85 program.SLOCKCOB
RDF lockstep gateway object code.LSGO
DoLockstep procedure object code.LSLIBTO
Forward declarations of the DoLockstep procedure call.FDOLOCK
The process-lockstep capability is available only with the RDF/IMPX and ZLT products. Forinformation about this capability, see Chapter 15 (page 309).
Component LicensingSome of the files on the CD must be licensed before they can be run.One of the advantages of using the RDFINST macro is that it automatically licenses those programsthat need to be licensed.RDFINST licenses these programs:• RDFAFXO• RDFCOM• RDFEXTO• RDFMONO• RDFPRGO• RDFRCVO• RDFSNOOP• RDFUPDO• RDIMAGE
Security GuidelinesThe information that follows will help you establish appropriate NonStop operating system andSafeguard security for your RDF environment. Table 3-1 identifies the special security-relatedattributes for each type of program in an RDF environment.
Table 3-1 RDF Process and Program Security Attributes
LICENSE Required for Object File?Run Under a Specific Logon ?Program Name
YESYES ++RDFAFXO
NONORDFCHEK
NONOMD5CHEK
NONOMD5SRVO
YESYES; 255,nnn +RDFCOM
76 Installing and Configuring RDF

Table 3-1 RDF Process and Program Security Attributes (continued)
LICENSE Required for Object File?Run Under a Specific Logon ?Program Name
YESYES ++RDFEXTO
YESYES ++RDFMONO
NOYES ++RDFNETO
YESYES ++RDFPRGO
YESYES ++RDFRCVO
NONO++++RDFSCAN
YESYES +++RDFSNOOP
YESYES ++RDFUPDO
NONOREADLIST
YESYES ++RDIMAGE
+ RDFCOM operational commands require super-user group access; however, INFO and STATUS commands canbe issued by all users.++ The RDF processes run under the userid of the user who set the PROGID attribute, or the RDF OWNER.+++ RDFSNOOP requires super-user group access to read image files.++++ Depends upon security of entry-sequenced file being accessed.
The following summarizes the reasons for the various security requirements of each RDF program:• RDFAFXO. The RDFAFXO process uses privileged TMF procedures to fix the audit trail
files and reset the CRASHOPEN flag in the audit trail file label and must be licensed withFUP or by running the RDFINST macro. RDFAFXO can be owned by any user ID.
• RDFCOM. The RDFCOM program communicates with the TMP in privileged mode andmust be licensed with FUP or by running the RDFINST macro. RDFCOM can be owned byany user ID; however, it must be run by a member of the super-user group (user ID 255,nnn)to change the running state of RDF.Alternatively, RDFCOM supports the use of the SAFEGUARD PROGID attribute to enableany user to start, stop, and manage RDF. Once the PROGID attribute is set, you must limitEXECUTE access to the RDFCOM object so that only those persons authorized to manageRDF can run RDFCOM.
• RDFEXTO. The RDF extractor program communicates with the TMP in privileged modeand must be licensed with FUP or by running the RDFINST macro. RDFEXTO can be ownedby any user ID.
• RDFMONO. The RDF monitor program communicates with the TMP in privileged modeand must be licensed with FUP or by running the RDFINST macro. RDFMONO can beowned by any user ID.
• RDFNETO. The RDFNETO program opens and writes to the network synchronization fileon each of the primary systems participating in the RDF network. RDFNETO can be ownedby any user ID.
• RDFPRGO. The RDF purger program purges image files in privileged mode and must belicensed with FUP or by running the RDFINST macro. RDFPRGO can be owned by any userID.
• RDFRCVO. The RDF receiver program opens the image files in privileged mode and mustbe licensed with FUP or by running the RDFINST macro. RDFRCVO can be owned by anyuser ID.
• RDFSCAN. The RDFSCAN program contains no privileged calls or privileged code andneed not be licensed. RDFSCAN can be owned and run by any user ID.
Installing RDF 77

• RDFSNOOP. The RDFSNOOP program opens the image files in privileged mode and mustbe licensed with FUP or by running the RDFINST macro. RDFSNOOP can be owned by anyuser ID. RDFSNOOP must be run by a member of the super-user group (user ID 255,nnn)to read the image files.
• RDFUPDO. RDF updater programs open image files in privileged mode and must belicensed with FUP or by running the RDFINST macro. RDFUPDO also must be able to opendatabase files for protected write access. When querying the backup database files, usersshould always open the files for shared read access.
• RDIMAGE. The RDIMAGE program opens the image files in privileged mode and mustbe licensed with FUP or by running the RDFINST macro. RDIMAGE can be owned by anyuser ID. RDIMAGE must be run by a member of the super-user group (user ID 255,nnn) toread the image files.
Using the OWNER Attribute to Allow Super Group Users to Start, Stop, and ManageRDF
By setting the OWNER global configuration parameter in a SET RDF configuration command,you are specifying the primary owner of your RDF environment (such as SUPER.RDF, forexample). Doing so enables other super group userids to start, stop, and manage RDF.Once the OWNER attribute is set, you must use SAFEGUARD to limit EXECUTE access to theRDFCOM object so that only those super group users authorized to manage RDF can runRDFCOM. Failure to do so is a serious security risk because, thereafter, all RDF objects run asthe userid of the RDF OWNER.
Initializing and Configuring TMFAfter copying the appropriate files from the primary system to the backup system, you mustensure that TMF is configured on both systems to support RDF operations. The actions you taketo do this depend on whether or not TMF was running previously on this system.
TMF Subsystem Not Running PreviouslyIf TMF was not running previously on the primary system, after you have installed TMF youshould take the following steps:1. Include the following commands in the TMF configuration OBEY command file:
START TMF, DISABLE BEGINTRANSDISABLE AUDITDUMP MAT
Although not required by RDF, it is recommended that you start TMF with transactionprocessing turned off, and then turn it on after the RDF subsystem is started. Doing soassures you that RDF is fully operational before transaction processing begins.The DISABLE AUDITDUMP command ensures that TMF does not purge any audit trailfiles before RDF extracts all pertinent data from them.
2. Initiate a TMFCOM session and then execute the TMF configuration OBEY command file.
NOTE: You should not restart the applications until RDF has been installed, initialized,started, and transaction processing in the primary system has been turned on (by issuing aTMFCOM ENABLE BEGINTRANS command).
If TMF was not running previously on the backup system, after you have installed TMF youmust use TMFCOM to issue a START TMF command and one or more ADD DATAVOLScommands to add to the TMF configuration all disk volumes to be used by the RDF updaterprocesses.
78 Installing and Configuring RDF

TMF Subsystem Running PreviouslyIf TMF was running on the primary system and you have shut the TMF subsystem down, andif you have started TMF on the backup system and added the RDF updater volumes to the TMFconfiguration, you need not take any other steps with respect to TMF. Proceed to the next task,described in “Initializing RDF”.
Initializing and Configuring RDFAfter initializing and configuring TMF, you are ready to initialize and configure RDF.
Initializing RDFTo initialize RDF, you issue an INITIALIZE RDF command at the primary system. When executed,this command:• Establishes new configuration and context files for the new RDF configuration (that resides
in the control subvolume)• Identifies the backup system in the configuration• Establishes a starting location in the audit trail where each configured extractor commences
reading audit.The INITIALIZE RDF command also establishes the name of the RDF control subvolume, whichyou must subsequently specify when initiating RDFCOM sessions. If you enter this commandfor an RDF configuration that already exists, you must explicitly purge the configuration filesand context files from the control subvolumes on both the primary and backup systems; otherwise,an error message will appear. This requirement helps ensure that you do not accidentally destroythe wrong RDF configuration in cases where multiple RDF configurations exist for replicationto multiple backup systems.
NOTE: Previously you were required to purge the RDF control subvolumes on the primaryand backup systems before you could run the RDFCOM Initialize RDF command (see details onRDF control subvolume in Chapter 4 (page 99)). You can now specify a special option thatautomatically purges the existing control subvolume on the primary and backup system as partof the RDF initialization command. For complete information on INITIALIZE RDF, see Chapter 8(page 187).
If you are going to replicate database changes to multiple backup systems, you must also specifya one-character control subvolume suffix in the INITIALIZE RDF command for individualconfigurations. If you specify a suffix character, the control subvolume name is the name of theprimary system without the backslash and with the suffix character appended to it. If you omitthe suffix character, the control subvolume name is the name of the primary system without thebackslash and without a suffix character.As a general rule, you can only issue the INITIALIZE RDF command if all of the followingconditions exist:• TMF is initialized.• RDF is not running.• You are logged on under TACL as a member of the super-user group.• You have a remote password from the primary system to the backup system. (It is
recommended, but not required, that you have a remote password from the backup systemto the primary system as well.)
For complete information about the INITIALIZE RDF command, see the description of theINITIALIZE RDF command in Chapter 8 (page 187).
Initializing and Configuring RDF 79

Initializing RDF To a TMF Shutdown TimestampIf TMF was running previously on the primary system and did not need to be initialized andconfigured, you can initialize RDF to a timestamp that reflects the time of the last TMF shutdown.This initialization is typically used when one stops TMF in order to initialize RDF to that TMFstop location. This might be useful if you are about to use RDF for the first time and you stopTMF in order to synchronize your backup database to your primary database. After you havesynchronized the databases and initialized RDF, you can start TMF, start RDF, and start yourapplications with an assurance that no audit will be skipped when RDF commences replicationoperations.To issue the INITIALIZE RDF command without first initiating an RDFCOM session, enter thecommand in the following format in response to the TACL prompt. In the TIMESTAMP parameter,be certain to specify the exact time (to the minute) that TMF was last shut down. You determinethe appropriate timestamp by examining previous TMF messages in the EMS log. In this example,the TIMESTAMP parameter specifies 1:32 p.m., January 7, 1999:>RDFCOM;INITIALIZE RDF, BACKUPSYSTEM \CHICAGO, SUFFIX A, TIMESTAMP 7JAN1999 13:32
To issue the INITIALIZE RDF command from within an RDFCOM session, enter the followingin response to the RDFCOM prompt:]INITIALIZE RDF, BACKUPSYSTEM \CHICAGO, SUFFIX A,TIMESTAMP 7JAN1999 13:32
If the INITIALIZE RDF commands in this discussion were issued from the primary system\DALLAS, RDF would respond by creating a configuration file in the control subvolume named$SYSTEM.DALLASA.CONFIG.
Initializing RDF Without any Timestamp OptionIf you have just installed (or deleted and reinstalled) TMF so that it starts at relative byte address(rba) 0 in audit trail file sequence number 1, you should now issue an INITIALIZE RDF commandwithout the TIMESTAMP parameter at the TACL prompt on the primary system:>RDFCOM; INITIALIZE RDF, BACKUPSYSTEM \BOSTON, SUFFIX A
When you begin an RDFCOM session on a system in which RDF has never been previouslyinitialized (such as \PRIMSYS, for example), RDFCOM responds with the following prompt:***Warning*** The control subvolume PRIMSYS is not presently***Warning*** configured for an RDF primary system.
You must use the OPEN command to open an RDF CONFIG file in anexisting RDF control subvolume, or you must initialize a new RDFconfiguration with the INITIALIZE RDF command.
To continue with the session, you must either enter an INITIALIZE RDF command, or use theOPEN command as directed in Chapter 8 (page 187).
Initializing RDF Without Stopping TMF (Using INITTIME Option)The INITIALIZE RDF command includes a parameter, INITTIME inittime , that you can useto initialize the RDF product without stopping TMF or your applications.There are two cases where you would typically use this capability:• If you want to install a new version of the RDF product and you cannot afford to stop TMF
even momentarily to get a TMF shutdown timestamp.• If you are running RDF and encounter a problem for which you would like to reinitialize
RDF without having to resynchronize your databases.
80 Installing and Configuring RDF
Determining a Valid inittime ValueWhen using the INITTIME parameter without the NOW clause, it is important that you specifya valid inittime value.To do so, first issue a STATUS RDF command and take note of the highest updater RTD time.Then round that RTD time up to the next higher minute (0:43 becomes 1:00, 1:27 becomes 2:00,3:04 becomes 4:00, and so forth). Finally, subtract that rounded-up time from the current systemtime shown in the status display.inittime := (current-system-time — rounded-highest-updater-RTD-time)RDFCOM then subtracts an additional three minutes from the specified timestamp. This is toensure that the extractor’s starting position is at a point in the MAT where RDF had previouslysent audit records to the backup system and the updaters had applied it to the backup database.This practice guarantees that no audit record is lost during initialization.When you include the INITTIME parameter in the INITIALIZE RDF command, RDFCOM initiatesa backward scan of the MAT searching for the first commit or abort record whose timestamp isless than the specifiedinittime . When RDF is subsequently restarted, some of the audit recordswill be reapplied to the backup database. This does not cause any inconsistencies between theprimary and backup databases, but rather ensures that they stay completely synchronized withone another.
CAUTION: The NOW clause of the INITTIME parameter causes RDF to be initialized at thecurrent date and time. The NOW value should only be used in a situation where you haveconfigured a reverse trigger and the INITIALIZE RDF command is used for reversing the directionof RDF. For more information see “Example” (page 236).
Special ConsiderationsWhen using this form of the INITIALIZE RDF command with a timestamp specified withINITTIME, there are three special cases that you might encounter.
Enscribe Create Records
If the previous version of RDF performed an Enscribe create operation on the backup systemprior to execution of the INITIALIZE RDF command and the extractor’s restart position in theaudit trail precedes the location of the Enscribe create record that an updater previously applied,then, when you restart RDF and the updater tries to apply the create record, it will report a FileSystem error 10 (File Already Exists) and you must purge the existing file. The updater willcontinue to report the error until you have purged the file.
Stop-RDF-Updater Records
Stop-RDF-Updater records in the master audit trail (MAT) are associated with committed NonStopSQL DDL operations performed on the primary system with the SHARED ACCESS parameter.Although such operations can be performed on the primary system without stopping yourapplications, they must be performed manually on the backup system after all updaters haveshut down in response to the same Stop-RDF-Updater record.As a general rule, you should not initialize RDF to an inittime if you recently performed aNonStop SQL/MP or NonStop SQL/MX operation with SHARED ACCESS on the primary system.For example, suppose you have a NonStop SQL/MP or NonStop SQL/MX table (tableA) thatcontains the range of keys A through Z and you just moved its partition boundary such thattableA now contains only the keys A through M and a new table (tableB) contains the keys Nthrough Z. Suppose also that you performed this operation manually on the backup system.If you then initialize RDF to a point in the MAT prior to the Stop-RDF-Updater record associatedwith the partition boundary change and an updater encounters audit records associated a keyN through Z, the updater will report an error because it will try to apply the audit record to
Initializing and Configuring RDF 81

tableA (which used to contain it, but now does not), and the audit record will not be appliedto the backup database. In this particular case, the database is not corrupted, but data corruptioncould happen for other NonStop SQL/MP or NonStop SQL/MX DDL SHARED ACCESSoperations.If you did recently perform a NonStop SQL/MP or NonStop SQL/MX operation with SHAREDACCESS on the primary system and you want to initialize RDF to a inittime , you should waitbefore issuing the command until you can specify an inittime that includes the three minutesadded by RDFCOM so that the starting position in the MAT is after the Stop-RDF-Updater record.As a precaution, if RDFCOM encounters a Stop-RDF-Updater record during its backward searchof the MAT, it issues a warning message asking if you want to proceed with initialization. If youcontinue the operation, the updaters will shut down when they encounter the Stop-RDF-Updaterrecord, at which time you should try to perform the NonStop SQL/MP DDL operation manuallyagain on the backup system.
TMF Shutdown Records
TMF shutdown records in the MAT do not cause a problem, except that if RDF is initialized toa point in the MAT prior to a TMF shutdown record, then once you have started RDF it willshutdown as soon as it reaches that TMF Shutdown record. All you need to do then is restartRDF.
Online Installation and Initialization Without Stopping RDFFor the procedure described in “Initializing RDF Without Stopping TMF (Using INITTIMEOption)” (page 80), you are required to stop RDF, delete the control subvolumes, reinitializeRDF, and then restart RDF. Although unlikely, stopping RDF does leave you briefly vulnerableto inconsistent data on the backup system if your primary system should fail after you stop RDFand delete the previous RDF control files, but before you restart RDF.By using the procedure that follows, you can install and initialize the RDF product withoutstopping RDF, TMF, or your applications.The procedure is best described by example. Assume that you are running RDF from \RDF04to \RDF06, and that your control subvolume is RDF04.1. For your current RDF subsystem (RDF04->RDF06), issue an RDFCOM STATUS RDF
command on the primary system.2. Notice the general timestamp and the RTD times (11AUG2008 05:26).
RDFCOM - T0346H09 – 11AUG08C)2008 Hewlett-Packard Development Company, L.P.
Status of \RDF04 -> \RDF06 RDF 2008/08/11 05:26:49.082Control Subvol: $SYSTEM.RDF04Current State : NormalRDF Process Name RTD Time Pri Volume Seqnce Rel Byte Addr Cpus Err------------------ ------ --------- --- -------- ------ ------------- ----- ----Monitor $RMON 185 $AUDMAT 56 1: 2Extractor (0) $REXT0 0:00 185 $AUDMAT 56 928000 1: 2Receiver (0) $RRCV0 0:00 185 $MIT 12 1: 2Imagetrail (0) $IMAGE0 3822Imagetrail (0) $IMAGE1 793Imagetrail (0) $IMAGE2 1790Imagetrail (0) $IMAGE3 998Purger $RPRG 185 1: 2$DATA10 -> $DATA10 $RUPD1 1:26 185 $IMAGE0 3821 1926445 1: 2$DATA11 -> $DATA11 $RUPD2 0:02 185 $IMAGE1 793 811008 2: 3$DATA12 -> $DATA13 $RUPD3 0:05 185 $IMAGE2 1790 1568 3: 0$DATA13 -> $DATA14 $RUPD3 0:10 185 $IMAGE3 998 3 3587 3: 0]
3. If the extractor RTD is greater than 0:00, wait until the extractor reports this value. If thevalue is 0:00, take the highest updater RTD and round up to the next minute. In this example,the highest updater RTD rounded up to the next minute is 2:00.
82 Installing and Configuring RDF

4. Subtract this value from the general timestamp (11AUG2008 05:24).5. Issue the STOP UPDATE command. This command stops the updaters but allows the
extractor and receiver to continue to shipping and storing audit, respectively.6. Install the new RDF software in a different volume.subvolume from that housing the current
version of RDF that is running. For example, if you are upgrading to T0346ABS, you mightspecify $system.rdfabs.
7. Run $system.rdfabs.RDFCOM and initialize a new RDF configuration, using:• The suffix parameter (such as suffix "a")• The INITTIME parameter, using the timestamp calculated in the preceding example
(11AUG2008 05:24).Initialize RDF, backupsystem \RDF06, suffix a, inittime 11AUG2008 05:24
8. If you do not already have a copy of the configuration script used for the current version ofRDF, you can get it by starting the RDFCOM for that RDF subsystem and using the INFO*, OBEYFORM command.
9. Use the same script to configure your new RDF subsystem, but you will need to change thefollowing:a. Set SOFTWARELOC to $system.rdfaavb. Set the extractor name(s) to a different name(s)c. Set the monitor name to a different named. Set the receiver name(s) to different name(s)
10. Now start your new RDF subsystem: ] run $system.rdfaav.rdfcom rdf04a ] start RDF, update off
You now have parallel sets of extractors shipping audit to parallel sets of receivers for thetwo operating RDF subsystems, although each subsystem has its own control subvolumesand its own imagetrail subvolumes.
11. When the extractor(s) for RDF04A have caught up, do the following:a. Issue a STOP RDF command for the previous RDF subsystem.b. Issue an UNPINAUDIT command for the previous subsystem.c. Issue a START UPDATE command for the RDF04A subsystem. Wait until all updaters
have caught up.d. Purge the previous control subvolumes on the primary and backup, as well as the
imagetrails for the previous subsystem.
You have now installed and started new RDF software without jeopardizing disaster-recoveryprotection by having to stop RDF.
Disaster PointsIf the primary system fails between steps 1 and 10, you perform the takeover operation usingyour previous RDF subsystem. If the primary system fails at or after step 11, you perform thetakeover operation using the new subsystem (RDF04A).
ConsiderationsThis method does not work with long-running transactions. You must not have any long-runningtransactions in the system when you start Step 1, above. If you have long-running transactions,you must stop them and wait until they clear the TMF subsystem before you start Step 1.If you are running with RDF process lockstep, you should change the RDF gateway startup scriptto reference the new extractor name before executing Step 11. Then stop the gateway manually.This action will restart the gateway, and the gateway will access the new extractor.
Initializing and Configuring RDF 83
For RDF network environments, you should subtract an additional 15 minutes from the timestampyou calculated in Step 4.
Configuring RDFFor RDF to operate correctly, you must establish values for the following sets of attributes in theRDF configuration file:• Global attributes that apply across RDF• Attributes that apply to image trails• Attributes that apply to triggers• Network configuration record attributes• Process attributes that apply to the individual RDFNET, monitor, extractor, receiver, purger,
and updater processesIn addition to the configuration file on disk, RDFCOM maintains a copy in memory. To configureRDF, first use RDFCOM SET commands to establish the values you want in the configurationmemory table, and then use ADD command to apply those values to the configuration file. Youdo this for each process individually; do all of the SETs for a process, and then add the particularobject. Notice that the only purpose of the configuration memory table is to serve as a temporaryrepository of configuration attributes for the SET command.Initially, some of the configuration attributes in the memory table are set to their default values.You use SET commands only for those attributes that you want to change from the default value.Before issuing the ADD command, you can verify the current attributes in the memory table byissuing SHOW commands.After issuing the ADD commands (but before starting RDF), you can change some attributevalues in the configuration file by issuing ALTER commands.
84 Installing and Configuring RDF

NOTE: Instead of issuing SET and ADD commands interactively within an RDFCOM session,you can create and execute an RDF configuration command file. The first time you configureRDF, you can either configure it interactively or use the text editor to create a command file.After you have configured RDF, you can easily create a command file from the existingconfiguration file as explained in “Creating a Configuration Command File” (page 96). You canthen use that command file whenever you need to reconfigure RDF. See Appendix B (page 359)for a sample configuration file.
Setting Global AttributesThe SET RDF command establishes values for global attributes that apply either to the entireRDF system or to all updater processes. These attributes and their default values are:
$0• LOGFILE
10 (seconds)• UPDATERDELAY
60 (seconds)• UPDATERTXTIME
60 (seconds)• UPDATERRTDWARNING
PROTECTED• UPDATEROPEN
$SYSTEM.RDF• SOFTWARELOC
OFF• NETWORK
OFF• NETWORKMASTER
ON• UPDATEREXCEPTION
volume undefined• LOCKSTEPVOL
OFF• REPLICATEPURGE
OFF• REMOTE MIRROR
system undefined• REMOTE STANDBY
(no default)• OWNER
LOGFILE Attribute
The LOGFILE attribute specifies the name of the EMS collector to which all RDF command,event, error, and warning messages are to be directed.The following commands specify the EMS collector $CTD25 as the RDF log file on both theprimary and backup systems:]SET RDF LOGFILE $CTD25]ADD RDF
The collector on the primary system receives log messages from the extractor and monitorprocesses (plus RDFCOM messages that are logged in message 835).The collector on the backup system receives log messages from the receiver, purger, and allupdater processes (plus RDFCOM messages that are logged in message 835).
UPDATERDELAY Attribute
The UPDATERDELAY attribute specifies how many seconds (from 1 to 10) the updater processesshould delay upon reaching the logical EOF in the image trail before checking to see if logicalEOF has advanced. The default is 10 seconds.This attribute should be left at the default value unless you have a very specific reason for loweringit; lowering the UPDATERDELAY value could adversely impact updater performance.
Initializing and Configuring RDF 85

UPDATERTXTIME Attribute
The UPDATERTXTIME attribute specifies the maximum transaction duration in seconds (from10 to 300) for all updater processes. The default is 60 seconds.RDF updaters operate in transaction mode. Updater transactions are essentially long-runningtransactions that pin audit trail files on the backup system and can affect the duration of backoutoperations if an updater transaction aborts for any reason.The default value is recommended for RDF environments with heavy updater activity (aggregateupdater throughput greater than 300 kb/second). Raising the tx-time in such environmentsmight adversely affect TMF performance on the backup system.In RDF environments with low to moderate updater activity and where no other transactionactivity is occurring on the backup system, you could raise the tx-time without affecting TMFperformance on the backup system.The goal of the UPDATERTXTIME is to allow each updater to do as much work as possible ina single transaction, but not so much work that it would take a long time to undo the transaction,if that transaction should abort. For this reason the default value of 60 seconds is generally anoptimal value.
UPDATERRTDWARNING Attribute
The UPDATERRTDWARNING attribute specifies the RTD warning threshold (in seconds, 0 orgreater) for all configured updaters. The default is 60 seconds.This threshold is used by the STATUS RTDWARNING command to determine which updaters,if any, are to be included in its display. The display includes the monitor process and only thoseRDF processes (extractor or updaters) whose RTD exceeds their configured RTD warningthreshold.
UPDATEROPEN Attribute
The UPDATEROPEN attribute specifies the access mode (PROTECTED, PROTECTED OPEN,or SHARED) that updaters use when opening database files. The default is PROTECTED.PROTECTED mode is strongly recommended at all times to protect your backup database fromimproper write activity by processes other than an RDF updater. PROTECTED mode also allowsuser applications to open backup database files for read access but not for write access while theupdater process has the file open. PROTECTED mode, however, is incompatible with takingonline dumps and RELOAD operations. Therefore, if you want to perform one of these twooperations, you need to change UPDATEROPEN from PROTECTED to SHARED. When youhave finished the operation, you should set UPDATEROPEN back to PROTECTED. Previouslyyou had to stop the updaters before you could change the UPDATEROPEN mode. You can nowdo this online, without stopping the updaters.PROTECTED OPEN is a special variation of PROTECTED. If you have PROTECTED set, it ispossible for the updater to close a file if that file has had no update activity for five or moreminutes. If a rogue user application then opens the file for write access, it is able to write to thebackup database files. If the updater then wants to apply audit from the primary system to thatfile, the updater will encounter an error 2 on its REDO operations, and the file will no longer bein synchronization with the corresponding file on the primary system. The PROTECTED OPENmode means that once the updater has opened the file, it will not close the file even if it encountersa period of idle activity against the file.
SOFTWARELOC Attribute
The SOFTWARELOC attribute specifies where the RDF software is installed on both the primaryand backup systems. The default is $SYSTEM.RDF.
86 Installing and Configuring RDF

NETWORK Attribute
The NETWORK attribute specifies whether or not you are configuring an RDF network.When set to OFF (the default value), an RDF takeover operation provides local databaseconsistency, but it cannot provide transaction consistency for network transactions that involvedseveral RDF backup databases.When set to ON, the RDF subsystem provides database consistency for network transactionsthat were replicated to other backup databases by other RDF subsystems.When set to ON, you must either have the NETWORKMASTER attribute for the same systemalso set to ON or have another system configured as the network master.
NETWORKMASTER Attribute
The NETWORKMASTER attribute specifies whether the particular system is the master of theRDF network.When set to OFF (the default value), the particular system is not the network master.When set to ON, the particular system is the network master of the RDF network and this RDFsystem coordinates takeover operations across all the RDF subsystems that make up the RDFnetwork. When this attribute is set to ON, the NETWORK attribute must also be set to ON.
UPDATEREXCEPTION Attribute
The UPDATEREXCEPTION attribute specifies the manner in which exception files are used.When set to ON (the default value), the updaters log an exception record for each and everyaudit record they must undo during a takeover.When set to OFF, the updaters log exception records only for the first and last audit records thatmust be undone (the minimum logging necessary to support Triple Contingency operation).
LOCKSTEPVOL Attribute
The LOCKSTEPVOL attribute specifies the primary system disk volume on which the RDFlockstep file (control-subvolume.ZRDFLKSP) is to be located. The specified volume must beconfigured to the Master Audit Trail (MAT), and either the entire volume or at least the lockstepfile must be protected by the RDF subsystem. For information about the RDF lockstep capability,see Chapter 15 (page 309).
REPLICATEPURGE Attribute
The REPLICATEPURGE attribute specifies whether Enscribe purge operations on the primarysystem are to be replicated on the backup system.When set to OFF (the default value), Enscribe purge operations are not replicated. You shoulduse the default (OFF) for all RDF configurations unless you have a specific need for replicatingEnscribe purge operations.If you configure the RDF subsystem to replicate network transactions, you should not replicateEnscribe purge operations because doing so might result in unexpected errors during the updaternetwork undo processing.When set to ON, all Enscribe operations on RDF-replicated files are replicated on the backupsystem. If you want specific Enscribe files purged, then you must also configure INCLUDEPURGEand/or EXCLUDEPURGE clauses for each affected updater (see “Updater Processes”).
REMOTE MIRROR Attribute
The REMOTE MIRROR attribute specifies whether ZLT is enabled or disabled. The default isoff. For information about the ZLT capability, see Chapter 17 (page 337).
Initializing and Configuring RDF 87

REMOTE STANDBY Attribute
The REMOTE STANDBY attribute specifies the system name of the ZLT standby system.node-name must be a valid name and must identify a system in your current Expand network.The default is the name of the backup system. For information about the ZLT capability, seeChapter 17 (page 337).
OWNER Attribute
The OWNER attribute specifies a userid under which all RDF processes will always run. Thisglobal configuration parameter provides functionality whereby any super-user group userid canstart and stop RDF.To illustrate this functionality, imagine ten users are responsible for managing a particular RDFconfiguration and that SUPER.RDF is configured as the OWNER. Instead of providing all tenusers access to the SUPER.RDF userid, each individual user can be assigned a separate super-usergroup userid. If one user is assigned SUPER.FIRST and another SUPER.SECOND, for example,they can both log on with their userid and be able to start or stop RDF. The RDF processes donot run under SUPER.FIRST or SUPER.SECOND, however, but under SUPER.RDF (the RDFOWNER assigned during configuration). The same principal applies to the other eight users.The userid associated with OWNER must be a valid Guardian userid and must identify anexisting user account on the RDF primary and backup systems. The OWNER must also be amember of the super-user group, since that is an existing requirement in RDF for stopping andstarting RDF.OWNER is an unalterable value. There is no need to change the value, unless you configured itincorrectly (in which case you must reinitialize RDF with the correct value).If the OWNER attribute is omitted, only the userid that initializes RDF can start or stop RDF (asis true for all versions of RDF prior to 1.7).
Setting Image Trail AttributesUse SET IMAGETRAIL and ADD IMAGETRAIL commands to configure the following imagetrail attribute:• ATINDEXThe ATINDEX attribute associates an image trail with a specific audit trail on the primary system.The RECEIVER RDFVOLUME attribute specifies the disk volume that contains the receiver’smaster image trail. The receiver process writes all commit/abort records to this volume. Allupdaters must be configured to secondary image trails.To create secondary image trails, use the ADD IMAGETRAIL command. Later, when youconfigure your individual updater processes, you assign each of these processes to a specificimage trail. By spreading updaters across secondary image trails, you reduce the number ofupdaters contending for a specific trail. ATINDEX specifies which receiver will write to that trail;0 is the default.Each secondary image trail contains the audit records needed by the associated updater processes.Image trail files in secondary image trails have the same extent sizes as image trail files on thevolume specified by RDFVOLUME.
88 Installing and Configuring RDF

NOTE: To have secondary image trails, you must add them after initialization and before RDFhas been started for the first time. Also you cannot add secondary image trails until you haveconfigured the receiver, as described in the previous paragraphs. The secondary image trail fileshave the same extents as the master image trail files. To delete a secondary image trail, you muststop RDF, delete any updaters associated with the particular trail, and then delete the trail.Normally, you should never delete a secondary image trail until RDF has completely caught upwith TMF.
To add one secondary image trail to the volume named $IMAGA1 and another to the volumenamed $IMAGA2, issue the following commands:]SET IMAGETRAIL ATINDEX 0]ADD IMAGETRAIL $IMAGA1]SET IMAGETRAIL ATINDEX 1]ADD IMAGETRAIL $IMAGA2
Dedicated Image Trails or Image Trails on UpdateVolumes
The master image trail (MIT) should always be placed on an image trail not used by any updaters.For secondary image trails, however, you have two options. If your peak time audit generationrates for RDF-protected data on a given audit trail are generally in the range of 1 to 3 megabytesof audit per second, the number of updaters you need does not exceed 30, and you normally runwith Update ON, you may be able to configure one image trail per updater and place thatimagetrail on that updater's UPDATEVOLUME. You should have sufficient disk space to holdboth your database files as well as the image trail. When determining if you have sufficient diskspace on the UPDATEVOLUME, you should consider size of individual image trail files and theconfigured value of the purger's RETAINCOUNT, and you should consider worst-case situationswhere an updater might fall way behind, in which case there might be a large number of imagefiles on that UPDATEVOLUME.Alternatively, you may find that you can configure a small number of dedicated image trailsand configure a large number of updaters to each dedicated trail provided that the volume ofaudit being written to the trail is generally less than 5 megabytes per second. For high volumethroughput where the volume of RDF-protected data in an audit trail exceeds 5 megabytes persecond, for optimal extractor-to-receiver throughput as well as for optimal updater throughput,it is recommended that you always use dedicated image trails and that you configure no morethan 3 or 4 updaters per image trail.As you can see from this discussion, there are many combinations one can achieve, dependingon the volume of audit being generated per datavol on the primary system and the number ofupdaters you configure to an image trail. The recommendations provided above are no morethan general recommendations. Each customer's environment differs. When you are ready toconfigure your image trails, you need to consider carefully the different considerations raisedabove.
Setting Trigger AttributesRDF offers two types of triggers, where a trigger is typically a user-generated script of operationsthat are automatically executed upon the completion of a specific event. The two types of triggersare the REVERSE trigger and the TAKEOVER trigger. The REVERSE trigger is executed by RDFonly for a STOP RDF, REVERSE operation, and it is executed immediately after RDF stops. TheTAKEOVER trigger is executed immediately upon the successful completion of an RDF takeoveroperation.Use SET TRIGGER and ADD TRIGGER commands to configure the following trigger attributes:• PROGRAM• INFILE• OUTFILE
Initializing and Configuring RDF 89
• CPUS• PRIORITY• WAIT or NOWAITThe PROGRAM parameter specifies the name of a Guardian object file that is executed once RDFhas reached a particular state, either after a STOP RDF, REVERSE, or TAKEOVER operation.The INFILE attribute specifies the name of an edit file that will be passed as the IN file to thetrigger process when it is created.The OUTFILE attribute specifies the name of a file or process that will be passed as the OUT fileto the trigger process when it is created.The CPUS attribute specifies the number of the primary and alternate CPUs in which the triggerprocess is to run.The PRIORITY attribute specifies the priority at which the trigger process will run.WAIT causes RDF to wait for the trigger process to terminate before shutting down. NOWAITspecifies that once the trigger process is launched, RDF can immediately proceed to shut down.For further details on how you might use these triggers, see the sections on switchover andtakeover in Chapter 6 (page 157).
Setting Network Configuration Record AttributesUse SET NETWORK and ADD NETWORK commands to configure the following networkconfiguration record attributes:• PRIMARYSYSTEM system-name
• BACKUPSYSTEM system-name
• REMOTECONTROLSUBVOL subvolume-name
• PNETTXVOLUME volume-name
If you are configuring the network master RDF subsystem, you must include a networkconfiguration record for every RDF subsystem in the RDF network (including the network masteritself). Each of those records must include the following parameters:
Name of the primary system.PRIMARYSYSTEM system-name
Name of the associated backup system.BACKUPSYSTEM system-name
Name of the primary system’s remote control subvolume.REMOTECONTROLSUBVOL subvolume-name
Name of the primary system volume on which the RDFsubsystem stores an audited network synchronization file.
PNETTXVOLUME volume-name
If you are configuring a non network master RDF subsystem, you must include a single networkconfiguration record containing the following attributes:
Name of the network master’s primary system.PRIMARYSYSTEM system-name
Name of the network master’s backup system.BACKUPSYSTEM system-name
Name of the network master’s remote controlsubvolume.
REMOTECONTROLSUBVOL subvolume-name
Thus, within its configuration file, the network master has all necessary information about everysystem in the RDF network (whereas the other systems have only a pointer enabling them toobtain information about other systems in the network).
PRIMARYSYSTEM Attribute
The PRIMARYSYSTEM attribute specifies the name of a primary system. There is no defaultvalue. Each primary system within an RDF network must be unique within the network. An
90 Installing and Configuring RDF

RDF network cannot contain two or more RDF subsystems with the same primary system (thatis, it cannot contain RDF subsystems for \A to \B and \A to \C).
BACKUPSYSTEM Attribute
The BACKUPSYSTEM attribute specifies the name of the backup system associated with thespecified primary system. There is no default value.
REMOTECONTROLSUBVOL Attribute
The REMOTECONTROLSUBVOL attribute specifies the name of the control subvolume usedby the RDF subsystem configured for the specified primary and backup systems. There is nodefault value.
PNETTXVOLUME Attribute
The PNETTXVOLUME attribute specifies the name of the volume on the particular primarysystem where the RDF network master stores an audited network-synchronization file. Thespecified volume must be a data volume protected by the RDF subsystem on the primary systemand be configured to the MAT.You only use this attribute when configuring the network master. On the master you must includethis parameter within every network configuration record (including the one for the masteritself).
Setting Individual Process AttributesHaving set the global attributes, you are now ready to set the parameters that apply to individualRDF processes: the RDFNET, monitor, extractor, receiver, purger, and updater processes.
RDFNET Process
Use SET RDFNET and ADD RDFNET commands to configure the following RDFNET attributes:• CPUS primary-CPU : backup-CPU• PRIORITY• PROCESSThe CPUS attribute specifies the processors in the primary system in which the RDFNET processwill run.The PRIORITY attribute specifies the priority at which the RDFNET process will run. You shouldset the RDFNET process’ priority slightly lower than that of the RDF monitor process.The PROCESS attribute supplies a name for the RDFNET process. You should specify a meaningfulmnemonic such as $RNET. The process name can be any unique valid process name up to sixcharacters, including the $ symbol. However, you cannot specify HP reserved process namesthat are of the form $X*, $Y*, or $Z*, in which * is any alphanumeric string.
Monitor Process
Use SET MONITOR and ADD MONITOR commands to configure the following monitorparameters:• CPUS primary-CPU : backup-CPU• PRIORITY• PROCESSThe CPUS attribute in the following form specifies the primary and backup processors in whichthe monitor will run:CPUS primary-CPU:backup-CPU
If the primary processor is not available when RDF is started, the monitor executes in the specifiedbackup processor without benefit of a backup process. When the primary processor is brought
Initializing and Configuring RDF 91

back online, the monitor creates its own backup process in the primary processor and thenswitches control to that monitor process.The PRIORITY attribute specifies the priority at which the monitor will run. You should set themonitor’s priority higher than that of any application’s process.The PROCESS attribute supplies a name for the monitor process. You should specify a meaningfulmnemonic such as $AMON or $MON1. The process name can be any unique valid process nameup to six characters, including the $ symbol. However, you cannot specify NonStop SQL/MPreserved process names that are of the form $X*, $Y*, or $Z*, in which * is any alphanumericstring.To configure an RDF monitor process named $MON1 to execute as a process pair in CPUs 4 and6 of the primary system at a priority of 186, issue the following commands:]SET MONITOR PROCESS $MON1]SET MONITOR CPUS 4:6]SET MONITOR PRIORITY 186]ADD MONITOR
You can issue ADD MONITOR commands only when RDF is stopped.
Extractor Process
Use SET EXTRACTOR and ADD EXTRACTOR commands to configure the following extractorparameters:• ATINDEX• CPUS primary-CPU : backup-CPU• PRIORITY• PROCESS• RTDWARNING• VOLUMEThe ATINDEX attribute specifies an integer value from 0 through 15 specifying the TMF audittrail on the primary system with which the extractor is associated. 0 specifies the MAT. 1 through15 specify auxiliary audit trails AUX01 through AUX15. The default is 0. If you omit this attribute,RDFCOM assumes the extractor is associated with the MAT. For information about protectingauxiliary audit trails, see Chapter 13 (page 291).The CPUS attribute specifies the processors in the primary system in which the extractor willrun.The PRIORITY attribute specifies the priority at which the extractor will run. You should set theextractor’s priority slightly lower than that of the RDF monitor process.The PROCESS attribute supplies a name for the extractor process. You should specify a meaningfulmnemonic such as $EXT. The process name can be any unique valid process name up to sixcharacters, including the $ symbol. However, you cannot specify HP reserved process namesthat are of the form $X*, $Y*, or $Z*, in which * is any alphanumeric string.The RTDWARNING attribute specifies the RTD warning threshold (in seconds, 0 or greater) forthe extractor. This threshold is used by the STATUS RTDWARNING command to determine ifthe extractor is to be included in its display. The display includes the monitor process and onlythose RDF processes (extractor or updaters) whose RTD exceeds their configured RTD warningthreshold.The VOLUME attribute specifies a valid volume name in the current TMF configuration on yourprimary system. When configuring RDF for ZLT, you must add the complete set of audit trailvolumes to which protected data volumes are configured. You use a SET EXTRACTOR VOLUMEstatement for each individual volume. You do not need to specify whether the volume is anactive volume, restore volume, or overflow volume; you merely specify the volume name. Forinformation about the ZLT capability, see Chapter 17 (page 337).
92 Installing and Configuring RDF

To configure an RDF extractor process named $EXT to run as a process pair in CPUs 5 and 3 ofthe primary system, at a priority of 185, with an RTD warning threshold of 360 seconds, issuethe following commands:]SET EXTRACTOR ATINDEX 0]SET EXTRACTOR PROCESS $EXT]SET EXTRACTOR CPUS 5:3]SET EXTRACTOR PRIORITY 185]SET EXTRACTOR RTDWARNING 60]ADD EXTRACTOR
You can issue ADD EXTRACTOR commands only when RDF is stopped.
Receiver Process
Use SET RECEIVER and ADD RECEIVER commands to configure the following receiver attributes:• ATINDEX• CPUS primary-CPU : backup-CPU• PRIORITY• PROCESS• RDFVOLUME• EXTENTS• FASTUPDATEMODEThe ATINDEX attribute specifies an integer value identifying a configured TMF audit trail onthe primary system. 0 specifies the MAT. 1 through 15 specify auxiliary audit trails AUX01through AUX15. The default is 0. For each configured extractor, there must be a correspondingreceiver with the same ATINDEX value. For information about protecting auxiliary audit trails,see Chapter 13 (page 291).The CPUS attribute specifies the processors in the backup system in which the receiver is to run.The PRIORITY attribute specifies the priority at which the receiver will run. You should set thereceiver’s priority higher than that of any application’s process and higher than that of any RDFupdater process.The PROCESS attribute supplies a name for the receiver process. You should specify a meaningfulmnemonic such as $RECV. The process name can be any unique valid process name up to 5characters, including the $ symbol. However, you cannot specify HP reserved process namesthat are of the form $X*, $Y*, or $Z*, in which * is any alphanumeric string.The RDFVOLUME attribute applies only to the master receiver. It specifies which volume onthe backup system will contain the receiver’s master image trail. The file naming convention forimage trail files is $volume.control-subvolume.AAnnnnnn, where n is a digit. For example,the first image file is named $volume.control-subvolume.AA000001. You cannot specify thesubvolume name because that name is controlled by RDF.The EXTENTS attribute only applies to the master receiver. It specifies the size of the primaryand secondary extents for all image trail files on all image trails.The FASTUPDATEMODE value controls the frequency with which the receiver writes to theimage trails and makes image trail data available to the updaters. With FASTUPDATEMODEOFF, the receiver buffers the audit sent by the extractor and writes those buffers out to the imagetrails at the most convenient time. This ensures that RDF can achieve the highest possibleextractor-to-receiver throughput, but it does delay the updaters in how quickly they are allowedto read and apply the audit to the backup database. One can typically observe updater RTDtimes in the range of 1-20 seconds, although it may only take an updater a fraction of one secondto apply 20 seconds worth audit.With FASTUPDATEMODE ON, as a receiver receives an extractor message, it buffers all theaudit sent in that message by the extractor, writes those buffers immediately to the image trails,and then makes that data immediately available to the updaters. Depending on the value of the
Initializing and Configuring RDF 93

UPDATERDELAY attribute in the global RDF configuration record, the updaters can then readthe image trails and apply the freshly written audit to the backup database immediately, therebykeeping updater RTD times to the lowest possible value. Because the receiver writes the auditimmediately to the image trails after processing each extractor message, havingFASTUPDATEMODE set ON can impact extractor-to-receiver throughput.For a complete discussion of FASTUPDATEMODE, see the description involving the SETRECEIVER command in Chapter 8 (page 187).To configure an RDF receiver process named $RECV to run as a process pair in CPUs 0 and 2 ofthe backup system at a priority of 185 with FASTUPDATEMODE off, and to have the RDF imagetrail file (with a primary extent size of 3000 pages and a secondary extent size of 3000 pages)reside on the volume $IMAGE, issue the following commands:]SET RECEIVER ATINDEX 0]SET RECEIVER PROCESS $RECV]SET RECEIVER CPUS 0:2]SET RECEIVER PRIORITY 185]SET RECEIVER RDFVOLUME $IMAGE]SET RECEIVER EXTENTS (3000,3000)]ADD RECEIVER
You cannot start RDF until you have configured a master receiver process.You can issue ADD RECEIVER commands only when RDF is stopped.
Purger Process
Use SET PURGER and ADD PURGER commands to configure the following purger attributes:• CPUS primary-CPU : backup-CPU• PRIORITY• PROCESS• RETAINCOUNT• PURGETIMEThe CPUS attribute specifies the processors in the backup system in which the purger is to run.The PRIORITY attribute specifies the priority at which the purger will run. You should set thepurger’s priority higher than that of any application’s process and higher than that of any RDFupdater process.The PROCESS attribute supplies a name for the purger process. You should specify a meaningfulmnemonic such as $PURG. The process name can be any unique valid process name up to 5characters, including the $ symbol. However, you cannot specify HP reserved process namesthat are of the form $X*, $Y*, or $Z*, in which * is any alphanumeric string.The RETAINCOUNT attribute specifies how many of the most recent image trail files will beretained on disk for each image trail. The default value is 2. For details about the RETAINCOUNTattribute and triple contingency, see Chapter 10 (page 271).The PURGETIME attribute specifies the number of minutes the purger process waits betweenattempts to purge redundant image trail files. The default value is 60.To configure an RDF purger process named $PURG to run as a process pair in CPUs 0 and 2 ofthe backup system at a priority of 185, and to ensure that at least six image trail files are alwaysretained on disk, issue the following commands:]SET PURGER PROCESS $PURG]SET PURGER CPUS 0:2]SET PURGER PRIORITY 185]SET PURGER RETAINCOUNT 6]SET PURGER PURGETIME 30]ADD PURGER
You cannot start RDF until you have configured a purger process.
94 Installing and Configuring RDF
You can issue ADD PURGER commands only when RDF is stopped.
Updater Processes
Use SET VOLUME and ADD VOLUME commands to configure the following updater attributes:• ATINDEX• CPUS primary-CPU : backup-CPU• PRIORITY• PROCESS• IMAGEVOLUME• UPDATEVOLUME• INCLUDE• EXCLUDE• EXCLUDEPURGE• INCLUDEPURGEYou must configure an updater process for each primary system volume to be protected by RDF.The ATINDEX attribute specifies an integer value from 0 through 15 specifying the audit trailon the primary system to which the data volume being protected is mapped. 0 specifies the MAT.1 through 15 specifies auxiliary audit trails AUX01 through AUX15, respectively. The default is0.The CPUS attribute specifies the processors in the backup system in which the updater will run.The PRIORITY attribute specifies the priority at which the updater will run. You should set theupdater’s priority higher than that of any application’s process but less than the priority of theRDF receiver process.The PROCESS attribute supplies a name for the updater process. You should specify a meaningfulmnemonic such as $UP01. The process name can be any unique valid process name up to5 characters, including the $ symbol. However, you cannot specify HP reserved process namesthat are of the form $X*, $Y*, or $Z*, in which * is any alphanumeric string.The IMAGEVOLUME attribute associates this updater process with a specific image trail youhave previously added to the RDF configuration. You cannot add this updater process, associatingit to an image volume, unless you have already added the image trail with the ADD IMAGETRAILcommand. Also, the ATINDEX of this updater must match the ATINDEX of the associated imagetrail.The UPDATEVOLUME attribute specifies the name of the disk volume on the backup systemthat corresponds to a particular volume on the primary system. This attribute enables you to usedifferent volume names on the backup system than are being used on the primary system, if youso desire.The following guidelines are strongly recommended:• There should be an identical one-to-one volume relationship between volumes on the primary
system and those on the backup system.• Each backup volume should have the same name as the associated primary volume.If the backup volume names are not identical to the corresponding primary volume names, thenyou will have to update every partitioned file and every file that has alternate keys on the backupsystem so that each points to the correct volume name.You can use INCLUDE and EXCLUDE lists to specify which files are to be, or are not to be,protected by RDF. For a description of INCLUDE and EXCLUDE lists, see Chapter 11 (page 279).If you want Enscribe purge operations replicated, but you want to be selective and have somepurges replicated and others not, then you use INCLUDEPURGE and EXCLUDEPURGE tospecify what purges you want replicated. Please note that you must also have the RDFREPLICATEPURGE attribute set to ON. For more details, see Chapter 11 (page 279).
Initializing and Configuring RDF 95

The following RDFCOM commands configure an updater named $UP01 to run as a process pairin CPUs 2 and 4 at a priority of 180. The updater will be associated with an secondary imagetrail on the volume $IMAGA1. The name of the backup volume and the primary volume beingprotected is $DATA01.]SET VOLUME ATINDEX 0]SET VOLUME PROCESS $UP01]SET VOLUME CPUS 2:4]SET VOLUME IMAGEVOLUME $IMAGA1]SET VOLUME PRIORITY 180]SET VOLUME UPDATEVOLUME $DATA01]ADD VOLUME $DATA01
The mapping between the configured updater process and a particular primary volume isaccomplished by the ADD VOLUME command.You can issue ADD VOLUME commands only when RDF is stopped.You must configure all updaters to use secondary image trails, thereby leaving the RDFVOLUME(master image trail) exclusively for use by the master receiver (at index 0).
Creating a Configuration Command FileYou can use the INFO * command with the OBEYFORM attribute to create a configurationcommand file quickly and easily from an existing RDF configuration:1. Redirect the output of the RDFCOM session from your terminal to the configuration
command file by issuing an appropriate OUT command. For example, to direct subsequentsession output to the configuration command file named RDF.INIT, enter the followingcommand:]OUT RDF.INIT
2. Issue an INFO * command with the OBEYFORM attribute:]INFO *,OBEYFORM
RDFCOM lists the current attributes in the RDF configuration file to RDF.INIT in OBEYcommand file format.
3. Issue another OUT command to redirect subsequent session output back to your terminal:]OUT
For further information about configuration command files, see the example file in Appendix B(page 359).
Configuration File CompatibilityBefore running certain commands, RDFCOM compares its own version against the version ofthe RDF configuration file to ensure that the configuration file is compatible with the currentversion of the RDF software. If RDFCOM detects a difference, it prints the following message tothe home terminal and aborts the command:RDFCOM version (version1) does not match the config file version (version2)
If that happens, you should make sure you are using the correct RDFCOM. If you are using thecorrect version and you get this message, then you must reinitialize RDF.If RDFCOM cannot determine the configuration file version, it prints the following message tothe home terminal and aborts the command:RDFCOM version (version) does not match the config file version unknown
If that happens, you should make sure you are using the correct RDFCOM. If you are using thecorrect version and you get this message, then you must reinitialize RDF.
96 Installing and Configuring RDF

Enabling RDF OperationsAfter you have copied all pertinent database files from the primary system to the backup system,installed the RDF software on both systems, initialized and configured TMF on the primary andall backup systems, and initialized and configured RDF, you can then start the TMF and RDFsubsystems. You must start TMF on the primary and all backup systems before you can startRDF.
Starting TMFTo start or restart TMF, issue the TMFCOM command START TMF. If you plan to start theapplications being protected by TMF before starting RDF, you can include the DISABLEBEGINTRANS attribute in the START TMF command; this attribute prevents the applicationsfrom starting any transactions until you issue the TMFCOM command ENABLE BEGINTRANS.For details about these TMFCOM commands, see the TMF Reference Manual.
Starting RDFThere are two ways to start RDF: with updating enabled and with updating disabled. If updatingis enabled, the updaters begin updating the backup database immediately. If updating is disabled,they do not (but the extractor and receiver continue to work normally). The default is to startRDF with updating enabled.To start RDF, issue the RDFCOM command START RDF:]START RDF
Notice that to issue this command, you must have an RDFCOM session running on the primarysystem and meet all of the following requirements:• You are logged on as a member of the super-user group (or have execution access for an
RDFCOM object that has been PROGID'd by the customer).• You have the same super ID that was used to initialize RDF (or have execution access an
RDFCOM object that has been PROGID'd by the customer). You can have a different superID if the RDF OWNER attribute has been set.
• You have a remote password on the primary system (it is also recommended, but notrequired, that you have a remote password on the backup system as well).
• The RDF configuration file contains all necessary attributes.• All updater volumes on the backup system are enabled for transaction processing.When RDF starts execution, it automatically performs a validation check on the configurationfile; if the check succeeds, RDF copies the configuration file$SYSTEM.control-subvolume.CONFIG to the backup system.If the RDF configuration file does not exist, or if there are any missing or invalid attributes,RDFCOM displays an error message and aborts the start operation.If you did not start TMF on the backup system, or if you did not add an updater volume to theTMF configuration on the backup system and enable it for transaction processing, thecorresponding updater logs an RDF error and terminates immediately. If you started TMF onthe backup system and added the updater volume to the TMF configuration but did not enablethat volume for transaction processing, the updater issues an error message and then stops.If TMF BEGINTRANS is disabled, RDF issues an error message.Unless you explicitly specify otherwise, RDF always starts with updating enabled: all updaterprocesses immediately begin updating their volumes by reading audit images from the RDFimage files and applying the appropriate changes to the backup database files.If you want to start RDF with the updater processes disabled, you should specify the UPDATEOFF attribute in the START RDF command on the primary system:]START RDF, UPDATE OFF
Enabling RDF Operations 97

If you later want to start the updater processes, you merely issue a START UPDATE command.
Restarting the ApplicationsAs the final step in establishing an RDF environment, if you had shut down your applicationspreviously, you can restart them now.
98 Installing and Configuring RDF
4 Operating and Monitoring RDFTo operate and monitor RDF, you enter commands through two online utilities: the RDFCOMand RDFSCAN interactive command interpreters. Through these utilities, you initiatecommunication with RDF, request various RDF operations or information displays, and terminatecommunication with the subsystem. This chapter, which is intended for system operators, explainshow to use these utilities by focusing on the following topics:• “Running RDFCOM” (page 99), including:
— Command syntax for starting an RDFCOM session— Running RDFCOM interactively, noninteractively, and through a command file— Using RDFCOM commands— Requesting online help for RDFCOM commands
• “Running RDFSCAN” (page 109), including:— Command syntax for starting an RDFSCAN session— Using RDFSCAN— Using RDFSCAN commands— Requesting online help for RDFSCAN commands
• “Performing Routine Operational Tasks” (page 112), including:— Displaying configuration attributes and operating statistics with RDFCOM— Changing configuration attributes with RDFCOM— Reading (monitoring) EMS messages with RDFSCAN
The syntax and functional descriptions of all RDFCOM and RDFSCAN commands appear inChapter 8 (page 187) and Chapter 9 (page 261), respectively.For information about responding to error messages, handling failures, and stopping andrestarting RDF, see Chapter 5 (page 121). For information about the messages themselves, seeAppendix C (page 365).
Running RDFCOMRDFCOM is an interactive command interpreter through which you begin a session and enterrequests to manage, operate, and control RDF. RDFCOM runs under the Guardian user interface(normally the TACL command interpreter) to the NonStop operating system. To initiatecommunication with RDFCOM, enter the keyword RDFCOM at the current TACL prompt. Thisbegins an RDFCOM session that lets you enter RDFCOM commands interactively,noninteractively, or through a command file, as explained shortly.
Command Syntax for Starting an RDFCOM SessionTo enter an RDFCOM session, use the following general command syntax. The specific attributesyou enter depend, of course, on the options you desire.RDFCOM [/[IN command-file ] [,OUT output-file ]/ ]
[control-subvolume] ; [command ]
RDFCOMis an implicit RUN command, instructing the TACL command interpreter to run the RDFCOMutility program.
Running RDFCOM 99

IN command-file
specifies a command file from which RDFCOM commands are to be read. RDFCOM reads132-byte records from the specified file until it encounters either the end-of-file mark or anEXIT command.If you do not specify the IN option, TACL automatically supplies the name of its currentdefault input file—usually the terminal from which you issued the RDFCOM command.Typically, it is very useful to have your RDF configuration commands specified in a text file.Then you specify this text file as the IN file. RDFCOM then performs the same configurationeach time you use the IN file and this saves you from having to enter all the commandsmanually, one line at a time.Vertical bar (|) is the comment character, if you want to include comment lines in theconfiguration file. For more details see, “Sample Configuration File” (page 360).
OUT output-file
specifies a file to which all output (other than prompts for entering RDFCOM commands) isto be written. This file might receive listings requested by INFO, SHOW, and STATUScommands, for example. It might also receive RDFCOM commands generated by theOBEYFORM option of the INFO command.If you do not specify the OUT option, TACL supplies the name of its current default outputdestination—usually the terminal from which you issued the RDFCOM command.If you specify a disk file that does not exist, an EDIT file (file code 101) having the name youspecified is automatically created, and RDFCOM output is directed to it. If you specify a diskfile that exists, this must be an EDIT file (file code 101); RDFCOM output is appended to thatfile. If you omit the volume or subvolume portions of the file name specifier, the default isyour current volume or subvolume, respectively.
control-subvolume
is the name of the RDF control subvolume on $SYSTEM on the primary and backup systems,as well as the subvolume on the image trail volumes on the backup system in which theimage trail files reside.The control subvolume name is the same as the name of the primary system without thebackslash (and with a one-character suffix appended to it, if you included the suffix in theINITIALIZE RDF command).If you omit control-subvolume, RDFCOM uses the name of the local system as the controlsubvolume, without the backslash and with no suffix character appended.
command
is an RDFCOM command. If the command is present, RDFCOM executes it and thenterminates.
NOTE: You should not specify an IN file as well as a command. If you do, RDFCOM willexecute the command and terminate without ever reading the IN file.
If a command is not present and no input file is specified, RDFCOM displays a right bracket (])as a prompt for you to enter commands interactively.
Using RDFCOM InteractivelyWhen you use RDFCOM interactively, you conduct a continuous online dialog with it througha series of prompts, commands, output displays, and messages.
Starting a SessionTo start an interactive RDFCOM session, enter the RDFCOM keyword at your TACL prompt,followed optionally by the name of the RDF control subvolume:
100 Operating and Monitoring RDF
>RDFCOM [control-subvolume]
For example, to start a session on a primary system named SANFRAN, you would enter thefollowing command (assuming that no suffix character was specified in the INITIALIZE RDFcommand):>RDFCOM SANFRAN
If the suffix character “3” was specified in the INITIALIZE RDF command, then you would enterthe following command:>RDFCOM SANFRAN3
When RDFCOM starts, it searches the specified control-subvolume on $SYSTEM of the localsystem for the RDF configuration file to open. In other words, the configuration file that RDFCOMexpects to open is:\local-system.$SYSTEM.control-subvolume.CONFIG
NOTE: If you invoke RDFCOM from the backup system, you must include the name of thecontrol subvolume in the RDFCOM command; if you do not, then RDFCOM will assume thatthe control subvolume has the same name as the local system (in this example it is the name ofthe backup system) and look for the configuration file in the wrong subvolume.
When it begins your interactive session, RDFCOM displays its product banner followed by theRDFCOM prompt:RDFCOM - T0346A07 - 05JUL05(C)2005 Hewlett-Packard Development Company, L.P.]
The right-bracket (]) prompt indicates that RDFCOM is ready to accept your first command.When you enter this command, RDFCOM processes it and then displays another right-bracketprompt for your next command. You continue interacting with RDFCOM in this way, repeatedlyreceiving a prompt and entering a command, until you explicitly end the session.If it detects an error during startup, RDFCOM displays an error message between the productbanner and the right-bracket prompt. If it discovers an error in an RDFCOM command, RDFCOMdisplays an error message immediately following the command. Each error message line beginswith the following text, even if the message continues to more than one line:*** Error ***
For example, if you issue an ADD RDF command without previously initializing RDF, RDFCOMissues the following message:*** Error *** RDF has not been initialized
Ending a SessionWhen you want to end your session with RDFCOM, you can either issue the EXIT command ortype Ctrl-Y.
NOTE: On most terminals, you enter Ctrl-Y by simultaneously pressing the control key andthe Y key. On some terminals, however, this escape function might be selected by a different keycombination or a single key. Before using RDFCOM, identify how this function is selected onyour terminal.
Interrupting Command ProcessingYou can interrupt RDFCOM processing by pressing the BREAK key at your terminal. RDFCOMresponds as follows:• If you press BREAK at the RDFCOM input prompt (]), RDFCOM returns control of the
terminal to RDFCOM’s parent process (typically, TACL) but continues execution. You can
Running RDFCOM 101

resume communication with RDFCOM by entering the operating system command PAUSEat the TACL prompt.
• If you press BREAK when an RDFCOM command that displays information (such as STATUSRDF) is in progress, RDFCOM terminates execution of this command and prompts you foranother one.
• If you press BREAK when an RDFCOM command that changes the RDF configuration orstatus (such as ALTER RDF) is in progress, RDFCOM continues to execute this commandwhile immediately prompting you for another one.
NOTE: On your terminal, the BREAK key might not actually be labeled “BREAK.” Allterminals, however, have some key or combination of keys that perform the BREAK operation.Before using RDFCOM, determine how this operation is selected on your terminal.
Using RDFCOM Noninteractively (without an IN File)When you use RDFCOM noninteractively, you enter one or more commands to RDFCOM at thesame time you start your session. RDFCOM executes all of these commands, and then terminatesthe session and returns control of your terminal to TACL.To run RDFCOM noninteractively, you enter the RDFCOM keyword, the control subvolumename, the semicolon, and one or more RDFCOM commands on the same line. The followingexample includes a command that displays current configuration information for the RDF monitor(the example assumes that \LONDON is the primary system, the suffix character “A” wasspecified in the INITIALIZE RDF command, and the user did not explicitly name the monitorprocess):1> RDFCOM LONDONA; INFO MONITOR RDFCOM - T0346A07 - 05JUL05(C)2005 Hewlett-Packard Development Company, L.P. MONITOR CPUS 0:1 MONITOR PRIORITY 170 MONITOR PROCESS $MON2>
As this example illustrates, after the command is executed, the RDFCOM session automaticallyterminates and the TACL prompt again appears.To specify multiple RDFCOM commands on a single line, you must enter a semicolon (;) toseparate each command from the preceding one. For example:3> RDFCOM LONDONA; INFO MONITOR; INFO EXTRACTOR
If any command on the line fails, RDFCOM reports the error and terminates without executingany of the subsequent commands.
Using RDFCOM From a Command File (IN file)RDFCOM can also read commands from a command file. The command file is a text file thatcontains the RDFCOM commands you want to execute, which you prepare using your standardtext editor. You might, for example, create a command file named RDFSET that contains thefollowing commands:SET RDF SOFTWARELOC $SYSTEM.RDFSET RDF LOGFILE $0SET RDF UPDATERDELAY 10SET RDF UPDATERTXTIME 60SET RDF UPDATERRTDWARNING 60SET RDF UPDATEROPEN PROTECTEDSET RDF NETWORK ONSET RDF NETWORKMASTER ONSET RDF UPDATEREXCEPTION OFFADD RDF
102 Operating and Monitoring RDF

To run RDFCOM and execute the commands in this file, supply the command file name in theIN option of the command to start RDFCOM:4> RDFCOM /IN RDFSET/ control-subvolume
When it uses a command file in this way, RDFCOM works in batch mode: RDFCOM begins thesession, reads and executes each command from the command file, and displays the associatedoutput at your terminal. When RDFCOM reaches the end of the command file or encounters anEXIT command within that file, RDFCOM terminates the session and returns control to TACL.If RDFCOM encounters an error while reading the command file, RDFCOM displays an errormessage, terminates the session, and returns control to TACL.If you include both the IN and OUT options in the RDFCOM command, RDFCOM readscommands from the command file specified by the IN option and directs all output to thedestination specified by the OUT option. For example, the following command causes RDFCOMto read commands from the command file COMFILE1 and list the output to the printer $LP:5> RDFCOM/IN COMFILE1, OUT $LP/ control-subvolume
In addition, you can execute the contents of a command file within an interactive RDFCOMsession by using the RDFCOM OBEY command. If you regularly use a series of sequential RDFoperations in your interactive sessions, for instance, you might want to specify these in a commandfile. Then each time you need these operations, you can execute them with a single OBEYcommand rather than with multiple individual RDFCOM commands.As an example, many users find that initializing RDF is much easier and more consistent whendone using command files. Suppose you have created a command file named RDFINIT thatcontains the commands for initializing the subsystem. You could execute all these commandsby simply entering:]OBEY RDFINIT
If you decide later that you want to use different installation attributes, you can change thecommand file and then enter the OBEY command again. Using command files makes performingrepeated tasks very convenient.During processing of an OBEY command, when RDFCOM reaches the end of the command file,RDFCOM prompts you for another RDFCOM command. If RDFCOM encounters an EXITcommand within the command file, RDFCOM terminates the session and returns control toTACL. If RDFCOM encounters an error while reading the command file, RDFCOM displays anerror message, and prompts you for another RDFCOM command.
NOTE: Previously you could not put the RDFCOM takeover command into an RDFCOM scriptfile because that command prompted the user several times before it executed. By using the new! option to the takeover command, you can now put the takeover command into a script file withthe ! option because the ! option eliminates the prompts. For more information, see the Takeovercommand in Chapter 8 “Entering RDFCOM Commands” .
Using Scripts for Easy and Fast RDF Initialization and ConfigurationIn the discussion above, you have learned how to use RDF command scripts for RDFCOMoperations and how to use an IN file to execute a list of RDFCOM commands. Here is a highlyconvenient way to use both of these methods to initialize and configure an RDF subsystem. Youcreate an EDIT file with the following TACL commands that you want executed on your primarysystem \Boston.fup purge $system.BOSTON.*!
fup purge \SF.$system.BOSTON.*!
rdfcom; initialize rdf,backupsystem \SF!
rdfcom /in $system.boston.rdfcfg/
rdfcom; start rdf
Running RDFCOM 103

You would execute this command as an OBEY file to your TACL prompt. For this example,assume you have been running an RDF subsystem where \Boston is your primary system and\SF is your backup system. You have stopped TMF and RDF, you have reinitialized andreconfigured TMF, and you want to reinitialize, reconfigure, and restart RDF.Recall that before you can initialize RDF you must delete the control subvolumes on both primaryand backup systems. These are executed by the first two commands in the TACL obey file above.The next command initializes RDF, specifying that the default system (\BOSTON) is your primarysystem and \SF is your backup. When RDFCOM completes this operation, the RDFCOM sessionends and TACL moves to the next RDFCOM command. This command reads in your configurationfile ($SYSTEM.BOSTON.RDFCFG) and creates the new configuration for your environment.When the last command in the script executes, this RDFCOM session terminates and a newRDFCOM session actually starts your newly configured RDF subsystem.You could place all three of the RDFCOM commands in the single RDFCOM command file$SYSTEM.BOSTON.RDFCFG, but the value of keeping the three operations executed by separateRDFCOM sessions is this. While your RDF configuration script may not change, your initializationcommand is likely to change each time you use the INITTIME option, so you may find it easierjust to edit the overall OBEY files to change the INITTIME value. Secondly, you might find iteasier to keep the START RDFCOM command as a separate operation, thereby keeping theconfiguration limited to just the different configuration commands.
Managing Multiple RDF Environments from One RDFCOM SessionIf you have multiple RDF subsystems running on a single node, you can manage and monitorall of them from a single RDFCOM session. You just need to use the OPEN command to openthe specific RDF subsystem you want to manage or monitor before issuing the command. Thisis best seen by an example.Suppose you have three RDF subsystems configured and they are replicating different data todifferent nodes.RDF Subsystem FOXIIA \FOXII ------------------> \TSII
RDF Subsystem FOXIIB \FOXII ------------------> \PRUNE
RDF Subsystem FOXIIC \FOXII ------------------> \PUMPKIN
Running one RDFCOM interactively, you can monitor the status of each by issuing the followingcommands: RDFCOM ] OPEN FOXIIA; STATUS RDF ] OPEN FOXIIB; STATUS RDF ] OPEN FOXIIC; STATUS RDF
Running one RDFCOM noninteractively, you can start each by issuing the following STARTRDF commands: RDFCOM FOXIIA; START RDF; STATUS RDF RDFCOM FOXIIB; START RDF; STATUS RDF RDFCOM FOXIIC; START RDF; STATUS RDF
As each command line in the above example ends, that specific RDFCOM session terminatesand the next line is executed.
Controlling Multiple RDF Environments Running on Different Nodes with a SingleObey File
If you have multiple RDF subsystems running on different nodes, you can control thosesubsystems from a single obey file. Consider the following environment.
104 Operating and Monitoring RDF

RDF Subsystem PRIM1 \PRIM1 ------------------> \BACK1
RDF Subsystem PRIM2 \PRIM2 ------------------> \BACK2
RDF Subsystem PRIM3 \PRIM3 ------------------> \BACK3
Now suppose these RDF subsystems are running as an RDF network, you have lost PRIM1, youhave stopped the applications on PRIM2 and PRIM3, and you want to execute the takeovercommands from a single obey file to be executed on BACK1. Here are the commands you wouldput in the obey file. Assume that you have put RDFCOM on $SYSTEM.SYSTEM on each nodeand licensed it. \BACK1.$SYSTEM.RDFCOM PRIM1; TAKEOVER! \BACK2.$SYSTEM.RDFCOM PRIM2; TAKEOVER! \BACK3.$SYSTEM.RDFCOM PRIM3; TAKEOVER!
Using RDFCOM CommandsTo request an RDFCOM operation, you enter a corresponding RDFCOM command. Thesecommands fall into three functional areas: configuration, operational, and utility commands.
Configuration CommandsRDFCOM configuration commands and their functions are summarized in Table 4-1. All of thesecommands except INFO and SHOW can be issued only by members of the super-user group;INFO and SHOW can be issued by anyone.
Table 4-1 RDFCOM Configuration Commands
FunctionObjectCommand
Applies option values from theconfiguration memory table to the RDFconfiguration file for the specifiedprocess, or adds RDF and image trailconfiguration records to the RDFconfiguration file.
PURGER;RDF;RDFNET;MONITOR;NETWORK;EXTRACTOR;TRIGGER;RECEIVER;VOLUME;IMAGETRAIL;
ADD
Alters the existing values in the RDFconfiguration file for the specifiedprocess.
PURGER;RDF;RDFNET;MONITOR;TRIGGER;EXTRACTOR;VOLUME;RECEIVER;
ALTER
Deletes the image trail or the entireconfiguration record for the specifiedtrigger or volume from the RDFconfiguration file.
VOLUME;IMAGETRAIL;TRIGGER;
DELETE
Displays current option values fromthe RDF configuration file for thespecified process or for all processes(*).
RDFNET;*;NETWORK;IMAGETRAIL;PURGER;RDF;TRIGGER;MONITOR;VOLUME;EXTRACTOR;
RECEIVER;
INFO
Initializes RDF.RDF;INITIALIZE
Resets all option values in theconfiguration memory table to theirdefault values for the specified process.
IMAGETRAIL;RDF;PURGER;MONITOR;RDFNET;EXTRACTOR;NETWORK;RECEIVER;TRIGGER;VOLUME;
RESET
Running RDFCOM 105

Table 4-1 RDFCOM Configuration Commands (continued)
FunctionObjectCommand
Adds option values to theconfiguration memory table for thespecified process.
IMAGETRAIL;RDF;PURGER;MONITOR;RDFNET;EXTRACTOR;NETWORK;RECEIVER;TRIGGER;VOLUME;
SET
Lists current option values from theconfiguration memory table for thespecified process.
VOLUME;RDF;PURGER;MONITOR;RDFNET;EXTRACTOR;NETWORK;RECEIVER;TRIGGER;IMAGETRAIL;
SHOW
Operational CommandsRDFCOM operational commands and their functions are listed in Table 4-2. All of these commandsexcept STATUS can be issued only by members of the super-user group; STATUS can be issuedby anyone.
Table 4-2 RDFCOM Operational Commands
FunctionObjectCommand
Copies missing audit records from thebackup system that has the most auditto the one that has the least audit (usethis command only if you haveconfigured RDF for TripleContingency)
- -;COPYAUDIT
Starts RDF.RDF;START
Starts all updater processes on thebackup system.
UPDATE;START
Lists current information about RDFprocesses.
PROCESS;MONITOR;VOLUME;RDF;RTDWARNING;EXTRACTOR;RDFNET;RECEIVER;
PURGER;
STATUS
Stops RDF.RDF;STOP
Signals the end of all necessary loadand BACKUP operations during onlinedatabase synchronization.
SYNCH;STOP
Stops all updater processes on thebackup system.
UPDATE;STOP
Initiates an RDF takeover operation onthe backup system.
- -;TAKEOVER
Unpins TMF audit trail files on theprimary system
- -;UNPINAUDIT
Validates the current attribute valuesin the RDF configuration file.
CONFIGURATION;VALIDATE
Utility CommandsRDFCOM utility commands and their functions are listed in Table 4-3. All of these commandscan be issued by anyone.
106 Operating and Monitoring RDF

Table 4-3 RDFCOM Utility Commands
FunctionObjectCommand
Terminates an RDFCOM session.- -EXIT
Enables you to edit (fix) a previouslyissued command.
- -FC
Displays help text for commands andmessages.
{ABBREVIATIONS } {ALL } {command} {message-number}
HELP
Displays the 10 most recently issuedRDFCOM commands.
- -HISTORY
Causes RDFCOM to read commandsfrom the specified command file.
filenameOBEY
Sets the RDF control subvolume to$SYSTEM.control-subvolume,thereby setting up RDF for access tothat configuration.
control-subvolumeOPEN
Redirects subsequent session outputto the specified device or file.
filenameOUT
Entering CommandsThe complete syntax of all RDFCOM commands appears in Chapter 8 (page 187). Some generalrules that apply to all RDFCOM commands appear in the following list:• You can enter commands in either uppercase or lowercase letters or any combination of
these.• RDFCOM reads command lines up to 132 characters (bytes) long; if the maximum line length
of your input device is less than 132 characters, and your command input exceeds the device’slimit, the input will wrap around to the next line but will terminate when 132 charactershave been read. RDFCOM does not support additional entry lines or special commandcontinuation characters.
• RDFCOM supports a comments character (vertical bar - |) within command entry lines orwithin OBEY command files.For more information on using the comment character, see the Sample Configuration scriptin “Sample Configuration File” (page 360).
Requesting Online HelpThrough the RDFCOM HELP command, you can display brief descriptions of:• RDFCOM command syntax (including syntax for the HELP command itself)• Numbered RDF messages (such as 700, 705, and so forth)The HELP text is intended as a reminder, not as a substitute for this manual.
Help for Command SyntaxTo obtain syntax information for an individual command, enter HELP followed by the commandname. For example, to display the ADD command syntax, enter: ]HELP ADD
RDFCOM displays the following: { RDF } { MONITOR } { EXTRACTOR } { RECEIVER }ADD { IMAGETRAIL $volume }
Running RDFCOM 107

{ PURGER } { RDFNET } { NETWORK } { TRIGGER trigger-type } { VOLUME $volume } { $volume }
Cannot be performed with RDF running.
Only a user in the SUPER group can execute this command.
To obtain a list of the available RDFCOM commands, enter:]HELP ALL
RDFCOM displays the following information:Help is available for the following:
Configuration Commands:
ADD ALTER { RDF | MONITOR | EXTRACTOR | RECEIVER | PURGER | TRIGGER | RDFNET | VOLUME } DELETE INFO INITIALIZE RESET SHOW SET { RDF | MONITOR | EXTRACTOR | RECEIVER | IMAGETRAIL | PURGER | NETWORK | RDFNET | TRIGGER | VOLUME } Operational Commands:
COPYAUDIT START STATUS STOP TAKEOVER UNPINAUDIT VALIDATE
Utility Commands:
EXIT FC HELP HISTORY OBEY OPEN OUT
RDF Concepts: Abbreviations
RDF error messages:error-number
E.g., "help 700" prints an explanation for the RDF error message 700
Help for RDF Error MessagesFor information about a particular error message (its cause, effect, and recommended recoverysteps), enter HELP followed by the message number. For example, to obtain information aboutmessage number 715, enter:]HELP 715
108 Operating and Monitoring RDF
In response, RDFCOM displays the following information:-------------------------------------------------------------| 715 Primary Stopped |-------------------------------------------------------------Cause: The primary process of a NonStop process pair has stopped. This probably was the result of an operator inadvertently issuing a STOP command from TACL.
Effect: The backup process takes over, but not in fault-tolerant mode, until the primary process can be re-created.
Recovery: This is an informational message; no recovery is required.
Running RDFSCANRDFSCAN is an interactive command interpreter through which you begin a session and enterrequests to scan and display the content of intermediate entry-sequenced RDF message fileproduced by the standard EMS filter RDFFLTO. RDFSCAN runs under the Guardian userinterface (normally TACL) to the operating system. To begin an RDFSCAN session and entercommands interactively, enter the keyword RDFSCAN at the current TACL prompt.
Command Syntax for Starting an RDFSCAN SessionTo enter an RDFSCAN session, use the following command syntax:
RDFSCAN filename
RDFSCANis an implicit RUN command, instructing the TACL command interpreter to run the RDFSCANutility program.
filename
specifies the entry-sequenced file to be opened.
Using RDFSCANWhen you use RDFSCAN, you conduct an interactive dialog with it through prompts, commands,output displays, and messages.RDFSCAN has two operational restrictions:• RDFSCAN does not use command files; you must enter all RDFSCAN commands from the
terminal.• RDFSCAN accepts only one command per prompt.
Starting a SessionTo start an interactive session with RDFSCAN, enter the RDFSCAN keyword at your TACLprompt, followed by the name of the entry-sequenced file you want to open. For example, tobegin an RDFSCAN session and open the file $SYSTEM.RDF.MSGLOG for scanning, enter:>RDFSCAN $SYSTEM.RDF.MSGLOG
RDFSCAN displays a banner, information about the message file, and a text line that promptsyou for input:RDFSCAN - T0346A06 - 14MAR04(C)1988 Tandem (C)2004 Hewlett Packard Development Company, L.P.File: $SYSTEM.RDF.RDFLOG, current record: 9454, last record: 9466Enter HELP ALL for instructions
Running RDFSCAN 109

Enter the RDFSCAN function you want:
To begin an RDFSCAN session and open the file $SPOOL.SANFRAN.RDFLOG for scanning,enter:
>RDFSCAN $SPOOL.SANFRAN.RDFLOG
RDFSCAN displays the following:RDFSCAN - T0346A06 - 14MAR04(C)1988 Tandem (C)2004 Hewlett Packard Development Company, L.P.File: $SPOOL.SANFRAN.RDFLOG, current record: 7346, last record: 8967Enter HELP ALL for instructions
Enter the RDFSCAN function you want:
To request an RDFSCAN operation, enter the corresponding RDFSCAN command (describednext in this discussion) at the prompt.
Ending a SessionTo terminate the RDFSCAN session, issue the EXIT command or type Ctrl-Y.
Using RDFSCAN CommandsTo request an RDFSCAN function, you enter a corresponding RDFSCAN command, selectedfrom the list in Table 4-4. All of these commands are unrestricted; they can be entered by anyuser.
Table 4-4 RDFSCAN Commands
FunctionObjectCommand
Specifies the record number at whichto begin the next RDFSCAN function.
[ record-number ]AT
Enables or disables the display ofrecord numbers for the lines listed.
[ ON | OFF ]DISPLAY
Terminates an RDFSCAN session.- -EXIT
Opens the specified file as the currentEMS log.
log-fileFILE
Displays help text for commands andRDFSCAN usage.
[ ALL ] [ command ] [ INTRO ]HELP
Beginning at the current record,examines subsequent messages in themessage file and displays those thatcontain the current match pattern. Theoperation terminates when thespecified number of matches has beenfound or the last record is encountered,whichever happens first.
numberLIST
Copies any log messages subsequentlydisplayed on the screen by LISTcommands to the specified file.
log-fileLOG
Defines the current match pattern.textMATCH
110 Operating and Monitoring RDF
Table 4-4 RDFSCAN Commands (continued)
FunctionObjectCommand
Turns off the LOG command.- -NOLOG
Beginning at the current record,examines the specified number ofmessages in the message file, anddisplays messages that contain thecurrent match pattern.
numberSCAN
The complete syntax for all RDFSCAN commands appears in Chapter 9 (page 261).You can abbreviate the command name by entering only the first character (such as L for List)or any number of the leading characters (such as DIS for Display). You can use either uppercaseor lowercase letters.
Requesting Online HelpThrough the RDFSCAN HELP command, you can request brief descriptions of:• Command syntax (including the syntax for the HELP command itself)• Introductory information on using the RDFSCAN utility
Help for Command SyntaxTo obtain syntax information for an individual command, enter HELP followed by the commandname. As an example, to display information for the LIST command, enter HELP LIST after theprompt:Enter the RDFscan function you want: HELP LIST
In response, RDFSCAN displays the following: LIST count
List will display count records from the current-recordpointer (set with AT.) If a pattern match has been selected with Match,then only those records that match will be displayed. countspecifies how many records will be displayed, even if many more must be read.
Scan will only read count no matter how many are displayed.
FILE: \WHICH.$SYSTEM.RDF.RDFLOG, current record: 37501, last record: 37513
Enter the next RDFscan function you want:
To obtain a list of all RDFSCAN commands, enter either HELP or HELP ALL. For example:Enter the next RDFscan function you want: HELP ALL
In response, RDFSCAN displays:Enter HELP INTRO for an introduction to RDFSCAN.
Valid RDFSCAN commands are:
At - Sets the current-record pointer to the value given.Display - Turns ON/OFF the display of line number with each line listed.Exit - Exits.File - Changes the RDF message file being scanned.Help - Help.List - Displays "n" lines of the RDFLOG with optional pattern matching.LOG - Sets and Opens the message file for echoing of Listed lines.Match - Sets the pattern to be matched (or turns it off.)NOLOG - Closes the log file.
Running RDFSCAN 111

Scan - Reads "n" lines of the RDFLOG and displays them with optional pattern matching.
FILE: \WHICH.$SYSTEM.RDF.RDFLOG, current record: 37501, last record: 37513
Enter the next RDFscan function you want:
Introductory Usage InformationTo display a brief introduction to the purpose, features, and use of RDFSCAN, enter HELPINTRO:
Enter the next RDFscan function you want: HELP INTRO
In response, RDFSCAN displays:RDFSCAN is a utility for quickly scanning the RDFLOG file. When you runRDFSCAN it calculates the last-record-number and displays it for you.You can then selectively list (display) various portions of the file.
You can set the "current-record-pointer" via AT number.Then you can LIST count records in the file startingat number. The current-record pointer will be incrementedas you display records so that you can continue listing records . . .
The display continues for a total of 44 lines. If the text extends beyond the last line of your terminalscreen, RDFSCAN allows you to continue paging through the display by responding Y to theprompt:MORE HELP ( [Y] or N) ?
Performing Routine Operational TasksThrough RDFCOM and RDFSCAN, you can perform many different RDF functions. Amongthese are the routine operational tasks that system operators do from day-to-day. These routinetasks include:• Displaying current configuration attributes and operating statistics• Changing configuration attributes• Reading RDF messagesOther specialized tasks are described throughout the manual.
Displaying Current Operating Statistics and Configuration InformationWhile RDF is running, you can obtain both a display of your current RDF configuration andrelevant operating statistics that pertain to each configured entity by issuing the RDFCOMSTATUS RDF command. This can also be obtained if you are using ASAP ( see Appendix E(page 465)). The display returned by the RDFCOM STATUS RDF command is as follows:]STATUS RDF
In response, RDF displays:RDFCOM - T0346H09 – 11AUG08(C)2008 Hewlett-Packard Development Company, L.P.
Status of \RDF04 -> \RDF05 RDF 2008/08/11 05:26:49.082Control Subvol: $SYSTEM.RDF04Current State : NormalRDF Process Name RTD Time Pri Volume Seqnce Rel Byte Addr Cpus Err------------------ ------ --------- --- -------- ------ ------------- ----- ----Monitor $RMON 185 $AUDIT 56 1: 2Extractor (0) $REXT0 0:00 185 $AUDIT 56 928000 1: 2Extractor (1) $REXT1 0:00 185 $DATA17 4 10435580 1: 2
112 Operating and Monitoring RDF

Receiver (0) $RRCV0 0:00 185 $MIT 44 1: 2Receiver (1) $RRCV1 0:00 185 1: 2Imagetrail (0) $IMAGE0 22Imagetrail (1) $IMAGEA 3Purger $RPRG 185 1: 2$DATA06 -> $DATA06 $RUPD1 0:06 185 $IMAGE0 22 9568 1: 2$DATA07 -> $DATA07 $RUPD2 0:00 185 $IMAGEA 3 811008 2: 3$DATA08 -> $DATA08 $RUPD3 0:06 185 $IMAGEA 3 811568 3: 0
In the STATUS RDF display, the first line gives the name of the primary system (\RDF04 in thisexample), the name of the backup system (\RDF05 in this example), and the timestamp thatshows when the STATUS RDF command was issued. The second line specifies the fully-qualifiedname of the control subvolume.
RDF StatesThe third line specifies the current state of the subsystem; any of the following entries are possible:
Table 4-5 RDF States
DescriptionStatus
RDF running with Update OnNormal
RDF running with Update OffNormal - Update Stopped
RDF was running with Update Off, Update was just turned On, butone or more updaters have not yet started.
Start Update Pending
RDF was running with Update On, Update was just turned Off, butone or more updaters have not yet stopped.
Stop Update Pending
RDF was running with Update On, you issued a STOP UPDATEcommand with the timestamp option, but one or more updaters havenot reached the end of Redo and/or Undo operations.
Stop Update, Timestamp Pending
RDF was running with Update On, you have issued a STOP RDFcommand, but one or more RDF processes have not yet stopped.
* STOP RDF In Progress *
RDF was running with either Update On or Off, you have issued aTMFCOM STOP TMF command on the primary system, the masterextractor has detected the STOP TMF audit record, but one or moreRDF processes have not yet stopped in response.
* TMF STOP In Progress *
You have tried to START RDF, but the RDF software on the backupsystem is not compatible with the RDF software on the primarysystem.
WRONG PROGRAM VERSION
RDF was running with Update On, a Shared Access NonStop SQL/MPor SQL/MX operation was detected, but some updaters have not yetshutdown.
NSA Stop Update Pending
Performing Routine Operational Tasks 113

Table 4-5 RDF States (continued)
DescriptionStatus
RDF had been running with Update On, a Shared Access NonStopSQL/MP or SQL/MX operation was detected, and all updaters havecompleted their shutdown. Note, you must consult the RDF LOG foreither the RDF event 905 or 908 to determine if it is safe for you toperform the DDL operation on the backup system.
Update NSA Stopped
The monitor is either stopped or is running but unable to respond.The latter situation can happen for several reasons, such as theSTATUS RDF command having been issued from the backup systemwhen the Expand connection to the primary system is done. Anotherexample of this can happen as a result of a STOP RDF, REVERSEoperation that includes a REVERSE trigger that starts RDF with theWAIT option. If this state persists and if Expand is up, then youshould check the status of the Monitor via a TACL status command.If the monitor is gone but the other RDF processes are still present,then the process was probably either manually stopped from TACLor perhaps is was stopped by a double CPU failure. If you can confirmthat the monitor is stopped and the other RDF processes are running,you should manually stop all surviving RDF processes by issuing thefollowing TACL command on both the primary and backup systems:STATUS *, PROG $SYSTEM.RDF.*, STOP. This example assumes thelocation of the RDF software is $SYSTEM.RDF.
* Monitor Unavailable *
Main STATUS RDF DisplayThe rest of the display provides current information about each RDF process configured.For extractors, receivers, and image trails, the configured ATINDEX value is displayed inparentheses following the object name. In the preceding example, the extractor $REXT0 andreceiver $RRCV0 are associated with the MAT, while the extractor $$REXT1 and receiver $RRCV1are associated with auxiliary audit trail AUX01.Because of insufficient space, however, ATINDEX values are not displayed explicitly for updaters.To determine the ATINDEX value of a particular updater, see the ATINDEX value of the updater'sspecific image trail.In this example, a monitor process and two extractor processes are configured on the primarysystem, and two receiver processes and three updater processes are configured on the backupsystem. For each process, the following items appear, indicated by column headings near thetop of the display:• RDF Process identifies the type of process. Notice that each updater process is identified
by the name of the primary volume the updater is protecting and the corresponding volumeon the backup system. In this example, each volume being updated on the backup systemhas the same name as the corresponding volume on the primary system (for example, updatesto the volume $DATA07 on the primary system are replicated by the updater process $RUPD2to the volume $DATA07 on the backup system).
• Name denotes the name assigned to the process.• RTD Time specifies the current RDF time delay (RTD) value for the extractor process,
receiver process, and all updater processes. These values can help you determine how farbehind the applications each process is running.In every audit trail, there are different timestamps that are observed by the extractor readingthat trail. The RTD value of an extractor corresponds to the difference between the lastmodification timestamp of the latest audit trail file in the audit trail being read by the extractorand the latest timestamp that extractor encountered within the audit trail. The extractor alsostores the latest timestamp taken from the audit trail in each audit record, which is thendefined as an image record.
114 Operating and Monitoring RDF

The receiver RTD time virtually always mirrors that of the extractor sending to it. The onlytime it varies is during a receiver restart condition. The value of this RTD time has to a largepart become obsolete, but it continues to be displayed for long standing continuity witholder RDF releases.The RTD value reported for each updater process is the difference between the “last modifiedtime” of the latest file in the audit trail to which the volume protected by the updater isconfigured and the timestamp from the latest image record that the updater has read.The RTD value reflects, in the most general sense, the amount of time by which the backupdatabase is behind the primary database. In the example shown earlier in this commanddescription, the specified RTD time for the updater $RUPD1 is 0 minutes and 6 seconds,meaning that the updater is running approximately 6 seconds behind the MAT on theprimary system. On a finely tuned RDF backup node, the RTD for an updater can typicallyvary between 1 and 20 seconds behind TMF processing.
NOTE: As can be seen from the discussion above, RTD times are not precise. They representa general figure of how far the updater might be behind. In this sense they have value, butthey should not be taken as precision indicators of how far an RDF process has fallen behind.Further, they do not at all reflect how long it will take the RDF process to catch up. Forexample, an extractor that shows it is 30 minutes behind may only take 15 seconds to catchup. Updaters typically show RTD times that cycle from 0 to 20 seconds, but it typically takesan updater a fraction of one second to catch up and show an RTD time of 0:00 before it startsto cycle back up to 15-20 seconds.
• Pri specifies the priority at which each process is running.• Volume and Seqnce together specify a file associated with each process:
The monitor entry reflects the name of the MAT file to which TMF is writing($AUDIT.ZTMFAT.AA000056 in this example).Each extractor entry reflects the name of the TMF audit trail file that it is reading($AUDIT.ZTMFAT.AA000056 for the master extractor and $DATA17.ZTMFAT.BB000004for the auxiliary extractor in this example).The master receiver entry reflects the name of the master image trail file($MIT.RDF04.AA000044) to which it is writing. Please note that only TMF and RDF controlrecords are written to the master image trail (MIT).The image trail entries reflect names of the secondary image trail files to which thecorresponding receiver has written image data (the master receiver writes MAT-based imagerecords to $IMAGE0.RDF04.AA000022 and the receiver $RRCV1 writes to AUX01-basedimage records to $IMAGEA1.RDF04.AA000003 in this example).Each updater entry reflects the name of the secondary image file from which it is reading($IMAGE0.RDF04.AA000022 for $RUPD1, $IMAGEA1.RDF04.AA000004 for $RUPD2, and$RUPD3 in this example).
• Rel Byte Addr specifies where in the specified file the particular process is either writing(receivers) or reading (extractors and updaters).
• Cpus specifies the CPUs in which each process pair is running.• Error lets you know if a process has experienced an error. If the column is blank, no error
has occurred. If the column for an updater contains asterisks (****), the updater hasexperienced a critical error. If the updater is doing an undo pass, the word undo appears inthe Error column. If RDFCOM cannot reach a particular process, the Error column for thatprocess contains the applicable file-system error number that RDFCOM encountered whenattempting to send to that process.The occurrence of a critical error could mean that the backup database is no longersynchronized with the primary database because of data loss. If asterisks appear in the Error
Performing Routine Operational Tasks 115

column for any RDF process, you should examine the messages in the RDF log file or onthe RDF log device to determine what is happening and what corrective action to take.Except for updaters, asterisks in the Error column continue to appear in every STATUSRDF display until the error condition has been corrected.For updaters, the asterisks disappear when the error is corrected and updating is restartedafter execution of any of the following commands:STOP UPDATESTOP RDFSTOP TMF
Although the occurrence of a critical error might mean that the primary and backup databasesare no longer synchronized with one another, that is not always the case. If, for example, theprimary CPU of the disk process goes down, all updater processes affected by that error conditionreport a file-system error and then attempt to restart. If the error does not occur again when theaffected updater processes restart, the databases are probably still synchronized with one another.In that case, the asterisks are cleared from subsequent STATUS RDF displays.For more information on critical errors, you can scan the EMS collectors on the primary andbackup systems:• The EMS collector on the primary system contains log messages for the extractor and monitor
processes.• The EMS collector on the backup system contains log messages for the receiver, purger, and
all updater processes.When RDF is not running, the STATUS RDF report indicates why. For example, the report mightindicate that the subsystem has never been started, or that it has crashed. The report also indicateswhere processing resumes in the TMF audit trail when RDF is restarted.When the BREAK key is pressed while the STATUS RDF command is executing with the PERIODoption (which requests repeated displays at a specified interval), the break takes effect withinone second rather than waiting until the end of the current interval.
Using RDF Status Data to Control TMF Audit DumpingYou can use the STATUS RDF command to determine when the RDF extractor has finishedprocessing the audit file that TMF wants to dump. The TMF/RDF trail listed for the extractor inthe STATUS RDF display indicates the TMF audit trail file that the RDF extractor is currentlyprocessing.Approximately 30 seconds after the STATUS RDF display shows that the extractor’s sequencevalue is greater than the number of the audit trail that TMF wants to dump, it is safe to mountthe tape and let TMF dump the audit trail if one is dumping to tape and not to disk.
Changing Configuration AttributesAfter RDF starts, you can change the following configuration attributes online as the need arises:• The priority at which each RDF process runs• The EMS log• RETAINCOUNT• PURGETIME (altering this attribute causes the purger to perform a purge pass immediately)• UPDATERDELAY• UPDATEROPENThese are the only configuration attributes that can be altered while RDF is running. To changeany other configuration attributes, you must first stop RDF or UPDATING as directed in“Restarting RDF” (page 136).
116 Operating and Monitoring RDF

To change any of the attribute values listed above, you start RDFCOM and use the ALTERcommand. ALTER is a restricted command; it can be issued only by members of the super-usergroup. See the description of the ALTER command in Chapter 8 (page 187).
Process PriorityAll configured RDF processes should run at a priority greater than that of any application process.Furthermore, the RDF processes should run at priorities relative to one another:• On the primary system, the monitor and extractor processes can run at the same priority
but it is recommended that you set the extractor’s priority slightly lower than that of themonitor.
• On the backup system, the receiver process should run at a higher priority than any updaterprocess.
The STATUS RDF display shows the priority at which each RDF process is running. Supposethis display indicates that the monitor currently runs at a priority of 165. To change its priorityto 170, use the ALTER command:]ALTER MONITOR PRIORITY 170
EMS Logs (Collectors)In an RDF configuration, two EMS logs (collectors) exist: one at the primary system and the otherat the backup system. The log on the primary system is used by the monitor, RDFCOM, andextractor and RDFNET processes. The log on the backup system is used by the receiver, updater,and purger processes.To redirect messages from the current EMS log to the log named $EMSC (on the control subvolumeCHICAGO), enter:]ALTER RDF LOGFILE $EMSC
The specified collector must reside on the local system. For example, if you are in an RDFCOMsession on the system \SANFRAN, you cannot specify something like \CHICAGO.$EMSC asthe log.For more information about the EMS log, see Chapter 1 (page 31), Chapter 3 (page 69), Chapter 8(page 187), and Chapter 9 (page 261).
RETAINCOUNTThe RETAINCOUNT purger process configuration attribute specifies how many image trail filesmust be retained on disk for each image trail.
PURGETIMEThe PURGETIME purger process configuration attribute specifies the number of minutes thepurger process waits between attempts to purge redundant image trail files. Altering this attributecauses the purger to perform a purge pass immediately.
UPDATERDELAYThe UPDATERDELAY global configuration attribute specifies how many seconds the updaterprocesses should delay upon reaching the logical EOF in the image trail before attempting a newread.
UPDATEROPENThe UPDATEROPEN global configuration attribute specifies how the updaters open databasefiles. By default it is PROTECTED, but PROTECTED OPEN and SHARED are alternatives. Seethe discussion on UPDATEROPEN in Chapter 3 “Installing and Configuring RDF”. When youchange UPDATEROPEN online, the updater closes all its files and then restarts using the newUPDATEROPEN attribute.
Performing Routine Operational Tasks 117

Reading Log MessagesRDF messages are sent to the EMS log (collector) specified during RDF configuration.If RDF encounters an error while attempting to open or send a message to the configured log,RDF takes the following actions:1. RDF writes either of the following messages to the local $0 process:
"705 File Open Error error# filename""700 File System Error error# filename"
2. RDF then closes the log (if it is open). The log remains as configured.The next time RDF needs to write a message to the log, RDF attempts to reopen the configuredlog. If the error condition persists, RDF repeats the steps just described.
Examining RDF MessagesRDF/IMP and IMPX direct their command, event, warning, and error messages to an EMScollector in the form of fully-tokenized messages.You can peruse messages in the EMS log on your terminal screen by using Viewpoint or whateverother tool you normally use for monitoring $0. When you do this, you are dealing with the entireEMS log (not just RDF messages).Each RDF event has Cause, Effect, and Recovery text associated with it. You can view this textfrom the EMS collector's interface, or you can enter HELP and the RDF event number to anRDFCOM prompt. For example,] HELP 906
This command returns the following: ----------------------------------------------------------------- | | | 906 Process creation error <nnn> <nnn>,file <file-name> | | | -----------------------------------------------------------------
Cause: The process encountered an error while attempting to create an RDF process. The error fields reported in the message are the error and error detail fields returned by the PROCESS_CREATE_ system procedure followed by the file-name of the program that was to be run.
Effect: The process is not started, and RDF shuts down.
Recovery: Consult the description of the PROCESS_CREATE_ procedure in the Guardian Procedure Calls Reference Manual to determine the cause of the failure. Once the underlying cause is corrected, RDF can be restarted.
To isolate RDF messages from the rest of the EMS log, you can use the standard EMS filterRDFFLTO to produce an intermediate entry-sequenced file which you then can scan using theRDFSCAN utility.As noted earlier in this chapter, when you access RDFSCAN, this utility displays currentinformation about the RDF message file, including the number of the last record. This number,presented in the following format, indicates the size of the message file so you can estimate whereto begin your scanning:File: $SYSTEM.RDF.RDFLOG, current record: 9454, last record: 9466
118 Operating and Monitoring RDF

NOTE: The record numbers reflected by RDFSCAN are approximate and might not exactlymatch the record numbers that would be displayed by a FUP INFO RDFLOG, STAT command.
With RDFSCAN you can specify:• A starting point within the message file• The number of records to retrieve• Text to search for in the message fileRDFSCAN displays those RDF messages that meet the criteria you specify.The following is a sample display for a primary system. (The column numbers in the top line donot appear in the display, and are included only for reference. ) (1) (2) (3) (4) (5) (6)
2004/06/09 16:10:51 \LA $MON1 731 RDF Monitor Started2004/06/09 16:11:08 \LA $Z333 774 RDF Local Extractor Started
The following is a sample display for a backup system. (The column numbers in the top line donot appear in the display, and are included only for reference. ) (1) (2) (3) (4) (5) (6)
2004/06/09 16:11:02 \NYC $Z011 771 RDF Remote Receiver Started2004/06/09 16:11:25 \NYC $Z012 773 RDF Remote Updater Started$LOST -> $BLOST2004/06/09 16:11:32 \NYC $Z013 773 RDF Remote Updater Started$BIG -> $BBIG2004/06/09 16:11:52 \NYC $Z014 773 RDF Remote Updater Started$POPPY -> $BPOPPY
In the preceding displays, the individual columns present this information:
Date-—is the date the message occurred, as reflected on the sending system.(1)
Time—is the time the message occurred, as reflected on the sending system.(2)
System—is the name of the system where the RDF process to which this message pertains is running.(3)
RDF Process—is the name of the RDF process to which the message pertains.(4)
Message Number—is the number that identifies the RDF message and its meaning.(5)
Message Text—is the descriptive text that appears in the message.(6)
The following sample RDFSCAN session shows another example of how you might use RDFSCANto examine messages in an RDF message file. The actual line length for RDFSCAN is 132 columns(not 58 as shown in this example). On the terminal screen, lines over 80 columns long wrap tothe next line. User input appears in boldface type. Notice also that record numbers, which donot appear in the previous display, have been enabled for this one.>RDFSCAN
RDFSCAN - T0346A06 - 14MAR04(C)1988 Tandem (C)2004 Hewlett Packard Development Company, L.P.File: $SYSTEM.RDF.RDFLOG, current record: 891, last record: 903Enter HELP ALL for instructions
Enter the RDFSCAN function you want: AT 750File: $SYSTEM.RDF.RDFLOG, current record: 750, last record: 903
Enter the next RDFSCAN function you want: MATCHEnter pattern to match: *REMOTE*File: $SYSTEM.RDF.RDFLOG, current record: 750, last record: 903, Pattern: *REMOTE*
Performing Routine Operational Tasks 119

Enter the next RDFSCAN function you want: DISPLAY ONFile: $SYSTEM.RDF.RDFLOG, current record: 750, last record: 903, Pattern: *REMOTE*
Enter the next RDFSCAN function you want: LIST 5
Record number: 7512004/06/04 11:20:16 \LAB1 $Z049 771 RDF Remote Receiver StartedRecord number: 7522004/06/04 11:20:26 \LAB1 $Z050 773 RDF Remote Updater Started$LOST -> $BLOSTRecord number: 7562004/06/04 11:20:30 \LAB1 $Z051 771 RDF Remote Receiver StartedRecord number: 7582004/06/04 11:21:46 \LAB1 $Z050 773 RDF Remote Updater Started$INFO -> $BINFORecord number: 7602004/06/04 11:22:33 \LAB1 $Z052 773 RDF Remote Updater Started$POPPY -> $BPOPPYFile: $SYSTEM.RDF.RDFLOG, current record: 761, last record: 903, Pattern: *REMOTE*
Enter the next RDFSCAN function you want: EXIT
Thank you for using RDFSCAN
More information about the RDFSCAN commands and elements shown in this example appearsin Chapter 9 (page 261).
ASAPHP's NonStop ASAP product provides in-depth monitoring of the RDF subsystem. It monitorsthe availability and status of all RDF components and also monitors how RDF is performing, inreal-time and historically. ASAP lets a user set goals on key properties like RTD time and alertswhen goals aren't met using a variety of alerting mechanisms. It also supports automated actionsto recover from common problems without operator intervention.
120 Operating and Monitoring RDF

5 Critical Operations, Special Situations, and ErrorConditions
When running RDF, there are a number of critical operations and situations that need carefulconsideration. Understanding all aspects of these operations and situations is essential.Understanding critical operations ensures that you perform said operations correctly, quickly,and efficiently. Understanding critical situations and error conditions ensures that you achieveresolution as quickly as possible.This chapter, which is directed to both system managers and operators, discusses the followingtopics:• “Recovering From File System Errors” (page 121)• “Handling Disk Space Problems” (page 124)• “Exceeding the Maximum Number of Concurrent File Opens” (page 125)• “Responding to Operational Failures” (page 125)• “Stopping RDF” (page 132)• “Restarting RDF” (page 136)• “Carrying Out a Planned Switchover” (page 136)• “Takeover Operations” (page 139)• “Reading the Backup Database (BROWSE versus STABLE Access)” (page 149)• “Access to Backup Databases with Stable Access” (page 150)• “RDF and NonStop SQL DDL Operations” (page 151)• “RDF and NonStop SQL/MX Operations” (page 153)• “Backing Up Image Trail Files” (page 153)• “TMF and Online Dumps on the Backup System” (page 154)• “Doing FUP RELOAD Operations With Updaters Running” (page 155)• “Exception File Optimization” (page 155)• “Switching Disks on Updater UPDATEVOLUMES” (page 155)• “Online Remirroring of Updater SUBVOLUMES” (page 156)
Recovering From File System ErrorsAll RDF processes can encounter file system error conditions. If it is RDFCOM, it reports an errormessage that includes the file system error in the RDFCOM Outfile. For any other RDF process(the monitor, the extractor, the receiver, the purger, the updater, or RDFNET), an RDF event isgenerated in the EMS event log, and this event includes the specific file system error and anyadditional information that is available. Of particular importance are RDF event messages 700,705, and 739. As an example, file-system error 59 appears in the following RDF event message705:10:59 \RDF05 $WU02 705 File open error 59 on $DATA07.QD004378.RFILE02
Table 5-1, 5-2, and 5-3 list the most common file system error numbers you might encounter andeach entry provides an appropriate recovery action. For every error condition reported byRDFCOM as well as for any RDF event, you are also given a detailed explanation of the cause,effect, and recovery action, and these are all listed in Appendix C.To analyze a file system error, see the appropriate table in this discussion, reading about anycorrective action specific to RDF. Then, for further information about the error (its cause, effect,and general recovery procedures), see the file-system information in theGuardian Procedure Errorand Messages Manual.
Recovering From File System Errors 121
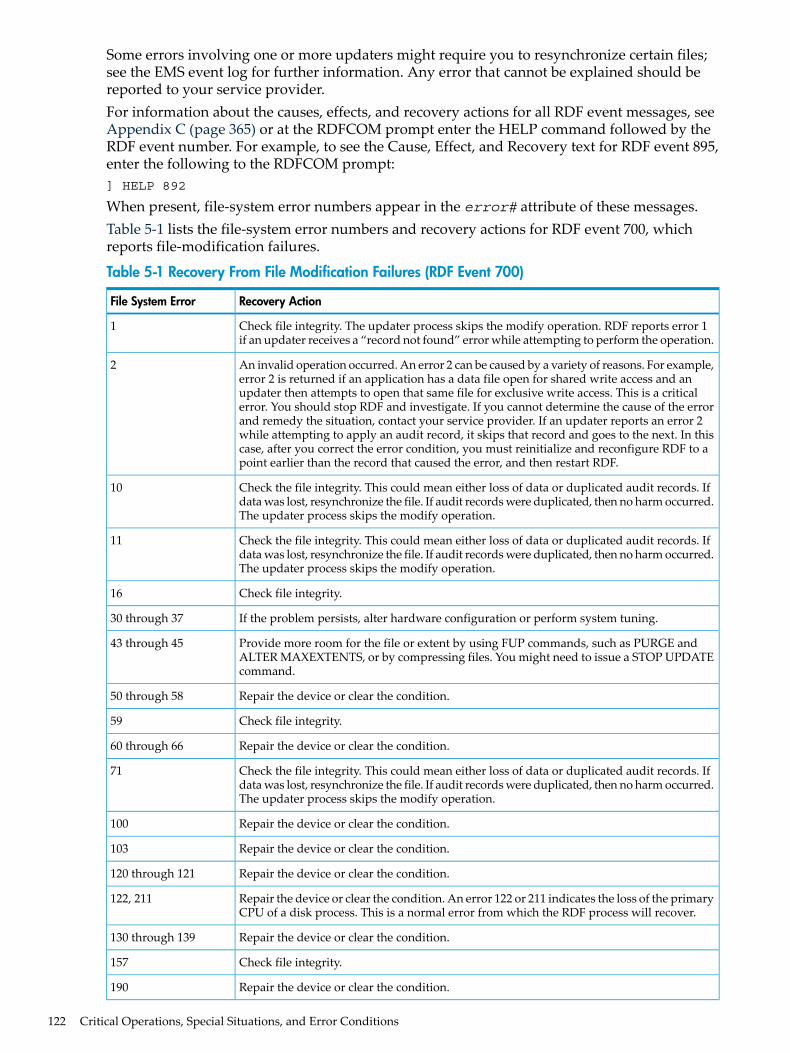
Some errors involving one or more updaters might require you to resynchronize certain files;see the EMS event log for further information. Any error that cannot be explained should bereported to your service provider.For information about the causes, effects, and recovery actions for all RDF event messages, seeAppendix C (page 365) or at the RDFCOM prompt enter the HELP command followed by theRDF event number. For example, to see the Cause, Effect, and Recovery text for RDF event 895,enter the following to the RDFCOM prompt:] HELP 892
When present, file-system error numbers appear in the error# attribute of these messages.Table 5-1 lists the file-system error numbers and recovery actions for RDF event 700, whichreports file-modification failures.
Table 5-1 Recovery From File Modification Failures (RDF Event 700)
Recovery ActionFile System Error
Check file integrity. The updater process skips the modify operation. RDF reports error 1if an updater receives a “record not found” error while attempting to perform the operation.
1
An invalid operation occurred. An error 2 can be caused by a variety of reasons. For example,error 2 is returned if an application has a data file open for shared write access and anupdater then attempts to open that same file for exclusive write access. This is a criticalerror. You should stop RDF and investigate. If you cannot determine the cause of the errorand remedy the situation, contact your service provider. If an updater reports an error 2while attempting to apply an audit record, it skips that record and goes to the next. In thiscase, after you correct the error condition, you must reinitialize and reconfigure RDF to apoint earlier than the record that caused the error, and then restart RDF.
2
Check the file integrity. This could mean either loss of data or duplicated audit records. Ifdata was lost, resynchronize the file. If audit records were duplicated, then no harm occurred.The updater process skips the modify operation.
10
Check the file integrity. This could mean either loss of data or duplicated audit records. Ifdata was lost, resynchronize the file. If audit records were duplicated, then no harm occurred.The updater process skips the modify operation.
11
Check file integrity.16
If the problem persists, alter hardware configuration or perform system tuning.30 through 37
Provide more room for the file or extent by using FUP commands, such as PURGE andALTER MAXEXTENTS, or by compressing files. You might need to issue a STOP UPDATEcommand.
43 through 45
Repair the device or clear the condition.50 through 58
Check file integrity.59
Repair the device or clear the condition.60 through 66
Check the file integrity. This could mean either loss of data or duplicated audit records. Ifdata was lost, resynchronize the file. If audit records were duplicated, then no harm occurred.The updater process skips the modify operation.
71
Repair the device or clear the condition.100
Repair the device or clear the condition.103
Repair the device or clear the condition.120 through 121
Repair the device or clear the condition. An error 122 or 211 indicates the loss of the primaryCPU of a disk process. This is a normal error from which the RDF process will recover.
122, 211
Repair the device or clear the condition.130 through 139
Check file integrity.157
Repair the device or clear the condition.190
122 Critical Operations, Special Situations, and Error Conditions

Table 5-1 Recovery From File Modification Failures (RDF Event 700) (continued)
Recovery ActionFile System Error
Repair the device or clear the condition.200 through 231
Enable the volume for TMF transaction processing.707
Table 5-2 lists the file-system error numbers and recovery actions for RDF event 705, whichreports file-opening failures.
Table 5-2 Recovery From File Open Failures (RDF Event 705)
Recovery ActionFile System Error
Resynchronize the file. The updater process skips the open operation.11
Issue a FUP LISTOPENS command for the file and stop applications that have the file open.12
Repair the device or clear the condition.14
If the problem persists, alter the hardware configuration or perform system tuning.30 through 37
Alter the security (probably Safeguard).48
Repair the device or clear the condition.50 through 58
Check file integrity.59
Repair the device or clear the condition.60 through 66
Repair the device or clear the condition.100
Repair the device or clear the condition.103
Repair the device or clear the condition.120 through 121
Repair the device or clear the condition.130 through 139
Check file integrity.157
Repair the device or clear the condition.190
Alter the security (probably Safeguard).199
Repair the device or clear the condition.200 through 231
Table 5-3 lists the file-system error numbers and recovery actions for RDF event 739, whichreports file-creation failures.
Table 5-3 Recovery From File Creation Failures (RDF Event 739)
Recovery ActionFile System Error
The file already exists. Purge the old one.10
Repair the device or clear the condition.14
If the problem persists, alter the hardware configuration or perform system tuning.30 through 37
Provide more room for the file or extent by using FUP commands, such as PURGE andALTER MAXEXTENTS, or by compressing files. You might need to issue a STOP UPDATEcommand.
43 through 45
Alter the security (probably Safeguard). If an updater fails to create a data file on a backupvolume because of a security violation, it logs this error and restarts with this file-creationimage until you change the security.
48
Repair the device or clear the condition.50 through 58
Check file integrity.59
Recovering From File System Errors 123
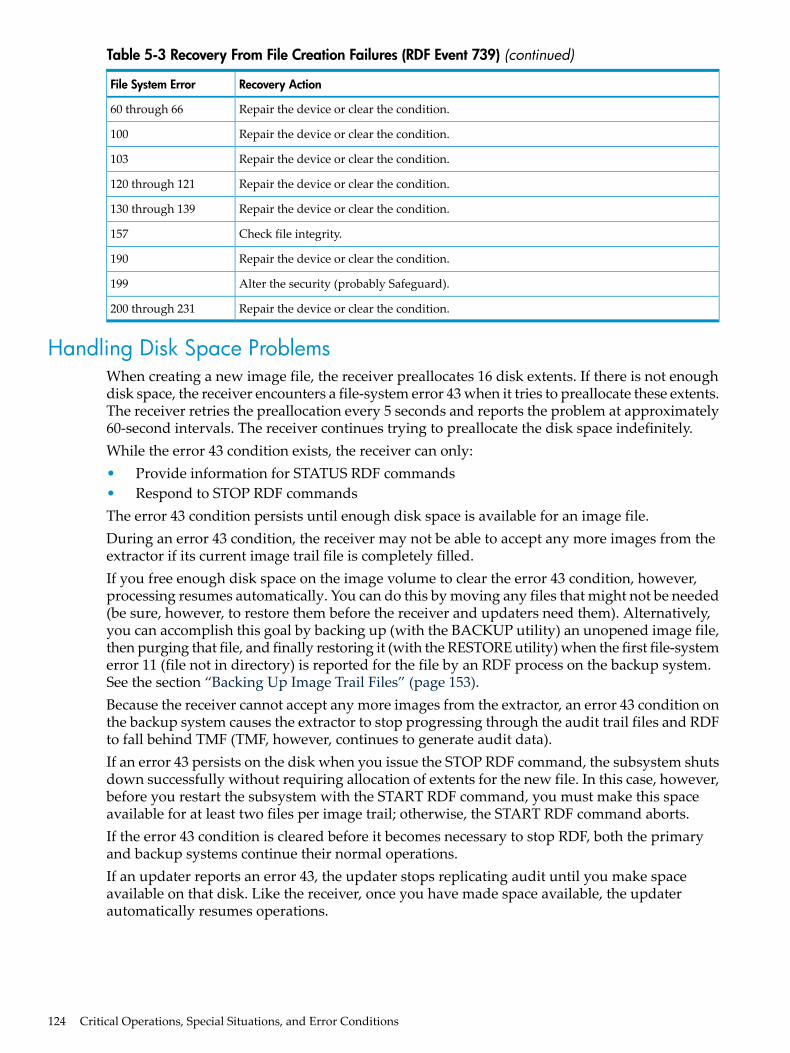
Table 5-3 Recovery From File Creation Failures (RDF Event 739) (continued)
Recovery ActionFile System Error
Repair the device or clear the condition.60 through 66
Repair the device or clear the condition.100
Repair the device or clear the condition.103
Repair the device or clear the condition.120 through 121
Repair the device or clear the condition.130 through 139
Check file integrity.157
Repair the device or clear the condition.190
Alter the security (probably Safeguard).199
Repair the device or clear the condition.200 through 231
Handling Disk Space ProblemsWhen creating a new image file, the receiver preallocates 16 disk extents. If there is not enoughdisk space, the receiver encounters a file-system error 43 when it tries to preallocate these extents.The receiver retries the preallocation every 5 seconds and reports the problem at approximately60-second intervals. The receiver continues trying to preallocate the disk space indefinitely.While the error 43 condition exists, the receiver can only:• Provide information for STATUS RDF commands• Respond to STOP RDF commandsThe error 43 condition persists until enough disk space is available for an image file.During an error 43 condition, the receiver may not be able to accept any more images from theextractor if its current image trail file is completely filled.If you free enough disk space on the image volume to clear the error 43 condition, however,processing resumes automatically. You can do this by moving any files that might not be needed(be sure, however, to restore them before the receiver and updaters need them). Alternatively,you can accomplish this goal by backing up (with the BACKUP utility) an unopened image file,then purging that file, and finally restoring it (with the RESTORE utility) when the first file-systemerror 11 (file not in directory) is reported for the file by an RDF process on the backup system.See the section “Backing Up Image Trail Files” (page 153).Because the receiver cannot accept any more images from the extractor, an error 43 condition onthe backup system causes the extractor to stop progressing through the audit trail files and RDFto fall behind TMF (TMF, however, continues to generate audit data).If an error 43 persists on the disk when you issue the STOP RDF command, the subsystem shutsdown successfully without requiring allocation of extents for the new file. In this case, however,before you restart the subsystem with the START RDF command, you must make this spaceavailable for at least two files per image trail; otherwise, the START RDF command aborts.If the error 43 condition is cleared before it becomes necessary to stop RDF, both the primaryand backup systems continue their normal operations.If an updater reports an error 43, the updater stops replicating audit until you make spaceavailable on that disk. Like the receiver, once you have made space available, the updaterautomatically resumes operations.
124 Critical Operations, Special Situations, and Error Conditions

Exceeding the Maximum Number of Concurrent File OpensThe maximum number of audited files a single updater can have concurrently open is 3,000. Ifyou have more than 3,000 audit files being replicated by a single updater, then it is possible thatthe updater associated with the volume may report RDF event 813 - "Concurrent file opensexceeds capacity". This happens if the updater has 3,000 files open and it must open a new file.Should this occur, the updater immediately generates the RDF event 813, commits its currenttransaction, closes all files, and restarts, which generates RDF event 837. When it restarts, itresumes processing image audit at the audit record for the file that caused the problem. In thissense, the problem is self-correcting, it does not impact updater performance, and it is safe foryou to have more than 3,000 audited files on the volume. The danger comes when you have morethan 3,000 audited files on the volume and all of them need to be updated every 6-10 minuteson a regular basis. If this happens regularly over a period of time, then it could cause the purgerto stop purging files.When this situation occurs, you must stop RDF as soon as possible and rebalance the number ofaudited files on the primary and backup volume of the affected updater so that you have nomore than 3,000 audit files on that volume. When RDF has been stopped and you have rebalancedthe audit files, then reinitialize and reconfigure RDF using the INITTIME option. See “InitializingRDF Without Stopping TMF (Using INITTIME Option)” (page 80).If the above problem occurs, the purger has stopped purging files, and you are unable to stopRDF to rebalance the number of audited files on the volume, you can try lowering the durationof the updater's transaction to the minimum value of 10 seconds as a short term workaround. Ifthis does not correct the problem, then the easiest way to correct the problem is to suspend theextractor on the primary system for 10 minutes. If you have RDF/ZLT protection, then you arenot at risk of losing any data if your primary system should fail while the extractor is suspended.If you do not have RDF/ZLT protection, then you are vulnerable to loss of data to an unplannedoutage of your primary system from the point where you suspend the extractor to the pointwhere the extractor has caught up after you have activated it, but this workaround will allowthe purger to purge files.If suspending the extractor is not acceptable, then use the following steps to resolve the problemfor the short term:1. Do status RDF to get the name of the latest image file on the image trail of the updater
generating the 813 events.2. Stop RDF3. Restart RDF with UPDATE OFF; this causes the receiver to rollover to a new image file on
each image trail.4. After one minute, STOP RDF again5. Restart RDF with UPDATE OFF; this causes the receiver to rollover to a new image file on
each image trail.6. On the image trail for the updater generating the 813 events, move the next file in sequence
(the one after the file identified in step 1) to a different subvolume. For example, if the updateris reading file AA000100, then move AA000111.
7. Move the file moved in the previous step back to the image trail.Remember that all of this can be avoided by keeping your audit files balanced so that you donot have more than 3,000 on any single RDF-protected volume.
Responding to Operational FailuresRDF can recover from any of the following events, as described in detail in the following pages:• Communications line failure on the primary or backup system• System failure that does not require an RDF Takeover operation• Processor failure on the primary or backup system
Exceeding the Maximum Number of Concurrent File Opens 125

• Failure of a TMF audited volume on the primary system• TMF subsystem failure after which the TMF volume recovery is successful• TMF file recovery operation on the primary system that is not to a timestamp, first purge,
or TOMATPOSITION position.• TMF ABORT TRANSACTION with the AVOIDHANGING option on the primary systemRDF cannot recover from the following events:• TMF file recovery operation to a timestamp, first purge, or TOMATPOSITION on the primary
system.• TMF subsystem failure after which TMF cannot perform a successful volume recovery
operationAfter a TMF file recovery to a timestamp, first purge, or TOMATPOSITION, or after a TMFsubsystem failure for which volume recovery cannot succeed, the databases or the affected fileson the primary and backup systems must be resynchronized.
Communication Line FailuresRDF can recover from communication line failures. When the extractor detects that acommunication line to the backup system is down, it reports the error to the EMS event log. Theextractor attempts to resend data every minute until the line to the backup system is reenabled.Unless you are running the ZRDF/ZLT product, the failure of the communications line will leadto the loss of committed transactions if you also lose your primary system and you must performan RDF Takeover operation before the extractor was able to catch up. This risk is eliminated withthe RDF/ZLT product and a proper configuration for CommitHold. For further details see, “ZeroLost Transactions (ZLT)” (page 337).If you stop RDF on the primary system when the communication line to the backup system isdown, the monitor tries to send a stop message to the processes on the backup system and reportsthat the line is down. All of the processes on the backup system continue to run until a STOPRDF command is issued at the backup system.
NOTE: If you issue a STOP RDF command on the primary or backup system while the networkis down, you must also issue a STOP RDF command on the other system while the network isstill down.
If you have an RDF network running and the Network Master's RDFNET process encounters acommunications line failure when attempting to perform a network transaction on anotherprimary node in the RDF network, then it can lead to an increase in work to be performed duringan RDF Takeover operation. Once the comm line comes back up and the RDFNET process canresume its network transactions, that need for increased takeover work is eliminated.
System FailuresIf you lose your primary system and you can recover it without having to perform an RDFTakeover operation, then no special recovery is required for RDF. When you have restarted yourprimary system, then restart RDF before you restart your applications.If you lose your primary system and you need to restart you applications as quickly as possible,then perform the RDF Takeover operation on your backup system. Details of the various tasksyou need to do after the RDF Takeover are provided further below. Additionally, if you caneventually recover your primary system, a discussion is also provided further below on howyou can recover the database on that system and bring it into synchronization with the databaseon your backup system where your applications are now running.If you lose your backup system, you only need to recover it and then restart RDF on your primarysystem as quickly as possible. If the communications line to your backup system has sufficientbandwidth, then RDF can catch up very quickly.
126 Critical Operations, Special Situations, and Error Conditions

Processor FailuresAll RDF processes other than RDFCOM run as process pairs. If a CPU failure causes a primaryRDF process to fail, the backup process takes over without interruption in service.If any RDF process pair stops unexpectedly, the monitor sends abort messages to the other RDFprocesses in order to bring about an orderly shutdown of RDF. You can then restart the subsystemby merely issuing a START RDF command.
NOTE: If the monitor process pair unexpectedly stops (for example, as in a double CPU failure),you must stop the other RDF processes manually and then restart the subsystem. The easiestway to do this is to issue a series of commands of the following form: STATUS *,PROGRDF-software-loc.procname, STOP.
The subtopics that follow discuss how RDF responds to extractor, receiver, updater, and RDFstate transition failures.
Extractor FailureAlthough the extractor runs as a process pair, the primary process does not maintain restartinformation nor checkpoint this information to its backup. Instead, the receiver maintains allrestart information for the extractor, ensuring that the extractor is restartable. The restart pointis based on the audit trail position of the last record stored in the image trail on the backupsystem.If the extractor process pair inadvertently stops, you can (as stated above) restart the RDFsubsystem by merely issuing a START RDF command.
CAUTION: During the interval between loss of the extractor and RDF subsystem restart, youshould not add any disk volumes to the RDF configuration (with the ADD VOLUME command).
If the primary CPU of the extractor process fails, the backup extractor process requests from thereceiver a new starting position in the audit trail, ensuring a correct restart position. Thisextractor-receiver protocol also provides protection against messages from the extractorerroneously arriving out-of-order: if a message arrives out-of-order, the receiver simply directsthe extractor to restart.When the CPU that failed comes back up, RDF switches the extractor to run on the reactivatedprimary CPU.If both the primary and backup CPUs of the extractor process fail, RDF aborts.
Receiver FailureIf the primary CPU of the receiver process fails, the receiver process in the backup CPU takesover and resynchronizes with the extractor process. The extractor process might have to resendaudit data that was generated several seconds earlier. When the CPU that failed comes back up,RDF switches the receiver to run on the reactivated primary CPU.If both the primary and backup CPUs of the receiver process fail, RDF aborts.
Updater FailureIf the primary CPU of an updater process fails, the corresponding updater process in the backupCPU takes over.If the primary CPU of an updater process fails and then comes back up, RDF does not switchthe updater to run on the reactivated primary CPU. Instead, once the backup updater takes over,it becomes (and remains) the new primary process. If you subsequently stop and then restartupdating, however, the original CPU configuration for this updater process is restored.If both the primary and backup CPUs of an updater fail, RDF aborts.
Responding to Operational Failures 127

Purger FailureIf the primary CPU of the purger process fails, the purger process in the backup CPU takes over,the current PURGETIME interval is aborted, and a new PURGETIME interval is started. Whenthe CPU that failed comes back up, RDF switches the purger to run on the reactivated primaryCPU.If both the primary and backup CPUs of the purger process fail, RDF aborts.
RDFNET FailureIf the primary CPU of the RDFNET process fails, the RDFNET process in the backup CPU takesover. When the CPU that failed comes back up, RDF switches the RDFNET process to run onthe reactivated primary CPU.If both the primary and backup CPUs of the RDFNET process fail, RDF aborts.
RDF State Transition FailurePeriods during which RDF or the updating process is either starting or stopping are known asRDF state transitions. In rare instances, when a primary CPU fails while RDF is either startingor stopping, it is possible that not all processes complete the stop or start operation.To minimize the chance of encountering this kind of failure, avoid CPU reloads during RDF statetransitions. Furthermore, if a CPU failure does occur during a state transition, carefully reviewthe EMS event log for signs of incorrect behavior. If the failure occurred while RDF or the updatingfacility was stopping, check the Process Pair Directory (PPD) to ensure that the appropriate RDFprocesses all have stopped; if they have not, you must stop them manually.If a state transition failure occurs during execution of a STOP RDF command and the operationappears to be stalled, manually stop all of the RDF processes by issuing the following commandon both the primary and backup system:STATUS *, PROG RDF-software-loc.*, STOP
For example,STATUS *, PROG $SYSTEM.RDF.*, STOP
If a state transition failure occurs during execution of a STOP UPDATE command and theoperation appears to be stalled, manually stop all of the RDF updaters by issuing the followingcommand on the backup system:STATUS *, PROG RDF-software-loc.RDFUPDO, STOP
CAUTION: Issuing this command in this situation is only safe, however, if this is the backupsystem for a single RDF environment.
Problems Involving TMF
TMF Audited Volume FailureRDF can recover from a failure of a TMF audited volume on the primary or backup system. Ifthe volume is successfully recovered by volume recovery, then you do not have to perform anyspecial RDF procedures.
TMF Subsystem Failure on the Primary SystemRDF can recover from a TMF failure on the primary system if the TMF volume recovery operationis successful after the failure. To perform this recovery:1. Stop RDF on the primary system by entering the following command through RDFCOM:
]STOP RDF
2. Restart TMF by entering the following command sequence through TMFCOM:
128 Critical Operations, Special Situations, and Error Conditions

~DISABLE DATAVOLS *~START TMF
Notice that these commands prevent any disk volumes on the local system from beingenabled for TMF operations before starting the subsystem.
3. Reenable all pertinent disk volumes for TMF operations by entering the following commandthrough TMFCOM:~ENABLE DATAVOLS *
When this command is executed, TMF performs its volume recovery operation on the auditedvolumes, and RDF reads the audit during this operation.
4. Restart RDF through RDFCOM by entering:]START RDF
NOTE: Normally you start RDF before starting your applications. If the TMF subsystemhas crashed on the primary system, however, characteristics of the TMF audit trail after theTMF subsystem is restarted require that you restart your applications before restarting RDF.This allows audit records to be generated in the MAT and any auxiliary audit trails involvedin your RDF environment. At that point you restart RDF.If you started RDF before starting your applications, you might notice that the auxiliaryextractor continues to read the same data over and over again without moving forward. Tocorrect that situation, you merely stop and then restart the RDF subsystem.
5. Restart your applications.
TMF Subsystem Failure on the Backup SystemRDF can recover from a TMF failure on the backup system if the TMF volume recovery operationis successful after the failure. To perform this recovery:1. From the primary system, stop updating of the backup database by entering this command
through RDFCOM:]STOP UPDATE
2. Correct the problem on the backup system and recover the volume.3. From the backup system, restart TMF on the backup system by entering this command
through TMFCOM:~START TMF
4. From the primary system, resume updating of the backup database by entering this commandthrough RDFCOM:]START UPDATE
Volume Recovery Processing
RDF handles volume recovery automatically.
Volume Recovery Failure
RDF cannot recover from a TMF subsystem failure if TMF cannot successfully perform volumerecovery. After the TMF failure has been resolved, you must perform the following tasks:1. Resynchronize the primary and backup databases, following procedures explained in
Chapter 6 (page 157) and Chapter 7 (page 167).2. Reinitialize RDF.
Responding to Operational Failures 129

File Recovery on the Primary SystemA file recovery operation occurs whenever a TMFCOM RECOVER FILES command is issued atthe primary system. A simple file recovery operation does not affect RDF nor does it requiredatabase synchronization. A file recovery operation to a timestamp or a first purge, however,does require you to stop RDF, reinitialize, and resynchronize the affected files.The file recovery TOMATPOSITION is a special usage that achieves synchronization itself. Ifyour RDF primary system has failed, you have executed an RDF takeover operation on yourbackup system without RDF/ZLT, and you have subsequently brought your primary systemback online, you can resynchronize the database on your recovered primary system with filerecovery TOMATPOSITION. When the takeover has completed on your backup system, RDFnormally logs an RDF event 888. This event provides you with a master audit trail sequencenumber and relative byte address that you can use for file recovery TOMATPOSITION on yourrecovered primary system. The result of this operation puts the database on your primary systeminto synchronization with the database on your backup system at the time when the takeoveroperation completed. If you started application processing on your backup system after thecompletion of the takeover operation, you then need to configure a new RDF subsystem toreplicate all changes made to the database on your backup system to the database on your primarysystem.
WARNING! File Recovery with TOMATPOSITION should only be used when recovering yourprimary system after an RDF Takeover operation on your backup system. If you use theTOMATPOSITION for any other reason, it will require database synchronization just like FileRecovery to a timestamp or first purge.
File Recovery on the Backup SystemYou are encouraged to take online dumps on your backup database on a regular basis for thefollowing reasons:• If you have lost your primary system and have taken over on your backup system, the online
dumps can be used for any type of file recovery operation provided the redo end point islocated after all audit data that was generated during the RDF takeover. For example, a filerecovery to a timestamp must be to a timestamp after the time when the RDF takeovercompleted.
• If RDF is running from your primary to your backup system and you lose one or more diskson your backup system, you should stop the RDF updating, perform a simple file recoveryon the backup system to recover the files on the affected disks, and then restart RDF updating.
You should not perform a file recovery to a timestamp, first purge, or TOMATPOSITION onyour backup system if the location occurs prior to an RDF takeover location. Those file recoveryoperations normally are used to recover a database that has been corrupted.Under normal circumstances, the best way to recover the backup database is to resynchronizeit with your primary database. Because that can involve significant time and effort, you shouldconsider using the following method instead (assume that the system clocks on the primary andbackup systems are set to the same time):• Stop RDF.• Perform file recovery to a timestamp on the backup system.• Determine the duration of the longest running transaction on your primary system. Subtract
this amount of time from the time used for the start of the file recovery operation. If youdon't know the duration of the longest transaction, it is better to overestimate than tounderestimate (use an arbitrary number, such as 10 minutes). There is nothing wrong withinitializing RDF to a point further back in time than is necessary.
130 Critical Operations, Special Situations, and Error Conditions

• On the primary system, reinitialize RDF with the INITTIME option, specifying the calculatedtimestamp from the above step.
• Restart RDF.When the updaters have caught up with transaction activity on the primary system, the backupdatabase is once again synchronized with your primary database.
TMFCOMABORT TRANSACTIONWith AVOIDHANGINGOption on Primary SystemUnder some circumstances, the TMF Backout process on the primary system is not able to backout transactions from a data file (for example, hung transactions). If this situation arises, and ifthe file is protected by RDF, the user should avoid issuing the TMFCOM ABORT TRANSACTIONcommand with the AVOIDHANGING option to abort such transactions. Use of this commandmakes RDF write internal entries into the ZFILEINC file on the backup RDF system, therebystopping the purger from purging old image trail files thereafter. For details about the ZFILEINCfile, see “RDF System Files” (page 362).If possible, the user should try to resolve the cause of the Backout errors first (for example, ALTERMAXEXTENTS of the file if it is an error 45) and then issue TMFCOM ABORT TRANSACTIONwithout any option.If RDF internal entries are written into the ZFILEINC file due to the TMFCOM ABORTTRANSACTION command with the AVOIDHANGING option, then a "brute force" method canbe used to restart the purger activity. That is, perform a PURGEDATA operation on the ZFILEINCfile. This method is to be used only if the user has resolved the hung transactions on the primarysystem without File Recovery or Volume Recovery, and if the transactions associated with entriesin the ZFILEINC file would never need to be undone on the backup system.
CAUTION: If the transaction associated to an RDF internal entry listed in the ZFILEINC fileneeds to be undone as a part of an RDF TAKEOVER operation, then using the above-describedbrute force method might corrupt the database on the backup system. It might also affect theStop-Update-To-Time operations.
Audit Trails Pinned by RDF on the Primary SystemWhen you start RDF, the extractor pins the audit trail file it is currently reading in order to preventTMF from rolling that file over. This operation of pinning the audit trail file by the extractor isparticularly useful if the extractor falls behind for some reason in that it keeps that audit trailfile in place for the extractor, thereby allowing the extractor to resume operations immediatelywhen the cause for it falling behind has been resolved.When the extractor pins an audit trail file, it does this by sending a message to TMF, asking TMFto keep the file pinned until the extractor no longer needs it, so in reality it is TMF who actuallypins the file on behalf of RDF. When the extractor rolls over from one audit trail file to the next,it unpins the earlier file and pins the next file.
NOTE: TMF keeps the extractor's audit trail file pinned even if you stop RDF. This ensures thatthe file is in the audit trail for the extractor when you next start RDF.
If TMF has an audit trail file pinned and it wants to roll over that file, then it generates a TMFevent to indicate that it cannot unpin the file because it is keeping the file pinned on behalf ofRDF. In this event, TMF includes in that event the name of the RDF control subvolume for theRDF subsystem that wants the file pinned. Thus you can always determine which RDF subsystemis holding up TMF.If the extractor has an audit trail file pinned, the extractor is either stopped or stalled for somereason, and this is affecting TMF, there are two ways to unpin the audit trail file.
Responding to Operational Failures 131

1. Issue the RDFCOM UNPINAUDIT command. If you have only one RDF subsystemconfigured on your primary system and the control subvolume is the name of the primarysystem, then this is a simple operation. If, however, you have multiple RDF subsystemsconfigured on the primary system, each with its own set of extractors, then you may needto issue the UNPIN audit command for each RDF subsystem. You do this by startingRDFCOM, and then for each RDF subsystem you issue the OPEN command with the nameof RDF subsystem's control subvolume, and then issue the UNPINAUDIT command. Whenyou have issued the UNPINAUDIT command for each control subvolume, then the file isunpinned by TMF.
2. Issue the STOP TMF command. While stopping RDF does not unpin an audit trail file,stopping TMF does.
There is a special circumstance that has caused trouble for some customers. Assume you arerunning RDF to protect your primary database. Now assume that someone configures a smallRDF test subsystem, starts that test subsystem, stops it, and then deletes the RDF controlsubvolume on the primary and backup systems to eliminate all vestiges of that test subsystem.In doing this, the person performing the test has omitted one critical task - issuing theUNPINAUDIT command for that subsystem before deleting the control subvolume. Why is thisa problem? Remember that when this RDF test subsystem was started, its extractor pinned thecurrent audit trail file, and this file remains pinned even after that RDF subsystem was stopped.To complicate this problem further, the control subvolume was deleted. To recover from thisproblem, recall that TMF generates an event when it cannot unpin a file because of RDF andrecall that the control subvolume for the RDF subsystem that has the file pinned is named in theevent. In this example, however, the control subvolume does not even exist because it was deletedat the end of the test. If you find yourself in this situation, then you must configure an RDFsubsystem with the name of the control subvolume listed in the TMF event. Once you haveconfigured it, you can then issue the RDFCOM OPEN command, specifying this control subvolumeand then issue the UNPINAUDIT command.
CAUTION: To avoid problems like that described immediately above, always be sure that youissue the UNPINAUDIT command before you delete an RDF control subvolume.
Stopping RDFIf the communications lines between the primary and backup systems are up, there are two waysto stop RDF:1. Issue a STOP RDF command on the primary system.2. Issue a TMFCOM STOP TMF command on the primary system. After the RDF updaters
have reached the TMF shutdown record, RDF stops and then TMF stops.If the communications lines between the two systems are down and you want to stop RDF, youmust issue the STOP RDF command on both the primary and backup systems.Stopping RDF leaves the backup database in an inconsistent state and also leaves the audit trailfile last opened by the extractor pinned.
CAUTION: If the primary system crashes, RDF processes on the backup system remain running.If you do not execute a takeover and are able to bring the primary system back up, you muststop the RDF processes on the backup system before you restart RDF on the primary system.While the primary is down issue STOP RDF on backup. Otherwise, issue the following TACLcommand on the backup system: STATUS *, PROG, $SYSTEM.RDF.*, STOP (assuming the RDFSOFTWARELOC is $SYSTEM.RDF).
For each shutdown procedure, the RDF receiver and updater processes write their current contextinformation to the RDF context file before stopping. If you restart but do not reinitialize RDF,the product retrieves the context information from the context file. The context information
132 Critical Operations, Special Situations, and Error Conditions
enables the RDF processes to resume processing where they stopped before the shutdown, unlessan audit trail file that RDF needs has been purged and cannot be restored to disk.
Stopping RDF by Stopping TMFThe reason for stopping RDF by stopping TMF is to ensure that the primary and backup databasesare logically identical when the shutdown is complete (RDF has applied all changes to the backupdatabase). That will be the case, of course, only if all the updater processes stopped at theshutdown record (if an updater experiences a double CPU failure, the databases will not beidentical). The disadvantage of this approach is that all applications on the primary system thatuse TMF must be stopped also.Stopping TMF also automatically unpins all audit trail files that were pinned on behalf of RDF.When you issue a TMFCOM STOP TMF command, the following events occur:1. TMF writes a shutdown record to the MAT. When the master extractor reads the shutdown
record, it notifies the monitor that TMF has stopped.
NOTE: If the extractor process falls way behind TMF because the communications linesto the backup system have been down and come up again, it can take some time for theextractor to get to the TMF shutdown record. The extractor stops processing the audit trailfiles when it cannot communicate with the receiver and resumes processing when thecommunications lines are restored.
2. The master extractor stops as soon as the master receiver replies that it has processed theTMF shutdown record.
3. The RDFNET process (if there is an RDF network) does not wait for any other process tostop; it merely stops when informed to do so.
4. If updating is enabled, each updater process stops when it reaches the TMF shutdown recordin its image trail.
5. The purger stops after all the updaters have stopped.6. The receiver(s) stop when the purger has stopped.7. The monitor stops after all the other RDF processes have stopped.If you stop TMF and then restart it before RDF can read the shutdown record, RDF stops whenit encounters the shutdown record. If that happens, you need to issue a START RDF commandto restart RDF.
NOTE: TMF does not start RDF, which means that if you start TMF, you must then explicitlystart RDF.
If the communications lines are down when you stop TMF, the extractor continues to run, butit will not recognize that TMF is shut down because the extractor does not read the data in theMAT until the extractor can transmit data to the receiver on the backup system. If the extractoris not reading the MAT, it cannot encounter the TMF shutdown message. Two situations couldarise:• If the communications lines come back up before you restart TMF, RDF encounters the
TMFCOM STOP TMF record in the MAT and then stops processing.• If the communications lines are down and you feel you really must stop the RDF system
irrespective of the TMF shutdown record, you must issue the STOP RDF command on boththe primary and backup systems. In this case, RDF stops processing without reading to theTMF shutdown record in the MAT.When you restart TMF, you must then restart RDF. RDF begins processing at the point whereit stopped. When RDF reads the TMF shutdown record associated with the preceding TMFshutdown, RDF shuts down. You must then restart RDF again by issuing another STARTRDF command.
Stopping RDF 133

When you shut down RDF by issuing a TMFCOM STOP TMF command, you can use successiveSTATUS RDF commands to determine when all of the RDF processes have stopped.
Stopping RDF From the Primary SystemWhen you issue the STOP RDF command on the primary system, all RDF processes stopimmediately without processing to the end-of-file mark in the MAT (except the updaters, whichmight continue for a short while to finish up their work in progress).While RDF is running, the database on the backup system is always in an inconsistent statebecause updaters apply audit asynchronously with regard to one another. When you stop RDFby issuing an STOP RDF command, the updaters stop immediately and they leave the backupdatabase in an inconsistent state. This is also true whenever you issue the STOP UPDATEcommand.To stop the RDF and put the primary and backup databases into logically identical states (thedata is the same although the physical structure of the files may differ between primary andbackup), you must execute the following steps:• Issue a TMFCOM DISABLE BEGINTRANS command on the primary system. This command
prevents the applications from initiating any new transactions until you issue a TMFCOMENABLE BEGINTRANS command.
CAUTION: If the starting of new transactions is disabled, applications could abort unlessthey have been coded to handle that situation.
• Issue TMFCOM STATUS TRANSACTIONS commands and wait until the display showsno transactions in progress.
• Issue STATUS RDF commands and wait until all of the RDF Time Delay (RTD) times arezero.
• Issue the STOP RDF command.
NOTE: Even when no TMF transactions are in progress, TMF periodically writes controlpoints to the MAT, which means that the MAT continues to fill even when no applicationactivity occurs. This can cause RTD times in the status display to fluctuate.
For an alternate method of bringing the backup database to a consistent state, see “Access toBackup Databases with Stable Access” (page 150).When you issue a STOP RDF command from the primary system, the following events occur:1. RDFCOM sends a STOP message to the monitor.2. The monitor sends stop messages to the extractor(s), the receiver(s), the purger, the updater(s),
and, if there is an RDF network, the RDFNET process.3. The monitor stops after all RDF processes have stopped.If the communications lines between the two systems are down when you issue the STOP RDFcommand, the monitor tells the extractor to stop and writes an error message for every processrunning on the backup system that the monitor could not access; the monitor then stops itself.If this situation occurs, you must use RDFCOM on the backup system to stop the remaining RDFprocesses before you can restart RDF.
Stopping RDF From the Backup SystemIf you issue a STOP RDF command on the primary system when the communications lines aredown, then you must also do so on the backup system. That is the only time you should everissue a STOP RDF command on the backup system.RDF can recover from a communications line failure, as explained in “Responding to OperationalFailures” (page 125).
134 Critical Operations, Special Situations, and Error Conditions

When you issue a STOP RDF command on the backup system, RDFCOM attempts to contactthe RDF monitor on the primary system. After discovering that the monitor is not accessible,RDFCOM sends individual stop messages to all RDF processes on the backup system.If RDFCOM can contact the monitor on the primary system, the STOP RDF command is aborted.To stop the RDF processes on the backup system, RDFCOM must be able to locate the RDFcontrol subvolume (whose name is the same as that of the control subvolume on the primarysystem). You must explicitly specify the control subvolume name when you start the RDFCOMsession. For example, if the associated primary system is named \DALLAS and you did notspecify a suffix in the INITIALIZE RDF command, start the RDFCOM session on the backupsystem:>RDFCOM DALLAS; STOP RDF
If the associated primary system is named \DALLAS and you specified the suffix “3” in theINITIALIZE RDF command, start the RDFCOM session on the backup system:>RDFCOM DALLAS3; STOP RDF
An alternative way to stop RDF on the backup system is to enter the following command throughTACL:>STATUS *, PROG RDF-software-loc.*, STOP
CAUTION: Issuing this command in this situation is only safe, however, if this is the backupsystem for a single RDF environment.
Stopping RDF Using STOP RDF, DRAINAs stated above, stopping TMF shuts down RDF and it guarantees that the backup database isthen logically identical to the primary database. If, however, you have several differentapplications running on your primary system, each working on its own database, and if not allare protected by the one RDF subsystem, then you may not want to stop TMF just to shutdownthe RDF subsystem. In this situation, you can use the STOP RDF, DRAIN command, but youmust observe the following sequence of steps.1. Stop the application that is updating your RDF-protected database.2. Enter the STOP RDF, DRAIN command.In response to the DRAIN command, the extractor marks its location in the audit trail when itreceives notice of the operation, and the updaters do not shut down until they have processedall audit up to that location. Finally, the purger process generates RDF event 852 to notify youthat the operation has completed. Since your application has previously stopped, your backupdatabase is now logically identical to your primary database that is protected by this RDFsubsystem, and you have not had to stop TMF to get into this state. When you are ready to restartRDF, just enter the START RDF command and it will resume where it left off last.
CAUTION: If you do not stop the application that is updating your RDF protected databaseuntil after you have issued the STOP RDF, DRAIN command, then the backup database has lowprobability of being logically identical to the primary database after RDF shuts down. If thishappens and the application is still down, then just restart RDF and then enter a new STOP RDF,DRAIN command after the Extractor shows an RTD time of 0:00.
Stopping RDF using STOP RDF, REVERSE OperationThis operation is only useful for the special situation involving a switchover operation. See thesection on STOP RDF, REVERSE and the Reverse Trigger further below for a description of whenyou would use this operation.
Stopping RDF 135

Restarting RDFIf you want to restart RDF and have it resume processing where it stopped at the previousshutdown, you can only do so if you have not reinitialized RDF subsystem since the shutdown.Use the START RDF command to restart RDF. RDF automatically starts with UPDATE ON unlessyou explicitly specify UPDATE OFF in the START RDF command.When RDF restarts, it uses the information in the context files to determine where it last stopped,and resumes processing from that point.
NOTE: If you delete and reconfigure TMF, then you must initialize RDF.
Carrying Out a Planned SwitchoverMany businesses run online transaction processing (OLTP) twenty-four hours a day. Stoppingapplications to perform software or hardware upgrades, repairs, or other maintenance can resultin complications and inconvenience for system users. To minimize such planned outages, youcan perform a planned switchover from the primary system to the backup system to keepapplications running while you modify or repair the primary system.Below, the general steps involved in coordinating a switchover of business operations from theprimary to backup system and back are provided. These only address the aspects of the switchoveritself with regard to RDF operation and general business operations. See the section “How toPlan for the Fastest Movement of Business Operations to Your Backup System After Takeover”further below for a variety of considerations on how to achieve the fastest possible switchovertime because the same issues apply, whether you are moving business operations due to aswitchover (planned outage of your primary system) or takeover (unplanned outage of yourprimary system).
Standard ConfigurationsIn a standard RDF configuration (system \A the primary, system \B the backup), the steps forperforming a planned switchover from \A to \B are:1. On system \A, stop the business applications that access the primary database.2. On system \A, issue a STOP TMF command.
TMF stops as soon as all outstanding database transactions are either committed or aborted.It then writes a shutdown record to the MAT. Subsequently, the RDF subsystem shuts downwhen all updater processes on the backup system (\B) have reached the shutdown recordin the image trail file. At this point, the primary and backup databases are identical.
3. On system \B, note the local system time; you will need it later.4. On system \B, restart the business applications.
At this point, the RDF subsystem is stopped, the business applications from system \A arerunning on system \B, and all audit records are being queued in TMF audit trails on system\B.
5. When system \A is ready to resume its normal operations, restart TMF on \A.6. On system \B, issue an INITIALIZE RDF command using the INITTIME option and
specifying the local system time you noted in step 3.This action initializes the RDF extractor on \B so that it cannot miss any relevant auditrecords.
7. On system \B, configure the RDF subsystem to run from \B to \A.8. On system \B, start the RDF subsystem. The RDF subsystem begins replicating database
changes from \B to \A.
136 Critical Operations, Special Situations, and Error Conditions

When the extractor for the new RDF subsystem running from \B to \A reports an RTD time of0:00, then you know that extractor has caught up and you can then prepare for another switchoveroperation to move your application processing back to \A.The planned switchover repeats the procedure described above, except that you reverse the rolesof systems \A and \B. After doing so, RDF replication once again occurs from \A to \B.
Using STOP RDF, REVERSE and the REVERSE TriggerThe STOP RDF, REVERSE command is a special operation that helps you streamline a switchoveroperation to move your business operations from your primary system to your backup systembecause you want to perform maintenance involving only your RDF-protected database and youdo not want to stop TMF. The use of the REVERSE trigger executes the various tasks that youneed to accomplish the switchover. Whereas the discussion immediately above involves stoppingTMF and switching over to the backup system, typically because you want to take down theprimary system for maintenance, you would use the STOP RDF, REVERSE operation if youwanted to leave your primary system up and just switch your business operations involvingyour RDF-protected database to your backup system. For this operation to work correctly, youmust execute the following steps:1. On the primary system, stop the applications that are updating your RDF-protected database.
This is imperative.2. Watch for the extractor's RTD to be 0:00.3. Enter the STOP RDF, REVERSE command.When the extractor receives notice of the operation, it notes where it is in the audit trail and shutsdown, and the updaters shut down as soon as they have reached the equivalent location. Thisis identical to the DRAIN command.Next, RDF automatically executes the REVERSE trigger that you have configured. You wouldwant this trigger to accomplish the same types of actions as the TAKEOVER trigger discussedfurther below in #9 in the section “How to Plan for the Fastest Movement of Business Operationsto Your Backup System After Takeover” (page 144). Unlike with the TAKEOVER trigger, youwould want to include in the REVERSE trigger the RDFCOM commands to configure a newRDF subsystem to run from your former backup system to your former primary system and thenstart that subsystem.
CAUTION: If you fail to stop the application associated with your RDF subsystem in step 1,the probability is high that you will corrupt your backup database. Then, if the REVERSE triggermoves application processing to the backup system and update activity is replicated by RDFback to the original primary system, you may find it very difficult to bring the two databasesback into synchronization without loss of committed data.
For further information about the STOP RDF, REVERSE command and the REVERSE trigger,see the corresponding sections in “Entering RDFCOM Commands” (page 187).
Reciprocal Configurations and SwitchoverIn a reciprocal RDF configuration, two systems act both as a primary and as the backup to theother.
Carrying Out a Planned Switchover 137

With reciprocal configurations it is imperative that you make sure the file-sets being replicatedby the two RDF subsystems are absolutely independent of each other, and this can only be donein one of two ways:1. The volumes protected by RDF Subsystem #1 are completely different from the volumes
protected by RDF Subsystem #2. For example, RDF Subsystem #1 protects volumes$DATA1-$DATA10, and RDF Subsystem #2 protects volumes $DATA20-$DATA30.
2. You use INCLUDE/EXCLUDE lists to ensure complete separation. For example, RDFSubsystem #1 INCLUDES SUBVOLA.* on volumes $DATA1-10, and RDF Subsystem #2INCLUDES SUBVOLB.* on volumes $DATA1-10.
Please note that in each of these configurations, there is no possible overlap of data being replicatedby the two RDF subsystems in a reciprocal configuration. See Reciprocal and Chain Replicationin Chapter 1 for a discussion of the potential problem that can occur if you do not use one of thetwo methods described above.The steps for performing a planned switchover from \A to \B in such a configuration are:1. On system \B, stop RDF subsystem # 2. Note the local system time; you will need it later.2. On system \A, stop the business applications that access the primary database (Applications
#1).3. On system \A, stop TMF(or if you do not want to stop TMF, use the STOP RDF, DRAIN
command).4. Wait for RDF subsystem #1 on \A to shut down.5. On system \B, restart Applications #1.
At this point, the RDF subsystem is down on both systems, the business applications fromsystem \A are now running on system \B, the business applications that were running onsystem \B are still running on system \B, and all audit records are being queued in TMFaudit trails on system \B.
6. When system \A is ready to resume its normal operations, restart TMF.7. On system \B, restart RDF subsystem #2 (the RDF subsystem that replicates data from \B
to \A for the business applications that normally run on \B). The subsystem resumes itsprocessing exactly where it was when you stopped it in step 1.
8. On system \B, initialize RDF subsystem #1. In the INITIALIZE RDF command, include theINITTIME option and specify the timestamp you noted in step 1. Configure the subsystemto replicate data from \B to \A for Applications #1 (the business applications that weremoved from system \A to system \B).
138 Critical Operations, Special Situations, and Error Conditions

When the extractor for RDF subsystem #1 reports an RTD time of 0:00, then you know thatextractor has caught up and you can then prepare for another switchover operation to moveyour application processing back to \A, as follows:1. On system \B, create an audited Enscribe file on each data volume in the RDF subsystem
#1 configuration.2. Wait until all of those files are created on system \A.3. On system \B, stop RDF subsystem #1.4. Purge the Enscribe files on both systems.5. On system \A, initialize RDF subsystem #1 using the INITTIME option and specifying the
current (for \A) local time.6. On system \A, restart Applications #1.
NOTE: There are variety of variations you can do to achieve the above operations. The methodprovided above is just one means to achieve this.
Takeover OperationsIf the primary system fails and you want to switch application processing to the backup system,you need to issue the TAKEOVER command on the backup system. The TAKEOVER commandcauses RDF to shut down after bringing the backup database to a consistent state.
The RDF Takeover OperationWhen updating is enabled, updaters apply audit as soon as it is safe-stored in the image trailson the backup system. In this respect, they apply audit without waiting to determine if theassociated transactions committed or aborted. At the moment when you lose your primary systemdue to some unplanned outage, the updaters might have applied audit for transactions whoseoutcomes were not resolved (committed or aborted) on the primary system at the time the primarysystem failed. Alternatively, the transactions might have been resolved on the primary system,but the extractor was stopped before it could send the final outcomes to the backup system. Thetakeover operation determines what audit needs to be backed out in order to bring the backupdatabase into a stable and consistent state. Audit is backed out of the backup database duringthree possible undo passes, described below. With proper configuration of the RDF/ZLT product,no transactions that were committed on the primary system are ever lost due to an unplannedoutage that requires an RDF takeover operation. There are special considerations that pertain tothe Takeover command in a ZLT environment. See Chapter 17 for details.With the RDF/IMPX product, it is possible that some transactions that committed on the primarysystem might be lost due to an unplanned outage. How many committed transactions are lostdepends entirely on whether the extractor was keeping up at the time of the outage or whetherthe extractor had fallen behind for some reason.When the takeover operation completes, your backup database is in a consistent and stable statewith regard to transactions that committed on your primary system.
Phase One Undo PassThis is also known as Local Undo. Audit can be backed out of the backup database for twopossible reasons.• If an updater has applied audit for a transaction whose outcome is unknown, that audit
must be backed out.• If RDF is replicating audit from aux audit trails and if the final outcome is known, but not
all of the audit for the transaction from an aux trail reached the backup system, that auditmust be backed out.
Takeover Operations 139

Transactions that must be undone during this undo pass are stored in the ZTXUNDO file in yourMaster Image Trail subvolume. You can use the READLIST utility to see what transactions wereundone by this Local Undo operation.
Phase Two Undo PassThis is also known as File Undo. If one or more volumes failed on the primary system and atransaction aborted, the TMF Backout process will backout the transaction on the volumes thatare still up, but it will be unable to backout the audit on the volumes that are down. If the downedvolumes come back online, the TMF Volume Recovery process backs out the audit that theBackout process could not back out. If, however, the primary system failed before VolumeRecovery had enabled the downed volumes, then, if you execute the RDF Takeover operationon the backup system, the updaters execute an undo pass that will undo the audit that VolumeRecovery would have undone on the primary system if it had been able to.Transactions that must be undone during this undo pass are stored in the ZFILUNDO file in theMaster Image Trail subvolume. You can use the READLIST utility to see what transactions wereundone by this File Undo operation.
Phase Three Undo PassThis is also known as Network Undo. If you are running in an RDF network and you lose oneor more primary systems, you must do a takeover on all backup systems in your RDF network.For a complete description of the takeover operation in an RDF network, see “RDF TakeoversWithin a Network Environment” (page 298).Transactions that must be undone during this undo pass are stored in the ZNETUNDO file inthe Master Image Trail subvolume.
Issuing the TAKEOVER CommandBefore you issue a TAKEOVER command on your backup system, you need to start an RDFCOMsession for the correct control subvolume. For example, if you were running RDF from \Bostonto \London and the control subvolume was BOSTON, then you would enter the followingRDFCOM command to the TACL prompt on \LONDON: > RDFCOM BOSTON
The Takeover command has the ! option (see the syntax for this command in Chapter 8 ). If youdo not include the ! sign, then RDFCOM tries to see if the monitor and extractor are still runningon the primary system. If it can access the monitor or extractor because the primary system isstill running, then RDFCOM aborts the command immediately. If you include the ! option, thenRDFCOM does not try to reach the monitor and extractor on the primary system. The ! optionalso determines whether or not you are prompted to confirm your intention of performing theTakeover operation, a topic discussed a little further below.It is highly recommended that you do not use the ! option because it prevents the Takeovercommand from getting started if the primary system is still running. If this is the case and if youexecute the Takeover operation anyway, the result is that the primary and backup databasesbecome out of synchronization.
140 Critical Operations, Special Situations, and Error Conditions
NOTE: If you do not use the ! option and if the primary system is down, then RDFCOM willneed to wait for the Expand level-4 timer to expire. This timer is usually set to 4 or 5 minutes,and this means that the actual takeover processing does not commence until after the timerexpires. Compared to all the other non-RDF tasks that need to be completed before you canresume application processing on your backup system, this short delay may not even be noticed.
If the communication lines are down or the monitor and extractor have failed when you issuethe TAKEOVER command, RDF executes the command on the backup system:• If RDFCOM finds that the primary system is down or that the monitor and extractor do not
exist, then, depending on whether you included the ! option or not, RDFCOM prompts youto confirm that you want the Takeover operation to proceed.– If you did not include the ! option, then RDFCOM reports several informational messages
and then asks the following prompt: "Are you sure you want to TAKEOVER?"You respond with "yes" or "no". If you respond "no", the operation immediatelyterminates.
– If you did include the ! option, then you are not prompted and the operation proceeds.• If RDF is running with updating off, RDFCOM stops the receiver and purger processes, and
then it starts a local RDF monitor process on the backup system in takeover mode. Themonitor then starts the receiver, purger, and all updater processes. (The name of this monitoron the backup system is generated by the system.)
• If RDF had been stopped, RDFCOM starts the monitor in TAKEOVER mode. The monitorthen starts the receiver, purger, and all updater processes. (The name of this monitor isgenerated by the system.)
If a monitor process was started on the backup system, the monitor stops after the other RDFprocesses have all shut down.The following example shows how to use the TAKEOVER command when RDF is running withupdating enabled. The command sequence in the example causes the backup system \TORONTOto take over processing from the primary system \SANFRAN.1. At the TACL prompt on the backup system (\TORONTO), start an RDFCOM session and
specify the control subvolume name:>RDFCOM SANFRAN
2. At the RDFCOM prompt, issue the TAKEOVER command:]TAKEOVER
RDF displays the following prompt message:*** TAKEOVER assumes a disaster on \SANFRAN has occurred.Are you sure you want to TAKEOVER?
3. To proceed with the takeover operation, enter Y or YES.To abort the takeover operation, enter N or NO.After you enter your response, RDFCOM returns its prompt. Once the Takeover operationis underway, you can use the STATUS RDF command to determine the progress of thetakeover operation. If the takeover operation is still in progress, RDF displays the currentstate as “TAKEOVER IN PROGRESS.”When the takeover operation finishes, RDF displays a message such as the following inresponse to the STATUS RDF command:STATUS RDF (\RDF04 -> \RDF06) is NOT runningAn RDF TAKEOVER has completedSafe MAT position is SNO 1, RBA 87876660MAT position for File Recovery: SNO 1, RBA 87876740
Takeover Operations 141

By using the TAKEOVER ! version of the TAKEOVER command you eliminate the Expandlevel-four timer and the prompt.For super fast takeover, see “How to Plan for the Fastest Movement of Business Operations toYour Backup System After Takeover” (page 144).
Issuing the TAKEOVER Command in an Obey FileYou have the following three options to issue the TAKEOVER command through an OBEY file.1. As stated in the section entitled “Using RDFCOM Noninteractively (without an IN File)”
(page 102), you can issue RDFCOM commands in a TACL obey file or a script file. You issuethe command as follows: RDFCOM <control-subvol-name>; Takeover !
Please note that you run this command on the backup system and that the<control-subvol-name> is the name that identifies the specific RDF subsystem for whichyou want to execute the Takeover command. It is suggested that you use the ! option forsimplicity. Otherwise you must configure your script file to handle the prompts that RDFCOMasks when executing the Takeover command.
2. The second option is to write the TAKEOVER command appended with the bang (!) characterin an EDIT file and OBEY the file from the RDFCOM prompt.For example, consider an EDIT file RDFTKOV that has the following content:TAKEOVER!
Now, you can obey the file RDFTKOV from the RDFCOM prompt, as shown below:RDFCOM] obey RDFTKOV
3. The third option is to write the TAKEOVER command appended with the bang (!) characterin an EDIT file and pass it as an IN file to RDFCOM.For example, consider an EDIT file RDFTKOV has the following content:TAKEOVER!
Now, you can use the EDIT file RDFTKOV as an INFILE to RDFCOM, using the followingcommand:RDFCOM /IN RDFTKOV/
NOTE: RDFCOM does not allow the TAKEOVER command without the bang (!) characterwhen issued in an IN file / OBEY file.
Monitoring Takeover OutcomeYou can monitor the status of RDF takeovers by issuing a STATUS RDF command on the backupsystem or by examining the events in the EMS log.When all of the updater processes have stopped, the purger logs either the RDF event number724 or 725 before stopping. Event 724 indicates that the takeover completed successfully. Event725 indicates that it did not, and you should reissue the TAKEOVER command. Event 724 isalways followed by event 735, which indicates the last MAT position seen by the receiver process.The 735 event is used primarily for triple contingency. These events will be followed by eitherRDF event 888 or 858. See “Restoring the Primary System” for more information.For RDF network takeover considerations, see Chapter 14 (page 295).For super fast takeover, see “How to Plan for the Fastest Movement of Business Operations toYour Backup System After Takeover” (page 144).
142 Critical Operations, Special Situations, and Error Conditions

Takeover FailureIf a double CPU failure occurs and any RDF process pair fails during the takeover operation,you can restart the operation just by entering the TAKEOVER command through RDFCOMagain. You can ascertain that a takeover operation failed by issuing a STATUS RDF commandand getting a response such as the following:STATUS RDF (\RDF04 -> \RDF05) is NOT runningA partial RDF TAKEOVER has completed
Also, a takeover failure generates RDF event 725 in the EMS log.
Monitor ConsiderationsWhether the RDF monitor was started when the initial TAKEOVER command was executed ornot, this process is always started when the TAKEOVER command is reissued.
Updater ConsiderationsWhen the purger shuts down at the end of the takeover operation, it examines the context recordof each updater process to determine if that updater has processed all applicable audit datathrough to end-of-file in the image trail. If all updaters have processed through to end-of-file,the purger logs a 724 message to the EMS event log, indicating that the takeover operationcompleted successfully. But if it determines that one or more updaters have terminatedprematurely, the purger logs RDF Event number 726 for the first updater that failed and thenlogs RDF Event number 725, a general message indicating that the takeover operation did notcomplete successfully. If these messages appear in the EMS event log, you must reissue theTAKEOVER command.
Takeover and Triple ContingencyIf you have configured two RDF subsystems for Triple Contingency, then when both takeoveroperations complete you must examine the RDF event 735 on each backup system. If both reportthe exact same MAT position, then you can designate either system as your new primary, configurea new RDF system to run from this new primary to the backup, and then resume applicationprocessing on the new primary with full RDF protection.If each reports a different MAT position, then go to the backup system with the lowest MATposition and execute the COPYAUDIT command (see Chapter 10 for details). The COPYAUDITcommand will copy over all additional audit that the other backup system has. When thecommand completes, you then enter a new Takeover command on the local system. When itcompletes, the two databases are in complete synchronization and you can then resume applicationprocessing on either backup system, as indicated above.
Checking Exception Files for Uncommitted TransactionsException files are used by updaters to store information about each audit record that the updaterundoes during the three possible undo passes. An exception record logs information about aspecific audit record that the updater has undone. This may or may not be useful informationfor you. If the volume of audit is small, then logging an exception record for each record undonemight have only a slight performance impact during the takeover operation. If, however, thevolume of audit to be undone by an updater is large (for example, thousands of records), thenlogging an exception record for each record undone could slow down the takeover work of eachupdater.You can choose whether you want an exception record for each audit record undone during thetakeover operation when you configure the RDF UPDATEREXCEPTION attribute. If you set itON, the updater logs an exception record for each audit record on which it executes undo. If setOFF, then an exception record is only written for the first and last audit records undone. If youset UPDATEREXCEPTION OFF, you can still determine which transactions were undone byusing the READLIST utility to read the undo files.
Takeover Operations 143

Your database administrator can use the RDFSNOOP utility to examine exception records inexception files. For information about RDFSNOOP, see Appendix B (page 359).
CAUTION: The absence of exception file records after a successful takeover operation does notnecessarily indicate that the backup database is logically identical to the primary database. It ispossible that no audit data reached the backup system for some transactions committed on theprimary system. That is, the transaction was started and committed, but the primary systemfailed before the associated audit was transmitted to the backup system.
How to Plan for the Fastest Movement of Business Operations to Your Backup SystemAfter Takeover
The following discussions should be carefully considered when setting up your RDF environmentbecause spending the time to do that will then simplify and speed up your ability to takeoverand resume business operations on your backup system after you have lost the primary to anunplanned outage. The same considerations also apply to orchestrating a planned switchover.1. RPO and RTO
RPO stands for Recovery Point Objective and represents how much audit you are willingto lose in the event of an unplanned outage of your primary system. Your objective is tohave the highest possible RPO, meaning you will lose the least amount of data. RDF/IMPXalready delivers the maximum RPO that any asynchronous replication product can deliveron NonStop by virtue of RDF’s private audit reading logic, which allows it to move auditoff of the primary system faster than any other product, thereby minimizing loss of data.With the RDF/ZLT product, there is no loss of data at all.RTO stands for Recovery Time Objective and represents how much time you can afford tobe down before resuming business operations on your backup system. Your objective shouldbe to have the lowest possible RTO. While the RDF takeover operation itself normally takesonly a small number of seconds, there are many other issues to consider in order to achievean optimal RTO, and this is the focus of the discussion that follows. As a rule, the more youplan in advance, the more you can lower your RTO.
2. Be Sure You Have All You NeedWhile RDF keeps your backup database up to date, there are doubtless many other files andobjects you need on your backup system in order to resume business operation there. Usethe NonStop AutoSync product to move and/or keep up to date your unaudited files, suchas text files, scripts, executable objects, applications, etc. Be sure you have every file that youneed on your primary system also on your backup system. Failure to move all files to yourbackup system and keep them up to date may lead to lengthy delays in your ability to resumebusiness operations on your backup system.
3. Takeover regular online dumps of your backup databaseA simple example provides the best explanation for this recommendation. Assume for themoment that you never take online dumps, you lose your primary system, you execute theRDF takeover command, you resume business operations on your backup system, and thenyou encounter a complete media failure of one or more disks on which your database resides.Without online dumps, you may never be able to recover the lost data.Therefore, taking an online dump before resuming business operations is important, butwhen do you do it? If you wait until after the RDF takeover operation has completed, thenit could take many hours before the online dumps complete, and only then would it be safeto resume business operations. Thus, not taking regular online dumps of your backupdatabase can lead to a significant length of time before you can safely resume businessoperations on your backup system. If, however, you take regular online dumps of yourbackup database as well as take audit dumps, then you can start business operations as soon
144 Critical Operations, Special Situations, and Error Conditions
as the RDF takeover operation completes and you will have full TMF protection. For moredetails see the discussion on “TMF and Online Dumps on the Backup System” (page 154).
4. Most customers require a high-level decision to takeover on the backup system; this is notan automated decision for the majority of RDF users; most require an executive level decisionto takeover.a. Make sure your system operators have a hierarchical list of who to contact in case of
the loss of your primary system. This will save time in getting executive authorizationand initiating the takeover on the backup
b. Determine in advance what constitutes a failure of the primary system so that the processfor escalation to the executive decision level can be started as soon as possible.
c. If the criteria for determining a failure is complicated, write it down; the last thing youwant to do during a real disaster time is to try to remember everything.
5. Have a solid disaster recovery plan in place that covers all the different tasks that need tobe done in order to switch operations to the backup. Write out all of your disaster recoveryplans to avoid having to recall them from memory when your anxiety is already high as aresult of the unplanned outage.
6. If you have command and control files on your primary system that are copied to yourbackup as part of your RDF set up, be sure you revise these on your backup system to reflectthe hardware and software configurations on your backup system. For example, if you havea fewer CPUs on your back up system, be sure that your command and control scripts donot contain references to CPUs that exist on the primary but not on the backup. Be sure youhave replaced all references to the name of the primary system with the name of the backupsystem in command and control files.
7. RDF does provide the “!” option on Takeover command. If specified, it eliminates the userprompt and it eliminates the check to reach the primary system, thereby eliminating theExpand level-4 timer. But, before you use this option, you should consider the followingpoints:a. How do you know if the primary system is down? By having RDFCOM check to see if
the primary system is accessible, you avoid starting a takeover operation by mistake.While the check does involve the Expand level-4 timer wait (5 minutes by default), youshould not lower that timer because it can have many other side-effects that you do notwant.
b. For the majority of RDF users, issuing the RDF Takeover command is neither anautomated operation nor is it typically executed without high-level approval, oftenexecutive level. Depending on the time of day or evening when the outage occurs, itmay take much more time than the level-4 timer delay, thereby making that delayinconsequential.
8. For the typical SQL requestor-server environment, you can start servers on both primaryand backup systems at all times, but you must ensure that ensure no work is ever routed toservers on the backup system.a. SQL files are only opened on demand; hence by having your servers up and running
on your backup system at all times, you can avoid the time it takes to start them whenyou encounter a takeover or switchover situation. It does mean that when you eventuallyroute work to these servers after a takeover or switchover, it may take time to havethem open up the backup database, but you avoid the cost of a cold startup.
b. Similarly, start Pathway servers and freeze them before they open any files; thiseliminates having to cold-start them after a takeover or switchover.
c. If you use the same application for query processing as well as read/write access, andyou are already performing query processing on your backup database, you will needto have the application close all files currently open for read-only access, and thenreopen them for read/write access after the RDF takeover. In this sense, it may be
Takeover Operations 145

advantageous to have one application that performs query processing and another thatdoes read/write operations.
d. If your applications have files open for read access, then your operations staff can closefiles and/or restart the applications while the decision is made to takeover or not.– If not takeover, then allow query processing to resume, as normal;– If takeover, then you have already closed the files and you can proceed with next
tasks need to commence work on your backup system.
9. For Enscribe files, applications typically open these before starting work; the points raisedfor 8c and 8d above apply here as well.
10. After RDF Takeover, use scripts to automate the remaining tasks that need to be done asquickly as possible. These tasks typically involve the following:a. Typically the most complicated task in moving business operations from the primary
to the backup system is switching your communications lines. Automate this as muchas possible by writing one or more scripts to handle the switching programmatically.
b. Update statistics for SQL tables? You are advised to keep these as up to date as possibleduring normal operations. You must stop the updaters to do this, but perhaps it couldbe scheduled during periods of low updater activity.
c. Recompile SQL applications? Use CHECK INOPERABLE PLANS (NonStop SQL/MPfeature that starts auto recompilation). If you use NonStop AutoSync, you can configurea trigger that will automatically start recompilation whenever NonStop AutoSync copiesa new version of the object to the backup system.
d. Does your data have the primary system's node name and/or number embedded in thedata? If yes, you may need to run a script that will change the name and number tothose of the backup system.
e. Handle any issues involving file opens if these have not already been addressed whilewaiting for takeover authorization.
f. Handle any tasks that pertain to your specific operations. There may be any number ofthings to be done. One task, for example, may be to determine what transactional workwas either never completed on the primary at the time of the disaster and what wasundone by RDF during the takeover; this allows you to determine what work you mightneed to have your applications reprocess on the backup system.
g. If your Pathway servers are frozen, thaw them now.h. Route work to servers on backup system if this is a separate step from step “f”.
11. If you set up an RDF takeover trigger, RDF automatically executes the trigger's scriptimmediately after the successful completion of the RDF takeover. This script might handleall or many of the different tasks listed above. Alternatively, when you know the RDFtakeover has completed successfully, you can execute such a script yourself. You candetermine the outcome of the RDF takeover in the following ways:a. RDFTKOVR file can be used as a semaphore; this file in the control-subvolume is empty
when created (EOF is 0) and stays empty until an RDF takeover has completed, at whichtime RDF writes a short text message to signal the takeover has successfully completed.You might want to write a program to monitor this file and, as soon as EOF changes toa non-zero value, have your program execute your script.
b. Write a process that monitors the RDF event log for RDF event 724 (RDF TakeoverCompletion event) and execute you script.
12. Test Your Switchover/Takeover ProceduresYou may not know whether you have everything you need on your backup system to movebusiness operations from your primary system to your backup until you perform that task.If you wait until you actually encounter a disaster and must move business operations tothe backup system, you may find that you are missing important items that you need.Therefore, the best way to be certain is to perform either a takeover or switchover operation
146 Critical Operations, Special Situations, and Error Conditions

in order to resume business operations on your backup system. Do it when you can scheduledown time or do it during periods of low activity. Since a lot can change over the course ofa year, it is a standard disaster recovery practice that you perform this exercise at least oncea year. The age old adage is "practice makes perfect", and this certainly applies here. Anannual test run can mean a considerable difference between a lengthy RTO versus a rapidRTO. The latter is always the goal, so one test a year is a small price to pay for the assurancethat you have everything you need and that your switch from the primary to the backupgoes as smoothly as possible. Secondly, practicing the movement of business operationsfrom your primary system to your backup promotes faster and smoother switchoveroperations when you need to take down your primary system to perform software orhardware upgrades.
NOTE: A common myth in the data replication arena is "an Active-Active environment iswhat I want, then my takeover and switchover testing is easy", and a myth this is. For mostNonStop users, the hardest part of switching from the primary to the backup is dealing withthe communications switching. Active-Active requires dealing with the same issues up frontin order to set up an Active-Active environment in the first place, and a switchover operationinvolves the same issues for being able to route all work to one side or the other.
Some suggestions for how to set up your test are as follows:• Down CPUs 0 and 1 on your primary system to simulate an unplanned outage• Execute the RDF Takeover operation• Execute the various scripts you have to resume business operations on your backup
system• Test your applications against your backup database• When you have finished your testing, clean up the backup database• Either make your backup system your new primary, or switch business operations back
to your original primary system.13. Suggestions for cleaning up your backup database after a test.
a. If your database is small, you might just resynchronize it from your primary system.b. If synchronization is not an option, then you can use the TMF Recover Files to Time
facility by observing the following steps:– After completion of the RDF takeover operation and before starting your testing,
create an audited Enscribe file and take note of the system time.– Perform your test, including running your applications with test data.– Verify that all is running correctly– Stop your applications– If your testing involved unaudited files, restore these to their pre-test state.– Execute a TMF Recover Files to Time operation, specifying the timestamp obtained
above after creating the Enscribe file.– If you had brought your primary system down after stopping your applications,
then you are ready to reinitialize RDF and restart it to run from primary to backup– If you had practiced an actual unplanned takeover while your applications were
running, then read the subsequent section on Restoring the Primary System.
Restoring the Primary SystemAfter you initiate a takeover, it is possible that the last committed transactions on the primarysystem did not make it to the backup system (meaning that the backup and primary databasesare not synchronized). When the failed primary system is restored to operable condition youhave two methods of resynchronizing your primary database with your backup database whereyour applications are now running. One method is online, and the other is offline.
Takeover Operations 147

If the takeover completes on the backup system, the purger logs an RDF event 888 specifying aMAT position (sno, rba). Subsequently, when the primary system is once again online and youare ready to switch the applications back to the primary, you first initiate a TMF file recoverycommand on the former primary system, using the TOMATPOSITION option with the MATposition from the 888 event. TMF restores the primary database to the exact same state that thebackup database was in when the takeover operation completed.
NOTE: You always use the logged MAT position from the 888 event message to initiate the filerecovery operation, even if the RDF configuration is replicating auxiliary audit trails.
You then configure the RDF subsystem to run from the backup to the primary system to bringthe primary database back up to date with updates that took place while the primary was down.When the primary database is fully current, you can then perform a planned switchover fromthe backup to the primary system, and restart your applications on the primary system.If the purger issues an 858 event message, file recovery on the primary system is not possible.This is only possible during a Takeover operation that involves an RDF network. See the discussionin Chapter 14 on how this situation can happen.
Online Method of Resynchronizing the Primary DatabaseWhen an RDF takeover operation completes, the purger process logs the RDF event 888, whichspecifies a Master Audit Trail position. On your primary system, you can then execute TMF FileRecovery with the TOMATPOSITION option. This option requires a MAT position, and you usethe position in the RDF Event 888. When File Recovery completes, the database on your primarysystem is in complete logical synchronization with the database on your backup system at thetime when the RDF takeover operation completed. If you had resumed business operations onyour backup system, run a new RDF configuration to bring the old primary system up to datewith the business operations that have taken place on the old backup system. When RDF hasbrought the former primary up to date, you can then perform a switchover operation to movebusiness operations to the former primary.If you have an RDF Network, there are some situations where File Recovery with theTOMATPOSITION option is not possible. If that is the case, RDF logs an RDF Event 858 at theend of the takeover operation.
Offline Method of Resynchronizing the Primary DatabaseAfter a takeover and when the failed primary system is restored to operable condition, you cantake the following steps to restore the original RDF configuration and make the old primarydatabase the current primary database again (where \A is the old primary system and \B is theold backup system):1. Stop the applications and TMF on \B.2. Save the database on \B to tape or use NonStop AutoSync to put a copy of your backup
database on your primary system.3. Restart the applications and TMF on \B.4. Initialize RDF on \B to the shutdown timestamp generated in Step 1.5. Configure RDF to go from \B to \A.6. Start RDF (\B to \A) with update off.7. Restore the database on \A.8. Turn on updating.9. When RDF has caught up, do a planned switchover from \B to \A (as described earlier).If you have an RDF Network, there are some situations where File Recovery with theTOMATPOSITION option is not possible. If that is the case, RDF logs an RDF Event 858 at theend of the takeover operation.
148 Critical Operations, Special Situations, and Error Conditions

Reading the Backup Database (BROWSE versus STABLE Access)Unlike databases protected by TMF, backup databases for RDF protection have no locks on rowsor records, even while these rows or records are being updated. Therefore, applications can readthe backup databases at any time; the data can, however, be inconsistent because reading andupdating can occur simultaneously.Except immediately after a takeover operation, after the updaters have stopped as the result ofa STOP TMF command, or after the updaters have stopped as the result of a STOP UPDATE,TIMESTAMP command (discussed further below), you only have the equivalent of BROWSEACCESS to the backup database. BROWSE ACCESS, a NonStop SQL/MP access option fortransaction consistency, provides immediate access to the data; however, the data can beinconsistent because a transaction might not be completely applied to the backup database whenthe query is in progress. This access provides the lowest consistency but the highest concurrency.Immediately after a takeover operation or after the updaters have stopped as the result of a STOPTMF or STOP UPDATE, TIMESTAMP command, you have the equivalent of STABLE ACCESSto the backup database; at those points, the backup database is consistent with regard to alltransactions whose outcomes (commit or abort) are known at the backup system.The following example shows the kind of data inconsistency that can occur if the backup databaseis read while the database is being updated:Suppose that a file named FILEA resides on $VOL1 on the primary system and that a file namedFILEB resides on $VOL2 on this primary system. Suppose transaction number 50 causes changesto both FILEA and FILEB on the primary system.Now suppose that the updater for $VOL1 has processed transaction 50, but the updater for$VOL2 has not.If the backup database is read at this point, the database reflects the incomplete updating fortransaction 50.To read the backup database while RDF is running, your application should open the backupfiles with SHARED READ-ONLY access.
Near Real Time Read Access to Updates on the Primary SystemThe receiver configuration option FASTUPDATEMODE (formerly known as SLOWMODE)controls the frequency with which the receiver writes to the image trails and makes image trailaudit available to the updaters. With FASTUPDATEMODE OFF, the default value, the receiverbuffers the audit sent by the extractor and writes those buffers out to the image trails at the mostconvenient time. This ensures that RDF can achieve the highest possible extractor-to-receiverthroughput, but it does delay the updaters in how quickly they are allowed to read and applythe audit to the backup database. One can typically observe updater RTD times cycle from 1-20seconds, although it may only take an updater a fraction of one second to apply 20 seconds worthaudit.With FASTUPDATEMODE ON, as each receiver receives an extractor message, it buffers all theaudit sent in that message by the extractor, writes those buffers immediately to the image trails,and then immediately makes that data available to the updaters. Depending on the value of theUPDATERDELAY attribute in the global RDF configuration record, the updaters can then readthe image trails and apply the freshly written audit to the backup database immediately, therebykeeping updater RTD times to the lowest possible value. Because the receiver writes the auditimmediately to the image trails after processing each extractor message, havingFASTUPDATEMODE set ON can also impact extractor-to-receiver throughput.For a complete discussion of FASTUPDATEMODE, see the description for this attribute underthe SET RECEIVER command in Chapter 8 “Entering RDFCOM Commands”. While havingFASTUPDATEMODE turned on does give you read access to data freshly committed on theprimary system as soon as possible, please note that the option still only provides you withBROWSE access.
Reading the Backup Database (BROWSE versus STABLE Access) 149

Access to Backup Databases with Stable AccessBecause the RDF updaters work asynchronously with respect to one another and to transactionboundaries, when you use the backup database as a read-only resource you are almost alwaysaccessing an inconsistent database, meaning that you normally only have Browse access to thebackup database. The following discussions provide three means of achieving Stable access toyour backup database without having to perform an RDF Takeover operation.
Stopping TMF on the Primary SystemOne way to ensure that the backup database is in a logically consistent state with respect totransaction boundaries is to stop TMF on the primary system (requiring that you first bring downall protected applications). For most customers this is unacceptable except under the most extremecircumstances.
Using the STOP RDF, DRAIN CommandIf you cannot stop TMF on your primary system, but you can stop the applications that areupdating your RDF-protected databases, then you can achieve STABLE access to the backupdatabase by performing the following steps.1. Stop the applications that are updating your RDF-protected database on your primary
system.2. Issue the RDFCOM STOP RDF, DRAIN command.3. When RDF has shut down, it will have applied all committed audit for transactions that
completed on the primary system prior to stopping your applications in Step 1.
STOP UPDATE to a TimestampA timestamp attribute is provided with the STOP UPDATE command to allow you to stop theupdaters on the backup system at a consistent point without affecting TMF or any applicationson the primary system.The format of the timestamp attribute is the same as that used for RDF initialization (20JUN200412:48, for example). When you include the timestamp, its value must be based on the time ofyour primary system and must be at least 5 minutes in the future. The updaters will apply allaudit associated with transactions that committed prior to the timestamp you specify. For anyaudit the updater may have applied prior to stopping its redo pass but where that audit isassociated with a transaction that committed at the stop time or after, the updater executes anundo pass to back that audit out of the database. When you next restart the updaters, they beginapplying the audit that they had previously backed out during the undo pass. For example, ifthe current time on the primary system is 11:30, and you want to bring the backup database toa stable state that includes all transactions that are committed before noon on June 21, 2004, youwould issue this command through RDFCOM:RDFCOM; STOP UPDATE, TIMESTAMP 21JUN2004 12:00
If the specified timestamp is not at least five minutes greater than the current time, RDFCOMaborts the command and displays the following message:The specified timestamp must be at least five minutes greater than the current time.
The STOP UPDATE command itself is logged to the EMS event log under the general RDFmessage 835. As each updater reaches an audit record whose transaction committed at or afterthe specified timestamp, the updater terminates its redo pass and logs the following RDF eventin the EMS log:785 Redo pass ending on reaching timestamp timestamp.
Because the updater may have applied some audit for transactions that had not yet committedat the specified timestamp, it then executes an undo pass to undo those specific records. For theundo pass, the purger builds an undo list based on those transactions that the updaters need to
150 Critical Operations, Special Situations, and Error Conditions
undo, the updaters read this list, and they read backwards in the image trail, performing logicalundo operations on those records that need to be backed out.The following example illustrates the effect of a STOP UPDATE, TIMESTAMP command. In theexample, t+number indicates a transid, and the timestamp below reflects the time of most recentcommit or abort record in the audit trail.RDFCOM; STOP UPDATE, TIMESTAMP 20JUN2004 12:00
commit update update update update update update commit update commit update commit t0 t1 t2 t3 t1 t2 t3 t1 t2 t2 t3 t311:50 11:50 11:50 11:50 11:50 11:50 11:50 11:59 11:59 12:00 12:00 12:01
The updater applies all image audit until it reaches the last update for t3 because this imagerecord contains the timestamp of the last commit record seen by the extractor when it sent therecord to the backup system, the commit of T2, and the updater ends its redo pass here becausethis timestamp is greater than or equal to the specified stop time in the STOP UPDATE command.Observe that the updater has applied audit for T1, T2, and T3, but also observe that the transactionsT2 and T3 committed at or after the stop time. The purger builds the undo list to back out allaudit associated with transactions T2 and T3, and the updater then starts an undo pass to undoaudit it had previously applied for these two transactions. When the updater shuts down, thebackup database is in a completely consistent state and contains only data for transactions thatcommitted before 12:00.When the updater shuts down, it keeps track of the last record it undid - in our example it is thefirst update for T2 at 11:50. Then, when you restart the updaters, the updater position to thissame record in the image trail and commences doing normal redo operations going forward.Thus, even though the Stop Update to Time operation had caused some audit to be backed out,when you restart the updaters, these updaters reapply all audit they had previously undone,and the database stays in a state of synchronization with the database on the primary system.If you erroneously set the timestamp too far into the future (for example, 26DEC3000), the onlyway to correct this mistake is to enter a STOP RDF command, restart RDF, and reenter the STOPUPDATE command with the correct timestamp.See also the description of the STOP UPDATE command in Chapter 8 (page 187).
RDF and NonStop SQL DDL OperationsWhen you must perform NonStop SQL DDL operations, many of these DDL operations requirethat you stop your applications before performing those operations, while other DDL operationscan be performed online, without stopping your applications, by using the SHARED ACCESSoption. Because RDF does not replicate NonStop DDL operations, you must carefully coordinateperforming any DDL operation to ensure that the tables and indexes on your backup systemstay in synchronization with those on the primary system.When you perform NonStop SQL/MP DDL operations such as the following, you can eitherinclude or omit the WITH SHARED ACCESS option:• The CREATE INDEX statement, used when creating an index on a table• The MOVE clause of the ALTER TABLE or ALTER INDEX statement, used when moving,
splitting, or merging disk file partitions, or when moving boundaries within partitionsTo determine all of the NonStop SQL/ DDL operations that can be performed WITH SHAREDACCESS, see the SQL/MP Reference Manualand the SQL/MX Reference Manual.When included, the WITH SHARED ACCESS option specifies that the DDL operation is to allowconcurrent read-write Data Manipulation Language (DML) access and read-only utility accessto the objects on which it operates during all but the final phase of the operation. For this reason,operations specifying the WITH SHARED ACCESS option are sometimes referred to as OnlineDDL operations.
RDF and NonStop SQL DDL Operations 151
The only operations that must be performed WITH SHARED ACCESS are merge partitions andmove boundaries. It is recommended that you perform all other operations with nonsharedaccess.
NOTE: When you make DDL changes to your primary database, you can use the NonStop SQLDDL Replicator product to replicate NonStop SQL/MP DDL changes to your backup databaseautomatically, instead of you having to perform those changes manually on the backup system.Please note that the NonStop SQL DDL Replicator product does not replicate NonStop SQL/MXchanges.
Performing Nonshared Access DDL OperationsFor DDL operations that do not include the WITH SHARED ACCESS option, you can minimizeoutage for the primary system applications:1. Stop the applications that use the database being protected by RDF.2. Stop TMF on the primary system.3. Wait for RDF to stop.4. Start TMF.5. Start RDF with updating disabled.6. Perform the DDL operations on the primary system.7. Restart the applications.8. Perform the same DDL operations on the backup system.9. Issue an RDFCOM START UPDATE command.Database administrators with a clear understanding of the underlying TMF auditing issues mightelect to skip some of these steps as long as the DDL operations and other audited operations areperformed in the correct sequence on the primary and backup systems. For example, it is notabsolutely necessary to stop TMF (and thus RDF), but it is safest to do so. As long as applicationprocessing is stopped and the display from a STATUS RDF command shows that the RTD timefor every updater process is zero, the DDL operations can be safely applied.
Performing Shared Access DDL OperationsDDL operations that include the WITH SHARED ACCESS option and are performed on theprimary system generate a special Stop-RDF-Updater audit record in the MAT. As each updateron the backup system encounters that record in its image trail file, that updater logs either anRDF Event 733 or 931 and then shuts down. When all of the updaters have done so, RDF logs aEvent 908 indicating that it is now safe to perform the same DDL operation on the backup system.When you have performed the same DDL operation on the backup system, you can then issuethe RDFCOM START UPDATE command.If RDF aborts while the updaters are in the process of shutting down, check the RDF log to seeif RDF generated event 908. If it did, then:1. Issue a START RDF, UPDATE OFF command on the primary system.2. Perform the DDL operation(s) on the backup system.3. Issue a START UPDATE command on the primary system.Whether or not RDF aborted while the updaters were shutting down, if one or more updatersdid not generate event 733, the purger process logs RDF event 905 indicating that you must notperform the DDL operation on the backup system. If that happens, issue either a START RDFcommand (if RDF was aborted) or a START UPDATE command (if the non updater processesare still running). When you do this, only those updaters that did not log the RDF event 733 arestarted. When they reach the Stop-RDF-Updater record, they shut down, and the purger once
152 Critical Operations, Special Situations, and Error Conditions
again checks to see all updaters have processed all image audit up to this special record. Whenthe purger generates the RDF event 908, you are now ready to perform steps 2 and 3 above.
CAUTION: While the NonStop SQL products allow a DDL change with Shared Access wherethe target is located on a different node, RDF does not support this. Consider an example whereyou gave a Table X on your RDF primary system \A and you want to create a new partition forthe table on \B. It makes no difference whether you have an RDF network configured or notbecause RDF cannot support a Shared Access operation where the target of the operation is ona different node. The reason for this is that TMF only generates the Stop-RDF-Updaters recordon the node where the source object of the operation is performed, in this case on \A. This meansthat even if the target node of the operation is also RDF protected, there is simply no way tocoordinate updaters to shutdown on the backup of the target node because thatStop-RDF-Updaters record is never seen by the updaters on the RDF backup system of \B.
NOTE: If you use the NonStop SQL DDL Replicator product to replicate your NonStop SQL/MPDDL changes that include the WITH SHARED ACCESS option, this product only replicates theDDL change when it sees that RDF has generated the 908 event. When it finishes the DDLoperation on the backup system, it automatically restarts the updaters. Thus the use of thisproduct can simplify your manual operations.
Network Configurations and Shared Access NonStop SQL DDL OperationsUnder certain circumstances, takeover network undo processing after having performed a sharedaccess NonStop SQL/MP DDL operation can lead to an abort with database corruption.You can, however, avoid that situation entirely by using the protocol described in “NetworkConfigurations and Shared Access NonStop SQL/MP DDL Operations” (page 303) whenperforming shared access NonStop SQL/MP DDL operations in a network environment:
RDF and NonStop SQL/MX OperationsFor particular information about replicating NonStop SQL/MX objects, see Chapter 16 (page 323).
Backing Up Image Trail FilesThe RDF image trail files exist strictly for use by the receiver, purger, and updater processes,and should not be explicitly opened by RDF users for any reason, including backup to tape. Oncethe receiver has processed an image file, this file might no longer serve a purpose (except in thecase of triple contingency where the file might be used in a COPYAUDIT operation). In particular,image files are not like TMF audit files; they cannot be used to restart RDF in the same way thataudit files are used to restart TMF. Typically, image files should only be accessed by RDF itselfor by RDF specialists and support people.However, if you do want to back up image trail files at your site, you should be aware of theway RDF accesses these files and the ramifications of this access. When the receiver updates animage trail file, it opens that file with shared read/write access. When updaters read image recordsfrom an image trail file and apply them to the backup database, they open the image trail filewith shared read-only access. When the RDF purger process determines that a particular imagetrail file is no longer needed by any updater, it purges that file unless the current RETAINCOUNTprecludes doing so. If you want to back up an image trail file, you should hold that file open toprevent the purger from purging it until your backup is complete.For a successful backup, follow these steps:
RDF and NonStop SQL/MX Operations 153

1. Execute a process that opens the image trail file with shared read access. This can be a simpleprocess that you supply to perform only this operation. When the purger determines thatall updaters are finished with this image trail file (named, say, AA000007), and have movedon to the next image trail file (named, say, AA000010), then it might try to purge AA000007.The purge operation will fail, however, because your process still has AA000007 open. Thepurger will terminate the purge attempt and try it again later. As long as your process keepsAA000007 open, the purger cannot purge it.
2. When the purger tries to purge AA000007 and fails, it writes a message denoting this errorto the EMS event log. This message implies that all updaters have moved from AA000007to AA000010 (or beyond), and will never need AA000007 again; it is your only way to knowfor certain that AA000007 will never be needed again. When this message is written, youcan start the backup process to dump AA000007 to tape.
3. When the backup process opens AA000007 and the backup is in progress, you can stop thefile-opening process run in Step 1. The purger will continue its attempts to purge AA000007,but these attempts also will fail as long as the backup process has AA000007 open. Eventually,when the backup is complete and AA000007 is successfully copied to tape, no processes willhave this file open. After this point, the purger will be able to purge AA000007 successfully.
Repeat the preceding steps for each image trail file you want to back up.
TMF and Online Dumps on the Backup SystemWhile taking online dumps of your backup database on your backup system is not required, youare nevertheless strongly urged to do so for the following two reasons:• If you were to have the complete failure of both mirrors of an updater's volume on your
backup system, you can perform a TMF Recover Files operation to recover the files onto anew disk. Without the online dump, you will have to stop RDF, reinitialize RDF, and thenperform a partial database synchronization, online or offline (see Chapter 7). If your databasefiles are smallish, then perhaps database synchronization is a more viable solution to recoveryfrom a media failure. If your database files are very large, then TMF File Recovery might bean easier and faster way to rebuild the file set on the affected disk.
NOTE: Using TMF online dumps to recover files updated by RDF for any other reasondoes not work because RDF updaters apply audit to the backup database with a completelydifferent transaction profile. For example, suppose you have discovered data corruption inthe database on your primary system, you can use TMF Recover Files to a timestamp onyour primary system, but you then cannot do the same operation on the backup system torecover the backup database to the same location as on your primary system. For this typeof File Recovery, you will have to resynchronize the affected files on your backup systemwith the newly recovered files on your primary system.
• Having online dumps of your backup database can allow you to start application processingon your backup system much faster when you experience a planned or unplanned outageof your primary system. See the related discussions in “Carrying Out a Planned Switchover”and “Takeover Operations” sections.
To take online dumps of your backup database, you must first alter the global RDFUPDATEROPEN configuration attribute to SHARED with RDFCOM.] ALTER RDF UPDATEROPEN SHARED
By default, the RDF UPDATEROPEN attribute is set to PROTECTED, and this is the recommendedvalue. When the dump has completed, you can then alter the attribute back to PROTECTED orPROTECTED OPEN. Previously you needed to stop the updaters before modifying this attribute,but you can now modify it online, without stopping the updaters. See the SET RDF commandin Chapter 8 for further details.
154 Critical Operations, Special Situations, and Error Conditions

Of course, if you are taking online dumps of your backup database, you must also configureTMF to perform audit dumping either to tape or disk.
Doing FUP RELOAD Operations With Updaters RunningBecause the backup database is audited by TMF, you cannot do FUP RELOAD operations on itunless you have altered the RDF UPDATEROPEN attribute to SHARED. Previously you neededto stop the updaters before you could alter this attribute, but RDF now allows you to do thisonline. It is recommended that you alter the attribute back to PROTECTED or PROTECTEDOPEN when you have finished the FUP RELOAD operations. The following RDFCOM commandsachieve this alteration:] ALTER RDF UPDATEROPEN SHARED] ALTER RDF UPDATEROPEN PROTECTED
Exception File OptimizationThe RDF exception files reside in the control subvolume on $SYSTEM. The name of each is thename of the updater’s volume on the primary system.Each updater maintains an exception file in which it identifies every audit record that must beundone on the backup database during a takeover. Typically records must be undone becausethe outcome of the associated transaction is unknown. When protecting auxiliary audit trails,however, the outcome of a transaction might be known (a COMMIT record is present in theMaster Image Trail), but if audit for the transaction is missing from an auxiliary audit trail thenthe transaction must be undone during the Takeover operation.If you are protecting only MAT volumes, the amount of undo required during a takeover isusually small. If one or more long-running transactions are active at the time of a takeover,however, the amount of undo required can increase substantially (depending upon the amountof audit records generated by those transactions).If you are protecting auxiliary audit trail volumes, a considerable amount of undo could also berequired if any of the extractor-receiver pairs (master or auxiliary) falls behind the others priorto the Takeover operations.If you have configured an RDF network to replicate network transactions, a considerable amountof undo could also be required if any of the nodes in the network falls behind the others priorto a takeover.In any case, if an updater has a large number of audit records to undo during a takeover, theperformance of its undo pass is negatively affected by logging exception records. Therefore, themanner in which exception files are used is a configurable attribute.To set this attribute, use the following RDFCOM command:SET RDF UPDATEREXCEPTION {ON | OFF}
When this attribute is set to ON (the default value), the updater logs an exception record forevery audit record it must undo during a takeover.When this attribute is set to OFF, the updater logs exception records only for the first and lastaudit records that must be undone (the minimum logging necessary to support Triple Contingencyoperation).
Switching Disks on Updater UPDATEVOLUMESThe SCF PRIMARY DISK command causes the disk process to switch to the backup CPU. If youneed to perform this switch on an updater's UPDATEVOLUME, you should always issue a STOPUPDATE command first, then issue the SCF PRIMARY DISK command next, and then issue aSTART UPDATE command.
Doing FUP RELOAD Operations With Updaters Running 155

NOTE: If you enter the SCF PRIMARY DISK for an updater's UPDATEVOLUME, the affectedupdater might report a number of RDF 700 events with the file-system errors 10, 11, and 71. Ifthese errors occur, they will be reported immediately following the disk primary event. In thissituation, these errors can be expected and they do not indicate that the backup database hasbecome inconsistent with the primary database. To avoid these errors, always stop the updatersfirst, issue the SCF PRIMARY DISK command, and restart the updaters.
Online Remirroring of Updater SUBVOLUMESIf you attempt to re-mirror an updater's UPDATEVOLUME online, the affected updater mightreport a number of RDF 700 events with the file-system errors 10, 11, and 71. In this situation,these errors can be expected and they do not indicate that the backup database has becomeinconsistent with the primary database. To avoid these errors, always stop the updaters firstbefore remirroring the disk.
156 Critical Operations, Special Situations, and Error Conditions

6 Maintaining the DatabasesA vital task in working with RDF is to keep the backup and primary databases synchronizedwith each other. This chapter, which is intended for database administrators, includes these keytopics:• “Understanding Database States” (page 157)• “Making Changes to Database Structures” (page 159)• “Resynchronizing Databases” (page 164)
Understanding Database StatesIt is important to understand the terms used to describe the different states of a primary databaseand its associated backup database. The following illustrations show synchronized andunsynchronized databases.In the illustrations, \PRIMARY indicates the primary system and database, and \BACKUPindicates the backup system and database. Tx indicates the data associated with a committedtransaction. In some illustrations, the extractor and updater process operations also appear.Figure 6-1 shows synchronized databases where RDF has just been initialized and the applicationon \PRIMARY is going to be started. The databases are synchronized because they contain thesame logical data and no audit has been generated.
Figure 6-1 Synchronized Databases Before Starting RDF
Figure 6-2 shows synchronized databases where the application is running on \PRIMARY, threemore transactions (T4, T5, T6) have occurred, and RDF is in the process of applying the datarecords for these transactions to the backup system. Transaction data for T4 has been applied tothe backup database. The data for T5 is still being applied to the backup database, and the datafor T6 has not yet been sent to the backup system.Although transactions T5 and T6 have not yet been applied to the backup database, the primaryand backup databases are synchronized in that the only thing delaying the two databases frombeing logically identical is the fraction of a second it takes the extractor and updaters to catch upwith the MAT.
Understanding Database States 157

Figure 6-2 Synchronized Databases During RDF Operations
Figure 6-3 shows synchronized databases where the application is running on \PRIMARY andthe transaction data for the three new transactions has been applied to the backup database.
Figure 6-3 Synchronized Databases, No Outstanding Audit
Figure 6-4 shows synchronized databases where TMF has just been shut down. The databasesare synchronized because RDF applies all audit generated on \PRIMARY to the backup databasebefore the subsystem reads the TMF shutdown record and subsequently shuts down (the databasesare not, however, logically identical until RDF has actually shut down).
158 Maintaining the Databases

Figure 6-4 Synchronized Databases After STOP TMF Command
Figure 6-5 shows unsynchronized databases. In this figure, T5 and T6 (transactions 5 and 6) havenot been transmitted to the backup system because of a physical disaster, such as fire or flood,or because the primary or backup systems have failed. The databases are unsynchronized becausetransactions were committed or aborted on the primary system before an unexpected shutdown,and the extractor cannot transmit the commit or abort status records for those transactions (T5and T6) to the backup system.
NOTE: If you have not lost your primary system to a disaster, then, when the failed systemcomes back online and RDF is restarted, RDF will put the backup database into synchronizationwith the primary when it has caught up.
Figure 6-5 Unsynchronized Databases
Making Changes to Database StructuresWhen you change the structure of a database on the primary system, you also need to changethe structure on the backup system.
Making Changes to Database Structures 159

NonStop SQL/MP or NonStop SQL/MX DatabasesFor NonStop SQL/MP or NonStop SQL/MX databases, changes you need to perform manuallyon the backup system include:• Catalog changes• Results of DDL operations, including creating or altering tables and views• Partition key changes• Table purges
Catalog ChangesRDF regards NonStop SQL/MP and NonStop SQL/MX DDL operations like updates to SQLcatalogs. Although SQL catalogs are audited tables, RDF does not replicate catalog changes. Thereason for this is that catalog data has embedded data that contains system name and numberinformation as well as volume and subvolume information. When an operation on the primarysystem also involves changing a catalog there, RDF cannot replicate that audited operationbecause it would require that RDF transform the internal information within the data of the auditrecords, replacing the system name and number information as well as perform volume mappingif required. The RDF product does not perform data transformations, and therefore RDF doesnot create catalogs or replicate catalog changes.The following guidelines apply to creating catalogs:• If a catalog exists on a volume protected by RDF, this catalog should also be present on the
corresponding volume on the backup system.• To avoid errors, create a catalog on the backup system before creating it on the primary
system. If audit data is generated for a primary catalog before the corresponding backupcatalog exists, every audit record for the catalog causes a file open error.
Updater processes check for catalog tables, which have a file code in the range 550 through 590and 859 (ODBC catalogs). An updater does not apply any changes to a table that has a catalogfile code.An update operation to a table that does not exist causes RDF to log an RDF error message 736,citing file-system error 11, and the updater retries until the file is created by the user.
DDL OperationsEvery NonStop SQL/MP or NonStop SQL/MX DDL operation performed on the primary systemmust also be performed on the backup system by NonStop SQL/MP or NonStop SQL/MX if anyof the tables or catalogs reside on volumes protected by RDF.Because RDF does not replicate DDL operations for SQL objects, you must perform those changesyourself on the backup system. When it is safe for you to perform those changes on the backupsystem without losing synchronization depends on how you performed the original operationon the primary system. With the NonStop SQL products, you have two ways to perform DDLchanges - With Shared Access and without Shared Access - and the method you choose affectshow you manage the operation on the backup system.
With Shared Access
These operations can be performed while your applications are running and they are closelyintegrated with RDF operations. Specifically, when you commit the DDL operation, a specialaudit record is generated. This record is sent by the extractor to the backup system, and eachupdater stops when it reaches that record and logs RDF event 733 to inform you that it is stoppingdue to Shared Access DDL operation. The purger monitors the stopping updaters and examinesthe details of each updater's stop. If all updaters reached the record and stopped accordingly,the purger then logs the RDF event 908. At this point, it is now safe for you to replicate the DDLchange manually on the backup system. If the purger detects that some updaters had stoppedprematurely (for example, double CPU failure), then it logs RDF event 905 that warns you that
160 Maintaining the Databases

you need to restart updating. When restarted, the only updaters that do any work are those thatterminated prematurely last time. When they reach the special record, they stop and the purgerthen logs the event 908. See the section “RDF and NonStop SQL DDL Operations” (page 151) forfurther discussion.
Without Shared Access
For all operations that do not include With Shared Access, you must stop your applications onyour primary system first because these operations are only allowed when all tables are closed.To coordinate such DDL operations in an RDF environment, you must stop your applicationsand then stop RDF when you are certain the updaters have applied all audit up to the pointwhen you stopped your applications. There are two safe ways to do this: stop TMF momentarilyafter stopping your applications, or execute the STOP RDF, DRAIN command when you arecertain your applications have all stopped. With the Stop TMF method, RDF will shut downwhen it has reached the stop-TMF audit record, thereby guaranteeing that all audit has beenapplied to the backup database up to the stop point. With the DRAIN method, RDF shuts downwhen the updaters have processed all audit up to the point where you issued the STOP RDF,DRAIN command, which must be issued after you stopped your applications. If no updatersstopped prematurely, the purger logs RDF event 852, and it now safe for you to perform thesame DDL change on the primary and backup systems before restarting RDF and yourapplications.
Adding a New Column
This is an operation that cannot be performed With Shared Access. To minimize applicationdowntime, you can coordinate the operation as follows. Stop the RDF updaters with a simpleSTOP UPDATE command. When the updaters have stopped, add the column to your backupdatabase and then restart update. Note, at this point, the new column is in the backup databasebut not yet on the primary. When the updaters update subsequent rows with the new column,the disk process adds the default value to the new column. Next, you perform a switchoveroperation (detailed in Chapter 5), start RDF on your backup system with update off, and thenstart your applications on your backup system. Add the column to the database on your formerprimary system (it is now the backup of your new RDF environment), and then START UPDATE.When RDF has caught up and at your convenience, perform a new switchover operation to moveyour application processing back to your primary system.
Making Changes to Database Structures 161

Guidelines for Create Index and Alter Table Move Operations
The following guidelines apply to NonStop SQL/MP and NonStop SQL/MX DDL operations:• Creating an index or loading data into an added table partition does not interfere with RDF
protection. Although a CREATE INDEX or ALTER TABLE MOVE FROM FIRST KEY UPTO KEY operation seems to create an audited index or partition within a transaction, onlythe updates to the catalog and file labels are audited. The index or partition is creatednonaudited, and audit is not turned on until after the operation is complete. Performingeither of these DDL operations on the backup system for a corresponding DDL operationon the primary system does not cause problems because the operation on the primary systemproceeds internally:1. Create a nonaudited table (index or partition).2. Move the data without logging by TMF.3. Issue an ALTER TABLE table-name AUDIT statement for the table.
It is safe to perform these operations just like other DDL operations on the primarysystem.
Example for CREATE INDEX With Shared Access
This example shows the SQLCI/MXCI commands for adding an index to a table and the orderof the operations:1. Specify the default catalog for the primary system.
CATALOG \PRIM.$DATA.DBCAT;
2. Create an index based on first names in a database on the primary system.CREATE INDEX \PRIM.$DATA1.DB.FIRST ON \PRIM.$DATA1.DB.EMPLOYEE ( FIRST-NAME, LAST-NAME ), WITH SHARED ACCESS;
3. Watch for the purger to log RDF event 908.4. On the backup system, set the default catalog for the backup database.
CATALOG \BACK.$DATA.DBCAT;
5. Create the index for the backup database. Note, because the updaters are stopped, you dono need to include the With Shared Access option and the operation in fact completes faster.CREATE INDEX \BACK.$DATA1.DB.FIRST ON \BACK.$DATA1.DB.EMPLOYEE ( FIRST-NAME, LAST-NAME );
You should use WITH SHARED ACCESS for the CREATE INDEX operations in the aboveexample if both RDF and the application are running.
Multiple Indexes on a Single Base Table
The following issues apply to both NonStop SQL/MP and NonStop SQL/MX.If there are multiple indexes on a single base table, special considerations apply when you useSQLCI CREATE INDEX commands on the backup system to coordinate NonStop SQL/MP DDLoperations between the primary and backup databases.Each NonStop SQL/MP index is assigned a unique key specifier that is stored as part of the keyfor that index. You can explicitly define the key specifier by including the KEYTAG clause in theCREATE INDEX command. If you do not do so, then the CREATE INDEX operation assigns anumeric value based on the order of index creation (1, 2, 3, and so forth).Because the key specifier is part of the key of every index row created on an RDF primary system,it also becomes part of the associated TMF audit record. RDF transmits the audit record to thebackup system where it is then applied to the backup copy of the index.If a CREATE INDEX command on the backup system does not include the KEYTAG clause (andif you are not extremely careful to create the indexes in the order shown by a SQLCI FILEINFObase table, DETAIL command on the primary system), it is possible for the key specifier of
162 Maintaining the Databases

a backup index to be different than that of the primary index. In such a case, the index rowstransmitted from the primary system to the backup system will be corrupt with regard to theirkey values. Although the records are physically present in the index on the backup system,NonStop SQL/MP does not see them because the actual key specifier value does not match theexpected one. Consequently, a FUP INFO index, STAT display will show the correct numberof records for the index, but a SQLCI SELECT COUNT (*) FROM index command will returnfewer rows for the index than indicated by the FUP INFO command. The row count continuesto grow in the base table, but remains the same for the index.You can avoid this problem by always using the KEYTAG clause in the CREATE INDEX commandto define a meaningful key specifier for each index you create.If you encounter the problem described above, use SQLCI to DROP and re-CREATE the offendingindexes, doing so in the proper creation order. The following annotated output illustrates thenecessary index creation order: >SQLCI FILEINFO $DATA.RDFSQL.MASTER, DETAIL
$DATA.RDFSQL.MASTER SQL BASE TABLE CATALOG $DATA.RDFSQL VERSION 2 TYPE K EXT ( 16 PAGES, 64 PAGES, MAXEXTENTS 160 ) REC 416 PACKED REC 415 BLOCK 4096 KEY ( COLUMN 0, OFFSET 0, LENGTH 4, ASC ) INDEX ( 1, $DATA.RDFSQL.MASTXYZ, <<create this index first COLUMN 18, OFFSET 54, LENGTH 2, ASC. COLUMN 19, OFFSET 56, LENGTH 2, ASC. NOT UNIQUE ) INDEX ( 2, $DATA.RDFSQL.MASTABC, <<create this index second COLUMN 88, OFFSET 300, LENGTH 15, ASC. COLUMN 87, OFFSET 285, LENGTH 15, ASC. NOT UNIQUE ) AUDIT BUFFERED AUDITCOMPRESS SECURITY (RWEP); NCNC MODIF: 27 Dec 1997, 20:01 CREATION DATE: 02 Dec 1997, 12:37 REDEFINITION DATE: 10 Jan 1998, 14:46 LAST OPEN: 10 Jan 1998, 14:46 EOF 466944 (2.2% USED) EXTENTS ALLOCATED: 160 INDEX LEVELS: 1 PARTITION ARRAY STANDARD
Partition Key ChangesIf you change a key for any partition on the primary system, you must also change the key forthe corresponding partition on the backup system.
Table PurgesIf you use the SQLCI PURGE command to purge a protected table from the primary system, youmust also purge the corresponding table from the backup system. You should not purge a tableon the backup system until you are sure RDF has completed all processing on the table. Theprocessing is complete when the RTD time is zero for the updater process associated with thetable’s volume. To check the RTD time, issue a STATUS RDF command.
Making Changes to Database Structures 163
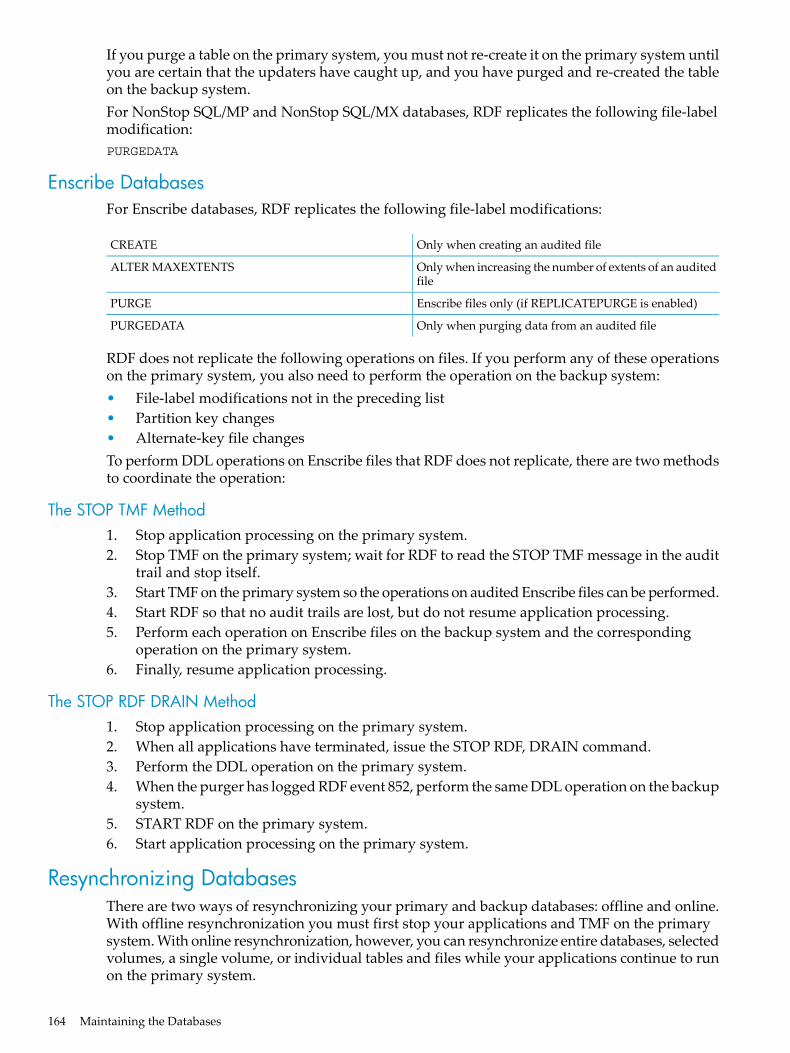
If you purge a table on the primary system, you must not re-create it on the primary system untilyou are certain that the updaters have caught up, and you have purged and re-created the tableon the backup system.For NonStop SQL/MP and NonStop SQL/MX databases, RDF replicates the following file-labelmodification:PURGEDATA
Enscribe DatabasesFor Enscribe databases, RDF replicates the following file-label modifications:
Only when creating an audited fileCREATE
Only when increasing the number of extents of an auditedfile
ALTER MAXEXTENTS
Enscribe files only (if REPLICATEPURGE is enabled)PURGE
Only when purging data from an audited filePURGEDATA
RDF does not replicate the following operations on files. If you perform any of these operationson the primary system, you also need to perform the operation on the backup system:• File-label modifications not in the preceding list• Partition key changes• Alternate-key file changesTo perform DDL operations on Enscribe files that RDF does not replicate, there are two methodsto coordinate the operation:
The STOP TMF Method1. Stop application processing on the primary system.2. Stop TMF on the primary system; wait for RDF to read the STOP TMF message in the audit
trail and stop itself.3. Start TMF on the primary system so the operations on audited Enscribe files can be performed.4. Start RDF so that no audit trails are lost, but do not resume application processing.5. Perform each operation on Enscribe files on the backup system and the corresponding
operation on the primary system.6. Finally, resume application processing.
The STOP RDF DRAIN Method1. Stop application processing on the primary system.2. When all applications have terminated, issue the STOP RDF, DRAIN command.3. Perform the DDL operation on the primary system.4. When the purger has logged RDF event 852, perform the same DDL operation on the backup
system.5. START RDF on the primary system.6. Start application processing on the primary system.
Resynchronizing DatabasesThere are two ways of resynchronizing your primary and backup databases: offline and online.With offline resynchronization you must first stop your applications and TMF on the primarysystem. With online resynchronization, however, you can resynchronize entire databases, selectedvolumes, a single volume, or individual tables and files while your applications continue to runon the primary system.
164 Maintaining the Databases

The remainder of this chapter describes how to do offline resynchronization. For informationabout online resynchronization, see Chapter 7 (page 167).To resynchronize the primary and backup databases, you need to make all backup database filesor tables logically identical to the primary database files or tables when there is no audit data tobe processed for the files or tables. If you know which files or tables are not synchronized,resynchronize the databases only on the volumes that contain those files or tables.There is no audit data to be processed for a volume at the following times:• Immediately after TMF has been started for the very first time and no applications have
been started yet• When the RTD time is zero for the volume’s updater process, and no audit data is being
generated by any application while the files or tables are being duplicated• When TMF is stopped (without the ABRUPT option)Make sure the primary and backup databases are synchronized if any of the following shouldoccur:• A TMF file recovery operation to a timestamp or to first purge occurs, after which only the
affected database tables or files need to be resynchronized.• Asterisks (****) appear in the final column of the STATUS RDF display, indicating that an
updater process has experienced an unexpected file-system error.
NOTE: Resynchronization is not always necessary, however, after a file-system error inan RDF process. For example, an updater process reporting an error 122 will restart.
• TMF is deleted and reconfigured, or RDF is reinitialized, after a STOP RDF command isissued at the primary system.
If RDF fails and reports an event whose recovery text indicates that database resynchronizationis required, you must resynchronize the backup and primary databases.
Resynchronizing Entire Databases OfflineTo resynchronize an entire database offline, you must stop TMF, initialize RDF to the TMFshutdown timestamp, and then copy the complete database from the primary system to thebackup system.Alternatively, in an environment where there are multiple databases and applications, but RDFis protecting only one of those databases, stopping TMF might not be desirable. In this case, youcan stop the applications associated with the RDF-protected database, copy the database fromthe primary system to the backup system (there are several ways of doing this), reinitialize RDFusing the INITTIME option, and start RDF.If you are unsure about which tables or files might not be synchronized, you need to comparethe questionable tables or files between the primary and backup databases and then, based onthat evaluation, resynchronize some of the database objects.To purge a NonStop SQL/MP or NonStop SQL/MX database, use the SQLCI/MXCI PURGE utilityand DROP command, as explained in the SQL/MP Installation and Management Guide and theSQL/MX Installation and Management Guide.To recopy a database to the backup system, follow the instructions in “Synchronizing the Primaryand Backup Databases” (page 71).
Resynchronizing Individual Volumes, Tables, and Files OfflineIf you are sure that only certain database files or tables on a particular volume might not besynchronized, all you need to do is synchronize the entire volume or just the individual filesand/or tables.
Resynchronizing Databases 165

To resynchronize only the affected volume or the individual files/tables on that volume, do thefollowing:1. Stop your applications.2. Either Stop TMF or stop RDF using the Drain option (see discussion on this option in
Chapter 5)3. Make a copy of the tables and files that reside on the particular volume.4. Move the copy of the database taken in Step 3 to your backup system.5. Restart TMF, if it was stopped in Step 2.6. What you need to do next depends on the what you did in Step 2:
• If you stopped TMF, the initialize RDF to the TMF shutdown timestamp• If you used the STOP RDF, DRAIN option, then reinitialize RDF to the time when you
initiated the Drain operation.7. Start RDF.8. Start your applications.
Resynchronizing Individual Tables or Files OfflineIf you are sure that only certain database tables or files might not be synchronized, all you needto do is synchronize those tables or files.To resynchronize an individual table or file:1. Stop your applications. It is also recommended that you stop TMF too because this guarantees
that no unexpected updates can touch the database, but it is not a requirement if you arecertain you have stopped all update activity to the affected volume.
2. Make a copy of the tables or files.3. Restart TMF on the primary system if you stopped it in Step 1.4. If you stopped TMF in Step 1, then wait for RDF to stop in response. Alternatively, if you
only stopped your applications, then issue the STOP RDF, DRAIN command, wait for RDFto stop, and wait for the purger to log the RDF event 852.
5. Copy the tables or files to the appropriate volume on the backup system.6. Restart RDF and your applications.
166 Maintaining the Databases
7 Online Database SynchronizationWith RDF/IMP, IMPX, or ZLT you can synchronize entire databases or selected volumes, files,tables or even partitions while your applications continue to run.For information about NonStop SQL/MX databases, see Chapter 16 (page 323).
OverviewThe RDF online database synchronization protocol consists of the following general steps (thedetails of which are discussed later in this chapter):• Initialize the RDF configuration with the SYNCHDBTIME option.• Issue a START RDF, UPDATE OFF command.• Get a copy of the database by one of two methods:
– Method 1– This method does not work for entry-sequenced files or tables, nor does it work
for NonStop SQL tables that have SYSKEYs or clustering keys.– Create an empty copy of the database.– Load the data from the actual database into the copy with shared access. Because
the load operation with shared access reads through locks held by applications,the resulting files are inconsistent with respect to transactions, but it is consistentwith respect to the physical state.
– Method 2– This method works for entry-sequenced files or tables, as well as for NonStop SQL
tables that have SYSKEYs or clustering keys.– Take an online dump of your database– Perform a File Recovery to a New Location (FRNL) from the online dump you have
just taken above.
• Load the data from the actual database into the copy with shared access. Because the loadoperation with shared access reads through transaction locks held by applications, theresulting file is inconsistent with respect to transactions, but it is consistent with respect toits physical state.
• When you have completed getting a copy of your database by either of the methods statedabove and you have moved the copy to the backup system, issue a START UPDATEcommand. As the updaters start applying audit, they put the backup database to a consistentstate with regard to transactions.
The RDF online database synchronization protocol can be used to synchronize entire databasesor selected parts of databases. The operations can be complex, depending upon the databasesystem being used (NonStop SQL/MP, NonStop SQL/MX, or Enscribe), the file types being used(key-sequenced and relative), and whether you need to synchronize an entire database or justselected portions. If you need to synchronize entire databases, you should first read“Synchronizing Entire Databases Online” and “Considerations When Synchronizing EntireDatabases” (page 169).Because you must run RDF with UPDATE OFF while you obtain a copy of the database, auditdata will collect in the RDF image trails before you can eventually start the updaters. Therefore,if your database is very large, you might want to consider synchronizing several volumes at atime (synchronize a subset of volumes and then start updating. When the updaters are caughtup, stop RDF and reinitialize RDF using synchdbtime. Then do the same with the next subset ofvolumes).
Overview 167

NOTE: RDF does not replicate NonStop SQL/MP and NonStop SQL/MX catalogs. Therefore,if you are synchronizing NonStop SQL/MP and NonStop SQL/MX tables, you might need tocreate NonStop SQL/MP and NonStop SQL/MX catalogs manually on the backup system if theydo not already exist.
Synchronizing Entire Databases OnlineTo synchronize an entire RDF backup database to the primary database online:1. If RDF is currently running, issue a STOP RDF command on the primary system.2. Purge the RDF control subvolume on both the primary and backup systems and then issue
an INITIALIZE RDF command of the following form on the primary system:INITIALIZE RDF, BACKUPSYSTEM \system, SYNCHDBTIME ddmmmyyyy hh:mm
where system is the name of the backup system, ddmmmyyyy is today’s date (such as17DEC2004), and hh:mm is an appropriate timestamp prior to the current time (see thedescription of the INITIALIZE RDF command in Chapter 8 (page 187)).
NOTE: If you have multiple RDF environments, be sure to specify an appropriate SUFFIXattribute in the above INITIALIZE RDF command to keep this RDF configuration separatefrom the other RDF configurations on the primary system. Also, if this configuration is toprotect different data from the other RDF configurations, you might want to consider usingthe INCLUDE and EXCLUDE options for your updaters.
3. Configure RDF and then issue a START RDF, UPDATE OFF command on the primarysystem.
4. Make a copy of all tables and files in the database:• Method 1
— Create an empty set of duplicate key-sequenced and relative files and tables thatdo not have SYSKEYs and clustering keys on either the primary or backup system.The duplicate tables and files must not be audited.You can create these files and tables on either the primary or backup system, butyou should only create them on the backup system if you have sufficient Expandbandwidth between the two systems to handle both the audit sent by the extractorand the data sent by the load operations.
— Using load commands, populate the empty tables and files.For NonStop SQL/MP tables, use SQLCI LOAD commands with the SHARE option.For Enscribe files, use FUP LOAD commands with the SHARE option.
• Method 2— Take online dumps of your entry-sequenced, key-sequenced, and relative files and
tables. Note, this is the only method you can use for entry-sequenced files andtables, as well as any tables that have SYSKEYs and clustering keys.
— Using these online dumps, perform File Recovery to a New Location to differentlocations on the primary system.
— Move the copy of the database to the backup system.
5. When you have completed getting a copy of the database, issue the RDFCOM STOP SYNCHcommand on the primary system. This command issues a message to the extractor. The
168 Online Database Synchronization

purpose of this command is to enable RDF to determine when the synchronization operationhas completed and the backup database is synchronized with the primary database.When the extractor completes its role in the online synchronization operation, it generatesthe RDF Event 782 and then resumes normal operations. For more detailed information, see“Phases of Online Database Synchronization” (page 183).
6. If the duplicate tables and files were created on the primary system in step 4, useBACKUP/RESTORE or FUP DUP operations to copy them to the backup system.For ENSCRIBE files with alternate key files, after restoring the files to the backup system,if the name of the alternate key file is in network form, then you must manually alter thesystem name of the alternate key file in the file label, replacing the name of the primarysystem with that of the backup.For example, suppose that on the primary system (\PRIMARY) you have a file named$DATA.TEST.PART0100 with an alternate key file named ALTF0100.After restoring both files to the backup system (\BACKUP), you must then use a FUP ALTERcommand to alter the file label of PART0100 to point to the alternate key file on the backupsystem.FUP ALTER $DATA.TEST.PART0100,ALTFILE ( 0, \BACKUP.$DATA.TEST.ALTF0100 )
This command does not pertain to NonStop SQL indexes because their labels areautomatically corrected by the MAP NAMES option of the RESTORE utility.The same issue pertains to Enscribe partitioned files. If the primary partition referencessecondary partitions that include the primary system name, you must alter the primarysystem name to that of the backup system.If you have an RDF network for replicating network transactions, then you will need to alterthe partition names to reference the correct names of the backup systems where the partitionsare located.
7. When a new copy of your database is on the backup system and the extractor has loggedthe message indicating it has completed its role in the online synchronization operation,issue the RDFCOM START UPDATE command on the primary system.
NOTE: If your updaters are protecting data volumes that are all configured to the MasterAudit Trail (MAT), you can start the updaters as soon as the duplicate database is on thebackup system and the extractor has issued the RDF event 782. If, however, your updatersare also protecting data volumes that are configured to one or more auxiliary audit trails,you must also wait for all of the auxiliary extractors to report 0:00 RTD times before startingthe updaters.
Considerations When Synchronizing Entire DatabasesThe considerations for online synchronization fall into the following categories:• Duration of getting a copy of the database prepared on the backup system• SYNCHDBTIME issues• CREATE/LOAD issues for NonStop SQL/MP and NonStop SQL/MX tables and Enscribe
files (See Step 4 - Method 1 under “Synchronizing Entire Databases Online” (page 168)• Enscribe queue file issues• Different versions of NonStop SQL products on the primary and backup systems• Moving the duplicated tables and files to the backup system
Synchronizing Entire Databases Online 169
Duration and Preparation IssuesAs indicated in the steps described above, getting a complete copy of your entire database andplacing it on the backup system can take quite a bit of time, and you cannot start the updatersuntil the database is fully prepared on the backup system. This leads to an issue that you mustconsider. While you are making a copy of the database and then getting it prepared on the backupsystem, you must run RDF with UPDATE OFF. This means that audit will accumulate in theRDF image trails. When synchronizing databases, you should configure image trail volumes thathave a lot of free space for image files.The key problem you want to avoid is where your steps to obtain the copy and prepare it on thebackup system take so long that your image trails run out of space before you are able to startthe updaters. If the image trails fill, then this causes the extractors on the primary system to stopsending audit data to the receivers because those receivers have no place to put the audit data.Because the extractors pin audit trail files to avoid having TMF delete files before the extractorshave finished with them, this pinning, if it lasts long enough, could lead in turn to the situationwhere no new transactions are allowed by the TMF product on the primary system.You can avoid the above situation by configuring enough image trails, and ensuring that theimage volumes have sufficient disk space. The more image trails you have, the safer you are.Once the synchronization process has completed, you can always reduce the number of imagetrails by stopping the RDF product and reconfiguring a new RDF environment that has fewerimage trails.Alternatively, if your database is so big that it could take more time to obtain the copy andprepare it than you have image space for, then you might want to synchronize one part of thedatabase at a time. When that operation has completed, you would then synchronize the nextportion. See the discussion on partial database synchronization and the issues pertaining to itthat follows.
SYNCHDBTIME IssuesWith the SYNCHDBTIME option in the INITIALIZE RDF command, there are three special casesyou might need to consider:• Enscribe create operations• NonStop SQL/MP and NonStop SQL/MX Shared Access DDL operations• TMF shutdown operations
Enscribe Create Records
If you created the same Enscribe file on the primary and backup systems prior to execution ofthe INITIALIZE RDF command, and if the extractor’s restart position is located before the auditrecord for the create operation on the primary system, you must remember to purge that file onthe backup system. Otherwise, when the updater tries to replicate the create operation, it willreport a File System error 10 (File Already Exists) and restart. It continues to restart and attemptto create the file until you purge the existing file on the backup system.
Stop-RDF-Updater Records
Stop-RDF-Updater records in the MAT are associated with committed NonStop SQL DDLoperations performed on the primary system with the WITH SHARED ACCESS option. Althoughsuch operations can be performed on the primary system without stopping your applications,they must be performed manually on the backup system after all updaters have shut down inresponse to the same Stop-RDF-Updater record.As a general rule, you should not initialize the RDF subsystem to a synchdbtime if you recentlyperformed a NonStop SQL operation with SHARED ACCESS on the primary system. For example,suppose you have a NonStop SQL/MP (tableA) that contains the range of keys A through Zand you just moved its partition boundary such that tableA now contains only the keys A
170 Online Database Synchronization

through M and a new table (tableB) contains the keys N through Z. Suppose also that youperformed this operation manually on the backup system.If you then initialize the RDF subsystem to a point in the MAT prior to the Stop-RDF-Updaterrecord associated with the partition boundary change and an updater encounters audit recordsassociated a key N through Z, the updater will report an error because it will try to apply theaudit records to tableA (which used to contain it, but now does not), and the audit records willnot be applied to the backup database. In this particular case the database is not corrupted, butdata corruption could occur for other NonStop SQL/MP or NonStop SQL/MX DDL SHAREDACCESS operations.If you did recently perform a NonStop SQL/MP or NonStop SQL/MXoperation with SHAREDACCESS on the primary system and you want to initialize the RDF subsystem to asynchdbtime,you must specify a synchdbtime such that the starting position in the MAT is after theStop-RDF-Updater record.As a precaution, if RDFCOM encounters a Stop-RDF-Updater record during its backward searchof the MAT, it issues a warning message to that effect asking if you want to proceed withinitialization. If the extractor encounters such a record while operating in database synchronizationmode, it abends.
TMF Shutdown Records
TMF shutdown records in the MAT do not cause a problem, except that RDF shuts down andyou must then restart it.
CREATE/LOAD Issues (Step 4, Method 1)Create an empty set of duplicate key-sequenced and relative files and tables that do not haveSYSKEYs and clustering keys on either the primary or backup system. The duplicate tables andfiles must not be audited.The LOAD command only works on tables and files that are nonaudited. If you create the emptyduplicate tables and files as audited entities, you must then use FUP ALTER commands to turnoff their audit attributes before you can load them.You can create these files and tables on either the primary or backup system, but you shouldonly create them on the backup system if you have sufficient Expand bandwidth between thetwo systems to handle both the audit sent by the extractor and the data sent by the load operations.Using load commands, populate the empty tables and files. For NonStop SQL/MP tables, useSQLCI LOAD commands with the SHARE option. For Enscribe files, use FUP LOAD commandswith the SHARE option.For information about the SQLCI LOAD, MXCI LOAD, or FUP LOAD commands, refer to theSQL/MPReferenceManual, the SQL/MXReferenceManual, or the File Utility Program (FUP) ReferenceManual, respectively. The following information is general in nature and is not intended as asubstitute for the information contained in those manuals.
General Considerations for Enscribe Files
• Key-sequenced files.To improve the performance of the load operations, specify the SORTEDoption.
• Relative files. To ensure complete consistency with the source files, specify the NOCOMPACT option.
• Entry-sequenced.Currently create/load method is not supported for entry-sequenced filesand the only other way is to follow Method 2 discussed in the “Overview” section.
• Unstructured Files. Unstructured files need to be synchronized offline.
Synchronizing Entire Databases Online 171

• Partitioned files (key-sequenced or relative). For partitioned files, you can initiate the loadoperation with a single command by executing the LOAD command against the primarypartition.
• Alternate key files (key-sequenced or relative). You should execute LOAD commandsagainst all alternate key files.
Special Consideration for Enscribe Files
If you create empty Enscribe files on your primary system, you should create them with the auditattribute set off. This is particularly important if you create them on volumes protected by RDF.If you create them as audited files on database volumes that are being protected by RDF, theupdaters also create them on the backup system. You then must purge the files on your backupsystem before copying the loaded files from the primary system.
General Considerations for NonStop SQL Tables
• Key-sequenced tableswithout SYSKEY.To improve the performance of the load operationssignificantly, specify the SORTED option.
• Tableswith SYSKEYorClusteringKeys.Because the NonStop SQL load operations generatenew SYSKEY and clustering key values, do not use the create/load method to get a copy ofsuch table. Instead, use the method explained in Step 4, Method 2 under “SynchronizingEntire Databases Online” (page 168) .
• Relative tables. To ensure complete consistency with the source files, specify the NOCOMPACT option.
• Entry-sequenced tables. Do not use the create/load method to obtain a copy ofentry-sequenced files. Instead, use the method explained in Step 4, Method 2 under“Synchronizing Entire Databases Online” (page 168).
• Partitioned tables. You can initiate the load operation with a single command by executingthe LOAD command against the primary partition.
• Index tables. With regard to index tables, there are several considerations for relative andkey-sequenced tables. Regardless of base table type, you cannot load an index table by itself.Index tables can only be loaded when the associated relative or key-sequenced table isloaded.If you want the associated index tables loaded when you load a relative or key-sequencedtable, you must create empty index tables first, before issuing the LOAD command. Whenyou load the base table, the index tables are loaded automatically.Alternatively, you can load your base tables without index tables. Then you can create andpopulate your index tables with the NonStop SQL product of choice before you start theRDF updaters.If you fail to create the index tables before issuing the START UPDATE command, theaffected updater reports a file-system error 11 (File not found) when trying to apply anupdate to an index table, and it continues to retry the update. In this situation, the updaterdoes not make forward progress until you create the index on your backup system.
Enscribe Queue File IssuesFor ENSCRIBE queue files, a different method of obtaining the fuzzy copy is required. You mustuse the FUP COPY command with the SHARE option specified, and with “FIRST 1” specified.For example, the following command copies the contents of file QUEUE1 to QUEUE2.FUP COPY QUEUE1, QUEUE2, FIRST 1, SHARE
To ensure that your target file, QUEUE2 in the above example, has the proper content, copy thecontent of the target file to the screen by using the following command:FUP COPY QUEUE2,, H
172 Online Database Synchronization

If the file is empty and contains zero records, you must reissue your original command again,and recheck the contents of the target file.FUP COPY QUEUE1, QUEUE2, FIRST 1, SHAREFUP COPY QUEUE2,, H
The target file, QUEUE2 in this example, is not ready for synchronization until it has at least onerecord in it. Therefore, you might need to repeat the above operation until a record appears.You could also copy the empty file to the backup system, insert a record into the file on thebackup system, and delete the inserted record:1. Start a transaction, do a WRITE to the empty queue file, and commit the transaction.2. Start a new transaction, do a READUPDATELOCK on the record, and commit the transaction.
This procedure pops the inserted record from the file, but leaves the special “dummy” recordin the 0th position. You must do this operation before you start RDF updating.
For information about the special “dummy” record in Enscribe Queue Files, see the informationabout queue files in the Enscribe Programmer’s Guide.
Different NonStop SQL Product VersionsIf you have different versions of the NonStop SQL product of choice on your primary and backupsystems, see the SQL/MP Version Management Guide(for SQL/MP users) or SQL/MX Database andApplication Migration Guide(for SQL/MX users) for information about what you can do and howto do it.Three of the more common issues are:• If your primary system has a higher version of the NonStop SQL/MP or NonStop SQL/MX
product than the backup system, then the tables on the primary system must not make useof features not supported by the lower product version. Failure to comply with this willresult in errors when attempting to create the duplicate tables.
• You can create the duplicate tables on the backup system and then load them over thenetwork from the primary system, but you must be knowledgeable about issues regardingdifferences in table and catalog versions. See the SQL/MP Version Management Guide orSQL/MX Database and Application Migration Guide.
• You can create and load the duplicate tables on the primary system and then move them tothe backup system using SQLCI DUP commands or BACKUP/RESTORE and tapes. In eithercase, however, the tables must be registered in a catalog on the backup system. Again, youmust be knowledgeable about issues regarding differences in table and catalog versions.See the SQL/MP Version Management Guide or SQL/MX Database and Application MigrationGuide.
Moving Duplicated Tables and Files to the Backup SystemIf you created the duplicate files and tables directly on the backup system and loaded them fromthe primary system, you can start the RDF updaters without any further considerations.If you created the duplicate files and tables on the primary system by Method 1 or Method 2 andthen moved them over to the backup system, however, you must be aware of the following:• If you move duplicate partitioned Enscribe files whose volume mappings differ between
the primary and backup systems, you must use a FUP ALTER command to alter the filelabels of the duplicate files on the backup system so they reflect the correct volume mappingof the various partitions on the backup system.For example, suppose you have a partitioned Enscribe file on the primary system whoseprimary partition is on $DATA1 and secondary partition is on $DATA2. If, on the backupsystem, the primary partition is on $DATA1 but the secondary partition is on $DATA3, youmust change the volume name in the file label of the duplicate secondary partition from$DATA2 to $DATA3:
Synchronizing Entire Databases Online 173

FUP ALTER $DATA1.subvol.file, PART (1,$DATA3)
• If you move duplicate Enscribe alternate key files, you must alter the system name in thefile label of the duplicate file or table to specify the backup system.For example, if you moved a duplicate Enscribe alternate key file named ALTF0100 associatedwith the file PART0100, you must change the system name in the file label of the duplicatealternate key file to that of the backup system:FUP ALTER $DATA1.TEST.PART0100 ALTFILE (0,\backup.$DATA.TEST.ALTF0100)
• If you use the SQLCI DUP or MXCI DUP command to move duplicate partitioned NonStopSQL tables, you must use the MAP NAMES option to specify the backup system name.
• If you use the SQLCI DUP or MXCI DUP command to move NonStop SQL tables with indextables, you must use the MAP NAMES option to specify the backup system name.
Example of Synchronizing An Entire Database OnlineFollowing is a summary of the steps necessary to perform an online synchronization of an entiredatabase.1. Issue the following RDFCOM command:
STOP RDF
2. Purge the RDF control subvolume and then issue the following RDFCOM command:INITIALIZE RDF, BACKUPSYSTEM \RDFB, SYNCHDBTIME 17JUN2004 17:05 !
NOTE: If you have multiple RDF environments, you can do online synchronization withinone RDF environment without disturbing any of the other RDF environments. Just be sureto include the appropriate SUFFIX attribute in the above INITIALIZE RDF command.
3. Configure RDF and then issue the following RDFCOM command:START RDF, UPDATE OFF
4. Create a set of empty nonaudited Enscribe files on the primary system with the same filestructure as the database files being synchronized. Although you can use the create file likefilex method, the complete sequence of FUP SET and CREATE commands are includedbelow to show the file structure of the partitioned files.volume $data2.testresetset type k, keyoff 2, keylen 4, no auditset buffered, ext(10,10)set rec 300, block 4096set maxextents 16set code 4700set part (1, $data3, 2, 2, [0,0,0,195] )set altkey (1, file 0, keyoff 6, keylen 2 )set altkey (2, file 0, keyoff 6, keylen 2 )set altkey (3, file 0, keyoff 6, keylen 2, no update )set altkey (4, file 0, keyoff 6, keylen 2, no update )set altkey (5, file 0, keyoff 6, keylen 2 )set altfile (0, $data2.test.altf0100 )create $data2.test.part0100set altfile (0, $data2.test.altf0101 )create $data2.test.part0101
volume $data3.testresetset type r, no auditset buffered, ext(10,10)set rec 4050, block 4096set maxextents 16
174 Online Database Synchronization

set code 4700set part (1, $data2, 2, 2 )set altkey (1, file 0, keyoff 6, keylen 2 )set altkey (2, file 0, keyoff 6, keylen 2, no update )set altkey (3, file 0, keyoff 6, keylen 2 )set altkey (4, file 0, keyoff 6, keylen 2, no update )set altkey (5, file 0, keyoff 6, keylen 2, no update )set altfile (0, $data3.test.altf0200 )create $data3.test.part0200set altfile (0, $data3.test.altf0201 )create $data3.test.part0201
After using a VOLUME command to specify the primary database volume from which youwant to extract the data, load the empty duplicate files:volume $data0.testload part0100, $data2.test.part0100, share, sortedload part0101, $data2.test.part0101, share, sortedload altf0100, $data2.test.altf0100, share, sortedload altf0101, $data2.test.altf0101, share, sorted
volume $data1.testload part0200, $data3.test.part0200, share, sorted, no compactload part0201, $data3.test.part0201, share, sorted, no compactload altf0200, $data3.test.altf0200, share, sortedload altf0201, $data3.test.altf0201, share, sorted
5. After the load operations in step 5 are done, issue the following RDFCOM command:STOP SYNCH
6. Use FUP DUP commands to move the duplicate files to the backup system. Remember thatthe files must be duplicated to the volumes on the backup system that are mapped to thecorresponding volumes where the database resides on the primary system. Assume youissue the FUP DUP command at the primary system and that the target volumes on thebackup system have the same names as the corresponding database volumes on the primarysystem ($DATA0 and $DATA1). Issue the following commands:volume $data2.testfup dup *,\rdfb.$data0.test.*fup alter \rdfb.$data0.test.part0100, & altfile (0, \rdfb.$data0.test.altf0100 )fup alter \rdfb.$data0.test.part0101, & altfile (0, \rdfb.$data0.test.altf0101 )
volume $data3.testfup dup *,\rdfb.$data1.test.*fup alter \rdfb.$data1.test.part0200, & altfile (0, \rdfb.$data1.test.altf0200 )fup alter \rdfb.$data1.test.part0201, & altfile (0, \rdfb.$data1.test.altf0201 )
7. Turn on the audit attributes for the backup database.8. Issue the RDFCOM START UPDATE command. When all of the updaters have logged a
message 782, the backup synchronization is complete.
Synchronizing Entire Databases Online 175

Synchronizing Selected Database Portions OnlineThere are a number of reasons why you might want to synchronize only selected portions ofyour database. For example:• If you have a large database, it might be easier to break the total number of volumes into
subsets, and then synchronize one subset at a time.• If a file or table has become corrupt, you might want to synchronize just that one file.• If an individual partition of a file or table has become corrupt, you might want to synchronize
just that one partition.
OverviewTo synchronize selected portions of your database, you follow the same steps as those forsynchronizing an entire database.
Example #1 – Staged Synchronization of an Entire DatabaseSuppose you are synchronizing your entire database by synchronizing selected portions first.Suppose your database is on ten volumes and you want to synchronize two volumes at a time.You would start by synchronizing your first two volumes, following the guidelines forsynchronizing an entire database.When this operation has completed and the RDF updaters are fully caught up, you stop theNonStop RDF product. You then delete your current RDF configuration and initialize a newRDF subsystem, using the SYNCHDBTIME option. For the timestamp to be used with theSYNCHDBTIME attribute, you specify a timestamp following the guidelines for the INITTIMEoption.When you create your new RDF configuration, include the first two volumes you have justsynchronized and include two new volumes. Regarding the first two volumes that are alreadysynchronized, you do not need to obtain new copies (see Step 4) of the files and tables and loadcopies of the files and tables on those volumes because they are already synchronized. For thetwo new volumes, you need to synchronize these following the steps for an entire databasesynchronization.When these two new volumes have been synchronized, you follow the same procedure discussedabove, and adding two new volumes to your new RDF configuration file.
Example #2 – Synchronization of an Individual VolumeSuppose you just need either to synchronize a new volume to an existing RDF configuration, oryou need to re-synchronize an existing volume in your configuration. You would first stop yourcurrent RDF subsystem. You then delete your current RDF control subvolume and initialize anew RDF subsystem, using the SYNCHDBTIME option. For the timestamp to be used with theSYNCHDBTIME attribute, you specify a timestamp following the guidelines for the INITTIMEoption.When you create your new RDF configuration:• If you are synchronizing a new volume, add it to your new configuration.• If you are resynchronizing an existing volume, then just use your existing RDF configuration.You then follow the guideline for an entire database synchronization operation, except that youonly need to obtain new copies ( see Step 4) of the files and tables on one volume.
Example #3 – Synchronization of an Individual File or Partition on a VolumeSuppose you just need to re-synchronize a single file or partition on an existing volume in yourRDF configuration. You would first stop your current RDF subsystem. You then delete yourcurrent RDF configuration and initialize a new RDF subsystem, using the SYNCHDBTIME
176 Online Database Synchronization
option. For the timestamp to be used with the SYNCHDBTIME attribute, you specify a timestampfollowing the guidelines for the INITTIME option.When you configure a new RDF subsystem, use your existing RDF configuration file. You thenfollow the guideline for an entire database synchronization operation, except that you only needto obtain a new copy of the one file or partition.
Partial Database Synchronization IssuesThere are many considerations when synchronizing selected portions of a database. You shouldread this chapter carefully before attempting to perform the operation.Typically you need to perform a partial database synchronization for either of two reasons:• You are adding a new volume to the RDF configuration that was not previously in your
configuration.• You have encountered a problem with a volume or a file that requires resynchronization.As stated above, a partial database synchronization follows the same steps as those forsynchronizing an entire database, except that you only need to obtain new copies of the files (see Step 4) to be synchronized and load duplicate copies of the files or tables to be synchronized.Also, when determining what timestamp to specify with the SYNCHDBTIME attribute, youshould follow the guidelines for the INITTIME option.There are a variety of considerations when synchronizing portions of a database. Read thefollowing carefully.
Enscribe Files Without Partitions
Key-Sequenced and Relative Files
Use either Method 1 or Method 2 of Step 4 under “Synchronizing Entire Databases Online”(page 168) to obtain a new copy of the file-set. Then use BACKUP and RESTORE (or FUP DUP)to move the duplicate file to the backup system.Alternatively, if you use Step 4, Method 1, you can create the duplicate file directly on the backupsystem and then load it across the network, provided you have enough Expand capacity tohandle both the data being loaded and the audit being shipped to the backup system by theextractor. If you created the duplicate file with the LIKE option and the primary file has analternate key file, then the file label of that duplicate file points to the alternate key file on theprimary system. You must change this to point to your alternate key file on your backup system.Use a FUP ALTER command to alter the file label manually. For example:FUP ALTER $DATA.TEST.PART0100, ALTFILE ( 0, \BACKUP.$DATA.TEST.ALTF0100 )
Entry-Sequenced Files
If you use Step 4, Method 2, there are no special considerations for entry-sequenced files. Youcannot use Step 4, Method 1.
Enscribe Files With Partitions
Key-Sequenced Files with Create/Load (Step 4, Method 1)
First create a non-audited duplicate file on the primary system. You must create the entire filewith all partitions. Then, you only need to load the partition that you need. For example, supposethe file has two partitions: $DATA1.TEST.PART0100 (primary) and $DATA2.TEST.PART0100(secondary). Issue the following command:FUP CREATE $DATA1.TEMP.PART0100, LIKE $DATA1.TEST.PART0100, NO AUDIT
That command creates the two files $DATA1.TEMP.PART0100 (primary partition) and$DATA2.TEMP.PART0100 (secondary partition).
Synchronizing Selected Database Portions Online 177
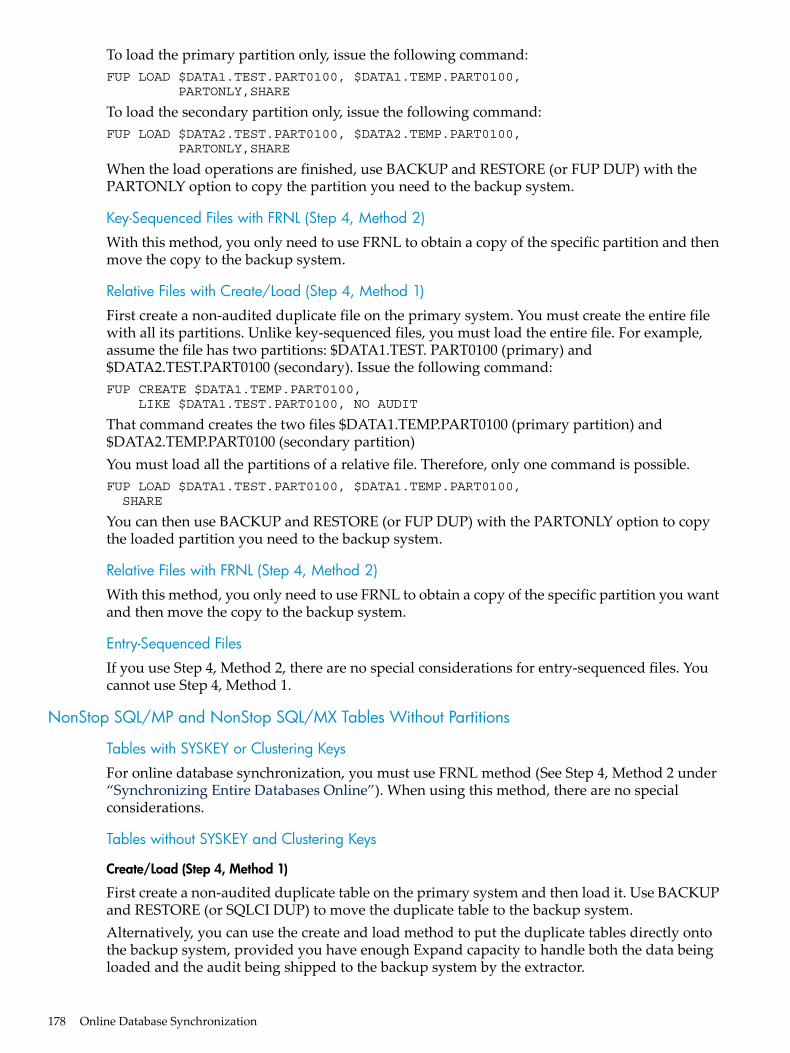
To load the primary partition only, issue the following command:FUP LOAD $DATA1.TEST.PART0100, $DATA1.TEMP.PART0100, PARTONLY,SHARE
To load the secondary partition only, issue the following command:FUP LOAD $DATA2.TEST.PART0100, $DATA2.TEMP.PART0100, PARTONLY,SHARE
When the load operations are finished, use BACKUP and RESTORE (or FUP DUP) with thePARTONLY option to copy the partition you need to the backup system.
Key-Sequenced Files with FRNL (Step 4, Method 2)
With this method, you only need to use FRNL to obtain a copy of the specific partition and thenmove the copy to the backup system.
Relative Files with Create/Load (Step 4, Method 1)
First create a non-audited duplicate file on the primary system. You must create the entire filewith all its partitions. Unlike key-sequenced files, you must load the entire file. For example,assume the file has two partitions: $DATA1.TEST. PART0100 (primary) and$DATA2.TEST.PART0100 (secondary). Issue the following command:FUP CREATE $DATA1.TEMP.PART0100, LIKE $DATA1.TEST.PART0100, NO AUDIT
That command creates the two files $DATA1.TEMP.PART0100 (primary partition) and$DATA2.TEMP.PART0100 (secondary partition)You must load all the partitions of a relative file. Therefore, only one command is possible.FUP LOAD $DATA1.TEST.PART0100, $DATA1.TEMP.PART0100, SHARE
You can then use BACKUP and RESTORE (or FUP DUP) with the PARTONLY option to copythe loaded partition you need to the backup system.
Relative Files with FRNL (Step 4, Method 2)
With this method, you only need to use FRNL to obtain a copy of the specific partition you wantand then move the copy to the backup system.
Entry-Sequenced Files
If you use Step 4, Method 2, there are no special considerations for entry-sequenced files. Youcannot use Step 4, Method 1.
NonStop SQL/MP and NonStop SQL/MX Tables Without Partitions
Tables with SYSKEY or Clustering Keys
For online database synchronization, you must use FRNL method (See Step 4, Method 2 under“Synchronizing Entire Databases Online”). When using this method, there are no specialconsiderations.
Tables without SYSKEY and Clustering Keys
Create/Load (Step 4, Method 1)
First create a non-audited duplicate table on the primary system and then load it. Use BACKUPand RESTORE (or SQLCI DUP) to move the duplicate table to the backup system.Alternatively, you can use the create and load method to put the duplicate tables directly ontothe backup system, provided you have enough Expand capacity to handle both the data beingloaded and the audit being shipped to the backup system by the extractor.
178 Online Database Synchronization

FRNL (Step 4, Method 2)
This method can be used for tables with or without SYSKEY or clustering keys.There are no special considerations for key-sequenced tables with indexes, but see below forissues regarding the synchronization of indexes.
NonStop SQL/MP and NonStop SQL/MX Tables With PartitionsThe utilities associated with and related to the NonStop SQL products have limitations that makesynchronization of individual partitions complicated and difficult. The following representmethods that enable you to circumvent these limitations.• SQLCI DUP and MXCI DUP does not have a PARTONLY option. Therefore, you cannot
duplicate only an individual partition.• While BACKUP and RESTORE have the PARTONLY option, if you have backed up tables
from the primary system, you must use the MAP NAMES option (LOCATION option withBACKUP and RESTORE 2) when restoring them on the backup system in order to specifythe correct system name. You cannot, however, include both the MAP NAMES (LOCATIONoption with BACKUP and RESTORE 2) and PARTONLY options in the RESTORE operation.Therefore, because you must use MAP NAMES or LOCATION, you cannot restore only asingle partition.
Described below is a set of steps that can be used to synchronize individual partitions of NonStopSQL/MP tables (either primary or secondary partitions).
NOTE: While the discussion below is concerned with NonStop SQL/MP, the same issues andresolutions apply for NonStop SQL/MX.
Requirements for Synchronization of Individual Partitions
To synchronize an individual partition of a partitioned table, you must have a copy of the entiretable on the backup system. If you are missing a volume because of a complete media failureand you do not have a backup copy of the table on tape or in an online dump, then you will haveto resynchronize the entire table. Therefore, to prevent this, you should have a copy of yourbackup database on tape or in an online dump. The preferred method is to have on online dumpbecause it can be used both for fast synchronization after a media failure on the backup systemas well as being able to takeover on the backup system as quickly as possible after your lose yourprimary system due to an unplanned outage. If you choose not to take online dumps, then youshould have a copy of all tables on your backup system on tape. The data in the copy on tapeneed not be current, but you need to have the physical structure of all tables on tape to facilitatethe ability to resynchronize individual partitions at a later date. To this end, you can employ thefollowing special trick, but it will not work if you need to resynchronize an individual partitionof a partitioned index. With an online dump, however, you can recover an individual partitionof an index.
Quick Trick for Having a Copy on Tape
1. Rename the table to a temporary name using the SQLCI ALTER TABLE command.2. Create a duplicate table with the original name of the table you renamed in step 1. This table
must have all the same partitions as the original table.3. Use BACKUP to put the duplicate table on tape. It will have all the partitions, but they are
empty. Thus, it will not take long to back the partitions up, nor will it take long to restoreany of the partitions.
4. Rename the table to a temporary name and then drop it. By renaming it before dropping it,you preserve any indexes that are associated with the original table name.
5. Rename the temporary table (step 1) back to the original table name.
Synchronizing Selected Database Portions Online 179

Thus, you now have on tape empty partitions for the entire table. Should you ever lose a volumeto a complete media failure, you can install a new disk and then use the RESTORE utility withthe PARTONLY option to recover the missing partition. Because you have backed up a tablewith the name you need on the backup system, you can restore any partition that you need towith the PARTONLY option and without having to use the MAP NAMES option. Once you haverestored the empty partition, you can use the protocol described below to synchronize the affectedpartition. With this trick, however, you cannot recover from a media failure that wipes out anindividual partition of a partitioned index. If that occurs, you will need to drop the index fromthe associated table, thereby eliminating all other partitions of the index. Then you must createa new index.
Key-Sequenced Tables
The most effective means of describing this method is to use an example. Suppose you have atable named PART whose primary partition is named $DATA.TEST.PART, that this table has50 secondary partitions, and you only need to synchronize the primary partition. The followingset of steps presumes you have just added back the volume needing synchronization to the RDFconfiguration and you are running with update off.Again, follow the steps for complete database synchronization, although with some specificmodifications. The complete set of steps with modifications are listed below.1. If RDF is currently running, issue a STOP RDF command on the primary system.2. Purge the RDF control subvolume and then issue an INITIALIZE RDF command of the
following form on the primary system:INITIALIZE RDF, BACKUPSYSTEM \system, SYNCHDBTIME ddmmmyyyy hh:mm
For the timestamp, follow the guidelines for the INITTIME option.
3. Configure RDF and then issue a START RDF, UPDATE OFF command on the primarysystem.
4. Make a copy of your table using one of the following two methods:• Method 1
Create the entire duplicate table on your backup system with a temporary name at atemporary location (such as \BACKUP.$DATA.DUP.PART).The alternative is to create the duplicate table on the primary system at a temporarylocation (such as \PRIMARY.$DATA.DUP.PART).If the table whose primary partition needs to be synchronized has indexes, do not createindexes for the duplicate table.
• Method 2Take an online dump of the specific partition that you to resynchronize, and thenperform a TMF FRNL operation to put that copy on a different volume. In this example,use MAP NAMES to recover it as $DATA.DUP.PART.
5. When you have completed Step 4, issue the RDFCOM STOP SYNCH command.6. If you used the Method 1 in Step 4 above to create the duplicate table on the primary system,
then use the BACKUP utility to put the entire duplicate table with all partitions onto tape.Because you only loaded the one partition, all other partitions of this duplicate table areempty.If you used Method 2 above, then use Backup to put $DATA.DUP.PART on tape.If you created the duplicate table directly on the backup system, skip this step.
7. If you created the duplicate table on the primary system with Method 1 or you created theduplicate partition using Method 2, then use the RESTORE utility to put the entire duplicate
180 Online Database Synchronization

table with all its partitions onto disk on the backup system. You must use MAP NAMES tocorrect the system name. Thus, $DATA.DUP.PART is now on the backup system.If you created the duplicate table directly on the backup system, skip this step.
8. Rename the original table on the backup system whose primary partition is beingsynchronized to a temporary name using the SQLCI ALTER TABLE command($DATA.TEST.PART becomes $DATA.TEMP.PART).
9. Rename the duplicate table on the backup system to the name of the original table whosepartition is being synchronized using the SQLCI ALTER TABLE command($DATA.DUP.PART becomes $DATA.TEST.PART).
10. Use the BACKUP utility with the PARTONLY option to back up just the partition you needsynchronized to tape (the primary partition, in this example). Remember that the duplicatetable now has the name of the original table. When this step completes, you now have ontape just the partition that you want to use on the backup system and it now has the correctname, although it is not yet aligned with the other partitions of the table on the backupsystem.
11. Rename the duplicate table back to its original duplicate table name ($DATA. TEST.PARTbecomes $DATA.DUP.PART).
12. Use SQLCI to drop the duplicate table. By renaming the duplicate table back to its originalname before dropping it, you can preserve whatever indexes exist on the backup systemthat are associated with the table being synchronized.
13. Rename the original table on the backup system from its temporary name back to its originalname using the SQLCI ALTER TABLE command ($DATA. TEMP.PART becomes$DATA.TEST.PART).
14. Use the RESTORE utility with the PARTONLY option to put the loaded primary partitionof the duplicate table into the correct location. MAP NAMES is not required because theloaded partition now has the correct name on tape and can be restored directly.
15. When the extractor has logged the message indicating it has completed its role in the onlinesynchronization operation, issue the RDFCOM START UPDATE command on your primarysystem.
The preceding procedure preserves indexes you might have on the backup system.There is an alternate method that might be faster in some situations than the method describedabove, although this method requires that you rebuild all indexes associated with the table onthe backup system.1. Drop all indexes associated with the table on the backup system that has a partition in need
of synchronization.2. Use the SQLCI LOAD command with the PARTONLY option to load the partition directly
from the primary system to the backup system (without having to create a duplicate table).3. When the load has completed, issue the RDFCOM STOP SYNCH command.4. Create all required indexes for the table on the backup system.5. When the extractor has logged the message indicating it has completed its role in the online
synchronization operation, issue the RDFCOM START UPDATE command on your primarysystem.
Thus, if it is faster for you to rebuild your indexes than to perform the main method above, thenthis alternative method can achieve synchronization more quickly for you.
Relative Tables
This method is the same as that described for key-sequenced tables above, except that you cannotuse PARTONLY to load relative tables. For relative tables, you must load the entire table.1. If RDF is currently running, issue a STOP RDF command on the primary system.
Synchronizing Selected Database Portions Online 181

2. Purge the RDF control subvolume and then issue an INITIALIZE RDF command of thefollowing form on the primary system:INITIALIZE RDF, BACKUPSYSTEM \system, SYNCHDBTIME ddmmmyyyy hh:mm
For the timestamp, follow the guidelines for the INITTIME option.
3. Configure RDF and then issue a START RDF, UPDATE OFF command on the primarysystem.
4. Make a copy of your table using one of the following two methods:• Method 1
Create the entire duplicate table on your backup system with a temporary name at atemporary location (such as \BACKUP.$DATA.DUP.PART).The alternative is to create the duplicate table on the primary system at a temporarylocation (such as \PRIMARY.$DATA.DUP.PART).If the table whose primary partition needs to be synchronized has indexes, do not createindexes for the duplicate table.Use the SQLCI LOAD command with the SHARED option to load the entire table.Again, with relative tables, you must load the entire table.
• Method 2
Take on online dump of the specific partition that you to resynchronize, and thenperform a TMF FRNL operation to put that copy on a different volume. In this example,use MAP NAMES to recover it as $DATA.DUP.PART.
5. When you have completed Step 4, issue the RDFCOM STOP SYNCH command.6. When the load has completed, issue the RDFCOM STOP SYNCH command.7. If you created the duplicate table on the primary system, then use the BACKUP utility to
put the entire duplicate table with all partitions onto tape.If you created the duplicate table directly on the backup system, skip this step.
8. If you created the duplicate table on the primary system, then use the RESTORE utility toput the entire duplicate table with all its partitions onto disk on the backup system. Youmust use MAP NAMES to correct the system name. $DATA.DUP.PART is now on thebackup system.If you created the duplicate table directly on the backup system, skip this step.
9. Rename the original table on the backup system whose primary partition is beingsynchronized to a temporary name using the SQLCI ALTER TABLE command($DATA.TEST.PART becomes $DATA.TEMP.PART).
10. Rename the duplicate table on the backup system to the name of the original table whosepartition is being synchronized using the SQLCI ALTER TABLE command($DATA.DUP.PART becomes $DATA.TEST.PART).
11. Use the BACKUP utility with the PARTONLY option to back up just the partition you needsynchronized to tape (the primary partition, in this example). Remember that the duplicatetable now has the name of the original table. Thus, you now have on tape the loaded partitionthat you need to synchronize. Because it has the correct name, you will not need to use MAPNAMES when you eventually restore it.
12. Rename the duplicate table back to its original duplicate table name ($DATA. TEST.PARTbecomes $DATA.DUP.PART).
13. Use SQLCI to drop the duplicate table. By renaming the duplicate table back to its originalname before dropping it, you can preserve whatever indexes exist on the backup systemthat are associated with the table being synchronized.
182 Online Database Synchronization
14. Rename the original table on the backup system from its temporary name back to its originalname using the SQLCI ALTER TABLE command ($DATA. TEMP.PART becomes$DATA.TEST.PART).
15. Use the RESTORE utility with the PARTONLY option to put the loaded primary partitionof the duplicate table into the correct location. MAP NAMES is not required because theloaded partition now has the correct name on tape and can be restored directly.
16. When the extractor has logged the message indicating it has completed its role in the onlinesynchronization operation, issue the RDFCOM START UPDATE command on your primarysystem.
NonStop SQL/MP and NonStop SQL/MX Indexes (With or Without Partitions)To synchronize indexes with or without partitions, do the following:1. Drop the indexes on the backup system.2. Create new indexes on the backup system.You do not use the RDFCOM STOP SYNCH command when you use this method.
Phases of Online Database SynchronizationOnline database synchronization, whether for entire databases or selected volumes, occurs intwo phases for both the extractor and all updaters.
Extractor PhasesThe extractor phases of online database synchronization are:
Phase 1, Part 1The extractor has received the STOP SYNCH message (indicating the load or backup operationis complete) and has reached the first TMP control point record in the audit trail that was generatedafter the load or backup operation completed. At this time, the extractor begins building a listof all transactions that might have been started during the create/load or backup operation.Upon completion of phase 1, part 1, the extractor logs message 766.
Phase 1, Part 2The extractor has reached the next TMP control point record in the audit trail and now has a listof all transactions that might have been started during the create/load or backup operation. Theextractor generates a synch-phase-1-complete record, and then continues its normaloperation.Upon completion of phase 1, part 2, the extractor logs message 767.
Phase 1, Part 3When the extractor encounters the next TMP control point record and all of the transactions inthe list have finished, the extractor generates a special synch-complete image record (whichis stored in all image trails by the receiver). All transactions that might have been started duringthe create/load or backup operations are now finished.
NOTE: TMP control points are generated as the result of transaction activity. For high rates oftransaction activity, the TMP control points might be only 1 or 2 minutes apart. For lower rates,they might be 5 to 10 minutes apart. On a completely idle system, TMP control points can beapproximately 30-60 minutes apart. Therefore, if your applications and TMF are idle or nearlyso, it could take an hour or more for the extractor to encounter two TMP control points.
Upon completion of phase 1, part 3, the extractor logs message 768.
Phases of Online Database Synchronization 183

Phase 2Phase 2 completes when the extractor is certain the synch-complete image record has beensuccessfully written in all image trails, and the extractor’s restart location is at a point in the audittrail following the TMP control point record associated with the completion of phase 1, part 3,above.Upon completion of phase 2, the extractor logs message 782.
Updater Phase 2You cannot start the updaters until the extractor has completed phase 2.
NOTE: If you are replicating only the Master Audit Trail (MAT), you can start the updaters assoon as the extractor issues its 782 event message. If you are also replicating one or more auxiliaryaudit trails, however, you must also wait for all of the auxiliary extractors to report 0:00 RTDtimes before starting the updaters.
Phase 2 completes when the updater encounters the synch-complete image record in theimage trail. At that time the updater has processed all audit records that might have beengenerated during the load or backup operation, and synchronization is complete for the associateddatabase volume.Upon completion of phase 2, the updater logs message 782.
Extractor Restart Considerations During Online Database SynchronizationA number of circumstances can cause the extractor to restart during online databasesynchronization, such as a primary CPU failure affecting either the extractor or receiver process.Whenever the extractor encounters a restart condition it automatically recovers and resumes itssynchronization functions. Where it resumes, however, depends upon where it was when therestart condition occurred.• If the restart condition occurs prior to the start of phase 1, the extractor resumes wherever
the receiver tells it to.• If the restart condition occurs after phase 1 has begun, the extractor might choose to resume
at an earlier position than the receiver tells it to. It does this to ensure that it has handled allcommitted and aborted transactions correctly. If the extractor does resume at an earlierposition, it logs message 775. Additionally, regardless of whether or not it adjusted therestart position, the extractor can log messages 766, 767, and 768 again, even if it had loggedany of them prior to the restart condition.
Determining When Online Database Synchronization Is CompleteThe following RDF messages assist you in knowing when the various phases of online databasesynchronization are complete:
Extractor MessagesMessages 766, 767, and 768 in combination report the completion of phase 1. Message 782 reportsthe completion of phase 2. Message 782 indicates that the extractor has finished its involvementin the online synchronization operation.
Updater MessagesMessage 782 reports the completion of phase 2 and indicates that the updater has finished itsinvolvement in the online synchronization operation. Even in a partial database synchronization,all updaters will log event 782 because, in a partial database synchronization, you follow theguidelines of a complete database synchronization, except that you are only loading the specificvolumes, table, and files you need. Therefore all updaters log the 782 event.
184 Online Database Synchronization

Additionally, the STATUS RDF display has been enhanced to identify which database volumesare still being synchronized. That information is reported in the error column of the display. Ifa volume is still being synchronized, its entry in the error column is sync. As soon as a volumeis successfully synchronized, its entry in the error column is blank. If an updater encounters anerror during synchronization, the associated entry in the error column is ****.The following sample display shows that the updater process $MUP1 for the data volume$DATA1 has successfully completed synchronization while the updater process $MUP2 for thedata volume $DATA2 is still doing the synchronization:RDF Process Name RTD Time Pri Volume Seqnce Rel Byte Addr Cpus Err------------------ ------ --------- --- ------- ------ ------------- ----- ----Monitor $MMON 185 $TRAILS 5 2: 3Extractor (0) $MEXT 0:00 185 $TRAILS 5 7110636 1: 2Receiver (0) $MRCV 0:00 185 $TRAILS 37 806912 1: 2$DATA06 -> $DATA06 $MUP1 0:00 185 $TRAILS 37 806912 1: 2 $DATA07 -> $DATA07 $MUP2 1:59 185 $TRAILS 32 712704 2: 3 sync
Determining When Online Database Synchronization Is Complete 185

186

8 Entering RDFCOM CommandsTo manage, operate, and control RDF and its environment, you enter commands through theRDFCOM online utility. This chapter, directed to system managers and operators, describes theRDFCOM commands and their attributes. In this chapter, you will find:• “Elements of RDFCOM Command Descriptions”• “RDFCOM-Related Filenames and Process Identifiers” (page 190)• “RDFCOM Commands” (page 192)
Elements of RDFCOM Command DescriptionsIn the description of each RDFCOM command, the following elements are covered:• Purpose, syntax, and attributes used with the command• Where issued (primary or backup system)• Security restrictions• RDF state requirement• Usage guidelines (where applicable)• Output displayed (where applicable)• Examples
Purpose, Syntax, and AttributesFor each command, the description begins by explaining the purpose or function of the command.Then, a syntax diagram and complete attribute descriptions present what keywords and variablesmake up the command: which are required, which are optional, and what the default assignmentsfor the optional items are. The meanings of the symbols used in the syntax diagrams are describedin .For most RDFCOM commands, the attributes specify configuration values stored in either:• The RDF configuration memory table, which you access by using the SET, RESET, and
SHOW commands• The RDF configuration file, which you access through the ADD, ALTER, and DELETE
commandsOther attributes request display options or select systems, disk volumes, files, and other objects.Many attributes are optional, but some are required.
Where IssuedSome RDFCOM commands can be issued only from the primary system, others only from thebackup system, and still others from either system. For each command, the allowed systems arelisted in “Where Issued.” For your convenience, they are also summarized in Table 8-1.
Security RestrictionsAlthough several RDFCOM commands are available to all users, other commands impact theoverall RDF environment and are, by default, restricted to members of the super-user group.For each command, the default security requirements appear under the heading “SecurityRestrictions.” In general, the default security restrictions for RDFCOM commands are:• The EXIT, FC, HELP, HISTORY, INFO, OBEY, OPEN, OUT, SHOW, and STATUS commands
can be used by all users.• The START RDF and TAKEOVER commands can only be used by the member of the
super-user group who initialized RDF.• The other RDFCOM commands can be used only by members of the super-user group.
Elements of RDFCOM Command Descriptions 187

The default security restrictions for all RDFCOM commands are summarized in Table 8-2.
RDF State RequirementSome RDFCOM commands can only be entered after RDF has been started; others must beentered before the subsystem has been started or after it has been stopped. In each commanddescription, these constraints are listed under the heading “RDF State Requirement.”
Usage GuidelinesDetails about the proper use of a command appear in “Usage Guidelines.” These details includeinformation about when to apply the command, possible constraints and unexpected effects ofthe command, hints on enhancing performance and avoiding errors, and other considerations.When a command is extremely basic or straightforward, the command description omits the“Usage Guidelines.”
Table 8-1 Systems for RDFCOM Commands
OtherObjects
TriggerNetworkRDFNETVolumeUpdatePurgerReceiverRDFMonitorImageTrail
Extractor
PPPPPPPPPPADD
EPPPPPPPPALTER
BCOPYAUDIT
EPPDELETE
EEXIT
EFC
EHELP
EHISTORY
EEEEEEEEEEINFO
PINITIALIZE
EOBEY
EOPEN
EOUT
PPPPPPPPPPRESET
PPPPPPPPPPSET
EEEEEEEEEPSHOW
PPSTART
E**EEEEEESTATUS
P*PESTOP
LegendP = PrimaryonlyB = BackuponlyE = Either* = SYNCH** =RTDWARNING
188 Entering RDFCOM Commands

Table 8-1 Systems for RDFCOM Commands (continued)
OtherObjects
TriggerNetworkRDFNETVolumeUpdatePurgerReceiverRDFMonitorImageTrail
Extractor
BTAKEOVER
PUNPINAUDIT
PVALIDATE
LegendP = PrimaryonlyB = BackuponlyE = Either* = SYNCH** =RTDWARNING
Table 8-2 Default User Security for RDFCOM Commands
OtherObjects
TriggerNetworkRDFNETVolumeUpdatePurgerReceiverRDFMonitorImageTrail
Extractor
SSSSSSSSSSADD
SSSSSSSSSALTER
O*COPYAUDIT
SSSDELETE
AEXIT
AFC
AHELP
AHISTORY
A*AAAAAAAAAAINFO
O*INITIALIZE
XOBEY
AOPEN
Legend:A = All usersS = Super-usergroup onlyO = owner ofRDFsubsystem* = Must alsohaveremotepassword forprimary nodeX = Dependson whichcommands arein the file** =RTDWARNING*** = SYNCH
Elements of RDFCOM Command Descriptions 189

Table 8-2 Default User Security for RDFCOM Commands (continued)
OtherObjects
TriggerNetworkRDFNETVolumeUpdatePurgerReceiverRDFMonitorImageTrail
Extractor
AOUT
SSSSSSSSSSRESET
SSSSSSSSSSSET
AAAAAAAAAASHOW
S*O*START
A**AAA*A*A*A*ASTATUS
S***S*S*STOP
OTAKEOVER
SUNPINAUDIT
SVALIDATE
Legend:A = All usersS = Super-usergroup onlyO = owner ofRDFsubsystem* = Must alsohaveremotepassword forprimary nodeX = Dependson whichcommands arein the file** =RTDWARNING*** = SYNCH
Output DisplayedFor the RDFCOM commands that display output at your terminal (for example, the INFO, SHOW,and STATUS series of commands), the elements that appear are explained in “Output Displayed.”
ExamplesUnder the heading “Examples,” each command description presents one or more examplesshowing how the command is used. For commands that display information, sample output alsoappears. Command entries and other user input appear in bold type; RDFCOM output appearsin regular type.
RDFCOM-Related Filenames and Process IdentifiersFile names and process identifiers sometimes appear as attributes in RDFCOM commands.These names typically identify objects such as disk files, log devices, and processes. Errors canresult from improperly specifying these names in RDFCOM commands. In almost all commands,these names are governed by the common syntax rules described in the following paragraphs.Where exceptions to these rules occur, they are noted in the individual command descriptions.
190 Entering RDFCOM Commands

The system does not distinguish between uppercase and lowercase alphabetic characters in afile name. If all the optional left-hand parts of a file name are present, it is called a fully qualifiedfile name; if any of the optional left-hand parts are missing, it is called a partially qualified filename.For more information about file names and process identifiers and the rules that govern them,see the Guardian Procedure Calls Reference Manual.
Reserved File NamesSubvolume names and file names that begin with the letter “Z” are reserved.
Disk File NamesThe syntax for a file name that identifies a disk file is:
[system.][[volume.]subvol.]filename
or[system.][volume.]temp-filename
system
specifies the name of the system on which the file resides. A system name consists of abackslash (\) followed by one to seven alphanumeric characters; the first alphanumericcharacter must be a letter.
volume
specifies the name of the volume on which the file resides. A volume name consists of a dollarsign ($) followed by one to six alphanumeric characters; the first alphanumeric charactermust be a letter.
subvol
specifies the name of the subvolume on which the file resides. A subvolume name has oneto eight alphanumeric characters; the first character must be a letter.
filename
specifies the name of a permanent disk file. A permanent-file name consists of one to eightalphanumeric characters, the first of which must be a letter.
temp-filename
specifies the name of a temporary disk file. A temporary-file name consists of a pound-sign(#) followed by four to seven numeric characters. The operating system assigns names totemporary files.
The following is an example of a fully qualified disk file name:\hdq.$mkt.reports.finance
Nondisk Device NamesThe syntax for a file name that identifies a nondisk device is:
[system.]device-name[.qualifier]
or[system.]ldev-number
system
specifies the name of the system on which the device resides. A system name consists of abackslash (\) followed by one to seven alphanumeric characters; the first alphanumericcharacter must be a letter.
RDFCOM-Related Filenames and Process Identifiers 191

device-name
specifies the name of a device. A device name consists of a dollar sign ($) followed by one toseven alphanumeric characters; the first alphanumeric character must be a letter.
qualifier
is an optional qualifier. It consists of a pound sign (#) followed by one to seven alphanumericcharacters; the first alphanumeric character must be a letter.
ldev-number
specifies a logical device number. A logical device number is represented by a dollar sign ($)followed by a maximum of five digits. The logical device number 0 (represented “$0”) isreserved for the Event Management Service (EMS) collector process.
The following are examples of file names that identify nondisk devices:\ny.$s.#titan3s$s.#lp$tape4$10
Process File NamesRDFCOM commands can refer to (and display information about) named processes. In thesecommands, process names can include no more than six characters: a dollar sign followed byone letter followed by one to four alphanumeric characters.The following are examples of file names that identify named processes:$zb$zsv$app2
RDFCOM CommandsMost RDFCOM commands operate on configuration attributes that govern the behavior of eitherthe overall RDF subsystem or individual RDF processes.The RDF configuration parameter settings are first specified in the configuration memory table,a buffer that serves as a temporary repository for these values. You define the parameter settingsin this table through the SET command, display them with the SHOW command, and reset themto their default values with the RESET command. RDF assigns default values for any parametersettings that you do not specify.The parameter settings in the configuration memory table are reset to their default values at thestart of your RDFCOM session. Thus, when you start a new session, the defaults prevail untilyou change them by entering new SET commands.When the configuration memory table contains the parameter settings you need, you can applythem to the permanent configuration file with the ADD command. After you issue the ADDcommand, the SET command values remain in memory until altered by subsequent SET or RESETcommands. You can alter the settings in this file with the ALTER command, display them withthe INFO command, remove an entire configuration record with the DELETE command, or clearthe entire table with the INITIALIZE RDF command.In the configuration file, unlike the configuration memory table, the parameter settings remainunchanged until you explicitly alter them. The settings in the file are not affected by the end ofa session—when you start a new session, the values that existed at the end of the last sessionsurvive into the new session.Descriptions of all RDFCOM commands follow in alphabetical order.
192 Entering RDFCOM Commands

ADDThe ADD command applies configuration parameter values for the specified process or otherobject from the RDF configuration memory table to the RDF configuration file.ADD {RDF } {MONITOR } {EXTRACTOR } {RECEIVER } {IMAGETRAIL $volume } {PURGER } {RDFNET } {NETWORK } {[VOLUME] $volume } {TRIGGER trigger-type }
RDFapplies RDF global configuration parameters.
MONITORapplies configuration parameters for the monitor.
EXTRACTORapplies configuration parameters for an extractor.
RECEIVERapplies configuration parameters for a receiver.
IMAGETRAIL $volumeadds a secondary image trail to the configuration, implicitly identifying that trail by the nameof the volume on the backup system to be used for its storage. You can add secondary imagetrails only after RDF has been initialized and before it has been started for the first time. Youmust also previously have added the receiver process.
PURGERapplies configuration parameters for the purger.
RDFNETapplies configuration parameters for the RDFNET process.
NETWORKapplies configuration parameters for an RDF network.
[VOLUME] $volumeapplies configuration parameters for an updater process, implicitly identifying the updaterprocess by the name of the volume on the primary system for which this process is responsible.The updater volume must be audited by TMF.
TRIGGER trigger-typeapplies configuration parameters for a trigger entity. trigger-type is either REVERSE orTAKEOVER.
Where IssuedPrimary system only.
Security RestrictionsYou can issue the ADD command if you are a member of the super-user group.
RDF State RequirementExcept for the ADD VOLUME and ADD TRIGGER commands, you can issue any ADD commandonly after initializing RDF but before entering the first START RDF command. After RDF isinitialized, you can issue an ADD VOLUME or ADD TRIGGER command anytime RDF is stopped.
RDFCOM Commands 193

Usage GuidelinesWith the ADD command, all configuration parameter settings that you previously supplied inSET commands for the particular process or other object are applied from the RDF memory tableto the RDF configuration file. Any parameter settings that you did not supply are set to theirdefault values.Each volume on the primary system protected by RDF requires a corresponding updater processon the backup system. You must issue one ADD VOLUME command for every primary systemvolume to be protected by RDF.Although more than one primary volume can be protected by a single disk volume on the backupsystem, HP strongly recommends that you configure your environment so that each updaterprocess writes to its own volume (that is, that there is a one-to-one mapping of primary volumesto backup volumes).If you add an updater process after you stop RDF, the context record of the new updater processis set to that of the receiver’s context for particular image trail of the updater. So, after the nextSTART RDF command, the newly added updater process begins reading from the current imagefile at the same place that the receiver process begins writing.
CAUTION: After RDF is configured and running, do not add an updater process unless a STOPTMF command has shut down RDF; otherwise, you cannot be sure that the data on the newlyadded backup system volume is synchronized with the data on the corresponding primarysystem volume.
The master image trail identified by the RDFVOLUME parameter in the SET RECEIVER commandis reserved for use by the MAT receiver process. All updaters must be configured to secondaryimage trails. Each image trail is stored on a separate volume on the backup system. To add asecondary image trail, you specify the disk volume intended for its use through the ADDIMAGETRAIL command. When you configure your individual updater processes with the SETVOLUME command, you assign each of these processes to a different image trail, reducing thenumber of updaters contending for a specific trail.Each secondary image trail contains only that audit data required by the associated updaters.Image files in secondary image trails have the same extent sizes as image files on the volumespecified by RDFVOLUME. Because the extent sizes for secondary image trails are obtained fromthe receiver’s configuration record, you do not specify them through any RDFCOM commands.With RDF/IMP, IMPX, or ZLT, if your RDF configuration is not particularly small (say, 30 volumesor more) and your performance requirements are not high, you can assign one image trail perupdater process, and you can place that image trail on the updater’s UPDATEVOLUME. If youhave the need for high performance, however, even on a small system, it might be best to havea dedicated volume for your image trails. For an RDF environment involving very high replicationrates, you should not configure more than 3 or 4 updaters to an image trail if the replication rateof these updaters is high.You cannot add secondary image trails until you have configured the receiver, because the extentsizes for these trails depend on those specified for the receiver’s master image files.
ExamplesTo configure the extractor process named $EXT to run in CPUs 0 and 1 at the default priority of165 with the default RTD warning threshold of 60 seconds, enter the following commands:]SET EXTRACTOR PROCESS $EXT]SET EXTRACTOR CPUS 0:1]ADD EXTRACTOR
To define $SYSTEM.RDFIMP as the location of the RDF software, enter the following commands:]SET RDF SOFTWARELOC $SYSTEM.RDFIMP]ADD RDF
194 Entering RDFCOM Commands

When the preceding command sequence is executed, all of the other RDF global parameters areset to their default values: (In this list, \LONDON is the system at which you issued the commandsequence.)PRIMARYSYSTEM: \LONDONCONTROL SUBVOLUME: LONDONLOGFILE : $0UPDATERDELAY: 10UPDATEROPEN: PROTECTEDUPDATEREXCEPTION: ONUPDATERTXTIME: 60UPDATERRTDWARNING: 60NETWORK: OFFNETWORKMASTER: OFFREPLICATEPURGE: OFFLOCKSTEPVOL: (omitted)OWNER: (omitted)
Suppose you want to protect the volume $DATA01 on the primary system by configuring anupdater process for the volume $DATA1 and secondary image trail $SECIT1 on the backupsystem (assuming that $SECIT1 was previously added to the RDF configuration by way of anADD IMAGETRAIL command). Also suppose the updater process is to be named $UP01, is torun in CPUs 2 and 3 of the backup system at the default priority of 160. In this example, weassume the ATINDEX value to be the default value of zero. To configure the updater process,enter the following commands:]SET VOLUME PROCESS $UP01]SET VOLUME CPUS 2:3]SET VOLUME MAPFILE $DATA05.CONFIG.MAPFILE]SET VOLUME MAPLOG $DATA05.LOG.MAPLOG]SET VOLUME UPDATEVOLUME $DATA1]SET VOLUME IMAGEVOLUME $SECIT1]ADD VOLUME $DATA01
The SET VOLUME commands supply only values that pertain to the backup system environment;it is not until you issue an ADD VOLUME command that the updater process actually becomesassociated with a particular volume on the primary system.To define a reverse trigger, enter a command sequence such as:SET TRIGGER PROGRAM $SYSTEM.RDF.RDFCOMSET TRIGGER INFILE $DATA01.RDFCONF.RIGHTSET TRIGGER OUTFILE $0SET TRIGGER WAITSET TRIGGER CPU 0:1SET TRIGGER PRIORITY 150ADD TRIGGER REVERSE
ALTERThe ALTER command changes the setting of the specified parameter in the RDF configurationfile to the supplied value.ALTER {RDF global-option } {EXTRACTOR extractor-option } {MONITOR monitor-option } {RECEIVER receiver-option } {PURGER purger-option } {RDFNET netsynch-option } {TRIGGER {trigger-type } {trigger-option } } {VOLUME updater-option }
global-option, extractor-option, monitor-option, receiver-option,purger-option, netsynch-option, trigger-option and updater-option
are described under the SET RDF, SET EXTRACTOR, SET MONITOR, SET RECEIVER, SETPURGER, SET RDFNET, SET TRIGGER, and SET VOLUME commands, respectively.
RDFCOM Commands 195

trigger-type
is REVERSE or TAKEOVER. This command parameter alters a trigger that has already beenadded to the RDF configuration.
Where IssuedThese commands can be issued only at the primary system, except altering the TAKEOVERtrigger, which can also be issued on the backup system if and only if the primary system is notavailable.
NOTE: You should only alter the TAKEOVER trigger on the backup system if you are aboutto issue the TAKEOVER command. If you alter this trigger on the backup system at any othertime, you must remember to issue the same alter command on the primary system when it isavailable again. If you fail to do this, then the next time you start RDF, the trigger informationon the primary system is copied to the backup system, and the changes you had made to thetrigger on the backup system are then lost.
Security RestrictionsYou can issue the ALTER command if you are a member of the super-user group.
RDF State RequirementWhile RDF is running, the only configuration parameters you can alter are the log file, the purgetime, the RDF updater delay, the RDF UPDATEROPEN, and the priority of each RDF process.To change the setting of any other parameter, you must first stop RDF.
Usage GuidelinesBefore entering the ALTER command, you can display the current configuration parameterswith the INFO RDF command. After entering ALTER, you can confirm your changes by againentering INFO RDF.For using ALTER RDF UPDATEROPEN to coordinate the taking of online dumps or reloads onthe backup system, see the discussion in Chapter 5 (page 121).If you use an ALTER RECEIVER command to change the EXTENTS parameter, the change willoccur on the next RDF image file rollover, unless RDF has never been started since its lastreinitialization.Although you can use the SET RECEIVER RDFVOLUME command to specify the disk volumeused for the master image trail, you cannot re-specify this volume by entering an ALTERRECEIVER RDFVOLUME command. To change this volume, you must reinitialize RDF and useanother SET RECEIVER RDFVOLUME command followed by an ADD RECEIVER command.If you need to change an updater’s image trail volume, it is recommended that you stop TMF;wait for RDF to stop; delete the volume; re-add the volume back into the configuration, associatingit to a different image trail volume; and then restart the TMF and RDF subsystems. This is theonly way to ensure that the backup database will remain synchronized with the primary database.
NOTE: Altering the RDF UPDATERDELAY value is not recommended unless you have a veryspecific reason for doing so; any value less than the default (10 seconds) can affect updaterperformance.
ExamplesTo change the priority at which an extractor process is currently running, issue an ALTEREXTRACTOR PRIORITY command. For example, the following command changes the executionpriority of the master extractor process to 170:]ALTER EXTRACTOR PRIORITY 170
196 Entering RDFCOM Commands

The following command changes the execution priority of the auxiliary extractor processassociated with the auxiliary audit trail AUX02 to 170:]ALTER EXTRACTOR ATINDEX 2 PRIORITY 170
To change the primary and backup CPUs for the master receiver process to CPUs 3 and 4respectively, enter an ALTER RECEIVER CPUS command:]ALTER RECEIVER CPUS 3:4
Remember you cannot do this particular alter operation while RDF is running.To change the primary and alternate CPUs of a reverse trigger to CPUs 3 and 4, enter an ALTERTRIGGER CPU command:]ALTER TRIGGER REVERSE CPUS 3:4
COPYAUDITThis command is only for use with the triple contingency feature.If the primary system fails, you must execute two takeovers: one on each backup system involvedin the triple contingency protocol. Upon successful completion of both takeovers, the databaseson the two backup systems will almost assuredly not be identical: one of the extractors will havebeen further ahead of the other in its RDF processing when the failure occurred.The COPYAUDIT command copies missing audit records from the backup system that wasfurther ahead in its RDF processing (had the most amount of audit data) to the system that wasfurther behind (had the least amount of audit data).COPYAUDIT , REMOTESYS name , REMOTECONTROLSUBVOL subvol
REMOTESYS namespecifies the name of the backup system that has the most audit records (that was furtherahead in its RDF processing).
REMOTECONTROLSUBVOL subvol
specifies the name of the RDF control subvolume on the remote system.
Where IssuedBackup system only (the backup system that has the least amount of audit records).
Security RestrictionsYou can issue the COPYAUDIT command only if you are a member of the super-user group andhave remote passwords on both systems.
RDF State RequirementAfter an RDF takeover operation has completed successfully on both backup systems, you mustissue the COPYAUDIT command while RDF is stopped.
Usage GuidelinesUpon successful completion of the two takeovers, examine the EMS event log on both backupsystems for a 735 message. That message, which follows the 724 message in the log, specifies thelast position in the MAT that was seen by the receiver process. Compare the MAT positions inthe two 735 messages and determine which of the two systems was further behind in its RDFprocessing when the failure occurred (that is, which system had received the least amount ofaudit data from the extractor by the time the primary system was lost). Then issue a COPYAUDITcommand on the system that is behind, specifying the name of the other backup system and itsRDF control subvolume.For the following discussion, assume that you have established these two RDF configurations:RDF Configuration #1: \A ------------------> \B
RDFCOM Commands 197

(The RDF control subvolume is A1 on both systems.)
RDF Configuration #2: \A ------------------> \C (The RDF control subvolume is A2 on both systems.)
Assume you have lost the original primary system (\A), you have successfully completed atakeover on both backup systems (\B and \C), and the MAT positions displayed by the respective735 messages are:\B: 735 LAST MAT POSITION: Sno 10, RBA 100500000
\C: 735 LAST MAT POSITION: Sno 10, RBA 100000000
500 kilobytes of audit records is missing at \C.Because \C has the least amount of audit records, you must issue the following command on\C:COPYAUDIT , REMOTESYS \B, REMOTECONTROLSUBVOL A1
For each image trail, RDFCOM on \C reads its own context file to determine the MAT positionof the last audit record in the trail. RDFCOM then searches the corresponding trail on \B to findthat audit record and performs large block transfers to move all audit records beyond that pointto the trail on \C. As it does this, RDFCOM issues messages to let you know which image trailit is currently processing.
NOTE: When it begins copying missing audit records from one system to the other, RDFCOMnever alters any of the existing image trail files on the local system. Instead, it creates a brandnew image file on the local system even if the starting point of the missing audit records on theother system is within a file with a different sequence number. This means that, upon completionof the COPYAUDIT operation, the local system will almost always have more image trail files(one or two per image trail) than the other system. This is expected behavior.
Because a takeover has already completed previously on \C, RDFCOM must now update thecontext records of the affected updaters and the receiver on \C (again, RDFCOM issues a messageto let you know it is doing this). RDFCOM must update the context records because it just addednew audit records to the image trails, and the updaters must have a chance to apply thatinformation upon successful completion of a subsequent (required) takeover.Each updater has an exception file containing information about all of the audit records it couldnot apply because the abort/commit status of the associated transaction was unknown at thetime of the original takeover. Because RDFCOM added more audit records to the image trail,there is a chance that the outcome of some of these transactions is now known. Therefore,RDFCOM repositions the updater’s restart location back to the first record that it could notpreviously apply. (If there were no exception records, then RDFCOM leaves the updater’s restartlocation unchanged.)Finally, RDFCOM turns off the receiver’s takeover completed flag and issues a message tellingyou that the COPYAUDIT operation has completed successfully and you must initiate anothertakeover on \C. Issue a TAKEOVER command on \C. If the takeover completes successfully(the receiver logs an RDF message 724 followed by a 735 message containing the same detail asin the 735 message associated with the takeover on \B), the two databases are logically identical.At that point you can initialize, configure, and start RDF on both systems, and then resumeapplication processing on the new primary system with full RDF protection.
COPYAUDIT RestartabilityThe COPYAUDIT command is restartable.If an error condition aborts execution of a COPYAUDIT command, you merely correct thecondition and then reissue the command. Upon restart, RDFCOM quickly checks the local systemimage files it had previously created to be sure they are still correct, deletes the file it was working
198 Entering RDFCOM Commands

on at the time of the error condition, and then resumes copying. Because it keeps track of whereit was in the COPYAUDIT operation, RDFCOM does not have to recopy the previously copiedimage files.RDFCOM abends if it encounters network problems while searching the remote image trails formissing audit records. If that happens, RDFCOM logs a message to the EMS event log, but notto the home terminal.If RDFCOM encounters network problems during any other phase of COPYAUDIT execution,it does not abend. Instead, it logs a message to the home terminal and aborts the COPYAUDITcommand.
ExampleAssume you have established two RDF configurations to provide triple contingency protection(\A to \B and \A to \C) and that the RDF control subvolume of the \A to \B configuration isA1 and the RDF control subvolume of the \A to \C configuration is A2.Assume further that, after failure of the primary system (\A), you do a takeover on both \B and\C and determine that \B was further ahead in its RDF processing.To copy the missing audit records from \B to \C, issue the following command on \C:]COPYAUDIT , REMOTESYS \B, REMOTECONTROLSUBVOL A1
DELETEThe DELETE command deletes the entire configuration record for the specified secondary imagetrail, updater process, or trigger from the RDF configuration file.DELETE {IMAGETRAIL $volume} [ATINDEX audittrail-index-number] {[VOLUME] $volume } {$volume } {TRIGGER type }
IMAGETRAIL $volumedeletes a secondary image trail from the configuration, implicitly identifying that trail by thename of the volume on the backup system where it is stored.
[ATINDEX audittrail-index-number]specifies the audit trail associated with the trail or process you want to delete. 0 designatesthe MAT; 1 through 15 designate auxiliary audit trails AUX01 through AUX15. If you omitthis parameter, RDFCOM assumes the specified trail or process is associated with the MAT.
[VOLUME] $volumedeletes an updater process, implicitly identifying the updater process by the name of thevolume on the primary system for which this process is responsible.
TRIGGER typewhere type is REVERSE or TAKEOVER. This command parameter deletes a trigger that hasalready been added to the RDF configuration.
Where IssuedThese commands can be issued only at the primary system, except deleting the TAKOEVERtrigger, which can be issued on either the primary or backup system. If issued on the backupsystem, the primary system cannot be accessible.
RDFCOM Commands 199
NOTE: You should only delete the TAKEOVER trigger on the backup system prior to issuingthe TAKEOVER command. If you delete the TAKEOVER trigger on the backup system whenyou are not intending to execute a takeover operation, then you must remember to delete thetrigger on the primary system too when the latter comes back online. Failure to do this meansthat when you start RDF next, RDFCOM will copy the TAKEOVER trigger information over tothe backup system, thereby reinstating it on that backup system.
Security RestrictionsYou can issue the DELETE command if you are a member of the super-user group.
RDF State RequirementAfter RDF is initialized, you can issue a DELETE command only when RDF is stopped.
Usage GuidelinesFor the DELETE command to have any effect, a configuration record must already exist for thesecondary image trail or updater process associated with the volume name supplied (that is,someone must have previously issued an ADD IMAGETRAIL or ADD VOLUME command forthe volume).When you issue a DELETE VOLUME command, RDF responds:• The extractor process stops sending image data for the volume specified in the DELETE
VOLUME command.• The updater process associated with this volume will not be started.Use the DELETE VOLUME command if an update volume on the backup system becomesunusable and you want RDF to continue maintaining the other volumes. In such a case, youmust stop RDF at the primary system, issue the DELETE VOLUME command, and then restartRDF.When it is convenient to do so, you can resynchronize the affected volume, configure a newupdater process by issuing appropriate SET VOLUME commands, and then issue an ADDVOLUME command to restart RDF protection for the affected primary volume.Before you can remove an image trail with the DELETE IMAGETRAIL command, you mustdelete all updater processes that are configured to that image trail. The DELETE IMAGETRAILcommand then deletes the configuration record for the image trail and all image files currentlybelonging to that trail. Thus, the network connection to the backup system must be availablewhen you enter this command.If you need to change an updater’s image trail volume, it is recommended that you stop TMF;wait for RDF to stop; delete the volume; re-add the volume back into the configuration, associatingit to a different image trail volume; and then restart the TMF and RDF subsystems. This is theonly way to ensure that the backup database will remain synchronized with the primary database.
ExamplesAssume that RDF is protecting primary system data volumes $DATA01, $DATA02, and $DATA03,and that all three volumes are configured to the MAT. Assume also that the changes are beingreplicated to backup system volumes $DATA1, $DATA2, and $DATA3, and that the updatersfor those volumes are acquiring their audit data from secondary image trail volumes $SECIT1,$SECIT2, and $SECIT3, respectively.To delete the configuration records for the updater process and secondary image trail associatedwith $DATA03, enter the following commands:]DELETE VOLUME $DATA03]DELETE IMAGETRAIL $SECIT3
200 Entering RDFCOM Commands

Now assume that RDF is protecting primary system data volume $DATA06, which is configuredto auxiliary audit trail AUX01. Assume also that the changes are being replicated to backupsystem volume $DATA6, and that the updater for that volume is acquiring its audit data fromsecondary image trail volume $SECITB.To delete the configuration records for the updater process and secondary image trail associatedwith auxiliary audit trail AUX01, enter the following commands:]DELETE VOLUME $DATA06 ATINDEX 1]DELETE IMAGETRAIL $SECITB ATINDEX 1
EXITThe EXIT command ends your current RDFCOM session.EXIT
Where IssuedPrimary or backup system.
Security RestrictionsNone; anyone can enter the EXIT command.
RDF State RequirementYou can issue the EXIT command at any time, whether or not RDF has been started.
Usage GuidelinesIf you issue the EXIT command in your current RDFCOM session, RDFCOM terminates thesession and returns control to the operating system.If the EXIT command appears in a command file, RDFCOM stops reading the command file andignores any commands in the file that follow the EXIT command. Furthermore, the followingapplies:• If the command file name was supplied in the IN option of the command that runs RDFCOM,
RDFCOM passes control to the operating system.• If the command file name was supplied in an OBEY command issued during an interactive
RDFCOM session, RDFCOM resumes control and prompts you for a new command.You can also end the current RDFCOM session by pressing the Control and Y keys at the sametime (Ctrl-Y), which is equivalent to issuing the EXIT command.
ExampleWhen the EXIT command is issued in an interactive session, control of the terminal returns tothe operating system:]EXIT2>
FCThe FC (fix command) command enables you to selectively examine, edit, or repeat a previouslyissued RDFCOM command.{FC} [text]{? } [text]{! } [text]
{FC} [ text ]requests RDFCOM to display the most recently issued command that begins with the specifiedtext string and issue a period (.) prompt for your input. You can then use the subcommands
RDFCOM Commands 201

R, I, and D to replace, insert, and delete characters in the command line. If you omit the textparameter, RDFCOM displays the most recently issued command.
{?} [ text ]requests RDFCOM to display the most recently issued command that begins with the specifiedtext string. If you omit the text parameter, RDFCOM displays the most recently issuedcommand.
{!} [ text ]requests RDFCOM to execute the most recently issued command that begins with the specifiedtext string. If you omit the text parameter, RDFCOM executes the most recently issuedcommand.
Where IssuedPrimary or backup system.
Security RestrictionsNone; anyone can enter the FC command.
RDF State RequirementYou can enter the FC command at any time, whether or not RDF has been started.
Usage GuidelinesWhen you issue an FC command, the requested command appears, followed by a subcommandprompt (.). At the prompt, you can enter the subcommands R, I, or D to respectively replace,insert, or delete characters in the command line. As a simpler alternative to the R subcommand,you can simply enter the replacement character directly under the character you want to replace.When you enter the ? or ! character instead of the keyword FC, the requested command appearsbut you are not prompted for subcommands to change it; use the ? or ! when you only want todisplay the command, not change it.The FC command is a standard feature of many HP software products. For more informationabout how to use this command, see the TACL Reference Manual.
ExamplesSuppose you enter the INFO MONITOR command, but mistype the second character in MONITORand receive an error message as a result:]INFO MINITOR
Expecting: RDF, MONITOR, EXTRACTOR, RECEIVER, PURGER, IMAGETRAIL Or: NETWORK, RDFNET, TRIGGER, VOLUME, "*" or a Volume name]
You can correct this mistake by entering the FC command, which redisplays the INFO MONITORcommand as you erroneously entered it, followed by a prompt for your R, I, or D subcommandor replacement character:]FC]INFO MINITOR.
To correct the entry, following the subcommand prompt, enter the replacement character Ounder the incorrect letter (I) that appears on the previous line, and then press the Return key (orits equivalent) to transmit the correction:]INFO MINITOR. O
202 Entering RDFCOM Commands

RDF now displays the corrected INFO MONITOR command followed by another prompt thatasks for any further corrections. Because you have no further changes, you press the Return keyafter the subcommand prompt. Now, RDFCOM processes the INFO MONITOR command, thistime successfully.]INFO MONITOR.MONITOR CPUS 0:1MONITOR PRIORITY 170MONITOR PROCESS $MON]
On the next line, suppose you inadvertently enter an extra character in the SHOW RDF command:]SHOW RDDFExpecting: RDF, MONITOR, EXTRACTOR, RECEIVER, PURGER, IMAGETRAIL Or: NETWORK, RDFNET, TRIGGER, or VOLUME]
You correct this entry by entering the FC command followed by the D (for delete) subcommandunder the extra character displayed:]FC]SHOW RDDF. D]SHOW RDF.RDF SOFTWARELOC $SYSTEM.RDFRDF LOGFILE $0RDF PRIMARYSYSTEM \MICKEYRDF UPDATERDELAY 10RDF UPDATERTXTIME 60RDF UPDATERRTDWARNING 60RDF UPDATEROPEN PROTECTEDRDF NETWORK OFFRDF NETWORKMASTER OFFRDF UPDATEREXCEPTION ONRDF REPLICATEPURGE OFFRDF OWNER SUPER.RDF
HELPThe HELP command displays explanatory text about RDFCOM commands and RDF messages.HELP [ABBREVIATIONS ] [ALL ] [command ] [RDF-msg-number]
ABBREVIATIONSlists the allowed abbreviations for RDFCOM command keywords.
ALLlists all RDFCOM commands.
command
displays information for the RDFCOM command specified by command.RDF-msg-number
displays information for the RDF message specified by RDF-msg-number.
Where IssuedPrimary or backup system.
Security RestrictionsNone; anyone can enter the HELP command.
RDFCOM Commands 203

RDF State RequirementYou can issue the HELP command at any time, whether or not RDF has been started.
Usage GuidelinesThis command retrieves and displays information from the RDFHELP file.If you omit all options, RDFCOM uses the ALL option and lists all RDFCOM commands.
ExamplesTo display the syntax of the ADD command, enter: ]HELP ADD
RDFCOM displays: { RDF } { MONITOR } { EXTRACTOR } { RECEIVER }ADD { IMAGETRAIL $volume } { PURGER } { RDFNET } { NETWORK } { TRIGGER <trigger-type> } { VOLUME $volume } { $volume }Cannot be performed with RDF running.
Only a user in the SUPER group can execute this command.
To list all available RDFCOM commands, enter:]HELP ALL
RDFCOM displays the following:Help is available for the following:
Configuration Commands:
ADD ALTER { RDF | MONITOR | EXTRACTOR | RECEIVER | PURGER | TRIGGER | RDFNET | VOLUME } DELETE INFO INITIALIZE RESET SHOW SET { RDF | MONITOR | EXTRACTOR | RECEIVER | IMAGETRAIL | PURGER | NETWORK | RDFNET | TRIGGER | VOLUME }
Operational Commands:
START STATUS STOP TAKEOVER UNPINAUDIT VALIDATE
Utility Commands:
EXIT FC HELP
204 Entering RDFCOM Commands

HISTORY OBEY OPEN OUT
RDF Concepts: Abbreviations
RDF error messages:error-number
E.g., "help 700" prints an explanation for the RDF error message 700
To display information about RDF message 715, enter:
]HELP 715
RDFCOM displays the following description:-------------------------------------------------------------| 715 Primary Stopped |-------------------------------------------------------------Cause: The primary process of a NonStop process pair has stopped. This probably was the result of an operator inadvertently issuing a STOP command from TACL.
Effect: The backup process takes over, but not in fault-tolerant mode, until the primary process can be re-created.
Recovery: This is an informational message; no recovery is required.
HISTORYThe HISTORY command displays the ten most recently issued RDFCOM commands (includingthe HISTORY command itself).HISTORY
Where IssuedPrimary or backup system.
Security RestrictionsNone; anyone can enter the HISTORY command.
RDF State RequirementYou can enter the HISTORY command at any time, whether or not RDF has been started.
ExamplesSuppose the following RDFCOM commands are the nine most recently issued:]ADD EXTRACTOR]START RDF]SHOW EXTRACTOR]ALTER EXTRACTOR PRIORITY 170]SHOW RECEIVER]ALTER RECEIVER PRIORITY 175]STATUS RDF]ALTER MONITOR PRIORITY 195]INFO *
RDFCOM Commands 205

Now, suppose you issue a HISTORY command:]HISTORY
In response, RDFCOM displays:History:
ADD EXTRACTOR START RDF SHOW EXTRACTOR ALTER EXTRACTOR PRIORITY 170 SHOW RECEIVER ALTER RECEIVER PRIORITY 175 STATUS RDF ALTER MONITOR PRIORITY 195 INFO * HISTORY
INFOThe INFO command displays the current configuration parameter values from the configurationfile for the specified process or other object.INFO {* } [ATINDEX audittrail-index-num] {IMAGETRAIL } [,OBEYFORM] {RDF } {MONITOR } {EXTRACTOR } {RECEIVER } {RDFNET } {NETWORK } {PURGER } {TRIGGER trigger-type } {VOLUME * } {[VOLUME] $volume }
*displays the current configuration parameter values for the RDF global options, for all updatervolumes, and for all RDF processes.
[ATINDEX audittrail-index-num]is an integer value from 0 through 15 identifying the TMF audit trail on the primary systemwith which the particular RDF object is associated. 0 specifies the MAT. 1 through 15 specifyauxiliary audit trails AUX01 through AUX15, respectively.You can use this option only with the EXTRACTOR, IMAGETRAIL, RECEIVER, and[VOLUME] $volume variations of the INFO command.For INFO EXTRACTOR, INFO IMAGETRAIL, and INFO RECEIVER commands, the defaultis 0. If you omit this parameter, RDFCOM assumes you want to display information aboutthe designated object associated with the MAT.For INFO VOLUME commands, this parameter is optional regardless of whether the updateris associated with MAT or an auxiliary audit trail.
OBEYFORMformats the INFO command output as command file text that can be executed by RDFCOM.Before issuing the INFO command, you can designate the command file for this text byspecifying the file name in either:• The OUT option of the RDFCOM command that begins your interactive session• An OUT command issued during the sessionIf you do not specify a command file for the text, TACL supplies the name of its currentdefault output destination—usually the terminal from which you began your session.
206 Entering RDFCOM Commands

The subsystem saves the text in the command file, also embedding the appropriate SET andADD commands. Any time you want, you can execute the text by specifying the commandfile name in an OBEY command or in the IN option of the RDFCOM command that beginsa session, producing a new RDF configuration based on the one captured by the INFOcommand. You can use the OBEYFORM option with any variation of the INFO command:for example, with INFO EXTRACTOR, INFO RDF, or INFO *.
IMAGETRAILdisplays the names of all volumes on the backup system that are configured as secondaryimage trail volumes.
RDFdisplays the current configuration parameter values for the RDF global options.
MONITORdisplays the current configuration parameter values for the monitor process.
EXTRACTORdisplays the current configuration parameter values for the extractor process.
RECEIVERdisplays the current configuration parameter values for the receiver process.
RDFNETdisplays the current configuration parameter values for the RDFNET process.
NETWORKdisplays the current configuration parameter values for an RDF network.
PURGERdisplays the current configuration parameter values for the purger process.
TRIGGER trigger-typedisplays the current configuration parameter values for the specified trigger type (REVERSE,TAKEOVER, or * ). INFO TRIGGER * displays both REVERSE and TAKEOVER triggers, ifany are defined.
VOLUME *displays the current configuration parameter values for all updater processes.
[VOLUME] $volumedisplays the current configuration parameter values for an updater process, implicitlyidentifying the updater process by the name of the volume on the primary system for whichthis process is responsible.
Where IssuedPrimary or backup system.
Security RestrictionsNone; anyone can enter the INFO command.
RDF State RequirementsYou can enter the INFO command any time after RDF has been initialized.
Usage GuidelinesThis command retrieves its information from the RDF configuration file.
RDFCOM Commands 207

Output DisplayedThe parameters displayed for the RDF global options, secondary image trails, and the individualprocesses are explained under the SET IMAGETRAIL, SET RDF, SET MONITOR, SETEXTRACTOR, SET RECEIVER, SET RDFNET, SET NETWORK, SET PURGER, and SET VOLUMEcommand descriptions.
ExamplesExamples of several INFO commands follow.
INFO * Command
To display all current RDF configuration parameters for both the primary and backup systems,enter:]INFO *
RDF displays the currently configured RDF parameter values in the following manner:RDF SOFTWARELOC $SYSTEM.RDFRDF BACKUPSYSTEM \TORONTORDF CONTROL SUBVOLUME SANFRANRDF LOGFILE $0RDF PRIMARYSYSTEM \SANFRANRDF UPDATERDELAY 10RDF UPDATERTXTIME 10RDF UPDATERRTDWARNING 60RDF UPDATEROPEN PROTECTEDRDF NETWORK OFFRDF NETWORKMASTER OFFRDF UPDATEREXCEPTION OFFRDF REPLICATEPURGE OFF
MONITOR CPUS 1:2MONITOR PRIORITY 165MONITOR PROCESS $MON1
EXTRACTOR ATINDEX 0EXTRACTOR CPUS 2:1EXTRACTOR PRIORITY 165EXTRACTOR PROCESS $EXTEXTRACTOR RTDWARNING 60
PURGER CPUS 3:2PURGER PRIORITY 165PURGER PROCESS $PURGPURGER RETAINCOUNT 50PURGER PURGETIME 60
RECEIVER ATINDEX 0RECEIVER CPUS 1:2RECEIVER EXTENTS (1000,1000)RECEIVER PRIORITY 165RECEIVER RDFVOLUME $DATA2RECEIVER FASTUPDATEMODE OFFRECEIVER PROCESS $RECV
IMAGETRAIL ATINDEX 0IMAGETRAIL $SECIT1
IMAGETRAIL ATINDEX 0IMAGETRAIL $SECIT2
VOLUME $DATA01VOLUME ATINDEX 0
208 Entering RDFCOM Commands

VOLUME CPUS 2:1VOLUME PRIORITY 160VOLUME UPDATEVOLUME $DATA1VOLUME IMAGEVOLUME $SECIT1VOLUME PROCESS $UP01
VOLUME $DATA02VOLUME ATINDEX 0VOLUME CPUS 2:1VOLUME PRIORITY 160VOLUME UPDATEVOLUME $DATA2VOLUME IMAGEVOLUME $SECIT2VOLUME PROCESS $UP02
VOLUME $DATA03VOLUME ATINDEX 0VOLUME CPUS 2:1VOLUME PRIORITY 160VOLUME UPDATEVOLUME $DATA3VOLUME IMAGEVOLUME $SECIT2VOLUME PROCESS $UP03
TRIGGER PROGRAM $SYSTEM.RDF.RDFCOMTRIGGER INFILE $DATA01.RDF.RDFCONFTRIGGER OUTFILE $DATA01.RDF.OUTFILETRIGGER CPUS 0:1TRIGGER PRIORITY 150TRIGGER NOWAITTRIGGER REVERSE
The primary system name is set implicitly and the backup system name is set in the INITIALIZERDF command.
INFO EXTRACTOR Command
To display the current configuration parameters for the auxiliary extractor process associatedwith auxiliary audit trail AUX02, enter the following command:]INFO EXTRACTOR ATINDEX 2
The output shows that the auxiliary extractor for AUX02 is configured with its default parametervalues: running in CPUs 2 and 1, with a priority of 165, and with the default RTD warningthreshold of 60 seconds:EXTRACTOR ATINDEX 2EXTRACTOR CPUS 2:1EXTRACTOR PRIORITY 165EXTRACTOR PROCESS $EXT2EXTRACTOR RTDWARNING 60
INFO EXTRACTOR Command With OBEYFORM Option
The OBEYFORM option is useful when you want to create an RDF configuration command filefrom an existing configuration: for example, for later use in an OBEY command. To copy thecurrent extractor process configuration parameters in command file format to the output filenamed $RDF.EX.COMFL, enter:]OUT $RDF.EX.COMFL]INFO EXTRACTOR, OBEYFORM
RDF produces the following output, based on the configuration used in the previous example:SET EXTRACTOR ATINDEX 2SET EXTRACTOR CPUS 2:1SET EXTRACTOR PRIORITY 165SET EXTRACTOR PROCESS $EXT2
RDFCOM Commands 209
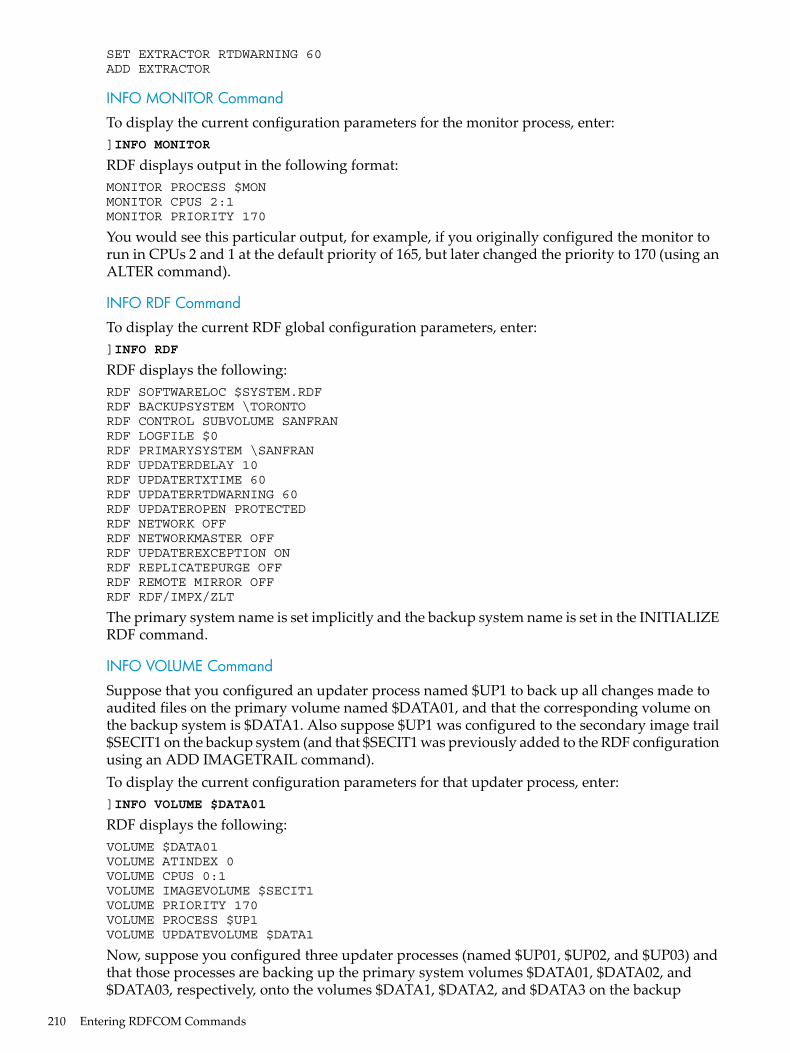
SET EXTRACTOR RTDWARNING 60ADD EXTRACTOR
INFO MONITOR Command
To display the current configuration parameters for the monitor process, enter:]INFO MONITOR
RDF displays output in the following format:MONITOR PROCESS $MONMONITOR CPUS 2:1MONITOR PRIORITY 170
You would see this particular output, for example, if you originally configured the monitor torun in CPUs 2 and 1 at the default priority of 165, but later changed the priority to 170 (using anALTER command).
INFO RDF Command
To display the current RDF global configuration parameters, enter:]INFO RDF
RDF displays the following:RDF SOFTWARELOC $SYSTEM.RDFRDF BACKUPSYSTEM \TORONTORDF CONTROL SUBVOLUME SANFRANRDF LOGFILE $0RDF PRIMARYSYSTEM \SANFRANRDF UPDATERDELAY 10RDF UPDATERTXTIME 60RDF UPDATERRTDWARNING 60RDF UPDATEROPEN PROTECTEDRDF NETWORK OFFRDF NETWORKMASTER OFFRDF UPDATEREXCEPTION ONRDF REPLICATEPURGE OFFRDF REMOTE MIRROR OFFRDF RDF/IMPX/ZLT
The primary system name is set implicitly and the backup system name is set in the INITIALIZERDF command.
INFO VOLUME Command
Suppose that you configured an updater process named $UP1 to back up all changes made toaudited files on the primary volume named $DATA01, and that the corresponding volume onthe backup system is $DATA1. Also suppose $UP1 was configured to the secondary image trail$SECIT1 on the backup system (and that $SECIT1 was previously added to the RDF configurationusing an ADD IMAGETRAIL command).To display the current configuration parameters for that updater process, enter:]INFO VOLUME $DATA01
RDF displays the following:VOLUME $DATA01VOLUME ATINDEX 0VOLUME CPUS 0:1VOLUME IMAGEVOLUME $SECIT1VOLUME PRIORITY 170VOLUME PROCESS $UP1VOLUME UPDATEVOLUME $DATA1
Now, suppose you configured three updater processes (named $UP01, $UP02, and $UP03) andthat those processes are backing up the primary system volumes $DATA01, $DATA02, and$DATA03, respectively, onto the volumes $DATA1, $DATA2, and $DATA3 on the backup
210 Entering RDFCOM Commands

system. The updaters $UP01 and $UP02 are accessing the secondary image trail $SECIT1; updater$UP03 is accessing the secondary image trail $SECIT2.To display the current configuration parameters for all of the updater processes, enter:]INFO VOLUME *
RDF displays the following:VOLUME $DATA01VOLUME ATINDEX 0VOLUME CPUS 0:1VOLUME IMAGEVOLUME $SECIT1VOLUME PRIORITY 160VOLUME PROCESS $UP01
VOLUME UPDATEVOLUME $DATA1
VOLUME $DATA02VOLUME ATINDEX 0VOLUME CPUS 2:3VOLUME IMAGEVOLUME $SECIT1VOLUME PRIORITY 160VOLUME PROCESS $UP02VOLUME UPDATEVOLUME $DATA2
VOLUME $DATA03VOLUME ATINDEX 0VOLUME CPUS 4:5VOLUME IMAGEVOLUME $SECIT2VOLUME PRIORITY 160VOLUME PROCESS $UP03VOLUME UPDATEVOLUME $DATA3
INFO PURGER Command
To display the current configuration parameters for the purger process, enter the followingcommand:]INFO PURGER
The output shows that the purger is configured with the following parameter values: runningin CPUs 3 and 2, with a priority of 165, with a retaincount of 50, with a purgetime of 60, and withthe process name $PURG:PURGER CPUS 3:2PURGER PRIORITY 165PURGER PROCESS $PURGPURGER RETAINCOUNT 50PURGER PURGETIME 60
INFO TRIGGER Command
To display the configuration parameters for any currently-configured triggers, enter the followingcommand:]INFO TRIGGER *
The following output shows that both a reverse trigger and a takeover trigger are configuredwith the designated parameter values:TRIGGER PROGRAM $SYSTEM.RDF.RDFCOMTRIGGER INFILE $DATA01.RDF.REVTRIGTRIGGER OUTFILE $DATA01.RDF.OUTFILETRIGGER CPUS 0:1TRIGGER PRIORITY 150TRIGGER NOWAITTRIGGER REVERSE
TRIGGER PROGRAM $SYSTEM.SYSTEM.TACL
RDFCOM Commands 211

TRIGGER INFILE $DATA01.RDF.TKOVERTRIGGER OUTFILE $DATA01.RDF.OUTFILETRIGGER CPUS 0:1TRIGGER PRIORITY 150TRIGGER NOWAITTRIGGER TAKEOVER
INFO TRIGGER Command With OBEYFORM Option
Like all INFO commands, INFO TRIGGER supports the optional OBEYFORM parameter. Theoutput of an INFO TRIGGER REVERSE, OBEYFORM command might be:SET TRIGGER PROGRAM $SYSTEM.RDF.RDFCOMSET TRIGGER INFILE $DATA01.RDF.RDFCONFSET TRIGGER OUTFILE $DATA01.RDF.OUTFILESET TRIGGER CPUS 0:1SET TRIGGER PRIORITY 150SET TRIGGER NOWAITADD TRIGGER REVERSE
INFO RDFNET Command
To display the current configuration parameters for the RDFNET process, enter the followingcommand:]INFO RDFNET
RDF displays the following:RDFNET PROCESS $MNETRDFNET CPUS 0:1RDFNET PRIORITY 180
INFO NETWORK Command
To display the current RDF network configuration parameters, enter the following command:]INFO NETWORK
RDF displays the following:NETWORK PRIMARYSYSTEM \RDF04NETWORK BACKUPSYSTEM \RDF06NETWORK RCSV RDF04NETWORK PNETTXVOLUME $DATA07
INITIALIZE RDFThe INITIALIZE RDF command creates the RDF configuration and context files for establishmentof a new RDF configuration.
NOTE: If you plan to initialize more than one RDF subsystem on your primary system, thenyou must open each new control subvolume before you initialize and configure your new RDFenvironment. This means that after you have initialized one RDF subsystem, you must enter anOPEN command, specifying the next control subvolume. You can then enter the INITIALIZEcommand. If a configuration file is not already in the specified control subvolume when the opencommand is issued, RDFCOM issues a warning indicating that a configuration record was notfound. This is expected behavior.
There must be no files in the control subvolume on either the primary or backup systems whenyou issue this command, otherwise the command will fail. If you are issuing the INITIALIZERDF command within an existing RDF configuration, you must first delete all the files from theRDF control subvolume on both the primary and backup systems. Alternatively, you can usethe "#" option at the end of the command and it will purge all files in the control subvolume onthe primary and backup system.
212 Entering RDFCOM Commands
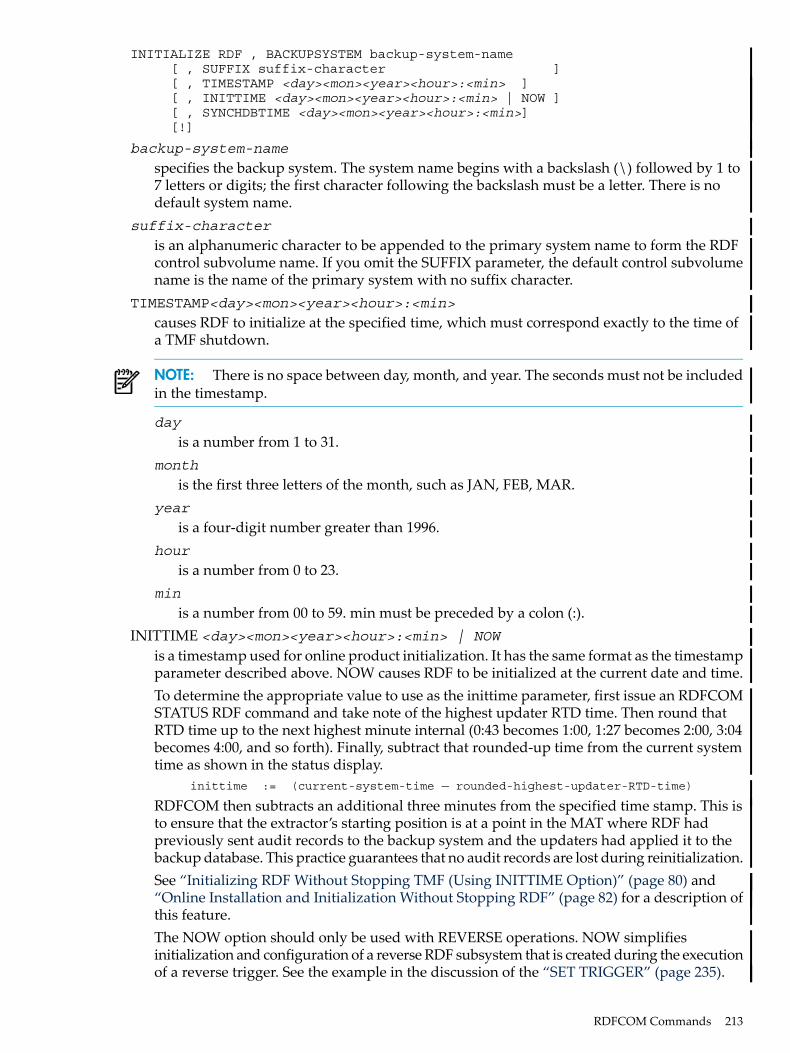
INITIALIZE RDF , BACKUPSYSTEM backup-system-name [ , SUFFIX suffix-character ] [ , TIMESTAMP <day><mon><year><hour>:<min> ] [ , INITTIME <day><mon><year><hour>:<min> | NOW ] [ , SYNCHDBTIME <day><mon><year><hour>:<min>] [!]
backup-system-name
specifies the backup system. The system name begins with a backslash (\) followed by 1 to7 letters or digits; the first character following the backslash must be a letter. There is nodefault system name.
suffix-character
is an alphanumeric character to be appended to the primary system name to form the RDFcontrol subvolume name. If you omit the SUFFIX parameter, the default control subvolumename is the name of the primary system with no suffix character.
TIMESTAMP<day><mon><year><hour>:<min>
causes RDF to initialize at the specified time, which must correspond exactly to the time ofa TMF shutdown.
NOTE: There is no space between day, month, and year. The seconds must not be includedin the timestamp.
day
is a number from 1 to 31.month
is the first three letters of the month, such as JAN, FEB, MAR.year
is a four-digit number greater than 1996.hour
is a number from 0 to 23.min
is a number from 00 to 59. min must be preceded by a colon (:).INITTIME <day><mon><year><hour>:<min> | NOW
is a timestamp used for online product initialization. It has the same format as the timestampparameter described above. NOW causes RDF to be initialized at the current date and time.To determine the appropriate value to use as the inittime parameter, first issue an RDFCOMSTATUS RDF command and take note of the highest updater RTD time. Then round thatRTD time up to the next highest minute internal (0:43 becomes 1:00, 1:27 becomes 2:00, 3:04becomes 4:00, and so forth). Finally, subtract that rounded-up time from the current systemtime as shown in the status display. inittime := (current-system-time — rounded-highest-updater-RTD-time)
RDFCOM then subtracts an additional three minutes from the specified time stamp. This isto ensure that the extractor’s starting position is at a point in the MAT where RDF hadpreviously sent audit records to the backup system and the updaters had applied it to thebackup database. This practice guarantees that no audit records are lost during reinitialization.See “Initializing RDF Without Stopping TMF (Using INITTIME Option)” (page 80) and“Online Installation and Initialization Without Stopping RDF” (page 82) for a description ofthis feature.The NOW option should only be used with REVERSE operations. NOW simplifiesinitialization and configuration of a reverse RDF subsystem that is created during the executionof a reverse trigger. See the example in the discussion of the “SET TRIGGER” (page 235).
RDFCOM Commands 213

SYNCHDBTIME <day><mon><year><hour>:<min>
is a timestamp used for online database synchronization. It has the same format as thetimestamp parameter described above.There are no special considerations for specifying the synchdbtime parameter, except that itmust designate a time earlier than the present time.The SYNCHDBTIME parameter can only be used if RDF/IMP, IMPX, or ZLT is installed onboth the primary and backup systems.For a description of the online synchronization feature, see Chapter 7 (page 167).
!causes the command to be executed without further confirmation. If you omit the exclamationpoint, RDFCOM prompts you for additional responses:• If you omit the TIMESTAMP, INITTIME, SYNCHDBTIME, and ! options, RDFCOM
displays:Are you sure you want to initialize? [Y/N]
Enter Y or YES to proceed; enter N or NO to cancel the command.
• If you include the TIMESTAMP option without the ! option, RDFCOM displays:Do you wish to proceed? [Y/N]
Enter Y or YES to proceed; enter N or NO to cancel the command.
If you enter Y or YES, RDFCOM displays:
Please wait while RDF searches for the specified timestamp.TMF shutdown at 12JAN2004 14:30 has been found. RDF will start at RBA: 376275 MAT file: $AUDIT.ZTMFAT.AA000414Do you still wish to start at this point? [Y/N]
Enter Y or YES to proceed; enter N or NO to cancel the command.
• If you include the INITTIME option without the ! option, RDFCOM displays:Do you wish to proceed? [Y/N]
Enter Y or YES to proceed; enter N or NO to cancel the command.
If you enter Y or YES, RDFCOM displays:
Please wait while RDF searches for the specified timestamp.Initialization point for 12JAN2004 14:30 has been found.RDF will start at RBA: 376275 MAT file: $AUDIT.ZTMFAT.AA000414Do you still wish to start at this point? [Y/N]
Enter Y or YES to proceed; enter N or NO to cancel the command.
• If you include the SYNCHDBTIME option without the ! option, RDFCOM displays:Do you wish to proceed? [Y/N]
Enter Y or YES to proceed; enter N or NO to cancel the command.
If you enter Y or YES, RDFCOM displays:
Please wait while RDF searches for the specified timestamp.Synch point for 12JAN2004 14:30 has been found. RDF will start at RBA: 376275 MAT file: $AUDIT.ZTMFAT.AA000414Do you still wish to start at this point? [Y/N]
Enter Y or YES to proceed; enter N or NO to cancel the command.
214 Entering RDFCOM Commands

#causes the control subvolume files both on the primary and backup systems to be purgedbefore initialization.• If used in an interactive mode (either as a command from RDFCOM or in an OBEY file
) without "!" operator, RDFCOM displays:RDFCOM will purge all the files in the control subvolume(of both local & remote systems) if present.Do you wish to proceed? [Y/N]
Processing continues based on User Reply.• This operator cannot be used inside an IN file without "!".
Where IssuedPrimary system only.
Security RestrictionsYou can issue the INITIALIZE RDF command if you are a member of the super-user group.
RDF State RequirementYou can issue the INITIALIZE RDF command only when RDF is stopped and no files exist inthe RDF control subvolumes on either the primary and backup systems.
Usage GuidelinesIf your RDF subsystem is running and you do not include the TIMESTAMP, INITTIME, orSYNCHDBTIME options in the INITIALIZE RDF command, then you must stop, delete, andreconfigure TMF before entering the INITIALIZE RDF command.Before issuing the INITIALIZE RDF command within an existing RDF configuration, you mustfirst purge all files from the control subvolume on both the primary and backup systems or youmust use the # option that authorizes RDFCOM to purge all of the files.TMF must be started on the primary system, but transaction processing need not be enabled,when you enter the INITIALIZE RDF command either with or without the TIMESTAMP,INITTIME, or SYNCHDBTIME options.The INITIALIZE RDF command creates the configuration and context files for establishment ofa new RDF configuration. After issuing the INITIALIZE RDF command, you must build the newconfiguration by entering the appropriate SET and ADD commands or by executing a commandfile containing those commands. Only then can you issue the START RDF command to startRDF.The INITIALIZE RDF command also establishes the name of the RDF control subvolume, whichyou subsequently specify when initiating RDFCOM sessions or in OPEN commands.If you include the SUFFIX parameter, the specified character becomes a permanent part of theRDF control subvolume name and you cannot alter it. If you want to change it, you mustreinitialize RDF again and specify a new suffix character. Note, however, that if you reinitializeRDF with a new suffix character, you should remember to purge the control subvolume andimage trails of the previous configuration you are replacing.When using the INITIALIZE RDF command, follow these guidelines:• The INITTIME option is particularly useful for initializing RDF without having to STOP
TMF. For example, if you have been running RDF 1.8, you have stopped RDF, and you havejust installed the RDF 1.9 software, use the INITTIME option instead of having to stop TMF.See Chapter 3 (page 69) for a discussion on this type of operation.
• The SYNCHDBTIME is the option you would use when performing an online databasesynchronization operation. For a full discussion on this option used in conjunction with acomplete or partial database synchronization, see Chapter 7 (page 167).
RDFCOM Commands 215

• If you include the TIMESTAMP, INITTIME, or SYNCHDBTIME options in the INITIALIZERDF command, the initialization will complete much quicker if all the files from the currentdown to the one in which the timestamp being sought is located are all on disk. If, however,some of these audit files have been dumped to tape, RDFCOM triggers TMF to prompt youto restore needed audit trail files. Therefore, not every file in the MAT must be present inthe audit trail at the time you issue the INITIALIZE command. For example, if the currentfile is AA000010, files AA000010 and A000009 are in the MAT, and A000008 contains thepoint where RDF is actually initialized but it has already been dumped to tape, then RDFCOMtriggers TMF to prompt you to restore AA000008. When you have restored that file, RDFCOMcontinues its search in A000008 for the correct initialization location.
• If you include the TIMESTAMP option in the INITIALIZE RDF command, then the specifiedtimestamp must correspond exactly to a TMF shutdown point. Whenever TMF stops inresponse to a STOP TMF command, it writes a timestamp in the Event Management Service(EMS) log. That is the timestamp you use with the TIMESTAMP option of the INITIALIZERDF command.
• If you do not include the TIMESTAMP, INITTIME, or SYNCHDBTIME options in theINITIALIZE RDF command, you must delete and reconfigure TMF before you initializeRDF. In this case, the extractor will transmit audit from the beginning of the first MasterAudit Trail (MAT) file (AA000001).
• If you include the TIMESTAMP option in the INITIALIZE RDF command, RDFCOM searchesbackwards in the MAT for a TMF shutdown record with the specified timestamp. If youinclude the INITTIME or SYNCHDBTIME option, RDFCOM searches backwards in theMAT for the first commit or abort record whose timestamp is less than the specifiedtimestamp. When it finds the shutdown record or commit/abort record, RDFCOM sets thecontext of the extractor to the record following that record.
• When RDF is initialized, the contexts of the receiver and all updaters are initialized to thebeginning of the first image file (AA000001). When RDF is started for the first time after ithas been initialized, any previously existing image files are purged.
• If you plan to include the TIMESTAMP option in the INITIALIZE RDF command, makesure that the primary system database is backed up after the TMF shutdown so that thebackup database can be restored at this point in the audit trail. Consider the followingexample:1. TMF and RDF subsystems are running.2. TMF subsystem is stopped, and RDF subsystem subsequently stops.3. TMF subsystem is started and application processing resumed.4. TMF subsystem is stopped.If you initialize RDF at the shutdown point at Step 1, you should restore on the backupsystem a copy of the primary system database taken at Step 1. The databases would not besynchronized if the database at Step 2 was restored to the backup system.If you initialize RDF to the timestamp corresponding to Step 2, you should restore on thebackup system a copy of the primary system database taken at Step 2.
• If you are using the TIMESTAMP option, it is a good idea to initialize RDF to the latest TMFshutdown point. In the example immediately above, if you were to initialize RDF to Point2, then, after you have initialized and started RDF, it will shutdown when it reaches theaudit trail location of the next TMF shutdown at Point 4. In this case, you must initializeRDF at the most recent TMF shutdown point. If you initialize RDF at an earlier shutdownpoint, RDF operations will start at that point but will shut down when the next TMFshutdown point is reached. In this case, you must restart RDF quickly so that operations onthe backup system do not fall too far behind those on the primary system. If you choose toinitialize RDF at a TMF shutdown point that is not the most recent, watch the RDF eventmessages for the RDF shutdown message and then restart RDF immediately.
216 Entering RDFCOM Commands
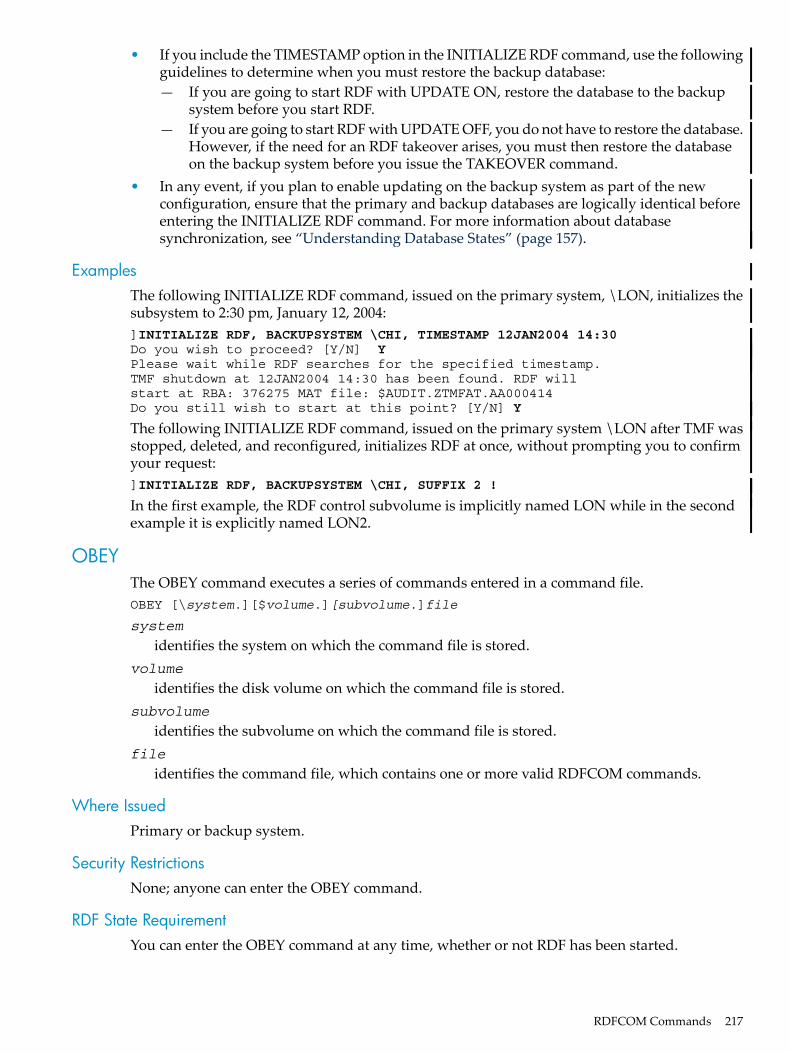
• If you include the TIMESTAMP option in the INITIALIZE RDF command, use the followingguidelines to determine when you must restore the backup database:— If you are going to start RDF with UPDATE ON, restore the database to the backup
system before you start RDF.— If you are going to start RDF with UPDATE OFF, you do not have to restore the database.
However, if the need for an RDF takeover arises, you must then restore the databaseon the backup system before you issue the TAKEOVER command.
• In any event, if you plan to enable updating on the backup system as part of the newconfiguration, ensure that the primary and backup databases are logically identical beforeentering the INITIALIZE RDF command. For more information about databasesynchronization, see “Understanding Database States” (page 157).
ExamplesThe following INITIALIZE RDF command, issued on the primary system, \LON, initializes thesubsystem to 2:30 pm, January 12, 2004:]INITIALIZE RDF, BACKUPSYSTEM \CHI, TIMESTAMP 12JAN2004 14:30Do you wish to proceed? [Y/N] YPlease wait while RDF searches for the specified timestamp.TMF shutdown at 12JAN2004 14:30 has been found. RDF will start at RBA: 376275 MAT file: $AUDIT.ZTMFAT.AA000414Do you still wish to start at this point? [Y/N] Y
The following INITIALIZE RDF command, issued on the primary system \LON after TMF wasstopped, deleted, and reconfigured, initializes RDF at once, without prompting you to confirmyour request:]INITIALIZE RDF, BACKUPSYSTEM \CHI, SUFFIX 2 !
In the first example, the RDF control subvolume is implicitly named LON while in the secondexample it is explicitly named LON2.
OBEYThe OBEY command executes a series of commands entered in a command file.OBEY [\system.][$volume.][subvolume.]file
system
identifies the system on which the command file is stored.volume
identifies the disk volume on which the command file is stored.subvolume
identifies the subvolume on which the command file is stored.file
identifies the command file, which contains one or more valid RDFCOM commands.
Where IssuedPrimary or backup system.
Security RestrictionsNone; anyone can enter the OBEY command.
RDF State RequirementYou can enter the OBEY command at any time, whether or not RDF has been started.
RDFCOM Commands 217
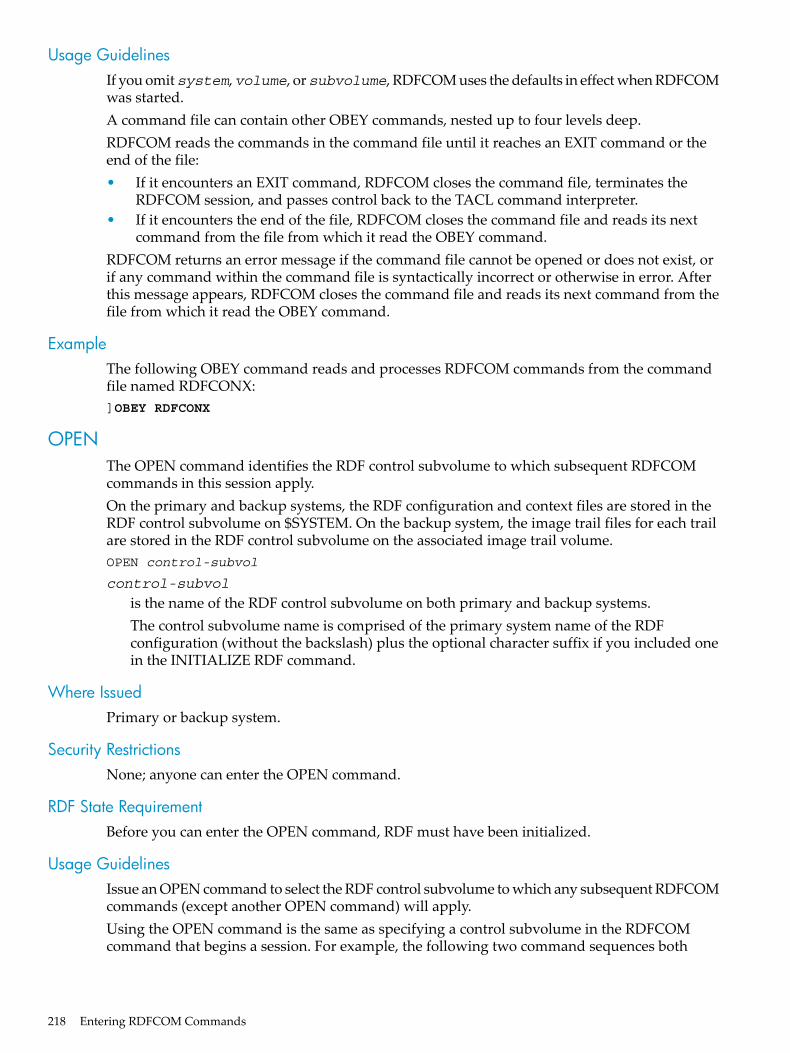
Usage GuidelinesIf you omitsystem,volume, orsubvolume, RDFCOM uses the defaults in effect when RDFCOMwas started.A command file can contain other OBEY commands, nested up to four levels deep.RDFCOM reads the commands in the command file until it reaches an EXIT command or theend of the file:• If it encounters an EXIT command, RDFCOM closes the command file, terminates the
RDFCOM session, and passes control back to the TACL command interpreter.• If it encounters the end of the file, RDFCOM closes the command file and reads its next
command from the file from which it read the OBEY command.RDFCOM returns an error message if the command file cannot be opened or does not exist, orif any command within the command file is syntactically incorrect or otherwise in error. Afterthis message appears, RDFCOM closes the command file and reads its next command from thefile from which it read the OBEY command.
ExampleThe following OBEY command reads and processes RDFCOM commands from the commandfile named RDFCONX:]OBEY RDFCONX
OPENThe OPEN command identifies the RDF control subvolume to which subsequent RDFCOMcommands in this session apply.On the primary and backup systems, the RDF configuration and context files are stored in theRDF control subvolume on $SYSTEM. On the backup system, the image trail files for each trailare stored in the RDF control subvolume on the associated image trail volume.OPEN control-subvol
control-subvol
is the name of the RDF control subvolume on both primary and backup systems.The control subvolume name is comprised of the primary system name of the RDFconfiguration (without the backslash) plus the optional character suffix if you included onein the INITIALIZE RDF command.
Where IssuedPrimary or backup system.
Security RestrictionsNone; anyone can enter the OPEN command.
RDF State RequirementBefore you can enter the OPEN command, RDF must have been initialized.
Usage GuidelinesIssue an OPEN command to select the RDF control subvolume to which any subsequent RDFCOMcommands (except another OPEN command) will apply.Using the OPEN command is the same as specifying a control subvolume in the RDFCOMcommand that begins a session. For example, the following two command sequences both
218 Entering RDFCOM Commands

accomplish the same thing—identifying DENVER3 as the RDF control subvolume and thenobtaining current status information for that system:• Sequence A:
>RDFCOM]OPEN DENVER3]STATUS RDF
• Sequence B:>RDFCOM DENVER3]STATUS RDF
Remember that, when you enter the RDFCOM command without specifying a control subvolume,RDFCOM assumes that the control subvolume name is the same as that of the local system onwhich the RDFCOM is running (without the backslash and with no suffix character). Thus, theOPEN and STATUS commands shown in Sequence A and Sequence B will only work if aconfiguration file exists on the control subvolume DENVER3.You must use the OPEN command if the system you are entering commands on services morethan one RDF configuration, or is a backup system in your RDF configuration, and you did notspecify a control subvolume in the RDFCOM command that started the present session.
ExamplesThe following command, issued from a common backup system for the primary systems\TORONTO and \DALLAS, identifies TORONTO as the RDF control subvolume for subsequentRDFCOM commands:]OPEN TORONTO
Having issued the above command, the next command obtains RDF status information for\TORONTO:]STATUS RDF
The following command identifies DALLAS as the RDF control subvolume:]OPEN DALLAS
Having issued the above command, the next command requests RDF configuration informationfor \DALLAS:]INFO *
In the two OPEN commands above, you do not include a backslash (\) because you are specifyingthe RDF control subvolume name (not a system name).
OUTThe OUT command redirects the output of the current RDFCOM session to the specified deviceor file.OUT [\system.][$volume.][subvolume.][file]
system
identifies the system on which the output file is stored.volume
identifies the disk volume on which the output file is stored.subvolume
identifies the subvolume on which the output file is stored.file
specifies the name of the file or device to which RDFCOM is to direct subsequent output.If you enter the OUT command but omit the file identifier altogether, RDFCOM directs the sessionoutput to the output file or device originally used for the current session.
RDFCOM Commands 219

Where IssuedPrimary or backup system.
Security RestrictionsNone; anyone can enter the OUT command.
RDF State RequirementYou can enter the OUT command at any time, whether or not RDF has been started.
Usage GuidelinesThe OUT command specifies a file to which all subsequent output, other than prompts for enteringRDFCOM commands, is to be written during this session. This file will receive listings producedby INFO, SHOW, and STATUS commands. The OUT command is often used to establish thedestination command file for the OBEYFORM option of the INFO command.If the specified output file does not exist, RDFCOM creates an EDIT (file code 101) file with thedesignated name and redirects session output to that file. If you specify a disk file that alreadyexists, this must be an EDIT file; RDFCOM appends its output to that file.RDFCOM continues to direct session output to the designated file or device until you issueanother OUT command or until you terminate the session, whichever happens first.If you do not specify an OUT command in your session, RDFCOM directs output to the currentdefault output destination—usually the terminal from which you issued the RDFCOM commandto start the session.
ExamplesSuppose that RDFCOM output is currently directed to the terminal at which you are enteringcommands. To temporarily direct an RDF status display to a specific spooler location and thenredirect all subsequent session output back to your terminal, enter the following commands:]OUT $s.#lp]STATUS RDF]OUT
The next OUT command establishes the destination of the text produced by the OBEYFORMoption in the subsequent INFO RDF command as a command file named CONFY. The secondOUT command in this sequence redirects later output back to your terminal:]OUT CONFY]INFO RDF, OBEYFORM]OUT
RESETThe RESET command resets all configuration parameters for the specified entity to their defaultvalues within the RDF configuration memory table. The parameters within the configurationfile do not change, however, unless you issue a corresponding ADD command.RESET {RDF } {MONITOR } {EXTRACTOR } {RECEIVER } {VOLUME } {IMAGETRAIL } {PURGER } {RDFNET } {NETWORK } {TRIGGER }
220 Entering RDFCOM Commands

RDFresets the values for the RDF global options.
MONITORresets the values for the monitor process.
EXTRACTORresets the values for the extractor process (this includes resetting the ATINDEX value to 0).
RECEIVERresets the values for the receiver process (this includes resetting the ATINDEX value to 0).
VOLUMEresets the values for the updater processes (this includes resetting the ATINDEX value to 0and clearing all EXCLUDE and INCLUDE clauses).
IMAGETRAILresets the ATINDEX value for the image trail to 0.
PURGERresets the values for the purger process.
RDFNETresets the values for the RDFNET process.
NETWORKresets the values for the network configuration record.
TRIGGERresets the values for a TRIGGER record.
For all of the default parameter values for the RDF global options and the individual processessee the SET EXTRACTOR, SET IMAGETRAIL, SET MONITOR, SET PURGER, SET RDF, SETRDFNET, SET RDFNETWORK, SET RECEIVER, SET VOLUME, and SET TRIGGER commanddescriptions.
Where IssuedPrimary system only.
Security RestrictionsYou can issue the RESET command if you are a member of the super-user group.
RDF State RequirementYou can enter the RESET command at any time, whether or not RDF has been started. Certainconstraints, however, apply to the subsequent ADD commands that apply the RESET values tothe configuration file. For further information, see the ADD command description.
Usage GuidelinesThe RESET command operates on the values in the configuration table in memory (which servesas a buffer), resetting those for the specified process to their default settings. These values donot affect RDF, however, until they are applied to the RDF configuration file with the ADDcommand.If you use INCLUDE/EXCLUDE lists for selective replication and if the files differ from onevolume to the next, then you should use the RESET VOLUME command after every ADDVOLUME command. See Chapter 3 for further details.
RDFCOM Commands 221

ExamplesTo reset the extractor process parameters in the configuration memory table to their defaultvalues, enter:]RESET EXTRACTOR
To reset the extractor process parameters in the configuration file to their default values so thatthese values now affect RDF, issue the following commands after RDF has been initialized:]RESET EXTRACTOR]SET EXTRACTOR PROCESS $EXT]ADD EXTRACTOR
To reset the updater process parameters in the configuration memory table to their default values,enter:]RESET VOLUME
To reset the trigger parameters in the configuration memory table to their default values, enter:]RESET TRIGGER
SET EXTRACTORThe SET EXTRACTOR command sets extractor process configuration parameters within the RDFconfiguration memory table. The supplied values are not applied to the RDF configuration file,however, until you issue an ADD EXTRACTOR command.SET EXTRACTOR extractor-option
where extractor-option is: {CPUS primary-CPU : backup-CPU } {PRIORITY priority } {PROCESS process-name } {ATINDEX audittrail-index-number } {RTDWARNING rtd-time } {VOLUME volume-name }
CPUS primary-CPU : backup-CPUidentifies the CPUs in which the extractor process is to run as a process pair on the primarysystem; primary-CPU is the primary CPU; backup-CPU is the backup CPU. Values rangefrom 0 through 15. The defaults are 0:1.
PRIORITY priority
identifies the execution priority for the extractor process; priority is the execution priority,from 10 through 199. The default priority is 165.
PROCESS process-nameidentifies the process name for the extractor process; process-name is any unique, validprocess name of up to six characters; the first character must be a dollar sign ($). You cannotspecify any of the reserved process names listed in the Guardian Procedure Calls ReferenceManual.This parameter is not optional. You must explicitly name the extractor process.
ATINDEX audittrail-index-number
is an integer value from 0 through 15 specifying the TMF audit trail on the primary systemwith which the extractor is associated. 0 specifies the MAT. 1 through 15 specify auxiliaryaudit trails AUX01 through AUX15. The default is 0. If you omit this parameter, RDFCOMassumes the extractor is associated with the MAT. For information about protecting auxiliaryaudit trails, see Chapter 13 (page 291).
RTDWARNING rtd-time
specifies the RTD warning threshold (in seconds, 0 or greater) for the extractor. This thresholdis used by the STATUS RTDWARNING command to determine if the extractor is to be
222 Entering RDFCOM Commands
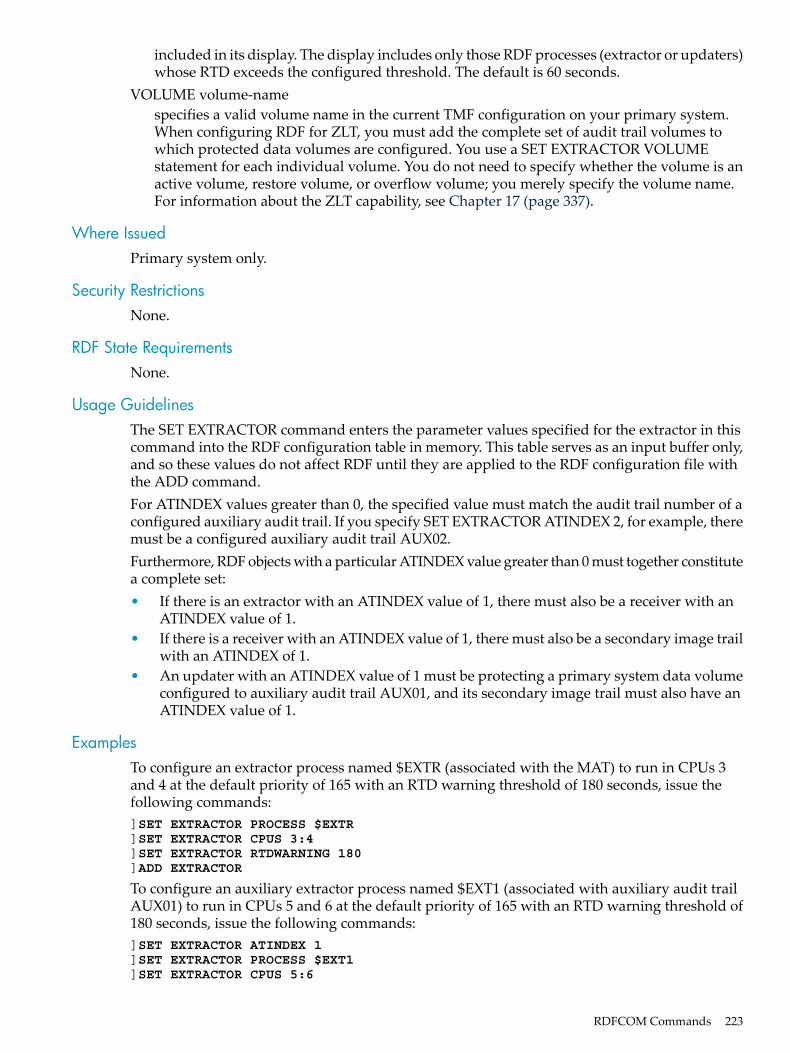
included in its display. The display includes only those RDF processes (extractor or updaters)whose RTD exceeds the configured threshold. The default is 60 seconds.
VOLUME volume-namespecifies a valid volume name in the current TMF configuration on your primary system.When configuring RDF for ZLT, you must add the complete set of audit trail volumes towhich protected data volumes are configured. You use a SET EXTRACTOR VOLUMEstatement for each individual volume. You do not need to specify whether the volume is anactive volume, restore volume, or overflow volume; you merely specify the volume name.For information about the ZLT capability, see Chapter 17 (page 337).
Where IssuedPrimary system only.
Security RestrictionsNone.
RDF State RequirementsNone.
Usage GuidelinesThe SET EXTRACTOR command enters the parameter values specified for the extractor in thiscommand into the RDF configuration table in memory. This table serves as an input buffer only,and so these values do not affect RDF until they are applied to the RDF configuration file withthe ADD command.For ATINDEX values greater than 0, the specified value must match the audit trail number of aconfigured auxiliary audit trail. If you specify SET EXTRACTOR ATINDEX 2, for example, theremust be a configured auxiliary audit trail AUX02.Furthermore, RDF objects with a particular ATINDEX value greater than 0 must together constitutea complete set:• If there is an extractor with an ATINDEX value of 1, there must also be a receiver with an
ATINDEX value of 1.• If there is a receiver with an ATINDEX value of 1, there must also be a secondary image trail
with an ATINDEX of 1.• An updater with an ATINDEX value of 1 must be protecting a primary system data volume
configured to auxiliary audit trail AUX01, and its secondary image trail must also have anATINDEX value of 1.
ExamplesTo configure an extractor process named $EXTR (associated with the MAT) to run in CPUs 3and 4 at the default priority of 165 with an RTD warning threshold of 180 seconds, issue thefollowing commands:]SET EXTRACTOR PROCESS $EXTR]SET EXTRACTOR CPUS 3:4]SET EXTRACTOR RTDWARNING 180]ADD EXTRACTOR
To configure an auxiliary extractor process named $EXT1 (associated with auxiliary audit trailAUX01) to run in CPUs 5 and 6 at the default priority of 165 with an RTD warning threshold of180 seconds, issue the following commands:]SET EXTRACTOR ATINDEX 1]SET EXTRACTOR PROCESS $EXT1]SET EXTRACTOR CPUS 5:6
RDFCOM Commands 223

]SET EXTRACTOR RTDWARNING 180]ADD EXTRACTOR
To configure a master extractor in an RDF/ZLT environment, where there are two active volumes($TMFMAT1 and $TMFMAT2), and one overflow volume ($MATOFLO), issue the followingcommands:]SET EXTRACTOR PROCESS $EXTR]SET EXTRACTOR CPUS 3:4]SET EXTRACTOR RTDWARNING 165]SET EXTRACTOR VOLUME $TMFMAT1]SET EXTRACTOR VOLUME $TMFMAT2]SET EXTRACTOR VOLUME $TMFOFLO]ADD EXTRACTOR
SET IMAGETRAILThe SET IMAGETRAIL command associates an image trail with a specific audit trail on theprimary system. The supplied value is not applied to the RDF configuration file, however, untilyou issue an ADD IMAGETRAIL command.SET IMAGETRAIL ATINDEX audittrail-index-number
ATINDEX audittrail-index-number
is an integer value identifying a configured TMF audit trail on the primary system. 0 specifiesthe MAT. 1 through 15 specify auxiliary audit trails AUX01 through AUX15.If 0, the image trail specified in the subsequent ADD IMAGETRAIL command is managedby the master receiver; if 1 through 15, it is managed by the auxiliary receiver with that sameATINDEX value. The default value is 0.For information about protecting auxiliary audit trails, see Chapter 13 (page 291).
Usage GuidelinesFor ATINDEX values greater than 0, the specified value must match the audit trail number of aconfigured auxiliary audit trail. If you specify SET IMAGETRAIL ATINDEX 2, for example, theremust be a configured auxiliary audit trail AUX02.Furthermore, RDF objects with a particular ATINDEX value greater than 0 must together constitutea complete set:• If there is an extractor with an ATINDEX value of 1, there must also be a receiver with an
ATINDEX value of 1.• If there is a receiver with an ATINDEX value of 1, there must also be a secondary image trail
with an ATINDEX of 1.• An updater with an ATINDEX value of 1 must be protecting a primary system data volume
configured to auxiliary audit trail AUX01, and its secondary image trail must also have anATINDEX value of 1.
SET MONITORThe SET MONITOR command sets monitor process configuration parameters within the RDFconfiguration memory table. The supplied values are not applied to the RDF configuration file,however, until you issue an ADD MONITOR command.SET MONITOR monitor-optionwhere monitor-option is: {CPUS primary-CPU : backup-CPU } {PRIORITY priority } {PROCESS process-name }
224 Entering RDFCOM Commands
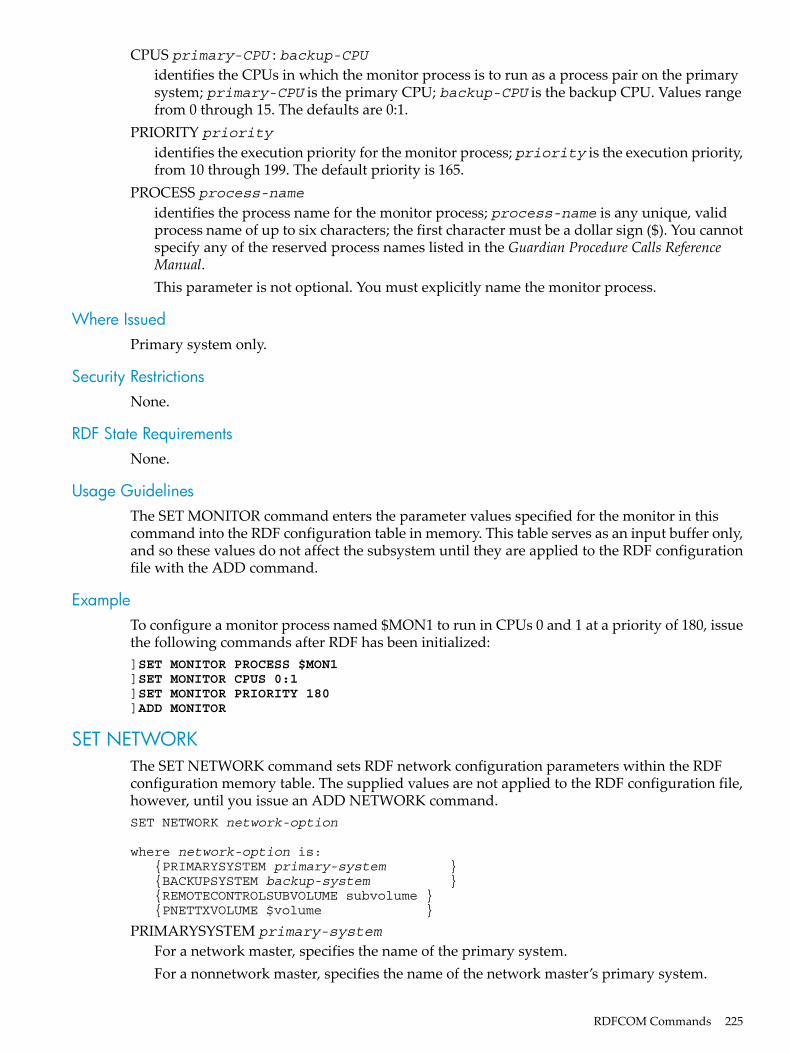
CPUS primary-CPU : backup-CPUidentifies the CPUs in which the monitor process is to run as a process pair on the primarysystem; primary-CPU is the primary CPU; backup-CPU is the backup CPU. Values rangefrom 0 through 15. The defaults are 0:1.
PRIORITY priority
identifies the execution priority for the monitor process; priority is the execution priority,from 10 through 199. The default priority is 165.
PROCESS process-nameidentifies the process name for the monitor process; process-name is any unique, validprocess name of up to six characters; the first character must be a dollar sign ($). You cannotspecify any of the reserved process names listed in the Guardian Procedure Calls ReferenceManual.This parameter is not optional. You must explicitly name the monitor process.
Where IssuedPrimary system only.
Security RestrictionsNone.
RDF State RequirementsNone.
Usage GuidelinesThe SET MONITOR command enters the parameter values specified for the monitor in thiscommand into the RDF configuration table in memory. This table serves as an input buffer only,and so these values do not affect the subsystem until they are applied to the RDF configurationfile with the ADD command.
ExampleTo configure a monitor process named $MON1 to run in CPUs 0 and 1 at a priority of 180, issuethe following commands after RDF has been initialized:]SET MONITOR PROCESS $MON1]SET MONITOR CPUS 0:1]SET MONITOR PRIORITY 180]ADD MONITOR
SET NETWORKThe SET NETWORK command sets RDF network configuration parameters within the RDFconfiguration memory table. The supplied values are not applied to the RDF configuration file,however, until you issue an ADD NETWORK command.SET NETWORK network-option
where network-option is: {PRIMARYSYSTEM primary-system } {BACKUPSYSTEM backup-system } {REMOTECONTROLSUBVOLUME subvolume } {PNETTXVOLUME $volume }
PRIMARYSYSTEM primary-system
For a network master, specifies the name of the primary system.For a nonnetwork master, specifies the name of the network master’s primary system.
RDFCOM Commands 225

BACKUPSYSTEM backup-system
For a network master, specifies the name of the associated backup system.For a nonnetwork master, specifies the name of the network master’s backup system.
REMOTECONTROLSUBVOLUME subvolumeFor a network master, specifies the name of the primary system’s remote control subvolume.For a nonnetwork master, specifies the name of the network master’s remote controlsubvolume.
PNETTXVOLUME $volumeFor a network master, specifies the name of the primary system volume on which the RDFsubsystem stores an audited network synchronization file.
Where IssuedPrimary system only.
Security RestrictionsNone.
RDF State RequirementsNone.
Usage GuidelinesThe SET NETWORK command enters the RDF network parameter values specified in thiscommand into the RDF configuration table in memory. This table serves as an input buffer only,and so these values do not affect the subsystem until they are applied to the RDF configurationfile with the ADD command.
ExampleTo configure the primary system \RDF04 and backup system \RDF06, issue the followingcommands after RDF has been initialized:SET NETWORK PRIMARYSYSTEM \RDF04SET NETWORK BACKUPSYSTEM \RDF06SET NETWORK REMOTECONTROLSUBVOLUME RDF04SET NETWORK PNETTXVOLUME $DATA07ADD NETWORK
SET PURGERThe SET PURGER command sets purger process configuration parameters within the RDFconfiguration memory table. The supplied values are not applied to the RDF configuration file,however, until you issue an ADD PURGER command.SET PURGER purger-option
where purger-option is: {CPUS primary-CPU : backup-CPU } {PRIORITY priority } {PROCESS process-name } {PURGETIME mins } {RETAINCOUNT num }
CPUS primary-CPU : backup-CPUidentifies the CPUs in which the purger process is to run as a process pair on the backupsystem; primary-CPU is the primary CPU; backup-CPU is the backup CPU. Values rangefrom 0 through 15. The default is 0:1.
226 Entering RDFCOM Commands

PRIORITY priority
identifies the execution priority for the purger process; priority is the execution priority,from 10 through 199. The default is 165.
PROCESS process-namespecifies the process name for the purger process;process-name is any unique, valid processname of up to six characters; the first character must be a dollar sign ($). You cannot specifyany of the reserved process names listed in the Guardian Procedure Calls Reference Manual.This parameter is not optional. You must explicitly name the purger process.
PURGETIME mins
specifies the number of minutes the purger process waits between attempts to purge redundantimage trail files. The default value is 60 minutes.
RETAINCOUNT num
specifies how many image trail files must be retained on disk for each image trail (includingthe image trail file currently in use). num must be within the range 2 to 5000. If you do notexplicitly set this configuration parameter, the default value is 2. This configuration parameteris only relevant for the triple contingency feature; otherwise, this parameter should be leftat its default value.
This parameter is important because if you lose the primary system, the triple contingencyprotocol will work only if all of the missing audit records at the backup system which is furtherbehind in its RDF processing is still on disk on the other backup system.For example, assume that you have lost the original primary system (\A), you have successfullycompleted a takeover on both backup systems (\B and \C), and the MAT positions displayedby the respective 735 messages are:\B: 735 LAST MAT POSITION: Sno 10, RBA 100500000
\C: 735 LAST MAT POSITION: Sno 10, RBA 100000000
500 kilobytes of audit records is missing on \C.Suppose that the image trail files are relatively small, such that the audit record at MAT 10,100000010 was placed at the start of image trail file AA000025 on \B. If the purger on \B isallowed to purge AA000025 before the takeovers occur, the triple contingency protocol will failbecause \C is missing some of the purged audit records (Sno 10, RBA 100000010 through Sno10, RBA 100500000).The RETAINCOUNT parameter is designed to prevent such a situation, although it is up to youto set this value correctly.You must figure out how much time disparity to allow for in the event that one receiver fallsbehind the other. Such a disparity would occur, for example, if the communications lines betweenthe primary system and one of the backup systems were to go down for some period of time.The RETAINCOUNT parameter must be such that no image trail files that might be needed fortriple contingency are ever purged.The best way to estimate the RETAINCOUNT value to specify is to pick an acceptable timedifferential such as 24 hours, 36 hours, or 48 hours; determine how many image trail rolloverstypically occur within that amount of time; and then set the RETAINCOUNT parameter to thatnumber of files.For example, if you believe the two receiver processes will never be more than 36 hours apart intheir RDF processing and your image trail file sizes are such that rollovers occur only once every24 hours, then you would be safe specifying a RETAINCOUNT of three for both backup systems.In that situation, the purger process on both backup systems will always keep at least two imagetrail files on disk (the one the receiver is currently writing to and the previous two). On thebackup system that is further ahead in its RDF processing, assume that files AA000010, AA000011,and AA000012 are on disk, the receiver rolls over to file AA000013, and all updaters have justbegun reading file AA000013. Also assume that there are no long-running transactions that span
RDFCOM Commands 227

from file AA000010 to file AA000013. Files AA000010 through AA000012 might no longer needed,but, because the RETAINCOUNT is set to three, the purger process can only purge AA000010(it must keep AA000011 and AA000012 on disk). Thus, as long as the RTD times of the extractorson the two backup systems are less than 24 hours apart, the triple contingency protocol will worksuccessfully.Similarly, if you believe the two receiver processes will never be more than 36 hours apart intheir RDF processing and your image trail file sizes are such that approximately 20 rolloversoccur every 24 hours, then you should set the RETAINCOUNT to 31 on both backup systems.
Where IssuedPrimary system only.
Security RestrictionsNone.
RDF State RequirementsNone.
Usage GuidelinesThe SET PURGER command enters the parameter values specified for the purger in this commandinto the RDF configuration table in memory. This table serves as an input buffer only, and sothese values do not affect the subsystem until they are applied to the RDF configuration file withthe ADD command.
ExampleTo configure a purger process named $PRG to run in CPUs 0 and 1 with a RETAINCOUNT of8, issue these commands:]SET PURGER PROCESS $PRG]SET PURGER CPUS 0:1]SET PURGER RETAINCOUNT 8]ADD PURGER
By default, in this example the purger process will run at a priority of 165 and the purgerpurgetime is set to 60 minutes.
SET RDFThe SET RDF command sets RDF global configuration parameters within the RDF configurationmemory table. The supplied values are not applied to the RDF configuration file, however, untilyou issue an ADD RDF command.SET RDF global-option
where global-option is: {LOGFILE $ems-collector-name } {UPDATERDELAY delay-time } {UPDATERTXTIME tx-time } {UPDATERRTDWARNING rtd-time } {UPDATEROPEN {PROTECTED | PROTECTED OPEN | SHARED} } {SOFTWARELOC $volume.subvolume } {NETWORK {ON | OFF} } {NETWORKMASTER {ON | OFF} } {UPDATEREXCEPTION {ON | OFF} } {LOCKSTEPVOL $volume } {REPLICATEPURGE {ON | OFF} } {REMOTE MIRROR {ON | OFF} } {REMOTE STANDBY {node-name} } {OWNER {owner-id} }
228 Entering RDFCOM Commands

LOGFILE ems-collector-name
specifies a device (EMS collector) that is to receive messages from RDF. The specified devicemust exist on both the primary and backup systems. The default is $0.The device on the primary system receives log messages from the extractor and monitorprocesses plus RDFCOM messages that are logged in message 835 and messages fromRDFNET, if configured.The device on the backup system receives log messages from the receiver, purger, and allupdater processes (plus RDFCOM messages that are logged in message 835).
UPDATERDELAY delay
specifies how many seconds (from 1 to 10) the updater processes should delay upon reachingthe logical EOF in the image trail before attempting a new read. The default is 10 seconds.The default updater delay is the recommended value for virtually all users of RDF. Loweringit could adversely affect other updaters’ performance.You can alter the UPDATERDELAY value while updaters are running by using the ALTERRDF UPDATERDELAY command.
UPDATERTXTIME tx-time
specifies the maximum transaction duration (in seconds, from 10 to 300) for all updaterprocesses. The default is 60 seconds.RDF updaters operate in transaction mode. Updater transactions are essentially long-runningtransactions that pin audit trail files on the backup system and can affect the duration ofbackout operations if an updater transaction aborts for any reason.The default value is recommended for RDF environments with heavy updater activity(aggregate updater throughput greater than 300 kb/second). Raising the tx-time in suchenvironments could adversely affect TMF performance on the backup system.In RDF environments with low to moderate updater activity and where no other transactionactivity is occurring on the backup system, you could raise the tx-time without affectingTMF performance on the backup system.
UPDATERRTDWARNING rtd-time
specifies the RTD warning threshold (in seconds, 0 or greater) for all configured updaters.The default is 60 seconds.This threshold is used by the STATUS RTDWARNING command to determine whichupdaters, if any, are to be included in its display. Besides the monitor process (and perhapsthe extractor), the display includes only those updaters, if any, whose RTD exceeds theconfigured updater RTD warning threshold.
UPDATEROPEN access-mode
specifies the access mode (PROTECTED, PROTECTED OPEN, or SHARED) that updatersuse when opening database files. The default is PROTECTED.PROTECTED access is strongly recommended at all times, except when you specifically wantto take online dumps or do reloads of the backup database with the updaters running. Beforeyou start an online dump or a reload operation, you should alter the UPDATEROPEN modefrom PROTECTED to SHARED. After the dump or reload has finished, you should changethe UPDATEROPEN mode back to SHARED. See the discussion in Chapter 3 for the issuesinvolved, including the meaning of PROTECTED OPEN.To change the configured updater access-mode:1. Issue a STOP UPDATE command.2. Issue an ALTER RDF UPDATEROPEN command specifying the desired access mode.3. Issue a START UPDATE command.
RDFCOM Commands 229

SOFTWARELOC $volume.subvolumespecifies where the RDF software is installed. The default is $SYSTEM.RDF.
NETWORK {ON | OFF}specifies whether or not you are configuring an RDF network.When set to OFF (the default value), RDF takeover operations execute and databaseconsistency is not guaranteed for transactions spanning more than one RDF backup database.When set to ON, the RDF subsystem guarantees database consistency across multiple RDFbackup systems configured within an RDF network.When set to ON, you must either have the NETWORKMASTER attribute for the same systemalso set to ON or have another system configured as the network master.
NETWORKMASTER {ON | OFF}specifies whether the particular system is the master of the RDF network. Each RDF networkhas one, and only one, network master.When set to OFF (the default value), the particular system is not the network master.When set to ON, the particular system is the network master of the RDF network. When thisattribute is set to ON, the NETWORK attribute must also be set to ON.
UPDATEREXCEPTION {ON | OFF}specifies the manner in which exception files are used.When set to ON (the default value), the updaters log an exception record for each and everyaudit record they must undo during a takeover.When set to OFF, the updaters log exception records only for the first and last audit recordsthat must be undone (the minimum logging necessary to support Triple Contingencyoperation).
LOCKSTEPVOL $volumespecifies the primary system disk volume on which the RDF lockstep file(ZRDFLKSP.control-subvolume) is to be located. The specified volume must be configuredto the Master Audit Trail (MAT), and either the entire volume or at least the lockstep filemust be protected by the RDF subsystem. For information about the RDF lockstep capability,see Chapter 15 (page 309).
REPLICATEPURGE {ON | OFF}specifies whether Enscribe purge operations on the primary system are to be replicated onthe backup system.When set to OFF (the default value), Enscribe purge operations are not replicated. You shoulduse the default (OFF) for all RDF configurations (unless you have a specific need for replicatingEnscribe purge operations).If you configure the RDF subsystem to replicate network transactions, you should not replicateEnscribe purge operations because doing so might result in unexpected errors during theupdater network undo processing.When set to ON, Enscribe purge operations on the primary system are replicated on thebackup system.
REMOTE MIRROR {ON | OFF}specifies whether ZLT is enabled or disabled. The default is off. For information about theZLT capability, see Chapter 17 (page 337).
REMOTE STANDBY {node-name}specifies the system name of the ZLT standby system. node-name must be a valid name andmust identify a system in your current Expand network. The default is the name of the backupsystem. For information about the ZLT capability, see Chapter 17 (page 337).
230 Entering RDFCOM Commands

{OWNER {owner-id}where owner-id is either groupname,username or groupnumber,usernumber.This parameter specifies the userid under which all RDF processes will always run. Thisglobal configuration parameter provides functionality whereby any super-user group useridcan start and stop RDF.Once the OWNER attribute is set, you must limit EXECUTE access to the RDFCOM objectso that only those super group users authorized to manage RDF can run RDFCOM. Failureto do so is a serious security risk because, thereafter, all RDF objects run as the userid of theRDF OWNER.To illustrate this functionality, imagine ten users are responsible for managing a particularRDF configuration and that SUPER.RDF is configured as the OWNER. Instead of providingall ten users access to the SUPER.RDF userid, each individual user can be assigned a separatesuper-user group userid. If one user is assigned SUPER.FIRST and another SUPER.SECOND,for example, they can both log on with their userid and be able to start or stop RDF. The RDFprocesses do not run under SUPER.FIRST or SUPER.SECOND, however, but underSUPER.RDF (the RDF OWNER assigned during configuration). The same principal appliesto the other eight users.By default, this attribute is not set, and therefore is not included in the INFO RDF output.The userid associated with OWNER must be a valid Guardian userid and must identify anexisting user account on the RDF primary and backup systems. The OWNER must also be amember of the super-user group, which is a requirement in RDF for stopping and startingRDF.OWNER is an unalterable value. You need not change the value, unless you configured itincorrectly (in which case you must reinitialize RDF with the correct value).If the OWNER parameter is omitted, only the userid that initializes RDF can start or stopRDF (as is true for all versions of RDF prior to 1.7).
Where IssuedPrimary system only.
Security RestrictionsNone.
RDF State RequirementsNone.
Usage GuidelinesThe SET RDF command enters the global parameter values specified in this command into theRDF configuration table in memory. This table serves as an input buffer only, and so these valuesdo not affect the subsystem until they are applied to the RDF configuration file with the ADDcommand.
SET RDFNETThe SET RDFNET command sets RDFNET process configuration parameters within the RDFconfiguration memory table. The supplied values are not applied to the RDF configuration file,however, until you issue an ADD RDFNET command.SET RDFNET netsynch-option
where netsynch-option is: {CPUS primary-CPU : backup-CPU }
RDFCOM Commands 231

{PRIORITY priority } {PROCESS process-name }
CPUS primary-CPU : backup-CPUidentifies the CPUs in which the RDFNET process is to run as a process pair on the primarysystem; primary-CPU is the primary CPU; backup-CPU is the backup CPU. Values rangefrom 0 through 15. The defaults are 0:1.
PRIORITY priority
identifies the execution priority for the RDFNET process; priority is the execution priority,from 10 through 199. The default priority is 165.
PROCESS process-nameidentifies the process name for the RDFNET process; process-name is any unique, validprocess name of up to six characters; the first character must be a dollar sign ($). You cannotspecify any of the reserved process names listed in the Guardian Procedure Calls ReferenceManual.This parameter is not optional. You must explicitly name the RDFNET process.
Where IssuedPrimary system only.
Security RestrictionsNone.
RDF State RequirementsNone.
Usage GuidelinesThe SET RDFNET command enters the parameter values specified for the RDFNET process inthis command into the RDF configuration table in memory. This table serves as an input bufferonly, and so these values do not affect the subsystem until they are applied to the RDFconfiguration file with the ADD command.
ExampleTo configure a RDFNET process named $MNET to run in CPUs 0 and 1 at a priority of 180, issuethese commands after RDF has been initialized:]SET RDFNET PROCESS $MNET]SET RDFNET CPUS 0:1]SET RDFNET PRIORITY 180]ADD NETRDF
SET RECEIVERThe SET RECEIVER command sets receiver process configuration parameters within the RDFconfiguration memory table. The supplied values are not applied to the RDF configuration file,however, until you issue an ADD RECEIVER command.SET RECEIVER receiver-option
where receiver-option is: {ATINDEX audittrail-index-number } {CPUS primary-CPU : backup-CPU } {EXTENTS (primary-extent , secondary-extent) } {RDFVOLUME $volume } {PRIORITY priority } {PROCESS process-name } {FASTUPDATEMODE {ON | OFF} }
232 Entering RDFCOM Commands

ATINDEX audittrail-index-number
is an integer value identifying a configured TMF audit trail on the primary system. 0 specifiesthe MAT. 1 through 15 specify auxiliary audit trails AUX01 through AUX15. The default is0. For each configured extractor, there must be a corresponding receiver with the sameATINDEX value.For information about protecting auxiliary audit trails, see Chapter 13 (page 291).
CPUS primary-CPU : backup-CPUidentifies the CPUs in which the receiver process is to run as a process pair on the backupsystem; primary-CPU is the primary CPU; backup-CPU is the backup CPU. Values rangefrom 0 through 15. The default is 0:1.
EXTENTS ( primary-extent , secondary-extent )specifies the extent sizes to be used for the RDF image files on the backup system;primary-extent-size is the primary extent size in pages; secondary-extent-sizeis the size of each secondary extent in pages. The default is 100,100. The limit is 65500, 65500.This parameter only has an effect when specified for the MAT receiver.
RDFVOLUME $volumespecifies which disk volume on the backup system is to be used for the receiver’s masterimage trail (the image trail to which the receiver writes all commit/abort records). The defaultis $SYSTEM.This attribute applies only to the master receiver (the receiver process configured with anATINDEX value of 0). It is ignored for auxiliary receivers.For best performance, do not use $SYSTEM as the RDFVOLUME.If the backup system will run with updating disabled, be sure to specify an RDFVOLUMEdisk that has an adequate amount of available space.If the RDFVOLUME disk becomes filled, the receiver process will receive error 43 messages(Unable to obtain disk space for extent) from the file system until the situation is corrected.
PRIORITY priority
identifies the execution priority for the receiver process; priority is the execution priority,from 10 through 199. The default is 165.
PROCESS process-namespecifies the process name for the receiver process; process-name is any unique, validprocess name of up to 5 characters; the first character must be a dollar sign ($). You cannotspecify any of the reserved process names listed in the Guardian Procedure Calls ReferenceManual. Names longer than 5 characters, including the $ sign, are invalid.This parameter is not optional. You must explicitly name the receiver process.
FASTUPDATEMODE {ON | OFF}FASTUPDATEMODE used to be known as SLOWMODE. During normal processing, theupdaters’ RTD values are typically 0 to 20 seconds behind the extractor’s RTD value. This isexpected and normal behavior, although if 20 it does not necessarily mean that the updatersare in fact running 20 seconds behind the extractor nor does it mean it will take 20 secondsfor the updaters to catch up. The updaters cannot read past what the receiver deems safe,and that is determined by the frequency with which the receiver updates its context records.The receiver normally updates its context records every 5 to 15 seconds, and the updaters’RTD values reflect that interval.Some customers prefer the updaters to have the lowest possible RTD value at all times. Thiscan be accomplished by setting FASTUPDATEMODE ON.With FASTUPDATEMODE ON, the receiver updates its context records after processingeach extractor message buffer. This enables the updaters to read and apply image recordsmuch faster. It also, however, slows the extractor-to-receiver throughput rate. You should
RDFCOM Commands 233
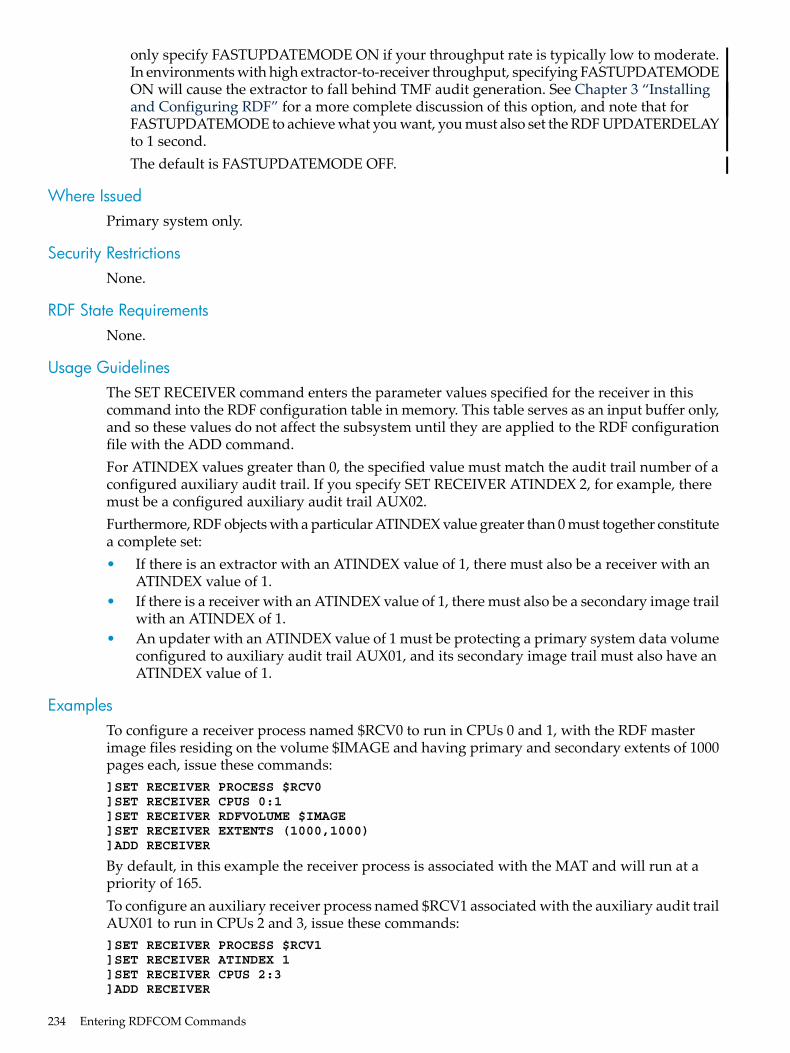
only specify FASTUPDATEMODE ON if your throughput rate is typically low to moderate.In environments with high extractor-to-receiver throughput, specifying FASTUPDATEMODEON will cause the extractor to fall behind TMF audit generation. See Chapter 3 “Installingand Configuring RDF” for a more complete discussion of this option, and note that forFASTUPDATEMODE to achieve what you want, you must also set the RDF UPDATERDELAYto 1 second.The default is FASTUPDATEMODE OFF.
Where IssuedPrimary system only.
Security RestrictionsNone.
RDF State RequirementsNone.
Usage GuidelinesThe SET RECEIVER command enters the parameter values specified for the receiver in thiscommand into the RDF configuration table in memory. This table serves as an input buffer only,and so these values do not affect the subsystem until they are applied to the RDF configurationfile with the ADD command.For ATINDEX values greater than 0, the specified value must match the audit trail number of aconfigured auxiliary audit trail. If you specify SET RECEIVER ATINDEX 2, for example, theremust be a configured auxiliary audit trail AUX02.Furthermore, RDF objects with a particular ATINDEX value greater than 0 must together constitutea complete set:• If there is an extractor with an ATINDEX value of 1, there must also be a receiver with an
ATINDEX value of 1.• If there is a receiver with an ATINDEX value of 1, there must also be a secondary image trail
with an ATINDEX of 1.• An updater with an ATINDEX value of 1 must be protecting a primary system data volume
configured to auxiliary audit trail AUX01, and its secondary image trail must also have anATINDEX value of 1.
ExamplesTo configure a receiver process named $RCV0 to run in CPUs 0 and 1, with the RDF masterimage files residing on the volume $IMAGE and having primary and secondary extents of 1000pages each, issue these commands:]SET RECEIVER PROCESS $RCV0]SET RECEIVER CPUS 0:1]SET RECEIVER RDFVOLUME $IMAGE]SET RECEIVER EXTENTS (1000,1000)]ADD RECEIVER
By default, in this example the receiver process is associated with the MAT and will run at apriority of 165.To configure an auxiliary receiver process named $RCV1 associated with the auxiliary audit trailAUX01 to run in CPUs 2 and 3, issue these commands:]SET RECEIVER PROCESS $RCV1]SET RECEIVER ATINDEX 1]SET RECEIVER CPUS 2:3]ADD RECEIVER
234 Entering RDFCOM Commands

By default, in this example the auxiliary receiver process will run at a priority of 165.
SET TRIGGERThe SET TRIGGER command sets trigger parameters within the RDF configuration memorytable. The supplied values are not applied to the RDF configuration file, however, until you issuean ADD TRIGGER command. The trigger type (REVERSE or TAKEOVER) is specified in theADD TRIGGER command.SET TRIGGER trigger-option
where trigger-option is: {PROGRAM program-file } {INFILE infile } {OUTFILE outfile } {CPUS primary-CPU : alternate-CPU } {PRIORITY priority } {WAIT |NOWAIT }
program-file
is the name of any Guardian object file. This object file is run once RDF has reached a particularstate, either after a STOP RDF, REVERSE, or TAKEOVER operation. program-file mustbe a properly-formed Guardian disk file name. The file does not have to exist. This parameteris mandatory. Typically program-file is $SYSTEM.SYSTEM.TACL if you want to run aTACL macro. Alternatively,program-file could be RDFCOM if no TACL macro is required.
CAUTION: When using RDFCOM as the TRIGGER process, the control subvolume for thereverse RDF environment must be empty before the STOP RDF, REVERSE is issued. If it isnot empty, RDF will not be able to initialize, and the reverse environment cannot be started.
infile
is the name of an edit file that will be passed as the IN file to the trigger process when it iscreated. infile must be a properly-formed Guardian disk file name. The file does not haveto exist. This parameter is mandatory.
outfileis the name of a file or process that will be passed as the OUT file to the trigger process whenit is created. outfile must be a properly-formed Guardian disk file or process name.
CPUS primary-CPU : alternate-CPUare the numbers of the primary and alternate CPUs in which the trigger process is to run.The alternate CPU is used only if the primary CPU is unavailable when the trigger is started.Values range from 0 through 15. The defaults are 0:1.
priorityis the process priority of the trigger process. Priority must be an integer from 10 through 199.The default is 150.
WAITcauses RDF to wait for the trigger process to terminate before shutting down. This is thedefault value.
NOWAITspecifies that once the trigger process is launched, RDF can immediately proceed to shutdown.
Where IssuedOnly on the primary system; backup system when the primary is not available.
RDFCOM Commands 235

Security RestrictionsNone.
RDF State RequirementsNone.
Usage GuidelinesThe SET TRIGGER command enters the trigger parameter values specified in this command intothe RDF configuration table in memory. This table serves as an input buffer only, so these valuesdo not affect the subsystem until they are applied to the RDF configuration file through the ADDcommand.
ExampleIn the following example, you are configuring an RDF environment to run from \Boston to\London. You start by initializing RDF to run from \Boston to \London.] INITIALIZE RDF, BACKUPSYSTEM \LONDON !
Now assume that you have configured an extractor, receiver, purger, a set of updaters, and nowyou want to configure a Takeover trigger. For this trigger, you have a TACL script file$SYSTEM.RDF.TKSCRIPT, and you want to this script to be executed automatically by TACLafter an RDF Takeover operation in CPU 3:4 with a priority of 160, and you want RDFCOM toshutdown immediately after firing off the trigger. To do the above, you issue the followingcommands:]SET TRIGGER PROGRAM $SYSTEM.SYSTEM.TACL]SET TRIGGER INFILE $SYSTEM.SYSTEM.TACL]SET TRIGGER CPUS 3:4]SET TRIGGER PRIORITY 160]SET TRIGGER NOWAIT]ADD TRIGGER TAKEOVER
The RDF configuration on \RIGHT is contained in the file \RIGHT.$DATA01.RDFCONF. RIGHT(specified in the INFILE). That file includes these commands (the standard SET/ADD RDF,EXTRACTOR, RECEIVER, PURGER, IMAGETRAIL and VOLUME configuration commandsare omitted):INITIALIZE RDF, BACKUPSYSTEM \LEFT, INITTIME NOW !START RDF
Initially, RDF runs from \LEFT to \RIGHT. To reverse replication, you enter this command on\LEFT:STOP RDF, REVERSE
This causes RDF to drain the replication stream up to the current point in time, and then executethe reverse trigger on \RIGHT (in this case the reverse trigger is RDFCOM with the input file$DATA01.RDFCONF.RIGHT). RDFCOM reads the input file, which causes a new RDFenvironment to be initialized and started from \RIGHT to \LEFT. Any messages from RDFCOMare reported to $0.After the RDFCOM process on \LEFT completes, the RDF environment from \LEFT to \RIGHTshuts down.
SET VOLUMEThe SET VOLUME command sets updater process configuration parameters within the RDFconfiguration memory table. The supplied values are not applied to the RDF configuration file,however, until you issue an ADD VOLUME command.SET VOLUME volume-option
where volume-option is:
236 Entering RDFCOM Commands

{ATINDEX audittrail-index-number } {CPUS primary-CPU : backup-CPU } {PRIORITY priority } {PROCESS process-name } {IMAGEVOLUME $volume } {UPDATEVOLUME $volume } {INCLUDE subvol.file } {EXCLUDE subvol.file } {MAPFILE $vol.subvol.file } {MAPLOG $vol.subvol.file }
ATINDEX audittrail-index-number
is an integer value from 0 through 15 specifying the audit trail on the primary system towhich the data volume being protected is mapped. 0 specifies the MAT. 1 through 15 specifiesauxiliary audit trails AUX01 through AUX15, respectively. The default is 0.
CPUS primary-CPU : backup-CPUidentifies the CPUs in which the updater process is to run as a process pair on the backupsystem; primary-CPU is the primary CPU; backup-CPU is the backup CPU. Values rangefrom 0 through 15. The defaults are 0:1.
PRIORITY priority
identifies the execution priority for the updater process; priority is the execution priority,from 10 through 199. The default is 160.
PROCESS process-nameidentifies the process name for the updater process; process-name is any unique, validprocess name of up to six characters; the first character must be a dollar sign ($). You cannotspecify any of the reserved process names listed in the Guardian Procedure Calls ReferenceManual.This parameter is not optional. You must explicitly name the updater process.
IMAGEVOLUME $volumeidentifies a disk volume associated with a secondary image trail previously added to theRDF configuration (by way of an ADD IMAGETRAIL command), implicitly associating thisupdater process with that trail.This parameter is required. There is no default. An updater must always be explicitlyassociated with a secondary image trail.
UPDATEVOLUME $volumespecifies what volume on the backup system will receive database updates for thecorresponding volume on the primary system. You specify the corresponding volume on theprimary system in the ADD command that actually configures the updater process. Thedefault is $SYSTEM.
INCLUDE subvol.file
specifies what subvolume(s) and file(s) on the primary system data volume are to be replicatedby the updater process on the backup system. subvol can have the wildcard character as asuffix (DB*, for example, specifying all subvolumes whose names begin with DB). Similarly,file can be an explicit filename, the wildcard character (specifying all files on the designatedsubvol), or have the wildcard character as a suffix (DATA*, for example, specifying all fileson the designated subvol whose names begin with DATA).
EXCLUDE subvol.file
specifies what subvolume(s) and file(s) on the primary system data volume are not to bereplicated on the backup system. As with the INCLUDE clause,subvol can have the wildcardcharacter as a suffix, and filename can be an explicit filename, the wildcard character, orhave the wildcard character as a suffix.
RDFCOM Commands 237

MAPFILE $vol.subvol.fnamespecifies the mapfile on the backup system that contains mapping strings that constitute themapping rules. The updater will apply these rules to the audit records present in the imagetrail files. This parameter is optional.
MAPLOG $vol.subvol.fnamespecifies the log file on the backup system into which the updater should log the source andtarget filename pairs if a mapping rule is applied. This parameter is optional.
Where IssuedPrimary system only.
Security RestrictionsNone.
RDF State RequirementsNone.
Usage GuidelinesThe SET VOLUME command enters the parameter values specified for the updater in thiscommand into the RDF configuration table in memory. This table serves as an input buffer only,and so these values do not affect the subsystem until they are applied to the RDF configurationfile with the ADD command.For ATINDEX values greater than 0, the specified value must match the audit trail number of aconfigured auxiliary audit trail. If you specify SET VOLUME ATINDEX 2, for example, theremust be a configured auxiliary audit trail AUX02.Furthermore, RDF objects with a particular ATINDEX value greater than 0 must together constitutea complete set:• If there is an extractor with an ATINDEX value of 1, there must also be a receiver with an
ATINDEX value of 1.• If there is a receiver with an ATINDEX value of 1, there must also be a secondary image trail
with an ATINDEX of 1.• An updater with an ATINDEX value of 1 must be protecting a primary system data volume
configured to auxiliary audit trail AUX01, and its secondary image trail must also have anATINDEX value of 1.
For a discussion on the use of INCLUDE and EXCLUDE lists, see Chapter 11 (page 279).Once an updater process has been added to the RDF configuration, you cannot alter its INCLUDEor EXCLUDE parameters. If you must do so, it is recommended that you STOP RDF, reinitializeRDF (with the INITTIME option), and reconfigure it with correct INCLUDE and EXCLUDE lists.See Chapter 3 (page 69) for a discussion of how to reinitialize RDF with the INITTIME option.You can specify a maximum of 100 INCLUDE and EXCLUDE parameters for each volume, inany combination.Unlike the behavior of other SET parameters, successive INCLUDE or EXCLUDE parametersdo not supersede preceding ones in the RDF configuration memory table (they merely extendthe include and exclude lists for the particular data volume).If you want to use the same INCLUDE/EXCLUDE lists for each volume, you only have to usethe SET commands when configuring the first updater. After you ADD that updater, the sameINCLUDE/EXCLUDE lists are retained in memory, and you only need to configure the otherupdater attributes. When you ADD the next updater, it inherits the same INCLUDE/EXCLUDElists.
238 Entering RDFCOM Commands

If you want to specify different INCLUDE/EXCLUDE lists for each volume, then you should usethe RESET VOLUME command after you ADD each updater. The RESET VOLUME commandclears out any INCLUDE/EXCLUDE lists you SET for the previous updater.To view the current INCLUDE and EXCLUDE parameters in the RDF configuration memorytable, issue a SHOW VOLUME command.To view the INCLUDE and EXCLUDE parameters for an updater that has already been added,issue an INFO VOLUME or INFO $volume command.
ExamplesSuppose that one of the volumes containing audited files on the primary system is named$DATA01 and you want to create an updater process named $U01 to maintain a copy of thatvolume, named $DATA1, on the backup system.To configure the updater process to run in CPUs 3 and 4 at the default priority of 160 using thesecondary image trail volume $SECIT1, issue these commands:]SET VOLUME PROCESS $U01]SET VOLUME CPUS 3:4]SET VOLUME IMAGEVOLUME $SECIT1]SET VOLUME UPDATEVOLUME $DATA1]ADD VOLUME $DATA01
Suppose that another volume on the primary system is named $DATA02 and you want to createan updater process named $U02 to replicate changes to only those tables and files on $DATA02whose subvolume name begins with OEM2 or OEM5.To configure the updater process to run in CPUs 5 and 6 at the default priority of 160 usingsecondary image trail volume $SECIT2 and data volume $DATA2 on the backup system, issuethese commands:]SET VOLUME PROCESS $U02]SET VOLUME CPUS 5:6]SET VOLUME IMAGEVOLUME $SECIT2]SET VOLUME UPDATEVOLUME $DATA2]SET VOLUME INCLUDE OEM2*.*]SET VOLUME INCLUDE OEM5*.*]ADD VOLUME $DATA02
SHOWThe SHOW command displays the current parameter values contained in the RDF configurationmemory table for the specified process. With this command, you can confirm the parametervalues before issuing the ADD command that actually applies them to the configuration file.SHOW {RDF } {MONITOR } {EXTRACTOR } {RECEIVER } {IMAGETRAIL } {TRIGGER } {VOLUME } {PURGER } {RDFNET } {NETWORK }
RDFdisplays the current configuration parameter values for the RDF global options.
MONITORdisplays the current configuration parameter values for the monitor process.
EXTRACTORdisplays the current configuration parameter values for the extractor process.
RDFCOM Commands 239

RECEIVERdisplays the current configuration parameter values for the receiver process.
IMAGETRAILdisplays the current configuration parameter values for the image trail.
PURGERdisplays the current configuration parameter values for the purger process.
RDFNETdisplays the current configuration parameter values for the RDFNET process.
NETWORKdisplays the current configuration parameter values for an RDF network.
TRIGGERdisplays the values of the TRIGGER attributes as they are currently set in memory.
VOLUMEdisplays the current configuration parameter values for an updater process.
Where IssuedPrimary system.
Security RestrictionsNone; anyone can issue the SHOW command.
RDF State RequirementsYou can enter the SHOW command at any time.
Usage GuidelinesThis command retrieves information from the RDF configuration memory table, which servesas an input buffer for a subsequent ADD command.If you have not yet issued any SET commands for the specified object, or have issued a RESETcommand for it, the SHOW command displays the default option values for the object.If you want to see what parameter values are already set in the configuration file, use the INFOcommand.
Output DisplayedThe parameters displayed for the RDF global options and the individual processes are explainedunder the SET EXTRACTOR, SET IMAGETRAIL, SET MONITOR, SET NETWORK, SET PURGER,SET RDF, SET RDFNET, SET RECEIVER, SET TRIGGER, and SET VOLUME commanddescriptions.
ExamplesExamples of several SHOW commands follow:
SHOW RDF CommandTo display the global configuration parameter values specified by a series of SET RDF commands,enter:]SHOW RDF
In response, RDFCOM displays something like this:RDF SOFTWARELOC $SYSTEM.RDFRDF LOGFILE $0RDF PRIMARYSYSTEM \RDF06
240 Entering RDFCOM Commands

RDF UPDATERDELAY 10RDF UPDATERTXTIME 60RDF UPDATERRTDWARNING 60RDF UPDATEROPEN PROTECTEDRDF NETWORK OFFRDF NETWORKMASTER OFFRDF UPDATEREXCEPTION ONRDF REPLICATEPURGE OFFRDF OWNER SUPER.RDF
The primary system name is set implicitly and the backup system name is set in the INITIALIZERDF command.
SHOW RECEIVER CommandSuppose that a series of SET RECEIVER commands specifies these configuration parametervalues:• The receiver process named $REC, which is associated with a configured master extractor
on the primary system, is to run in CPUs 3 and 4 at priority 165.• The volume $IMAGE, with 1000-page primary and secondary extents, is to be used for the
master image trail files.To display the values specified by those SET RECEIVER commands, enter:]SHOW RECEIVER
In response, RDFCOM displays:RECEIVER ATINDEX 0RECEIVER CPUS 3:4RECEIVER EXTENTS (1000,1000)RECEIVER PRIORITY 165RECEIVER RDFVOLUME $IMAGERECEIVER FASTUPDATEMODE OFFRECEIVER PROCESS $REC
RDFCOM includes the line containing PROCESS process-name in the display only if theprocess name was specified in a SET command.
SHOW PURGER CommandSuppose that a series of SET PURGER commands specifies that a purger process named $PURGis to run in CPUs 3 and 2 at priority 165 with a RETAINCOUNT of 50.To display the values specified by those SET PURGER commands, enter:]SHOW PURGER
In response, RDFCOM displays:PURGER CPUS 3:2PURGER PRIORITY 165PURGER PROCESS $PURGPURGER RETAINCOUNT 50PURGER PURGETIME 60
RDFCOM includes the line containing PROCESS process-name in the display only if theprocess name was specified in a SET command.
SHOW VOLUME CommandSuppose that a series of SET VOLUME commands specified these configuration parameter values:• The updater process named $UP07 is to run in CPUs 2 and 1 of the backup system at a
priority of 160.• The volume $DATA7 on the backup system is to be used for receiving database updates to
the volume $DATA07 on the primary system (which is configured to the auxiliary audittrail $AUX01).
RDFCOM Commands 241

• The updater is to use the secondary image trail $SECIT1 (which was previously added tothe RDF configuration by way of an ADD IMAGETRAIL command).
• You have configured this updater only to replicate file in the subvolume MYFILESET.*, butyou do not want to replicate MYFILESET.LOG.
To display the values specified by those SET VOLUME commands, enter:]SHOW VOLUME
This output results:VOLUME ATINDEX 1VOLUME CPUS 2:1VOLUME PRIORITY 160VOLUME UPDATEVOLUME $DATA7VOLUME IMAGEVOLUME $SECIT1VOLUME PROCESS $UP07VOLUME INCLUDE MYFILESET.*VOLUME EXCLUDE MYFILESET.LOG
SHOW RDFNET CommandSuppose that a series of SET RDFNET commands specifies the RDFNET process named $MNETis to run in CPUs 0 and 1 at priority 180.To display the values specified by those SET RDFNET commands, enter:]INFO RDFNET
RDF displays:RDFNET PROCESS $MNETRDFNET CPUS 0:1RDFNET PRIORITY 180
SHOW NETWORK CommandSuppose that a series of SET NETWORK commands specifies \RDF04 as the network master’sprimary system, \RDF06 as the network master’s backup system, RDF04 as the network master’sremote control subvolume, and $DATA07 as the network master’s PNETTXVOLUME volume.To display the values specified by those SET NETWORK commands, enter:]SHOW NETWORK
RDF displays:NETWORK PRIMARYSYSTEM \RDF04NETWORK BACKUPSYSTEM \RDF06NETWORK RCSV RDF04NETWORK PNETTXVOLUME $DATA07
SHOW TRIGGER CommandIf you have entered a series of SET TRIGGER commands and you want to review them beforeissuing the ADD TRIGGER command, type:]SHOW TRIGGER
RDF displays a list like this:TRIGGER PROGRAM $SYSTEM.RDF.RDFCOMTRIGGER INFILE $DATA01.RDF.RDFCONFTRIGGER OUTFILE $DATA01.RDF.OUTFILETRIGGER CPUS 0:1TRIGGER PRIORITY 150TRIGGER NOWAIT
START RDFThe START RDF command starts RDF.
242 Entering RDFCOM Commands
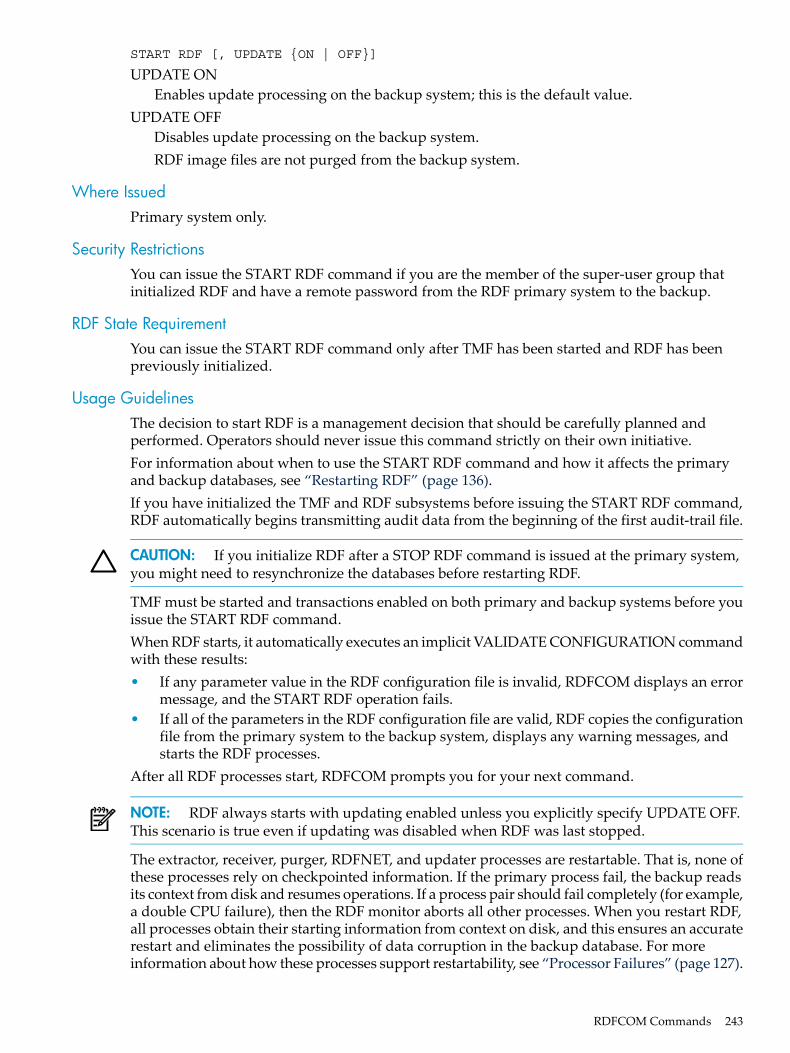
START RDF [, UPDATE {ON | OFF}]
UPDATE ONEnables update processing on the backup system; this is the default value.
UPDATE OFFDisables update processing on the backup system.RDF image files are not purged from the backup system.
Where IssuedPrimary system only.
Security RestrictionsYou can issue the START RDF command if you are the member of the super-user group thatinitialized RDF and have a remote password from the RDF primary system to the backup.
RDF State RequirementYou can issue the START RDF command only after TMF has been started and RDF has beenpreviously initialized.
Usage GuidelinesThe decision to start RDF is a management decision that should be carefully planned andperformed. Operators should never issue this command strictly on their own initiative.For information about when to use the START RDF command and how it affects the primaryand backup databases, see “Restarting RDF” (page 136).If you have initialized the TMF and RDF subsystems before issuing the START RDF command,RDF automatically begins transmitting audit data from the beginning of the first audit-trail file.
CAUTION: If you initialize RDF after a STOP RDF command is issued at the primary system,you might need to resynchronize the databases before restarting RDF.
TMF must be started and transactions enabled on both primary and backup systems before youissue the START RDF command.When RDF starts, it automatically executes an implicit VALIDATE CONFIGURATION commandwith these results:• If any parameter value in the RDF configuration file is invalid, RDFCOM displays an error
message, and the START RDF operation fails.• If all of the parameters in the RDF configuration file are valid, RDF copies the configuration
file from the primary system to the backup system, displays any warning messages, andstarts the RDF processes.
After all RDF processes start, RDFCOM prompts you for your next command.
NOTE: RDF always starts with updating enabled unless you explicitly specify UPDATE OFF.This scenario is true even if updating was disabled when RDF was last stopped.
The extractor, receiver, purger, RDFNET, and updater processes are restartable. That is, none ofthese processes rely on checkpointed information. If the primary process fail, the backup readsits context from disk and resumes operations. If a process pair should fail completely (for example,a double CPU failure), then the RDF monitor aborts all other processes. When you restart RDF,all processes obtain their starting information from context on disk, and this ensures an accuraterestart and eliminates the possibility of data corruption in the backup database. For moreinformation about how these processes support restartability, see “Processor Failures” (page 127).
RDFCOM Commands 243

ExamplesTo start RDF with updating enabled, enter:]START RDF
To start RDF with updating disabled, enter:]START RDF, UPDATE OFF
START UPDATEThe START UPDATE command starts all updater processes on the backup system.START UPDATE
Where IssuedPrimary system only.
Security RestrictionsYou can issue the START UPDATE command if you are a member of the super-user group andhave a remote password from the RDF primary system to the backup.
RDF State RequirementBefore you can issue this command, RDF must be running.
Usage GuidelinesAfter the updater processes start, they examine the audit data in the RDF image files and applyany changes to the backup database.
ExampleTo initiate updating on the backup system of all volumes protected by RDF, enter:]START UPDATE
STATUSThe STATUS command displays current configuration information and operational statistics forthe RDF environment, or specified portions thereof. All forms of the STATUS command, exceptSTATUS RTDWARNING, automatically include information and statistics for the monitorprocess.STATUS {MONITOR } [, PERIOD seconds[, COUNT repeat]] {RDF } {EXTRACTOR } {RECEIVER } {PURGER } {PROCESS procname } {VOLUME } {RTDWARNING } {RDFNET }
MONITORrequests information and statistics for the monitor process. All STATUS commands displaydetails for the RDF monitor process except the STATUS RTDWARNING command.
RDFrequests information and statistics for the entire RDF environment.
EXTRACTORrequests information and statistics for the extractor process.
244 Entering RDFCOM Commands

RECEIVERrequests information and statistics for the receiver process.
PURGERrequests information and statistics for the purger process.
PROCESS procnamerequests information and statistics for the specified process.
VOLUMErequests information and statistics for all configured updater processes.
RTDWARNINGrequests information and statistics for only those processes (the extractor or any updater)that have fallen behind the configured RTD threshold (rtd-time). For information aboutsetting that threshold, see the SET RDF command. Each time this command is issued and aprocess is displayed because it has fallen behind the RTD warning threshold, an EMS eventis generated for that process.
RDFNETrequests information and statistics for the RDFNET process.
PERIOD seconds
specifies the interval in seconds between successive executions of the command.COUNT repeat
specifies how many times to execute the particular STATUS command. If you omit theCOUNT repeat option but include the PERIOD seconds option, the command is executedrepeatedly at the specified time intervals until you press the BREAK key.
Where IssuedPrimary or backup system.
Security RestrictionsNone; anyone can enter a STATUS command.
RDF State RequirementYou can enter a STATUS command at any time after RDF has been initialized.
Usage GuidelinesThe STATUS command provides you with the most current information about RDF and itsoperational status, presenting data for the specified RDF processes.
STATUS RDF Command Output DisplayThe output of the STATUS RDF command shows all critical information about each configuredRDF entity. Here are two examples:RDFCOM - T0346H09 – 11AUG08(C)2008 Hewlett-Packard Development Company, L.P.
Status of \RDF04 -> \RDF05 RDF 2008/08/11 05:26:49.082Control Subvol: $SYSTEM.RDF04Current State : NormalRDF Process Name RTD Time Pri Volume Seqnce Rel Byte Addr Cpus Err------------------ ------ --------- --- ------- ------ ------------- ----- ----Monitor $RMON 185 $AUDMAT 56 1: 2Extractor (0) $REXT0 0:00 185 $AUDMAT 56 928000 1: 2Extractor (1) $REXT1 0:00 185 $AUDAUX 4 10435580 1: 2Receiver (0) $RRCV0 0:00 185 $MIT 12 1: 2Receiver (1) $RRCV1 0:00 185 1: 2Imagetrail (0) $IMAGE0 22
RDFCOM Commands 245

Imagetrail (1) $IMAGEA 3Purger $RPRG 185 1: 2$DATA06 -> $DATA06 $RUPD1 0:06 185 $IMAGE0 22 9568 1: 2$DATA07 -> $DATA07 $RUPD2 0:00 185 $IMAGEA 3 811008 2: 3$DATA08 -> $DATA08 $RUPD3 0:06 185 $IMAGEA 3 811568 3: 0
RDFCOM - T0346H09 – 11AUG08C)2008 Hewlett-Packard Development Company, L.P.
Status of \RDF04 -> \RDF05 RDF 2008/08/11 05:26:49.082Control Subvol: $SYSTEM.RDF04Current State : * TAKEOVER in progress *RDF Process Name RTD Time Pri Volume Seqnce Rel Byte Addr Cpus Err------------------ ------ --------- --- ------- ------ ------------- ----- ----Monitor $Z345 ......... ... 2: 3Receiver (0) $RRCV0 ......... 185 $MIT 12 1: 2Receiver (1) $RRCV1 ......... 185 1: 2Imagetrail (0) $IMAGE0 22Imagetrail (1) $IMAGEA 3Purger $RPRG 185 1: 2$DATA06 -> $DATA06 $RUPD1 ......... 185 $IMAGE0 20 9568 1: 2 net$DATA07 -> $DATA07 $RUPD2 ......... 185 $IMAGEA 3 811008 2: 3 undo$DATA08 -> $DATA08 $RUPD3 ......... 185 $IMAGEA 3 811568 3: 0 undo
In each of these examples, the first line shows the RDF banner that includes the Product VersionNumber and the date of its release (T0346A08 - 11AUG08). The second line contains the standardHewlett-Packard banner. The status information about the specific RDF subsystem begins onthe third line, where the names of the primary (\RDF04) and backup (\RDF05) systems are given,followed by the timestamp when this instance of the STATUS RDF command was issued.The control subvolume is listed next line, and the following line lists the current state of the RDFsubsystem. In the first example, the state is NORMAL (RDF running with Update On), and thesecond example the state indicates that an RDF takeover operation has begun. The following listrepresents all possible RDF states. For a discussion of each of these states, see “Displaying CurrentOperating Statistics and Configuration Information” (page 112) in Chapter 4.• Normal• Normal - Update Stopped• Start Update Pending• Stop Update Pending• Stop Update, Timestamp Pending• * STOP RDF In Progress *• * TMF STOP In Progress *• * TAKEOVER In Progress *• WRONG PROGRAM VERSION• NSA Stop Update Pending• Update NSA Stopped• *Monitor Unavailable*The rest of the display provides current information about each RDF process configured.For extractors, receivers, and image trails, the configured ATINDEX value is displayed inparentheses following the object name. In the above example, the extractor a$REXT0 and receiver$RRCV0 are associated with the MAT, while the extractor $REXT1 and receiver $RRCV1 areassociated with auxiliary audit trail AUX01.Because of insufficient space, however, ATINDEX values could not be displayed explicitly forupdaters. To determine the ATINDEX value of a particular updater, see the ATINDEX value ofthe associated secondary image trail.In the first example above, an RDF network master's running environment on the primary systemis depicted with a monitor process, a master extractor ($REXT0) associated with the MAT, asecond extractor ($REXT1) associated with the AUX01 audit trail, and the special RDFNETprocess. On the backup system the other set of RDF processes is depicted: the master receiver
246 Entering RDFCOM Commands

($RRCV0) associated with the MAT and writing to the Master Image Trail ($MIT) and a SecondaryImage Trail ($IMAGE0), a second receiver ($RRCV1) associated with AUX01 and writing to aSecondary Image Trail ($IMAGEA1), updater $RUPD1 associated with the MAT reading $IMAGE0and applying updates to $DATA006, updater $RUPD2 associated with the AUX01 reading$IMAGEA1 and applying updates to $DATA007, and updater $RUPD3 associated with theAUX01 reading $IMAGEA1 and applying updates to $DATA08.The second example above shows the same configuration, but this time in the midst of an RDFtakeover operation.In both examples, different state information is displayed for each entity under the differentcolumn headings.
RDF ProcessThe first column of the display identifies the type of process. Notice that each updater processis identified by the names of both the primary volume the updater process is protecting and thecorresponding volume on the backup system. In this example, each volume being updated onthe backup system has the same name as the corresponding volume on the primary system (forexample, updates to the volume $DATA007 on the primary system are duplicated by the updaterprocess $RUPD2 to the volume $DATA007 on the backup system).
NameThe second column specifies the name of each process. Because the secondary image trails$IMAGE0 and $IMAGEA1 are not processes, they do not have process names or RTD times. Inthe second example above, observe that the monitor no longer has the configured process name.The reason for this is that the monitor started on the backup system for a takeover operation isstarted with a Guardian-generated name.
RTD TimeThe third column (labeled RTD Time) specifies the current relative time delay (RTD) value forthe extractor process, receiver process, and all updater processes. These values can help youdetermine how far behind the application program each process is running. Please note that anRTD time is not a precise indication of how far an RDF process is behind. An RTD time is onlyrelative and is an approximation. The more accurate RTD time is that of the extractor. An updater'sRTD is even more relative because it may show 20 seconds one instance and then show 0 secondsin the next instance. The reason for this is that the updater applies audit through an exceptionallyefficient low-level interface direct to the disk process and it can take only a fraction of 1 secondto apply what was generated on the primary system in 20 seconds.On the primary system, TMF attaches a timestamp to every commit and abort status recordgenerated for the application program. The extractor process, in turn, attaches the most recentTMF commit/abort timestamp to all data modification image records.The RTD value for the master extractor is the difference between the “last modified time” of thelatest file in the TMF Master Audit Trail (MAT) and the timestamp of the last commit or abortrecord seen by this extractor. For an extractor associated with an aux trail, its RTD value is thedifference between the “last modified time” of the latest file in the specific audit trail and thegeneral time when the last audit record processed by this extractor was added to this audit trail.As each receiver processes image records, it stores them in image trail buffers and writes thosebuffers to disk as the need arises. The receiver's RTD only has value on a receiver restart condition(for example, primary CPU failure), where the receiver process has had to go to disk to get itscontext and then begin operations anew, just as if it were just started by RDFCOM. The RTDreflects only how long it takes to complete its restart, and in this sense a receiver's RTD has noconsequence because the extractor's RTD is of critical importance. In the takeover situationreflected in the second example, the RTD is replaced by dots to indicate there is no RTD.
RDFCOM Commands 247

The RTD value reported for each updater process is the difference between the “last modifiedtime” of that updater's audit trail on the primary system and the timestamp added to the imagerecord by the extractor before sending it to the receiver. As is the case with the receiver duringan RDF takeover operation, the RTD is replaced by dots to indicate there is no RTD.On a finely tuned RDF backup node, the RTD for an updater can regularly lag 1 to 15 secondsbehind TMF processing. However, this 15-second delay does not mean that 15 seconds are neededto catch up; that operation might take only a few seconds.If RDFCOM cannot connect to a particular process, RDFCOM displays dots (...) in the RTD Time,Sequence, and Rel Byte No fields, and an appropriate file-system error number in the Error field.
PriThe fourth column specifies the priority at which each process is running. In the RDF takeoversituation, the priority of the monitor is not reported.
Volume and SeqnceThe fifth and sixth columns together specify a file associated with each process:• The monitor entry reflects the name of the latest MAT file to which TMF is writing
($AUDMAT.ZTMFAT.AA000056 in this example).• Each extractor entry reflects the name of the TMF audit trail file from which it is reading
($AUDMAT.ZTMFAT.AA000056 for the master extractor and$AUDAUX1.ZTMFAT.BB000004 for the auxiliary extractor in this example).
• The receiver entries reflect the names of the current image trail files to which each receiveris writing ($RRCV0 write control records to $MIT and image records for updater $RUPD1to $IMAGE0; $RRCV1 writes image records for updaters $RUPD2 and $RUPD3 to $IMAGEA1in this example).
• The image trail entries reflect the names of the secondary image trail files to which eachreceiver is writing ($RRCV0 writes image records for updater $RUPD1 to $IMAGE0; $RRCV1writes image records for updaters $RUPD2 and $RUPD3 to $IMAGEA1 in this example).
• Each updater entry reflects the name of the secondary image file from which it is reading($DATA03.RDF04.AA000020 for $RU01, $DATA04.RDF04.AA000003 for $RU02, and$DATA05.RDF04.AA000003 for $RU03 in this example).
If RDFCOM cannot connect to a particular process, RDFCOM displays dots (...) in the RTD Time,Sequence, and Rel Byte No fields, and an appropriate file-system error number in the Error field.In the case of an RDF takeover operation, however, nothing is displayed for the Monitor's sequenceand relative byte number because those values have no relevance.
Rel Byte Addr
The column designated "Rel Byte Addr" indicates the relative byte address where the process inquestion is positioned. For the extractor and updaters, it indicates where in the file that theprocess is reading. For the receiver it represents where in the file that the last write operationcompleted.If RDFCOM cannot connect to a particular process, RDFCOM displays dots (...) in the RTD Time,Sequence, and Rel Byte No fields, and an appropriate file-system error number in the Error field.During non-takeover processing, you can observe the relative byte numbers increasing, and asthe processes finishes with a given file, you can see that the sequence number of the file increasesand that the relative byte number drops as the process starts reading at the beginning of thatnext file. During a takeover or a stop-update-to-time operation when an updater has begun itsundo pass, however, you can observe that the relative byte numbers decrease. Further, when anupdater has finished with its current file, you can observe that the sequence number decreasesas the updater switches to the next file in reverse sequence and that the relative byte numberstarts at the end of this next file and decreases as the updater reads backwards through the file.
248 Entering RDFCOM Commands

CpusThe eighth column specifies the CPUs in which each process pair is running.
ErrorThe final column is used for several purposes. For all RDF processes it is usually blank, whichindicates the process is running normally and without any error condition. The following displayscan also be reported.****
The specific process has encountered a serious error. You should examine the event log tosee what happened. If the error condition is cleared, for example, an updater reporting a filesystem error 122, then the asterisks are cleared. If the error condition is not corrected, theasterisks continue to appear until the situation is corrected. If an updater encounters anunexpected error 1, 10, 11, 71, or some other condition, this could indicate that your backupdatabase is no longer in synchronization with the primary system's database. If you stopRDF and then restart it, any asterisks previously reported are cleared until a process encountersa new unexpected error condition.
syncDuring an online database synchronization operation, an updater reports "sync" in thiscolumn until it has caught up and has gone past the point when the STOP SYNCH commandwas issued.
undoDuring a takeover or stop-update-to-time operation, after the update has finished its forwardmoving redo pass, it reports "undo" when it performs its reverse moving undo pass in orderto back out any updates for transactions that need to be undone. In a takeover operation foran RDF network, "undo" indicates the first undo pass when local transactions are undonebecause their outcomes are unknown.
netDuring an RDF network takeover operation, there are three possible undo phases: local undo(marked "undo" as stated above), file-undo (not marked because this highly rare and typicallyonly lasts a few seconds), and network undo. The latter is reflected as "net", and this undopass backs out transactions for which RDF has a commit record in this system, but a commitis missing on another backup system in the RDF takeover. See “Network Transactions”(page 295) for the details of an RDF network takeover operation.
For more information on critical errors, you can scan the EMS collectors on the primary andbackup systems:• The EMS collector on the primary system contains log messages for the extractor and monitor
processes.• The EMS collector on the backup system contains log messages for the receiver, purger, and
all updater processes.
Special MessagesIf you issue the STATUS RDF command while an RDF TAKEOVER operation is in progress,RDF displays the current state as “TAKEOVER IN PROGRESS”, as seen in the second exampleabove.If you issue the STATUS RDF command after an RDF TAKEOVER operation has completed,RDFCOM displays this message instead of the usual status display:STATUS RDF (\RDF04 -> \RDF06) is NOT runningAn RDF TAKEOVER has completedSafe MAT position is SNO 1, RBA 87876660MAT position for File Recovery: SNO 1, RBA 87876740
RDFCOM Commands 249
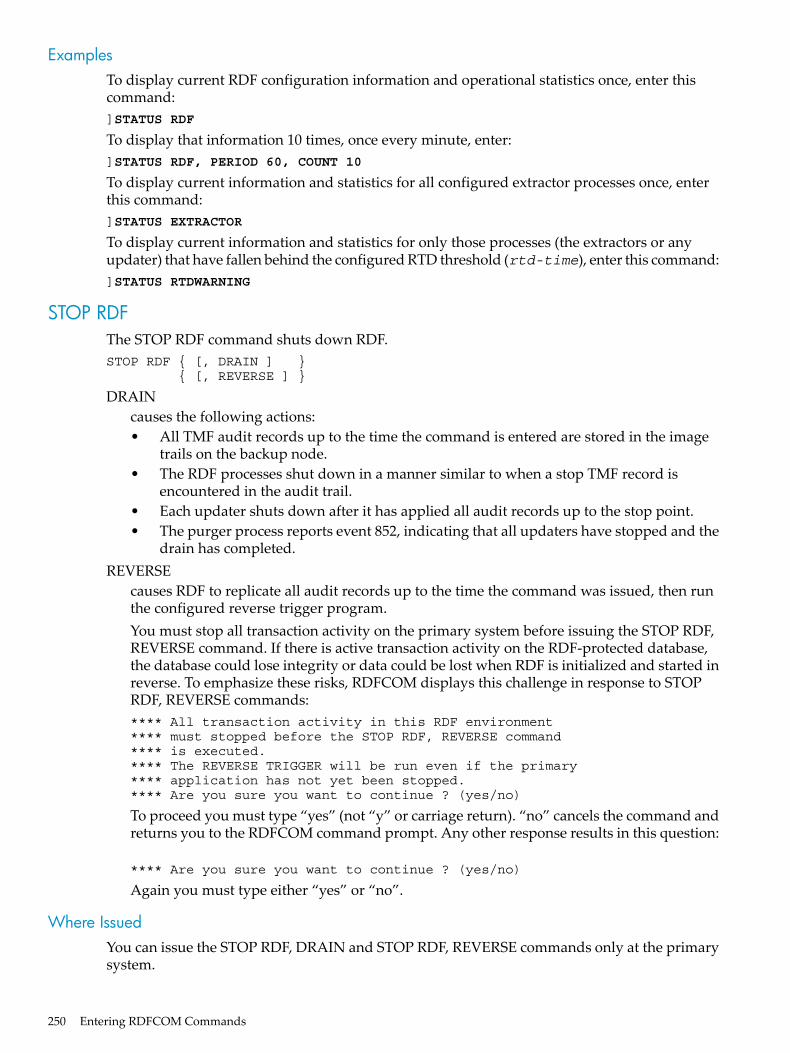
ExamplesTo display current RDF configuration information and operational statistics once, enter thiscommand:]STATUS RDF
To display that information 10 times, once every minute, enter:]STATUS RDF, PERIOD 60, COUNT 10
To display current information and statistics for all configured extractor processes once, enterthis command:]STATUS EXTRACTOR
To display current information and statistics for only those processes (the extractors or anyupdater) that have fallen behind the configured RTD threshold (rtd-time), enter this command:]STATUS RTDWARNING
STOP RDFThe STOP RDF command shuts down RDF.STOP RDF { [, DRAIN ] } { [, REVERSE ] }
DRAINcauses the following actions:• All TMF audit records up to the time the command is entered are stored in the image
trails on the backup node.• The RDF processes shut down in a manner similar to when a stop TMF record is
encountered in the audit trail.• Each updater shuts down after it has applied all audit records up to the stop point.• The purger process reports event 852, indicating that all updaters have stopped and the
drain has completed.REVERSE
causes RDF to replicate all audit records up to the time the command was issued, then runthe configured reverse trigger program.You must stop all transaction activity on the primary system before issuing the STOP RDF,REVERSE command. If there is active transaction activity on the RDF-protected database,the database could lose integrity or data could be lost when RDF is initialized and started inreverse. To emphasize these risks, RDFCOM displays this challenge in response to STOPRDF, REVERSE commands:**** All transaction activity in this RDF environment**** must stopped before the STOP RDF, REVERSE command**** is executed.**** The REVERSE TRIGGER will be run even if the primary**** application has not yet been stopped.**** Are you sure you want to continue ? (yes/no)
To proceed you must type “yes” (not “y” or carriage return). “no” cancels the command andreturns you to the RDFCOM command prompt. Any other response results in this question:
**** Are you sure you want to continue ? (yes/no)
Again you must type either “yes” or “no”.
Where IssuedYou can issue the STOP RDF, DRAIN and STOP RDF, REVERSE commands only at the primarysystem.
250 Entering RDFCOM Commands

Security RestrictionsYou can issue the STOP RDF command if you are a member of the super-user group that initializedRDF and have a remote password from the RDF primary system to the backup.
RDF State RequirementYou can issue the STOP RDF, DRAIN and STOP RDF, REVERSE commands only while RDF isrunning and update is on.
Usage GuidelinesThe decision to stop RDF is a management decision that should be carefully planned andperformed. Operators should never issue the STOP RDF command strictly on their own initiative.To execute a planned RDF shutdown, you should generally use the STOP TMF command ratherthan STOP RDF. Issue the STOP TMF command at the primary system while the communicationslines are up. In addition to stopping TMF, this action stops all RDF processes and saves thecontext of each process in a file. Alternatively, if you have multiple applications running on yourprimary system and not all of the databases are RDF-protected, then stopping TMF to coordinatea planned and synchronized shutdown may not be possible. In this case, you can perform anordered stop (do not perform a TACL stop that would then cause in-flight transactions to beaborted by TMF) of the applications updating the RDF-protected database, and when you arecertain they have completed, then issue the STOP RDF, DRAIN command. Because yourapplications have stopped, then the RDF-protected database on the primary system is closedand is in the same state as if TMF was stopped. See “Critical Operations, Special Situations, andError Conditions” (page 121) for a discussion on how this operation may be of value to you.For information about when to use the STOP RDF command and how it affects the primary andbackup databases, see “Stopping RDF” (page 132).There are three ways to stop RDF:• Issue a STOP TMF command at the primary system.
When you issue the TMFCOM command STOP TMF, RDF also shuts down after RDFencounters the TMF shutdown record in the MAT. This method ensures that the primaryand backup databases are logically identical with one another when RDF stops. When yourestart RDF, the context file directs RDF where to resume.
• Issue a STOP RDF command at the primary system.If the decision has been made to stop RDF without stopping TMF, issue a STOP RDFcommand at the primary system. RDF stops immediately after all RDF processes save contextinformation in the context file.
• Issue a STOP RDF command at the backup system.You should use this method of stopping RDF only if one of the following two conditions istrue:— The RDF monitor process is not running on the primary system.— All communications lines to the primary system are down.
If the decision has been made to stop RDF on the backup system, issue a STOP RDFcommand at the backup system. All processes running on the backup system writecontext information to a context file and then stop.If the communications lines between the primary and backup systems are up, a STOPRDF command issued at the backup system fails, and RDFCOM displays an errormessage.
RDFCOM Commands 251

NOTE: Before you can restart RDF, you must stop RDF on the primary system as well.
When RDFCOM executes the STOP RDF command, it writes a message to the RDF log fileindicating this action.Updaters cannot always respond immediately to a STOP RDF command. If an updater has auditrecords queued for the disk process, the updater must wait until all of that information isprocessed before it can shut down.If RDF appears to be hung and unable to shutdown, you can stop the RDF by issuing the followingTACL command:SSTATUS *. PROG, $SYSTEM.RDF.*, STOP
This assumes your RDF software is in $SYSTEM.RDF. If you have set the RDF SOFTWARELOCattribute to a different location, use that location instead of $SYSTEM.RDF.
CAUTION: Issuing this command in this situation is only safe, however, if this is the backupsystem for a single RDF environment.
The STOP RDF, REVERSE command is a special purpose function designed for a fast switchoveroperation. See the related discussion in “Critical Operations, Special Situations, and ErrorConditions” (page 121).RDF must be running in the Normal state (with Update On) to issue a STOP RDF, DRAIN orSTOP RDF, REVERSE command. In addition, entering either command under any of theseconditions results in an error:• on the backup system• while RDF is stopping due to a stop TMF• while a stop-update-to-timestamp operation is pending• while a SQL DDL operation with SHARED ACCESS is being processed
ExamplesTo request RDFCOM to stop RDF, enter:]STOP RDF
The command to stop RDF in a coordinated manner after having stopped your applications is:]STOP RDF, DRAIN
The command to stop RDF for a coordinated fast switchover is:]STOP RDF, REVERSE
STOP SYNCHThe STOP SYNCH command is used as part of the online database synchronization protocol.STOP SYNCH
Where IssuedPrimary system.
Security RestrictionsYou can issue the STOP SYNCH command if you are a member of the super-user group andhave a remote password from the RDF primary system to the backup.
RDF State RequirementYou can issue the STOP SYNCH command only when RDF is running.
252 Entering RDFCOM Commands

Usage GuidelinesYou must wait until the preceding load or TMF FRNL operations have completed before issuingthis command.See the descriptions of online database synchronization in Chapter 7 (page 167) for the properuse of this command.
ExampleTo issue this command as part of online database synchronization, enter:]STOP SYNCH
STOP UPDATEThe STOP UPDATE command suspends updating of the backup database and stops all updaterprocesses. When all updater processes are stopped, RDF issues a 910 EMS message.STOP UPDATE [ , TIMESTAMP <day><mon><year><hour>:<min> ]
If you use the TIMESTAMP option, the operation is called a stop-update-to-time operation, whichis discussed further below.
NOTE: The timestamp you specify must be at least 5 minutes later than the current time atyour primary system. If you specify an earlier time, an error message appears. Additionally, alltransactions that committed prior to the timestamp are applied and retained in the backupdatabase. Any transactions that committed at or after the specified timestamp are backed out ofthe backup database. When you subsequently restart Update, any transactions undone duringthe previous stop-update-to-time operation are reapplied to the backup database, thereby keepingthe backup database in full synchronization with the primary database.
day
is a number from 1 to 31.month
is the first three letters of the month, such as JAN, FEB, MAR.year
is a four-digit number, such as 2004.hour
is a number from 0 to 23.min
is a number from 00 to 59. min must be preceded by a colon (:).
Where IssuedPrimary system only.
Security RestrictionsYou can issue the STOP UPDATE command if you are a member of the super-user group andhave a remote password from the RDF primary system to the backup.
RDF State RequirementYou can issue the STOP UPDATE command only when RDF is running.
RDFCOM Commands 253

Usage GuidelinesUse the STATUS RDF command to determine whether updating is enabled or disabled. If updatingis disabled, the STATUS RDF display specifies the state “Update stopped” and shows no statusinformation for the updater processes.When you disable updating with the STOP UPDATE command, the extractor continues to sendall relevant audit from the primary system to the receiver, and the latter stores it in the imagetrails. Therefore if you STOP UPDATE, you still have full RDF protection. If your primary systemshould fail, you have only to issue the RDF TAKEOVER command and the updaters are restartedin order to apply all remaining committed transactions stored in the image trails to the backupdatabase.When you stop the updaters without the TIMESTAMP option, the backup database is not typicallyin a consistent state. This does not mean that the backup database is not out of runningsynchronization with the primary database, but it does mean the some transactions may havebeen partially applied to the backup database. Stopping the updaters without the TIMESTAMPoption is useful for performing a variety of different operations, such as maintenance tasks orproducing reports based on what is commonly known as BROWSE ACCESS. For relatedinformation, see “Reading the Backup Database (BROWSE versus STABLE Access)” (page 149)in Chapter 5.If you want to read the backup database when it is in a fully consistent state with respect totransaction boundaries, then use the TIMESTAMP option with the STOP UPDATE command.This stop-update-to-time operation is fully discussed in the section “Access to Backup Databaseswith Stable Access” (page 150) in Chapter 5. A stop-update-to-time operation typically includesan undo pass to back out any updates the updaters may have applied for transactions that didnot commit by the specified timestamp. Any transactions backed out are reapplied when youissue the next START UPDATE command.If you issue the STOP UPDATE command without the TIMESTAMP option, the RDFCOM promptis not returned until all updaters have stopped. If you include the TIMESTAMP option, then theRDFCOM prompt is returned immediately since the stoppage is required to be at least 5 minutesin the future.See also the discussion on RDF states displayed by the STATUS RDF command in this chapteras well as in the section "Displaying Current Configuration Parameters and Operating Statistics"in Chapter 4.Updaters cannot always respond immediately to a STOP UPDATE command. If an updater hasaudit records queued for the disk process, the updater must wait until all of that information isprocessed before it can shut down.If you erroneously set the timestamp too far into the future (for example, 26NOV2009), the onlyway to correct this mistake is to enter a STOP RDF command, restart RDF, and reenter the STOPUPDATE command with the correct timestamp.If all protected data volumes on the primary system are not up and enabled when the specifiedTIMESTAMP is reached, both the stop-update-to-time operation and the RDF product abort. Insuch a case, you can restart RDF immediately but you should not reissue the stop-update-to-timecommand until all protected data volumes on the primary system are up and enabled.
ExamplesTo suspend updating activities and stop the updater processes, enter this command:STOP UPDATE
To suspend updating activities and stop the updaters from processing transactions committedby 2:30 P.M. or later on January 20, 2004, enter this command:STOP UPDATE, TIMESTAMP 20JAN2004 14:30
254 Entering RDFCOM Commands

TAKEOVERThe TAKEOVER command puts the backup database into a consistent state with regard totransaction boundaries, after which it can become your new database of record.TAKEOVER [!]
If you omit the ! option, then RDFCOM attempts to reach the primary system to verify that it isindeed inaccessible. If it is able to reach the RDF monitor and extractor on the primary system,then the TAKEOVER command is immediately aborted. If the primary system is inaccessible, itthen prompts you to confirm that you really want to execute the takeover. The reason for bothtasks is to allow you to be certain you are not mistakenly issuing the TAKEOVER command.If you include the ! option, then the step to access the primary and the prompting are both omittedand the takeover operation proceeds immediately.
NOTE: If you include the ! option and the primary system is still accessible, then the TAKEOVERcommand may very well put your backup database out of synchronization with the primarydatabase. Therefore you should only include the ! option if you are absolutely certain you wantto proceed unequivocally with the takeover operation.
Where IssuedBackup system only.
Security RestrictionsYou can issue the TAKEOVER command if you are the member of the super-user group thatinitialized RDF.
Usage GuidelinesThe TAKEOVER command is customarily issued when the primary system fails or otherwisebecomes unavailable, and you want to make the backup database your new database of recordfor your applications.
CAUTION: The TAKEOVER command is not a normal operational command.Operators shouldnever issue this command strictly on their own initiative. Issue this command only whenspecifically told to do so by someone in high authority.
For a thorough discussion of a variety of issues you need to plan for in order to facilitate a fastoverall takeover operation that moves your application processing to the backup system, see thediscussion for “How to Plan for the Fastest Movement of Business Operations to Your BackupSystem After Takeover” (page 144) in Chapter 5. The TAKEOVER command normally takes onlya matter of a few seconds, but all the other considerations and tasks delay moving yourapplications to the backup system. With advanced planning, RDF customers have been able torecover from loss of the primary system and resume operations on the backup system within asmall number of minutes, but it requires advanced planning.For takeover considerations in a ZLT environment, see Chapter 17 (page 337).If RDF is running with Update On in a non-ZLT environment, then RDFCOM sends a takeovermessage to each RDF process on the backup system, and an RDF monitor is not started.If RDF is running with updating off, RDFCOM stops the receiver and purger processes and startsthe monitor in takeover mode. The monitor then starts the receiver and purger processes and allupdater processes.
RDFCOM Commands 255

In a non-network configuration, a takeover operation occurs in two phases.• Phase 1 (local undo) undoes transaction data that was incomplete at the backup system at
the time the primary system failed. That is, it undoes transactions that were applied duringthe redo phase but the final states of those transactions are unknown by RDF.
• Phase 2 (file undo) only runs if volumes went down on the primary system, transactionswere aborted, and the volumes were never reenabled on the primary system before theprimary system was lost. In that situation, RDF determines what Backout could not undo,and performs that undo itself.
A network configuration adds a third phase (network undo). See Chapter 14 (page 295).For more information about undo processing during a takeover operation, see TakeoverOperations in Chapter 5 (page 121).During the takeover operation, the purger produces lists that identify all transactions that mustbe undone by the updaters during the three different undo phases. These are stored in structuredfiles, but they can be read with the READLIST utility in the RDF software's subvolume. See page334 for the files that are created for the three undo phases. Additionally, if you have configuredRDF UPDATEREXCEPTION ON, then each updater record information about each audit recordit undoes during the undo passes into its own exception file, thereby giving you an accurateaccount of what was undone by each updater. If you have this attribute off, then it only recordsthe first and last record it has undone. Under normal conditions, the number of transactionsundone by an updater is small and writing to the exception file has not measurable cost. In somecircumstances, writing to the exception file can prolong the RDF takeover operation:• long-running batch transactions
If a long batch transaction was running on your primary system that did a large number ofupdaters at the time the primary system failed, then all of these need to be undone by theupdaters; if UPDATEREXCEPTION is ON, then each update of the batch needs to be undoneand an exception record written.
• Auxiliary Audit and a Comm Problem
If your RDF environment includes extractor-receiver pairs associated with auxiliary audittrails, then if one extractor-receiver pair has fallen way behind because of a communicationsproblems, then all affected transactions must be undone by all affected updaters, and thiscan lead to a lot of audit being undone with exception records.
• RDF Network
If you have an RDF Network and one primary system suffers an unplanned outage, thenthe amount of undo required by all backup systems is proportional to how long it takes youto stop all transaction processing on the surviving primary systems. If this is not done quickly,then all these transactions might need to be undone in order to guarantee business consistencyafter the RDF takeover operation completes, which could also generate a large volume ofexceptions records.
When all the updater processes shut down, the purger checks to see if each completed its takeoverprocessing. If yes, the purger logs RDF event 724. If some updaters stopped prematurely (forexample, double CPU failure), it logs RDF event 725. In the latter case, you only need to be sureall CPUs are available and then reissue the TAKEOVER command.It is conceivable that one or more transactions could get committed on the primary databaseimmediately prior to the TAKEOVER operation but that their commit records did not reach thebackup system before the primary system failure. If that happens, the audit data for the affectedtransactions is not committed on the backup system and is instead written to the exception fileif you have RDF UPDATEREXCEPTION ON.Updater Exception files can be read by the RDFSNOOP utility. For information about usingRDFSNOOP, see Appendix B (page 359).
256 Entering RDFCOM Commands

If your primary system is recovered and comes back online, See Chapter 5 (page 121) for how torecover it and use its database as a backup to the database on your backup system where yourapplication processing is not taking place.For further related considerations, see also Exception File Optimization in Chapter 5 (page 121).
LimitationWhen building the undo list for an RDF takeover operation, the purger has a limit of 655,360transactions. If this limit is exceeded, the purger process logs an RDF event 853 and abends. Inthis situation, contact your service provider. With some special settings, there is no limit to thenumber of transactions that can be undone during a takeover operation.
ExampleThis command sequence initiates RDF TAKEOVER processing in which the backup system\TORONTO takes over processing from the primary system \SANFRAN.1. From the TACL command interpreter on the backup system (\TORONTO), enter:
>RDFCOM SANFRAN
2. From within the RDFCOM session, enter:]TAKEOVER
3. RDF displays this prompt message:*** TAKEOVER assumes a disaster on \SANFRAN has occurred.Are you sure you want to TAKEOVER?
To proceed with the TAKEOVER operation, enter Y or YES.To stop the TAKEOVER operation, enter N or NO.After you enter your response, RDFCOM prompts you for your next command.
4. Having initiated the RDF TAKEOVER operation, you can then use a STATUS RDF commandto determine the status of the TAKEOVER operation. If the TAKEOVER operation is still inprogress when you enter the STATUS RDF command, the subsystem displays the currentstate as “TAKEOVER IN PROGRESS.”If the TAKEOVER is finished, RDF displays this message in response to the STATUS RDFcommand:STATUS RDF (\SANFRAN -> \TORONTO6) is NOT runningAn RDF TAKEOVER has completedSafe MAT position is SNO 1, RBA 87876660MAT position for File Recovery: SNO 1, RBA 87876740
Check the log for 724 or 725 messages. Message 724 indicates that the takeover completedsuccessfully. Message 725 indicates that it did not, and you should reissue the TAKEOVERcommand.
UNPINAUDITThe UNPINAUDIT command unpins TMF audit trail files on the primary system.UNPINAUDIT
Where IssuedPrimary system only.
Security RestrictionsYou can issue the UNPINAUDIT command if you are a member of the super-user group.
RDFCOM Commands 257

RDF State RequirementYou can only issue the UNPINAUDIT command while RDF is stopped.
Usage GuidelinesIf the system at which you issue the UNPINAUDIT command is the primary system in morethan one RDF configuration, then you must open the RDF control subvolume and issue anotherUNPINAUDIT command for each of the other RDF configurations as well. The TMF audit trailfiles will not be unpinned until an UNPINAUDIT command has been executed for all RDFconfigurations that use them.If you cannot remember all of the RDF configurations that might have pinned audit trail filesand the pinned files are affecting TMF, then you must stop TMF. While audit files remain pinnedeven when RDF is stopped, no files are pinned once TMF has been stopped and restarted.If you unpin files, RDF cannot be restarted if the files required by the extractor cannot be madeavailable. When you unpin audit trail files, be sure that these files are dumped to disk or tape.If they are not dumped and the TMP renames the file or files required by the extractor, you willhave to reinitialize RDF.In response to the UNPINAUDIT command, RDFCOM issues a prompt asking you to confirmyour request.If the files are unpinned successfully, RDFCOM issues an informational message to that effect.If an error occurs while attempting to unpin the audit trail files, the command is ignored, andRDFCOM issues a message indicating the error.
ExampleTo unpin TMF audit trail files on the primary system, enter:]UNPINAUDIT
VALIDATE CONFIGURATIONThe VALIDATE CONFIGURATION command validates the parameters in the RDF configurationfile.VALIDATE CONFIGURATION
Where IssuedPrimary system only.
Security RestrictionsYou can issue the VALIDATE CONFIGURATION command if you are a member of the super-usergroup.
RDF State RequirementYou can only issue the VALIDATE CONFIGURATION command while RDF is stopped.
Usage GuidelinesIt is often useful to issue a VALIDATE CONFIGURATION command just prior to issuing aSTART RDF command. If the validation check reveals errors in the configuration file, you cancorrect them immediately, ensuring that the START RDF operation will complete successfully.Transaction processing need not be enabled on the primary system, however, when you enterthe VALIDATE CONFIGURATION command.Whenever you issue a START RDF command, RDF automatically validates the configuration asthough a VALIDATE CONFIGURATION command was explicitly issued.
258 Entering RDFCOM Commands

In response to a VALIDATE CONFIGURATION command, RDF verifies:• RDF global options are configured.• RDF is initialized, and TMF is running on the primary system.• The monitor, extractor, receiver, purger, and at least one updater are all configured.• The primary and backup CPUs are different from each other for each of the monitor, extractor,
receiver, purger, and updater processes.• The TMF audit trail referred to by the context file exists (for an RDF restart).• All necessary RDF image files are present (for an RDF restart).• The volumes for the image files (specified by the RDFVOLUME option of a SET RECEIVER
command and any ADD IMAGETRAIL commands) are valid and exist on the backup system.• The volumes for the image files have enough room for two more image files (for an RDF
restart).• The primary volumes associated with the updater processes are valid and are being audited
to the TMF audit trail.• The backup volume associated with each updater process (specified by the UPDATEVOLUME
option of the SET VOLUME command) exists on the backup system.• Mapping strings specified in the mapfiles of all the updaters are valid.If RDFCOM detects any configuration errors, it displays an appropriate message.
ExampleTo validate the RDF configuration, enter:]VALIDATE CONFIGURATION
If the current content of the RDF configuration file is valid, RDFCOM displays this message:Configuration Validated
If any of the parameters in the RDF configuration file are not valid, RDFCOM displays a messagesuch as:BACKUPSYSTEM (\TORONTO) is not available
RECEIVER RDFVOLUME $TRAIN does not exist
RDFCOM Commands 259

260
9 Entering RDFSCAN CommandsAll RDF messages are directed to an EMS event log (collector). To examine that log withoutlooking at all events for the entire system, you first use the standard EMS filter RDFFLTO tocreate an intermediate entry-sequenced file copy of the RDF log, and then enter commandsthrough the RDFSCAN online utility.This chapter, which is written for system managers and operators, describes the RDFSCANcommands and their attributes. In this chapter, you will find:• “About the EMS Log” (page 261)• “Elements of RDFSCAN Command Descriptions” (page 261)• “RDFSCAN Commands” (page 262)File names entered as parameters in RDFSCAN commands are subject to the same syntax rulesas those used in RDFCOM commands. For these rules, see File Names and Process Identifiersin Chapter 8 (page 187).
About the EMS LogThe EMS log receives all messages from RDF, including those dealing with RDF startup andshutdown, RDF events, errors, and informative data. In an RDF configuration, an EMS log exists,and is assigned the same name, on both the primary and backup nodes.The EMS log is specified as the global RDF parameter LOGFILE in the RDF configuration file.At configuration time, you can either• Supply the name of the desired collector in a SET RDF LOGFILE command, and add it to
the configuration file with an ADD RDF command• Let RDF use $0 by defaultAt any later time, you can change the collector specified in the configuration file by entering anALTER RDF LOGFILE command.You can use RDFSCAN to examine the RDF messages in the EMS log by way of an intermediateentry-sequenced file produced by the RDFFLTO filter. You must specify the name of theintermediate file in the RDFSCAN command that begins your session.For more information about EMS event log content, format, and scanning methods, see:• “Scanning the EMS Event Log” (page 38)• “Running RDFSCAN” (page 109)• “Performing Routine Operational Tasks” (page 112)
Elements of RDFSCAN Command DescriptionsThe RDFSCAN command descriptions include the same elements as the RDFCOM commanddescriptions in Chapter 8 (page 187), except for these items, which are not included because theyare the same in all cases:• Where Issued: All RDFSCAN commands can be issued at either the primary or backup node.• Security Restrictions: All RDFSCAN commands are unrestricted; they can be entered by
anyone who can log on to the node.• RDF State Requirement: All RDFSCAN commands can be entered at any time, whether or
nor RDF is initialized or running.
About the EMS Log 261

In addition, this element is included only if applicable:• Output Displayed: Only two RDFSCAN commands (LIST and SCAN) produce output,
although others influence its content and destination.For information about the other elements, see “Command Description Elements” in Chapter 8(page 187).Except for the LOG and NOLOG commands, you can abbreviate the command name by enteringonly the first character (such as L for LIST) or any number of the leading characters (such as DISfor DISPLAY). You can use either uppercase or lowercase letters.As in earlier chapters, the boldface text in the examples represents characters you enter in responseto messages that prompt you for input.Descriptions of all RDFSCAN commands follow in alphabetical order.
RDFSCAN Commands
ATThe AT command specifies the record in the intermediate entry-sequenced file at which RDFSCANbegins the next operation.AT [record-number]
record-number
identifies the record by its record number. Record number 0 specifies the first record (RDFmessage) in the file.
Usage GuidelinesMessages generated by RDF are written to an EMS event log. The AT command specifies thestarting point in the intermediate entry-sequenced file generated by the RDFFLTO filter wherethe LIST and SCAN commands, used to examine these messages, begin their operations.If you enter the AT command without the record number, RDFSCAN prompts you:Enter record number:
ExamplesSuppose that $SYSTEM.SANFRAN.RDFLOG is a file generated by RDFFLTO. To position theRDFSCAN pointer at record 750 within that file and then list 25 records, first enter AT 750 inresponse to the current RDFSCAN prompt:Enter the RDFSCAN function you want: AT 750
RDFSCAN repositions its pointer and displays this message and prompt:File: $SYSTEM.SANFRAN.RDFLOG, current record: 750, last record: 2955
Enter the next RDFSCAN function you want:
Now list the records by entering LIST 25 at the prompt:Enter the next RDFSCAN function you want: LIST 25
RDFSCAN responds by listing the records. For information about this listing, see “LIST” (page 265).
DISPLAYThe DISPLAY command enables or disables the display of line (record) numbers in subsequentRDFSCAN output.DISPLAY {ON | OFF}
ONenables the display of record numbers.
262 Entering RDFSCAN Commands

OFFdisables the display of record numbers.
Usage GuidelinesThe DISPLAY function is automatically enabled if pattern matching is enabled and is automaticallydisabled if pattern matching is disabled.For information about enabling and disabling pattern matching, see the MATCH commanddescription in “MATCH” (page 267).
ExamplesSuppose that $SYSTEM.SANFRAN.RDFLOG is a file generated by RDFFLTO, that the RDFSCANpointer is positioned at record 2947, and that pattern matching is disabled (no match pattern hasyet been defined in a MATCH command). To display the next four records in the file with therecord numbers showing, enter the DISPLAY ON command followed by the LIST 4 command:Enter the next RDFscan function you want: DISPLAY ONFile: $SYSTEM.SANFRAN.RDFLOG, current record: 2947, last record: 2955
Enter the next RDFscan function you want: LIST 4Record number: 29472004/06/11 15:13:30 \LAB1 $LEXT 774 RDF Local Extractor StartedRecord number: 29482004/06/11 16:10:01 \LAB1 $RDFCOM 835 STOP UPDATERecord number: 29492004/06/11 16:10:06 \LAB1 $ZRDF 808 Update mode has been set OFFRecord number: 29502004/06/11 16:49:56 \LAB1 $RDFCOM 835 STOP RDFFile: $SYSTEM.SANFRAN.RDFLOG, current record: 2951, last record: 2955
Enter the next RDFscan function you want:
If you issue a LIST 4 command only, without setting the display feature on, RDFSCAN displays:Enter the next RDFscan function you want: LIST 42004/06/11 15:13:30 \LAB1 $LEXT 774 RDF Local Extractor Started2004/06/11 16:10:01 \LAB1 $RDFCOM 835 STOP UPDATE2004/06/11 16:10:06 \LAB1 $ZRDF 808 Update mode has been set OFF2004/06/11 16:49:56 \LAB1 $RDFCOM 835 STOP RDFFile: $SYSTEM.SANFRAN.RDFLOG, current record: 2951, last record: 2955
Enter the next RDFscan function you want:
EXITThe EXIT command ends your current RDFSCAN session.EXIT
Usage GuidelinesWhen you issue the EXIT command, RDFSCAN terminates your session and returns control tothe TACL command interpreter.You can also end your session by pressing the Control and Y keys at the same time (Ctrl-Y),which is equivalent to issuing the EXIT command.
RDFSCAN Commands 263

ExamplesIf you issue an EXIT command in response to the RDFSCAN prompt, RDFSCAN terminates thesession and displays a logoff message:Enter the next RDFscan function you want: EXITThank you for using RDFscan
If you press Ctrl-Y in response to the RDFSCAN prompt, RDFSCAN terminates the session anddisplays an end-of-file indication followed by the logoff message:Enter the next RDFscan function you want: Ctrl-YEOF!
Thank you for using RDFscan
FILEThe FILE command selects a file generated by the RDFFLTO filter to which subsequent RDFSCANcommands apply.FILE [\system.][$volume.][subvolume.]file
\system
identifies the system on which the file is stored.$volume
identifies the disk volume on which the file is stored.subvolume
identifies the subvolume on which the file is stored.file
identifies the file that you want to examine.
Usage GuidelinesThe FILE command allows you to examine a different file than the one your session is currentlyaccessing. In fact, you can use the FILE command to specify any entry-sequenced file.When you issue the FILE command, RDFSCAN identifies the file specified as the one to whichsubsequent AT, DISPLAY, LIST, MATCH, and SCAN commands in this session apply—thetarget file for these commands. This file remains the target file until you specify a new target ina later FILE command, or until you end the session.If you enter a FILE command without specifying a file name, RDFSCAN prompts you for thisname by displayingEnter new filename:
ExamplesSuppose you have been examining the file $SYSTEM.GOLDGT.OLDLOG from a session on theprimary node \SANFRAN, but now want to look at another file, NEWLOG, on the same node,volume, and subvolume. This command closes OLDLOG, switches the target file to NEWLOG,and opens NEWLOG:Enter the next RDFscan function you want: FILE NEWLOG
When it receives this command, RDFSCAN displays a message of this format, followed by aprompt for a new command:File: $SYSTEM.GOLDGT.NEWLOG, current record: 5432, last record: 6733Enter the next RDFscan function you want:
264 Entering RDFSCAN Commands

HELPThe HELP command displays the syntax of RDFSCAN commands or introductory informationabout the RDFSCAN utility.HELP [ ALL ] [ INTRO ] [ command ]
ALLdisplays the syntax of all RDFSCAN commands.
INTROdisplays information on how to use the RDFSCAN utility.
command
displays the syntax of the RDFSCAN command indicated by command.
Usage GuidelinesIf you enter HELP without any option, RDFSCAN prompts you:HELP Function
Enter command or ALL:
ExamplesTo display the syntax of the LOG command, enter the HELP LOG command:Enter the next RDFscan function you want: HELP LOG
In response, RDFSCAN displays:
LOG filename
LOG allows you to echo to filename the recordsdisplayed via LIST. If filename does not exist, anEDIT file is created for you.
File: $SYSTEM.SANFRAN.RDFLOG, current record: 9454, last record: 9466
Enter the next RDFSCAN function you want:
LISTThe LIST command displays a specified number of log messages that contain the current matchpattern.LIST number
number
is the maximum number of log records to be shown.
Usage GuidelinesIf you omit the number of records to be listed, RDFSCAN prompts you:Enter count to list:
The search begins at the current record (the record number specified in an immediately precedingAT command).If pattern matching is enabled, the LIST command examines the file until RDFSCAN finds thespecified number of matches or encounters the last record, whichever happens first. RDFSCANdisplays all messages within that range that contain the current match pattern.
RDFSCAN Commands 265

If pattern matching is disabled, the LIST command displays the specified number of messagesstarting at the current record. This behavior is identical to using the SCAN command with patternmatching disabled.For information about enabling and disabling pattern matching, see the MATCH commanddescription in “MATCH” (page 267).
Output DisplayedThe LIST command displays the records in the file, including their record number (if the DISPLAYfunction is enabled) and the event logged in the record: the date and time of the event, the filesinvolved in the event, and the event itself.
ExamplesSuppose you want to display the first four messages (starting at record 500) that contain thematch pattern $AU02. You interact with RDFSCAN by entering the AT, MATCH, and LISTcommands:Enter the next RDFSCAN function you want: AT 500File: $SYSTEM.SANFRAN.RDFLOG, current record: 500, last record: 2955
Enter the next RDFSCAN function you want: MATCH *$AU02*File: $SYSTEM.SANFRAN.RDFLOG, current record: 500, last record: 2955, Pattern: *AU02*
Enter the next RDFSCAN function you want: LIST 4 Record number: 5532004/06/08 04:13:49 \LAB1 $AU02 790 Backup Process Created in Processor 03Record number: 5542004/06/08 04:13:49 \LAB1 $AU02 718 Switched to original Primary ProcessorRecord number: 7922004/06/08 05:01:35 \LAB1 $AU02 790 Backup Process Created in Processor 03Record number: 7932004/06/08 05:01:35 \LAB1 $AU02 718 Switched to original Primary ProcessorFile: $SYSTEM.SANFRAN.RDFLOG, current record: 794, last record: 2955
Enter the next RDFSCAN function you want:
LOGThe LOG command selects a file to which subsequent LIST commands copy their output inaddition to the standard output device. When you issue the LOG command followed by a LISTcommand, RDFSCAN continues to display the LIST records on the standard device and alsocopies them to the file specified in the LOG command.LOG [\system.][$volume.][subvolume.]file
\system
identifies the system on which the destination file is located.$volume
identifies the disk volume on which the destination file is located.subvolume
identifies the subvolume in which the destination file is located.file
identifies the destination file for the records.
266 Entering RDFSCAN Commands

Usage GuidelinesThe LIST command always transmits its output to the standard output device for RDFSCAN,which is normally your terminal. When you specify a destination file in the LOG command,RDFSCAN directs subsequent LIST command output to that destination file as well as producingit on the standard output device. That is, with the LOG command, LIST output goes both to yourterminal and the file specified in LOG.
NOTE: Do not confuse the file specified in the LOG command with the EMS event log thatreceives RDF messages and whose contents are displayed by the LIST command. For informationabout selecting the file for your session, see FILE command description in “FILE” (page 264).
If the file specified by the LOG command does not exist, RDFSCAN creates an EDIT file of thatname.If you enter a LOG command without specifying a file name, RDFSCAN prompts you for thefile name by displaying:Enter log file name:
To terminate copying to the file selected by LOG, issue a NOLOG command.
Output DisplayedThe LOG command copies the records to the destination file in the same format used by the LISTcommand.
ExamplesSuppose you are examining the entry-sequenced file $SYSTEM.SANFRAN.RDFLOG from withinan RDFSCAN session on the primary node \SANFRAN and that your default volume andsubvolume are $SYSTEM and SANFRAN, respectively. To copy all records that you examinewith the LIST command to the file named $SYSTEM.SANFRAN.ECHO, enter LOG ECHO inresponse to the RDFSCAN prompt, interacting with RDFSCAN in this way: . . .Enter the next RDFSCAN function you want: LOG ECHO
Logfile opened.File: $SYSTEM.SANFRAN.RDFLOG, current record: 9454, last record: 9466
Enter the next RDFSCAN function you want: LIST 100 . . .
MATCHThe MATCH command specifies a pattern to search for in the file. RDFSCAN searches for thespecified character string without regard for uppercase or lowercase.MATCH text
text
specifies a match pattern.
Usage GuidelinesThe match pattern you specify in the MATCH command is used in searches subsequentlyconducted by the LIST and SCAN commands. Pattern matching is disabled until you enter aMATCH command.
RDFSCAN Commands 267
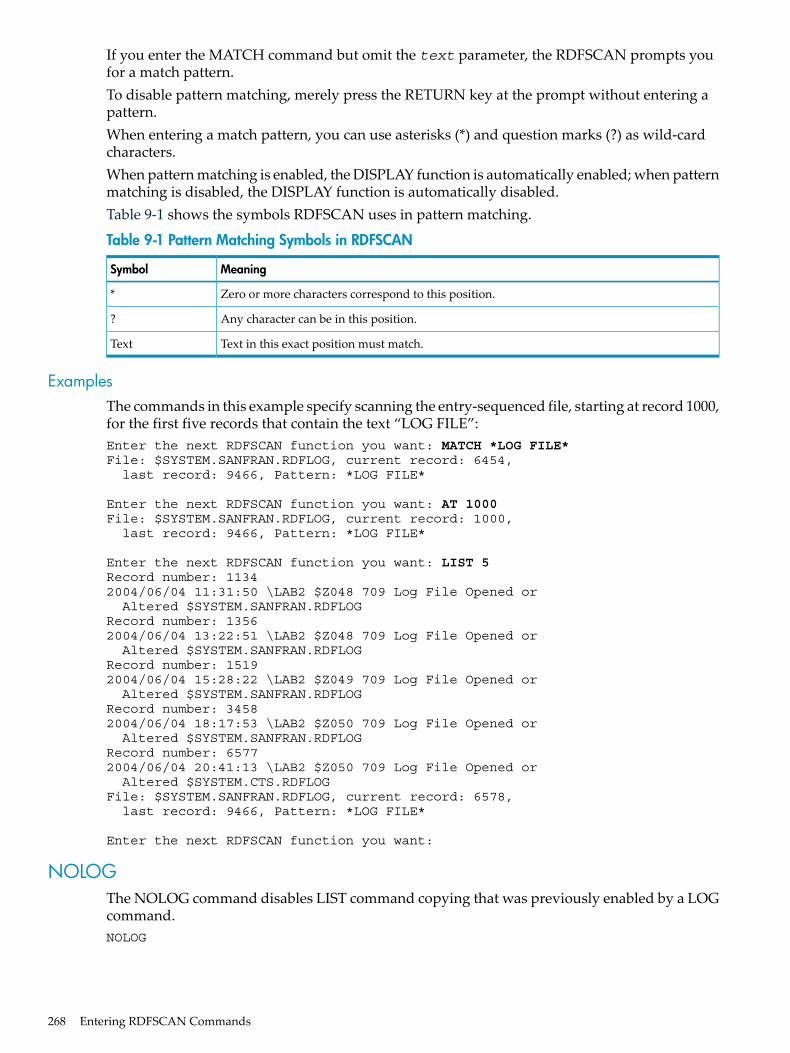
If you enter the MATCH command but omit the text parameter, the RDFSCAN prompts youfor a match pattern.To disable pattern matching, merely press the RETURN key at the prompt without entering apattern.When entering a match pattern, you can use asterisks (*) and question marks (?) as wild-cardcharacters.When pattern matching is enabled, the DISPLAY function is automatically enabled; when patternmatching is disabled, the DISPLAY function is automatically disabled.Table 9-1 shows the symbols RDFSCAN uses in pattern matching.
Table 9-1 Pattern Matching Symbols in RDFSCAN
MeaningSymbol
Zero or more characters correspond to this position.*
Any character can be in this position.?
Text in this exact position must match.Text
ExamplesThe commands in this example specify scanning the entry-sequenced file, starting at record 1000,for the first five records that contain the text “LOG FILE”:Enter the next RDFSCAN function you want: MATCH *LOG FILE*File: $SYSTEM.SANFRAN.RDFLOG, current record: 6454, last record: 9466, Pattern: *LOG FILE*
Enter the next RDFSCAN function you want: AT 1000File: $SYSTEM.SANFRAN.RDFLOG, current record: 1000, last record: 9466, Pattern: *LOG FILE*
Enter the next RDFSCAN function you want: LIST 5Record number: 11342004/06/04 11:31:50 \LAB2 $Z048 709 Log File Opened or Altered $SYSTEM.SANFRAN.RDFLOGRecord number: 13562004/06/04 13:22:51 \LAB2 $Z048 709 Log File Opened or Altered $SYSTEM.SANFRAN.RDFLOGRecord number: 15192004/06/04 15:28:22 \LAB2 $Z049 709 Log File Opened or Altered $SYSTEM.SANFRAN.RDFLOGRecord number: 34582004/06/04 18:17:53 \LAB2 $Z050 709 Log File Opened or Altered $SYSTEM.SANFRAN.RDFLOGRecord number: 65772004/06/04 20:41:13 \LAB2 $Z050 709 Log File Opened or Altered $SYSTEM.CTS.RDFLOGFile: $SYSTEM.SANFRAN.RDFLOG, current record: 6578, last record: 9466, Pattern: *LOG FILE*
Enter the next RDFSCAN function you want:
NOLOGThe NOLOG command disables LIST command copying that was previously enabled by a LOGcommand.NOLOG
268 Entering RDFSCAN Commands

Usage GuidelinesWhen you issue the NOLOG command, RDFSCAN stops copying records to the file specifiedin the LOG command. However, RDFSCAN continues to display at your terminal all recordsaccessed by subsequent LIST commands.
ExamplesThis command disables the copying of LIST command output:Enter the next RDFSCAN function you want: NOLOG
File: $SYSTEM.SANFRAN.RDFLOG, current record: 9454, last record: 9466
Enter the next RDFSCAN function you want:
SCANThe SCAN command scans a specific number of messages in the file and displays all of those inthat range that contain the current match pattern.SCAN number
number
is the number of messages to scan within the log file.
Usage GuidelinesThe search begins at the current record (ordinarily the record number specified in an immediatelypreceding AT command), and continues until either the number of records specified in numberare examined or until the end-of-file is reached, whichever comes first.If pattern matching is enabled, the SCAN command displays only those records that contain thecurrent match pattern.If pattern matching is disabled, the SCAN command displays the specified number of messagesstarting at the current record. This behavior is identical to using the LIST command with patternmatching disabled.
NOTE: The SCAN command performs a slightly different operation than the LIST commandwhen pattern matching is enabled. For example:• If you specify SCAN 10, RDFSCAN searches the next 10 records for the currently
specified pattern and displays all records from among those 10 in which the pattern isfound. For instance, if only 6 records among the next 10 contain that pattern, only those 6records are displayed. RDFSCAN searches until either 10 records are examined or theend-of-file is encountered, whichever comes first.
• If you specify LIST 10, RDFSCAN searches the rest of the file for thecurrently-specified pattern and displays the first 10 records between thecurrent location and the end of the file that contain that pattern. RDFSCANsearches until either 10 records are displayed or the end-of-file is reached, whichever comesfirst. If the rest of the file contains only 6 records that match, only those 6 records aredisplayed.
For information about enabling and disabling pattern matching, see the MATCH commanddescription in “MATCH” (page 267).
ExamplesThe commands in this example specify displaying all messages in the file from record 1000through record 2000 that contain the match pattern $AU02:
RDFSCAN Commands 269

Enter the next RDFSCAN function you want: AT 1000File: $SYSTEM.SANFRAN.RDFLOG, current record: 1000, last record: 2955
Enter the next RDFSCAN function you want: MATCH *$AU02*File: $SYSTEM.SANFRAN.RDFLOG, current record: 1000, last record: 2955, Pattern: *AU02*
Enter the next RDFSCAN function you want: SCAN 1000Record number: 10112004/06/08 04:13:49 \LAB1 $AU02 790 Backup Process Created in Processor 03Record number: 13422004/06/08 04:13:49 \LAB1 $AU02 718 Switched to original Primary ProcessorRecord number: 17922004/06/08 05:01:35 \LAB1 $AU02 790 Backup Process Created in Processor 03Record number: 19332004/06/08 05:01:35 \LAB1 $AU02 718 Switched to original Primary ProcessorFile: $SYSTEM.SANFRAN.RDFLOG, current record: 2000, last record: 2955
270 Entering RDFSCAN Commands

10 Triple ContingencyThe triple contingency feature makes it possible for your applications to resume running withfull RDF protection within minutes after loss of your primary system.
NOTE: Replication of network transactions is not supported in conjunction with the triplecontingency feature, nor is the replication of auxiliary audit trails. You can, however, use theRDF/ZLT product to achieve triple contingency protection for RDF configurations that includeauxiliary audit trails (that capability is described at the end of this chapter).
OverviewThe triple contingency feature is made possible by the ability to replicate to multiple backupsystems. Physically, triple contingency consists of two RDF configurations with the same primarysystem but separate backup systems:RDF Configuration #1 \A ---------> \B
RDF Configuration #2 \A ---------> \C
Both RDF systems are virtually identical to one another, but one replicates data to the backupsystem \B and the other to the backup system \C.Functionally, the triple contingency feature consists of:• A purger configuration parameter, RETAINCOUNT, that prevents the purger process from
purging image trail files that might be needed for triple contingency recovery.• An RDFCOM command, COPYAUDIT, that quickly synchronizes the two backup databases
after loss of the primary system and successful takeovers on the backup systems.
RequirementsYou must be running the same release of RDF on all three systems.All protected data volumes in both RDF environments must be mapped to the Master AuditTrail (MAT) of the associated primary system.It is recommended, but not required, that the two backup systems have the same hardwareconfiguration. They must, however, have the same data volumes and image trails.The two RDF configurations must be configured identically (with a few minor exceptions, suchas the suffix characters specified in the INITIALIZE RDF command and the process names forthe extractors and monitors of the two RDF subsystems).
How Triple Contingency WorksIn general, the triple contingency feature operates in this manner:• The RETAINCOUNT configuration parameter on both backup systems prevents the purger
process from purging image trail files that might be needed for triple contingency recovery.• If the primary system fails, you execute two takeovers: one on each backup system. Upon
successful completion of both takeovers (signalled by a 724 message in the EMS event logof both backup systems), the databases on the two backup systems will almost assuredlynot be identical: one of the extractors will have been ahead of the other in its RDF processingwhen the failure occurred.
• Examine the EMS event log on both backup systems for a 735 message. That message, whichfollows the 724 message in the log, specifies the last position in the MAT that was seen bythe receiver process. Compare the MAT positions in the two 735 messages and determinewhich of the two systems was further behind in its RDF processing when the failure occurred
Overview 271

(that is, which system had received the least amount of audit data from the extractor by thetime the primary system was lost).
• On the backup system that was further behind (had the least amount of audit data), issuethe COPYAUDIT command specifying the name of the other backup system and its RDFcontrol subvolume. That command copies over all missing audit records from the designatedsystem.
• Upon successful completion of the COPYAUDIT operation, do a second takeover on thatsystem. When the second takeover has completed successfully, initialize and configure thetwo backup systems as a new primary-backup pair (either system can be the primary) andthen restart application processing on the new primary system.
The remainder of this chapter discusses the hardware and software requirements, theRETAINCOUNT parameter, and the COPYAUDIT command in detail.
WARNING! To be able to use the triple contingency feature, it is imperative that you carefullyobey the instructions and caveats presented in this chapter.
Hardware RequirementsBoth backup systems should have similar hardware with respect to RDF operation (in particular,the data volumes and image trails must be identical between the two systems). It is also stronglyrecommended that the Expand bandwidth between the primary and backup systems be the samefor both configurations, as well as between the two backup systems.
Software RequirementsYou must be running the same release of RDF on all three systems (the primary system andboth backup systems).The two RDF subsystems should be configured identically with respect to both backupsystems.At the very least, these key fields must be identical on both backup systems:• The primary database volumes being protected• The mapping of data volumes between the primary and backup system• The number of image trails• The mapping of updaters to image trails• The image trail extents• The purger RETAINCOUNTOther fields, such as process names and process priorities, do not need to be identical on the twobackup systems.
272 Triple Contingency

It is strongly recommended, however, that the various RDF process priorities be identical onboth backup systems so that the performance of the two systems is approximately the same.
WARNING! If the two backup systems are configured differently from one another in anyimportant regard, the triple contingency feature will not work when you need it, and there willbe no advance warning to that effect. Prior to a primary system failure, the two backup systemsrun independently of one another and no cross-checking whatsoever is performed to verify thatthey are configured compatibly for triple contingency recovery. To guarantee that the two backupsystems are configured compatibly, it is strongly recommended that you FUP DUP the OBEYcommand file that you use for initializing and configuring one RDF configuration, change thesuffix character and the backup system in the INITIALIZE RDF command (and perhaps someof the process names), and then use that same OBEY command file to initialize and configurethe second RDF configuration.
The RETAINCOUNT Configuration ParameterThe purger RETAINCOUNT parameter specifies how many image trail files (including the onecurrently in use) must be retained on disk for each image trail. The default value for this parameteris two.This parameter is important because if you lose the primary system, the triple contingencyprotocol will work only if one of the backup systems has retained all of the audit records thatthe other is missing.For example, assume that you have lost the original primary system (\A), you have successfullycompleted a takeover on both backup systems (\B and \C), and the MAT positions displayedby the respective 735 messages are:
\B: 735 LAST MAT POSITION: Sno 10, RBA 100500000
\C: 735 LAST MAT POSITION: Sno 10, RBA 100000000
500 kilobytes of audit records is missing on \C.Suppose that the image trail files are relatively small, such that the audit record at MAT 10, RBA100000010 was placed at the start of image trail file AA000025 on \B. If the purger on \B isallowed to purge AA000025 before the takeovers occur, the triple contingency protocol will failbecause \C is missing some of the purged audit records (Sno 10, RBA 100000010 through Sno10, RBA 100500000).The RETAINCOUNT parameter is designed to prevent such a situation, although it is up to youto set this value correctly.You must determine how much time disparity to allow for in the event that one receiver fallsbehind the other. Such a disparity would occur, for example, if the communications lines betweenthe primary system and one of the backup systems were to go down for some period of time.The RETAINCOUNT parameter must be such that no image trail files that might be needed fortriple contingency are ever purged.The best way to do determine the appropriate RETAINCOUNT value is to pick an acceptabletime differential such as 24 hours, 36 hours, or 48 hours, determine how many image trail rolloverstypically occur within that amount of time, and then set the RETAINCOUNT parameter to thatnumber of files.For example, if you believe the two receiver processes will never be more than 36 hours apart intheir RDF processing and your image trail file sizes are such that rollovers occur only once every24 hours, then you would be safe specifying a RETAINCOUNT of three for both backup systems.In that situation, the purger process on both backup systems will always keep at least three imagetrail files on disk (the one the receiver is currently writing to and the previous two). Assume, onthe backup system which is further ahead in its RDF processing, that files AA000010, AA000011,and AA000012 are on disk, the receiver rolls over to file AA000013, and all updaters have justbegun reading file AA000013. Files AA000010 through AA000012 might be considered expendable
The RETAINCOUNT Configuration Parameter 273

(and therefore be eligible for purging), but, because the RETAINCOUNT is set to three, the purgerprocess can only purge AA000010 (it must keep AA000011 and AA000012 on disk). Thus, as longas the RTD times of the extractors on the two backup systems are less than 36 hours apart, thetriple contingency protocol will work successfully.Similarly, if you believe the two receiver processes will never be more than 48 hours apart intheir RDF processing and your image trail file sizes are such that approximately 20 rolloversoccur every 24 hours, then you should set the RETAINCOUNT to 40 on both backup systems.You set the RETAINCOUNT parameter by issuing this command:SET PURGER RETAINCOUNT num
where num is a number within the range 2 through 5000. The default is 2.You can alter the RETAINCOUNT only when RDF is stopped.You alter the RETAINCOUNT parameter by issuing this command:ALTER PURGER RETAINCOUNT num
where num is once again within the range 2 through 5000. (Before entering this command,however, you must first stop RDF.)
The COPYAUDIT CommandIf the primary system fails, you must execute two takeovers: one on each backup system. Uponsuccessful completion of both takeovers (signalled by a 724 message in the EMS event log of eachbackup system), the databases on the two backup systems will almost assuredly be different:one of the systems will have been further ahead of the other in its RDF processing when thefailure occurred.The COPYAUDIT command copies missing audit records from the backup system that wasfurther ahead in its RDF processing (had the most amount of audit data) to the system that wasfurther behind (had the least amount of audit data).Upon successful completion of the two takeovers, examine the EMS event log on both backupsystems for a 735 message. That message, which follows the 724 message in the log, specifies thelast position in the MAT that was seen by the receiver process. Compare the MAT positions inthe two 735 messages and determine which of the two systems was further behind in its RDFprocessing when the failure occurred (that is, which system had received the least amount ofaudit data from the extractor by the time the primary system was lost). Then issue a COPYAUDITcommand on that system, specifying the name of the other backup system and its RDF controlsubvolume.The syntax of the COPYAUDIT command is:COPYAUDIT, REMOTESYS sys, REMOTECONTROLSUBVOL subvol
where sys is the name of the other system (the backup system that has themost amount of auditrecords) and subvol is the name of the RDF control subvolume on that system.For this discussion, assume that you have established two RDF configurations:RDF Configuration #1: \A ------------------> \B (The RDF control subvolume is A1 on both systems.)
RDF Configuration #2: \A ------------------> \C (The RDF control subvolume is A2 on both systems.)
Assume you have lost the original primary system (\A), you have successfully completed atakeover on both backup systems (\B and \C), and the MAT positions displayed by the respective735 messages are:\B: 735 LAST MAT POSITION: Sno 10, RBA 100500000
\C: 735 LAST MAT POSITION: Sno 10, RBA 100000000
274 Triple Contingency

500 kilobytes of audit records is missing on \C.Because \C has the least amount of audit records, you must issue this command on \C:COPYAUDIT, REMOTESYS \B, REMOTECONTROLSUBVOL A1
For each image trail, RDFCOM on \C reads its own context file to determine the MAT positionof the last audit record in the trail. RDFCOM then searches the corresponding trail on \B to findthat audit record and performs large block transfers to move all audit records beyond that pointto the trail on \C. As it does this, RDFCOM issues messages to let you know which image trailit is currently processing.
NOTE: When it begins copying missing audit records from one system to the other, RDFCOMnever alters any of the existing image trail files on the local system. Instead, it creates a brandnew image file on the local system even if the starting point of the missing audit records on theother system is in a file with a different sequence number. This means that, upon completion ofthe COPYAUDIT operation, the local system will almost always have more image trail files (oneor two per image trail) than the other system. This is expected behavior.
If the takeover completes successfully (the receiver logs an RDF message 724 followed by a 735message containing the same detail as in the 735 message associated with the takeover on \B),the two databases are logically identical.At that point you can initialize, configure, and start RDF on both systems and then resumeapplication processing on the new primary system with full RDF protection.
COPYAUDIT RestartabilityThe COPYAUDIT command is restartable.If an error condition aborts execution of a COPYAUDIT command, you merely correct thecondition and then reissue the command. Upon restart, RDFCOM quickly checks the local systemimage files it had previously created to be sure they are still correct, deletes the file it was workingon at the time of the error condition, and then resumes copying. Because it keeps track of whereit was in the COPYAUDIT operation, RDFCOM does not have to recopy the previously copiedimage files.RDFCOM abends if it encounters network problems while searching the remote image trails formissing audit records. If that happens, RDFCOM logs a message to the EMS event log, but notto the home terminal.If RDFCOM encounters network problems during any other phase of COPYAUDIT execution,it does not abend. Instead, it logs a message to the home terminal and aborts the COPYAUDITcommand.
Using ZLT to Achieve Triple Contingency Protection for Auxiliary AuditTrails
The COPYAUDIT command does not support auxiliary audit trails.With the RDF/ZLT product, however, you can achieve the same protection without using aCOPYAUDIT command, and thereby protect RDF environments that include auxiliary audittrails.
Triple Contingency Without ZLTThe triple contingency feature builds upon the ability to replicate to multiple backup systems.With this feature, you establish two essentially identical RDF configurations:RDF Subsystem #1 \A ---------> \B
COPYAUDIT Restartability 275
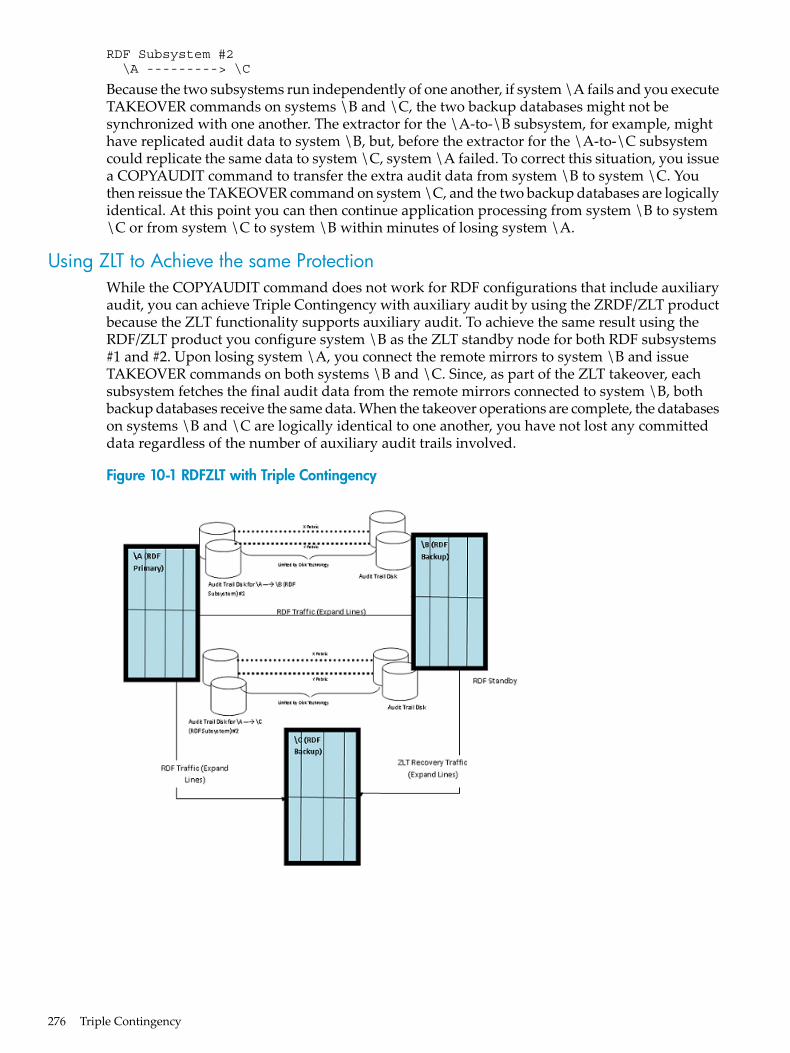
RDF Subsystem #2 \A ---------> \C
Because the two subsystems run independently of one another, if system \A fails and you executeTAKEOVER commands on systems \B and \C, the two backup databases might not besynchronized with one another. The extractor for the \A-to-\B subsystem, for example, mighthave replicated audit data to system \B, but, before the extractor for the \A-to-\C subsystemcould replicate the same data to system \C, system \A failed. To correct this situation, you issuea COPYAUDIT command to transfer the extra audit data from system \B to system \C. Youthen reissue the TAKEOVER command on system \C, and the two backup databases are logicallyidentical. At this point you can then continue application processing from system \B to system\C or from system \C to system \B within minutes of losing system \A.
Using ZLT to Achieve the same ProtectionWhile the COPYAUDIT command does not work for RDF configurations that include auxiliaryaudit, you can achieve Triple Contingency with auxiliary audit by using the ZRDF/ZLT productbecause the ZLT functionality supports auxiliary audit. To achieve the same result using theRDF/ZLT product you configure system \B as the ZLT standby node for both RDF subsystems#1 and #2. Upon losing system \A, you connect the remote mirrors to system \B and issueTAKEOVER commands on both systems \B and \C. Since, as part of the ZLT takeover, eachsubsystem fetches the final audit data from the remote mirrors connected to system \B, bothbackup databases receive the same data. When the takeover operations are complete, the databaseson systems \B and \C are logically identical to one another, you have not lost any committeddata regardless of the number of auxiliary audit trails involved.
Figure 10-1 RDFZLT with Triple Contingency
276 Triple Contingency
SummaryTo be able to use the triple contingency feature, you must:1. Establish two RDF configurations with the same primary system and separate backup
systems.2. Ensure that the hardware configurations of the two backup systems are identical with regard
to data volumes and image trail volumes.3. Ensure that the data volumes and image trails of the two RDF configurations are configured
identically with respect to the two backup systems (with the few minor exceptions notedearlier in this chapter).
4. Set an adequate purger RETAINCOUNT parameter on the backup systems (it must be thesame on both).
Upon loss of the primary system, you must:1. Issue a TAKEOVER command on both backup systems.2. When the takeovers have completed successfully, examine the EMS event log on both backup
systems for a 735 message to determine which system is missing audit records.3. On the system with the least amount of audit records, issue a COPYAUDIT command
specifying the name of the other backup system and its RDF control subvolume.4. When the COPYAUDIT command has completed successfully, issue a second TAKEOVER
command on that same system.5. Initialize, configure, and start RDF on whichever system you want to be the primary in the
new configuration.6. Start application processing on the new primary system.
Summary 277

278

11 Subvolume-Level and File-Level ReplicationBy default, RDF provides volume-level protection, wherein changes to all audited files and tableson each protected primary system data volume are replicated to an associated backup systemdata volume.RDF/IMP, IMPX, and ZLT also support subvolume-level and file-level replication. To use thiscapability, you supply INCLUDE and EXCLUDE clauses when configuring updaters to identifyspecific subvolumes and files you want either replicated or not replicated.RDF/IMP, IMPX, and ZLT also allow you to be selective about what Enscribe files you wantpurged. For RDF to replicate Enscribe purger operations, you must configure the global RDFREPLCATEPURGE to ON. By itself, this means that RDF shall replicates all Enscribe purgeoperations. If you want selectivity in what purge operations you want replicated, you can thenuse INCLUDEPURGE and EXCLUDEPURGE clauses when you configure the updaters. Pleasenote that to use INCLUDEPURGE and EXCLUDEPURGE, the RDF REPLICATEPURGE attributemust also be set to ON.
NOTE: This chapter specifically addresses the including and excluding of Enscribe and NonStopSQL/MP database objects. The same principles, however, also apply to NonStop SQL/MX databaseobjects. INCLUDE and EXCLUDE clauses require the use of Guardian names. If you have anANSI-named NonStop SQL/MX object that you want to include or exclude, you must first obtainthe underlying Guardian name by using the MXGNAMES utility or the MXCI SHOWDDLcommand as described in Chapter 16 (page 323).
INCLUDE ClausesINCLUDE clauses explicitly designate those subvolumes, files, and tables residing on a particularprimary system data volume to be replicated. Changes to all other audited files and tables onthe particular volume are ignored.In this example, only changes to the audited files MYSUBVOL.MYFILE, MMTEST10.FILE1, andMMTEST10.FILE2 on $DATA01 are replicated:SET VOLUME CPUS 1:2SET VOLUME IMAGEVOLUME $IMAGESET VOLUME PRIORITY 185SET VOLUME PROCESS $MM01SET VOLUME UPDATEVOLUME $DATA01SET VOLUME INCLUDE MYSUBVOL.MYFILESET VOLUME INCLUDE MMTEST10.FILE1SET VOLUME INCLUDE MMTEST10.FILE2ADD VOLUME $DATA01
EXCLUDE ClausesEXCLUDE clauses explicitly designate those subvolumes, files, and tables residing on a particularprimary system data volume that you do not want replicated. All other audited files and tableson the particular volume are replicated.In this example, changes to all audited files and tables on $DATA01 are replicated, exceptMMTEST10.CONC0826:SET VOLUME CPUS 1:2SET VOLUME IMAGEVOLUME $IMAGESET VOLUME PRIORITY 185SET VOLUME PROCESS $MM01SET VOLUME UPDATEVOLUME $DATA01SET VOLUME EXCLUDE MMTEST10.CONC0826ADD VOLUME $DATA01
INCLUDE Clauses 279

Wildcard Character (*)The asterisk (*) can be used as a wildcard character in both subvolume and file names.
Within Subvolume NamesWhen used to designate subvolume names, the * must always be used as a suffix.su*v.fname, *.fname, and *.*, for example, are not valid.But DB*.filename is valid because the asterisk is used as a subvolume name suffix. In thiscase, changes made to all audited files and tables on all subvolumes whose name starts with DBon the protected data volume are replicated.
Within FilenamesWhen used by itself as a filename, the * designates all audited files and tables on the specifiedsubvolume. When used as a suffix, the * designates all audited files and tables on the specifiedsubvolume whose names start with the supplied pattern. If the * is not used by itself to representall files, it must be used as a suffix. Embedded wildcard characters (such as fil*nam) are notvalid.
INCLUDE/EXCLUDE and RDFCOM In-Memory TableRecall that when you use the SET commands to set various attributes of an RDF object, the setcommands store the values you set in an in-memory table. If you use INCLUDE and/or EXCLUDElists when you configure an updater, these are also stored in the in-memory table too. This canmake using the same INCLUDE and EXCLUDE lists for each volume very convenient becauseyou only have to specify them for the first volume and they are carried over to each subsequentvolume that you add for RDF protection. For example, consider the following: SET VOLUME CPUS 1:2 SET VOLUME IMAGEVOLUME $IMAGE SET VOLUME PRIORITY 185 SET VOLUME PROCESS $MM01 SET VOLUME UPDATEVOLUME $DATA01 SET VOLUME INCLUDE MYSUBVOL.MYFILE SET VOLUME INCLUDE MMTEST10.FILE1 SET VOLUME INCLUDE MMTEST10.FILE2 ADD VOLUME $DATA01
SET VOLUME CPUS 1:2 SET VOLUME IMAGEVOLUME $IMAGE SET VOLUME PRIORITY 185 SET VOLUME PROCESS $MM02 SET VOLUME UPDATEVOLUME $DATA02 ADD VOLUME $DATA01
With this set of configuration commands, both updaters have the same file-sets included.If, however, the file-sets you want to INCLUDE or EXCLUDE differ from one volume to the next,then you must use the RESET VOLUME command after each ADD command in order to clearout the previously specified INCLUDE and EXCLUDE lists, as follows: SET VOLUME CPUS 1:2 SET VOLUME IMAGEVOLUME $IMAGE SET VOLUME PRIORITY 185 SET VOLUME PROCESS $MM01 SET VOLUME UPDATEVOLUME $DATA01 SET VOLUME INCLUDE MYSUBVOL.MYFILE SET VOLUME INCLUDE MMTEST10.FILE1 SET VOLUME INCLUDE MMTEST10.FILE2 ADD VOLUME $DATA01
RESET VOLUME
280 Subvolume-Level and File-Level Replication

SET VOLUME CPUS 1:2 SET VOLUME IMAGEVOLUME $IMAGE SET VOLUME PRIORITY 185 SET VOLUME PROCESS $MM02 SET VOLUME UPDATEVOLUME $DATA02 SET VOLUME INCLUDE SBSUBVOL.MYFILE SET VOLUME INCLUDE SBTEST10.FILE1 SET VOLUME INCLUDE SBTEST10.FILE2 ADD VOLUME $DATA02
RESET VOLUME
If you did not use the RESET VOLUME command above, then the INCLUDE lists for $DATA01and $DATA02 are as follows: $DATA01 MYSUBVOL.MYFILE MMTEST10.FILE1 MMTEST10.FILE2
$DATA02 MYSUBVOL.MYFILE MMTEST10.FILE1 MMTEST10.FILE2 SBSUBVOL.MYFILE SBTEST10.FILE1 SBTEST10.FILE2
INCLUDE and EXCLUDE ProcessingYou can specify a maximum of 100 INCLUDE and EXCLUDE parameters for each volume, inany combination. When you specify both INCLUDE and EXCLUDE clauses for a given volume,the clauses are processed hierarchically, with the INCLUDE clauses processed first and EXCLUDEclauses processed second.
INCLUDEPURGE and EXCLUDEPURGEThese updater attributes work exactly the same as for INCLUDE and EXCLUDE, with the exactsame wildcard functionality, and with the exact same performance ramifications.There is one additional consideration. The total number of INCLUDE, EXCLUDE,INCLUDEPURGE, and EXCLUDEPURGE clauses that you can have for one updater is 100. Thismeans, for example, that you can have 25 for each of the these clauses, but not one more. If youhave 50 INCLUDEs and 50 EXCLUDEs, then you cannot add any INCLUDEPURGE andEXCLUDEPURGE clauses for the updater. Please note that the aggregate for the updater is 100for all four types. If you have no INCLUDEs and no EXCLUDEs, then you can have up to 100INCLUDEPURGE and EXCLUDEPURGE clauses - for example 80 INCLUDEPURGE and 20EXCLUDEPURGE clauses. Alternatively, you could have 100 EXCLUDEPURGE clauses, butnote that in this case you cannot have any INCLUDE, EXCLUDE, and EXCLUDEPURGE clauses.Observe the following example.SET VOLUME CPUS 1:2SET VOLUME IMAGEVOLUME $IMAGESET VOLUME PRIORITY 185SET VOLUME PROCESS $MM01SET VOLUME UPDATEVOLUME $DATA01SET VOLUME INCLUDE MMTEST10.*SET VOLUME INCLUDEPURGE MMTEST.FILE*SET VOLUME EXCLUDEPURGE MMTEST.FILE10
ADD VOLUME $DATA01
INCLUDE and EXCLUDE Processing 281

In the above example, the INCLUDE clause specifies that only audited files in$DATA01.MMTEST10 are to be replicated. The INCLUDEPURGE clause specifies that everyEnscribe purge operation involving files in this same subvolume are to be replicated, but theEXCLUDEPURGE clause specifies that any purge operations involving the file$DATA01.MMTEST10.FILE10 are NOT to be replicated.
Error CheckingExtensive checking is done when the subvolume and file names are parsed, and invalid namescause errors. The logic of a series of INCLUDE and EXCLUDE clauses, however, is not checked.For example, information is not regarded as an error, even though it makes no sense becauseeverything will be filtered out:SET VOLUME INCLUDE MMTEST10.*SET VOLUME EXCLUDE MMTEST10.*
Performance RamificationsThe extractor processes all INCLUDE and EXCLUDE clauses. If the extractor reads an auditrecord associated with a file or table not specified in an INCLUDE clause, it discards the record.Similarly, if the extractor reads an audit record associated with a file or table specified in anEXCLUDE clause, it discards the record.With volume-level replication, the extractor needs to test only the volume name to determine ifa record should be sent to the backup system. With subvolume- and file-level replication, however,the extractor must also test the subvolume name and filename. Hence there is more work to dowith subvolume- and file-level replication. If you use large numbers of INCLUDE and EXCLUDEclauses for each volume, the extractor might have to evaluate the subvolume name and filenameagainst multiple lists, which could lead to increased CPU usage by the extractor and lowerextractor performance than with simple volume-level replication. Therefore, you should becareful about how many INCLUDE and EXCLUDE clauses you specify for each volume. Theuse of wildcard characters in subvolume names and filenames can help considerably. For example,to replicate all of the files within all subvolumes whose names begin with the letters DB, you cando so with a single INCLUDE clause:INCLUDE DB*.*
Summary ExamplesConsider this updater configuration example, where the primary system is \PRIMARY and thebackup system is \BACKUP:SET VOLUME CPUS 1:2SET VOLUME IMAGEVOLUME $IMAGESET VOLUME PRIORITY 185SET VOLUME PROCESS $MM01SET VOLUME UPDATEVOLUME $DATA01ADD VOLUME $DATA01
In the above example, all audited files and tables on \PRIMARY.$DATA01 are replicated to\BACKUP.$DATA01.Now consider this updater configuration example:SET VOLUME CPUS 1:2SET VOLUME IMAGEVOLUME $IMAGESET VOLUME PRIORITY 185SET VOLUME PROCESS $MM01SET VOLUME UPDATEVOLUME $DATA01SET VOLUME INCLUDE MMTEST10.*SET VOLUME EXCLUDE MMTEST10.CONC0826SET VOLUME INCLUDE DATA*.*SET VOLUME EXCLUDE DATA*.C*
282 Subvolume-Level and File-Level Replication

SET VOLUME INCLUDEPURGE RRVOL*.*SET VOLUME EXCLUDEPURGE RRTYP*.*
There is still one updater responsible for replicating changes from $DATA01 on the primarysystem to $DATA01 on the backup system, but the INCLUDE and EXCLUDE clauses explicitlyidentify which subvolumes and files on \PRIMARY.DATA01 are to be replicated (all auditedfiles and tables in the subvolumes MMTEST10, DATA*, and DB* are replicated, exceptMMTEST10.CONC0826 and any files or tables in DATA* whose names start with "C").
Summary Examples 283

284

12 Subvolume Name MappingRDF allows users to replicate data from primary system source subvolumes to differently nameddestination subvolumes on the backup system. However, the recommended configuration is stillone-to-one mapping between source subvolumes on the primary system and their correspondingdestination subvolumes on the backup system. One-to-one mapping ensures that each partitionof a partitioned file or table is mapped to the correct backup subvolume. The use of identicallynamed primary and backup subvolume names on both systems prevents naming conflicts aftera takeover operation.The subvolume name mapping feature should be used under special conditions where the userpurposely wants to replicate data to a differently named subvolume based on businessrequirements. When you use differently named subvolumes on the primary and backup system,you must change all subvolume references before the primary system's applications are startedon the backup system.This chapter addresses these topics:• “Creating a Mapfile to Define the Rules for Subvolume Name Mapping” (page 285)• “Rules for Creating Mapfile Mapping Strings” (page 285)• “How an Updater Manages Filename Collisions” (page 286)• “Creating a Maplog to Log Subvolume Name Mapping” (page 287)• “Adding a Mapfile and Maplog to an Updater's Configuration Record” (page 288)• “Managing Subvolume Name Mapping for Partitioned Files” (page 288)For more information about the problems associated with using differently named subvolumes,see “Managing Subvolume Name Mapping for Partitioned Files” (page 288).
Creating a Mapfile to Define the Rules for Subvolume Name MappingYou define subvolume name mapping in a mapfile. The mapfile is an EDIT file that contains thesupported subvolume mapping strings, which constitute the mapping rules.The mapfile must reside on the backup system so that it is accessible if and when the primarysystem is not accessible. Each mapfile can be used by one or more updaters.The subvolume mapping strings in a mapfile must use the format:MAP NAMES source-subvol-set.* TO destination-subvol-set.*
Where:MAP, NAMES, TO
Are keywords. If any of these keywords is not present in a mapping string, an error is logged.source-subvol-set.*
Is the source subvolume fileset for which the mapping rule is applied.destination-subvol-set.*
Is the destination subvolume fileset into which the changes corresponding to the files fromthe source subvolume fileset are replicated.
Rules for Creating Mapfile Mapping StringsThese rules apply to the content and structure of mapping strings inside a mapfile:• A mapfile must contain one or more mapping strings or be empty.• Only one mapping string is allowed on each line of the mapfile.• The mapfile can also contain blank lines and comment lines. A comment line must begin
with the | character.• Node names are not allowed in mapping strings.
Creating a Mapfile to Define the Rules for Subvolume Name Mapping 285
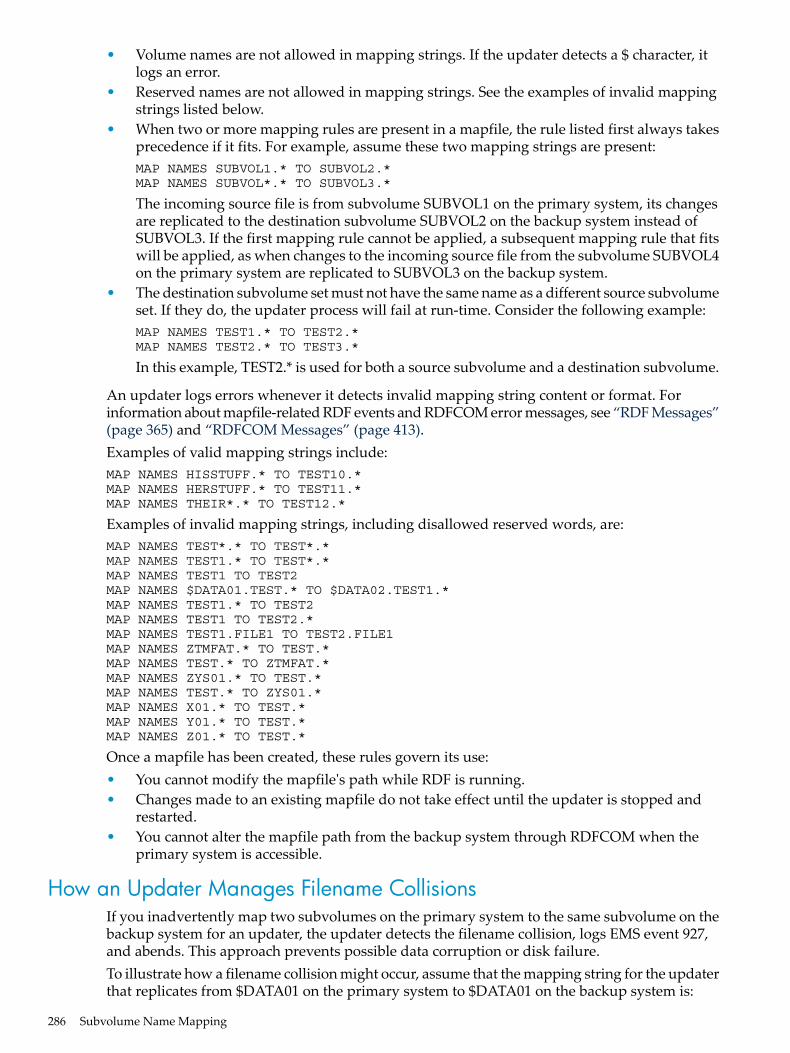
• Volume names are not allowed in mapping strings. If the updater detects a $ character, itlogs an error.
• Reserved names are not allowed in mapping strings. See the examples of invalid mappingstrings listed below.
• When two or more mapping rules are present in a mapfile, the rule listed first always takesprecedence if it fits. For example, assume these two mapping strings are present:MAP NAMES SUBVOL1.* TO SUBVOL2.*MAP NAMES SUBVOL*.* TO SUBVOL3.*
The incoming source file is from subvolume SUBVOL1 on the primary system, its changesare replicated to the destination subvolume SUBVOL2 on the backup system instead ofSUBVOL3. If the first mapping rule cannot be applied, a subsequent mapping rule that fitswill be applied, as when changes to the incoming source file from the subvolume SUBVOL4on the primary system are replicated to SUBVOL3 on the backup system.
• The destination subvolume set must not have the same name as a different source subvolumeset. If they do, the updater process will fail at run-time. Consider the following example:MAP NAMES TEST1.* TO TEST2.*MAP NAMES TEST2.* TO TEST3.*
In this example, TEST2.* is used for both a source subvolume and a destination subvolume.
An updater logs errors whenever it detects invalid mapping string content or format. Forinformation about mapfile-related RDF events and RDFCOM error messages, see “RDF Messages”(page 365) and “RDFCOM Messages” (page 413).Examples of valid mapping strings include:MAP NAMES HISSTUFF.* TO TEST10.*MAP NAMES HERSTUFF.* TO TEST11.*MAP NAMES THEIR*.* TO TEST12.*
Examples of invalid mapping strings, including disallowed reserved words, are:MAP NAMES TEST*.* TO TEST*.*MAP NAMES TEST1.* TO TEST*.*MAP NAMES TEST1 TO TEST2MAP NAMES $DATA01.TEST.* TO $DATA02.TEST1.*MAP NAMES TEST1.* TO TEST2MAP NAMES TEST1 TO TEST2.*MAP NAMES TEST1.FILE1 TO TEST2.FILE1MAP NAMES ZTMFAT.* TO TEST.*MAP NAMES TEST.* TO ZTMFAT.*MAP NAMES ZYS01.* TO TEST.*MAP NAMES TEST.* TO ZYS01.*MAP NAMES X01.* TO TEST.*MAP NAMES Y01.* TO TEST.*MAP NAMES Z01.* TO TEST.*
Once a mapfile has been created, these rules govern its use:• You cannot modify the mapfile's path while RDF is running.• Changes made to an existing mapfile do not take effect until the updater is stopped and
restarted.• You cannot alter the mapfile path from the backup system through RDFCOM when the
primary system is accessible.
How an Updater Manages Filename CollisionsIf you inadvertently map two subvolumes on the primary system to the same subvolume on thebackup system for an updater, the updater detects the filename collision, logs EMS event 927,and abends. This approach prevents possible data corruption or disk failure.To illustrate how a filename collision might occur, assume that the mapping string for the updaterthat replicates from $DATA01 on the primary system to $DATA01 on the backup system is:
286 Subvolume Name Mapping

MAP NAMES TEST1.* TO TEST2.*
Assume that the file $DATA01.TEST1.FILE on the primary system is modified. RDF applies themapping rule on this file and replicates its changes to the file $DATA01.TEST2.FILE on thebackup system.Next, the file $DATA01.TEST2.FILE on the primary system is modified. RDF determines thatthe mapping rule does not apply. If RDF had to replicate the changes, they would be replicatedto the file $DATA01.TEST2.FILE on the backup system. If this situation occurred, changes to thefiles $DATA01.TEST1.FILE and $DATA01.TEST2.FILE on the primary system would be replicatedto the same file, $DATA01.TEST2.FILE, on the backup system. Instead, RDF detects the filenamecollision, logs error 927, and abends.The updater might not be able to prevent filename collisions when it:• Closes files on the backup system because their corresponding source files on the primary
system have not been modified for at least ten minutes• Encounters a restart condition (for example, file system error 122)• Undergoes a process takeover• Is stopped with a user-supplied STOP RDF/UPDATE command• Is stopped for other reasonsIf the updater is restarted under any of these circumstances, it cannot detect a filename collisionuntil and unless the files from both subvolumes on the primary system that are mapped to thesame subvolume on the backup system have both been modified within ten minutes.
Creating a Maplog to Log Subvolume Name MappingMaplog is an optional EDIT file into which the updater logs source filenames from the primarysystem and their mapped destination filenames on the backup system. The updater logs theentry of the data file only once until the time that the data file is open on the backup system.However, if the data file is closed and reopened on the backup system, the updater logs multipleentries for the same data file.If the maplog file already exists at the cold start, it will be emptied with a Purgedata operation.If the maplog does not exist, the ADD VOLUME and ALTER VOLUME MAPLOG commandswill create an empty maplog file on the backup system.Use the RDFCOM SET command to specify the maplog filename and path in the updater'sconfiguration record, as described in “Adding a Mapfile and Maplog to an Updater's ConfigurationRecord”. You can turn off logging to the maplog by altering the maplog to none.
NOTE: The updater closes files on the backup system when their corresponding source fileson the primary system have not been modified for at least ten minutes. When this occurs, theupdater will also forget the filename collision information described in “How an Updater ManagesFilename Collisions”.
Use RDFCOM ALTER to turn off maplog logging. For example:ALTER VOLUME $DATA01 MAPLOG
In this example, $DATA01 is the name of the volume on the primary system, and MAPLOG isthe keyword. Because MAPLOG is followed by end of line, it indicates that the maplog file onthe backup system be turned off.You can also alter the maplog file to a different path. For example:ALTER VOLUME $DATA01 MAPLOG $DATA05.NAPCONFG.MAPLOG2
If a maplog is not properly constructed or formatted, the updater generates errors. For informationabout maplog-related RDF event messages and RDFCOM error messages, see “RDF Messages”(page 365) and “RDFCOM Messages” (page 413).
Creating a Maplog to Log Subvolume Name Mapping 287

Adding a Mapfile and Maplog to an Updater's Configuration RecordUse the RDFCOM SET command to store the names and paths for an updater's mapfile andmaplog into the updater's configuration record. For example:RESET VOLUME SET VOLUME ATINDEX 0SET VOLUME CPUS 2:1SET VOLUME PRIORITY 175SET VOLUME PROCESS $WU01SET VOLUME UPDATEVOLUME $DATA04SET VOLUME IMAGEVOLUME $DATA01SET VOLUME MAPFILE $data05.napconfg.mapfileSET VOLUME MAPLOG $data05.napconfg.maplogADD VOLUME $DATA01
The updater's configuration record identifies the primary system source volume ($DATA01),the backup system destination volume to which it is mapped ($DATA04), and the locations ofthe updater's mapfile and maplog on the backup system. This mapfile and maplog are applicableonly to that updater. The mapfile and maplog pathnames cannot contain a node name.You turn maplog logging off by specifying:ALTER VOLUME $DATA01 MAPLOG
After the mapfile and maplog information has been stored in the updater's configuration record,RDFCOM parses the mapping strings specified in the mapfile, logs any errors, and creates anempty maplog if one does not exist.When the updater starts in response to an RDFCOM START RDF/UPDATE command, it:• Checks that the mapfile is not edited or modified by the user since the updater was last
stopped.• Compares the last modification timestamp and CRVSN number of the mapfile with those
stored in its configuration record. If they match, the updater reads all the mapping stringsfrom the mapfile and skips their validation. If they do not match, the updater performsvalidation of all the mapping strings and generates the appropriate EMS events in responseto errors.
• Reads the image records and applies the mapping rules to them before applying them tothe backup system database.
• If a maplog has been specified, the updater logs the source and destination filename pairsin the maplog.
• Once started, the updater will not read modifications made to the mapfile until the updaterhas been stopped and restarted or until a process takeover occurs.
Managing Subvolume Name Mapping for Partitioned FilesProblems can occur when you map a partitioned file on the primary system to a differentlynamed subvolume on the backup system. When a file on the primary system is partitioned acrossvolumes, updater mapping rules can cause the file to be replicated to partitions in separatesubvolumes on the backup system. If this situation occurs, the partitions can become corrupted,and the updater cannot detect it. When a user application on the backup system attempts to openboth partitioned files, it reports an error.
288 Subvolume Name Mapping

To illustrate this problem scenario, assume these circumstances:• You create an audited, partitioned, key-sequenced file (Enscribe, SQL/MP, or SQL/MX) on
the primary system where the primary and secondary partitions are on the same subvolumeat $DATA01.SVOL.FILE and $DATA02.SVOL.FILE.
• One updater replicates the changes for the primary partition $DATA01.SVOL.FILE on theprimary system to $DATA11.SVOL1.FILE on the backup system using this mapping string:MAP NAMES SVOL.* TO SVOL1.*
• A second updater replicates the changes for the secondary partition $DATA02.SVOL.FILEon the primary system to $DATA22.SVOL2.FILE on the backup system by using this mappingstring:MAP NAMES SVOL.* TO SVOL2.*
As a result of these mapping rules, both partitions on the backup system are created in the samesubvolume, SVOL1. When the second updater applies an audit to the secondary partition,$DATA22.SVOL2.FILE, it reports an error 11 because the partition $DATA22.SVOL2.FILE doesnot exist.If you run FUP COPY on the primary partition file $DATA02.SVOL1.FILE on the backup system,FUP reports file-system error 3 or 72 when it attempts to open the secondary partition file$DATA22.SVOL2.FILE. FUP displays the contents of the primary partition file but not the contentsof the secondary partition file.To avoid this problem, when you map a subvolume on the primary system to a differently namedsubvolume on the backup system, always ensure that the mapping rules do not affect partitionedfiles.
Managing Subvolume Name Mapping for Partitioned Files 289

290

13 Auxiliary Audit TrailsIn addition to the Master Audit Trail (MAT), RDF/IMPX and ZLT support protection of up to 15auxiliary audit trails.If you want to protect data volumes associated with an auxiliary audit trail, you must configurean auxiliary extractor and an auxiliary receiver for that trail. Thus, for each auxiliary audit trail,there will be one auxiliary extractor-receiver pair.
Auxiliary ExtractorAn auxiliary extractor can only be configured to a single auxiliary audit trail. Such an extractorwill read only the designated auxiliary audit trail; it will never read any part of the MAT or anyother auxiliary audit trail. When reading the audit trail, it looks for any audit records associatedwith the pool of volumes being protected by RDF (normal filtering logic). All such records aresent to the backup system in accordance with standard RDF architectural behavior. Each auxiliaryextractor is associated with a corresponding auxiliary receiver through the user-specifiedconfiguration. The auxiliary extractor communicates only with that particular auxiliary receiver,and never sends data to the master receiver or any other auxiliary receiver.
Auxiliary ReceiverAn auxiliary receiver is associated with a specific auxiliary extractor. Because the auxiliaryextractor sends audit records associated only with its particular auxiliary audit trail, thecorresponding auxiliary receiver writes audit records to the image trails of updaters associatedonly with volumes configured to the particular auxiliary audit trail.For example, assume that $DATA1 on the primary system is configured as a data volume inauxiliary audit trail AUX01, and an auxiliary extractor is configured for AUX01. The auxiliaryextractor sends all audit records for $DATA1 to a corresponding auxiliary receiver on the backupsystem. The receiver writes the data to an image trail that is, in turn, read and processed by anupdater responsible for replicating database changes for $DATA1.
Configuring Extractors and ReceiversThe SET EXTRACTOR and SET RECEIVER commands include this optional syntax:ATINDEX atindex
where atindex is an integer value corresponding to the audit trail number of the MAT (0) oran auxiliary audit trail (1 through 15) on the primary system. The default is 0.Because 0 is reserved for the MAT, the extractor and receiver with an atindex value of 0 arethe master extractor and receiver. The extractors and receivers withatindex values of 1 through15 must protect volumes associated with configured auxiliary audit trails AUX01 through AUX15,respectively.A master extractor and receiver are required, because TMF control records are required on thebackup system in the event of an RDF takeover operation or a stop-update-to-time operation.Auxiliary extractors and receivers are optional.For each extractor, there must be a corresponding receiver with the same atindex value.
Error conditions• It is an error not to have a master extractor (atindex value of 0).• It is an error not to have a master receiver (atindex value of 0).• It is an error if you do not have an auxiliary extractor and receiver with the same atindex
value. That is, if you have an auxiliary extractor with an atindex value of 1, you must havean auxiliary receiver with an atindex value of 1.
Auxiliary Extractor 291

• It is an error if the specified atindex does not correspond to a valid index of a configuredauxiliary audit trail. That is, if you have configured two TMF auxiliary audit trails with therespective audit trail numbers of 1 and 2, you cannot configure an auxiliary extractor withan atindex value of 3.
• It is an error to specify two extractors or two receivers with the same atindex value.
Configuring Image TrailsEach image trail must be exclusively managed by a single receiver process, and all audit recordsstored in an image trail must come from the same primary system audit trail. Therefore, if yourRDF environment is to protect primary system data volumes that are configured to auxiliaryaudit trails, you must use this command to associate each image trail with the appropriatereceiver:SET IMAGETRAIL ATINDEX atindex
where atindex is an integer value from 0 through 15 specifying which receiver manages theimage trail. 0 specifies the receiver associated with the MAT; 1 through 15 specifies the receiversassociated with auxiliary audit trails AUX01 through AUX15, respectively.The default value is 0.After the SET IMAGETRAIL ATINDEX command, you must issue an ADD IMAGETRAILcommand.
Configuring UpdatersThe SET VOLUME command includes this optional syntax:ATINDEX atindex
where atindex is an integer value from 0 through 15 specifying the audit trail to which thatdata volume is mapped on the primary system. 0 specifies the MAT, and the data volume on theprimary system must be mapped to the MAT. 1 through 15 specifies auxiliary audit trail AUX01through AUX15, respectively, and the data volume on the primary system must be mapped tothe designated auxiliary audit trail.The default value is 0.
NOTE: Data volumes on the backup system need not be mapped to the same audit trail as onthe primary system. If a data volume on the primary system is mapped to the MAT, for example,the corresponding updater volume on the backup system can be mapped to an auxiliary audittrail.
Error Conditions• It is an error if the specified image trail atindex does not map to a receiver with the same
atindex.• It is an error if the updater’s atindex does not equal the same audit trail index to which
the data volume on the primary system is mapped.• It is an error if the atindex of the updater and its image trail are not the same.
Ramifications for STOP TMF, Stop-Update-to-Time, and SQL Shared AccessDDL Ops
Under normal circumstances, auxiliary extractors always run ahead of the master extractor.Abnormal situations, such as CPU failures, can cause auxiliary extractors to fall behind the masterextractor.If an auxiliary extractor is running behind the master extractor when you issue a STOP TMFcommand, the TMF shutdown operation cannot complete until the auxiliary extractor has caught
292 Auxiliary Audit Trails

up with the master extractor. When that happens, RDF (or more specifically, the master receiverprocess) might falsely appear to be hung. As soon as the auxiliary extractor has caught up,however, the TMF shutdown operation proceeds. The same can happen to the updaters when astop-update-to-time or a SQL shared access DDL operation enters the RDF subsystem, whereinthe updaters configured to an auxiliary audit trail may take a long time to shutdown if theauxiliary extractor has fallen behind. When that extractor finally caztches up, the affected updatersare able to shutdown.
Takeover RamificationsFor a non-RDF/ZLT congfiguration, if an auxiliary extractor is running behind the master extractorwhen you issue a TAKEOVER command, a transaction just committed on the primary system(and who’s commit record was received by the master receiver) could be backed out on thebackup system.This could happen under these circumstances:• In addition to the MAT, you have configured RDF to protect one or more auxiliary audit
trails.• When the primary system fails, an auxiliary extractor is running behind the master extractor.
For example, the master receiver has received the commit record associated with a particulartransaction, but the auxiliary receiver is missing audit data for that same transaction.
• A committed transaction (whose commit record was received by the master receiver justbefore the primary system failure) updated only a volume associated with the MAT.
Usage of Master and Auxiliary Audit TrailsA master extractor must always be associated with the MAT even if no data volumes areconfigured to the MAT. A master extractor is required because the MAT contains audit recordsthat preserve TMF control information required by RDF on the backup system, and this controlinformation is not stored in any auxiliary audit trail.
Using Expand Multi-CPU PathsThe use of Expand with ATM, Fast Ethernet, or Servenet provides considerable bandwidth, andit is often sufficient to have a single Expand path driven out of a single processor.If your RDF configuration is replicating auxiliary audit trails, however, the total amount of auditdata to be sent from the primary system to the backup system could be more than a single Expandpath can handle. If that is the case, you should use the Expand multi-CPU path feature.Expand multi-CPU paths enable you to spread the communications load over multiple processorsby connecting multiple Expand line-handler processes, each in a separate processor, betweentwo adjacent nodes. In an RDF environment, you would use this feature to establish dedicatedpaths for the master extractor-receiver pair and multiple auxiliary extractor-receiver pairs.Suppose you will be configuring three extractor-receiver pairs: one for the MAT and one eachfor auxiliary audit trails AUX01 and AUX02. Suppose further that both your primary and backupsystems have ten processors. For each Expand multi-CPU path, you place the matching Expandline-handlers in the same processor on both systems.To set up our three paths in processors 3, 5, and 7, for example, you would put matching Expandline-handlers in processor 3 on both systems, in processor 5 on both systems, and in processor7 on both systems. Within RDF you would then configure processor 3 as the primary CPU forthe master extractor and receiver, processor 5 as the primary CPU for the AUX01 extractor andreceiver, and processor 7 as the primary CPU for the AUX02 extractor and receiver. Thereafterall messages between the master extractor and receiver will go through the path in processor 3on both systems, all messages between the AUX01 extractor and receiver will go through thepath in processor 5 on both systems, and all messages between the AUX02 extractor and receiverwill go through the path in processor 7 on both systems.
Takeover Ramifications 293

For more information about Expand multi-CPU paths, see theExpandConfiguration andManagementManual.
294 Auxiliary Audit Trails

14 Network TransactionsThe RDF/IMPX and RDF/ZLT products are able to guarantee backup database consistency fortransactions that update data residing on more than one RDF primary system. RDF/IMPX andRDF/ZLT can map the volumes being protected to both the MAT and auxiliary audit trails.
NOTE: Network transaction processing is currently not supported in configurations that usethe triple contingency feature. You must use RDF/IMPX or RDF/ZLT to protect all databasesopen to network transactions.
Without planning for network transaction support, the RDF product cannot guarantee databaseconsistency among the associated backup systems following the failure of one of the primarysystems.Support for network transactions requires two major external changes.1. If you have a distributed database spread over several RDF primary systems, you must
configure an RDF network wherein each primary system residing on its own, mutuallyexclusive node has its own RDF subsystem that replicates its local data to its own backupsystem. This is referred to as an RDF network because each RDF subsystem knows the namesof the systems protected by all other RDF subsystems in the network. One, and only one,RDF subsystem within the network is configured as the network master.
2. If you lose one or more RDF primary systems in the RDF network, you must execute RDFtakeover operations on all backup systems in the network.For those primary systems still alive, you must first quiesce all application activity (bothlocal and remote) so that no further database updates are being performed, and then bringdown the communication lines between the primary and backup systems before initiatingthe takeover.
With network transaction support, you must now be more careful when creating Enscribe filesthat have alternate key files. Specifically, when you create an Enscribe file with an altkey file youmust ensure that both files reside on the same primary system and that both are protected bythe same RDF subsystem. If you do not do so, then the updater responsible for creating the fileon the backup system will not create the file; rather, it will report an error 740 when it determinesthat the altkey file is not protected by its RDF subsystem.For RDF/ZLT configurations, all nodes that participate in a network transaction need to beconfigured in the RDF network for RDF/ZLT protection.
Configuration ChangesTo support network transactions, several configuration attributes and a configuration recordhave been added to the RDF configuration file.
NETWORK AttributeThis attribute, located in the RDF configuration record, specifies whether or not you areconfiguring an RDF network.To set this attribute, use this RDFCOM command: SET RDF NETWORK {ON | OFF}
When this attribute is set to OFF (the default value), RDF takeover operations execute just asthey have in the past, and database consistency is not guaranteed for transactions that spannedmore than one primary system.When this attribute is set to ON, the RDF subsystem can guarantee backup database consistencyacross multiple RDF systems configured within an RDF network.
Configuration Changes 295

NETWORKMASTER AttributeThis attribute, located in the RDF configuration record, specifies whether or not the particularsystem is the master of the RDF network. Each RDF network has one, and only one, networkmaster.To set this attribute, use this RDFCOM command: SET RDF NETWORKMASTER {ON | OFF}
When this attribute is set to OFF (the default value), the particular system is not the networkmaster.When this attribute is set to ON, the particular system is the network master of the RDF network.If this attribute is set to ON, the NETWORK attribute must also be set to ON.
Network Configuration RecordThis configuration record contains some or all of these network attributes:PRIMARYSYSTEM system-nameBACKUPSYSTEM system-nameREMOTECONTROLSUBVOL subvolume-namePNETTXVOLUME volume-name
If you are configuring the network master RDF subsystem, you must include a networkconfiguration record for every RDF subsystem in the RDF network (including the network masteritself). Each of those records must include these attributes:
Name of the primary system.PRIMARYSYSTEM system-name
Name of the associated backup system.BACKUPSYSTEM system-name
Name of the primary system’s remote control subvolume.REMOTECONTROLSUBVOL subvolume-name
Name of the primary system volume on which the RDFsubsystem stores an audited network synchronization file.
PNETTXVOLUME volume-name
If you are configuring a non network master RDF subsystem, you must include a single networkconfiguration record containing these attributes:
Name of the network master’s primary system.PRIMARYSYSTEM system-name
Name of the network master’s backup system.BACKUPSYSTEM system-name
Name of the network master’s remote control subvolume.REMOTECONTROLSUBVOL subvolume-name
Thus, within its configuration file, the network master has all necessary information about everysystem in the RDF network (whereas the other systems have only a pointer enabling them toobtain information about other systems in the network).
PRIMARYSYSTEM Network AttributeThis is the name of a primary system. It is set by this RDFCOM command:SET NETWORK PRIMARYSYSTEM system-name
There is no default value. Each primary system within an RDF network must be unique withinthe network. An RDF network cannot contain two or more RDF subsystems with the sameprimary system (that is, it cannot contain RDF subsystems for \A to \B and \A to \C).
BACKUPSYSTEM Network AttributeThis is the name of the backup system associated with the specified primary system. It is set bythis RDFCOM command:SET NETWORK BACKUPSYSTEM system-name
296 Network Transactions

There is no default value.
REMOTECONTROLSUBVOL (RCSV) Network AttributeThe remote control subvolume (RCSV) is the name of the control subvolume used by the RDFsubsystem configured for the specified primary and backup systems. It is set by this RDFCOMcommand.SET NETWORK REMOTECONTROLSUBVOL subvolume-name
There is no default value.
PNETTXVOLUME Network AttributeYou only use this attribute when configuring the network master. On the master you must includethis attribute within every network configuration record (including the one for the master itself).This attribute specifies the name of the volume on the particular primary system where the RDFnetwork master stores an audited network-synchronization file. The specified volume must bea data volume protected by the RDF subsystem on the primary system and be configured to theMAT. The PNETTXVOLUME volume is set by this RDFCOM command.SET NETWORK PNETTXVOLUME volume-name
There is no default value.
Adding the Network RecordWhen you have finished setting the attributes of a network record for a given RDF subsystem,you add that information to your current configuration file with this RDFCOM command.ADD NETWORK
RDF Network Synchronizer (RDFNET) ProcessRDF/IMPX and RDF/ZLT include an RDF executable process, the RDFNET process, that can onlybe configured within a network master RDF subsystem (and can therefore only be started on thenetwork master’s primary system).This process provides a synchronization point within the image trails of all backup systems inan RDF network. The process does that by updating an audited file named ZRDFNETX on theprimary system of each RDF subsystem in the RDF network. The overhead of this process shouldbe transparent because the RDFNET process only starts a single transaction every 15 secondsand only executes a single update against the ZRDFNETX file on the primary system of eachRDF subsystem in the RDF network.The fully-qualified name of the ZRDFNETX file for each system is:$volume-name.subvolume-name.ZRDFNETX
where volume-name is the configured PNETTXVOLUME network attribute andsubvolume-nameis the configured REMOTECONTROLSUBVOLUME network attribute.
RDF Network Control FilesThese control files exist in the Master Image Trail (MIT) subvolume of all RDF subsystems thatare configured for replication of network transactions: ZRDFLCMT, ZRDFLCM2, andZNETUNDO. Additionally, the network master has three more files: ZRDFNMTX, ZRDFNMT2,ZRDFNMT3. These files contain internal information that RDF needs to execute takeoveroperations involving an RDF network correctly. The files are empty until you actually initiate atakeover operation on a backup system within an RDF network.
Normal RDF Processing Within a Network EnvironmentEach RDF subsystem within an RDF network conducts its processing individually, as though itwere not involved in an RDF network. That is, for a given RDF subsystem, the extractors read
RDF Network Control Files 297

the MAT and auxiliary audit trails and send data to the receivers. The updaters read their datafrom their image trails and apply it to their UpdateVolumes. During normal processing, no RDFsubsystem (except the RDFNET process within the network master primary system) interactswith any other RDF subsystem in the RDF network. Therefore, the performance of an individualRDF subsystem is unaffected by its inclusion within an RDF network.
RDF Takeovers Within a Network EnvironmentWith RDF/ZLT, no committed data from any primary system in the RDF network is lost. Thediscussions that follow regarding loss of data in a network takeover only apply to non-RDF/ZLTenvironments.If you have configured an RDF network and must initiate a takeover on a backup system in thenetwork, then you must execute a takeover on all the backup systems in the network. You dothat by issuing an RDFCOM TAKEOVER command on each individual backup system. Whena takeover occurs within an RDF network, each subsystem’s takeover operation consists of threephases of operation:1. A local undo phase2. A file undo phase3. A network undo phase
Takeover Phase 1 – Local UndoThis phase is identical to a normal RDF takeover (one that is totally unrelated to an RDF network).It consists of determining what transaction data has already been applied to the backup databasebut whose outcomes are unknown. Once the transactions have been identified, all updatesassociated with them are undone. The purger process determines what transactions must beundone and it writes the list into the ZTXUNDO file in the MIT.For example, suppose you began a transaction on your primary system, you executed ten updates,and you committed the transaction, but the extractor process was only able to transmit the firstfive updates to the backup system before being terminated by an unplanned outage. In such acase, the RDF subsystem recognizes it is missing data for the particular transaction (because itdoes not know how the transaction ended), and it undoes the five updates it had previouslyapplied to the backup database.In summary, phase 1 of a takeover operation undoes data associated with transactions whosecomplete data did not make it to the backup system at the time the primary system failed.
Takeover Phase 2 – File UndoThis undo phase only gets executed if volumes went down on the primary system, transactionswere aborted, and the volumes were never reenabled on the primary system before the primarysystem was lost. In that situation, RDF determines what Backout could not undo on the primarysystem, and the Phase 2 File Undo operation performs this type of undo. Even with the RDF/ZLTproduct, the File Undo operation performs this type of undo.
Takeover Phase 3 – Network UndoPhase three determines if network transaction data is missing from any of the backup systemsin the RDF network, and marks those transactions to be undone on all of the systems. For example,suppose you began a network transaction, updated tables on ten different systems, and thencommitted the transaction. Now suppose that nine of the ten systems were able to transmit theirupdates and commit records to their backup systems, but the tenth primary system went downbefore its extractor was able to do the same. Phase three determines that the particular transactioninvolved all 10 databases, that one of the backup databases is missing audit data for thattransaction, and identifies the transaction as one that must be undone on the other nine systems
298 Network Transactions
(it is undone during phase 1 on the tenth system). All of the updaters then look for audit dataassociated with the transaction, and undo it.The purger of the network master determines what network transactions are incomplete acrossthe different backup systems, and it produces the master network undo list. Each purger thenuses this master list to ascertain the transaction data that must be undone on its backup database.For example, if a network transaction involved only four of the ten primary systems in an RDFnetwork, then that transaction only needs to be undone on the backup databases where that datawas replicated. Because the other systems were not involved, the transaction does not need tobe listed there. The list of network transactions that need to be undone on a specific systemresides in its ZNETUNDO file.
Takeover Phase 3 PerformanceThe speed with which a takeover completes for an entire RDF network varies based on thenumber of systems in the network and how far any system had fallen behind when the takeoverwas initiated.For example, if you have three systems in your RDF network, and all extractors on all threesystems were keeping up with audit generation on their systems, and then one system fails, thetakeover operations might only take a modest number of additional seconds to complete phase3 takeover processing.In contrast, if you have three systems in your RDF network, and one extractor had fallen 60minutes behind at the time its system went down, then phase 3 takeover processing on the othertwo systems will take many more seconds to complete. The reason for this is that phase 3processing on the two systems that were not behind will have to go through 60 minutes of datato determine what must be undone due to data missing on the system that had fallen behind.A variation of the first example is that no extractors have fallen behind, but you have 25 systemsin your RDF network. In such a case, phase 3 processing might take many additional secondsbecause data must be checked for so many different systems in order to determine what networkdata might be missing from the various systems in the RDF network.
Communication Failures During Phase 3 Takeover ProcessingIf one RDF subsystem is unable to reach the backup system of another RDF subsystem duringphase 3 processing, phase 3 processing stalls until the communication line comes back up. Thiscan lengthen the overall duration of takeover operations on all backup systems. Should this typeof stall occur, the RDF subsystem issues an event message alerting operators to the situation.
Takeover Delays and Purger RestartsDuring phase 3 purger work, the network master needs information from the other purgerprocesses in the RDF network, and, during the latter part of phase 3 processing, the non-networkmaster purgers need information from the purger of the network master. When a purger processis waiting for information from another purger, it waits for up to 60 seconds, during which timeit does not respond to certain requests (such as STATUS RDF). After a purger has waited 60seconds, it quits the operation and restarts. This allows the purger to read the $RECEIVE file,respond to messages that have been waiting for replies, and then retry phase 3 processing.
Takeover RestartabilityAs has always been the case, the RDFCOM TAKEOVER command is restartable. Therefore, if atakeover operation terminates prematurely for any reason on any system in an RDF network, itcan be restarted.
RDF Takeovers Within a Network Environment 299

Takeover and File RecoveryWhen a takeover operation completes in an RDF network environment, the purger logs twoevents: one reports a safe MAT position (indicating that all committed data up to that locationwas successfully applied to the backup database), and the second (888 or 858) reports whetheror not a File Recovery position is available for use on the primary system. The RDF event 888reports that a File Recovery is available and it includes the exact sno and RBA to be used for aFile Recovery operation on the primary system. If, however, “kept-commits” have beenencountered during phase 2 processing, a File Recovery position is not available; this is reportedin RDF event 858. This last situation will never occur in an RDF/ZLT environment because a FileRecovery position is always available with RDF/ZLT.If an RDF event 888 is reported, then the specified File Recovery position is based on both phase1 and phase 3 processing. Each system logs its own File Recovery position. While that positioncan differ from one backup system to the next, the logged position for any single system is correct.If you supply the returned File Recovery position to the TMF file recovery process on the primarysystem, the process recovers the files on the primary database up to that point. If you use FileRecovery to a MAT position on all primary systems in the RDF network, in each case using thereturned File Recovery positions, then your primary distributed database will be consistentacross the RDF network.You would use the File Recovery position with File Recovery in several situations: Assume youhave had an outage of your primary system, you have executed the RDF takeover operation onyour backup system, and you have resumed business transactions on your backup system.Assume further that the former primary system has been repaired, it is back online, and youwant to switch your business transactions from the active backup database back to the formerprimary database. To do so, you merely execute a planned RDF switchover from the backup tothe newly restored primary.The problem with doing a planned switchover from backup to primary after an RDF takeoveroperation is that some transactions might have committed on the primary system immediatelyprior to the unplanned outage, and the outage brought down the extractor before it could sendthat data to the backup system. In such a case, when you bring the primary system back up thetwo databases are no longer synchronized because the primary database contains committedtransactions that are not in the backup database. Such transactions cannot be recovered.In the past you would have had to synchronize your entire primary and backup databases. Thatcould be a lengthy task. Now you can simply use TMF file recovery to a MAT position. If youexecute this operation on your primary system using the MAT position specified in the RDFevent 888 message (see the description of message 888 in Appendix C (page 365)), it brings theprimary database into the exact same state that the backup database was in upon completion ofthe RDF takeover. Thus, after file recovery has completed, you can execute a normal plannedswitchover from backup to primary.
NOTE: Due to the order transactions that commit on individual systems, file recovery mightnot always be possible. If an 888 message is generated, however, it can be trusted.
The Effects of Undoing Network TransactionsExcept with RDF/ZLT, phase 3 undo processing within an RDF network environment usuallyresults in other transactions being undone on every system in the network because the RDFproduct is designed to make the safest, and most conservative, assumptions regarding all possibleinterrelationships between transactions. This is best illustrated by example.Consider an RDF network consisting of two RDF subsystem configurations (primary system \Aprotected by backup system \X, and primary system \B protected by backup system \Y). Assumethat network transactions originate on both \A and \B, and that they update data on both \Aand \B. Assume further that each system also executes local, non-network, transactions.
300 Network Transactions

More specifically, assume that system \A (the network master) executes:1. T10 (network transaction started on \A)2. T11 (non-network transaction)3. T11 commit4. T10 commit5. T12 (network transaction started on \A)6. T12 commit7. T13 (network transaction started on \B)8. T13 commit9. T14 (non-network transaction)10. T15 (network transaction started on \A)11. T14 commit12. T15 commitAt approximately the same time system \B executes:1. T10 (network transaction started on \A)2. T20 (non-network transaction)3. T12 (network transaction started on \A)4. T13 (network transaction started on \B)5. T21 (non-network transaction)6. T22 (non-network transaction)7. T36 (network transaction started on \C)8. T21 commit9. T22 commit10. T36 commit11. T20 commit12. T10 commit13. T13 commit14. T12 commitAssume that the primary system \B goes down after having transmitted the commit record forT13 to its backup system \Y. At that point \Y has the commits for T10, T13, T20, T21, T22 andT36. \Y only has to perform local undo (during which T12 is undone).The purger on \X (the network master) determines that the first transaction requiring networkundo is T12 because that transaction was active on both \A and \B when \B went down.Therefore, even though T12 originated on \A and was committed on \A, it must be undone on\X (the backup system of \A) because it was undone on \Y (the backup system of \B). Thisensures database consistency across both nodes. When the purger identifies the first networktransaction that must be undone during network undo processing, it logs an RDF 877 eventmessage specifying that transaction.Besides transaction T12, transactions T14 and T15 must also be undone on \X because theyfollowed the commit of T12 on \A and their database changes could have been based on thecommitted outcome of T12. If T14 and T15 are not also undone, database consistency could becompromised because their effects on the database might have been based upon data that wasbacked out. T14 is a local transaction, not a network transaction. Nonetheless, its database changescould have been based on the outcome of T12 and therefore must be undone. Thus, both networkand business consistency are maintained.T13 does not, however, have to be undone even though it committed on \A after T12. Why?Because the purger on \X (the network master) determines that, although T13 followed T12 on\A, the sequence for these two commits had to have been reversed on \B, where the commit for
RDF Takeovers Within a Network Environment 301
T13 preceded the commit for T12. Therefore, the purger determines that these two transactionscould not have touched the same data, and T13 does not need to be undone.This illustrates a very important point. With network transactions, the commit sequence ofnetwork transactions might differ from one node to another, depending on where the transactionsoriginated. For example, consider two network transactions: T101 and T102. Assume T101originated on \M and T102 originated on \N. Assume further that they altered data on both \Mand \N, and committed at the same time. The commit operation for T101 is coordinated by theTMP on \M because that is where T101 originated; similarly, T102 is coordinated by the TMPon \N because that is where T102 originated. Thus, on \M, the sequence of commit records onthe audit trail will likely be T101 followed by T102, whereas on \N it will likely be T102 followedby T101.For these two reasons, we can be certain T101 and T102 did not alter the same data:• Transaction record locking would have prevented these transactions from altering the same
data.• The commit sequence on \M being T101 followed by T102 and the commit sequence on \N
being T102 followed by T101 unequivocally means that these two transactions were activeat the same time and committed at the same time. Therefore they could not have altered thesame data.
If we return to the issue of T13 in the example further above, the commit sequence differs on \Aand \B. When the purger on \A determines that T12, T14, and T15 must be undone, it alsodetermines that the results of T13 can be kept intact because T13 had to have completed on \Bbefore T12. Why? The commit records on \A guarantee that both T12 and T13 did indeed commit.Therefore, although the commit record for T12 is missing from \B, the commit record for T13 ispresent. This guarantees that T13 committed prior to T12, and that the results of T13 can be keptintact on both nodes.When a purger determines that it can keep the results of a transaction even though that transactionfollows one that must be undone because data for it is missing elsewhere, the purger logs anRDF 823 event message identifying the particular transaction.
NOTE: If you have local transactions that do not touch data involved in network transactionactivity, and you do not want these local transactions undone just because data might be missingfor the network transactions during a takeover operation, you are advised to configure separateRDF subsystems: one to protect just the data involved in network transaction activity, and thesecond to protect the non-network data. Of course, both sets of data must have no dependencieson the other.
Takeover and the RETAINCOUNT ValueIn order for all systems in an RDF network to execute phase 3 takeover processing correctly, youmust ensure that all image data potentially needed for undo is available on each system. Theway to achieve that is to set the purger’s RETAINCOUNT to an acceptable value on each system.For a complete discussion about this attribute and how it works, refer to Chapter 10 (page 271).(The same RETAINCOUNT guidelines that apply to a triple contingency environment also applyto an RDF network environment.)If you have not set the RETAINCOUNT properly and image files have been purged that aresubsequently needed for phase 3 takeover processing, the takeover operations on the systemswhere the image data is missing might fail. In such a case, your entire distributed database acrossall RDF backup systems could be compromised with inconsistent data.
302 Network Transactions

Network Configurations and Shared Access NonStop SQL/MP DDLOperations
Under certain circumstances after a shared access NonStop SQL/MP DDL operation, takeovernetwork undo processing leads to an abort with database corruption.To avoid this problem, use this protocol when performing shared access NonStop SQL/MP DDLoperations in a network environment:1. Issue the RDFCOM STOP RDF command on the primary system where you plan to perform
the shared access NonStop SQL/MP DDL operation.2. From TMFCOM STATUS TRANSACTIONS, collect all the network transactions that are
currently in progress.3. Wait until all transactions observed in step 2 have completed and are no longer listed.4. For all other primary nodes in your RDF network, run RDFCOM STATUS RDF commands.5. When all other RDF subsystems in the RDF network list 0:00 extractor RTD times, issue the
RDFCOM START RDF command on the system where you had stopped RDF.6. Perform your shared access NonStop SQL/MP DDL operation on your primary system.7. Follow the normal method for replicating shared access NonStop SQL/MP DDL operations
on your backup system.
Network Validation and ConsiderationsA set of rules has been devised to ensure that all RDF subsystems in your configured RDF networkare consistent with each other.1. You must validate all non network master subsystems before validating the network master’s
subsystem.2. Because you cannot validate the network master until all non network master subsystems
have been validated, you cannot start the network master until all non network mastersubsystems have been validated.
3. If you have validated a non network master, you are allowed to start that subsystem eventhough the network master has not been validated.
See Appendix C (page 365) for the error messages that can occur during validation steps.
NOTE: It is strongly recommended that you validate the configurations of all RDF subsystemsin your RDF network with the RDFCOM VALIDATE CONFIGURATION command before youattempt to start any. This would then guarantee that your entire RDF network is configuredcorrectly before you start any of the individual RDF subsystems.
RDF Reinitialization in a Network EnvironmentFor any number of reasons you might choose to stop some of your RDF network subsystemsand reinitialize them. This can be done without impacting the other subsystems in the RDFnetwork. When you reconfigure those subsystems after initialization, there are severalconsiderations.
Network Master Subsystem InitializationWhen you reconfigure the subsystem, the network record must list all the non network mastersystems and the information for each system in the network record must be identical to theprevious configuration. If not, validation will fail and you will not be able to start the subsystem.
Non-Network Master Subsystem InitializationIf you reconfigure the RDF subsystem of a non-network master:
Network Configurations and Shared Access NonStop SQL/MP DDL Operations 303

1. The network configuration record must point to the network master of the RDF network.2. You must ensure that the updater responsible for the PNETTXVOLUME is also configured
to the same image trail as that listed in the network master’s network configuration record.Otherwise, validation will fail and you will be unable to start the newly configured subsystem.
NOTE: If you must change the PNETTXVOLUME, the imagetrail, or the RDFVOLUMEof any subsystem in your RDF network, then you must stop and reinitialize all of the RDFsubsystems in that network.
RDF Networks and ABORT or STOP RDF OperationsIf no network transactions are active, you can stop RDF on any subsystem at any time withoutaffecting the other systems in an RDF network. The same is true with regard to an RDF monitorprocess aborting its RDF subsystem.There is, however, one exceptional situation. The RDFNET process runs on the network master’sprimary system. For every primary system in the RDF network, the RDFNET process maintainsa special file on its PNETTXVOLUME volume. If the communications line to one of those primarysystems is down, and you then issue a STOP RDF command on the network master’s primarysystem, the STOP RDF command could appear to hang. The reason for this is that the RDFNETprocess might be trying to open a file for the system whose path is down. In such a case, theRDFNET process waits until either the line comes back up or the Expand level-4 timer expires.If the RDFNET process must wait for the Expand level-4 timer to expire, it will not be able torespond to the STOP RDF or abort RDF request until the timer expires. By default, the timer isfour or five minutes.If you are waiting for the network master subsystem to shut down, and the operation does notappear to be happening, check the communication lines to the other systems in the network. Ifone of them is down and the RDFNET process is tying up the orderly shutdown of RDF, stopthe RDFNET process manually.
CAUTION: If you stop any RDF subsystem in an RDF network, you could lose large amountsof committed data in the event of an unplanned outage.
RDF Networks and Stop-Update-to-Time OperationsStop-update-to-time operations affect only the backup database of the particular system on whichthey are initiated. If you have an RDF network, you can execute a stop-update-to-time operationon any primary system in the network, but the operation affects only the backup database of thesystem on which it is initiated (it does not affect data in any other backup database, even fornetwork transactions).For example, suppose you have ten RDF subsystems in your RDF network, and most transactionson each system touch two or more systems in the network. Thus, nearly every transaction is anetwork transaction. If you execute a stop-update-to-time operation on one of these systems,that operation only brings that particular subsystem’s backup database into a consistent statewith regard to transaction commit times on the associated primary database. It does not executeundo operations on any other backup systems in the RDF network.To illustrate this, assume you began a transaction (T10) at 12:00 P.M., executed ten updates oneach of two primary systems in an RDF network (\A and \B), and committed T10 at 12:05.Assume further that you had previously issued a stop-update-to-time operation on system \A,specifying 12:01 P.M. When the stop-update-to-time operation completes, the data for T10 isbacked out of system \A’s backup database because T10 committed after 12:00 P.M. The datafor T10 on system \B’s backup database, however, remains unaffected (because astop-update-to-time operation only applies to the backup system associated with the primarysystem on which it is initiated).
304 Network Transactions

It is rare for clocks on different systems to have exactly the same values, thus rendering itimpossible for stop-update-to-time operations to perform correctly across multiple backupsystems.
Sample ConfigurationsTwo sample configurations follow, one for the network master and one for a non network master.The network attributes are highlighted in bold.
Sample Network Master ConfigurationThe configuration that follows is for a network master RDF subsystem running from \RDF04 to\RDF06:SET RDF SOFTWARELOC $SYSTEM.RDFSET RDF LOGFILE $0SET RDF UPDATERDELAY 10SET RDF UPDATERTXTIME 60SET RDF UPDATERRTDWARNING 60SET RDF UPDATEROPEN PROTECTEDSET RDF NETWORK ONSET RDF NETWORKMASTER ONSET RDF UPDATEREXCEPTION OFFADD RDF
SET MONITOR CPUS 1:2SET MONITOR PRIORITY 185SET MONITOR PROCESS $MMONADD MONITOR
SET EXTRACTOR ATINDEX 0SET EXTRACTOR CPUS 1:2SET EXTRACTOR PRIORITY 185SET EXTRACTOR PROCESS $MEX1SET EXTRACTOR RTDWARNING 60ADD EXTRACTOR
SET RECEIVER ATINDEX 0SET RECEIVER CPUS 3:2SET RECEIVER EXTENTS (100,100)SET RECEIVER PRIORITY 185SET RECEIVER RDFVOLUME $DATA11SET RECEIVER FASTUPDATEMODE OFFSET RECEIVER PROCESS $MR41ADD RECEIVER
SET PURGER CPUS 3:2SET PURGER PRIORITY 185SET PURGER PROCESS $RP40SET PURGER RETAINCOUNT 5SET PURGER PURGETIME 60ADD PURGER
SET IMAGETRAIL ATINDEX 0ADD IMAGETRAIL $DATA06
SET NETWORK PRIMARYSYSTEM \RDF04SET NETWORK BACKUPSYSTEM \RDF06SET NETWORK REMOTECONTROLSUBVOLUME RDF04SET NETWORK PNETTXVOLUME $DATA07ADD NETWORK
SET NETWORK PRIMARYSYSTEM \RDF05SET NETWORK BACKUPSYSTEM \RDF06
Sample Configurations 305
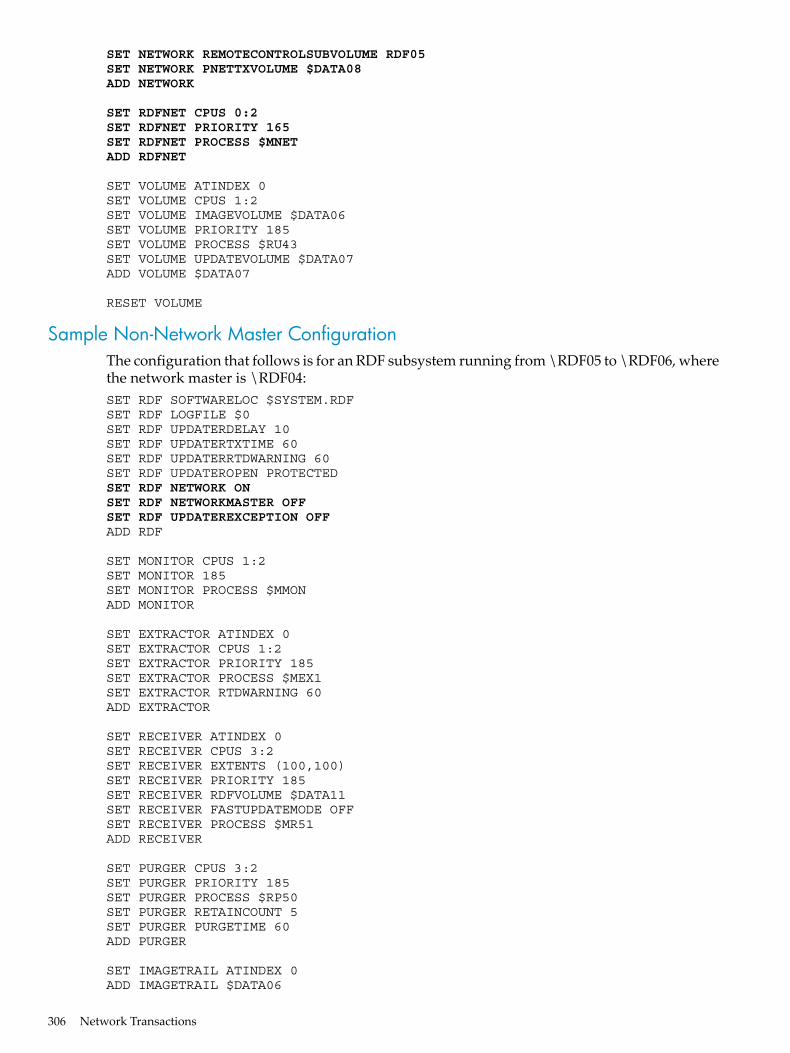
SET NETWORK REMOTECONTROLSUBVOLUME RDF05SET NETWORK PNETTXVOLUME $DATA08ADD NETWORK
SET RDFNET CPUS 0:2SET RDFNET PRIORITY 165SET RDFNET PROCESS $MNETADD RDFNET
SET VOLUME ATINDEX 0SET VOLUME CPUS 1:2SET VOLUME IMAGEVOLUME $DATA06SET VOLUME PRIORITY 185SET VOLUME PROCESS $RU43SET VOLUME UPDATEVOLUME $DATA07ADD VOLUME $DATA07
RESET VOLUME
Sample Non-Network Master ConfigurationThe configuration that follows is for an RDF subsystem running from \RDF05 to \RDF06, wherethe network master is \RDF04:SET RDF SOFTWARELOC $SYSTEM.RDFSET RDF LOGFILE $0SET RDF UPDATERDELAY 10SET RDF UPDATERTXTIME 60SET RDF UPDATERRTDWARNING 60SET RDF UPDATEROPEN PROTECTEDSET RDF NETWORK ONSET RDF NETWORKMASTER OFFSET RDF UPDATEREXCEPTION OFFADD RDF
SET MONITOR CPUS 1:2SET MONITOR 185SET MONITOR PROCESS $MMONADD MONITOR
SET EXTRACTOR ATINDEX 0SET EXTRACTOR CPUS 1:2SET EXTRACTOR PRIORITY 185SET EXTRACTOR PROCESS $MEX1SET EXTRACTOR RTDWARNING 60ADD EXTRACTOR
SET RECEIVER ATINDEX 0SET RECEIVER CPUS 3:2SET RECEIVER EXTENTS (100,100)SET RECEIVER PRIORITY 185SET RECEIVER RDFVOLUME $DATA11SET RECEIVER FASTUPDATEMODE OFFSET RECEIVER PROCESS $MR51ADD RECEIVER
SET PURGER CPUS 3:2SET PURGER PRIORITY 185SET PURGER PROCESS $RP50SET PURGER RETAINCOUNT 5SET PURGER PURGETIME 60ADD PURGER
SET IMAGETRAIL ATINDEX 0ADD IMAGETRAIL $DATA06
306 Network Transactions
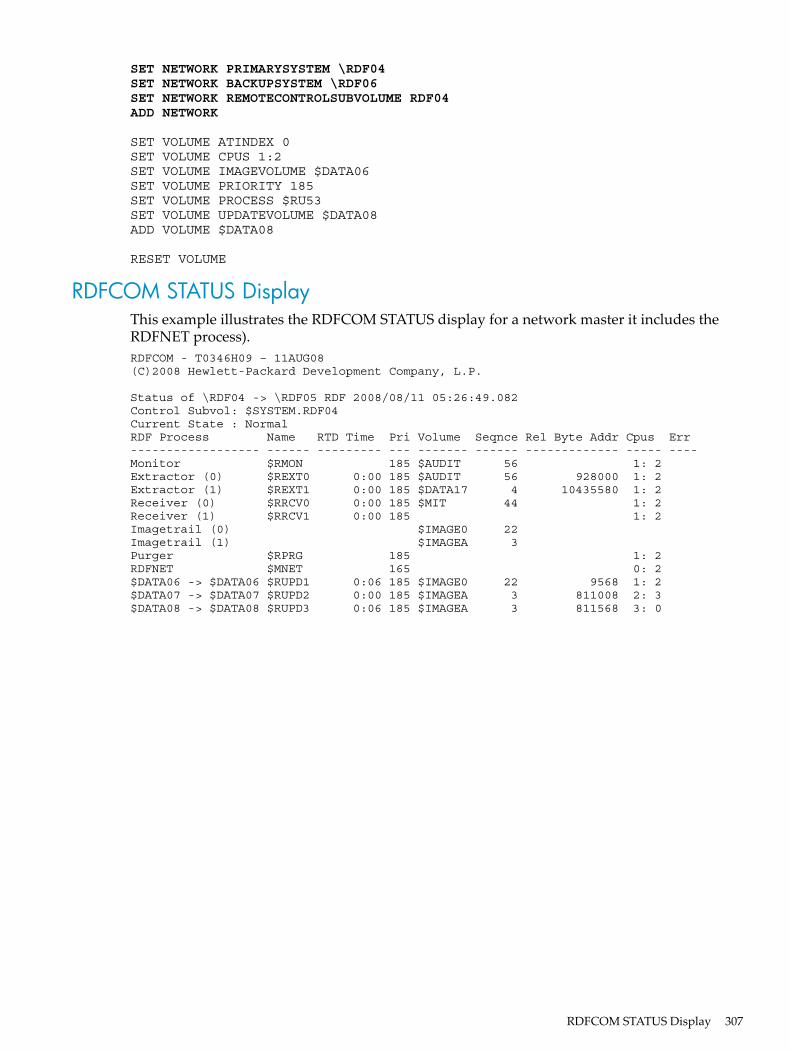
SET NETWORK PRIMARYSYSTEM \RDF04SET NETWORK BACKUPSYSTEM \RDF06SET NETWORK REMOTECONTROLSUBVOLUME RDF04ADD NETWORK
SET VOLUME ATINDEX 0SET VOLUME CPUS 1:2SET VOLUME IMAGEVOLUME $DATA06SET VOLUME PRIORITY 185SET VOLUME PROCESS $RU53SET VOLUME UPDATEVOLUME $DATA08ADD VOLUME $DATA08
RESET VOLUME
RDFCOM STATUS DisplayThis example illustrates the RDFCOM STATUS display for a network master it includes theRDFNET process).RDFCOM - T0346H09 – 11AUG08(C)2008 Hewlett-Packard Development Company, L.P.
Status of \RDF04 -> \RDF05 RDF 2008/08/11 05:26:49.082Control Subvol: $SYSTEM.RDF04Current State : NormalRDF Process Name RTD Time Pri Volume Seqnce Rel Byte Addr Cpus Err------------------ ------ --------- --- ------- ------ ------------- ----- ----Monitor $RMON 185 $AUDIT 56 1: 2Extractor (0) $REXT0 0:00 185 $AUDIT 56 928000 1: 2Extractor (1) $REXT1 0:00 185 $DATA17 4 10435580 1: 2Receiver (0) $RRCV0 0:00 185 $MIT 44 1: 2Receiver (1) $RRCV1 0:00 185 1: 2Imagetrail (0) $IMAGE0 22Imagetrail (1) $IMAGEA 3Purger $RPRG 185 1: 2RDFNET $MNET 165 0: 2$DATA06 -> $DATA06 $RUPD1 0:06 185 $IMAGE0 22 9568 1: 2$DATA07 -> $DATA07 $RUPD2 0:00 185 $IMAGEA 3 811008 2: 3$DATA08 -> $DATA08 $RUPD3 0:06 185 $IMAGEA 3 811568 3: 0
RDFCOM STATUS Display 307

308

15 Process-Lockstep OperationThe RDF/IMPX products include the process-lockstep operation, which is process-based. Thatis, when a process invokes the lockstep operation for a business transaction, the process mustwait until all audit records associated with that business transaction are safely stored in imagetrails on the backup system before continuing.Process-lockstep is not needed with RDF/ZLT because ZLT functionality provides means wherebyno committed data is ever lost during an unplanned outage. Hence, ZLT functionality is a moreefficient means of achieving the same result as process-lockstep. Process-lockstep can be usedwith RDF/ZLT, but does not add anything that ZLT functionality does not already provide.A lockstep operation consists of these steps.1. A process starts a business transaction and does database updates.2. The process calls endtransaction to commit the work.3. The process issues a DoLockstep procedure call.4. The DoLockstep procedure communicates with an RDF gateway process.5. The gateway starts a lockstep transaction against an RDF lockstep file.6. The gateway communicates with the RDF subsystem regarding the lockstep transaction.7. The RDF subsystem tells the gateway when lockstep audit has been safely stored on the
backup system.8. The gateway returns status to the DoLockstep procedure.9. DoLockstep returns status to the process.Thus, although the business transaction is actually committed on the primary system (and thefile locks or table locks are released), the process cannot continue processing until all of the auditdata associated with that transaction is safely stored in the image trails on the backup system).While the process waits until DoLockstep completes, other processes can view and modify thejust-changed records, and this must be understood and taken into consideration by the applicationdesigner.
NOTE: The lockstep capability can be used only for replicating Master Audit Trail (MAT) data.In addition, the lockstep capability cannot be used in an RDF network environment. Furthermore,you can have only one RDF subsystem configured for lockstep on a given node because thegateway can only be configured to a single extractor process.
The RDF/IMPX and RDF/ZLT independent product CDs include these files associated with thelockstep capability:
Sample code for invoking the DoLockstep procedure from a COBOL 85 program.SLOCKCOB
RDF lockstep gateway object code.LSGO
DoLockstep procedure object code.LSLIBTO
Forward declarations of the DoLockstep procedure call.FDOLOCK
Starting a Lockstep OperationTransactions protected by a lockstep operation are begun, performed, and terminated just as anyother transaction: call BeginTransaction, do the necessary database updates, and then callEndTransaction.What defines a lockstep operation is the invocation of the new DoLockstep procedure. You issuethe DoLockstep call immediately after the associated EndTransaction call.
Starting a Lockstep Operation 309

The DoLockstep ProcedureHow you invoke the DoLockstep procedure differs depending on whether your applications arewritten in COBOL or TAL.
Including the DoLockstep in COBOL85 ApplicationsTo invoke the DoLockstep procedure from a COBOL85 program, you must first include theDoLockstep object module in the SPECIAL-NAMES paragraph in the CONFIGURATION section.CONFIGURATION SECTION. SOURCE-COMPUTER. HP NONSTOP. OBJECT-COMPUTER. HP NONSTOP. SPECIAL-NAMES. FILE "$vol.subvol.LSLIBTO" IS LOCKSTEP-LIB.
where $vol.subvolis the location where you have placed the object file.You then invoke the DoLockstep procedure in the PROCEDURE division by using this statement:ENTER TAL "DOLOCKSTEP" IN LOCKSTEP-LIB GIVING RETURN-CODE
The lockstep software provided with the RDF/IMPX and RDF/ZLT products includes a sampleCOBOL85 program (SLOCKCOB) that demonstrates how to use the DoLockstep procedure ina COBOL program.
Invoking DoLockStep by Way of TALThe lockstep software provided with the RDF/IMPX and RDF/ZLT products includes a TALheader file containing the DoLockstep procedure declaration and the corresponding object file.You must modify your program to source in the header file FDOLOCK. For example, includethese lines of code where you add procedure declarations. ?LIST ?NOLIST, SOURCE EXTDECS ?LIST ?NOLIST, SOURCE FDOLOCK; ?LIST
After recompiling your program, you must then decide whether you want to bind the objectexplicitly into your program or treat the object as a user library.Typically you should explicitly bind the object into your program. The object file (LSLIBTO) isvery small, and there are no benefits to treating it as a user library.To bind LSLIBTO into your program, issue this statement:Select Search $vol.subvol.LSLIBTO
where $vol.subvolis the location where you have placed the object file.If you do not want to bind the object into your program and if you do not already use a userlibrary, then you can skip the bind step and treat LSLIBTO as a user library.The TAL procedure call syntax is:status := DoLockstep;
where status is an int.
NOTE: The DoLockstep procedure can only be invoked from TAL and COBOL85 programs.Non-native C and native mode languages (C, C++, native mode COBOL, and pTAL) are notsupported.
DoLockStep ExecutionDoLockstep communicates with an RDF gateway process that acts as the coordinator of thelockstep operation. This gateway initiates a new lockstep transaction against a special RDFlockstep file. The gateway passes information about the lockstep transaction to the RDF extractor.
310 Process-Lockstep Operation

When the RDF receiver has flushed all audit records up to and including the lockstep audit intothe image trail, it replies to the extractor that the lockstep data is safe. When the extractor receivesthat information, it replies to the gateway which, in turn, passes status back to the DoLockstepcall, and the latter then returns status to the application.DoLockstep is a waited operation that waits until the RDF subsystem has safely stored all auditdata up to and including all audit data associated with the lockstep transaction in the image trail.Therefore, if the communications line between the primary and backup nodes should go downafter the application has called DoLockstep, the application will wait until the line comes backup and the lockstep audit data is safely stored.DoLockstep returns one of these three states:LockStepDone (value is 31428)
All audit data associated with the lockstep operation has been safely stored in the image trailon the backup system.
LockStepDisabled (value is 31429)Only returned when you have disabled lockstep processing. When this condition code isreturned to your application, what your application does next is up to you. For example, youmight choose to execute a recovery transaction that backs out the work of the previousbusiness transaction, or you might want to continue as if the lockstep operation has completedand rely on RDF to ship the audit data to the backup system as soon as possible.
LockStepNotDone (value is 31426)The RDF gateway process cannot be started. This status has the same ramifications asLockstepDisabled, and what your application does next is your decision.
The Lockstep TransactionRemember, you must commit your business transaction before you call DoLockstep. Thus, whenthe gateway process issues the lockstep transaction, all audit records associated with your businesstransaction are guaranteed to be flushed in the audit trail on the primary system before anylockstep audit is generated. Therefore, when the lockstep audit is safely in the image trail on thebackup system, you are also guaranteed to have all audit records of your business transactionsafely in the image trail as well, because your business audit preceded the lockstep audit.
RDF Lockstep FileEach lockstep transaction involves a single update to a gateway-managed lockstep file. This fileis created by the lockstep gateway and it must only be updated by the gateway. If you open thefile and update data in it, you can potentially corrupt all future lockstep operations.When configuring the RDF configuration record, you must specify the name of the volume onwhich you want the lockstep file to be located. This volume must be configured to the MasterAudit Trail (MAT), and either the entire volume or at least the lockstep file must be protectedby the RDF subsystem. You specify the volume by issuing a SET RDF LOCKSTEPVOL command.SET RDF LOCKSTEPVOL volume
Where volume is a volume name and the volume is configured to the MAT. Additionallyyou must ensure that you add an updater to protect either the volume or the lockstep file.
The full file name is volume.ZRDFLKSP.control-subvol. If you only need to protect this fileon this volume, then INCLUDE it when you configure the updater for the volume.The RDF lockstep protocol supports virtual disks, so you can store your database on virtual disksmanaged by the Storage Management Facility (SMF). The RDF LOCKSTEPVOL, however, mustbe a physical disk, and it must be configured to the Master Audit Trail (MAT). Because the RDFlockstep file on the LOCKSTEPVOL is a direct (physical, not logical) file, it can reside easily ona small portion of a physical disk to store the file, and you can then subdivide the rest of the diskinto virtual disks.
The Lockstep Transaction 311

Multiple Concurrent Lockstep OperationsBecause DoLockstep suspends the calling application until the associated lockstep transactioncommits on the backup system, a single application process cannot have more than one lockstepoperation in progress at any one time.Multiple application processes, however, can invoke DoLockstep concurrently.If called while idle, the RDF gateway immediately initiates a lockstep transaction to perform therequested lockstep operation (one calling process, one lockstep transaction).If called while it has a lockstep transaction active, the RDF gateway merely queues the request.When the current lockstep transaction commits, the gateway initiates a new one that performsthe lockstep operation collectively for all of the queued requests (multiple calling processes, onelockstep transaction).Because the business transactions of each application process must have committed on theprimary system before the process called DoLockstep, the audit data for those is guaranteed tobe in the Master Audit Trail (MAT) when the lockstep transaction begins. Thus, when the lockstepaudit data is committed on the backup system, all audit data generated in the MAT prior to thatdata is also guaranteed to be committed on the backup system.
Lockstep and Auxiliary Audit TrailsYou can use the lockstep protocol for business transactions involving files or tables on volumesthat are configured to auxiliary audit trails. In such a case, the lockstep protocol behaves exactlyas it would if all volumes were configured to the MAT. Remember, however, that you must stillconfigure an RDF lockstep volume for the lockstep file, and this volume must be configured tothe MAT.
The Lockstep Gateway ProcessThe RDF lockstep gateway process is managed by the Subsystem Control Facility (SCF). To starta lockstep gateway process, you must create and execute an SCF script file. The recommendedscript settings are:ASSUME PROCESS $ZZKRN ADD #LSGO, &NAME $ZLSGW, &CPU FIRSTOF (1,2,3), &PROGRAM volume.subvolume.LSGO, &STARTMODE APPLICATION, &STARTUPMSG "ENABLE <extractor-process-name>", &AUTORESTART 10 START #LSGO
For detailed information about these attributes, see the information about configuring andmanaging generic processes in the SCF Reference Manual for H-Series RVUs. For some attributes,however, restrictions apply when the attributes are used with a lockstep gateway process.
NAMEThis attribute must be $ZLSGW. If you specify anything else, the lockstep gateway stops andyou cannot perform lockstep operations. This means you can only have a single lockstep gatewayprocess running on your primary system.
PROGRAMThis attribute specifies where the RDF gateway object code resides. Typically, that location isthe same volume and subvolume where all of the other RDF software resides. The object nameis LSGO, and that you must fully qualify the name. For example, you might specify the PROGRAMattribute as $SYSTEM.RDF.LSGO.
312 Process-Lockstep Operation

STARTUPMSGThis attribute must include the process name of your RDF extractor (for example, STARTUPMSG"ENABLE $MEXT"). The startup message must also include either ENABLE or DISABLE as thefirst parameter. Failure to include either of these parameters will cause the gateway to stop. Thegateway can only communicate with one extractor. If you have multiple RDF subsystems usingthe same node as their primary system, only one of them can execute lockstep operations.
AUTORESTARTThis attribute specifies the number of times SCF attempts to restart the gateway process if itshould stop unexpectedly. You should set this attribute to 10.
Disabling LockstepTo disable lockstep processing:1. Change ENABLE to DISABLE in the STARTUPMSG attribute script.2. Manually delete the RDF lockstep gateway process from SCF.3. Run the changed SCF script.When SCF restarts the gateway, lockstep processing is disabled. Thus, if your application callsDOLOCKSTEP, the gateway will return control immediately to the application without doinglockstep processing.Disabling lockstep processing is a very useful feature. Suppose that the communications linesfrom your RDF primary to your RDF backup systems are down. In such a case, the extractorcannot send audit data to the backup system, and lockstep processing will hang until thecommunications lines are back up and the extractor resumes sending audit data. This is desiredbehavior if you really want lockstep processing. But suppose that the communications lines havebeen down for so long that your applications are getting no work done at all. In such a case, youmight want to disable lockstep processing to allow your applications to resume their workwithout lockstep operations.When lockstep is disabled, remember that your original transaction has already committed onthe primary system. If you should subsequently lose the primary system and do a takeover onthe backup system, the transaction might or might not have been committed in the backupdatabase depending on whether or not the extractor got all of the original audit data over to thebackup system before the primary system failed.
Reenabling LockstepTo reenable lockstep processing:1. Change DISABLE to ENABLE in the STARTUPMSG attribute script.2. Manually delete the RDF lockstep gateway process from SCF.3. Run the changed SCF script.When SCF restarts the gateway, lockstep processing is enabled.
Lockstep Performance RamificationsBy definition, a lockstep operation will increase the response time of your application because,after having invoked DoLockstep, the application must wait for the data to become safely storedin the backup system’s image trail. The extractor and receiver processes have been streamlinedto facilitate lockstep processing, but a short delay is unavoidable.Expand problems or CPU failures that trigger extractor and receiver restart operations couldalso increase response times.As described in “Multiple Concurrent Lockstep Operations” (page 312), the RDF gateway onlyever has a single lockstep transaction in progress at any one time. If called while a lockstep
Disabling Lockstep 313

transaction is in progress, the RDF gateway merely queues the request. Consequently, if anapplication process issues a DoLockstep request immediately after the gateway has started alockstep transaction, that request must wait to be performed until the current lockstep transactionis committed on the backup system. That could also increase response times.
Lockstep and Auxiliary Audit TrailsYou cannot use lockstep processing in an RDF subsystem that is protecting auxiliary audit trails.
Lockstep and Network TransactionsYou cannot use lockstep to protect data associated with network transactions because the lockstepprotocol only pertains to operations on a single system. If lockstep is used with networktransactions, consistency between lockstep operations and the distributed application databasefiles cannot be guaranteed after an RDF takeover.For a description of lockstep operation event messages, see “Lockstep Gateway Event Messages”(page 314)
Lockstep Gateway Event MessagesLockstep gateway messages are sent to the configured EMS event log (collector). You specifythe EMS event log by using the SET RDF command described in Chapter 8 (page 187).
1I/O completed on an unknown file number.
Cause While reading $RECEIVE, the lockstep gateway received an I/O completion on anunknown file number.Effect The lockstep gateway stops.Recovery This is an internal error, but the gateway is restarted. If the problem persists, contactthe Global Mission Critical Solution Center (GMCSC) or your service provider.
2A STARTUPMSG argument is missing for the lockstep gateway.
Cause You are missing either the ENABLE/DISABLE argument, or you have not specifiedthe name of the RDF extractor.Effect The lockstep gateway stops.Recovery In your SCF script for starting the lockstep gateway, you must specify eitherENABLE or DISABLE and the RDF extractor process name with the STARTUPMSG attribute.The process name must not include a node name.
3The first argument of the STARTUPMSG attribute for your lockstep gatewaywas neither ENABLE nor DISABLE.
Cause You did not specify ENABLE or DISABLE as the first argument of the STARTUPMSGattribute in your SCF script.Effect The lockstep gateway stops.Recovery In your SCF script for starting the lockstep gateway, you must specify eitherENABLE or DISABLE as the first argument of the STARTUPMSG attribute.
4The lockstep gateway has received error errnum when attempting tocommunicate with the RDF extractor procname.
314 Process-Lockstep Operation

errnum
is a file-system error number.procname
is the name of an extractor process.Cause The RDF extractor is no longer responding, and it might be stopped.Effect The lockstep gateway stops.Recovery Determine why the RDF subsystem stopped, correct the problem, and then restartthe subsystem.
5The lockstep gateway received error errnum from the RDF extractorprocname.
errnum
is a file-system error number.procname
is the name of the process that is in use.Cause When the gateway attempted to obtain the name of the RDF lockstep file from theextractor, it received the indicated error. This condition can happen if the RDF subsystem withthe specified extractor was not configured for lockstep, or the version of your RDF subsystemdoes not support lockstep operations.Effect The lockstep gateway stops.Recovery If you want to perform RDF lockstep operations, you must be sure you have thecorrect version of the RDF product, and you must be sure you have configured your RDFsubsystem for lockstep operation.
6Create error errnum on the RDF lockstep file filename.
errnum
is a file-system error number.filename
is the name of a lockstep file.Cause When the gateway attempted to create the specified lockstep file, it received thespecified error.Effect The lockstep gateway stops.Recovery Correct the error condition and restart the lockstep gateway.
7Open error errnum on filename.
errnum
is a file-system error number.filename
is the name of a lockstep file.Cause The lockstep gateway received the specified error while attempting to open thespecified lockstep file.Effect The lockstep gateway stops.Recovery Correct the error condition and restart the lockstep gateway.
Lockstep Gateway Event Messages 315
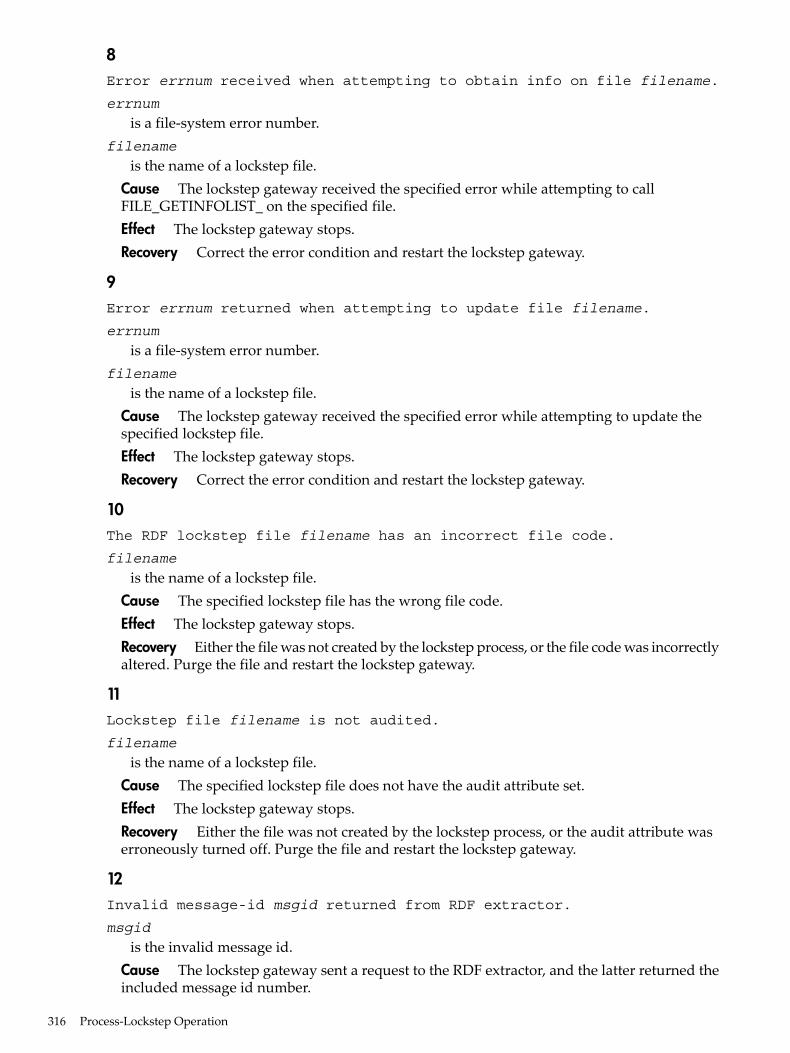
8Error errnum received when attempting to obtain info on file filename.
errnum
is a file-system error number.filename
is the name of a lockstep file.Cause The lockstep gateway received the specified error while attempting to callFILE_GETINFOLIST_ on the specified file.Effect The lockstep gateway stops.Recovery Correct the error condition and restart the lockstep gateway.
9Error errnum returned when attempting to update file filename.
errnum
is a file-system error number.filename
is the name of a lockstep file.Cause The lockstep gateway received the specified error while attempting to update thespecified lockstep file.Effect The lockstep gateway stops.Recovery Correct the error condition and restart the lockstep gateway.
10The RDF lockstep file filename has an incorrect file code.
filename
is the name of a lockstep file.Cause The specified lockstep file has the wrong file code.Effect The lockstep gateway stops.Recovery Either the file was not created by the lockstep process, or the file code was incorrectlyaltered. Purge the file and restart the lockstep gateway.
11Lockstep file filename is not audited.
filename
is the name of a lockstep file.Cause The specified lockstep file does not have the audit attribute set.Effect The lockstep gateway stops.Recovery Either the file was not created by the lockstep process, or the audit attribute waserroneously turned off. Purge the file and restart the lockstep gateway.
12Invalid message-id msgid returned from RDF extractor.
msgid
is the invalid message id.Cause The lockstep gateway sent a request to the RDF extractor, and the latter returned theincluded message id number.
316 Process-Lockstep Operation

Effect The lockstep gateway stops.Recovery This is an internal error, but the gateway is restarted. If the problem persists, contactthe Global Mission Critical Solution Center (GMCSC) or your service provider.
13Invalid data returned from the RDF Extractor.
Cause The lockstep gateway sent a request to the RDF extractor, and the latter returnedinvalid data.Effect The lockstep gateway stops.Recovery This is an internal error, but the gateway is restarted. If the problem persists, contactthe Global Mission Critical Solution Center (GMCSC) or your service provider.
14BEGINTRANSACTION error errnum when attempting a lockstep transaction.
errnum
is a file-system error number.Cause The gateway encountered the specified error on BEGINTRANSACTION.Effect If the error is retryable, the lockstep gateway starts a new transaction. If the error isunexpected, the gateway stops.Recovery This is an informational error, unless the gateway stops. If it stops, correct thecondition that caused the error and then restart the gateway.
15Read error errnum on $RECEIVE.
errnum
is a file-system error number.Cause The lockstep gateway received the specified error when reading $RECEIVE.Effect The lockstep gateway stops.Recovery This is an internal error, but the gateway is restarted. If the problem persists, contactthe Global Mission Critical Solution Center (GMCSC) or your service provider.
16Error errnum encountered while responding to the applications thatcalled DOLOCKSTEP.
errnum
is a file-system error number.Cause The gateway encountered the included error while trying to reply to the callingapplications.Effect The lockstep gateway stops.Recovery This is an internal error, but the gateway is restarted. If the problem persists, contactthe Global Mission Critical Solution Center (GMCSC) or your service provider.
17Open error errnum on $RECEIVE.
errnum
is a file-system error number.Cause The lockstep gateway received the specified error when attempting to open $RECEIVE.
Lockstep Gateway Event Messages 317

Effect The lockstep gateway stops.Recovery This is an internal error, but the gateway is restarted. If the problem persists, contactthe Global Mission Critical Solution Center (GMCSC) or your service provider.
18Filename formatting error errnum.
errnum
is a file-system error number.Cause The lockstep gateway received the specified error while attempting to format thelockstep filename.Effect The lockstep gateway stops.Recovery This is an internal error, but the gateway is restarted. If the problem persists, contactthe Global Mission Critical Solution Center (GMCSC) or your support representative.
19Invalid process name procname for lockstep gateway.
procname
is the invalid process name.Cause The required process name is $ZLSGW, but you supplied the specified name in yourSCF script.Effect The lockstep gateway stops.Recovery You must change your SCF script and use the required process name.
20PROCESS_GETINFO_ error errnum on lockstep gateway.
errnum
is a file-system error number.Cause The specified error was returned when the lockstep gateway attempted to obtaininformation about itself.Effect The lockstep gateway stops.Recovery This is an internal error, but the gateway is restarted. If the problem persists, contactthe Global Mission Critical Solution Center (GMCSC) or your service provider.
21Invalid process name procname for the RDF extractor.
procname
is the invalid process name.Cause You have specified a node name with the name of the extractor in your SCF script.Effect The lockstep gateway stops.Recovery You must remove the node name for the extractor from your SCF script.
22Open error errnum on RDF master extractor procname.
errnum
is a file-system error number.procname
is the name of an extractor process.
318 Process-Lockstep Operation
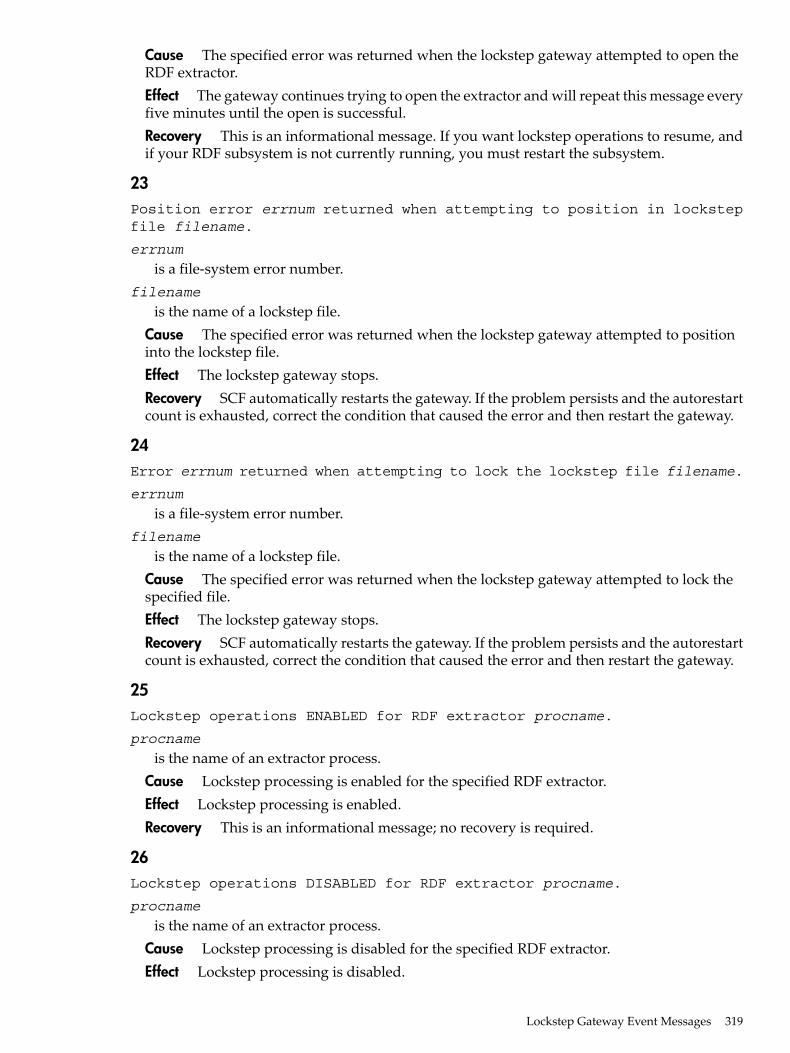
Cause The specified error was returned when the lockstep gateway attempted to open theRDF extractor.Effect The gateway continues trying to open the extractor and will repeat this message everyfive minutes until the open is successful.Recovery This is an informational message. If you want lockstep operations to resume, andif your RDF subsystem is not currently running, you must restart the subsystem.
23Position error errnum returned when attempting to position in lockstepfile filename.
errnum
is a file-system error number.filename
is the name of a lockstep file.Cause The specified error was returned when the lockstep gateway attempted to positioninto the lockstep file.Effect The lockstep gateway stops.Recovery SCF automatically restarts the gateway. If the problem persists and the autorestartcount is exhausted, correct the condition that caused the error and then restart the gateway.
24Error errnum returned when attempting to lock the lockstep file filename.
errnum
is a file-system error number.filename
is the name of a lockstep file.Cause The specified error was returned when the lockstep gateway attempted to lock thespecified file.Effect The lockstep gateway stops.Recovery SCF automatically restarts the gateway. If the problem persists and the autorestartcount is exhausted, correct the condition that caused the error and then restart the gateway.
25Lockstep operations ENABLED for RDF extractor procname.
procname
is the name of an extractor process.Cause Lockstep processing is enabled for the specified RDF extractor.Effect Lockstep processing is enabled.Recovery This is an informational message; no recovery is required.
26Lockstep operations DISABLED for RDF extractor procname.
procname
is the name of an extractor process.Cause Lockstep processing is disabled for the specified RDF extractor.Effect Lockstep processing is disabled.
Lockstep Gateway Event Messages 319

Recovery This is an informational message; no recovery is required.
27Lockstep Gateway Started.
Cause The lockstep gateway is started.Effect The lockstep gateway continues its initialization activity.Recovery This is an informational message; no recovery is required.
28RDF extractor procname responded with error errnum to lockstep request.
procname
is the name of an extractor process.errnum
is a file-system error number.Cause While the extractor is processing a lockstep request, the gateway stops, has beenrestarted by SCF, and has sent a new lockstep request to the extractor.Effect The lockstep gateway stops.Recovery SCF automatically restarts the gateway. If the problem persists and the autorestartcount is exhausted, wait 30 seconds and then restart the gateway again.
29Lockstep transaction aborted with error errnum.
errnum
is a file-system error number.Cause The specified error was encountered on a lockstep transaction.Effect If the error is retryable, the lockstep gateway starts a new transaction. If the error isunexpected, the gateway stops.Recovery This is an informational error, unless the gateway stops. If it stops, correct thecondition that caused the error and then restart the gateway.
30ENDTRANSACTION error errnum encountered on lockstep transaction.
errnum
is a file-system error number.Cause The specified error was encountered on ENDTRANSACTION.Effect If the error is retryable, the lockstep gateway starts a new transaction. If the error isunexpected, the gateway stops.Recovery This is an informational error, unless the gateway stops. If it stops, correct thecondition that caused the error and then restart the gateway.
31Invalid process name: procname for the RDF master extractor.
procname
is the invalid process name.Cause In your SCF script for starting the lockstep gateway, the process name specified inthe STARTUPMSG attribute was not a valid process name for the RDF master extractor.Effect The lockstep gateway stops.
320 Process-Lockstep Operation

Recovery Correct the STARTUPMSG attribute script and then manually delete the RDFlockstep gateway process from SCF and run your newly edited SCF script. The process namemust not include a node name.
32A spurious STARTUPMSG argument was encountered for the lockstep gateway.
Cause In your SCF script for starting the lockstep gateway, the STARTUPMSG attributecontained an extra or unrecognizable argument.Effect The lockstep gateway stops.Recovery The STARTUPMSG attribute must include exactly two arguments: the wordENABLE or DISABLE, and a valid RDF extractor process name, all enclosed in quotes. Correctthe STARTUPMSG attribute script and then manually delete the RDF lockstep gateway processfrom SCF and run your newly edited SCF script. The process name must not include a nodename.
Lockstep Gateway Event Messages 321

322

16 NonStop SQL/MX and RDFRDF supports replication of NonStop SQL/MX user tables (file code 550) and indexes (file code552). These operations are supported in much the same way as they are with NonStop SQL/MP,and the same types of data and DDL operations are replicated.This chapter describes these operations:• “Including and Excluding SQL/MX Objects”• “Creating NonStop SQL/MX Primary and Backup Databases” (page 323)• “Creating a NonStop SQL/MX Backup Database From an Existing Primary Database”
(page 326)• “Online Database Synchronization With NonStop SQL/MX Objects” (page 328)• “Offline Synchronization for a Single Partition” (page 330)• “Correcting Incorrect NonStop SQL/MX Name Mapping” (page 332)• “Consideration for Creating Backup Tables” (page 333)• “Restoring to a Specific Location” (page 333)• “Comparing NonStop SQL/MX Tables” (page 335)Given the way the name mapping works between NonStop SQL/MX objects and their underlyingGuardian file names, there are special considerations when setting up NonStop SQL/MX objectsto be replicated by RDF. This chapter describes those issues.The command interface for NonStop SQL/MX is MXCI.
Including and Excluding SQL/MX ObjectsBy default, RDF provides volume-level protection, wherein changes to all audited files and tableson each protected primary system data volume are replicated to an associated backup systemdata volume.RDF also supports subvolume- and file-level replication. To use this capability, you use INCLUDEand EXCLUDE clauses when configuring updaters to identify specific database objects you wantreplicated or not replicated. INCLUDE and EXCLUDE clauses require the use of Guardian names.If you have an ANSI-named NonStop SQL/MX object that you want to include or exclude, youfirst must get the underlying Guardian name by using the MXGNAMES utility or the MXCISHOWDLL command. The use of INCLUDE and EXCLUDE clauses is described in Chapter 11(page 279).
Creating NonStop SQL/MX Primary and Backup DatabasesTo create a NonStop SQL/MX primary and backup database from scratch, perform these steps:1. Create the catalog on the primary system:
CREATE CATALOG catalog_name LOCATION optional_Guardian_location;
For example, if issued on the primary system this command creates a catalog named PCATon volume $DATA01 on the primary system:CREATE CATALOG PCAT LOCATION $DATA01;
For the rest of this procedure assume that the name of the primary system is \PNODE, andthe name of the backup system is \BNODE.
2. Create the catalog on the backup system.The catalog name must be different from that of the primary catalog.For example, if issued on the backup system this command creates a catalog named BCATon volume $DATA01 on the backup system:CREATE CATALOG BCAT LOCATION $DATA01;
Including and Excluding SQL/MX Objects 323

3. If you want each catalog to be seen from both systems, register your primary and backupcatalogs.To register the primary catalog on the backup system, issue a REGISTER CATALOGcommand on the primary system.To register the backup catalog on the primary system, issue a REGISTER CATALOGcommand on the backup system.The format of the REGISTER CATALOG command is:REGISTER CATALOG catalog ON node.volume;
Where catalog is the local catalog, node is the remote system where you want the localcatalog registered, and volume is where the local catalog is to be registered on the remotesystem.For example, this command (if executed on the primary system) registers the primary catalogon volume $DATA00 of the backup system:REGISTER CATALOG pcat ON \bnode.$data00;
This command (if executed on the backup system) registers the backup catalog on volume$DATA00 of the primary system:REGISTER CATALOG bcat ON \pnode.$data00;
4. Create the schema on the primary system.If you do not use the LOCATION clause, NonStop SQL/MX will set the subvolume itself.In that case, you must query NonStop SQL/MX to obtain the subvolume name because thesubvolume name is needed when creating the schema on the backup system.If you specify the LOCATION clause, the subvolume name must start with "ZSD" and theentire name must be eight characters in length.For example, if issued on the primary system, this command (without a LOCATION clause)creates a schema called PCAT.SCH on the primary system: CREATE SCHEMA PCAT.SCH;
If you omit the LOCATION clause, then, after creating the schema, you must use this queryto obtain the subvolume of the schema (where you fill in the correct node-name,schema-name, and catalog-name):SELECT S.schema_subvolumeFROM NONSTOP_SQLMX_node-name.system_schema.schemata S, NONSTOP_SQLMX_node-name.system_schema.catsys CWHERE S.schema_name = 'schema-name' AND C.cat_name = 'catalog-name' AND S.cat_uid = C.cat_uid;
Node-name is a Guardian system name that excludes the backslash (\).In this example, the node-name is PNODE, the schema-name is SCH, and the catalog-nameis PCAT.SELECT S.schema_subvolumeFROM NONSTOP_SQLMX_PNODE.system_schema.schemata S,NONSTOP_SQLMX_PNODE.system_schema.catsys CWHERE S.schema_name = 'SCH' ANDC.cat_name = 'PCAT' AND S.cat_uid = C.cat_uid;
For the rest of this procedure assume that the above query returns the value ZSDXYZ3A.
5. Create the schema on the backup system using the same schema name and the samesubvolume name as on the primary system.Because RDF is replicating based on the underlying Guardian file locations, you must usethe LOCATION clause. If you specified the LOCATION clause when creating the primarysystem's schema, you must use the same subvolume here. If you did not specify the
324 NonStop SQL/MX and RDF

LOCATION clause when creating the primary system's schema, you must query the primarysystem to obtain the Guardian subvolume name, and you must use the Guardian subvolumename with the LOCATION clause here.For example, if issued on the backup system, this command creates a schema on the backupsystem called SCH in catalog BCAT using subvolume ZSDXYZ3A:CREATE SCHEMA BCAT.SCH LOCATION ZSDXYZ3A;
6. Create each object (table or index) on the primary system.The ANSI name of the object must be constructed as follows:• catalog name: use the name of the primary catalog you created in Step 1.• schema name: use the name you used in Steps 4 and 5.• table or index name: whatever ANSI name you choose for the object.
For example, this command creates a table called TAB1 in schema PCAT.SCH, withthree partitions, located on volumes $DATA02, $DATA03, $DATA04, respectively.CREATE TABLE PCAT.SCH.TAB1 (a int not null, b int, primary key (a))LOCATION $DATA02PARTITION ( ADD FIRST KEY (100) LOCATION $DATA03, ADD FIRST KEY (200) LOCATION $DATA04 );
You should specify only the desired volume to allow NonStop SQL/MX to generate thecomplete Guardian filenames. This is true for non-partitioned objects as well as forpartitioned objects. Thus, you specify only the volume name in the LOCATION clause,and NonStop SQL/MX constructs the fully qualified Guardian name for the object,using:
• The volume you specified for the object in the LOCATION clause.• The subvolume associated with the object's ANSI schema (as indicated in that portion
of the object's ANSI name).• The system-generated Guardian filename. In this case, you must obtain the underlying
Guardian filename using SHOWDDL or a metadata query before you can set up yourbackup database.Now, the full CREATE TABLE statement for CAT.SCH.TAB1, including the full Guardiannames of the partitions, can be displayed in MXCI by using the command:SHOWDDL PCAT.SCH.TAB1;
Assume the system generates these Guardian file names:$DATA02.ZSDXYZ3A.KQY8KY00
$DATA03.ZSDXYZ3A.KQY8RK00
$DATA04.ZSDXYZ3A.KQY8YG00
The volumes specified in the LOCATION clauses of the CREATE TABLE statement areused and that the subvolume is the subvolume created by the CREATE SCHEMAstatement in Step 3.If you want to specify the complete Guardian filename for your object yourself, youmust use the LOCATION clause specifying the volume on which you want the objectplaced and using the Guardian subvolume associated with the object's schema. TheGuardian filename must be exactly eight characters long and end in "00" (zero-zero).You cannot specify a volume and subvolume portion without also specifying thefilename. All NonStop SQL/MX partitions for a table must have the same Guardiansubvolume name but the Guardian filename will not normally be the same, even if thepartitions are on different volumes.
Creating NonStop SQL/MX Primary and Backup Databases 325

7. Create each object on the backup system.The ANSI name of the object must be constructed as follows:• catalog name: use the name of the backup catalog you created in Step 2.• schema name: use the name you used in Steps 4 and 5.• table or index name: must match on the primary and backup systems.
This command creates a table called TAB1 in the schema BCAT.SCH, with threepartitions, located on volumes $data02, $data13, $data14, respectively.CREATE TABLE BCAT.SCH.TAB1 (a int not null, b int, primary key (a))LOCATION $DATA02.ZSDXYZ3A.KQY8KY00PARTITION (ADD FIRST KEY (100) LOCATION $DATA13.ZSDXYZ3A.KQY8RK00, ADD FIRST KEY (200) LOCATION $DATA14.ZSDXYZ3A.KQY8YG00);
The subvolume.filenames are identical between the primary and backup systemsin this example, but two of the volumes have been remapped for RDF between theprimary and backup systems: $data02 is replicated to $data02, but $data03 is replicatedto $data13 and $data04 is replicated to $data14.With regard to the Guardian filename, you must use a fully-qualified LOCATIONclause, thereby ensuring that the underlying Guardian subvolume.filenames areidentical on the primary and backup systems; otherwise, the updater will report a 736event, listing the underlying Guardian subvolume.filename of the object, and theupdater will wait until you have created such a file. At this point, you will have tocorrect the naming problem as described in “Correcting Incorrect NonStop SQL/MXName Mapping” (page 332).When you have completed Steps 6 and 7 for each table and index, the primary databaseis ready for transaction activity, and the backup database is ready for RDF to replicatethat transaction activity.
Creating a NonStop SQL/MX Backup Database From an Existing PrimaryDatabase
To create an RDF backup NonStop SQL/MX database from an existing primary database, performthese steps:1. Create a catalog on your backup system to correspond to the primary system catalog whose
objects you want RDF to replicate. The name of the backup catalog must differ from thename of the primary catalog. The volume in the optional LOCATION clause might differfrom the volume used on the primary system.CREATE CATALOG catalog_name LOCATION optional_guardian_location;
For example, if issued on the backup system, the commandCREATE CATALOG BCAT LOCATION $DATA01;
creates a catalog named BCAT on volume $DATA01 on the backup system.For the rest of this procedure assume that the name of the primary system is \PNODE andthe name of the backup system is \BNODE.
2. Create the schema on the backup system using the same schema name and the samesubvolume name as on the primary system.For example, if issued on the backup system, this command creates a schema on the backupsystem called SCH in catalog BCAT using subvolume ZSDXYZ3A:CREATE SCHEMA BCAT.SCH LOCATION ZSDXYZ3A;
You must use the LOCATION clause. If you specified the LOCATION clause when creatingthe primary system's schema, you must use the same subvolume here. If you did not specifythe LOCATION clause when creating the primary system's schema or if you do not know
326 NonStop SQL/MX and RDF
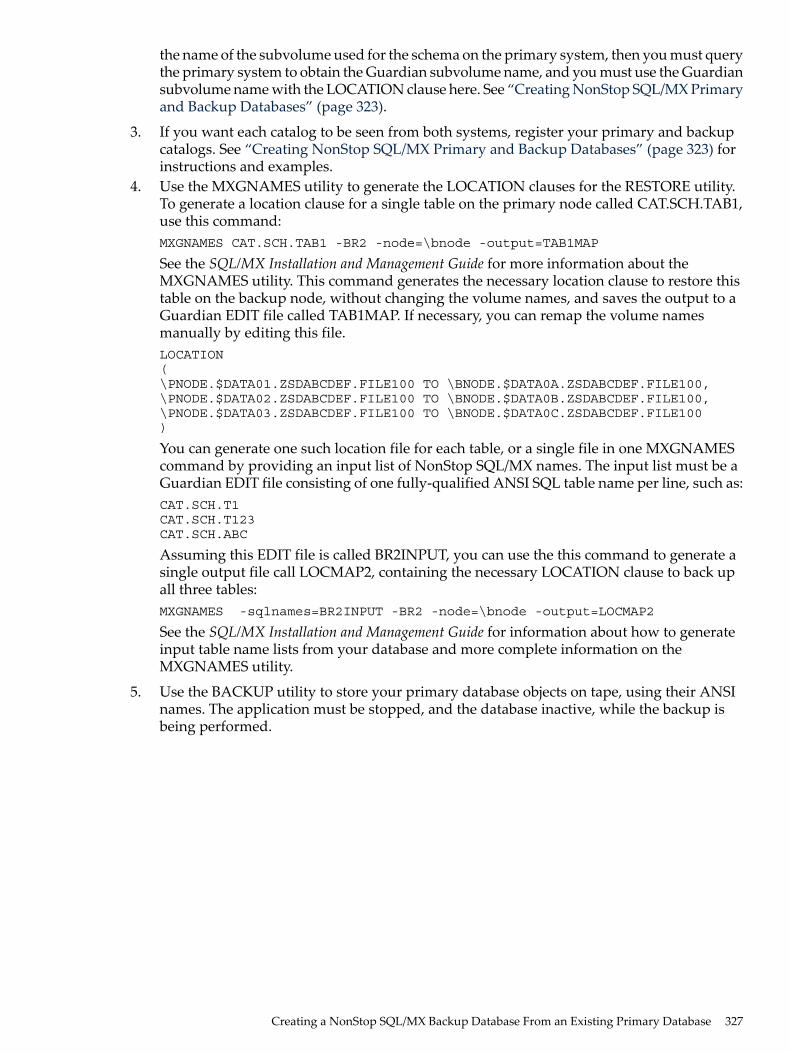
the name of the subvolume used for the schema on the primary system, then you must querythe primary system to obtain the Guardian subvolume name, and you must use the Guardiansubvolume name with the LOCATION clause here. See “Creating NonStop SQL/MX Primaryand Backup Databases” (page 323).
3. If you want each catalog to be seen from both systems, register your primary and backupcatalogs. See “Creating NonStop SQL/MX Primary and Backup Databases” (page 323) forinstructions and examples.
4. Use the MXGNAMES utility to generate the LOCATION clauses for the RESTORE utility.To generate a location clause for a single table on the primary node called CAT.SCH.TAB1,use this command:MXGNAMES CAT.SCH.TAB1 -BR2 -node=\bnode -output=TAB1MAP
See the SQL/MX Installation and Management Guide for more information about theMXGNAMES utility. This command generates the necessary location clause to restore thistable on the backup node, without changing the volume names, and saves the output to aGuardian EDIT file called TAB1MAP. If necessary, you can remap the volume namesmanually by editing this file.LOCATION( \PNODE.$DATA01.ZSDABCDEF.FILE100 TO \BNODE.$DATA0A.ZSDABCDEF.FILE100,\PNODE.$DATA02.ZSDABCDEF.FILE100 TO \BNODE.$DATA0B.ZSDABCDEF.FILE100,\PNODE.$DATA03.ZSDABCDEF.FILE100 TO \BNODE.$DATA0C.ZSDABCDEF.FILE100)
You can generate one such location file for each table, or a single file in one MXGNAMEScommand by providing an input list of NonStop SQL/MX names. The input list must be aGuardian EDIT file consisting of one fully-qualified ANSI SQL table name per line, such as:CAT.SCH.T1CAT.SCH.T123CAT.SCH.ABC
Assuming this EDIT file is called BR2INPUT, you can use the this command to generate asingle output file call LOCMAP2, containing the necessary LOCATION clause to back upall three tables:MXGNAMES -sqlnames=BR2INPUT -BR2 -node=\bnode -output=LOCMAP2
See the SQL/MX Installation and Management Guide for information about how to generateinput table name lists from your database and more complete information on theMXGNAMES utility.
5. Use the BACKUP utility to store your primary database objects on tape, using their ANSInames. The application must be stopped, and the database inactive, while the backup isbeing performed.
Creating a NonStop SQL/MX Backup Database From an Existing Primary Database 327

6. At the backup system, use the RESTORE utility to place the objects on the backup system,specifying the ANSI names for the backup system. Use the LOCATION clauses to haveRESTORE place the objects in the correct Guardian locations. See “Restoring to a SpecificLocation” for general restore syntax for NonStop SQL/MX databases.For example, assume you have the objects on your primary system that have these fullyqualified Guardian names:\pnode.$DATA01.ZSDABCDEF.FILE100\pnode.$DATA02.ZSDABCDEF.FILE100\pnode.$DATA03.ZSDABCDEF.FILE100
For the RESTORE command, you must name the qualified Guardian filenames of yoursource objects and also the qualified Guardian filenames of your target objects in theLOCATION clause.LOCATION ( \pnode.$DATA01.ZSDABCDEF.FILE100 TO \bnode.$DATA0A.ZSDABCDEF.FILE100, \pnode.$DATA02.ZSDABCDEF.FILE100 TO \bnode.$DATA0B.ZSDABCDEF.FILE100, \pnode.$DATA03.ZSDABCDEF.FILE100 TO \bnode.$DATA0C.ZSDABCDEF.FILE100 )
The volume names can differ between the primary and backup systems. Also, the subvolumeand filenames on the backup system must be identical to those on the primary system, andthe subvolume must correspond to the subvolume you used when you created your schema.
The backup database is now ready for RDF replication activity.
Online Database Synchronization With NonStop SQL/MX ObjectsThe principles of protocol for online database synchronization with NonStop SQL/MX objectsare the same as for Enscribe and NonStop SQL/MP objects. That is, you follow the guidelines forthe RDF online database-synchronization protocol. The only difference is how the fuzzy copy isobtained. The following discussions focus on the two options for getting the fuzzy copy: creatinga fuzzy copy on the primary system or creating the fuzzy copy on the backup system. Pleasenote, however, that the method of taking an online dump and then the use of TMF File Recoveryto a New Location (FRNL) is an alternative to getting a fuzzy copy than the method below, andthis is discussed in Chapter 7.
Creating the Fuzzy Copy on the Primary SystemThe advantage of this method is that in creating and populating the fuzzy copy on the primarysystem you achieve better performance than by creating and populating the fuzzy copy over thenetwork. Once created and populated, you use BACKUP/RESTORE to move the fuzzy copy tothe backup system. The disadvantage of this method is that it requires disk space on the primarysystem to store a second copy of your NonStop SQL/MX database.To create the fuzzy copy on the primary system, perform these steps.1. Create a temporary catalog on your primary system to correspond to your regular catalog
on your primary system whose objects you want RDF to replicate.CREATE CATALOG catalog_name LOCATION optional_guardian_location;
2. Create a temporary schema for your temporary catalog. Follow the instructions in “Creatinga NonStop SQL/MX Backup Database From an Existing Primary Database” (page 326), butbe sure to perform the instructions on your primary system instead of on the backup system.The name of the temporary schema must be identical to the name of the schema whoseobjects you want replicated. You must also ensure that the subvolume name for the temporaryschema is identical to that of the schema whose objects you want replicated.
3. Create temporary objects in your temporary schema. Follow the guidelines outlined in“Creating a NonStop SQL/MX Backup Database From an Existing Primary Database”(page 326), except that you must create these temporary objects on the primary system andon different volumes from those used for your primary objects. You can use the use the
328 NonStop SQL/MX and RDF

MXGNAMES utility as described in “Creating a NonStop SQL/MX Backup Database Froman Existing Primary Database” (page 326) to generate the LOCATION clauses for thetemporary objects, modifying the volume names as necessary and using the primary nodename for the -node option. Alternatively, you can use the SHOWDDL command to obtainthe fully qualified filenames of the objects you want replicated and specify the same Guardiansubvol.filenames in the corresponding LOCATION clauses when creating the temporaryobjects.For example, suppose you have a primary table that has two partitions, for which you wantmake a fuzzy copy, and the fully qualified Guardian names are:$DATA01.ZSDABCDE.HWEFGH00$DATA02.ZSDABCDE.HWEFHJ00
When you create the temporary table, you might list these Guardian names in the LOCATIONclause:$DATAXX.ZSDABCDE.HWEFGH00$DATAYY.ZSDABCDE.HWEFHJ00
4. Populate the temporary tables.INSERT INTO temporary-table SELECT * FROM primary-table;
5. Use BACKUP to put the temporary objects onto tape.6. Create a catalog on your backup system to correspond to your primary catalog on your
primary system whose objects you want RDF to replicate.7. Create the schema on the backup node using the same schema name and the same subvolume
name as the schema for your primary database. See “Creating NonStop SQL/MX Primaryand Backup Databases” (page 323) for details and an example.
8. If you want each catalog to be seen from both systems, register your primary and backupcatalogs.To register the primary catalog on the backup system, issue a REGISTER CATALOGcommand on the primary system.To register the backup catalog on the primary system, issue a REGISTER CATALOGcommand on the backup system.The format of the REGISTER CATALOG command is:REGISTER CATALOG catalog ON node.volume;
Where catalog is the local catalog, node is the remote system where you want the localcatalog registered, and volume is where the local catalog is to be registered on the remotesystem.For example, this command (if executed on the primary system) registers the primary catalogon the backup system:REGISTER CATALOG pcat ON \bnode.$data00;
If executed on the backup system, this command registers the backup catalog on the primarysystem:REGISTER CATALOG bcat ON \pnode.$data00;
9. Use RESTORE to place the temporary objects on the backup system, but specifying thebackup catalog as the target. See “Creating a NonStop SQL/MX Backup Database From anExisting Primary Database” (page 326) for details. Note that:• The subvolume.filename of the primary and temporary objects are identical.• The schema and object names of the primary and temporary objects are identical.
Be sure that when you restore the ANSI names you specify the backup catalog name,not the temporary catalog name. Also, be sure you use the LOCATION clause to specifythe explicit Guardian subvolume.filenames with the volume names where youwant the objects placed.
Online Database Synchronization With NonStop SQL/MX Objects 329

The backup database is now ready for RDF replication, and you can drop the temporarycatalog.schema.objects on your primary system.
Creating the Fuzzy Copy on the Backup SystemThe advantage of this method is that it eliminates the use of temporary objects as well as tapehandling because you create your backup objects directly on the backup system. The disadvantageis that it requires you to load the data from your primary objects to your backup objects overExpand lines, which might take longer than the alternate method given above if the data is greatin size.To create the fuzzy copy on the backup system, perform these steps.1. Create the backup catalog on your backup system. This operation is identical to operation
in “Creating a NonStop SQL/MX Backup Database From an Existing Primary Database”(page 326).
2. Create the schema on the backup system. This operation is identical to that outlined in“Creating a NonStop SQL/MX Backup Database From an Existing Primary Database”(page 326).
3. So each catalog can be seen from both systems, you must register your primary and backupcatalogs as described in “Creating NonStop SQL/MX Primary and Backup Databases”(page 323).
4. Obtain the fully qualified Guardian filenames for all objects on the primary system that youwant replicated.
5. Create each object on the backup system. See “Creating NonStop SQL/MX Primary andBackup Databases” (page 323).
6. Determine where you will run the command to load the data from the primary objects tothe backup objects. If you run the command on the primary system, NonStop SQL/MXselects the data locally and inserts over the network into the backup object. Alternatively,you can run the operation on the backup system, which selects the data remotely and insertsthe data locally.
7. Populate the backup objects by running an INSERT statement on whichever system youprefer.INSERT INTO backup-table SELECT * FROM primary-table;
where backup-table and primary-table are the 3-part ANSI names of the two tables.
The backup database is now ready for RDF replication.
Offline Synchronization for a Single PartitionYou must first determine the key ranges for each of your partitions.For the partition that you want to synchronize, find out whether a partition already exists on thebackup system. If a partition exists, then there are two methods to synchronize the backuppartition to the primary: directly and indirectly.
Directly From the Primary to the Backup1. Delete all rows in the backup partition. If the partition whose rows you want to delete has
the key range of "F"-"J" and the next partition starts with "K", delete rows from the F-Jpartition:DELETE FROM name WHERE key-column >= 'F' and key-column < 'K';
330 NonStop SQL/MX and RDF

2. Load the rows from the primary partition into the backup partition. This requires eachcatalog to be registered on the other node as described in “Creating NonStop SQL/MXPrimary and Backup Databases” (page 323).INSERT INTO backup-table SELECT * FROM primary-table WHERE key-column >= 'F' AND key-column < 'K';
Indirectly From the Primary to the Backup By Way of a Temporary FileIf the number of rows to load over the network is too great, you can use a temporary file on theprimary system:1. Create a temporary catalog on your primary system to correspond to your regular catalog
on your primary system whose objects you want RDF to replicate.2. Create a temporary schema for your temporary catalog. Follow the instructions given above
in “Creating a NonStop SQL/MX Backup Database From an Existing Primary Database”.The name of the temporary schema need not be identical to the name of the schema whoseobjects you want replicated, nor must the subvolume name be identical.
3. Create a temporary table in your temporary schema, including all partitions. The partitionranges must be identical to those of your primary table. Follow the guidelines outlined in“Creating a NonStop SQL/MX Backup Database From an Existing Primary Database”, above,except that you must create the temporary table on the primary system and on differentvolumes from those used for your primary objects.
4. Now load only the rows from the primary partition that you want synchronized into thetemporary partition:INSERT INTO backup-table SELECT * FROM primary-table WHERE key-column >= 'F' AND key-column < 'K';
5. Use Backup to put the temporary table on tape.6. Create a catalog on the backup system to correspond to the temporary catalog on the primary
system.7. Create the schema on the backup system using the same schema name and the same
subvolume name as the schema for the temporary database.8. Use RESTORE to place the temporary objects on the backup system, specifying the temporary
catalog on the backup system as the target. See “Creating a NonStop SQL/MX BackupDatabase From an Existing Primary Database” (page 326) for details.
9. For the backup partition you want synchronized, delete all rows in that partition:DELETE FROM name WHERE key-column >= 'F' and key-column < 'K';
10. Now load only the rows from the temporary partition that you want synchronized into yourbackup table's partition:INSERT INTO backup-table SELECT * FROM temporary-table WHERE key-column >= 'F' AND key-column < 'K';
Backup Partition Does Not Already ExistIf a partition does not already exist on the backup system, you must create a partition on thebackup system. See “Creating a NonStop SQL/MX Backup Database From an Existing PrimaryDatabase” (page 326) for instructions. Then you must insert the rows into the backup partitionusing either of the two methods described above. In this case you do not need to delete the rowsfrom the backup partition because it is already empty.
Online Synchronization for a Single PartitionYou must first determine the key ranges for each of your partitions.
Online Synchronization for a Single Partition 331

Perform the steps described in “Online Database Synchronization With NonStop SQL/MX Objects”(page 328). In this case, you are only dealing with a single partition. If you create a temporarytable on your primary system, you only need to populate the one partition with the INSERTstatement shown in “Offline Synchronization for a Single Partition” (page 330).If you synchronize the backup partition directly from the primary system, first delete all rowsfrom the backup partition, as described in “Offline Synchronization for a Single Partition”(page 330), and then load the data into the backup partition using the INSERT statement alsodescribed in that topic.
Correcting Incorrect NonStop SQL/MX Name Mapping
Primary and Backup ANSI Catalog Are the SameIf you created the primary and backup catalogs and used the same name for both, you cannotuse the REGISTER CATALOG command to make either catalog visible on the other system. Soyou cannot perform NonStop SQL/MX operations that refer to both catalogs, such as the methodfor populating NonStop SQL/MX objects for online database synchronization, nor use moreadvanced ANSI name support features in a future release.To correct the problem:1. Use the BACKUP utility to store one entire catalog on tape.2. Drop the entire catalog.3. Use the RESTORE utility to put the catalog back on disk, but specify a different target catalog
name, taking care that you explicitly map all source Guardian file names to identical targetsusing the LOCATION clause.
Alternatively, you can drop the entire catalog, and then recreate it and all dependent schemasand objects.
Primary and Backup ANSI Schema Names Are Not the SameIf you created the primary and backup schemas to have different ANSI schema names, RDFreplication can proceed, but you must remember that the backup database has a different schemaname in the event of a planned or unplanned outage that requires you resume transaction activityon the backup system. Furthermore, you will not be able to use more advanced RDF ANSI namemapping features in subsequent releases of the NonStop SQL/MX product.If you created the primary and backup schemas to have different names, use BACKUP andRESTORE to restore the entire schema to a different target schema, similar to the proceduredescribed in “Primary and Backup ANSI Catalog Are the Same” (page 332). When you issue theRESTORE command, you must explicitly map all source Guardian file names to identical targets.
Schema Subvolume Names Are Not the SameIf you created the primary and backup schemas to have different subvolume names, underlyingGuardian names for objects in the schemas will not match, and RDF will not replicate correctly.To correct the problem:1. Back up the entire schema.2. Drop the schema, and re-create it using the correct subvolume name.3. Restore the entire schema. When you issue the RESTORE command, you must explicitly
map all source Guardian filenames to targets that have the corrected subvolume portion.
Guardian Filename Is Incorrect for PartitionYou can modify all or any portion of an individual partition's Guardian file name by using theMODIFY TABLE MOVE PARTITION command.
332 NonStop SQL/MX and RDF

Consideration for Creating Backup TablesCurrently, you cannot use the CREATE LIKE statement to create backup or temporary tablesbecause CREATE LIKE does not preserve the original Guardian file names that are essential forRDF.At some point in the future when ANSI names are supported, CREATE LIKE will be a viablemeans of creating backup or temporary tables, but until then the following discussion has theutmost significance. NonStop SQL/MX will store data in rows on disk in a private format, whichdoes not necessarily correspond to the sequence in which the user specifies columns on CREATETABLE. For example, this CREATE TABLE statement:create table t (colx varchar(100), coly int);
will cause rows to be laid out on disk in this format:row-header coly-data colx-data
Consider these two statements, which will produce a logically equivalent table:create table t (colx varchar(100));
alter table t add column coly int;
The above two statements will produce this row layout on disk:row-header coly-data colx-data
Applying audit generated for one row layout to a table that has a different row layout will notwork well.Therefore, users must create backup tables in exactly the same way that the primary tables werecreated. If you have never added any additional columns to your primary table after it wascreated, use the CREATE LIKE statement. Of course, you must have registered your catalogsfirst. See “Creating NonStop SQL/MX Primary and Backup Databases” (page 323) for instructions.If you have added columns to your primary table after it was created, you must take particularcare when creating the backup table, and you should not use the CREATE LIKE statement.Rather, use the SHOWDDL command to see the order in which additional columns were added.You must then create the table on the backup system in the same way in which the primary tablewas created, and then add the additional columns to the backup table in the same order thatthey were added to the primary table.
Restoring to a Specific LocationSee the RESTORE information in the Guardian Disk and Tape Utilities Reference Manual for thesyntax of the RESTORE utility.The LOCATION option allows you to change the physical location of NonStop SQL/MX objectsas they are restored. The LOCATION option is used to specify one or more mappings.If you specify LOCATION, you cannot specify PARTONLY ON.For synchronizing RDF backup databases, you need to use the fully qualified name option:\A.$data01.ZSDUTRWA.HEBFRW00 TO \B.$data01.ZSDUTRWA.HEBFRW00
or
\A.$data01.ZSDUTRWA.HEBFRW00 TO \B.$dataAA.ZSDUTRWA.HEBFRW00
ExampleAssume:
Consideration for Creating Backup Tables 333

1. Primary Node: \P Backup Node: \B2. All volume names are identical on the primary and backup systems.3. Primary catalog name: PCAT Backup catalog name: BCAT4. You are restoring four tables from two different schemas in catalog PCAT.5. Schema information:
Backup schema nameSchema subvolumePrimary schema name
BCAT.MYSCHEMAZSDAAAAAPCAT.MYSCHEMA
BCAT.MYSCHEMAXZSDBBBBBPCAT.MYSCHEMAX
1. Table and Index information:
Guardian Names for partitions and indexesTable or Index Name
\P.$data01.ZSDAAAAA.HEBFRW00\P.$data02.ZSDAAAAA.HEBFRX00\P.$data03.ZSDAAAAA.HEBFRY00\P.$data02.ZSDAAAAA.YREWPO00
PCAT.MYSCHEMA.MYTABLE1PCAT.MYSCHEMA.MYINDEX1
\P.$data01.ZSDAAAAA.GABCDE00\P.$data02.ZSDAAAAA.GABCDF00\P.$data03.ZSDAAAAA.GABCDG00\P.$data02.ZSDAAAAA.YZZWPO00
PCAT.MYSCHEMA.MYTABLE2PCAT.MYSCHEMA.MYINDEX2
\P.$data01.ZSDBBBBB.FGABCD00\P.$data02.ZSDBBBBB.FGABCE00\P.$data03.ZSDBBBBB.FGABCF00\P.$data03.ZSDBBBBB.IGABCD00
PCAT.MYSCHEMAX.MYTABLE1PCAT.MYSCHEMAX.MYINDEX1
\P.$data04.ZSDBBBBB.EFGHIJ00\P.$data03.ZSDBBBBB.DEFGHI00
PCAT.MYSCHEMAX.MYTABLE2PCAT.MYSCHEMAX.MYINDEX2
2. The RESTORE command would be:RESTORE $tape, ( MX ( ( TBL PCAT.MYSCHEMA.MYTABLE1, TGT CATALOG BCAT ), ( TBL PCAT.MYSCHEMA.MYTABLE2, TGT CATALOG BCAT ), ( TBL PCAT.MYSCHEMX.MYTABLE1, TGT CATALOG BCAT ), ( TBL PCAT.MYSCHEMX.MYTABLE2, TGT CATALOG BCAT ) ), LOCATION ( \P.$data01.ZSDAAAAA.HEBFRW00 TO \B.$data01.ZSDAAAAA.HEBFRW00, \P.$data02.ZSDAAAAA.HEBFRX00 TO \B.$data02.ZSDAAAAA.HEBFRX00, \P.$data03.ZSDAAAAA.HEBFRY00 TO \B.$data03.ZSDAAAAA.HEBFRY00, \P.$data02.ZSDAAAAA.YREWPO00 TO \B.$data02.ZSDAAAAA.YREWPO00,
\P.$data01.ZSDAAAAA.GABCDE00 TO \B.$data01.ZSDAAAAA.GABCDE00, \P.$data02.ZSDAAAAA.GABCRF00 TO \B.$data02.ZSDAAAAA.GABCRF00, \P.$data03.ZSDAAAAA.GABCRG00 TO \B.$data03.ZSDAAAAA.GABCRG00, \P.$data02.ZSDAAAAA.YZZWPO00 TO \B.$data02.ZSDAAAAA.YZZWPO00,
\P.$data01.ZSDBBBBB.FGABCD00 TO \B.$data01.ZSDBBBBB.FGABCD00, \P.$data02.ZSDBBBBB.FGABCE00 TO \B.$data02.ZSDBBBBB.FGABCE00, \P.$data03.ZSDBBBBB.FGABCF00 TO \B.$data03.ZSDBBBBB.FGABCF00, \P.$data03.ZSDBBBBB.IGABCD00 TO \B.$data03.ZSDBBBBB.IGABCD00,
\P.$data04.ZSDBBBBB.EFGHIJ00 TO \B.$data04.ZSDBBBBB.EFGHIJ00, \P.$data03.ZSDBBBBB.DEFGHI00 TO \B.$data03.ZSDBBBBB.DEFGHI00 ), INDEXES INCLUDED );
334 NonStop SQL/MX and RDF

As described in “Creating a NonStop SQL/MX Backup Database From an Existing PrimaryDatabase” (page 326), you can use the MXGNAMES utility to automatically generate the correctLOCATION clauses, substituting the backup node name as needed. However, you must remapany nonmatching volume names in these locations manually.
Comparing NonStop SQL/MX TablesWhile the unsupported RDFCHEK utility program can be used to compare Enscribe files orNonStop SQL/MP tables, it cannot be used to compare NonStop SQL/MX tables. If you need tocompare a NonStop SQL/MX table on your primary against a NonStop SQL/MX table on yourbackup system, for example, one method of doing so is as follows:1. Use the NonStop SQL/MX Select statement to select all rows in the primary table, and then
store them in an Enscribe entry-sequenced file.2. Use the NonStop SQL/MX Select statement to select all rows in the backup table, and then
store them in another Enscribe entry-sequenced file.3. Use RDFCHEK to compare the two entry-sequenced files.Alternatively, you can use the unsupported utility MD5CHEK to compare NonStop SQL/MXtables without using an intermediate entry-sequenced file. The online help for MD5CHEK, whichyou can view by running MD5CHEK with no parameters, describes how to use MD5CHEK.
Comparing NonStop SQL/MX Tables 335

336

17 Zero Lost Transactions (ZLT)Zero Lost Transactions (ZLT), functionality that is available only with the RDF/ZLT product,ensures that no transactions that commit on the primary system are lost on the RDF backupsystem if that primary system is downed by an unplanned outage. RDF achieves this though theuse of remote mirroring for the relevant TMF audit trail volume(s). That is, one mirror of anaudit trail volume remains local to the primary system, but the other mirror is located at a remotestandby site.When a primary system is downed by some unplanned outage or disaster, there might be someaudit data that the extractor on the primary system was unable to send to the backup systembefore the outage. With ZLT functionality, RDF fetches all remaining audit data from the remotemirror, thereby guaranteeing no loss of committed data during the RDF takeover operation.If a remote mirror is not available at the time of the outage, ZLT functionality cannot beguaranteed. ZLT functionality can be guaranteed only if you enable the TMF CommitHoldModecapability on your primary system by including the COMMITHOLDMODE parameter in aTMFCOM ALTER AUDITTRAIL command. When CommitHoldMode is enabled, TMF suspendsall commit operations if a remote mirror fails. For information about using the TMFCommitHoldMode capability, see “Using CommitHoldMode” (page 340) and the TMF ReferenceManual.If all of the remote mirrors are functioning, ZLT functionality has no impact on normal RDFoperations. If you must perform an RDF takeover operation, however, there are additional stepsinvolved that can lengthen the time to perform the overall operation. In return, you get the ZLTguarantee of not losing any transactions that committed on the primary system. WhenCommitHoldMode is enabled and a remote mirrors fails, all active transactions are preventedfrom aborting or committing. That dramatically impacts transaction processing on your primarysystem. For more about this situation, see “Using CommitHoldMode” (page 340).
How It WorksOne mirror of each audit trail disk volume is removed to a remote location from the local mirror.The distance is limited by the chosen disk technology and acceptable communications latency.Thus, each audit trail volume is still mapped to a mirrored pair of disks, but one of the disks isphysically removed. For the remote mirror, an alternate cable must be present so that this mirrorcan be attached to a standby system in the event of a takeover. That standby system can be eitherthe backup system itself or a separate system geographically removed from the primary andbackup systems. If you are using a separate standby system, it must be connected to the backupsystem by way of Expand lines (of unlimited length).Figure 17-1 shows the configuration where a single system serves as both the standby and backupsystems, and the remote mirror is located at the standby/backup site.
How It Works 337

Figure 17-1 ZLT Configuration With a Single Standby/Backup System
Figure 17-2 shows the configuration where a single system serves as both the standby and backupsystems, and the remote mirror is located at an intermediate site.
Figure 17-2 ZLT Configuration With a Single Standby/Backup System and With the Remote MirrorLocated at an Intermediate Site
Figure 17-3 shows the configuration where individual standby and backup systems are locatedat separate sites.
338 Zero Lost Transactions (ZLT)
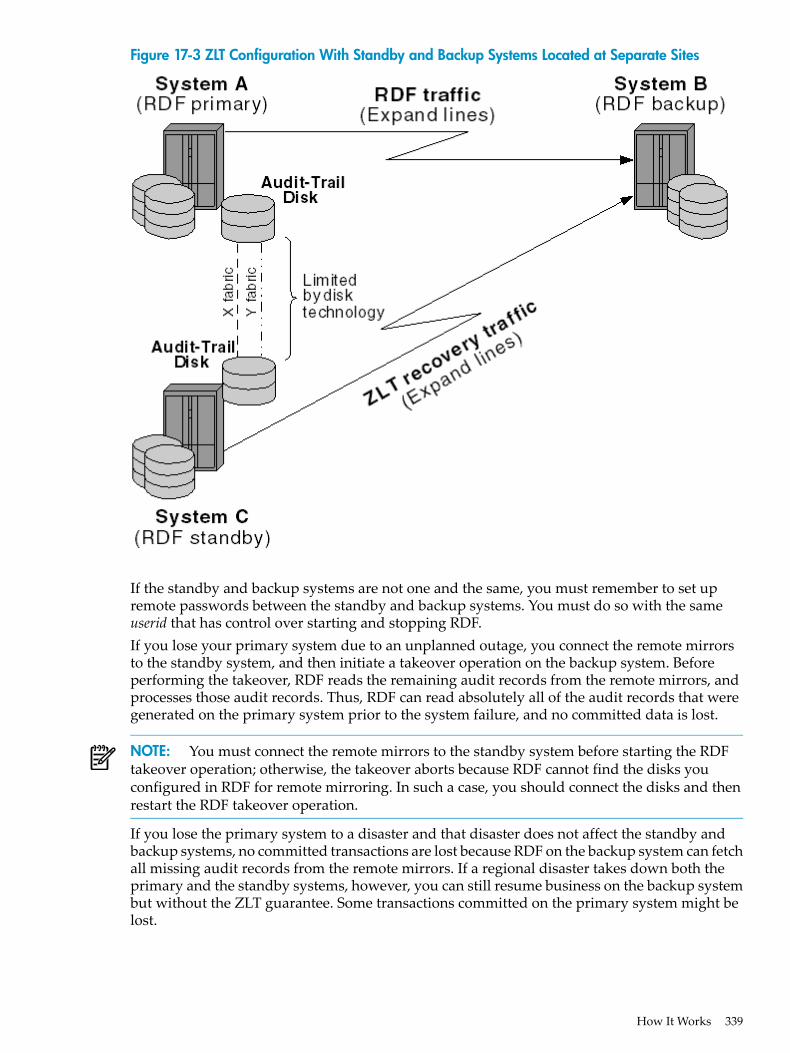
Figure 17-3 ZLT Configuration With Standby and Backup Systems Located at Separate Sites
If the standby and backup systems are not one and the same, you must remember to set upremote passwords between the standby and backup systems. You must do so with the sameuserid that has control over starting and stopping RDF.If you lose your primary system due to an unplanned outage, you connect the remote mirrorsto the standby system, and then initiate a takeover operation on the backup system. Beforeperforming the takeover, RDF reads the remaining audit records from the remote mirrors, andprocesses those audit records. Thus, RDF can read absolutely all of the audit records that weregenerated on the primary system prior to the system failure, and no committed data is lost.
NOTE: You must connect the remote mirrors to the standby system before starting the RDFtakeover operation; otherwise, the takeover aborts because RDF cannot find the disks youconfigured in RDF for remote mirroring. In such a case, you should connect the disks and thenrestart the RDF takeover operation.
If you lose the primary system to a disaster and that disaster does not affect the standby andbackup systems, no committed transactions are lost because RDF on the backup system can fetchall missing audit records from the remote mirrors. If a regional disaster takes down both theprimary and the standby systems, however, you can still resume business on the backup systembut without the ZLT guarantee. Some transactions committed on the primary system might belost.
How It Works 339

Using CommitHoldModeIf you want absolute ZLT protection, you must configure your audit trails with theCOMMITHOLDMODE attribute set to on. Doing so causes each write to the audit trail to bedirected to the remote audit trail disk first. If that write fails for any reason, TMF activatescommit-hold mode.If CommitHoldMode mode is activated, TMF stops all further commit operations. Becausetransactions on the primary system cannot commit or abort while the remote mirror is unavailable,you achieve ZLT protection if you should lose your primary system while commit-hold modeis activated. When such an event occurs, however, transaction processing on the primary systemeffectively stops.TMF provides another configuration attribute associated with CommitHoldMode:COMMITHOLDTIMER. If CommitHoldMode is activated, the COMMITHOLDTIMER valuespecifies how long you want CommitHoldMode to remain activated and what to do when thattime is reached. The parameters are:COMMITHOLDTIMER {timeout [ON TIMEOUT {SUSPEND|CRASH}] | -1 }
If timeout is set to a positive value (from 5 seconds to 24 hours) and CommitHoldMode becomesactivated, all commit processing stops until either you correct the problem that caused activationof COMMITHOLDMODE or the timeout value is reached. If the timeout value is reached, TMFperforms the action specified by the ON TIMEOUT option (SUSPEND or failure).CommitHoldMode affects transaction processing on your primary system dramatically when aremote mirror becomes unavailable. If a remote mirror becomes unavailable, you must choosewhether you want ZLT protection or the resumption of transaction processing.If ZLT protection is critical to your disaster recovery plan, specify ON TIMEOUT CRASH.Crashing TMF under these circumstances provides ZLT protection.If it is important to resume transaction processing on the primary system, specify ON TIMEOUTSUSPEND. Suspending commit-hold mode under these circumstances, however, deprives youof ZLT protection should you lose the primary system to some unplanned outage.If you set timeout to -1, TMF maintains an activated commit-hold state indefinitely until youcorrect the issue causing the activation, you manually suspend commit-hold mode, or you turnoff commit-hold mode.The default timeout value is 60 seconds and the default action upon reaching the timeout valueis SUSPEND (which means loss of ZLT protection).
Hardware SetupTo set up RDF for ZLT with remote mirror capability you must have established your hardwaresetup first. That is, you must set up remote mirroring for every audit trail volume that relates tothe RDF environment before you configure RDF.
NOTE: Because the remote mirrors will be connected to your standby system in the event ofan unplanned takeover, you should choose disk names that will not conflict with disks alreadyconnected to the standby system.
ZLT is currently only supported with an HP StorageWorks XP disk array.
Assigning CPUs on the Standby SystemBy default, the same CPUs configured for each extractor on the primary system are used for thecorresponding extractor on the standby system, provided that both the necessary primary andbackup CPUs are available on the standby system.If the necessary primary or backup CPU for an extractor is not available on the standby system,the RDF monitor process selects from those CPUs that are available. If the monitor must select
340 Zero Lost Transactions (ZLT)

the primary CPU for all extractors, it puts the primary processes of the extractors in as manydifferent CPUs as possible to achieve load balancing provided there are enough CPUs. If, forexample, you have six extractors configured, but you only have two CPUs on your standbysystem, the monitor places the primary processes of three extractors on one CPU and the primaryprocesses for the other three extractors on the other CPU. If the monitor process selects theprimary CPU of an extractor and the configured backup CPU is not available on the standbysystem, then the extractor does not run as a process pair; it only has the primary process.
RDF Configuration Attributes
RDF Remote Mirror ConfigurationWhen declaring the attributes of the RDF configuration record, you use this optional attributeto specify whether ZLT is enabled or disabled:SET RDF REMOTE MIRROR [ ON | OFF ]
The default is off. If this attribute is off, normal RDF operations are unchanged, as is executionof the RDF TAKEOVER command. If this attribute is on, then you must also set other RDF andextractor attributes, and the TAKEOVER operation has an additional step: connecting the remotemirrors to the standby system.
RDF Remote Standby ConfigurationIf you set the RDF REMOTE MIRROR attribute on, you must also set the system name of astandby system. This standby system can be either a third system, apart from the primary andbackup systems, or it can be the backup system itself. The syntax for specifying the standbysystem name is:SET RDF REMOTE STANDBY node-name
node-name must be a valid name and must identify a system in your current Expand network.If you set the standby to a different node than your backup system, the specified system mustbe accessible to the backup system.
RDF Configuration Record ValidationWhen you ADD the RDF configuration record, these checks are performed:• If you set the RDF REMOTE MIRROR attribute on, but did not issue a SET RDF REMOTE
STANDBY command, the ADD command fails.• If you set the RDF REMOTE MIRROR attribute off and issued a SET RDF REMOTE STANDBY
command, the ADD command fails.ZLT is only a feature of the RDF/ZLT product: you cannot add the RDF record with ZLT attributesif you do not have the RDF/ZLT product installed.
NOTE: The hardware configuration for use of a remote mirror on the audit trail is not part ofthe RDF configuration, nor is it part of any RDF validation. You must have placed the remotemirror in a location where you can connect it to the standby system at the time of a takeover. Ifyou fail to do this, the RDF takeover operation fails until you have connected the remote mirrorto the standby system or turned off remote mirroring. See “ALTER RDF Remote MirrorConfiguration” (page 342).
Extractor Audit-Trail ConfigurationWhen configuring RDF for ZLT, you must add the complete set of audit trail volumes to whichRDF-protected data volumes are configured. For example, if your RDF configuration only protectsdata volumes configured to the Master Audit Trail (MAT), you must specify all audit trail volumesthat are configured in TMF for the MAT (active, overflow, and restore). Because each audit trail
RDF Configuration Attributes 341
can have up to 16 active, 16 restore, and 16 overflow volumes, an extractor list can contain up to48 volume names. Set each volume name:SET EXTRACTOR VOLUME volume-name
volume-name must be a valid volume name specified in the current TMF configuration on yourprimary system. Use a SET statement for each individual volume. You do not need to specifywhether the volume is an active volume, restore volume, or overflow volume; you merely specifythe volume name. The list of volumes you specify is placed in the extractor configuration record.When you ADD the extractor attributes, RDFCOM checks to ensure that each configured volumeis a valid volume. If any are not, the ADD command fails with an error for the first volume namethat is either an invalid name or does not correspond to a valid volume.
ALTER RDF Remote Mirror ConfigurationYou can alter the RDF REMOTE MIRROR configuration attribute to turn ZLT protection on andoff as needed. If entered on the primary system, you must stop RDF, alter the attribute, and thenrestart RDF. If the primary system is no longer available and you are preparing to start the RDFtakeover operation, you can alter the attribute on the backup system. The syntax is:ALTER RDF REMOTE MIRROR [ ON | OFF ]
If you issue the ALTER command on the backup system while the network is down and theprimary system is still up, you must then issue the ALTER command again on the primary systemwhen the network comes back up; otherwise, the change will not be kept on either the primaryor the backup system.If one of your remote mirrors fails during normal operations on your primary system, you mightwant to turn the RDF REMOTE MIRROR configuration attribute off on the primary system sothat if you need to execute a takeover operation you can complete the takeover as quickly aspossible. Remember, if you have the RDF REMOTE MIRROR configuration attribute turned offat the time of a takeover, you do not have ZLT protection. When the troublesome mirror comesback up and is fully revived so that it is current with the local mirror, you then re-enable ZLTon the primary to reinstate ZLT protection.
ZLT Takeover Operations
CAUTION: At the time of a ZLT takeover, HP strongly recommends that before connecting theremote mirrors to the standby system, you either disconnect the remote mirrors from the primaryRDF system, or disable the XP disk array Logical Unit (LUN) from the primary system. If theremote mirror's LUN remains shared and active with both the primary and the standby RDFsystems, it might cause data corruption on the remote mirror disk.
If ZLT is configured and enabled when a TAKEOVER command is issued on the backup system,the overall takeover operation executes in two phases.
NOTE: Before issuing the TAKEOVER command, you must have connected the remote mirrorsto the standby system. When the remote mirrors are connected to the standby system, the auditrecords on the remote mirrors have no relationship to the audit trail on the standby system. Theremote mirrors are not part of the TMF configuration of the standby system.
Phase 1 (ZLT Processing)RDFCOM stops all RDF processes on the backup system. If the standby and backup systems arenot the same system, RDFCOM copies the RDF configuration file on the backup system to thestandby system. RDFCOM then starts an RDF monitor process on the backup system. Thatmonitor then starts the extractor(s) on the standby system and the receiver(s), purger, andupdater(s) on the backup system.
342 Zero Lost Transactions (ZLT)

Each extractor logs RDF event 901 reporting it is started for ZLT processing, starts a specialaudit-fixup process to fix up the last file in the audit trail (see “The Audit-Fixup Process” below),and sends all remaining audit records to its receiver. When an extractor reaches the end of itsaudit trail, it sends a “ZLT finished” indication to its receiver, and logs RDF event 900 reportingit has completed its ZLT task. When all extractors are finished, they are terminated and deleted.Upon receiving the “ZLT finished” indication, each receiver logs RDF event 903 reporting it hascompleted its ZLT task, and tells its updater to commence normal takeover operations. Whenall receivers have finished their ZLT processing, the overall takeover operation proceeds to phase2.
The Audit-Fixup ProcessThe audit-fixup process only ever runs on the remote standby system in an RDF/ZLT environmentand typically lasts only a few seconds. The audit-fixup process performs file-fixup operationson audit trail files on the remote mirror that have been left with the CRASHOPEN flag setfollowing a failure of the RDF primary node. The audit-fixup process is started by an extractorwhenever the extractor attempts to read an audit trail file that has the CRASHOPEN flag set.Unlike the other RDF processes, the audit-fixup process does not persist for the duration of theRDF environment. The audit-fixup process is started on demand by the extractor process, andterminates as soon as it has performed the file-fixup processing on the audit trail file.This process does not run as process pair, but the extractor will start a new audit-fixup processif the audit-fixup process is terminated due to a processor failure. No configuration parametersare required for the audit-fixup process. The audit-fixup process runs in the same CPU as theextractor primary process with a process priority one less than the extractor priority.
Phase 2 (Takeover Processing)The initial part of Phase 2 takeover processing is performed by the purger in building the undolists. When an updater reaches the end-of-file of its image trail, it asks the purger for an undolist. (The purger cannot start building the undo lists until all receivers have finished their ZLTprocessing.) The updaters use those lists to back out any audit for transactions that wereunresolved on the primary system at the time of the unplanned outage.
ZLT EventsEvent Management System (EMS) events are logged to report the progress of the ZLT operationin the various RDF processes. For descriptions of these messages, see messages 900 through 903in Appendix C (page 365).
Error ConditionsIf the standby system is different from the backup system and the monitor cannot reach thestandby system to start the extractor(s), the takeover operation aborts. If that happens, you mustbring the standby system up (and make sure it is available to the backup system by way of theExpand network) and then reissue the TAKEOVER command.If an extractor cannot find an audit file it needs because the disk has not yet been mounted, theextractor abends and the takeover operation aborts. If you have not yet mounted the disk theextractor needs, you must mount it before reissuing the TAKEOVER command. If the remotemirror cannot be mounted and you want to do the takeover without the ZLT guarantee, you canalter the RDF REMOTE MIRROR attribute on the backup system to off. When you reissue theTAKEOVER command, the takeover then proceeds as a normal takeover operation (withoutZLT).
STATUS RDFYou cannot issue the STATUS RDF command from the standby system; it must only be issuedfrom the backup system.
ZLT Takeover Operations 343
If a takeover does not involve ZLT, the extractor is not included in the STATUS display duringan RDF takeover operation. With ZLT configured and enabled, the STATUS RDF display changesduring an RDF takeover. During phase 1 (ZLT processing), status is displayed for the extractor(s),consisting of process name, sno, rba, cpus, error. The RTD field, however, is left blank.
RDFCOM INFO and SHOW CommandsThe INFO command output includes the RDF and extractor configuration attributes for ZLT, asdoes the output for the SHOW command.
Old Audit-Trail FilesWhen a ZLT takeover operation completes, you should not purge the old audit trail files on theremote mirrors connected to the standby system if you believe you can recover the primarysystem. The old audit trail files are necessary for recovering the primary system.If you can’t recover the primary system, you might purge the files because they have no furtheruse.Because the old audit trail files are not managed by TMF on the standby system, if you chooseto purge them you must do so manually using Snoop.
Recovering the Primary System After an RDF ZLT TakeoverIf you had to execute the RDF takeover operation and you are able to bring your former primarysystem back online, you must perform these tasks to recover the database on your former primarysystem.
344 Zero Lost Transactions (ZLT)
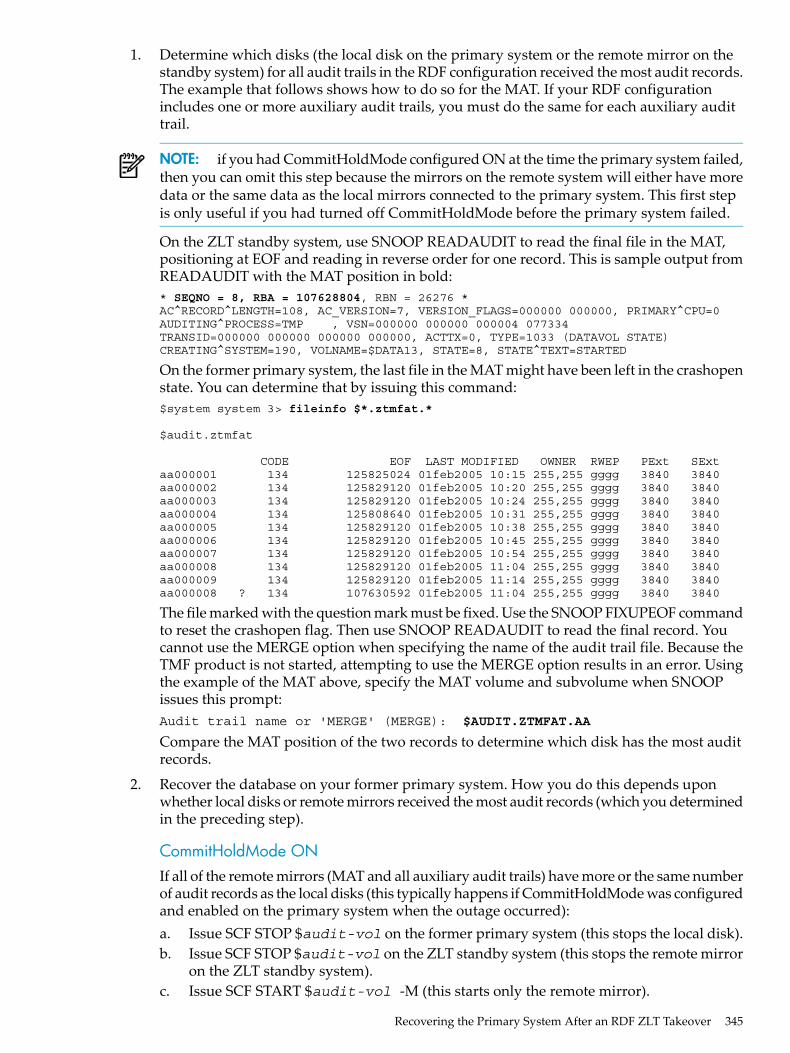
1. Determine which disks (the local disk on the primary system or the remote mirror on thestandby system) for all audit trails in the RDF configuration received the most audit records.The example that follows shows how to do so for the MAT. If your RDF configurationincludes one or more auxiliary audit trails, you must do the same for each auxiliary audittrail.
NOTE: if you had CommitHoldMode configured ON at the time the primary system failed,then you can omit this step because the mirrors on the remote system will either have moredata or the same data as the local mirrors connected to the primary system. This first stepis only useful if you had turned off CommitHoldMode before the primary system failed.
On the ZLT standby system, use SNOOP READAUDIT to read the final file in the MAT,positioning at EOF and reading in reverse order for one record. This is sample output fromREADAUDIT with the MAT position in bold:* SEQNO = 8, RBA = 107628804, RBN = 26276 * AC^RECORD^LENGTH=108, AC_VERSION=7, VERSION_FLAGS=000000 000000, PRIMARY^CPU=0 AUDITING^PROCESS=TMP , VSN=000000 000000 000004 077334 TRANSID=000000 000000 000000 000000, ACTTX=0, TYPE=1033 (DATAVOL STATE) CREATING^SYSTEM=190, VOLNAME=$DATA13, STATE=8, STATE^TEXT=STARTED
On the former primary system, the last file in the MAT might have been left in the crashopenstate. You can determine that by issuing this command:$system system 3> fileinfo $*.ztmfat.*
$audit.ztmfat
CODE EOF LAST MODIFIED OWNER RWEP PExt SExtaa000001 134 125825024 01feb2005 10:15 255,255 gggg 3840 3840aa000002 134 125829120 01feb2005 10:20 255,255 gggg 3840 3840aa000003 134 125829120 01feb2005 10:24 255,255 gggg 3840 3840aa000004 134 125808640 01feb2005 10:31 255,255 gggg 3840 3840aa000005 134 125829120 01feb2005 10:38 255,255 gggg 3840 3840aa000006 134 125829120 01feb2005 10:45 255,255 gggg 3840 3840aa000007 134 125829120 01feb2005 10:54 255,255 gggg 3840 3840aa000008 134 125829120 01feb2005 11:04 255,255 gggg 3840 3840aa000009 134 125829120 01feb2005 11:14 255,255 gggg 3840 3840aa000008 ? 134 107630592 01feb2005 11:04 255,255 gggg 3840 3840
The file marked with the question mark must be fixed. Use the SNOOP FIXUPEOF commandto reset the crashopen flag. Then use SNOOP READAUDIT to read the final record. Youcannot use the MERGE option when specifying the name of the audit trail file. Because theTMF product is not started, attempting to use the MERGE option results in an error. Usingthe example of the MAT above, specify the MAT volume and subvolume when SNOOPissues this prompt:Audit trail name or 'MERGE' (MERGE): $AUDIT.ZTMFAT.AA
Compare the MAT position of the two records to determine which disk has the most auditrecords.
2. Recover the database on your former primary system. How you do this depends uponwhether local disks or remote mirrors received the most audit records (which you determinedin the preceding step).
CommitHoldMode ONIf all of the remote mirrors (MAT and all auxiliary audit trails) have more or the same numberof audit records as the local disks (this typically happens if CommitHoldMode was configuredand enabled on the primary system when the outage occurred):a. Issue SCF STOP $audit-vol on the former primary system (this stops the local disk).b. Issue SCF STOP $audit-vol on the ZLT standby system (this stops the remote mirror
on the ZLT standby system).c. Issue SCF START $audit-vol -M (this starts only the remote mirror).
Recovering the Primary System After an RDF ZLT Takeover 345

d. Once the remote mirror is started, issue SCF START $audit-vol (which causes the revivefrom -M to -P)
e. Start TMF. When startup is complete, the database on the primary system contains thesame data that the database on the backup system had at the conclusion of the RDFtakeover operation.
CommitHoldMode OFF or DisabledIf any local disk (the MAT or any auxiliary audit trail) has more audit records than thecorresponding remote mirror (this can only happen if CommitHold was not configured orwas configured but disabled on the primary system when the outage occurred):1. Issue SCF STOP $audit-vol on the ZLT standby system (this stops the remote mirror
on the ZLT standby system).2. Connect the remote mirror to the former primary system.3. Issue SCF START $audit-vol (this causes a revive from -P to -M).4. Start TMF.5. Initiate TMF file recovery with the MAT position option, where the position you specify
is the MAT position reported in the RDF 888 event on the backup system. The RDFevent 888 is logged when the takeover operation completes.
3. For information about how to return your application processing to the former primarysystem, see “Carrying Out a Planned Switchover” (page 136).
ZLT and RDF NetworksIf you have an RDF network and also want ZLT protection on any of the nodes in that network,then every node that participates in a user transaction must be configured for ZLT protection.For example, assume that systems \A and \B are both configured as nodes within an RDFnetwork, and that system \B is also configured for ZLT protection.If system \A starts a transaction and any updates associated with that transaction are done onsystem \B, then system \A also must be configured for ZLT protection.
STOP TMF OperationsWithin an RDF environment that is configured for ZLT processing, STOP TMF operations arehandled as follows:
During Normal OperationsIf updating is off, the TMF shutdown audit-record is not stored in image trails, and the monitor,extractor(s), receiver(s), and purger RDF processes stop.If updating is on, the shutdown audit-record is stored in image trails, and all RDF processes stop.
During ZLT Takeover ProcessingDuring Phase 1 of the ZLT Takeover processing, the shutdown audit-record is not stored inimage trails, and the RDF processes continue running.The goal of ZLT processing is to catch up data as quickly as possible. Thus, there is no point instopping RDF processes if a STOP TMF record is found in the master audit trail (MAT).
346 Zero Lost Transactions (ZLT)

SQL Shared Access DDL OperationsNormal support for SQL shared access DDL operations is provided during ZLT takeoveroperations:• The updaters are guaranteed to stop at the correct locations.• If some of the updaters terminated prematurely while a shared access operation is in the
system, only those that had not completed the task are restarted during the next takeoveroperation.
SQL Shared Access DDL Operations 347

348
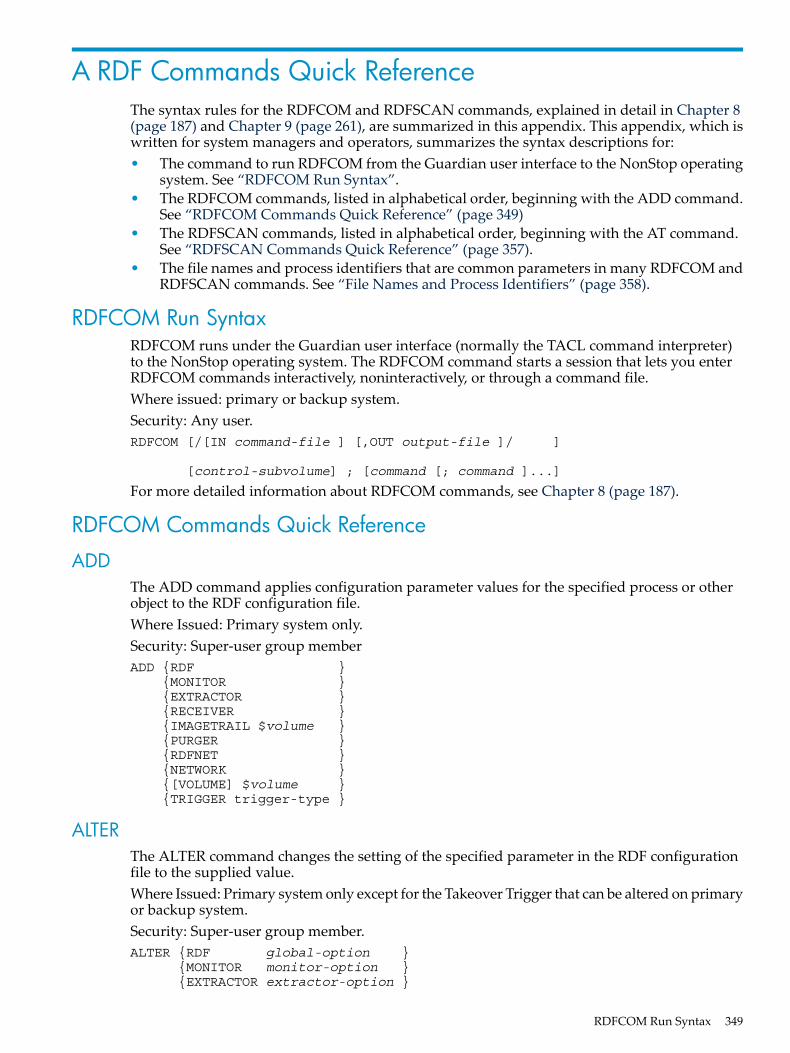
A RDF Commands Quick ReferenceThe syntax rules for the RDFCOM and RDFSCAN commands, explained in detail in Chapter 8(page 187) and Chapter 9 (page 261), are summarized in this appendix. This appendix, which iswritten for system managers and operators, summarizes the syntax descriptions for:• The command to run RDFCOM from the Guardian user interface to the NonStop operating
system. See “RDFCOM Run Syntax”.• The RDFCOM commands, listed in alphabetical order, beginning with the ADD command.
See “RDFCOM Commands Quick Reference” (page 349)• The RDFSCAN commands, listed in alphabetical order, beginning with the AT command.
See “RDFSCAN Commands Quick Reference” (page 357).• The file names and process identifiers that are common parameters in many RDFCOM and
RDFSCAN commands. See “File Names and Process Identifiers” (page 358).
RDFCOM Run SyntaxRDFCOM runs under the Guardian user interface (normally the TACL command interpreter)to the NonStop operating system. The RDFCOM command starts a session that lets you enterRDFCOM commands interactively, noninteractively, or through a command file.Where issued: primary or backup system.Security: Any user.RDFCOM [/[IN command-file ] [,OUT output-file ]/ ]
[control-subvolume] ; [command [; command ]...]
For more detailed information about RDFCOM commands, see Chapter 8 (page 187).
RDFCOM Commands Quick Reference
ADDThe ADD command applies configuration parameter values for the specified process or otherobject to the RDF configuration file.Where Issued: Primary system only.Security: Super-user group memberADD {RDF } {MONITOR } {EXTRACTOR } {RECEIVER } {IMAGETRAIL $volume } {PURGER } {RDFNET } {NETWORK } {[VOLUME] $volume } {TRIGGER trigger-type }
ALTERThe ALTER command changes the setting of the specified parameter in the RDF configurationfile to the supplied value.Where Issued: Primary system only except for the Takeover Trigger that can be altered on primaryor backup system.Security: Super-user group member.ALTER {RDF global-option } {MONITOR monitor-option } {EXTRACTOR extractor-option }
RDFCOM Run Syntax 349
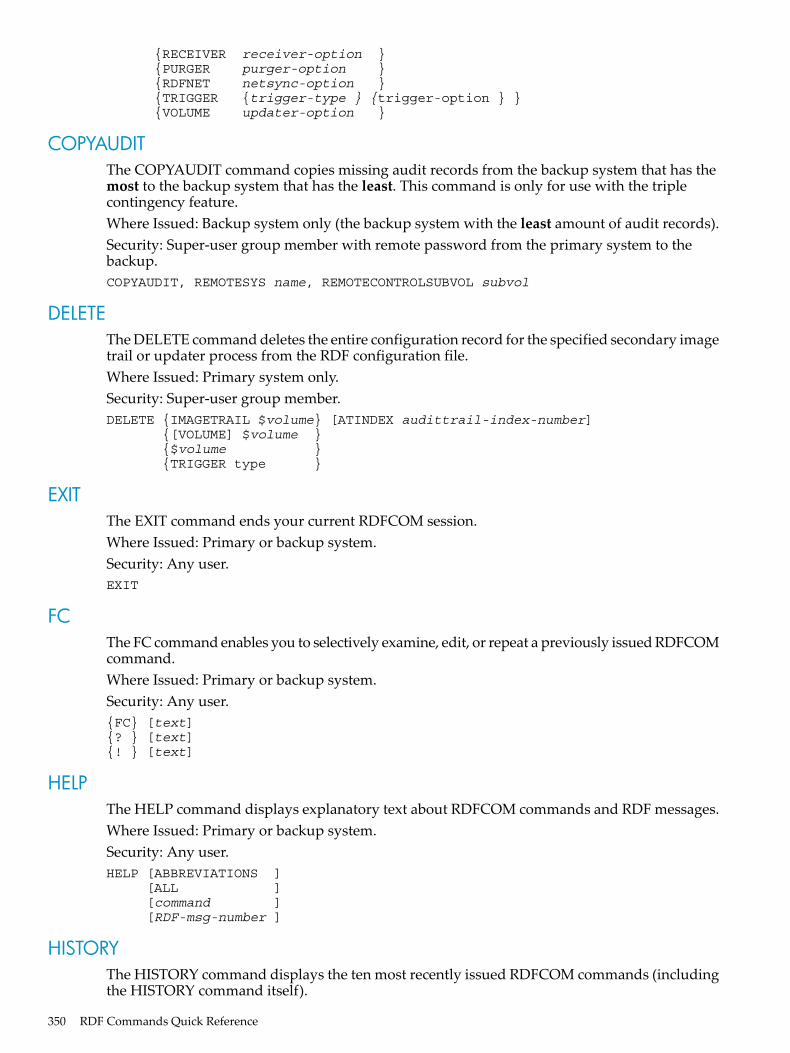
{RECEIVER receiver-option } {PURGER purger-option } {RDFNET netsync-option } {TRIGGER {trigger-type } {trigger-option } } {VOLUME updater-option }
COPYAUDITThe COPYAUDIT command copies missing audit records from the backup system that has themost to the backup system that has the least. This command is only for use with the triplecontingency feature.Where Issued: Backup system only (the backup system with the least amount of audit records).Security: Super-user group member with remote password from the primary system to thebackup.COPYAUDIT, REMOTESYS name, REMOTECONTROLSUBVOL subvol
DELETEThe DELETE command deletes the entire configuration record for the specified secondary imagetrail or updater process from the RDF configuration file.Where Issued: Primary system only.Security: Super-user group member.DELETE {IMAGETRAIL $volume} [ATINDEX audittrail-index-number] {[VOLUME] $volume } {$volume } {TRIGGER type }
EXITThe EXIT command ends your current RDFCOM session.Where Issued: Primary or backup system.Security: Any user.EXIT
FCThe FC command enables you to selectively examine, edit, or repeat a previously issued RDFCOMcommand.Where Issued: Primary or backup system.Security: Any user.{FC} [text]{? } [text]{! } [text]
HELPThe HELP command displays explanatory text about RDFCOM commands and RDF messages.Where Issued: Primary or backup system.Security: Any user.HELP [ABBREVIATIONS ] [ALL ] [command ] [RDF-msg-number ]
HISTORYThe HISTORY command displays the ten most recently issued RDFCOM commands (includingthe HISTORY command itself).
350 RDF Commands Quick Reference

Where Issued: Primary or backup system.Security: Any user.HISTORY
INFOThe INFO command displays the current configuration parameter values from the configurationfile for the specified process or other object.Where Issued: Primary or backup system.Security: Any user.INFO {* } [ATINDEX audittrail-index-num] {IMAGETRAIL } [,OBEYFORM] {RDF } {MONITOR } {EXTRACTOR } {RECEIVER } {RDFNET } {NETWORK } {PURGER } {TRIGGER trigger-type } {VOLUME * } {[VOLUME] $volume }
INITIALIZE RDFThe INITIALIZE RDF command creates the RDF configuration and context files for establishmentof a new RDF configuration. By using the INITTIME parameter, you can perform the productinitialization online. By using the SYNCHDBTIME parameter, you can initialize the productonline and synchronize the entire database online.Where Issued: Primary system only.Security: Super-user group member.INITIALIZE RDF , BACKUPSYSTEM backup-system-name[ , SUFFIX suffix-character ][ , TIMESTAMP <day><mon><year><hour>:<min>][ , INITTIME <day><mon><year><hour>:<min> | NOW ][ , SYNCHDBTIME <day><mon><year><hour>:<min> ][!][#]
OBEYThe OBEY command executes a series of commands entered in an OBEY command file.Where Issued: Primary or backup system.Security: Any user.OBEY [\system.][$volume.][subvolume.]file
OPENThe OPEN command specifies the RDF control subvolume to which subsequent commands inthis RDFCOM session apply.Where Issued: Primary or backup system.Security: Any user.OPEN control-subvolume
OUTThe OUT command redirects the output of the current RDFCOM session to the specified deviceor file.
RDFCOM Commands Quick Reference 351

Where Issued: Primary or backup system.Security: Any user.OUT [\system.][$volume.][subvolume.][file]
RESETThe RESET command resets all configuration parameters for the specified process to their defaultvalues within the RDF configuration memory table. The corresponding parameters within theconfiguration file do not change, however, unless you issue an ADD command.Where Issued: Primary system only.Security: Super-user group member.RESET {RDF } {MONITOR } {EXTRACTOR } {RECEIVER } {VOLUME } {IMAGETRAIL } {PURGER } {RDFNET } {NETWORK } {TRIGGER }
SET EXTRACTORThe SET EXTRACTOR command sets the designated configuration parameters for the extractorprocess to the supplied values within the RDF configuration memory table. The supplied valuesare not applied to the RDF configuration file, however, until you issue an ADD command.Where Issued: Primary system only.Security: Super-user group member.SET EXTRACTOR extractor-option
where extractor-option is: {CPUS primary-CPU : backup-CPU } {PRIORITY priority } {PROCESS process-name } {ATINDEX audittrail-index-number } {RTDWARNING rtd-time } {VOLUME volume-name }
SET IMAGETRAILThe SET IMAGETRAIL command associates an image trail with a specific audit trail on theprimary system. The supplied value is not applied to the RDF configuration file, however, untilyou issue an ADD IMAGETRAIL command.Where Issued: Primary system only.Security: Super-user group member.SET IMAGETRAIL ATINDEX audittrail-index-number
SET MONITORThe SET MONITOR command sets the designated configuration parameters for the monitorprocess to the supplied values within the RDF configuration memory table. The supplied valuesare not applied to the RDF configuration file, however, until you issue an ADD command.Where Issued: Primary system only.Security: Super-user group member.SET MONITOR monitor-option
where monitor-option is:
352 RDF Commands Quick Reference

{CPUS primary-CPU : backup-CPU } {PRIORITY priority } {PROCESS process-name }
SET NETWORKThe SET NETWORK command sets RDF network configuration parameters within the RDFconfiguration memory table. The supplied values are not applied to the RDF configuration file,however, until you issue an ADD NETWORK command.Where Issued: Primary system only.Security: Super-user group member.SET NETWORK network-option
where network-option is: {PRIMARYSYSTEM primary-system } {BACKUPSYSTEM backup-system } {REMOTECONTROLSUBVOLUME subvolume } {PNETTXVOLUME $volume }
SET PURGERThe SET PURGER command sets the designated configuration parameters for the purger processto the supplied values within the RDF configuration memory table. The supplied values are notapplied to the RDF configuration file, however, until you issue an ADD command.Where Issued: Primary system only.Security: Super-user group member.SET PURGER purger-option
where purger-option is: {CPUS primary-CPU : backup-CPU} {PRIORITY priority } {PROCESS process-name } {PURGETIME mins } {RETAINCOUNT num }
SET RDFThe SET RDF command sets the designated RDF global configuration parameters to the suppliedvalues within the RDF configuration memory table. The supplied values are not applied to theRDF configuration file, however, until you issue an ADD command.Where Issued: Primary system only.Security: Super-user group member.SET RDF global-option
where global-option is: {LOGFILE $ems-collector-name } {UPDATERDELAY delay-time } {UPDATERTXTIME tx-time } {UPDATERRTDWARNING rtd-time } {UPDATEROPEN {PROTECTED | SHARED|PROTECTED OPEN} } {SOFTWARELOC $volume.subvolume } {NETWORK {ON | OFF} } {NETWORKMASTER {ON | OFF} } {UPDATEREXCEPTION {ON | OFF} } {LOCKSTEPVOL $volume } {REPLICATEPURGE {ON | OFF} } {REMOTE MIRROR {ON | OFF} } {REMOTE STANDBY {node-name} } {OWNER {owner-id} }
RDFCOM Commands Quick Reference 353

SET RDFNETThe SET RDFNET command sets the designated configuration parameters for the RDFNETprocess to the supplied values within the RDF configuration memory table. The supplied valuesare not applied to the RDF configuration file, however, until you issue an ADD command.Where Issued: Primary system only.Security: Super-user group member.SET RDFNET netsync-option
where netsync-option is: {CPUS primary-CPU : backup-CPU} {PRIORITY priority-number } {PROCESS process-name }
SET RECEIVERThe SET RECEIVER command sets the designated configuration parameters for the receiverprocess to the supplied values within the RDF configuration memory table. The supplied valuesare not applied to the RDF configuration file, however, until you issue an ADD command.Where Issued: Primary system only.Security: Super-user group member.SET RECEIVER receiver-option
where receiver-option is: {ATINDEX atindex } {CPUS primary-CPU : backup-CPU } {EXTENTS (primary-extent-size,secondary-extent-size)} {PRIORITY priority-number } {PROCESS process-name } {RDFVOLUME volume } {FASTUPDATEMODE on-off value }
SET TRIGGERThe SET TRIGGER command sets trigger parameters within the RDF configuration memorytable. The supplied values are not applied to the RDF configuration file, however, until you issuean ADD TRIGGER command. The trigger type (REVERSE or TAKEOVER) is specified in theADD TRIGGER command.Where Issued: Primary system; backup system when the primary is not available.Security: Super-user group member.SET TRIGGER trigger-option
where trigger-option is: {PROGRAM program-file } {INFILE infile } {OUTFILE outfile } {CPUS primary-CPU : backup-CPU } {PRIORITY priority } {WAIT | NOWAIT }
SET VOLUMEThe SET VOLUME command sets the designated configuration parameters for an updater processto the supplied values within the RDF configuration memory table. The supplied values are notapplied to the RDF configuration file, however, until you issue an ADD command.Where Issued: Primary system only.Security: Super-user group member.SET VOLUME volume-option
354 RDF Commands Quick Reference
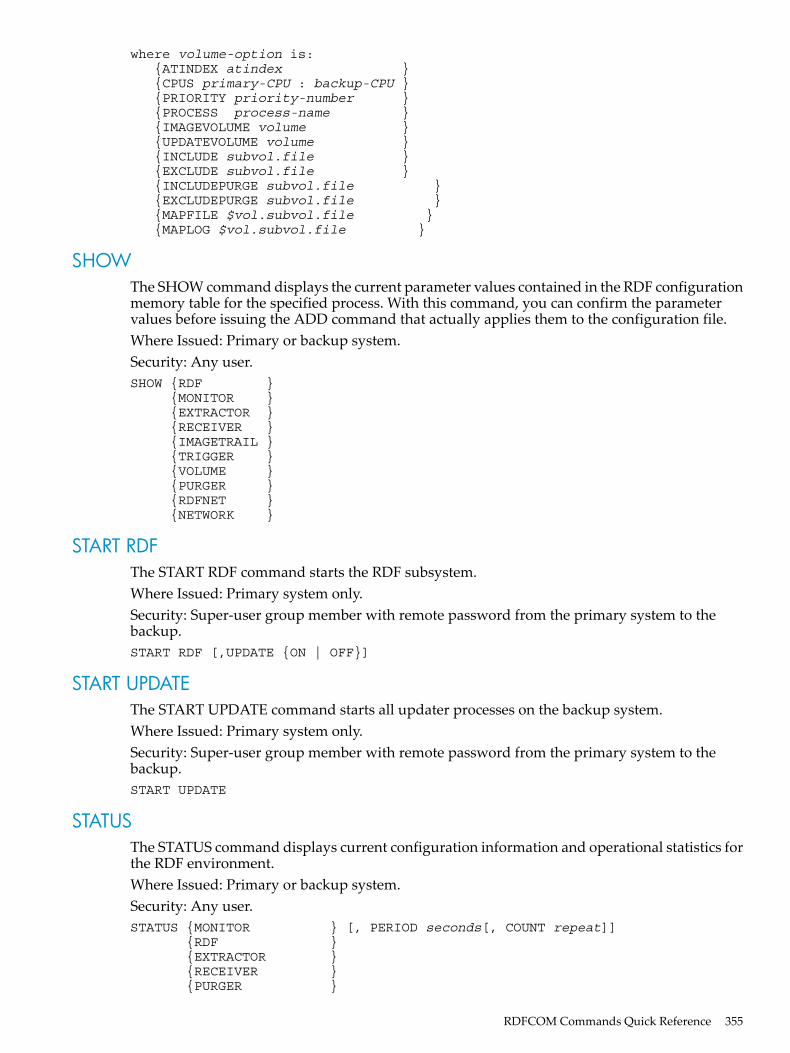
where volume-option is: {ATINDEX atindex } {CPUS primary-CPU : backup-CPU } {PRIORITY priority-number } {PROCESS process-name } {IMAGEVOLUME volume } {UPDATEVOLUME volume } {INCLUDE subvol.file } {EXCLUDE subvol.file } {INCLUDEPURGE subvol.file } {EXCLUDEPURGE subvol.file } {MAPFILE $vol.subvol.file } {MAPLOG $vol.subvol.file }
SHOWThe SHOW command displays the current parameter values contained in the RDF configurationmemory table for the specified process. With this command, you can confirm the parametervalues before issuing the ADD command that actually applies them to the configuration file.Where Issued: Primary or backup system.Security: Any user.SHOW {RDF } {MONITOR } {EXTRACTOR } {RECEIVER } {IMAGETRAIL } {TRIGGER } {VOLUME } {PURGER } {RDFNET } {NETWORK }
START RDFThe START RDF command starts the RDF subsystem.Where Issued: Primary system only.Security: Super-user group member with remote password from the primary system to thebackup.START RDF [,UPDATE {ON | OFF}]
START UPDATEThe START UPDATE command starts all updater processes on the backup system.Where Issued: Primary system only.Security: Super-user group member with remote password from the primary system to thebackup.START UPDATE
STATUSThe STATUS command displays current configuration information and operational statistics forthe RDF environment.Where Issued: Primary or backup system.Security: Any user.STATUS {MONITOR } [, PERIOD seconds[, COUNT repeat]] {RDF } {EXTRACTOR } {RECEIVER } {PURGER }
RDFCOM Commands Quick Reference 355

{PROCESS procname } {VOLUME } {RTDWARNING } {RDFNET }
STOP RDFThe STOP RDF command shuts down the RDF subsystem.Where Issued: Primary or backup system (can be issued on the backup system only when allcommunications lines to the primary system are down).Security: Super-user group member with remote password from the primary system to thebackup.STOP RDF { [, DRAIN ] } { [, REVERSE ] }
STOP SYNCHThe STOP SYNCH command is used as part of the online database synchronization protocol.See the descriptions of online database synchronization in Chapter 7 (page 167) for the properuse of this command.Where Issued: Primary system.Security: Any user.STOP SYNCH
STOP UPDATEThe STOP UPDATE command suspends updating of the backup database and stops all updaterprocesses.Where Issued: Primary system only.Security: Super-user group member with remote password from the primary system to thebackup.STOP UPDATE [, TIMESTAMP timestamp ]
TAKEOVERThe TAKEOVER command causes the backup database to become the database of record.Where Issued: Backup system only.Security: Super-user group member.TAKEOVER [!]
UNPINAUDITThe UNPINAUDIT command unpins TMF audit trail files on the primary system.Where Issued: Primary system only.Security: Super-user group member.UNPINAUDIT
VALIDATE CONFIGURATIONThe VALIDATE CONFIGURATION command validates the parameters in the RDF configurationfile.Where Issued: Primary system only.Security: Super-user group member.VALIDATE CONFIGURATION
356 RDF Commands Quick Reference

RDFSCAN Commands Quick ReferenceRDFSCAN runs under the Guardian user interface (normally the TACL command interpreter)to the NonStop operating system. The RDFSCAN command starts an RDFSCAN session thatlets you enter RDFSCAN commands interactively, noninteractively, or through a command file.Where issued: primary or backup system.Security: Any user.RDFSCAN [ file ]
ATThe AT command specifies the record in the RDF log file at which RDFSCAN begins the nextoperation.AT [record-number]
DISPLAYThe DISPLAY command enables or disables the display of line (record) numbers in subsequentRDFSCAN output.DISPLAY {ON | OFF}
EXITThe EXIT command ends your current RDFSCAN session.EXIT
FILEThe FILE command selects the RDF log file to which subsequent RDFSCAN commands apply.FILE [\system.][$volume.][subvolume.]file
HELPThe HELP command displays the syntax of RDFSCAN commands or introductory informationabout the RDFSCAN utility.HELP [ ALL ] [ INTRO ] [ command ]
LISTThe LIST command displays a specified number of log messages that contain the current matchpattern.LIST number
LOGThe LOG command selects a file to which subsequent LIST commands copy their output inaddition to the standard output device. When you issue the LOG command followed by a LISTcommand, RDFSCAN continues to display the LIST records on the standard device and alsocopies them to the file specified in the LOG command.LOG [\system.][$volume.][subvolume.]file
MATCHThe MATCH command specifies a pattern to search for in the log file. RDFSCAN searches forthe specified character string without regard for uppercase or lowercase.MATCH text
RDFSCAN Commands Quick Reference 357
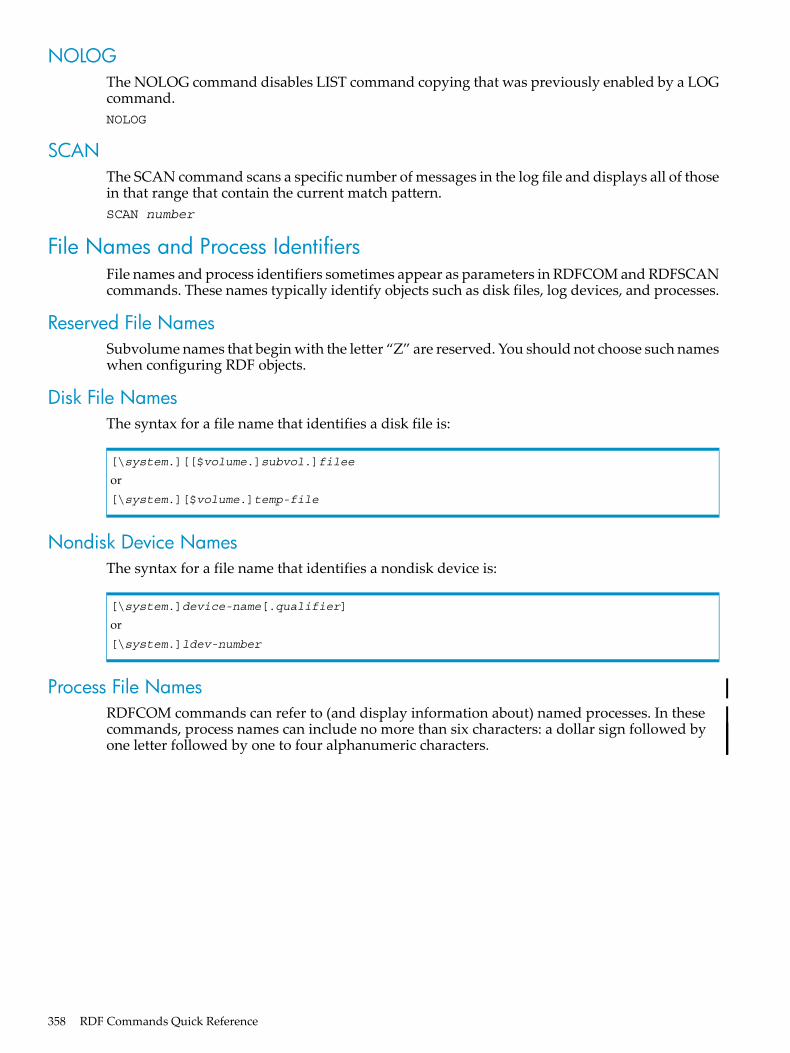
NOLOGThe NOLOG command disables LIST command copying that was previously enabled by a LOGcommand.NOLOG
SCANThe SCAN command scans a specific number of messages in the log file and displays all of thosein that range that contain the current match pattern.SCAN number
File Names and Process IdentifiersFile names and process identifiers sometimes appear as parameters in RDFCOM and RDFSCANcommands. These names typically identify objects such as disk files, log devices, and processes.
Reserved File NamesSubvolume names that begin with the letter “Z” are reserved. You should not choose such nameswhen configuring RDF objects.
Disk File NamesThe syntax for a file name that identifies a disk file is:
[\system.][[$volume.]subvol.]filee
or[\system.][$volume.]temp-file
Nondisk Device NamesThe syntax for a file name that identifies a nondisk device is:
[\system.]device-name[.qualifier]
or[\system.]ldev-number
Process File NamesRDFCOM commands can refer to (and display information about) named processes. In thesecommands, process names can include no more than six characters: a dollar sign followed byone letter followed by one to four alphanumeric characters.
358 RDF Commands Quick Reference

B Additional Reference InformationThis appendix provides additional reference information about:• “Default Configuration Parameters” (page 359)• “Sample Configuration File” (page 360)• “RDFSNOOP Utility” (page 362)• “RDF System Files” (page 362)• “RDF File Codes” (page 364)Process names are also reserved: $X* , $Y* , and $Z*.Certain keywords in the NonStop SQL/MP product are reserved words in SQL commands. Thosereserved words are listed in the SQL/MP Reference Manual.
Default Configuration ParametersThis table lists the default values and allowable ranges for RDF configuration parameters.
MAXMINDefault Value(s)Parameter
n.a.n.a.BACKUPSYSTEM valueused on INITIALIZE RDF
RDF BACKUPSYSTEM
n.a.n.a.$0RDF LOGFILE
n.a.n.a.offRDF NETWORK
n.a.n.a.noneRDF OWNER
n.a.n.a.offRDF REPLICATEPURGE
n.a.n.a.$SYSTEM.RDFRDF SOFTWARELOC
10110RDF UPDATERDELAY
n.a.n.a.PROTECTEDRDF UPDATEROPEN
3001060RDF UPDATERTXTIME
none060RDFUPDATERRTDWARNING
n.a.n.a.onRDF USEEXCEPTION
19910165RDFNET PRIORITY
1500:1MONITOR CPUS
19910165MONITOR PRIORITY
1500EXTRACTOR ATINDEX
1500:1EXTRACTOR CPUS
19910165EXTRACTOR PRIORITY
none060EXTRACTORRTDWARNING
1500RECEIVER ATINDEX
1500:1RECEIVER CPUS
6550010(100,100)RECEIVER EXTENTS
19910165RECEIVER PRIORITY
n.a.n.a.$SYSTEMRECEIVER RDFVOLUME
Default Configuration Parameters 359

MAXMINDefault Value(s)Parameter
n.a.n.a.offRECEIVERFASTUPDATEMODE
1500:1TRIGGER CPUS
19910150TRIGGER PRIORITY
n.a.n.a.WAITTRIGGER WAIT
n.a.n.a.WAITTRIGGER NOWAIT
1500:1PURGER CPUS
19910165PURGER PRIORITY
14403060PURGER PURGETIME
500022PURGER RETAINCOUNT
1500VOLUME ATINDEX
1500:1VOLUME CPUS
19910160VOLUME PRIORITY
n.a.n.a.$SYSTEMVOLUMEUPDATEVOLUME
n.a.n.a.RECEIVER RDFVOLUMEVOLUMEIMAGEVOLUME
n.a.n.a.noneVOLUME MAPFILE
n.a.n.a.noneVOLUME MAPLOG
Sample Configuration FileThe following is a sample OBEY command file for configuring the RDF subsystem for the firsttime.Comment lines begin with the | symbol and are ignored by RDFCOM.| ***| *** Remove all information from the current RDF configuration| *** file.| ***INITIALIZE RDF, BACKUPSYSTEM \LONDON, SUFFIX 1!| ***| *** Set the RDF Global Parameters| ***SET RDF SOFTWARELOC $SYSTEM.RDFSET RDF REPLICATEPURGE ONSET RDF NETWORK OFF
| ***| *** Set the monitor parameters.| ***SET EXTRACTOR CPUS 2:1SET EXTRACTOR PRIORITY 165SET EXTRACTOR PROCESS $EXT| ***| *** Add the extractor parameters to the| *** RDF configuration file.| ***ADD EXTRACTOR
| ***| *** Set the receiver parameters.| *** $REC is the name of the receiver process.| ***
360 Additional Reference Information

SET RECEIVER CPUS 1:2SET RECEIVER EXTENTS (1000,1000)SET RECEIVER PRIORITY 165SET RECEIVER RDFVOLUME $GOLDSET RECEIVER FASTUPDATEMODE ONSET RECEIVER PROCESS $MRECV| ***| *** Add the receiver parameters to the| *** RDF configuration file.| ***ADD RECEIVER| ***| *** Add secondary image trails.| ***ADD IMAGETRAIL $SECIT1ADD IMAGETRAIL $SECIT2| ***| *** Set the updater parameters for the first| *** volume to be protected by the RDF product.| *** $U01 is the name of this updater. Volume| *** $DB1 on the backup node corresponds to the| *** volume $DB01 on the primary node. This updater| *** will use the secondary image trail SECIT1.| ***SET VOLUME CPUS 2:1SET VOLUME PRIORITY 160SET VOLUME UPDATEVOLUME $DB1SET VOLUME IMAGEVOLUME $SECIT1SET VOLUME MAPFILE $DATA05.CONFIG.MAPFILESET VOLUME MAPLOG $DATA05.LOG.MAPLOGSET VOLUME INCLUDE RAGH*.TESTSET VOLUME INCLUDE RRANGA.RAJ*SET VOLUME EXCLUDE ARVI*.SHUK*SET VOLUME INCLUDEPURGE NITIN.C*SET VOLUME EXCLUDEPURGE SAHADEV.BN*SET VOLUME PROCESS $U01| ***| *** Add the RDF updater parameters for| *** the first updater process to the| *** configuration file.| ***ADD VOLUME $DB01| ***| *** Set the updater parameters for the second| *** volume to be protected by the RDF product.| *** $U02 is the name of this updater. Volume| *** $DB2 on the backup node corresponds to| *** the volume $DB02 on the primary node. This| *** updater will use the secondary image trail| *** SECIT2.| ***SET VOLUME CPUS 2:1SET VOLUME PRIORITY 160SET VOLUME UPDATEVOLUME $DB2SET VOLUME IMAGEVOLUME $SECIT2SET VOLUME PROCESS $U02| ***| *** Add the RDF updater parameters for| *** the second updater process to the| *** configuration file.| ***ADD VOLUME $DB02| ***| *** Set the updater parameters for the third| *** volume to be protected by the RDF product.| *** $U03 is the name of this updater. Volume
Sample Configuration File 361

| *** $DB3 on the backup node corresponds to| *** the volume $DB03 on the primary node.| *** Note that the IMAGEVOLUME parameter is omitted;| *** it defaults to $SECIT2 because it was not reset| *** after the previous ADD VOLUME command.| ***SET VOLUME CPUS 2:1SET VOLUME PRIORITY 160SET VOLUME UPDATEVOLUME $DB3SET VOLUME PROCESS $U03| ***| *** Add the RDF updater parameters for| *** the third updater process to the| *** configuration file.| ***ADD VOLUME $DB03
RDFSNOOP UtilityRDFSNOOP is a utility that is used to examine image file records pointed to by RDF exceptionfiles. RDFSNOOP does not have a set of commands, but it does prompt you for informationabout the exception files.To use RDFSNOOP, enter RDFSNOOP at the TACL prompt:> RDFSNOOP
RDFSNOOP prompts you for the RDF control subvolume name.Input control subvolume name:
Enter the subvolume name. Then RDFSNOOP prompts you for the volume name:Input volume name:
Enter the name of the volume for which you want to see exception records. If no exception recordswere written for that volume, RDFSNOOP displays this message:No exception records written for specified volume.
If the specified volume has exception records, RDFSNOOP displays the image records wherethe exceptions occurred. Here is an example of a formatted display of an RDF exception record:Input control subvolume name: PRIM1Input volume name: $TEST3
**** ACO^INSERT ****TRANSID: 000367 000004 000000 000002FILE: $TEST3 BWBJUNK JUNK TIME: JUN 12, 2004, 11:51:28.46OLD LEN: 0000 NEW LEN: 0547
**** OCTAL DUMP OF IMAGE DATA APPENDAGE ***
000006 041127 041112 052516 045440 045125 047113 020040 020040 000000 001417 024272 000000 001043 130001 000017 000000 000007 060542 061544 062546 063400 000114
**** ASCII DUMP OF IMAGE DATA APPENDAGE *** ..BWBJUNK.JUNK......................abcdefg..L
*** END OF EXCEPTION FILE FOR VOLUME $TEST3 ***
RDF System FilesThe following files are created by the RDF subsystem and used by RDF processes:• Configuration file
This is a key-sequenced file with record length 4062. The configuration file contains aninternal representation of the configuration parameters that are set through RDFCOM
362 Additional Reference Information

commands. The configuration file resides on both the primary and backup node; on bothnodes, the configuration file is named:$SYSTEM.control-subvolume.CONFIG
• Context fileThe context file is a key-sequenced file with record length 4062. The context file contains thecontext information that tells the RDF subsystem where the RDF processes stopped. Thereis a separate context file on the primary node and the backup node; on both nodes, thecontext file is named:$SYSTEM.control-subvolume.CONTEXT
• Exception filesException files are entry-sequenced files that contain transaction information for all auditdata that could not be applied during takeover processing. These files exist on the backupnode and use the naming convention:$SYSTEM.control-subvolume.volume
The RDF subsystem creates one exception file for each primary node volume that the RDFsubsystem is protecting.The name of the exception file is the primary volume name configured for the updater ofthat volume.You can use the RDFSNOOP utility to display the contents of exception files, as explainedpreviously in this appendix.
• RDF image filesRDF image files are unstructured files that contain logical audit record images andcommit-abort records. These image files exist on the backup node. The RDF image filesreside on $volume.control-subvolume, in which $volume is specified by the RDFVOLUMEparameter of the ADD RECEIVER command and ADD IMAGETRAIL command. The actualfile names are of the form AAnnnnnn.
• RDFLOCK fileThe RDFLOCK file is an unstructured, semaphore lock file that exists only to protectRDFCOM from performing multiple critical operations at the same time. A semaphore lockis the software mechanism that prevents other processes from executing certain functionsuntil the process that initiated the semaphore lock has finished its processing. For example,if you issue any one of these RDFCOM commands, RDFCOM tries to lock the RDFLOCKfile:COPYAUDITINITIALIZE RDFSTART RDFSTOP RDFSTART UPDATESTOP UPDATETAKEOVER
If the RDFLOCK file is not already locked, RDFCOM locks this file and executes the criticaltype of operation. If another RDFCOM user tries to execute a critical type of operation andRDFCOM finds the RDFLOCK file already locked, RDFCOM issues the message:Another RDFCOM is performing a CRITICAL operation.
• ZFILEINC fileThis is a key-sequenced file that stores information about transactions and files involved intransactions that aborted on the primary system, but TMF Backout could not undo the auditbecause the volumes were down. A record for each transaction and file is stored in theZFILEINC file. If a volume is re-enabled on the primary system and TMF Backout is able toundo the audit data it could not previously undo, then the corresponding records are removedfrom the ZFILEINC file.
RDF System Files 363

The ZFILEINC file resides on the backup node and is named$SYSTEM.control-subvolume.ZFILEINC.
• RDFTKOVR fileThis file records whether an RDF Takeover operation has completed successfully. This fileis empty under normal circumstances (eof = 0). If, however, you have executed an RDFTakeover operation and it completes successfully, then they key word "DONE" is writtenin the file by RDF. This file can be used for executing fast business takeover operations. See“How to Plan for the Fastest Movement of Business Operations to Your Backup SystemAfter Takeover” (page 144) for more details.The RDFTKOVR file resides on the backup node and is named$SYSTEM.control-subvolume.RDFTKOVR.
• ZRCVnn filesOne file is created for each auxiliary receiver in your RDF configuration, and the nn is thetwo-digit ATINDEX of the receiver. These files store information about SQL Shared AccessDDL operations involving files protected by RDF.The ZRCVnn files reside on the backup node and are named $SYSTEM.control-subvolume.ZRCVnn.
• UNDO List filesThese files contain the lists of transactions that need to be undone either during astop-update-to-time operation or takeover operation. They can be read with the READLISTutility, which creates a similarly named file in the MIT that can be read with RDFSCAN.The ZNETUNDO file only exists in RDF network environments.The undo list files resides on the backup node and are named:$master-image-trail-volume.control-subvolume. ZTXUNDO$master-image-trail-volume.control-subvolume.ZFILUNDO$master-image-trail-volume.control-subvolume.ZNETUNDO
• Network List filesThese files contain the lists of transactions that need to be evaluated for possible undo duringa takeover operation if you have configured an RDF Network.The Network list files resides on the backup node and are named:$master-image-trail-volume.control-subvolume. ZRDFLCMT$master-image-trail-volume.control-subvolume. ZRDFLCM2$master-image-trail-volume.control-subvolume. ZRDFLCM3$master-image-trail-volume.control-subvolume. ZRDFNMTX$master-image-trail-volume.control-subvolume. ZRDFNMT2$master-image-trail-volume.control-subvolume. ZRDFNMT3.
Each backup system of the RDF Network has its own ZRDFLCMT file. The other files areonly located in the MIT of the network master.
RDF File CodesRDF image trail file code = 720RDF configuration file code = 721RDF primary context file code = 722RDF remote context, ZFILEINC, and ZRCVnn file code = 723
364 Additional Reference Information
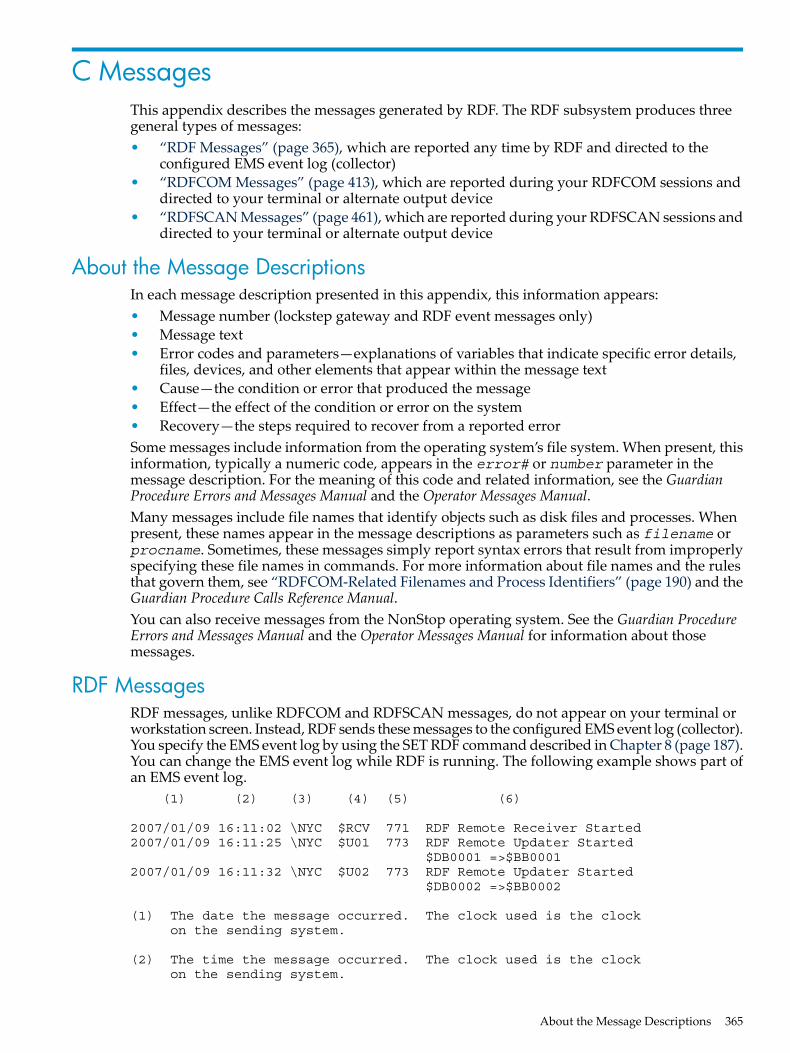
C MessagesThis appendix describes the messages generated by RDF. The RDF subsystem produces threegeneral types of messages:• “RDF Messages” (page 365), which are reported any time by RDF and directed to the
configured EMS event log (collector)• “RDFCOM Messages” (page 413), which are reported during your RDFCOM sessions and
directed to your terminal or alternate output device• “RDFSCAN Messages” (page 461), which are reported during your RDFSCAN sessions and
directed to your terminal or alternate output device
About the Message DescriptionsIn each message description presented in this appendix, this information appears:• Message number (lockstep gateway and RDF event messages only)• Message text• Error codes and parameters—explanations of variables that indicate specific error details,
files, devices, and other elements that appear within the message text• Cause—the condition or error that produced the message• Effect—the effect of the condition or error on the system• Recovery—the steps required to recover from a reported errorSome messages include information from the operating system’s file system. When present, thisinformation, typically a numeric code, appears in the error# or number parameter in themessage description. For the meaning of this code and related information, see the GuardianProcedure Errors and Messages Manual and the Operator Messages Manual.Many messages include file names that identify objects such as disk files and processes. Whenpresent, these names appear in the message descriptions as parameters such as filename orprocname. Sometimes, these messages simply report syntax errors that result from improperlyspecifying these file names in commands. For more information about file names and the rulesthat govern them, see “RDFCOM-Related Filenames and Process Identifiers” (page 190) and theGuardian Procedure Calls Reference Manual.You can also receive messages from the NonStop operating system. See the Guardian ProcedureErrors and Messages Manual and the Operator Messages Manual for information about thosemessages.
RDF MessagesRDF messages, unlike RDFCOM and RDFSCAN messages, do not appear on your terminal orworkstation screen. Instead, RDF sends these messages to the configured EMS event log (collector).You specify the EMS event log by using the SET RDF command described in Chapter 8 (page 187).You can change the EMS event log while RDF is running. The following example shows part ofan EMS event log. (1) (2) (3) (4) (5) (6)
2007/01/09 16:11:02 \NYC $RCV 771 RDF Remote Receiver Started2007/01/09 16:11:25 \NYC $U01 773 RDF Remote Updater Started $DB0001 =>$BB00012007/01/09 16:11:32 \NYC $U02 773 RDF Remote Updater Started $DB0002 =>$BB0002
(1) The date the message occurred. The clock used is the clock on the sending system.
(2) The time the message occurred. The clock used is the clock on the sending system.
About the Message Descriptions 365

(3) The name of the system on which the particular RDF process is running.
(4) The name or process ID of the RDF process that issued this message.
(5) The message number.
(6) The message text that explains the log entry.
If the EMS event log is $0 (the default collector), only items (3), (4), (5) and (6) are logged becauseof file-length restrictions.The pages that follow list all the RDF messages that RDF produces. The messages appear inascending order by message number.
700File-system error error on ANSI-object-type ANSI-name, Partitionpartition-id, file filename [, SNO sno , RBA rba]
erroris the file-system error number that identifies the specific error.
ANSI-object-typeis the ANSI object type (for example, table, index, and so on).
ANSI-nameis the ANSI name of the SQL/MX object that encountered the error.
partition-IDis the partition ID of the SQL/MX object that encountered the error.
filenameis the Guardian file name of the file that encountered the error.
snois the sequence number of the file that encountered the error.
rbais the relative byte address within the file where the error occurred.
Cause A file-system error occurred. The message includes both the file-system error numberand the name of the file or table that encountered the error.Effect Variable; depends on which file-system error occurred.Recovery ANSI-name or filename is the name of the object that encountered the error. SeeTable 5-1 (page 122) to determine the appropriate recovery actions.
701Error error communicating with processname
erroris the file-system error number that identifies the specific error.
processnameis the name of the affected process.
Cause The process that issued this message encountered the specified file-system error whileattempting to communicate with the specified process.Effect Variable; depends upon the process and the particular error, it might be retried or itmight cause RDF to abort.Recovery Correct the error reported in the message and if RDF aborted, restart RDF.
702Program version is inconsistent program expected-expectedreceived-received
366 Messages

programis the name of the program file that RDF tried to execute.
expectedis the expected version number of the program.
receivedis the actual version number of the program, as reflected by the program file.
Cause In response to a START RDF command, RDF attempted to execute the designatedprogram file ( program ). The program in that file, however, had a different version number( received ) than was expected ( expected ). You have installed the wrong version of RDF.Effect RDF stops.Recovery Install the correct version of RDF on all systems, and then start RDF.
703Still waiting on purger for undo pass
Cause The updater has sent a request for permission to read the undo list, but the purgerhas not yet given the updater permission.Effect The updater waits until the purger has completed building the undo list.Recovery This is an informational message. No recovery is required, unless the purger isreporting problems.
704Updaters stopped before stop-update-to-time has completed
Cause The purger has detected that all the updaters have stopped, but at least one updaterstopped prematurely and did not stop at the specified timestamp.Effect The updaters are stopped, but the backup database is not in a consistent statecorresponding to the stop update timestamp.Recovery Restart the updaters. If you still need to bring the backup database to a consistentstate, do the following. Wait for the updaters to catch up and then issue a new stop update totime command, specifying a new timestamp.
705File Open Error error on [ANSI-object-typeANSI-name, Partitionpartition-id,] file filename
erroris the file-system error number that identifies the specific error.
ANSI-object-typeis the ANSI object type (for example, table, index, and so on).
ANSI-nameis the ANSI name of the SQL/MX object that encountered the error.
partition-idis the partition ID of the SQL/MX object that encountered the error.
filenameis the Guardian file name of the file that encountered the error.
snois the sequence number of the file that encountered the error.
rbais the relative byte address within the file where the error occurred.
Cause A file-system error occurred while RDF was attempting to open a file, table, or process.The message includes both the file-system error number and the name of the file, table, orprocess that was to be opened.
RDF Messages 367

Effect If this message is issued by an updater process, see Table 5-2 in the RDF manual todetermine the appropriate recovery actions.The extractor retries OPEN calls for the audit trail files if the error is 11 (file missing), 12 (filein use), or 59 (file is bad). Those errors might occur while the audit trail file is being restoredto disk.The receiver retries OPEN calls for the image files if the error is 11 (file missing), 12 (file inuse), or 59 (file is bad). Those errors might occur while the image file is being restored to disk.Recovery If this message is issued by an updater process, see Table 5-2 (page 123) to determinethe appropriate recovery actions.
706RDF monitor shutdown complete
Cause The monitor process has stopped itself and all RDF processing as the result of anoperator-initiated stop or a catastrophic failure.Effect The monitor sends a stop message to all RDF processes, and they all successfully shutdown.Recovery If the operator issued a STOP TMF or STOP RDF command, this message is merelyinformational and no recovery is required.If this message is unexpected, check the RDF log to determine the cause of the failure.You can attempt to correct the underlying problem, and then restart RDF. If you do that,however, you should select a convenient time to stop TMF and verify that the primary andbackup databases are synchronized.You should also check the event log to determine whether the shutdown and startup proceededwithout error. If that is not the case, no recovery is possible.
707TMF is not yet started
Cause The extractor detected that TMF has not been started yet.Effect RDF cannot run if TMF is not also running. Normally RDFCOM will recognize thatTMF has not been started and will prevent RDF from starting. In the case of an RDF 707 event,TMF was running when RDFCOM verified that TMF was started, but TMF was then stoppedbefore the extractor was started. If the extractor detects that TMF is not started, it aborts itself,and the monitor aborts the receiver and itself.Recovery You must START TMF before attempting to START RDF.
708Internal error detected
Cause An internal error has been detected in RDFCOM.Effect RDFCOM aborts.Recovery This is an internal error. Contact your service provider.
709Logfile opened or altered filename
filenameis the name of the new EMS event log (collector).
Cause An RDF process has successfully changed the logfile to the specified EMS EventCollector.Effect Messages are now logged to the new collector.Recovery This is an informational message; no recovery is required.
368 Messages

710TMP is inaccessible
Cause An RDF process has tried to obtain audit trail information from the TMF managementprocess pair (TMP), but the TMP was not accessible. The probable cause is that TMF is notcurrently running. RDF requires that TMF be up and running on the primary and all backupnodes.Effect The RDF process abends.Recovery You must start the TMF product on the affected node.
711Failure to get process info - error error
erroris the file-system error number that identifies the specific error.
Cause The updater failed to obtain process information about itself. This is a fatal error.Effect The updater process abends.Recovery This is an internal error. Contact your service provider.
712Process creation error nnn nnn, file filename
nnn nnnare the upper and lower bytes, respectively, of the status code reported by theNEWPROCESS procedure.
filenameis the name of the program file that was to be executed.
Cause The monitor encountered an error while attempting to create an RDF process. Theerror fields reported in the message are the upper and lower bytes of the status returned bythe NEWPROCESS system procedure followed by the filename of the program that was to berun.Effect The process is not started, and RDF shuts down.Recovery See the description of the NEWPROCESS procedure in the Guardian ProcedureErrors and Messages Manual to determine the cause of the failure. Once the underlying causeis corrected, RDF can be restarted.
713Backup process creation error nnn nnn, file filename
nnn nnnare the upper and lower bytes, respectively, of the status code reported by theNEWPROCESS procedure.
filenameis the name of the program file that was to be executed.
Cause The primary process of an RDF NonStop process pair encountered an error whileattempting to create its backup process. The error fields reported in the message are the upperand lower bytes of the status returned by the NEWPROCESS system procedure followed bythe filename of the program that was to be run.This error will occur if one or more parameters in the configuration file are incorrect, if therequired processor is not running, or if there are insufficient resources.Effect The backup process is not started. The primary continues to run, but will be vulnerableto a CPU failure. The primary will try to create its backup repeatedly until it succeeds.
RDF Messages 369

Recovery See the description of the NEWPROCESS procedure in the Guardian ProcedureErrors and Messages Manual to determine the cause of the failure. Once the underlying causeis corrected, the backup process can be created.
714CHECKPOINT Failure - backup comm error error
erroris the file-system error number that identifies the specific error.
Cause A call to the checkpoint procedure failed, and the backup process of a NonStop processpair is still running. The message includes the number of the file-system error that wasencountered when the primary process was trying to communicate with the backup process.Effect The backup process is stopped, and a new one is created after about 15 seconds.Recovery See the description of the CHECKPOINT procedure in theGuardian Procedure CallsReferenceManual to determine the cause of the failure. If possible, correct the underlying causeto avoid its reoccurrence.
715Primary stopped
Cause The primary process of a NonStop process pair has stopped. This probably was theresult of an operator inadvertently issuing a STOP command from TACL.Effect The backup process takes over, but not in fault-tolerant mode, until the primary processcan be re-created.Recovery This is an informational message; no recovery is required.
716Primary abended
Cause The primary process of a NonStop process pair has abended.Effect The backup process takes over, but not in fault-tolerant mode, until the primary processcan be re-created.Recovery Scan the EMS event log to determine why the process abended. An INSPECTSAVEABEND file should have been created in the volume and subvolume where you placedthe RDF/IMP software; you should save that file for problem resolution by your serviceprovider.
717Primary processor down
Cause The primary CPU of a NonStop process pair has stopped.Effect The backup process takes over, but not in fault-tolerant mode. The primary processwill be re-created after its CPU is reloaded.Recovery Reload the downed processor.
718Switched to original primary processor
Cause The original backup process of a NonStop process pair has successfully created abackup process in the configured primary processor and has successfully switched processingto that process.Effect The NonStop process pair is switching primary and backup roles so that the primaryprocess is now running in the CPU configured as the primary processor.Recovery This is an informational message; no recovery is required.
370 Messages
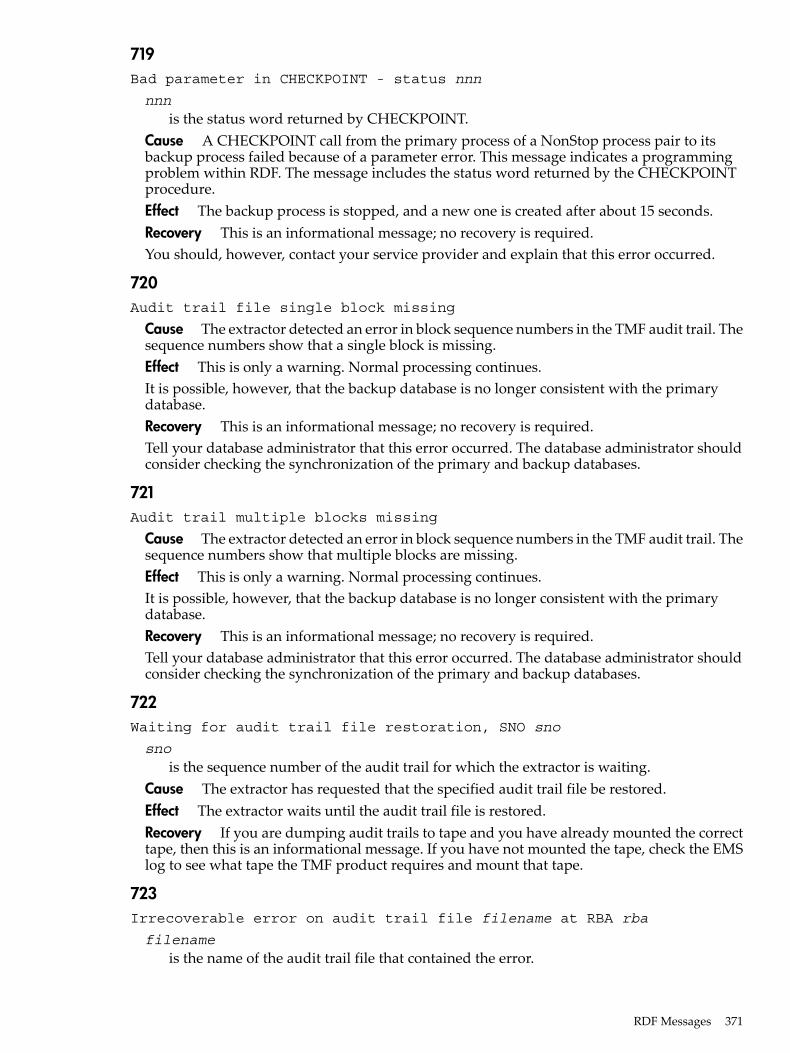
719Bad parameter in CHECKPOINT - status nnn
nnnis the status word returned by CHECKPOINT.
Cause A CHECKPOINT call from the primary process of a NonStop process pair to itsbackup process failed because of a parameter error. This message indicates a programmingproblem within RDF. The message includes the status word returned by the CHECKPOINTprocedure.Effect The backup process is stopped, and a new one is created after about 15 seconds.Recovery This is an informational message; no recovery is required.You should, however, contact your service provider and explain that this error occurred.
720Audit trail file single block missing
Cause The extractor detected an error in block sequence numbers in the TMF audit trail. Thesequence numbers show that a single block is missing.Effect This is only a warning. Normal processing continues.It is possible, however, that the backup database is no longer consistent with the primarydatabase.Recovery This is an informational message; no recovery is required.Tell your database administrator that this error occurred. The database administrator shouldconsider checking the synchronization of the primary and backup databases.
721Audit trail multiple blocks missing
Cause The extractor detected an error in block sequence numbers in the TMF audit trail. Thesequence numbers show that multiple blocks are missing.Effect This is only a warning. Normal processing continues.It is possible, however, that the backup database is no longer consistent with the primarydatabase.Recovery This is an informational message; no recovery is required.Tell your database administrator that this error occurred. The database administrator shouldconsider checking the synchronization of the primary and backup databases.
722Waiting for audit trail file restoration, SNO sno
snois the sequence number of the audit trail for which the extractor is waiting.
Cause The extractor has requested that the specified audit trail file be restored.Effect The extractor waits until the audit trail file is restored.Recovery If you are dumping audit trails to tape and you have already mounted the correcttape, then this is an informational message. If you have not mounted the tape, check the EMSlog to see what tape the TMF product requires and mount that tape.
723Irrecoverable error on audit trail file filename at RBA rba
filenameis the name of the audit trail file that contained the error.
RDF Messages 371

rbais the relative byte address where the error occurred in the audit trail file.
Cause The extractor encountered an irrecoverable error at the designated relative byteaddress (rba) in the designated TMF audit trail file. This message indicates an internal RDFor TMF error.Effect This is a catastrophic error; the extractor abends, and RDF stops.Recovery Because this message indicates a system error, you should preserve the indicatedaudit trail file for further analysis by your service provider.
724RDF TAKEOVER has completed successfully
Cause The purger has determined that all updaters have processed through to the end ofthe image trail and the RDF TAKEOVER operation has completed.Effect Normal purger shutdown processing continues. When the purger stops, the TAKEOVERoperation will be finished.Recovery This is an informational message; no recovery is required.
725RDF TAKEOVER has not completed
Cause One of two conditions caused this event.• UPDATE was OFF when the purger began the RDF TAKEOVER operation.• At least one updater process terminated prematurely, without processing through to the
end of the image trail. The premature updater shutdown might have resulted from adouble CPU failure or a STOP command entered manually from TACL. Because theupdater might not have processed all image audit, the RDF TAKEOVER operation cannotbe considered complete. Scan the EMS event log for RDF message 726: this messageidentifies the updater process that did not complete TAKEOVER processing.
Effect Normal purger shutdown processing continues.Recovery If UPDATE was OFF at the time of the RDF TAKEOVER, then a second RDFTAKEOVER operation is automatically started, and no recovery is required. Otherwise, youmust restart the takeover operation with the RDFCOM TAKEOVER command.
726Updater did not complete the TAKEOVER vol => vol
vol => volare the volume on the primary node that the updater is protecting and the correspondingvolume to which it is writing on the backup node.
Cause The RDF purger has determined that the updater process indicated in this messagedid not complete RDF TAKEOVER processing. That updater might have stopped prematurelybecause of a double CPU failure or a STOP command entered manually from TACL.Effect The updater responsible for the volume named in the message did not complete RDFTAKEOVER processing.Recovery When you have determined why the updater stopped prematurely and you havecorrected the problem, you must re-issue the RDFCOM TAKEOVER command.
727Audit-trail file missing SNO sno
snois the sequence number of the missing audit trail file.
Cause The specified file should exist on disk, but it does not.Effect The extractor abends.
372 Messages

Recovery This is an internal error. Contact your service provider.
728Backup Processor Down
Cause The CPU of the backup process of a NonStop process pair failed.Effect The primary process continues to run, but not in fault-tolerant mode.Recovery Reload the downed processor. The backup process is re-created when the processoris reloaded.
729Attempt to alter process priority failed priority
priorityis the priority requested for the process.
Cause An attempt to alter the priority of an RDF process to the indicated priority hasfailed.Effect The process continues to run at its current priority.Recovery This is an informational message; no recovery is required.Reissue the ALTER command.
730Process priority altered priority
priorityis the priority requested for the process.
Cause The operator successfully changed the priority of an RDF process to priority.Effect The process runs at the new priority.Recovery This is an informational message; no recovery is required.
731RDF monitor started
Cause The operator issued a START RDF command.Effect The RDF monitor process is running and starting up the other RDF processes.Recovery This is an informational message; no recovery is required.
732Unable to create exception file filename, error error
filenameis the name of the exception file that the updater was trying to create.
erroris the file-system error number that identifies the specific error.
Cause An updater process encountered an error while attempting to create an exceptionfile. The message includes the file-system error number and the name of the exception file thatthe updater was trying to create.Effect This is a catastrophic error; the updater abends, and RDF stops.Recovery Determine the cause of the error, correct the condition, and then restart RDF.
733Stopping update for SQL DDL operation on file filename.
filenameis the Guardian file name of the file that is affected by the DDL operation.
RDF Messages 373
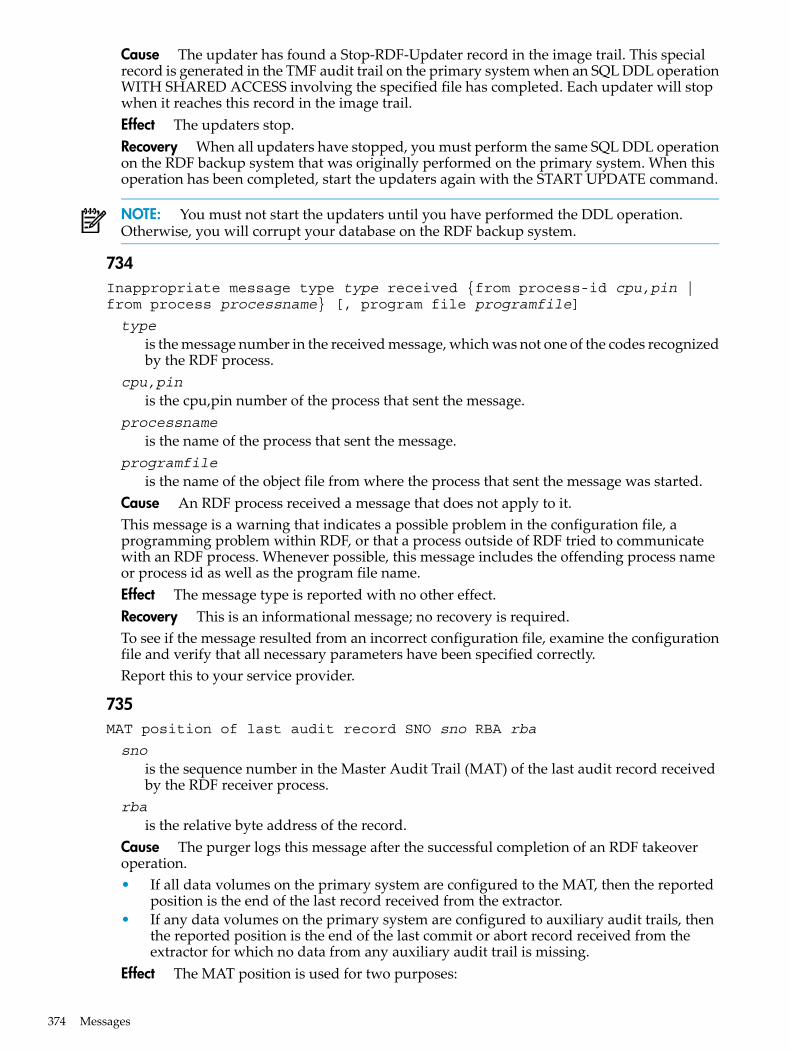
Cause The updater has found a Stop-RDF-Updater record in the image trail. This specialrecord is generated in the TMF audit trail on the primary system when an SQL DDL operationWITH SHARED ACCESS involving the specified file has completed. Each updater will stopwhen it reaches this record in the image trail.Effect The updaters stop.Recovery When all updaters have stopped, you must perform the same SQL DDL operationon the RDF backup system that was originally performed on the primary system. When thisoperation has been completed, start the updaters again with the START UPDATE command.
NOTE: You must not start the updaters until you have performed the DDL operation.Otherwise, you will corrupt your database on the RDF backup system.
734Inappropriate message type type received {from process-id cpu,pin |from process processname} [, program file programfile]
typeis the message number in the received message, which was not one of the codes recognizedby the RDF process.
cpu,pinis the cpu,pin number of the process that sent the message.
processnameis the name of the process that sent the message.
programfileis the name of the object file from where the process that sent the message was started.
Cause An RDF process received a message that does not apply to it.This message is a warning that indicates a possible problem in the configuration file, aprogramming problem within RDF, or that a process outside of RDF tried to communicatewith an RDF process. Whenever possible, this message includes the offending process nameor process id as well as the program file name.Effect The message type is reported with no other effect.Recovery This is an informational message; no recovery is required.To see if the message resulted from an incorrect configuration file, examine the configurationfile and verify that all necessary parameters have been specified correctly.Report this to your service provider.
735MAT position of last audit record SNO sno RBA rba
snois the sequence number in the Master Audit Trail (MAT) of the last audit record receivedby the RDF receiver process.
rbais the relative byte address of the record.
Cause The purger logs this message after the successful completion of an RDF takeoveroperation.• If all data volumes on the primary system are configured to the MAT, then the reported
position is the end of the last record received from the extractor.• If any data volumes on the primary system are configured to auxiliary audit trails, then
the reported position is the end of the last commit or abort record received from theextractor for which no data from any auxiliary audit trail is missing.
Effect The MAT position is used for two purposes:
374 Messages

• To compare MAT positions in preparation for the RDFCOM COPYAUDIT command ofthe triple contingency protocol
• To use for File Recovery to a MAT position on the primary systemRecovery This is an informational message; no recovery is required.
736[ANSI-object-type ANSI-name, Partition partition-id,] [File filename]missing on backup system
ANSI-object-typeis the ANSI object type (for example, table, index, and so on.).
ANSI-nameis the ANSI name of the SQL/MX object that encountered the error.
partition-idis the partition ID of the SQL/MX object that encountered the error.
filenameis the Guardian file name of the file that encountered the error.
Cause The updater could not obtain information about the specified ANSI table or Guardianfile. Before an updater can apply audit records to the underlying table or Guardian file, it mustobtain information about the object. The probable reason why information could not be obtainedis that the ANSI table or Guardian file has not yet been created on the backup system.Effect The updater delays for 30 seconds and then tries to obtain the information again.Recovery If the specified file is an Enscribe file, you must create the file on the backup system.You should always create SQL objects on the backup system first and then create them on theprimary system.
737RDF extractor establishing synch
Cause When the extractor is starting or restarting, it must send a request to the receiver toobtain its starting position in the TMF audit trail. The extractor issues event 737, indicatingthat the extractor is attempting to become synchronized with the receiver by requesting itsstarting position.Effect The extractor attempts to become synchronized with the receiver.Recovery This is an informational message; no recovery is required.
738RDF extractor synch established SNO sno RBA rba
snois the sequence number of the TMF Master Audit Trail (MAT) for which the synchronizationpoint was established.
rbais the relative byte address of the synchronization point.
Cause This message indicates that the receiver has sent the extractor a starting position inthe TMF audit trail, and that the extractor has thereby become synchronized with the receiver.Effect Extractor is synchronized with the receiver.Recovery This is an informational message; no recovery is required.
739File creation failed. Error error On filename
erroris the file-system error number that identifies the specific error.
RDF Messages 375

filenameis the name of the file that the updater tried to create.
Cause An updater was unable to create a file on its UPDATEVOLUME disk. The messageincludes both the file-system error number and the name of the file the updater attempted tocreate.Effect See Table 5-3 (page 123) to determine the effect of this error.Recovery See Table 5-3 (page 123) to determine the appropriate recovery actions.
740Create for unprotected RDF volume failed volume. Error error
volumeis the name of the volume that could not be found among those protected by RDF.
erroris the file-system error number that identifies the specific error.
Cause This warning message is issued when a create operation for the primary partition ofa partitioned file must map one or more of the file’s secondary partitions to a volume that doesnot match any of the volumes protected by RDF on the primary node. This message is alsoissued when the creation of a file with alternate keys is attempted and the correspondingalternate key file does not match any of the volumes protected by RDF on the primary node.Effect The create operation fails and is skipped.Recovery For partitioned files and files with alternate keys, if any partition or alternate keyfile is on a volume protected by RDF, then all partitions and alternate key files must be onvolumes protected by RDF.Either the file must be redefined on the primary node, or the other volume must be madeprotected by RDF. In the latter case, the backup file must then be resynchronized with theprimary file.
741RDF extractor message out of order
Cause The receiver has received a message from the extractor that is out of order. When thisevent occurs, the extractor automatically reestablishes synchronization with the receiver. Ifthe extractor has several outstanding requests to the receiver and the first is found to be outof order, the receiver rejects each subsequent request with this same error. When the extractorreestablishes synchronization, normal processing resumes.Effect The receiver directs the extractor to reestablish synchronization.Recovery This is an informational message; no recovery is required.
742RDF extractor internal audit read error. File filename RBA rba
filenameis the name of the audit trail file that contained the error.
rbais the relative byte address where the error occurred in the audit trail file.
Cause The extractor encountered an error in audit processing.Effect The extractor abends, thereby stopping the other RDF processes.Recovery Save the SAVEABEND file, the audit trail file, and contact your service provider.You must reinitialize RDF.
743Catastrophic error encountered
376 Messages

Cause A fatal error occurred in RDF.Effect RDF stops.Recovery Restart RDF and contact your service provider.
744FILEINFO obtained on [ANSI-object-type ANSI-name, Partitionpartition-id,] file filename
ANSI-object-typeis the ANSI object type (for example, table, index, and so on.).
ANSI-nameis the ANSI name of the SQL/MX object that encountered the error.
partition-idis the partition ID of the SQL/MX object that encountered the error.
filenameis the Guardian file name of the file that encountered the error.
Cause The updater was previously delayed in obtaining information about the specifiedobject. See RDF error 736. The information has now been obtained.Effect The updater continues processing.Recovery This is an informational message; no recovery is required.
745Audit record conversion error error
erroris the error number.
Cause The extractor encountered the specified error while attempting to convert an auditrecord from one version to another.Effect The extractor abends, thereby stopping the other RDF processes.Recovery This is an internal error. Contact your service provider.
746Error during program initialization
Cause A fatal error occurred during RDF subsystem initialization.Effect RDF stops. Error 743 should follow this message.Recovery Check the EMS event log for any preceding errors that might indicate the sourceof the problem. If it is possible to correct the underlying problem, then RDF can be restarted.
747Volume must be a TMF datavol volume
volumeis the name of the volume on the remote node that must be added to the TMF configurationas a data volume.
Cause Either TMF has not been started on the remote node, or the volume associated withthis updater on the remote node has not been added as a datavol in the TMF configuration.TMF must be started on the remote node, and the volume associated with this updater on theremote node must be added as a datavol to this remote TMF configuration.Effect The updater will not start.Recovery Start TMF on the remote system and add the associated volume as a datavol in theTMF configuration. Additionally, you should start the volume for transaction processing.
RDF Messages 377

748Internal error - RDF extractor abending
Cause The extractor has detected an audit record of an unknown version.Effect The extractor process abends.Recovery This is an internal error. Contact your service provider.
749Old audit record format encountered
Cause The extractor has detected an audit record generated by an unsupported version ofTMF.Effect The extractor abends.Recovery Reinitialize RDF. You might need to resynchronize the primary and backupdatabases.
750Failure to obtain TLE for SIGNALTIMEOUT
Cause All RDF processes rely upon the ability to post timers by calling SIGNALTIMEOUTand take action when those timers expire. This message indicates that a call toSIGNALTIMEOUT failed because there were insufficient time list elements (TLEs) available.Effect The process continues to run, but recovery is required.Recovery Issue a STOP RDF command immediately. Then investigate why there is a shortageof TLEs in the CPU of the RDF process that could not obtain one. If you want to start RDFagain while conducting this investigation, you should alter the RDF configuration of the processthat could not obtain the TLE, specifying a different set of CPUs.
751FILE_OPEN_CHKPT_ error error on filename
erroris the file-system error number that identifies the specific error.
filenameis the name of the file associated with the error.
Cause A call to the FILE_OPEN_CHKPT_ procedure failed, and the backup process of aprocess pair is still running. The message includes the file-system error number encounteredwhen the primary process attempted to communicate with the backup process and the nameof the file associated with the error.Effect The backup process is stopped, and a new one is created after about 15 seconds.Recovery See the description of the FILE_OPEN_CHKPT_ procedure in theGuardian ProcedureCalls Reference Manual to determine the cause of the failure. If possible, correct the underlyingcause to avoid its reoccurrence.
752Audit block RBN out of sequence. File filename RBN rbn RBA rba
filenameis the name of the audit trail file that contained the error.
rbnis the relative block number of the block where the error occurred in the audit trail file.
rbais the relative byte address where the error occurred in the audit trail file.
Cause The extractor detected that the relative block number (RBN) of a block of audit datain the TMF audit trail is out of sequence. This message indicates an internal RDF or TMF error.
378 Messages

The message includes the file name, relative block number, and relative byte address of theaudit file in question.Effect This is a catastrophic error; the extractor abends, and RDF stops.Recovery This message indicates an internal RDF or TMF error. You must resynchronize theprimary and backup databases. Save the audit trail file, and report this error to your serviceprovider.
753Audit trail file stutter. File filename RBN rbn RBA rba
filenameis the name of the audit trail file that contained the error.
rbnis the relative block number of the block where the error occurred in the audit trail file.
rbais the relative byte address where the error occurred in the audit trail file.
Cause The extractor detected a block of audit data that is repeated in the TMF audit trail.This message indicates an internal RDF or TMF error. The message includes the file name,relative block number, and relative byte address of the audit file in question.Effect The block is ignored and processing continues.It is possible, however, that the backup database is no longer consistent with the primarydatabase.Recovery Preserve the audit trail file, and report this error to your service provider.
754Network restored - continuing service
Cause The primary system processes have determined that the communications lines havebeen restored. The extractor is now able to communicate with the receiver.Effect Processing continues from the point at which the network failed.Recovery This is an informational message; no recovery is required.
755CHECKMONITOR failure - backup abended
Cause The primary process of a process pair stopped after creating its backup process, butbefore completing the backup initialization.Effect This is a catastrophic error; the process abends, and RDF stops.Recovery Restart the RDF product and report the error to your service provider.
756Format-2 audit filtered for filename
filenameis the name of a format-2 database file to which the encountered audit record applies.
Cause The extractor has encountered an audit record associated with the format-2 filefilename and the backup system is not format-2 aware.Effect The extractor skips the audit record and does not send it to the receiver.Recovery If you intend to replicate this file you must upgrade the backup node’s operatingsystem to one that supports format-2 files and resynchronize this file.
757Updaters stopped, stop-update-to-time operation complete
RDF Messages 379

Cause The purger has detected that all the updaters have shut down following a successfulstop-update-to-time operation.Effect The database is now in a consistent state.Recovery This is an informational message; no recovery is required.
758Process abending
Cause The indicated process is abending.Effect A SAVEABEND file is created, a stack trace is logged, and the process (and its backupprocess, if any) abends. RDF stops.Recovery Restart the RDF product and report the error to your service provider.
759Secondary partition on unknown node filename
filenameis the name of the affected file.
Cause An updater has encountered an audit record associated with either an Enscribe create,an increase of MAXEXTENTS for an Enscribe file, or a PURGEDATA operation for an Enscribefile, and the file on the primary system has secondary partitions that are located on differentsystems in the network.Effect The updater skips this record. If the record is associated with an Enscribe createoperation, the specific partition of the file is not created on the backup system. Therefore, ifthe updater subsequently encounters another audit record associated with that file, the updaterpauses its processing until that file is created.Alternatively, if the record was associated with a PURGEDATA or increase to MAXEXTENTS,the operation is not replicated on the backup system.Recovery If the record was associated with an Enscribe create, you must manually create thefile on the backup system. If the record was associated with a PURGEDATA or increase toMAXEXTENTS, you must issue the STOP UPDATE command and then perform the operationmanually on the backup system.
760Image trail file purged filename
filenameis the name of an image trail file.
Cause The purger has determined that the specified image file is no longer needed and haspurged it.Effect The specified file is purged.Recovery This is an informational message; no recovery is required.
761Backup stopped
Cause The backup process of a process pair has been stopped. This probably was the resultof an operator inadvertently issuing a STOP command from TACL.Effect A new backup will be created.Recovery This is an informational message; no recovery is required.
762Context file is old; must INITIALIZE RDF
Cause An RDF process has determined that the existing context file belongs to an olderversion of RDF.
380 Messages

Effect You cannot start the RDF subsystem.Recovery Purge all existing context and configuration files on the primary and backup system.Then initialize the RDF subsystem.
763Process incompatible with local system
Cause The process reporting the error has determined that it has been installed on the wrongoperating system.Effect The process abends.Recovery Install the version of the RDF product that is compatible with the installed releaseof the operating system.
764Internal error - inconsistent NSA stop, [ANSI-object-type ANSI-name,Partition partition-id,] file filename
ANSI-object-typeis the ANSI object type (for example, table, index, and so on.).
ANSI- nameis the ANSI name of the SQL/MX object that encountered the error.
partition-idis the partition ID of the SQL/MX object that encountered the error.
filenameis the Guardian file name of the file that encountered the error.
Cause The RDF monitor process detected an internal inconsistency regarding RDF’sunderstanding of an SQL shared access operation.Effect The monitor abends.Recovery This is an internal error. Contact your service provider.
765Invalid audit record encountered [, type record-type ]
Cause The updater process has sent an audit record to the disk process that is the wrongversion to the disk process that is in the wrong version. The record type is included in themessage if it is available.Effect The updater abends.Recovery This is an internal error. Contact your service provider.
766Phase one part 1 database synchronization complete
Cause The first part of phase one of a database synchronization operation has completed.Effect The extractor continues with processing the second part of phase one.Recovery This is an informational message; no recovery is required.
767Phase one part 2 database synchronization complete
Cause The second part of phase one of a database synchronization operation has completed.Effect The extractor continues with the third part of phase one.Recovery This is an informational message; no recovery is required.
RDF Messages 381
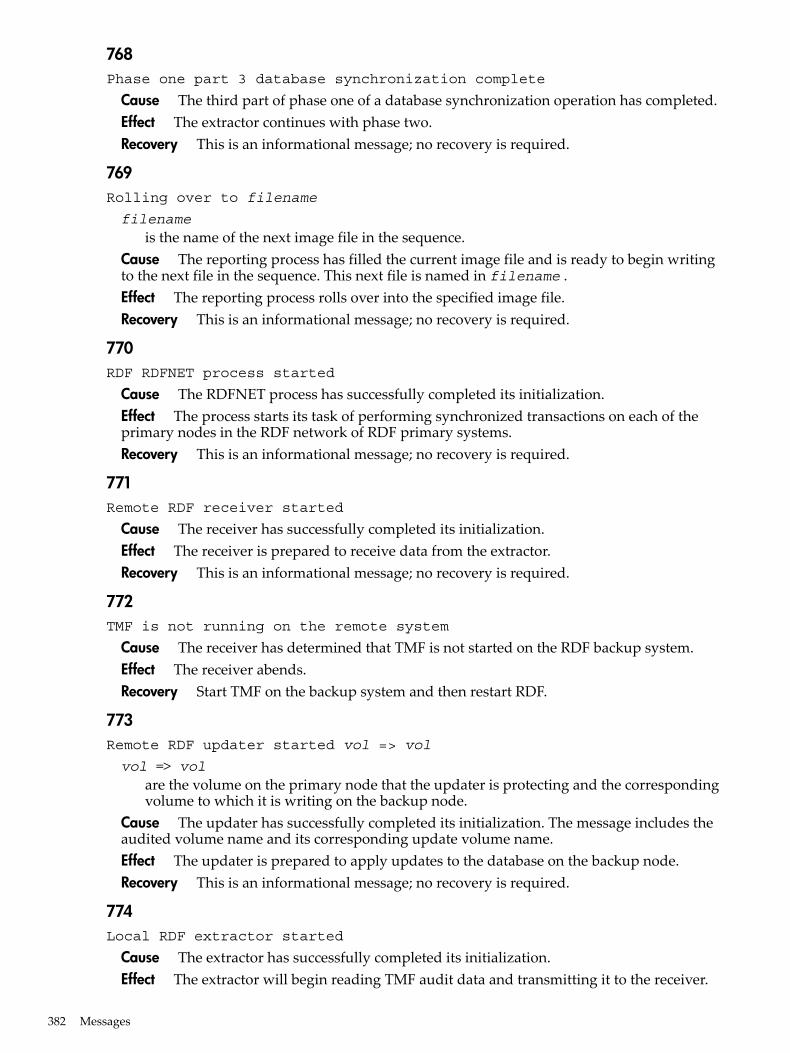
768Phase one part 3 database synchronization complete
Cause The third part of phase one of a database synchronization operation has completed.Effect The extractor continues with phase two.Recovery This is an informational message; no recovery is required.
769Rolling over to filename
filenameis the name of the next image file in the sequence.
Cause The reporting process has filled the current image file and is ready to begin writingto the next file in the sequence. This next file is named in filename .Effect The reporting process rolls over into the specified image file.Recovery This is an informational message; no recovery is required.
770RDF RDFNET process started
Cause The RDFNET process has successfully completed its initialization.Effect The process starts its task of performing synchronized transactions on each of theprimary nodes in the RDF network of RDF primary systems.Recovery This is an informational message; no recovery is required.
771Remote RDF receiver started
Cause The receiver has successfully completed its initialization.Effect The receiver is prepared to receive data from the extractor.Recovery This is an informational message; no recovery is required.
772TMF is not running on the remote system
Cause The receiver has determined that TMF is not started on the RDF backup system.Effect The receiver abends.Recovery Start TMF on the backup system and then restart RDF.
773Remote RDF updater started vol => vol
vol => volare the volume on the primary node that the updater is protecting and the correspondingvolume to which it is writing on the backup node.
Cause The updater has successfully completed its initialization. The message includes theaudited volume name and its corresponding update volume name.Effect The updater is prepared to apply updates to the database on the backup node.Recovery This is an informational message; no recovery is required.
774Local RDF extractor started
Cause The extractor has successfully completed its initialization.Effect The extractor will begin reading TMF audit data and transmitting it to the receiver.
382 Messages

Recovery This is an informational message; no recovery is required.
775Restart position adjusted for database synchronization
Cause The extractor has encountered a restart condition during an online databasesynchronization operation, and its current audit trail restart position sent by the receiver mightlead to loss of data.Effect The extractor revises its restart location to an earlier point in the audit trail, therebyguaranteeing that no data will be lost.Recovery This is an informational message; no recovery is required.
776Remote RDF receiver shutdown complete
Cause The receiver has terminated normal processing as the result of a STOP TMF, STOPRDF, or TAKEOVER command.Effect Normal RDF shutdown processing continues.Recovery This is an informational message; no recovery is required.
777Unexpected STOP SYNCH message received
Cause The extractor has received a STOP SYNCH message, but it is not involved in a databasesynchronization operation.Effect The extractor abends.Recovery This is an internal error. If no database synchronization operation was in progress,you must restart RDF. If a database synchronization operation was in progress, you mustrestart the entire operation from the beginning.
778Remote RDF updater shutdown complete
Cause The updater has terminated normal processing as the result of a STOP TMF, STOPRDF, STOP UPDATE, or TAKEOVER command.Effect Normal RDF shutdown processing continues. If this message is issued as the result ofa STOP UPDATE command, RDF will continue processing with updating disabled.Recovery This is an informational message; no recovery is required.
779Local RDF extractor shutdown complete
Cause The extractor has terminated normal processing as the result of a STOP TMF or STOPRDF command.Effect Normal RDF shutdown processing continues.Recovery This is an informational message; no recovery is required.
780Warning - Unapplied image record info in file filename
filenameis the name of the exception file.
Cause An updater is unable to apply image records for some transactions because aTAKEOVER command was executed and the commit, abort, or data records for the transactionswere not sent to the backup system. The message includes the name of the exception filecontaining information about the image records that were not applied.
RDF Messages 383

Effect If all the records for a transaction are not received on the backup node, the transactionis treated as if it aborted. For every image record that is not applied to the backup database,an exception record is written to the designated exception file.Recovery This is a normal occurrence during TAKEOVER processing. The system managercan use RDFSNOOP to list the image records that were not applied to the backup database.The backup database will be consistent after the TAKEOVER operation, but some transactionsthat might have committed on the primary system might not be applied to the backup database.
781RDF extractor transaction status table overflow
Cause The extractor’s transaction status table that is used for online database synchronizationoperations has overflowed. This has happened because more than 650,000 transactions werestarted during the first TMP control point interval following the RDFCOM STOP SYNCHcommand, and these transactions are still active.Effect The extractor abends.Recovery You must initialize RDF to a new database synchronization timestamp and thenrestart the entire operation from the beginning.
782Phase two database synchronization complete
Cause Phase two of the database synchronization involving the process generating thismessage has completed.Effect If the process is the extractor, then all operations performed by the extractor for thedatabase synchronization are complete, although the updaters might not have completed theirwork on the backup system.If the process is an updater, then the backup database is synchronized for the volume protectedby the particular updater.Recovery This is an informational message; no recovery is required.
783RDF receiver process is not running
Cause The monitor or extractor process could not open the remote receiver process after acommunications failure.Effect If the monitor or extractor process receives a file-system error 14 (process does notexist), RDF will shut down on the primary node.Recovery If RDF was stopped on the remote node by a STOP RDF command while thecommunications lines were down, simply restart RDF by issuing a START RDF command.
784Shutdown pending STOP UPDATE, TIMESTAMP timestamp
timestampis the specified timestamp.
Cause The process has received notice that an RDFCOM STOP UPDATE, TIMESTAMPcommand was executed.Effect Each updater applies only audit data associated with transactions that committedprior to the specified timestamp.Recovery This is an informational message; no recovery is required.
785Redo pass ending on reaching timestamp timestamp
384 Messages

timestampis the timestamp specified previously by an operator in an RDFCOM STOP UPDATE,TIMESTAMP timestamp command.
Cause A STOP UPDATE, TIMESTAMP timestamp command has been issued and theupdater has completed its redo pass.Effect The updater is ready to commence its undo pass.Recovery This is an informational message; no recovery is required.
786STOP SYNCH message received
Cause The extractor has received notification of the RDFCOM STOP SYNCH command.This event represents the start of part one of phase 1 of the extractor’s work in an onlinedatabase synchronization operation.Effect When the extractor encounters the next TMP control point record in the MAT, it entersphase one, part 1 processing.Recovery This is an informational message; no recovery is required.
787Image trail file position error error on filename. SNO sno RBA rba
erroris the error number that identifies the specific error.
filenameis the name of the image trail file that contained the error.
snois the sequence number where the error occurred.
rbais the relative byte address where the error occurred.
Cause The receiver or an updater has encountered the indicated error while attempting toposition into an image file.Effect The process abends.Recovery Correct the problem that caused the error and then restart RDF.
788ALLOCATESEGMENT failure. Returned status status
statusis a status code reflecting information about the error.
Cause An RDF process received an error from the ALLOCATESEGMENT system procedure.Effect This is a catastrophic error; the process abends, and RDF stops.Recovery See the description of the ALLOCATESEGMENT procedure in the GuardianProcedure Calls Reference Manual to determine the cause of the failure. Once the underlyingcause is corrected, you can restart RDF.
789CHECKALLOCATESEGMENT failed with error error
erroris the error number that identifies the specific error.
Cause The primary process of an RDF process pair received an error from theCHECKALLOCATESEGMENT system procedure.
RDF Messages 385

Effect This error is not fatal; processing continues. The backup process is stopped and thenre-created later.Recovery See the description of the CHECKALLOCATESEGMENT procedure in theGuardianProcedure Errors and Messages Manual to determine the cause of the failure. Some correctiveaction might be required for the backup process to be re-created without repeated failures.The most likely cause is insufficient space available for swapping on the swap volume.
790Backup process created in processor cpu
cpuis the CPU in which the backup process was created.
Cause The backup process of a process pair was created in the specified processor.Effect The primary process will now run in fault-tolerant mode.Recovery This is an informational message; no recovery is required.
796Image file creation error error on filename
erroris the file-system error number that identifies the specific error.
filenameis the name of the image file associated with the error.
Cause The receiver or purger process could not create the specified file due to the specifiedfile-system error.Effect This is a catastrophic error; the process abends and RDF stops.Recovery Correct the underlying condition, then restart RDF.
797Warning - Image file purge error error# on filename [File is currentlyopened by proc-id, program-filename]
erroris the file-system error number that identifies the specific error.
filenameis the name of the image file associated with the error.
proc-idis the process ID of the opener process.
program-filenameis the program filename of the opener process.
Cause The purger process could not purge an image file that is no longer needed. The messageincludes the file-system error number and the name of the image file. If the image file is in useby another process, its process name or process ID is reported together with the programfilename of the process that has the image file open.Effect This is only a warning.The process will retry the purge operation.Recovery Correct the underlying condition, and then the process will purge the image fileat the next opportunity.
386 Messages

NOTE: Under some circumstances, after the configured backup receiver process re-createsits primary process and switches to that process, it continues to hold an image file open. Whenthe receiver no longer needs this image file and the purger tries to purge it, the purger logsRDF error 797 accompanied by file-system error 12. If the backup receiver process is the opener,you can manually stop the backup receiver process with the TACL STOP command; this clearsthe problem so that the next time the receiver stops or finishes with an image file, this file willbe purged.
798Image trail file open error error on filename
erroris the file-system error number that identifies the specific error.
filenameis the name of the image file associated with the error.
Cause An RDF process encountered the specified file-system error while attempting to openthe specified file.Effect The process abends, and RDF stops. The exception to this is an error 12 (file in use)issued when either the receiver or purger attempts to open the file. In this case, the processposts a short delay and then retries the operation, and it repeats these two steps until successful.Recovery For an error 12 associated with an image file, perform a FUP LISTOPENS on thefile to determine which process currently has the designated file open. If the process that hasthe image file open is not an RDF process, then stop that process.In all other cases, restart RDF.
799Image trail file read error error on filename, RBA rba
erroris the file-system error number that identifies the specific error.
filenameis the name of the image file associated with the error.
rbais the relative byte address where the error occurred.
Cause An RDF process encountered an error while attempting to read an image file.Effect This is a catastrophic error; the process abends, and RDF stops.The message includes the error number returned by the READ system procedure, followedby the file name.Recovery Restart RDF. If the condition persists, you might have to reinitialize RDF.Preserve the designated image file and report the problem to your service provider.
800Image trail file write error error on filename
erroris the file-system error number that identifies the specific error.
filenameis the name of the image file associated with the error.
Cause The receiver process encountered a file-system error while attempting to write to thespecified file.Effect The message includes the error number returned by the WRITE system procedurefollowed by the file name.
RDF Messages 387

For error 43 (unable to obtain disk space for extent), the receiver retries the write operation.All other errors are fatal; the receiver abends, and RDF stops.Recovery The only recovery from an error 43 condition is to free some disk space. You cando that by purging unused files, by using FUP DEALLOCATE to deallocate unused extents(not for image files), or by using DCOM to move extents so that small free areas are combinedinto a larger free space.
801Internal error code
codeis an internal error code that provides further information about the error.
Cause An RDF process has detected an internal inconsistency.Effect This error should never occur and is fatal to RDF.Recovery Restart RDF. If the problem persists, then you will need to reinitialize RDF andreport the error to your service provider.
802Image trail file has bad RDF header record filename
filenameis the name of the image file associated with the error.
Cause An RDF process has encountered a bad header in an image file.Effect A bad header indicates that the image file has been corrupted.This is a catastrophic error; the process abends, and RDF stops.Recovery Restart RDF. If the problem persists, then you will need to reinitialize RDF andreport the error to your service provider.
803Position error error on filename
erroris the file-system error number that identifies the specific error.
filenameis the name of the affected file.
Cause The RDFNET process has encountered the specified error on the specified file.Effect The RDFNET process aborts its current transaction, posts a timer, and waits for thattimer to expire before attempting a new transaction.Recovery You should determine the cause of the error and take appropriate corrective action.
804READUPDATELOCK error error on filename
erroris the file-system error number that identifies the specific error.
filenameis the name of the file on which the error occurred.
Cause The RDFNET process has encountered the specified error on the specified file.Effect The RDFNET process aborts its current transaction, posts a timer, and waits for thattimer to expire before attempting a new transaction.Recovery You should determine the cause of the error and then take appropriate correctiveaction.
388 Messages

805WRITEUPDATE error error on file-name
erroris the file-system error number that identifies the specific error.
filenameis the name of the file on which the error occurred.
Cause The RDFNET process has encountered the specified error on the specified file.Effect The RDFNET process aborts its current transaction, posts a timer, and waits for thattimer to expire before attempting a new transaction.Recovery You should determine the cause of the error and then take appropriate correctiveaction.
806RDF RDFNET process Shutdown Complete
Cause The RDFNET process has terminated normal processing as the result of a STOP TMFor STOP RDF command.Effect Normal RDF shutdown processing continues.Recovery This is an informational message; no recovery is required.
807Update mode has been set ON
Cause The operator issued a START UPDATE command.Effect RDF starts updating the backup database.Recovery This is an informational message; no recovery is required.
808Update mode has been set OFF
Cause The operator issued a STOP UPDATE command.Effect RDF stops updating the backup database.Recovery This is an informational message; no recovery is required.
809Shutting down in response to STOP RDF
Cause The operator issued a STOP RDF command.Effect The RDF process stops normally.Recovery This is an informational message; no recovery is required.
810Shutting down in response to STOP TMF, timestamp timestamp
timestampis the time of the shutdown.
Cause The operator issued a TMFCOM STOP TMF command at the primary node.timestamp is the time of that shutdown.Effect The RDF process stops normally.Recovery This is an informational message; no recovery is required.
811RDF TAKEOVER initiated
RDF Messages 389

Cause The operator issued a TAKEOVER command.Effect RDF starts a TAKEOVER operation.Recovery This is an informational message; no recovery is required.
812Error error communicating with procname
erroris the file-system error number that identifies the specific error.
procnameis the name of the process with which the updater cannot communicate.
Cause The updater encountered a file-system error while attempting to communicate withthe receiver or purger. The file-system error number and the name of the receiver or purgerare included in the message.Effect This is a catastrophic error; the updater abends, and RDF will abort.Recovery Determine the cause of the error. If the receiver or purger did not abend, correctthe condition, and restart RDF.
813Concurrent file opens exceed capacity
Cause This message is reported by updater processes when the number of concurrent fileopens exceeds the capacity of the table in which the updater maintains information about fileopens.Effect The updater will close idle files (if any) and continue. If there are no idle files, thenthe updater will close all files and establish a restart point from which processing can continue.In the latter case, there will be a performance degradation.Recovery This is an informational message. If the condition persists, however, your databaseadministrator should consider moving some of the files protected by TMF on the primarynode volume to another volume, and adding another updater to back up the new volume. Ifyou do that, you must synchronize the affected volumes on the primary and backup nodes.
814Backup process takeover in processor cpu
cpuis the number of the processor in which the backup process is now running.
Cause The primary process has stopped for some reason, perhaps a cpu failure.Effect The backup process of the process pair has taken over.Recovery This is an informational message, although you should determine why the primaryprocess stopped and take corrective action if necessary.
815Primary process takeover in processor cpu
cpuis the number of the processor in which the primary process is now running.
Cause A new primary process has been created by the backup process, and the backupprocess has switched control to this primary process.Effect The primary process of the process pair has taken over.Recovery This is an informational message; no recovery is required.
816Image trail file SETMODE error error on filename
390 Messages

erroris a file-system error number.
filenameis the name of the image file associated with the error.
Cause The receiver or purger process has encountered an error while attempting to performa setmode operation on the specified file.Effect The process abends.Recovery Correct the problem that led to the error and restart RDF.
817Shutting down in response to STOP UPDATE
Cause The operator issued a STOP UPDATE command, and the updater is stopping normally.This message is issued only by updater processes.Effect The updater stops.Recovery This is an informational message; no recovery is required.
818SQL DDL operation aborting database synchronization
Cause While working on an online database synchronization operation, the extractor hasencountered an RDF-Stop-Updater audit record. This record indicates that an SQL DDLoperation with SHARED ACCESS altered the database on the primary system.Effect This SQL DDL operation has altered the primary database from what was beingduplicated to the backup system, thereby invalidating the online synchronization operation.The extractor abends.Recovery You must initialize RDF to a new database synchronization timestamp and thenrestart the entire operation from the beginning.
819RDF extractor stopped unexpectedly, extractor
extractoris the name of the extractor process that stopped.
Cause The extractor has stopped unexpectedly. The message includes the name of the stoppedprocess. The message might be expected during ZLT processing, depending on the timingconditions.Effect This message is issued by the RDF monitor. The monitor sends an abort request to allremaining RDF processes to stop RDF.Recovery A subsequent warm start of RDF might be possible, but the success of the restartdepends on the nature of the failure that caused the original process to stop. If the message isissued during ZLT processing, no recovery is required.
820RDF receiver stopped unexpectedly, receiver
receiveris the name of the receiver process that stopped.
Cause The receiver has stopped unexpectedly. The message includes the name of the stoppedprocess.Effect This message is issued by the RDF monitor. The monitor sends an abort request to allremaining RDF processes to stop RDF.Recovery A subsequent warm start of RDF might be possible, but the success of the restartdepends on the nature of the failure that caused the original process to stop.
RDF Messages 391

821RDF updater stopped unexpectedly, updater
updateris the name of the updater process that stopped.
Cause An updater has stopped unexpectedly. The message includes the name of the stoppedprocess.Effect This message is issued by the RDF monitor. The monitor sends an abort request to allremaining RDF processes to stop RDF.Recovery A subsequent warm start of RDF will probably be successful, but the success ofthe restart depends on the nature of the failure that caused the original updater process tostop.
822Shutting down in response to ABORT RDF
Cause An RDF process is being shut down by the RDF monitor following the prematureloss of another RDF process.Effect The process stops normally.Recovery Scan the EMS event log to determine the original cause of the failure. It might bepossible to restart RDF.
823Network transaction to be kept: %num num num num
%num num num numidentifies a network transaction.
Cause This network transaction was committed in the audit trail on the primary system afterthe first network transaction marked for undo. It can be kept because it committed prior tothe first network transaction marked for undo on a different node in the RDF network. Note,however, that this transaction could still be undone during final checking for businessconsistency across all backup nodes.Effect This is an internal event. There is no effect.Recovery This is an informational message; no recovery is required.
824Missing RDF extractor config record, ATINDEX audit-trail-index
Cause The RDF monitor was unable to find an extractor configuration record whenperforming a START RDF command. The ATINDEX value in the message indicates the audittrail index for the extractor.Effect The START operation fails and RDF shuts down.Recovery Use the SET and ADD commands to create an extractor configuration record andthen retry the START RDF command.
825Missing RDF receiver config record, ATINDEX audit-trail-index
Cause The RDF monitor was unable to find a receiver configuration record when executinga START RDF command. The ATINDEX value in the message indicates the audit trail indexfor the receiver.Effect The START operation fails and RDF shuts down.Recovery Use the SET and ADD commands to create a receiver configuration record andthen retry the START RDF command.
392 Messages

826Missing RDF updater CONFIG record
Cause The RDF monitor was unable to find an updater configuration record when performinga START RDF command.Effect The START operation fails and RDF shuts down.Recovery Use the SET and ADD commands to create one or more updater configurationrecords.
827RDF version incompatible with TMF
Cause The RDF process is not compatible with the audit format being generated by TMF.Effect RDF stops.Recovery Restart RDF under the correct version of the operating system and/or TMF.
828Killing backup process ...
Cause The primary process of a process pair has detected a problem in communicating withthe backup process. An earlier message will have indicated the communications problem.Effect Because of the severity of the problem, the primary process attempts to stop the backupprocess. If the backup process stops, the primary process then attempts to create a new backupprocess.Recovery This is an informational message; no recovery is required.
829An RDF takeover operation was initiated on the backup system
Cause This message indicates that the monitor detected an RDF takeover operation wasexecuted on the RDF backup system.Effect This is a catastrophic error and will cause the RDF processes on the primary systemto stop.Recovery You must reinitialize RDF and you might need to synchronize your databases.
830Warning - Network down when stopping process name
nameis the name of the RDF process that was not stopped.
Cause The RDF monitor is attempting to stop a process on the backup node but cannot doso because the communications lines are down.Effect If a STOP RDF command was being processed, the RDF monitor continues with theshutdown, and all processes on the primary system will stop. The backup processes will remainrunning.Recovery To stop the RDF processes on the backup system, you must run RDFCOM on thebackup system and issue a second STOP RDF command.Once all processes have stopped, RDF can be restarted when the network is restored.
831RDF fatal error information text
textis the stack trace.
Cause An RDF process is terminating abnormally.
RDF Messages 393

Effect The equivalent of an INSPECT TRACE is written and then the process will abend.Recovery This message gives your service provider information about the state of a processthat is terminating abnormally.You might be able to correct the underlying problem and restart RDF. Otherwise it might benecessary to reinitialize RDF.
832Open error error on filename
erroris the file-system error number that identifies the specific error.
filenameis the name of the affected file.
Cause The RDFNET process obtained the specified error in attempting to open the specifiedfile.Effect The RDFNET process restarts.Recovery You should determine the nature of the error and take corrective action.
833Filtered audit of unknown type, type
typespecifies the type of audit.
Cause The extractor encountered an audit record it did not recognize.Effect This is a fatal error; RDF shuts down.Recovery This message probably is the result of running on a primary system that has hadan audit trail created for a version of TMF that RDF does not support. The message could alsomean that the audit trail file was corrupted by some program other than TMF, or that anirrecoverable system error has occurred.In any event, you will have to reinitialize the TMF and RDF.Save the audit trail, and report this error to your service provider.
834Purge pass terminated prematurely. Reason: reason
reasonis a reason code.
Cause This message is issued by the purger if it has to terminate the current purge pass forone of a variety of reasons. The reason codes refer to the internal conditions that might be ofuse to support and development staff.Effect The purger terminates the current purge pass. A new purge pass will be initiated afterPURGETIME minutes.Recovery This is an informational event. Under normal conditions, it should be loggedinfrequently. If the event appears regularly and if the purger stops purging files, then it couldbe an indication of throughput problems between the extractor and receiver processes. If thismessage persists, the purger has stopped purging old image files, and the extractor has notfallen behind, please contact your service provider.
835RDFCOM csv command-text [ issued by userid ]
csvspecifies the RDF control subvolume of the affected RDF environment.
394 Messages

command-textis the text of the command that was issued.
useridif present, is the Guardian userid (group.user) of the user who issued the command.
Cause RDFCOM logs this message whenever you issue any of these commands: ALTER,INITIALIZE RDF, START RDF, START UPDATE, STOP RDF, STOP UPDATE, or TAKEOVER.command-text is the command text. If the event includes a userid, it indicates that the useridwas not the RDF OWNER or that the userid was not the owner of the RDFCOM object file.The userid included in the message is the Guardian userid of the user who issued theassociated command.Effect The specified RDFCOM command is executed.Recovery This is an informational message; no recovery is required.
836Volume is not enabled for transaction processing
Volumeis the name of the affected volume.
Cause TMF reports that the specified updatevolume is not enabled. This might be the resultof an earlier failure and the volume is still recovering, or the user has disabled the volume inTMFCOM.Effect The updater is unable to apply updates to this volume until the datavol is enabled.The updater retries the operation every minute until the volume is enabled.Recovery If the volume is recovering, the updater resumes processing once the volumebecomes enabled. If the datavol has been manually disabled, you must enable the datavol toallow the updater to resume operations.
837Info - Restarting at image trail file position SNO sno RBA rba
snois the sequence number of the image file in use at the updater restart.
rbais the relative byte address in the image file where the updater restart occurred.
Cause This informational message is logged by an updater when it begins a restart operation.The image file sequence number and the relative byte address within that image file areincluded in the message.Effect An updater restart is performed under a variety of circumstances, such as a failure inthe primary CPU of the updater, a failure in the primary CPU of the corresponding disk process,or various file errors. The reason for the updater restart can be determined from previousmessages. During an updater restart, file-system errors 10, 11, and 71 are not reported by theupdater because they probably represent database operations that have already been performed.Recovery Perform any corrective actions suggested by the preceding messages (actions suchas reloading the appropriate CPU, correcting the underlying file error condition).
838RDFNET process has terminated unexpectedly
Cause The RDFNET process has terminated unexpectedly.Effect This message is issued by the RDF monitor. The monitor sends an abort request to allremaining RDF processes to stop RDF.Recovery Determine the reason why the RDFNET process stopped, correct that problem,then restart RDF. If the problem persists, contact your service provider.
RDF Messages 395
839Error - Audit-trail file is missing. File filename
filenameis the name of the audit trail file that could not be found.
Cause The extractor was unable to find the designated audit trail file.Usually this occurs because TMF has purged the audit trail file while RDF was stopped. WhenRDF is running, RDF prevents TMF from purging audit trail files until the extractor has readthem, even if the extractor is running far behind TMF (the extractor has a large RTD value)and TMF has performed several rollovers. Use the STATUS RDF command to see the extractor’scurrent RTD value.Effect The extractor tries to open the audit trail file indefinitely unless an irrecoverable erroroccurs on the file.Recovery Restore the audit trail file from tape by using SNOOP RESTOREAUDIT.If copies of the audit trail have not been maintained, then you will have to reinitialize RDF,and resynchronize the primary and backup databases.
840Error - Process name is in use, procname
procnameis the name of the process that is in use.
Cause A user-specified process name is already in use when the monitor tries to start theindicated process.Effect The monitor shuts down RDF in an orderly manner.Recovery If you can stop the process and give it another name, you can then simply restartRDF; otherwise, you will have to alter the name of the RDF process so that the name does notconflict with other process names.
841Error - Unable to complete STOP UPDATE. Error error
erroris a file-system error number.
Cause The monitor was unable to send a shutdown message to an updater because of theindicated file-system error.Effect The monitor terminates the attempt to send STOP UPDATE messages to any otherupdaters. It then sends an ABORT RDF message to all the other RDF processes and waits forthem to stop.Recovery If any updaters have not shutdown after the monitor has sent ABORT RDFmessages, then you might have to terminate the surviving updaters manually using a TACLSTOP command.
842Error - START prevented by RDF TAKEOVER
Cause You issued a START RDF command, but the monitor detected that RDF has alreadyprocessed a TAKEOVER command.Effect The START RDF command fails.Recovery The backup database is consistent and ready for use as a backup contingencydatabase. Perform the rest of your installation-specific operations for switching to the backupnode (for example, reroute your communications and start your applications).If you performed the TAKEOVER operation inadvertently, you will need to issue an INITIALIZERDF command and resynchronize the databases.
396 Messages

843Incorrect version of audit received
Cause The receiver has received audit from the extractor that does not match the version ofaudit that the receiver expects.Effect The receiver abends.Recovery This is an internal error. Contact your service provider.
844Phase one database synchronization complete
Cause The updater that generated this message has completed phase one of the onlinesynchronization operation for its volume on the backup system.Effect The updater starts phase two of the online synchronization operation.Recovery This is an informational message; no recovery is required.
845Initialization synchronization completed
Cause The updater that generated this message has completed its synchronization work forRDF initialization to an initialization timestamp.Effect The updater resumes its normal processing.Recovery This is an informational message; no recovery is required.
846RDF TAKEOVER during database synchronization
Cause When the updater completed its RDF Takeover operation, it had not yet completedits role in an online database synchronization.Effect The database might not be in a consistent state.Recovery There is no recovery. If you lose your primary system during an online databasesynchronization, the backup database has not yet been synchronized, and its data thereforemight not be consistent.
847RDF TAKEOVER during initialization synchronization
Cause When the updater completed its RDF Takeover operation, it had not yet completedits role in an INITIALIZE RDF...INITTIME operation.Effect The database might not be in a consistent state.Recovery There is no recovery. If you lose your primary system while the updaters are tryingto catch up from an INITIALIZE RDF...INITTIME operation, the backup database has not yetbeen synchronized, and the data in it therefore might not be consistent.
848RDF extractor waiting for network reply
Cause The extractor has sent the maximum number of messages to the receiver and it hasnot received any replies for at least five minutes.Effect The extractor cannot proceed any further.Recovery This is not an RDF problem. You should investigate your Expand network andtake corrective action. If necessary, you can issue a STOP RDF command on both primary andbackup systems to stop the RDF processes in an orderly fashion.
849TMF Shutdown before phase one of database synchronization
RDF Messages 397
Cause TMF was stopped during an RDF online database synchronization operation, beforethe extractor had completed its phase one processing.Effect The extractor abends because the database synchronization operation can no longersucceed.Recovery You must reinitialize the RDF product and restart the online databasesynchronization operation.
850TMF Shutdown during phase one of database synchronization
Cause TMF was stopped during an RDF online database synchronization operation, afterthe extractor had completed its phase one, part 1 processing.Effect The extractor completes phases one and two of its database synchronization processingand then shuts down in response to the TMF shutdown audit record.Recovery This is an informational message; no recovery is required. When you restart theRDF product, ensure that the duplicate database tables and files have been moved to thebackup system before you start the updaters.
851Too many nodes in network transactions
Cause The RDF product cannot support an environment where transactions involving theRDF primary system have originated on more than 255 different nodes. The receiver hasencountered transactions that have originated on more than 255 nodes.Effect The receiver abends and the RDF system aborts.Recovery Recovery is not possible. Contact your service provider.
852STOP RDF, DRAIN completed. All updaters have stopped
Cause A STOP RDF, DRAIN command has completed successfully.Effect This RDF environment shuts down.Recovery This is an informational message; no recovery is required.
853Purger TST filled
Cause In determining what transactions need to be undone, the internal table of transactionshas become filled.Effect RDF aborts.Recovery Contact your service provider for assistance with recovering from this situation.
854ZTXUNDO file cannot be opened
Cause While attempting to write the list of transactions that need to be undone to theZTXUNDO file, that file could not be opened.Effect RDF aborts.Recovery If the operation involves an RDF takeover, take corrective action to enable the fileto be opened and then reissue the TAKEOVER command.If the operation involves a stop-update-to-time operation, take corrective action to enable thefile to be opened and then restart RDF. If you still want to bring the backup database into aconsistent state, you will need to issue a new STOP UPDATE, TIMESTAMP timestampcommand specifying a new timestamp.
398 Messages

855RDF transaction already aborted
Cause The named RDF process has encountered an error condition that requires that its lasttransaction be aborted, but the transaction has already been aborted.Effect The process restarts and continues processing.Recovery This is an informational message; no recovery is required.
856Commencing image trail purge pass
Cause The purger process is ready to start the task of determining what image files it canpurge.Effect The purger purges any image trail files that are no longer required by RDF.Recovery This is an informational message; no recovery is required.
857Error error on ENDTRANSACTION encountered
erroris an error number.
Cause The named RDF process has encountered an error when attempting to end its currenttransaction.Effect The process aborts the current transaction, restarts and continues processing.Recovery This is an informational message; no recovery is required.
858A safe File Recovery position does not exist
Cause A network takeover operation has completed, but, for this particular node in the RDFnetwork, there is no safe MAT position with which you can issue a File Recovery operationon your primary system should that node become available again.Effect There is no effect.Recovery This is an informational message; no recovery is required.
859Error error on BEGINTRANSACTION encountered
erroris an error number.
Cause The named RDF process has encountered the specified error when attempting tobegin a new transaction.Effect The process either restarts or abends, depending on the error.Recovery See the description of BEGINTRANSACTION errors in the TMF ApplicationProgrammer's Guide and take appropriate corrective action, if necessary.
860Fatal error error on BEGINTRANSACTION encountered
erroris an error number.
Cause The named RDF process has encountered the specified error when attempting tobegin a new transaction.Effect The process abends and RDF will abort.
RDF Messages 399
Recovery See the description of BEGINTRANSACTION errors in the TMF ApplicationProgrammer’s Guide and take appropriate corrective action.
861Extractor processname RTD (rtd) exceeds RTD warning threshold(threshold#)
processnameis an extractor process name.
rtdis an RTD value.
threshold#is an RTDWARNING warning threshold value.
Cause The extractor has fallen behind the configured RTDWARNING threshold specifiedin the RDF configuration.Effect The extractor continues normal processing.Recovery This is an informational message. You should, however, try to determine why theextractor has fallen behind and take corrective action if necessary.
862Updater processname RTD (rtd) exceeds RTD warning threshold (threshold#)
processnameis an updater process name.
rtdis an RTD value.
threshold#is an RTDWARNING warning threshold value.
Cause The specified updater has fallen behind the configured updater RTDWARNINGthreshold.Effect The updater continues normal processing.Recovery This is an informational message. You should, however, try to determine why theupdater has fallen behind and take corrective action, if necessary.
863Missing RDFNET CONFIG record
Cause The RDF monitor process was unable to find the RDFNET configuration record whenperforming a START RDF command.Effect The START RDF operation fails and RDF shuts down.Recovery Restart RDF. If the record is still missing, then you might have to reinitialize RDF.
864SQL Shared Access DDL record found during undo pass
Cause The updater has encountered audit associated with an SQL Shared Access DDLoperation during undo processing for a stop-update-to-time operation.Effect The updater terminates immediately, and the stop-update-to-time operation isunsuccessful. This situation happened because you had a transaction on your primary systemthat started before your SQL Shared Access DDL operation and was still active after it.Recovery Restart the updaters. If you need to bring the backup database into a stable state,you will have to issue a later time that is later than your previous time.
400 Messages

865Missing purger config record
Cause The purger configuration record is not in the RDF configuration file.Effect The reporting process abends and RDF will abort.Recovery Restart RDF. If the problem persists, contact your service provider.
866RDF purger stopped unexpectedly
Cause The purger process has terminated unexpectedly.Effect RDF aborts.Recovery Determine why the purger stopped, and then restart RDF. If the problem persists,contact your service provider.
867Remote RDF purger shutdown complete
Cause The purger process has stopped.Effect RDF continues to shut down.Recovery This is an informational message; no recovery is required.
868Commencing the undo pass
Cause The updater has terminated its redo pass and is now starting an undo pass to backout changes for audit data that has been applied and must now be undone. If the updater isinvolved in an RDF takeover operation, it must undo changes previously made that wereassociated with transactions on the primary system whose final outcome is unknown. If theupdater was involved in a stop-update-to-time operation, it must undo any changes previouslymade for transactions on the primary system that were not resolved when the shutdowntimestamp was reached.Effect The updater commences undo processing.Recovery This is an informational message; no recovery is required.
870No image files present on image trail
Cause The purger process could not find any image files on the image trail subvolume.Effect The purger process abends, causing RDF to shut down.Recovery This is an internal error. Report this to your service provider.
872Warning; Lockstep operation is denied
Cause An application has attempted an RDF lockstep operation but you have not configuredRDF for lockstep operations.Effect No lockstep operations can take place, and the lockstep gateway process abends.Recovery This is a warning. If you want lockstep operations, you must stop RDF and createa new RDF configuration with the RDF LOCKSTEPVOL attribute set.
873Remote RDF purger started
Cause The purger has started as the result of a START RDF command.Effect The purger commences normal processing.
RDF Messages 401

Recovery This is an informational message; no recovery is required.
874SEGMENT_ALLOCATE_ returned error error, error-detail#
erroris an error number.
error-detail#is the detailed error number.
Cause The specified error occurred while attempting to allocate an extended segment.Effect The affected process abends and RDF will abort.Recovery Try to determine why the segment could not be allocated. Take appropriatecorrective action and restart RDF.
875Incompatible file format filenameformatfileformat, audit auditformat
filenameis the filename.
fileformatspecifies the format of the file.
auditformatspecifies the format of the audit trail.
Cause The updater process has detected that the file format and the audit format do notagree. The event shows the file format and the audit format.Effect The process abends and RDF will abort.Recovery The file must be altered or recreated with the correct file format and then RDF canbe restarted.
876Imagetrail safe position: SNO sno RBA rba
snois the sequence number.
rbais the relative byte address.
Cause This is an imagetrail safe position.Effect This is an internal event. There is no effect.Recovery This is an informational message for historical purposes about a pending undopass. No recovery action is required.
877First network transaction to be undone: %num num num num
%num num num numidentifies a network transaction.
Cause This is the first transaction that requires network undo with respect to local processing.Note, however, that some transactions preceding it might also require undo for businessconsistency across all backup nodes. The transid is listed in internal format.Effect This is an internal event. There is no effect.Recovery This is an informational message for historical purposes about a network undopass. No recovery is required.
402 Messages

878Invalid image filename or filecode [ANSI-object-type ANSI-name, Partitionpartition-id,] file filename
ANSI-object-typeis the ANSI object type (for example, table, index, and so on.).
ANSI-nameis the ANSI name of the SQL/MX object that encountered the error.
partition-idis the partition ID of the SQL/MX object that encountered the error.
filenameis the Guardian filename of the file that encountered the error.
Cause The purger process has found a file or table in an image trail subvolume where thefilename either does not contain a valid file-sequence number, or the filecode is not 720.Effect The purger process will not process any more files in that particular subvolume. Theoperation will be attempted again after PURGETIME minutes.Recovery The file or table being reported was not created by RDF and is not part of the RDFenvironment. It must be manually purged or renamed out of the image subvolume before thepurger process can continue normal processing.
879Audit attribute not set for [ANSI-object-type ANSI-name, Partitionpartition-id,] file filename
ANSI-object-typeis the ANSI object type (for example, table, index, and so on.).
ANSI-nameis the ANSI name of the SQL/MX object that encountered the error.
partition-idis the partition ID of the SQL/MX object that encountered the error.
filenameis the Guardian filename of the file that encountered the error.
Cause The specified table or file on the backup system does not have its audit attribute set.Effect The updater waits until the audit attribute is turned on.Recovery Turn on the audit attribute for the specified table or file.
880Takeover issued during a stop-update-to-time operation
Cause A TAKEOVER command was issued while a stop-update-to-time operation was inprogress.Effect The process abends, and RDF will abort.Recovery You need to reissue the RDFCOM TAKEOVER command. This will ensure thatthe stop-update-to-time operation has been aborted and the RDF subsystem is prepared toexecute the takeover operation.
881Aborting current RDF process transaction
Cause The named RDF process has encountered a restart condition and must abort its currenttransaction.Effect The process aborts the transaction and restarts.
RDF Messages 403

Recovery This is an informational message. You must examine the event log to determinewhy the process is restarting and if any recovery action is required.
882RDF process transaction unilaterally aborted
Cause The named RDF process' current transaction has been aborted by TMF and the diskprocess.Effect The process restarts.Recovery This is an informational message. You must examine the event log to determinewhy the process is restarting and if any recovery action is required.
883Physical volumes in pool exceed the limit of 15
Cause The updater is configured to a virtual SMF disk that consists of more than 15 physicaldisks. This configuration is not supported by the RDF product.Effect The updater abends and the RDF subsystem shuts down.Recovery Reset your RDF configuration and/or your SMF configuration so that the updatersare either assigned to physical volumes, or your SMF virtual disks map to 15 or fewer physicalvolumes.
884The RDFNET process is restarting
Cause The RDFNET process encountered a condition that caused it to restart.Effect The process restarts and resumes normal processing.Recovery Examine the preceding events for this process to try to determine why the processis restarting. Take corrective action if necessary.
885Updater phase one takeover processing complete
Cause The updater has completed the local undo processing phase.Effect The updater is ready to commence the next phase of undo processing.Recovery This is an informational message; no recovery is required.
886Updater phase three takeover processing complete
Cause The updater has reached the end of network undo takeover processing for an RDFnetwork environment.Effect The updater is ready to complete takeover processing.Recovery This is an informational message; no recovery is required.
887Process trapped. Signal sig-num
sig-numis the signal number associated with the trap.
Cause The process reporting the event experienced an internal error and has trapped. Themessage indicates the signal number associated with the trap.Effect The process abends.Recovery This is an internal error. Preserve the saveabend file created and report the incidentto your service provider.
404 Messages

888MAT position for File Recovery: SNO num RBA num
Cause A successful takeover has completed. If you need to bring your primary databaseback into synchronization with your backup database, use TMF File Recovery on your primarysystem with the specified MAT position.Effect None.Recovery This is an informational message. See the TMF Manual for information about TMFFile Recovery to an audit trail position (TOMATPOSITION).
889Purger restarting on attempt to build network undo list
Cause The purger has been attempting to build the network undo list, but it has eitherencountered a network error or it has been waiting too long for information it needs.Effect The purger begins another attempt to build the list.Recovery This is an informational message. You should examine the event log to see if thepurger has reported a network error and take corrective action if required. If no errors havebeen reported, then the purger is waiting for another purger in the RDF network to completework. If this is the case, you have no recovery action. The local purger will retry until theremote purger has completed the required work.
890Purger attempting to build network undo list
Cause The purger is ready to try to build the network undo list. This event indicates thatthis is the purger's first attempt or it is about to retry the operation because of a previousfailure.Effect The purger starts an attempt to build the list.Recovery This is an informational message; no recovery is required.
891First network transaction to be undone: %identifier
identifieris the transaction identifier.
Cause This is the first transaction that requires network undo with respect to businessconsistency across all backup nodes. All transactions that committed after this transaction areundone on this node except those transactions that can be safely kept because they actuallycommitted before this transaction on one or more different primary nodes in the RDF network.The transaction identifier is listed in internal format.Effect This is an internal event. There is no effect.Recovery This is an informational message for historical purposes about a network undopass. No recovery action is required.
892Image file filename is missing
filenameis the name of the missing image file.
Cause An updater has attempted to roll over to the specified image file, but that file ismissing.Effect The updater retries until the file is restored (the event message is repeated every minuteuntil the file has been restored).Recovery Restore the missing file to the image trail.
RDF Messages 405

893Stop Update to Time Operation rejected
Cause You attempted to issue a new STOP UPDATE, TIMESTAMP command, but theexisting ZTXUNDO list from your last stop-update-to-time operation is still needed.Effect The command is aborted.Recovery Wait until all RDF updaters have been started and have caught up, then retry theoperation. If you get this event message again, stop the RDF product, then restart it. After RDFstarts you might issue another STOP UPDATE, TIMESTAMP command.
894SQL NSA operation detected at SNO sno RBA rba
snois the sequence number.
rbais the relative byte address.
Cause The auxiliary receiver has detected information about an SQL SHARED ACCESSDDL operation associated with the specified SNO and RBA in the Master Audit Trail (MAT)on your primary system.Effect The auxiliary receiver coordinates stopping its updaters at the correct location.Recovery This is an informational message. When all updaters on all trails have shut downfor the SQL NSA operation, you can execute the same DDL operation on your backup system.After having done this, you might restart your updaters.
895File incomplete record encountered during stop-update-to-time operation
Cause You have performed a stop-update-to-time operation, but not all the volumes on theRDF primary system are up and recovered.Effect The operation is aborted, and the RDF subsystem aborts.Recovery You can restart the RDF product immediately, but you cannot perform a newstop-update-to-time operation until you have enabled all RDF protected volumes on yourprimary system.
896Updater phase two takeover processing complete
Cause The updater has reached the end of file incomplete undo takeover processing for anRDF environment.Effect The updater is ready to complete takeover processing.Recovery This is an informational message; no recovery is required.
898SQL NSA operation detected in network undo operation
Cause An SQL SHARED ACCESS DDL operation was detected during the network undophase of the RDF takeover operation.Effect The updater abends, and the takeover operation aborts.Recovery Recovery might not be possible. Contact your service provider.
899Too many transactions for undo processing. Repeat the operation.
406 Messages

Cause The updater has detected more than the default maximum number of transactionsthat need to be undone. This exceeds the number of transactions that can currently be loadedinto memory.Effect The updater abends, and the takeover operation aborts.Recovery If this happens during a takeover operation, reissue the TAKEOVER command.When the updater restarts the table will automatically be resized to accommodate the requirednumber of transactions. If this happens in a stop-update-to-time operation, restart RDF andissue a new STOP UPDATE, TIMESTAMP command at a time when there are fewer transactionsactive.
900Extractor has finished ZLT processing
Cause The extractor has sent all remaining audit from the remote mirror(s) on the ZLTstandby system to the backup system.Effect The extractor shuts down.Recovery This is an informational message; no recovery is required.
901Extractor is started for ZLT processing
Cause The extractor is started on the ZLT standby system for ZLT processing.Effect The extractor reads and sends all remaining audit from the remote mirror(s) connectedto the ZLT standby system to the receiver on the backup system.Recovery This is an informational message; no recovery is required.
902The remote mirror for volume is missing
volumeis a volume name.
Cause The extractor has determined that the specified remote mirror is not connected to theZLT standby system or that an expected audit trail file is missing.Effect The extractor abends.Recovery Connect all required remote mirrors to the ZLT standby system and then re-issuethe RDF TAKEOVER command. If you have already connected all remote mirrors and youget this event, then you already have all audit needed for the takeover operation. To allow thetakeover operation to complete, disable the REMOTE MIRROR attribute in your RDFconfiguration with this RDFCOM command: ALTER RDF REMOTE MIRROR OFF. Thenre-issue the RDF TAKEOVER command.
903Receiver has finished ZLT processing
Cause All remaining audit from the ZLT standby system has been received and stored inthe image trails for this receiver.Effect If this message comes from the master receiver, then normal RDF TAKEOVERprocessing is ready to proceed. If it comes from an auxiliary receiver, then normal RDFTAKEOVER processing does not start until the master receiver has finished ZLT processing.Recovery This is an informational message; no recovery is required.
904Auxiliary receiver is catching up
Cause The master receiver has found a TMF shutdown record. The auxiliary receiver reportingthis event is working to catch up to the corresponding point.
RDF Messages 407
Effect The master receiver waits until all auxiliary receivers have caught up. The auxiliaryreceiver might continue to report this event as it continues to catch up.Recovery If the master receiver has been waiting for more than 30 seconds, you should checkthe status of all auxiliary extractors and receivers with the RDFCOM STATUS PROCESScommand. If you see this event when attempting to issue an RDF TAKEOVER operation, youshould manually stop all RDF processes on the backup system and then reissue the RDFCOMTAKEOVER command.
905SQL DDL operation must not be performed
Cause You have completed an SQL DDL operation WITH SHARED ACCESS for a file onyour primary system, but one or more updaters has terminated prematurely before havingprocessed all required audit.Effect It is not yet safe for you to execute this DDL operation on the backup system.Recovery Issue the RDFCOM START UPDATE command. You must not execute this DDLoperation on the backup database until the RDF 908 event has been logged.
906Process creation error nnn nnn, file filename
nnn nnnare the error number and error detail returned by the PROCESS_CREATE_ systemprocedure.
filenameis the name of the program file that was to be executed.
Cause The process encountered an error while attempting to create an RDF process. Theerror fields reported in the message are the error number and error detail returned by thePROCESS_CREATE_ system procedure followed by the filename of the program that was tobe run.Effect The process is not started, and RDF shuts down.Recovery See the description of the PROCESS_CREATE_ procedure in theGuardian ProcedureCalls Reference Manual to determine the cause of the failure. Once the underlying cause iscorrected, RDF can be restarted.
907Backup process creation error nnn nnn, file filename
nnn nnnare the error number and error detail returned by the PROCESS_CREATE_ systemprocedure.
filenameis the name of the program file that was to be executed.
Cause The primary process of an RDF NonStop process pair encountered an error whileattempting to create its backup process. The error fields reported in the message are the errornumber and error detail returned by the PROCESS_CREATE_ system procedure followed bythe filename of the program that was to be run.This error will occur if one or more parameters in the configuration file are incorrect, if therequired processor is not running, or if there are insufficient resources.Effect The backup process is not started. The primary continues to run, but will be vulnerableto a CPU failure. The primary will try to create its backup repeatedly until it succeeds.Recovery See the description of the PROCESS_CREATE_ procedure in theGuardian ProcedureCalls Reference Manual to determine the cause of the failure. Once the underlying cause iscorrected, the backup process can be created.
408 Messages

908A file is prepared for SQL DDL operation
Cause You have completed an SQL DDL operation WITH SHARED ACCESS for a file onyour primary system, and all updaters have processed the required audit. It is now safe foryou to execute the same DDL operation on the backup database. To obtain the name of thesource file involved in the operation on the primary system, look for the last RDF 733 event,which lists the name of the file.Effect You must execute the DDL operation on the backup database before you restart theupdaters.Recovery This is an informational message; no recovery is required.
909Trigger CPUs for trigger-type trigger are unavailable
trigger-typeis the trigger type, REVERSE or TAKEOVER.
Cause Neither the primary nor alternate CPUs for the configured trigger are available.Effect The trigger is started in an alternate CPU.Recovery This is an informational message; no recovery is required.
910Update stopped as a result of a STOP UPDATE command
Cause The purger logs this event whenever all updaters have stopped following a STOPUPDATE command.Effect The updater processes are stopped.Recovery This is an informational message; no recovery is required.
911Updaters stopped before STOP RDF, DRAIN has completed
Cause The purger has detected that all the updaters have stopped, but at least one updaterstopped prematurely and did not drain all audit.Effect The STOP RDF, DRAIN is not complete.Recovery Restart RDF and issue a new STOP RDF, DRAIN command.
912Starting trigger-type trigger using object-file
trigger-typeis the trigger type, REVERSE or TAKEOVER.
object-fileis the name of the Guardian object file to be executed.
Cause The purger is about to start the user-configured trigger process.Effect The trigger process is started.Recovery This is an informational message; no recovery is required.
914Trigger process completed. [ Completion Code: num ] [ Termination Text:text ] [ The process is abended. ]
numis the completion code.
RDF Messages 409

textis the termination text.
Cause The purger has seen that the user specified trigger process has stopped. The messagemight include completion code and/or termination text information that indicates why theprocess stopped. If the process abended that will also be indicated.Effect The trigger process is stopped.Recovery There is no set recovery procedure. See the Guardian Procedure Errors and MessagesManual for a description of completion codes.
915Drain operation complete but a primary volume is down
Cause A STOP RDF, DRAIN or STOP RDF, REVERSE command has completed but RDFhas detected that a volume on the primary node is down.Effect Any transactions that touched the affected volume that were active when the volumewent down are unresolved (on both the primary and backup systems). If this event is the resultof a STOP RDF, REVERSE, the REVERSE trigger is not executed.Recovery Repair and bring up the affected volume, restart RDF and repeat the operation.
916File create error err on filename
erris a Guardian error number.
filenameis the name of the file that could not be created.
Cause The process that reported this event could not create the specified file. The attemptto create the file returned the specified Guardian error.Effect The file is not created and the effect on RDF depends on which process reported theerror and on what it was attempting to do at the time.Recovery If possible, the user should attempt to correct the underlying problem or seekassistance from their service provider.
917Shared access DDL operation encountered while DRAIN or REVERSE is pending
Cause A STOP RDF, DRAIN (or REVERSE) operation is being processed and the RDFextractor encountered a shared access DDL operation in the TMF audit trail.Effect These two operations cannot be processed concurrently, which causes RDF to abort.Recovery Restart RDF and the shared access DDL operation will be processed as normal.Having completed the shared access DDL operation, a new STOP RDF, DRAIN (or REVERSE)command can be issued.
918STOP TMF record encountered while DRAIN or REVERSE is pending
Cause A STOP RDF, DRAIN (or REVERSE) operation is being processed and the RDFextractor encountered a STOP TMF record in the TMF audit trail.Effect These two operations cannot be processed concurrently, which causes RDF to abort.Recovery Restart RDF and the STOP TMF record will be processed as normal. Once RDFhas stopped as a result of the STOP TMF record, RDF can be restarted and a new STOP RDF,DRAIN (or REVERSE) command can be issued.
919Extractor will try again to process a critical audit record
410 Messages

Cause The extractor has encountered a critical audit record that pertains to either a STOPTMF operation or a NonStop SQL/MP or NonStop SQL/MX DDL operation WITH SHAREDACCESS, and the Monitor was unable to communicate information about the operation toanother RDF process. See the most recent RDF Event 701 for details.Effect The extractor delays for a short period of time and then tries to process this auditrecord again.Recovery See the most recent RDF event 701 and take corrective action. When you havecorrected that problem, the extractor can proceed with processing this critical audit record.
920[Exception Reason: exception-cause ]
[ An unknown exception occurred, type type ]
exception-causeis the cause for the exception.
typeis the unknown exception type.
Cause The specified process has encountered a critical exception and has trapped. If possible,the event will have a text description of the reason for the exception. If not, the numeric typeof the exception is indicated.Effect The process abends, and RDF will abort.Recovery Take corrective action to alleviate the cause of the exception, if possible, and restartRDF. If the cause of the exception is not immediately obvious, contact your service provider.
921The updater's MAPFILE filename is not an edit file.
Cause The updater has detected that the mapfile is not an edit file.Effect The updater stops and RDF aborts.Recovery Provide an edit file, then restart RDF.
922Mapping string mapping-string is invalid [ at position index ] in theMAPFILE filename. Cause cause
mapping-stringidentifies the invalid mapping string.
indexis the string index at which the mapping string is invalid.
filenameis the name of the updater mapfile specified in the updater configuration.
causeidentifies the reason for the mapping string to be invalid.
Cause The updater has detected that the specified mapping string is invalid. The position,if included in the event, indicates the string index at which the mapping string is invalid. Theevent also includes a description of the reason for the string to be invalid.Effect The updater stops and RDF aborts.Recovery Correct the mapping string in the mapfile, and restart RDF.
926The MAPFILE filename is not found
filenameis the name of the updater mapfile specified in the updater configuration.
RDF Messages 411

Cause The updater has detected that the specified mapfile is not found.Effect The updater stops and RDF aborts.Recovery Provide an existing mapfile, and restart RDF.
927Filenames filename1 and filename2 collide on the same physical filenamefilename3 on the backup system
filename1is the name of one colliding file on the primary system.
filename2is the name of another colliding file on the backup system.
filename3is the name of a physical file on the backup system on which the two files are colliding.
Cause The updater has detected that a name collision has occurred on the specified filenamesdue to subvolume name mapping. Either two subvolumes on the primary system are mappedto the same subvolume on the backup system, or the primary system subvolume name of onemapping string matches with the backup subvolume name of another mapping string.Effect The updater abends and RDF aborts.Recovery Correct the mapping string in the mapfile, and restart RDF.
928$ character detected in the mapping string mapping-string at positionindex in the MAPFILE filename
mapping-stringidentifies the invalid mapping string.
indexis the string index at which the $ character is detected.
filenameis the name of the updater mapfile specified in the updater configuration.
Cause The updater has detected the $ character in the specified mapping string. The volumename is not allowed in the mapping string. The position indicates the string index at whichthe $ character is found.Effect The updater stops and RDF aborts.Recovery Correct the mapping string in the mapfile, and restart RDF.
929The updater's MAPLOG filename is not an edit file
filenameis the name of the updater maplog specified in the updater configuration.
Cause The updater has detected that the maplog is not an edit file.Effect The updater stops and RDF will abort.Recovery Provide an edit file, and restart RDF.
931Stopping update for an SQL DDL operation on <ANSI-Name>.
<ANSI-Name>is the identity of the target name of the affected SQL object on the backup system.
Cause The updater has found a Stop-RDF-Updater record in the image trail. This specialrecord is generated in the TMF audit trail on the primary system when an SQL DDL operation
412 Messages

WITH SHARED ACCESS involving the specified table or index has completed. Each updaterstops when it reaches this record in the audit trail.Effect All the updaters stop.Recovery When all updaters have stopped, you must perform the same SQL DDL operationon the RDF backup node that was originally done on the primary node. When this operationhas been performed, start the updaters using the START UPDATE command. If STARTUPDATE command is issued before performing the operation, it will corrupt the database onthe RDF backup system.
CAUTION: You must not start the updaters until you have performed the DDL operation onyour backup. Otherwise, you will corrupt your database on the RDF backup system.
RDFCOM MessagesThe following pages list all messages generated by RDFCOM. These messages appear on yourterminal screen during an RDFCOM session. Alternatively, they can be directed to another outputdevice or file through the OUT command, issued during an RDFCOM session or the OUTparameter entered in the RDFCOM command that begins the session. The messages appear inalphabetic order by message text.
$ character detected in the mapping string mapping-string in the MAPFILEfilename
mapping-stringis the erroneous mapping string specified in the mapfile.
filenameis the name of the updater mapfile specified in the updater configuration.
Cause RDFCOM detected a $ character in the mapping string specified in the updater mapfilewhen an ADD VOLUME, ALTER VOLUME, START RDF, START UPDATE, or VALIDATECONFIGURATION command was being executed.Effect The command fails.Recovery Correct the mapping string by removing the $ character, then reenter the command.
Allocation error error# on IMAGETRAIL volume-name
error#is the file-system error number that identifies the specific error.
volume-nameis the image trail volume on which insufficient storage exists.
Cause During execution of a START RDF command or a VALIDATE CONFIGURATIONcommand, RDFCOM determined that sufficient disk storage for image files did not exist ineach secondary image trail for at least one additional image file. As one of its validation checksduring processing of these commands, RDFCOM tries to create a temporary image file on theIMAGETRAIL volume and then attempts to allocate all extents for it. This allocation failed forthe reason indicated by the file-system number error#.Effect The command fails.Recovery See the Guardian Procedure Errors and Messages Manual for a description of andrecovery actions for the file-system error. Correct the error indicated by error#. This mightnecessitate altering the IMAGETRAIL configuration parameter to specify a new volume forthe secondary image trail. Then, reenter the START RDF or VALIDATE command.
ALTER Failed: error#
error#is the file-system error number that identifies the specific error.
Cause An ALTER command failed.
RDFCOM Messages 413
Effect The ALTER operation was not completed.Recovery See the OperatorMessagesManual for a description of the error code. For additionaldetails about understanding and correcting file-system errors, see theGuardian Procedure Errorsand Messages Manual. If possible, correct the error and reenter the command that encounteredthe error. Otherwise, see your system manager.
ALTER of this element cannot be performed with RDF up
Cause An ALTER command was issued for a non-runtime ALTER option.Effect The command fails.Recovery Either shut down RDF and reenter the ALTER command, or select another commandto enter.
ALTER of this element cannot be performed with updaters running
Cause An ALTER command was issued for a non-runtime ALTER option.Effect The command fails.Recovery Stop updating by entering the STOP UPDATE command through RDFCOM, andthen reenter the ALTER command.
ALTER RECEIVER RDFVOLUME is no longer supported
Cause RDFCOM no longer supports this command.Effect The command fails.Recovery Select another command.
Ambiguous timestamp for operation
Cause RDFCOM could not resolve an ambiguous timestamp after a change to Local CivilTime (LCT) when the LCT was changed relative to Greenwich Mean Time (GMT). In thissituation, two LCTs map to the same GMT and it is impossible to determine the correct intendedtime.This problem typically occurs in Autumn, when the clock is set back from Daylight SavingsTime. If you specify an RDF initialization timestamp between 1:00AM and 2:00AM on thatday, the intended time is ambiguous. Did you mean before the clock was turned back or after?To eliminate this ambiguity, a specified RDF initialization timestamp in this one-hour intervalis reported as an error.Effect Initialization is aborted.Recovery Reinitialize RDF specifying a timestamp that is earlier than the ambiguous time.
A partial RDF TAKEOVER has completed
Cause You issued a STATUS RDF command after a TAKEOVER command has completed,but one or more updater processes had terminated prematurely and was therefore unable toprocess all applicable image audit data.Effect The primary and backup databases are inconsistent.Recovery To determine which updaters terminated prematurely, examine the EMS eventlog for error number 726. Then, reissue the TAKEOVER command.
A required attribute for network master is missing
Cause You must specify the PrimarySystem, BackupSystem, RemoteControlSubvolume,and PnetTxVolume attributes for each Network record in the configuration of your networkmaster, but you are missing one or more or more of these network attributes.Effect The configuration command fails.Recovery Set the missing fields and add the record.
A required attribute for a non network master is missing
414 Messages

Cause You must specify the PrimarySystem, BackupSystem, and RemoteControlSubvolumefor the network master of your RDF network.Effect The configuration command fails.Recovery Set the missing fields and add the record.
A TAKEOVER operation has not completed on the local system
Cause You tried to execute the COPYAUDIT command, but the RDF TAKEOVER operationhas not completed on the local system.Effect The COPYAUDIT command is aborted.Recovery You must execute the RDF TAKEOVER operation on both backup systems beforeyou can use the COPYAUDIT command of the triple contingency protocol.
An RDF TAKEOVER has completed
Cause The operator issued a TAKEOVER command at the backup node and the TAKEOVERoperation has completed.Effect The backup database becomes the database of record.Recovery This is an informational message; no recovery is required.
At least one non network master NETWORK record required
Cause No non network master NETWORK record was found when validating this networkmaster subsystem.Effect RDF does not start.Recovery Add one or more network records to the configuration describing the non networkmaster subsystem(s).
Audit is missing. Contact your HP analyst.
Cause The COPYAUDIT command could not find audit that should exist in the local imagetrail.Effect The COPYAUDIT command aborts.Recovery There might be no recovery for this problem. To verify that required audit is missingfrom your local image trail, contact your local HP analyst.
Aux audit support is only available with the RDF/IMPX product
Cause You tried to have RDF/IMP protect a data volume associated with an auxiliary audittrail.Effect The SET or ADD command fails.Recovery RDF/IMPX must be installed do this.
Aux audit trail not found with index num
Cause You tried to add an RDF object with an ATINDEX that does not correspond to theaudit trail number of a configured auxiliary audit trail.Effect The ADD command fails.Recovery Review and revise your RDF and TMF configurations.
Aux RECEIVER Record does not exist for atindex num
Cause You tried to add an updater with the specified ATINDEX, but there is no receiverwith that value.Effect The ADD command fails.Recovery Reenter the ADD command specifying a correct ATINDEX.
Backup node in network master record is incorrect primary system
RDFCOM Messages 415

Cause The network master network record does not have the have the specified backupsystem name for the local RDF subsystem.Effect Validation fails.Recovery You must reconfigure your network master.
BACKUPSYSTEM is Not Defined
Cause The RDF configuration file is invalid.Effect The RDF configuration record was not added.Recovery Enter a SET RDF command, using the BACKUPSYSTEM parameter to identify thebackup system. Then, enter an ADD RDF command to add this system to the configuration.
BACKUPSYSTEM \node is Unavailable
nodeis the name of the backup node that was unavailable.
Cause Either the START RDF command failed because the backup node was unavailable,or the RDF configuration file is invalid.Effect The command or requested operation fails.Recovery Examine the RDF configuration file, and correct it if necessary. Otherwise, reenterthe START RDF command when the backup node becomes available.
Broadcast ALTER Failed: error# on component
error#is the file-system error number that identifies the specific error.
componentis the name of the RDF component for which the ALTER command failed.
Cause An ALTER command failed for the specified components.Effect The command fails.Recovery See the OperatorMessagesManual for a description of the error code. For additionaldetails about understanding and correcting file-system errors, see theGuardian Procedure Errorsand Messages Manual. If possible, correct the error and reenter the command that encounteredthe error. Otherwise, see your system manager.
Cannot delete NETWORK PNETTXVOLUME volume
volumeis the name of an RDF data volume.
Cause You have attempted to delete an updater that protects the specified PNETTXVOLUME.This is not allowed because it would break your RDF network.Effect Delete fails.Recovery If you really must delete the updater, you will then need to reconfigure yournetwork master and possibly your local configuration.
Configuration Validation Aborted
Cause The RDF configuration file is invalid.Effect The VALIDATE CONFIGURATION or START RDF command that checked theconfiguration file fails.Recovery Check and correct the configuration file. Then reenter the VALIDATECONFIGURATION or START RDF command.
Couldn't create or clear the BACKUPSYSTEM CONTEXT (error#)
error#is the file-system error number that identifies the specific error.
416 Messages
Cause The context file data could not be created or cleared while START RDF processingwas being performed after the INITIALIZE RDF command.Effect START RDF processing is aborted.Recovery See the OperatorMessagesManual for a description of the error code. For additionaldetails about understanding and correcting file-system errors, see theGuardian Procedure Errorsand Messages Manual. If possible, correct the error and reenter the command that encounteredthe error. Otherwise, see your system manager.
Couldn't create or clear the PRIMARYSYSTEM CONFIG (error#)
error#is the file-system error number that identifies the specific error.
Cause The configuration file data cannot be created or cleared while START RDF processingis performed after INITIALIZE RDF.Effect START RDF processing is aborted.Recovery See the OperatorMessagesManual for a description of the error code. For additionaldetails about understanding and correcting file-system errors, see theGuardian Procedure Errorsand Messages Manual. If possible, correct the error and reenter the command that encounteredthe error. Otherwise, see your system manager.
Couldn't create or clear the PRIMARYSYSTEM CONTEXT (error#)
error#is the file-system error number that identifies the specific error.
Cause The context file data cannot be created or cleared while START RDF processing isperformed after INITIALIZE RDF.Effect START RDF processing is aborted.Recovery See the OperatorMessagesManual for a description of the error code. For additionaldetails about understanding and correcting file-system errors, see theGuardian Procedure Errorsand Messages Manual. If possible, correct the error and reenter the command that encounteredthe error. Otherwise, see your system manager.
Couldn't OPEN the started process: error#
error#is the error number that identifies the specific error.
Cause An open error occurred during START RDF or STOP RDF command processing.Effect The START RDF or STOP RDF operation is aborted.Recovery See the OperatorMessagesManual for a description of the error code. For additionaldetails about understanding and correcting process errors, see the Guardian Procedure Errorsand Messages Manual. If possible, correct the error and reenter the command that encounteredthe error. Otherwise, see your system manager.
Couldn't WRITE startup to the started process error#
error#is the error number that identifies the specific error.
Cause A write error occurred during START RDF or STOP RDF command processing.Effect The operation is aborted.Recovery See the OperatorMessagesManual for a description of the error code. For additionaldetails about understanding and correcting process errors, see the Guardian Procedure Errorsand Messages Manual. If possible, correct the error and reenter the command that encounteredthe error. Otherwise, see your system manager.
cpu:cpu CPUS are NOT available
RDFCOM Messages 417
cpu:cpuare the primary and backup CPUs, respectively.
Cause Both the configured primary and backup CPUs were unavailable when a START RDFcommand was issued.Effect The command fails.Recovery Wait until both CPUs become available, and reenter the START RDF command.If necessary, see your system manager.
cpu:cpu CPUS are not SYSGEN’d
cpu:cpuare the primary and backup CPUs, respectively.
Cause A START RDF command failed because the specified CPUs do not exist (they werenot configured during SYSGEN).Effect The command fails.Recovery Reconfigure RDF to use other CPUs or, if you must use the specified CPUs, seeyour system manager.
Creation error error# on IMAGETRAIL volume-name
error#is the file-system error number that identifies the specific error.
volume-nameis the image trail volume on which the error occurred.
Cause During execution of a START RDF command or a VALIDATE CONFIGURATIONcommand, RDFCOM determined that sufficient disk storage for image files did not exist ineach secondary image trail for at least one additional image file. As one of its validation checksduring processing of these commands, RDFCOM tries to create a temporary image file on theIMAGETRAIL volume. This allocation failed for the reason indicated by the file-system numbererror#.Effect The command fails.Recovery See the OperatorMessagesManual for a description of the error code. For additionaldetails about understanding and correcting file-system errors, see theGuardian Procedure Errorsand Messages Manual. Correct the error indicated by error#. This might necessitate alteringthe IMAGETRAIL configuration parameter to specify a new volume for the secondary imagetrail. Then, reenter the START RDF or VALIDATE command.
Ctrl-subvol network record not found
Ctrl-subvolis the name of an RDF subsystem control subvolume.
Cause The RDF subsystem with the specified control subvolume does not contain a networkrecord.Effect Validation fails.Recovery You must add the appropriate NETWORK configuration record.
Database synchronization is only available with the NonStop(TM)RDF/IMP(X) product
Cause You tried to add a volume to the RDF configuration and use the online databasesynchronization feature, but RDF/IMP or IMPX is not installed.Effect The ADD command fails.Recovery If you want to perform online database synchronization, RDF/IMP or IMPX mustbe installed on both the primary and backup systems.
Data from auxiliary audit trails is not allowed with lockstep
418 Messages

Cause You tried to add an auxiliary extractor or receiver to an RDF environment that hadpreviously been configured for lockstep operations.Effect The ADD EXTRACTOR or ADD RECEIVER command fails.Recovery You cannot have both lockstep operation and protection for data configured to anauxiliary audit trail in the same RDF subsystem. If you want lockstep protection, then yourdata must be placed on TMF data volumes configured to the Master Audit Trail. If your datamust remain on TMF data volumes configured to auxiliary audit trails, then you mustreconfigure your RDF subsystem without lockstep protection.You must rethink what data you want protected and whether or not it needs lockstep protection.You might have to configure two separate RDF subsystems, protecting lockstep data with onesubsystem, and protecting the data associated with auxiliary audit trails with the other RDFsubsystem. You cannot have lockstep protection for data configured to auxiliary audit trails.
Do you still wish to start at this point? [Y/N]
Cause In response to your INITIALIZE RDF command and your confirmation to proceedwith that command’s execution, RDFCOM has found the record with the specified TMFshutdown timestamp in the MAT and RDF is ready to be initialized at that shutdown point.This message requests your confirmation to proceed further.Effect If you respond YES or Y, RDF will be initialized at the shutdown point you specified;when RDF starts, the extractor will begin reading audit at that point in the audit trail. If yourespond NO or N, however, the subsystem will not be initialized.Recovery This is an informational message; no recovery is required.
Do you wish to proceed? [Y/N]
Cause You entered an INITIALIZE RDF command that attempted to initialize RDF at aspecific TMF shutdown timestamp, and received this message as a prompt for confirmation.Effect If you respond YES or Y, RDFCOM searches the MAT file for a TMF shutdowntimestamp equal to the one specified. If you respond NO or N, RDF is not initialized.Recovery This is an informational message; no recovery is required.
Encountered error error# when checking filename
error#is the file-system error number that identifies the specific error.
filenameis the name of an RDF configuration file on the control subvolume.
Cause While RDF was attempting to check if an RDF control file existed in$SYSTEM.control-subvolume on the backup system, file-system error error# wasreturned.Effect The INITIALIZE RDF command aborts.Recovery See the OperatorMessagesManual for a description of the error code. For additionaldetails about understanding and correcting file-system errors, see theGuardian Procedure Errorsand Messages Manual. Analyze and correct the problem, and then retry the INITIALIZE RDFcommand.
Error error# obtained in attempting to unpin audit
error#is the file-system error number that identifies the specific error.
Cause The TMP returned the specified file-system error number when attempting to unpina TMF audit trail file.Effect The UNPINAUDIT command is ignored.Recovery See the OperatorMessagesManual for a description of the error code. For additionaldetails about understanding and correcting file-system errors, see theGuardian Procedure Errors
RDFCOM Messages 419
and Messages Manual. Take appropriate corrective action, and then reissue the UNPINAUDITcommand.
Error error# obtaining FILECODE and CRVSN of the MAPFILE filename
error#is the file-system error number that identifies the specific error.
filenameis the name of the updater mapfile specified in the updater configuration.
Cause RDFCOM could not obtain the file code and CRVSN of the updater mapfile when anADD VOLUME, START RDF, START UPDATE, or VALIDATE CONFIGURATION commandwas being executed.Effect The command fails.Recovery See theGuardian Procedure Errors andMessagesManual for a description and recoveryactions for the file-system error. Correct the error indicated by error#, and then reenter thecommand.
Error error# obtaining FILECODE and EOF of the MAPLOG filename
error#is the file-system error number that identifies the specific number.
filenameis the name of the updater maplog specified in the updater configuration.
Cause RDFCOM could not obtain the file code and CRVSN of the updater maplog when anADD VOLUME, ALTER VOLUME, START RDF, or START UPDATE command was beingexecuted.Effect The command fails.Recovery See the Guardian Procedure Errors and Messages Manual for a description of andrecovery actions for the file-system error. Correct the error indicated by error#, then reenterthe command.
Error error# obtaining pool information for SMF volume
error#is the file-system error number that identifies the specific error.
volumeis the SMF volume.
Cause RDFCOM experienced an error while attempting to obtain the physical diskinformation for the specified SMF disk volume. The error number indicates the cause.Effect The RDFCOM command being executed fails.Recovery Correct the underlying problem with the SMF pool and reissue the RDFCOMcommand.
Error error# on allocation of extents for imagefile
error#is the file-system error number that identifies the specific error.
Cause The COPYAUDIT command encountered the specified error while attempting toallocate extents for a new image file on the local image trail.Effect The COPYAUDIT command aborts.Recovery See the OperatorMessagesManual for a description of the error code. For additionaldetails about understanding and correcting file-system errors, see theGuardian Procedure Errorsand Messages Manual. Take appropriate corrective action, and then reissue the COPYAUDITcommand.
Error error# on create of image file filename
420 Messages

error#is the file-system error number that identifies the specific error.
filenameis the name of the image trail file associated with the error.
Cause The COPYAUDIT command encountered the specified error while attempting tocreate the specified image file on the local image trail volume.Effect The COPYAUDIT command aborts.Recovery See the OperatorMessagesManual for a description of the error code. For additionaldetails about understanding and correcting file-system errors, see theGuardian Procedure Errorsand Messages Manual. If possible, correct the error and reenter the COPYAUDIT command.Otherwise, see your system manager.
Error error# on filename while cleaning the control subvolume on thelocal system.
error#is the file-system error number that identifies the specific error.
filenameis the name of the local control subvolume file associated with the error.
Cause The INITIALIZE RDF command encountered the specified error while attempting topurge the local control subvolume files.Effect The INITIALIZE RDF command aborts.Recovery See the OperatorMessagesManual for a description of the error code. For additionaldetails about understanding and correcting file-system errors, see theGuardian Procedure Errorsand Messages Manual. Correct the error and reenter the INITIALIZE RDF command. If theproblem persists, contact your system manager.
Error error# on filename while cleaning the control subvolume on theremote system.
error#is the file-system error number that identifies the specific error.
filenameis the name of the remote control subvolume file associated with the error.
Cause The INITIALIZE RDF command encountered the specified error while attempting topurge the remote control subvolume files.Effect The INITIALIZE RDF command aborts.Recovery See the OperatorMessagesManual for a description of the error code. For additionaldetails about understanding and correcting file-system errors, see theGuardian Procedure Errorsand Messages Manual. Correct the error and reenter the INITIALIZE RDF command. If theproblem persists, contact your system manager.
Error error# on PURGEDATA for the MAPLOG file filename
error#is the file-system error number that identifies the specific error.
filenameis the name of the updater maplog specified in the updater configuration.
Cause Purgedata operation returned an error when RDFCOM tried to clean the updatermaplog file when an ADD VOLUME, ALTER VOLUME, or START RDF command was beingexecuted.Effect The command fails.
RDFCOM Messages 421

Recovery See the Guardian Procedure Errors and Messages Manual for a description of therecovery actions for the file-system error. Correct the error indicated by error#, then reenterthe command.
Error error# on process info attempt
error#is the file-system error number that identifies the specific error.
Cause The COPYAUDIT command encountered the specified error while attempting toprocess information about the current RDFCOM session.Effect The COPYAUDIT command aborts.Recovery See the OperatorMessagesManual for a description of the error code. For additionaldetails about understanding and correcting file-system errors, see theGuardian Procedure Errorsand Messages Manual. Take appropriate corrective action, and then reissue the COPYAUDITcommand.
Error error# on setmode for imagefile ownership
error#is the file-system error number that identifies the specific error.
Cause The COPYAUDIT command encountered the specified error while attempting toperform a SET MODE operation to set the ownership for a new image file on the local imagetrail.Effect The COPYAUDIT command aborts.Recovery See the OperatorMessagesManual for a description of the error code. For additionaldetails about understanding and correcting file-system errors, see theGuardian Procedure Errorsand Messages Manual. Take appropriate corrective action, and then reissue the COPYAUDITcommand.
Error error# on setmode for imagefile security
error#is the file-system error number that identifies the specific error.
Cause The COPYAUDIT command encountered the specified error while attempting to setthe security for a new image file on the local image trail where it is storing new audit.Effect The COPYAUDIT command aborts.Recovery See the OperatorMessagesManual for a description of the error code. For additionaldetails about understanding and correcting file-system errors, see theGuardian Procedure Errorsand Messages Manual. Take appropriate corrective action, and then reissue the COPYAUDITcommand.
Error error# on setmode for large transfers
error#is the file-system error number that identifies the specific error.
Cause The COPYAUDIT command encountered the specified error while attempting toperform a SET MODE operation to enable large transfers of data.Effect The COPYAUDIT command aborts.Recovery See the OperatorMessagesManual for a description of the error code. For additionaldetails about understanding and correcting file-system errors, see theGuardian Procedure Errorsand Messages Manual. Take appropriate corrective action, and then reissue the COPYAUDITcommand.
Error in the MAPFILE filename
filenameis the name of the updater mapfile specified in the updater configuration.
422 Messages

Cause During execution of a VALIDATE CONFIGURATION command, RDFCOMdetermined that the updater mapfile is invalid.Effect The command fails.Recovery Correct the mapfile and reenter the command.
Expected MAP in the mapping string mapping-string in the MAPFILE filename
mapping-stringis the erroneous mapping string specified in the mapfile.
filenameis the name of the updater mapfile specified in the updater configuration.
Cause RDFCOM found that the mapping string specified in the updater mapfile did notcontain the keyword MAP when an ADD VOLUME, ALTER VOLUME, START RDF, STARTUPDATE, or VALIDATE CONFIGURATION command was being executed.Effect The command fails.Recovery Add the keyword MAP in the mapping string, then reenter the command.
Expected NAMES in the mapping string mapping-string in the MAPFILEfilename
mapping-stringis the erroneous mapping string specified in the mapfile.
filenameis the name of the updater mapfile specified in the updater configuration.
Cause RDFCOM found that the mapping string specified in the updater mapfile did notcontain the keyword NAMES when an ADD VOLUME, ALTER VOLUME, START RDF,START UPDATE, or VALIDATE CONFIGURATION command was being executed.Effect The command fails.Recovery Add the keyword NAMES in the mapping string, then reenter the command.
Expected TO in the mapping string mapping-string in the MAPFILE filename
mapping-stringis the erroneous mapping string specified in the mapfile.
filenameis the name of the updater mapfile specified in the updater configuration.
Cause RDFCOM found that the mapping string specified in the updater mapfile did notcontain the keyword TO when an ADD VOLUME, ALTER VOLUME, START RDF, STARTUPDATE, or VALIDATE CONFIGURATION command was being executed.Effect The command fails.Recovery Add the keyword TO in the mapping string, then reenter the command.
Expecting: a Control Subvolume name
Cause The control subvolume was incorrectly specified in an OPEN command.Effect The command fails.Recovery Check the control subvolume name and make sure that you are spelling it correctly.Then reenter the command, including the proper control subvolume name or specifying adifferent control subvolume.
Expecting: RDF, MONITOR, EXTRACTOR, RECEIVER, VOLUME
Cause RDF did not understand the command.Effect The command fails.Recovery Check the syntax rules for the command you entered. Perhaps you misspelled akeyword parameter or misplaced a delimiter.
RDFCOM Messages 423
Expecting 'Yes' or 'No' response.
Cause You have entered an unexpected response to an RDFCOM prompt that requires onlyeither YES (or Y) or NO (or N) as verification to proceed with your request.Effect The requested operation does not take place.Recovery Reenter your request, this time specifying either YES, Y, NO, or N to the prompt.
Expecting 'Yes' or 'No' response. Search stopped
Cause While attempting to initialize RDF to a TMF shutdown timestamp, you have enteredan unexpected response to the RDFCOM prompt that asks if you want RDFCOM to triggerthe restoration of an audit trail file that has been dumped.Effect The search for the shutdown timestamp ceases, and the RDF initialization fails.Recovery Reenter the INITIALIZE RDF command, to begin the sequence of prompts again.This time, respond properly (either YES, Y, NO, or N) to the prompt about restoring the audittrail file.
Extended Data Segment Error: error
erroris the NEWPROCESS error number that identifies the specific error.
Cause A NEWPROCESS error occurred during START RDF or TAKEOVER processing.Effect The START RDF or TAKEOVER operation is aborted.Recovery See the OperatorMessagesManual for a description of the error code. For additionaldetails about understanding and correcting process errors, see the Guardian Procedure Errorsand Messages Manual. If possible, correct the error and reenter the command that encounteredthe error. Otherwise, see your system manager.
Extended Swap File Segment Error: error#
error#is the NEWPROCESS error number that identifies the specific error.
Cause A NEWPROCESS error occurred during START RDF or TAKEOVER processing.Effect The START RDF or TAKEOVER operation is aborted.Recovery See the OperatorMessagesManual for a description of the error code. For additionaldetails about understanding and correcting process errors, see the Guardian Procedure Errorsand Messages Manual. If possible, correct the error and reenter the command that encounteredthe error. Otherwise, see your system manager.
EXTRACTOR record exists, use ALTER EXTRACTOR
Cause An ADD EXTRACTOR command was issued when the configuration file alreadycontained an extractor record.Effect The command fails.Recovery No recovery is required if you want to use the existing extractor process asconfigured. If you want to change any of the extractor’s configuration options, however, enteran ALTER EXTRACTOR command that specifies those changes.
EXTRACTOR record NOT found
Cause The INFO command could not find an extractor record in the configuration file.Effect The command fails.Recovery Alter the configuration to include an extractor process.
FASTUPDATEMODE is not turned ON for Master Receiver.
Cause You have turned FASTUPDATEMODE ON for an Auxillary Receiver when theFASTUPDATEMODE is OFF for the Master Receiver.Effect The command fails.
424 Messages

Recovery Set FASTUPDATEMODE ON for the Master Receiver before settingFASTUPDATEMODE ON for any Auxiliary Receiver.
FASTUPDATEMODE should be turned OFF for all the Auxilliary Receiversbefore it is turned OFF for the Master Receiver.
Cause You have tried to turn FASTUPDATEMODE OFF for the Master Receiver whenFASTUPDATEMODE is ON for one or more Auxilliary Receivers.Effect FASTUPDATEMODE will not be turned OFF for the Master Receiver.Recovery Check the FASTUPDATEMODE of all the auxilliary receivers and set it to OFF forall those which have FASTUPDATEMODE ON before reissuing the command.
Fixing up context to enable another RDFCOM Takeover command
Cause The COPYAUDIT command has finished copying the missing audit from the remotesystem to the local system, and is now about to update context records to permit execution ofanother TAKEOVER command.Effect RDF begins to update the context records.Recovery This is an informational message; no recovery is required.
Fixing up the ZFILEINC file to enable another RDFCOM Takeover command
Cause The COPYAUDIT command has finished copying the missing audit from the remotesystem to the local system, and is now about to copy the ZFILEINC file from the remote systemto the local system.Effect RDF begins to copy the ZFILEINC file.Recovery This is an informational message; no recovery is required.
Global record not found for subsystem ctrl-subvol
ctrl-subvolis the name of an RDF subsystem control subvolume.
Cause The global record of the RDF subsystem with the specified control subvolume couldnot be found.Effect Validation fails.Recovery Before you can validate your local RDF subsystem, you must configure all RDFsubsystems in your network.
If INITIALIZE command is specified in an IN file the pound (#) charactershould be used with bang (!) option.
Cause INITIALIZE RDF command was issued using an IN file to RDFCOM with "#" operatorbut without the "!" option.Effect The command fails.Recovery When issuing the INITIALIZE RDF using an IN file to RDFCOM with "#" operator,specify "!" operator also.
Illegal File Format: error#
error#is the NEWPROCESS error number that identifies the specific error.
Cause A NEWPROCESS error occurred during START RDF or TAKEOVER processing.Effect The START RDF or TAKEOVER operation is aborted.Recovery See the OperatorMessagesManual for a description of the error code. For additionaldetails about understanding and correcting process errors, see the Guardian Procedure Errorsand Messages Manual. If possible, correct the error and reenter the command that encounteredthe error. Otherwise, see your system manager.
Illegal Home Terminal: error#
RDFCOM Messages 425

error#is the NEWPROCESS error number that identifies the specific error.
Cause A NEWPROCESS error occurred during START RDF or TAKEOVER processing.Effect The START RDF or TAKEOVER operation is aborted.Recovery See the OperatorMessagesManual for a description of the error code. For additionaldetails about understanding and correcting process errors, see the Guardian Procedure ErrorsandMessages Manual. Correct the error and reenter the START RDF or TAKEOVER command.
Image files needed for Triple Contingency must have been purged becausethe receiver’s retaincount must have been set too low.
Cause Audit required for the COPYAUDIT command on the remote system has been purged,probably because the receiver’s RETAINCOUNT value was set too low.Effect The COPYAUDIT command aborts.Recovery There might be no recovery for this problem. You must perform the databasesynchronization without the help of RDFCOM.
IMAGETRAIL for IMAGEVOLUME vol-name does not exist
vol-nameis the image trail volume for which the image trail does not exist.
Cause You tried to add an updater, but have not yet added an image trail for the updater’svolume.Effect The ADD command fails.Recovery Add the image trail. Then add the updater.
IMAGETRAIL for IMAGEVOLUME vol-name does not exist or the atindex ofthe IMAGEVOLUME does not match the updater’s atindex
vol-nameis the image trail volume
Cause You tried to add an updater for a particular ATINDEX, but there is no imagetrailconfiguration for that value. Either you have not yet added the imagetrail or you added it witha different ATINDEX.Effect The ADD command fails.Recovery Review and revise your RDF configuration.
IMAGETRAIL is already in use by Receiver
Cause You tried to add a secondary image trail, but the volume you specified for that trailis already being used for receiver’s RDFVOLUME.Effect The command fails.Recovery Select a different volume for the secondary image trail.
Imagetrails cannot be added if RDF has been started after initialization
Cause You tried to add a secondary image trail after RDF has been started. However, youcan only add secondary image trails after RDF has been initialized and before it has beenstarted for the first time following this initialization.Effect The command fails.Recovery If you must add an image trail, you must stop TMF, allow RDF to catch up to theshutdown, and then reinitialize and reconfigure RDF.
IMAGETRAIL volume-name has already been added
volume-nameis the name of the volume you specified for the image trail.
426 Messages

Cause You tried to add a secondary image trail on the volume volume-name, but an imagetrail has already been added for this volume.Effect The command fails.Recovery Select a different volume for the secondary image trail.
IMAGETRAIL volume-name is not used by any updater
volume-nameis the name of the image trail.
Cause While validating your configuration, RDFCOM determined that the image trail onthe volume volume-name is not referenced by any updater processes.Effect The validation operation aborts.Recovery Delete this image trail
IMAGETRAIL volume-name record not found; DELETE aborted
volume-nameis the name of the secondary image trail that was specified in the command.
Cause You tried to delete a secondary image trail that does not exist.Effect The command fails.Recovery Select a different secondary image trail to delete, or select another command.
IMAGETRAIL VOLUME volume-name does NOT exist
volume-nameis the name of the volume.
Cause While validating your configuration, RDFCOM determined that the volume for thisimage trail does not exist on the backup node.Effect The validation operation aborts.Recovery Delete this image trail volume and all updaters that use it.
IMAGETRAIL VOLUME volume-name is not a disk volume
volume-nameis the name of the volume.
Cause While validating your configuration, RDFCOM determined that volume-name doesnot refer to a disk device on the backup node.Effect The validation operation aborts.Recovery Delete this image trail volume and all updaters that refer to it.
IMAGEVOLUME volume-name is not a legal volume name
volume-nameis the name of the volume.
Cause The SET VOLUME IMAGEVOLUME command specified an invalid volume name.Effect The command fails.Recovery Reenter the command, using a correct volume name.
Inconsistent network options are not allowed
Cause You have attempted to add the RDF configuration record with the RDF NetworkMasterattribute on but the Network attribute off.Effect The configuration command fails.Recovery You must determine whether you are in an RDF network or not.
Initialization point for timestamp has been found
RDFCOM Messages 427

timestampis an INITTIME timestamp specified previously by an operator in an RDFCOM INITIALIZERDF command.
Cause You are attempting to initialize RDF to a timestamp that is earlier than the currenttime, and database synchronization is not involved. A record whose timestamp is less thantimestamp has been found.Effect The RDFCOM INITIALIZE RDF command continues.Recovery This is an informational message; no recovery is required.
Initialization timestamp is timestamp
timestampis an INITTIME timestamp specified previously by an operator in an RDFCOM INITIALIZERDF command.
Cause You are attempting to initialize RDF to a timestamp that is earlier than the currenttime, and database synchronization is not involved. A record whose timestamp is less thantimestamp has been found, and timestamp has been stored in the RDF configuration record.Effect The RDFCOM INITIALIZE RDF command continues.Recovery This is an informational message; no recovery is required.
Initialization with database synchronization is only available with theNonStop(TM) RDF/IMP(X) product.
Cause You tried to initialize RDF with the SYNCHDBTIME option, but RDF/IMP or IMPXis not installed.Effect The INITIALIZE RDF command fails.Recovery If you want to perform online database synchronization, RDF/IMP or IMPX mustbe installed on both the primary and backup systems.
INITIALIZE RDF aborted
Cause This message follows a previous error message that indicates why the INITIALIZERDF command failed.Effect RDF is not initialized.Recovery Examine the error message immediately preceding this one, correct the conditionreported, and reenter the INITIALIZE RDF command.
Internal consistency error on Network records
Cause RDFCOM has detected an internal error that indicates inconsistency.Effect The configuration command fails.Recovery Contact the Global Mission Critical Solution Center (GMCSC) or your serviceprovider.
Internal error encountered in imagetrail search
Cause The context of the remote image trail does not correspond to the information storedin the local context.Effect The COPYAUDIT command aborts.Recovery There is no recovery for this problem. Contact your local HP representative.
Invalid TMF shutdown timestamp
Cause You entered an INITIALIZE RDF timestamp command, but specified the timestamp(or one or more of its components) incorrectly.Effect RDF is not initialized.
428 Messages

Recovery Examine the specified timestamp. If the format is correct, then the error arises froman incorrect value for the date or time, such as 30 for hour or 32 for day. Correct the specifiedtimestamp and reenter the INITIALIZE RDF command.The correct format for the timestamp is day month year hour:min, where:day
is a number from 1 to 31.month
is the first three letters of the month, such as JAN, FEB, MAR.year
is a two-digit or four-digit number, such as 91 or 1991. Any year greater than 1999 mustbe specified in four digits.
houris a number from 0 to 23.
minis a number from 00 to 59. min must be preceded by a colon (:).
Library Conflict
Cause A NEWPROCESS error occurred during START RDF or TAKEOVER processing.Effect The START RDF or TAKEOVER operation is aborted.Recovery If possible, correct the error and reenter the command that encountered the error.Otherwise, see your system manager.
Library File Error: error#
error#is the NEWPROCESS error number that identifies the specific error.
Cause A NEWPROCESS error occurred during START RDF or TAKEOVER processing.Effect The START RDF or TAKEOVER operation is aborted.Recovery See the OperatorMessagesManual for a description of the error code. For additionaldetails about understanding and correcting process errors, see the Guardian Procedure ErrorsandMessages Manual. Correct the error and reenter the START RDF or TAKEOVER command.
Local image file filename is missing
filenameis the name of the image trail file.
Cause The COPYAUDIT command could not find the specific image file on the local imagetrail, although this file should exist on disk.Effect The COPYAUDIT command aborts.Recovery There is no recovery for this problem. You must perform the databasesynchronization without the help of RDFCOM.
Mapping string mapping-string is invalid in the MAPFILE filename
Expected * in the filename portion in subvolume-name
mapping-stringis the erroneous mapping string specified in the mapfile.
filenameis the name of the updater mapfile specified in the updater configuration.
subvolume-nameis the erroneous subvolume specified in the mapping string.
RDFCOM Messages 429

Cause RDFCOM expected * in the filename portion of the subvolume indicated bysubvolume-namewhen an ADD VOLUME, ALTER VOLUME, START RDF, START UPDATE,or VALIDATE CONFIGURATION command was being executed.Effect The command fails.Recovery Correct the mapping string, then reenter the command.
Mapping string mapping-string is invalid in the MAPFILE filename, errorerror#
mapping-stringis the erroneous mapping string specified in the mapfile.
filenameis the name of the updater mapfile specified in the updater configuration.
error#is the file-system error number that identifies the specific error.
Cause RDFCOM found that the mapping string specified in the updater mapfile is invalidwhen an ADD VOLUME, ALTER VOLUME, START RDF, START UPDATE, or VALIDATECONFIGURATION command was being executed.Effect The command fails.Recovery See theGuardian Procedure Errors andMessagesManual for a description and recoveryactions for the file-system error. Correct the error indicated by error#, then, reenter thecommand.
Mapping string mapping-string is invalid in the MAPFILE filename
The subvolume subvolume-name is invalid.
mapping-stringis the erroneous mapping string specified in the MAPFILE.
filenameis the name of the updater MAPFILE specified in the updater configuration.
subvolume-nameis the erroneous subvolume specified in the mapping string.
Cause RDFCOM detected that the subvolume indicated by subvolume-name is invalidwhen an ADD VOLUME, ALTER VOLUME, START RDF, START UPDATE, or VALIDATECONFIGURATION command was being executed.Effect The command fails.Recovery Correct the mapping string, then reenter the command.
Mapping string mapping-string is invalid at position index in the MAPFILEfilename
mapping-stringis the erroneous mapping string specified in the MAPFILE.
indexis the erroneous position in the mapping string.
filenameis the name of the updater MAPFILE specified in the updater configuration.
Cause RDFCOM detected that the mapping string is invalid at the position indicated byindex when an ADD VOLUME, ALTER VOLUME, START RDF, START UPDATE, orVALIDATE CONFIGURATION command was being executed.Effect The command fails.Recovery Correct the mapping string, then reenter the command.
Master EXTRACTOR Record already exists
430 Messages

Cause You have already added an extractor with an ATINDEX value of 0.Effect The ADD EXTRACTOR command fails.Recovery Review and revise your RDF configuration.
Master RECEIVER Record already exists
Cause You have already added a receiver with an ATINDEX value of 0.Effect The ADD EXTRACTOR command fails.Recovery Review and revise your RDF configuration.
Maximum number of image trails already added
Cause You have already added the maximum number of secondary image trails (255), andcannot add more.Effect The command fails.Recovery No recovery action is possible; your RDF subsystem can only support 256 secondaryimage trails.
Missing network master NETWORK record
Cause No network record exists that corresponds to the network master subsystem.Effect RDF does not start.Recovery Add a network record to describe the network master subsystem.
MONITOR Record exists, use ALTER MONITOR
Cause An ADD MONITOR command was issued when the configuration file alreadycontained a monitor record.Effect The command fails.Recovery No recovery is required if you want to use the existing monitor process asconfigured. If you want to change any of the monitor’s configuration options, however, enteran ALTER MONITOR command that specifies those changes.
MONITOR record NOT found
Cause The INFO command could not find a monitor record in the configuration file.Effect The command fails.Recovery Alter the configuration to include the monitor process.
Network options are only available with the RDF/IMPX product
Cause You have attempted to specify configuration information for an RDF network, butyou do not have an RDF/IMPX license.Effect The configuration command fails.Recovery If you need to run in an RDF network, you need to obtain the RDF/IMPX licenseand product.
NETWORK record can only be added into a networked subsystem
Cause An ADD NETWORK command was entered but the RDF NETWORK parameter isset OFF.Effect The ADD NETWORK command is rejected.Recovery Reconfigure RDF to have the RDF NETWORK parameter set ON.
Network record not found
Cause The current RDF subsystem is configured in an RDF network, but a network recordhas not been added.Effect Validation fails.
RDFCOM Messages 431

Recovery You must add the appropriate NETWORK configuration record.
Network synch file ZRDFNETX file must be INCLUDED
Cause An INCLUDE pattern has been specified that will cause audit records associated withthe NetSynch data file to be filtered out.Effect RDF can not be started.Recovery Correct the VOLUME INCLUDE associated with the PNETTXVOLUME so thatthe file $volume.control-subvolume.ZRDFNETX is included.
Network synch file ZRDFNETX must not be EXCLUDED
Cause An EXCLUDE pattern has been specified which will case audit associated with theNetSynch data file to be filtered out.Effect RDF can not be started.Recovery Correct the VOLUME EXCLUDE associated with the PNETTXVOLUME so thatthe EXCLUDE pattern does not exclude the file $volume.control-subvolume.ZRDFNETX.
No EXTRACTOR is Configured
Cause The RDF configuration file is invalid.Effect The validation fails.Recovery Alter the configuration to include the extractor.
No EXTRACTOR is configured for ATINDEX atindex
Cause You added a receiver with the specified ATINDEX, but there is no extractor with thatvalue.Effect The validation fails.Recovery Add an extractor with the same ATINDEX value or delete the particular receiver.
No RECEIVER is configured for ATINDEX atindex
Cause You added an extractor with the specified ATINDEX, but there is no receiver withthat value.Effect The validation fails.Recovery Add a receiver with the same ATINDEX value or delete the particular extractor.
Not able to open the MAPFILE filename, error error#
filenameis the name of the updater mapfile specified in the updater configuration.
error#is the file-system error number that identifies the specific error.
Cause RDFCOM was not able to open the updater mapfile when an ADD VOLUME, ALTERVOLUME, START RDF, START UPDATE, or VALIDATE CONFIGURATION command wasbeing executed.Effect The command fails.Recovery See theGuardian Procedure Errors andMessagesManual for a description and recoveryactions for the file-system error. Correct the error indicated by error#, then, reenter thecommand.
No image files could be found in the imagetrail onvolume-name.subvolume-name
volume-nameis the name of the image trail’s volume
subvolume-nameis the name of the image trail’s subvolume.
432 Messages

Cause The COPYAUDIT command could not find any image files on the remote image trail.This problem indicates that the receiver’s RETAINCOUNT value was probably not set highenough and that, as a result, some image files on the remote system were purged.Effect The COPYAUDIT command aborts.Recovery There is no recovery action. The COPYAUDIT command cannot be executedbecause image files needed for this command were already purged from the remote system.
No MONITOR is Configured
Cause The RDF configuration file is invalid.Effect The validation fails.Recovery Alter the configuration to include the monitor.
No PCB available
Cause A NEWPROCESS error occurred during START RDF or TAKEOVER processing.Effect The command fails.Recovery Check system resource utilization. When resources become available, reenter thecommand.
No RECEIVER is Configured
Cause The RDF configuration file is invalid.Effect The configuration validation fails.Recovery Check the receiver parameter entries in the configuration file for invalid valuesand correct any errors found.
No VOLUMEs are configured
Cause The RDF configuration file is invalid.Effect The configuration validation fails.Recovery Check the updater process parameters in the configuration file for invalid valuesand correct any errors found.
No VOLUMES are configured for ATINDEX atindex
Cause You added an extractor and receiver with the specified ATINDEX, but there are noupdaters with that value.Effect The validation fails.Recovery Add at least one updater with the same ATINDEX value or delete the particularextractor-receiver pair.
Obtained error error# in attempting to examine remote imagetrail files
error#is the file-system error number that identifies the specific error.
Cause The COPYAUDIT command encountered the specified error in attempting to readthe remote image trail files.Effect The command fails.Recovery See the OperatorMessagesManual for a description of the error code. For additionaldetails about understanding and correcting file-system errors, see theGuardian Procedure Errorsand Messages Manual. If possible, correct the error and reenter the COPYAUDIT command.Otherwise, see your system manager.
Only one Network record is allowed for a non-network master
Cause Your current RDF configuration does not have the NetworkMaster attribute set andyou have tried to add more than one network record.Effect The configuration command fails.
RDFCOM Messages 433

Recovery If the network record you have previously added pertains to the RDF networkmaster subsystem, then do not add any further network records. If the network record youhave previously added does not pertains to the RDF network master subsystem, then youneed to purge your current configuration, reinitialize, and reconfigure.
Only the SUPER group can execute this command
Cause You issued a command restricted to members of the super-user group, but your logonID does not indicate that group.Effect The command fails.Recovery Select another command, or ask an authorized person in the super-user group toissue the command for you.
Open error error# on filename
error#is the file-system error number that identifies the specific error.
filenameis the name of the TMF Master Audit Trail (MAT).
Cause An open error occurred on the TMF Master Audit Trail (MAT).Effect The file is not opened.Recovery See the Guardian Procedure Errors and Messages Manual for a description of therecovery actions for the file-system error. Correct the error indicated by error#, then reenterthe command.
Open error error# on MAPLOG file filename
error#is the file-system error number that identifies the specific error.
filenameis the name of the updater maplog specified in the updater configuration.
Cause RDFCOM was not able to open the updater maplog when an ADD VOLUME, ALTERVOLUME, START RDF, or START UPDATE command was being executed.Effect The command fails.Recovery See the Guardian Procedure Errors and Messages Manual for a description of therecovery actions for the file-system error. Correct the error indicated by error#, then reenterthe command.
Operation can only be performed on the BACKUPSYSTEM \backup
backupis the name of the backup node that can perform the operation.
Cause The command can be issued only at the backup system.Effect The command fails.Recovery Enter another command.
Operation can only be performed on the PRIMARYSYSTEM \primary
primaryis the name of the primary node that can perform the operation.
Cause The command can be issued only at the primary node.Effect The command fails.Recovery Enter another command.
Operation is NOT allowed when RDF is running
Cause The command is not allowed while RDF is running.
434 Messages

Effect The command fails.Recovery Enter another command, or shut down RDF and reenter this command.
Operation must be performed on the PRIMARYSYSTEM \primary or BACKUPSYSTEM\backup
primaryis the name of the primary node that can perform the operation.
backupis the name of the backup node that can perform the operation.
Cause The command was issued at a third system, which is not allowed.Effect The command fails.Recovery Enter another command, or reenter this command at the specific primary or backupnode reflected by this message.
Please wait while RDF searches for the specified shutdown timestamp
Cause You entered an INITIALIZE RDF command that attempted to initialize RDF at aspecific TMF shutdown timestamp, and responded YES or Y to the subsequent confirmationprompt, directing the subsystem to proceed with the initialization.Effect RDFCOM reads backward through the MAT in search of a TMF shutdown recordwith the same timestamp you specified.Recovery This is an informational message; no recovery is required. You can terminate theoperation at any time by pressing the BREAK (or equivalent) key.
PNETTXVOLUME volume for ctrl-subvol must be protected by a MATbased-updater
volumeis the name of an RDF data volume.
ctrl-subvolis the name of an RDF subsystem control subvolume.
Cause The specified volume for the RDF subsystem with the specified control subvolumeis not configured to the Master Audit Trail (MAT).Effect Validation fails.Recovery The PNETTXVOLUME must be configured to the Master Audit Trail (MAT). Youneed to reconfigure your network master and the subsystem with the specified controlsubvolume.
PNETTXVOLUME volume is not configured to a MAT based updater
volumeis the name of an RDF data volume.
Cause The specified PNETTXVOLUME is not configured to a MAT based updater.Effect Validation fails.Recovery You must reconfigure your network master and possibly your local configuration.
Position error error# on file remote-config-file
error#is the file-system error number that identifies the specific error.
remote-config-fileis the name of the remote configuration file.
Cause The COPYAUDIT command encountered the specified error while attempting toposition into the remote configuration file.Effect The COPYAUDIT command aborts.
RDFCOM Messages 435

Recovery See the OperatorMessagesManual for a description of the error code. For additionaldetails about understanding and correcting file-system errors, see theGuardian Procedure Errorsand Messages Manual. If possible, correct the error and reenter the COPYAUDIT command.Otherwise, contact your service provider.
Position error error# on local image file
error#is the file-system error number that identifies the specific error.
Cause The COPYAUDIT command encountered the specified error while attempting toposition into a local image file on the local image trail.Effect The COPYAUDIT command aborts.Recovery See the OperatorMessagesManual for a description of the error code. For additionaldetails about understanding and correcting file-system errors, see theGuardian Procedure Errorsand Messages Manual. If possible, correct the error and reenter the COPYAUDIT command.Otherwise, contact your service provider.
Position error error# on new image file filename
error#is the file-system error number that identifies the specific error.
filenameis the name of the image trail file associated with the error.
Cause The COPYAUDIT command encountered the specified error while attempting toposition into the specified image file on the local image trail volume.Effect The COPYAUDIT command aborts.Recovery See the OperatorMessagesManual for a description of the error code. For additionaldetails about understanding and correcting file-system errors, see theGuardian Procedure Errorsand Messages Manual. If possible, correct the error and reenter the COPYAUDIT command.Otherwise, contact your service provider.
Position error error# on remote image file
error#is the file-system error number that identifies the specific error.
Cause The COPYAUDIT command encountered the specified error while attempting toposition into a remote image file on the remote image trail.Effect The COPYAUDIT command aborts.Recovery See the OperatorMessagesManual for a description of the error code. For additionaldetails about understanding and correcting file-system errors, see theGuardian Procedure Errorsand Messages Manual. If possible, correct the error and reenter the COPYAUDIT command.Otherwise, contact your service provider.
Primary node in network master record is incorrect primary-system
primary-systemis an RDF system name.
Cause The network master network record does not have the specified primary systemname.Effect Validation fails.Recovery You must reconfigure your network master.
PRIMARYSYSTEM (\node) and BACKUPSYSTEM (\node) are the same
nodeis the name assigned to both the primary and backup nodes.
436 Messages

Cause The RDF configuration file is invalid: both primary and backup node names areidentical.Effect The validation fails.Recovery Alter the RDF configuration to reflect different names for these two nodes.
Process Name Error: error#
error#is the error number that identifies the specific error.
Cause A NEWPROCESS error occurred during START RDF or TAKEOVER processing.Effect The START RDF or TAKEOVER operation is aborted.Recovery See the OperatorMessagesManual for a description of the error code. For additionaldetails about understanding and correcting process errors, see the Guardian Procedure Errorsand Messages Manual. If possible, correct the error and reenter the command that encounteredthe error. Otherwise, contact your service provider.
Program and Library File are the Same
Cause A NEWPROCESS error occurred during START RDF or TAKEOVER processing.Effect The START RDF or TAKEOVER operation is aborted.Recovery Change the library filename.
Program File Error: error# on progfile
error#is the error number that identifies the specific error.
progfileis the name of the program file on which the error was encountered.
Cause A NEWPROCESS error occurred during START RDF or TAKEOVER processing.Effect The START RDF or TAKEOVER operation is aborted.Recovery See the OperatorMessagesManual for a description of the error code. For additionaldetails about understanding and correcting process errors, see the Guardian Procedure Errorsand Messages Manual. If possible, correct the error and reenter the command that encounteredthe error. Otherwise, see your system manager.
RDF already in TAKEOVER processing
Cause The operator issued a TAKEOVER command at the backup node while RDF wasperforming a TAKEOVER operation.Effect The last TAKEOVER command is ignored.Recovery This is an informational message; no recovery is required.
RDF configuration file is not open, use OPEN command
Cause The configuration file must be open before any RDFCOM commands other thanOPEN or OBEY can be executed.Effect The attempted operation is aborted.Recovery Open the configuration file with the OPEN command.
RDF has not been initialized.
Cause You issued an INITIALIZE RDF command, but entered NO or N in response to thesubsequent confirmation prompt for continuing the initialization process.Effect RDF is not initialized.Recovery This is an informational message; no recovery is required.
RDF LOGFILE filename NOT a legal filename on system \node
RDFCOM Messages 437

filenameis the name of the nonexistent EMS collector (RDF log file).
nodeis the name of the system where the collector name is invalid.
Cause The RDF configuration file is invalid: a nonexistent EMS collector was specified.Effect The ADD RDF command fails.Recovery Specify a valid EMS collector name in a SET RDF command, and then reenter theADD RDF command.
RDF network subsystem ctrl-subvol has not been validated
ctrl-subvolis the name of an RDF subsystem control subvolume.
Cause Your are attempting to validate the network master of your RDF network before youhave validated all non network master subsystems.Effect Validation fails.Recovery Validate all your non network master subsystems and then validate your localsubsystem.
RDF (\primary -> \backup) is NOT running
Cause A STATUS RDF or STOP RDF command was issued while RDF was stopped.Effect The command fails.Recovery Reissue the command after RDF is started.
RDF record exists, use ALTER RDF
Cause An ADD RDF command was issued when the configuration file already containedan RDF global record.Effect The command fails.Recovery No recovery is required if you want to use the subsystem with the existing RDFglobal parameters configured. If you want to change any of the global parameters, however,enter an ALTER RDF command that specifies those changes.
RDF record NOT found
Cause The INFO command could not find an RDF global record in the configuration file.Effect The command fails.Recovery Alter the configuration to include all RDF global parameters.
RDF Shutdown in progress, please wait...
Cause RDF is shutting down.Effect The shutdown operation continues.Recovery This is an informational message; no recovery is required.
RDF START Failure, Scan LOGFILE for reason
Cause A START RDF command failed. RDF writes a description of the problem in theLOGFILE.Effect The START RDF command fails.Recovery Check the EMS event log for the message covering this error. If possible, correctthe cause of the error and reissue the START RDF command. Otherwise, contact your systemmanager.
RDF subsystem ctrl-subvol is not configured as a Network master
438 Messages
ctrl-subvolis the name of an RDF subsystem control subvolume.
Cause The RDF subsystem that you specified as your network master has not been configuredas a network master.Effect Validation fails.Recovery You need to reconfigure your local subsystem and specify the control subvolumeof your network master. You might also need to reconfigure your network master.
RDF subsystem ctrl-subvol stopped. TMF audit trails remain pinned.
ctrl-subvolis the name of an RDF subsystem control subvolume.
Cause The user issued a STOP RDF command for the RDF subsystem with the specifiedcontrol subvolume.Effect The RDF product has stopped, but the TMF product continues to pin audit trail fileson behalf of the RDF product.Recovery If you intend to restart the RDF product, no recovery action is necessary.If you intend to delete the RDF configuration, then you must issue an RDFCOM UNPINAUDITcommand. Failure to do this could cause TMF to run out of audit trail space.
RDFCOM internal error in handling prompt
Cause RDFCOM detected an internal error in handling your response to the RDFCOMprompt.Effect The attempted command is aborted.Recovery Contact the Global Mission Critical Solution Center (GMCSC) or your serviceprovider.
RDFCOM is asking the TMP to restore the file. If the file was previouslydumped to tape, watch for the TMP to tell you to mount the appropriatetape.
Cause In response to a prompt, you requested RDFCOM to trigger restoration of an audittrail file. If the file has been previously dumped to tape, you must now watch the EMS log forthe TMP’s prompt to mount the appropriate tape.Effect The restore operation proceeds.Recovery When the tape-mount prompt appears in the EMS log, mount the tape.
RDFNETS process only allowed for RDF network master configuration.
Cause You have attempted to add the NetSynch process to your configuration, but yourconfiguration is not the network master.Effect The configuration command fails.Recovery Do not add this record.
RDFVOLUME in network master record is incorrect rdf-vol.
rdf-volis the RDFVOLUME specified in the network record of the network master.
Cause The RDFVOLUME of the current RDF configuration does not match the value specifiedin the network record of the network master.Effect Validation fails.Recovery You must reconfigure your network master and possibly your local configuration.
RDFVOLUME in network master record is invalid.
Cause The RDFVOLUME of the current RDF configuration is invalid in the network recordof the network master.
RDFCOM Messages 439

Effect Validation fails.Recovery You must reconfigure your network master and possibly your local configuration.
RDFVOLUME is not allowed for an aux receiver. Auxiliary receivers donot have an RDFVOLUME.
Cause You tried to add an auxiliary receiver for which you had specified an RDFVOLUME.Effect The ADD command fails.Recovery Issue a RESET RECEIVER command, and then reconfigure the particular receiverwithout specifying an RDFVOLUME.
Read error error# on file remote-config-file
error#is the file-system error number that identifies the specific error.
remote-config-fileis the name of the remote configuration file.
Cause The COPYAUDIT command encountered the specified error while attempting to readthe remote configuration file.Effect The COPYAUDIT command aborts.Recovery See the OperatorMessagesManual for a description of the error code. For additionaldetails about understanding and correcting file-system errors, see theGuardian Procedure Errorsand Messages Manual. If possible, correct the underlying error and reenter the COPYAUDITcommand. Otherwise, contact your service provider.
Read error error# on remote image file
error#is the file-system error number that identifies the specific error.
Cause The COPYAUDIT command encountered the specified error while attempting to readdata from a remote image file on the remote image trail.Effect The COPYAUDIT command aborts.Recovery See the OperatorMessagesManual for a description of the error code. For additionaldetails about understanding and correcting file-system errors, see theGuardian Procedure Errorsand Messages Manual. If possible, correct the underlying error and reenter the COPYAUDITcommand. Otherwise, see your service provider.
Read error error# on remote ZFILEINC file
error#is the file-system error number that identifies the specific error.
Cause The COPYAUDIT command encountered the specified error while attempting to readdata from the remote ZFILEINC file.Effect The COPYAUDIT command aborts.Recovery See the OperatorMessagesManual for a description of the error code. For additionaldetails about understanding and correcting file-system errors, see theGuardian Procedure Errorsand Messages Manual. If possible, correct the underlying error and reenter the COPYAUDITcommand. Otherwise, contact your service provider.
RECEIVER RDFVOL error error# on allocation
error#is a file-system error number that indicates lack of storage space on disk.
Cause During execution of a START RDF command, RDFCOM determined that sufficientdisk storage for image files did not exist.
440 Messages
As one of its validation checks during START RDF processing, RDFCOM tries to create atemporary image file on the receiver’s RDFVOLUME and then to allocate all 16 extents. Thischeck, if successful, verifies that:• If RDF is starting for the first time, there is enough storage for at least one image file• If RDF has been started previously, there is enough storage for one image file when the
next image-file rollover occursIf the check fails because there is insufficient storage, this message appears.
Effect The START RDF command is aborted.Recovery See the OperatorMessagesManual for a description of the error code. For additionaldetails about understanding and correcting file-system errors, see theGuardian Procedure ErrorsandMessagesManual. Make sufficient space available on disk, and then reenter the START RDFcommand.
RECEIVER RDFVOL error error# on creation
error#is the file-system error number that identifies the specific error.
Cause During execution of a START RDF command or a VALIDATE CONFIGURATIONcommand, RDFCOM determined that sufficient disk storage for image files did not exist onthe RDFVOLUME. As one of its validation checks during processing of these commands,RDFCOM tries to create a temporary image file on the receiver’s RDFVOLUME and then toallocate all 16 extents. This check, if successful, verifies that:• If RDF is starting for the first time, there is enough storage for at least one image file• If RDF has been started previously, there is enough storage for one image file when the
next image-file rollover occursIf the check fails because there is insufficient storage, this message appears.
Effect The command fails.Recovery See the OperatorMessagesManual for a description of the error code. For additionaldetails about understanding and correcting file-system errors, see theGuardian Procedure Errorsand Messages Manual. If possible, correct the error and reenter the command that encounteredthe error. Otherwise, see your system manager.
RECEIVER RDFVOLUME device is NOT a disk volume
deviceis the name of the non-disk device.
Cause The RDF configuration file is invalid.Effect The validation of the receiver fails.Recovery Specify a valid disk volume.
RECEIVER RDFVOLUME volume-name does NOT exist
volume-nameis the name of the nonexistent RDFVOLUME file.
Cause The RDF configuration file is invalid.Effect The validation of the receiver fails.Recovery Specify a valid disk volume.
RECEIVER Record does not exist
Cause You tried to add a secondary image trail before adding the receiver’s configurationrecord.Effect The command fails.Recovery Add the receiver’s record. Then, add the secondary image trail.
RDFCOM Messages 441
RECEIVER record exists, use ALTER RECEIVER
Cause An ADD RECEIVER command was issued when the configuration file alreadycontained a receiver record.Effect The command fails.Recovery No recovery is required if you want to use the existing receiver process as it isconfigured. If you want to change any of the receiver’s configuration options, however, enteran ALTER RECEIVER command that specifies those changes.
RECEIVER record NOT found.
Cause The INFO command could not find a receiver record in the configuration file.Effect The command fails.Recovery Alter the configuration to include a receiver process.
Receiver record not found for subsystem ctrl-subvol.
ctrl-subvolis the name of an RDF subsystem control subvolume.
Cause RDFCOM was unable to read the receiver record for the RDF subsystem with thespecified control subvolume.Effect Validation fails.Recovery Determine why the receiver record for the subsystem cannot be obtained.
RECEIVER Record with ATINDEX atindex does not exist.
Cause You tried to add an imagetrail with the specified ATINDEX, but there is no receiverwith that value.Effect The ADD command fails.Recovery You must add the corresponding receiver process before adding an imagetrailwith the same ATINDEX value.
Remote system for Triple Contingency CopyAudit command is unavailable:remote-system
remote-systemis the name of the RDF backup system that received the most audit.
Cause You entered a COPYAUDIT command, but remote-system cannot be reachedbecause of a network problem.Effect The COPYAUDIT command aborts.Recovery When the remote system becomes available, reissue the COPYAUDIT command.
Remote system for Triple Contingency CopyAudit command is unknown:remote-system
remote-systemis the name of the RDF backup system that received the most audit.
Cause You entered a COPYAUDIT command, but remote-system is unknown to RDF.Effect The COPYAUDIT command aborts.Recovery Find the correct node name for the other RDF backup system, and reissue theCOPYAUDIT command.
Reserved subvolume subvolume-name found in the mapping stringmapping-string in the MAPFILE filename
subvolume-nameis the erroneous subvolume specified in the mapping string.
442 Messages

mapping-stringis the erroneous mapping string specified in the mapfile.
filenameis the name of the updater mapfile specified in the updater configuration.
Cause RDFCOM found a reserved subvolume name in the mapping string specified in theupdater mapfile when an ADD VOLUME, ALTER VOLUME, START RDF, START UPDATE,or VALIDATE CONFIGURATION command was being executed.Effect The command fails.Recovery Remove the reserved subvolume name in the mapping string, then reenter thecommand.
Restore failed with error error# Search is stopped.
error#is the file-system error number that identifies the specific error.
Cause Restoration of an audit trail file has failed for the reason indicated by error#.Effect RDFCOM immediately terminates its search for a TMF shutdown timestamp and thenits attempt to initialize RDF.Recovery See the OperatorMessagesManual for a description of the error code. For additionaldetails about understanding and correcting file-system errors, see theGuardian Procedure Errorsand Messages Manual. If possible, correct the error and reenter the command that encounteredthe error. Otherwise, see your system manager.
Searching for missing audit in remote imagetrail on volume
volumeis one of the RDF image trail volumes on the remote system named in the COPYAUDITcommand.
Cause The COPYAUDIT command is about to search for missing audit; this audit reachedthe specified image trail on the remote system but did not reach the local system before theoriginal primary system was lost.Effect The COPYAUDIT command begins the search.Recovery This is an informational message; no recovery is required.
Shutdown at specified timestamp timestamp does not exist
timestampis the shutdown timestamp to which the initialization was requested.
Cause You entered an INITIALIZE RDF timestamp command, but RDFCOM found anaudit timestamp earlier than the one you specified in the command. This indicates that a TMFshutdown at the specified timestamp does not exist.Effect RDF is not initialized.Recovery Examine the EMS log or the OPRLOG for a TMF shutdown message, and use thecorresponding timestamp.
SHUTDOWN Failure: error# on RECEIVER
error#is the error number that identifies the specific error.
Cause RDFCOM could not stop the receiver because of error#.Effect The shutdown operation is aborted.Recovery See the OperatorMessagesManual for a description of the error code. For additionaldetails about understanding and correcting errors, see theGuardian Procedure Errors andMessagesManual. If possible, correct the error and reenter the command that encountered the error.Otherwise, see your system manager.
RDFCOM Messages 443

SHUTDOWN Failure: error# on VOLUME volume
error#is the error number that identifies the specific error.
volumeis the name of an RDF data volume.
Cause RDFCOM could not stop the updater for volume volume because of error.Effect The shutdown is aborted.Recovery See the OperatorMessagesManual for a description of the error code. For additionaldetails about understanding and correcting errors, see theGuardian Procedure Errors andMessagesManual. If possible, correct the error and reenter the command that encountered the error.Otherwise, see your system manager.
Specified network backup system name is not defined.
Cause The specified backup system does not exist.Effect The configuration command fails.Recovery You must specify a valid backup system name.
Specified network backup system name is unavailable.
Cause RDFCOM is unable to reach the specified backup system.Effect The configuration command fails.Recovery Determine why the communications path to this system is down and take theappropriate recovery steps to bring it back up.
Specified network primary system name is not defined.
Cause The specified primary system does not exist.Effect The configuration command fails.Recovery You must specify a valid primary system name.
Specified network primary system name is unavailable.
Cause RDFCOM is unable to reach the specified primary system.Effect The configuration command fails.Recovery Determine why the comm path to this system is down and take the appropriaterecovery steps to bring it up.
Specified TMF shutdown timestamp at timestamp is earlier than theearliest timestamp in the TMF MAT. Please examine the OPRLOG for acorrect TMF shutdown timestamp.
timestampis the shutdown timestamp to which the initialization was requested.
Cause RDFCOM has searched the entire MAT currently on disk, but the timestamp youspecified in the INITIALIZE RDF command is earlier than the earliest audit timestamp in theaudit trailEffect RDF is not initialized.Recovery If all files of the MAT are currently on disk (for instance, the files from AA000001to the current audit file), then the specified timestamp is earlier than the last time TMF wasinitialized. To recover, you need to reexamine the EMS log or the OPRLOG for a later TMFshutdown point or stop TMF and use that shutdown point.If the shutdown record is located in an audit file that is no longer on disk, you will need torestore that file to disk, as well as all files between it and the latest file, and then reenter thecommand. For example, if files AA000009 through AA000010 are currently on disk, and theshutdown record is located in AA000007, then you must restore AA000007 through AA000008
444 Messages
to disk. Alternatively, you can use a different TMF shutdown point that is located in a MATfile still on disk, or you can stop TMF and use that resulting shutdown point.
START RDF Aborted
Cause A START RDF command aborted.Effect The command fails.Recovery Scan the EMS event log to determine why the command aborted, correct the errorif possible, and reenter the START RDF command.
START UPDATE in progress, Please Wait...
Cause A START UPDATE command is being executed.Effect The start operation continues for the updater process.Recovery This is an informational message; no recovery is required.
Starting RDF, Please Wait...
Cause A START RDF command is being executed.Effect The start operation continues for RDF.Recovery This is an informational message; no recovery is required.
STATUS RDF (\primary-> \backup) is NOT running
primaryis the name of the primary node in the RDF configuration.
backupis the name of the backup node in the RDF configuration.
Cause A STATUS RDF command was issued while RDF was not running.Effect The command fails.Recovery Enter another command, or wait until RDF is started and then reenter the STATUSRDF command.
STOP SYNCH command is aborted.
Cause You are attempting to execute the RDFCOM STOP SYNCH command, but either theRDF product is not running or another critical operation is already in progress.Effect The RDFCOM STOP SYNCH command aborts.Recovery Correct the situation and then reissue the command.
STOP SYNCH command is aborted because database synchronization is notin progress.
Cause You are attempting to execute an RDFCOM STOP SYNCH command, but onlinedatabase synchronization is not in progress.Effect The RDFCOM STOP SYNCH command aborts.Recovery You can only execute the STOP SYNCH command if the RDF product is currentlyinvolved in online database synchronization. Because the RDF product is not involved in adatabase synchronization, this is an informational message; no recovery is required.
STOP UPDATE in progress, Please Wait...
Cause A STOP UPDATE command is being executed.Effect The stop operation continues for the updater process.Recovery This is an informational message; no recovery is required.
STOP UPDATE request could not be completed
Cause You entered a STOP UPDATE command, but the monitor could not send stop messagesto all updater processes and has logged RDF error 841 to the EMS event log.
RDFCOM Messages 445

Effect Some updaters might have shut down, but others never received the stop messageand are still running. The receiver and monitor cannot now identify these updaters, and youcannot stop them with another STOP UPDATE command or a STOP RDF command.Recovery All remaining updaters must be manually stopped from the TACL interface (forexample, with a TACL STOP $UPD1 command). Examine the EMS event log for the errormessage 841; this message contains the Guardian error number that the monitor received whenattempting to stop the updater.
Storing missing audit in the imagetrail.
Cause The COPYAUDIT command has located the missing audit for the image trail identifiedin the previous message and is ready to move that audit from the remote system to the localsystem.Effect The COPYAUDIT command moves the audit to the local system.Recovery This is an informational message; no recovery is required.
SUFFIX must be a single alphanumeric character
Cause You specified an incorrect value for the SUFFIX option of the INITIALIZE RDFcommand.Effect The INITIALIZE RDF command is aborted.Recovery Reenter the command, specifying a single alphanumeric character for the suffixcharacter.
Swap File Error: error#
error#is the file-system error number that identifies the specific error.
Cause A NEWPROCESS error occurred during START RDF or TAKEOVER processing.Effect The command fails.Recovery See the OperatorMessagesManual for a description of the error code. For additionaldetails about understanding and correcting process errors, see the Guardian Procedure Errorsand Messages Manual. If possible, correct the error and reenter the command that encounteredthe error. Otherwise, see your system manager.
Synch point for synchdbtime has been found
synchdbtimeis a SYNCHDBTIME timestamp specified previously by an operator in an RDFCOMINITIALIZE RDF command.
Cause In conjunction with a complete database synchronization, a record whose timestampis less than synchdbtime has been located successfully.Effect The RDFCOM INITIALIZE RDF command continues.Recovery This is an informational message; no recovery is required.
Synch timestamp is synchdbtime
synchdbtimeis a SYNCHDBTIME timestamp specified previously by an operator in an RDFCOMINITIALIZE RDF command.
Cause In conjunction with a complete database synchronization, you are attempting toinitialize RDF to a timestamp that is earlier than the current time. A record whose timestampis less than synchdbtime has been found, and synchdbtime has been stored in the RDFconfiguration record.Effect The RDFCOM INITIALIZE RDF command continues.Recovery This is an informational message; no recovery is required.
TAKEOVER in progress
446 Messages

Cause A takeover operation is underway.Effect The takeover operation continues.Recovery This is an informational message; no recovery is required.
TAKEOVER command is not allowed in an OBEY/IN file without the bang (!)option.
Cause TAKEOVER command has been issued through an OBEY/IN file without bang (!)option.Effect The TAKEOVER operation is aborted.Recovery Specify the bang (!) option along with the TAKEOVER command in the OBEY/ INfile or issue the TAKEOVER command from RDFCOM command prompt.
The control subvolume name is not presently configured for an RDF primarysystem. You must use the OPEN command to open an RDF CONFIG file in anexisting RDF control subvolume, or you must initialize a new RDFconfiguration with the INITIALIZE RDF command.
nameis the name of the control subvolume explicitly specified or the primary system nameassigned by default.
Cause The control subvolume either specified or selected by default does not exist.Effect The control subvolume remains undefined.Recovery Either use the OPEN command to open an RDF CONFIG file in an existing RDFcontrol subvolume, or initialize a new RDF configuration with the INITIALIZE RDF command.
The control subvolume \sys.$SYSTEM.subvol is not empty. The files onthe control subvolume must be purged. Please note, these files mightbelong to another RDF configuration.
sysis the name of the primary system.
subvolis the name of the local RDF control subvolume.
Cause You tried to execute an INITIALIZE RDF command, but RDF control files (such asCONFIG or CONTEXT) already exist on the local control subvolume.Effect The INITIALIZE RDF command aborts.Recovery You must purge $SYSTEM.subvol.* on the primary system before you can retrythe INITIALIZE RDF command. Before doing so, however, be sure that the existing files donot belong to a different RDF configuration that is still valid.
The EXTRACTOR must be a named process
Cause You must specify a process name for the extractor process before issuing an ADDcommand.Effect The start command fails.Recovery You must reconfigure RDF with a named extractor process.
The last record in the local imagetrail on volume-name.subvolume-namecould not be found in the remote trail
volume-nameis the name of the image trail’s volume
subvolume-nameis the name of the image trail’s subvolume.
Cause The COPYAUDIT command could not find the last record in the local image trail onthe remote image trail. This problem indicates that the receiver’s RETAINCOUNT value was
RDFCOM Messages 447

probably not set high enough and that, as a result, some image files on the remote system werepurged.Effect The COPYAUDIT command aborts.Recovery There is no recovery action. The COPYAUDIT command cannot be executedbecause image files needed for this command were already purged from the remote system.
The MAPFILE filename is not found
filenameis the name of the updater mapfile specified in the updater configuration.
Cause RDFCOM could not find the updater mapfile when an ADD VOLUME, ALTERVOLUME, START RDF, START UPDATE, or VALIDATE CONFIGURATION command wasbeing executed.Effect The command fails.Recovery Provide an existing mapfile and reenter the command.
The MAPFILE filename should be an edit file
filenameis the name of the updater mapfile specified in the updater configuration.
Cause RDFCOM found that the updater mapfile is not an EDIT format file when an ADDVOLUME, ALTER VOLUME, START RDF, START UPDATE, or VALIDATE CONFIGURATIONcommand was being executed.Effect The command fails.Recovery Provide an edit file and reenter the command.
The MAPLOG file filename could not be created: error error#
filenameis the name of the updater maplog specified in the updater configuration.
error#is the file-system error number that identifies the specific error.
Cause Create operation returned an error when RDFCOM tried to create the updater maplogfile when an ADD VOLUME, ALTER VOLUME, START UPDATE, or START RDF commandwas being executed.Effect The command fails.Recovery See the Guardian Procedure Errors and Messages Manual for a description of therecovery actions for the file-system error. Correct the error indicated by error#, then reenterthe command.
The MAPLOG file filename should be an edit file
filenameis the name of the updater maplog specified in the updater configuration.
Cause RDFCOM found that the updater maplog is not an edit format file when an ADDVOLUME, ALTER VOLUME, START RDF, or START UPDATE command was being executed.Effect The command fails.Recovery Provide an edit file and reenter the command.
The MAT file with sequence number seq-num is not currently on disk.RDFCOM can trigger the restoration of the file, but only as a waitedoperation and you must mount the tapes Do you want RDFCOM to restorethe file?
seq-numis the sequence number of the MAT file.
448 Messages
Cause While searching for a TMF shutdown timestamp to use to initialize RDF, RDFCOMfound that the audit trail file with the specified sequence number is not currently available.If you respond to the prompt with YES or Y, RDFCOM directs the TMP to begin restoring thisfile.
NOTE: If the file was dumped to tape, you must wait for the TMP to prompt you to mountthe tape. This mount request is logged in the EMS log.
If you respond with NO or N, then RDFCOM aborts the initialization attempt.Effect RDFCOM waits for your response to the prompt.Recovery Respond YES or Y, or NO or N, to the prompt.
The MONITOR must be a named process.
Cause You must specify a process name for the monitor process before issuing an ADDcommand.Effect The start command fails.Recovery You must reconfigure RDF with the named monitor process.
The number of physical UPDATEVOLUMES exceeds 255. RDF/IMPX is requiredfor this many volumes.
Cause RDF has detected that the user is running RDF/IMP and the total number of physicalvolumes for all UPDATEVOLUMEs exceeds 255. This can happen where some, or all, of theUPDATEVOLUMEs are SMF virtual disks.Effect RDF will not start.Recovery Upgrade the RDF software to RDF/IMPX or reconfigure your disks on the RDFbackup node so that the total number of physical disks for all the UPDATEVOLUMEs is lessthan 255.
The PURGER must be a named process
Cause You must specify a process name for the purger process before issuing an ADDcommand.Effect The start command fails.Recovery You must reconfigure RDF with a named purger process.
The RDF primary system in the environment you are attempting to copyaudit from does not match the primary system in this environment.
Cause The COPYAUDIT command detected that the RDF primary system in the RDFenvironment you are attempting to copy audit from is not the same as the RDF primary systemin the local environment.Effect The COPYAUDITcommand aborts.Recovery Correct the REMOTESYS remote-sys and REMOTECONTROLSUBVOL rcvsparameters and reissue the COPYAUDIT command.
RDFNET must be a named process
Cause You must specify a process name for the RDFNET process before issuing an ADDcommand.Effect The start command fails.Recovery You must reconfigure RDF with a named RDFNET process.
"The remote control subvolume\bksys.$SYSTEM.subvol is not empty. Thefiles on the remote control subvolume must be purged. Please note, thesefiles might belong to another RDF configuration.
RDFCOM Messages 449

\bksysis the name of the RDF backup system.
subvolis the name of the remote control subvolume.
Cause You tried to execute an INITIALIZE RDF command, but the RDF control files (suchas CONFIG or CONTEXT) already exist on the remote control subvolume. If these files are onthe backup system, then that name is specified.Effect The INITIALIZE RDF command aborts.Recovery You must purge \$SYSTEM.subvol.* on the backup systems before you can retrythe INITIALIZE RDF command. Before doing so, however, be sure that the existing files donot belong to a different RDF configuration that is still valid.
The specified timestamp cannot be in the future
Cause You have specified an INITTIME timestamp that is in the future rather than in thepast.Effect The INITIALIZE RDF command aborts.Recovery Reissue the STOP UPDATE, TIMESTAMP command, specifying a timestamp thatis earlier than the current system time as shown in the status display.
The specified timestamp must be at least five minutes greater than thecurrent time
Cause The timestamp specified in a STOP UPDATE, TIMESTAMP command is less thanfive minutes from the current time.Effect The STOP UPDATE command aborts.Recovery Reissue the STOP UPDATE, TIMESTAMP command, specifying a timestamp thatis at least five minutes ahead of the current time.
The STOP SYNCH command is aborted because it has been issued previously.
Cause You are attempting to execute an RDFCOM STOP SYNCH command, but the commandhas already been issued previously.Effect The RDFCOM STOP SYNCH command aborts.Recovery You can only execute the STOP SYNCH command if the RDF product is currentlyinvolved in online database synchronization. Because the STOP SYNCH command has alreadybeen issued, this is an informational message; no recovery is required.
The Triple Contingency COPYAUDIT command has completed successfully.You must now issue a new RDFCOM Takeover command.
Cause The COPYAUDIT command has finished copying the missing audit from the remotesystem to the local system and has updated all context records on the local system.Effect The context records are updated.Recovery This is an informational message; no recovery is required.
The total number of items in the INCLUDE, EXCLUDE, INCLUDEPURGE andEXCLUDEPURGE lists has exceeded 100.
Cause The total number of items in the INCLUDE, EXCLUDE, INCLUDEPURGE, andEXCLUDEPURGE lists, are more than 100.Effect The volume is not added for RDF protection.Recovery Reduce the total number of items in the INCLUDE, EXCLUDE, INCLUDEPURGE,and EXCLUDEPURGE lists to less than or equal to 100.
The UPDATER must be a named process
Cause You must specify a process name for the updater process before issuing an ADDcommand.
450 Messages

Effect The start command fails.Recovery You must reconfigure RDF with a named updater process.
The year must be greater than 1996.
Cause You specified the year of a timestamp that is earlier than 1997.Effect The command involving the timestamp fails.Recovery Reissue the command, specifying a timestamp year that is 1997 or greater.
This aux EXTRACTOR Record already exists.
Cause You tried to add an EXTRACTOR with a particular ATINDEX value, but there isalready one configured with that value.Effect The ADD command fails.Recovery Review and revise your RDF configuration.
This aux RECEIVER Record already exists.
Cause You tried to add an RECEIVER with a particular ATINDEX value, but there is alreadyone configured with that value.Effect The ADD command fails.Recovery Review and revise your RDF configuration.
This command is not allowed in an OBEY file.
Cause An illegal command was encountered within an OBEY command file.Effect The command fails.Recovery Remove the command from the OBEY command file, and reenter the commanddirectly from your terminal.
This RDF subsystem is not configured in the network master subsystem
Cause Your current RDF subsystem is not listed in your the configuration of your networkmaster.Effect Validation fails.Recovery You must reconfigure your network master and possibly your local configuration.
TMF is having trouble.
Cause There is a problem with TMF.Effect The configuration validation fails.Recovery Check the status of TMF. When TMF is operational, reenter the command.
TMF is not configured.
Cause TMF has not been configured.Effect The requested RDFCOM operation fails.Recovery Configure and start TMF, and request the RDFCOM operation again.
TMF is not running.
Cause While either attempting to validate the RDF configuration or to start RDF, RDFCOMdiscovered that TMF is not running.Effect The command fails.Recovery Start TMF. Then validate your configuration and start RDF.
TMF is not started yet.
Cause TMF has not been started.Effect The requested RDFCOM operation fails.
RDFCOM Messages 451
Recovery Check the contents of the RDF configuration file, issue a VALIDATE RDF commandto verify the configuration, and reissue your request for the RDFCOM operation you originallywanted to perform.
TMF NAT table is full.
Cause There is a problem with TMF.Effect The configuration validation fails.Recovery Check the status of TMF. When TMF is operational, reenter the command.
TMF Shutdown at timestamp has been found. RDF starts with MAT filefilename at RBA relative-byte-address
timestampis the shutdown timestamp sought.
filenameis the name of the MAT file that contained the record with the matching timestamp.
relative-byte-addressis the relative byte address where the record with the matching timestamp was found inthe MAT file.
Cause RDFCOM has found the TMF shutdown timestamp identical to the timestamp specifiedin the INITIALIZE RDF timestamp command.Effect RDF is ready to be initialized at the specified timestamp.Recovery This is an informational message; no recovery is required.
TMF STOP in progress.
Cause A TMF stop operation is in progress.Effect TMF stops, and RDF automatically stops thereafter.Recovery This is an informational message; no recovery is required.
To issue this command, the RTD time of the extractor must be 0:00. Haveyou confirmed that the RTD is 0:00?
Cause You are attempting to execute an RDFCOM STOP SYNCH command. To ensure thatthe extractor does not miss any audit record, the extractor RTD must be 0:00 before executingthis command.Effect You are prompted for a “yes” or “no” response.Recovery Enter YES (or Y) to execute the command or NO (or N) to cancel it.
Too many volumes are configured (number > max)
maxis 64 for RDF, and 255 for the RDF/MP, MPX, IMP, or IMPX
Cause The maximum number of volumes that can be protected on a node (64 for RDF, 255for RDF/MP, MPX, IMP, or IMPX) has been exceeded.Effect The configuration validation fails.Recovery Delete some of the volumes.
Too many volumes are specified in this ALTER command
Cause You specified too many volumes in the command parameter list of an ALTERcommand.Effect The ALTER command aborts.Recovery Eliminate some of the volumes from the command parameter list.
Triple Contingency CopyAudit command aborted.
452 Messages

Cause The COPYAUDIT command has aborted because of a problem reported in the previousRDFCOM message.Effect The COPYAUDIT command aborts.Recovery Correct the problem reported in the previous error message and reissue theCOPYAUDIT command.
Unable to allocate Map
Cause A NEWPROCESS error occurred during START RDF or TAKEOVER processing.Effect The NEWPROCESS procedure fails.Recovery Make sufficient space available on the swap volume for the requested operation.
Unable to communicate with CPU cpu
cpuis the CPU that is not responding.
Cause A NEWPROCESS error occurred during START RDF or TAKEOVER processing.Effect The NEWPROCESS procedure fails.Recovery Check the status of the CPU, or enter SET and ALTER commands to direct theprocess to run on a different CPU.
Unable to get MAT filename with sequence number seq-num from the TMP;search stopped.
seq-numis the sequence number of the MAT file.
Cause RDFCOM could not obtain the fully qualified name of the audit trail file with thespecified sequence number from the TMP.Effect RDFCOM terminates the search for a TMF shutdown timestamp and then its attemptto initialize RDF.Recovery Check to see if TMF is started:• If it is not, start TMF before you again attempt to initialize RDF.• If it is running and this error occurs, this is an internal error. Contact the Global Mission
Critical Solution Center (GMCSC) or your service provider.
Unable to obtain the process access id of RDFCOM
Cause RDFCOM could not obtain the process access id of the user who started the RDFCOMsession.Effect The ADD command fails.Recovery Exit RDFCOM and then try again. If the problem persists, contact the GlobalMission Critical Solution Center (GMCSC) or your service provider.
Unable to purge old image file due to error error# DELETE ABORTED
error#is the file-system error number that identifies the specific error.
Cause A START RDF command failed because the reported error prevented RDFCOM frompurging the old image file.Effect The command fails.Recovery See the OperatorMessagesManual for a description of the error code. For additionaldetails about understanding and correcting file-system errors, see theGuardian Procedure Errorsand Messages Manual. Manually purge any files on the image file subvolume, and then reissuethe START RDF command.
Unable to purge remaining image files; error error#
RDFCOM Messages 453
error#is the file-system error number that identifies the specific error.
Cause A DELETE IMAGETRAIL command tried to delete an image trail, but RDFCOMcould not purge all image files in the trail because of the error denoted by file-systemfile-error.Effect The command fails.Recovery See the OperatorMessagesManual for a description of the error code. For additionaldetails about understanding and correcting file-system errors, see theGuardian Procedure Errorsand Messages Manual. Correct the error and reenter the command.
Undefined Externals
Cause A NEWPROCESS error occurred during START RDF or TAKEOVER processing.Effect The operation is aborted.Recovery This is an internal error. Contact the Global Mission Critical Solution Center(GMCSC) or your service provider.
Unidentifiable newprocess error: newproc0:7:newproc8:15
newproc#identifies the new process error.
Cause A NEWPROCESS error occurred during START RDF or TAKEOVER processing.Effect The command fails.Recovery See the Operator Messages Manual for a description of the error. For additionaldetails about understanding and correcting process errors, see the Guardian Procedure Errorsand Messages Manual. If possible, correct the error and reenter the command that encounteredthe error. Otherwise, see your system manager.
Unlicensed Privileged Program
Cause A NEWPROCESS error occurred during START RDF or TAKEOVER processing.Effect The operation is aborted.Recovery License the program, using the File Utility Program (FUP).
UPDATE is already off
Cause A STOP UPDATE command was issued when updating is disabled.Effect The command fails.Recovery This is an informational message; no recovery is required.
UPDATE is already on
Cause A START UPDATE command was issued when updating is enabled.Effect The command fails.Recovery This is an informational message; no recovery is required.
UPDATE request could not be performed
Cause RDFCOM could not execute a START UPDATE or STOP UPDATE command.Effect The command fails.Recovery Scan the EMS event log to determine why the command could not be performed.Correct the error condition, if possible, and request the update operation again.
VOLUME device is NOT a disk volume
deviceis the non-disk device assigned to the updater.
Cause The RDF configuration file is invalid.
454 Messages

Effect RDF will not start.Recovery Change the RDF configuration to reflect a valid disk volume.
VOLUME device UPDATEVOLUME is NOT a disk volume
deviceis the non-disk device assigned for the UPDATEVOLUME.
Cause The RDF configuration file is invalid.Effect RDF will not start.Recovery Change the RDF configuration to reflect a valid disk volume.
VOLUME Record exists, use ALTER VOLUME volume
Cause An ADD VOLUME command was issued when the configuration file already containedan updater record for the volume.Effect The RDF command fails.Recovery No recovery is required if you want to use the existing updater process as it isconfigured. If you want to change any of the updater’s configuration options, however, enteran ALTER VOLUME command that specifies those changes.
VOLUME volume contains too many physical volumes The SMF pool cannotcontain more than 15 volumes
volumeis the offending SMF virtual disk
Cause The updater is configured to a virtual SMF disk that consists of more than 15 physicaldisks. This configuration is not supported by the RDF product.Effect RDF will not start.Recovery Reset your RDF configurations and/or your SMF configuration so that the updatersare either assigned to physical volumes, or your SMF virtual disks map to 15 or fewer physicalvolumes.
VOLUME volume does NOT exist
volumeis the volume on the primary node for which the updater is responsible.
Cause The RDF configuration file is invalid.Effect RDF will not start.Recovery Bring the volume up or delete it from the RDF configuration.
VOLUME volume is NOT configured within TMF
volumeis the volume on the primary node for which the updater is responsible.
Cause The RDF configuration file is invalid.Effect RDF will not start.Recovery Delete the volume from the RDF configuration or add the volume to the TMFconfiguration.
VOLUME volume needs the IMAGETRAIL image trail; DELETE aborted
volumeis the name of the volume on the primary system that requires the image trail.
image trailis the name of the required image trail.
Cause You tried to delete an image trail that is still being used by an updater.Effect The command fails.
RDFCOM Messages 455

Recovery Delete the updater, and then delete the image trail.
VOLUME vol-name does not match imagetrail ATINDEX atindex
Cause You added an updater with the specified ATINDEX, but the IMAGEVOLUMEconfigured for the updater does not have that value.Effect The validation fails.Recovery Alter the particular updater’s ATINDEX value to match the appropriate audit trailnumber or delete the updater.
VOLUME vol-name is NOT audited to ATINDEX atindex
Cause You added an updater with the specified ATINDEX, but the primary system datavolume to be protected is not mapped to the audit trail with that audit trail number.Effect The validation fails.Recovery Alter the particular updater’s ATINDEX value to match the appropriate audit trailnumber or delete the updater.
VOLUME volume UPDATEVOLUME does NOT exist
volumeis the volume on the primary node for which the updater is responsible.
Cause The RDF configuration file is invalid.Effect RDF will not start.Recovery Bring the volume up, or delete it from the RDF configuration.
VOLUME volume record NOT found
volumeis the volume on the primary node for which the updater is responsible.
Cause The INFO command could not find an updater record for volume in the configurationfile.Effect The command fails.Recovery Alter the configuration to include the updater process.
WARNING - BACKUPSWAP parameter has no effect, KMSF swap volume takesprecedence
Cause The user attempted to SET or ALTER the RDF BACKUPSWAP parameter.Effect This parameter no longer has any effect. The KMSF subsystem controls the placementof the RDF processes’ swap files.Recovery This is an informational message; no recovery is required.
*** Warning *** FASTUPDATEMODE is already OFF.
Cause You have tried to turn FASTUPDATEMODE OFF for a Receiver when it was alreadyOFF.Effect The command is ignored.Recovery This is an informational message; no recovery is required.
*** Warning *** FASTUPDATEMODE is already ON.
Cause You have tried to turn FASTUPDATEMODE ON for a Receiver when it was alreadyON.Effect The command is ignored.Recovery This is an informational message; no recovery is required.
WARNING: No backup cpu has been configured for the procname
456 Messages

procnameis the RDF process without a backup CPU, which is one of: EXTRACTOR, MONITOR,RECEIVER, or $volume UPDATER.
Cause RDF is started without a backup process for the process identified in this message.Effect RDF is started.Recovery Stop RDF, reconfigure it to include a backup CPU for the RDF process, and startthe subsystem once again.
* * * WARNING * * * NSA SQL DDL operation encountered in the audittrail. If you have already performed this DDL operation on the backupdatabase, you should initialize RDF to a later point in the audit trail.
Cause You tried to initialize RDF to a timestamp, and RDFCOM encountered an audit recordindicating that you previously performed a SQL shared-access DDL operation.Effect The operation completes.Recovery This is an informational message. If you already performed the SQL DDL operationmanually on the backup system, then you must reinitialize RDF to a later point in time. Failureto do so could cause a cascade of errors by RDF updaters after you start RDF.
WARNING - PRIMARYSWAP parameter has no effect, KMSF swap volume takesprecedence
Cause The user attempted to SET or ALTER the RDF PRIMARYSWAP parameter.Effect This parameter no longer has any effect. The KMSF subsystem controls the placementof the RDF processes’ swap files.Recovery This is an informational message; no recovery is required.
* * * WARNING * * * RDF will start at the first record in the TMF masteraudit trail beyond the specified shutdown timestamp. RDF will ignoreall audit generated before this timestamp.
Cause You entered an INITIALIZE RDF command that attempted to initialize RDF at aspecific TMF shutdown timestamp.Effect RDF is ready to start reading the Master Audit Trail (MAT).Recovery This is an informational message; no recovery is required.
* * * WARNING * * * RDF will start at the first record in the TMF masteraudit trail whose timestamp is less than the specified timestamp. Thetimestamp you specified must follow the documented guidelines.
Cause You are attempting to initialize RDF in conjunction with a complete databasesynchronization.Effect If an audit record can be found whose timestamp is less than the specified timestamp,RDF is initialized to that record.Recovery This is an informational message; no recovery is required.
* * * WARNING * * * RDF will start at the first record in the TMF masteraudit trail whose timestamp is less than the specified timestamp. Thetimestamp you specified must follow the documented guidelines. Pleasenote that RDFCOM will subtract an additional three minutes from thespecified timestamp to ensure a safe restart position.
Cause You are attempting to initialize RDF to a timestamp that is earlier than the currenttime, and database synchronization is not involved.Effect If an audit record can be found whose timestamp is less than the specified timestamp,RDF is initialized to that record. If you were running RDF prior to this initialization command,you should take into consideration the highest updater RTD. In addition, RDFCOM subtracts
RDFCOM Messages 457

another three minutes from the specified timestamp to ensure that the starting position in theaudit trail is a safe one.Recovery This is an informational message; no recovery is required.
*** WARNING *** REPLICATEPURGE is not turned ON.
Cause REPLICATEPURGE is turned OFF but INCLUDEPURGE or EXCLUDEPURGE listshave been added for a volume.Effect The INCLUDEPURGE or EXCLUDEPURGE lists will be ignored for the volume.Recovery SET RDF REPLICATEPURGE to ON before starting RDF.
*** Warning *** Updater Open Mode has been specified the same value asit was before using the ALTER RDF UPDATEROPEN command.
Cause The ALTER RDF UPDATEROPEN command has been specified with the same modewhich was present prior to issuing the command.Effect The command fails.Recovery This is an informational message. No action needed.
Write error error# on attempt to reach the extractor, STOP SYNCH commandaborted.
error#is the file-system error number that identifies the specific error.
Cause You are attempting to execute an RDFCOM STOP SYNCH command, but RDFCOMencountered the specified error while sending the message to the extractor.Effect The STOP SYNCH command aborts.Recovery See the OperatorMessagesManual for a description of the error code. For additionaldetails about understanding and correcting file-system errors, see theGuardian Procedure Errorsand Messages Manual. Correct the problem and reissue the STOP SYNCH command.
Write error error# on local image file
error#is the file-system error number that identifies the specific error.
Cause The COPYAUDIT command encountered the specified error while attempting towrite data to a local image file on the local image trail.Effect The COPYAUDIT command aborts.Recovery See the OperatorMessagesManual for a description of the error code. For additionaldetails about understanding and correcting file-system errors, see theGuardian Procedure Errorsand Messages Manual. If possible, correct the error and reenter the COPYAUDIT command.Otherwise, see your system manager.
Write error error# on local ZFILEINC file
error#is the file-system error number that identifies the specific error.
Cause The COPYAUDIT command encountered the specified error while attempting towrite data to the local ZFILEINC file.Effect The COPYAUDIT command aborts.Recovery See the OperatorMessagesManual for a description of the error code. For additionaldetails about understanding and correcting file-system errors, see theGuardian Procedure Errorsand Messages Manual. If possible, correct the underlying error and reenter the COPYAUDITcommand. Otherwise, contact your service provider.
Write error error# on new image file filename
458 Messages

error#is the file-system error number that identifies the specific error.
filenameis the name of the image trail file associated with the error.
Cause The COPYAUDIT command encountered the specified error while attempting towrite data into the specified image file on the local image trail volume.Effect The COPYAUDIT command aborts.Recovery See the OperatorMessagesManual for a description of the error code. For additionaldetails about understanding and correcting file-system errors, see theGuardian Procedure Errorsand Messages Manual. If possible, correct the error and reenter the COPYAUDIT command.Otherwise, see your system manager.
You are about to copy audit records from remote-system to local-system
Are you sure you want to proceed [Y/N] ?
remote-systemis the name of the RDF backup system that received the most audit.
local-systemis the name of the local RDF system that received the least audit.
Cause You entered a COPYAUDIT command and receive this message as a prompt forconfirmation that you want to proceed with the command’s execution.Effect If you respond YES or Y, RDF executes the command. If you respond NO or N, thecommand terminates.Recovery This is an informational message; no recovery is required.
You are about to unpin a file that the extractor needs. Are you sureyou want to proceed?
Cause You have asked RDFCOM to unpin a file that is currently needed by the extractor. Ifyou respond “yes,” the file is unpinned and TMF can rename it. If the file is renamed, RDFcannot be restarted until you restore the file.Effect RDFCOM suspends until you respond to the prompt.Recovery Respond “yes” or “no” to the prompt.
You are attempting a TAKEOVER operation immediately after the receiverhas crashed. Please contact your HP analyst before proceeding with theTAKEOVER operation.
Cause RDFCOM has detected that the receiver stopped prematurely the last time it wasrunning. Because you are attempting the takeover operation before RDF has been allowed torestart, the probability is high that your database is already inconsistent with respect totransaction boundaries. That is, for some transactions, all audit data might not have beenapplied to database.Effect The database might be inconsistent.Recovery Performing the takeover might still leave the database inconsistent. If younevertheless choose to perform the takeover operation, you must first manually repair the lastimage file on disk. Before proceeding, contact the Global Mission Critical Solution Center(GMCSC) or your service provider.
You are logged on as user-id. To issue this command you must be super-id.
Cause You tried to issue a critical RDFCOM command, but you are not the super-user whoinitialized the RDF configuration.Effect The command fails.Recovery Log on as the super-user who initialized your RDF configuration.
RDFCOM Messages 459

You cannot add more than 48 network records
Cause The current limit for the number of RDF subsystems in your RDF network is 48 andyou have attempted to add 49.Effect The configuration command fails.Recovery Do not add any more network records.
You cannot alter MAPFILE on the backup system if the primary system isavailable
Cause During execution of an ALTER VOLUME command on the backup system, RDFCOMdetermined that the primary system is accessible.Effect The command fails.Recovery Reenter the command on the primary system.
You cannot alter MAPLOG on the backup system if the primary system isavailable
Cause During execution of an ALTER VOLUME command on the backup system, RDFCOMdetermined that the primary system is accessible.Effect The command fails.Recovery Reenter the command on the primary system.
You cannot START RDF after an RDF Takeover operation.
Cause You tried to start RDF after an RDF takeover operation has been performed.Effect The START RDF command fails.Recovery You must initialize RDF on the primary system. You should also ensure that thetakeover operation completed successfully.
You cannot start updaters before the extractor has completed Phase 2of its online database synchronization operation.
Cause You tried to start updaters by either a START RDF or START UPDATE commandbefore the extractor completed Phase 2 of its database synchronization operation.Effect The START RDF or START UPDATE command fails.Recovery You must wait until the extractor has logged message 782 before starting theupdaters. You can, however, issue a START RDF, UPDATE OFF command.
You have not added the master EXTRACTOR yet
Cause You tried to add an auxiliary extractor before adding the master extractor.Effect The ADD command fails.Recovery You must add the master extractor first.
You have not added the master RECEIVER yet
Cause You tried to add an auxiliary receiver before adding the master receiver.Effect The ADD command fails.Recovery You must add the master receiver first.
You must specify the year with four digits
Cause You specified the year in a timestamp with less than four digits.Effect The command involving the timestamp fails.Recovery Reissue the command, specifying a four-digit year in the timestamp.
460 Messages
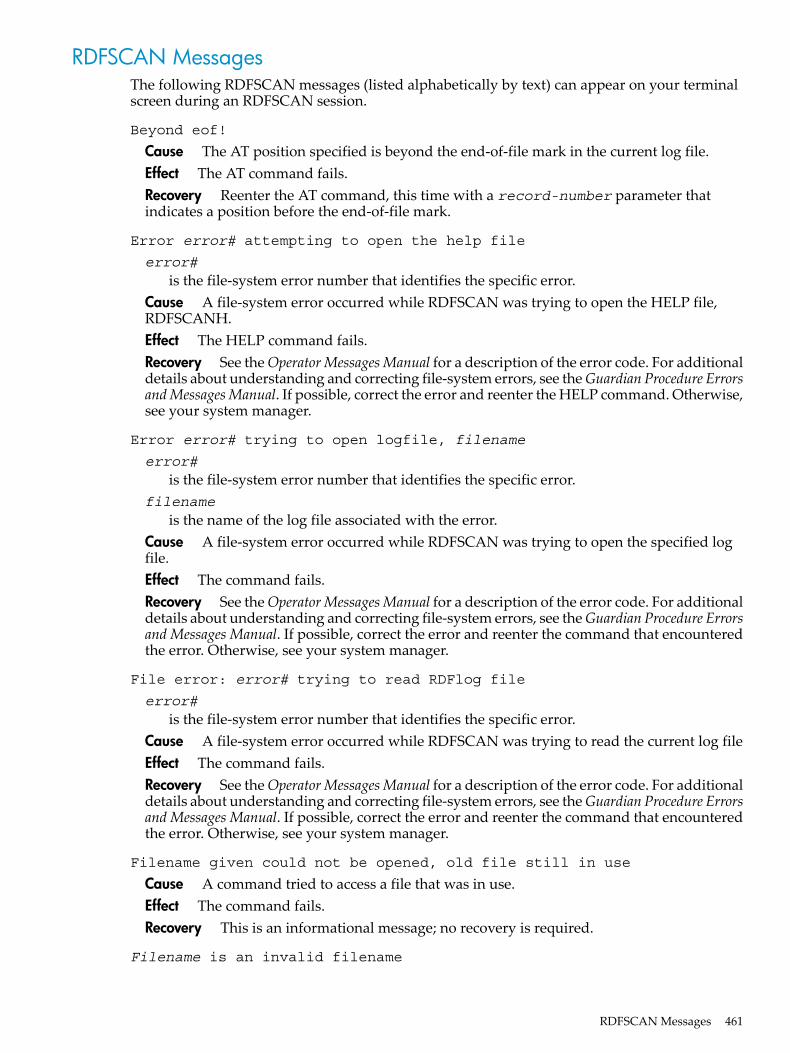
RDFSCAN MessagesThe following RDFSCAN messages (listed alphabetically by text) can appear on your terminalscreen during an RDFSCAN session.
Beyond eof!
Cause The AT position specified is beyond the end-of-file mark in the current log file.Effect The AT command fails.Recovery Reenter the AT command, this time with a record-number parameter thatindicates a position before the end-of-file mark.
Error error# attempting to open the help file
error#is the file-system error number that identifies the specific error.
Cause A file-system error occurred while RDFSCAN was trying to open the HELP file,RDFSCANH.Effect The HELP command fails.Recovery See the OperatorMessagesManual for a description of the error code. For additionaldetails about understanding and correcting file-system errors, see theGuardian Procedure ErrorsandMessagesManual. If possible, correct the error and reenter the HELP command. Otherwise,see your system manager.
Error error# trying to open logfile, filename
error#is the file-system error number that identifies the specific error.
filenameis the name of the log file associated with the error.
Cause A file-system error occurred while RDFSCAN was trying to open the specified logfile.Effect The command fails.Recovery See the OperatorMessagesManual for a description of the error code. For additionaldetails about understanding and correcting file-system errors, see theGuardian Procedure Errorsand Messages Manual. If possible, correct the error and reenter the command that encounteredthe error. Otherwise, see your system manager.
File error: error# trying to read RDFlog file
error#is the file-system error number that identifies the specific error.
Cause A file-system error occurred while RDFSCAN was trying to read the current log fileEffect The command fails.Recovery See the OperatorMessagesManual for a description of the error code. For additionaldetails about understanding and correcting file-system errors, see theGuardian Procedure Errorsand Messages Manual. If possible, correct the error and reenter the command that encounteredthe error. Otherwise, see your system manager.
Filename given could not be opened, old file still in use
Cause A command tried to access a file that was in use.Effect The command fails.Recovery This is an informational message; no recovery is required.
Filename is an invalid filename
RDFSCAN Messages 461
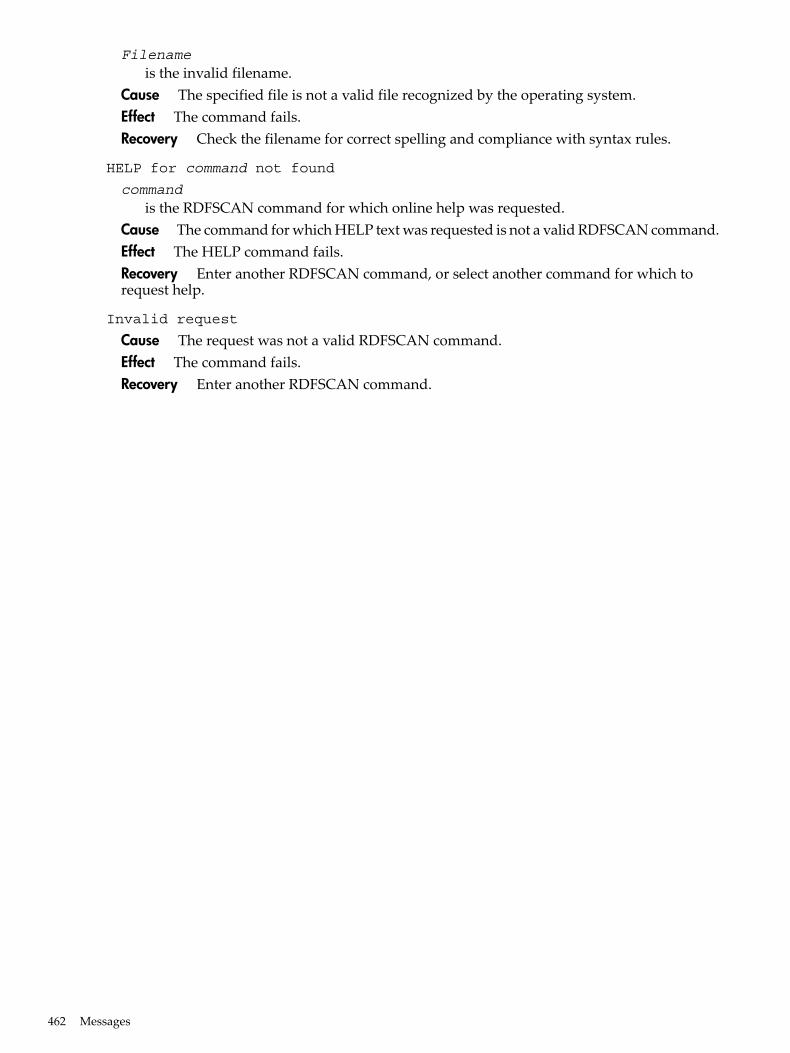
Filenameis the invalid filename.
Cause The specified file is not a valid file recognized by the operating system.Effect The command fails.Recovery Check the filename for correct spelling and compliance with syntax rules.
HELP for command not found
commandis the RDFSCAN command for which online help was requested.
Cause The command for which HELP text was requested is not a valid RDFSCAN command.Effect The HELP command fails.Recovery Enter another RDFSCAN command, or select another command for which torequest help.
Invalid request
Cause The request was not a valid RDFSCAN command.Effect The command fails.Recovery Enter another RDFSCAN command.
462 Messages
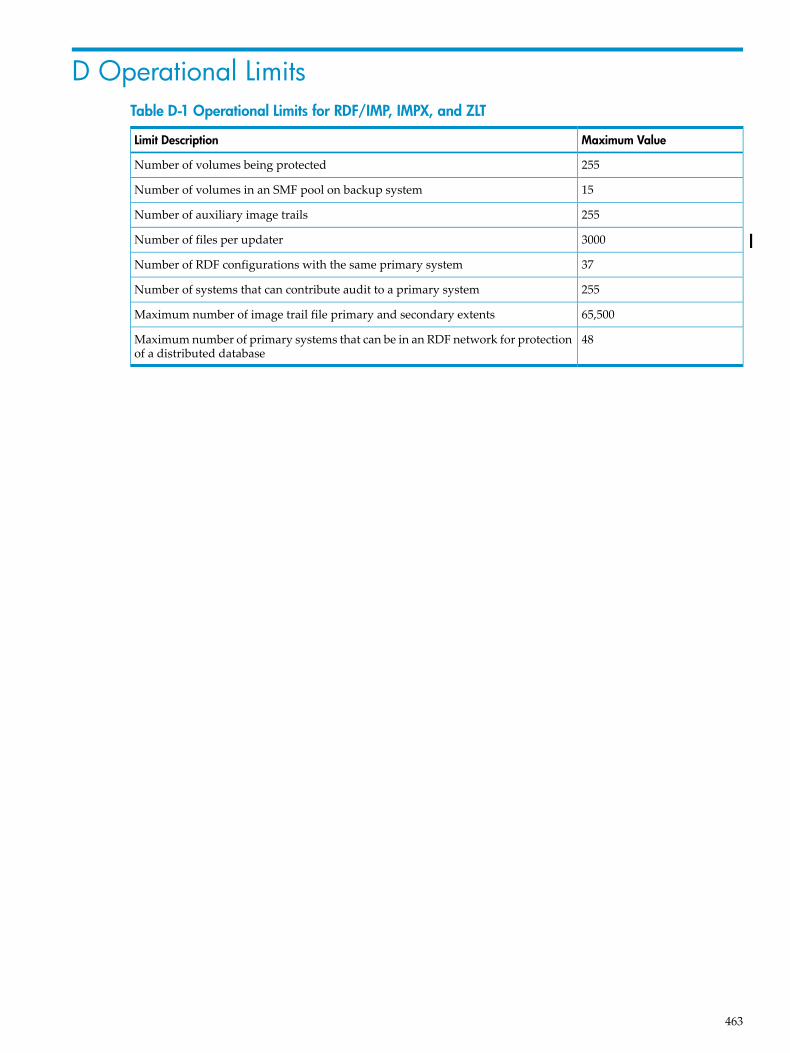
D Operational LimitsTable D-1 Operational Limits for RDF/IMP, IMPX, and ZLT
Maximum ValueLimit Description
255Number of volumes being protected
15Number of volumes in an SMF pool on backup system
255Number of auxiliary image trails
3000Number of files per updater
37Number of RDF configurations with the same primary system
255Number of systems that can contribute audit to a primary system
65,500Maximum number of image trail file primary and secondary extents
48Maximum number of primary systems that can be in an RDF network for protectionof a distributed database
463

464

E Using ASAPASAP (Availability Statistics and Performance) allows many subsystem entities to be monitoredacross a network of NonStop servers. The status and statistics for the entities are collected on asingle system, and are then monitored either through the ASAP command interface or throughthe ASAP graphical user interface (GUI) PC client.RDF/IMP and IMPX are instrumented to feed state information to ASAP, thus allowing RDFsubsystems to be monitored, in an integrated way, alongside all other subsystems supported byASAP. These RDF entities report state and statistical information to ASAP:• Monitor• Extractor• RDFNET (optional)• Receiver• Purger• Updater
Architectural OverviewRDF/IMP and IMPX are supplied with an object file called ASAPRDF which is the ASAP/RDFSmart Gatherer Process (SGP). SGP is the interface between ASAP and the RDF environments.For every system in which ASAP is configured to collect RDF data, the ASAP monitor starts anRDF SGP process. Figure E-1 shows a single RDF environment replicating from \PRI to \BAK.To monitor an RDF environment using ASAP, you must configure an RDF SGP on both theprimary and backup RDF systems. The SGP on the primary system reports data for the monitorand extractor processes. The SGP on the backup system reports data for the image trails andreceiver, purger, and updater processes.At regular intervals, the SGP process reports the status of each RDF entity residing on that systemto the ASAP collector (not shown). The ASAP collector writes the RDF status information intothe ASAP database, from which ASAP can be used to display and monitor the status of the RDFenvironment. See the ASAP Server Manual and the ASAP Client Manual for details about how tomonitor ASAP entities.
Architectural Overview 465

Figure E-1 The RDF/ASAP Environment
InstallationThe RDF SGP is packaged with the RDF/IMP and IMPX products and, by default, is installed on$SYSTEM.RDF. You might, however, place this object file wherever you want. If you install theSGP object file somewhere other than $SYSTEM.RDF, you must ensure that the ASAPconfiguration points to the correct location (by way of the SET RDF command within the ASAPcommand interface). See the ASAP Server Manual for details about the SET RDF command.
Auto DiscoveryTo simplify configuration, the RDF SGP automatically attempts to discover all the RDFenvironments on the system where it is started by searching RDF control subvolumes on $SYSTEMfor RDF configuration files. By default it monitors the status of all RDF/IMP and IMPXenvironments it finds.
NOTE: Before starting the RDF SGP for the first time, you should purge any control subvolumesthat are old and no longer being used to ensure that ASAP monitors only current RDFenvironments.
Monitoring Specific RDF EnvironmentsIf you only want to monitor specific RDF environments, you can override the auto-detection byexplicitly specifying the RDF environments for which you want the SGPs to collect stats. TheASAP CI command is:MONITOR RDF csv-bksys
Where csv is the RDF control subvolume of the RDF environment and bksys is the backupsystem name. There are no ‘\’ characters in either field.For example, this command would result in the RDF SGP only gathering stats from the RDFenvironment running from \DOME to \TANDA.
466 Using ASAP

MONITOR RDF DOME->TANDA
This command uses DOME as the CSV. To use a control subvolume with a suffix, say E, oneshould use the command:MONITOR RDF DOMEE->TANDA
where,DOMEE is the control subvolume and TANDA is the RDF Backup System without '\'.
Adding and Removing RDF EnvironmentsThe RDF SGP performs the auto detection and processing of the RDF environments addedthrough the MONITOR command when the process starts. If RDF environments are added orremoved while the RDF SGP is running, ASAP does not monitor them until the next time theRDF SGP is stopped and restarted.
Version CompatibilityThe RDF SGP supplied with each version of RDF/IMP(X) only runs with that version of RDF.All RDF/IMP(X) environments on a given system must match the version of the RDF SGP.
RDF Metrics Reported by ASAPFor each RDF entity, the RDF SGP passes the information shown in Table E-1 back to ASAP.
Table E-1 RDF Metrics Reported by ASAP
UpdaterRDFNETPurgerImagetrailReceiverExtractorMonitorInformationPassed toASAP
XX1XXXXXName
OperationalStatus:
XX1XXXXX“Running”
X———X——“Error”
XX1XXXXX“Stopped”
XX1XXXXX“Aborted”
X——————“Updt off”
XX1XXXXX“TKOVcomplete”
XX1XXXXX“TKOV partcomplete”
XX1XXXXX“TKOVactive”
XX1XXXXXError
XX1X—XXXPin
X——————PrimaryVolume
X——————BackupVolume
X——XX2XXVolume
Adding and Removing RDF Environments 467

Table E-1 RDF Metrics Reported by ASAP (continued)
UpdaterRDFNETPurgerImagetrailReceiverExtractorMonitorInformationPassed toASAP
X——XXX—TMFAuxiliaryAudit Index
X———XXXFileSequenceNumber
X————X—RelativeByteAddress
X———XXXRTD Time
XX1X—XXXPrimaryCPU
XX1X—XXXBackupCPU
XX1X—XXXPriority
1 Only in an RDF Network environment2 Only reported by the master receiver where the master image trail (MIT) volume is reported
468 Using ASAP
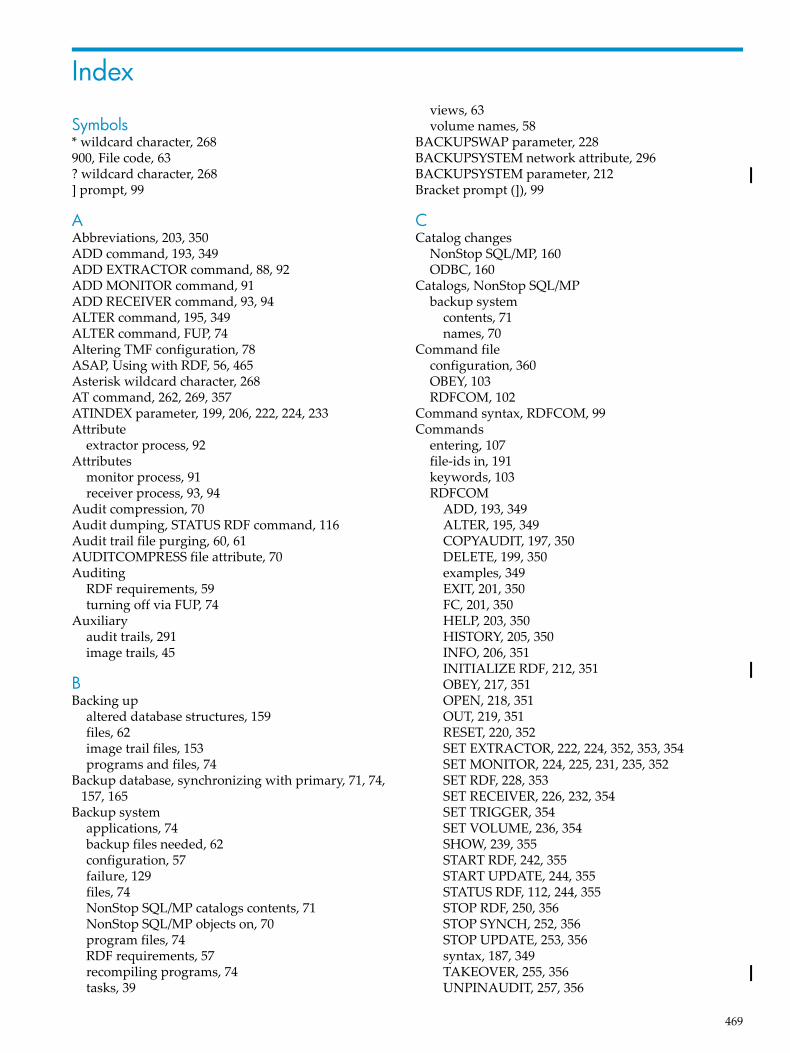
Index
Symbols* wildcard character, 268900, File code, 63? wildcard character, 268] prompt, 99
AAbbreviations, 203, 350ADD command, 193, 349ADD EXTRACTOR command, 88, 92ADD MONITOR command, 91ADD RECEIVER command, 93, 94ALTER command, 195, 349ALTER command, FUP, 74Altering TMF configuration, 78ASAP, Using with RDF, 56, 465Asterisk wildcard character, 268AT command, 262, 269, 357ATINDEX parameter, 199, 206, 222, 224, 233Attribute
extractor process, 92Attributes
monitor process, 91receiver process, 93, 94
Audit compression, 70Audit dumping, STATUS RDF command, 116Audit trail file purging, 60, 61AUDITCOMPRESS file attribute, 70Auditing
RDF requirements, 59turning off via FUP, 74
Auxiliaryaudit trails, 291image trails, 45
BBacking up
altered database structures, 159files, 62image trail files, 153programs and files, 74
Backup database, synchronizing with primary, 71, 74, 157, 165
Backup systemapplications, 74backup files needed, 62configuration, 57failure, 129files, 74NonStop SQL/MP catalogs contents, 71NonStop SQL/MP objects on, 70program files, 74RDF requirements, 57recompiling programs, 74tasks, 39
views, 63volume names, 58
BACKUPSWAP parameter, 228BACKUPSYSTEM network attribute, 296BACKUPSYSTEM parameter, 212Bracket prompt (]), 99
CCatalog changes
NonStop SQL/MP, 160ODBC, 160
Catalogs, NonStop SQL/MPbackup system
contents, 71names, 70
Command fileconfiguration, 360OBEY, 103RDFCOM, 102
Command syntax, RDFCOM, 99Commands
entering, 107file-ids in, 191keywords, 103RDFCOM
ADD, 193, 349ALTER, 195, 349COPYAUDIT, 197, 350DELETE, 199, 350examples, 349EXIT, 201, 350FC, 201, 350HELP, 203, 350HISTORY, 205, 350INFO, 206, 351INITIALIZE RDF, 212, 351OBEY, 217, 351OPEN, 218, 351OUT, 219, 351RESET, 220, 352SET EXTRACTOR, 222, 224, 352, 353, 354SET MONITOR, 224, 225, 231, 235, 352SET RDF, 228, 353SET RECEIVER, 226, 232, 354SET TRIGGER, 354SET VOLUME, 236, 354SHOW, 239, 355START RDF, 242, 355START UPDATE, 244, 355STATUS RDF, 112, 244, 355STOP RDF, 250, 356STOP SYNCH, 252, 356STOP UPDATE, 253, 356syntax, 187, 349TAKEOVER, 255, 356UNPINAUDIT, 257, 356
469

VALIDATE CONFIGURATION, 258, 356RDFSCAN
AT, 262, 357DISPLAY, 262EXIT, 263, 357FILE, 264, 357HELP, 265, 357LIST, 265, 357LOG, 266, 357MATCH, 267, 357NOLOG, 267, 268, 358SCAN, 269, 358
RDFSCAN commandsDISPLAY, 357
STATUS RDF, 112Communications
estimating required resources, 58RDF requirements, 57, 59
Communications line failure, 126Comparing SQL/MX tables, 335CONFIG file description, 362Configuration
backup system, 57command file, creating for RDF, 96extractor process, 88, 92monitor process, 91primary system, 57receiver process, 93, 94sample, 360TMF subsystem, 60
Configuration fileRDF subsystem, 84TMF subsystem, 78
Configuration file description, 362Configuration parameters, default, 359Configuring the RDF subsystem, 84Configuring the TMF subsystem, 78CONGCTRL SYSGEN parameter, 63Consistent state, access to backup databases, 150Context file description, 363Control subvolume, RDF, 53COPYAUDIT command, 197, 274, 350CPUS attribute
monitor process, 91receiver process, 93, 94
CPUS parameter, 222, 224, 225, 231, 235, 236, 352, 353extractor process, 88, 92
CPUs, displaying, 249Create operation
error recovery, 123file-system errors, 123RDF errors, 123
DDatabase operations, replicating, 64Database synchronization, 71
File Utility Program (FUP), 74OBEY command files, 71when to synchronize, 251
Databasesbacking up altered structures, 159Enscribe file-label modifications, 164NonStop SQL/MP
backing up altered structures, 160catalog changes, 160DDL operations, 160partition key changes, 163synchronization, 160table purges, 163
NonStop SQL/MX, 323states, 157synchronizing
entire database, 165individual tables or files, 166individual volumes, 165
DDL operationsnonshared access, 152NonStop SQL/MP, 151, 160not replicated by RDF, 64shared access, 152
Default configuration parameters, 359DEFER AUDITDUMP command, TMF subsystem, 78DEFINEs
example for NonStop SQL/MP tables, 72MAP NAMES incompatible with, 73NonStop SQL/MP object names, 74
DELETE command, 199, 350DELETE VOLUME example, 199, 200, 201DISABLE BEGINTRANS option, TMF, 97Disk file names, 358Disk process RDF requirements, 59Disk volume
configuration, 58limit, 58mapping, 58
DISPLAY command, 262, 357Documentation related to RDF, 29DoLockstep procedure, 310DRAIN parameter, 250DSM catalogs, 63
EEMS event log, 38
messages logged in, 39, 118EMS event log, scanning, 39, 118EMS support, 55ENABLE BEGINTRANS option, TMF, 97Enscribe
databasessynchronizing, 71synchronizing with FUP, 74synchronizing with SQLCI commands, 72synchronizing:with OBEY command files, 71
filelabel modifications, 64partitioned, 65preparing for RDF protection, 70
purge operations, 64
470 Index

Error messages, file system, 366Error recovery
create operation, 123modify operation, 122open operation, 122RDF error 700, modify operation, 122RDF error 705, open operation, 122RDF error 739, create operation, 123
Event log, scanning messages in EMS, 39, 118Exception files
description, 363examining, 362records, 38
EXCLUDE clauses, 279EXIT command, 201, 263, 350, 357Expand
estimating required resources, 58multi-CPU paths (superpaths), 293
EXPAND line failure, 126Extractor process, 42
attributesadding to configuration file, 92configuration example, 93setting option values, 92
auxiliary, 291configuration, 88, 92, 222, 224, 352, 353, 354failure, 127object code file, 75parameters
ADD EXTRACTOR example, 194adding to configuration file, 88, 193, 349ALTER EXTRACTOR example, 196altering, 196displaying configuration values, 206, 351displaying option values, 239, 355INFO EXTRACTOR example, 209, 211RESET EXTRACTOR example, 222resetting option values, 220, 352SET EXTRACTOR example, 223setting option values, 88, 222, 224, 352, 353, 354
FFailures
extractor, 127on the backup system, 129on the primary system, 128processor, 127RDF state transition, 128updater, 127
FC command, 201, 350Features, RDF subsystem, 35File
auditing by TMF required, 59backing up, 62configuration command example, 360error recovery
creation failures, 123modification failures, 122open failures, 122
exception, examining, 362label modifications, 64log, 38, 261OBEY command, 103, 360partitioned, 63
placement of partitions, 65RDF requirements, 59temporary, 65
File code 900, 63FILE command, 264, 357File names, 358File recovery
on the backup system, 130on the primary system, 130
File replication, 54, 279File system errors, 366
create operation, 123modify operation, 122open operation, 122
File Utility Program (FUP)ALTER command, 74synchronizing ENSCRIBE databases, 74
File, log, 38, 261File-ids, 191File-label modifications, 164Files
backup system, 74partitioned, synchronizing, 74preparing for RDF protection, 70
GGateway process, RDF, 312
HHardware requirements, 57Help
RDFCOM online, 107RDFSCAN online, 111
HELP command, 203, 265, 350, 357HISTORY command, 205, 350
IImage trail, 45Image trail files
backing up, 153description, 363writing to, 39
IMAGETRAIL parameter, 199IMAGEVOLUME parameter, 236INCLUDE clauses, 279Indexes, NonStop SQL/MP, 70INFO * command, 96INFO command, 206, 351INFO NETWORK command, example, 212INFO RDFNET command, example, 212Initialization, online, 80INITIALIZE RDF command, 79, 212, 351Initializing
RDF, 79
471

TMF, 78INITTIME parameter, 81, 213Installing the RDF subsystem, 75
KKeywords, 103
LLabel modifications, file, 64Licensed programs, 76Line failure, 126LIST command, 265, 357LOCATION option, 333Lockstep gateway messages, 314Lockstep operation, 55LOG command, 266, 357Log device, messages sent to, 365Log file, 261
$0, 366description, 38example, 119, 365messages in, 118scanning messages in, 39specifying in RDFSCAN, 264, 357
Log, EMS event, 118LOGDEVICE parameter, 228LOGFILE parameter, 228
MManaging the RDF subsystem, 99MAPFILE
adding to an updater's configuration record, 288creating mapping strings, 285
MAPLOGadding to an updater's configuration record, 288created to log subvolume name mapping, 287
MappingSQL/MX name, 332volume-to-volume, 58
Master audit trail, calculating amount of data, 59Master image trail, 45MATCH command, 267, 357Match pattern for log messages, 265, 267, 269, 357, 358Messages
displaying HELP text for, 107file-system errors, 366in log file, 118lockstep gateway, 314logged in log file, 38RDF, 365, 366RDFCOM, 413RDFSCAN, 461scanning in EMS event log, 39, 118scanning in log file, 39
Modify operationerror recovery, 122file-system errors, 122RDF errors, 122
Monitor process, 42
configuration, 224, 225, 231, 235, 352object code file, 75parameters, 91, 360
adding to configuration file, 193, 349altering, 196displaying configuration values, 206, 351displaying option values, 239, 355INFO MONITOR example, 210resetting option values, 220, 352SET MONITOR example, 225, 226, 232setting option values, 224, 225, 231, 235, 352
Multiple backup systems, replication to, 52
NName mapping, SQL/MX, 332NETWORK attribute, 295Network transactions, 55, 295NETWORKMASTER attribute, 296NOLOG command, 267, 268, 358Nondisk device names, 358Nonshared access DDL operations, 152NonStop process pairs, RDF, 41NonStop SQL/MP
audited volume requirement, 70databases
backing up altered structures, 160catalog changes, 160DDL operations, 160example of synchronizing, 72, 73partition key changes, 163purging, 165synchronization, 160synchronizing, 71synchronizing with OBEY command files, 71table purges, 163
DDL operationsnonshared access, 152shared access, 152
DEFINEs, object names, 74objects on backup system, 70program files, recompilation, 74report definitions on backup system, 71synchronizing databases, 71tables
DEFINEs for, example, 72partition key changes, 163partitioned, 63, 65placement of partitions, 65preparing for RDF protection, 70purges, 163
versions, RDF requirements, 59views, backup system, 63
NonStop SQL/MP DDL operations, 151NonStop SQL/MX and RDF, 323NonStop SQL/MX operations and RDF, 153
OOBEY command, 217, 351OBEY command files, 103, 360
472 Index
backup system, 71, 74synchronizing databases with, 71
OBEYFORM option, 206of INFO command, 96
OBEYVOL command, 218ODBC catalog changes, 160Offline synchronization for a single partition, 330Online database synchronization, 167
phases of, 183Online help
RDFCOM, 107RDFSCAN, 111
Online initialization, 80OPEN command, 218, 351Open operation
error recovery, 122file-system errors, 122RDF errors, 122
Operating systemRDF requirements, 59security, 76
Operating the RDF subsystem, 99Operations, RDF subsystem, 42OUT command, 96, 219, 351Outages
planned, 35unplanned, 34
PParameters, 360
default configuration, 359extractor process, 88
Partition key changes, NonStop SQL/MP, 163Partitioned
filesplacement of partitions, 65restriction, 63
tablesplacement of partitions, 65restriction, 63
Partitioned files, synchronizing, 74PATHPACKETBYTES SYSGEN parameter, 63Pattern search, match pattern for log messages, 265, 267,
269, 357, 358Phases of online database synchronization, 183Planned outages, 35Planned switchovers, 136PNETTXVOLUME network attribute, 297Primary database
backing up altered structures, 159resynchronizing with backup, 165synchronization with backup, 157synchronizing with backup, 71
File Utility Program (FUP), 74OBEY command files, 71
Primary systembacking up files, 62configuration, 57failure, 128
preparing for RDF installation, 69processes, 41RDF requirements, 57
Primary system failure, stopping the backup systembefore restarting the primary system, 132
PRIMARYSWAP parameter, 228PRIMARYSYSTEM network attribute, 296PRIORITY attribute
extractor process, 92monitor process, 91receiver process, 93, 94
PRIORITY parameter, 222, 224, 225, 231, 235, 236, 352, 353extractor process, 88
PROCESS attributeextractor process, 92receiver process, 93, 94
Process file names, 358Process identifiers, 358PROCESS parameter, 222, 224, 225, 231, 235, 236, 352, 353
extractor process, 88Processes, RDF, 40Processor failures, 127Program files, backup system, 74Program files, NonStop SQL/MP, 70Purge operations, 64Purger process, 49
QQuestion mark wildcard character, 268
RRDF and SQL/MX operations, 153RDF subsystem
attributesextractor process, 92receiver process, 93, 94
auxiliary audit trails, 291configuration command file, 96configuration file, 84configuring, 84control subvolume, 53default configuration parameters, 359documentation related to, 29EMS support, 55errors
create operation, 123modify operation, 122open operation, 122
exception records, 38extractor process, 61features, 35file-level replication, 279finding status of, 244, 355image file, 39initializing, 79installation, 75introduction to, 31licensed programs, 76
473

log device for messages, 365log file, 38, 261log file example, 365managing, 99messages, 365, 366messages, scanning, 39, 118network transactions, 295NonStop process pairs, 41operating, 99operations, 42parameters
BACKUPSWAP, 228BACKUPSYSTEM, 212CPUS, 222, 224, 225, 226, 231, 232, 235, 236, 352, 353EXTENTS, 226, 232image trail, 88IMAGETRAIL, 199IMAGEVOLUME, 236LOGDEVICE, 228LOGFILE, 228monitor process, 91PRIMARYSWAP, 228PRIORITY, 222, 224, 225, 226, 231, 232, 235, 236, 352,
353PROCESS, 222, 224, 225, 226, 231, 232, 235, 236, 352,
353RDFVOLUME, 226, 232REMOTECONTROLSUBVOL, 197remotesys, 197RESET PROCESS, 222, 224, 225, 226, 231, 232, 235,
236, 352, 353RETAINCOUNT, 226, 232SUFFIX, 212TIMESTAMP, 212, 253UPDATERDELAY, 228UPDATEVOLUME, 236VOLUME, 199
performance, 70processes, 41RDFCOM, 99replication to multiple backup systems, 52requirements
hardware, 57software, 59
requirements for TMF, 60restarting, 132, 136security, 76SMF support, 65starting, 97state transition failure, 128stopping
methods of, 132restarting and, 132
subvolume-level replication, 279tasks, 39time delay (RTD), 134user interfaces, 38
RDF/IMP product components, 75RDF/IMPX product components, 75
RDF/ZLT product components, 76RDFCHEK
file comparison utility, 75licensed program, 76
RDFCOMcommand summary, 103command syntax, 99, 101commands
ADD, 193, 349ADD EXTRACTOR, 88, 92ADD MONITOR, 91ADD RECEIVER, 93, 94ALTER, 195, 349COPYAUDIT, 350DELETE, 199, 350examples, 187, 349EXIT, 201, 350FC, 201, 350HELP, 203, 350HISTORY, 205, 350INFO, 96, 206, 351INITIALIZE RDF, 79, 212, 351OBEY, 217, 351OPEN, 218, 351OUT, 96, 219, 351RESET, 220, 352SET EXTRACTOR, 88, 92, 222, 224, 352, 353, 354SET MONITOR, 91, 224, 225, 231, 235, 352SET RDF, 228, 353SET RECEIVER, 93, 94, 226, 232, 354SET VOLUME, 236, 354SHOW, 239, 355START RDF, 97, 242, 355START UPDATE, 98, 244, 355STATUS RDF, 112, 244, 355STOP RDF, 250, 356STOP SYNCH, 252, 356STOP UPDATE, 253, 356TAKEOVER, 255, 356UNPINAUDIT, 356VALIDATE CONFIGURATION, 258, 356
description, 99keywords, 103online help, 107prompt (]), 99running, 99security requirements, 77using from a command file, 102using interactively, 100using noninteractively, 102
RDFEXTOextractor object file, 75security requirements, 77
RDFINST installation macro, 75RDFLOCK file description, 363RDFLOG, 109, 357RDFMONO
monitor object file, 75security requirements, 77
474 Index
RDFNETO, security requirements, 77RDFRCVO
licensed program, 76receiver object file, 75security requirements, 77
RDFSCANdescription, 261description of use, 39, 118ending a session, 110help text file, 75messages, 461object code file, 75online help, 111running, 109security requirements, 77starting a session, 109wildcard characters in match patterns, 268
RDFSCAN commandsAT, 262, 357DISPLAY, 262, 357EXIT, 263, 357FILE, 264, 357HELP, 265, 357LIST, 265, 357LOG, 266, 357MATCH, 267, 357NOLOG, 267, 268, 358quick reference, 357SCAN, 269, 358using, 110
RDFSCANH help text file, 75RDFSNOOP, 362
licensed program, 76object code file, 75security requirements, 78
RDFUPDOlicensed program, 76security requirements, 78updater object file, 75
RDFVOLUME attributereceiver process, 93, 94
RDFVOLUME parameterverification of image file volume, 259
RDIMAGE, security requirements, 78Receiver process, 44
attributes, 93, 94auxiliary, 291configuration, 93, 94, 226, 232, 354disk space allocation, 124object code file, 75parameters
adding to configuration file, 193, 349altering, 196displaying configuration values, 206, 351displaying option values, 239, 355resetting option values, 220, 352SET RECEIVER example, 228, 234setting option values, 226, 232, 354SHOW RECEIVER example, 241
Recompiling programs, 74Reload of backup database, 62REMOTECONTROLSUBVOL network attribute, 297REMOTECONTROLSUBVOL parameter, 197REMOTESYS parameter, 197Replicating database operations, 64Replication
file-level, 279subvolume-level, 279to multiple backup systems, 52
Report definitions, SQLCI, 71Requirements, RDF
hardware, 57software, 59TMF, 60
Reserved, file names, 358RESET command, 220, 352RESET PROCESS parameter, 222, 224, 225, 231, 235, 236,
352, 353Restart point, updater, 48Restarting the RDF subsystem, 136Restoring SQL/MX tables, 333Resynchronizing
databases, 165individual tables or files, 166individual volumes, 165
RETAINCOUNT parameter, 226, 232, 273REVERSE parameter, 250RTD time, column in STATUS RDF display, 247Running RDFCOM, 99
SSAFEGUARD security, 76SCAN command, 266, 269, 358Scanning RDF messages, 39Searching log files, 268Security
guidelines, 76RDF objects, 76
SET EXTRACTOR command, 88, 92, 222, 224, 352, 353, 354
SET MONITOR command, 91, 224, 225, 231, 235, 352SET RDF command, 228, 353SET RECEIVER command, 93, 94, 226, 232, 354SET TRIGGER command, 235SET VOLUME command, 236, 354Shared access DDL in an RDF network, 153, 303Shared access DDL operations, 152SHOW command, 239, 355SHOW NETWORK command, example, 242SHOW RDFNET command, example, 242SMF support, 65SOFTDOC software documentation file, 75Software requirements, 59SQL/MP DDL operations not replicated by RDF, 64SQL/MX and RDF, 323SQL/MX LOCATION option, 333SQL/MX name mapping, 332
475
SQL/MX offline synchronization for a single partition,330
SQL/MX tablescomparing, 335restoring, 333
START RDF command, 97, 242, 355START TMF command, TMFCOM, 97START TRANSACTION command, TMFCOM, 74, 78START UPDATE command, 98, 244, 355Starting the RDF subsystem, 97Starting the TMF subsystem, 97STATUS RDF command, 112, 244, 355STOP RDF command, 250, 356STOP SYNCH command, 252, 356STOP UPDATE command, 150, 253, 356stop-update-to-time, 150, 253, 406Stopping the backup system after a primary system
failure, 132Stopping the RDF subsystem
by stopping the TMF subsystem, 133from the backup system, 134, 251from the primary system, 134, 251methods of, 132TAKEOVER command, 139
Subvolumenames, 191replication, 279
Subvolume name mappingcreating a maplog, 287creating mapping strings, 285invalid mapping strings, 286managing filename collisions, 286problems mapping partitioned files, 288restrictions on use of, 285valid mapping strings, 286
Subvolume replication, 54SUFFIX parameter, 212Superpaths, Expand, 293Switching disks on updater UPDATEVOLUMES, 155Switchovers, planned, 136Synchronization, online, 167, 328Synchronizing
an individual file or partition online, 331an individual volume online, 176databases, 71, 251
File Utility Program (FUP), 74OBEY command files, 71
entire databases online, 168partitioned files, 74selected database portions online, 176
Synchronizing an individual file or partition online, 176Syntax of RDFCOM commands, 99, 187, 349SYSGEN parameters, 63
TTables, NonStop SQL/MP
backup system, 70partition key changes, 163partitioned, 63
placement of partitions, 65preparing for RDF protection, 70purges, 163
TACL macrosbackup system, 71RDFINST for RDF installation, 75
TAKEOVER command, 255, 356audited volumes on backup system, 70stopping the RDF subsystem, 139
Takeover operations, ZLT, 342Tasks, RDF subsystem, 39Temporary disk files, 65TIMESTAMP parameter, 212, 253Timestamp, STOP UPDATE command, 150TMF subsystem
audit trail rollover, 60configuration file, altering, 78configuration for RDF, 60configuring, 78DEFER AUDITDUMP command, 78initializing, 78RDF recovery from failure, 128, 129RDF requirements, 60starting, 97transactions, designing for RDF protection, 64volume failure, 128with dump process, 61without dump process, 61
TMFCOM ABORT TRANSACTIONAVOIDHANGING option, 131avoiding use of, 131
TMFCOM START TRANSACTION command, 74, 78Transactions
designing for RDF protection, 64lockstep, 311network, 295
Triple contingency feature, 53, 271
UUNPINAUDIT command, 257, 356Unplanned outages, 34UPDATE option, START RDF command, 97Updater process, 46
alternate key files, auditing, 48configuration, 236DELETE VOLUME example, 199, 200, 201deleting volume, 199, 350error recovery, 121file-system errors, 49, 121object code file, 75parameters, 361
ADD VOLUME example, 195adding to configuration file, 193, 349altering, 196displaying configuration values, 206, 351displaying option values, 239INFO VOLUME example, 210RESET VOLUME example, 222resetting option values, 220, 352
476 Index

SET VOLUME example, 239setting option values, 236SHOW VOLUME example, 241
partitioned files, auditing, 48RDF errors, 121restart point, 48restart points, error recovery, 121
Updater, failure, 127UPDATERDELAY parameter, 228UPDATEVOLUME parameter, 236User interfaces, RDF subsystem, 38
VVALIDATE CONFIGURATION command, 258, 356Views, NonStop SQL/MP, 63, 70Volume
audited on backup system, 70configuration, 58failure, TMF, 128limit, 58mapping, 58mapping primary to backup, 70names, 191names, different on primary and backup, 70
VOLUME command, 218VOLUME parameter, 199
WWildcard characters in match patterns, 268
ZZLT
overview, 337takeover operations, 342
477
