how to use gmail to access your own [email protected] jay diloy
TRANSCRIPT

www.jaydiloy.com
Note: This is how I did this using my own webhost. Maybe there’s a little difference on your side, but
still the process is almost the same. You may refer to your webhost’s knowledge base for your email
settings.
www.jaydiloy.com
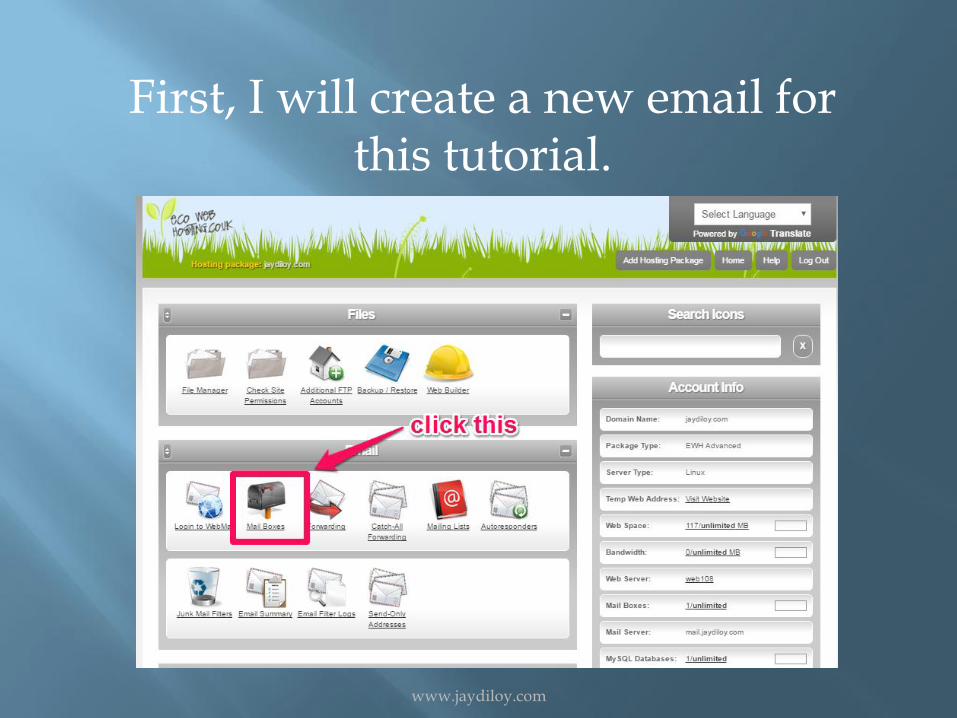
First, I will create a new email for this tutorial.
www.jaydiloy.com
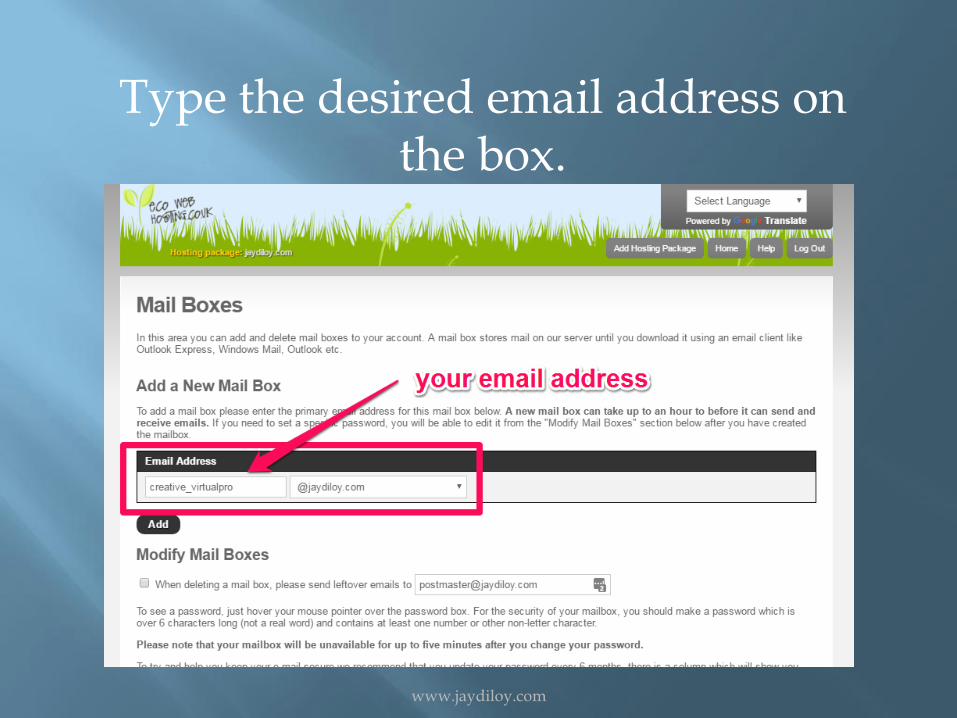
Type the desired email address on the box.

www.jaydiloy.com

www.jaydiloy.com
I have now my new email address. Copy the password, we will need it
later in setting up the Gmail.

www.jaydiloy.com
I go back to my cPanel and click “Forwarding”.

www.jaydiloy.com
I choose the email we created, and type the destination address which
is my Gmail.

www.jaydiloy.com
Click create. Maybe on your host, it is save instead of create.
www.jaydiloy.com
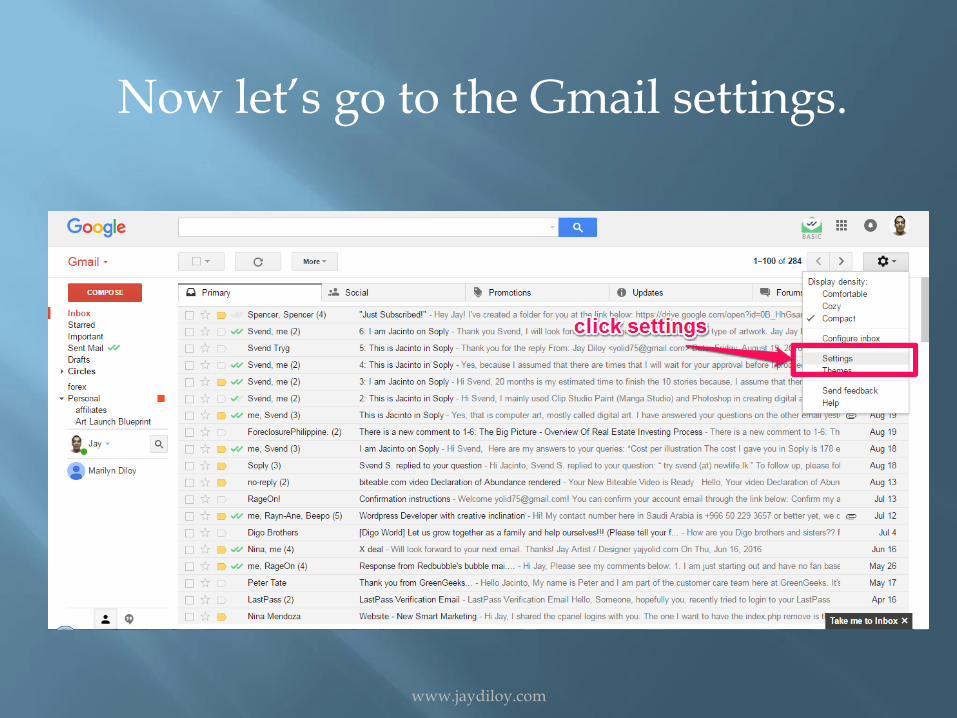
Now let’s go to the Gmail settings.

www.jaydiloy.com
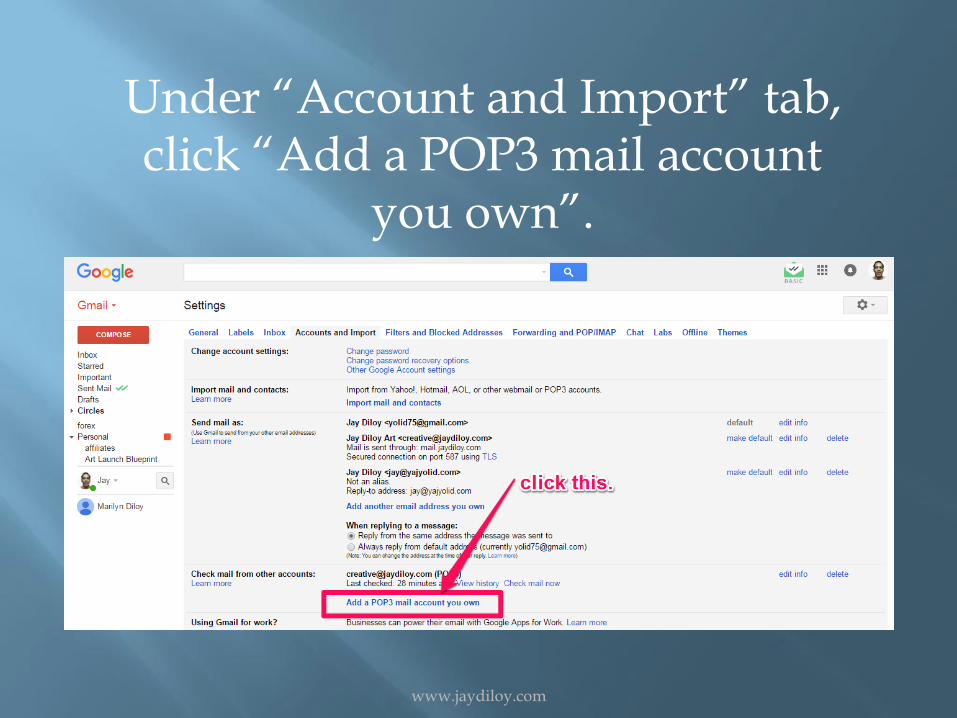
On the settings page, go to “Accounts and Import” tab.
www.jaydiloy.com
Under “Account and Import” tab, click “Add a POP3 mail account
you own”.

www.jaydiloy.com
A new window will pop up. I type the email address ([email protected])
we created and click “Next Step”.

www.jaydiloy.com
Type the email address and the password of webmail (the one we copied before).
Then click “Add Account”.

www.jaydiloy.com
Make sure the “Yes” is ticked to be able to send mail as your own domain email.
And click “Next Step”.

www.jaydiloy.com
Enter the name you want to appear on your email. Click “Next Step”.

www.jaydiloy.com
Note: smtp.yourdomain.com is the default setting, on some webhost it
will leave as is.

www.jaydiloy.com
But in my case, the setting for the SMTP server must be change to
mail.mydomain.com . So you need to check which setting is right for you.

www.jaydiloy.com
The username is your complete email address and the password of your webmail.
And then click “Add Account”.

www.jaydiloy.com
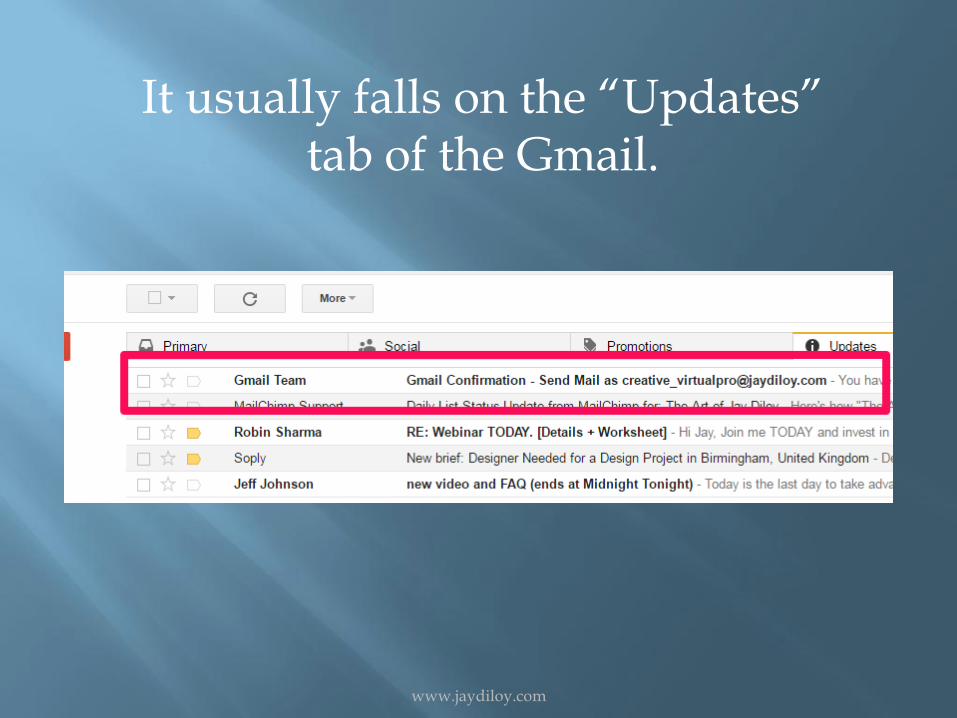
Check the email for the confirmation code.
www.jaydiloy.com
It usually falls on the “Updates” tab of the Gmail.

www.jaydiloy.com
Copy the confirmation code.

www.jaydiloy.com
Paste the confirmation code on the box and click “Verify”.
www.jaydiloy.com
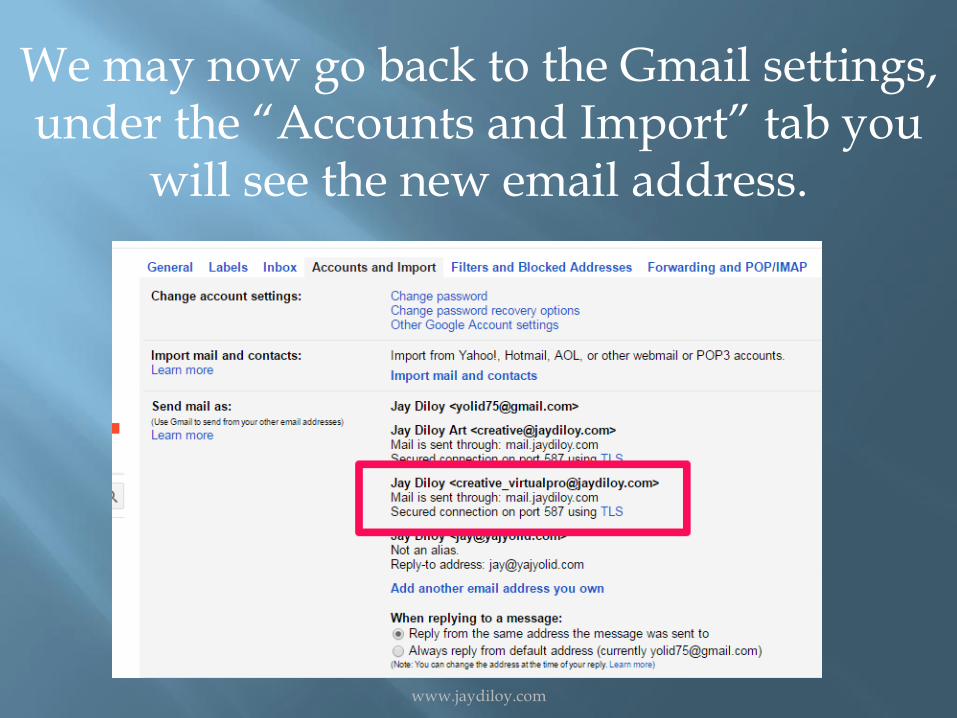
We may now go back to the Gmail settings, under the “Accounts and Import” tab you
will see the new email address.

www.jaydiloy.com
I can now send and receive emails with the new email address using my own domain
using my Gmail account.

www.jaydiloy.com
I hope you find this helpful. If you encounter any problem, you may ask me or get help from your webhost provider.