how to make a 24 inch wooden star with a 2x4
TRANSCRIPT

instructables
How to Make a 24 Inch Wooden Star With a 2x4
by Dunkiedoo
This tutorial will show you how to make a 22 to 24"wooden star with a single 8 foot 1x4 or 2x4. Three years ago my wife decided she would like tohave a wooden star hung above our fire place. I triedto find information on the web on how to make oneand did not find anything at the time so I sat down
and worked out how to do it. Huge pile of scrap and sawdust later... I succeededand then decided I liked making them. Now theseyears later, I have made hundreds and hundreds ofstars in sizes ranging from 12" to 48".
How to Make a 24 Inch Wooden Star With a 2x4: Page 1

Step 1: Construction....
These stars are constructed with 10 separate piecesof wood, all cut to the same shape. The wood grainruns parallel to all the outside edges of the star, whichlooks really great and there is no exposed end grainin the finished star.
Also, the star is laid up with alternating sides of theboard, up and down, i.e. A, B, A, B. (Like cuttingboards are made) This helps to prevent warping ofthe finished piece. They are very stable and work well
whether hung indoors or outdoors.
The trick to making wooden stars this way is incutting the angles accurately so that all the pieces fittogether with no gaps. This can be accomplishedwithout using expensive precision measuring tools.
Here is how I do it.
How to Make a 24 Inch Wooden Star With a 2x4: Page 2

Step 2: Tools and Supplies You Will Need
Table saw
18 Degree Angle Cutting Jig or sled (you will makethis)
Ruler or tape measure
Strait edge
20" x 16" x 1/2 inch plywood (this will be cut toconstruct the jig)
1 - 8 foot 1x4 or 2x4 (I like Pine or Spruce) but.... yourpick... (This will be used to make the star)
Wood glue (I recommend Tightbond 2, or 3 if you aregoing to hang it outdoors)
5 Minute epoxy (I like Devcon)
Sandpaper
Wood stain (your choice)Paint (your choice)
Optional:
Miter saw
Table saw cross cut sled
Router and T-Slot bit (if you want to cut T-Slots in theback to hang the stars on)
Kreg Jig
Kreg screws 1 1/4"
Kreg Vise grip Clamp
Screw Gun w/ Kreg square driver bit
pin nailer
How to Make a 24 Inch Wooden Star With a 2x4: Page 3

Step 3: Make a Jig for Cutting the Angles:
First, make a jig so the pieces can be precisely cut tothe exact angle of 18 degrees with your table saw.
The Math... (base measurement times (tan18) =height measurement) ( 20" times 0.32491969 =6.498) Therefore... we get 20" by 6.5" --- 40" by 13"would also net you an 18 degree angle.
It's Important to be as precise with these steps asyou possibly can but don't worry if it's not perfect!
Cut two pieces of 1/2" plywood to exactly 20" by 6.5".All corners 90 degrees (precision)
On one rectangular piece, mark a diagonal line fromcorner to corner (precision)
Cut the board along that line. (Leave the line andsand to it) (precision)
Note: a good trick is to temporarily attach the two
20" X 6 1/2" and use the board as guide to cut theboard on the table saw. (see drawing)
Pin nail or glue the cut off triangle piece to theRectangle base piece as shown. Be sure the top(long edges) of the parts are precisely aligned!(Discard the other triangular piece or use as a futurestar jig).
That's it... You have an 18 degree angle jig.
Next, make a removable stop block in the jig bydrilling a hole for a dowel in the base of the jig(whatever size dowel or pin you may have on hand)at a point 12 1/4" from the right edge and "at least"3/4" away from the angled face of the jig. (seedrawing) Cut off a piece of dowel about 3" long andinsert it into the hole. It should fit snug but, Do notglue the dowel into the hole!
You may wish to glue some 120 grit sand paper to
the base (shown yellow in the drawing) to improve thefriction when cutting pieces. I also installed hold adown clamp on my jig but it's not shown in all of thedrawings. It really improves safety and ease of use!
Save the left over 20"x3" piece of 1/2" plywood forlater use as a support for the parts on the left side ofthe blade when cutting pieces.
1. 12" to Dowel Edge
1
How to Make a 24 Inch Wooden Star With a 2x4: Page 4

Step 4: Cutting the Parts for the Star
Next we will cut the 8 foot 1x4 or 2x4 into 5 pieces...each 14.5 inches long and set them aside. (I use amiter saw for this step)
Next...
With the table saw not running... set the blade angleto 90 degrees vertical and raise the blade up some...place the jig (as shown in the drawing) between theblade and the fence. Bring the fence in toward theblade until the jig just starts to have some frictionwhen slid forward and back. Lock the fence down.
Pull the jig toward yourself so you can position theboard you are cutting against the stop pin and alongthe angled edge of the jig. Raise the blade highenough to cut the board thru when the cut is made.
Start the table saw. Keep pressure, with the jig,against the fence and the board held down firmly...
and make the first cut. Pull the jig back towardyourself and clear of the blade. Take the part that wason the jig when you made the cut and set it aside.
(Always check for and remove wood chips orsawdust along the edges of the jig that couldthrow off the angle of the next cut)
Take the cutoff piece, flip it around, place it on the jig,cut that piece as well. It should now be a duplicate ofthe first piece. Set it aside and repeat until all fiveboards are cut and you have 10 matching pieces.
(If the second piece is not as large as the first oneyou cut we will make an adjustment to the jigitself. Slide the jig back clear of the blade... unlockthe fence and bring it in 1/4". Lock the fence. Trimthe 1/4" from the left hand edge of the jig itself.Repeat with scrap until both pieces cut from a 141/2" piece match. Now the jig is set.)
How to Make a 24 Inch Wooden Star With a 2x4: Page 5

Step 5: Trimming Parts
Line the parts as shown with all the pieces up against the table saw fence, "cut face" down and trim about 1/8" to1/4" from the tips using a table saw crosscut sled. (as shown in the drawing) This step helps ensure properalignment when gluing up pieces and removes the sharp points of the star.
You want the tips and edges to be exactly aligned on glue-up.
Step 6: Glue the Pieces Together
Sprinkle some fine sawdust on your work surface toprevent the pieces from sticking to the surface whenyou place the glued-up parts there.
Run a bead of glue down the "cut edges" (seedrawing) and spread it into a thin layer on each pair.Use pressure and a sliding back and forth motion untilyou feel the parts seizing together. Carefully alignthem at the tips and edges. Wipe off glue squeezeout and lay them down on your work surface to set.
The drawing shows to pin nail the parts together nearthe tips at glue-up. It is moderately useful.
Do not use pin nails if you intend on beveling the star
at a later stage of building unless you position themso the saw will not cut into them when you cut thebevels.
I built a small block jig to facilitate tacking a Romexstaple to hold the parts tight while they set. (seedrawing) This works on solid stars but not for centercutout stars. It can eliminate the need for clamps andspeeds up the process as well as facilitating perfectalignment of the parts..
Let them set up at least 2 hours before moving to thenext step.
How to Make a 24 Inch Wooden Star With a 2x4: Page 6

Step 7: Second Cuts on Jig
After the 5 "petals" (I call them that) are set up... Wewill make the second cuts on the pieces.
Remove Romex staples from the petals (if used)
Using the same jig... re-position the stop block dowelto the end of the jig. Drill a hole and place the stopblock at least 1" away from the edges as shown in thedrawing. (not critical but it does have to be away fromthe edge of the angled part of the jig somewhat.)
Set Up for the Second Cuts
With the saw OFF...
Move the fence out from the blade, place the petal inthe jig and line up the jig with the fence positioned sothat the blade will cut the part. (as shown in thedrawing)
Use a strait edge held along the blade to help
determine where it will cut) Lock down the fence.
This is the point where the leftover strip of 1/2"plywood can come in handy to help support the cutoff piece on the left side of the jig when making yourcuts.
Make the cut..... (Remember to hold the jig firmlyagainst the fence as you make the cuts)
Flip the piece over and cut the other side. Repeat....until all petals are cut.
You will end up with five petals that look like thedrawing.
Note: If you wish to make a solid star, with no cutoutin the center, you may align the cut to that point (seedrawing) and you will end up with a solid star approx.22 inches in dia.
How to Make a 24 Inch Wooden Star With a 2x4: Page 7

Step 8: Test the Fit for Gaps and Assemble the Star
Place all the pieces on a flat surface and test fit them.It is almost certain that there will be a gap of somesort either toward the middle or toward the outsideedge of the star where the pieces fit together. It alldepends on how accurately the jig was cut in the firstplace. Ten pieces with a 1/10 degree error would stillnet an accumulated error of one degree on thefinished piece.
This is where we will make corrections to the jig andrecut the parts using shims.
Study the drawing and determine where to place theshim. Keep re-cutting all the pieces using differentshim thickness until you find your stars fit togetherwith no gaps. Work your shim thickness up in littlesteps. (Note: Do not move the fence from the originalposition when you made the cuts... just recut the
petals using the desired shims)
I used a couple of playing cards to make my shimsand ended up with an error of 3 playing cards as myshim thickness.
Once you determine the correct shim placement andthickness... all stars produced with this jig will use thesame shim and shim placement when making the2nd cuts to the pieces.
Make a note right on the jig to place x number ofplaying cards, or whatever, at that location whenmaking the second cuts to the petals from then on. (Ihave found that different size stars may requiredifferent shim sizes.)
How to Make a 24 Inch Wooden Star With a 2x4: Page 8

Step 9: Drill Kreg Screw Holes (Optional)
If you are going to use Kreg screws... drill the holes for them now.
Since I use Kreg screws to do final assembly of stars and for extra strength of the joints and also makes theassembly process so much easier! ... (read... no clamps needed!) I drill kreg screws in one edge of the back ofeach petal at this point of the operation.
Step 10: Beveled Stars (Option)
Bevel the petals of the Star
At this point... Before glue up... if you started with a2x4 in the beginning, you can bevel the petals of thestar. (skip this step if you are not making a beveledstar)
NEVER PUSH THESE PIECES THRU THE SAWWITH YOUR HANDS! Use Push Sticks in bothhands! and... Very important! Make sure you completelycut away each piece with each pass or you WILLget kickback!!!
First Time Set Up
Raise the table saw blade all the way up. Set thefence to around 3/4" from the blade. Tilt the bladeapprox. 13 degrees in order to put a bevel on thepieces for a 24 inch star or 18 degrees for a 12 inchstar. You may need to make successive cuts andbring the fence in until you are happy with the profile
Some experimentation of the angle of the blade maybe needed to suit your taste and set up but the mostimportant thing is, AVOID KICKBACK!, Make surethe blade would still cut the cutoff piece away tothat profile setting with one pass!
Cutting Bevels on the Petals
Place the bottom against the fence, (side of the petaldown), make a cut (tip end first), then flip end overend.... place bottom against fence again and makethe other cut. (wide end first)
Do the same to all 5 petals... You will end up with abeveled star when you put it together.
(See some of the pictures of 12" and 24" beveledstars made on the same jig, same process... differentstop block positions in the setup and different cutlines)
How to Make a 24 Inch Wooden Star With a 2x4: Page 9

Step 11: Optional Jig for Glue Ups With Kreg Screws
If you are making more than a few of these and areusing Kreg screws to assemble them, it may be worthyour time to make up an assembly jig for non beveledor flat stars. I have found a piece of 1/2" plywood witha couple of stand off pieces of 2x4 at each end willalso work a clamping table. I use two kreg 6"automax clamps to assemble my stars.
Since you are basically gluing end grain to end grainwhich does not result in very strong glue joints wecan use Kreg screws to fasten and help hold the shortglue joints. This in and of itself is not perfect either butI have made hundreds of stars using this method withno problems. They also act as a clamping system onassembly.
Apply a thin layer of glue to the edges being joined...clamp the first petal down with an automax clampplace the next petal in posision and align and clamp itdown with the other clamp ... drive in a Kreg screw,pick up and rotate clockwise... repeat until the star isassembled.Note:
This jig will work on flat stars but not with beveled.(see Next step... Gluing Petals Together WithoutKreg Screws or step 13 to learn how to make a jig forassembling beveled stars using the two clampmethod and plywood clamping table.
How to Make a 24 Inch Wooden Star With a 2x4: Page 10

Step 12: Gluing Petals Together Without Kreg Screws
On Beveled stars...You can use Devcon 5 minute epoxy on the final assembly.
I find beveled stars are much easier to assemble on final glue up with epoxy glue if you are only making a fewstars.
I still like to use Kreg screws (for insurance) but I wait until the glue sets up and then drive in the Kreg screws.
If you are making a lot of beveled stars.... see the next step for instructions on making a glue-up jig.
How to Make a 24 Inch Wooden Star With a 2x4: Page 11

Step 13: A Way to Assemble Beveled Stars With a Jig
Make a "glue up jig" for the assembly of beveledstars.
1. Cut 2 - 2x4 8 inches long
2. Mark and cut off a 36 degree wedge from the endof each 2x4
3. Raise the blade on the table saw all the way up...Set the fence at 1/4" from the blade.
4. Tilt the blade to the desired bevel. (I use 18 deg.bevels on my 12" stars so I would set the table sawblade to 18 degrees)
5. Make the cuts on the two pieces as shown in thedrawing above.
6. Glue the two parts as shown.
7. Apply glue to both edges of the first petal and placeit one the jig... clamp it in position. (clamp it to thetable) Apply glue to the next petal, align it and clampinto place on the jig. Drive in a 1 1/2" Kreg screw.(NOTE: I built a small table with a piece of 1/2"plywood and some blocks at each end as a clampingtable) see drawing
8. Release the clamps... rotate the part clockwise andrepeat until star is assembled.
9. If you build other size beveled stars you may havea different angle of bevel. Just make a jig forassembling that size star.
10. I have found the Kreg automaxx 6" clampsinvaluable for this operation.
How to Make a 24 Inch Wooden Star With a 2x4: Page 12
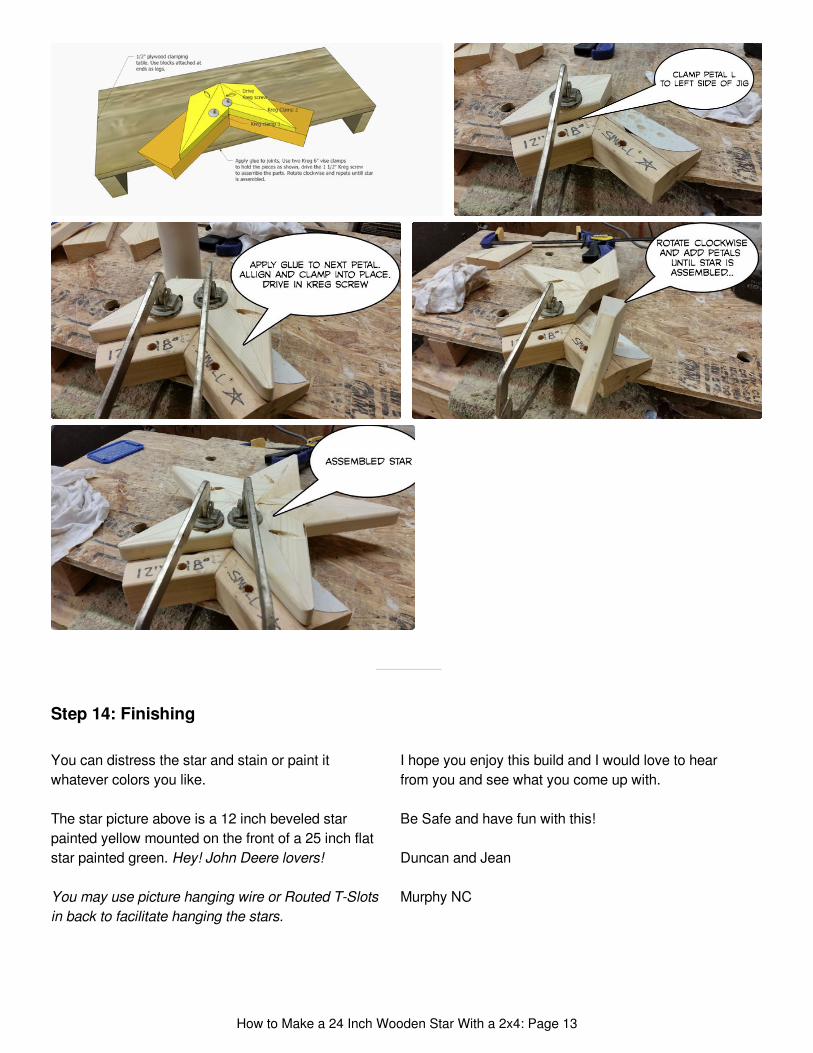
Step 14: Finishing
You can distress the star and stain or paint itwhatever colors you like.
The star picture above is a 12 inch beveled starpainted yellow mounted on the front of a 25 inch flatstar painted green. Hey! John Deere lovers!
You may use picture hanging wire or Routed T-Slotsin back to facilitate hanging the stars.
I hope you enjoy this build and I would love to hearfrom you and see what you come up with.
Be Safe and have fun with this!
Duncan and Jean
Murphy NC
How to Make a 24 Inch Wooden Star With a 2x4: Page 13

Step 15: Notes on Making Larger Stars
Several people have asked if you can make larger stars than 24 inches.... Yes, I have made 48 inch stars so farwith this setup.
Here are some pictures I took this week of my setup as I was cutting 48 inch barn stars.
No details.... just pictures in sequence.
(Not shown in the photos are the 3, #20 biscuit joints I used to assemble each petal and the drilling of twoKreg screws holes per petal.)
1. 24" 1x8 boards 1. Plywood strip on side of blade same thickness as the 18 deg jig2. Stop-peg near end of jig
1
1
2
How to Make a 24 Inch Wooden Star With a 2x4: Page 14

1. All lined up, fence locked and ready to cut. 1. Making the cuts
1. Second cuts after glue up of petals2. Note the absence of my shim here (I forgot to put in in this photo)
1. Here it is!
1. All petals cut and test fitted.... Looks good!
1
1
1 21
1
How to Make a 24 Inch Wooden Star With a 2x4: Page 15

1. A piece of OSB with 2x3 under makes a nice assembly table 2. Long reach Kreg clamps can now be used to pin down your pieces soKreg screws can be used to assemble and glue up the petals
1. Tightbond 3 bead is placed and spread 1. Kreg Clamp pins down the parts and Kreg screws are driven.2. 1 1/4" Kreg screws3. The tick marks show where the 3 #20 biscuits were added to eachpetal4. 1 1/4" Kreg screw
1. Sometimes.... two clamps are needed to keep parts aligned.
1
2
11 23
4
1
How to Make a 24 Inch Wooden Star With a 2x4: Page 16

Step 16: How the Center Star Cutouts Work
The drawings illustrate how the center star cutoutswork.
In this illustration we are starting with a board thatmeasures 20" x 5 1/2" x 3/4", a typical 1x6.
The diagonal cut in this case does not start or end atthe corners of the board. (see drawing)
First.... All center star cuts are done before glue-up of the 10 pieces into the five "petals"
Second..... After glue-up of the petals.... the
second cuts are made as shown in the drawings.
Another way to accomplish a center star cutout is toplace the pieces on the table saw as shown. Thecloser you bring the fence to the blade the larger thecenter hole will be. Try cutting off only a little at a timeon all the pieces and test fitting until you are happywith the results. (see drawing)
Most important thing When you make the secondcuts, align the fence and make the cut so it passesthru the point shown in the drawing.
1. This flat edge becomes the star cut out
1. Cut to this point, flip and repeat 2. Second cuttings after the parts are glued together3. Cutting Jig simplified for clarity4. Cut Line5. This "V" when combined with the other petals forms the center star cut-out
1
1
2
345
How to Make a 24 Inch Wooden Star With a 2x4: Page 17

Yeah Ok. I'm hooked! You're instuctable and consistent updates are just brilliant!
Very nice! Thanks for sharing.
Because miter gauges are notoriously inaccurate and you can often end up with a small mountainof 88.9° angles right from the start I'd suggest investing $65 in a miterset, miterset.com for settingyour angles right the first time. You'll save 65 bucks in lumber alone..
Hi... thanks for your comment! I understand what you are saying about using precision tools forsetting up and making accurate cuts. I have an Incra 1000 HD and Wixey.
The intent, when I wrote this instructable was to put this project in reach of folks who might nothave access to those tools. In this case I found that even though I have these tools... they are notreally needed to make these stars.
I have made over a thousand stars with the homemade jig made from the instructions herein..
Step 17: Practical Size Limits From Nominal Lumber
The actual width of the lumber controls the largestsize of solid stars that can be produced with it.
If you make a larger star with any size lumber thanthe chart nets above, you will have a star shapedhole in the center. This is often desirable.
In practice.... this is done by cutting the boardslonger than needed, starting and ending your cuts asshown above. Divide the excess length of board sothat the cut starts and ends with the same amount ofleft over wood length at each end. I add from 2" to 4"overall length if I am making stars with cut-outs.
In the case of the 24" stars... the base star (solid) iscut from 11" boards but notice we are using 14.5"boards and splitting the difference so the cut leavesabout the same at each end. This leaves about 2"extra on each end of the boards in this case.
So..... Bottom line.....
For solid stars, cut from the corners.
For center cut-out stars... cut away from thecorners using longer boards. (again.... see thedrawing)
1. Practical Solid Star Limits2 times this dim minus about 1 inch2. Nominal Lumber Sizes3. Actual Lumber Widths4. Add 1" per foot to determine the initial board cut length 5. Nominal Lumber Dims6. Actual Lumber Widths7. In Practice, add 2" to these dims to determine initial board lengths
1
23
4
56
7
How to Make a 24 Inch Wooden Star With a 2x4: Page 18
I looked at the Miterset and found it interesting. Love my Wixey!
Thanks again for your input!
Duncan ZOOM
I hear you about the availability of tools folks may have, but as far as I'm concerned anyone withany kind of a table saw, cheap or top of the line a miterset is absolutely indispensable. It'll turn thecheapest junk miter gauge into a real accurate gauge in a matter of seconds. If you're going toinvest in a table saw there's really no good reason to not invest in a miterset other than absolutedire poverty. Even then it might be worth it to beg, borrow or steal the 65 bucks. ;)
While you're at it a $20 Wixey angle set for your blade can't hurt either.. It's nice to know that you'recutting at the correct angles..
Really great tutorial, this one is definitely on my to-do list. Thanks
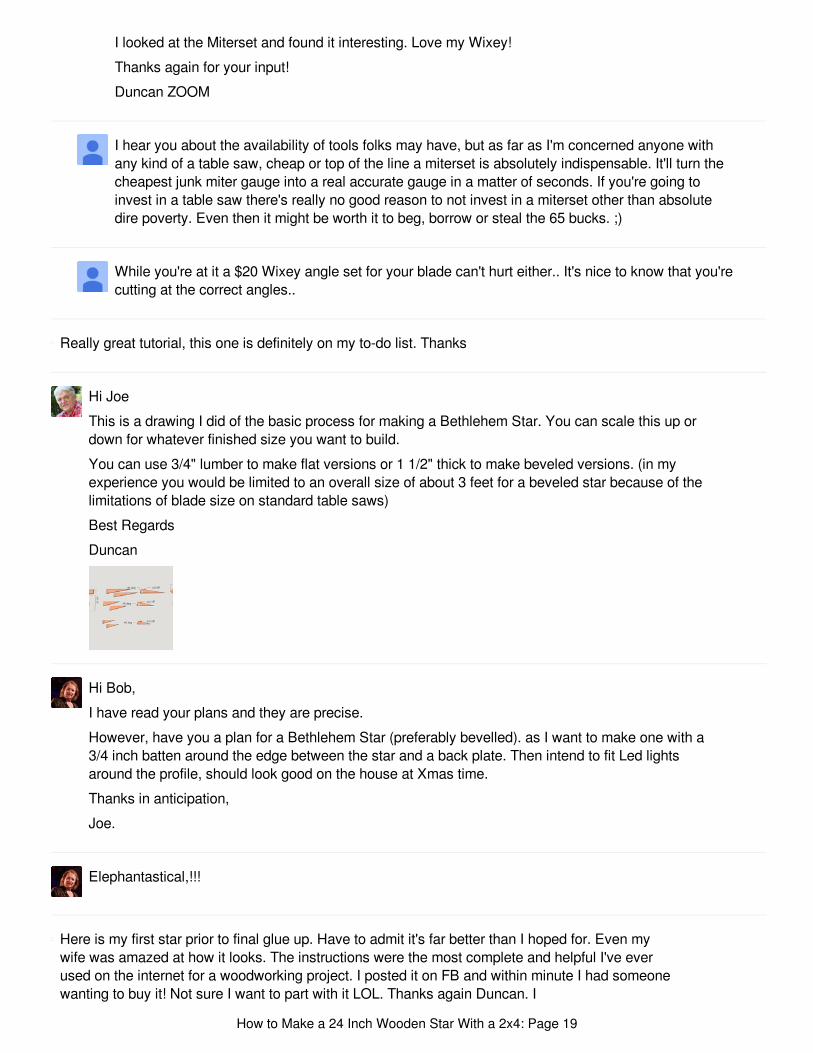
Hi Joe
This is a drawing I did of the basic process for making a Bethlehem Star. You can scale this up ordown for whatever finished size you want to build.
You can use 3/4" lumber to make flat versions or 1 1/2" thick to make beveled versions. (in myexperience you would be limited to an overall size of about 3 feet for a beveled star because of thelimitations of blade size on standard table saws)
Best Regards
Duncan
Hi Bob,
I have read your plans and they are precise.
However, have you a plan for a Bethlehem Star (preferably bevelled). as I want to make one with a3/4 inch batten around the edge between the star and a back plate. Then intend to fit Led lightsaround the profile, should look good on the house at Xmas time.
Thanks in anticipation,
Joe.
Elephantastical,!!!
Here is my first star prior to final glue up. Have to admit it's far better than I hoped for. Even mywife was amazed at how it looks. The instructions were the most complete and helpful I've everused on the internet for a woodworking project. I posted it on FB and within minute I had someonewanting to buy it! Not sure I want to part with it LOL. Thanks again Duncan. I
How to Make a 24 Inch Wooden Star With a 2x4: Page 19

Patdog, Awesome looking! I can see you've got this down! No doubt you will have to make more....LOL!! I made one for my wife way back and a few friends and family wanted one and now at thispoint I have made literally 1000s. They sell well.... and I enjoy making them! I am really pleased tosee this star and I appreciate your compliments for the indestructibles page! Many thanks! Duncan
Well tried gluing the petals together and I found that the Kreg jig screw method is making forslightly uneven joints even with the glue jig (don't have the Kreg clamps and that could be theproblem). I think I am going to make a dowel jig and try that. I've used it before on another projectand I think it will work well for this. Plus you don't have the problem of hitting/cutting metal screws ifyou have to do some post glue fabricating later. Don't have a biscuit cutter either. LOL
Hi Patdog,
When I first started making beveled stars and before I came up with the idea of a glue-up jig, I used5 minute epoxy. You put down the parts on a sheet of paper... mix up your glue, apply it and putthe parts together. You can jostle them and nudge the pieces until they are just right and then 5minutes later you can pick it up and peel the paper off the back. Later when the glue is really sethard... you drive in the Kreg screws. On a one or two off basis... this works as well as any way youcan do it. The two 6" Kreg clamps are the critical factor when you want to use a glue-up jig. Itallows you to hold down the parts and to get the screws in without the parts moving out ofalignment.. Again... you did a fantastic job on the pieces you made!
My friend Bob gave me the idea of edge gluing two different pieces of wood together and makingthe star out of that. This is what it looks like... (see drawing) One is black walnut and maple and theother, subtle version is all black walnut
Hi Patdog,
When I first started making beveled stars and before I came up with the idea of a glue-up jig, I used5 minute epoxy. You put down the parts on a sheet of paper... mix up your glue, apply it and putthe parts together. You can jostle them and nudge the pieces until they are just right and then 5minutes later you can pick it up and peel the paper off the back. Later when the glue is really sethard... you drive in the Kreg screws. On a one or two off basis... this works as well as any way youcan do it. The two 6" Kreg clamps are the critical factor when you want to use a glue-up jig. Itallows you to hold down the parts and to get the screws in without the parts moving out ofalignment.. Again... you did a fantastic job on the pieces you made!
Cowboy Blue -took a shot at the weathered look, can live with it.
How to Make a 24 Inch Wooden Star With a 2x4: Page 20

Hey,
I edited the Instructables doc today and moved the beveled jig instructions to step 13, where thatplacement is more logical. Thanks again for the pics and let me know how you make out with yourbeveled stars!
Duncan
Hi
Good job! I love it!
I added a step to my instructables (Step 17) It shows how I made a jig to help assemble thebeveled stars.... keep up the good work brother!
Duncan
What a great tutorial. Thanks so much! Gonna try to tackle beveled next. Gotta get the right clampsand I'll be off! Thanks again.
Hi Ya!
So glad this worked for you! You guys are the reason I shared this! Please keep posting yourwork... it makes my day every time you do for sure! I have worked out a way to assemble beveledstars using standard glue instead of epoxy. I will post it here soon. Thanks again....
Best Regards
Hey Dunk,
Fantastic Instructable. Very well illustrated and clearly written. From the photos and your writing Ican see that you must have made hundreds of these. What kind of pricing structure would you puton the various sizes in your neck of the woods? They have to be popular. Great job!
Hey Dunk, Your latest help was tremendously useful. I was able to complete the 36 inch star and the lady whohad ordered it was more than pleased. Just want to say thanks again for your instructions andcontinued help. My next task will be to tackle a beveled star. We will see how it goes. You are thebest Dunk. Thanks again. Bob
How to Make a 24 Inch Wooden Star With a 2x4: Page 21

Bob
How's it going? Building like mad I hope!
Bob,
That star looks awesome! I see you used laminations to get the width of wood you needed. Neverthought of doing that. I love how that looks! It adds another dimension to the star for sure! I'm goingto have to try that! One question I have is what are you doing for finish? I like the look you haveand the way you bring out the grain of the wood!
You should have no problems with beveled stars... just remember to make the 5 petals to whereyou "could" glue them up if you wanted to at that point. Then set the blade on your saw to around13 to 15 degrees and make your beveled cuts. You'll have to experiment some to get the exactprofile you are looking for but I'm sure you will be successful. Your work is beautiful!
Best!
Dunk
Interlocking Flushmounts cabinet assembly fittings.
The best system I have found for hanging wooden stars (especially outdoors) is pictured below.One part is mounted on the back of the star and the mating piece is mounted on the wall. Then thestar is mounted by dropping it down on to the other interlocking mounting plate. You can find themon Amazon or at cabinetmakerssupply.com They are an extremely strong and stable way to mountyour stars yet they can be easily removed for refinishing and rehung etc... etc.
Dunk
Here is a Star I made this week, It is a combo 36" flat star with a 21" beveled star mounted on it.The 21" beveled star has a raised 5" star on the middle. All finished in antique white, distressedand glazed.
Two more pics submitted by my friend Tim (known as Timator below) He made a 25 inch and abeveled 12 inch and put them over his mantle. Looks super!
How to Make a 24 Inch Wooden Star With a 2x4: Page 22

Here is the first star I ever made. It's placed over our mantle. I placed LED strip lights on the backand it make a nice halo around the star.
Parts: I used TriangleT93007 LED strips and a 12v wall wort power supply and a Lerway mini LEDdimmer controller. Cost about 15 dollars total on Amazon.
Here are some pics of recent stars I've made. First... a pair of black walnut stars, the larger is 25inches and the smaller is 12 inches. They are finished with 7 coats of tung oil and hand rubbedbetween coats.
The other star is a 46 inch Barn Star finished, walnut stain, dark glaze and spar varnish. The close-up shows the hand detailing of the wood surface.
Hoping others like Tim and Bob will keep posting their creations and many other people will beinspired to try their hands!
Dunk
just a quick post.. My friend Tim (listed below as Timator) sent me a picture of his set up... He isdoing his stars with a radial arm saw. Very inovative for sure! Great job Tim!
Just wanted to show you what I was able to create thanks to your wonderful instructions. I nowhave many orders one of which is for a 36" star that I am trying to figure if it can be done using my20" jig. Any thoughts?
Hey Bob
How to Make a 24 Inch Wooden Star With a 2x4: Page 23

Hows it going? Did the last updates to the Instructables get you going on the 36" star? I hope so!Can't wait to see how you do!
Dunk
Bob,
Lemme add one more thing to the last comment... When you are making the larger stars... quite abit of the piece "hangs off" the side of the jig when you are making your cuts. I take a narrow pieceof plywood the same thickness as the base and about 20" long and place it on the left side of thetable saw blade and this supports the pieces so they get cut true. Kinda like a two part sled if youknow what I mean.
Dunk
I added a set of pictures of my setup when I cut 48 inch stars. I hope it helps with your currentefforts! Keep me posted how you are doing!
Thanks again. We are keeping busy with the star making. You are a life saver. Your help isdefinitely appreciated. Take care.
You are most welcome! That's why I put it out there. So happy!!
Bob,Yes you can make 36" stars easy.... Just use 1x6 lumber to start with. cut it to about 20" lengthsand setup the table saw fence and the stop pins to facilitate cutting your pieces. I make 48" starsall the time using 1X8" lumber. One of these days I will have to try a six foot star using 1X12 andsee if that is do-able. BTW your stars look awesome! Great job brother!!!
Best!Dunk
Added a chart to the Instructables to assist in determining the overall size of stars produced with agiven length and width of lumber
I have a lady that wants a 36" star with the cut out star in the center. I can not get my jig set to leave the star in the center. My wood is 1" x 20". Thanks again.
Hi Bob
I added a step to the original Instructables to illustrate the center star cut out process. Basicallywhen you cut your 10 pieces you cut off a small piece of each part and that is what forms thecenter star cut out. Play with it and let me know how you do. The final cut of the five petals iswhere the center star emerges. (see drawing)
How to Make a 24 Inch Wooden Star With a 2x4: Page 24

On the subject of adding stars to the front of a larger star without having to pin them, screw, or gluethem. I have developed a method that has worked out well for us. See the drawing. I install athreaded insert into the back of all the little stars I make.
Then use a cross piece of hard wood with a 1.25" by 10-32 screw to clamp them together throughthe star shaped hole in the larger star. This way they can be hung separately or together at will.and/or mix and matched with other colors etc.
I also recommend if you are transporting these stars for any reason.... that you put routed t-slots inthe backs to facilitate hanging them. That way there is no hardware on the backs of the stars todamage the stars next to them.
Here's a pic of the three i have made so far. Thanks again Dunkiedoo!!
Awesome! I can't tell them from my own! They look great! Now you better make a bunch becauseall your friends and family will want one. I recently found that if you use a round rasp you can distress the finish by riding along the grainand indenting the wood with it. The grain runs parallel to the sides of the star and the results reallyaccentuate the looks of the finished star! I use a card scraper to pull of any nibs that the raspforms. Then I use a dark stain on the whole star (front and back) Next I paint, (or leave just stained), let dry, distress sand a little and then stain again (yup, again),last, I use water based poly to finish them. You made my day! Way to go brother! Dunk
Very good! Can't wait to get started. This is what i have been looking for. Thanks
What changes are needed to the jig for 3" material and a 8" star? Thanks again and a great job!
I use the same exact jig to make an eight inch star all the way up to a 48 inch star. The jig itselfdoes not change. The jig is simply used to cut the angles needed to construct a star. The length ofthe boards that you start with determine the overall diameter of the star and the width of the boardsdetermine the sizes of solid stars you can make.I use the following sizes of initial boards to make either 3/4" or 1 1/2" thick:
How to Make a 24 Inch Wooden Star With a 2x4: Page 25

12 inch stars = 5 boards 6 inches long X 3.5" wide21 inch stars = 5 boards 11 inches long X 3.5" wide (larges solid star at this width of wood)27 inch star = 5 boards 14.5 inches long X 3.5" wide (these stars will have a star cut out in thecenter)48 inch star = 5 boards 24 inches long X 7.25 wide (makes a solid 4 foot star)
on an 8 inch star you would start with 5 boards cut at 4.5 inches long or so. Width is not soimportant because when you make the cuts there is a piece that goes to waste with each cut.as you can see for a given size finished star you divide the finished size by 2 and cut the initialboards to that length.
What changes with the sizes you make is the stop pin placement on the jig for a certain size ofstar. Also the placement of the hold down clamp as werll. Make the jig and start making some starsand you will get a feel for where to place the stops and the fence. Hope this helps! Be Safe!Duncan
Thought id let you know you were of much help. Thank you so much.
You are welcome! can't wait to see your stars!
Thank you so much for answering my question. Definitely cleared up my answer so I am headed tothe shop now to try it out. I will let you know how it goes.
How to Make a 24 Inch Wooden Star With a 2x4: Page 26