how to install yeti winch and roller fairlead mounting kit...
TRANSCRIPT
How To Install Yeti Winch and Roller Fairlead
Mounting Kit (GEACHA002)
Part List
(1) WINCH PLATE (1) Fairlead Mount SPACER (1) Fairlead Mount TOP PLATE
(10) M2 x 5mm Socket Head Screw, Alloy Steel(4) M2 x 6mm Button Head Screw, Stainless Steel(2) M3 x 10mm Button Head Screw, Alloy Steel(2) M3 x 14mm Button Head Screw, Alloy Steel(2) M3 x 20mm Button Head Screw, Alloy Steel(2) M3 Nylon Lock Nut
Tools Needed1.27mm (.050”), 1.5mm and 2.0mm (5/64”) hex drivers or allen wrenches #1 Philips ScrewdriverNeedle Nose Pliers
Items Needed (not included)3Racing Automatic Crawler Winch (3RACR01-27)
OptionalGear Head Six Shooter LED Light Bar and Factor 55 Winch Shackle Mount (see last page)
Page 1 of 6 ver. 1.0 Copyright Rpp Hobby
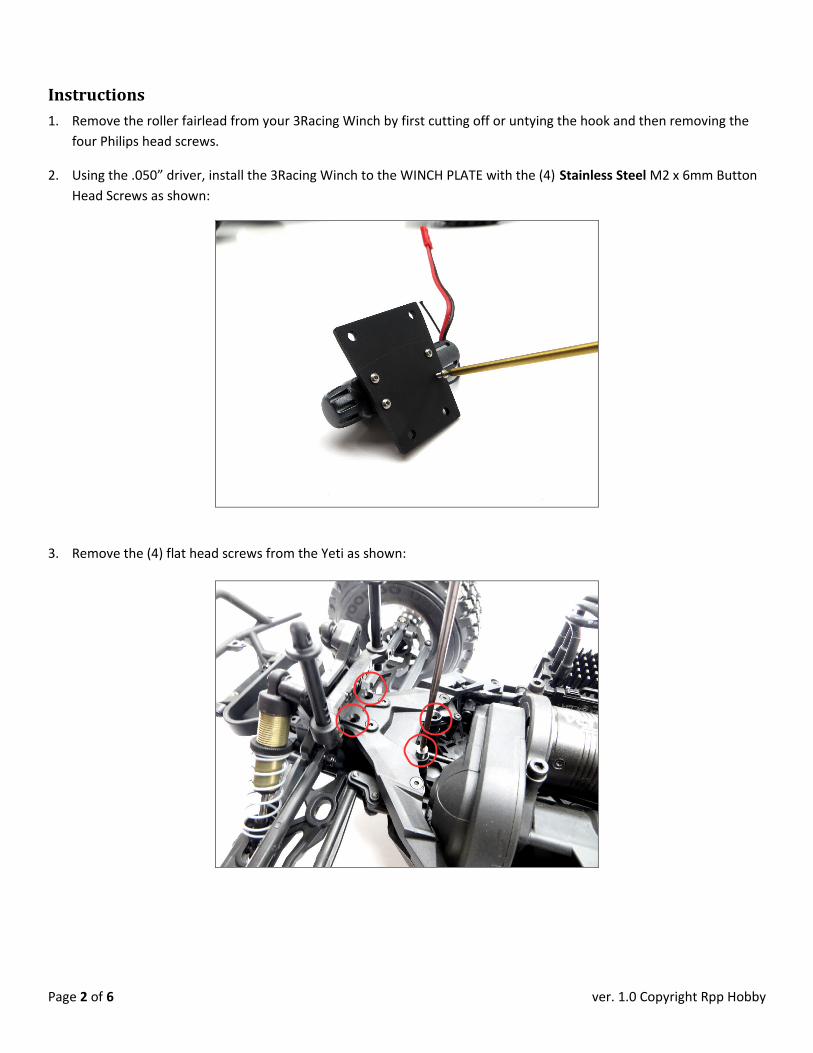
Instructions1. Remove the roller fairlead from your 3Racing Winch by first cutting off or untying the hook and then removing the
four Philips head screws.
2. Using the .050” driver, install the 3Racing Winch to the WINCH PLATE with the (4) Stainless Steel M2 x 6mm Button Head Screws as shown:
3. Remove the (4) flat head screws from the Yeti as shown:
Page 2 of 6 ver. 1.0 Copyright Rpp Hobby

4. Install WINCH PLATE with 3Racing Winch using the (2) M3 x 14mm and (2) M3 x 20mm Button Head Screws as shown (M3 x 14mm in the front two positions and the M3 x 20mm in the two rear positions):
5. Using (4) of the M2 x 5mm Socket Head Screws, install roller fairlead (removed from 3Racing winch in Step 1) to SPACER.
Page 3 of 6 ver. 1.0 Copyright Rpp Hobby
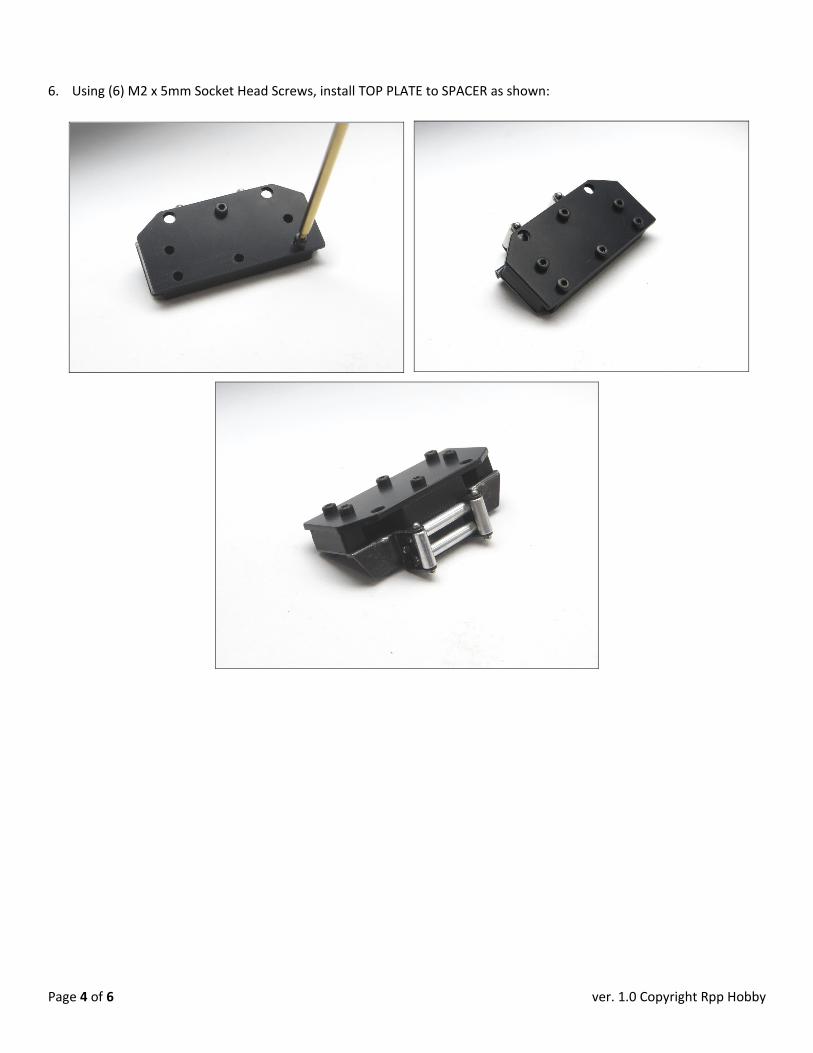
6. Using (6) M2 x 5mm Socket Head Screws, install TOP PLATE to SPACER as shown:
Page 4 of 6 ver. 1.0 Copyright Rpp Hobby

7. Attached roller fairlead assembly to Yeti front bumper using (2) M3 x 10mm and (2) M3 Lock Nuts:
8. Reattach 3Racing hook or optional Gear Head Factor 55 Shackle Mount.
9. Follow 3Racing Winch instructions to complete installation.
10. Enjoy!
Page 5 of 6 ver. 1.0 Copyright Rpp Hobby
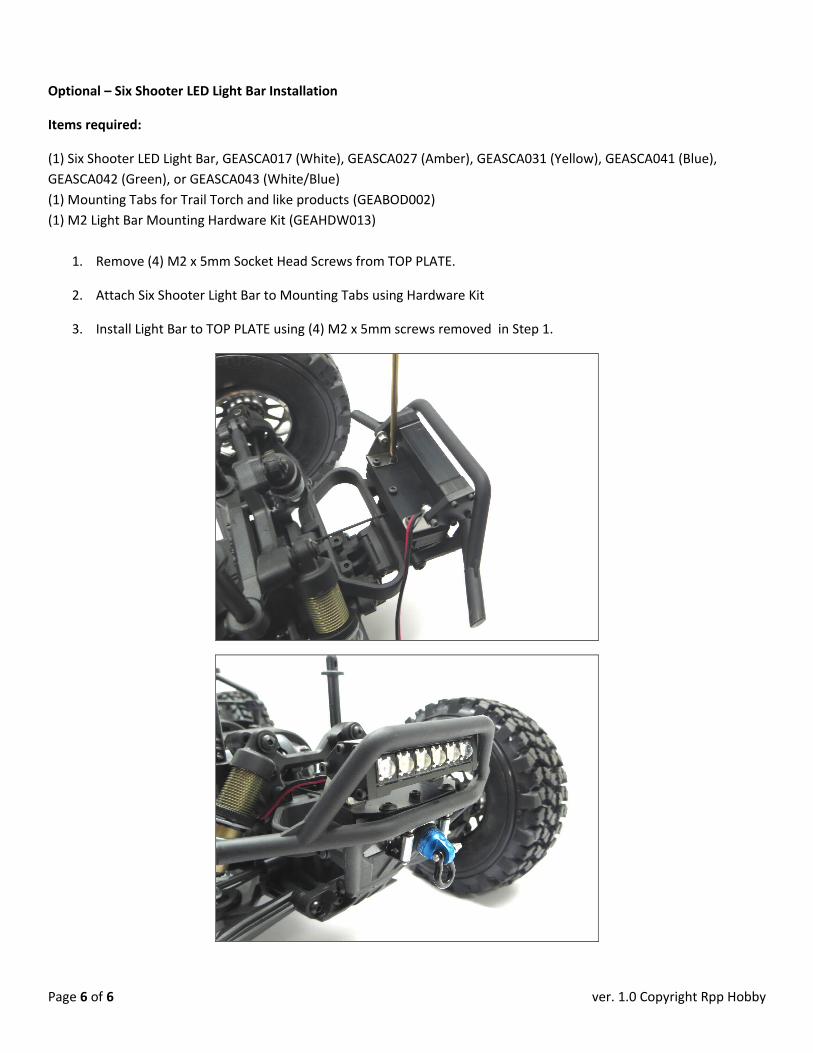
Optional – Six Shooter LED Light Bar Installation
Items required:
(1) Six Shooter LED Light Bar, GEASCA017 (White), GEASCA027 (Amber), GEASCA031 (Yellow), GEASCA041 (Blue), GEASCA042 (Green), or GEASCA043 (White/Blue)(1) Mounting Tabs for Trail Torch and like products (GEABOD002)(1) M2 Light Bar Mounting Hardware Kit (GEAHDW013)
1. Remove (4) M2 x 5mm Socket Head Screws from TOP PLATE.
2. Attach Six Shooter Light Bar to Mounting Tabs using Hardware Kit
3. Install Light Bar to TOP PLATE using (4) M2 x 5mm screws removed in Step 1.
Page 6 of 6 ver. 1.0 Copyright Rpp Hobby