how to install steering control toyota tacoma...
TRANSCRIPT

AXXESS STEERING WHEEL CONTROL INTERFACE
INSTALLATION MANUAL
axxessinterface.com 800.221.0932
The ASWC is a universal steering wheel control interface that can be used on most any vehicle with steering wheel controls. Designed to be used with today’s top aftermarket radio manufactures like Pioneer, Sony, Alpine, Kenwood, Eclipse, JVC, and others, the ASWC is all you’ll need to retain the OEM steering wheel controls. The ASWC has the ability to auto-detect many vehicle makes and aftermarket radios and it will preset the steering wheel controls to the aftermarket radio automatically so no programming is required. If desired the ASWC can be manually programmed so the user can make the steering wheel controls function the way they want them to, only limited by the functions of the aftermarket radio. The ASWC also has a non-volatile memory which means the ASWC will re-member the programming even if the ASWC is disconnected from the vehicle. The ASWC is also updatable using the Axxess website (www.axxessinterface.com) and the USB-CAB update cable. If there is an update made to the ASWC there is no need to send inventory back, or ask for the latest version, you can update it yourself and save time and money.
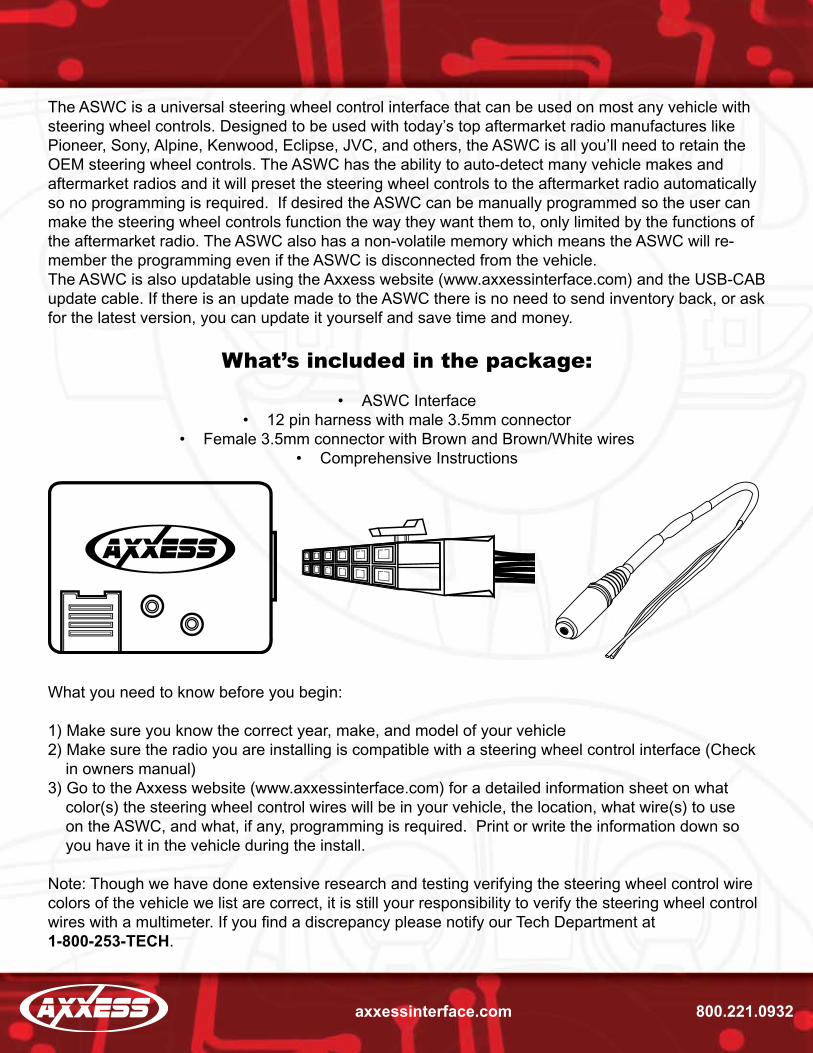
What’s included in the package:
ASWC Interface•12 pin harness with male 3.5mm connector•
Female 3.5mm connector with Brown and Brown/White wires•Comprehensive Instructions•
What you need to know before you begin:
1) Make sure you know the correct year, make, and model of your vehicle2) Make sure the radio you are installing is compatible with a steering wheel control interface (Check in owners manual) 3) Go to the Axxess website (www.axxessinterface.com) for a detailed information sheet on what color(s) the steering wheel control wires will be in your vehicle, the location, what wire(s) to use on the ASWC, and what, if any, programming is required. Print or write the information down so you have it in the vehicle during the install.
Note: Though we have done extensive research and testing verifying the steering wheel control wire colors of the vehicle we list are correct, it is still your responsibility to verify the steering wheel control wireswithamultimeter.IfyoufindadiscrepancypleasenotifyourTechDepartmentat1-800-253-TECH.

axxessinterface.com 800.221.0932
USB PORT COVER PROGRAMMING LEDRESET BUTTON
PIN1
PIN2
PIN3
PIN4
PIN5
PIN6
PIN12
PIN11
PIN10
PIN9
PIN8
PIN7
A brief overview of the ASWC interface and wire harness:
On the top of the ASWC interface there are three points of interest:
1)TheProgrammingled–thiswillflashrapidlywheninautodetectmode,flashesslowlyinmanual programming mode
2) The Reset button – Hold down button more then 2 seconds but less then 10 seconds to start auto detect mode; hold down longer then 10 seconds to start manual programming mode
3) The slide cover for the USB update port – open this up to reveal the USB update port. Using the USB-CAB update cable and the Axxess website you can make sure you always have the latest, updated inventory.
Below are the wire colors of the ASWC. Please go to the Axxess website (www.axxessinterface.com) fordetailedinformationonyourspecificvehicleandwhatcolorwire(s)touseontheASWC.
Pin 1 – Pink Pin 2 – White/Green Pin 3 – Orange/Green Pin 4 – Green/OrangePin 5 – Gray/Red Pin 6 – Black
Pin 7 – Blue/Pink Pin 8 – Black/Green Pin 9 – White (Ring of 3.5mm connector)Pin 10 – Red (Tip of 3.5mm connector)Pin 11 – Gray/Blue Pin 12 – Red
Wire Insertion View

axxessinterface.com 800.221.0932
The Installation
Once you have collected the information or printed out the information sheet on your particular ve-hicle from the Axxess website (www.axxessinterface.com) you’re ready to install the ASWC. So here we go:
1) Connect the Black wire of the ASWC (pin 6) to ground. You may use the same grounding point as the aftermarket radio.
2) Connect the Red wire of the ASWC (pin 12) to a 12 volt accessory wire, one that turns on and off with the ignition key.
3) Locate the correct SWC wire(s) in the vehicles radio or secondary harness as described in the vehicle information sheet found in the Axxess website. Connect the correct wire color(s) from the ASWC to the vehicles steering wheel control wire(s) in the vehicle.
We recommend that the wires are soldered for the best and most secure connection. T-Taps are not recommended due to the higher chance of an intermitted connection (this means you Zack). 4) If you are using an Eclipse or Kenwood radio, plug the female 3.5mm connector with the Brown and Brown/White wires into the male 3.5mm connector of the ASWC harness. * For Kenwood radios: Connect the Kenwood SWC wire (normally Blue/Yellow) to the Brown wire of the ASWC. Isolate and tape the Brown/White wire, it will not be used.
* For Eclipse radios: Connect the Eclipse SWC wires (Normally Brown and Brown/Black) to the Brown and Brown/White wires of the ASWC. Brown goes to Brown and Brown/White goes to Brown/Black.
5) For all other radios, plug in the male 3.5mm connector of the ASWC into the back of the aftermarket radio, designated for an external SWC control interface. Please refer to the aftermarket radios manual if you are in doubt where the 3.5mm connector of the ASWC goes.
Once all connections have been made, plug in the aftermarket radio if not done already.
Programming the ASWC
The ASWC can be programmed in two ways; it can do it by itself in Auto Detect Mode or it can be manuallyprogrammed.WewillstartwiththeAutoDetectModefirst:
Auto Detect Mode:
The ASWC has the ability to auto detect certain vehicles and to know what aftermarket radio it is connected to. The vehicle info sheet from the Axxess website (www.axxessinterface.com) will show if your vehicle would be auto detected and what action, if any, is required by you for this process to take place.

axxessinterface.com 800.221.0932
For the Auto Detect feature to work there are 3 possible actions, however only one action will be re-quired by you depending on your vehicle:
1) Turn the ignition on and no other action is required.
2) Turn the ignition on, press and hold down the Volume Up button on the steering wheel.
Or
3) Turn the ignition on, press and release the Volume Up button repeatedly on the steering wheel.
Like we said before, only one of these actions will need to be done depending on your vehicle for the auto detect feature to work. Please refer to the vehicle info sheet in the Axxess website.
These are the steps for the Auto Detect Mode:
1) Complete connections to the vehicle and the aftermarket radio.
*IfthisisthefirsttimetheASWCisbeinginstalledinavehicle:
2)Turntheignitionon;theledwillstartflashingrapidlywhichmeanstheASWCislookingforthe vehicle and the radio.
3) Perform action required for your particular vehicle as noted in the vehicle info sheet.
4)Afteracoupleofsecondstheledshouldstopflashingandnotlightupfor2seconds.Atthispoint do not push any buttons.
5)Afterthe2secondstherewillbeaseriesof7flashes,someshortandsomelong.Makeanoteofwhichflasheswerelongforthismaybeneededlater.
6)Theledwillpauseforanother2secondsthenflashupto9times.Againmakeanoteofhowmanyflashes.
7) This is the end of the auto detection stage. If the ASWC detected the vehicle and the radio successfully the led will light up solid red.
8) Make sure the steering wheel control buttons function correctly in the vehicle and enjoy your radio.
So what if the led does not light up solid red? Check out troubleshooting section below.

axxessinterface.com 800.221.0932
* If the ASWC was installed in a vehicle before:
2)Turntheignitionon,theledwillflashslowly
3) Hold down the reset button for more then 2 seconds but less then 10 seconds, the led will startflashingrapidly
4) Perform action required for your particular vehicle as noted in the vehicle info sheet
5)Afteracoupleofsecondstheledshouldstopflashingandnotlightupfor2seconds.Atthispoint do not push any buttons.
6)Afterthe2secondstherewillbeaseriesof7flashes,someshortandsomelong.
7)Theledwillpauseanother2secondsthenaseriesof9flashes.
8) This is the end of the auto detection stage. If the ASWC detected the vehicle and the radio successfully the led will light up solid red.
9) Make sure the steering wheel control buttons function correctly in the vehicle and enjoy your radio.
So what if the led does not light up solid red or the steering wheel controls is not working correctly with the aftermarket radio? Check out troubleshooting section right below.
Troubleshooting the Auto Detect Mode
Soyoutriedtheautodetectfeatureandattheendtheleddidnotstayonsolidred,itstartedflashing.That means the ASWC did not detect the vehicle. Follow these couple steps to determine what hap-pened:
First some basic steps:
1) Verify that you have 12 volt accessory and a good ground to the ASWC.
2) Verify with the vehicle information sheet on the Axxess website that you connected the correct steering wheel control wires in the vehicle to the correct wire(s) on the ASWC.
3) Verify that the 3.5mm connector is connected to your radio securely and in the correct location.
4) If using the female 3.5mm connector on an Eclipse or Kenwood radio, verify that the radio’s SWC wire is connected to the correct wire on the ASWC.

axxessinterface.com 800.221.0932
Oncealltheinformationabovehasbeenverifiedandcorrect,referbacktothe2setsofledflashesduringtheautodetectsequence.Hereiswhattheflashesstandfor:
LED Feedback
The1stseriesofledflashesrepresentthewire(s)thatareconnectedtothevehiclefromtheASWC.Shortflashesrepresentthesteeringwheelcontrolwire(s)thatarenotconnectedtothevehiclefromthe ASWCLongflashesrepresentthewire(s)thatareconnectedtothevehicle
1stledflashispin#2(White/Green)ontheASWC2ndledflashispin#3(Orange/Green)ontheASWC3rdledflashispin#4(Green/Orange)ontheASWC4thledflashispin#5(Gray/Red)ontheASWC5thledflashispin#8(Black/Green)ontheASWC6thledflashispin#11(Gray/Blue)ontheASWC7thledflashispin#1(Pink)ontheASWC
Ifduringtheautodetectsequencetherewasnolongledflash,justshortones,theASWCwasnotconnected to the correct wire in the vehicle or the incorrect wire was used on the ASWC. Double check connections and the vehicle information sheet to verify that you have the correct wires con-nected.
The2ndsetofledflashesrepresentswhatbrandradiotheASWCbelievesitisconnectedto.Eachflashisforadifferentradiomanufacturer.
1stledflashisforEclipse2ndledflashisforKenwood3rdledflashisforClarion4thledflashisforSonyandDual5thledflashisforJVC6thledflashisforPioneerandJensen7thledflashisforAlpine*8thledflashisforVisteon9thledflashisforValor
*Note:IftheASWCflashes7timesandyoudonothaveanAlpineradioconnectedtoitthatmeansthat the ASWC did not see any radio connected. Verify the 3.5mm connector is connected to the SWC input on the radio.

axxessinterface.com 800.221.0932
Manual Programming/SWC Button Reassignment:
If your vehicle is not listed for auto detection by the ASWC on the Axxess website most vehicles can still be manually programmed to the ASWC by following these steps:
* Note: Not every radio will have all the possible swc commands on the steering wheel. Aftermarket radios that do not have Bluetooth will not recognize the PTT (Push To Talk) or On Hook / Off Hook commands, however those buttons can be manually programmed to do other commands. Please refertotheradiosowners’manualorwirelessremoteforspecificcommandstheradiowillrecognize.
1) Complete connections to the vehicle and the aftermarket radio, making sure the 3.5mm connector is connected.
*IfthisisthefirsttimetheASWCisbeinginstalledinavehicle:
2)Turntheignitionon;theledwillstartflashingrapidly
3)After10secondstheASWCwillgointotheLEDfeedbackmode.Aftertheseriesofledflashestheledwillstayinaslowconstantflashstate.
Or
* If the ASWC has been in a vehicle before:
2) Press and hold the reset button down for more then 10 seconds.
3)Afterthe10secondstheledwillbeginaslowconstantflash.
4) At this point press and hold the Volume Up button on the steering wheel for 7 seconds until the led goes solid red. Now release the Volume Up button and the led goes off. Volume Up has now been programmed.
5) Now press and hold the Volume Down button until the led goes solid red. Release the Volume Down button and the led goes off. Volume Down has now been programmed.
6) At this point press and hold the next button on the steering wheel that corresponds with the programming list (see below). The chart below shows in what order the steering wheel control buttons need to be programmed in.
If the next function on the list is not on the steering wheel press and hold the Volume Up button for 1 second till the led comes on then release the button. This tells the ASWC that the function is not avail-able and moves on to the next function.

axxessinterface.com 800.221.0932
1. Volume Up 2. Volume Down 3. Seek Up/Next 4. Seek Down/Prev 5. Source/Mode 6. Mute 7. Preset Up 8. Preset Down 9. Power 10. Band 11. Play/Enter 12. PTT (Push To Talk) 13. On Hook 14. Off Hook 15. Fan Up 16. Fan Down 17. Temp Up 18. Temp Down
* Note: Remember not all radios will have all these commands. Please refer to the radios’ owners manualforspecificcommandsrecognizedbytheradio.
7) You can end this half of the programming in 2 ways:
1) After the last button is programmed on your steering wheel (you do not have to go through the whole list), hold down the Volume Up button for at least 10 seconds. The led will go into the slow constant blink mode.
Or
2) After the 18th button is programmed or skipped the led will go back to the slow constant blink mode.
* If at any time you get lost or mess up hold down the reset button on the ASWC for more then 10 seconds.Thiswillrestartthemanualprogramming.Gobacktostep#4andstartagain.
AtthispointyouwillnowbeintheRadioIdentificationmode
8)PressandholdtheVolumeDownbuttonfor5secondstilltheledstartstoflashquickly.
9) Release the Volume Down button.
axxessinterface.com 800.221.0932
10)After4secondsoftheledflashingquicklytheledwillgooutfor2seconds.
11)Thentheledwillflash,upto9times,dependingonwhatradiotheASWCthinksit’sconnectedto.
Here are the led blinks and which radio they represent:
1stledflashisforEclipse2ndledflashisforKenwood3rdledflashisforClarion4thledflashisforSonyandDual5thledflashisforJVC6thledflashisforPioneerandJensen7thledflashisforAlpine*8thledflashisforVisteon9thledflashisforValor
*Note:IftheASWCflashes7timesandyoudonothaveanAlpineradioconnectedtoitthatmeansthat the ASWC did not see any radio connected. Verify the 3.5mm connector is connected to the SWC input on the radio.
12)Makesurethenumberofflashesmatchwhatradioyouhaveinstalled.
13)IftheledflashesmatchtheradiothenholddowntheVolumeDownbuttonuntiltheledgoessolid red.
14) Programming for the vehicle and the radio is now complete. Test out the steering wheel control functions to make sure it works correctly.
Iftheledflashesdonotmatchtheradioyouhaveconnected,youmustmanuallyprogramtheASWCto tell it what radio it is connected to.
1) To manually program the aftermarket radio, press and hold the Volume Up button on the steering wheel control until the led goes solid red, then release Volume Up.
2) At this point Eclipse is programmed.
If you are using an Eclipse radio go to step 3.
If you are using a different radio go to step 4.
3)PressandholdVolumeDownfor5seconds.Theledwillflashoncethengosolidredindicatingtheprogramminghasfinished.Goenjoyyourradio.
axxessinterface.com 800.221.0932
4) If you have a different radio then Eclipse, press the Volume Up button again till the led goes solid red, then release Volume Up. You have now programmed Kenwood.
5) Here is the chart to show how many presses of the Volume Up button is needed for which radio you are trying to program:
1stledflashisforEclipse2ndledflashisforKenwood3rdledflashisforClarion4thledflashisforSonyandDual5thledflashisforJVC6thledflashisforPioneerandJensen7thledflashisforAlpine*8thledflashisforVisteon9thledflashisforValor
*Note:IftheASWCflashes7timesandyoudonothaveanAlpineradioconnectedtoitthatmeansthat the ASWC did not see any radio connected. Verify the 3.5mm connector is connected to the SWC input on the radio.
6) Once the radio manufacturer has been selected hold Volume Down for at least 5 seconds. TheledwillflashthenumberoftimeswhichradiowasselectedthentheledwillremainontoindicatetheASCWhasfinishedprogramming.
7) Go enjoy your radio.
Remapping the SWC Buttons
Let’s say you have the ASWC programmed to your vehicle and your radio and you want to change the button assignment for the steering wheel controls. For instance you would like Seek Up to be Mute.
This process is the same as manually programming the ASWC (please refer to the Manual Program-ming section) with a couple of notes:
•TheASWCmusthavedetectedthevehicleandradioitisattachedtobeforeyoucanremap any buttons.•Youcanonlystarttheremappingofthesteeringwheelcontrolsprocesswithinthefirst20seconds of turning the ignition key on. If you wait longer then the 20 seconds you will have to turn the ignition off then back on again.•Withinthefirst20secondsifanybuttonotherthenVolumeUporVolumeDownispushed,the remapping process will stop.•Ifduringtheremappingprocessnobuttonispushedfor30secondstheremappingprocessis aborted and the original settings are reset.

axxessinterface.com 800.221.0932
So let’s begin the remapping process:
1)IdeallyhavingtheASWCvisibleisrecommendedsinceyoucanseetheledflashestoconfirm button recognition.
2) Turning off the radio is recommended
3)Withinthefirst20secondsofturningtheignitionon,pressandholddowntheVolumeUpbutton for at least 25 seconds.
4) The led will light up solid red. Release Volume Up and the led will go out. Volume Up has now been programmed.
5) Follow the list below in order however pushing the steering wheel control button you want for the function below. If you want to skip a command press the Volume Up on the steering wheel, this will tell the ASWC to skip the command and go to the next one.
1. Volume Up 2. Volume Down 3. Seek Up/Next 4. Seek Down/Prev 5. Source/Mode 6. Mute 7. Preset Up 8. Preset Down 9. Power 10. Band 11. Play/Enter 12. PTT (Push To Talk) 13. On Hook 14. Off Hook 15. Fan Up 16. Fan Down 17. Temp Up 18. Temp Down
* Note: Remember not all radios will have all these commands. Please refer to the radios’ owners manualforspecificcommandsrecognizedbytheradio.
For instance the next command to be mapped is the Volume Down command. Let’s say you want the Mode button on your steering wheel to be the Volume Down command. Hold down the Mode but-ton till the led lights up solid red, and then release it. Now your Mode button on the steering wheel is Volume Down.

axxessinterface.com 800.221.0932
6) After the last button is programmed on your steering wheel (you do not have to go through the whole list), hold down the Volume Up button for at least 10 seconds then the led will go out.
Or
After the 18th button is programmed or skipped the led will go out and the remapping is completed.
If for any reason after remapping the steering wheel controls you want to go back to the original steer-ing wheel control settings, follow these steps:
1)Withinthefirst20secondsofturningtheignitionon.PressandholddowntheoriginalVolume Down button (not the Volume Down button you just remapped) for at least 25 seconds.
2) The led will turn on then release the Volume Down button and the led will turn off.
3) The original steering wheel control settings will be restored.