how to install sync4dr guide for...how to install sync4dr 9th november 2015 sync4dr installation...
TRANSCRIPT
HOW TO INSTALL
SYNC4DR 9th November 2015 Sync4DR Installation Steps
This document provides the step by step guide for users trying to install Sync4DR.
Created by: Koh Choon How
Date: 11/09/2015
Last Updated by
Date

Installation Guide for Business Edition
1. Click on Next.
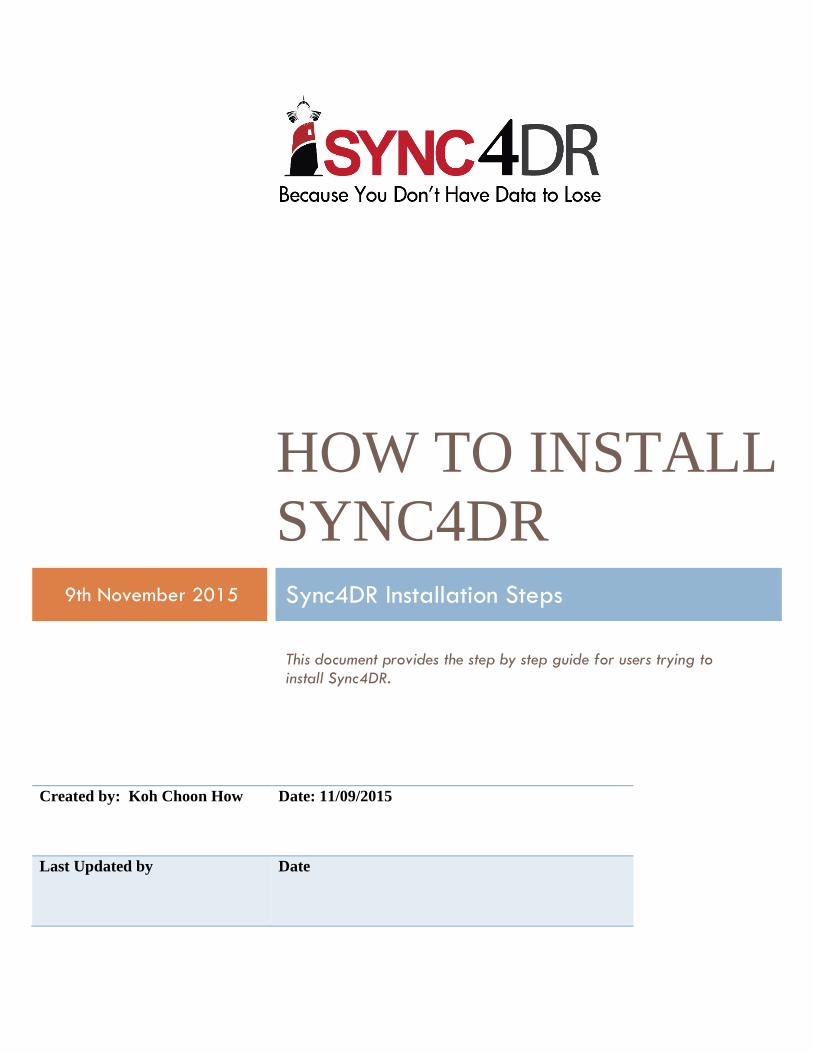
2. Select Accept and click Next.

3. Choose one of the options and click next. a. User Credential - you will have access to local/network locations. b. System - It is used mainly for Rsync Server and Network folder backup destination. It is also
used if the user credentials is not known.

4. Enter the user credentials as shown above. a. Domain - Enter the domain name if your machine is in a Windows Domain environment. b. Username c. Password - Empty password is not allowed. This is due to a security feature that is enabled
by default in Windows.
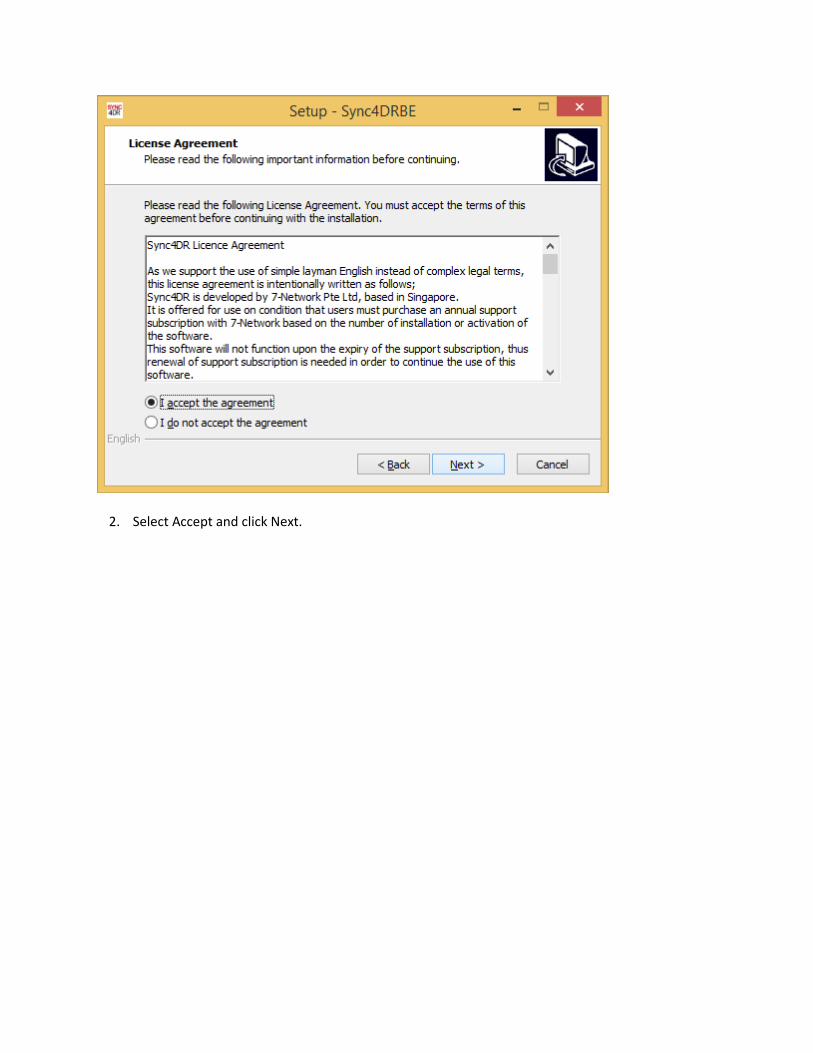
1. You will receive the above prompt if you did not enter any password.
2. You will receive the above prompt if the entered user credential is wrong.
3. You will receive the above prompt if no user credentials are entered.
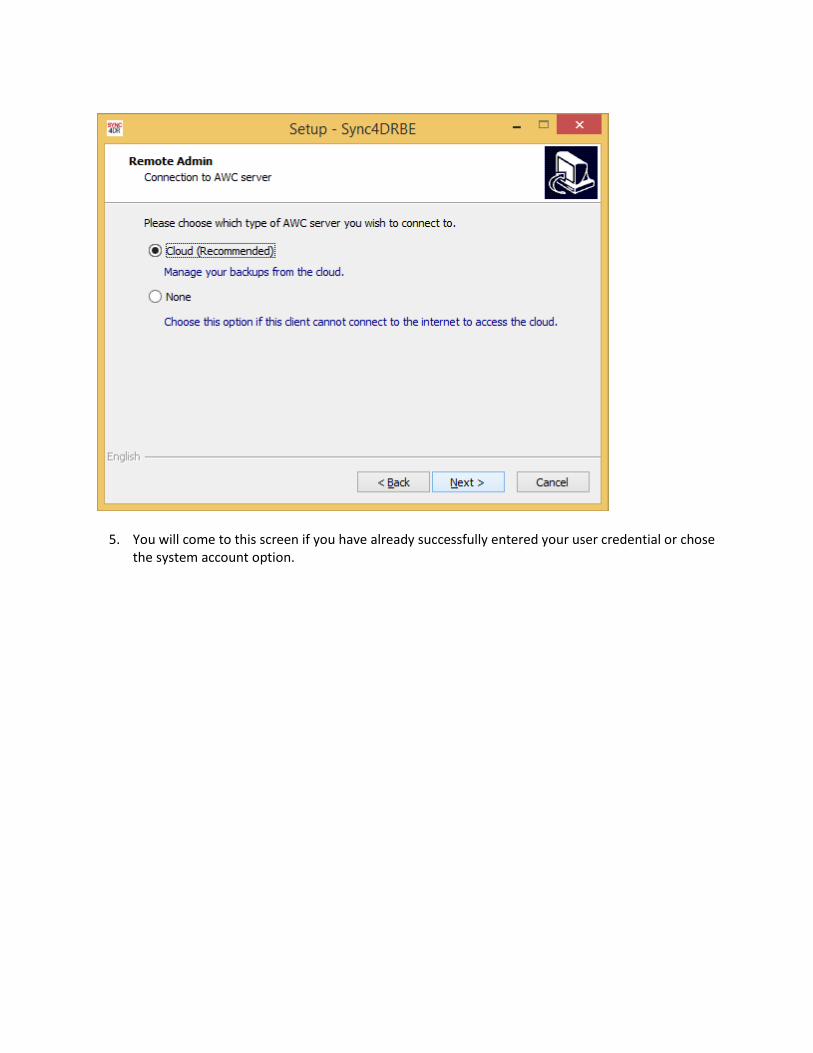
5. You will come to this screen if you have already successfully entered your user credential or chose the system account option.

6. Choosing the Cloud option will bring you to this screen. You will need to enter the 10-digit Company ID that you have received in your email when you first register your company on the Sync4DR Cloud Management.
a. You will get the above prompt if you did not provide a Company ID.
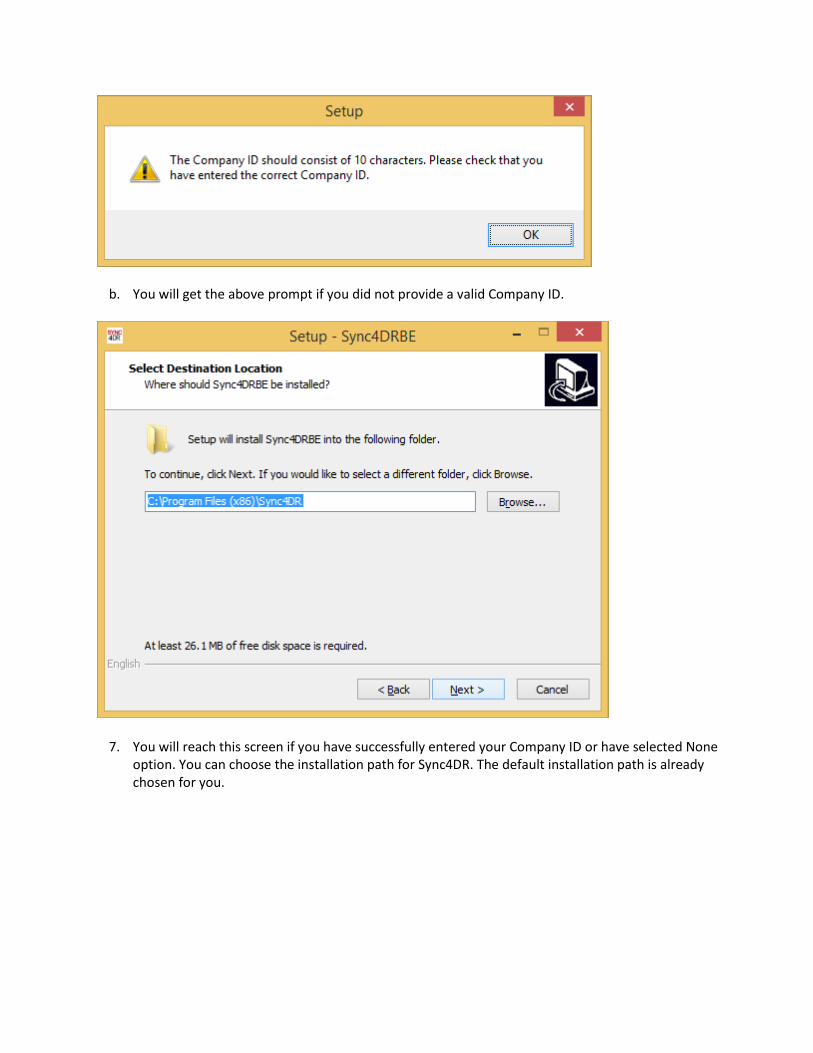
b. You will get the above prompt if you did not provide a valid Company ID.
7. You will reach this screen if you have successfully entered your Company ID or have selected None option. You can choose the installation path for Sync4DR. The default installation path is already chosen for you.

8. You can select what you want your Start Menu folder to be. Note that Start Menu is not available in Windows 8/8.1

9. Decide if you want to have a Desktop Icon for Sync4DR here.

10. Click on Install to begin the installation.

11. You will be shown this screen if Sync4DR was previously installed on your machine and you are re-installing Sync4DR. Choose the default option of "Automatically close the applications" and clicking Next.

12. After the installation is done, you will see a Quick Create Wizard. You can choose to create a backup job with the given choices of the user profiles that was found on your machine. You can also skip the auto-creation of the backup job if you want to customize your backup from the cloud or the manager.

13. Ticking the Launch option will allow you to launch the Manager program after you finish the installation. Do take note that on some machines (depending on security settings), you may receive a prompt that says you do not have sufficient privileges to run the Manager. Either you run the setup file as an administrator or you can go to your start menu and run the manager directly after the installation is done.