how to access the sharedrive (p:) from your personal computer. · 2019-07-08 · how to access the...
TRANSCRIPT
How to Access the SHAREDRIVE (P:) from your personal computer.
Table of Contents
WINDOWS ......................................................................................................................................... 2
Determine the version, build, and bit-version of windows you are running. ........................................... 2
Determine if your device has encryption enabled. ................................................................................... 2
Installing the VPN ...................................................................................................................................... 6
Mapping the shardrive to your computer .............................................................................................. 11
MAC ......................................................................................................................................................... 17
Download the AnyConnect software ...................................................................................................... 17
Open the package file ............................................................................................................................. 20
Open the AnyConnect client ................................................................................................................... 24
Enter your gatorlink ................................................................................................................................ 26
Enabling FileVault (encryption) ............................................................................................................... 35

How to Access the SHAREDRIVE from your personal
laptop or computer.
For years, NICAP interns have longed for access to the sharedrive from computers that
were not hardwired into the QI office.
Today you can. The following is a stepwise protocol for making your life easier as a
NICAP intern!
For those who use Macs, the protocol will be a little different, but still straight forward.
WINDOWS A. Determine the version, build, and bit-version of windows you are running.
a. Navigate to the START and click it open.
b. Open up Windows Explorer (aka, File Explorer)
c. Go to My Computer (aka This PC)
d. Right-Click My Computer and select properties. The following window
should appear
In this example, I am running Windows 10 Education. This is a 64-bit version of
Windows.
B. Determine if your device has encryption enabled. Devices that are running
WINDOWS 10 PRO, WINDOWS 10 EDUCATION, or WINDOWS 10
ENTERPRISE have BitLocker already installed and/or enabled in the computer.

If you are running WINDOWS 10 HOME or WINDOWS 10 S or any other
version, you will not have BitLocker enabled.
a. To determine if you have bitlocker enabled, Go to Start. Search
“BitLocker”. “Manage BitLocker” option should come up. You need to
select it. The corresponding window should open, titled ‘BitLocker Drive
Encryption’.
b. If it says ‘BitLocker is On’, then there is nothing else you need to do in
terms of drive encryption. If it does not say bit locker is on, then you will
have to turn it on when you are not using your computer for time sensitive
projects. (turn it on and let it encrypt your drive at night, it will take a few
hours and you wont be able to use you computer as efficiently)
c. I DON’T HAVE WINDOWS 10 PRO, ENTERPRISE, EDUCATION. WHAT
SHOULD I DO?
i. You will need to download a product key from the UF webstore for
Windows 10 Education.
1. Open your web browser an type in the following address:
https://portal.helpdesk.ufl.edu
2. You will be prompted to login using GatorLink.
3. A page will appear that will show your eligibility for certain
software licenses. This page is sometimes not accurate. All
UF students have access to Windows 10 Education.

4. Scroll down to ‘ Eligible, take me to OnTheHub’. Click on this
link and this will take you to the portal where you will access
the new key
5. Select Windows 10 link

6. Select add to cart. And then you should select the product
key download link that is provided to you. Be advised, each
student is only allowed ONE key. You will also have to put in
your customer number and name as the signature. That
information is under the fill-in fields.

7. Once you have the key, click get started and it will tell you
how to change your product key depending on your version
of Windows.
C. Installing the VPN
a. You need to download Cisco AnyConnect VPN application. Navigate to
https://ufhealth.org/vpn
b. Select “UF Anyconnect Client [PC,MAC]” on the right hand side of the
webpage.

c. If you are running Windows, select the download links under “7/8/8.1/10+”.
If you are running MAC, select the download link under “Mac OSX”.
d. For Windows users, you must run the files in order. First download the
anyconnect-win-4.6.01103-vpn-predeploy-k9.msi. Run this file. Then
download the anyconnect-win-4.6.01103-vpn-predeploy-k9.msi. Run
this file second.
e. After the installer is finished, You need to run the AnyConnect application.
Go to Start → search Anyconnect → select the “Cisco AnyConnecer
Secure Client”.

f. You will have a dialogue box (VPN Ready to Connect) where you need to
put in the following address
i. vpn.health.ufl.edu
g. Click “Connect”

h. Another dialogue should show up that askes you for a username and
password. Enter your gatorlink username and password.

In the lower right hand corner, you should see the AnyConnect app symbol change to a
Lock. Your network icon may or may not change as well. You are now connected to
UFHealth network.

D. Mapping the shardrive to your computer
a. You need to have your computer know where to look for on the UFHealth
netwrok for the shardrive. First open up File Explorer.
b. Hover over “This PC” and right click. Select “Map network drive”

The following dialogue box should appear:
You can set a custom drive letter for the network drive, but I wouldn’t change this.
c. Type in, or copy and paste, the following address to the shardrive in the
field “Folder”: \\AHCDFS.AHC.UFL.EDU\FILES\NSGY\GROUP
i. Make sure you include the first two backslashes [ \\ ]

d. Make sure to check all boxes and Select “Finish”
The following dialogue should appear.

e. Type your gatorlink username using this format in the “User name” field:
ufad\”gatorlink username”.
f. Type your gatorlink password in the “Password” feild. You can also select
“Remember credentials”
g. Click “Ok”. It should open up the sharedrive.
You can access and edit files as if you were in the QI office. Be careful not to delete any
files. In addition, be careful not to have other files or folders on your computer open
while you are using the shardrive. Accedental uploads can happen and there is no
safegaurd to prevent this in place at this time. Be mindful.
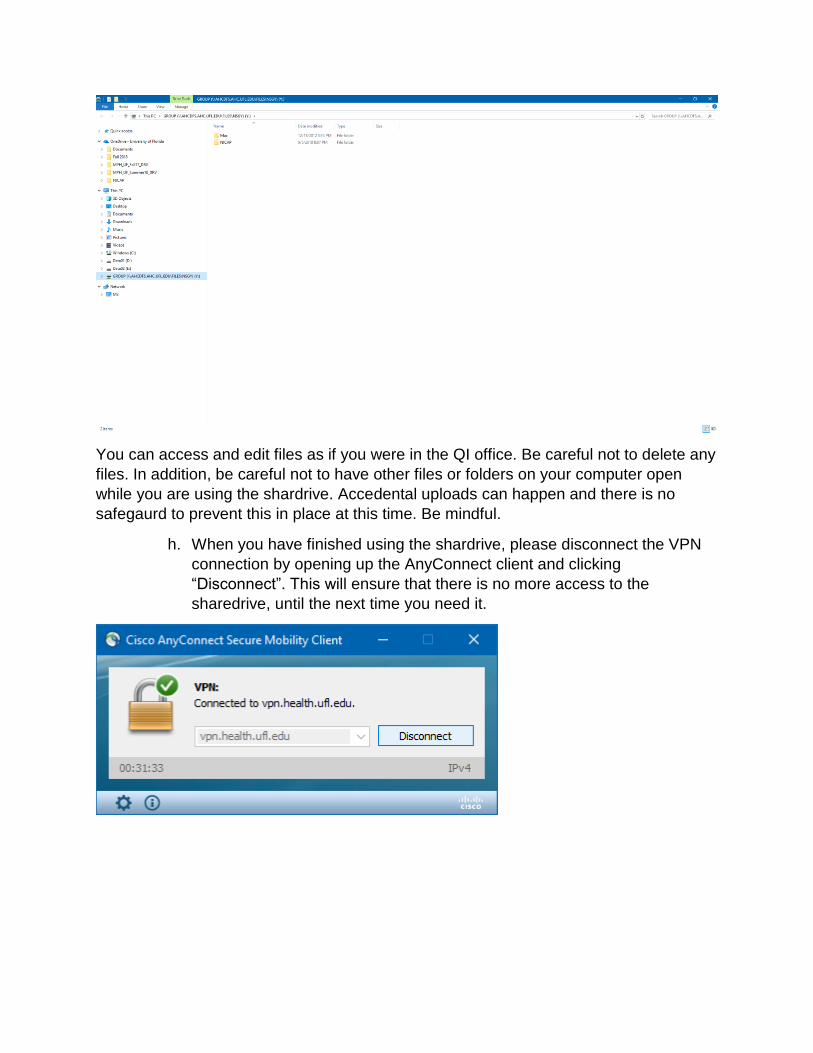
h. When you have finished using the shardrive, please disconnect the VPN
connection by opening up the AnyConnect client and clicking
“Disconnect”. This will ensure that there is no more access to the
sharedrive, until the next time you need it.


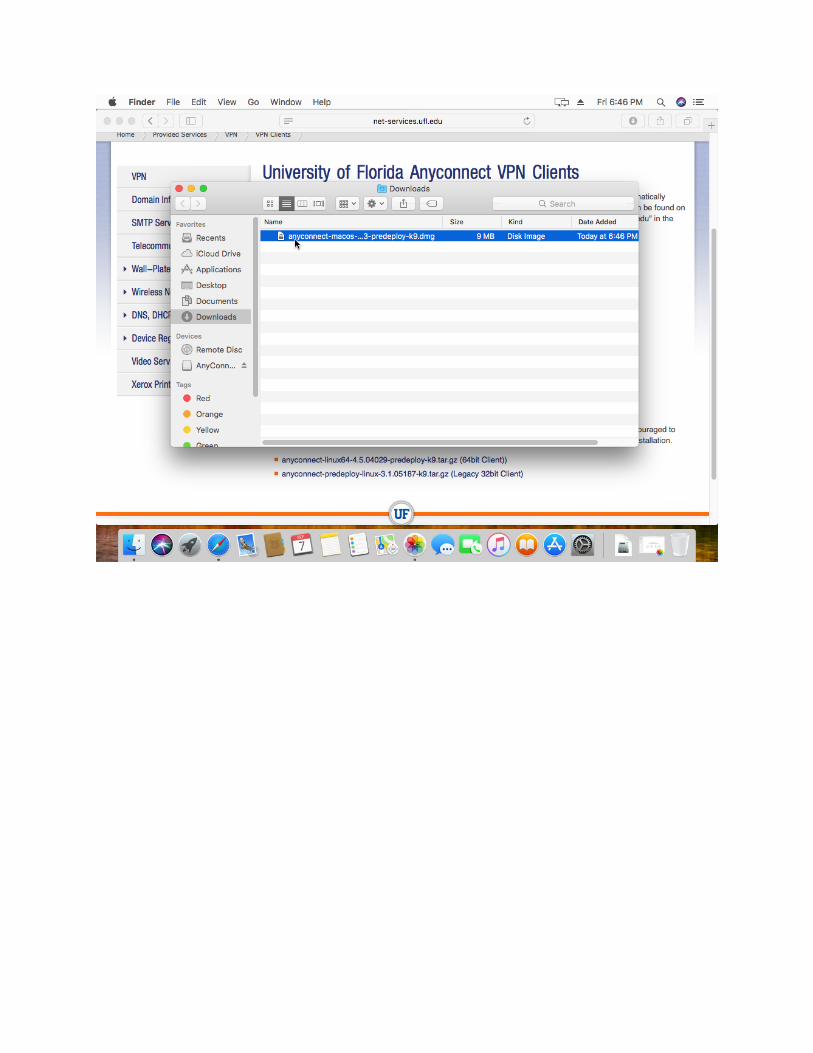
B. Open the package file and run it.

C. Follow the instructions and complete the installation of the AnyConnect
Client.


D. Open the AnyConnect client, by using Launchpad and searching “cisco”

E. Type in the following vpn address: vpn.health.ufl.edu in the Field provided.
Then click “Connect”

F. Enter your gatorlink username and password


G. Go to Finder → Go → Connect to server (Command K)

H. A dialogue will show asking for the server address. Type in the following in the
field:
smb://ufad\[email protected]/FILES/NSGY/GROUP
Make sure to type in your gatorlink username where it it says
gatorlinkusername
When entering the address, make sure to TYPE it in.

I. It will then ask you for login. Login with you Gatorlink password. You shouldn’t
have to type in your username.


J. To disconnect from the sharedrive, you can go to the AnyConnect client icon
in the top of the screen → click → disconnect.
K. When you disconnect from cisco, please eject the sharedrive from your
computer, else you’ll get the Pinwheel
L. To access the shardrive folder from your computer, navigate to Finder → Go→
Computer. There should be a drive that says GROUP. This is the shard rive.


E. Enabling FileVault (encryption)
a. Go to System Preferences → Security and Privacy → FileVault tab. By
default, this is disabled. You need to enable this in order to protect PHI.
b. BE ADVISED, enabling FileVault will slow your computer down as it
encrypts your entire hard drive (depending on the type and size of Hard
drive. For reference, a 1 Terabyte 5400 rpm drive takes around 4 hours,
when left alone.) . I suggest enabling it when you go to sleep so your
computer can work through the night.
c. After your drive is encrypted, you will be able to use your computer as
normal.


