history of the grid - g e n e r i c i n d e x p a g e · history of the grid ... especially not the...
TRANSCRIPT
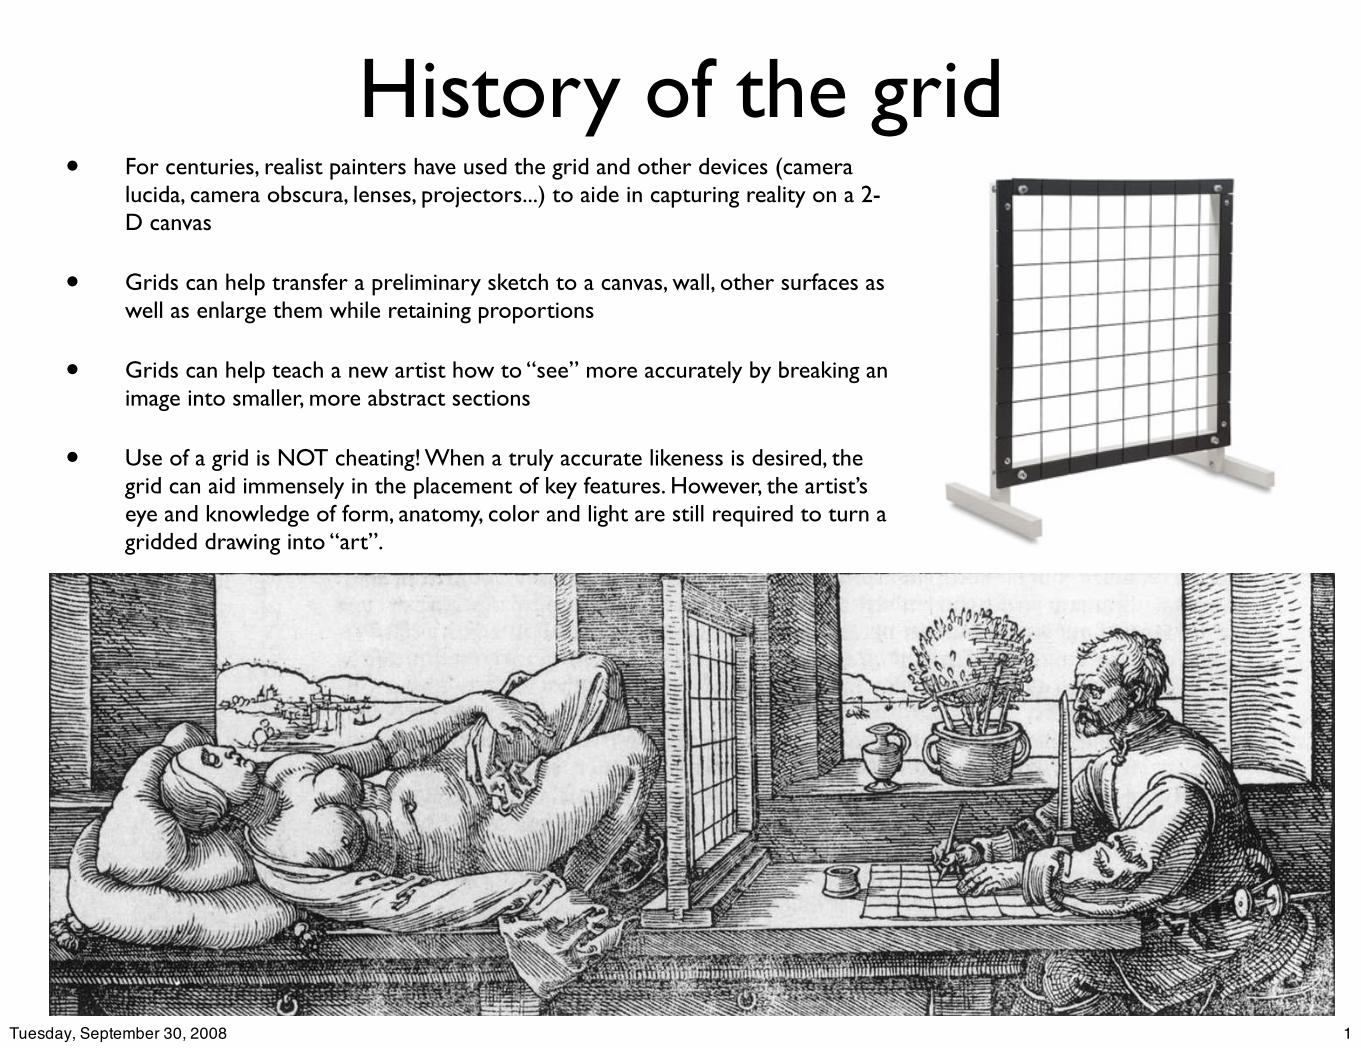
History of the grid• For centuries, realist painters have used the grid and other devices (camera
lucida, camera obscura, lenses, projectors...) to aide in capturing reality on a 2-D canvas
• Grids can help transfer a preliminary sketch to a canvas, wall, other surfaces as well as enlarge them while retaining proportions
• Grids can help teach a new artist how to “see” more accurately by breaking an image into smaller, more abstract sections
• Use of a grid is NOT cheating! When a truly accurate likeness is desired, the grid can aid immensely in the placement of key features. However, the artist’s eye and knowledge of form, anatomy, color and light are still required to turn a gridded drawing into “art”.
1Tuesday, September 30, 2008
Other alternatives to the grid• Projector
• Good for working on large surfaces
• Distortion can be a problem, as well as lighting & consistent alignment
• Lightbox
• Works ok for small pieces, thin paper
• Difficult for large pieces, works on thick/hard surfaces without transfer techniques (pigment dust, waxy pencils, “pouncing”, etc)
Neither trains the eye/hand as well as using the grid.
2Tuesday, September 30, 2008
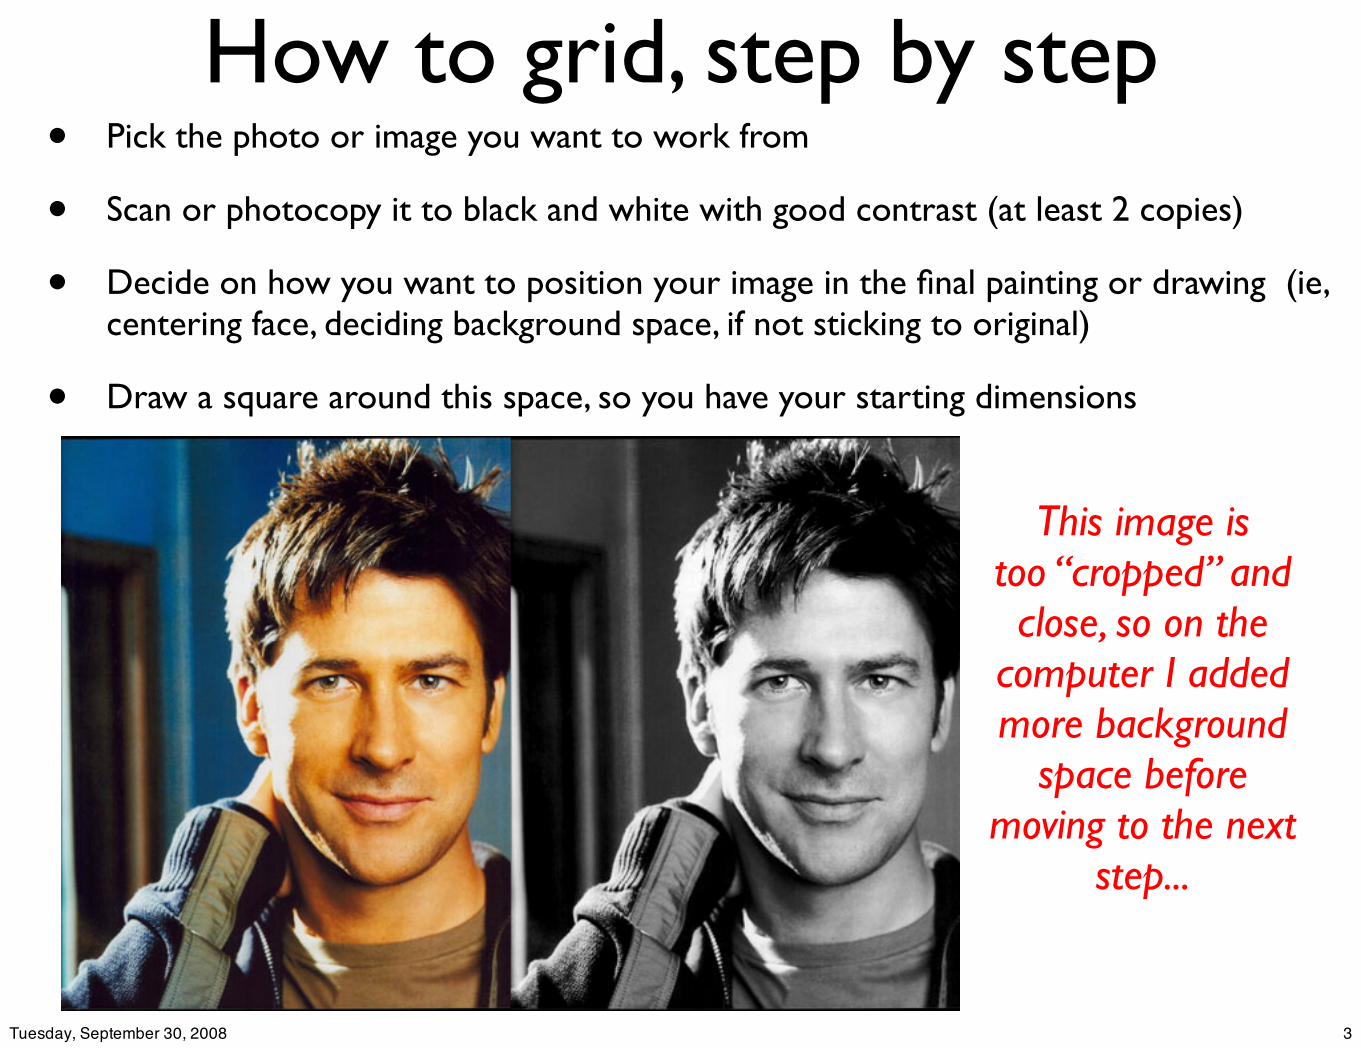
How to grid, step by step• Pick the photo or image you want to work from
• Scan or photocopy it to black and white with good contrast (at least 2 copies)
• Decide on how you want to position your image in the final painting or drawing (ie, centering face, deciding background space, if not sticking to original)
• Draw a square around this space, so you have your starting dimensions
This image istoo “cropped” and close, so on the
computer I added more background
space before moving to the next
step...
3Tuesday, September 30, 2008
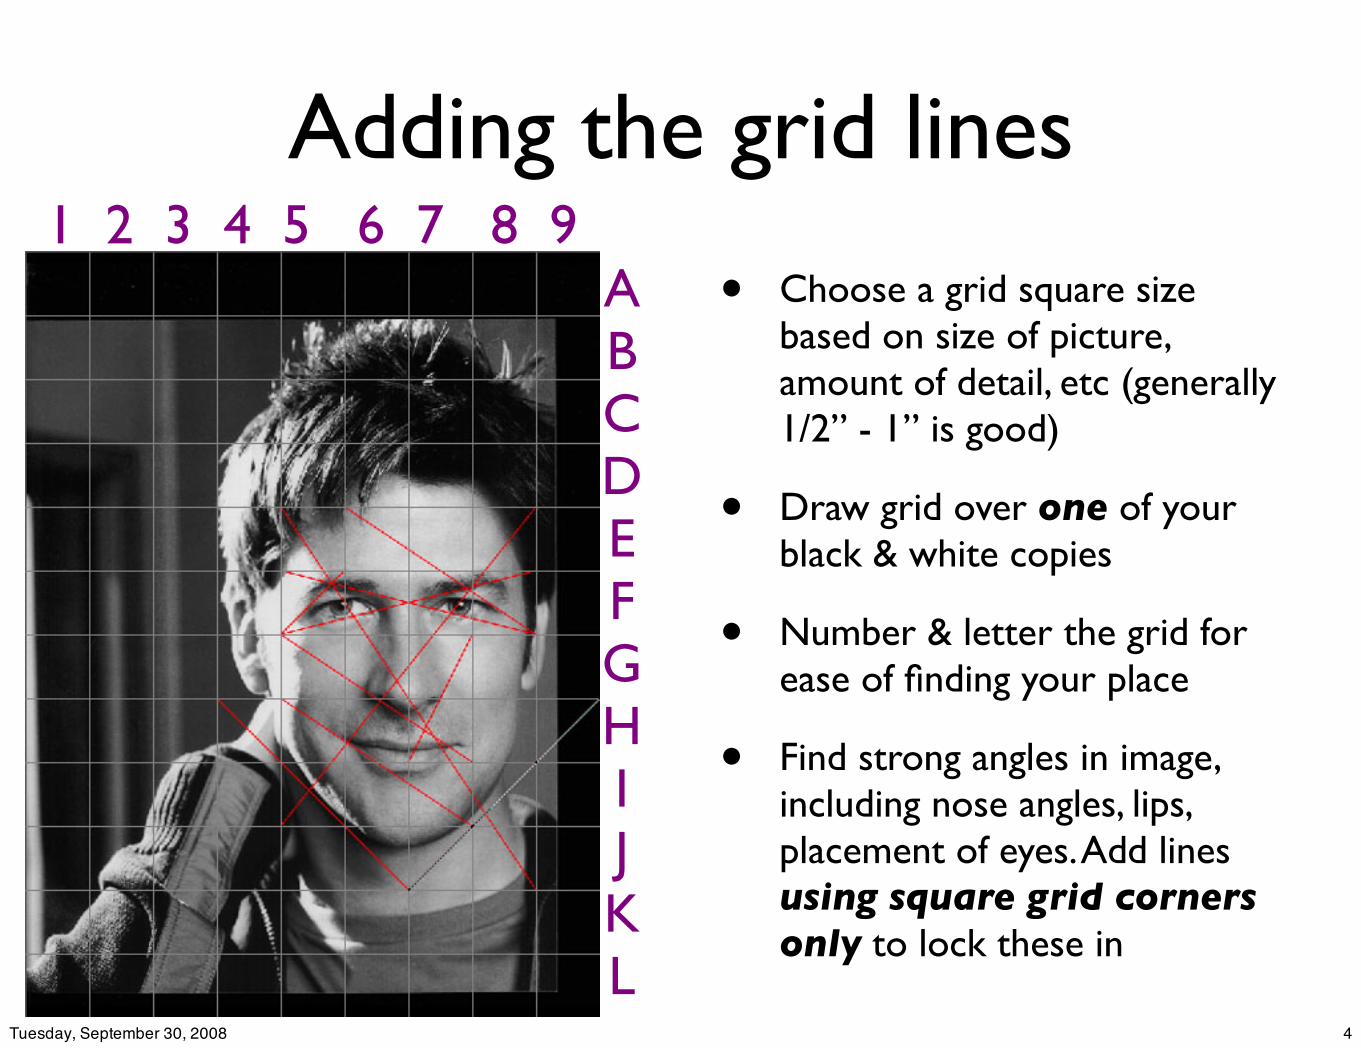
Adding the grid lines
• Choose a grid square size based on size of picture, amount of detail, etc (generally 1/2” - 1” is good)
• Draw grid over one of your black & white copies
• Number & letter the grid for ease of finding your place
• Find strong angles in image, including nose angles, lips, placement of eyes. Add lines using square grid corners only to lock these in
1 2 3 4 5 6 7 8 9 ABCDEFGHIJKL
4Tuesday, September 30, 2008
Preparing your art surface• Determine final proportions of your image to determine how to
scale your grid.
• Example:
• Your original image is 8” x 10” with a 1/2” grid.
• Your canvas size is 16” x 20”. Draw a 1” grid on it as you are doubling the size of your image
• Draw your lines lightly, and using an appropriate media to remove later (ex: charcoal pencil for an oil or acrylic painting; soft pencil for a pencil or watercolor piece)
• Rule of portraiture: do not enlarge your image to “larger than life” size
5Tuesday, September 30, 2008
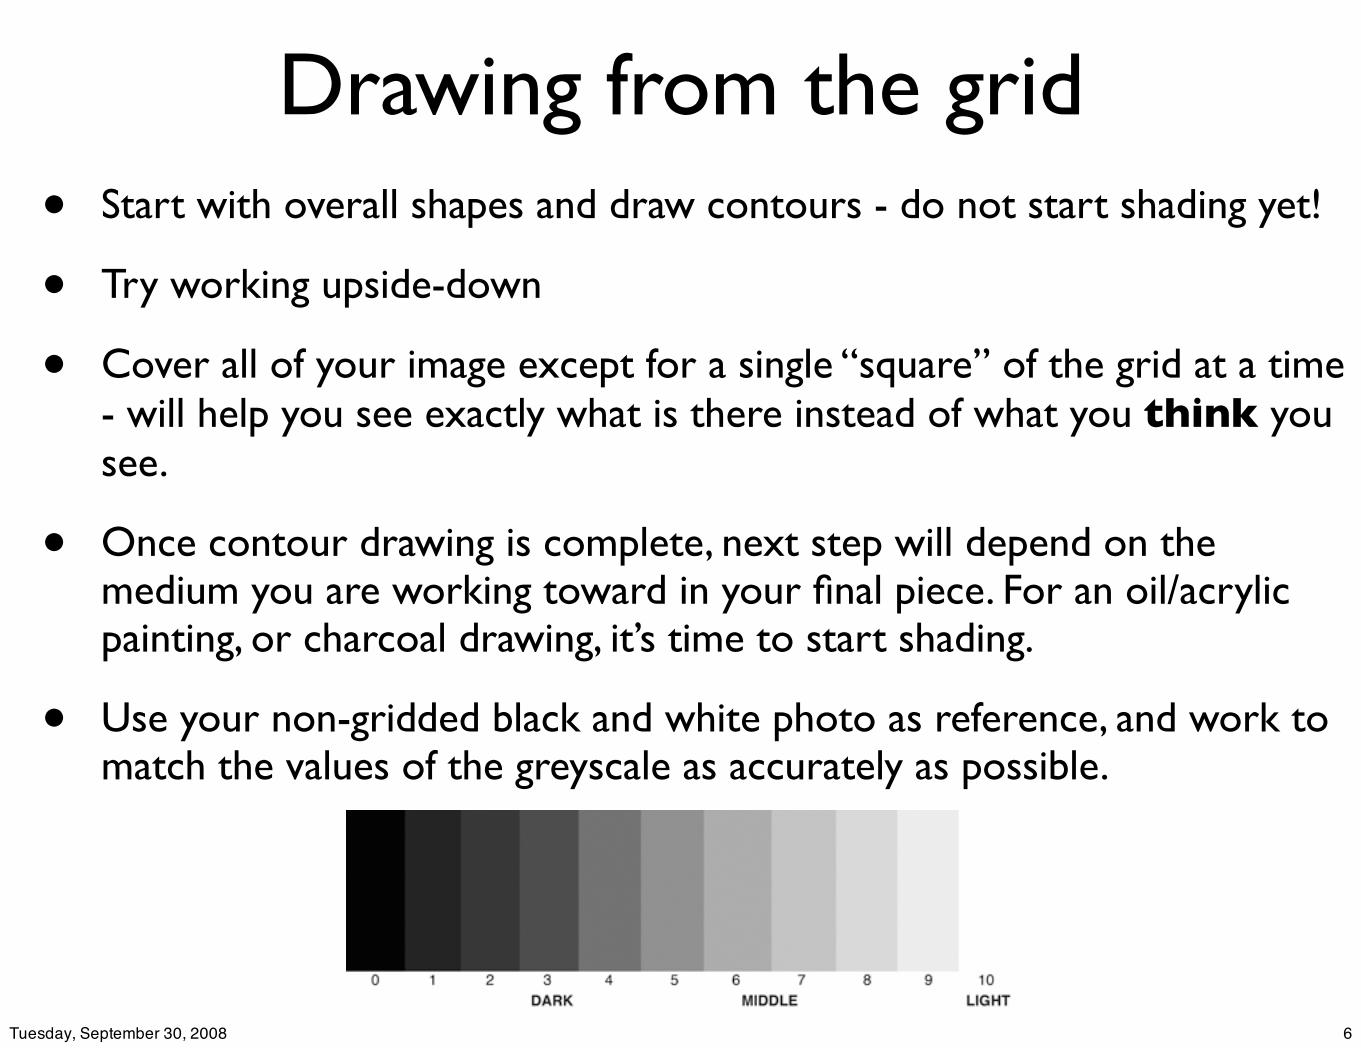
Drawing from the grid• Start with overall shapes and draw contours - do not start shading yet!
• Try working upside-down
• Cover all of your image except for a single “square” of the grid at a time - will help you see exactly what is there instead of what you think you see.
• Once contour drawing is complete, next step will depend on the medium you are working toward in your final piece. For an oil/acrylic painting, or charcoal drawing, it’s time to start shading.
• Use your non-gridded black and white photo as reference, and work to match the values of the greyscale as accurately as possible.
6Tuesday, September 30, 2008
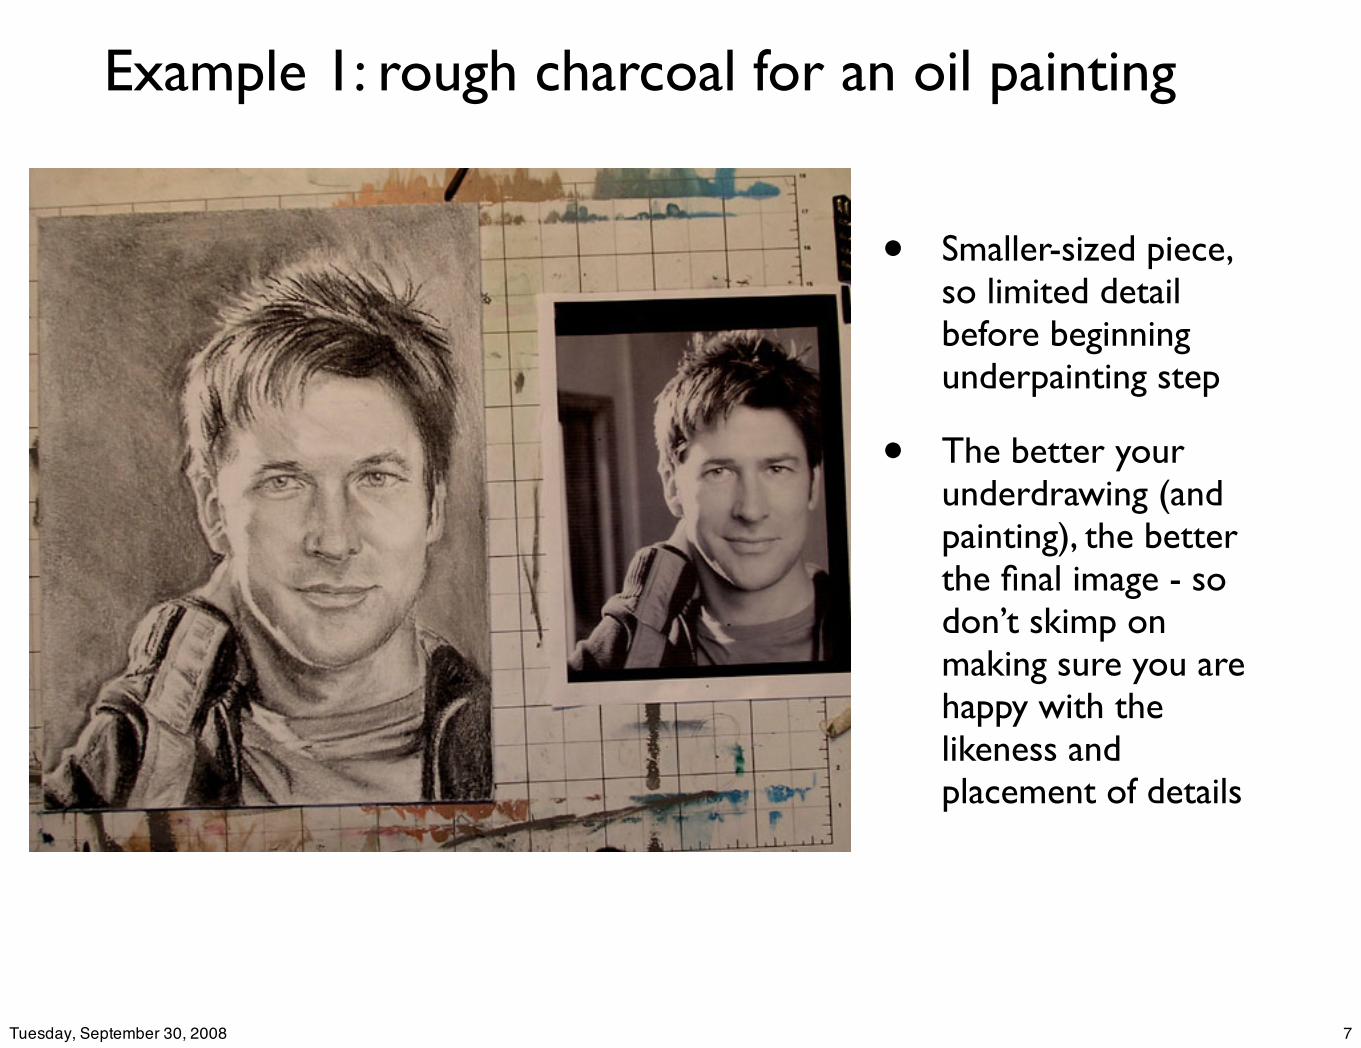
Example 1: rough charcoal for an oil painting
• Smaller-sized piece, so limited detail before beginning underpainting step
• The better your underdrawing (and painting), the better the final image - so don’t skimp on making sure you are happy with the likeness and placement of details
7Tuesday, September 30, 2008
Tips for better results from photos(or, why photorealism does not = realism)
• Photos and artificial light/flashbulbs can “flatten” an image, distorting and obscuring natural features and loosing depth.
• Ways you can adjust for this:
• Study anatomy and take life drawing courses. Knowing the general bone and muscle structure of the face and body will help “fill in the blanks” when working from a photo source.
• Lose your edges. Remember that nothing in nature has a hard edge - especially not the human body! Soft edges, especially in areas meant to fall into the background, will help create depth and a natural feeling to your artwork.
• Concentrate on overall form before getting lost in detail. Blur your vision when looking at your artwork and comparing it to your source image to loose the detail. Remember that nothing in the shadow planes of your image should be a higher value (ie, “brighter”) than anything in the light planes.
8Tuesday, September 30, 2008
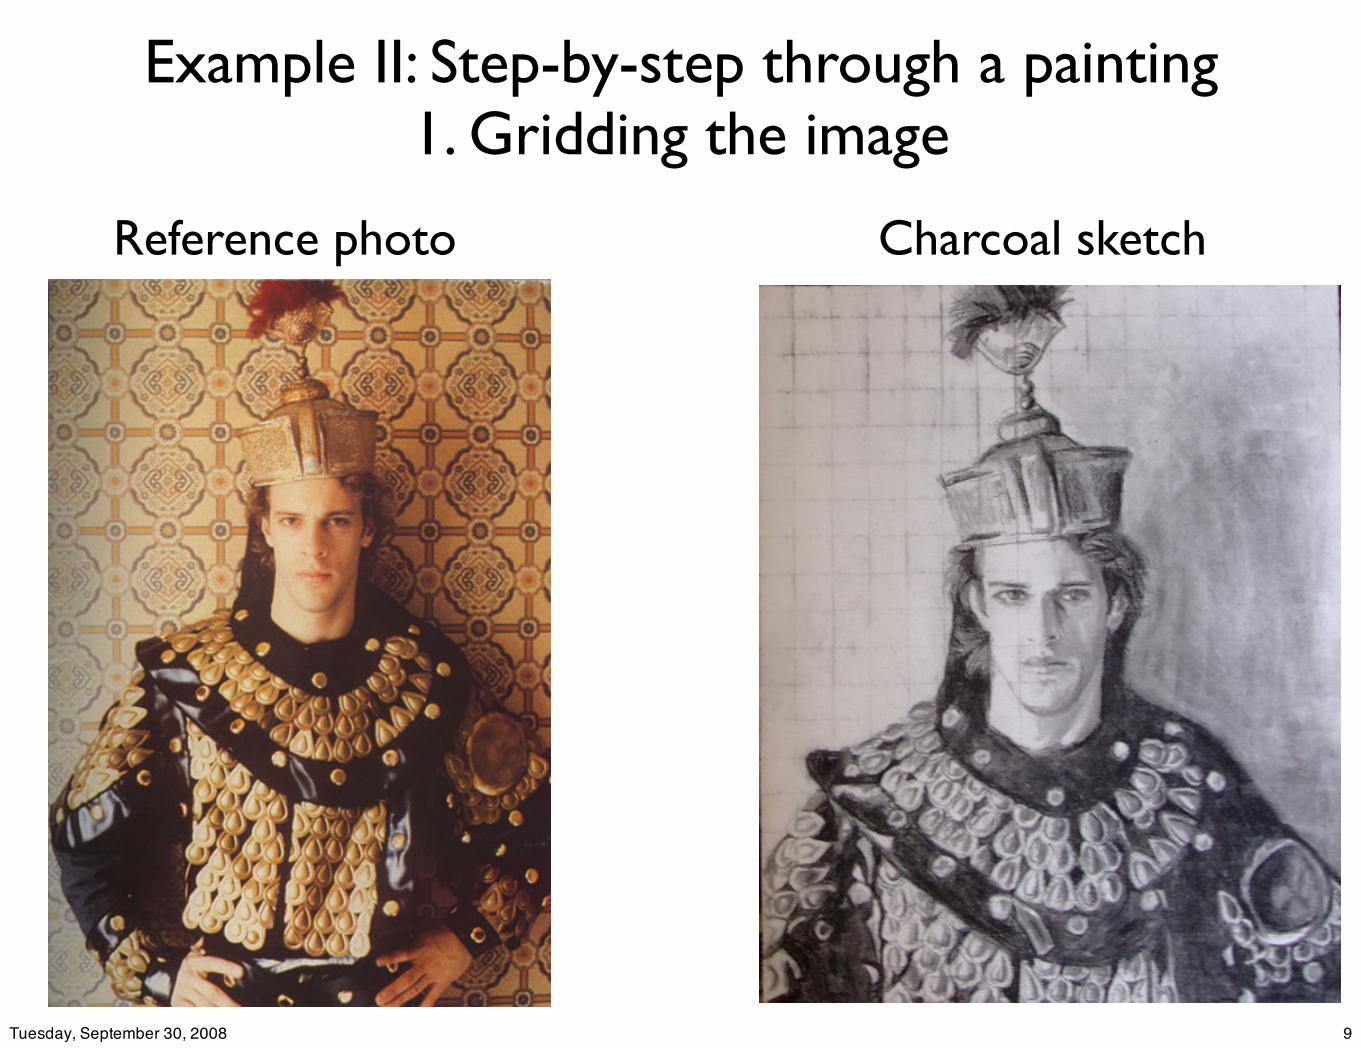
Example II: Step-by-step through a painting1. Gridding the image
Reference photo Charcoal sketch
9Tuesday, September 30, 2008
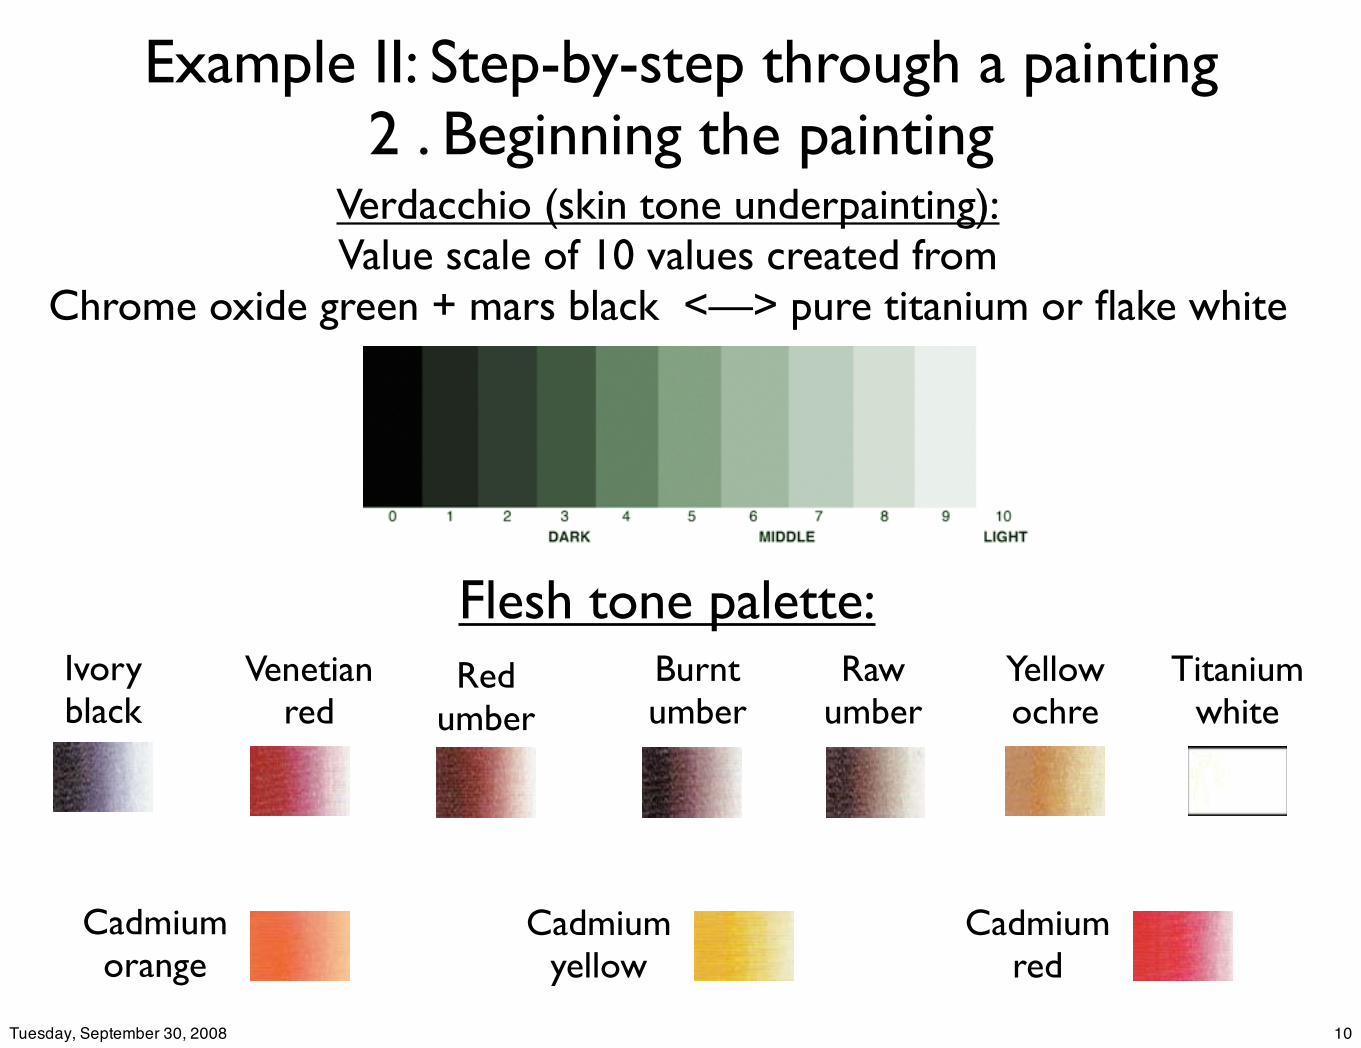
Example II: Step-by-step through a painting2 . Beginning the painting
Verdacchio (skin tone underpainting):Value scale of 10 values created from
Chrome oxide green + mars black <—> pure titanium or flake white
Flesh tone palette:Ivory black
Venetian red
Red umber
Burnt umber
Raw umber
Yellowochre
Titaniumwhite
Cadmiumorange
Cadmiumyellow
Cadmiumred
10Tuesday, September 30, 2008

Example II: Step-by-step through a painting2 . Beginning the painting
Background/underpainting First painting/dead coloring
11Tuesday, September 30, 2008
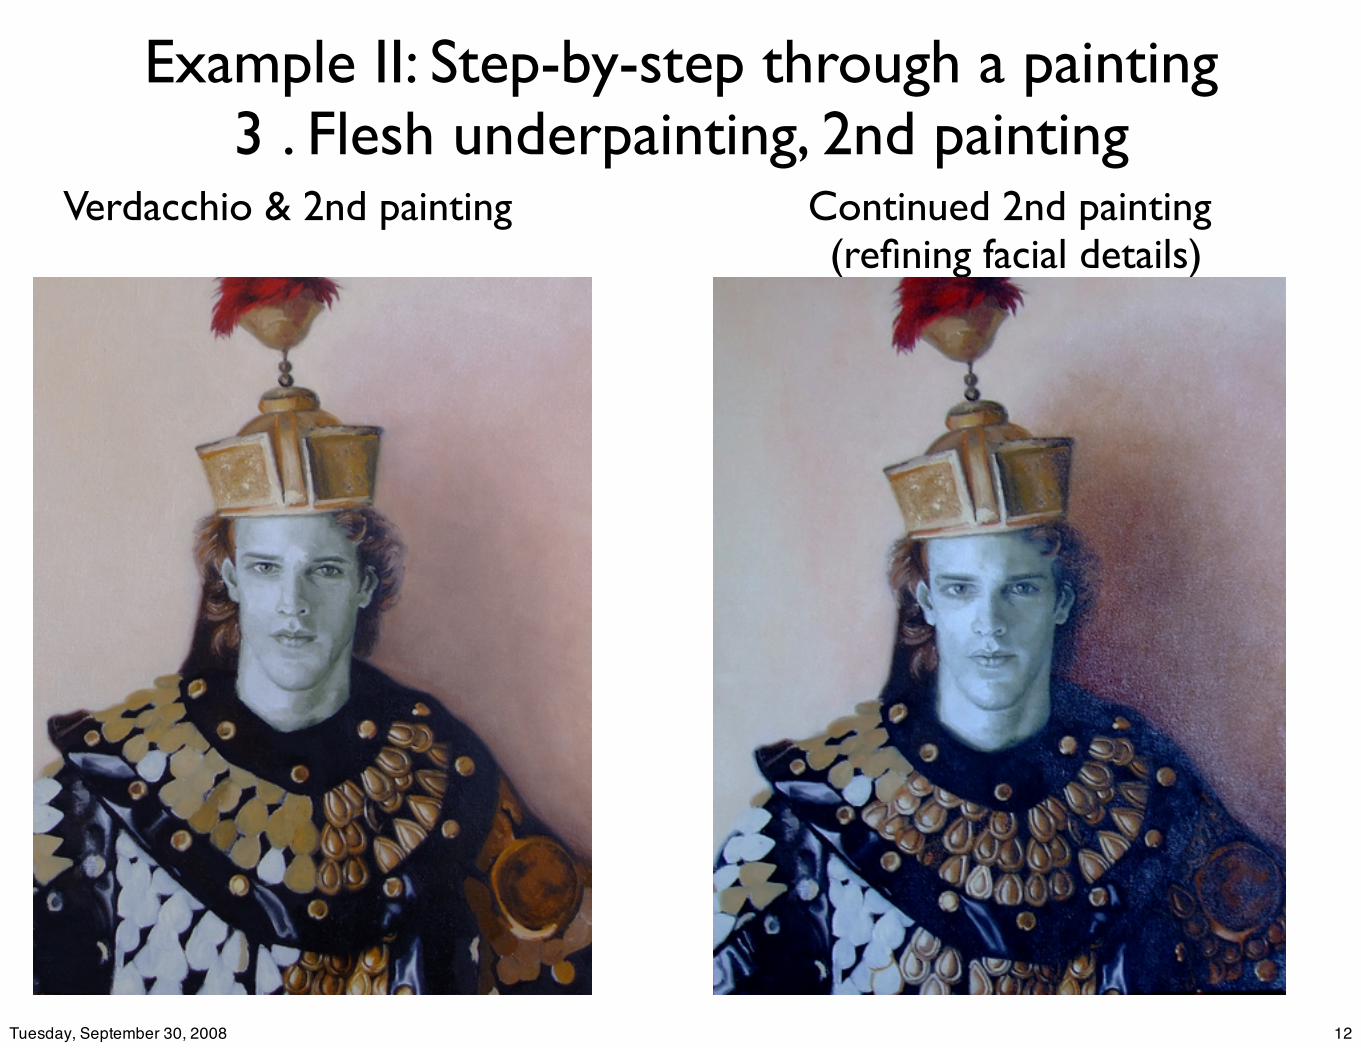
Example II: Step-by-step through a painting3 . Flesh underpainting, 2nd painting
Verdacchio & 2nd painting Continued 2nd painting (refining facial details)
12Tuesday, September 30, 2008

Example II: Step-by-step through a painting4 . Applying fleshtones
Fleshtone 1st application Finished fleshtones + 2nd painting
13Tuesday, September 30, 2008
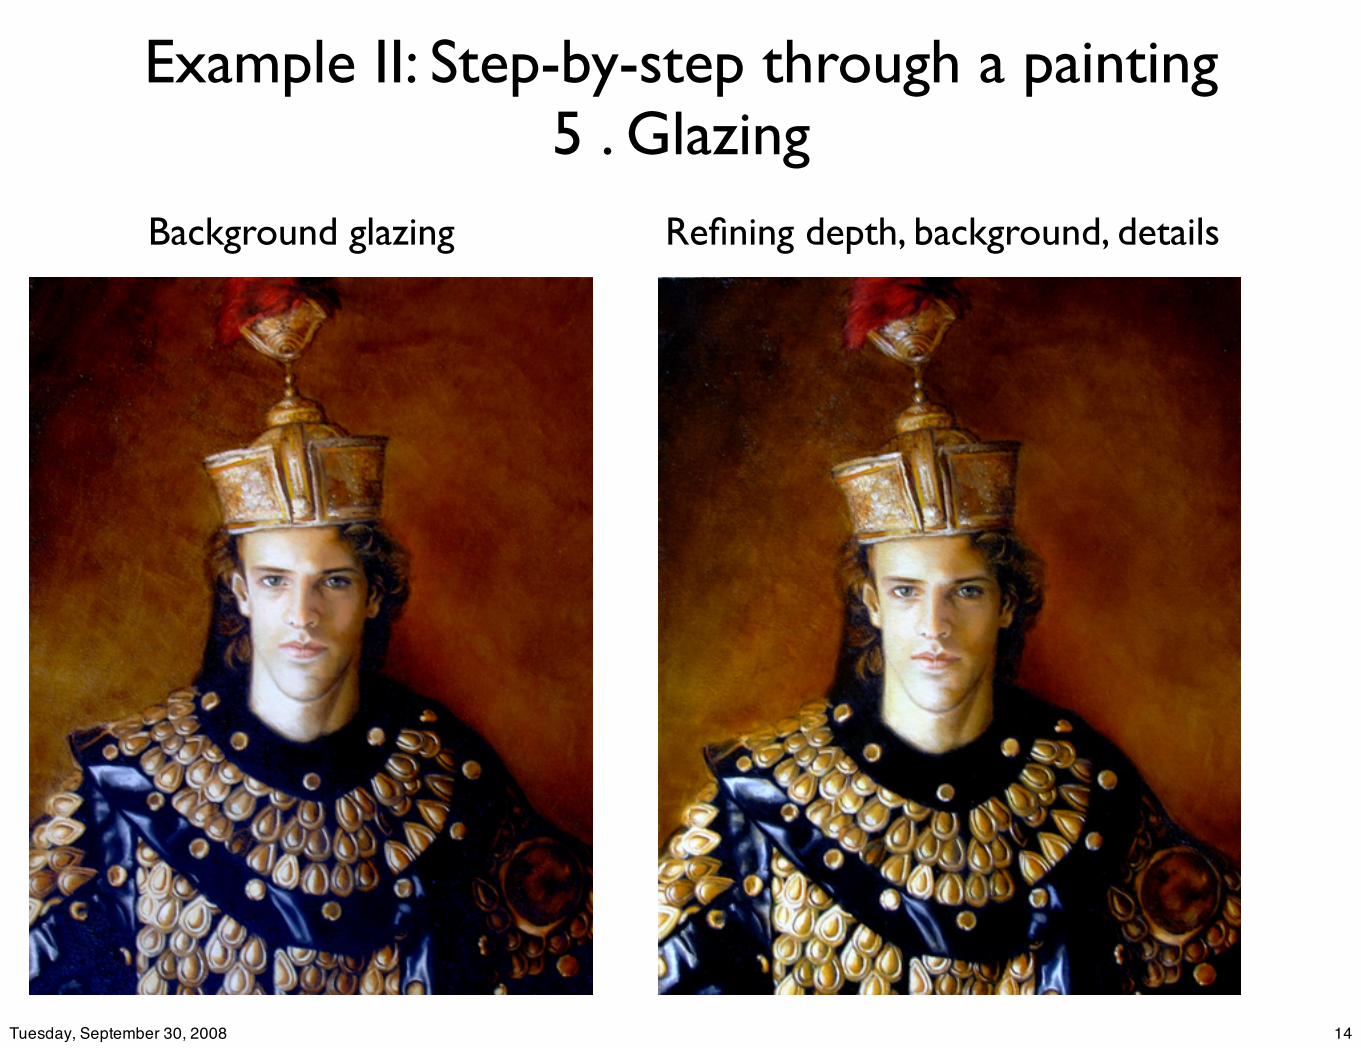
Example II: Step-by-step through a painting5 . Glazing
Background glazing Refining depth, background, details
14Tuesday, September 30, 2008
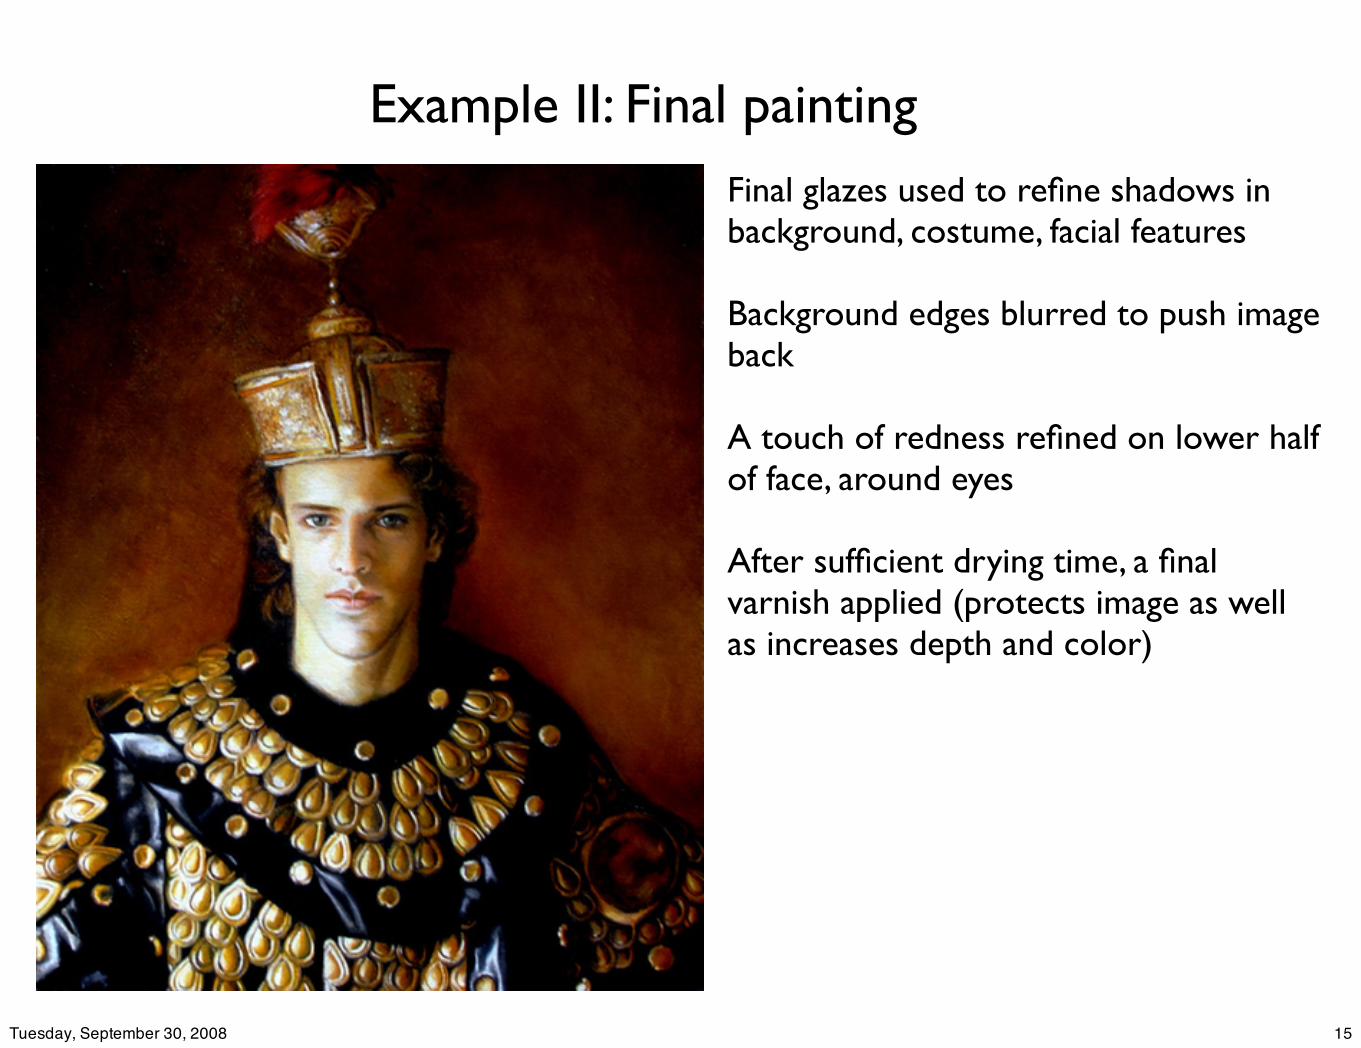
Example II: Final paintingFinal glazes used to refine shadows in background, costume, facial features
Background edges blurred to push image back
A touch of redness refined on lower half of face, around eyes
After sufficient drying time, a final varnish applied (protects image as well as increases depth and color)
15Tuesday, September 30, 2008

Recommended references
• Anatomy For Artists, Reginald Marsh, Dover Publications, 1970.
• Controlled Painting, Frank Covino, NorthLight Books, 1982.
• Creative Painting From Photographs, Rudy De Reyna, Watson-Guptill Publications, 1975.
• Drawing the Human Head, Burne Hogarth, Watson-Guptill Publications, 2002.
• The Fine Art of Portraiture, Van Nostrand-Reinhold, 1970.
• Secret Knowledge: Rediscovering the Lost Techniques of the Old Masters, David Hockney, Studio, 2001.
16Tuesday, September 30, 2008