hardware parts - grilla grills
TRANSCRIPT
Kamado Cart Assembly
1
Handle GripSteering Bearing1/2” Steering Bolt1/2” Steering Washer1/2” Steering LocknutHandle Shoulder Bolt5/8” Wheel Locknut5/8” Wheel Bolt 8”x2.5” WheelLocking Plugs5/16” Mounting Bolt Long5/16” Mounting Bolt Short5/16” Mounting NutWheel washerWheel CapsBlack StrappingHandle WasherHandle Nut
[A][B][C][D][E][F][G][H] [I][J] [K][L][M][N][O][P][Q][R]
x1x1x1x1x1x1x2x4 x4
x27x44
x6x50
x4x4x3X2X1
HArdwareHandleFrame BaseSteering AssemblyCart LegsCart TopRear Wheel BracketFrame StiffenersCover Panels Upper/Lower Tray Rests
[1][2][3][4][5][6][7][8] [9]
x1x1x1x4x1x2x2x4 x4
Parts• 5/16”, 1/2”, 1” Open Ended Wrench or an adjustable cresent wrench of size• Allen Wrench• Small phillips head screw driver
Tools Needed
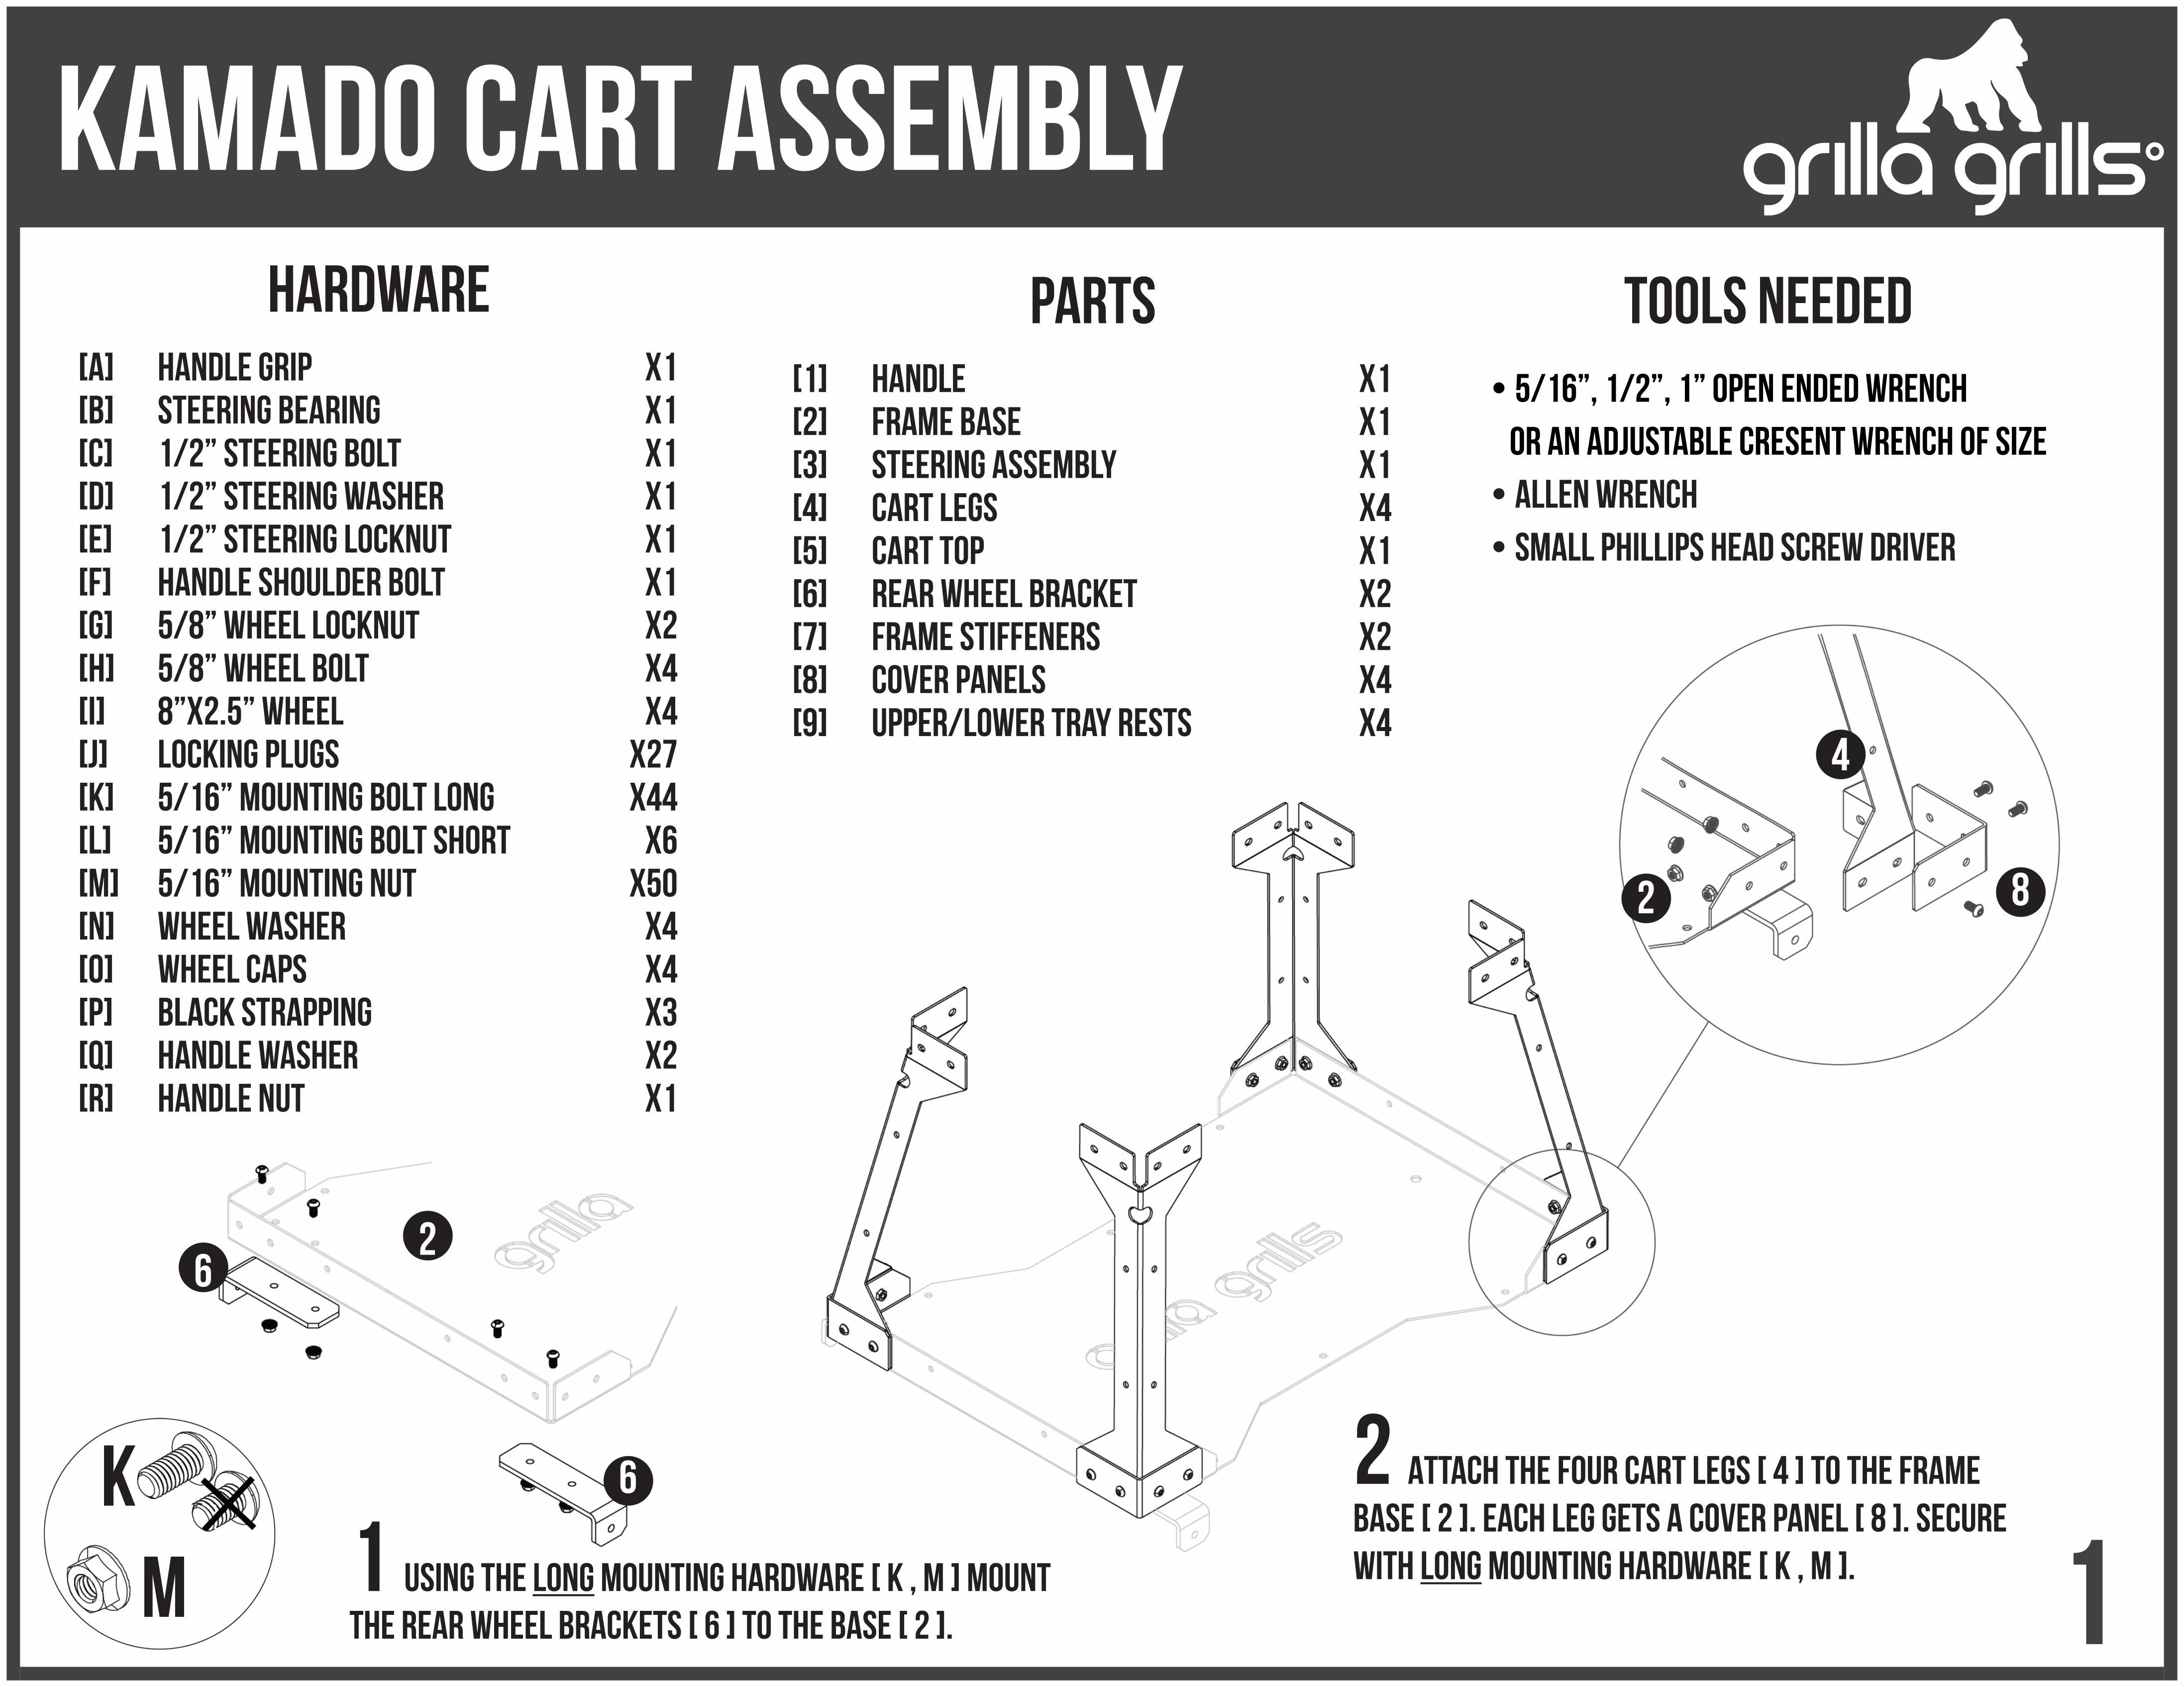
1 using the long mounting hardware [ k , m ] mount the rear wheel brackets [ 6 ] to the base [ 2 ].
2 Attach the four cart legs [ 4 ] to the frame base [ 2 ]. Each leg gets a cover panel [ 8 ]. Secure with long mounting hardware [ k , m ].
KM
4
82
2
6
6
Kamado Cart Assembly
2K
M
lM
5
7
7
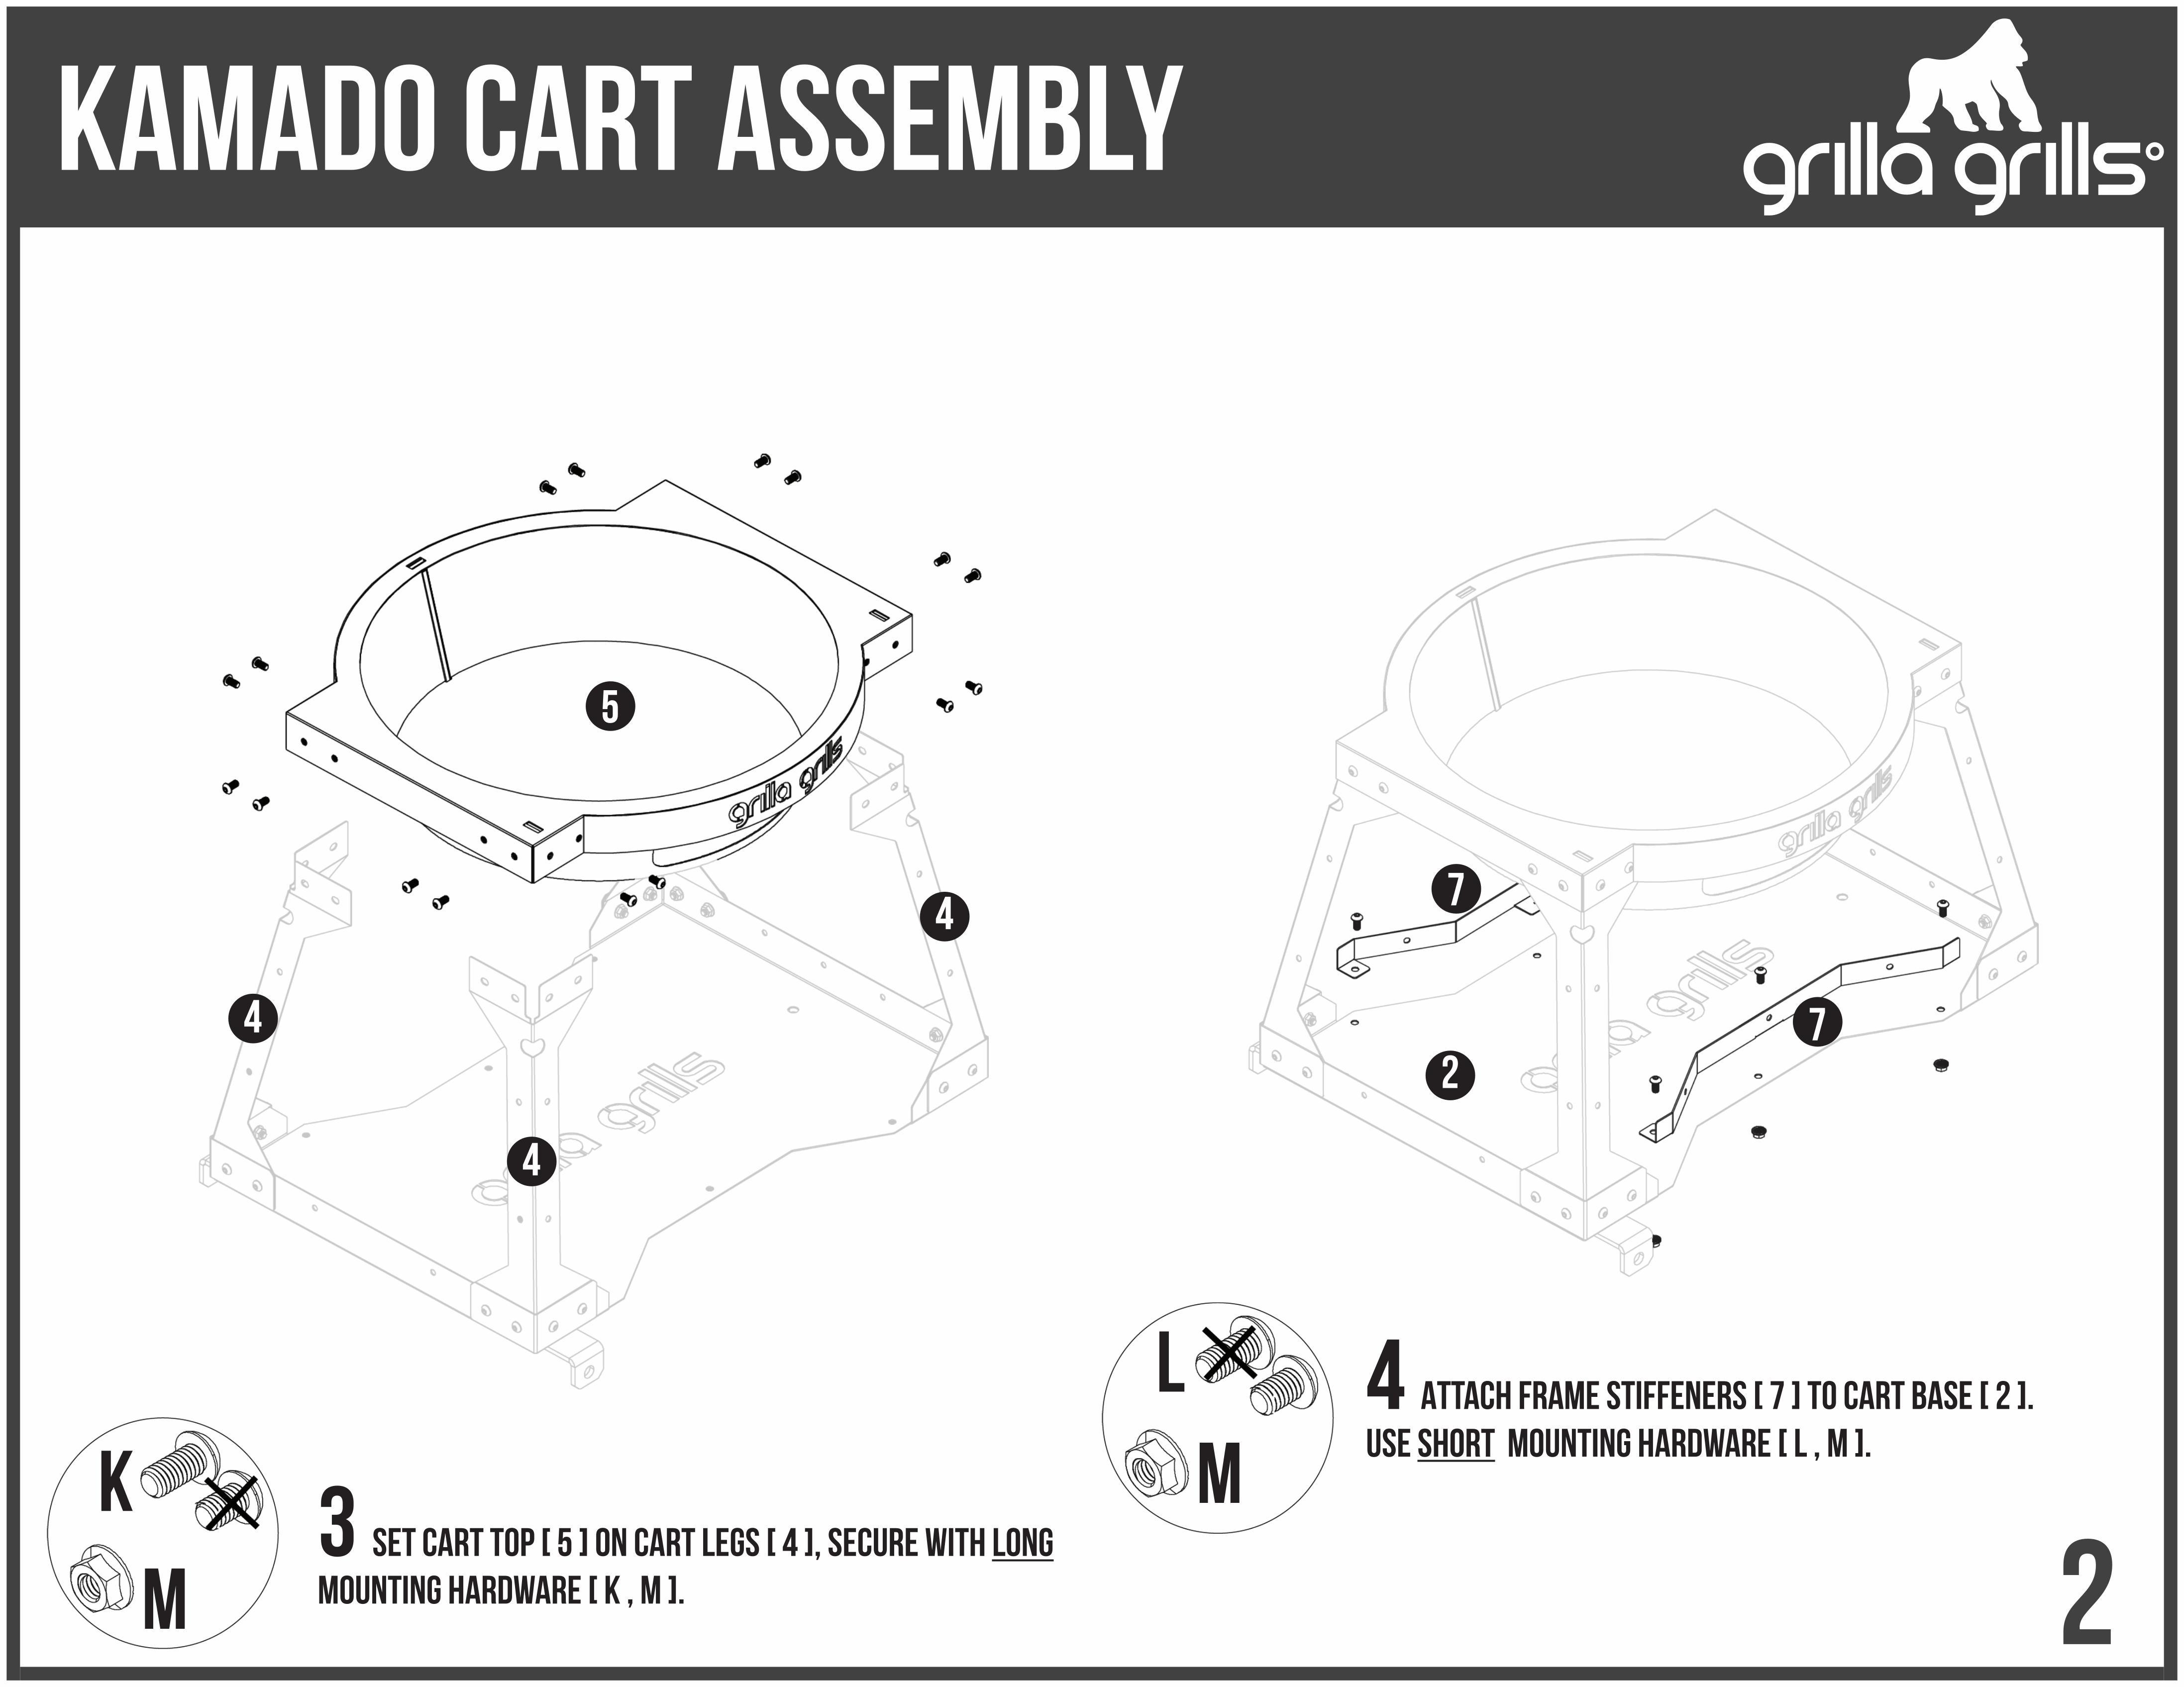
3 Set Cart Top [ 5 ] on Cart Legs [ 4 ], secure with long mounting hardware [ k , m ].
4 Attach frame stiffeners [ 7 ] to cart base [ 2 ]. Use short mounting hardware [ l , m ].
2
4
4
4

Kamado Cart Assembly
3
5 Turn the cart on one end with the rear wheel bracket ( 6 ) facing up. Mount the two 8” wheels ( I ) with 5/8” wheel bolts ( H ) and locknut ( G ) and Wheel washer ( N ).
6 On the opposite end install the steering assembly ( 3 ) to the frame base ( 2 ). Use the steering hardware ( B , C , D , E ).
7 With the steering assembly ( 3 ) on, mount the two remaining 8” wheels ( I ) with the remaining 5/8” wheel bolts ( H ) thread onto Steering Assembly ( 3 ). Placing the supplied wheel washers (N) after the wheel.
Once wheels are in place install wheel caps (O).
3
CD
EB
H
GN
2
6
6
3

Kamado Cart Assembly
4K
M
9 Attach the handle grip ( A ) to the handle ( 1 ) and secure with the Handle Hardware ( F, Q and R ). Make sure to install the handle ( 1 ) in the upright postion.
8 Attach the upper/lower tray [ 9 ] rests to the cart legs [ 4 ] and base [ 2 ].
9
9
1
A
F2 RQ

Kamado Cart Assembly
512 Push Plugs [ j ] into open holes around cart
11 Loosen banding around grill and insert strapping. secure Kamado Grill with Black Strapping [ p ].
10 Set Kamado Grill in Cart Top. Position accordingly. Ensure vent holes are clear from obstruction.