hardware and software guide...gti-pm-010-1018-gb page 3 of 10 decpro hardware guide accessories...
TRANSCRIPT

GTI-PM-010-1018-GB
Hardware and Software Guide
DESIGNERS AND MANUFACTURERS OF
For Golf, Sportsturf & Landscape applications
©Bailoy Products Limited
GTI-PM-010-1018-GB Page 1 of 10
DecPro V1.03
Introduction ........................................................................................................................................................................... 2
DecPro Hardware Guide ........................................................................................................................................................ 3 Accessories ................................................................................................................................................................................. 3 The Power Supply Input ............................................................................................................................................................. 3 The rechargeable Battery Pack ................................................................................................................................................... 3 Switches, Connectors and Indicators ......................................................................................................................................... 3 Connecting the Decoder to DecPro ............................................................................................................................................ 5 Useful hints and warnings .......................................................................................................................................................... 5 Warranty and Service ................................................................................................................................................................. 5
DecPro Software Guide .......................................................................................................................................................... 6 Installing the DecPro hardware and software ............................................................................................................................ 6 The Settings tab .......................................................................................................................................................................... 7 The Decoder Programmer tab .................................................................................................................................................... 7 The Logbook tab ......................................................................................................................................................................... 8 Specifications.............................................................................................................................................................................. 9
The DecPro software license agreement .............................................................................................................................. 10

GTI-PM-010-1018-GB Page 2 of 10
Introduction
The Decoder Programmer (DecPro) is intended for use by Installation and Service Personnel. DecPro allows for programming
of Decoders manufactured by Bailoy Products Ltd.
The DecPro handset is used in conjunction with the supplied software. Both DecPro and associated software are required to
program, read or test Decoders. The DecPro handheld acts as the interface between the software and the Decoder.
Bluetooth
Connection
Wired
Connections
Computer, laptop or tablet
running the DecPro software
DecPro
Handheld GTI 2 & 3-wire Decoders
The DecPro software is installed on a device (computer, tablet, etc.), which has Bluetooth (A type of short-range wireless
connection) installed. Instructions are exchanged between DecPro and the device using Bluetooth.
The user is advised to read this document thoroughly before use.
Damage caused by not following the procedures explained in this document
will void the warranty.
DecPro offers the following functions:
• Programming Decoder Numbers.
• Reading programmed Decoder Numbers.
• Testing Decoders.
DecPro can be used with the following 3-wire Decoders:
• GTI Trident 1-way Decoder (1 Station). TRI-DEC-01
• GTI Trident 2-way Decoder (2 Stations). TRI-DEC-02
• GTI Trident 3-way Decoder (3 Stations). TRI-DEC-03
• GTI Trident 4-way Decoder (4 Stations). TRI-DEC-04
DecPro can be used with the following 2-wire Decoders:
• GTI Gemini 1-way Decoder (1 Station). GEM-DEC-01
• GTI Gemini 2-way Decoder (2 Stations). GEM-DEC-02
• GTI Gemini 3-way Decoder (3 Stations). GEM-DEC-03
• GTI Gemini 4-way Decoder (4 Stations). GEM-DEC-04
Note:
DecPro can also be used for Gemini, Trident & CDS-DIU decoders manufactured by Bailoy and sold under license to third
parties, provided they were manufactured after 2002. These are easily recognised as they have the same unique enclosure
design and Gemini or Trident logo.
GTI-PM-010-1018-GB Page 3 of 10
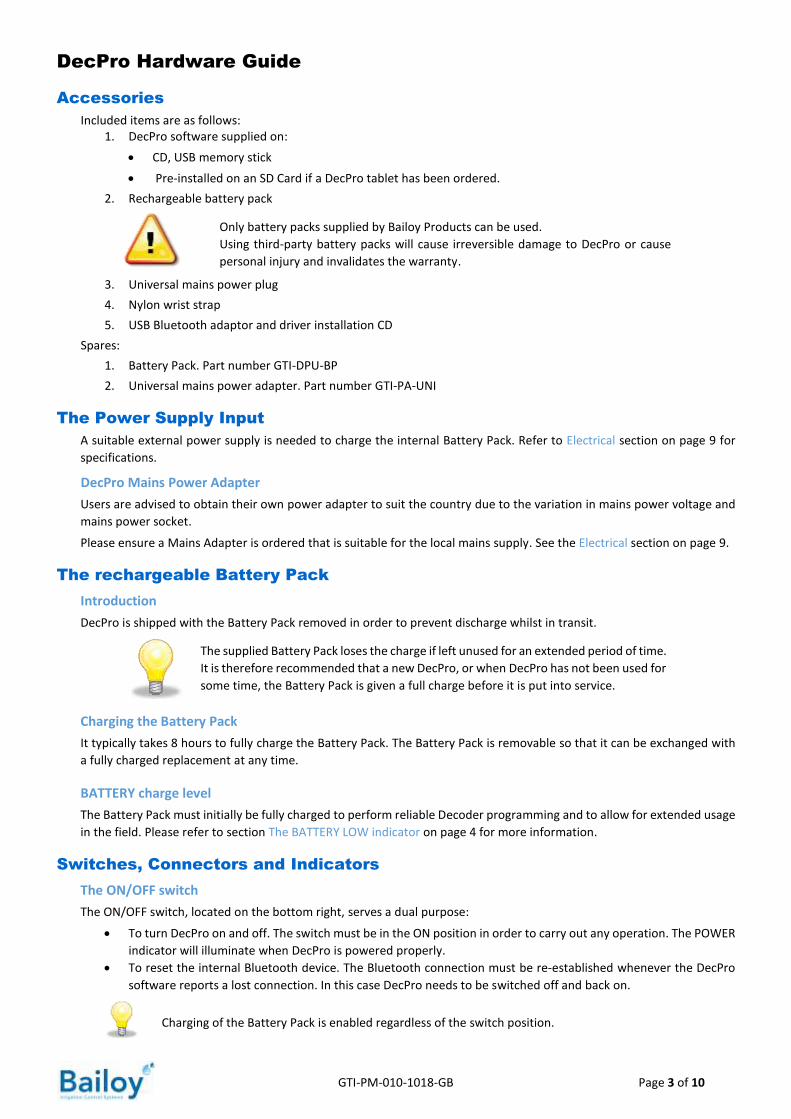
DecPro Hardware Guide
Accessories
Included items are as follows: 1. DecPro software supplied on:
• CD, USB memory stick
• Pre-installed on an SD Card if a DecPro tablet has been ordered.
2. Rechargeable battery pack
Only battery packs supplied by Bailoy Products can be used.
Using third-party battery packs will cause irreversible damage to DecPro or cause
personal injury and invalidates the warranty.
3. Universal mains power plug
4. Nylon wrist strap
5. USB Bluetooth adaptor and driver installation CD
Spares:
1. Battery Pack. Part number GTI-DPU-BP
2. Universal mains power adapter. Part number GTI-PA-UNI
The Power Supply Input
A suitable external power supply is needed to charge the internal Battery Pack. Refer to Electrical section on page 9 for
specifications.
DecPro Mains Power Adapter
Users are advised to obtain their own power adapter to suit the country due to the variation in mains power voltage and
mains power socket.
Please ensure a Mains Adapter is ordered that is suitable for the local mains supply. See the Electrical section on page 9.
The rechargeable Battery Pack
Introduction
DecPro is shipped with the Battery Pack removed in order to prevent discharge whilst in transit.
The supplied Battery Pack loses the charge if left unused for an extended period of time.
It is therefore recommended that a new DecPro, or when DecPro has not been used for
some time, the Battery Pack is given a full charge before it is put into service.
Charging the Battery Pack
It typically takes 8 hours to fully charge the Battery Pack. The Battery Pack is removable so that it can be exchanged with
a fully charged replacement at any time.
BATTERY charge level
The Battery Pack must initially be fully charged to perform reliable Decoder programming and to allow for extended usage
in the field. Please refer to section The BATTERY LOW indicator on page 4 for more information.
Switches, Connectors and Indicators
The ON/OFF switch
The ON/OFF switch, located on the bottom right, serves a dual purpose:
• To turn DecPro on and off. The switch must be in the ON position in order to carry out any operation. The POWER
indicator will illuminate when DecPro is powered properly.
• To reset the internal Bluetooth device. The Bluetooth connection must be re-established whenever the DecPro
software reports a lost connection. In this case DecPro needs to be switched off and back on.
Charging of the Battery Pack is enabled regardless of the switch position.

GTI-PM-010-1018-GB Page 4 of 10
The POWER socket
Use this socket, located on the bottom left, to connect the mains power adapter.
The quick-load Connectors
The DecPro front panel has 5 quick-load connectors, which are used to connect the Decoder wires. Each connector has a
small wire-entry hole facing away from the top panel. Each connector is marked and colour-coded to reflect the decoder
wire colours. See Figure 1 on page 5.
The POWER indicator
The ON/OFF switch is used to turn the DecPro power on or off. It is red when DecPro is powered properly. A failure to
illuminate, even when the switch is in the ON position, may be because the Battery Pack is fully discharged. However, this
indicator should illuminate when DecPro is supplied from an external power source.
The CHARGE indicator
Whenever an external supply is present, the CHARGE indicator should illuminate regardless of the ON/OFF switch position.
It indicates that the external supply voltage is present and that the Battery Pack is being charged:
• Red. DecPro is charging.
• Green. DecPro is fully charged. It is not recommended to continue charging as this may reduce battery life.
• Gradual change from red to yellow to green. Indicating the charging progress.
The BATTERY LOW indicator
Always check this indicator. It illuminates when the battery voltage is below the operating level and indicates that the
Battery Pack requires charging. Initially it will flash intermittently whilst decoder programming is taking place. As the
battery discharges further, it will illuminate for progressively longer periods until eventually it will illuminate continuously.
At this point decoder programming will become unreliable or impossible and the Bluetooth connection between DecPro
and the computer will also be lost. If the battery becomes totally exhausted then there will be insufficient power left to
even offer a BATTERY LOW indication. When an external supply is connected and the Battery Pack is recharging then the
behaviour of the BATTERY LOW indicator will be reinstated.
The RX and TX indicators
The RX (Receiving data) and TX (Transmitting data) indicators flash intermittently while the DecPro software is accessing
the decoder connected to DecPro. If the indicators fail to blink then the Bluetooth connection between the computer and
DecPro may have been lost. In this case the DecPro software immediately alerts the user. DecPro may need to be reset
(Refer to section The ON/OFF switch on page 3).

GTI-PM-010-1018-GB Page 5 of 10
Connecting the Decoder to DecPro
The Decoder wires are connected as follows:
• The first 3 connectors are used for the Decoder input wires. These are BLACK, RED and GREEN. The GREEN
connector is only used for the Trident decoder.
• The 4th connector (OUTPUT) is for one of the Decoder output wires. Any one of the output wires (VIOLET, YELLOW,
WHITE or ORANGE) can be connected. The other output wires must remain disconnected.
A specific output of a suspect Decoder can be tested by connecting the corresponding wire.
• The 5th connector is for the common BROWN wire.
Figure 1
Useful hints and warnings
• DecPro must only be used in conjunction with genuine Bailoy GTI Trident and Gemini decoders.
• ONLY 1 decoder can be connected to DecPro at any one time.
• NEVER connect any external voltage sources to the quick-load terminals. Damage and injury could result.
• Do NOT connect a Decoder to DecPro while wires remain connected to the CSG cable or solenoid. This may result in
permanent damage to DecPro.
• When connecting a Gemini decoder, the GREEN connector must not be used.
• NEVER pull or force the decoder wires from the quick-load connectors without firmly pressing down the release
buttons first. Treat the connectors with care, also keep them clean and free from broken wire strands.
Improper use may result in permanent damage to DecPro. Failure to operate
DecPro in any way other than outlined above will result in the warranty being void.
Warranty and Service
The manufacturer’s warranty does NOT cover damage caused by operating DecPro outside the specified input voltage
range.
DecPro is not user serviceable. In the event of failure, it must be returned to Bailoy Products Limited for repairs.

GTI-PM-010-1018-GB Page 6 of 10
DecPro Software Guide This section describes the installation and usage of the DecPro software. The User is expected to have basic knowledge of
Microsoft Windows. Definitions used in this guide:
• DecPro: The Decoder Programmer handheld device.
• Decoder: The field hardware that decodes commands from the main Controller (DOU).
• Decoder Type: Different types of Decoders (e.g. Trident or Gemini).
• Output: A specific output of the Decoder.
• Number of Outputs: Number of outputs available on a Decoder.
• Decoder Number: Number assigned to one of the Decoder outputs.
• Programming: Decoder Number (re-)programming of an output.
• Reading: Retrieving the number of outputs or the Decoder Numbers from the Decoder.
• Block Program: A quick method to program the Decoder with sequential Decoder Numbers.
Installing the DecPro hardware and software
Bluetooth hardware
A Bluetooth connection is required between the computer and DecPro. Some devices already have Bluetooth hardware
installed (In which case the Bluetooth symbol is visible in the Notification area of the Windows taskbar). If this is not
the case:
• Windows 10. Simply insert the supplied Bluetooth adaptor into a spare USB port. Windows will automatically
recognise the adaptor
DecPro must be paired by the user prior to using the DecPro software.
Pairing DecPro with the computer using the Bluetooth Manager
Pairing procedure:
• Turn on the DecPro handset
• Right click the Bluetooth icon in the notification area of the Windows taskbar. Select the Add a Bluetooth Device
option from the displayed menu. Follow the onscreen instructions. The DecPro RX and TX indicators flash a few
times while the computer is searching
• When DecPro is detected it will be shown as DECPRO XXXXXX, where XXXXXX is the 6-digit serial number found
on the DecPro handset
A pass key is normally not required by DecPro. Therefore, this field should be left blank if asked during the pairing process. However, when:
• DecPro cannot be found, or…
• The Bluetooth Manager insists on entering a pass key
Then try pairing with one of the following dummy pass keys:
• 1234
• 0000
After a successful pairing, a Bluetooth-based serial port (e.g. COM20), is added to the Windows Device Manager under
the Ports (COM & LPT) branch.
Installation of the DecPro software
The DecPro software is installed using one of the following methods. If you have purchased a DecPro tablet from Bailoy
then the software has been preinstalled, so you only need to do the following if you want to install onto another device.
• CD:
o Insert the CD and the installation should start automatically within a few seconds. Follow the instructions
given by the installation program.
o If the installation does not start automatically then open the Windows File Explorer and double click on
the Setup file.
o Once the installation is completed, DecPro can be started by double-clicking the DecPro shortcut icon
on the Windows Desktop.
• USB Memory stick:
o Insert the USB memory stick into the USB port on the device you want to run DecPro on.
o Open the Windows File Explorer and double click on the Setup file.
o Once the installation is completed, DecPro can be started by double-clicking the DecPro shortcut icon
on the Windows Desktop.

GTI-PM-010-1018-GB Page 7 of 10
The Settings tab
This page is used to establish the connection with DecPro. The following steps are required to establish the connection:
1. Switch on DecPro.
2. Ensure the Battery Pack is sufficiently charged.
3. The Bluetooth service must be released and made available by closing any other Bluetooth applications.
4. Start the DecPro software.
5. Click the Find DecPro automatically button or select the correct serial port from the list of Available Serial Ports.
6. The remaining tabs are made visible as soon as a connection with DecPro has been established.
The Decoder Programmer tab
The following steps must be completed before performing any programming functions: 1. Connect the Decoder to the DecPro handheld.
Do not use the GREEN connector when a Gemini decoder is connected.
2. The selected Decoder Type must match the connected Decoder.
Programming a decoder requires the following steps:
1. Select the correct Decoder Type.
2. Establish the number of Decoder Outputs.
3. Assign a valid Decoder Number to each available Decoder Output.
4. Program the Decoder with the new Decoder Numbers.
• Some buttons allow for keyboard interaction, click the? button to see the keys that can also
be used.
• Refer to section Valid Decoder Numbers on page 9 for the available Decoder Numbers.
Selecting the correct Decoder Type
Select the correct Decoder Type from the dropdown list.
The Output Buttons A, B, C and D) are activated by default. However, it is recommended to establish the Number of
Outputs by clicking the Read the Number of Outputs button when the Decoder is connected to avoid the risk of any errors.
Refer to section Establishing the number of a Decoder outputs on page 8 for detailed steps on establishing the number of
Decoder Outputs.
Assigning Decoder Numbers to the Decoder Outputs
Enter the numbers using the button based keypad (Click the ? button to see which key strokes can be used):
• Only valid Decoder Numbers are allowed (Refer to section Valid Decoder Numbers on page 9).
• Duplicate numbers are not allowed.
The following steps are followed to enter a Decoder Number:
1. A valid Decoder Number is entered by pressing a combination of digit keys (e.g. press keys 9 and 1 to create Decoder Number 91).
2. Press the required Decoder Output button (A, B, C or D) to assign the entered number to that Decoder Output.
3. All available Decoder Outputs must be assigned a valid Decoder Number.
Decoder Programming options
1. When the Auto Assign button is active, valid Decoder Numbers will be automatically assigned to the next available Output.
2. When the Block Program button is active, sequential Decoder Numbers will be assigned to all available Decoder Outputs starting from Output A. Block Program is the quickest method to change all Decoder Numbers at the same time.
3. When the Verify Programming button is active, DecPro checks the programmed Decoder Numbers to confirm a successful programming cycle.
The option is active when the corresponding button has a green background.
GTI-PM-010-1018-GB Page 8 of 10
Program the Decoder with the new numbers
The following steps are required to program a decoder:
1. Connect the Decoder to DecPro (Refer to section Connecting the Decoder to DecPro on page 5).
2. Select the correct Decoder Type (Refer to section Selecting the correct Decoder Type on page 7).
3. Click the Read Number of Outputs button.
4. Assign a valid Decoder Number to each available Decoder Output (Refer to section Assigning Decoder Numbers to the Decoder Outputs on page 7).
5. Press the Program Decoder Numbers button to start the programming process.
6. The results will be shown on completion.
Establishing the number of a Decoder outputs
The following steps are required to establish the number of Outputs available on the connected Decoder:
1. Connect the Decoder to DecPro (Refer to section Connecting the Decoder to DecPro on page 5).
2. Ensure the selected Decoder Type matches the connected Decoder (Refer to section Selecting the correct
Decoder Type on page 7).
3. Click the Read Number of Outputs button.
4. Provided that DecPro detects a valid number of outputs, the Number of Outputs field is updated and the status
of buttons A, B, C and D will be updated accordingly.
Reading the Decoder Numbers from a Decoder
The following steps are required to read the Decoder Numbers:
1. Connect the Decoder to DecPro (Refer to section Connecting the Decoder to DecPro on page 5).
2. Ensure the correct Decoder Type is selected to match the connected Decoder (Refer to section Selecting the
correct Decoder Type on page 7).
3. Click the Read Decoder Numbers button to start the process.
4. When valid Decoder Numbers have been retrieved from the Decoder, the Output fields are filled with a black
background (Numbers assigned by the user are shown with a blue background).
Restoring a Decoder to factory settings
If a Decoder fails to program, then restoring the decoder to the factory settings may make it programmable again.
The following steps are required to restore the decoder to factory settings:
1. Connect the Decoder to DecPro (Refer to section Connecting the Decoder to DecPro on page 5).
2. Ensure the correct Decoder Type is selected to match the connected Decoder (Refer to section Selecting the
correct Decoder Type on page 7).
3. Press the Restore Decoder button to perform the restore action.
4. The results will be shown.
The Decoder must not be disconnected during the restore process.
The Logbook tab
All actions performed by the user are logged and can be found under the Logbook tab. New entries are added to the top
of the list. As a result, all previous actions can be checked. The entire log is cleared when the DecPro software is restarted.

GTI-PM-010-1018-GB Page 9 of 10
Specifications
Electrical
Mains power adapter for DecPro:
• 12 to 40V, AC or DC
• At least 500mA
• 2.5mm plug, polarity insensitive.
Mechanical
Dimensions:
Maximum length : 185mm
Maximum width : 82mm
Maximum height : 75mm
Weight:
Approximate weight: 312g
Computer
The DecPro software is compatible with Windows 10. The computer must have Bluetooth hardware installed and enabled.
Note that the computer can be a desktop, laptop, palmtop or a tablet.
Valid Decoder Numbers
Decoders can be programmed with the following numbers:
Trident Gemini
1 … 110
114 … 117
1 … 95
101 … 102
104 … 110
113 … 117

GTI-PM-010-1018-GB Page 10 of 10
The DecPro software license agreement
END-USER LICENSE AGREEMENT FOR BAILOY PRODUCTS LTD. SOFTWARE
IMPORTANT-READ CAREFULLY: This End-User License Agreement ("EULA") is a legal agreement between you (either an individual or a single entity), and Bailoy
Products Ltd. for the software product identified above, which includes computer software and associated media and printed materials, and may include
"online" or electronic documentation ("SOFTWARE PRODUCT" or "SOFTWARE"). By installing, copying, or otherwise using the SOFTWARE PRODUCT, you agree
to be bound by the terms of this EULA.
If you do not agree to the terms of this EULA; promptly return the unused SOFTWARE PRODUCT to the place from which you obtained it for a full refund.
SOFTWARE PRODUCT LICENSE
The SOFTWARE PRODUCT is protected by copyright laws and international copyright treaties, as well as other intellectual property laws and treaties. The SOFTWARE PRODUCT is
licensed, not sold.
1. GRANT OF LICENSE. This EULA grants you the following limited, non-exclusive rights:
(a) Software Product. You may install and use the enclosed SOFTWARE PRODUCT on a single computer.
(b) Hardware. You may only use the enclosed SOFTWARE PRODUCT with original products that are designed and manufactured by Bailoy Products Ltd.
(c) Bailoy Products Ltd. reserves all rights not expressly granted to you.
2. COPYRIGHT. All rights, title, and copyrights in and to the SOFTWARE PRODUCT (including, but not limited to, any images, photographs, animations, video, audio, music, text,
and "applets" incorporated into the SOFTWARE PRODUCT) and any copies of the SOFTWARE PRODUCT are owned by Bailoy Products Ltd. or its suppliers. The SOFTWARE
PRODUCT is protected by copyright laws and international treaty provisions. Therefore, you must treat the SOFTWARE PRODUCT like any other copyrighted material, except
that you may either (a) make one copy of the SOFTWARE PRODUCT solely for backup or archival purposes, or (b) install the SOFTWARE PRODUCT on a single computer,
provided you keep the original solely for backup or archival purposes. You may not copy the printed materials accompanying the SOFTWARE PRODUCT.
3. DESCRIPTION OF OTHER RIGHTS AND LIMITATIONS.
(a) Limitations on Reverse-Engineering, Decompilation, and Disassembly. You may not reverse-engineer, decompile, or disassemble the SOFTWARE PRODUCT, except and
only to the extent that such activity is expressly permitted by applicable law notwithstanding this limitation.
(b) Rental. You may not rent or lease the SOFTWARE PRODUCT.
(c) Software Transfer. You may permanently transfer all of your rights under this EULA, provided you retain no copies, you transfer all of the SOFTWARE PRODUCT (including
all component parts, the media and printed materials, any upgrades, this EULA, and, if applicable, the Certificate of Authenticity), and the recipient agrees to the terms
of this EULA. If the SOFTWARE PRODUCT is an upgrade, any transfer must include all prior versions of the SOFTWARE PRODUCT.
(d) Termination. Without prejudice to any other rights, Bailoy Products Ltd. may terminate this EULA if you fail to comply with the terms and conditions of this EULA. In
such event, you must destroy all copies of the SOFTWARE PRODUCT and all of its component parts.
MISCELLANEOUS
If you acquired this product in the United States, this EULA is governed by the laws of the State of Washington.
If you acquired this product in Canada, this EULA is governed by the laws of the Province of Ontario, Canada. Each of the parties hereto irrevocably attorns to the jurisdiction of the
courts of the Province of Ontario and further agrees to commence any litigation that may arise hereunder in the courts located in the Judicial District of York, Province of Ontario.
If this product was acquired outside the United States, local law may apply.
Should you have any questions concerning this EULA, or if you desire to contact Bailoy Products Ltd. for any reason, please write to your dealer.
NO WARRANTIES. To the maximum extent permitted by applicable law, Bailoy Products Ltd. expressly disclaim any warranty for the SOFTWARE PRODUCT. The SOFTWARE PRODUCT
and any related documentation are provided "as is" without warranty of any kind, either express or implied, including, without limitation, the implied warranties of merchantability
or fitness for a particular purpose. The entire risk arising out of use or performance of the SOFTWARE PRODUCT remains with you.
LIMITATION OF LIABILITY. Bailoy Products Ltd.'s entire liability and your exclusive remedy under this EULA shall not exceed the price paid for the product.
NO LIABILITY FOR CONSEQUENTIAL DAMAGES. To the maximum extent permitted by applicable law, in no event shall Bailoy Products Ltd. or its suppliers be liable for any damages
whatsoever (including, without limitation, damages for loss of business profit, business interruption, loss of business information, or any other pecuniary loss) arising out of the use
of, or inability to use, this Bailoy Products Ltd. product, even if Bailoy Products Ltd. has been advised of the possibility of such damages. Because some states/jurisdictions do not
allow the exclusion or limitation of liability for consequential or incidental damages, the above limitation may not apply to you.

BAILOY PRODUCTS LIMITED.
The Old Forge, High Street, Harmondsworth Village, Middlesex, UB7 0AQ, United Kingdom
T: +44 (0)208 897 0125E: [email protected]: bailoy.com