hands-on lab create and use your first toolchain · pdf filehands-on lab create and use your...
TRANSCRIPT

Hands-on Lab
Create and use your first toolchain
https://www.ibm.com/devops/method/tutorials/tutorial_toolchain_flow

Within a few minutes, you can create an open toolchain and start using it to continuously
deliver a "Hello World" app in an IBM® Bluemix® environment.
In this tutorial, you create a toolchain from a template that contains a specific set of tool
integrations and code to develop and deploy a sample Cloud Foundry app that is written
in Node.js. The toolchain is preconfigured for continuous delivery, source control, issue
tracking, and online editing. After you create the toolchain, you change the app's code
and push the change to the GitHub repository (repo). When you push changes to your
repo, the delivery pipeline automatically builds and deploys the code that is in the repo.
Prerequisites
• A Bluemix account. The account is free and provides access to everything you need
to develop, track, plan, and deploy apps. Sign up for a trial of Bluemix. The account
requires an IBMid. If you don't have an IBMid, you can create one when you
register. Bluemix is an open-standards, cloud-based platform for building, running,
and managing apps.
• A GitHub account. If you don't have one, sign up.
• Verify the toolchains and tool integrations that are available in your region and
Bluemix environment. A toolchain is a set of tool integrations that support
development, deployment, and operations tasks.
Note: If you already created this toolchain, skip to this task.
Task 1: Create a toolchain
Open the creation page for the Simple Cloud Foundry toolchain by clicking the Create
toolchain button.
Tip: For instructions to navigate to the toolchain templates and select a toolchain to
create, see Navigating to the toolchain templates.
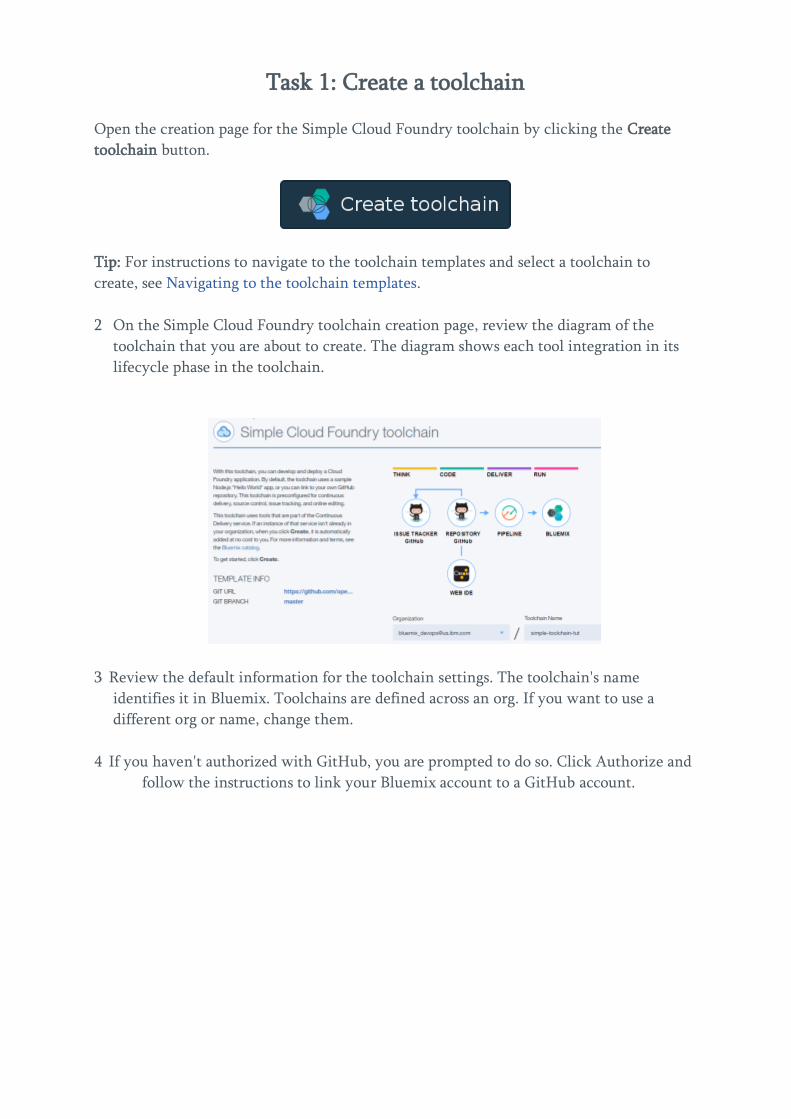
2 On the Simple Cloud Foundry toolchain creation page, review the diagram of the
toolchain that you are about to create. The diagram shows each tool integration in its
lifecycle phase in the toolchain.
3 Review the default information for the toolchain settings. The toolchain's name
identifies it in Bluemix. Toolchains are defined across an org. If you want to use a
different org or name, change them.
4 If you haven't authorized with GitHub, you are prompted to do so. Click Authorize and
follow the instructions to link your Bluemix account to a GitHub account.
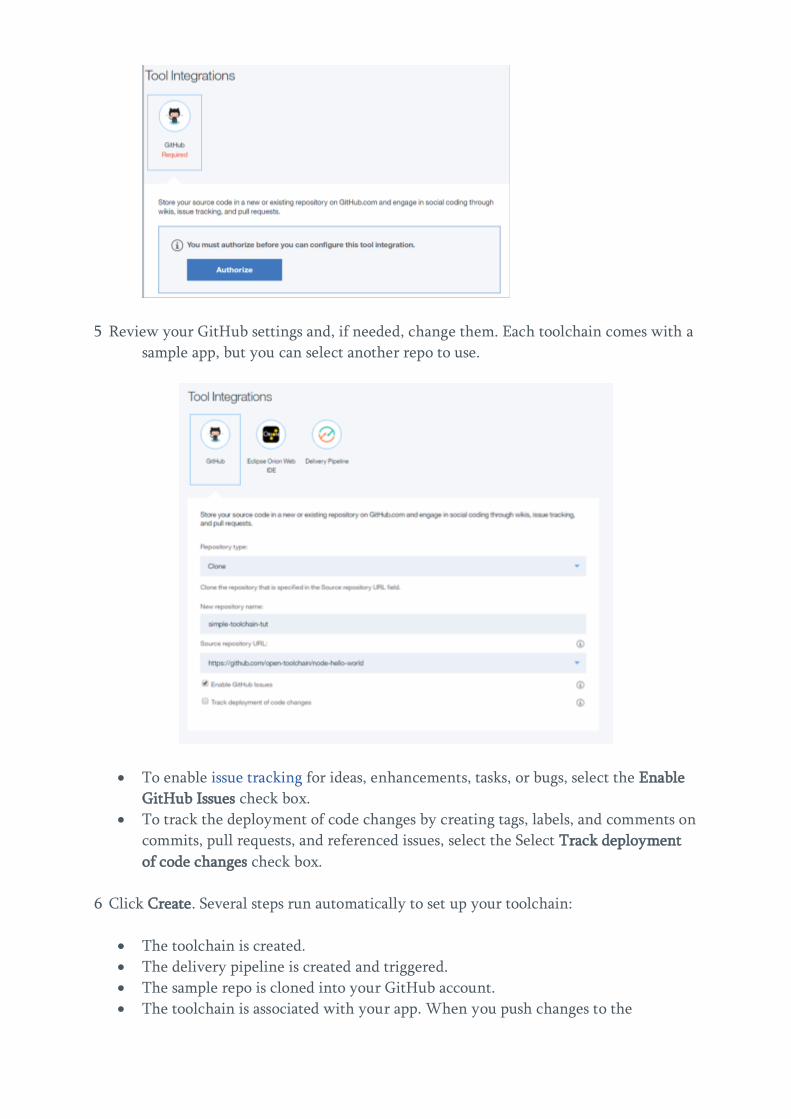
5 Review your GitHub settings and, if needed, change them. Each toolchain comes with a
sample app, but you can select another repo to use.
• To enable issue tracking for ideas, enhancements, tasks, or bugs, select the Enable
GitHub Issues check box.
• To track the deployment of code changes by creating tags, labels, and comments on
commits, pull requests, and referenced issues, select the Select Track deployment
of code changes check box.
6 Click Create. Several steps run automatically to set up your toolchain:
• The toolchain is created.
• The delivery pipeline is created and triggered.
• The sample repo is cloned into your GitHub account.
• The toolchain is associated with your app. When you push changes to the

toolchain's GitHub repo, the pipeline automatically builds and deploys the app.
After a few moments, your new toolchain's Overview page opens.
7 You can see the deployed app by clicking View App.
The running app is displayed.
8 Return to the Toolchains page.
The Toolchains page displays all the toolchains that are in your org. For each
toolchain, you can see icons that represent the tool integrations that are in that
toolchain. From this list, you can rename and delete toolchains.
9 Click your new toolchain to open its Overview page.

Task 2: Modify the code
In this tutorial, you use the Eclipse Orion Web IDE to modify source code. When you edit
in the Web IDE, your changes are saved to your cloud workspace. When you commit a
change, it is saved to a Git repo on the cloud. When you push or sync a change, it is
pushed to the origin Git repo (remote repo). Syncing a change also saves the change from
the remote repo to your Git repo and workspace on the cloud.
You can also use the GitHub editor or your favourite editor to modify your app's code.
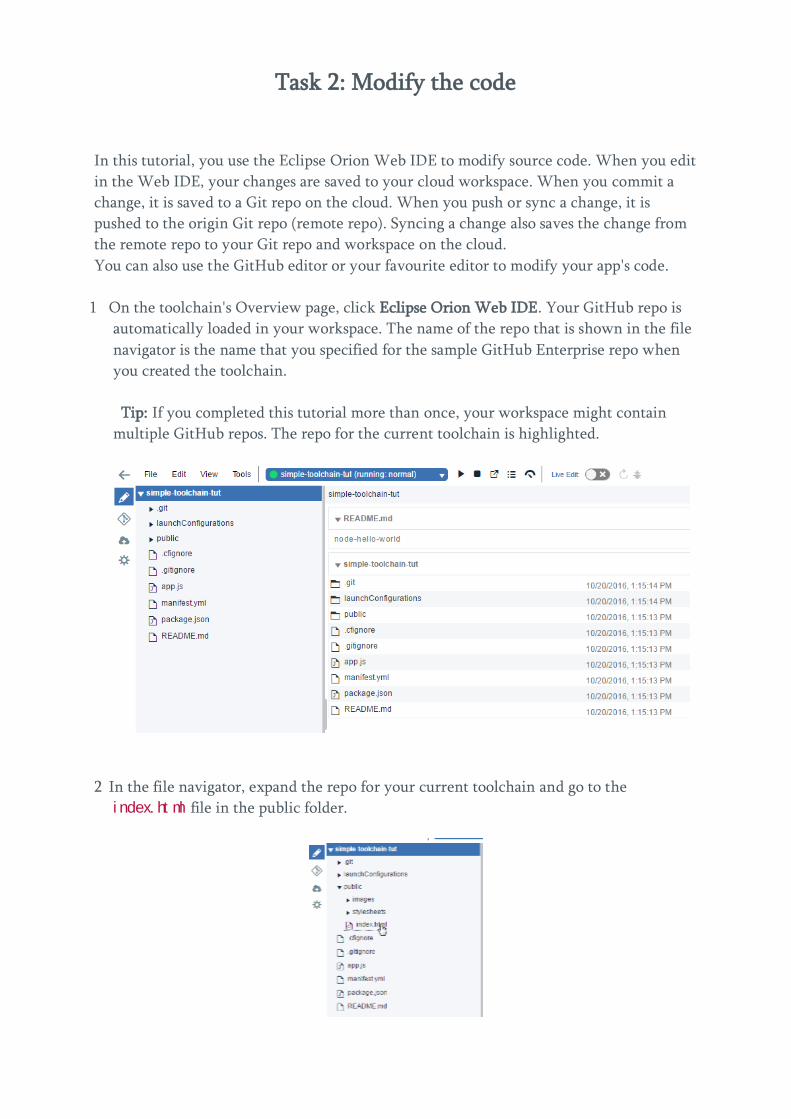
1 On the toolchain's Overview page, click Eclipse Orion Web IDE. Your GitHub repo is
automatically loaded in your workspace. The name of the repo that is shown in the file
navigator is the name that you specified for the sample GitHub Enterprise repo when
you created the toolchain.
Tip: If you completed this tutorial more than once, your workspace might contain
multiple GitHub repos. The repo for the current toolchain is highlighted.
2 In the file navigator, expand the repo for your current toolchain and go to the
i ndex. ht ml file in the public folder.
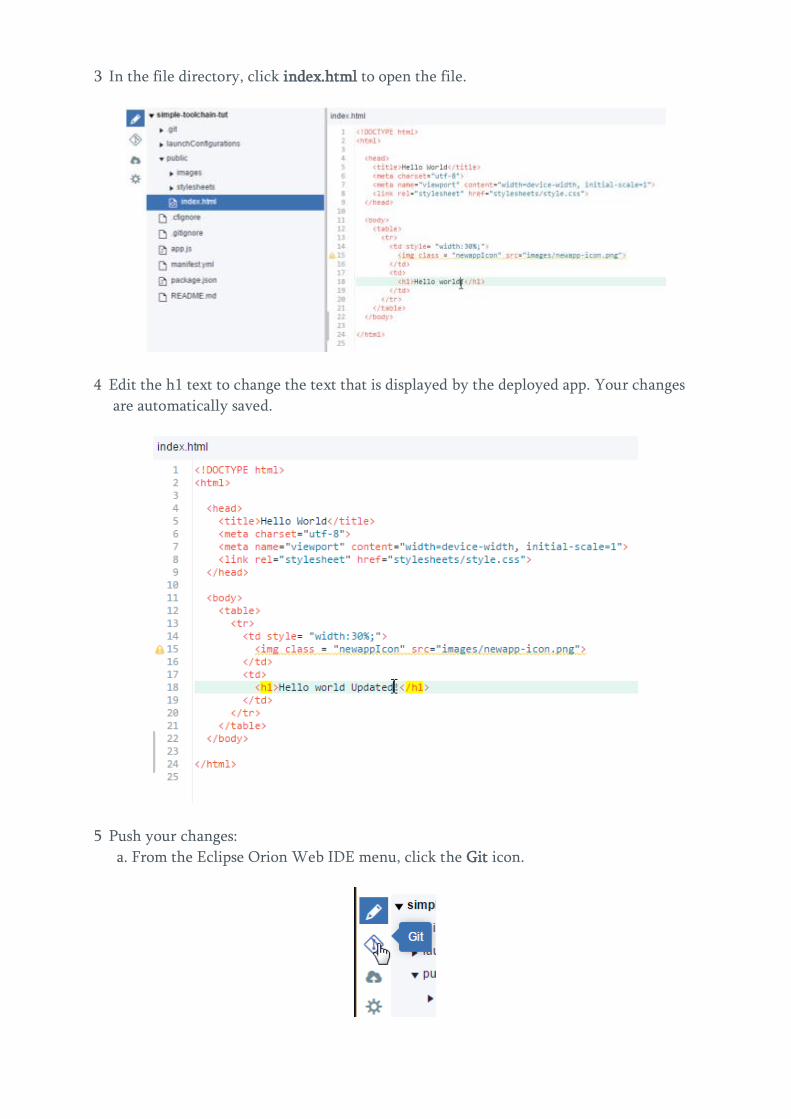
3 In the file directory, click index.html to open the file.
4 Edit the h1 text to change the text that is displayed by the deployed app. Your changes
are automatically saved.
5 Push your changes:
a. From the Eclipse Orion Web IDE menu, click the Git icon.

b. In the Working Directory Changes section, type a commit message and make sure
that the changed file is selected. You can expand publi c/i ndex. ht ml to see the
changes. The changes are highlighted: the original content is in red and the changed
content is in green.
c. Click Commit to put the changes in the local master branch.
d. To push the changes to the origin/master branch, click Push. The origin/master
branch is used by the pipeline, which automatically builds and deploys your
changes.
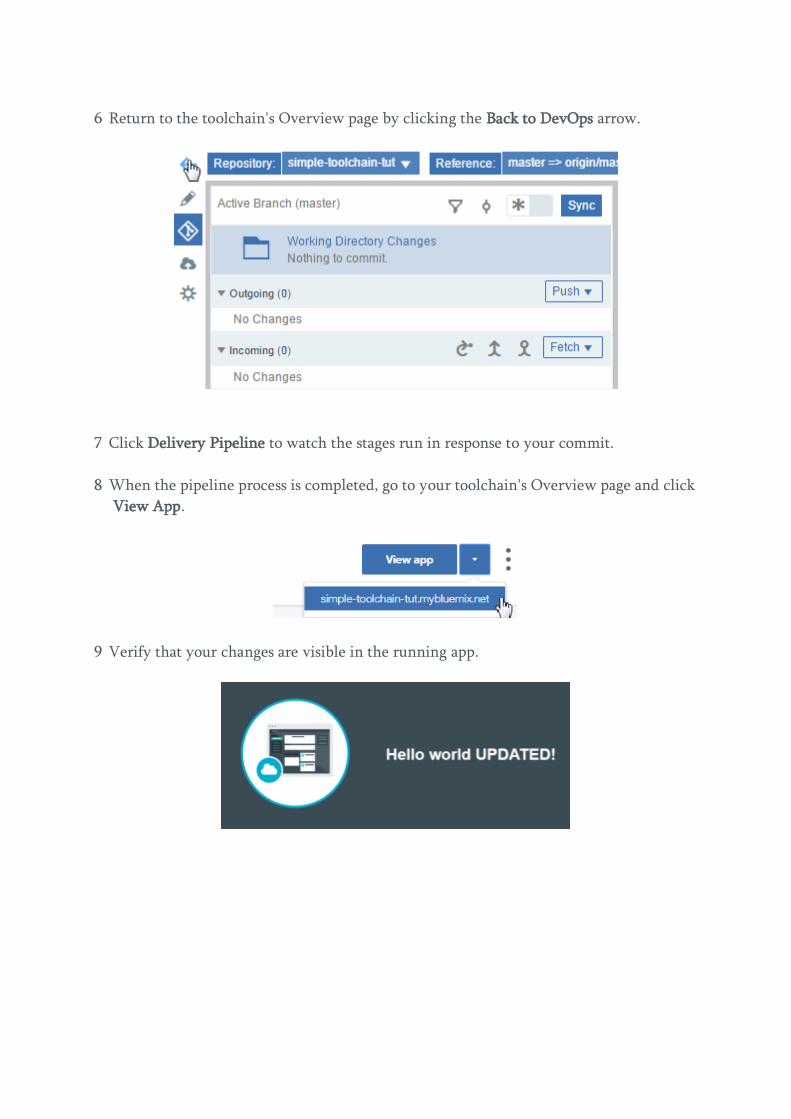
6 Return to the toolchain's Overview page by clicking the Back to DevOps arrow.
7 Click Delivery Pipeline to watch the stages run in response to your commit.
8 When the pipeline process is completed, go to your toolchain's Overview page and click
View App.
9 Verify that your changes are visible in the running app.

Task 3: Add a stage to the pipeline
1 Click on the toolchain's Overview page.
2 Click on the Delivery Pipeline tool integration to view the build and deployment
activity for your app. The pipeline has two stages: one where your app is built and
another where it is deployed. After the pipeline completes its deployment process,
the pipeline dashboard shows that both stages completed successfully.
Note: The Build stage contains one build job that compiles your project in preparation
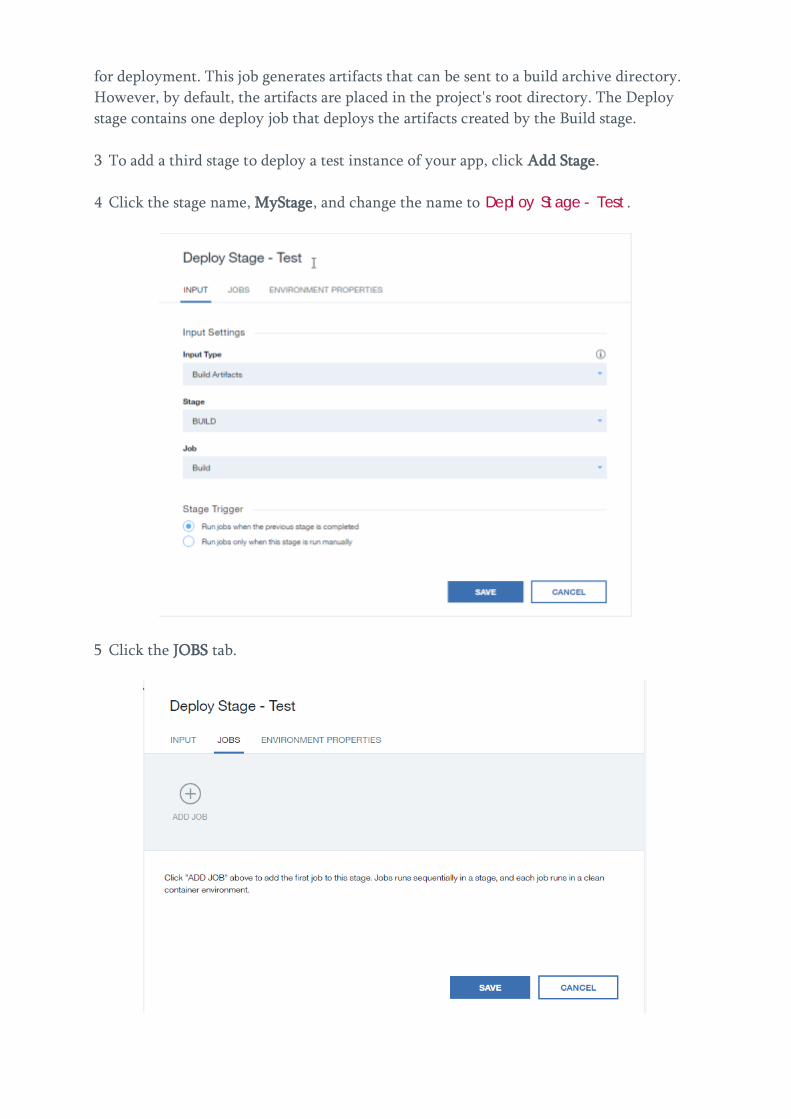
for deployment. This job generates artifacts that can be sent to a build archive directory.
However, by default, the artifacts are placed in the project's root directory. The Deploy
stage contains one deploy job that deploys the artifacts created by the Build stage.
3 To add a third stage to deploy a test instance of your app, click Add Stage.
4 Click the stage name, MyStage, and change the name to Depl oy St age - Test .
5 Click the JOBS tab.
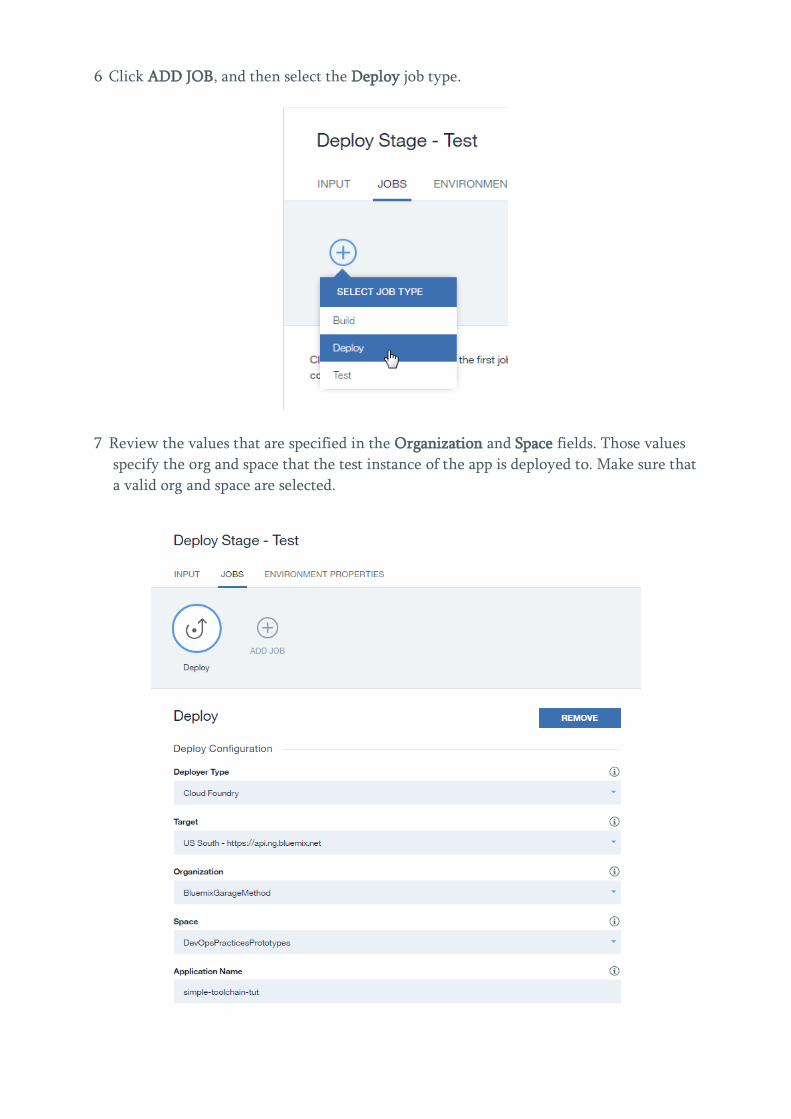
6 Click ADD JOB, and then select the Deploy job type.
7 Review the values that are specified in the Organization and Space fields. Those values
specify the org and space that the test instance of the app is deployed to. Make sure that
a valid org and space are selected.

8 In the Deploy Script field, change the cf push command to cf push "${ CF_APP}"-t est -
n "${ CF_APP}"-t est . Note that this stage is configured to stop if the job fails. This
command will deploy the app to
9 Click SAVE.
10 Drag the stage that you just created so that it is between the first two stages.
11 View the updated pipeline.
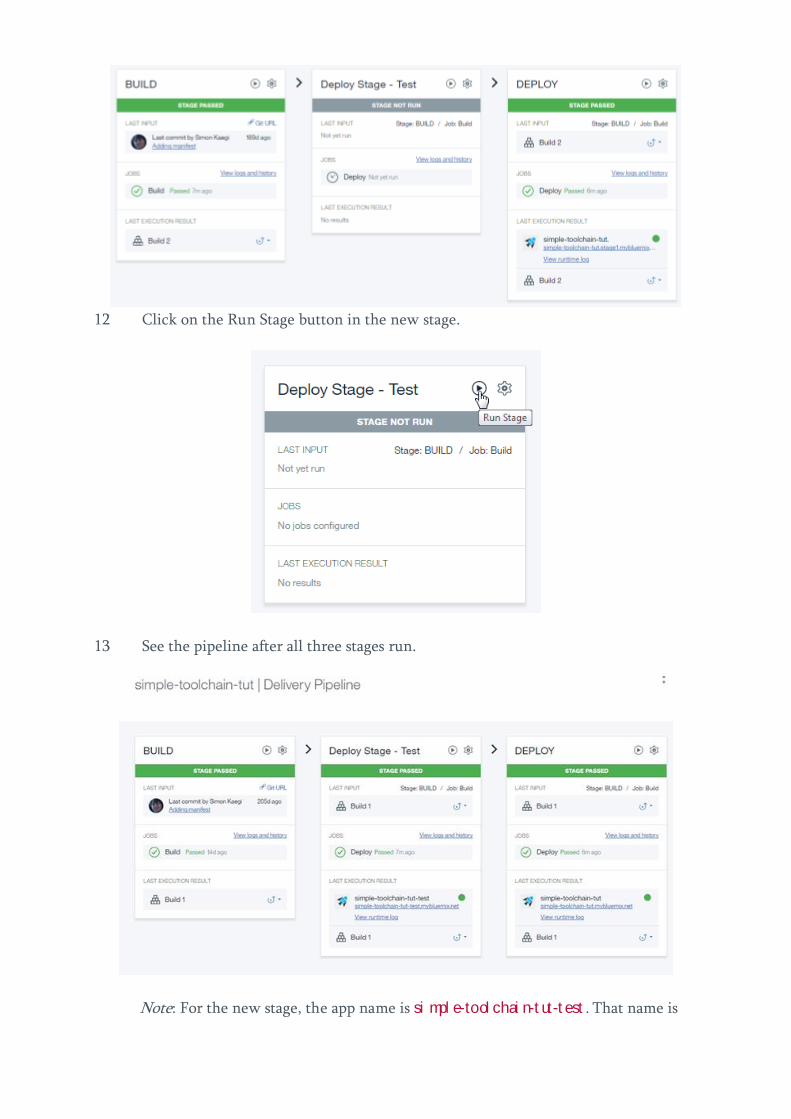
12 Click on the Run Stage button in the new stage.
13 See the pipeline after all three stages run.
Note: For the new stage, the app name is si mpl e-tool chai n-t ut-t est . That name is
set by the push "${ CF_APP}"-t est command . The deployed app is running at the
si mpl e-t ool chai n-t ut-t est. mybl uemi x. net route, which is set by the - n attribute that
sets the host name.
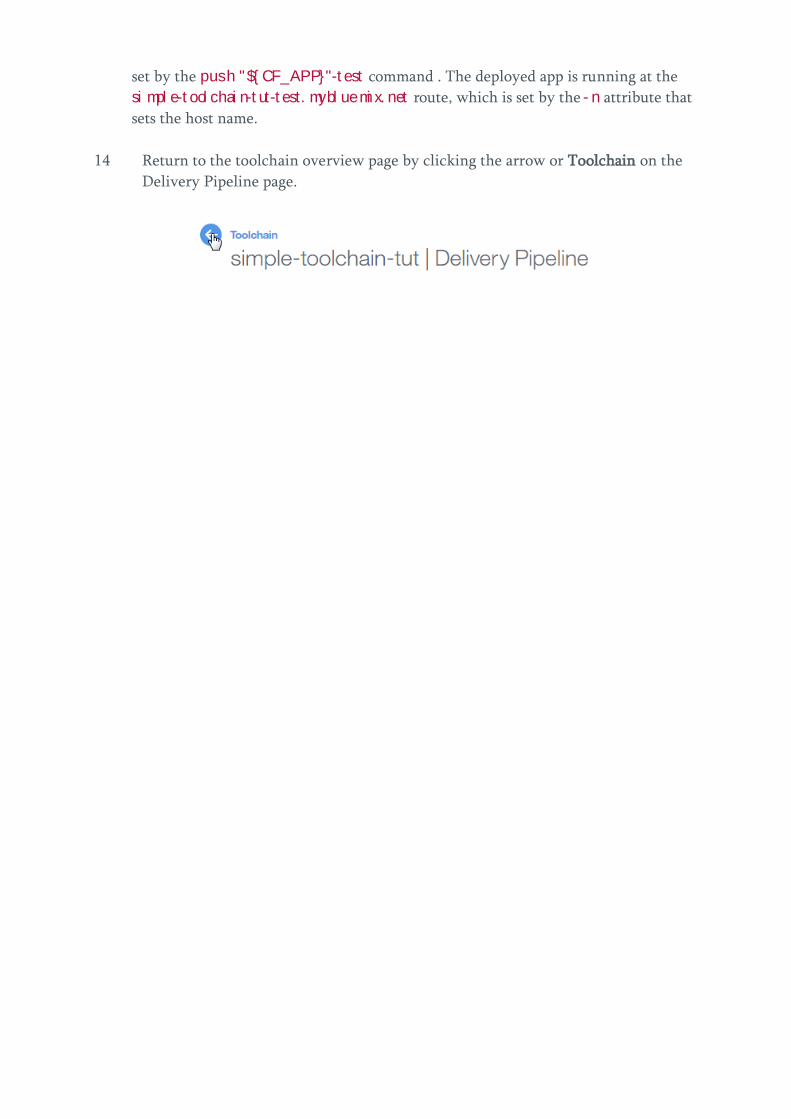
14 Return to the toolchain overview page by clicking the arrow or Toolchain on the
Delivery Pipeline page.

Summary
In this tutorial, you learned how to continuously integrate and deploy an app to Bluemix
by using a toolchain. You created a toolchain from a template that included a GitHub repo
with a Node.js Hello World app and a delivery pipeline. You changed your app's code by
using the Eclipse Orion Web IDE and added a stage to the pipeline. When you pushed the
updated code, your change was built and deployed automatically.
To learn more about what you can do with your toolchain, try these tutorials:
• Add a tool integration to a toolchain
• Add a custom tool integration to a toolchain
• Add a stage to a pipeline in your toolchain
To learn how to create and use advanced toolchains, try these tutorials:
• Create and use a microservices toolchain
• Create a custom toolchain