gototraining training
DESCRIPTION
Get the most out of GoToTraining.TRANSCRIPT
GoToTraining Training
For SPSU Faculty
Computer Training Resources
Walter Proctor
November 2013
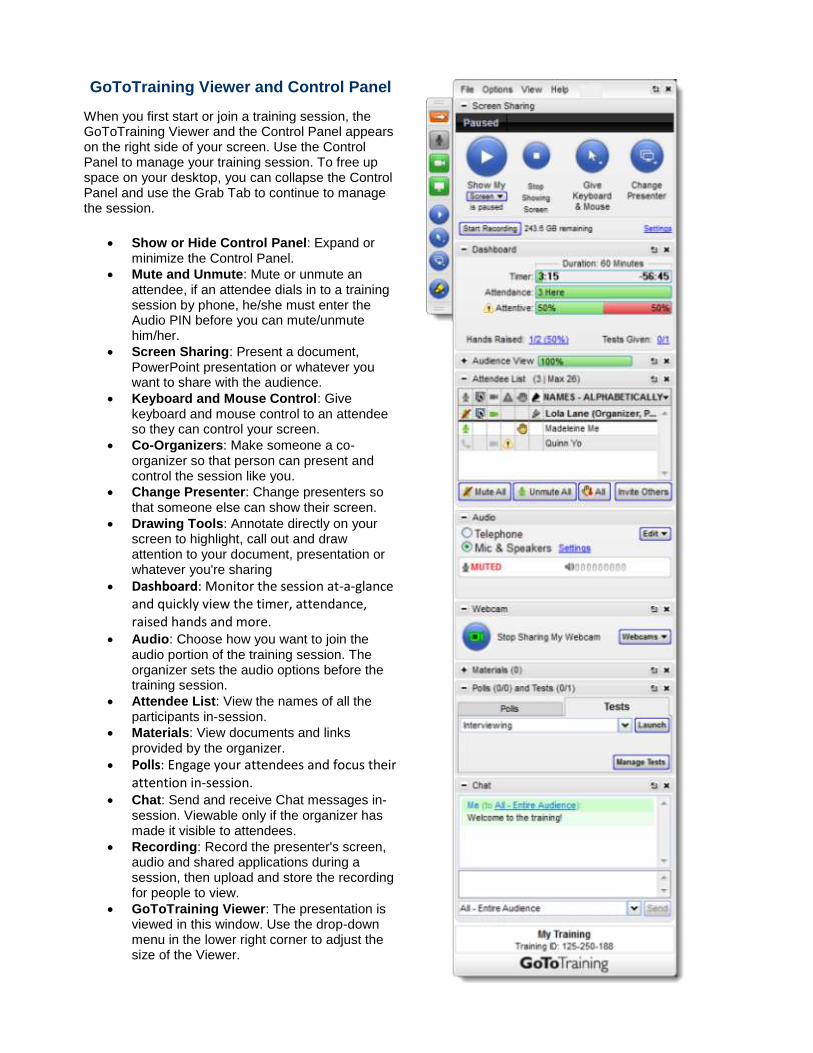
GoToTraining Viewer and Control Panel
When you first start or join a training session, the GoToTraining Viewer and the Control Panel appears on the right side of your screen. Use the Control Panel to manage your training session. To free up space on your desktop, you can collapse the Control Panel and use the Grab Tab to continue to manage the session.
Show or Hide Control Panel: Expand or minimize the Control Panel.
Mute and Unmute: Mute or unmute an attendee, if an attendee dials in to a training session by phone, he/she must enter the Audio PIN before you can mute/unmute him/her.
Screen Sharing: Present a document, PowerPoint presentation or whatever you want to share with the audience.
Keyboard and Mouse Control: Give keyboard and mouse control to an attendee so they can control your screen.
Co-Organizers: Make someone a co-organizer so that person can present and control the session like you.
Change Presenter: Change presenters so that someone else can show their screen.
Drawing Tools: Annotate directly on your screen to highlight, call out and draw attention to your document, presentation or whatever you're sharing
Dashboard: Monitor the session at-a-glance and quickly view the timer, attendance, raised hands and more.
Audio: Choose how you want to join the audio portion of the training session. The organizer sets the audio options before the training session.
Attendee List: View the names of all the participants in-session.
Materials: View documents and links provided by the organizer.
Polls: Engage your attendees and focus their attention in-session.
Chat: Send and receive Chat messages in-session. Viewable only if the organizer has made it visible to attendees.
Recording: Record the presenter's screen, audio and shared applications during a session, then upload and store the recording for people to view.
GoToTraining Viewer: The presentation is viewed in this window. Use the drop-down menu in the lower right corner to adjust the size of the Viewer.

GoToTraining Terms
Attendee: An attendee is any person who
joins a training session with no pre-specified
role. Attendees have very limited privileges.
Attentiveness: Attentiveness of the audience
can be seen in the Dashboard pane of the
Organizer Control Panel and in the Attendee
List. GoToTraining monitors audience
attentiveness by checking if the Attendee
Viewer and Control Panel are active and on top
of other applications. For example, if an attendee
clicks on another application (bringing it to the
forefront) that attendee would show as
inattentive.
Control Panel: The Control Panel gives
organizers, panelists and attendees access to
various in-session training functions.
Course Catalog: The Course Catalog is an
online listing of all posted upcoming scheduled
training sessions. People can read about training
sessions from this list and register for them, or
see that they are full.
GTM/GTT Suite Icon: Organizers on Mac
can use the GoToMeeting daisy icon to
access both GoToMeeting and GoToTraining
features. Double-click the daisy icon on your
desktop to access organizer shortcuts.
GTM/GTT System Tray Icon: Organizers
on Windows can use the daisy icon in your
system tray to access both GoToMeeting and
GoToTraining features. Right-click the daisy
icon to access organizer shortcuts.
Icon Description
GoToMeeting/GoToTraining is ready.
GTM/GTT is connecting.
GoToMeeting is in session.
GoToTraining is in session.
GTM/GTT is offline.
GTM/GTT is not connected.
Hallway: The hallway is a dialog box
displayed to attendees who have joined a live
training session before an organizer has actually
started it. Once an organizer has started the live
training session, the hallway dialog box
disappears and attendees see the Waiting Room.
In-Session: The time frame from when the
training session is started by the organizer to
when the training session ends.
Organizer: An organizer is the person who
schedules and starts a training session. There can
be more than one organizer in a training session.
Post-training: The time frame after the
training session ends, when tasks are done on the
GoToTraining website, such as reporting,
archiving a recording or sending out a follow-up
email. Only scheduling organizers and co-
organizers scheduled in advance of the training
session can perform post-training tasks.
Attendees promoted in-session to an organizer
cannot log in to GoToTraining and perform
post-training tasks.
Presenter: A presenter is the person
showing his or her desktop. The current
presenter can then pass this role back to the
organizer or to another attendee.
Pre-training: The time frame before the
training session begins when tasks are done on
the GoToTraining website, such as scheduling a
training session, monitoring the registration
count or creating in-session polls and
evaluations. Only organizers can perform pre-
training tasks.
Registrant: A registrant is any person who
has registered for a training session.
Registration Confirmation: The
Registration Confirmation email provides
training session information, links to materials
and pre-tests, audio information and a unique
link to join the training session. If you are using
Manual Approval, a registrant does not receive a
Registration Confirmation until you have
approved that person.
Viewer: The GoToTraining Viewer is the
window that appears on the attendee's computer
displaying the presenter's desktop or shared
application.
Waiting Room: The Waiting Room
screen displays in the Viewer any time attendees
wait for a presenter to begin showing his or her
screen or when Screen Sharing is stopped.
What equipment do I need to use
GoToTraining? All you need to start using GoToTraining are the
following:
• A Windows or Mac computer
• An Internet connection (broadband is best)
• A Microphone and speakers (built-in or USB
headset)
• A Webcam to use HDFaces video
conferencing
Most computers have built-in microphones and
speakers, but you will get much better audio quality
if you use a headset or handset. You can also make
calls on your landline or mobile device.
Set Default Audio Options
You can set the default audio options for all your future
upcoming sessions. Changing your audio options will not
affect your previously scheduled sessions – it will only
affect future scheduled sessions. You have 2 audio
options: Use built-in audio conferencing or Use my own
conference call service – you can choose one or the other
but not both. If you choose to provide your own
conference call service, you must provide your own
telephone numbers for participants, and you won't have
access to built-in audio conferencing (VoIP, long distance
and toll-free numbers).
Use built-in audio conferencing (VoIP, long
distance and toll-free numbers)
If you select Use built-in audio conferencing, you
can select VoIP, Long distance number for and/or
Toll-free number for (if you have Integrated Toll-
Free audio service) to customize the default audio
settings to best fit your needs.
• VoIP – Your participants can use microphone
and speakers to connect to audio through
their computer.
• Long distance number – Your participants can
use a telephone to dial in to the audio
conference using a long distance number. You
can choose which countries to provide long
distance numbers for your attendees.
• Toll-free number – Your participants can use a
telephone to dial in to the audio conference
using a toll-free number. You can choose
which countries to provide toll-free numbers
for your attendees.
Use Mic & Speakers (VoIP) to connect to the
audio conference (Windows) Your audio quality may vary depending on your audio
software, hardware, operating system and Internet
connection. We recommend using a USB headset plugged
into your computer and placing your microphone away
from other speakers or devices.
1. In the Audio pane of your Control Panel, select
the Mic & Speakers option to connect to the audio
conference over VoIP (requires microphone and
speakers).
2. Test your audio hardware and audio input and
output by selecting Settings next to the Mic &
Speakers option.
3. In the Preferences window, test your microphone
and speakers setup. You'll be muted while you're
testing your audio setup. Make sure to select the
appropriate device.
• Test your microphone setup: Speak into your
microphone. If your microphone works, the
audio indicator will turn green.
• Test your speakers setup: Click Play Sound to
check that you can hear audio from your
speakers. If your speakers work, you'll hear
sound.
If your microphone or speakers aren't working, try
selecting another device that's connected to your
computer from the drop-down menu until the audio
indicators turn green.
4. Click OK when you've verified that your
microphone and speakers are working properly.
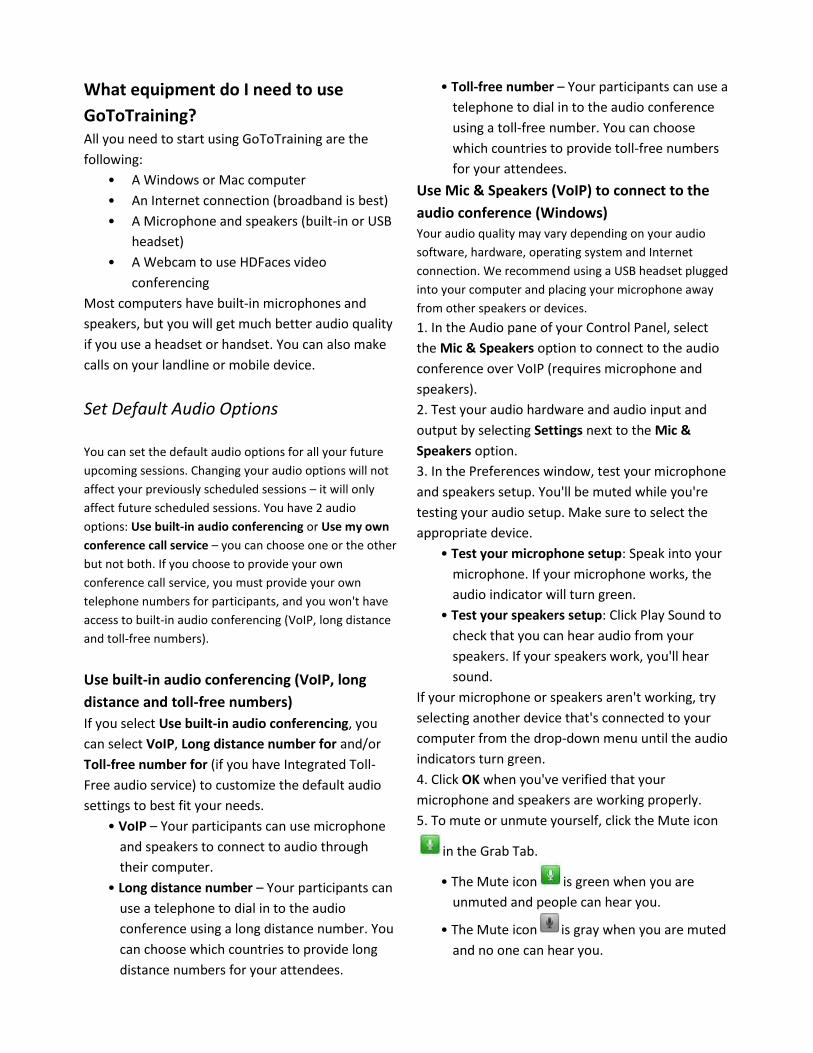
5. To mute or unmute yourself, click the Mute icon
in the Grab Tab.
• The Mute icon is green when you are
unmuted and people can hear you.
• The Mute icon is gray when you are muted
and no one can hear you.
Use Mic & Speakers (VoIP) to connect to the audio
conference (Mac)
1. In the Audio pane of your Control Panel, select the
Mic & Speakers option to connect to the audio
conference over VoIP (requires microphone and
speakers).
2. Test your audio hardware and audio input and
output. The audio indicators should turn green
when you or other attendees speak.
If your microphone or speakers aren't working, try
selecting another device that's connected to your
computer until the audio indicators turn green.
• If your microphone is not working, change your
audio input device from the drop-down menu. Try
talking into the microphone to test if the audio is
picked up.
• If your speakers are not working, change the audio
output device from the drop-down menu. Listen to
see if you can hear audio.
3. You may adjust the speaker volume on your Mac if
needed.
Test your audio setup (Windows only)
Test your audio setup by clicking Settings in the
Audio pane of your Control Panel. Or, you can
rightclick the GoToTraining daisy icon in your
system tray, and select Preferences > Audio. Check to
see if you're using an appropriate audio device. Click
Play Sound to check that you can hear sound from
your speakers. Speak into the microphone to test
your microphone setup.
Co-Organizers If you're the scheduling organizer, you can make
someone a co-organizer so that another participant can
present and control the session like you. Attendees can
be promoted to organizers in-session but won't have
access to post-session features, such as reporting and
sending follow-up emails.
Make someone an organizer in-session
1. During a session, right-click a participant's name
from the Attendee List.
2. Select Make Organizer. Once you make
someone an organizer, they have the same
abilities as you do for the remainder of the
session.
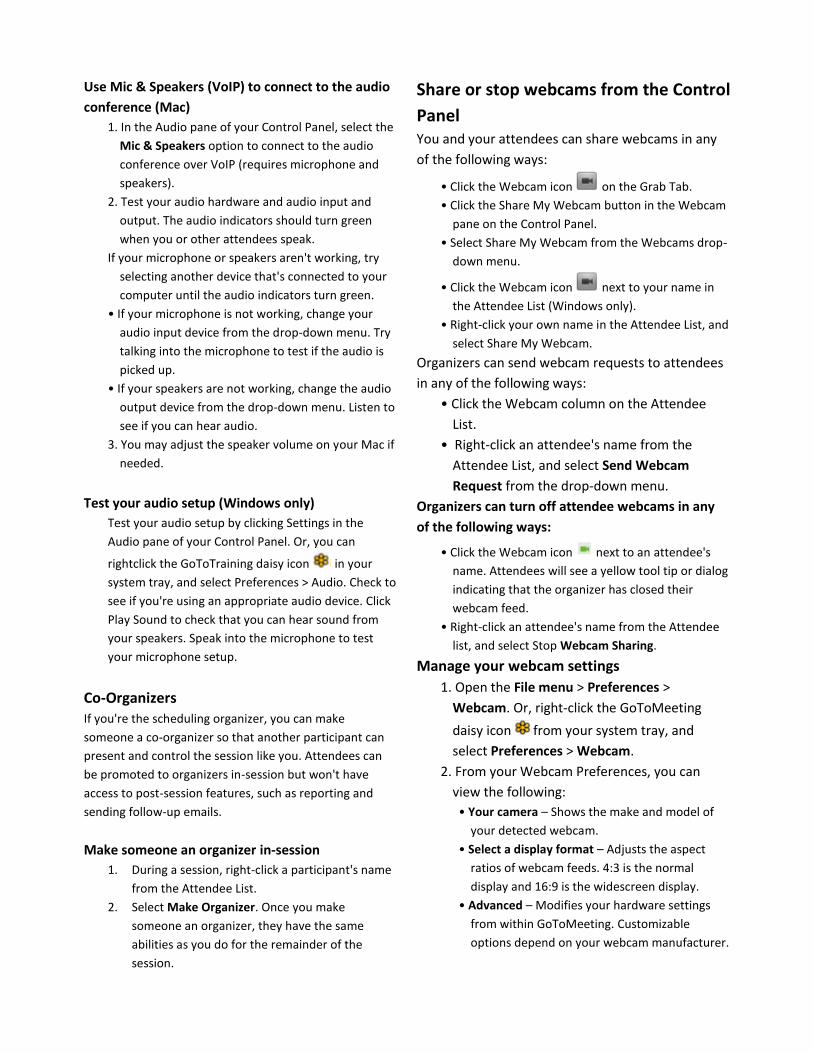
Share or stop webcams from the Control
Panel You and your attendees can share webcams in any
of the following ways:
• Click the Webcam icon on the Grab Tab.
• Click the Share My Webcam button in the Webcam
pane on the Control Panel.
• Select Share My Webcam from the Webcams drop-
down menu.
• Click the Webcam icon next to your name in
the Attendee List (Windows only).
• Right-click your own name in the Attendee List, and
select Share My Webcam.
Organizers can send webcam requests to attendees
in any of the following ways:
• Click the Webcam column on the Attendee
List.
• Right-click an attendee's name from the
Attendee List, and select Send Webcam
Request from the drop-down menu.
Organizers can turn off attendee webcams in any
of the following ways:
• Click the Webcam icon next to an attendee's
name. Attendees will see a yellow tool tip or dialog
indicating that the organizer has closed their
webcam feed.
• Right-click an attendee's name from the Attendee
list, and select Stop Webcam Sharing.
Manage your webcam settings
1. Open the File menu > Preferences >
Webcam. Or, right-click the GoToMeeting
daisy icon from your system tray, and
select Preferences > Webcam.
2. From your Webcam Preferences, you can
view the following:
• Your camera – Shows the make and model of
your detected webcam.
• Select a display format – Adjusts the aspect
ratios of webcam feeds. 4:3 is the normal
display and 16:9 is the widescreen display.
• Advanced – Modifies your hardware settings
from within GoToMeeting. Customizable
options depend on your webcam manufacturer.

Start, Schedule and Manage Trainings
To schedule a training
1. Log in to your GoToTraining account.
2. On the My Trainings page, click the Schedule a
Training button. Or, you can select Schedule a
Training in the left navigation.
3. On the Schedule a Training page, enter a title and
description for your new training – the description
is used on the registration page and in the
invitation email you send to registrants.
4. Using the Occurs drop-down menu, how frequent
you want the training to occur:
• Once – Participants register once to attend a
session.
• Weekly – Sessions occur once at the same
time and day every week.
• Monthly – Sessions occur at the same time for
every date or day every month (e.g., 1st of
every month or first Wednesday of every
month).
• Custom Schedule – Sessions occur in random
intervals.
5. Select the Start Date, Start Time and End Time.
6. Use the Training Time Zone drop-down menu to
select the time zone that the session will be held
in.
7. If you select Weekly, Monthly or Custom
Schedule, you can choose how frequently sessions
occur
by selecting a Registration Type:
• Participants register once to attend all sessions
• Participants register for individual sessions that
they'll attend
8. When you’re done, click Schedule.
Edit the date and time of a session
1. Log in to your GoToTraining account.
2. Select My Trainings in the left navigation.
Click the title of the training.
3. On the Manage Training page, click Edit in the
Date and Time section to change the date
and/or time of the session.
4. On the Edit Date and Time page, make your
changes and click Save.
Add another session to a training 1. Log in to your GoToTraining account.
2. Select My Trainings in the left navigation. Click the
title of the training.
3. On the Manage Training page, click Edit in the
Date and Time section.
4. To add another session to the training, click Add
another session. You can select the "Notify all
registrants of these changes" check box to alert your
registrants of the change.
5. Then click Save.
Add a session to your calendar
1. Log in to your GoToTraining account.
2. Select My Training in the left navigation. Click the
title of the training.
3. On the Manage Training page, click Add to
Calendar in the Date and Time section. An
invitation email will launch in your default email
client, which you can save as a reminder for
yourself.
Cancel a session
1. Log in to your GoToTraining account.
2. Select My Trainings in the left navigation.
Click the title of the training.
3. On the Manage Training page, the Date and
Time section displays each session. Click Edit
and then click the Cancel icon next to the
session(s) you want to cancel on the Edit Date
and Time page. To cancel the entire training,
return to the Manage Training page and click
Cancel Training at the top.
4. Select the "Notify all registrants of these
changes" check box if you want to alert your
registrants of the change.
5. Then click Save.
You can customize the cancellation email that is sent
to registrants. After you click Yes when prompted to
confirm the cancellation, you'll be taken to the Send
Registration Cancellation Email page where you can
customize the text of the email's subject and body.
Add co-organizers
1. Log in to your GoToTraining account.
2. Select My Trainings in the left navigation.
Click the title of the training.
3. On the Manage Training page, click Edit in the
Organizers section.
4. On the Co-organizers page, click the Add Co-
Organizer button to add co-organizers to help
you manage the training. New co-organizers
will receive a training invitation email.
Customize Your Training After you've scheduled a training, you can customize
its settings!
Edit the title and description
1. Log in to your GoToTraining account.
2. Select My Trainings in the left navigation. Click
the title of the training.
3. On the Manage Training page, click Edit in the
Title and Description section to change the title or
description.
4. On the Edit Title and Description page, make your
changes, and click Save. Select the "Notify all
participants of these changes" check box to alert
your registrants of the change via email.
Registrant details
1. On the Manage Training page, click the
Registrants number link.
2. On the Registrants page, click the registrant's
name to see that registrant's details. Depending
on which settings are enabled for the training, you
may see the registrant's registration details and test
answers.
Emails 1. Log in to your GoToTraining account.
2. Select My Trainings in the left navigation. Click
the title of the training.
3. On the Manage Training page, scroll down to the
Email section.
4. Click Edit next to the type of email you want to
send.
Send confirmation emails to registrants
1. Confirmation emails are immediately sent
upon registration if automatic approval is
enabled. If manual approval is enabled,
confirmation emails are sent upon approval.
To resend the confirmation email, go to the
Manage Training page.
2. Click View next to Tracking Registrants. On
the Registrants page, click a registrant's name.
3. On the Registrant Details page, click Resend
Confirmation Email.
Forgot your password? 1. Go to the Forgot Your Password? page.
2. Enter the email address you use to log in
to your account.
3. Click Continue to reset your password.
4. Once you receive the Forgot Your
Password email, click the link to create a
new password. Then log in using your
newly created password.
Engage Attendees with Materials, Tests,
Polls and Evaluations
You can engage your attendees by creating custom
Materials, Tests, Polls and Evaluations.
Create, edit and delete Materials before a
session
You can upload documents, images and media files
and add web links to your Materials so that
attendees can review or complete tasks before,
during and/or after a training in follow-up emails.
Materials added to a training are automatically
added to the Library for later use.
Note:The Materials page for each training is
available only to registrants for that particular
training. Each organizer account has a maximum of
2GB of storage space for materials and recordings.
1. Log in to your GoToTraining account.
2. Select My Trainings in the left navigation.
Click the title of the training.
3. On the Manage Training page, scroll down to
the Manage Content section. Click Edit next to
Materials.
4. On the Materials page, click Add Material >
From Computer or Add Link. Then complete the
steps to add your Materials.
• To choose when to provide access to
Materials, click the Settings icon and select
any or all of the following options:
• Upon registration
• During the training session
• After the training session
• To preview how the Materials page looks, click
Attendee Materials page.
• To edit Materials, go to the Materials page and
click the name of the Material you would like to
edit. Make your changes on the Edit Material
box, and then click Save.
• To delete a Material, click the Remove icon
next to the Material on the Materials page.
Create, edit and delete Tests before a
session
You can create one or more Tests that can be
launched before, during or after a training. Up
to 50 questions per Test can be created. An
attendee can complete a Test 1 time only. You
can also choose to show attendees the correct
answers and their Test scores in-session.
All tests created are stored in the Library for
later use.
1. Log in to your GoToTraining account.
2. Select My Trainings in the left navigation.
Click the title of the training.
3. On the Manage Training page, scroll down to
the Manage Content section. Click Edit next to
Tests.
4. On the Tests page, click Add Test > Create
New or From Library.
5. Enter the title and instructions (optional).
6. Then select the question type from the drop-
down menu:
• Multiple Choice (One Answer)
• Multiple Choice (Multiple Answers)]
• True/False
• Short Answer
7. Enter a question in the Question field. If you
selected a Multiple Choice question type,
enter at least 2 answers in the Answer field.
If you selected a Multiple Choice or
True/False question type, indicate which
answer is correct.
8. Click Add to Test if you'd like to continue
adding more questions. Then click Save.
• To choose when to give the Test, click the
Settings icon and check the "Upon
registration" check box, the "During the
training session" check box or the "After
the training session" check box.
• To choose when to show Test scores or
answers, click the Settings icon and
check "Show correct answers and test
scores, "Show only test scores" or "Show
neither."
• To preview the Test, click the Preview icon
next to the title of the Test.
• To create another Test for the session,
click Edit on the Tests page, and then click
Add Test >Create New Test.
• To view the Tests results, create a after
the session ends.
• To edit Tests, go to the Tests page and
click the name of the test you would like
to edit. Make
your changes on the Edit Test page, and
then click Save.
• To delete a Test, go to the Manage
Training page, click Edit next to Tests, and
click the Remove icon next to the Tests
on the Tests page.
Create, edit and delete Polls before a session
Using Polls during a training is a great way to
generate immediate feedback, check for
understanding and keep attendees alert and
interested. You can create a Poll before a training
(from the Polls page or Library page) or during a
training.
1. Log in to your GoToTraining account.
2. Select My Trainings in the left navigation. Click
the title of the training.
3. On the Manage Training page, scroll down to the
Manage Your Content section. Click Edit next to
Polls.
4. On the Create a New Poll page, click Create Poll >
Create New or From Library. Then choose the
type of Poll:
• Multiple Choice (One Answer)
• Multiple Choice (Multiple Answers)
5. Enter a question into the Question field.
6. Enter at least 2 answers in the Answer field.
7. Click Save.
• To create another Poll for the session, click
Edit on the Manage Polls page, and then click
Create Poll > Create New Poll. You can add up
to 20 Polls per training.
• To view the Poll results, create an Attendee
Report after the session ends.
• To edit Polls, go to the Manage Training page,
click Edit next to Polls and click the Poll
question. Make your changes on the Edit Poll
page, and then click Save.
• To change the order of Polls, go to the
Manage Training page, click Edit next to Polls,
and change the order of the polls on the
Manage Polls page. Click Update Order when
you're done.
• To delete a Poll, go to the Manage Training
page, click Edit next to Polls, and click the
Remove icon next to the Poll on the Polls
page.
Create, edit and delete Evaluations before a
session
Evaluations allow you to collect feedback after a
training. You can view Evaluation results in the
Evaluation Report once the training has ended and
attendees have completed the Evaluation.
1. Log in to your GoToTraining account.
2. Select My Trainings in the left navigation. Click
the title of the training.
3. On the Manage Training page, scroll down to the
Evaluations section. Click Edit next in the
Evaluations section.
4. On the Evaluation page, click the Add Evaluation
> Create New or From Library.
5. Enter the title of the Evaluation and choose the
question type:
• Multiple Choice with One Answer (2 or more
answers are required)
• Multiple Choice with Multiple Answers (3 or
more answers are required)
• Rate on a Scale of 1 to 5
• Short Answer
• Comment Box
If you'd like to provide more than 3 answer options,
click Add another answer.
6. When you're ready to save your first question and
answer, click Add to Evaluation. To add another
question, click New Question on the Evaluation
page. Repeat step 5 to add more questions to the
Evaluation. You can add up to 25 questions to a
Evaluation.
7. When you've completed creating your Evaluation,
click Save. You can choose to launch the evaluation
after the training by selecting the "After training
session" check box or send the evaluation link to
registrants in the follow-up email by selecting the
"In Follow-up email" check box. Then click Save.
• To edit a Evaluation question or answer, click
the title of the Evaluation and click the
question you would like to edit it. Make your
changes, and then click Save.
• To change the order of Evaluation questions,
go to the Manage Training page, and click Edit
next to Evaluations. On the Evaluation page,
drag and drop an Evaluation up or down in the
list as you'd want it to appear to attendees.
Click Save.
• To delete an Evaluation question, go to the
Manage Training page, and click Edit next to
Surveys. On the Evaluation page, Remove icon
next to the question.
• To preview an Evaluation, go to the Manage
Training page, and click Edit next to
Evaluations.
On the Evaluations page, click the Preview icon
to see how the Evaluation will appear to
your attendees.
• To choose when to send out an Evaluation, go
to the Evaluations page and choose 1 or both
options:
• After training session: The evaluation will
launch after the training.
• In the Follow-up Email: All registrants will
receive the evaluation link in the Follow-up
Email.
Library
Materials, Tests, Polls and Evaluations can be
created and stored in the Library, where they
remain available for unlimited reuse. Changes made
to any item in the Library affect all copies of that
item currently in use. Content sharing must first be
enabled by the company administrator for
organizers on corporate accounts to share content.
Add Materials to the Library
1. Log in to your GoToTraining account.
2. Select Library in the left navigation.
2. In the Materials tab, click Upload Files > From
Computer (to upload files) or Add Link (to add
URLs).
3. To upload files from your computer, select a file
and click Upload. To add a link, enter a URL and
click Add Link.
Upload, Share and Delete a Recording
After you've recorded a session, you can store your
recordings and share the link with your attendees.
By default you have 2GB of storage space for your
recordings and materials. You can upload a
recording file no larger than 300MB at a time.You
can also distribute a recording and send or upload
the recording wherever you'd like. Although you can
record sessions on Macs running 10.6 (Snow
Leopard) or higher, you can only upload and stream
.MOV files using Mac OS X 10.7 (Lion). For corporate
plans, we calculate storage space using all of the
materials and recordings that are uploaded to your
company's GoToTraining account.
Upload a recording
1. Log in to your GoToTraining account.
2. Select My Recordings in the left navigation.
3. On the My Recordings page, click the Upload
Recording button to browse for and select the
recording file from your computer. By default
recordings are saved to the Documents folder

on the computer where you recorded the
session.
4. Once the recording file has uploaded
successfully to My Recordings, you can view
the upload date, size, recoding title and the
number of registrants.
Share a recording
1. Find the recording on the My Recordings
page.
2. Hover over the Share icon .
3. Copy and paste the link in the bubble tool tip.
4. Send the link to your registrants. To view the
recording, registrants must provide their first
name, last name and email address to
register. You can return to the My Recordings
page and click the number of views link to see
the number of recording views and generate a
report.
Delete a recording
1. Find the recording on the My Recordings
page.
2. Select the Trash icon .
3. In the "Confirm Delete" box, select Yes to
permanently delete the recording.
View remaining storage space
1. In the left navigation, find the Storage Space
widget.
2. By default, you have 2GB of storage space for
materials and recordings. You can see how
much space your files use and how much
space remains.
Screen Sharing
Screen Sharing allows you to present a document,
presentation or whatever you want to share with
your attendees. If you have multiple monitors set
up, you can choose to share all monitors or single
monitors.
If you have multiple applications running on
Windows, you can choose to share only one
program, application, monitor or window. You can
also show a clean Windows desktop to hide icons
and the task bar, as well as blank out the
background, so that the focus remains on the
content you are presenting to your attendees.
Start Screen Sharing
1. When you're ready to start sharing your
screen, click the Show My Screen button in
the Screen Sharing pane.
2. Use the Screen drop-down menu to choose
what you want to share. By default, your main
monitor is displayed. If you're on a Windows
computer, you can also choose to show
specific applications and a clean screen.
Note: Sharing specific applications or a clean
screen is not currently available on Mac,
so we recommend closing any windows
you don't want attendees to see before
you start sharing your desktop.
Pause Screen Sharing
1. If you want to temporarily pause Screen
Sharing, click the Show My Screen button
again. Your screen remains frozen on the last
image attendees see until you re-start Screen
Sharing.
2. To resume Screen Sharing, click the Show My
Screen button.
Stop Screen Sharing
1. If you want to stop showing your screen to
attendees, click the Stop Showing Screen
button in the Screen Sharing pane to disable
it. Attendees see the GoToTraining Viewer
when you stop sharing your screen.
• To resume Screen Sharing, click the Show My
Screen button.
• To leave the session without ending it for
everyone else, click File > Exit - Leave Training.

You need to make someone an organizer to
hold the session in your absence.
• To end the session for everyone, click File >
Exit - End Training or simply click the Quit icon
at the top-right corner of your Control Panel.
Generate a Report
1. Log in to your GoToTraining account.
2. Select Generate Reports in the left
navigation.
3. Select the report type:
• Registration Report – Shows when each
person registered for the training and
their answers to the registration
questions.
• Attendee Report – Shows details about
each attendee, including registration
information and how long they attended
the session.
• Evaluation Report – Shows evaluation
questions and attendees' answers.
• Registrant Test Report – Shows when
registrants submitted tests for a training,
their scores for each test and the average
test score.
• Test Report by Date – Shows the average
score for one test and the average score
for each test question over a specified
date range.
• Training History Report – Shows the
duration and number of attendees for
each training over a specified date range.
4. Choose a date range within the last year, or
choose specific From and To dates to filter
your report data.
5. Click Show Training Sessions to see the
results.
6. To export the data, select Excel or CSV and
then click Generate Report.