global fun challenge pack - wordpress.com
TRANSCRIPT

Global Fun Challenge Pack
This pack was put together by the unit teams of 1st and 4th Barnehurst Rainbows
and 4th Northumberland Heath Rainbows as part of their event fundraising during
lockdown in 2020.
In this pack you will find a selection of activities from various countries and regions
around the world.
Badges can be ordered using the order form at the back of the pack.
We would love to see what you and your units get up to when completing the badge
and you can share this on social media with us on any of the details below:
@4thNorthHeath
@BarnehurstRain1
@GGErithCrayDiv
#GlobalFun
Hopefully, we have included a real variety of activities and also lots of resources to
help too.
There is no requirement to complete a set amount of activities, we have highlighted
a couple of opportunities for links with the Girlguiding programme. If you spot any
other overlaps, please do let us know so we can amend the pack for others
If you have any questions, or have any suggestions of additional activities, please do
get in touch through email: [email protected]
Page 2 of 34
Mexico
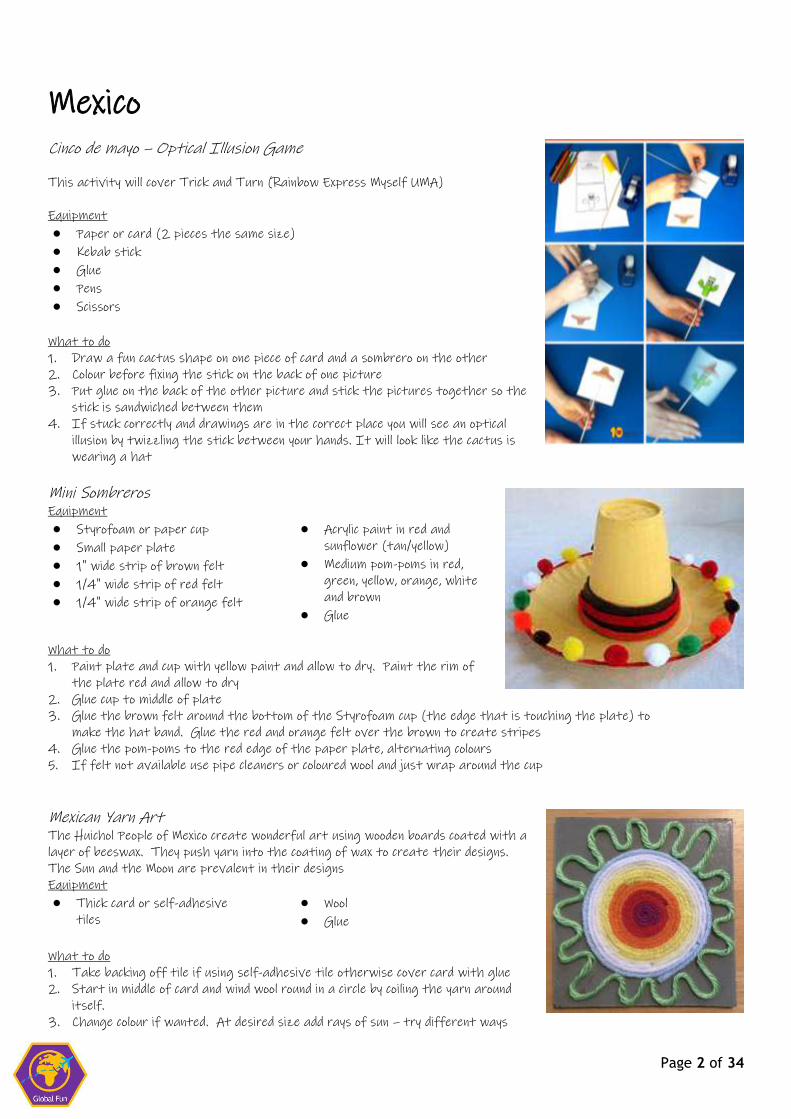
Cinco de mayo – Optical Illusion Game
This activity will cover Trick and Turn (Rainbow Express Myself UMA)
Equipment
● Paper or card (2 pieces the same size)
● Kebab stick
● Glue
● Pens
● Scissors
What to do
1. Draw a fun cactus shape on one piece of card and a sombrero on the other
2. Colour before fixing the stick on the back of one picture
3. Put glue on the back of the other picture and stick the pictures together so the
stick is sandwiched between them
4. If stuck correctly and drawings are in the correct place you will see an optical
illusion by twizzling the stick between your hands. It will look like the cactus is
wearing a hat
Mini Sombreros Equipment
● Styrofoam or paper cup
● Small paper plate
● 1" wide strip of brown felt
● 1/4" wide strip of red felt
● 1/4" wide strip of orange felt
● Acrylic paint in red and
sunflower (tan/yellow)
● Medium pom-poms in red,
green, yellow, orange, white
and brown
● Glue
What to do
1. Paint plate and cup with yellow paint and allow to dry. Paint the rim of
the plate red and allow to dry
2. Glue cup to middle of plate
3. Glue the brown felt around the bottom of the Styrofoam cup (the edge that is touching the plate) to
make the hat band. Glue the red and orange felt over the brown to create stripes
4. Glue the pom-poms to the red edge of the paper plate, alternating colours
5. If felt not available use pipe cleaners or coloured wool and just wrap around the cup
Mexican Yarn Art The Huichol People of Mexico create wonderful art using wooden boards coated with a
layer of beeswax. They push yarn into the coating of wax to create their designs.
The Sun and the Moon are prevalent in their designs
Equipment
● Thick card or self-adhesive
tiles
● Wool
● Glue
What to do
1. Take backing off tile if using self-adhesive tile otherwise cover card with glue
2. Start in middle of card and wind wool round in a circle by coiling the yarn around
itself.
3. Change colour if wanted. At desired size add rays of sun – try different ways

Page 3 of 34
Llama Balloons
Equipment
● Card or paper
● Balloons
● Balloon stick
● Crepe paper
● Glue
● Scissors
What to do
1. Blow up balloon – not too big
2. Cut three strips of crepe paper with different widths and fringe
along one edge
3. Fix the strips to the balloon. Start in the middle of the balloon
with the widest strip, then attach the middle strip and top it
off with the smallest
4. Draw a nose and ears on card and cut out. Fix to the balloon
5. Fringe a strip of crepe paper then bunch it up to make a fringe for the llama and fix in place
6. Attach the stick to the balloon and add fringed crepe paper
Ojo De Dios - God’s Eye The Ojo has roots in the ancient Huichol Indians of Mexico. The brightly coloured combination of
yarn and sticks is said to symbolize the all seeing eye of God and represents the power of seeing
and understanding unseen things
Equipment
● Sticks
● Wool
● Scissors
What to do
1. Hold two sticks together with your thumb & forefinger. While holding the sticks, wrap the wool around
the sticks diagonally two to three times and then two to three times the opposite directions.
2. Next, wrap the wool around one
side of the cross
3. Carry it over, diagonally
following the line of the
previously wrapped wool
4. Continue to wrap the wool over
each side and across diagonally
5. Continue wrapping until you
reach your desired number of
rows
6. When you are ready to change
colours, tie the two pieces of
yarn together and continue
wrapping – ends should show
only on the back
7. When you have reached the
desired number of colours tie off the wool at one end of the stick and use as a loop to hang up the Gods
Eye

Page 4 of 34
India
Cotton bud Mandalas
Mandala is another name for Rangoli
Equipment
● Paper Plate
● Cotton buds
● Food colouring
● Pens
● Glue
What to do
1. Add few drops of food colouring and a drop of water to a shallow dish
2. Dip end of cotton bud into colour and allow to dry (speed up drying by placing in microwave for about 3
minutes and 30 seconds on a paper plate)
3. Lay out design on paper plate, colour areas in between and secure cotton buds with glue
Paper Plate Mandala
Equipment
● Paper Plate
● Pumpkin seeds
● Paint
● Pom poms
● Glue
What to do
1. Paint the seeds black and allow to dry
2. Make the patterns on the seed
3. Draw four circles on the paper plate and glue the decorated pumpkin seeds around these circles
4. Finish it by gluing the pom-poms around the paper plate
Milk Carton Elephant Equipment
● Empty plastic milk carton
● Paint
● Tissue paper
● Wobble eye
● Scissors
What to do
1. Draw lines on the milk bottle as guides for you to cut. Draw one line
around the whole bottle slightly higher from the bottom of the handle
2. Draw an arch from this line on each side of the bottle - this will form the
legs. Next, cut the lines that you have drawn to create the elephant shape
and get rid of the bottom half of the milk bottle
3. Paint the milk bottle
4. Add the decorations - wobble eye, gold paint tassels and sequins to the
purple sheet and gold stripes and a pom pom to the elephant’s hat
5. Use different sized carton to make an elephant
family
6. Use tissue paper only for a simple elephant

Page 5 of 34
Clay Diva Lamp
Equipment
● Air drying clay
● Paint
● Tea light
What to do
1. Take a piece of clay and roll into a ball
2. Using your thumb, push into the middle of the ball,
gently pushing the edges away to make a little pot
3. Ensure that it is wide enough to fit the tea light
4. Allow to dry
5. Paint in bright colours or cover the clay in a mixture of
PVA glue and glitter. Allow this to dry before using
6. Add a tea light or you can use a LED tea light
Thali Plates Thali means plate in Hindi. The idea behind a thali is to offer your guests
all of the 6 different flavours: sweet, salt, bitter, sour, astringent and
spicy on one single plate. According to Indian food serving customs, a proper
meal should be a perfect balance of all these 6 flavours
Equipment
● Metallic (plastic) plates
● Paper doilies
● Sticky jewels
● Stickers
What to do
1. Place doily on plate and decorate with available materials
Paper Peacock The peacock is the National bird of India
Equipment
● Blue, Green and orange
card/paper
● Blue, green, gold paint
● Googly eyes
● Gold cord
● Glue
● Scissors
What to do
1. Cut an 8 Inch circle out of green card/paper and peacock shaped body out of blue card/paper
2. Cut out beak and feet from orange card/paper
3. Use glue to stick the body onto the green circle
4. Add 2 pieces of gold cord to top of head
5. Glue on eyes, beak, and feet
6. Dip finger in green paint and press onto green paper as shown.
7. Allow to dry and repeat with the blue paint, making sure they overlap the green fingerprints
8. Allow to dry before adding dots of gold paint using a paint brush. The feathers will be complete once dry

Page 6 of 34
Switzerland
Cuckoo Clock
Equipment
● 2 Foam Sheet (6×9”)
● Ruler
● Clock Movement
● Scissors
● Foam Circles/Bird for decorating
● Glue
● Pencil/Pen
● Round object of approximately 4” diameter
● Drinks Can Tab
What to do
1. Complete the following for two sheets (A & B) of foam. Measure and mark
6” along the long side. Measure and mark 3” along the short side of the
rectangle. Connect these points in pencil and cut. This is the roof
2. On one sheet (A) make the cuckoo window by marking a point that is 3”
from the point of the roof. Measure and mark ¾” inch on either side of the
3” mark. At the ¾” marks, measure up 1½” Use any round object to trace a
curved roof over the 1½” mark. Cut out cuckoo hole and save this piece
3. Draw round the cuckoo hole on a piece of foam a different colour and cut out.
Cut in half down the middle. Decorate and glue either side of the hole – these are the shutters
4. On the piece of foam cut out 2 strips that are 1” wide and 5” long. Glue them to the sides of sheet (B)
5. Make a small hole for the shaft of the clock mechanism. This is what the hands of the clock attach to on
sheet A underneath the cuckoo window
6. Make a hole for the clock mechanism (Complete on the other foam sheet you did not use for the cuckoo
hole- Foam Sheet B- this will be the back of your cuckoo clock)
7. Cut a rectangle that is big enough for the clock mechanism you have in the centre of sheet B
8. Using another sheet of foam cut 2 strips that are 1” wide by 5” long and glue to the sides of sheet B.
Cut another 2 strips (both 1” by 4”) and glue these strips to the roof’s sides on B. Allow to dry and glue
sheet A on top
9. On a sheet of foam of another colour draw a circle of 4” diameter. Cut a small circle at the centre for
the clock’s mechanism shaft
10. Cut out and glue four large foam circles at the 12, 3, 6 and 9 o’clock places. Glue two smaller foam circles
between each of the larger circles. Glue the large circle (clock face) to the centre of sheet A
11. Follow the instructions on the clock mechanism and install the hands and battery
12. Create a perch for the cuckoo by cutting a square of foam 1½” by 1½”. Glue to the back of the clock and
bottom of the window frame. Cut another strip of the same colour that is 2” long and ½” high and glue
to the inside of the bottom of the window
13. Make a cuckoo bird and glue to the perch
14. Cut 2 pieces of red foam that are 2” wide by 6” long – this is the roof – glue in place
15. Glue the tab from a drinks can to the back of the clock so it can hang up
16. Decorate a wide craft stick and glue to the bottom of the clock. This is the pendulum
17. Your cuckoo clock is now complete

Page 7 of 34
Edelweiss Brooch Edelweiss is a flower that can be found in mountain pastures
Equipment
● White, yellow and green felt
● Tiny jewels
● Badge back
● Glue
What to do
1. Cut 2 leaf shapes from the green felt
2. Cut at least 12 petal shapes from the white felt
3. Glue the petals on top of the leaves as shown
4. Cut a small circle of yellow felt and add tiny jewels. Glue at the centre of the flower
5. Glue flower to badge back. Your brooch is now ready to wear
Rosti Rosti is the Swiss version of hash browns or potato pancakes
made with butter, potatoes, and salt. Rosti is a national
dish of Switzerland. It can be cut into wedges and served
with sausages or other meats and cheeses. Or topped with
an egg and served with salad
Ingredients
● 3 to 4 medium starchy potatoes peeled
● 2 to 4 tablespoons butter
● Salt to taste
● Optional add-ins: parsley, onions, nutmeg, pepper, or ground paprika
What to do
1. Grate the peeled raw potatoes into a bowl
2. Melt 2 to 4 tablespoons of butter in a frying pan
3. Add the grated potatoes about 1 inch deep and salt them as desired.
4. Add onions or optional spices as desired
5. Cook the potatoes over medium heat for several minutes, stirring two or three times to coat the
potatoes evenly with butter
6. Shape into a round and cook for 10 minutes
7. Cover the potatoes and cook for another 5 to 10 minutes
8. Tip onto a plate and then carefully slide back into the pan adding more butter
9. Cook for another 15 minutes until browned
10. Serve and enjoy
11. This can be made with parboiled potatoes that are cold in exactly the same way but will need less cooking
time

Page 8 of 34
Africa
Milk Carton African Mask
Equipment
● 1 empty and clean milk carton
● Newspaper (torn into trips at least 1 inch wide)
● Scissors
● Paper Mache paste (Mix together 2 parts PVA Glue with 1
part water)
● Paint
● Items for adornment (ribbon, old material, etc)
What to do
1. Use the scissors to cut away the back part of the carton
2. Once removed press down on the carton to give a flattened
appearance
3. Dip strips of newspaper in the paper mache paste and apply
to mask. Repeat until mask is completely covered
4. Allow to completely dry before painting
5. Once the paint is dry add any embellishments
African Paper Plate Necklace This paper plate craft is inspired by the beaded necklaces of the
Samburu Tribe.
Equipment
● Paper plates
● Paint
● Scissors
What to do
1. Cut a “v” shape out of the top of the plate. Then cut along
the inside edge
2. Paint the plate in bright and fun African colours and designs.
Allow to dry
Elephant Ears
Ingredients
● Puff pastry – ready made
● Ground cinnamon
● Caster sugar
What to do
1. Mix together 3 parts caster sugar to 1 part ground cinnamon
2. Sprinkle this cinnamon sugar on one side of pastry. Roll over with a rolling pin to press
in the sugar. Turn the pastry over and repeat
3. Fold one edge of pastry towards the centre in 2cm folds. Repeat on the opposite
edge. Both folded ends should meet in the middle, fold over and slice into 1.5cm pieces
4. Lay flat on baking tray about 2cm apart. Chill for 15 minutes
5. Bake in a preheated oven for 10 minutes or until golden brown

Page 9 of 34
New Zealand
Matariki Stars Matariki also called the Pleiades is a group of stars which
signals the Māori New Year which is commonly celebrated in
New Zealand. The group of stars rises in New Zealand’s
midwinter during June. In recent years Matariki has
become a way to celebrate Maori culture
Equipment
● Cardboard
● Wool
● Scissors
What to do
1. Cut several circles from the card
2. Cut ½ inch to 1-inch slits, equal distance apart all the way around the circle
3. Thread wool into a slit, leaving a length on the other side
4. Begin making your way around the circle, passing through each slit several times, until you have your
desired look
5. Leave enough to tie off a loop
6. Tie a loop for hanging
Tā Moko Faces Tā mokois the permanent body and face marking by Māori people
Equipment
● Paper or card
● Marker pens
What to do
1. Draw a large face on the paper
2. Colour and draw on symbols to create your own Tā Moko face
3. By attaching string or elastic you will have a mask
Use your Tā Moko Face in conjunction with the next idea

Page 10 of 34
The Haka
This was a dance traditionally performed before fighting. Today its associated with
The All Blacks – the national rugby team of New Zealand and is performed by team
members prior to the start of any game
Equipment
None
What to do
1. Follow the instructions given by the leader and perform the dance moves

Page 11 of 34
Netherlands
Dutch Windmill
Equipment
● Plastic or polystyrene cup
● Green, black, and white paper
● Paint
● Split pin
● Stickers
● Glue
● Scis
sors
● Tap
e
What to do
1. Paint cup if wanted and allow to dry or alternatively use coloured cups
2. Make the windmill with a square of paper – size dependant in relation to the cup
3. Fold the paper from corner to corner so it is triangular and crease well. Open and repeat
with the other corners
4. Cut along the creases to within ¾ inch of the centre
5. Fold every other corner point to the centre of the square and hold in place by pushing the split pin
through all layers
6. Cut a rectangle and 2 squares from the black paper for a door and windows and stick onto the cup
7. Add fringed green paper to represent grass as shown in the picture and any flower stickers
8. Now push the spit pin with the windmill through the cup and secure the blades in place
Italy
Leaning Tower of Pisa Equipment
● Empty inner tube from kitchen or toilet paper or similar
● Grey or white paint
● 12 grey or white pipe cleaners
● Glue
● Scissors
What to do
1. Trim a piece off the end of the tube, cut it on an angle so the tower will lean
2. Paint the tube white or grey and allow to dry
3. Cut some pipe cleaners into 2-inch lengths and bend each length to make an arch
4. Glue a pipe cleaner around the top of your tower
5. Glue an arch to the top of the tube below the pipe cleaner and continue with more arches right round the
tube
6. Glue another pipe clear underneath and then glue another role of arches underneath
7. Glue arches all the way down to the end of your tower, gluing a pipe cleaner in between
8. Your tower is now complete
Roman Mosaics
Equipment
● Coloured card, paper or foam
● Glue
● Scissors
What to do
1. Draw a pattern onto card
2. Cut strips of paper and cut these into small pieces
3. Glue these pieces onto the pattern in your desired
combinations

Page 12 of 34
France
Eiffel Tower Straw Craft Equipment
● Straws
● Card
● Glue
● Scissors
What to do
1. Draw the outline of the Eiffel tower on card (the picture will give some guidance)
2. Use the straws to fill the outline. Cut to different lengths and secure in place with glue
3. For something different use twigs or even craft sticks
Take this activity further by building a free-standing tower using spaghetti and mini marshmallows
Eiffel tower building contest! ● Split the children up into pairs or teams.
● Give each team a set amount of straws and tape Example: 25 straws & 2 feet of masking tape (or more
of each)
● Set a pre-determined time to build the free-standing ‘Eiffel’ tower.
● For teamwork and creativity give certificate for the tallest, shortest, straightest, most leaning, most
authentic, most realistic, most unusual, or unique, most original, most humorous
Lolly Stick Bicycle
The Tour de France is a well-known cycle race that even has stages in Britain Equipment
● Cardboard hoops or paper plates
● Large and small craft sticks
● Paint
● Glue
What to do
1. Make a hoop from cardboard or cut a circle from the middle of the paper
plates. Paint and allow to dry
2. Either use coloured craft sticks or paint them before using
3. Glue small craft sticks to the inside of the cardboard circle so as to make
the spokes of the wheels
4. Next make the frame for the bicycle by arranging large craft sticks in
the shape shown and glue in place. Add a seat and handlebars
5. Attach the frame to the wheels
6. Display on a wall
Fashion Show
Paris is seen as a centre of the fashion industry and holds many fashion shows where top designers show off
their latest creations
Why not try these ideas:
1. As a group decide on a theme for a show (such as holiday outfits) and then an event is planned where
everyone has a role such as designers, commentator, journalist, photographer, audience, buyer. Plan music
and make outfits from the designs
2. Hold a Failed Fashion Show - rehearse a fashion show in which EVERYTHING GOES WRONG! (On
purpose) It’s fun but not easy to do. Example: The compere trips over the microphone cord, or models
wear things that do not fit—and do not go together. Think of all the silliness you can!
3. Hold a Wacky Hair Do and Fashion Show – everyone dresses in fantasy fashion back-combs, gels and styles
each other’s hair, while others design, draw, cut-out and tape outfits using materials such as newspaper,
plastic sacks, lining paper. Paints/ markers, tape and accessories can be used. Do not forget to include
fantasy make-up.

Page 13 of 34
Australia
Woven Shark Many sharks are found in the seas around Australia
Equipment
● Paper plate
● Paint
● Wool
● Hole punch
● Glue
● Scissors
What to do
1. Carefully cut the
centre from the plate. Then on the piece cut out draw a boat shape as shown – these shapes are the
shark’s smile and fins
2. Use the curved bottom of the boat shape to make some sharp shark teeth by cutting zig zag shapes
3. Paint the ring and fins grey and allow to dry
4. Using the hole punch make holes round the inner ring of the paper plate at the positions of numbers on a
clock
5. Cut a length of wool and fasten to plate and then weave across plate from one hole to another in a
random manner
6. Glue the shark’s dorsal fin and pectoral fins on along with teeth and eyes
Aboriginal Stone Painting Transform pebbles and stones into creatures and works of
art using this simple Aboriginal dot painting technique.
Equipment
● Green card
● Flat stone
● Glue
● Pens
● Ink pads
● Q tips or cotton buds
● Scissors
What to do
1. Draw a turtle shape on green card ensuring your chosen stone fits neatly in the body section and cut out
2. Using the cotton buds and ink pads make dots on the flippers, tail, and head of the turtle
3. Draw a circular pattern on scrap paper and then copy this onto the stone with pens using the same dot
painting technique
4. Glue the stone onto the back of the turtle

Page 14 of 34
Koala Finger Puppet Equipment
● Grey, black card
● Wobble eyes
● Glue
● Scissors
What to do
1. On the grey card draw a large circle, another that is smaller and another two that are smaller
still and cut out
2. Also cut 2 grey ovals and a black oval
3. Near the bottom of the large circle, cut 2 circles as finger holes
4. Glue the 2 small grey circles – ears either side of the middle-sized circle. Use scissors to fringe round the outside of
each ear
5. Glue the head to the top of the body and then glue on the arms
6. Add the nose to the face and wobble eyes
7. Your puppet is now ready to play with. Put your fingers through the finger holes and use them to kick pom poms
Denmark
Cinnamon Danish Pastry
Ingredients
● Puff pastry
● Pecans (optional)
● Ground cinnamon
● Butter
● Brown sugar
● Icing sugar
What to do
1. If using pecans toast in the oven and then chop
2. Mix cinnamon, brown sugar and butter together
3. Unroll sheet of puff pastry and spread cinnamon mixture on top leaving a 1-inch border on the sides
4. Roll the pastry and slice into equal size pieces
5. Bake for 20 minutes until golden brown and leave to cool
6. Mix icing sugar with a little water and drizzle over to of pastries and sprinkle pecans on top
Butter Making
Ingredients
● Double cream (at room temperature)
● Jam jar with lid
What to do
1. Half fill a jam jar with the cream
2. Ensure lid is secure and start to shake the jar, the cream should slowly
thicken
3. Keep shaking. It may take some time. Soon you will hear liquid
sploshing inside the jar – the cream is separating
4. Carry on shaking. Soon you will hear sloshing and feel something banging on the sides of the jar as you are shaking.
You now have buttermilk and a ball of butter in your jar
5. Pour out the buttermilk. (You can save it to use in baking later!)
6. Spread the butter on bread or crackers

Page 15 of 34
Lego, a child’s toy consisting of interlocking building bricks was
developed in Denmark. Try out these activities
Lego Friendship Bracelets
Equipment
● Lego bricks
● Wool
● Plastic needle
● Scissors
What to do
1. Ask an adult to drill holes on the short sides of the Lego
bricks
2. Thread the needle with wool and pass through the holes in
the Lego brick
3. Repeat with different coloured wool
4. Tie a knot into the yarn to attach it to the brick. Repeat with the other side
5. Tie the bracelets on your wrist to wear

Page 16 of 34
United Kingdom
Pipe Cleaner Rose Rings The rose is the national flower of England
Equipment
● 6 red pipe cleaners
● 1 green pipe cleaner
What to do
1. Line up the red pipe cleaners and twist them together in the middle 4 or 5 times.
This is the part of the ring that will go around your finger
2. Place the middle of the twisted pipe cleaners under and around the finger where the
ring will go, making sure the ends are even on both sides of your finger. Cross the
ends of the pipe cleaners over your finger to get the ring size
3. Carefully pull the “ring” off your finger. Then, pinching where the pipe cleaners cross,
twist the pipe cleaners twice. Try the ring on to make sure it fits and adjust the size
if needed before you continue
4. Separate all of the pipe cleaners evenly around the
circle
5. Pinch the end of one of the pipe cleaners, then roll it
into a spiral until you reach the middle
6. Continue rolling each of the pipe cleaner ends into a
spiral towards the middle. Each spiral is a rose petal
7. Adjust the shape and position of each of the petals if
needed to make it more rose shaped
8. Take the green pipe cleaner and wrap it around the back of the ring. Twist it a couple times, tightly against the
bottom of the rose, to hold it in place
9. Pinch the end of one of the green pipe cleaner ends, then roll it into a spiral towards the middle. Repeat for the other
end of the green pipe cleaner
10. Pinch each of the green spirals to bend them into a leaf shape
11. Why not try making in different colours
Shortbread Kilts
Cheat a little by using shop bought biscuits
Equipment
● Petticoat Tails Shortbread
● Tube icing in bright colours
What to do
1. Use a sharp knife to cut the points off Petticoat Tails Shortbread
2. Create your very own edible clan tartan using the tube icing

Page 17 of 34
Woven Thistle Craft
The thistle is the flower of Scotland, try this craft
Equipment
● Green card
● Purple and green wool
● Hole punch
● Tape
● Scissors
What to do
1. Draw a thistle shape similar to that shown on green card and cut out
2. Punch holes along the top
3. Cut 4 'notches' from each side
4. Tape the end of the green wool to the back of the thistle. Wrap the wool around the
thistle from notch 1 on one side to notch 2 on the other, all the way down the thistle and
back up to produce a criss cross effect.
5. Tape the end of the wool to the back of the thistle
6. Make tassels at the top of the thistle by cutting two lengths of wool for each hole. Fold
them in half and push the length through the hole, making a loop. Thread the loose ends
of wool through the loop. Repeat for each hole
Welsh Lovespoon
Equipment
● A wooden spoon
● Brown paint
● Brown craft foam
● Lovespoons symbols chart
● Glue
What to do
1. Paint the wooden spoon with brown paint
and leave to dry
2. Choose the symbols that you would like to
put on your spoon (look at Lovespoon
symbols meanings chart)
3. Draw the symbols onto the foam or paper
and cut out
4. Glue foam onto the length of spoon
handle

Page 18 of 34
Welsh Harp
Music is an important part of Welsh culture with many male voice choirs associated with its coal mining
villages
Equipment
● Silver card
● Metallic thread or wool
● Scissors
● Hole punch
What to do
1. Draw a harp shape on card and carefully cut it out
2. Use the hole punch and make holes as shown
3. Make the strings of the harp by threading the wool through the holes
Take it further and hold an Eisteddfod with singing, reciting and more
St. David Mascot
St. David, a monk of the 5th & 6th century is the patron saint of Wales. Since
the 18th century, March 1st, the anniversary of his death, has been celebrated
as Wales’ national day.
Equipment
● Polystyrene Ball
● Brown Felt
● White String or Cord
● Brown Pipe Cleaners
● Pom Poms
● Yellow Card
● Double sided tape
● Glue
● Empty kitchen roll or similar
● Black Pen
● Scissors
What to do
1. Paint a polystyrene ball pink for the head and leave to dry
2. Draw a face onto the head using black pen
3. Cut the kitchen roll to desired size for your mascot
4. Cut the brown felt to the same height as the kitchen roll. Wrap the felt around the tube and stick using
double sided tape
5. Attach the head to the top of the tube with glue and leave to dry
6. Wrap 2 or 3 brown pipe cleaners together and wrap into a circle and glue to the top of his head for hair
7. Cut a strip of brown felt that will go round the mascot as a cape – ensure the bottom has a wavy
effect. Attach to the top of his body around his neck using double sided tape
8. Cut a further two strips of felt – these will be the arms - fold in half and secure with small pink pom
poms poking out for hands at one end
9. Stick the arms underneath the top part of the robe using double sided tape
10. To make the feet stick 2 pink pom poms onto a piece of brown felt using double sided tape or glue. Cut
around to make the base of the sandals. Cut 4 thin strips of brown felt for the sandal straps. Stick 2
strips on each foot
11. Cut a long strip of brown felt to wrap around the middle of the tube and tie
12. Cut out a small cross from yellow card and stick to a piece of white string/cord. Tie the cord around the
monk’s neck
Page 19 of 34
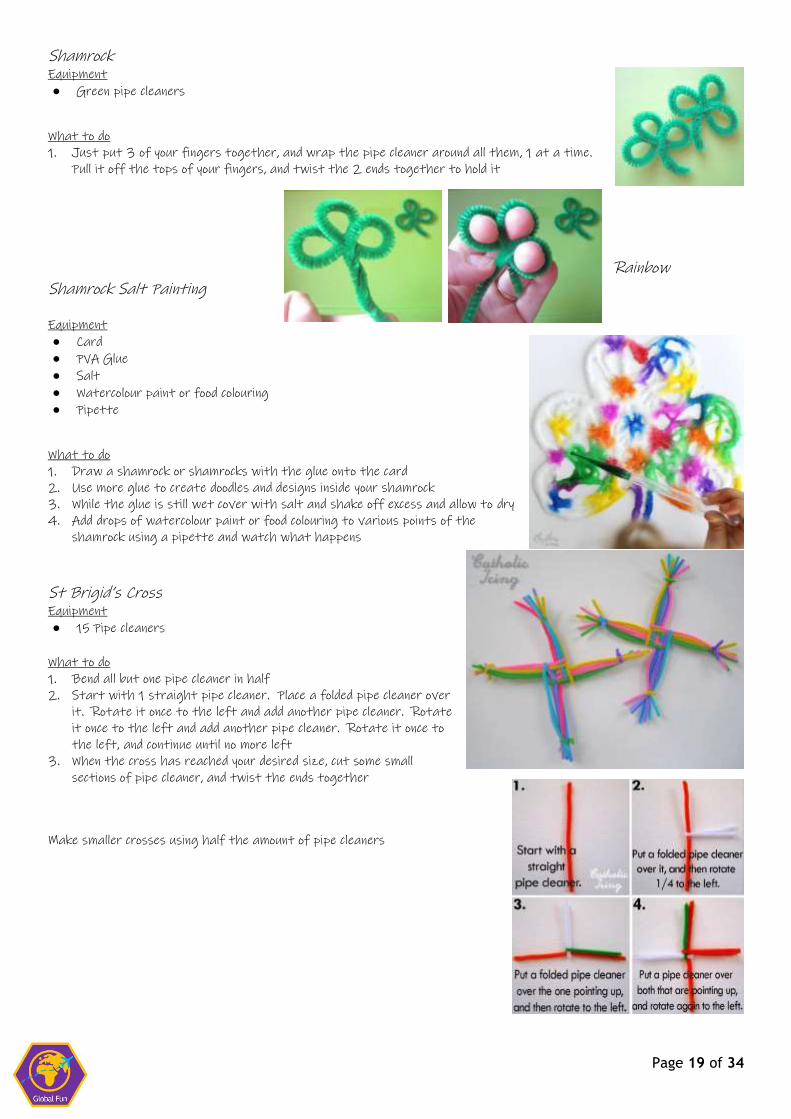
Shamrock Equipment
● Green pipe cleaners
What to do
1. Just put 3 of your fingers together, and wrap the pipe cleaner around all them, 1 at a time.
Pull it off the tops of your fingers, and twist the 2 ends together to hold it
Rainbow
Shamrock Salt Painting
Equipment
● Card
● PVA Glue
● Salt
● Watercolour paint or food colouring
● Pipette
What to do
1. Draw a shamrock or shamrocks with the glue onto the card
2. Use more glue to create doodles and designs inside your shamrock
3. While the glue is still wet cover with salt and shake off excess and allow to dry
4. Add drops of watercolour paint or food colouring to various points of the
shamrock using a pipette and watch what happens
St Brigid’s Cross Equipment
● 15 Pipe cleaners
What to do
1. Bend all but one pipe cleaner in half
2. Start with 1 straight pipe cleaner. Place a folded pipe cleaner over
it. Rotate it once to the left and add another pipe cleaner. Rotate
it once to the left and add another pipe cleaner. Rotate it once to
the left, and continue until no more left
3. When the cross has reached your desired size, cut some small
sections of pipe cleaner, and twist the ends together
Make smaller crosses using half the amount of pipe cleaners

Page 20 of 34
Japan
Koinobori Carp Kite or Windsock These Koinobori (carp streamers) are hung all over Japan in celebration of Children's Day. They were
originally displayed outside the houses of families with boys. This is because carp are symbolic of strength
and determination.
Equipment
● Paper or card
● Tissue paper
● Crepe paper
● Hole punch
● Glue
● Scissors
● String
What to do
1. Make a template of a ‘fish scale’ – oblong with a curved end and use with the tissue paper to cut lots of
scales
2. Place a line of glue along one piece of the card (longest edge) and carefully place on the fish scales. Take
care to keep the line of scales as straight as possible
3. Keep adding rows of scales until half the card is covered
4. Cut a strip of black paper about 2 inches wide and glue it across the top layer of scales. This will hide
the ends and serve as the line separating the face and body of the carp
5. Cut two almond shaped eyes from the black paper and glue them on as eyes
6. Turn over the card. Cut strips of crepe paper in many colours and glue them along the bottom edge of the
card
7. Roll the card to connect the edges and staple in place – top, bottom and centre. If the staple does not
reach use glue
8. Make small holes on either side of the top of the kite with the hole punch. Thread through a piece of
string and tie with a knot. Use to hang the carp windsock
Magic Paper Lotus Flower The lotus flower can be found everywhere in Japan
Equipment
● Paper
● Cup and saucer
● Scissors
● Yellow pencil and regular pencil
● Washer and wooden bead
● Bowl with water
What to do
1. Use the cup and saucer to draw three circles on the paper, sized 5½, 3½, and
2 inches. Colour the smallest circle yellow. Cut out the circles
2. Fold the circles three or four times, then open to a half circle and cut out
notches to get pointed flower petals by cutting halfway to the centre. Cut
holes into the middle of the two larger flowers
3. Put the washer and bead in the middle of the two smallest circles, then fold the
petals over one by one. Lay this on the largest paper flower and fold again
4. Carefully place the flower on the water’s surface and wait to see what happens:
Slowly your paper flower will open like a real water lily blossom
5. Let the wet flowers dry on a plate and use again – they will open faster than
new ones
6. Instead of using white paper try coloured paper or colour the white paper with
wax crayon or coloured pencil. Do not use markers as these will bleed into the
water

Page 21 of 34
Tanabata
Also known as Star Festival, Tanabata is a Japanese festival meaning “Evening of the
seventh.”
Tanabata is originally based on a Chinese legend. It celebrates the meeting of two
stars Vega and Altair which are usually separated by the Milky Way and, according to
legend, only allowed to meet once a year: on the seventh day of the seventh lunar
month.
The Story
A long long time ago there lived a beautiful princess named Orihime (Vega). She could
weave very beautiful cloth and worked very hard, so hard that she couldn’t meet
anyone to fall in love with. Her father felt sorry for her, so he introduced her to
Hikoboshi (Altair, he is also known as Kengyu), a cow herdsman who lived on the other
side of the Amanogawa River (known as the Milky Way).
It was love at first sight for Orihime and Kengyuu, and they spent so much time
together that they neglected their responsibilities. Orihime’s father, Tenkou, the god of the sky, became so
angry that he separated them by taking Orihime back across the Amanogawa River. This made the two
lovers very sad, and so Tenkou decided that he would allow them to meet once a year on the 7th day of the
7th month. However, if it is raining on that day, the river (milky way) is too flooded to cross, so they must
wait another year to meet
Equipment
● Tree branch
● Coloured paper
What to do
1. Find a tree branch and then decorate with lanterns, streamers etc
2. Write your wishes on paper(tanzaku) and hang them from the branches

Page 22 of 34
China Fire Breathing Dragon Dragons have long been associated with China
Equipment
● Empty paper tube
● Green paper
● 2 green pom poms approx 1 inch
● 2 green pom poms approx 3/8 inch
● 2 googly eyes approx 1/2 inch
● Red, yellow, and orange tissue paper
● Scissors
● Glue
What to do
1. Cut the paper and cover the tube, glue in place
2. Attach wobble eyes to the biggest pom poms – these will be the dragon eyes
3. Glue these eyes to one end of the tube as shown
4. Attach the two smaller pom poms near the other end of the paper tube to make the dragon's nose
5. Cut strips of red, yellow and orange tissue paper, about 9" or 10" long. Glue these strips to the inside of
the tube under the dragon’s nose
6. The dragon is now complete. When you blow in the end of the tube, it looks like the dragon is breathing
fire
Paper Plate Goldfish
Goldfish are considered fortunate in China especially in the new year and signify abundance and are usually
depicted in pairs.
Equipment
● 2 Gold paper plates
● Orange tissue paper
● Wobble eyes
● Scissors
● Glue
What to do
1. Cut a triangular wedge from one side of each plate
2. Glue to the plate on the opposite side as shown.
3. Tear off pieces of the tissue paper and glue to the plate
4. Glue on the eye
Ping Pong Launcher Table Tennis or ping pong is a popular pastime in China. Try this activity
using ping pong balls
Equipment
● Empty small plastic bottle
● Scissors
● String
● Rubber bands – two per toy
● A large bead
● A nail – for punching a hole in
the lid of the bottle
What to do
1. Cut the bottom off the bottle roughly 10 cm from the lid (optional)
2. Cut four notches around the side of the other piece of the bottle – at positions 3, 6,9 and 12 on a clock
3. Place the rubber bands through the notches so that they make an X as shown
4. Use a hammer and nail to poke a hole in the bottle lid (adult required)
5. Tie the string to the rubber bands at the X and poke it through the hole in the lid of the bottle
6. Tie a bead to the bottom of the string
7. Place ping pong ball on rubber bands at the X
8. Pull bead to stretch rubber band and gently release to throw ball in the air

Page 23 of 34
Russia Matryoshka Tree Ornament
In provincial Russia, before the revolution, the name Matryona (or Matriyosha) was a popular female name,
originally derived from the Latin “mater” meaning “mother”. This was associated with the image of the
mother of a large family, who was healthy with a portly figure. Subsequently it became a symbol of
motherhood and fertility. The technique of matryoshka making has remained unchanged and requires
exceptionally high professional skills. As a rule matryoshka are made from lime wood. The logs are stripped
and kept in the open air for two years before use. Only an experienced master can tell when the wood is
ready. They are then cut into workable pieces, with each piece being turned as many as fifteen times before
the matryoshka is considered perfect and ready for painting with water-colours. The design and colour of the
“kokosnik” (headdress) is one of the most important features of a matryoshka.
Equipment
● Paper or card
● Glue
● Thread
● Scissors
● Cottonwool
What to do
1. Print out the figures above, cut out, make hole at top.
2. Alternatively copy basic shape onto card, colour with pens or paint
3. Using glue, stick cotton wool to the back of one piece – where the
tummy is situated
4. Stick the dolls together
5. Fix a loop of ribbon through the hole so it can be hung on a tree
Babushka Easter eggs Babushka is a traditional Russian folk tale
Equipment
● Hard boiled eggs
● Pencil
● Acrylic paints
● Cocktail sticks
● Cotton buds
● Marker pens
What to do
1. Draw a circle on the top part of the egg. Draw a line below the circle all-round
the egg
2. Choose a colour for the headscarf and paint the egg as shown and allow to dry
3. Paint the bottom of the egg in another colour and allow to dry
4. With a marker pen, make two dots for the eyes and above three small lines for the eyelashes
5. Dip a cotton bud into pink paint to make the cheeks.
6. To make the mouth, cut a cocktail stick to have a flat end. Dip it into red paint and make two small dots
next to each other
7. For the dress details, use another cut cocktail stick to make small white dots around the head and the
dress

Page 24 of 34
Canada
Canadian Mountie Canadian Mounties are well known for their uniform and is the name given to
the police force. They originally rode across the plains on horseback
Equipment
● Large craft stick
● Red, black, yellow, brown paper
● Wobble eyes
● Marker pens
● Glue
● Scissors
What to do
1. Cut out the following and put to one side: brown hat, a red rectangle for
the jacket, two red triangles cut to form two arms, a black rectangle for
the trousers, brown rectangle for the boots, two very thin yellow stripes for the trousers
2. Use glue to add the pieces to the stick as shown, including the eyes. Allow to dry
3. Use markers to add these details: a small, black collar and patches on the shoulders, the belt and cross
piece, details on the boots and pants
Inuksuk or stone men An inuksuk (plural inuksuit) is a human-made stone landmark or cairn used by the Inuit, Iñupiat, Kalaallit,
Yupik, and other peoples of the Arctic region of North America.
When you drive along some of the highways in Canada, these line the rock cuts on the side of the road.
Originally, Inuksuks were built by the Inuit, to be directional signs or to mark important areas like food
caches.
Equipment
● Flat stones in different sizes
● Glue (optional)
What to do
1. Use a variety of stones to create your own stone
man. Flat sones work better as they will balance
2. To keep your creation, glue the stones together

Page 25 of 34
Norway
Gnomes Equipment
● Toilet paper rolls
● Paint (acrylic)
● Marker pen
● Pom pom
● Glue
What to do
1. Cut two slits down opposite sides of the toilet paper (same end). Cut in between those slits on the back
of the gnome. Fold down the pieces and cut them across the back (from one slit to the other)
2. Cut the front of the toilet paper gnome into a little gnome's hat. You can cut a pointy hat (centre point)
or a curved, floppy hat
3. Paint the hat. Leave room for a face (just the eyes and maybe a nose) and paint the beard white. Make
gnomes with short beards, long beards, pointy beards, rounded beards
4. Paint the body
5. Use the marker and draw on eyes
6. Add a pom pom nose with a dab of glue
Finland
Yarn Wrapped Reindeer 2
Equipment
● Cardboard
● Brown wool
● 2 clothes pegs
● Brown pipe cleaners
● Googly eyes
● Red pom pom
● Brown
paint
● Glue
● Tape
● Scissors
What to do
1. Paint the pegs brown and allow to dry
2. Cut a triangle shape out of the cardboard. Cut a long length of brown wool.
Tape one end to the cardboard triangle. Wrap the wool around the triangle in all directions until the
triangle is mostly full. Secure in place with tape
3. Cut the brown pipe cleaner in half and wrap one half around your each clothes peg leaving the ends out to
make reindeer antlers. Attach the clothes peg to the wrapped triangle
4. Finish the reindeer by using glue to add on a red pom pom nose and googly eyes
5. Punch a hole at the top and tie on a ribbon to make a hanging ornament
Reindeer Krispies Ingredients
● 150 g dark chocolate
● 50 g butter
● 2Tbsp honey
● 120 g rice crispy cereal
● 24 pretzels
● 24 edible candy eyeballs
● 12 red smarties
● Cake cases
What to do
1. Melt chocolate with butter and honey
2. Mix in rice crispy cereal, until complete covered
3. Place mixture into cake cases
4. Decorate each crispy cake with 2 pretzels, 2 edible candy eyeballs and a red
smartie, to make reindeer antlers, eyes and nose
5. Allow to set

Page 26 of 34
Peru Nazca Lines In the Peruvian desert, there’s an unsolved mystery: deep lines, etched
into the sand, that form pictures. You can find a monkey, a
hummingbird, a spider, geometric shapes, and more. They can only be
seen from far above and are at least 1500 years old—perhaps older.
Why are these mammoth shapes there? How were they designed and
thought of, at a time before airplanes? No one knows, though there
are many theories. We just know they are a fascinating puzzle!
Equipment
● Sand
● Card
● Glue
● Something with a fine, round tip
● Red or brown paint
What to do
1. Mix paint with the glue. Add paint and spread over the card – this is the desert
2. Etch images into the sand using fine tipped brush. Allow to dry and display
Guatemala Twirling Parrot Equipment
● Paper
● Cardboard
● Paint
● Wobble eyes
● String scissors
● Glue
What to do
1. Draw a parrot’s body and beak on cardboard and cut out. Paint the beak and body and allow to
dry
2. From paper cut 1-inch strips along the longest side for tail feathers. For the wings, cut 1-
inch strips along the shortest side. Cut the ends of the strips to give them a curved shape
3. Cut a slit in the centre of the parrot body for the wing feathers and a 1-inch strip at the rear of the
parrot for the tail feathers
4. Hold the strips of tail feathers together tightly and carefully pull them through the slit in the bird. Pull
them halfway through and then bend the feathers down for the tail feathers. Do this step again for
the wings of the bird
5. Glue the yellow beak onto the parrot and add wobble eyes
6. Finish the twirling parrot craft by poking a hole in the top of it’s head and tying on a piece of white
string
Brazil
Snake Many snakes can be found in the jungles and rainforests
Equipment
● Paper or card
● Marker pens
● Scissors
● Glue
What to do
1. Draw the shape of a snake onto paper – ensure it’s a good length
2. Decorate with circles of coloured paper which are glued in place
3. Add a tongue and draw on eyes
4. Twist into an8 shape by sticking the head in the back curve and the tail through the front
curve. Tape the head and tail in place

Page 27 of 34
Philippines
Christmas Star Christmas in the Philippines is celebrated for months, starting in
September, and the most iconic symbol of Filipino Christmas spirit is the
parol. These star shaped lanterns are found outside homes and along
village & city streets for months leading up to Christmas, their
importance comparable to Christmas trees in Western cultures. The parol
represents the star of Bethlehem that guided the Three Wise Men.
Making, lighting, and decorating a parol is an expression of faith, hope,
goodwill and the triumph of light over darkness.
Parols are traditionally made from bamboo and rice paper in the shape of a
five-pointed star. They are now made in a variety of materials, shapes,
and sizes. These ornaments are based on the traditional five-pointed star
shape with tassels.
Equipment
● 5 bendy straws ● Tissue paper, cut in strips ● Ribbon
What to do
1. Pinch the long end of a bendy straw and connect it to the short end of the next straw
2. Continue doing this with all the straws – making a star shape as you go – until you finally connect the
last one back to the first
3. Try to weave at least one straw through the spokes of the star so that the shape holds together
better
4. To make the tassels, take a couple of tissue paper strips and tie them very carefully to the bottom
points of the star
5. Make a loop with ribbon through the top point of the star and hang on your Christmas tree!
Greece
Medusa Medusa was a creature from ancient Greece, who resembled a woman with live snakes
in her hair. She was known to turn anyone that looked at her into stone
Equipment
● Paper plate
● Pipe cleaners
● Paper
● Gems, jewels
● Glue
● Paint
● Hole punch
● Wobble eyes
What to do
1. Roll the end of a pipe cleaner to create a coil. Pinch one end of the coil to make a nose. This is the head of
a snake
2. Cut and attach a piece of red pipe cleaner to the pointed edge of the coil. This will be a tongue of the
snake
3. Attach wobble eyes to finish the snake. Repeat and make a further 4 snakes
4. Paint plate and allow to dry
5. Make a crown by drawing round the top half of the plate onto yellow card, then draw a second arch about
1½ inches below the first
6. Cut out the crown and decorate with gems
7. Use the hole punch to make 5 holes around the edge of the plate
8. Place the pipe cleaner snake through the hole and twist to secure in place. Repeat with the other snakes
9. Attach the crown to the plate
10. Make eyes using half a pipe cleaner that has been secured in an oval shape and glue in place. Repeat for
the other eye

Page 28 of 34
11. Glue wobble eyes in place
12. Cut a red pipe cleaner into four pieces. Wrap two pieces together about ½ apart at the top to create a
forked tongue
13. Make a mouth and nose from pipe cleaners. Attach the tongue to the mouth and glue on plate along with
the nose
14. Create teeth from half a white pipe cleaner bent as shown and glue on plate inside the mouth
Greek Yogurt Fruit Bark
Ingredients
● Greek yogurt
● Strawberries
● Blueberries
● Chocolate chips
What to do
1. Cut strawberries into slices or chunks
2. Mix fruit and chocolate chips into yogurt and spread onto a tray
3. Place in a freezer for at least 4 hours
4. Break into pieces and eat
Try with different combinations of fruit e.g. raspberries, blackberries
Egypt
Pizza Mummies Ingredients
● Muffins
● Pizza sauce
● Cheese
● Black olives
What to do
1. Cut muffins in half
2. Spread pizza sauce on each half
3. Criss-cross each one with strips of cheese
4. Cut an olive in half and place in position as eyes
5. Another olive can be cut in thin slices to represent teeth, with small pieces as a nose
6. Cook in oven until cheese is melted
If you do not like black olives use sweetcorn or pieces of onion instead
Edible Mummies
Ingredients
● Hot dog sausages
● Pizza dough or puff pastry
● Beaten egg - optional
● Mustard
What to do
1. Cut dough or pastry into long thin strips
2. Carefully wrap round sausages – so they look mummified
3. Brush with egg if using
4. Bake in the oven until golden
5. Add a small amount of mustard to represent the eyes

Page 29 of 34
Cartouche A cartouche is a frame surrounded by a loop of rope, with the name of a god or royal
person in the middle. The cartouche protected against evil spirits in this life and
the afterlife
Equipment
● Clay
● Plaster of Paris
● Paints
● Corrugated card
● Wool
● Paper and
pens
● Plastic
container
● Glue
What to do
1. Plan the design by drawing around the plastic container onto paper as a guide
for the shape. Draw a border then draw the symbols in the middle.
2. Press a 1cm layer of clay into the base of the container, ensure it is as flat as possible. Press a border
into the clay to represent the rope tied around the edge
3. Press the cartouche symbols into the surface of the clay using modelling tools, strips of thick card or your
fingers. If the impression does not look clear enough in the clay, press over the top with a modelling tool
to make the lines deeper. Keep the shapes bold and not too fiddly or thin. Allow the clay to dry overnight
to harden.
4. Follow instructions on the packet for mixing plaster and mix to a creamy consistency (2 parts water to 3
parts of plaster).
5. Carefully pour the plaster mix over the clay, gently tipping the container so the base is evenly covered.
Tap the sides to remove any air bubbles then leave to dry for 2-3 hours or even longer.
6. Remove the plaster cast from the container and ensure it is completely dry with no clay attached to the
plaster
7. Paint the background of the plaster cast gold then paint the symbols, using one colour at a time, wait for
the paint to dry before applying the next colour.
8. Make the base for the cartouche by wrapping 2 pieces of corrugated card with masking tape and
painting gold
9. Rub the base of the plaster cartouche with sandpaper to flatten it slightly. Check it stands upright
then glue it onto the base.
10. Glue small pieces of wool at the bottom of the cartouche to represent the tied rope
Egyptian Fan Ancient Egyptian fan bearers played an important role in royal households to keep
the air moving in the heat. The fan was also a symbol of protection and the
breath of life.
Equipment
● Paper plate
● Wooden fan
● Feathers
● Paint
● Jewels
● Markers
● pens
● Glue
● Scissors
What to do
1. Cut a large cardboard plate in half, then glue it onto a wooden fan, with the reverse (white) side facing
upwards. Use plenty of glue and leave to dry.
2. Paint the fan and cardboard plate with gold metallic acrylic. Leave to dry.
3. Cut off 1cm-2cm from the feathers to remove the pointed ends.
4. Paint a pattern onto the front of the fan using the curved shapes of the wooden fan and cardboard plate
as a guide for the design. Allow to dry
5. Add further patterns with marker pens
6. Turn the fan over then spread plenty of glue around the edge of the plate. When it is tacky add feathers
in a fan shape and allow to dry
7. Add jewels and gems to then fan

Page 30 of 34
Hieroglyphics Pictures were used to represent different letters in ancient Egypt.
Equipment
● Card
● Marker pens
● Scissors
What to do
1. Cut card to desired width and length
2. Decorate with hieroglyphics – can you ‘write’ your name?
Take it further by using these symbols to write a message for others to decipher
The Arctic A cold area of land and sea at the top of the earth. Its native people are known as Inuit. Many arctic
animals only visit in the summer when parts of the land are free of snow
Inuit Blanket Toss The blanket toss is a game that is performed during Inuit celebrations. The blanket toss originated out on
the ice, where the Inuits would toss a fellow hunter up into the air using an animal skin. The hunter would
then scope the area to find seals and walruses to hunt.
Equipment
● Blanket
● Toy figure
● 2 sheets of paper
● Craft foam
● Cocktail stick
What to do
1. Weave 2 sheets of paper together, and place on the foam
2. Carefully poke a hole into the foam with the cocktail stick
3. Place the toy figure on top of the cocktail stick.
4. The toy figure is now suspended over top of the homemade blanket
Double Thumbed Mittens During the cold winter months, the Inuits hunted seals and fish in ice holes. Keeping
a good grip on the fishing line was critical to catch a meal. Sometimes this would
mean getting the palm of your mitten wet while retrieving a meal or reaching
through the ice. However, the Inuits had a solution to this problem…. Just flip over
your mittens! The Inuits used double-thumbed mittens for this reason!
Equipment
● Brown card or brown craft
foam
● Paper
● Hole punch
● String or wool
● Scissors
What to do
1. With fingers in a mitten shape, trace around your hand on paper, leaving approx. ½ inch spacing from
around the hand
2. Cut out and trace around it again. Turn the mitten over so it overlaps the one just traced. Redraw the
thumb.
3. Cut out this shape and use as a template to cut two double sided mittens from the brown card or craft
foam
4. Carefully line up the mittens and punch holes around the edge
5. Sew together with string or wool

Page 31 of 34
Sock Harp Seal Pups Equipment
● White socks
● White felt
● Wobble eyes
● Black pom pom
● Wool or string
● Glue
● Rubber band
What to do
1. Fill a sock with stuffing from an old pillow or cut up tights and close with a rubber
band
2. Cut out flippers from the felt
3. Use the toe seam as a guide and glue pom pom at this point for a nose
4. Glue wobble eyes above
5. Attach flippers to either side of body with glue
6. Finally glue string either side of nose for whiskers
Antarctica An area of frozen land at the bottom of the earth. People consist of mainly scientists. Hardly any animals
live in Antarctica because it is too cold and there is almost no food to eat
Paper Cup Roll and Make Penguin Equipment
● Paper cup
● Black paper or card
● Orange and white card
● Wobble eyes
● Glue
● Dice
What to do
1. Using the white card cut out egg shaped ovals that are almost the
length of the cup – this will be the front of the penguin
2. Cut feet and beaks from the orange card and wings from the black card
3. Cover the cup in black paper or paint black, alternatively purchase black
cups
4. Now for the fun – let the game begin as its time to build a penguin
5. Decide which part of the penguin corresponds to the numbers on a dice
e.g. 6 = body
5 = white front
4 = wings
3 = feet
2 = beak
1 – eyes
Players take it in turns to roll the dice and build their penguin with the corresponding piece. As the penguin
has two wings, feet and eyes, players can only take one piece at a time. Use glue to secure pieces in place
(Or use blue tack so you can play again).
Blueberry Penguin Ingredients
● Rice cake or similar
● Blueberries
● Strawberry
● Satsuma or similar
What to do
1. Cut bottom off the strawberry and peel the satsuma
2. Place rice cake on a plate and surround with blueberries as shown
3. Cut a segment of satsuma in half and place on rice cake for the beak and add blueberry
eyes
4. Add two satsuma segments for feet and the strawberry hat

Page 32 of 34
Ice Fishing Equipment
● Ice Cubes
● Glass of Water
● Salt
● Food Colouring
(optional)
● String
What to do
1. Add half a dozen or so ice cubes to a cup and fill with water
2. Lay the string over an ice cube
3. Sprinkle salt over the string and ice. Wait 30-60 seconds
4. Gently pull the string. The ice should come along with it!
Take it further
How many seconds is the right amount of time for the string to pick up the ice? What type of string is best
for ice fishing? The length of time the string sits on the ice can make a difference. Experiment with
different time increments
The amount of salt used can affect the melting of the ice. Too much salt and the ice will melt too fast. Or
too little time on the ice, the string will not have time to freeze to the cube!
Adding salt to ice will lower the ice’s melting point. Salt causes a physical change by altering the properties
and temperature of the ice cube. However, if the surrounding temperature is still freezing, the ice will re-
freeze (reversible change) and freeze the string along with it. Now you have been ice fishing!

Page 33 of 34
Caribbean
Sugar Painting Sugar played an important role in the economic growth of the
Caribbean. Cane fields covered many of the islands and until sugar beet was grown in temperate climates was
the only way of sweetening foods
Equipment
● Corn syrup or a very thick sugar solution
● Food colouring
● Paper
● Paint brushes
What to do
1. Make a thick sugar solution by mixing sugar with water, boiling to evaporate the water, and allowing to
cool
2. Place a small amount of corn syrup or sugar solution into small containers (a deep muffin tin works well and
is easy to clean)
3. Add food colouring – the more you add the brighter the colour – and mix well
4. Now it's time to paint – make patterns – the mixture is thick and sticky so straight lines will be
impossible
5. Note after allowing to dry the ‘picture’ will still be sticky as it does not dry completely
Turtle Pots Many varieties of turtle can be seen swimming in the sea, and only come to land to lay their
eggs
Equipment
● Empty dessert pot
● Pom poms - green
● Wobble eyes
● Acrylic paint - green
● Glue
● Soil
● Seeds or small plants
What to do
1. Paint pot inside and out and allow to dry
2. Glue a large pom pom to one side of the pot and four smaller pom poms behind – as
shown. These are the head and legs
3. Add wobble eyes to the head
4. To use the turtle for growing, make some holes in the base of the pot.
5. Add soil and either sprinkle the surface with seeds or add a small plant
6. Make sure your pot is kept watered
Rasta Tie-Dye
Equipment
● Sharpie Markers
● Plain White T-shirts or cotton
fabric
● 70% Isopropyl Rubbing
Alcohol
● Dropper
● Plastic cup
● Rubber band
● Plate
What to do
1. Place a plastic cup inside the t-shirt so that the fabric is stretched over the top of the cup. Secure with
a rubber band
2. Use markers to make a simple design - dots and dashes with plenty of white space remaining
3. When the design is complete, slip a plate inside the shirt for any rubbing alcohol that may seep through
4. Using a dropper, begin dropping rubbing alcohol on the t-shirt – the colour will start to spread and mix.
Allow to dry before repeating the process elsewhere on the t-shirt
5. Allow to dry completely before using a hot iron to fix the colours on the t shirt
6. Wash alone not with your favourite dress just to be safe

Page 34 of 34
Badge ordering
You can order badges in two ways, either by cheque or electronically
Paying by cheque:
Please complete the details and post this form with full payment
Leader name …………………………………………………………………………………………………………………………………………
Unit name …………………………………………………………………………………………………………………………………………….
Address to post badges to …………………………………………………………………………………………………………………
…………………………………………………………………………………………………………………………………………………………………
…………………………………………………………………………………………………………………………………………………………………
…………………………………………………………………………………………………………………………………………………………………
Contact email address for any queries ……………………………………………………………………………………………..
Number of badges (£1 each) ………………………………….
Postage at ………………………………….
Total ………………………………….
Paying electronically:
We can take payments electronically via BACs or card
payment.
If paying by card – order badges here: https://rainbow-
badges.onlineweb.shop/Princess_Fun/p7219745_20507896.aspx
If paying by BACS please email the following details to us ([email protected]) with
subject: Global Fun Badges and we will provide you with bank details
● Leader name
● Unit name
● Address to post badges to
● Number of badges (£1 each)
● Postage at
● Total
Postage costs:
1-15 Badges = £1.00
16 – 30 Badges = £1.50
31 – 50 Badges = £2.00
51+ = £3.00
Make cheques payable to
4th Northumberland Heath Rainbows
Post to:
V Whitehead
40 Rudland Road
Bexleyheath
Kent
DA7 6DD