getting started - xerox® workcentre®...
TRANSCRIPT

www.xerox.com/office/support
7
2
8
3 4 5
61
1
8
3
7
4 5 62
2
3
4
5
6
Control Panel
Available services can vary on your printer setup. For details about services and settings, see the User Guide.
Menus
Job controlsAlphanumeric keypad
Touch screen
Services Home displays main services, such as copy,
scan, and fax.
Services returns to the active service from the Job
Status or Machine Status screens, or to a preset
service.
Log In/Out accesses password protected features.
Help (?) displays additional information about the
current selection or service.
Language changes the touch screen language and
keyboard settings.
Power Saver enters or exits Power Saver mode.
Power restarts or powers down the printer.
Clear All
StopInterrupt Print
Start
Job Status displays active, held, and completed jobs.
Machine Status displays settings and information.
© 2015 Xerox Corporation. All Rights Reserved. Xerox®, Xerox and Design®, WorkCentre®, and ConnectKey®
are trademarks of Xerox Corporation in the United States and/or other countries. BR12811
Clear All clears previous and changed settings for the
current service. Press twice to reset all defaults and clear
existing scans.
Start starts the selected job.
Stop temporarily stops the current job. Follow the onscreen
message to cancel or resume your job.
Interrupt Print pauses the currently printing job to run a
more urgent job.
Alphanumeric keys may be used for entering copy
quantities, fax numbers, and other numeric information.
C (clear) deletes numeric values or the last digit entered.
Xerox® WorkCentre® 3655 Multifunction Printer
Xerox® ConnectKey® 2.0 Technology
www.xerox.com/office/support
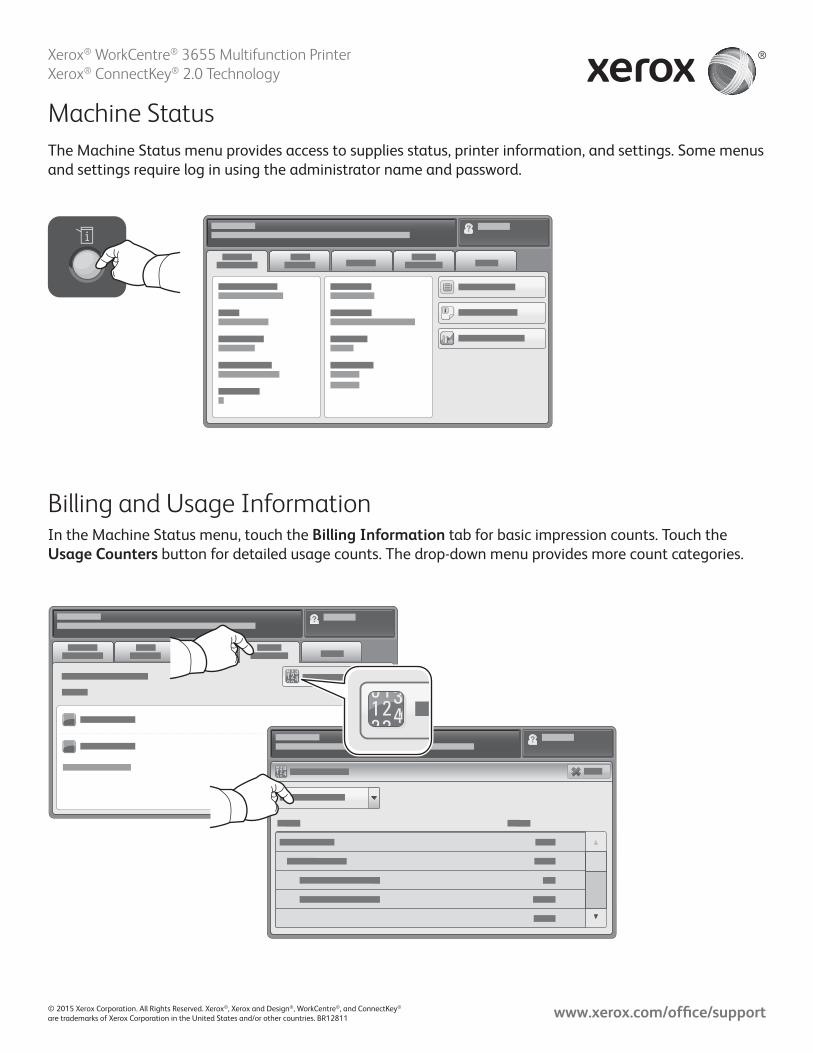
Machine Status
Billing and Usage Information
The Machine Status menu provides access to supplies status, printer information, and settings. Some menus
and settings require log in using the administrator name and password.
In the Machine Status menu, touch the Billing Information tab for basic impression counts. Touch the
Usage Counters button for detailed usage counts. The drop-down menu provides more count categories.
Xerox® WorkCentre® 3655 Multifunction Printer
Xerox® ConnectKey® 2.0 Technology
© 2015 Xerox Corporation. All Rights Reserved. Xerox®, Xerox and Design®, WorkCentre®, and ConnectKey®
are trademarks of Xerox Corporation in the United States and/or other countries. BR12811

www.xerox.com/office/support
4
3
21
Printer Tour
Optional accessories can be part of your printer setup. For details, see the User Guide.
USB Port
Fuser
Jam Access:
Power
Paper Trays
Convenience Stapler
Toner Cartridge
Smart Kit Drum Cartridge
Duplex Automatic Document Feeder
Bypass Tray
Xerox® WorkCentre® 3655 Multifunction Printer
Xerox® ConnectKey® 2.0 Technology
© 2015 Xerox Corporation. All Rights Reserved. Xerox®, Xerox and Design®, WorkCentre®, and ConnectKey®
are trademarks of Xerox Corporation in the United States and/or other countries. BR12811

www.xerox.com/office/support
Windows Mac
Y
1 2
3
Paper Handling
Loading Paper
Paper Orientation
For details about trays and paper, see the User Guide.
Letterhead
Prepunched
Envelope Y > 297 mm (11.7 in.)
Custom
Folio
Legal
Confirm or change size and type settings if needed.
When printing, select options in the print driver.For best results, fan the edges of the paper. Adjust
guides to fit the paper size. Do not load paper above
the maximum fill line.
Xerox® WorkCentre® 3655 Multifunction Printer
Xerox® ConnectKey® 2.0 Technology
© 2015 Xerox Corporation. All Rights Reserved. Xerox®, Xerox and Design®, WorkCentre®, and ConnectKey®
are trademarks of Xerox Corporation in the United States and/or other countries. BR12811
www.xerox.com/office/support
XY
22.1 2.2
1
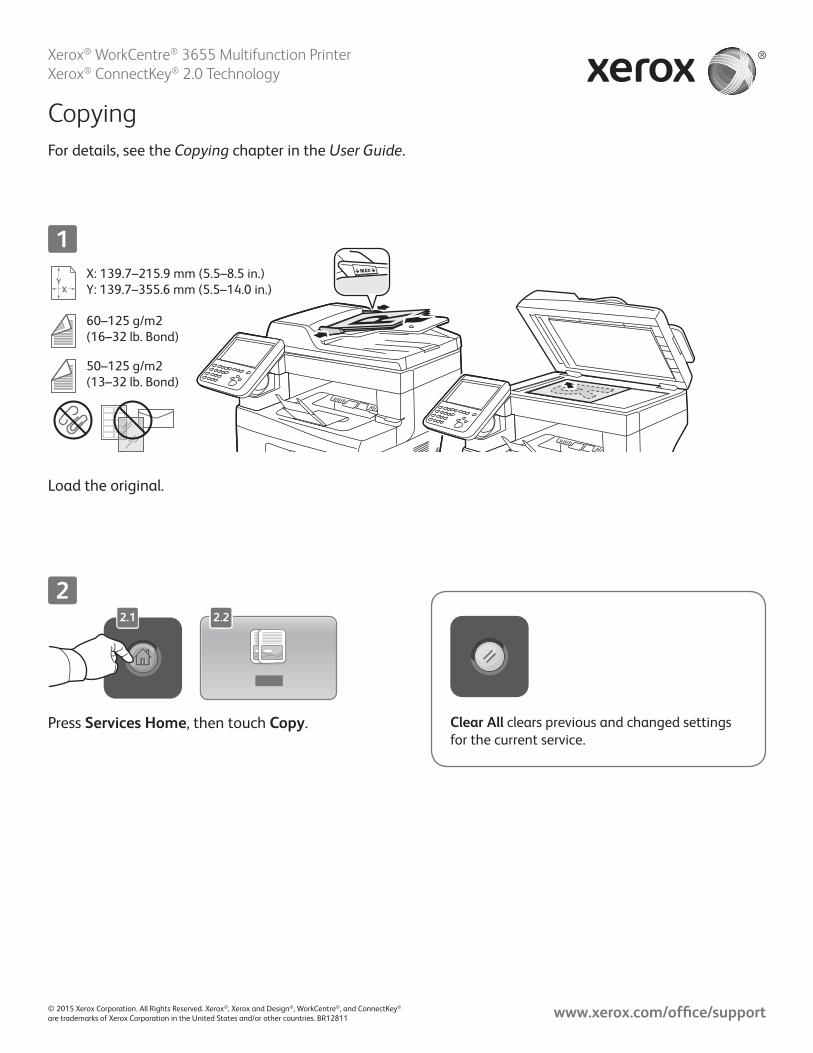
Copying
For details, see the Copying chapter in the User Guide.
Load the original.
Press Services Home, then touch Copy. Clear All clears previous and changed settings
for the current service.
50–125 g/m2
(13–32 lb. Bond)
60–125 g/m2
(16–32 lb. Bond)
X: 139.7–215.9 mm (5.5–8.5 in.)
Y: 139.7–355.6 mm (5.5–14.0 in.)
Xerox® WorkCentre® 3655 Multifunction Printer
Xerox® ConnectKey® 2.0 Technology
© 2015 Xerox Corporation. All Rights Reserved. Xerox®, Xerox and Design®, WorkCentre®, and ConnectKey®
are trademarks of Xerox Corporation in the United States and/or other countries. BR12811
www.xerox.com/office/support
1
2
3
4
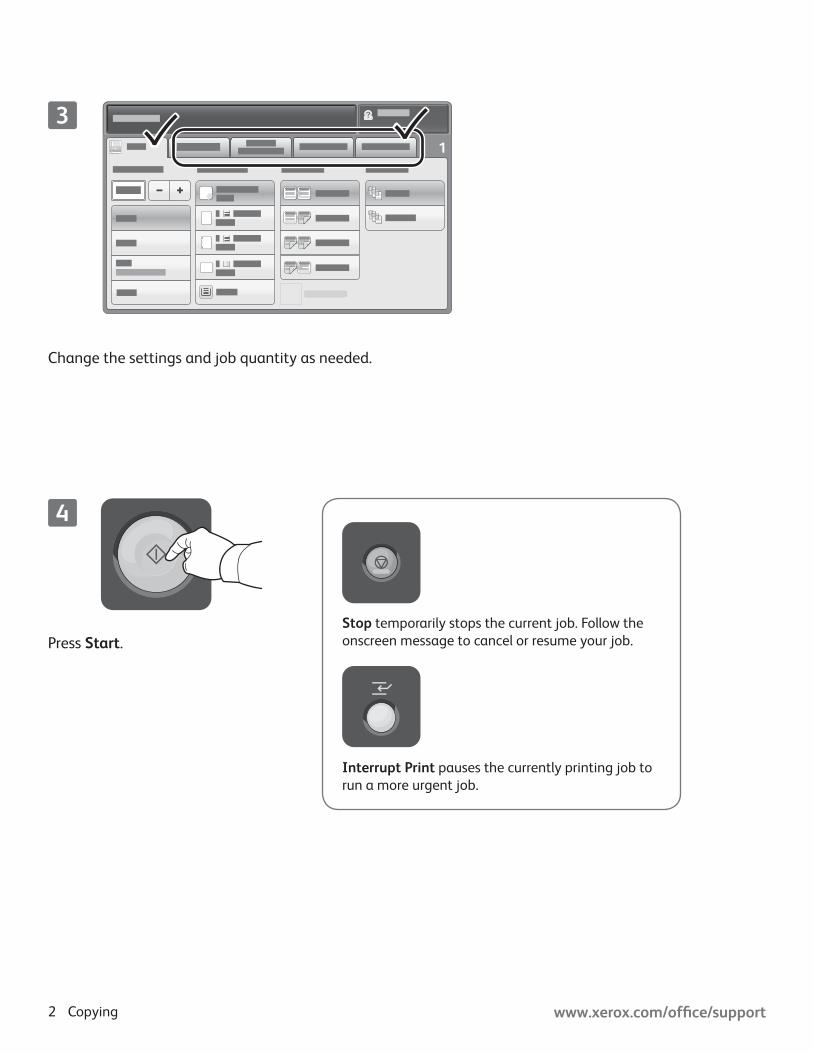
Change the settings and job quantity as needed.
Press Start.
Copying
Stop temporarily stops the current job. Follow the
onscreen message to cancel or resume your job.
Interrupt Print pauses the currently printing job to
run a more urgent job.
www.xerox.com/office/support
XY
22.1 2.2
1
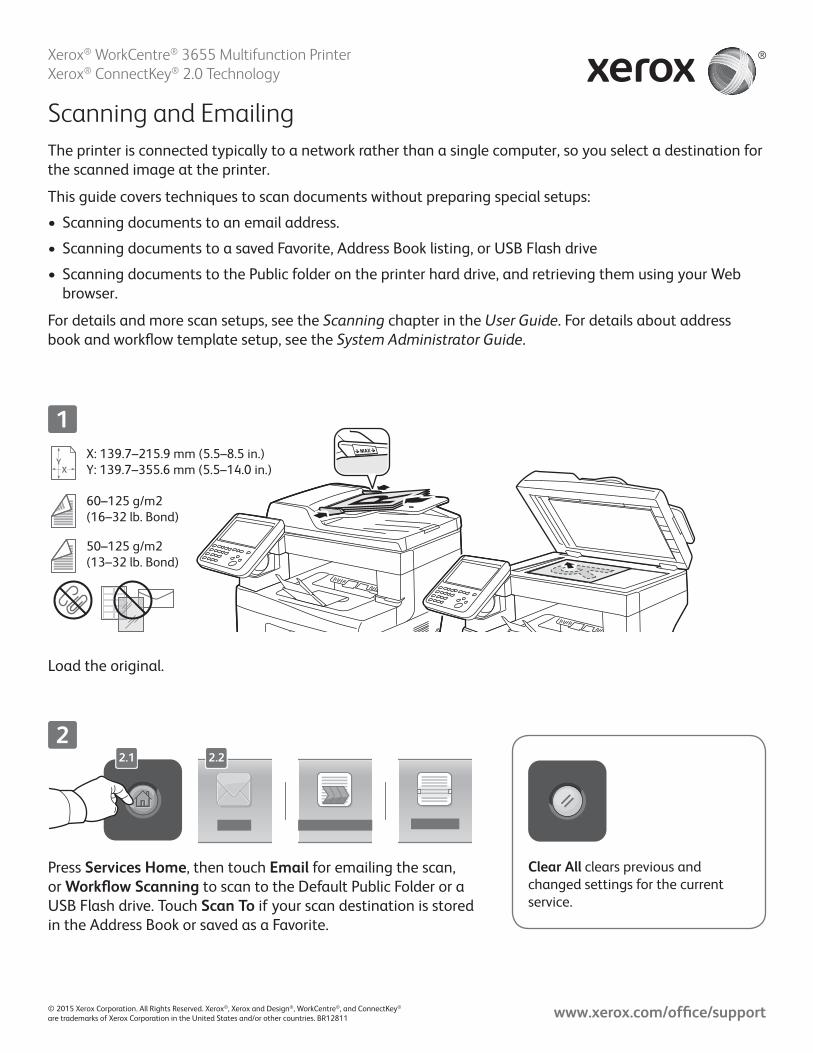
Scanning and Emailing
The printer is connected typically to a network rather than a single computer, so you select a destination for
the scanned image at the printer.
This guide covers techniques to scan documents without preparing special setups:
• Scanning documents to an email address.
• Scanning documents to a saved Favorite, Address Book listing, or USB Flash drive
• Scanning documents to the Public folder on the printer hard drive, and retrieving them using your Web
browser.
For details and more scan setups, see the Scanning chapter in the User Guide. For details about address
book and workflow template setup, see the System Administrator Guide.
Press Services Home, then touch Email for emailing the scan,
or Workflow Scanning to scan to the Default Public Folder or a
USB Flash drive. Touch Scan To if your scan destination is stored
in the Address Book or saved as a Favorite.
Clear All clears previous and
changed settings for the current
service.
Load the original.
50–125 g/m2
(13–32 lb. Bond)
60–125 g/m2
(16–32 lb. Bond)
X: 139.7–215.9 mm (5.5–8.5 in.)
Y: 139.7–355.6 mm (5.5–14.0 in.)
Xerox® WorkCentre® 3655 Multifunction Printer
Xerox® ConnectKey® 2.0 Technology
© 2015 Xerox Corporation. All Rights Reserved. Xerox®, Xerox and Design®, WorkCentre®, and ConnectKey®
are trademarks of Xerox Corporation in the United States and/or other countries. BR12811
www.xerox.com/office/support2
5
3
4
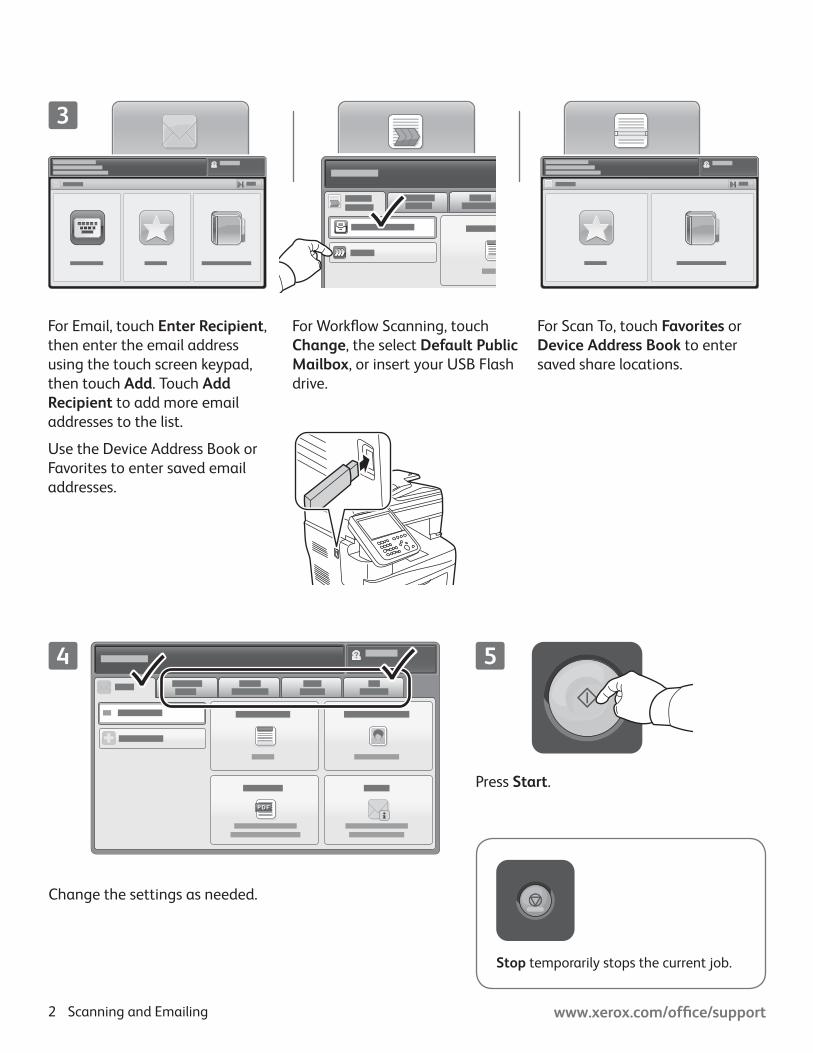
Stop temporarily stops the current job.
Press Start.
Scanning and Emailing
Change the settings as needed.
For Email, touch Enter Recipient,
then enter the email address
using the touch screen keypad,
then touch Add. Touch Add Recipient to add more email
addresses to the list.
Use the Device Address Book or
Favorites to enter saved email
addresses.
For Workflow Scanning, touch
Change, the select Default Public Mailbox, or insert your USB Flash
drive.
For Scan To, touch Favorites or
Device Address Book to enter
saved share locations.
www.xerox.com/office/support3
1
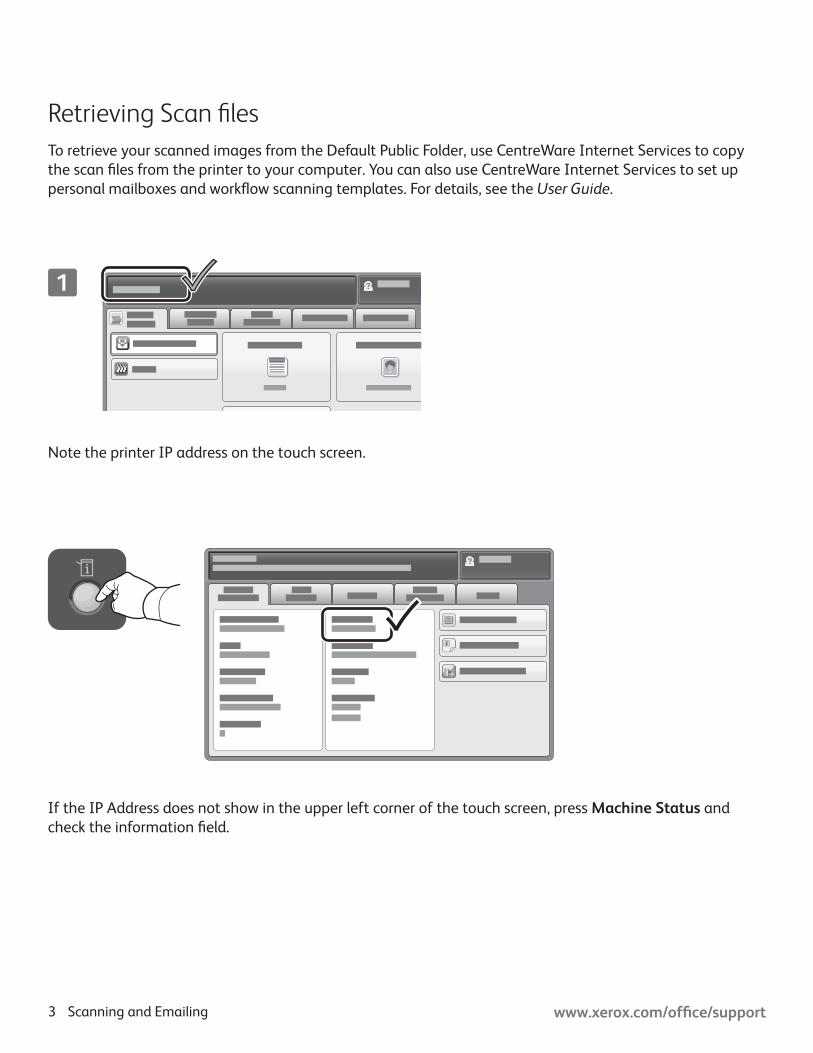
Retrieving Scan files
Scanning and Emailing
Note the printer IP address on the touch screen.
If the IP Address does not show in the upper left corner of the touch screen, press Machine Status and
check the information field.
To retrieve your scanned images from the Default Public Folder, use CentreWare Internet Services to copy
the scan files from the printer to your computer. You can also use CentreWare Internet Services to set up
personal mailboxes and workflow scanning templates. For details, see the User Guide.
www.xerox.com/office/support4
http://xxx.xxx.xxx.xxx
JPG
PDFPDF
JPG
PDFPDF
CentreWare®
Internet Services
4.1 4.2
JPG
PDFPDF
CentreWare®
Internet Services
2
4
3
Scanning and Emailing
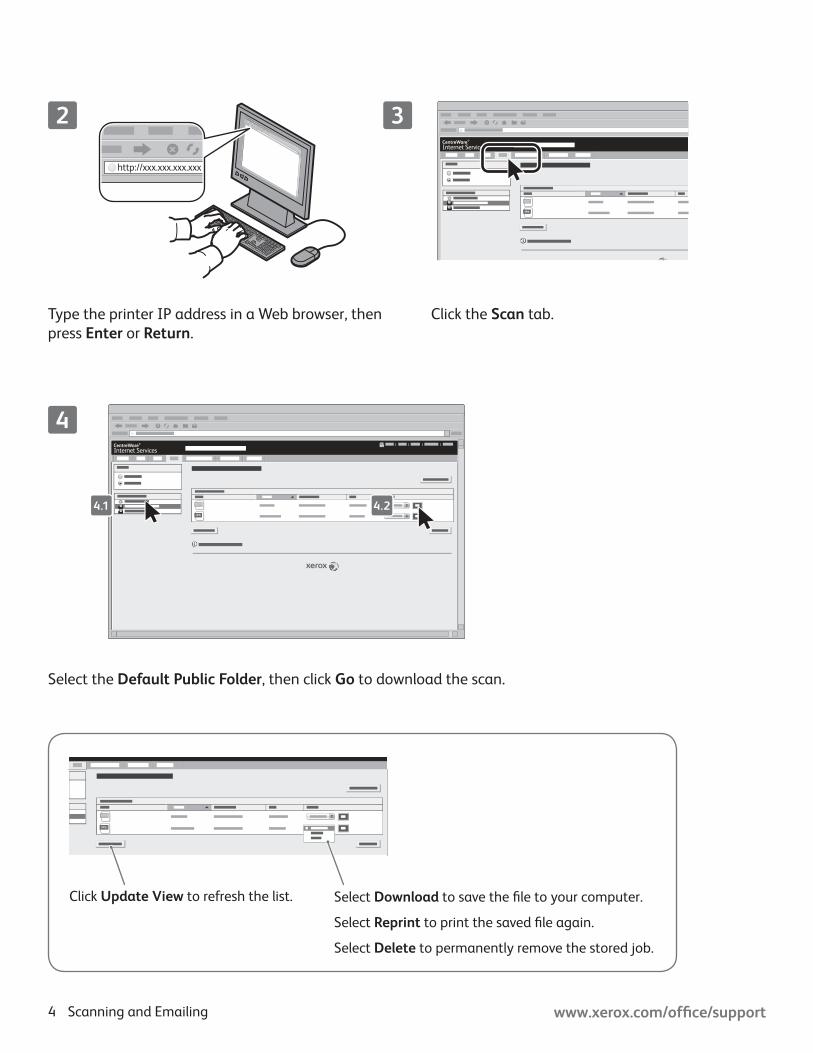
Type the printer IP address in a Web browser, then
press Enter or Return.
Click the Scan tab.
Click Update View to refresh the list. Select Download to save the file to your computer.
Select Reprint to print the saved file again.
Select Delete to permanently remove the stored job.
Select the Default Public Folder, then click Go to download the scan.
www.xerox.com/office/support
XY
22.1 2.2
1
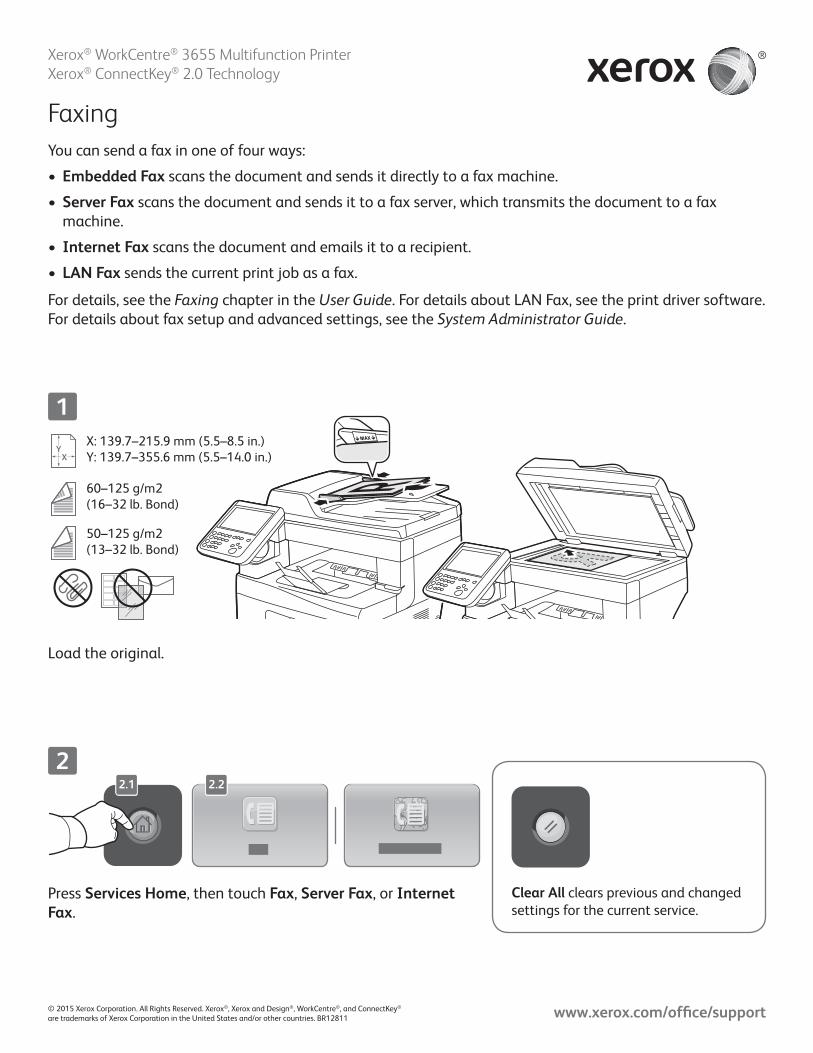
Faxing
You can send a fax in one of four ways:
• Embedded Fax scans the document and sends it directly to a fax machine.
• Server Fax scans the document and sends it to a fax server, which transmits the document to a fax
machine.
• Internet Fax scans the document and emails it to a recipient.
• LAN Fax sends the current print job as a fax.
For details, see the Faxing chapter in the User Guide. For details about LAN Fax, see the print driver software.
For details about fax setup and advanced settings, see the System Administrator Guide.
Press Services Home, then touch Fax, Server Fax, or Internet Fax.
Clear All clears previous and changed
settings for the current service.
Load the original.
50–125 g/m2
(13–32 lb. Bond)
60–125 g/m2
(16–32 lb. Bond)
X: 139.7–215.9 mm (5.5–8.5 in.)
Y: 139.7–355.6 mm (5.5–14.0 in.)
Xerox® WorkCentre® 3655 Multifunction Printer
Xerox® ConnectKey® 2.0 Technology
© 2015 Xerox Corporation. All Rights Reserved. Xerox®, Xerox and Design®, WorkCentre®, and ConnectKey®
are trademarks of Xerox Corporation in the United States and/or other countries. BR12811

www.xerox.com/office/support2
1 2 3
4 5 6
7 8 9
( , ) ( = )
( : )
( / )
3
54
Stop temporarily stops the current job.
Change the settings as needed.
Press Start.
Faxing
For fax numbers, touch Enter Recipient, then enter the fax number using the touch screen alphanumeric
keys and special characters, then touch Add. Touch Add Recipient to add more fax numbers to the list.
For Internet Fax email addresses,touch Enter Recipient, then enter the email address using the touch screen
keypad, then touch Add. Touch Add Recipient to add more email addresses to the list.
Use the Device Address Book, Favorites, or Mailboxes to enter saved numbers, or the the Device Address
Book to enter saved email addresses. Use Polling to access stored fax locations.
www.xerox.com/office/support
1
2 32.1 2.2
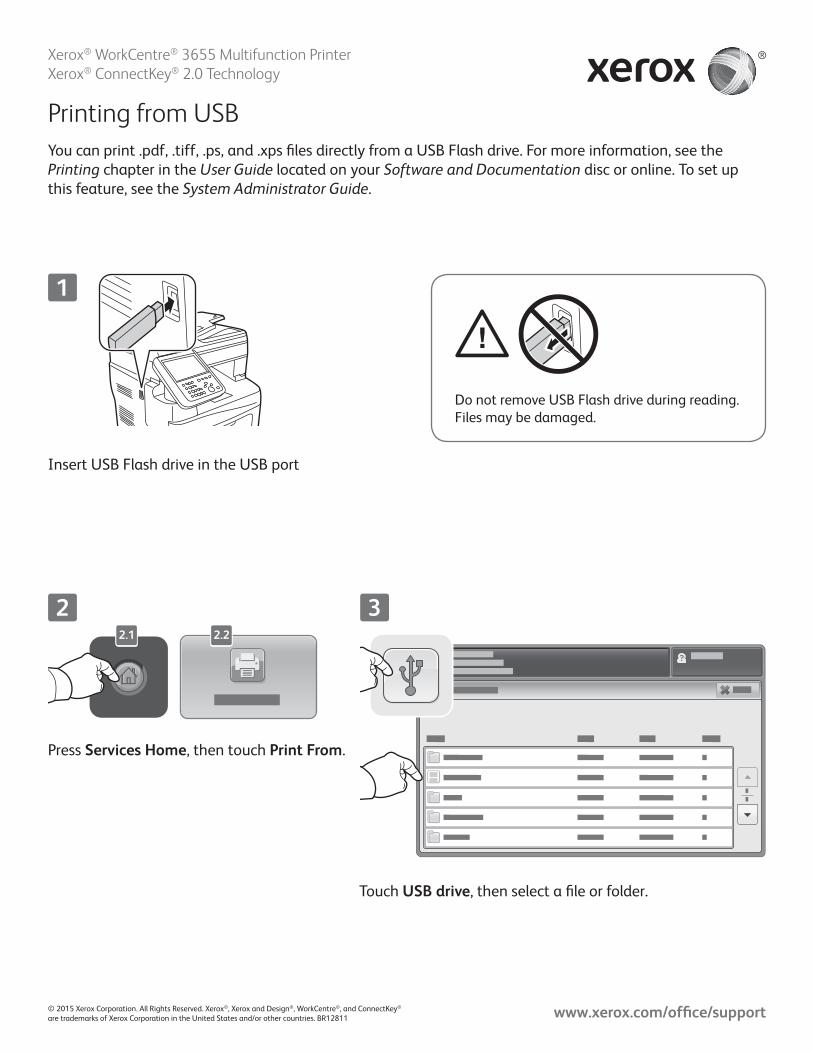
Printing from USB
Press Services Home, then touch Print From.
Touch USB drive, then select a file or folder.
Insert USB Flash drive in the USB port
Do not remove USB Flash drive during reading.
Files may be damaged.
You can print .pdf, .tiff, .ps, and .xps files directly from a USB Flash drive. For more information, see the
Printing chapter in the User Guide located on your Software and Documentation disc or online. To set up
this feature, see the System Administrator Guide.
Xerox® WorkCentre® 3655 Multifunction Printer
Xerox® ConnectKey® 2.0 Technology
© 2015 Xerox Corporation. All Rights Reserved. Xerox®, Xerox and Design®, WorkCentre®, and ConnectKey®
are trademarks of Xerox Corporation in the United States and/or other countries. BR12811

www.xerox.com/office/support2
1
1 2 3
4 5 6
7 8 9
0
6
4 5
Press Start.
Stop temporarily stops the current job. Follow the
onscreen message to cancel or resume your job.
Interrupt Print pauses the currently printing job to
run a more urgent job.
Printing from USB
Change the settings as needed. Change the print quantity as needed,
then touch OK.