geometry and spatial sense in artwork developed as part of
TRANSCRIPT
Geometry and Spatial Sense in Artwork Developed as part of Complementary Learning: Arts-integrated Math and Science Curricula generously
funded by the Martha Holden Jennings Foundation Introduction: In this lesson students will be introduced to the characteristics and properties of the following geometric concepts: lines, segments, rays, angles, skew lines, parallel lines and perpendicular lines. They will become familiar with the definitions and visual identification of these concepts. Students will review geometric shapes by viewing a set of pictures and identifying different lines and angles found in those pictures. Finally, students will tour the Cleveland Museum of Art. While on this tour, they will be responsible for finding eleven different pieces of artwork and filling out an assessment piece for the unit. The assessment piece will ask the students to find a variety of figures in the artwork including various types of lines and angles. Grade Level and Subject Area: Grade 5; Mathematics Key Concepts: lines, line segments, rays, angles, skew lines, parallel lines, perpendicular lines Objectives: Lesson #1
Students will be able to: Identify and describe various types of lines. Search for and label various types of lines around the classroom. Draw a quick sketch of a house and label various types of lines.
Lesson #2 Students will be able to:
Review definitions and pictures that were introduced throughout lesson #1. Identify lines, line segments, rays, angles, skew lines, parallel lines and perpendicular
lines found in pictures. Create their own drawing and label the various geometric figures in that picture.
Lesson #3 Students will be able to:
Review definitions and model concepts learned in previous two lessons. Tour the Cleveland Museum of Art and identify examples of each of the geometric
concepts learned throughout the unit as seen in the artwork. Materials: Smartboard/projector Power point presentation fro Lesson #1 Index cards (7 for each student) Post-it-notes (4 for each group of students) ½ sheet formative assessment house drawing activity
Power point presentation for Lesson #2 Formative/Summative assessment worksheet
Summative Assessment worksheets Clipboards/pens/pencils for museum tour

Procedure: Lesson #1 - In this lesson, students will be introduced to the characteristics and properties of the following geometric concepts: lines, segments, rays, angles, skew lines, parallel lines and perpendicular lines. They will become familiar with the definitions and visual identification of these concepts.
1. Display various types of lines on the smartboard/projector. 2. If any students know what any of these are called, have them come to the board to label the various
lines. Discuss any correct/incorrect guesses 3. View power point presentation of various line types. Have students complete word/picture
flashcards cards while viewing. These word/picture cards can be completed on index cards and will be used for other activities and studying purposes. Word should be on the front and the definition and drawing should be on the back.
4. Give students post-it-notes with the words angle, skew lines, parallel lines, perpendicular lines on them. In small groups, have students stick their post-it-notes in various locations around the classroom. Allow each group to present their findings.
5. On a separate, ½ sheet of paper, have students sketch a picture of a house as shown by the teacher on the board. (Students will copy the drawing as the teacher draws.) Instruct students to label the following on the house picture: ray, angle, skew lines, parallel lines, perpendicular lines.
Assessment: FORMATIVE ASSESSMENTS: post-it-note activity, house drawing/line identification SUMMATIVE ASSESSMENTS: to be seen in future lessons
Reflections: Do not spend too much time on procedure #2 where students are asked to try and identify objects
before learning the appropriate names. Simply use this step as an introduction. Be sure to have students keep index cards in a baggie or rubber band to be saved for future use. Review house drawing formative assessment before teaching lesson #2 to determine which
students need re-teaching Extensions/Cross Disciplinary Connections:
Challenge higher-level thinkers to identify additional types of lines/angels during post-it-note activity.
Have students begin to create their own drawings on which they labels various lines/angels. Allow students to search through text books from other subject areas to identify pictures that
contain the line/angle vocabulary learning throughout this lesson.
Lesson #2 - In this lesson, students will review the geometric concepts learned throughout lesson #1. They will do so by viewing a set of pictures and identifying different lines and angles found in those pictures.
1. Begin with a review of all geometric concepts learned yesterday. Students can look at slide #1 of the power point presentation and match up words with pictures. Re-teach as necessary.
2. Allow students 5-10 minutes to review flashcards (that were created yesterday) with a partner. 3. Show students power point presentation that asks students to identify various geometric figures in
different pictures. While viewing presentation, students should complete formative assessment worksheet.
4. Review formative assessment worksheet (students may grade their own or trade with a partner). 5. Have students complete summative assessment (on the back of the formative assessment sheet. For
this, students will draw their own picture and label the lines and angles taught throughout lesson #1. (The “picture” must actually be a drawing of something such as a group of kids playing in a park on a sunny day.)
Assessment: FORMATIVE ASSESSMENTS: introductory slide matching activity; picture identification activity SUMMATIVE ASSESSMENTS: geometric drawing and labeling

Reflections: If necessary, re-teach concepts at the beginning based on student success with procedure #1. The power point from lesson #1 could be re-used to do this.
Review of the formative assessment could be done in a number of ways: students trade with a partner, students turn their papers in for a quick completion grade before reviewing, etc.
Allow enough time for students to create their drawings for the summative assessment and remind them the drawing must be of “something”. Often 5th grade students take a wide variety of time lengths to create a drawing.
If some students finish early, have them either create another picture or study their flashcards with a friend.
Extensions/Cross Disciplinary Connections: Challenge higher-level thinking students to also label acute/obtuse angles in their drawings. Encourage students to create a drawing based on the content being learned in one of their other
classes (i.e. a picture of a woodland habitat for the summative assessment).
Lesson #3 - In this lesson, students will tour the Cleveland Museum of Art. While on this tour, they will be responsible for finding eleven different pieces of artwork and filling out an assessment piece for the unit. The assessment piece will ask the students to find a variety of figures in the artwork including various types of lines and angles.
1. Before beginning tour, verbally review geometric concepts with students. Have students model angles, parallel, perpendicular and skew with their arms. Briefly re-teach as necessary based on student responses.
2. Allow students to complete museum tour. Each student must have their own summative assessment set of worksheets to be filled out during tour.
3. Students must complete worksheets at the end of the tour, to be reviewed after teacher grading. Assessment:
FORMATIVE ASSESSMENTS: introductory discussion/modeling of geometric concepts with arms
SUMMATIVE ASSESSMENTS: completed assessment worksheets (done during museum tour) Reflections:
If necessary, re-teach concepts at the beginning based on student success with procedure #1. This should be brief.
Before beginning the tour, review questions with students. They may need help with understanding exactly what needs to be answered and especially what needs to be drawn.
Extensions/Cross Disciplinary Connections: Some discussion can take place regarding the history of the artwork. Encourage higher-level thinkers to identify geometric concepts in other pieces of artwork
throughout the museum. These students can even come up with questions to quiz each other.
Standards: Ohio Department of Education Academic Content Standards:
Mathematics: Grade 5; Geometry and Spatial Sense “Use standard language to describe line, segment, ray, angle, skew, parallel and perpendicular.” “Label vertex, rays, interior and exterior for an angle.” Visual Arts: Grade 5; Connections, Relationships and Applications “Use artwork to communicate and enhance understanding of concepts in other subject areas (e.g., science, English language arts, mathematics and social studies).” Visual Arts: Grade 5; Analyzing and Responding “Use specific criteria individually and in groups to assess works of art.”
National Standards: Mathematics: Geometry
“Analyze characteristics and properties of two and three dimensional geometric shapes and develop mathematical arguments about geometric relationships.” Visual Arts: Making Connections Between Visual Arts and Other Disciplines “Students describe ways in which the principles and subject matter of other disciplines taught in the school are interrelated with the visual arts.”
This lesson plan was developed by Rachel Daw,

GEOMETRY & SPATIAL SENSEIN ARTWORK
Lesson #1

Do you know what these are?
Try and label!

LINE: extends forever in each direction
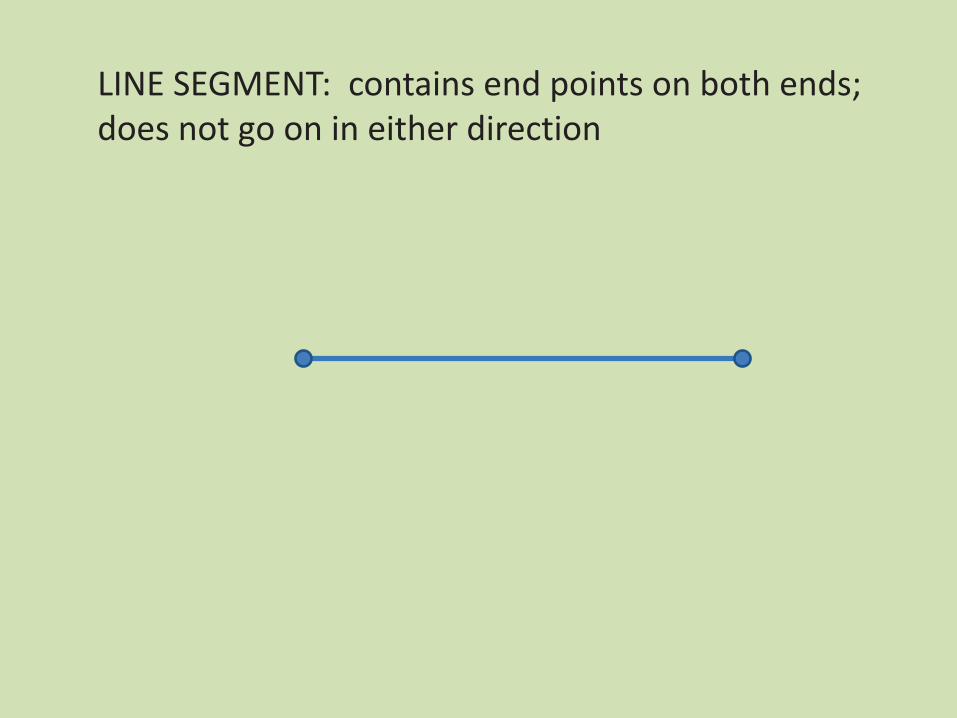
LINE SEGMENT: contains end points on both ends; does not go on in either direction

RAY: contains one end point and extends forever on the other end

ANGLES: two rays meet at a point and extend in their own directions

PARALLEL LINES: two lines that are next to each other and will never touch
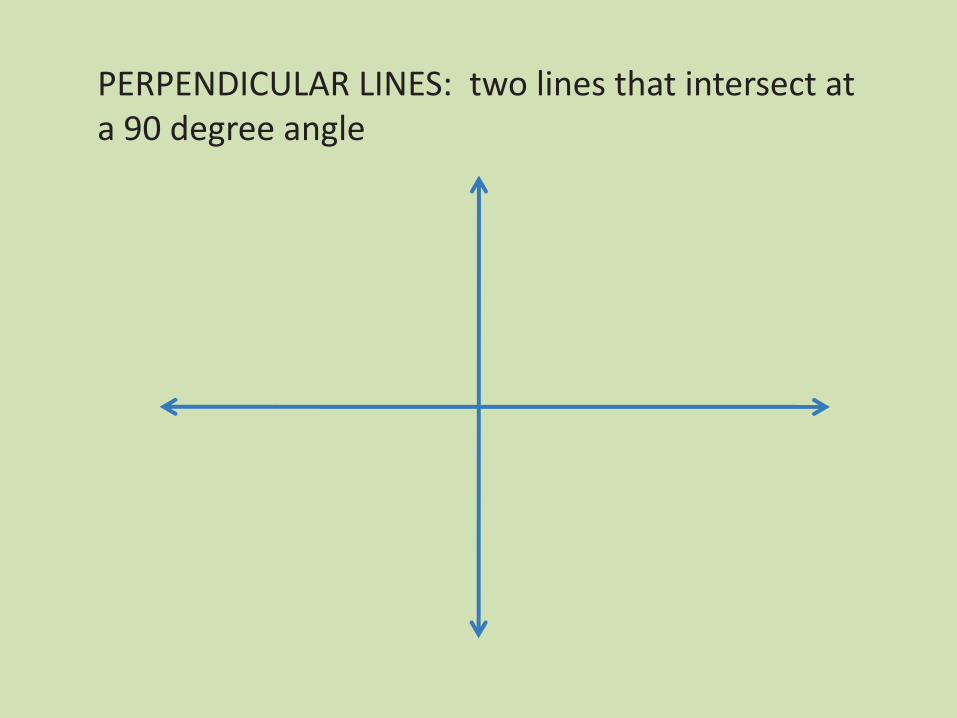
PERPENDICULAR LINES: two lines that intersect at a 90 degree angle

SKEW LINES: two lines that are near each other but are not parallel and not intersecting

NOW, LABEL THE FOLLOWING AS YOU FIND THEM AROUND THE CLASSROOM:
1.ANGLES2.PARALLEL LINES3.PERPENDICULAR LINES4.SKEW LINES

EXIT SLIP
Copy down the drawing of the house that your teacher created here. Label the following as you find it on the house:
RAYANGLEPARALLEL LINESPERPENDICULAR LINESSKEW LINES

GEOMETRY & SPATIAL SENSEIN ARTWORK
Lesson #2

Time to Review!Do you know what these are?
Try and match!
PARALLEL LINES
SKEW LINES
LINE
ANGLE
LINE SEGMENT
RAY
PERPENDICULAR LINES

Name the circled part of the picture below!1.

Name the circled part of the picture below!2.

Name the circled part of the picture below!3.

Name the circled part of the picture below!4.

Name the circled part of the picture below!5.

Name the circled part of the picture below!6.

Name the circled part of the picture below!7.

Name the circled part of the picture below!8.

Name the circled part of the picture below!9.

Name the circled part of the picture below!10.

Name: ____________________________________ Date: __________________
GEOMETRY AND SPATIAL SENSE IN ARTWORK
LESSON #2
Formative Assessment
Directions: Observe each picture on the power point presentation. Write down what sort of lines you see inside the circled areas!
1.
2.
3.
4.
5.
6.
7.
8.
9.
10.

Summative Assessment
Directions: Create your own drawing (must be a picture of something!) that includes at least one of each of the following:
LINE, RAY, LINE SEGMENT, ANGLE, PARALLEL LINES, PERPENDICULAR LINES, SKEW LINES

Name: ____________________________________ Date: _____________________
GEOMETRY AND SPATIAL SENSE IN ARTWORK
LESSON #3
Summative Assessment
Directions: Find the following pieces of artwork at the Cleveland Museum of Art. As you find each piece of artwork, answer the corresponding questions. Each answer should include: line, line segment, ray, parallel lines, perpendicular lines, skew lines, angle.
1. Male Torso, 1917: Brancusi, Constantin
What type of lines are found along the side of the torso? ________________________________
2. Shiva as Brahma, late 9000s-early 1000s; South Africa
What type of lines are created by the statue’s left hand, which is being held out straight? ______________
3. Box (Pykis) in the Form of a Composite Capital, 305-30 BC; Egypt
At the top and on both sides of the figure you will find a portion of the artwork that looks a bit like flower petals. What sort of figure are these “petals” most closely related to? ___________________________

4. Mannequin, 1920s; Lissitzky, Eli
In this figure, the mannequin has both of this knees bent. What image is created when the top part of the leg and the bottom part of the leg bend at the knee? _____________________
5. Winter trees Reflected in a Pond, 1841-1842; Talbot, William Henry Fox
The second and third trees from the right do not intersect and they do not run parallel to each other. What type of lines do they form? ________________________
6. The Family, Luzzara, 1953; Strand, Paul
The spokes on the bicycle wheel most closely resemble what type of line that starts in one spot and extends in the other direction? ____________________
The man standing up to the left of the door has a plaid shirt on. What types of intersecting lines are formed by that plaid pattern? ________________________________
7. Old Glory, 1992; Bassler, James
What types of lines are the red lines of the flag? ______________________
8. Hide Shirt, 1890; Unknown
The white strips on either side of the shirt form what sort of object? __________________
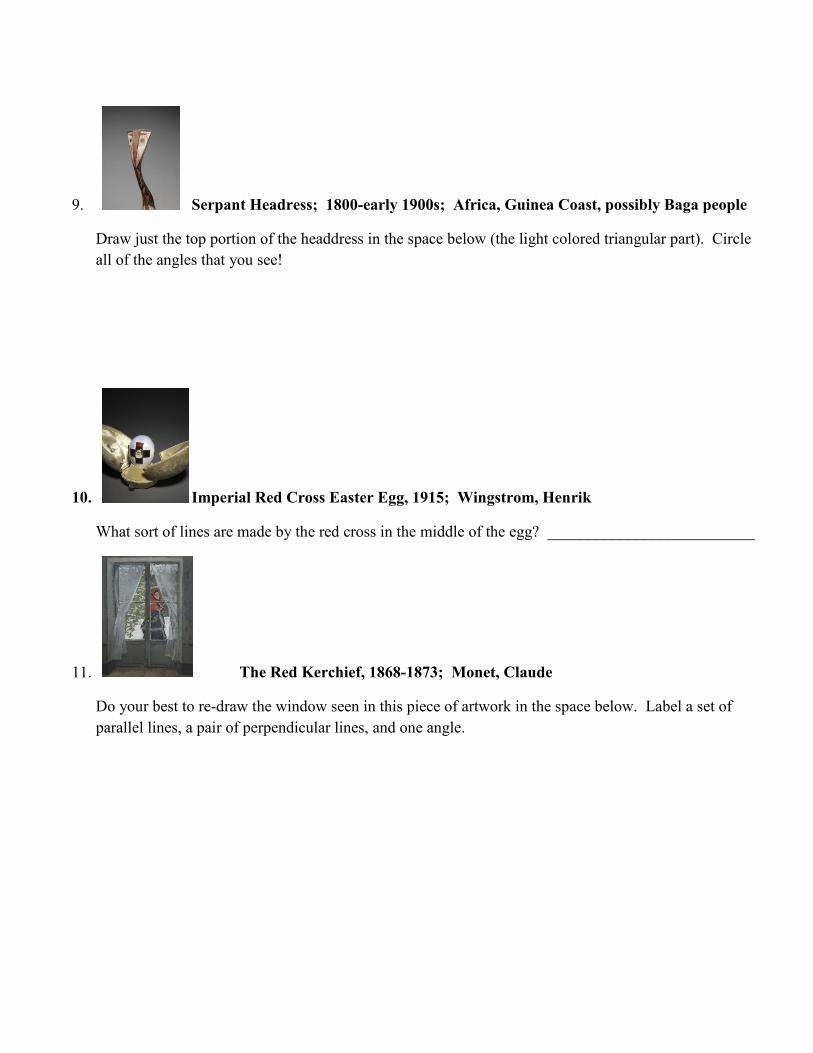
9. Serpant Headress; 1800-early 1900s; Africa, Guinea Coast, possibly Baga people
Draw just the top portion of the headdress in the space below (the light colored triangular part). Circle all of the angles that you see!
10. Imperial Red Cross Easter Egg, 1915; Wingstrom, Henrik
What sort of lines are made by the red cross in the middle of the egg? __________________________
11. The Red Kerchief, 1868-1873; Monet, Claude
Do your best to re-draw the window seen in this piece of artwork in the space below. Label a set of parallel lines, a pair of perpendicular lines, and one angle.