gateway -- hw-module module shutdown · note set the restart interval to be long enough to allow a...
TRANSCRIPT
Cisco ASA S
C H A P T E R 17
gateway through hw-module module shutdown Commands17-1eries Command Reference, A through H Commands

Chapter
gatewayTo specify which group of call agents are managing a particular gateway, use the gateway command in mgcp map configuration mode. To remove the configuration, use the no form of this command.
gateway ip_address [group_id]
Syntax Description
Defaults This command is disabled by default.
Command Modes The following table shows the modes in which you can enter the command:
Command History
Usage Guidelines Use the gateway command to specify which group of call agents are managing a particular gateway. The IP address of the gateway is specified with the ip_address option. The group_id option is a number from 0 to 4294967295 that must correspond with the group_id of the call agents that are managing the gateway. A gateway may only belong to one group.
Examples The following example allows call agents 10.10.11.5 and 10.10.11.6 to control gateway 10.10.10.115, and allows call agents 10.10.11.7 and 10.10.11.8 to control both gateways 10.10.10.116 and 10.10.10.117:
ciscoasa(config)# mgcp-map mgcp_policyciscoasa(config-mgcp-map)# call-agent 10.10.11.5 101ciscoasa(config-mgcp-map)# call-agent 10.10.11.6 101ciscoasa(config-mgcp-map)# call-agent 10.10.11.7 102ciscoasa(config-mgcp-map)# call-agent 10.10.11.8 102ciscoasa(config-mgcp-map)# gateway 10.10.10.115 101ciscoasa(config-mgcp-map)# gateway 10.10.10.116 102ciscoasa(config-mgcp-map)# gateway 10.10.10.117 102
gateway The group of call agents that are managing a particular gateway.
group_id The ID of the call agent group, from 0 to 2147483647.
ip_address The IP address of the gateway.
Command Mode
Firewall Mode Security Context
Routed Transparent Single
Multiple
Context System
Mgcp map configuration • Yes • Yes • Yes • Yes —
Release Modification
7.0(1) This command was added.
17-2Cisco ASA Series Command Reference, A through H Commands
Chapter
Related Commands Commands Description
debug mgcp Enables the display of debugging information for MGCP.
mgcp-map Defines an MGCP map and enables mgcp map configuration mode.
show mgcp Displays MGCP configuration and session information.
17-3Cisco ASA Series Command Reference, A through H Commands

Chapter
gateway-fqdnTo configure the FQDN of the ASA. use the gateway-fqdn command. To remove the configuration, use the no form of this command.
gateway-fqdn value {FQDN_Name | none}
no gateway-fqdn
Syntax Description
Defaults The default FQDN name is not set in the default group policy. New group policies are set to inherit this value.
Command Modes The following table shows the modes in which you can enter the command:
Command History
Usage Guidelines If you have configured Load Balancing between your ASAs, specify the FQDN of the ASA in order to resolve the ASA IP address used for re-establishing the VPN session. This setting is critical to support client roaming between networks of different IP protocols (such as IPv4 to IPv6).
You cannot use the ASA FQDN present in the AnyConnect profile to derive the ASA IP address after roaming. The addresses may not match the correct device (the one the tunnel was established to) in the load balancing scenario.
If the ASA’s FQDN is not pushed to the client, the client will try to reconnect to whatever IP address the tunnel had previously established. In order to support roaming between networks of different IP protocols (from IPv4 to IPv6), AnyConnect must perform name resolution of the device FQDN after roaming, so that it can determine which ASA address to use for re-establishing the tunnel. The client uses the ASA FQDN present in its profile during the initial connection. During subsequent session reconnects, it always uses the device FQDN pushed by ASA (and configured by the administrator in the group policy), when available. If the FQDN is not configured, the ASA derives the device FQDN (and sends it to the client) from whatever is set under Device Setup > Device Name/Password and Domain Name in ASDM.
fqdn-name Defines the ASA FQDN to push down to the AnyConnect client.
none Defines the FQDN as null value where the FQDN is not specified. The global FQDN configured using hostname and domain-name commands will be used if available.
Command Mode
Firewall Mode Security Context
Routed Transparent Single
Multiple
Context System
group-policy configuration • Yes — • Yes — —
Release Modification
9.0(1) This command was added.
17-4Cisco ASA Series Command Reference, A through H Commands

Chapter
If the device FQDN is not pushed by the ASA, the client cannot reestablish the VPN session after roaming between networks of different IP protocols.
Examples The following example defines the FQDN of the ASA as ASAName.example.cisco.com
ciscoasa(config-group-policy)# gateway-fqdn value ASAName.example.cisco.comciscoasa(config-group-policy)#
The following example removes the FQDN of the ASA from the group policy. The group policy then inherits this value from the Default Group Policy.
ciscoasa(config-group-policy)# no gateway-fqdnciscoasa(config-group-policy)#
The following example defines the FQDN as having no value. The global FQDN configurd using ciscoasa and domain-name commands will be used if available.
ciscoasa(config-group-policy)# gateway-fqdn noneciscoasa(config-group-policy)#
17-5Cisco ASA Series Command Reference, A through H Commands

Chapter
graceful-restartTo configure graceful restart for OSPFv3 on a NSF capable ASA, use the graceful-restart command under router configuration mode. Optionally, configure the graceful restart interval with the restart-interval option. Use the no form of the command to disable graceful-restart.
graceful-restart [restart-interval seconds]
no graceful-restart
Syntax Description
Defaults OSPFv3 graceful restart is disabled by default.
Command Modes The following table shows the modes in which you can enter the command:
Command History
Usage Guidelines Use the graceful-restart command to allow OSPFv3 to remain in the data forwarding path through a process restart.
Note Set the restart interval to be long enough to allow a typical reboot cycle for ASA. Do not set the restart-interval too long to avoid the network relying on old route information.
Examples The following example enables OSPFv3 graceful-restart:
ciscoasa(config)# ipv6 router ospf 1ciscoasa(config-router)# graceful-restart restart-interval 180
restart-interval seconds
(Optional) Specifies the length of the graceful restart interval, in seconds. The range is from 1 to 1800. The default is 120.
Note For a restart interval below 30 seconds, graceful restart will be terminated.
Command Mode
Firewall Mode Security Context
Routed Transparent Single
Multiple
Context System
Router configuration mode • Yes • Yes • Yes — —
Release Modification
9.3(1) This command was introduced.
17-6Cisco ASA Series Command Reference, A through H Commands

Chapter
Related Commands Command Description
graceful-restart helper Enables OSPFv3 graceful restart on NSF-aware ASA.
17-7Cisco ASA Series Command Reference, A through H Commands

Chapter
graceful-restart helperTo configure graceful restart for OSPFv3 on a NSF aware ASA, use the graceful-restartUse the no form of the command to disable graceful-restart helper mode.
graceful-restart helper [strict-lsa-checking]
no graceful-restart helper
Syntax Description
Defaults OSPFv3 graceful restart helper mode is enabled by default.
Command Modes The following table shows the modes in which you can enter the command:
Command History
Usage Guidelines When an ASA has NSF enabled, it is said to be NSF-capable and will operate in graceful restart mode--the OSPF process performs nonstop forwarding recovery due to a Route Processor (RP) switchover. By default, the neighboring ASAs of the NSF-capable ASA will be NSF-aware and will operate in NSF helper mode. When the NSF-capable ASA is performing graceful restart, the helper ASAs assist in the nonstop forwarding recovery process. If you do not want the ASA to help the restarting neighbor with nonstop forwarding recovery, enter the no nsf ietf helper command.
To enable strict LSA checking on both NSF-aware and NSF-capable ASAs, enter the graceful-restart helper strict-lsa-checking command. However, strict LSA checking will not become effective until the ASA becomes a helper ASA during a graceful restart process. With strict LSA checking enabled, the helper ASA will terminate the helping process of the restarting ASA if it detects that there is a change to an LSA that would be flooded to the restarting ASA or if there is a changed LSA on the retransmission list of the restarting ASA when the graceful restart process is initiated.
Examples The following example enables graceful-restart helper with strict LSA checking:
ciscoasa(config)# ipv6 router ospf 1ciscoasa(config-router)# graceful-restart helper strict-lsa-checking
strict-lsa-checking (Optional) Enables strict link-state advertisement (LSA) checking for helper mode.
Command Mode
Firewall Mode Security Context
Routed Transparent Single
Multiple
Context System
Router configuration mode • Yes • Yes • Yes • Yes —
Release Modification
9.3(1) This command was introduced.
17-8Cisco ASA Series Command Reference, A through H Commands
Chapter
Related Commands Command Description
graceful-restart Enables OSPFv3 graceful restart on NSF-capable ASA.
17-9Cisco ASA Series Command Reference, A through H Commands

Chapter
groupTo specify the Diffie-Hellman group in an IKEv2 security association (SA) for AnyConnect IPsec connections, use the group command in ikev2 policy configuration mode. To remove the command and use the default setting, use the no form of this command:
group {1 | 2 | 5 | 14 | 19 | 20 | 21 | 24}
no group {1 | 2 | 5 | 14 | 19 | 20 | 21 | 24}
Syntax Description
Defaults The default Diffie-Hellman group is group 14.
Usage Guidelines An IKEv2 SA is a key used in Phase 1 to enable IKEv2 peers to communicate securely in Phase 2. After entering the crypto ikev2 policy command, you can use the group command to set the SA Diffie-Hellman group. The ASA and the AnyConnect client use the group identifier to derive a shared secret without transmitting it to each other. The lower the Diffie-Hellman group number, the less CPU time it requires to execute. The higher the Diffie-Hellman group number, the greater the security.
When the AnyConnect client is operating in non-FIPS mode, the ASA supports Diffie-Hellman groups 1, 2 and 5. In FIPS mode, it supports groups 2 and 5. Therefore, if you configure the ASA to use only group 1, the AnyConnect client in FIPS mode will fail to connect.
Command Modes The following table shows the modes in which you can enter the command:
Command History
1 Specifies the 768-bit Diffie-Hellman group 1 (not supported in FIPS mode).
2 Specifies the 1024-bit Diffie-Hellman group 2.
5 Specifies the 1536-bit Diffie-Hellman group 5.
14 Chooses ECDH group as the IKEv2 DH key exchange group.
19 Chooses ECDH groups as the IKEv2 DH key exchange group.
20 Chooses ECDH groups as the IKEv2 DH key exchange group.
21 Chooses ECDH groups as the IKEv2 DH key exchange group.
24 Chooses ECDH groups as the IKEv2 DH key exchange group.
Command Mode
Firewall Mode Security Context
Routed Transparent Single
Multiple
Context System
Ikev2 policy configuration • Yes — • Yes — —
Release Modification
8.4(1) This command was added.
17-10Cisco ASA Series Command Reference, A through H Commands

Chapter
Examples The following example enters ikev2 policy configuration mode and sets the Diffie-Hellman group to group 5:
ciscoasa(config)# crypto ikev2 policy 1ciscoasa(config-ikev2-policy)# group 5ciscoasa(config-ikev2-policy) group 2(Deprecated)ciscoasa(config-ikev2-policy) group 5(Deprecated)ciscoasa(config-ikev2-policy) group 24(Deprecated)ciscoasa(config-ikev2-policy) group 14
Related Commands
9.0(1) The ability to choose an ECDH group as the IKEv2 DH key exchange group was added.
9.13.(1) The default DH group is group 14. The command options group 2, group 5 and group 24 was deprecated and will be removed in the later release.
Release Modification
Command Description
encryption Specifies the encryption algorithm in an IKEv2 SA for AnyConnect IPsec connections.
group Specifies the Diffie-Hellman group in an IKEv2 SA for AnyConnect IPsec connections.
lifetime Specifies the SA lifetime for the IKEv2 SA for AnyConnect IPsec connections.
prf Specifies the pseudo-random function in an IKEv2 SA for AnyConnect IPsec connections.
17-11Cisco ASA Series Command Reference, A through H Commands

Chapter
group-aliasTo create one or more alternate names by which the user can refer to a tunnel group, use the group-alias command in tunnel-group webvpn configuration mode. To remove an alias from the list, use the no form of this command.
group-alias name [enable | disable]
no group-alias name
Syntax Description
Defaults There is no default group alias, but if you do specify a group alias, that alias is enabled by default.
Command Modes The following table shows the modes in which you can enter the command:
Command History
Usage Guidelines The group alias that you specify appears in the drop-down list on the login page. Each group can have multiple aliases or no alias. This command is useful when the same group is known by several common names, such as “Devtest” and “QA”.
Examples The following example shows the commands for configuring the tunnel group named “devtest” and establishing the aliases “QA” and “Fra-QA” for the group:
ciscoasa(config)# tunnel-group devtest type webvpnciscoasa(config)# tunnel-group devtest webvpn-attributesciscoasa(config-tunnel-webvpn)# group-alias QAciscoasa(config-tunnel-webvpn)# group-alias Fra-QAciscoasa(config-tunnel-webvpn)#
disable Disables the group alias.
enable Enables a previously disabled group alias.
name Specifies the name of a tunnel group alias. This can be any string you choose, except that the string cannot contain spaces.
Command Mode
Firewall Mode Security Context
Routed Transparent Single
Multiple
Context System
Tunnel-group webvpn configuration
• Yes — • Yes — —
Release Modification
7.1(1) This command was added.
17-12Cisco ASA Series Command Reference, A through H Commands

Chapter
Related Commands Command Description
clear configure tunnel-group Clears the entire tunnel group database or the named tunnel group configuration.
show webvpn group-alias Displays the aliases for the specified tunnel group or for all tunnel groups.
tunnel-group webvpn-attributes
Enters the tunnel-group webvpn configuration mode for configuring WebVPN tunnel group attributes.
17-13Cisco ASA Series Command Reference, A through H Commands

Chapter
group-delimiterTo enable group name parsing and specify the delimiter to be used when parsing group names from the user names that are received when tunnels are being negotiated, use the group-delimiter command in global configuration mode. To disable this group name parsing, use the no form of this command.
group-delimiter delimiter
no group-delimiter
Syntax Description
Defaults By default, no delimiter is specified, disabling group-name parsing.
Command Modes The following table shows the modes in which you can enter the command:
Command History
Usage Guidelines The delimiter is used to parse tunnel group names from user names when tunnels are negotiated. By default, no delimiter is specified, disabling group name parsing.
Examples This example shows the group-delimiter command to change the group delimiter to the hash mark (#):
ciscoasa(config)# group-delimiter #
Related Commands
delimiter Specifies the character to use as the group name delimiter. Valid values are: @, #, and !.
Command Mode
Firewall Mode Security Context
Routed Transparent Single
Multiple
Context System
Global configuration • Yes — • Yes — —
Release Modification
7.0(1) This command was added.
Command Description
clear configure group-delimiter Clears the configured group delimiter.
show running-config group-delimiter Displays the current group delimiter value.
strip-group Enables or disables strip group processing.
17-14Cisco ASA Series Command Reference, A through H Commands

Chapter
group-lockTo restrict remote users to access through the tunnel group only, issue the group-lock command in group-policy configuration mode or username configuration mode. To remove the group-lock attribute from the running configuration, use the no form of this command.
group-lock {value tunnel-grp-name | none}
no group-lock
Syntax Description
Defaults No default behavior or values.
Command Modes The following table shows the modes in which you can enter the command:
Usage Guidelines To disable group lock, use the group-lock none command. The no group-lock command allows inheritance of a value from another group policy.
Group lock restricts users by checking if the group configured in the VPN client is the same as the tunnel group to which the user is assigned. If it is not, the ASA prevents the user from connecting. If you do not configure group lock, the ASA authenticates users without regard to the assigned group.
Command History
Examples The following example shows how to set group lock for the group policy named FirstGroup:
ciscoasa(config)# group-policy FirstGroup attributesciscoasa(config-group-policy)# group-lock value tunnel group name
none Sets group-lock to a null value, thereby allowing no group lock restriction. Prevents inheriting a group lock value from a default or specified group policy.
value tunnel-grp-name Specifies the name of an existing tunnel group that the ASA requires for the user to connect.
Command Mode
Firewall Mode Security Context
Routed Transparent Single
Multiple
Context System
Group-policy configuration • Yes — • Yes — —
Username configuration • Yes — • Yes — —
Release Modification
7.0(1) This command was added.
17-15Cisco ASA Series Command Reference, A through H Commands

Chapter
group-objectTo add group objects to object groups, use the group-object command while configuring the object. To remove group objects, use the no form of this command.
group-object obj_grp_name
no group-object obj_grp_name
Syntax Description
Defaults No default behavior or values.
Command Modes The following table shows the modes in which you can enter the command:
Command History
Usage Guidelines The group-object command is used with the object-group command to add an object that itself is an object group. This sub-command allows logical grouping of the same type of objects and construction of hierarchical object groups for structured configuration.
Duplicate objects are allowed in an object group if they are group objects. For example, if object 1 is in both group A and group B, it is allowed to define a group C which includes both A and B. It is not allowed, however, to include a group object which causes the group hierarchy to become circular. For example, it is not allowed to have group A include group B and then also have group B include group A.
The maximum allowed levels of a hierarchical object group is 10.
Note The ASA does not support IPv6 nested network object groups, so you cannot group an object with IPv6 entries under another IPv6 object group.
obj_grp_name Identifies the object group (one to 64 characters) and can be any combination of letters, digits, and the “_”, “-”, “.” characters.
Command Mode
Firewall Mode Security Context
Routed Transparent Single
Multiple
Context System
Protocol, network, service, icmp-type, security group, and user object-group configuration modes
• Yes • Yes • Yes • Yes —
Release Modification
7.0(1) This command was added.
8.4(2) Support for adding object groups in the object-group user configuration mode for use with the Identity Firewall feature was added.
17-16Cisco ASA Series Command Reference, A through H Commands

Chapter
Examples The following example shows how to use the group-object command to eliminate the need to duplicate hosts:
ciscoasa(config)# object-group network host_grp_1ciscoasa(config-network)# network-object host 192.168.1.1ciscoasa(config-network)# network-object host 192.168.1.2 ciscoasa(config-network)# exitciscoasa(config)# object-group network host_grp_2ciscoasa(config-network)# network-object host 172.23.56.1ciscoasa(config-network)# network-object host 172.23.56.2ciscoasa(config-network)# exitciscoasa(config)# object-group network all_hostsciscoasa(config-network)# group-object host_grp_1ciscoasa(config-network)# group-object host_grp_2ciscoasa(config-network)# exitciscoasa(config)# access-list grp_1 permit tcp object-group host_grp_1 any eq ftpciscoasa(config)# access-list grp_2 permit tcp object-group host_grp_2 any eq smtpciscoasa(config)# access-list all permit tcp object-group all-hosts any eq w
The following example shows how to use the group-object command to add a local user group to a user group object:
ciscoasa(config)# object-group user sampleuser1-groupciscoasa(config-object-group user)# description group members of sampleuser1-groupciscoasa(config-object-group user)# user-group EXAMPLE\\group.sampleusers-allciscoasa(config-object-group user)# user EXAMPLE\user2ciscoasa(config-object-group user)# exitciscoasa(config)# object-group user sampleuser2-groupciscoasa(config-object-group user)# description group members of sampleuser2-groupciscoasa(config-object-group user)# group-object sampleuser1-groupciscoasa(config-object-group user)# user-group EXAMPLE\\group.sampleusers-marketingciscoasa(config-object-group user)# user EXAMPLE\user3
Related Commands Command Description
clear configure object-group
Removes all the object-group commands from the configuration.
object-group Defines object groups to optimize your configuration.
show running-config object-group
Displays the current object groups.
17-17Cisco ASA Series Command Reference, A through H Commands

Chapter
group-policyTo create or edit a group policy, use the group-policy command in global configuration mode. To remove a group policy from the configuration, use the no form of this command.
group-policy name {internal [from group-policy_name] | external server-group server_group password server_password}
no group-policy name
Syntax Description
Defaults No default behavior or values.
Command Modes The following table shows the modes in which you can enter the command:
Command History
Usage Guidelines A default group policy, named “DefaultGroupPolicy,” always exists on the ASA. However, this default group policy does not take effect unless you configure the ASA to use it. For configuration instructions, see the CLI configuration guide.
external server-group server_group
Specifies the group policy as external and identifies the AAA server group for the ASA to query for attributes.
from group-policy_name Initializes the attributes of this internal group policy to the values of a preexisting group policy.
internal Identifies the group policy as internal.
name Specifies the name of the group policy. The name can be up to 64 characters long and can contain spaces. Group names with spaces must be enclosed in double quotes, for example, “Sales Group”.
password server_password Provides the password to use when retrieving attributes from the external AAA server group. The password can be up to 128 characters long and cannot contain spaces.
Command Mode
Firewall Mode Security Context
Routed Transparent Single
Multiple
Context System
Global configuration • Yes — • Yes • Yes —
Release Modification
7.0.1 This command was added.
9.0(1) Support for multiple context mode was added.
17-18Cisco ASA Series Command Reference, A through H Commands

Chapter
Use the group-policy attributes command to enter group-policy configuration mode, in which you can configure any of the group-policy Attribute-Value Pairs. The DefaultGroupPolicy has these Attribute-Value Pairs:
In addition, you can configure webvpn configuration mode attributes for the group policy, either by entering the webvpn command in group policy configuration mode or by entering the group-policy attributes command and then entering the webvpn command in group-webvpn configuration mode. See the description of the group-policy attributes command for details.
Attribute Default Value
backup-servers keep-client-config
banner none
client-access-rules none
client-firewall none
default-domain none
dns-server none
group-lock none
ip-comp disable
ip-phone-bypass disabled
ipsec-udp disabled
ipsec-udp-port 10000
leap-bypass disabled
nem disabled
password-storage disabled
pfs disable
re-xauth disable
secure-unit-authentication disabled
split-dns none
split-tunnel-network-list none
split-tunnel-policy tunnelall
user-authentication disabled
user-authentication-idle-timeout none
vpn-access-hours unrestricted
vpn-filter none
vpn-idle-timeout 30 minutes
vpn-session-timeout none
vpn-simultaneous-logins 3
vpn-tunnel-protocol IPsec WebVPN
wins-server none
17-19Cisco ASA Series Command Reference, A through H Commands

Chapter
Examples The following example shows how to create an internal group policy with the name “FirstGroup”:
ciscoasa(config)# group-policy FirstGroup internal
The following example shows how to create an external group policy with the name “ExternalGroup,” the AAA server group “BostonAAA,” and the password “12345678”:
ciscoasa(config)# group-policy ExternalGroup external server-group BostonAAA password 12345678
Related Commands Command Description
clear configure group-policy Removes the configuration for a particular group policy or for all group policies.
group-policy attributes Enters group-policy configuration mode, which lets you configure attributes and values for a specified group policy or lets you enter webvpn configuration mode to configure WebVPN attributes for the group.
show running-config group-policy
Displays the running configuration for a particular group policy or for all group policies.
webvpn Enters webvpn configuration mode, in which you can configure the WebVPN attributes for the specified group.
17-20Cisco ASA Series Command Reference, A through H Commands

Chapter
group-policy attributesTo enter the group-policy configuration mode, use the group-policy attributes command in global configuration mode. To remove all attributes from a group policy, user the no form of this command.
group-policy name attributes
no group-policy name attributes
Syntax Description
Defaults No default behavior or values.
Command Modes The following table shows the modes in which you can enter the command:
Command History
Usage Guidelines In group-policy configuration mode, you can configure Attribute-Value Pairs for a specified group policy or enter group-policy webvpn configuration mode to configure WebVPN attributes for the group.
The syntax of the commands in attributes mode have the following characteristics in common:
• The no form removes the attribute from the running configuration, and enables inheritance of a value from another group policy.
• The none keyword sets the attribute in the running configuration to a null value, thereby preventing inheritance.
• Boolean attributes have explicit syntax for enabled and disabled settings.
A default group policy, named DefaultGroupPolicy, always exists on the ASA. However, this default group policy does not take effect unless you configure the ASA to use it. For configuration instructions, see the CLI configuration guide.
name Specifies the name of the group policy.
Command Mode
Firewall Mode Security Context
Routed Transparent Single
Multiple
Context System
Global configuration • Yes — • Yes — —
Release Modification
7.0(1) This command was added.
17-21Cisco ASA Series Command Reference, A through H Commands

Chapter
The group-policy attributes command enters group-policy configuration mode, in which you can configure any of the group-policy Attribute-Value Pairs. The DefaultGroupPolicy has these Attribute-Value Pairs:
In addition, you can configure webvpn-mode attributes for the group policy, by entering the group-policy attributes command and then entering the webvpn command in group-policy configuration mode. See the description of the webvpn command (group-policy attributes and username attributes modes) for details.
Attribute Default Value
backup-servers keep-client-config
banner none
client-access-rule none
client-firewall none
default-domain none
dns-server none
group-lock none
ip-comp disable
ip-phone-bypass disabled
ipsec-udp disabled
ipsec-udp-port 10000
leap-bypass disabled
nem disabled
password-storage disabled
pfs disable
re-xauth disable
secure-unit-authentication disabled
split-dns none
split-tunnel-network-list none
split-tunnel-policy tunnelall
user-authentication disabled
user-authentication-idle-timeout none
vpn-access-hours unrestricted
vpn-filter none
vpn-idle-timeout 30 minutes
vpn-session-timeout none
vpn-simultaneous-logins 3
vpn-tunnel-protocol IPsec WebVPN
wins-server none
17-22Cisco ASA Series Command Reference, A through H Commands

Chapter
Examples The following example shows how to enter group-policy attributes mode for the group policy named FirstGroup:
ciscoasa(config)# group-policy FirstGroup attributesciscoasa(config-group-policy)#
Related Commands Command Description
clear configure group-policy Removes the configuration for a particular group policy or for all group policies.
group-policy Creates, edits, or removes a group policy.
show running-config group-policy
Displays the running configuration for a particular group policy or for all group policies.
webvpn Enters group-webvpn configuration mode, in which you can configure the WebVPN attributes for the specified group.
17-23Cisco ASA Series Command Reference, A through H Commands

Chapter
group-promptTo customize the group prompt of the WebVPN page login box that is displayed to WebVPN users when they connect to the ASA, use the group-prompt command in webvpn customization configuration mode. To remove the command from the configuration and cause the value to be inherited, use the no form of this command.
group-prompt {text | style} value
no group-prompt {text | style} value
Syntax Description
Defaults The default text of the group prompt is “GROUP:”.
The default style of the group prompt is color:black;font-weight:bold;text-align:right.
Command Modes The following table shows the modes in which you can enter the command:
Command History
Usage Guidelines The style option is expressed as any valid CSS parameters. Describing these parameters is beyond the scope of this document. For more information about CSS parameters, consult CSS specifications at the World Wide Web Consortium (W3C) website at www.w3.org. Appendix F of the CSS 2.1 Specification contains a convenient list of CSS parameters, and is available at www.w3.org/TR/CSS21/propidx.html.
Here are some tips for making the most common changes to the WebVPN pages—the page colors:
• You can use a comma-separated RGB value, an HTML color value, or the name of the color if recognized in HTML.
• RGB format is 0,0,0, a range of decimal numbers from 0 to 255 for each color (red, green, blue); the comma-separated entry indicates the level of intensity of each color to combine with the others.
• HTML format is #000000, six digits in hexadecimal format; the first and second represent red, the third and fourth green, and the fifth and sixth represent blue.
text Specifies a change to the text.
style Specifies a change the style.
value The actual text to display or Cascading Style Sheet (CSS) parameters (the maximum number is 256 characters).
Command Mode
Firewall Mode Security Context
Routed Transparent Single
Multiple
Context System
Webvpn customization configuration
• Yes — • Yes — —
Release Modification
7.1(1) This command was added.
17-24Cisco ASA Series Command Reference, A through H Commands

Chapter
Note To easily customize the WebVPN pages, we recommend that you use ASDM, which has convenient features for configuring style elements, including color swatches and preview capabilities.
Examples In the following example, the text is changed to “Corporate Group:”, and the default style is changed with the font weight increased to bolder:
ciscoasa(config)# webvpnciscoasa(config-webvpn)# customization ciscociscoasa(config-webvpn-custom)# group-prompt text Corporate Group:ciscoasa(config-webvpn-custom)# group-prompt style font-weight:bolder
Related Commands Command Description
password-prompt Customizes the password prompt of the WebVPN page.
username-prompt Customizes the username prompt of the WebVPN page.
17-25Cisco ASA Series Command Reference, A through H Commands
Chapter
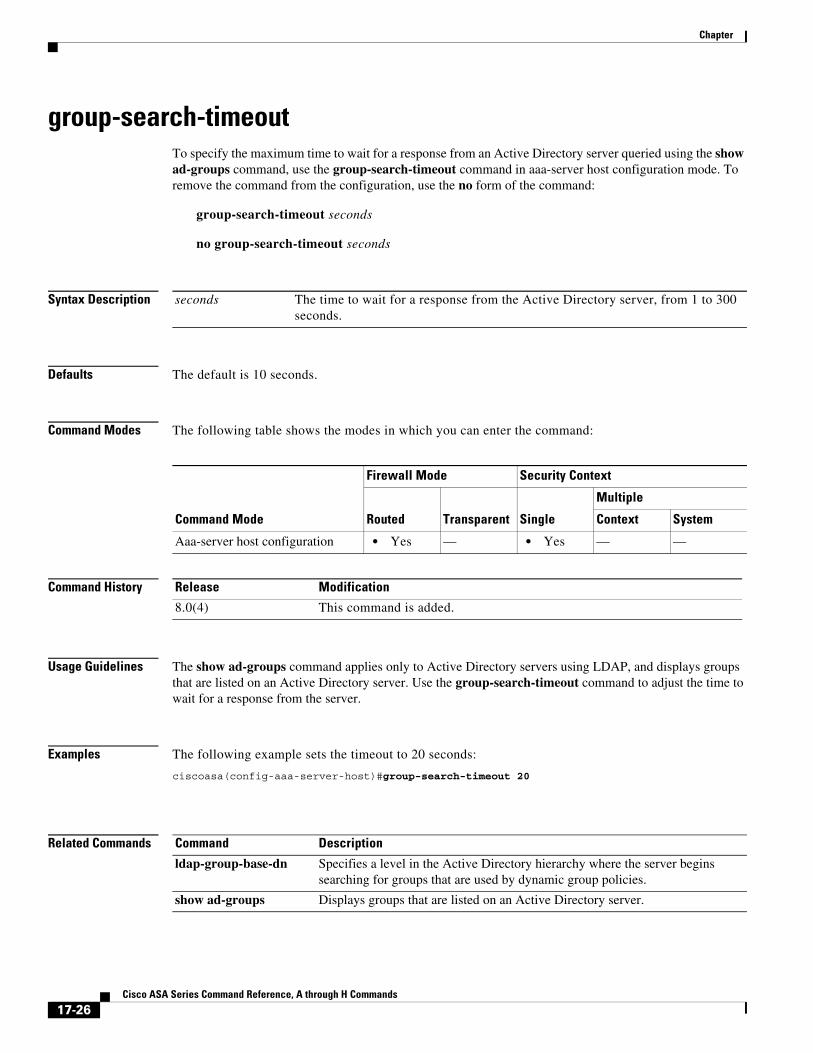
group-search-timeout To specify the maximum time to wait for a response from an Active Directory server queried using the show ad-groups command, use the group-search-timeout command in aaa-server host configuration mode. To remove the command from the configuration, use the no form of the command:
group-search-timeout seconds
no group-search-timeout seconds
Syntax Description
Defaults The default is 10 seconds.
Command Modes The following table shows the modes in which you can enter the command:
Command History
Usage Guidelines The show ad-groups command applies only to Active Directory servers using LDAP, and displays groups that are listed on an Active Directory server. Use the group-search-timeout command to adjust the time to wait for a response from the server.
Examples The following example sets the timeout to 20 seconds:
ciscoasa(config-aaa-server-host)#group-search-timeout 20
Related Commands
seconds The time to wait for a response from the Active Directory server, from 1 to 300 seconds.
Command Mode
Firewall Mode Security Context
Routed Transparent Single
Multiple
Context System
Aaa-server host configuration • Yes — • Yes — —
Release Modification
8.0(4) This command is added.
Command Description
ldap-group-base-dn Specifies a level in the Active Directory hierarchy where the server begins searching for groups that are used by dynamic group policies.
show ad-groups Displays groups that are listed on an Active Directory server.
17-26Cisco ASA Series Command Reference, A through H Commands

Chapter
group-urlTo specify incoming URLs or IP addresses for the group, use the group-url command in tunnel-group webvpn configuration mode. To remove a URL from the list, use the no form of this command.
group-url url [enable | disable]
no group-url url
Syntax Description
Defaults There is no default URL or IP address, but if you do specify a URL or IP address, it is enabled by default.
Command Modes The following table shows the modes in which you can enter the command:
Command History
Usage Guidelines Specifying a group URL or IP address eliminates the need for the user to select a group at login. When a user logs in, the ASA looks for the user’s incoming URL/address in the tunnel group policy table. If it finds the URL/address and if this command is enabled in the tunnel group, then the ASA automatically selects the associated tunnel group and presents the user with only the username and password fields in the login window. This simplifies the user interface and has the added advantage of never exposing the list of groups to the user. The login window that the user sees uses the customizations configured for that tunnel group.
If the URL/address is disabled and the group-alias command is configured, then the drop-down list of groups is also displayed, and the user must make a selection.
You can configure multiple URLs/addresses (or none) for a group. Each URL/address can be enabled or disabled individually. You must use a separate group-url command for each URL/address specified. You must specify the entire URL/address, including either the HTTP or HTTPS protocol.
You cannot associate the same URL/address with multiple groups. The ASA verifies the uniqueness of the URL/address before accepting it for a tunnel group.
disable Disables the URL, but does not remove it from the list.
enable Enables the URL.
url Specifies a URL or IP address for this tunnel group.
Command Mode
Firewall Mode Security Context
Routed Transparent Single
Multiple
Context System
Tunnel-group webvpn configuration
• Yes — • Yes — —
Release Modification
7.1(1) This command was added.
17-27Cisco ASA Series Command Reference, A through H Commands

Chapter
Examples The following example shows the commands for configuring the WebVPN tunnel group named “test” and establishing two group URLs, “http://www.cisco.com” and “https://supplier.example.com” for the group:
ciscoasa(config)# tunnel-group test type webvpnciscoasa(config)# tunnel-group test webvpn-attributesciscoasa(config-tunnel-webvpn)# group-url http://www.cisco.comciscoasa(config-tunnel-webvpn)# group-url https://supplier.example.comciscoasa(config-tunnel-webvpn)#
The following example enables the group URLs http://www.cisco.com and http://192.168.10.10 for the tunnel group named RadiusServer:
ciscoasa(config)# tunnel-group RadiusServer type webvpnciscoasa(config)# tunnel-group RadiusServer general-attributesciscoasa(config-tunnel-general)# authentication server-group RADIUSciscoasa(config-tunnel-general)# accounting-server-group RADIUSciscoasa(config-tunnel-general)# tunnel-group RadiusServer webvpn-attributesciscoasa(config-tunnel-webvpn)# group-alias “Cisco Remote Access” enableciscoasa(config-tunnel-webvpn)# group-url http://www.cisco.com enableciscoasa(config-tunnel-webvpn)# group-url http://192.168.10.10 enableciscoasa(config-tunnel-webvpn)#
Related Commands Command Description
clear configure tunnel-group Clears the entire tunnel group database or the named tunnel group configuration.
show webvpn group-url Displays the URLs for the specified tunnel group or for all tunnel groups.
tunnel-group webvpn-attributes
Enters the webvpn configuration mode for configuring WebVPN tunnel group attributes.
17-28Cisco ASA Series Command Reference, A through H Commands

Chapter
gtp-u-header-check To check whether the inner payload of a GTP data packet is a valid IP packet and drop it if it is not, use the gtp-u-header-check command in GTP inspection policy map parameters configuration mode. Use the no form of this command disable the check.
gtp-u-header-check [anti-spoofing [gtpv2-dhcp-bypass | gtpv2-dhcp-drop]]
no gtp-u-header-check [anti-spoofing [gtpv2-dhcp-bypass | gtpv2-dhcp-drop]]
Syntax Description
Defaults This command is disabled by default.
Command Modes The following table shows the modes in which you can enter the command:
Command History
Usage Guidelines You can use this command to implement anti-spoofing. It is possible for hackers to pretend (spoof) that they are another customer by using another IP address than the one assigned through GTP-C. Anti-spoofing checks whether the GTP-U address used is actually the one which was assigned using GTP-C.
anti-spoofing Checks whether the mobile user IP address in the IP header of the inner payload matches the IP address assigned in GTP control messages such as Create Session Response, and drops the GTP-U message if the IP addresses do not match. This check supports IPv4, IPv6, and IPv4v6 PDN Types.
If the mobile station gets its address using DHCP, the end-user IP address in GTPv2 is 0.0.0.0 (IPv4) or prefix::0 (IPv6), so in this case, the system updates the end-user IP address with the first IP address found in the inner packets. You can change the default behavior for DHCP-obtained addresses using the gtpv2-dhcp keywords.
gtpv2-dhcp-bypass Do not update the 0.0.0.0 or prefix::0 address. Instead, allow packets where the end-user IP address is 0.0.0.0 or prefix::0. This option bypasses the anti-spoofing check when DHCP is used to obtain the IP address.
gtpv2-dhcp-drop Do not update the 0.0.0.0 or prefix::0 address. Instead, drop all packets where the end-user IP address is 0.0.0.0 or prefix::0. This option prevents access for users that use DHCP to obtain the IP address.
Command Mode
Firewall Mode Security Context
Routed Transparent Single
Multiple
Context System
Parameters configuration mode. • Yes • Yes • Yes • Yes —
Release Modification
9.10(1) This command was introduced.
17-29Cisco ASA Series Command Reference, A through H Commands

Chapter
Examples The following example enables anti-spoofing with the default behavior.
ciscoasa(config)# policy-map type inspect gtp gtp-map ciscoasa(config-pmap)# parameters ciscoasa(config-pmap-p)# gtp-u-header-check anti-spoofing
Related Commands Commands Description
anti-replay Enables GTP anti-replay in GTP inspection.
inspect gtp Enables GTP application inspection.
policy-map type inspect gtp
Creates or edits a GTP inspection policy map.
show service-policy inspect gtp
Displays the GTP configuration and statistics.
17-30Cisco ASA Series Command Reference, A through H Commands

Chapter
h245-tunnel-blockTo block H.245 tunneling in H.323, use the h245-tunnel-block command in parameters configuration mode. To disable this feature, use the no form of this command.
h245-tunnel-block action [drop-connection | log]
no h245-tunnel-block action [drop-connection | log]
Syntax Description
Defaults No default behavior or values.
Command Modes The following table shows the modes in which you can enter the command:
Command History
Examples The following example shows how to block H.245 tunneling on an H.323 call:
ciscoasa(config)# policy-map type inspect h323 h323_mapciscoasa(config-pmap)# parametersciscoasa(config-pmap-p)# h245-tunnel-block action drop-connection
Related Commands
drop-connection Drops the call setup connection when an H.245 tunnel is detected.
log Issues a log when an H.245 tunnel is detected.
Command Mode
Firewall Mode Security Context
Routed Transparent Single
Multiple
Context System
Parameters configuration • Yes • Yes • Yes • Yes —
Release Modification
7.2(1) This command was added.
Command Description
class Identifies a class map name in the policy map.
class-map type inspect
Creates an inspection class map to match traffic specific to an application.
policy-map Creates a Layer 3/4 policy map.
show running-config policy-map
Display all current policy map configurations.
17-31Cisco ASA Series Command Reference, A through H Commands

Chapter
hardware-bypassTo enable the hardware bypass on the Cisco ISA 3000 so that traffic continues to flow between an interface pair during a power outage, use the hardware-bypass command in global configuration mode. To disable the hardware bypass, use the no form of this command.
hardware-bypass GigabitEthernet {1/1-1/2 | 1/3-1/4} [sticky]
no hardware-bypass GigabitEthernet {1/1-1/2 | 1/3-1/4} [sticky]
Note This feature is only available on the Cisco ISA 3000 appliance.
Syntax Description
Command Default Hardware bypass is enabled by default.
Command Modes The following table shows the modes in which you can enter the command:
Command History
Usage Guidelines When the hardware bypass is active, no firewall functions are in place, so make sure you understand the risks of allowing traffic through. When the hardware bypass is deactivated, there is a brief connection interruption as the ASA takes over the flows.
GigabitEthernet {1/1-1/2 | 1/3-1/4}
Supported interface pairs are copper GigabitEthernet 1/1 & 1/2; and GigabitEthernet 1/3 & 1/4. If you have a fiber Ethernet model, only the copper Ethernet pair (GigabitEthernet 1/1 & 1/2) supports hardware bypass. Enter this command separately for each pair.
sticky (Optional) Keeps the appliance in hardware bypass mode after the power comes back and the appliance boots up. In this case, you need to manually turn off the hardware bypass when you are ready using the no hardware-bypass manual command; this option lets you control when the brief interruption occurs.
Command Mode
Firewall Mode Security Context
Routed Transparent Single
Multiple
Context System
Global configuration — • Yes • Yes — —
Release Modification
9.4(1.225) This command was added.
17-32Cisco ASA Series Command Reference, A through H Commands
Chapter
Note When the ISA 3000 loses power and goes into hardware bypass mode, only the above interface pairs can communicate; when using the default configuration, inside1 <---> inside2, and outside1 <---> outside2 can no longer communicate. Any existing connections between these interfaces will be lost.
Examples The following example disables hardware bypass for GigabitEthernet 1/1 and 1/2, and enables it for 1/3 and 1/4:
ciscoasa(config)# no hardware-bypass GigabitEthernet 1/1-1/2ciscoasa(config)# hardware-bypass GigabitEthernet 1/3-1/4
Related Commands Command Description
hardware-bypass boot-delay Configures the hardware bypass to remain active until after the ASA FirePOWER module boots up.
hardware-bypass manual Manually activates or deactivates the hardware bypass.
17-33Cisco ASA Series Command Reference, A through H Commands

Chapter
hardware-bypass boot-delayTo configure the hardware bypass on the Cisco ISA 3000 to remain active until after the ASA Firepower module boots up, use the hardware-bypass boot-delay command in global configuration mode. To disable the boot delay, use the no form of this command.
hardware-bypass boot-delay module-up sfr
no hardware-bypass boot-delay module-up sfr
Note This feature is only available on the Cisco ISA 3000 appliance.
Syntax Description
Command Default The boot delay is disabled by default.
Command Modes The following table shows the modes in which you can enter the command:
Command History
Usage Guidelines You must enable hardware bypass using the hardware-bypass command without the sticky option for the hardware-bypass boot-delay command to operate. Without the hardware-bypass boot-delay command, the hardware bypass is likely to become inactive before the ASA FirePOWER module finishes booting up. This scenario can cause traffic to be dropped if you configured the module to fail-close, for example.
Examples The following example enables hardware bypass (without the sticky option), and enables the boot delay:
ciscoasa(config)# hardware-bypass GigabitEthernet 1/1-1/2ciscoasa(config)# hardware-bypass GigabitEthernet 1/3-1/4ciscoasa(config)# hardware-bypass boot-delay module-up sfr
module-up sfr Delays disabling the hardware bypass until after the ASA FirePOWER module boots up.
Command Mode
Firewall Mode Security Context
Routed Transparent Single
Multiple
Context System
Global configuration — • Yes • Yes — —
Release Modification
9.4(1.225) This command was added.
17-34Cisco ASA Series Command Reference, A through H Commands
Chapter
Related Commands Command Description
hardware-bypass Configures the hardware bypass for supported interface pairs.
hardware-bypass manual Manually activates or deactivates the hardware bypass.
17-35Cisco ASA Series Command Reference, A through H Commands

Chapter
hardware-bypass manualTo manually activate or deactivate the hardware bypass on the Cisco ISA 3000, use the hardware-bypass manual command in privileged EXEC mode.
hardware-bypass manual GigabitEthernet {1/1-1/2 | 1/3-1/4}
no hardware-bypass manual GigabitEthernet {1/1-1/2 | 1/3-1/4}
Note This feature is only available on the Cisco ISA 3000 appliance.
Syntax Description
Command Default No default behavior or values.
Command Modes The following table shows the modes in which you can enter the command:
Command History
Usage Guidelines When you configure the hardware-bypass command sticky option that keeps bypass enabled, you must use the hardware-bypass manual command to deactivate hardware bypass after power is restored.
This command changes the current hardware bypass state. In the event of a power failure, the hardware-bypass configuration command actions take priority. For example, if hardware-bypass is disabled in the configuration, but you enable hardware bypass manually, then at a power failure, hardware bypass becomes disabled according to the configuration.
Examples The following example manually deactivates hardware bypass for GigabitEthernet 1/2 and 1/2:
ciscoasa# no hardware-bypass manual GigabitEthernet 1/1-1/2
GigabitEthernet {1/1-1/2 | 1/3-1/4}
Supported interface pairs are copper GigabitEthernet 1/1 & 1/2; and GigabitEthernet 1/3 & 1/4. If you have a fiber Ethernet model, only the copper Ethernet pair (GigabitEthernet 1/1 & 1/2) supports hardware bypass. Enter this command separately for each pair.
Command Mode
Firewall Mode Security Context
Routed Transparent Single
Multiple
Context System
Privileged EXEC — • Yes • Yes — —
Release Modification
9.4(1.225) This command was added.
17-36Cisco ASA Series Command Reference, A through H Commands

Chapter
Related Commands Command Description
hardware-bypass Configures the hardware bypass for supported interface pairs.
hardware-bypass boot-delay Configures the hardware bypass to remain active until after the ASA FirePOWER module boots up.
17-37Cisco ASA Series Command Reference, A through H Commands

Chapter
health-checkTo enable the cluster health check feature, use the health-check command in cluster group configuration mode. To disable the health check, use the no form of this command.
health-check [holdtime timeout] [vss-enabled] [monitor-interface {interface_id | service-module | debounce-time}]
no health-check [holdtime timeout] [vss-enabled] [monitor-interface {interface_id | service-module | debounce-time}]
Syntax Description
Command Default Health check is enabled by default, with a holdtime of 3 seconds.
holdtime timeout (Optional) Determines the amount of time between keepalive or interface status messages, between .3 (9.8(1) and later or .8 (9.7 and earlier) and 45 seconds. The default is 3 seconds. Note that configuring a lower holdtime will increase CCL messaging and CPU activity. If you downgrade your ASA software after setting the hold time to .3 - .7, this setting will revert to the default of 3 seconds because the new setting is unsupported.
monitor-interface {interface_id | service-module | debounce-time}
(Optional) When using the no form of the command, disables the interface health check on an interface or on a hardware module (service-module). You might want to disable health monitoring of non-essential interfaces, for example, the management interface. You can specify any port-channel ID, redundant ID, or single physical interface ID. Health monitoring is not performed on VLAN subinterfaces or virtual interfaces such as VNIs or BVIs. You cannot configure monitoring for the cluster control link; it is always monitored.
Use the debounce-time keyword to configure the debounce time before the ASA removes a failed interface. Set the debounce time between 300 and 9000 ms. The default is 500 ms. Lower values allow for faster detection of interface failures. Note that configuring a lower debounce time increases the chances of false-positives. When an interface status update occurs, the ASA waits the number of milliseconds specified before removing the interface. In the case of an EtherChannel that transitions from a down state to an up state (for example, the switch reloaded, or the switch enabled an EtherChannel), a longer debounce time can prevent the interface from appearing to be failed on a cluster unit just because another cluster unit was faster at bundling the ports.
vss-enabled If you configure the cluster control link as an EtherChannel (recommended), and it is connected to a VSS or vPC pair, then you might need to enable the vss-enabled option. For some switches, when one unit in the VSS/vPC is shutting down or booting up, EtherChannel member interfaces connected to that switch may appear to be Up to the ASA, but they are not passing traffic on the switch side. The ASA can be erroneously removed from the cluster if you set the ASA holdtime timeout to a low value (such as .8 seconds), and the ASA sends keepalive messages on one of these EtherChannel interfaces. When you enable vss-enabled, the ASA floods the keepalive messages on all EtherChannel interfaces in the cluster control link to ensure that at least one of the switches can receive them.
17-38Cisco ASA Series Command Reference, A through H Commands

Chapter
Interface health monitoring is enabled on all interfaces by default.
The debounce time is 500 ms.
Command Modes The following table shows the modes in which you can enter the command:
Command History
Usage Guidelines When any topology changes occur (such as adding or removing a data interface, enabling or disabling an interface on the ASA or the switch, or adding an additional switch to form a VSS or vPC) you should disable the health check feature and also disable interface monitoring for the disabled interfaces (no health-check monitor-interface). When the topology change is complete, and the configuration change is synced to all units, you can re-enable the health check feature.
Keepalive messages between members determine member health. If a unit does not receive any keepalive messages from a peer unit within the holdtime period, the peer unit is considered unresponsive or dead. Interface status messages detect link failure. If an interface fails on a particular unit, but the same interface is active on other units, then the unit is removed from the cluster.
Note In 9.8(1), the unit health check messaging scheme was changed to heartbeats in the data plane from keepalives in the control plane. Using the data plane improves CPU usage and reliability.
If a unit does not receive interface status messages within the holdtime, then the amount of time before the ASA removes a member from the cluster depends on the type of interface and whether the unit is an established member or is joining the cluster. For EtherChannels (spanned or not), if the interface is down on an established member, then the ASA removes the member after 9 seconds. If the unit is joining the cluster as a new member, the ASA waits 45 seconds before rejecting the new unit. For non-EtherChannels, the unit is removed after 500 ms, regardless of the member state.
This command is not part of the bootstrap configuration, and is replicated from the master unit to the slave units.
Command Mode
Firewall Mode Security Context
Routed Transparent Single
Multiple
Context System
Cluster group configuration • Yes • Yes • Yes — • Yes
Release Modification
9.0(1) This command was added.
9.1(4) The vss-enabled keyword was added.
9.4(1) The monitor-interface keyword was added.
9.5(1) The service-module keyword was added.
9.8(1) The holdtime minimum value was lowered to .3 seconds. The debounce-time keyword was added for the Firepower 4100/9300.
9.9(2) The debounce-time keyword was added for ASA appliances.
9.10(1) The debounce-time keyword now applies to interfaces changing from a down state to an up state.
17-39Cisco ASA Series Command Reference, A through H Commands

Chapter
Examples The following example disables the health check:
ciscoasa(config)# cluster group cluster1ciscoasa(cfg-cluster)# no health-check
Related Commands Command Description
clacp system-mac When using spanned EtherChannels, the ASA uses cLACP to negotiate the EtherChannel with the neighbor switch.
cluster group Names the cluster and enters cluster configuration mode.
cluster-interface Specifies the cluster control link interface.
cluster interface-mode Sets the cluster interface mode.
conn-rebalance Enables connection rebalancing.
console-replicate Enables console replication from slave units to the master unit.
enable (cluster group) Enables clustering.
health-check auto-rejoin
Customizes the auto-rejoin cluster settings after a health check failure.
key Sets an authentication key for control traffic on the cluster control link.
local-unit Names the cluster member.
mtu cluster-interface Specifies the maximum transmission unit for the cluster control link interface.
priority (cluster group)
Sets the priority of this unit for master unit elections.
17-40Cisco ASA Series Command Reference, A through H Commands

Chapter
health-check application To enable Cloud Web Security application health checking, use the health-check application command in scansafe general-options configuration mode. To remove health checking or return to the default timeout, use the no form of this command.
health-check application {[url url_string] | timeout seconds}
no health-check application {[url url_string] | timeout seconds}
Syntax Description
Command Default Health checking is disabled by default.
Command Modes The following table shows the modes in which you can enter the command:
Command History
Usage Guidelines When you subscribe to the Cisco Cloud Web Security service, you are assigned a primary Cloud Web Security proxy server and backup proxy server. These servers are routinely polled to check for their availability. If your ASA is unable to reach the Cloud Web Security proxy server (for example, if no SYN/ACK packets arrive from the proxy server), then the proxy server is polled through a TCP three-way handshake to check its availability. If the proxy server is unavailable after a configured number of retries (the default is five), the server is declared as unreachable, and the backup proxy server becomes active.
You can further refine failover by checking the health of the Cloud Web Security application. In some cases, the server can complete the TCP three-way handshake, yet the Cloud Web Security application on the server is not functioning correctly. If you enable application health checking, the system can fail over
url url_string (Optional.) Specifies the URL to use when polling the application. If you do not specify a URL, the default URL is used. The default URL is http://gs.scansafe.net/goldStandard?type=text&size=10.
Specify a URL only if instructed to do so by Cisco Cloud Web Security.
timeout seconds Specifies how long the ASA waits after sending a GET request for the health check URL to get a response. The ASA retries the request after the timeout up to the retry limit for polling the server before marking the server as down and initiating failover. The default is 15 seconds, the range is 5-120 seconds.
Command Mode
Firewall Mode Security Context
Routed Transparent Single
Multiple
Context System
Scansafe general-options configuration
• Yes • Yes • Yes — • Yes
Release Modification
9.6(2) This command was added.
17-41Cisco ASA Series Command Reference, A through H Commands

Chapter
to the backup server even if the three-way handshake completes, if the application itself does not respond. This provides a more reliable failover setup. Use the health-check application command to enable this extra check.
Health checking involves sending a GET request with a test URL to the Cloud Web Security application. Failure to respond within the configured timeout and retry limits marks the server as down, and the system initiates failover. The backup server is also tested to ensure that it is functioning correctly before it is marked as the active server. After failover, the application on the primary server is retested every 30 seconds until it comes back online and can be marked the active server again.
The ASA automatically falls back to the primary Cloud Web Security proxy server from the backup server after continued polling shows that the primary server is active for two consecutive retry count periods. You can change this polling interval using the retry-count command.
Examples The following example configures a primary and backup server and enables health checking using the default URL and timeout. You must enter the health-check application command separately to enable health checking and to set a non-default timeout.
scansafe general-options server primary ip 10.24.0.62 port 8080server backup ip 10.10.0.7 port 8080health-check application
retry-count 7 license 366C1D3F5CE67D33D3E9ACEC265261E5
Related Commands Command Description
class-map type inspect scansafe
Creates an inspection class map for whitelisted users and groups.
default user group Specifies the default username and/or group if the ASA cannot determine the identity of the user coming into the ASA.
http[s] (parameters) Specifies the service type for the inspection policy map, either HTTP or HTTPS.
inspect scansafe Enables Cloud Web Security inspection on the traffic in a class.
license Configures the authentication key that the ASA sends to the Cloud Web Security proxy servers to indicate from which organization the request comes.
match user group Matches a user or group for a whitelist.
policy-map type inspect scansafe
Creates an inspection policy map so you can configure essential parameters for the rule and also optionally identify the whitelist.
retry-count Enters the retry counter value, which is the amount of time that the ASA waits before polling the Cloud Web Security proxy server to check its availability.
scansafe In multiple context mode, allows Cloud Web Security per context.
scansafe general-options
Configures general Cloud Web Security server options.
server {primary | backup}
Configures the fully qualified domain name or IP address of the primary or backup Cloud Web Security proxy servers.
show conn scansafe Shows all Cloud Web Security connections, as noted by the capitol Z flag.
17-42Cisco ASA Series Command Reference, A through H Commands

Chapter
show scansafe server Shows the status of the server, whether it’s the current active server, the backup server, or unreachable.
show scansafe statistics
Shows total and current HTTP(S) connections.
user-identity monitor Downloads the specified user or group information from the AD agent.
whitelist Performs the whitelist action on the class of traffic.
Command Description
17-43Cisco ASA Series Command Reference, A through H Commands

Chapter
health-check auto-rejoinTo customize the auto-rejoin cluster settings after a health check failure, use the health-check auto-rejoin command in cluster group configuration mode. To restore the default values, use the no form of this command.
health-check {data-interface | cluster-interface | system} auto-rejoin {unlimited | auto_rejoin_max} [auto_rejoin_interval [auto_rejoin_interval_variation]]
no health-check {data-interface | cluster-interface | system} auto-rejoin [{unlimited | auto_rejoin_max} [auto_rejoin_interval [auto_rejoin_interval_variation]]]
Syntax Description
Command Default • The cluster auto-rejoin feature for a failed cluster control link is unlimited attempts every 5 minutes.
• The cluster auto-rejoin feature for a failed data interface is 3 attempts every 5 minutes, with the increasing interval set to 2.
• The cluster auto-rejoin feature for an internal system error is 3 attempts every 5 minutes, with the increasing interval set to 2.
auto_rejoin_interval (Optional) Defines the interval duration in minutes between rejoin attempts, between 2 and 60. The default value is 5 minutes. The maximum total time that the unit attempts to rejoin the cluster is limited to 14400 minutes (10 days) from the time of last failure.
auto_rejoin_interval_variation
(Optional) Defines if the interval duration increases, between 1 and 3:
• 1—No change
• 2—2 x the previous duration
• 3—3 x the previous duration.
For example, if you set the interval duration to 5 minutes, and set the variation to 2, then the first attempt is after 5 minutes; the 2nd attempt is 10 minutes (2 x 5); the 3rd attempt 20 minutes (2 x 10), and so on. The default value is 1 for the cluster-interface and 2 for the data-interface and system.
auto_rejoin_max Defines the number of attempts at rejoining the cluster, between 0 and 65535. 0 disables auto-rejoining. The default value is unlimited for the cluster-interface and 3 for the data-interface and system.
cluster-interface Sets the auto-rejoin settings for the cluster control link.
data-interface Sets the auto-rejoin settings for data interfaces.
system Sets the auto-rejoin settings for internal errors for the system. Internal failures include: application sync timeout; inconsistent application statuses; and so on.
unlimited Sets the number of attempts at rejoining the cluster to unlimited, the default for the cluster-interface.
17-44Cisco ASA Series Command Reference, A through H Commands

Chapter
Command Modes The following table shows the modes in which you can enter the command:
Command History
Usage Guidelines This command lets you customize the auto-rejoin options to suit your network conditions.
Examples The following example configures 10 rejoin attempts for both interface types. For data interfaces, the rejoin interval is 10 minutes, with an interval duration increase of 3 x the interval. for the cluster control link, the rejoin interval is 7 minutes, with an interval duration increase of 2 x the interval.
ciscoasa(config)# cluster group pod1ciscoasa(cfg-cluster)# local-unit unit1ciscoasa(cfg-cluster)# cluster-interface port-channel1 ip 192.168.1.1 255.255.255.0ciscoasa(cfg-cluster)# site-id 1ciscoasa(cfg-cluster)# health-check data-interface auto-rejoin 10 10 3ciscoasa(cfg-cluster)# health-check cluster-interface auto-rejoin 10 7 2ciscoasa(cfg-cluster)# priority 1ciscoasa(cfg-cluster)# key chuntheunavoidableciscoasa(cfg-cluster)# enable noconfirm
Related Commands
Command Mode
Firewall Mode Security Context
Routed Transparent Single
Multiple
Context System
Cluster group configuration • Yes • Yes • Yes — • Yes
Release Modification
9.9(2) Added the system keyword.
9.5(1) This command was added.
Command Description
clacp system-mac When using spanned EtherChannels, the ASA uses cLACP to negotiate the EtherChannel with the neighbor switch.
cluster group Names the cluster and enters cluster configuration mode.
cluster-interface Specifies the cluster control link interface.
cluster interface-mode Sets the cluster interface mode.
conn-rebalance Enables connection rebalancing.
console-replicate Enables console replication from slave units to the master unit.
enable (cluster group) Enables clustering.
health-check Enables the cluster health check feature, which includes unit health monitoring and interface health monitoring.
key Sets an authentication key for control traffic on the cluster control link.
local-unit Names the cluster member.
mac-address site-id Configures a site-specific MAC address for each site.
mtu cluster-interface Specifies the maximum transmission unit for the cluster control link interface.
17-45Cisco ASA Series Command Reference, A through H Commands

Chapter
priority (cluster group)
Sets the priority of this unit for master unit elections.
site-id Sets a site ID to avoid MAC address flapping in inter-site clustering.
Command Description
17-46Cisco ASA Series Command Reference, A through H Commands

Chapter
hello-intervalTo specify the interval between EIGRP hello packets sent on an interface, use the hello-interval command in interface configuration mode. To return the hello interval to the default value, use the no form of this command.
hello-interval eigrp as-number seconds
no hello-interval eigrp as-number seconds
Syntax Description
Defaults The default is 5 seconds.
Command Modes The following table shows the modes in which you can enter the command:
Command History
Usage Guidelines The smaller the hello interval, the faster topological changes will be detected, but more routing traffic will occur. This value must be the same for all routers and access servers on a specific network.
Examples The following example sets the EIGRP hello interval to 10 seconds and the hold time to 30 seconds:
ciscoasa(config-if)# hello-interval eigrp 100 10ciscoasa(config-if)# hold-time eigrp 100 30
Related Commands
as-number Specifies the autonomous system number of the EIGRP routing process.
seconds Specifies the interval between hello packets that are sent on the interface. Valid values are from 1 to 65535 seconds.
Command Mode
Firewall Mode Security Context
Routed Transparent Single
Multiple
Context System
Interface configuration • Yes — • Yes • Yes —
Release Modification
8.0(2) This command was added.
9.0(1) Support for multiple context mode was added.
Command Description
hold-time Configures the EIGRP hold time advertised in hello packets.
17-47Cisco ASA Series Command Reference, A through H Commands

Chapter
hello padding multi-pointTo enable IS-IS hello padding at the router level, enter the hello padding multi-point command in router isis configuration mode. To disable IS-IS hello padding, use the no form of this command.
hell padding multi-point
no hello padding multi-point
Syntax Description This command has no arguments or keywords.
Defaults Hello padding is enabled by default.
Command Modes The following table shows the modes in which you can enter the command:
Command History
Usage Guidelines This command enables IS-IS hellos to be padded to the full maximum transmission unit (MTU) size. The benefit of padding IS-IS hellos to the full MTU is that it allows for early detection of errors that result from transmission problems with large frames or errors that result from mismatched MTUs on adjacent interfaces.
You can disable hello padding to avoid wasting network bandwidth in case the MTU of both interfaces is the same, or in case of translational bridging. While hello padding is disabled, the ASAs still send the first five IS-IS hellos padded to the full MTU size to maintain the benefits of discovering MTU mismatches.
To disable hello padding for all interfaces on an ASA for the IS-IS routing process, enter the no hello padding multi-point command in router configuration mode. To selectively disable hello padding for a specific interface, enter the no isis hello padding command in interface configuration mode.
Examples In the following example the no hello padding multi-point command is used to turn off hello padding at the router level:
ciscoasa(config)# router isisciscoasa(config-router)# hello padding multi-point
Command Mode
Firewall Mode Security Context
Routed Transparent Single
Multiple
Context System
Router configuration • Yes — • Yes • Yes —
Release Modification
9.6(1) This command was added.
17-48Cisco ASA Series Command Reference, A through H Commands

Chapter
Related Commands Command Description
advertise passive-only Configures the ASA to advertise passive interfaces.
area-password Configures an IS-IS area authentication password.
authentication key Enables authentication for IS-IS globally.
authentication mode Specifies the type of authentication mode used in IS-IS packets for the IS-IS instance globally.
authentication send-only
Configure the IS-IS instance globally to have authentication performed only on IS-IS packets being sent (not received).
clear isis Clears IS-IS data structures.
default-information originate
Generates a default route into an IS-IS routing domain.
distance Defines the administrative distance assigned to routes discovered by the IS-IS protocol.
domain-password Configures an IS-IS domain authentication password.
fast-flood Configures IS-IS LSPs to be full.
hostname dynamic Enables IS-IS dynamic hostname capability.
ignore-lsp-errors Configures the ASA to ignore IS-IS LSPs that are received with internal checksum errors rather than purging the LSPs.
isis adjacency-filter Filters the establishment of IS-IS adjacencies.
isis advertise-prefix Advertises IS-IS prefixes of connected networks in LSP advertisements on an IS-IS interface.
isis authentication key Enables authentication for an interface.
isis authentication mode
Specifies the type of authentication mode used in IS-IS packets for the IS-IS instance per interface
isis authentication send-only
Configure the IS-IS instance per interface to have authentication performed only on IS-IS packets being sent (not received).
isis circuit-type Configures the type of adjacency used for the IS-IS.
isis csnp-interval Configures the interval at which periodic CSNP packets are sent on broadcast interfaces.
isis hello-interval Specifies the length of time between consecutive hello packets sent by IS-IS.
isis hello-multiplier Specifies the number of IS-IS hello packets a neighbor must miss before the ASA declares the adjacency as down.
isis hello padding Configures IS-IS hellos to the full MTU size per interface.
isis lsp-interval Configures the time delay between successive IS-IS LSP transmissions per interface.
isis metric Configures the value of an IS-IS metric.
isis password Configures the authentication password for an interface.
isis priority Configures the priority of designated ASAs on the interface.
isis protocol shutdown Disables the IS-IS protocol per interface.
isis retransmit-interval
Configures the amount of time between retransmission of each IS-IS LSP on the interface.
isis retransmit-throttle-interval
Configures the amount of time between retransmissions of each IS-IS LSP on the interface.
17-49Cisco ASA Series Command Reference, A through H Commands

Chapter
isis tag Sets a tag on the IP address configured for an interface when the IP prefix is put into an LSP.
is-type Assigns the routing level for the IS-IS routing process.
log-adjacency-changes Enables the ASA to generate a log message when an NLSP IS-IS adjacency changes state (up or down).
lsp-full suppress Configures which routes are suppressed when the PDU becomes full.
lsp-gen-interval Customizes IS-IS throttling of LSP generation.
lsp-refresh-interval Sets the LSP refresh interval.
max-area-addresses Configures additional manual addresses for an IS-IS area.
max-lsp-lifetime Sets the maximum time that LSPs persist in the ASA's database without being refreshed.
maximum-paths Configures multi-path load sharing for IS-IS.
metric Globally changes the metric value for all IS-IS interfaces.
metric-style Configures an ASA running IS-IS so that it generates and only accepts new-style, length, value objects (TLVs).
net Specifies the NET for the routing process.
passive-interface Configures a passive interface.
prc-interval Customizes IS-IS throttling of PRCs.
protocol shutdown Disables the IS-IS protocol globally so that it cannot form any adjacency on any interface and will clear the LSP database.
redistribute isis Redistributes IS-IS routes specifically from Level 1 into Level 2 or from Level 2 into Level 1.
route priority high Assigns a high priority to an IS-IS IP prefix.
router isis Enables IS-IS routing.
set-attached-bit Specifies constraints for when a Level 1-Level 2 router should set its attached bit.
set-overload-bit Configures the ASA to signal other routers not to use it as an intermediate hop in their SPF calculations.
show clns Shows CLNS-specific information.
show isis Shows IS-IS information.
show route isis Shows IS-IS routes.
spf-interval Customizes IS-IS throttling of SPF calculations.
summary-address Creates aggregate addresses for IS-IS.
Command Description
17-50Cisco ASA Series Command Reference, A through H Commands

Chapter
helpTo display help information for the command specified, use the help command in user EXEC mode.
help {command | ?}
Syntax Description
Defaults No default behaviors or values.
Command Modes The following table shows the modes in which you can enter the command:
Command History
Usage Guidelines The help command displays help information about all commands. You can see help for an individual command by entering the help command followed by the command name. If you do not specify a command name and enter ? instead, all commands that are available in the current privilege level and mode display.
If you enable the pager command and after 24 lines display, the listing pauses, and the following prompt appears:
<--- More --->
The More prompt uses syntax similar to the UNIX more command as follows:
• To see another screen of text, press the Space bar.
• To see the next line, press the Enter key.
• To return to the command line, press the q key.
Examples The following example shows how to display help for the rename command:
ciscoasa# help rename
USAGE:
rename /noconfirm [{disk0:|disk1:|flash:}] <source path> [{disk0:|disk1:
? Displays all commands that are available in the current privilege level and mode.
command Specifies the command for which to display the CLI help.
Command Mode
Firewall Mode Security Context
Routed Transparent Single
Multiple
Context System
User EXEC • Yes • Yes • Yes • Yes • Yes
Release Modification
7.0(1) This command was added.
17-51Cisco ASA Series Command Reference, A through H Commands

Chapter
|flash:}] <destination path>
DESCRIPTION:
rename Rename a file
SYNTAX:
/noconfirm No confirmation{disk0:|disk1:|flash:} Optional parameter that specifies the filesystem<source path> Source file path<destination path> Destination file path
ciscoasa#
The following examples shows how to display help by entering the command name and a question mark:
ciscoasa(config)# enable ?usage: enable password <pwd> [encrypted]
Help is available for the core commands (not the show, no, or clear commands) by entering ? at the command prompt:
ciscoasa(config)# ?aaa Enable, disable, or view TACACS+ or RADIUS
user authentication, authorization and accounting…
Related Commands Command Description
show version Displays information about the operating system software.
17-52Cisco ASA Series Command Reference, A through H Commands
Chapter
hidden-parameterTo specify hidden parameters in the HTTP POST request that the ASA submits to the authenticating web server for SSO authentication, use the hidden-parameter command in aaa-server-host configuration mode. To remove all hidden parameters from the running configuration, use the no form of this command.
hidden-parameter string
no hidden-parameter
Note To configure SSO with the HTTP protocol correctly, you must have a thorough working knowledge of authentication and HTTP protocol exchanges.
Syntax Description
Defaults No default behavior or values.
Command Modes The following table shows the modes in which you can enter the command:
Command History
Usage Guidelines This is an SSO with HTTP Forms command.
The WebVPN server of the ASA uses an HTTP POST request to submit an SSO authentication request to an authenticating web server. That request may require specific hidden parameters from the SSO HTML form—other then username and password—that are not visible to the user. You can discover hidden parameters that the web server expects in the POST request by using a HTTP header analyzer on a form received from the web server.
The hidden-parameter command lets you specify a hidden parameter that the web server requires in the authentication POST request. If you use a header analyzer, you can copy and paste the entire hidden parameter string, including any encoded URL parameters.
string A hidden parameter embedded in the form and sent to the SSO server. You can enter it on multiple lines. The maximum number of characters for each line is 255. The maximum number of characters for all lines together—the complete hidden parameter—is 2048.
Command Mode
Firewall Mode Security Context
Routed Transparent Single
Multiple
Context System
Aaa-server-host configuration • Yes — • Yes — —
Release Modification
7.1(1) This command was added.
17-53Cisco ASA Series Command Reference, A through H Commands

Chapter
For ease of entry, you can enter a hidden parameter on multiple, sequential lines. The ASA then concatenates the lines into a single hidden parameter. While the maximum characters per hidden-parameter line is 255 characters, you can enter fewer characters on each line.
Note Any question mark in the string must be preceded by a Ctrl+v escape sequence.
Examples The following example shows a hidden parameter comprised of four form entries and their values, separated by &. Excerpted from the POST request, the four entries and their values are:
• SMENC with a value of ISO-8859-1
• SMLOCALE with a value of US-EN
• target with a value of https%3A%2F%2Ftools.cisco.com%2Femco%2Fappdir%2FAreaRoot.do
%3FEMCOPageCode%3DENG
• smauthreason with a value of 0
SMENC=ISO-8859-1&SMLOCALE=US-EN&target=https%3A%2F%2Ftools.cisco.com%2Femco%2Fappdir%2FAreaRoot.do%3FEMCOPageCode%3DENG&smauthreason=0
ciscoasa(config)# aaa-server testgrp1 host example.comciscoasa(config-aaa-server-host)# hidden-parameter SMENC=ISO-8859-1&SMLOCALE=US-EN&targeciscoasa(config-aaa-server-host)# hidden-parameter t=https%3A%2F%2Ftools.cisco.com%2Femcciscoasa(config-aaa-server-host)# hidden-parameter o%2Fappdir%2FAreaRoot.do%3FEMCOPageCociscoasa(config-aaa-server-host)# hidden-parameter de%3DENG&smauthreason=0ciscoasa(config-aaa-server-host)#
Related Commands Command Description
action-uri Specifies a web server URI to receive a username and password for SSO authentication.
auth-cookie-name Specifies a name for the authentication cookie.
password-parameter Specifies the name of the HTTP POST request parameter in which a user password must be submitted for SSO authentication.
start-url Specifies the URL at which to retrieve a prelogin cookie.
user-parameter Specifies the name of the HTTP POST request parameter in which a username must be submitted for SSO authentication.
17-54Cisco ASA Series Command Reference, A through H Commands

Chapter
hidden-sharesTo control the visibility of hidden shares for CIFS files, use the hidden-shares command in group-webvpn configuration mode. To remove the hidden shares option from the configuration, use the no form of this command.
hidden-shares {none | visible}
[no] hidden-shares {none | visible}
Syntax Description
Defaults The default behavior for this command is none.
Command Modes The following table shows the modes in which you can enter the command:
Command History
Usage Guidelines A hidden share is identified by a dollar sign ($) at the end of the share name. For example, drive C is shared as C$. With hidden shares, a shared folder is not displayed, and users are restricted from browsing or accessing these hidden resources.
The no form of the hidden-shares command removes the option from the configuration and disables hidden shares as a group policy attribute.
Examples The following example makes visible WebVPN CIFS hidden-shares related to GroupPolicy2:
ciscoasa(config)# webvpnciscoasa(config-group-policy)# group-policy GroupPolicy2 attributesciscoasa(config-group-policy)# webvpnciscoasa(config-group-webvpn)# hidden-shares visibleciscoasa(config-group-webvpn)#
none Specifies that no configured hidden shares are visible or accessible to users.
visible Reveals hidden shares, making them accessible to users.
Command Mode Firewall Mode Security Context
Routed Transparent Single
Multiple
Context System
Group-webvpn configuration • Yes • Yes • Yes • Yes —
Release Modification
8.0(2) This command was added.
17-55Cisco ASA Series Command Reference, A through H Commands

Chapter
Related Commands Command Description
debug webvpn cifs Displays debugging messages about the CIFS.
group-policy attributes Enters group-policy configuration mode, which lets you configure attributes and values for a specified group policy or lets you enter webvpn configuration mode to configure WebVPN attributes for the group.
url-list Configures a set of URLs for WebVPN users to access.
url-list Applies a list of WebVPN servers and URLs to a particular user or group policy.
17-56Cisco ASA Series Command Reference, A through H Commands

Chapter
hold-timeTo specify the hold time advertised by the ASA in EIGRP hello packets, use the hold-time command in interface configuration mode. To return the hello interval to the default value, use the no form of this command.
hold-time eigrp as-number seconds
no hold-time eigrp as-number seconds
Syntax Description
Defaults The default is 15 seconds.
Command Modes The following table shows the modes in which you can enter the command:
Command History
Usage Guidelines This value is advertised in the EIGRP hello packets sent by the ASA. The EIGRP neighbors on that interface use this value to determine the availability of the ASA. If they do not receive a hello packet from the ASA during the advertised hold time, the EIGRP neighbors will consider the ASA to be unavailable.
On very congested and large networks, the default hold time might not be sufficient time for all routers and access servers to receive hello packets from their neighbors. In this case, you may want to increase the hold time.
We recommend that the hold time be at least three times the hello interval. If the ASA does not receive a hello packet within the specified hold time, routes through this neighbor are considered unavailable.
Increasing the hold time delays route convergence across the network.
Examples The following example sets the EIGRP hello interval to 10 seconds and the hold time to 30 seconds:
ciscoasa(config-if)# hello-interval eigrp 100 10
as-number The autonomous system number of the EIGRP routing process.
seconds Specifies the hold time, in seconds. Valid values are from 1 to 65535 seconds.
Command Mode
Firewall Mode Security Context
Routed Transparent Single
Multiple
Context System
Interface configuration • Yes — • Yes • Yes —
Release Modification
8.0(2) This command was added.
9.0(1) Support for multiple context mode was added.
17-57Cisco ASA Series Command Reference, A through H Commands

Chapter
ciscoasa(config-if)# hold-time eigrp 100 30
Related Commands Command Description
hello-interval Specifies the interval between EIGRP hello packets sent on an interface.
17-58Cisco ASA Series Command Reference, A through H Commands

Chapter
homepageTo specify a URL for the web page that displays upon login for this WebVPN user or group policy, use the homepage command in webvpn configuration mode. To remove a configured home page, including a null value created by issuing the homepage none command, use the no form of this command.
homepage {value url-string | none}
no homepage
Syntax Description
Defaults There is no default home page.
Command Modes The following table shows the modes in which you can enter the command:
Command History
Usage Guidelines To specify a home page URL for users associated with the group policy, enter a value for the URL string in this command. To inherit a home page from the default group policy, use the no form of the comand. The no option allows inheritance of a value from another group policy. To prevent inheriting a home page, use the homepage none command.
Clientless users are immediately brought to this page after successful authentication. AnyConnect launches the default web browser to this URL upon successful establishment of the VPN connection. On Linux platforms, AnyConnect does not currently support this command and ignores it.
Examples The following example shows how to specify www.example.com as the home page for the group policy named FirstGroup:
ciscoasa(config)# group-policy FirstGroup attributesciscoasa(config-group-policy)# webvpnciscoasa(config-group-webvpn)# homepage value http://www.example.com
none Indicates that there is no WebVPN home page. Sets a null value, thereby disallowing a home page. Prevents inheriting a home page.
value url-string Provides a URL for the home page. The string must begin with either http:// or https://.
Command Mode
Firewall Mode Security Context
Routed Transparent Single
Multiple
Context System
Webvpn configuration • Yes — • Yes — —
Release Modification
7.0(1) This command was added.
17-59Cisco ASA Series Command Reference, A through H Commands

Chapter
Related Commands Command Description
webvpn Lets you enter webvpn configuration mode to configure parameters that apply to group policies or usernames.
17-60Cisco ASA Series Command Reference, A through H Commands

Chapter
homepage use-smart-tunnelTo allow the group policy home page to use the smart tunnel feature when clientless SSL VPN is used, use the homepage use-smart-tunnel command in the group-policy webvpn configuration mode.
homepage {value url-string | none}
homepage use-smart-tunnel
Syntax Description
Command Modes The following table shows the modes in which you can enter the command:
Command History
Usage Guidelines You can use the HTTP capture tool to monitor the browser session and verify that the smart tunnel was initiated during the WebVPN connection. What you see in the browser capture determines whether the request is forwarded to the web page without degradation and whether the smart tunnel is used. If you see something like https://172.16.16.23/+CSCOE+portal.html, the +CSCO* indicates that the content is degraded by the ASA. When the smart tunnel is initiated, you see an http get command to a specific URL without the +CSCO* (such as GET 200 html http://mypage.example.com).
Examples If you consider a case where Vendor V wants to provide Partner P with clientless access to their internal inventory server pages, Vendor V’s administrator must decide the following:
• Will users have access to the inventory pages after they log into a clientless SSL VPN, whether or not they go through the clientless portal?
• Will the smart tunnel be a good choice for access because the page includes a Microsoft Silverlight component?
• Is a tunnel-all policy suitable because once the browser has been tunneled, all tunnel policy forces all browser traffic to go through Vendor V’s ASA, leaving Partner P’s users with no access to internal resources?
none Indicates that there is no WebVPN home page. Sets a null value, thereby disallowing a home page. Prevents inheriting a home page.
value url-string Provides a URL for the home page. The string must begin with either http:// or https://.
Command Mode
Firewall Mode Security Context
Routed Transparent Single
Multiple
Context System
Group-policy webvpn configuration
• Yes — • Yes — —
Release Modification
8.3(1) This command was added.
17-61Cisco ASA Series Command Reference, A through H Commands
Chapter
With the assumption that inventory pages are hosted at inv.example.com (10.0.0.0), the following example creates a tunnel policy that contains only one host:
ciscoasa(config-webvpn)# smart-tunnel network inventory ip 10.0.0.0ciscoasa(config-webvpn)# smart-tunnel network inventory host inv.example.com
The following example applies a tunnel-specified tunnel policy to the partner’s group policy:
ciscoasa(config-group-webvpn)# smart-tunnel tunnel-policy tunnelspecified inventory
The following example specifies the group policy home page and enables a smart tunnel on it:
ciscoasa(config-group-webvpn)# homepage value http://inv.example.comciscoasa(config-group-webvpn)# homepage use-smart-tunnel
17-62Cisco ASA Series Command Reference, A through H Commands

Chapter
host (network object)To configure a host for a network object, use the host command in object network configuration mode. To remove the host from the object, use the no form of this command.
host ip_address
no host ip_address
Syntax Description
Defaults No default behavior or values.
Command Modes The following table shows the modes in which you can enter the command:
Command History
Usage Guidelines If you configure an existing network object with a different IP address, the new configuration will replace the existing configuration.
Examples The following example shows how to create a host network object:
ciscoasa (config)# object network OBJECT1ciscoasa (config-network-object)# host 10.1.1.1
Related Commands
ip_address Identifies the host IP address for the object, either IPv4 or IPv6.
Command Mode
Firewall Mode Security Context
Routed Transparent Single
Multiple
Context System
Object configuration • Yes • Yes • Yes • Yes —
Release Modification
8.3(1) This command was added.
Command Description
clear configure object Clears all objects created.
nat Enables NAT for the network object.
object network Creates a network object.
object-group network Creates a network object group.
show running-config object network
Shows the network object configuration.
17-63Cisco ASA Series Command Reference, A through H Commands

Chapter
host (parameters)To specify a host to interact with using RADIUS accounting, use the host command in radius-accounting parameter configuration mode, which is accessed by using the parameters command in the policy-map type inspect radius-accounting submode. To disable the specified host, use the no form of this command.
host address [key secret]
no host address [key secret]
Syntax Description
Defaults The no option is disabled by default.
Command Modes The following table shows the modes in which you can enter the command:
Command History
Usage Guidelines Multiple instances of this command are allowed.
Examples The following example shows how to specify a host with RADIUS accounting:
ciscoasa(config)# policy-map type inspect radius-accounting raciscoasa(config-pmap)# parametersciscoasa(config-pmap-p)# host 209.165.202.128 key cisco123
host Specifies a single endpoint sending the RADIUS accounting messages.
address The IP address of the client or server sending the RADIUS accounting messages.
key Optional keyword to specify the secret of the endpoint sending the gratuitous copy of the accounting messages.
secret The shared secret key of the endpoint sending the accounting messages used to validate the messages. This can be up to 128 alphanumeric characters.
Command Mode
Firewall Mode Security Context
Routed Transparent Single
Multiple
Context System
Radius-accounting parameters configuration
• Yes • Yes • Yes • Yes —
Release Modification
7.2(1) This command was added.
17-64Cisco ASA Series Command Reference, A through H Commands
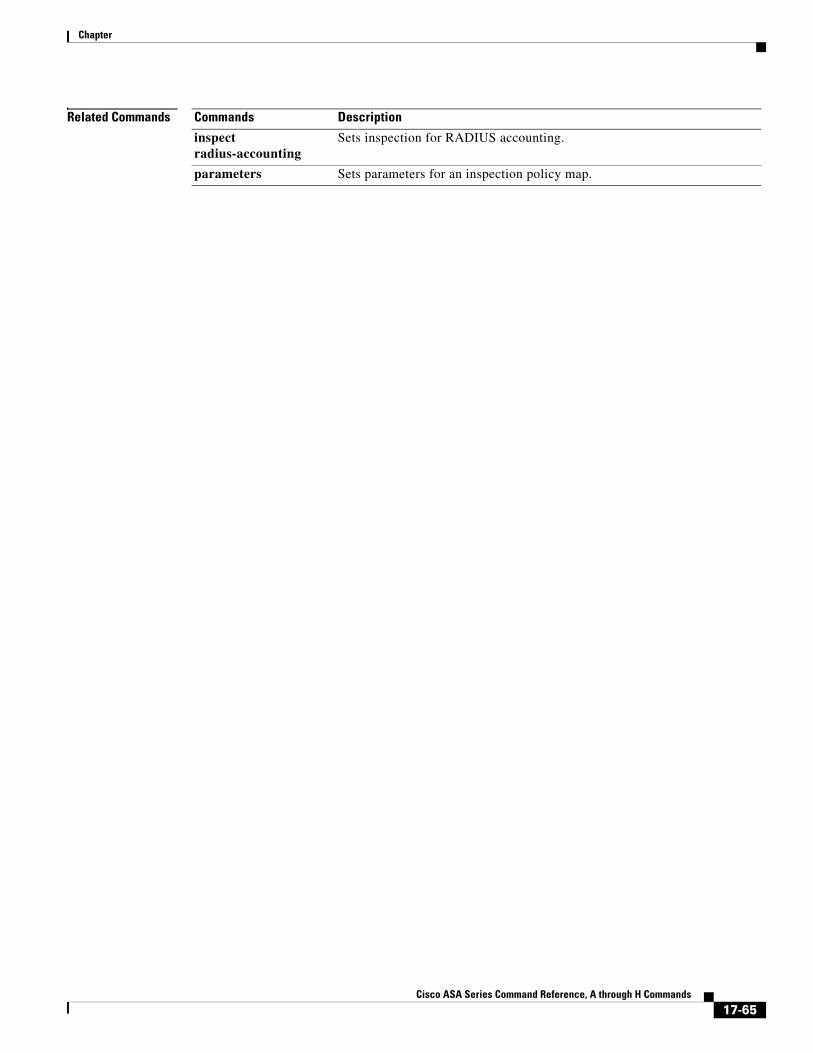
Chapter
Related Commands Commands Description
inspect radius-accounting
Sets inspection for RADIUS accounting.
parameters Sets parameters for an inspection policy map.
17-65Cisco ASA Series Command Reference, A through H Commands

Chapter
hostnameTo set the ASA hostname, use the hostname command in global configuration mode. To restore the default hostname, use the no form of this command.
hostname name
no hostname [name]
Syntax Description
Defaults The default hostname depends on your platform.
Command Modes The following table shows the modes in which you can enter the command:
Command History
Usage Guidelines The hostname appears as the command line prompt, and if you establish sessions to multiple devices, the hostname helps you keep track of where you enter commands. For multiple context mode, the hostname that you set in the system execution space appears in the command line prompt for all contexts.
The hostname that you optionally set within a context does not appear in the command line, but can be used for the banner command $(hostname) token.
Examples The following example sets the hostname to firewall1:
ciscoasa(config)# hostname firewall1firewall1(config)#
Related Commands
name Specifies a hostname up to 63 characters. A hostname must start and end with a letter or digit, and have as interior characters only letters, digits, or a hyphen.
Command Mode
Firewall Mode Security Context
Routed Transparent Single
Multiple
Context System
Global configuration • Yes • Yes • Yes • Yes • Yes
Release Modification
7.0(1) You can no longer use non-alphanumeric characters (other than a hyphen).
Command Description
banner Sets a login, message of the day, or enable banner.
domain-name Sets the default domain name.
17-66Cisco ASA Series Command Reference, A through H Commands

Chapter
hostname dynamicTo enable IS-IS dynamic hostname capability on the ASA, use the hostname dynamic command in router isis configuration mode. To disable the dynamic hostname feature, use the no form of this command.
hostname dynamic
no hostname dynamic
Syntax Description This command has no arguments or keywords.
Defaults The dynamic hostname is enabled by default.
Command Modes The following table shows the modes in which you can enter the command:
Command History
Usage Guidelines In the IS-IS routing domain, the system ID is used to represent each ASA. The system ID is part of the network entity title (NET) that is configured for each IS-IS ASA. For example, an ASA with a configured NET of 49.0001.0023.0003.000a.00 has a system ID of 0023.0003.000a. Router-name-to-system-ID mapping is difficult for network administrators to remember during maintenance and troubleshooting on the routers. Entering the show isis hostname command displays the entries in the system-ID-to-router-name mapping table.
The dynamic hostname mechanism uses link-state protocol (LSP) flooding to distribute the router-name-to-system-ID mapping information across the entire network. Every ASA on the network will try to install the system ID-to-router name mapping information in its routing table.
If an ASA that has been advertising the dynamic name type, length, value (TLV) on the network suddenly stops the advertisement, the mapping information last received remains in the dynamic host mapping table for up to one hour, which allows the network administrator to display the entries in the mapping table during a time when the network experiences problems. Entering the show isis hostname command displays the entries in the mapping table.
Examples The following example sets the hostname to firewall1:
ciscoasa(config)# hostname firewall1
Command Mode
Firewall Mode Security Context
Routed Transparent Single
Multiple
Context System
Router isis configuration • Yes — • Yes • Yes —
Release Modification
9.6(1) This command was added.
17-67Cisco ASA Series Command Reference, A through H Commands

Chapter
firewall1(config)#
Related Commands Command Description
advertise passive-only Configures the ASA to advertise passive interfaces.
area-password Configures an IS-IS area authentication password.
authentication key Enables authentication for IS-IS globally.
authentication mode Specifies the type of authentication mode used in IS-IS packets for the IS-IS instance globally.
authentication send-only
Configure the IS-IS instance globally to have authentication performed only on IS-IS packets being sent (not received).
clear isis Clears IS-IS data structures.
default-information originate
Generates a default route into an IS-IS routing domain.
distance Defines the administrative distance assigned to routes discovered by the IS-IS protocol.
domain-password Configures an IS-IS domain authentication password.
fast-flood Configures IS-IS LSPs to be full.
hello padding Configures IS-IS hellos to the full MTU size.
ignore-lsp-errors Configures the ASA to ignore IS-IS LSPs that are received with internal checksum errors rather than purging the LSPs.
isis adjacency-filter Filters the establishment of IS-IS adjacencies.
isis advertise-prefix Advertises IS-IS prefixes of connected networks in LSP advertisements on an IS-IS interface.
isis authentication key Enables authentication for an interface.
isis authentication mode
Specifies the type of authentication mode used in IS-IS packets for the IS-IS instance per interface
isis authentication send-only
Configure the IS-IS instance per interface to have authentication performed only on IS-IS packets being sent (not received).
isis circuit-type Configures the type of adjacency used for the IS-IS.
isis csnp-interval Configures the interval at which periodic CSNP packets are sent on broadcast interfaces.
isis hello-interval Specifies the length of time between consecutive hello packets sent by IS-IS.
isis hello-multiplier Specifies the number of IS-IS hello packets a neighbor must miss before the ASA declares the adjacency as down.
isis hello padding Configures IS-IS hellos to the full MTU size per interface.
isis lsp-interval Configures the time delay between successive IS-IS LSP transmissions per interface.
isis metric Configures the value of an IS-IS metric.
isis password Configures the authentication password for an interface.
isis priority Configures the priority of designated ASAs on the interface.
isis protocol shutdown Disables the IS-IS protocol per interface.
isis retransmit-interval
Configures the amount of time between retransmission of each IS-IS LSP on the interface.
17-68Cisco ASA Series Command Reference, A through H Commands

Chapter
isis retransmit-throttle-interval
Configures the amount of time between retransmissions of each IS-IS LSP on the interface.
isis tag Sets a tag on the IP address configured for an interface when the IP prefix is put into an LSP.
is-type Assigns the routing level for the IS-IS routing process.
log-adjacency-changes Enables the ASA to generate a log message when an NLSP IS-IS adjacency changes state (up or down).
lsp-full suppress Configures which routes are suppressed when the PDU becomes full.
lsp-gen-interval Customizes IS-IS throttling of LSP generation.
lsp-refresh-interval Sets the LSP refresh interval.
max-area-addresses Configures additional manual addresses for an IS-IS area.
max-lsp-lifetime Sets the maximum time that LSPs persist in the ASA's database without being refreshed.
maximum-paths Configures multi-path load sharing for IS-IS.
metric Globally changes the metric value for all IS-IS interfaces.
metric-style Configures an ASA running IS-IS so that it generates and only accepts new-style, length, value objects (TLVs).
net Specifies the NET for the routing process.
passive-interface Configures a passive interface.
prc-interval Customizes IS-IS throttling of PRCs.
protocol shutdown Disables the IS-IS protocol globally so that it cannot form any adjacency on any interface and will clear the LSP database.
redistribute isis Redistributes IS-IS routes specifically from Level 1 into Level 2 or from Level 2 into Level 1.
route priority high Assigns a high priority to an IS-IS IP prefix.
router isis Enables IS-IS routing.
set-attached-bit Specifies constraints for when a Level 1-Level 2 router should set its attached bit.
set-overload-bit Configures the ASA to signal other routers not to use it as an intermediate hop in their SPF calculations.
show clns Shows CLNS-specific information.
show isis Shows IS-IS information.
show route isis Shows IS-IS routes.
spf-interval Customizes IS-IS throttling of SPF calculations.
summary-address Creates aggregate addresses for IS-IS.
Command Description
17-69Cisco ASA Series Command Reference, A through H Commands

Chapter
hostscan enableTo enable hostscan for clientless SSL VPN remote access or remote access using the AnyConnect client, use the hostscan enable command in webvpn configuration mode. To disable hostscan, use the no form of this command.
hostscan enable
no hostscan enable
Syntax Description This command has no arguments or keywords.
Defaults No default behavior or values.
Command Modes The following table shows the modes in which you can enter the command:
Command History
Usage Guidelines Hostscan is enabled or disabled globally for all remote access connection attempts made to the ASA with one exception.
The hostscan enable command does the following:
1. Provides a validity check that supplements the check performed by the previous hostscan image path command.
2. Creates an sdesktop folder on disk0: if one is not already present.
3. Inserts a data.xml (Hostscan configuration) file in the sdesktop folder if one is not already present.
4. Loads the data.xml from the flash device to the running configuration.
5. Enables Hostscan.
Note • You can enter the show webvpn hostscan command to determine whether or not hostscan is enabled.
• The hostscan image path command must be in the running configuration before you enter the hostscan enable command.
• The no hostscan enable command disables Hostscan in the running configuration. If Hostscan is disabled, you cannot access Hostscan Manager and remote users cannot use Hostscan.
Command Mode
Firewall Mode Security Context
Routed Transparent Single
Multiple
Context System
Webvpn configuration mode • Yes — • Yes — —
Release Modification
9.5(2) This command was added.
17-70Cisco ASA Series Command Reference, A through H Commands

Chapter
• If you transfer or replace the data.xml file, disable and then enable Hostscan to load the file into the running configuration.
• Hostscan is enabled or disabled globally for all remote access connection attempts made to the ASA. You cannot enable or disable Hostscan for an individual connection profile or group policy.
Exception: Connection profiles for clientless SSL VPN connections can be configured so that Hostscan will not run on the client computer if the computer is attempting to connect to the ASA using a group URL and Hostscan is enabled globally. For example:
ciscoasa(config)# tunnel-group group-name webvpn-attributes
ciscoasa(config-tunnel-webvpn)# group-url https://www.url-string.com
ciscoasa(config-tunnel-webvpn)# without-Hostscan
Examples The following commands shows how to view the status of the hostscan image and enable it:
ciscoasa(config-webvpn)# show webvpn hostscanHostscan is not enabled.ciscoasa(config-webvpn)# hostscan enableciscoasa(config-webvpn)# show webvpn hostscanHostscan version 4.1.0.25 is currently installed and enabled.ciscoasa(config-webvpn)#
Related Commands Command Description
hostscan image Copies the hostscan image named in the command from the flash drive specified in the path to the running configuration.
show webvpn hostscan
Identifies the version of Hostscan if it is enabled. Otherwise, the CLI indicates “Secure Desktop is not enabled.”
without-Hostscan Configures connection profiles for clientless SSL VPN sessions so that hostscan will not run on the client computer if the computer is attempting to connect to the ASA using a group URL and Hostscan is enabled globally.
17-71Cisco ASA Series Command Reference, A through H Commands

Chapter
hostscan imageTo install or upgrade the Cisco Host Scan distribution package and add it to the running configuration, use the hostscan image command in webvpn configuration mode. To remove the Host Scan distribution package from the running configuration, use the no form of this command:
hostscan image path
no hostscan image path
Syntax Description
Defaults No default behavior or values.
Command Modes The following table shows the modes in which you can enter the command:
Command History
Usage Guidelines Enter the show webvpn hostscan command to determine the version of the Host Scan image that is currently installed and enabled.
After installing Host Scan with the hostscan image command, enable the image using the enable command.
Enter the write memory command to save the running configuration to ensure that the Host Scan image is available the next time that the ASA reboots.
path Specifies the path and filename of the Cisco Host Scan package, up to 255 characters.
The Host Scan package can be a standalone Host Scan package that has the file name convention, hostscan-version.pkg, or it can be the full AnyConnect Secure Mobility Client package that can be downloaded from Cisco.com and has the file name convention, anyconnect-win-version-k9.pkg. When customers specify the AnyConnect Secure Mobility Client, the ASA extracts the Host Scan package from the AnyConnect package and installs it.
The Host Scan package contains the Host Scan software as well as the Host Scan library and support charts.
Command Mode
Firewall Mode Security Context
Routed Transparent Single
Multiple
Context System
Webvpn configuration • Yes — • Yes — —
Release Modification
9.5(2) This command was added.
17-72Cisco ASA Series Command Reference, A through H Commands

Chapter
Examples The following commands show how to install a Cisco Host Scan package, enable it, view it, and save the configuration on the flash drive:
ciscoasa> enPassword: ****** ciscoasa# config tciscoasa(config)# webvpnciscoasa(config-webvpn)# show webvpn hostscanHostscan is not enabled.ciscoasa(config-webvpn)# hostscan image disk0:/hostscan_3.0.0333-k9.pkg ciscoasa(config-webvpn)# hostscan enableciscoasa(config-webvpn)# show webvpn hostscanHostscan version 3.0.0333 is currently installed and enabledciscoasa(config-webvpn)# write memoryBuilding configuration...Cryptochecksum: 2e7126f7 71214c6b 6f3b28c5 72fa0a1e
22067 bytes copied in 3.460 secs (7355 bytes/sec)[OK]ciscoasa(config-webvpn)#
Related Commands Command Description
show webvpn hostscan Identifies the version of Cisco Host Scan if it is enabled. Otherwise, the CLI indicates “Hostscan is not enabled.”
hostscan enable Enables Hostscan for management and remote user access.
17-73Cisco ASA Series Command Reference, A through H Commands

Chapter
hpm topn enableTo enable real-time reports in ASDM of the top hosts connecting through the ASA, use the hpm topn enable command in global configuration mode. To disable the hosts reporting, use the no form of this command.
hpm topn enable
no hpm topn enable
Syntax Description This command has no arguments or keywords.
Command Default This command is disabled by default.
Command Modes The following table shows the modes in which you can enter the command:
Command History
Usage Guidelines You might want to disable this command to maximize system performance. This command populates the ASDM Home > Firewall Dashboard > Top 200 Hosts pane.
Examples The following example enables the top hosts reporting:
ciscoasa(config)# hpm topn enable
Related Commands
Command Mode
Firewall Mode Security Context
Routed Transparent Single
Multiple
Context System
Global configuration • Yes • Yes • Yes — —
Release Modification
8.3(1) This command was added.
Command Description
clear configure hpm Clears the HPM configuration.
show running-config hpm
Shows the HPM configuration.
17-74Cisco ASA Series Command Reference, A through H Commands

Chapter
hsiTo add an HSI to an HSI group for H.323 protocol inspection, use the hsi command in hsi group configuration mode. To disable this feature, use the no form of this command.
hsi ip_address
no hsi ip_address
Syntax Description
Defaults No default behavior or values.
Command Modes The following table shows the modes in which you can enter the command:
Command History
Examples The following example shows how to add an HSI to an HSI group in an H.323 inspection policy map:
ciscoasa(config-pmap-p)# hsi-group 10ciscoasa(config-h225-map-hsi-grp)# hsi 10.10.15.11
Related Commands
ip_address IP address of the host to add. A maximum of five HSIs per HSI group is allowed.
Command Mode
Firewall Mode Security Context
Routed Transparent Single
Multiple
Context System
Hsi group configuration • Yes • Yes • Yes • Yes —
Release Modification
7.2(1) This command was added.
Command Description
class-map Creates a Layer 3/4 class map.
endpoint Adds an endpoint to the HSI group.
hsi-group Creates an HSI group.
policy-map Creates a Layer 3/4 policy map.
show running-config policy-map
Display all current policy map configurations.
17-75Cisco ASA Series Command Reference, A through H Commands

Chapter
hsi-groupTo define an HSI group for H.323 protocol inspection and to enter hsi group configuration mode, use the hsi-group command in parameters configuration mode. To disable this feature, use the no form of this command.
hsi-group group_id
no hsi-group group_id
Syntax Description
Defaults No default behavior or values.
Command Modes The following table shows the modes in which you can enter the command:
Command History
Examples The following example shows how to configure an HSI group in an H.323 inspection policy map:
ciscoasa(config-pmap-p)# hsi-group 10ciscoasa(config-h225-map-hsi-grp)# hsi 10.10.15.11ciscoasa(config-h225-map-hsi-grp)# endpoint 10.3.6.1 insideciscoasa(config-h225-map-hsi-grp)# endpoint 10.10.25.5 outside
Related Commands
group_id HSI group ID number, from 0 to 2147483647.
Command Mode
Firewall Mode Security Context
Routed Transparent Single
Multiple
Context System
Parameters configuration • Yes • Yes • Yes • Yes —
Release Modification
7.2(1) This command was added.
Command Description
class-map Creates a Layer 3/4 class map.
endpoint Adds an endpoint to the HSI group.
hsi Adds an HSI to the HSI group.
policy-map Creates a Layer 3/4 policy map.
show running-config policy-map
Display all current policy map configurations.
17-76Cisco ASA Series Command Reference, A through H Commands

Chapter
hsts enableTo configure sending the HTTP Strict Transport Security Header to browsers and other user agents, use the hsts enable command in webvpn configuration mode. To remove this setting from the configuration use the no form of this command. Once enabled, compliant browsers and user agents will switch to HTTPS if access is attempted in an unsecured manner.
hsts enable
no hsts enable
Syntax Description This command has no arguments or keywords.
Defaults By default, the Strict Transport Security Header is not used.
Command Modes The following table shows the modes in which you can enter the command:
Command History
Usage Guidelines HTTP Strict Transport Security (HSTS) is a web security policy mechanism which helps to protect websites against protocol downgrade attacks and cookie hijacking. It allows web servers to declare that web browsers (or other complying user agents) should only interact with it using secure HTTPS connections, and never via the insecure HTTP protocol.
When enabled, the default timeout value if of 10,886,400 seconds (18weeks) is used. This can be changed using the hsts max-age command.
Examples ciscoasa(config)# webvpnciscoasa(config-webvpn)# hsts enableciscoasa(config-webvpn)#
Command Mode
Firewall Mode Security Context
Routed Transparent Single
Multiple
Context System
Webvpn configuration • Yes — • Yes — —
Release Modification
9.8(2) This command was introduced.
17-77Cisco ASA Series Command Reference, A through H Commands

Chapter
Related Commands Command Description
hsts max-age Maximum amount of time the ASA will be treated as an HSTS host and accessed securely.
show running-config webvpn hsts Displays the running configuration for SSL VPN, including any HTTP settings.
17-78Cisco ASA Series Command Reference, A through H Commands

Chapter
hsts max-ageWhen configured to send the HTTP Strict Transport Security Header to browsers or other user agents, (using the hsts enable command), hsts max-age sets the maximum amount of time the ASA will be treated as an HSTS host and accessed securely
hsts max-age max-value-in-seconds
Syntax Description
Defaults By default, the maximum is 10,886,400 (18 weeks).
Command Modes The following table shows the modes in which you can enter the command:
Command History
Usage Guidelines HTTP Strict Transport Security (HSTS) is a web security policy mechanism which helps to protect websites against protocol downgrade attacks and cookie hijacking. It allows web servers to declare that web browsers (or other complying user agents) should only interact with it using secure HTTPS connections, and never via the insecure HTTP protocol.
When enabled, the default timeout value of 10,886,400 seconds (18weeks) is used. This command alters the timeout.
Examples ciscoasa(config)# webvpnciscoasa(config-webvpn)# hsts max-age 31536000ciscoasa(config-webvpn)#
max-value-in-seconds The amount of time in seconds that HSTS will be in effect. Range is from <0-31536000> seconds.
Command Mode
Firewall Mode Security Context
Routed Transparent Single
Multiple
Context System
Webvpn configuration • Yes — • Yes — —
Release Modification
9.8(2) This command was introduced.
17-79Cisco ASA Series Command Reference, A through H Commands

Chapter
Related Commands Command Description
hsts enable Enables sending of the HSTS Header.
show running-config webvpn hsts
Displays the running configuration for SSL VPN, including any HTTP settings.
17-80Cisco ASA Series Command Reference, A through H Commands

Chapter
html-content-filterTo filter Java, ActiveX, images, scripts, and cookies for WebVPN sessions for this user or group policy, use the html-content-filter command in webvpn configuration mode. To remove a content filter, use the no form of this command.
html-content-filter {java | images | scripts | cookies | none}
no html-content-filter [java | images | scripts | cookies | none]
Syntax Description
Defaults No filtering occurs.
Command Modes The following table shows the modes in which you can enter the command:
Command History
Usage Guidelines To remove all content filters, including a null value created by issuing the html-content-filter none command, use the no form of this command without arguments. The no option allows inheritance of a value from another group policy. To prevent inheriting an HTML content filter, use the html-content-filter none command.
Using the command a second time overrides the previous setting.
Examples The following example shows how to set filtering of Java and ActiveX, cookies, and images for the group policy named FirstGroup:
ciscoasa(config)# group-policy FirstGroup attributesciscoasa(config-group-policy)# webvpn
cookies Removes cookies from images, providing limited ad filtering and privacy.
images Removes references to images (removes <IMG> tags).
java Removes references to Java and ActiveX (removes the <EMBED>, <APPLET>, and <OBJECT> tags.
none Indicates that there is no filtering. Sets a null value, thereby disallowing filtering. Prevents inheriting filtering values.
scripts Removes references to scripting (removes <SCRIPT> tags).
Command Mode
Firewall Mode Security Context
Routed Transparent Single
Multiple
Context System
Webvpn configuration • Yes — • Yes — —
Release Modification
7.0(1) This command was added.
17-81Cisco ASA Series Command Reference, A through H Commands

Chapter
ciscoasa(config-group-webvpn)# html-content-filter java cookies images
Related Commands Command Description
webvpn Lets you enter webvpn configuration mode to configure parameters that apply to group policies or usernames. Lets you enter global configuration mode to configure global settings for WebVPN.
17-82Cisco ASA Series Command Reference, A through H Commands

Chapter
http (global)To specify hosts that can access the HTTP server internal to the ASA, use the http command in global configuration mode. To remove one or more hosts, use the no form of this command. To remove the attribute from the configuration, use the no form of this command without arguments.
http ip_address subnet_mask interface_name
no http
Syntax Description
Defaults No hosts can access the HTTP server.
Command Modes The following table shows the modes in which you can enter the command:
Command History
Examples The following example shows how to allow the host with the IP address of 10.10.99.1 and the subnet mask of 255.255.255.255 access to the HTTP server via the outside interface:
ciscoasa(config)# http 10.10.99.1 255.255.255.255 outside
The next example shows how to allow any host access to the HTTP server via the outside interface:
ciscoasa(config)# http 0.0.0.0 0.0.0.0 outside
interface_name Provides the name of the ASA interface through which the host can access the HTTP server. A physical or virtual interface can be specified. if a BVI interface is specified, managenent-access must be configured on that interface.
ip_address Provides the IP address of a host that can access the HTTP server.
subnet_mask Provides the subnet mask of a host that can access the HTTP server.
Command Mode
Firewall Mode Security Context
Routed Transparent Single
Multiple
Context System
Global configuration • Yes • Yes • Yes • Yes —
Release Modification
7.0(1) This command was added.
9.7(1) If you have a directly-connected HTTP management station, you can use a /31 subnet on the ASA and the host to create a point-to-point connection.
9.9.(2) Virtual interfaces can now be specified.
17-83Cisco ASA Series Command Reference, A through H Commands

Chapter
Related Commands Command Description
clear configure http Removes the HTTP configuration: disables the HTTP server and removes hosts that can access the HTTP server.
http authentication-certificate Requires authentication via certificate from users who are establishing HTTPS connections to the ASA.
http redirect Specifies that the ASA redirect HTTP connections to HTTPS.
http server enable Enables the HTTP server.
show running-config http Displays the hosts that can access the HTTP server, and whether or not the HTTP server is enabled.
17-84Cisco ASA Series Command Reference, A through H Commands

Chapter
http[s] (parameters)To specify the service type for the scansafe inspection policy map, use the http[s] command in parameters configuration mode. To remove the service type, use the no form of this command. You can access the parameters configuration mode by first entering the policy-map type inspect scansafe command.
{http | https}
no {http | https}
Syntax Description This command has no arguments or keywords.
Command Default No default behavior or values.
Command Modes The following table shows the modes in which you can enter the command:
Command History
Usage Guidelines You can only specify one service type for a Scansafe inspection policy map, either http or https. There is no default; you must specify a type.
Examples The following example creates an inspection policy map, and sets the service type to HTTP:
ciscoasa(config)# policy-map type inspect scansafe cws_inspect_pmap1ciscoasa(config-pmap)# parameters ciscoasa(config-pmap-p)# http
Related Commands
Command Mode
Firewall Mode Security Context
Routed Transparent Single
Multiple
Context System
Global configuration • Yes • Yes • Yes • Yes —
Release Modification
9.0(1) This command was added.
Command Description
class-map type inspect scansafe
Creates an inspection class map for whitelisted users and groups.
default user group Specifies the default username and/or group if the ASA cannot determine the identity of the user coming into the ASA.
inspect scansafe Enables Cloud Web Security inspection on the traffic in a class.
17-85Cisco ASA Series Command Reference, A through H Commands

Chapter
license Configures the authentication key that the ASA sends to the Cloud Web Security proxy servers to indicate from which organization the request comes.
match user group Matches a user or group for a whitelist.
policy-map type inspect scansafe
Creates an inspection policy map so you can configure essential parameters for the rule and also optionally identify the whitelist.
retry-count Enters the retry counter value, which is the amount of time that the ASA waits before polling the Cloud Web Security proxy server to check its availability.
scansafe In multiple context mode, allows Cloud Web Security per context.
scansafe general-options
Configures general Cloud Web Security server options.
server {primary | backup}
Configures the fully qualified domain name or IP address of the primary or backup Cloud Web Security proxy servers.
show conn scansafe Shows all Cloud Web Security connections, as noted by the capitol Z flag.
show scansafe server Shows the status of the server, whether it’s the current active server, the backup server, or unreachable.
show scansafe statistics
Shows total and current http connections.
user-identity monitor Downloads the specified user or group information from the AD agent.
whitelist Performs the whitelist action on the class of traffic.
Command Description
17-86Cisco ASA Series Command Reference, A through H Commands

Chapter
http authentication-certificateTo require a certificate for authentication with ASDM HTTPS connections, use the http authentication-certificate command in global configuration mode. To remove the attribute from the configuration, use the no version of this command.
http authentication-certificate interface name [match certificate_map_name]
no http authentication-certificate [interface [match certificate_map_name]]
Syntax Description
Defaults HTTP certificate authentication is disabled.
Command Modes The following table shows the modes in which you can enter the command:
Command History
Usage Guidelines You can require certificate authentication, with or without AAA authentication. You configure certificate authentication for each interface, so that connections on a trusted/inside interface do not have to provide a certificate. You can use the command multiple times to enable certificate authentication on multiple interfaces.
The ASA validates certificates against the PKI trust points. If a certificate does not pass validation, the ASA closes the SSL connection.
interface Specifies the interface on the ASA that requires certificate authentication.
match certificate_map_name
Requires the certificate to match a certificate map. Configure the map using the crypto ca certificate map command.
Command Mode
Firewall Mode Security Context
Routed Transparent Single
Multiple
Context System
Global configuration • Yes — • Yes — —
Release Modification
7.0(1) This command was added.
8.0.3 This command was deprecated in favor of the ssl certificate-authentication command.
8.2.1 This command was re-added; the global ssl certificate-authentication command was kept for backwards compatibility.
8.4.7, 9.1.3 Certificate-only authentication was enabled. Previously, this command only added certificate authentication to user authentication when you enabled the aaa authentication http console command.
9.6(2) We added the match certificate_map_name option.
17-87Cisco ASA Series Command Reference, A through H Commands
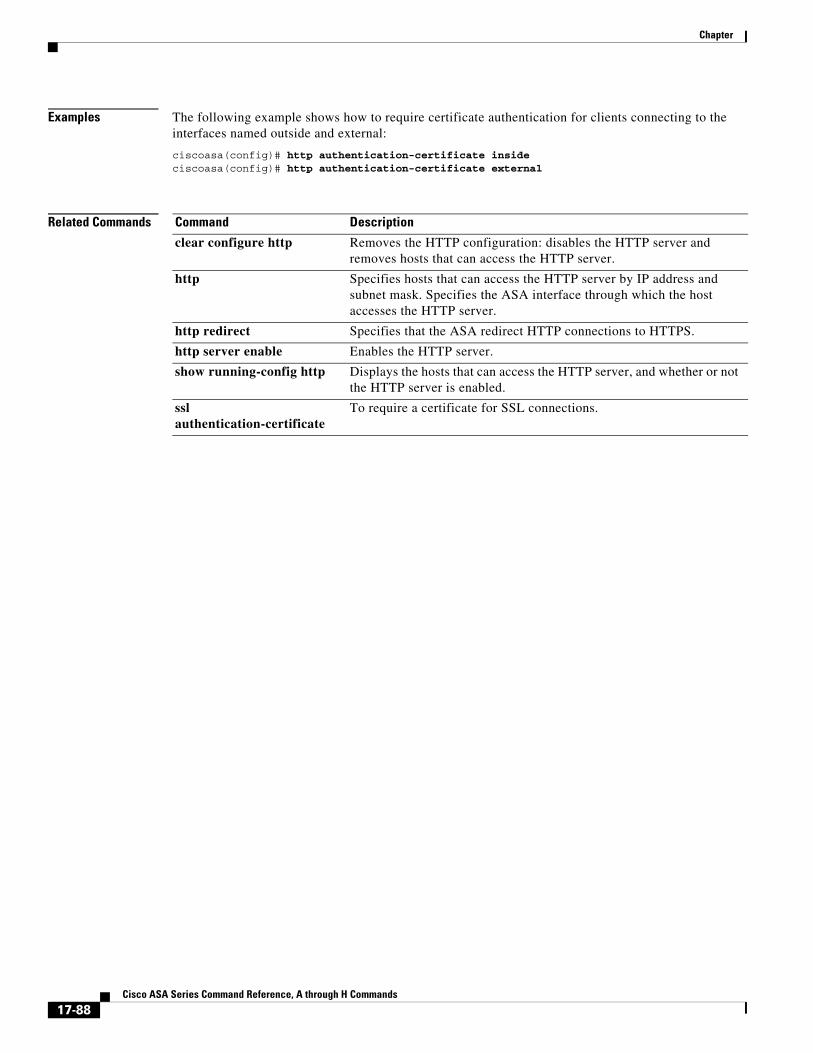
Chapter
Examples The following example shows how to require certificate authentication for clients connecting to the interfaces named outside and external:
ciscoasa(config)# http authentication-certificate insideciscoasa(config)# http authentication-certificate external
Related Commands Command Description
clear configure http Removes the HTTP configuration: disables the HTTP server and removes hosts that can access the HTTP server.
http Specifies hosts that can access the HTTP server by IP address and subnet mask. Specifies the ASA interface through which the host accesses the HTTP server.
http redirect Specifies that the ASA redirect HTTP connections to HTTPS.
http server enable Enables the HTTP server.
show running-config http Displays the hosts that can access the HTTP server, and whether or not the HTTP server is enabled.
ssl authentication-certificate
To require a certificate for SSL connections.
17-88Cisco ASA Series Command Reference, A through H Commands

Chapter
http-compTo enable compression of HTTP data over a WebVPN connection for a specific group or user, use the http-comp command in the group-policy webvpn and username webvpn configuration modes. To remove the command from the configuration and have the value be inherited, use the no form of this command.
http-comp {gzip | none}
no http-comp {gzip | none}
Syntax Description
Defaults By default, compression is set to enabled.
Command Modes The following table shows the modes in which you can enter the command:
Command History
Usage Guidelines For WebVPN connections, the compression command configured in global configuration mode overrides the http-comp command configured in group policy and username webvpn configuration modes.
Examples The following example disables compression for the group-policy sales:
ciscoasa(config)# group-policy sales attributesciscoasa(config-group-policy)# webvpnciscoasa(config-group-webvpn)# http-comp none
gzip Specifies compression is enabled for the group or user.
none Specifies compression is disabled for the group or user.
Command Mode
Firewall Mode Security Context
Routed Transparent Single
Multiple
Context System
Group-policy webvpn configuration
• Yes — • Yes — —
Username webvpn configuration • Yes — • Yes — —
Release Modification
7.1(1) This command was added.
17-89Cisco ASA Series Command Reference, A through H Commands

Chapter
Related Commands Command Description
compression Enables compression for all SVC, WebVPN, and IPsec VPN connections.
17-90Cisco ASA Series Command Reference, A through H Commands
Chapter
http connection idle-timeoutTo set an idle timeout for HTTPS connections to the ASA, including ASDM, WebVPN, and other clients, use the http connection idle-timeout command in global configuration mode. To disable the timeout, use the no form of this command.
http connection idle-timeout [seconds]
no http connection idle-timeout [seconds]
Syntax Description
Defaults This command is disabled by default.
Command Modes The following table shows the modes in which you can enter the command:
Command History
Usage Guidelines The ASA disconnects a connection that is idle for the set period of time. If you set both the http server idle-timeout and the http connection idle-timeout commands, the http connection idle-timeout command takes precendence.
Examples The following example sets the idle timeout for HTTPS sessions to 600 seconds:
ciscoasa(config)# http connections idle-timeout 600
Related Commands
seconds The idle timeout, from10-86400 seconds.
Command Mode
Firewall Mode Security Context
Routed Transparent Single
Multiple
Context System
Global configuration • Yes • Yes • Yes • Yes —
Release Modification
9.14(1) This command was added.
Command Description
clear configure http Removes the HTTP configuration, disables the HTTP server, and removes hosts that can access the HTTP server.
http Specifies hosts that can access the HTTP server by IP address and subnet mask and the interface through which the host accesses the HTTP server.
http authentication-certificate
Requires authentication via certificate from users who are establishing HTTPS connections to the ASA.
17-91Cisco ASA Series Command Reference, A through H Commands

Chapter
http server enable Enables the HTTP server for ASDM sessions.
http server idle-timeout Sets the ASDM idle timeout.
http server session-timeout
Limits the session time of ASDM sessions to the ASA.
http redirect Specifies that the ASA redirect HTTP connections to HTTPS.
show running-config http Displays the hosts that can access the HTTP server, and whether or not the HTTP server is enabled.
Command Description
17-92Cisco ASA Series Command Reference, A through H Commands

Chapter
http-only-cookieTo prevent a Clientless SSL VPN session cookie from being accessed by a third party through a client-side script such as Javascript, use the http-only-cookie command in webvpn mode. Remove this restriction using the no form of this command.
http-only-cookie
no http-only-cookie
Defaults The session cookie is available for use by a third party.
Command Modes The following table shows the modes in which you can enter the command:
Command History
Usage Guidelines Embedded objects such as Flash applications and Java applets, as well as external applications, usually rely on an existing session cookie to work with the server. They get it from a browser using some Javascript on initialization. Adding the httponly flag to the Clientless SSL VPN session cookie makes the session cookie only visible to the browser, not the client-side scripts, and it makes session sharing impossible.
Note Use this command only if Cisco TAC advises you to do so. Enabling this command presents a security risk because the Clientless SSL VPN features listed below will not work without any warning.
• Change the VPN session cookie setting only when there are no active Clientless SSL VPN sessions.
• Use the show vpn-sessiondb webvpn command to check the status of Clientless SSL VPN sessions.
• Use the vpn-sessiondb logoff webvpn command to log out of all Clientless SSL VPN sessions.
• The following Clientless SSL VPN features will not work when the http-only-cookie command is enabled:
– Java plug-ins
– Java rewriter
– Port forwarding
– File browser
Command Mode
Firewall Mode Security Context
Routed Transparent Single
Multiple
Context System
Webvpn configuration • Yes — • Yes — —
Release Modification
9.1(7) This command was added.
17-93Cisco ASA Series Command Reference, A through H Commands

Chapter
– Sharepoint features that require desktop applications (for example, MS Office applications)
– AnyConnect Web launch
– Citrix Receiver, XenDesktop, and Xenon
– Other non-browser-based and browser plugin-based applications
Examples hostname(config)# webvpnhostname(config-webvpn)# http-only-cookie
17-94Cisco ASA Series Command Reference, A through H Commands
Chapter
http-only-cookieTo enable the httponly flag for a Clientless SSL VPN session cookie, use the http-only-cookie command in webvpn configuration mode. To remove the flag from the configuration, use the no form of this command.
http-only-cookie
no http-only-cookie
Syntax Description This command has no arguments or keywords.
Defaults The httponly flag is disabled by default.
Command Modes The following table shows the modes in which you can enter the command:
Command History
Usage Guidelines Embedded objects such as Flash applications and Java applets, as well as external applications, usually rely on an existing session cookie to work with the server. They get it from a browser using some Javascript on initialization. Adding the httponly flag to the Clientless SSL VPN session cookie makes the session cookie only visible to the browser, not the client-side scripts, and it makes session sharing impossible.
Change the VPN session cookie setting only when there are no active Clientless SSL VPN sessions Use the show vpn-sessiondb webvpn command to check the status of Clientless SSL VPN sessions. Use the vpn-sessiondb logoff webvpn command to log out of all Clientless SSL VPN sessions.
The following Clientless SSL VPN features will not work when the http-only-cookie command is enabled:
• Java plug-ins
• Java rewriter
• Port forwarding
• File browser
• Sharepoint features that require desktop applications (for example, MS Office applications)
• AnyConnect Web launch
Command Mode
Firewall Mode Security Context
Routed Transparent Single
Multiple
Context System
Webvpn configuration • Yes — • Yes — —
Release Modification
9.2(3) This command was introduced.
17-95Cisco ASA Series Command Reference, A through H Commands

Chapter
• Citrix Receiver, XenDesktop, and Xenon
• Other non-browser-based and browser plugin-based applications
Note Use this command only if Cisco TAC advises you to do so. Enabling this command presents a security risk.
Examples The following example shows how to enable the httponly flag for a Clientless SSL VPN session cookie:
ciscoasa(config)# webvpnciscoasa(config-webvpn)# http-only-cookieciscoasa(config-webvpn)
Related Commands Command Description
show running-config webvpn Displays the running configuration for Clientless SSL VPN.
17-96Cisco ASA Series Command Reference, A through H Commands
Chapter
http-proxy (call-home)To set the HTTP(S) proxy for smart licensing and Smart Call Home, use the http-proxy command in call-home configuration mode. To remove the proxy, use the no form of this command.
http-proxy ip_address port port
no http-proxy [ip_address port port]
Syntax Description
Command Default No default behavior or values.
Command Modes The following table shows the modes in which you can enter the command:
Command History
Usage Guidelines This command sets an HTTP or HTTPS proxy globally for Smart Call Home and smart licensing.
Examples The following example sets the HTTP proxy:
ciscoasa(config)# call-homeciscoasa(cfg-call-home)# http-proxy 10.1.1.1 port 443
Related Commands
ip_address Sets the IP address for the HTTP proxy server.
port port Sets the port number for the HTTP proxy. For example, use 443 for an HTTPS server.
Command Mode
Firewall Mode Security Context
Routed Transparent Single
Multiple
Context System
Call-home configuration • Yes • Yes • Yes — • Yes
Release Modification
9.3(2) This command was added.
Command Description
call-home Configures Smart Call Home. Smart licensing uses Smart Call Home infrastructure.
clear configure license Clears the smart licensing configuration.
feature tier Sets the feature tier for smart licensing.
license smart Lets you request license entitlements for smart licensing.
17-97Cisco ASA Series Command Reference, A through H Commands

Chapter
license smart deregister
Deregisters a device from the License Authority.
license smart register Registers a device with the License Authority.
license smart renew Renews the registration or the license entitlement.
service call-home Enables Smart Call Home.
show license Shows the smart licensing status.
show running-config license
Shows the smart licensing configuration.
throughput level Sets the throughput level for smart licensing.
Command Description
17-98Cisco ASA Series Command Reference, A through H Commands
Chapter
http-proxy (dap)To enable or disable HTTP proxy port forwarding, use the http-proxy command in dap-webvpn configuration mode.To remove the attribute from the configuration, use the no form of this command.
http-proxy {enable | disable | auto-start}
no http-proxy
Syntax Description
Defaults No default value or behaviors.
Command Modes The following table shows the modes in which you can enter the command:
Command History
Usage Guidelines The ASA can apply attribute values from a variety of sources. It applies them according to the following hierarchy:
1. DAP record
2. Username
3. Group policy
4. Group policy for the tunnel group
5. Default group policy
It follows that DAP values for an attribute have a higher priority than those configured for a user, group policy, or tunnel group.
When you enable or disable an attribute for a DAP record, the ASA applies that value and enforces it. For example, when you disable HTTP proxy in dap-webvpn configuration mode, the ASA looks no further for a value. When you instead use the no value for the http-proxy command, the attribute is not present in the DAP record, so the ASA moves down to the AAA attribute in the username, and if necessary, the group policy to find a value to apply.
auto-start Enables and automatically starts HTTP proxy port forwarding for the DAP record.
enable/disable Enables or disables HTTP proxy port forwarding for the DAP record.
Command Mode
Firewall Mode Security Context
Routed Transparent Single
Multiple
Context System
Dap-webvpn configuration • Yes • Yes • Yes — —
Release Modification
8.0(2) This command was added.
17-99Cisco ASA Series Command Reference, A through H Commands

Chapter
Examples The following example shows how to enable HTTP proxy port forwarding for the DAP record named Finance.
ciscoasa (config)# dynamic-access-policy-record Financeciscoasa(config-dynamic-access-policy-record)# webvpnciscoasa(config-dap-webvpn)# http-proxy enableciscoasa(config-dap-webvpn)#
Related Commands Command Description
dynamic-access-policy-record Creates a DAP record.
show running-config dynamic-access-policy-record
Displays the running configuration for all DAP records, or for the named DAP record.
17-100Cisco ASA Series Command Reference, A through H Commands

Chapter
http-proxy (webvpn)To configure the ASA to use an external proxy server to handle HTTP requests, use the http-proxy command in webvpn configuration mode. To remove the HTTP proxy server from the configuration, use the no form of this command.
http-proxy {host [port] [exclude url] | pac pacfile} [username username {password password}]
no http-proxy
Syntax Description
Defaults By default, no HTTP proxy server is configured.
Command Modes The following table shows the modes in which you can enter the command:
host Hostname or IP address for the external HTTP proxy server.
pac pacfile Identifies the PAC file that contains a JavaScript function that specifies one or more proxies.
password (Optional, and available only if you specify a username) Enter this keyword to accompany each HTTP proxy request with a password to provide basic, proxy authentication.
password Password to send to the proxy server with each HTTP request.
port (Optional) Port number used by the HTTP proxy server. The default port is 80, which is the port that the ASA uses if you do not supply a value. The range is 1-65535.
url Enter a URL or a comma-delimited list of several URLs to exclude from those that can be sent to the proxy server. The string does not have a character limit, but the entire command cannot exceed 512 characters. You can specify literal URLs or use the following wildcards:
• * to match any string, including slashes (/) and periods (.). You must accompany this wildcard with an alphanumeric string.
• ? to match any single character, including slashes and periods.
• [x-y] to match any single character in the range of x and y, where x represents one character and y represents another character in the ANSI character set.
• [!x-y] to match any single character that is not in the range.
username (Optional) Enter this keyword to accompany each HTTP proxy request with a username to provide basic, proxy authentication.
username Username to send to the proxy server with each HTTP request.
Command Mode
Firewall Mode Security Context
Routed Transparent Single
Multiple
Context System
Webvpn configuration • Yes — • Yes — —
17-101Cisco ASA Series Command Reference, A through H Commands

Chapter
Command History
Usage Guidelines Requiring Internet access via a server that the organization controls provides another opportunity for filtering to assure secure Internet access and administrative control.
The ASA supports only one instance of the http-proxy command. If one instance of this command is already present in the running configuration and you enter another instance, the CLI overwrites the previous instance. The CLI lists any http-proxy commands in the running configuration if you enter the show running-config webvpn command. If the response does not list an http -proxy command, then none is present.
Note Proxy NTLM authentication is not supported in http-proxy. Only proxy without authentication and basic authentication are supported.
Examples The following example shows how to configure use of an HTTP proxy server with an IP address of 209.165. 201.2 using the default port, 443:
ciscoasa(config)# webvpnciscoasa(config-webvpn)# http-proxy 209.165.201.2ciscoasa(config-webvpn)
The following example shows how to configure use of the same proxy server, and send a username and password with each HTTP request:
ciscoasa(config-webvpn)# http-proxy 209.165.201.2 jsmith password mysecretdonttellciscoasa(config-webvpn)
The following example shows the same command, except when the ASA receives the specific URL www.example.com in an HTTP request, it resolves the request instead of passing it on to the proxy server:
ciscoasa(config-webvpn)# http-proxy 209.165.201.2 exclude www.example.com username jsmith password mysecretdonttellciscoasa(config-webvpn)
The following example shows how to use the exclude option:
ciscoasa(config-webvpn)# http-proxy 10.1.1.1 port 8080 exclude *.com username John pasword 12345678ciscoasa(config-webvpn)
The following example shows how to use the pac option:
ciscoasa(config-webvpn)# http-proxy pac http://10.1.1.1/pac.jsciscoasa(config-webvpn)
Release Modification
7.0(1) This command was added.
8.0(2) The exclude, username, and password keywords were added.
17-102Cisco ASA Series Command Reference, A through H Commands

Chapter
Related Commands Command Description
https-proxy Configures the use of an external proxy server to handle HTTPS requests.
show running-config webvpn Displays the running configuration for SSL VPN, including any HTTP and HTTPS proxy servers.
17-103Cisco ASA Series Command Reference, A through H Commands

Chapter
http redirectTo specify that the ASA redirect HTTP connections to HTTPS, use the http redirect command in global configuration mode. To remove a specified http redirect command from the configuration, use the no form of this command. To remove all http redirect commands from the configuration, use the no form of this command without arguments.
http redirect interface [port]
no http redirect [interface]
Syntax Description
Defaults HTTP redirect is disabled.
Command Modes The following table shows the modes in which you can enter the command:
Command History
Usage Guidelines The interface requires an access list that permits HTTP. Otherwise the ASA does not listen to port 80, or to any other port that you configure for HTTP.
If the http redirect command fails, the following message appears:
"TCP port <port_number> on interface <interface_name> is in use by another feature. Please choose a different port for the HTTP redirect service"
Use a different port for the HTTP redirect service.
Examples The following example shows how to configure HTTP redirect for the inside interface, keeping the default port 80:
ciscoasa(config)# http redirect inside
interface Identifies the interface for which the ASA should redirect HTTP requests to HTTPS.
port Identifies the port that the ASA listens on for HTTP requests, which it then redirects to HTTPS. By default, it listens on port 80,
Command Mode
Firewall Mode Security Context
Routed Transparent Single
Multiple
Context System
Global configuration • Yes — • Yes — —
Release Modification
7.0(1) This command was added.
17-104Cisco ASA Series Command Reference, A through H Commands

Chapter
Related Commands Command Description
clear configure http Removes the HTTP configuration: disables the HTTP server and removes hosts that can access the HTTP server.
http Specifies hosts that can access the HTTP server by IP address and subnet mask. Specifies the ASA interface through which the host accesses the HTTP server.
http authentication-certificate Requires authentication via certificate from users who are establishing HTTPS connections to the ASA.
http server enable Enables the HTTP server.
show running-config http Displays the hosts that can access the HTTP server, and whether or not the HTTP server is enabled.
17-105Cisco ASA Series Command Reference, A through H Commands
Chapter
http server basic-auth-clientTo allow non-browser-based HTTPS clients to access HTTPS services on the ASA, use the http server basic-auth-client command in global configuration mode. To remove support for a client, use the no form of this command.
http server basic-auth-client user_agent
no http server basic-auth-client user_agent
Syntax Description
Command Default By default, ASDM, CSM, and REST API are allowed.
Command Modes The following table shows the modes in which you can enter the command:
Command History
Usage Guidelines Enter each client string using a separate command. Many specialty clients (for example, python libraries, curl, and wget) do not support Cross-site request forgery (CSRF) token-based authentication, so you need to specifically allow these clients to use the ASA basic authentication method. For security purposes, you should only allow required clients.
user_agent Specifies the client's User-Agent string in the HTTP header of the HTTP request. You can specify the complete string or a partial string; partial strings must match the start of the User-Agent string. We recommend complete strings for better security. Note that the string is case-sensitive.
For example, curl will match the following User-Agent string:
curl/7.19.7 (x86_64-redhat-linux-gnu) libcurl/7.19.7 NSS/3.19.1 Basic ECC zlib/1.2.3 libidn/1.18 libssh2/1.4.2
curl will not match the following User-Agent string:
abcd curl/7.19.7 (x86_64-redhat-linux-gnu) libcurl/7.19.7 NSS/3.19.1 Basic ECC zlib/1.2.3 libidn/1.18 libssh2/1.4.2
CURL will not match the following User-Agent string:
curl/7.19.7 (x86_64-redhat-linux-gnu) libcurl/7.19.7 NSS/3.19.1 Basic ECC zlib/1.2.3 libidn/1.18 libssh2/1.4.2
Command Mode
Firewall Mode Security Context
Routed Transparent Single
Multiple
Context System
Global configuration • Yes • Yes • Yes • Yes —
Release Modification
9.12(1) Command added.
17-106Cisco ASA Series Command Reference, A through H Commands
Chapter
Examples The following example allows the curl client:
ciscoasa(config)# http server basic-auth-client curl
Related Commands Command Description
http server enable Enables the HTTPS server on the ASA.
17-107Cisco ASA Series Command Reference, A through H Commands

Chapter
http server enableTo enable the ASA HTTP server, use the http server enable command in global configuration mode. To disable the HTTP server, use the no form of this command.
http server enable [port]
Syntax Description
Defaults The HTTP server is disabled.
Command Modes The following table shows the modes in which you can enter the command:
Command History
Examples The following example shows how to enable the HTTP server.
ciscoasa(config)# http server enable
Related Commands
port The port to use for HTTP connections. The range is 1-65535. The default port is 443.
Command Mode
Firewall Mode Security Context
Routed Transparent Single
Multiple
Context System
Global configuration • Yes • Yes • Yes • Yes —
Release Modification
7.0(1) This command was added.
Command Description
clear configure http Removes the HTTP configuration: disables the HTTP server and removes hosts that can access the HTTP server.
http Specifies hosts that can access the HTTP server by IP address and subnet mask. Specifies the ASA interface through which the host accesses the HTTP server.
http authentication-certificate Requires authentication via certificate from users who are establishing HTTPS connections to the ASA.
http redirect Specifies that the ASA redirect HTTP connections to HTTPS.
show running-config http Displays the hosts that can access the HTTP server, and whether or not the HTTP server is enabled.
17-108Cisco ASA Series Command Reference, A through H Commands

Chapter
http server idle-timeoutTo set an idle timeout for ASDM connections to the ASA, use the http server idle-timeout command in global configuration mode. To disable the timeout, use the no form of this command.
http server idle-timeout [minutes]
no http server idle-timeout [minutes]
Syntax Description
Defaults The default setting is 20 minutes.
Command Modes The following table shows the modes in which you can enter the command:
Command History
Examples The following example sets the idle timeout for ASDM sessions to 500 minutes:
ciscoasa(config)# http server idle-timeout 500
Related Commands
minutes The idle timeout, from 1-1440 minutes.
Command Mode
Firewall Mode Security Context
Routed Transparent Single
Multiple
Context System
Global configuration • Yes • Yes • Yes • Yes —
Release Modification
8.2(1) This command was added.
Command Description
clear configure http Removes the HTTP configuration, disables the HTTP server, and removes hosts that can access the HTTP server.
http Specifies hosts that can access the HTTP server by IP address and subnet mask and the interface through which the host accesses the HTTP server.
http authentication-certificate
Requires authentication via certificate from users who are establishing HTTPS connections to the ASA.
http server enable Enables the HTTP server for ASDM sessions.
http server session-timeout
Limits the session time of ASDM sessions to the ASA.
17-109Cisco ASA Series Command Reference, A through H Commands

Chapter
http redirect Specifies that the ASA redirect HTTP connections to HTTPS.
show running-config http Displays the hosts that can access the HTTP server, and whether or not the HTTP server is enabled.
Command Description
17-110Cisco ASA Series Command Reference, A through H Commands

Chapter
http server session-timeoutTo set a session timeout for ASDM connections to the ASA, use the http server session-timeout command in global configuration mode. To disable the timeout, use the no form of this command.
http server session-timeout [minutes]
no http server session-timeout [minutes]
Syntax Description
Defaults The session timeout is disabled. ASDM connections have no session time limit.
Command Modes The following table shows the modes in which you can enter the command:
Command History
Examples The following example sets a session timeout for ASDM connections to 1000 minutes:
ciscoasa(config)# http server session-timeout 1000
Related Commands
minutes The session timeout, from 1-1440 minutes.
Command Mode
Firewall Mode Security Context
Routed Transparent Single
Multiple
Context System
Global configuration • Yes • Yes • Yes • Yes —
Release Modification
8.2(1) This command was added.
Command Description
clear configure http Removes the HTTP configuration: disables the HTTP server and removes hosts that can access the HTTP server.
http Specifies hosts that can access the HTTP server by IP address and subnet mask and the interface through which the host accesses the HTTP server.
http authentication-certificate
Requires authentication via certificate from users who are establishing HTTPS connections to the ASA.
http server enable Enables the HTTP server for ASDM sessions.
http server idle-timeout Limits the idle time of ASDM sessions to the ASA.
http redirect Specifies that the ASA redirect HTTP connections to HTTPS.
show running-config http Displays the hosts that can access the HTTP server, and whether or not the HTTP server is enabled.
17-111Cisco ASA Series Command Reference, A through H Commands
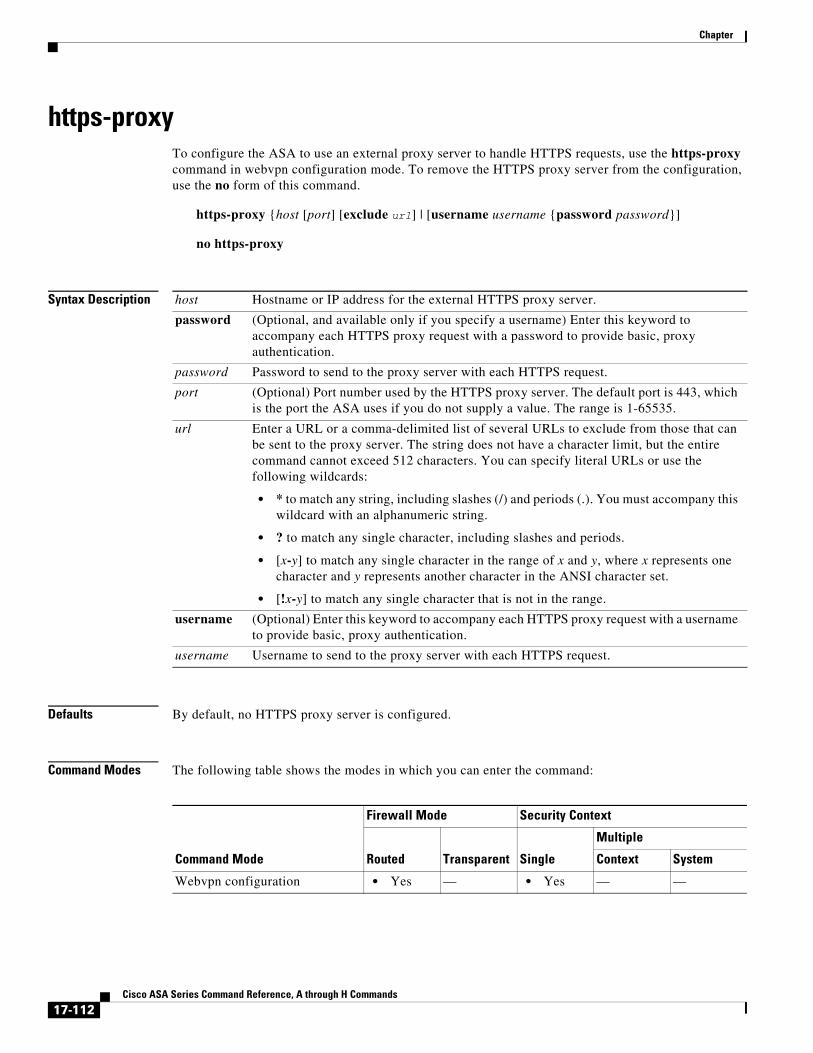
Chapter
https-proxyTo configure the ASA to use an external proxy server to handle HTTPS requests, use the https-proxy command in webvpn configuration mode. To remove the HTTPS proxy server from the configuration, use the no form of this command.
https-proxy {host [port] [exclude url] | [username username {password password}]
no https-proxy
Syntax Description
Defaults By default, no HTTPS proxy server is configured.
Command Modes The following table shows the modes in which you can enter the command:
host Hostname or IP address for the external HTTPS proxy server.
password (Optional, and available only if you specify a username) Enter this keyword to accompany each HTTPS proxy request with a password to provide basic, proxy authentication.
password Password to send to the proxy server with each HTTPS request.
port (Optional) Port number used by the HTTPS proxy server. The default port is 443, which is the port the ASA uses if you do not supply a value. The range is 1-65535.
url Enter a URL or a comma-delimited list of several URLs to exclude from those that can be sent to the proxy server. The string does not have a character limit, but the entire command cannot exceed 512 characters. You can specify literal URLs or use the following wildcards:
• * to match any string, including slashes (/) and periods (.). You must accompany this wildcard with an alphanumeric string.
• ? to match any single character, including slashes and periods.
• [x-y] to match any single character in the range of x and y, where x represents one character and y represents another character in the ANSI character set.
• [!x-y] to match any single character that is not in the range.
username (Optional) Enter this keyword to accompany each HTTPS proxy request with a username to provide basic, proxy authentication.
username Username to send to the proxy server with each HTTPS request.
Command Mode
Firewall Mode Security Context
Routed Transparent Single
Multiple
Context System
Webvpn configuration • Yes — • Yes — —
17-112Cisco ASA Series Command Reference, A through H Commands

Chapter
Command History
Usage Guidelines Requiring Internet access via a server that the organization controls provides another opportunity for filtering to assure secure Internet access and administrative control.
The ASA supports only one instance of the https-proxy command. If one instance of this command is already present in the running configuration and you enter another instance, the CLI overwrites the previous instance. The CLI lists any https-proxy commands in the running configuration if you enter the show running-config webvpn command. If the response does not list an https-proxy command, then none is present.
Examples The following example shows how to configure use of an HTTPS proxy server with an IP address of 209.165. 201.2 using the default port, 443:
ciscoasa(config)# webvpnciscoasa(config-webvpn)# https-proxy 209.165.201.2ciscoasa(config-webvpn)
The following example shows how to configure use of the same proxy server, and send a username and password with each HTTPS request:
ciscoasa(config-webvpn)# https-proxy 209.165.201.2 jsmith password mysecretdonttellciscoasa(config-webvpn)
The following example shows the same command, except that when the ASA receives the specific URL www.example.com in an HTTPS request, it resolves the request instead of passing it on to the proxy server:
ciscoasa(config-webvpn)# https-proxy 209.165.201.2 exclude www.example.com username jsmith password mysecretdonttellciscoasa(config-webvpn)
The following example shows how to use the exclude option:
ciscoasa(config-webvpn)# https-proxy 10.1.1.1 port 8080 exclude *.com username John pasword 12345678ciscoasa(config-webvpn)
The following example shows how to use the pac option:
ciscoasa(config-webvpn)# https-proxy pac http://10.1.1.1/pac.jsciscoasa(config-webvpn)
Related Commands
Release Modification
7.0(1) This command was added.
8.0(2) The exclude, username, and password keywords were added.
Command Description
http-proxy Configures the use of an external proxy server to handle HTTP requests.
show running-config webvpn Displays the running configuration for SSL VPN, including any HTTP and HTTPS proxy servers.
17-113Cisco ASA Series Command Reference, A through H Commands

Chapter
http username-from-certificateTo specify the field in a certificate/rule from which you want to derive the username for ASDM authorization or authentication use, use the http username-from-certificate command.
http username-from-certificate {<primary-attr> [<secondary-attr>] | use-entire-name | use-script} | pre-fill-username]
Syntax Description
Command Default The default for this command is http username-from-certificate CN OU.
Command Modes The following table shows the modes in which you can enter the command:
Command History
Usage Guidelines Possible values for primary and secondary attributes and the meanings of the related keywords are as follows:
pre-fill-username Enables the use of the existing username-from-certificate command from the tunnel-group general-attributes mode that serves the same purpose for VPN connections. When enabled, this username, along with the password typed in by the user, is used for authentication.
primary-attr Specify the attribute used to derive the username.
secondary-attr Specify an additional attribute used with the primary attribute to derive the username.
use-entire-name Use entire DN name. Not available as a secondary attribute.
use-script Use LUA script generated by ASDM.
Command Mode
Firewall Mode Security Context
Routed Transparent Single
Multiple
Context System
Webvpn configuration • Yes — • Yes — —
Release Modification
9.4(1) This command was added.
Attribute/Keyword Definition
C Country: the two-letter country abbreviation. These codes conform to ISE 3166 country abbreviations.
CN Common Name: the name of a person, system, or other entity. Not available as a secondary attribute.
DNQ Domain Name Qualifier.
17-114Cisco ASA Series Command Reference, A through H Commands

Chapter
This command is not available on platforms that do not support webvpn(ASA 1000v) and platforms with No Payload Encryption (NPE) enabled.
Examples 100/act(config)# http ?
configure mode commands/options: Hostname or A.B.C.D The IP address of the host and/or network authorized to access the HTTP server X:X:X:X::X/<0-128> IPv6 address/prefix authorized to access the HTTP server authentication-certificate Request a certificate from the HTTPS client when a management connection is being established redirect Redirect HTTP connections to the security gateway to use HTTPS server Enable the http server required to run Device Manager username-from-certificate Specify fields from certificate DN to be used for authorization/authentication100/act(config)# help http
USAGE:
[no] http {<local_ip>|<hostname>} <mask> <if_name> [no] http authentication-certificate <if_name> [no] http redirect <if_name> [<port>] [no] http server enable [<port>] [no] http username-from-certificate {<primary-attr> [<secondary-attr>] | use- entire-name | use-script } [pre-fill-username] show running-config [all] http clear configure http
DESCRIPTION:
http Configure HTTP server
EA Email address.
GENQ Generation qualifier.
GN Given name.
I Initials.
L Locality: the city or town where the organization is located.
N Name.
O Organization: the name of the company, institution, agency, association or other entity.
OU Organizational Unit: the subgroup within the organization (0).
SER Serial Number.
SN Surname.
SP State/Province: the state or province where the organization is located.
T Title.
UID User Identifier.
UPN User Principal Name.
Attribute/Keyword Definition
17-115Cisco ASA Series Command Reference, A through H Commands

Chapter
SYNTAX:
<local_ip> The ip address of the host and/or network authorized to access the device HTTP server.
<hostname> Hostname of the host authorized to access the device HTTP server.
<mask> The IP netmask to apply to <local_ip>. Default is 255.255.255.255.
<if_name> Network interface name.
<port> The decimal number or name of a TCP or UDP port. Default is "http" (80).<primary-attr> The DN from the certificate to be used as the username <secondary-attr> Optional Secondary DN from the certificate to be used in the username
17-116Cisco ASA Series Command Reference, A through H Commands

Chapter
hw-module module allow-ipFor the AIP SSC on the ASA 5505, to set the hosts that are allowed to access the management IP address, use the hw-module module allow-ip command in privileged EXEC mode.
hw-module module 1 allow-ip ip_address netmask
Syntax Description
Defaults In the factory default configuration, the following hosts are allowed to manage the IPS module: 192.168.1.5 through 192.168.1.254.
Command Modes The following table shows the modes in which you can enter the command:
Command History
Usage Guidelines This command is only valid when the SSC status is Up.
These settings are written to the IPS application configuration, not the ASA configuration. You can view these settings from the ASA using the show module details command.
You can alternatively use the IPS application setup command to configure this setting from the IPS CLI.
Examples The following example shows how to configure host parameters on the SSC:
ciscoasa# hw-module module 1 allow-ip 209.165.201.29 255.255.255.0
Related Commands
1 Specifies the slot number, which is always 1.
ip_ address Specifies the host IP address(es).
netmask Specifies the subnet mask.
Command Mode
Firewall Mode Security Context
Routed Transparent Single
Multiple
Context System
Privileged EXEC • Yes • Yes • Yes — —
Release Modification
8.2(1) This command was added.
Command Description
hw-module module ip Configures the AIP SSC management address.
show module Shows module status information.
17-117Cisco ASA Series Command Reference, A through H Commands

Chapter
hw-module module ipFor the AIP SSC on the ASA 5505, to configure the management IP address, use the hw-module module ip command in privileged EXEC mode.
hw-module module 1 ip ip_address netmask gateway
Syntax Description
Defaults No default behavior or values.
Command Modes The following table shows the modes in which you can enter the command:
Command History
Usage Guidelines Make sure this address is on the same subnet as the ASA VLAN IP address. For example, if you assigned 10.1.1.1 to the VLAN for the ASA, then assign another address on that network, such as 10.1.1.2, for the IPS management address.
If the management station is on a directly connected ASA network, then set the gateway to be the ASA IP address assigned to the IPS management VLAN. In the example decribed, set the gateway to 10.1.1.1. If the management station is on a remote network, then set the gateway to be the address of an upstream router on the IPS management VLAN.
Note These settings are written to the IPS application configuration, not the ASA configuration. You can view these settings from the ASA using the show module details command.
You can alternatively use the IPS application setup command to configure this setting from the IPS CLI.
Examples The following example shows how to configure a management address for the IPS module:
ciscoasa# hw-module module 1 ip 209.165.200.254 255.255.255.224 209.165.200.225
1 Specifies the slot number, which is always 1.
gateway Specifies the gateway IP address.
ip_address Specifies the management IP address.
netmask Specifies the subnet mask.
Command Mode
Firewall Mode Security Context
Routed Transparent Single
Multiple
Context System
Privileged EXEC • Yes • Yes • Yes — —
Release Modification
8.2(1) This command was added.
17-118Cisco ASA Series Command Reference, A through H Commands

Chapter
Related Commands Command Description
hw-module module allow-ip Configures the AIP SSC management host addresses.
show module Shows module status information.
17-119Cisco ASA Series Command Reference, A through H Commands
Chapter
hw-module module password-resetTo reset the password for the default admin user on the hardware module to the default value, use the hw-module module password-reset command in privileged EXEC mode.
hw-module module 1 password-reset
Syntax Description
Defaults The default username and password depends on your module:
• IPS module—username: cisco; password: cisco
• CSC module—username: cisco; password: cisco
• ASA CX module—username: admin; password: Admin123
Command Modes The following table shows the modes in which you can enter the command:
Command History
Usage Guidelines This command is only valid when the hardware module is in the Up state and supports password reset. For IPS, password reset is supported if the module is running IPS Version 6.0 or later. After resetting the password, you should change it to a unique value using the module application. Resetting the module password causes the module to reboot. Services are not available while the module is rebooting, which may take several minutes. You can run the show module command to monitor the module state.
The command always prompts for confirmation. If the command succeeds, no other output appears. If the command fails, an error message appears that explains why the failure occurred. The possible error messages are as follows:
1 Specifies the slot number, which is always 1.
Firewall Mode Security Context
Command Mode Routed Transparent Single
Multiple
Context System
Privileged EXEC • Yes • Yes • Yes • Yes —
Release Modification
7.2(2) This command was added.
8.4(4.1) Support for the ASA CX module was added.
17-120Cisco ASA Series Command Reference, A through H Commands

Chapter
Unable to reset the password on the module in slot 1
Unable to reset the password on the module in slot 1 - unknown module state
Unable to reset the password on the module in slot 1 - no module installed
Failed to reset the password on the module in slot 1 - module not in Up state
Unable to reset the password on the module in slot 1 - unknown module type
The module in slot 1 does not support password reset
Unable to reset the password on the module in slot 1 - no application found
The SSM application version does not support password reset
Failed to reset the password on the module in slot 1
Examples The following example resets a password on a hardware module in slot 1:
ciscoasa(config)# hw-module module 1 password-resetReset the password on module in slot 1? [confirm] y
Related Commands Command Description
hw-module module recover Recovers a module by loading a recovery image from a TFTP server.
hw-module module reload Reloads the module software.
hw-module module reset Shuts down and resets the module hardware.
hw-module module shutdown Shuts down the module software in preparation for being powered off without losing configuration data.
show module Shows module information.
17-121Cisco ASA Series Command Reference, A through H Commands

Chapter
hw-module module recoverTo load a recovery software image from a TFTP server to an installed module, or to configure network settings to access the TFTP server, use the hw-module module recover command in privileged EXEC mode. You might need to recover a module using this command if, for example, the module is unable to load a local image.
hw-module module 1 recover {boot | stop | configure [url tfp_url | ip module_address | gateway gateway_ip_address | vlan vlan_id]}
Syntax Description
Defaults No default behavior or values.
Command Modes The following table shows the modes in which you can enter the command:
1 Specifies the slot number, which is always 1.
boot Initiates recovery of this module and downloads a recovery image according to the configure keyword settings. The module then reboots from the new image.
configure Configures the network parameters to download a recovery image. If you do not enter a network parameter after the configure keyword, you are prompted for all parameters. This command prompts you for the URL for the TFTP server, the management interface IP address and netmask, gateway address, and VLAN ID. These network parameters are configured in ROMMON; the network parameters you configured in the module application configuration are not available to ROMMON, so you must set them separately here.
gateway gateway_ip_address
(Optional) The gateway IP address for access to the TFTP server through the SSM management interface.
ip module_address (Optional) The IP address of the module management interface.
stop Stops the recovery action, and stops downloading the recovery image. The module boots from the original image. You must enter this command within 30 to 45 seconds after starting recovery using the hw-module module recover boot command. If you issue the stop command after this period, it might cause unexpected results, such as the module becoming unresponsive.
url tfp_url (Optional) The URL for the image on a TFTP server, in the following format:
tftp://server/[path/]filename
vlan vlan_id (Optional) Specifies the VLAN ID for the management interface.
Command Mode
Firewall Mode Security Context
Routed Transparent Single
Multiple
Context System
Privileged EXEC • Yes • Yes • Yes — • Yes
17-122Cisco ASA Series Command Reference, A through H Commands
Chapter
Command History
Usage Guidelines If the module suffers a failure, and the module application image cannot run, you can reinstall a new image on the module from a TFTP server.
Note Do not use the upgrade command within the module software to install the image.
Be sure the TFTP server that you specify can transfer files up to 60 MB in size. This process can take approximately 15 minutes to complete, depending on your network and the size of the image.
This command is only available when the module is in the Up, Down, Unresponsive, or Recovery state. See the show module command for state information.
You can view the recovery configuration using the show module 1 recover command.
Note This command is not supported on these modules: ASA CX, ASA FirePOWER.
Examples The following example sets the module to download an image from a TFTP server:
ciscoasa# hw-module module 1 recover configureImage URL [tftp://127.0.0.1/myimage]: tftp://10.1.1.1/ids-newimgPort IP Address [127.0.0.2]: 10.1.2.10Port Mask [255.255.255.254]: 255.255.255.0Gateway IP Address [1.1.2.10]: 10.1.2.254VLAN ID [0]: 100
The following example recovers the module:
ciscoasa# hw-module module 1 recover bootThe module in slot 1 will be recovered. This mayerase all configuration and all data on that device andattempt to download a new image for it.Recover module in slot 1? [confirm]
Related Commands
Release Modification
7.0(1) This command was added.
Command Description
debug module-boot Shows debug messages about the module booting process.
hw-module module reset
Shuts down a module and performs a hardware reset.
hw-module module reload
Reloads the module software.
hw-module module shutdown
Shuts down the module software in preparation for being powered off without losing configuration data.
show module Shows module information.
17-123Cisco ASA Series Command Reference, A through H Commands

Chapter
hw-module module recover (ASA 5506W-X)To load recover the default configuration or access ROMMON to load a new image on the wireless access point on a ASA 5506W-X, use the hw-module module recover command in privileged EXEC mode.
hw-module module wlan recover [configuration | image]
Syntax Description
Defaults No default behavior or values.
Command Modes The following table shows the modes in which you can enter the command:
Command History
Usage Guidelines The image keyword sessions to the access point CLI over the backplane and reloads the access point. When the access point boots, you can escape the boot process to access ROMMON and perform a TFTP image download. See Reloading the Access Point Image > Using the CLI for detailed steps.
Examples The following example recovers an image on the access point:
ciscoasa# hw-module module wlan recover imageWARNING: Image recovery cannot be carried out via CLI command on this module. Do you want to reset the module and session into the module console to carry out the image recovery?[confirm] Resetting the module and sessioning into the module console
Related Commands
configuration Resets the wireless access point to the factory default configuration.
image Sessions into the module console so you can access ROMMON and perform a TFTP upgrade procedure.
Command Mode
Firewall Mode Security Context
Routed Transparent Single
Multiple
Context System
Privileged EXEC • Yes • Yes • Yes — • Yes
Release Modification
9.4(1) This command was added.
Command Description
hw-module module wlan reset
Shuts down a module and performs a hardware reset.
17-124Cisco ASA Series Command Reference, A through H Commands

Chapter
hw-module module reloadTo reload module software for a physical module, use the hw-module module reload command in privileged EXEC mode.
hw-module module 1 reload
Syntax Description
Defaults No default behavior or values.
Command Modes The following table shows the modes in which you can enter the command:
Command History
Usage Guidelines This command differs from the hw-module module reset command, which also performs a hardware reset before reloading the module.
This command is only valid when the module status is Up. See the show module command for state information.
Examples The following example reloads the module in slot 1:
ciscoasa# hw-module module 1 reloadReload module in slot 1? [confirm] yReload issued for module in slot 1%XXX-5-505002: Module in slot 1 is reloading. Please wait...%XXX-5-505006: Module in slot 1 is Up.
1 Specifies the slot number, which is always 1.
Command Mode
Firewall Mode Security Context
Routed Transparent Single
Multiple
Context System
Privileged EXEC • Yes • Yes • Yes — • Yes
Release Modification
7.0(1) This command was added.
8.4(4.1) Support for the ASA CX module was added.
9.2(1) Support for the ASA FirePOWER module was added.
17-125Cisco ASA Series Command Reference, A through H Commands

Chapter
Related Commands Command Description
debug module-boot Shows debugging messages about the module booting process.
hw-module module recover
Recovers a module by loading a recovery image from a TFTP server.
hw-module module reset
Shuts down a module and performs a hardware reset.
hw-module module shutdown
Shuts down the module software in preparation for being powered off without losing configuration data.
show module Shows module information.
17-126Cisco ASA Series Command Reference, A through H Commands

Chapter
hw-module module resetTo reset the module hardware and then reload the module software, use the hw-module module reset command in privileged EXEC mode.
hw-module module {1 | wlan} reset
Syntax Description
Defaults No default behavior or values.
Command Modes The following table shows the modes in which you can enter the command:
Command History
Usage Guidelines When the module is in an Up state, the hw-module module reset command prompts you to shut down the software before resetting.
You can recover a module (if supported) using the hw-module module recover command. If you enter the hw-module module reset command while the module is in a Recover state, the module does not interrupt the recovery process. The hw-module module reset command performs a hardware reset of the module, and the module recovery continues after the hardware reset. You might want to reset the module during recovery if the module hangs; a hardware reset might resolve the issue.
This command differs from the hw-module module reload command, which only reloads the software and does not perform a hardware reset.
This command is only valid when the module status is Up, Down, Unresponsive, or Recover. See the show module command for state information.
Examples The following example resets an module in slot 1 that is in the Up state:
ciscoasa# hw-module module 1 reset
1 Specifies the slot number, which is always 1.
wlan For the ASA 5506W-X, specifies the wireless access point.
Command Mode
Firewall Mode Security Context
Routed Transparent Single
Multiple
Context System
Privileged EXEC • Yes • Yes • Yes — • Yes
Release Modification
7.0(1) This command was added.
8.4(4.1) Support for the ASA CX module was added.
9.2(1) Support for the ASA FirePOWER module was added.
9.4(1) The wlan keyword was added.
17-127Cisco ASA Series Command Reference, A through H Commands

Chapter
The module in slot 1 should be shut down beforeresetting it or loss of configuration may occur.Reset module in slot 1? [confirm] yReset issued for module in slot 1%XXX-5-505001: Module in slot 1 is shutting down. Please wait...%XXX-5-505004: Module in slot 1 shutdown is complete.%XXX-5-505003: Module in slot 1 is resetting. Please wait...%XXX-5-505006: Module in slot 1 is Up.
Related Commands Command Description
debug module-boot Shows debugging messages about the module booting process.
hw-module module recover
Recovers a module by loading a recovery image from a TFTP server.
hw-module module reload
Reloads the module software.
hw-module module shutdown
Shuts down the module software in preparation for being powered off without losing configuration data.
show module Shows module information.
17-128Cisco ASA Series Command Reference, A through H Commands

Chapter
hw-module module shutdownTo shut down the module software, use the hw-module module shutdown command in privileged EXEC mode.
hw-module module 1 shutdown
Syntax Description
Defaults No default behavior or values.
Command Modes The following table shows the modes in which you can enter the command:
Command History
Usage Guidelines Shutting down the module software prepares the module to be safely powered off without losing configuration data.
This command is only valid when the module status is Up or Unresponsive. See the show module command for state information.
Examples The following example shuts down a module in slot 1:
ciscoasa# hw-module module 1 shutdownShutdown module in slot 1? [confirm] yShutdown issued for module in slot 1ciscoasa#%XXX-5-505001: Module in slot 1 is shutting down. Please wait...%XXX-5-505004: Module in slot 1 shutdown is complete.
1 Specifies the slot number, which is always 1.
Command Mode
Firewall Mode Security Context
Routed Transparent Single
Multiple
Context System
Privileged EXEC • Yes • Yes • Yes — • Yes
Release Modification
7.0(1) This command was added.
8.4(4.1) Support for the ASA CX module was added.
9.2(1) Support for the ASA FirePOWER module was added.
17-129Cisco ASA Series Command Reference, A through H Commands

Chapter
Related Commands Command Description
debug module-boot Shows debugging messages about the module booting process.
hw-module module recover
Recovers a module by loading a recovery image from a TFTP server.
hw-module module reload
Reloads the module software.
hw-module module reset
Shuts down a module and performs a hardware reset.
show module Shows module information.
17-130Cisco ASA Series Command Reference, A through H Commands