gas slide-in range n b - ge appliances
TRANSCRIPT

I(Jse and Care Guide
Gas Slide-in Range
n! Safety instructions ....................3-6Anti-Tip Device . . . . . . . . . . . . . . . . . . ..................2, 3, 31
❑ Operating Instructions, TipsAluminum Foil .......,..................5, 16, 19-21Clock and Timer . . . . . . . . . . . . . . . . . . . . . . . . . . . . . . . . . . . . . . . . . . . 12
Fan . . . . . . . . . . . . . . . . . . . . . . . . . . . . . 13, 14, 17-19,21,24Features ....................................................7, 11Oven. . . . . . . . . . . . . . . . . . . . . . . . . . . . . . . . . . . . . . . . . . . . . . . . . . . . . 13-25
Baking . . . . . . . . . . . . . . . . . . . . . . . . . . . . . . . . . . . . . . . . . . . . . . . . . 14-18
Broiling, Broiling Guide ...................2 1,22Control Panel .......................................9-1 1
Control Settings ..................................9-1 1Light; Bulb Replacement ................14, 30Roasting, Roasting Guide ...............19, 20Self-Cleaning instructions ..............23-25
Vent . . . . . . . . . . . . . . . . . . . . . . . . . . . . . . . . . . . . . . . . . . . . . . . . . . . . . . . . . . . 14Surface Cooking .....................................8- 10
Control Settings ...................................97 10
Cooktop Comparison ................................8Super Burner . . . . . . . . . . . . . . . . . . . . . . . . . . . . . . . . . . . .............9
ID.- .,‘+. Care and Cleaning ...................26-30
Cooktop.....................................................2 7Door Removal............................................28Removable Oven Bottom ..........................30
Self-Cleaning Instructions .................23 -25
B●
Problem Solver.......................33, 34Thermostat Adjustment–
Do It Yourself . . . . . . . . . . . . . . . . . . . . . . . . . . . . . . . . . . ..........18
More questions ?...call
GE Answer Center” 800.626.2000
m PreparationAnti-Tip Device....................................2, 3,31Flooring and Leveling ....................................6
Minor Adjustments .....................................32Removal of Packaging Tape .....................26
mQConsumer Services ..................35Appliance Registration .................................2Important Phone Numbers .......................35Model and Serial Number Location ..........2
Warranty . . . . . . . . . . . . . . . . . . . . . . . . . . ..,,..........Back Cover
Model..: JGSP20GE Appliances JGSP21
164L72966P049

HELP US HELP YOU...
Read this guide carefully.It is intended to help you operate and maintain yournew range properly.Keep it handy for answers to your questions.If you don’t understand something or need more help,write (include your phone number):
Consumer AffairsGE AppliancesAppliance ParkLouisville, KY 40225
Write down the model and serial numbers.You’ll find the model and serial numbers on thefront frame behind the storage drawer or kick panel.These numbers are also on the Consumer ProductOwnership Registration Card that came with yourrange. Before sending in this card, please write thesenumbers here:
Model Number Serial Number
Use these numbers in any correspondence or servicecalls concerning your range.
If you received a damaged range...Immediately contact the dealer (or builder) that soldyou the range.
Save time and money. Before yourequest service . . .Check the Problem Solver in the back of this guide.It lists causes of minor operating problems that youcan correct yourself.
A WARNING
● ALL RANGESCAN TIP
● INJURY TO PERSONSCOULD RESULT
● INSTALL ANTI-TIPDEVICES PACKEDWITH RANGE
● SEE INSTALLATIONINSTRUCTIONS
WARNING: If the information in thismanual is not followed exactly, a fire orexplosion may result causing propertydamage, personal injury or death.
— Do not store or use gasoline or otherflammable vapors and liquids in thevicinity of this or any other appliance.
— WHAT TO DO IF YOU SMELL GAS
● Do not try to light any appliance.
● Do not touch any electrical switch; donot use any phone in your building.
● Immediately cali your gas supplier froma neighbor’s phone. Follow the gassupplier’s instructions.
● If you cannot reach your gas supplier,call the fire department.
— Installation and service must beperformed by a qualified installer, serviceagency or the gas supplier.
.
—
IF YOU NEED SERVICETo obtain service, see the Consumer Services page inthe back of this guide.
To obtain replacement parts, contact GE/HotpointService Centers.
We’re proud of our service and want you to bepleased. If for some reason you are not happy withthe service you receive, here are three steps to followfor further help.FIRST, contact the people who serviced yourappliance. Explain why you are not pleased.In most cases, this will solve the problem.
NEXT, if you are still not pleased, write all thedetails—including your phone number—to:
Manager, Consumer RelationsGE AppliancesAppliance ParkLouisville, KY 40225
FINALLY, if your problem is still not resolved, write:Major Appliance Consumer
Action Panel20 North Wacker DriveChicago, IL 60606
2

.—
IMPORTANT SAFETY INSTRUCTIONSRead all instructions before using this appliance.
MPORTANT SAFETY NOTICE
● The California Safe Drinking Water and ToxicEnforcement Act requires the Governor ofCalifornia to publish a list of substances known tothe state to cause cancer, birth defects or otherreproductive harm, and requires businesses to warncustomers of potential exposure to such substances.
● Gas appliances can cause minor exposure tofour of these substances, namely benzene, carbonmonoxide, formaldehyde and soot, caused primarilyby the incomplete combustion of natural gas orLP fueIs. Properly adjusted burners, indicated bya bluish rather than a yellow flame, will minimizeincomplete combustion. Exposure to thesesubstances can be minimized by venting with anopen window or using a ventilation fan or hood.
When You Get Your Range
c Have the installer show you the location ofthe range gas cut-off valve and how to shutit off if necessary.
Have your range installed and properlygrounded by a qualified installer, in accordancewith the Installation Instructions. Any adjustmentand service should be performed only by qualifiedgas range installers or service technicians.
● Do not attempt to repair or replace anypart of your range unless it is specificallyrecommended in this guide. All other servicingshould be referred to a qualified technician.
● Plug your range into a 120-volt groundedoutlet only. Do not remove the round groundingprong from the plug. If in doubt about thegrounding of the home electrical system, it isyour personal responsibility and obligation tohave an ungrounded outlet replaced with aproperly grounded, three-prong outlet inaccordance with the National Electrical Code.Do not use an extension cord with this appliance.
● Be sure all packaging materials areremoved from the range before operatingit to prevent fire or smoke damage should thepackaging material ignite.
● Locate the range out of kitchen trafilc pathand out of drafty locations to prevent pilotoutage and poor air circulation.
● Be sure your range is correctly adjusted by aqualified service technician or installer for thetype of gas (natural or LP) that is to be used.Your range can be converted for use with eithertype of gas. See the Installation Instructions.
WARNING: These adjustments must be madeby a qualified service technician in accordancewith the manufacturer’s instructions and all codesand requirements of the authority havingjurisdiction. Failure to follow these instructionscould result in serious injury or property damage.The qualified agency performing this workassumes responsibility for the conversion.
● After prolonged use of a range, high floortemperatures may result and inany floorcoverings will not withstand this kind of use.Never install the range over vinyl tile or linoleumthat cannot withstand such type of use. Neverinstall it directly over interior kitchen carpeting.
Using Your Range
“ CAUTION: ITEMS OF INTEREST TOCHILDREN SHOULD NOT BE STORED INCABINETS ABOVE A RANGE OR ON THEBACKSPLASH OF A RANGE-CHILDRENCLIMBING ON THE RANGE TO REACHITEMS COULD BE SERIOUSLY
WARNING–AU rangescan tip and injury could result. Toprevent accidental tipping of therange, attach it to the wall or floorby installing the Anti-Tip devicesupplied. Make sure the chain fitssecurely into the slot in the bracket.If YOU null the rarwe out from the wall
INJURED.
@
,4
@
k
fo; a~~reason, m;ke sure the Anti-Tip device isproperly engaged before you push the range backagainst the wall. If it is not, there is a possible riskof the range tipping over and causing injury if you
~ or a child stand, sit or lean on an open door.Please refer to the Anti-Tip device informationin this guide. Failure to take this precaution couldresult in tipping of the range and injury.Do not allow the bracket to damage the gasplumbing in any way.
(continued next page)
3

IMPORTANT SAFETY INSTRUCTIONS(continued)
c Do not allow anyone to climb, stand or hang onthe door, storage drawer, kick panel or cooktop.They could damage the range and even tip it over,causing severe personal injury.
● Let the burner grates and other surfaces coolbefore touching them or leaving them wherechildren can reach them.
s Never wear loose fitting or hanging garmentswhile using the appliance. Be careful whenreaching for items stored in cabinets over therange. Flammable material could be ignited ifbrought in contact with flame or hot oven surfacesand may cause severe burns.
● For your safety, never use your appliance forwarming or heating the room.
&
A“4$ ‘ !’ ● Do not use water on grease fires.Never pick up a flaming pan.Turn the controls off. Smother a
flaming pan on a surface burner by coveringthe pan completely with a well-fitting lid, cookiesheet or fiat tray. Use a multi-purpose dry chemicalor foam-type fire extinguisher.Flaming grease outside a pan can be put outby covering it with baking soda or, if available,by using a multi-purpose dry chemical or foam-type fire extinguisher.
Flame in the oven can be smothered completelyby closing the oven door and turning the oven offor by using a multi-purpose dry chemical or foam-type fire extinguisher.
● Do not leave children alone or unattendedwhere a range is hot or in operation. Theycould be seriously burned.
● Teach children not to play with the controlsor any other part of the range.
● Never leave the oven door open when you are notwatching the range.
● Always keep combustible wall coverings?curtains or drapes a safe distance from yourrange.
● Always keep dish towels, dish cloths, potholdersand other linens a safe distance from yourrange.
● Always keep wooden and plastic utensils andcanned food a safe distance away from yourrange.
● Do not leave paper products, cooking utensilsor food in the oven when not in use.
● Do not store flammable materials in an oven,a range storage drawer or near a cooktop.
● Do not store or use combustible materials,gasoline or other flammable vapors and liquidsin the vicinity of this or any other appliance.
● Do not let cooking grease or other flammablematerials accumulate in or near the range.
● When cooking pork, follow the directions exactlyand always cook the meat to an internal temperatureof at least 170°F. This assures that, in the remotepossibility that trichina may be present in the meat,it will be killed and the meat will be safe to eat.
Surface Cooking
● Always use the LITE position when igniting thesurface burners and make sure the burners haveignited.
● Never leave surface burners unattended athigh flame settings. Boilovers cause smokingand greasy spillovers that may catch on fire.
● Adjust the surface burner flame size so it doesnot extend beyond the edge of the cookware.Excessive flame is hazardous.
● Use only dry potholders-moistor damp pot holders on hot surfacesmay result in burns from steam. Do
not let pot holders come near open flames whenlifting cookware. Do not use a towel or other bulkycloth in place of a pot holder. Such cloths can catchfire on a hot surface burner.
● To minimize the possibility of burns, ignitionof flammable materials and spillage, turn cookwarehandles toward the side or back of the rangewithout extending over adjacent burners.
● Always turn the surface burners off beforeremoving the cookware.
● Carefully watch foods being fried at a highflame setting. —
4

. ,ever block the vents (air openings) of therange. They provide the air inlet and outlet thatare necessary for the range to operate properlywith correct combustion. Air openings are locatedat the rear of the cooktop, at the top and bottom ofthe oven door, and under the storage drawer orkick panel.
● Do not use a wok on the cooking surface if thewok has a round metal ring that is placed overthe burner grate to support the wok. This ringacts as a heat trap, which may damage the burnergrate and burner head. Also, it may cause theburner to work improperly. This may cause acarbon monoxide level above that allowed bycurrent standards, resulting in a health hazard.
● Foods for frying should be as dry as possible.Frost on frozen foods or moisture on fresh foodscan cause hot fat to bubble up and over the sidesof the pan.
● Use least possible amount of fat for effectiveshallow or deep-fat frying. Filling the pan toofull of fat can cause spillovers when food is added.
“ a combination of oils or fats will be used.A frying, stir together before heating or as fatsmelt slowly.
● A1ways heat fat slowly, and watch as it heats.
. Use a deep fat thermometer wheneverpossible to prevent overheating fat beyondthe smoking point.
o Use proper pan size—Avoid pans that areunstable or easily tipped. Select cookware havingflat bottoms large enough to cover the surfaceburner grates. This wiil save both cleaning timeand prevent hazardous accumulations of food, sinceheavy spattering or spillovers left on range canignite. Use pans with handles that can be easilygrasped and remain cool.
● When using glass cookware, make sure it isdesigned for top-of-range cooking.
Q Keep all plastics away from the surfaceburners.
● Do not leave any items on the cooktop. The hotair from the vent may ignite flammable items andwill increase pressure in closed containers, whichmay cause them to burst.
● To avoid the possibility of a burn, always becertain that the controls for all surface burnersare at the off position and all grates are coolbefore attempting to remove them.
● When flaming foods are under the hood, turnthe fan off. The fan, if operating, may spreadthe flames.
● If you smell gas, turn off the gas to the range andcall a qualified service technician. Never use anopen flame to locate a leak.
● Clean the cooktop with caution. If a wet spongeor cloth is used to wipe up spills on a hot cooktop,be careful to avoid steam burns.
Oven● Do not use oven for a storage area. Items
stored in the oven can ignite.● Stand away from the range when opening the
door of a hot oven. The hot air and steam thatescapes can cause bums to hands, face and eyes.
c Keep the oven free from grease buildup.
c Place the oven shelves in the desired positionwhile oven is cool.
● Pulling out the shelf to the shelf-stop is aconvenience in lifting heavy foods. It is alsoa precaution against bums from touching hotsurfaces of the door or oven walls.
● Do not heat unopened food containers.Pressure could buiId up and the containercould burst, causing an injury.
Q Do not use aluminum foil anywhere in the ovenexcept as described in this guide. Misuse couldresult in a fire hazard or damage to the range.
● When using cooking or roasting bags in theoven, follow the manufacturer’s directions.
G Use only glass cookware that is recommendedfor use in gas ovens.
c When broiling, if meat is too close to the flame,the fat may ignite. Trim excess fat to preventexcessive flare-ups.
● Do not use your oven to drv newsr)a~ers.If overheated, they can catc~on fir;. -
(continued next page)
5

4! IMPORTANT SAFETY INSTRUCTIONS(continued)
● Always remove the broiIer pan from the ovenas soon as you finish broiling. Grease left in thepan can catch on fire if the oven is used withoutremoving the grease from the broiler pan.
● Make sure the broiler pan is in place correctlyto reduce the possibility of grease fires.
● If you should have a grease fire in the broilerpan, turn the oven off and keep the oven doorclosed to contain the fire until it bums out.
● Keep the range clean and free of accumulationsof grease or spillovers, which may ignite.
● Never leave jars or cans of fat drippings on ornear your range.
Self-Cleaning Oven
● Be sure to wipe up excess spillage before theself-cleaning operation.
● Before self-cleaning the oven, remove thebroiler pan, rack and other cookware,
● Do not clean the door gasket. The door gasketis essential for a good seal. Be careful not to rub,damage or move the gasket.
● Clean only parts listed in this Use andCare Guide.
● Do not use oven cleaners. No commercialoven cleaner or oven Iiner protective coatingof any kind should be used in or around anypart of the oven. Residue from oven cleanerswill damage the inside of the oven when theself-clean cycle is used.
* If the self-cleaning mode malfunctions, turnthe oven off and disconnect the power supply.Have it serviced by a qualified technician,
● Do not attempt to repair or replace any partof your range unless it is specificallyrecommended in this guide. All other servicingshould be referred to a qualified technician.
SAVE THESEINSTRUCTIONS
—
FLOORING AND LEVELING
Flooring under the RangeYour range, like so many other household items, The range should be installed on a l/4-inch-thickis heavy and can settle into soft floor coverings sheet of plywood (or similar material) as follows:such as cushioned vinyl or carpeting. When moving When the floor covering ends at the front of thethe range on this type of flooring, use care, and it is range, the area that the range will rest on should berecommended that these simple and inexpensive built up with plywood to the same level or higher thaninstructions be followed. the floor covering. This will allow the range to be
moved for cleaning or servicing.
Leveling the RangeUse a 1 %“ open-end or adjustable wrench to equally If using a spirit level, take two readings, with theback out the four legs. The flanges (rims) below the level placed diagonally first in one direction andsides of the cooktop must be raised above the top of then the other.the countertop. Carefully slide the range into its Adjust the four legs carefully. Level the range front toinstallation space. Observe that it is clearing the back and side to side. The range legs must rest on the —countertop. Then place a spirit level or a glass floor. The range must not hang from the countertop.measuring cup partially filled with water on oneof the ov;n sheives to ;heck for levelness.
6

-—,
m
II (II /
I
(I ‘ E
JGSP21
Explainedon page
Explainedon page
14
Feature Index
12 Oven Light SwitchLets you turn the interior ovenlight on and off.
13 Automatic Oven Light Switch
14 Oven Interior Light
15 Oven Shelf SupportsShelf positions for cooking aresuggested in the Baking, Roastingand Broiling sections.
16 Lift-Off Oven DoorEasily removed for cleaning.
17 Storage Drawer or Kick Panel
18 Broiler Pan and RackDo not clean in theself-cleaning oven.
Feature Index
1 Model and Serial Numbers
2 Oven Door Gasket
3 Removable Oven Bottom
2
23,28
30 14
13,30
13
4 Oven Shelves with Stop-Locks 5, 13, 15,23, 27
5 Automatic Oven Door Latch 24, 25
6 Surface Burner Controls
7 Lift-Up Cooktop
8 Oven Vent
9,26
27
5, 14
2,3,314,26
9 Anti-Tip DeviceSee the Installation Instructions. (j, 21,
22.2710 Surface Burners and Grates 8,9,29
11 Oven Controls, Clock and Timer 11, 12,26
7 —
—

HOW DOES THIS COOKTOP COMPARETO YOUR OLD ONE?
Your new cooktop has gas burners. If you are used The best types of cookware to use, plus heat-up andto cooking with induction or other electric surface cool-down times, depend upon [he type of burner orunits, you will notice some differences when you use surface unit you have.gas burners.
Twe of Cookto~
Gas Burners
Radiant(Glass Ceramic)Cooktop
LInduction
Electric Coil
‘eo
Solid Disk
o@
)
Description
Regular or sealedgas burners useeither LP gasor natural gas.
Electric coilsunder a glass-ceramic cooktop.
High frequencyinduction coilsunder a glasssurface.
Flattened metaltubing containingelectric resistancewire suspendedover a drip pan.
Solid cast irondisk sealed to thecooktop surface.
The following chart will help you to understand thedifferences between gas burner cooktops and anyother type of cooktop you may have used in the past.
How it Works
Flames heat the pans directly. Pan tlatness is not critical to cooking results, butpans should be well balanced. Gas burners heat the pan right away and changeheat settings right away. When you turn the control off, cooking stops right away.
Heat travels to the glass surface and then to the cookware, so pans must be flat onthe bottom for good cooking results. The glass cooktop stays hot enough tocontinue cooking after it is turned off. Remove the pan from the surface unit ifyou want cooking to stop.
Pans must be made of ferrous metals (metal that attracts a magnet). Heat isproduced by a magnetic circuit between the coil and the pan. Heats up right awayand changes heat settings right away, like a gas cooktop. After turning the controloff, the glass cooktop is hot from the heat of the pan, but cooking stops right away.
Heats by direct contact with the pan and by heating the air under the pan. For bestcooking results, use good quality pans. Electric coils are more forgiving ofwarped pans than radiant or solid disks. Heats up quickly but does not changeheat settings as quickly as gas or induction. Electric coils stay hot enough tocontinue cooking for a short time after they are turned off.
Heats by direct contact with the pan, so pans must be flat on the bottom for goodcooking results. Heats up and cools down more slowly than electric coils. Thedisk stays hot enough to continue cooking after it is turned off. Remove the panfrom the solid disk if you want the cooking to stop.
—
—
8

filectric IgnitionYour surface burners are lighted by electric ignition, Surface burners in use when an electrical powereliminating the need for standing pilot lights with failure occurs will continue to operate normally.constantly burning flames.
In case of a power failure, you can light the surfaceburners on your range with a match. Hold a lightedmatch to the burner, then turn the knob to the LITEposition. Use extreme caution when lightingburners this way.
Surface Burner Controls Super BurnerKnobs that turn the surface burners on and off are On some models, the right front burner is cone-shapedmarked as to which burners they control. The two with a circular opening through the center of theknobs on the left control the left front and left rear burner. This burner can provide 309?0 more powerburners. The two knobs on the right control the right than any one of the other three. Use it for canning orfront and right rear burners. large pans.
To Light a Surface BurnerPush the control
knob in and turn itlunterclockwise to
LITE. You will hear alittle clickingnoise—the sound ofthe electric sparkigniting the burner.
After the burnerignites, turn theknob to adjust thetlame size.
After Lighting a BurnerCheck to be sure the burner you turned on is the one If simmering on one burner and the other burners areyou want to use. turned on, the gas flow of the simmering burner may
Do not operate a burner for an extended period of have to be adjusted.
time without cookware on the grate. The finish on the Be sure the burners and grates are cool before yougrate may chip without cookware to absorb the heat. place your hand, a pot holder, cleaning cloths or otherThe lowest setting of the burner has a small flame to materials on them.
provide simmering capability. To simmer foods, setthe cooktop control knob to the lower setting that will
(continued ne.rtpqe)
maintain the desired simmer.
9
SURFACE COOKING(continued)
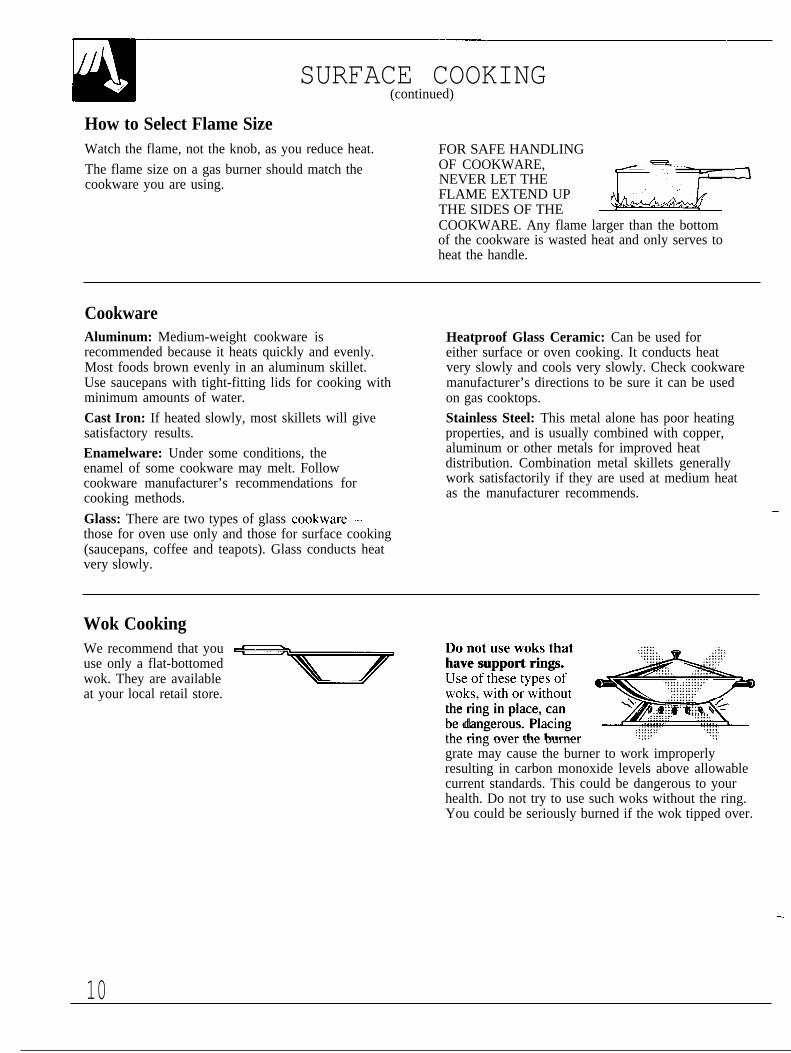
How to Select Flame SizeWatch the flame, not the knob, as you reduce heat. FOR SAFE HANDLING
The flame size on a gas burner should match the OF COOKWARE,A
cookware you are using. NEVER LET THEFLAME EXTEND UPTHE SIDES OF THECOOKWARE. Any flame larger than the bottomof the cookware is wasted heat and only serves toheat the handle.
CookwareAluminum: Medium-weight cookware isrecommended because it heats quickly and evenly.Most foods brown evenly in an aluminum skillet.Use saucepans with tight-fitting lids for cooking withminimum amounts of water.
Cast Iron: If heated slowly, most skillets will givesatisfactory results.
Enamelware: Under some conditions, theenamel of some cookware may melt. Followcookware manufacturer’s recommendations forcooking methods.
Glass: There are two types of glass cookware—those for oven use only and those for surface cooking(saucepans, coffee and teapots). Glass conducts heatvery slowly.
Heatproof Glass Ceramic: Can be used foreither surface or oven cooking. It conducts heatvery slowly and cools very slowly. Check cookwaremanufacturer’s directions to be sure it can be usedon gas cooktops.
Stainless Steel: This metal alone has poor heatingproperties, and is usually combined with copper,aluminum or other metals for improved heatdistribution. Combination metal skillets generallywork satisfactorily if they are used at medium heatas the manufacturer recommends.
—
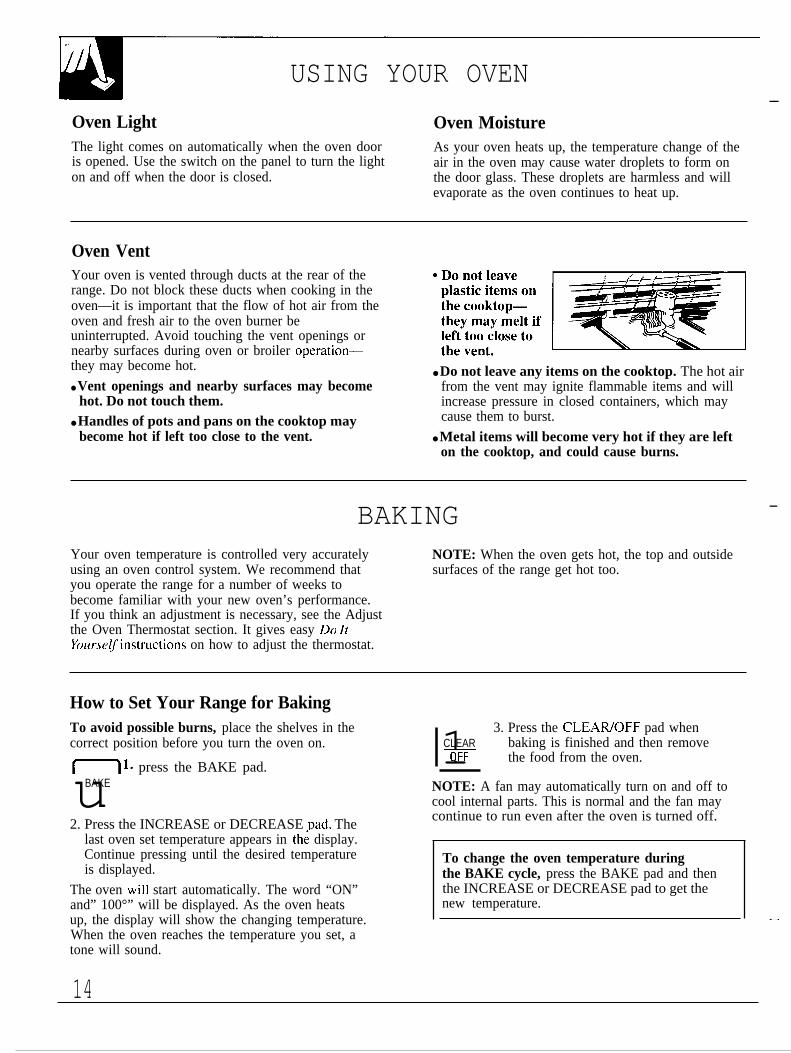
Wok CookingWe recommend that youuse only a flat-bottomedwok. They are availableat your local retail store. ‘;;U;;;:*have support rings.
the ring in place, can ,,::.g;~~~:: “:’’~::;;~, %+be dangerous. Placingthe ring over the burner ,.,grate may cause the burner to work improperlyresulting in carbon monoxide levels above allowablecurrent standards. This could be dangerous to yourhealth. Do not try to use such woks without the ring.You could be seriously burned if the wok tipped over.
—
10

& & b1. CLEAIVOFF. Press this pad to cancel all oven
operations except the clock and timer.
2. PROGRAM STATUS. Words light up in thedisplay to indicate what is in the time display.Programmed information can be displayed at anytime by touching the pad of the operation you wantto see. For example, you can display the current.—i me of day while the timer is counting down by
pressing the CLOCK pad.
3. TIME DISPLAY. Shows the time of day, the timesset for the timer or the automatic oven operation.
4. OVEN TEMPERATURE AND BROILDISPLAY. Shows the oven temperature or thebroil setting selected.
5. FUNCTION INDICATORS. Lights up toshow whether oven is in the bake, broil or self-clean mode.
6. INCREASE. Short taps to this pad increase thetime or temperature by small amounts. Press andhold the pad to increase the time or temperature bylarger amounts.
7. TIMER ON/OFF. Press this pad to selectthe timer function. The timer does not controloven operations. The timer can time up to 9 hoursand 55 minutes.
To set the timer, first press the TIMER ON/OFFpad. Then press the INCREASE or DECREASEpad to change the time.To cancel the timer, press and hold the TIMERON/OFF pad until the word “TIMER” disappearsfrom the display.
8.
9.
CLOCK. To set the clock, first press the CLOCKpad. Then press the INCREASE-or DECREASEpad to change the time of day.
STOP TIME. Use this pad along with theCOOK TIME or CLEAN pad to set the ovento start automatically at a iime you select.
10. COOK TIME. Press this pad for the TimedBaking operations.
11. CLEAN. Press this pad to select the self-cleaningfunction. See the Operating the Self-CleaningOven section.
12. BROIL. Press this pad to select the broil function.
13. BAKE. Press this pad to select the bake function.
14. DECREASE. Short taps to this pad decrease thetime or temperature by small amounts. Press andhold the pad to decrease the time or temperatureby larger amounts.
If “F-” and a number flash in the display,and the oven control signals, this indicatesfunction error code. Press the CLEAWOFF pad.Allow the oven to cool for one hour. Put the ovenback into operation. If the function error coderepeats, disconnect the power to the range andcall for service.
11

OVEN CONTROL, CLOCK AND TIMER
Clock To Set the ClockThe clock must be set to the correct time of day forthe automatic oven timing functions to work properly.The time of day cannot be changed during a TimedBaking or Self-Cleaning cycle. c1
1. Press the CLOCK pad.
CLOCK
‘n
2. Press the INCREASE or DECREASEA padtoselthetimeof day.~
Timer To Set the TimerThe timer does not control ovenoperations. The maximum settingon the timer is 9 hours and 55 c1
1. Press the TIMERTIMER ON/OFF pad.ON/OFF
minutes.
2. Press the INCREASE orDECREASE pad to set theamount of time on the timer.
The timer will start automatically.within a few seconds of releasingthe pad. The timer, as you are usetting it, will display seconds until1 minute is reached. Then it willdisplay minutes and seconds until60 minutes is reached.
After 60 minutes, it will displayhours (“HR” now appears indisplay) and minutes until themaximum time of 9 hours and55 minutes is reached. —
To Reset the Timer To Cancel the TimerIf “TIMER” is displayed, press the INCREASE or Press and hold the TIMER ON/OFF pad until theDECREASE pad until the desired time is reached. word “TIMER” disappears from the display.
If “TIMER” is not displayed, press the TIMERON/OFF pad first, then follow the instructions aboveto set the timer.
End of Cycle TonesThe end of cycle tone is 3 short beeps followed by To return the end of cycle tone to the repeating beeps,1 beep that repeats every 6 seconds until you press press and hold the CLEAR/OFF pad for 10 seconds.any operation. If you would like to eliminate therepeating beeps, press and hold the CLEAWOFF padfor 10 seconds.
Power Outage Display MessagesAfter a power outage, when power is restored the If “door” appears in the display, the oven door isdisplay will flash and time shown will no longer opened and needs to be closed. If “LOCK” appearsbe correct-for example, after a 5-minute power in the display, the oven door is in the locked position.interruption the clock will be 5 minutes slow. The BAKE, BROIL and COOK TIME cannot be set if the —
display flashes until the clock is reset. All other door is in the locked position.functions that were in operation when the powerwent out will have to be programmed again.
12

-efore Using Your Oven1. Look at the controls. Be sure you understand how
to set them properly.2. Check the oven interior. Look at the shelves.
Take a practice run at removing and replacing themproperly, to give sure, sturdy support.
3. Read over the information and tips that tallow.4. Keep this guide handy so you can refer to it,
especially during the first weeks of using yournew range.
NOTE:● You may notice a “burning” or “oily” smell the fkst few
times you turn your oven on. This is normal in a newoven and will disappear in a short time. To speed theprocess, set a self-clean cycle for a minimum of 3 hours.See the Operating the Self-Cleaning Oven section.
● A fan may automatically turn on and off to coolinternal parts. This is normal and the fan maycontinue to run even after the oven is turned off.
Electric IgnitionThe oven burner and broil burner are lighted by After the oven reaches the selected temperature, theelectric ignition. oven burner cycles—off completely, then on with aTo light either burner, touch the pad for the desired full flame-to keep the oven temperature controlled.function and press the INCREASE or DECREASEpad until the desired temperature is displayed. Theburner should ignite within 30–90 seconds.
Power OutageCAUTION: DO NOT MAKE ANY ATTEMPT TO
‘ERATE THE ELECTRIC IGNITION OVENJRING AN ELECTRICAL POWER OUTAGE.
Neither the oven nor the broiler can be lit during anelectrical power outage. Gas will not flow unless theglow bar is hot.
If the oven is in use when a power outage occurs, theoven burner shuts off and cannot be re-lit until poweris restored.
Oven ShelvesThe shelves are designed with stop-locks, so thatwhen placed correctly on the shelf supports, theywill stop before coming completely out from theoven, and will not tilt when removing food from orplacing food on them.When placing cookware on a shelf, pull the shelf outto the stop position. Place the cookware on the shelf,then slide the shelf back into the oven. This willeliminate reaching into the hot oven.
To remove a shelf from theoven pull the shelf towardyou, tilt the front end upwardand pull the shelf out.To replace, place the shelfon the shelf support with thestop-locks (curved extension
34/Sii$igl,‘Iii?.> --- , -.of ;he shelf) facing up and toward the rear of theoven. Tilt up the front and push the shelf toward theback of the oven until it goes past the bump on theshelf support. Then lower the front of the shelf andpush it all the way back.
Shelf PositionsThe oven has four shelf supports identified in this ~~+.!!illustration as A (bottom), B, C and D (top).
elf positions for cooking are suggested in thedaking, Roasting and Broiling sections.
(i’mlill[lcvl 11(,.1-/ pay<)
4
.)qo
““x~fi\. j’ ‘,
1,Y A
Qo&j ‘
\\~,
13
USING YOUR OVEN
Oven Light—
Oven MoistureThe light comes on automatically when the oven door As your oven heats up, the temperature change of theis opened. Use the switch on the panel to turn the light air in the oven may cause water droplets to form onon and off when the door is closed. the door glass. These droplets are harmless and will
evaporate as the oven continues to heat up.
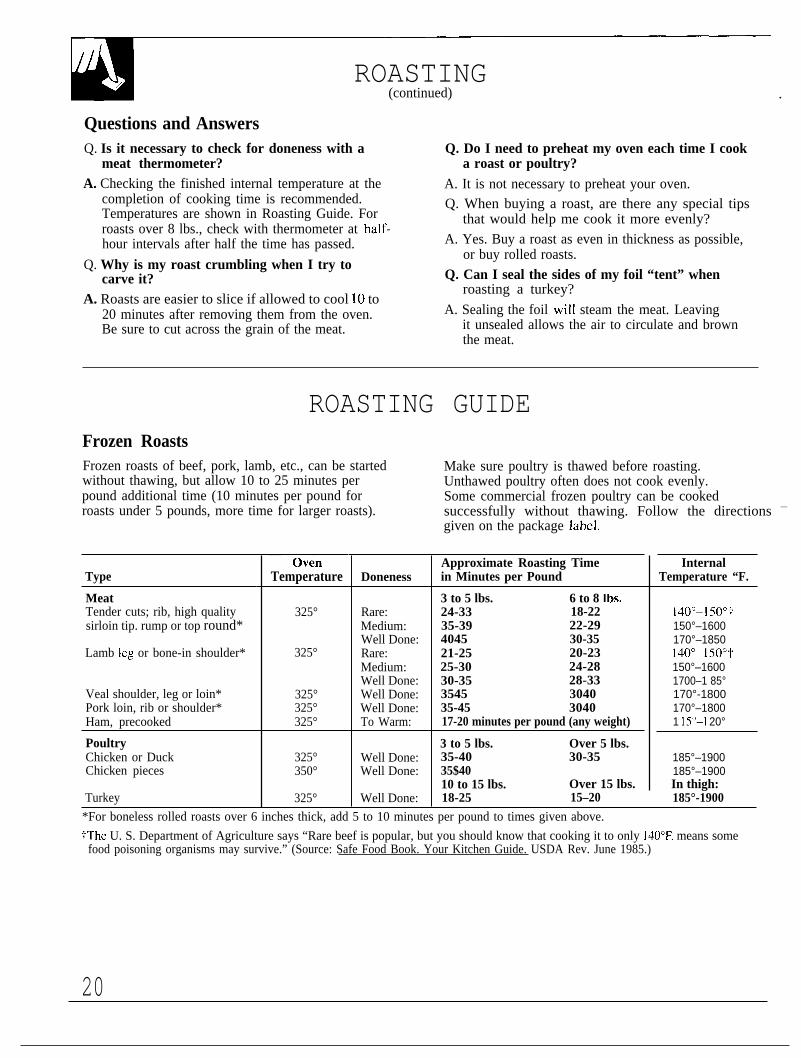
Oven VentYour oven is vented through ducts at the rear of therange. Do not block these ducts when cooking in theoven—it is important that the flow of hot air from theoven and fresh air to the oven burner beuninterrupted. Avoid touching the vent openings ornearby surfaces during oven or broiler operation—they may become hot.
● Vent openings and nearby surfaces may becomehot. Do not touch them.
● Handles of pots and pans on the cooktop maybecome hot if left too close to the vent.
● Do not leave any items on the cooktop. The hot airfrom the vent may ignite flammable items and willincrease pressure in closed containers, which maycause them to burst.
● Metal items will become very hot if they are lefton the cooktop, and could cause burns.
BAKING —
Your oven temperature is controlled very accurately NOTE: When the oven gets hot, the top and outsideusing an oven control system. We recommend that surfaces of the range get hot too.you operate the range for a number of weeks tobecome familiar with your new oven’s performance.If you think an adjustment is necessary, see the Adjustthe Oven Thermostat section. It gives easy Do ZtYow-selj_instructions on how to adjust the thermostat.
How to Set Your Range for BakingTo avoid possible burns, place the shelves in thecorrect position before you turn the oven on.
(—] L press the BAKE pad. 1 3. Press the CLEAIUOFF pad whenCLEAR baking is finished and then removeF the food from the oven.
uBAKE NOTE: A fan may automatically turn on and off tocool internal parts. This is normal and the fan may
2. Press the INCREASE or DECREASE Pad. Thelast oven set temperature appears in th; display.Continue pressing until the desired temperatureis displayed.
The oven will start automatically. The word “ON”and” 100°” will be displayed. As the oven heatsup, the display will show the changing temperature.When the oven reaches the temperature you set, atone will sound.
continue to run even after the oven is turned off.
To change the oven temperature duringthe BAKE cycle, press the BAKE pad and thenthe INCREASE or DECREASE pad to get thenew temperature.
—
14

ven ShelvesArrange the ovenshelf or shelves inthe desired locationswhile the oven iscool. The correctshelf positiondepends on the kindof food and thebrowning desired.As a general rule,place-most foods in the middle of the oven, on eithershelf positions B or C. See the chart for suggestedshelf positions.
PreheatingPreheat the oven if the recipe calls for it. Preheatmeans bringing the oven up to the specified
nperature before putting the food in the oven.~ preheat, set the oven at the correct temperature—
selecting a higher temperature does not shortenpreheat time.
Type of Food Shelf Position
Angel food cake A
Biscuits or muffins B or C
Cookies or cupcakes B or C
Brownies B or C
Layer cakes B or C
Bundt or pound cakes A or B
Pies or Pie shells B or C
Frozen pies A (on cookie sheet)
Casseroles B or C
Roasting A or B
Preheating is necessary for good results when bakingcakes, cookies, pastry and breads. For most casserolesand roasts, preheating is not necessary. For ovenswithout a preheat indicator light or tone, preheat10 minutes. After the oven is preheated, place thefood in the oven as quickly as possible to preventheat from escaping.
Baking PansUse the proper baking pan. The type of finish on thepan determines the amount of browning that will occur.
● Dark, rough or dull pans absorb heat resulting in abrowner, crisper crust. Use this type for pies.
● Shiny, bright and smooth pans reflect heat, resultingin a lighter, more delicate browning. Cakes andcookies require this type of pan.
● Glass baking dishes also absorb heat. When bakingin glass baking dishes, the temperature may need tobe reduced by 25”F.
Pan PlacementFor even cooking and proper browning, there must beenough room for air circulation in the oven. Bakingresults will be better if baking pans are centered asmuch as possible rather than being placed to the frontor to the back of the oven.
Pans should not touch each other or the walls of theoven. Allow 1- to 1 X-inch space between pans as wellas from the back of the oven, the door and the sides.If you use two shelves, stagger the pans so one is notdirectly above the other.
(continued next page)
15

BAKING(continued) —
Baking GuidesWhen using prepared baking mixes, follow package recipe or instructionsfor the best baking results.
CookiesWhen baking cookies, flat cookie sheets (withoutsides) produce better-looking cookies. Cookies bakedin a jelly roll pan (short sides all around) may havedarker edges and pale or light browning may occur.
Do not use a cookie sheet so large that it touches thewalls or the door of the oven. Never entirely covera shelf with a large cookie sheet.
For best results, use only one cookie sheet in the ovenat a time.
Pies CakesFor best results, bake pies in dark, rough or dull pans When baking cakes, warped or bent pans will causeto produce a browner, crisper crust. Frozen pies in foil uneven baking results and poorly shaped products.pans should be placed on an aluminum cookie sheet A cake baked in a pan larger than the recipefor baking since the shiny foil pan reflects heat away
.recommends will usually be crisper, thinner and drier
from the pie crust; the cookie sheet helps retain it. than it should be. If baked in a pan smaller thanrecommended, it may be undercooked and batter mayoverflow. Check the recipe to make sure the pan sizeused is the one recommended.
Aluminum FoilNever entirely cover a shelf with aluminum foil.This will disturb the heat circulation and result inpoor baking. A smaller sheet of foil maybe usedto catch a spillover by placing it on a lower shelfseveral inches below the food.
Don’t PeekSet the timer for the estimated cooking time and do DO NOT open the door to check until thenot open the door to look at your food. Most recipes minimum time. Opening the oven door frequentlyprovide minimum and maximum baking times such during cooking allows heat to escape and makes
—
as “bake 30-40 minutes.” baking times longer. Your baking results may alsobe affected.
16

..OW to Time BakeThe oven control allows you to turn the oven on To set the clock, first press the CLOCK pad. Pressor off automatically at specific times that you set. the INCREASE or DECREASE pad until the correctNOTE: Before beginning make sure the clock time of day is displayed.shows the correct time of day.
How to Set Immediate Start and Automatic Stop4,To avoid possible burns, place the shelves in the
correct position before you turn the oven on.
The oven will turn on immediately and cook for aselected length of time. At the end of Cook Time,the oven will turn off automatically.
~ 1. Press the COOK TIME Dad.uCOOK,
TIMENOTE: If your recipe requirespreheating, you may need to addadditional time to the lemzth ofthe Cook Time.
n
2. Press the INCREASE pad until the
A desired length of baking time appears in~ the display.
‘—~ SO Pressthe BAKE pad.
L-JBAKE
CLEAR%F-
Press the INCREASE or DECREASEpad until the desired temperature isdisplayed. An attention tone will occurif step 3 is not done.
The oven will start automatically.The word “ON” and “100°” will bedisplayed. The Cook Time will begin tocount down. As the oven heats up, thedisplay will show the changingtemperature. When the oven reaches thetemperature you set, a tone will sound.The oven will continue to cook for theprogrammed amount of time, then shutoff automatically.
Press the CLEAR/OFF Dad to clearthe display if necessary.’ Remove thefood from the oven. Remember, eventhough the oven shuts off automatically,foods continue cooking after the controlsare off.
NOTE:● Foods that spoil easily, such as milk, eggs, fish,
stuffings, poultry and pork, should not be allowedto sit for more than one hour before or after cooking.Room temperature promotes the growth of harmfulbacteria. Be sure that the oven light is off becauseheat from the bulb will speed harmful bacteriagrowth.
● A fan may automatically turn on and off to coolinternal parts. This is normal and the fan maycontinue to run even after the oven is turned off.
(continued next page)
17

TIMED BAKING(continued) —
How to Set Delay Start and Automatic Stop
Quick Reminder:1. Press the COOK TIME pad.2. Press the INCREASE/DECREASE pad to set
the Cooking Time.3. Press the STOP TIME pad.4. Press the INCREASE/DECREASE pad to set
the length of Cooking Time.5. Press the BAKE pad.6. Press the INCREASE/DECREASE pad until
the desired temperature appears in the display.
To avoid possible burns, place the shelves in thecorrect po~ition before you turn the oven on.You can set the oven control to delav-start the oven,cook for a specific length of time aid then turn offautomatically.For example: Let’s say it’s 2:00 and dinner time isshortly after 7:00. The recipe suggests 3 hours bakingtime at 325”F. Here’s how:1. Press the COOK TIME pad.
NOTE: If your recipe requires preheating, you mayneed to add additional time to the Cook Time.
2. For 3 hours of cooking time, press the INCREASEpad until “3:00” appears in the display.
3. Press the STOP TIME pad. “5:00” appears in thedisplay and “STOP TIME” flashes. The controlautomatically sets the Stop Time by adding theCook Time to the time of day. In this example, thetime of day is 2:00 and the Cook Time is 3 hours.Adding 3 hours to the time of day equals 5:00.
4. Change the Stop Time from 5:00 to 7:00 bypressing the INCREASE pad until “7:00” appearsin the display.
5. Press the BAKE pad.6. Press the INCREASE or DECREASE pad until
“325°” is displayed.At 4:00, the oven will turn on automatically. Theword “ON” and “100°” will be displayed. The CookTime will begin to count down. As the oven heatsup, the display will show the changing temperature.The oven will continue to cook for the programmed3 hours and shut off automatically at 7:00.
7. Press the CLEAR/OFF pad to clear the display ifnecessary. Remove the food from the oven. Remember,even though the oven shuts off automatically, foodscontinue cooking after the controls are off.
NOTE:● The low temperature zone of this range (between
150”F. and 200”F.) is available to keep hot cookedfoods warm. Food kept in the oven longer than twohours at these low temperatures may spoil.
● Foods that spoil easily, such as milk, eggs, fish,stuffings, poultry and pork, should not be allowed to –sit for more than one hour before or after cooking.Room temperature promotes the growth of harmfulbacteria. Be sure the oven light is off because heatfrom the bulb will speed harmful bacteria growth.
● A fan may automatically turn on and off to coolinternal parts. This is normal and the fan maycontinue to run even after the oven is turned off.
ADJUST THE OVEN THERMOSTAT-DO ZT YOURSELF?You may feel that your new oven cooks differentlythan the one it replaced. We recommend that youuse your new oven for a few weeks to become morefamiliar with it, following the times given in yourrecipes as a guide.If you think your new oven is too hot or too cold,you can adjust the thermostat yourself. If you thinkit is too hot, adjust the thermostat to make it cooler. Ifyou think it is too cool, adjust the thermostat to makeit hotter.We do not recommend the use of inexpensivethermometers, such as those found in grocery stores,to check the temperature setting of your new oven.These thermometers may vary 20zI0 degrees.
18
To Adjust the Thermostat:1. Press the BAKE pad.2. Select an oven temperature between 500°F. and 550”F.3. Immediately, before the BAKE indicator stops
flashing, press and hold the BAKE pad for about4 seconds. The display will change to the ovenadjustment display.
4. The oven temperature can be adjusted up to(+) 35”F. hotter or (-) 35”F. cooler. Use theINCREASE or DECREASE pads to select thedesired change in the display.
5. When you have made the adjustment, press the –CLEAWOFF pad to go back to the time of daydisplay. Use your oven as you would normally.
NOTE: This adjustment will not affect the broilingor self-cleaning temperatures. It will be retained inmemory after a power failure.

. .oasting is cooking by dry heat. Tender meat orpoultry can be roasted uncovered in your oven.Roasting temperatures, which should be low andsteady, keep spattering to a minimum.
Roasting is really a baking procedure used for meats.Therefore, the oven controls are set for Baking orTimed Baking. (You may hear a slight clicking sound,indicating the oven is working properly.) TimedBaking will turn the oven on and off automatically.
Most meats continue to cook slightly while standing,after being removed from the oven. The standing timerecommended for roasts is 10 to 20 minutes. Thisallows the roasts to firm up and makes them easier tocarve. The internal temperature will rise about 5° to10”F. during the standing time. To compensate for thetemperature rise, if desired, remove the roast fromoven sooner (at 5° to 10”F. less than the temperaturein the Roasting Guide.)
Remember that food will continue to cook in thehot oven and therefore should be removed when thedesired internal temperature has been reached.
1. Place the shelf in Aor B position. No ~<<y~’ljl~preheating is necessary. _
2. Check the weight of “v”;:?;<’[: Athe meat, and place, (@ifat-side-up, or poultrybreast-side-up, on the ~-.roasting rack in ashallow pan. The melting fat will baste the meat.Select a pan as close to the size of the meat asoossible. (The broiler pan with rack is a good pan‘or this.)
(’-) 3. press the BAKE pad.
IIBAKE
( )
~ 4. Press the INCREASE oru~ DECREASE pad until the desiredtemperature is displayed.
~v
The oven will start automatically. The word “ON”and “100°” will be displayed. As the oven heats up,the display will show the changing temperatures.When the oven reaches the set temperature a tonewill sound.
n
5. Press the CLEAR/OFF pad whenCLEAR baking is finished and then removeF the food from the oven.
NOTE: A fan may automatically turn on and off tocool internal parts. This is normal and the fan maycontinue to run even after the oven is turned off.
‘-To change the oven temperature during roasting,press the BAKE pad and then the INCREASE orDECREASE pad to get the new temperature.
Use of Aluminum FoilYou can use aluminum foil to line the broiler pan.This makes clean-up easier when using the pan formarinating, cooking with fruits, cooking heavilycured meats or basting food during cooking. Pressthe foil tightly around the inside of the pan.
(continued next page)
19
ROASTING(continued) .
Questions and AnswersQ. Is it necessary to check for doneness with a Q. Do I need to preheat my oven each time I cook
meat thermometer? a roast or poultry?A. Checking the finished internal temperature at the A. It is not necessary to preheat your oven.
completion of cooking time is recommended.Temperatures are shown in Roasting Guide. For
Q. When buying a roast, are there any special tipsthat would help me cook it more evenly?
roasts over 8 lbs., check with thermometer at half-hour intervals after half the time has passed. A. Yes. Buy a roast as even in thickness as possible,
Q. Why is my roast crumbling when I try toor buy rolled roasts.
carve it? Q. Can I seal the sides of my foil “tent” when
A. Roasts are easier to slice if allowed to cool 10 toroasting a turkey?
20 minutes after removing them from the oven. A. Sealing the foil will steam the meat. LeavingBe sure to cut across the grain of the meat. it unsealed allows the air to circulate and brown
the meat.
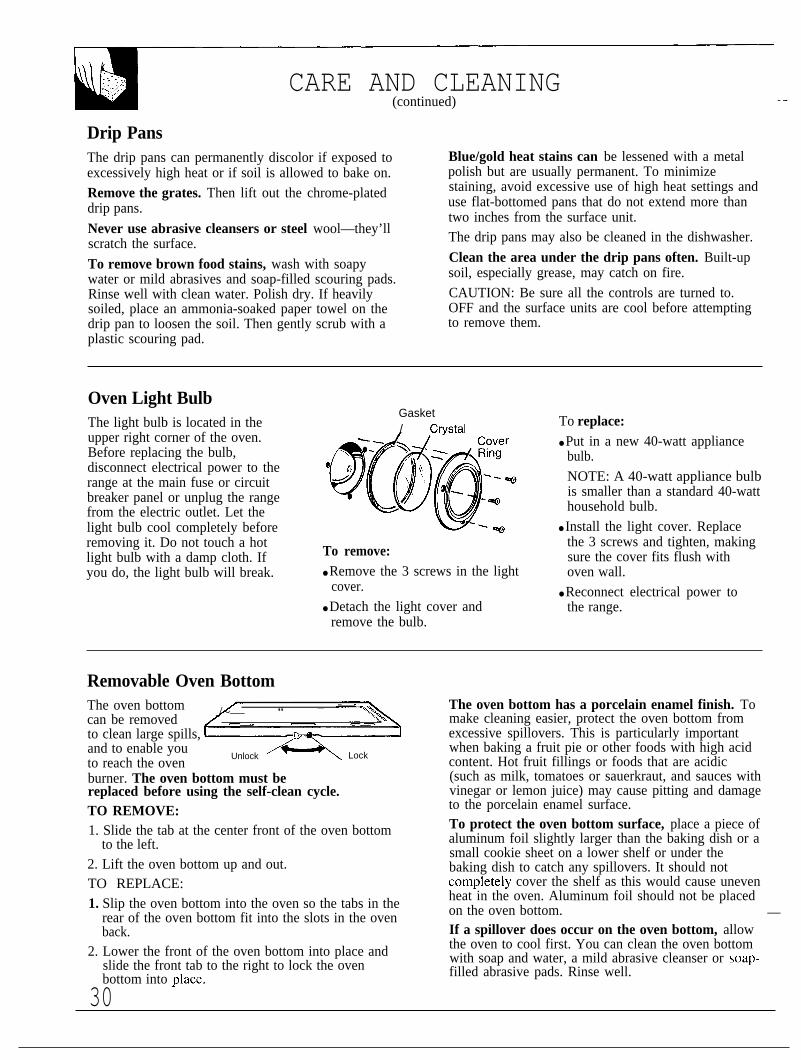
ROASTING GUIDEFrozen RoastsFrozen roasts of beef, pork, lamb, etc., can be startedwithout thawing, but allow 10 to 25 minutes perpound additional time (10 minutes per pound forroasts under 5 pounds, more time for larger roasts).
Type
MeatTender cuts; rib, high qualitysirloin tip. rump or top round*
Lamb leg or bone-in shoulder*
Veal shoulder, leg or loin*Pork loin, rib or shoulder*Ham, precooked
PoultryChicken or DuckChicken pieces
Turkey
__6Rr_Temperature
325°
325°
325°325°325°
325°350°
325°
Doneness
Rare:Medium:Well Done:Rare:Medium:Well Done:Well Done:Well Done:To Warm:
Well Done:Well Done:
Well Done:
Make sure poultry is thawed before roasting.Unthawed poultry often does not cook evenly.Some commercial frozen poultry can be cookedsuccessfully without thawing. Follow the directions —
given on the package label.
Approximate Roasting Timein Minutes per Pound
3 to 5 lbs. 6 to 8 Ibs.24-33 18-2235-39 22-294045 30-3521-25 20-2325-30 24-2830-35 28-333545 304035-45 304017-20 minutes per pound (any weight)
3 to 5 lbs. Over 5 lbs.35-40 30-3535$4010 to 15 lbs. Over 15 lbs.18-25 15–20
InternalTemperature “F.
140°–1500t150°–1600170°–1850140°–1500t150°–16001700–1 85°170°-1800170°–18001 150–1 20°
185°–1900185°–1900In thigh:185°-1900
*For boneless rolled roasts over 6 inches thick, add 5 to 10 minutes per pound to times given above.
TThe U. S. Department of Agriculture says “Rare beef is popular, but you should know that cooking it to only 140”F. means somefood poisoning organisms may survive.” (Source: Safe Food Book. Your Kitchen Guide. USDA Rev. June 1985.)
20

tiroiling is cooking food by direct heat from above the Turn the food only once during broiling. Timefood. Most fish and tender cuts of meat can be the foods for the first side according to thebroiled. Follow these directions to keep spattering and Broiling Guide.smoking to a minimum. Turn the food, then use the times given for the second
side as a guide to the preferred doneness.
The oven door should be closed during broiling.1. If the meat has fat or gristle around the edge, cut
vertical slashes through both about 2“ apart. Ifdesired, the fat may be trimmed, leaving a layerabout 1/8” thick,
2. Place the meat on the broiler rack in the broiler panwhich comes with the range. Always use the rackso the fat drips into the broiler pan; otherwise thejuices may become hot enough to catch on fire.
3. Position the shelf on the recommended shelf positionas suggested in the Broiling Guide.
4. Close the oven door.
(—] 5.presstheBRoILPad.
IIBROIL
b J
6. Press the INCREASE pad once for LO Broil.
Press the INCREASE pad twice for HI Broil.
To change from HI Broil to LO Broil, press theBROIL pad, then press the DECREASE pad.
7. When broiling is completed, press the CLEAR/OFFpad. Serve the food immediately, and leave the panoutside the oven to cool during the meal for easiestcleaning.
NOTE: A fan may automatically turn on and off tocool internal parts. This is normal and the fan maycontinue to run even after the oven is turned off.
Jse of Aluminum FoilYou can use aluminum foil to line your broiler panand broiler rack. However, you must mold the foiltightly to the rack and cut slits in it just like the rack.
Without the slits, the foil will prevent fat and meatjuices from draining to the broiler pan. The juicescould become hot enough to catch on fire. If you donot cut the slits, you are frying, not broiling.
Questions & AnswersQ. When broiling, is it necessary to always use a
rack in the pan?A. Yes. Using the rack suspends the meat over the
pan. As the meat cooks, the juices fall into the pan,thus keeping meat drier. Juices are protected by therack and stay cooler, thus preventing excessivespatter and smoking.
Q. Do I need to grease my broiler rack to preventmeat from sticking?
A. No. The broiler rack is designed to reflect broilerheat, thus keeping the surface cool enough to preventmeat sticking to the surface. However, spraying thebroiler rack lightly with a vegetable cooking spraybefore cooking will make clean-up easier.
Q. Should I salt the meat before broiling?A. No. Salt draws out the juices and allows them to
evaporate. Always salt after cooking. Turn themeat with tongs; piercing the meat with a fork alsoallows the juices to escape. When broiling poultryor fish, brush each side often with butter.
(continued next page)
21

BROILING GUIDE
● Always use the broiler pan and rack that comes with ● When arranging food on the pan, do not let fattyyour oven. It is designed to minimize smoking and edges hang over the sides because dripping fat couldspattering by trapping the juices in the shielded soil the oven.lower part of the pan.
● The broiler does not need to be preheated. However,● Broiling should always be done with the oven for very thin foods, or to increase browning, preheat
door closed. if desired.
● For steaks and chops, slash fat evenly around the ● Use LO Broil to cook foods such as poultry or thickoutside edges of the meat. To slash, cut crosswise pork chops thoroughly without over-browning them.through the outer fat surface just to the edge of the c Frozen steaks can be broiled by positioningmeat. Use tongs to turn the meat over to prevent the oven shelf at next lowest shelf position andpiercing the meat and losing the juices. increasing cooking time given in this guide
● If desired, marinate meats or chicken before broiling 1 !4 times per side.or brush with barbecue sauce last 5 to 10 minutes only.
.
FoodBacon
‘Gr;und BeefWell DoneBeef SteaksRareMediumWell DoneRareMediumWell DoneChicken
Bakery ProductsBread (Toast) orToaster PastriesEnglish MuffinsLobster Tails
Fish
Ham Slices(precooked)Pork ChopsWell Done
Lamb ChopsMediumWell DoneMediumWell DoneWieners andsimilar precookedsausages, bratwurst
Qua~ityand/or ] ShelfThickness ]Positiom
I1/2 lb. (about 8 cthin slices)
1 inch thick(1 to 1X lbs.)
1X inch thick(2 to 2X lbs.)
BBBBBB
1 whole(2 to 2!A lbs.),split lengthwise
A
I(6 to 8 oz. each)
l-lb. fillets 1/4 to B1/2 inch thick
First SideTime, Minutes
5
8-9
912-13
13101525
28-30
2-3
3413-16
5
Second SideTime, Minutes Comments
2!4 Arrange in single layer.
Space evenly.6-7 Up to 8 patties take about same time.
7 Steaks less than 1 inch thick cook5-6 through before browning. Pan frying8-9 is recommended. Slash fat.6-7 —
9-1216-18
18-20 Reduce time about 5 to 10 minutes perside for cut-up chicken. Brush each sidewith melted butter. Broil skin-side-downfirst.
1/2-1 Space evenly. Place English muffinscut-side-up and brush with butter,if desired.
Do not Cut through back of shell. Spread open.turn over. Brush with melted butter before and
after half of broiling time.5 Handle and turn very carefully. Brush
with lemon butter before and duringcooking if desired. Preheat broiler toincrease browning.
1 inch thick c 8 8 Increase time 5 to 10 minutes per sidefor 1 % inch thick or home cured ham.
2 (1/2 inch thick) B 10-12 4-5 Slash fat.2 (1 inch thick), B 12–13 8-9about 1 lb.
2(1 inch thick), B 8 4-7 Slash fat.about 10 to 12 oz. B 10 102(1 k inch thick) B 10 4-6about 1 lb. B 17 12-14 —l-lb. pkg. (10) c 6 1-2 If desired, split sausages in half
lengthwise; cut into 5- to 6-inch pieces.
22

Quick Reminder:1. Prepare the oven for cleaning.
2. Close the oven door.
3. Press the CLEAN pad.
4. Press the INCREASE or DECREASE padto set the Clean Time.
Before a Clean CycleThe range must be completely cool in order to setthe self-clean cycle.We recommend venting with an open windowor using a ventilation fan or hood during the firstself-clean cycle.
1. Remove the broiler pan, broiler rack, all cookwareand any aluminum foil from the oven—they can’twithstand the high cleaning temperatures.
NOTE: The oven shelves may be cleaned inthe self-cleaning oven. However, they will darken,lose their luster and become hard to slide.
2. Wipe Up heavy soil on the oven bottom. If you~se soap, rinse thoroughly before self-cleaningto prevent staining.
n I
Area Area Openings Oven dooroutside inside in door gasketgasket gasket
3. Clean spatters or soil on the oven front frame andthe oven door outside the gasket with a dampenedcloth. The oven front frame and the oven dooroutside the gasket do not get cleaned by the self-clean cycle. On these areas, use detergent and hotwater or a soap-filled steel wool pad. Rinse wellwith a vinegar and water solution. This will helpprevent a brown residue from forming when theoven is heated. Buff these areas with a dry cloth.Do not clean the gasket.
Do not use abrasives or oven cleaners. Clean thetop, sides and outside front of the oven door withsoap and water.
Make sure the oven light bulb cover is in place.
Do not rub or clean the door gasket—the fiberglass material of the gasket has anextremely low resistance to abrasion. An intactand well-fitting oven door gasket is essential forenergy-efficient oven operation and good bakingresults. If you notice the gasket becoming worn,frayed or damaged in any way or if it has becomedisplaced on the door, you should have it replaced.
Do not let water run down through openings inthe top of the door. To help prevent water fromgetting in these slots when cleaning, open the dooras far as it will go.
4. Close the oven door and make sure the ovenlight is off. If the oven light is not turned off,the life of the bulb will be shortened or it maybum out immediately. The door latchesautomatically after the clean cycle is set.
Do not use commercial oven cleaners or ovenprotectors in or near the self-cleaning oven.A combination of any of these products plus thehigh clean-cycle temperature may damage theporcelain finish of the oven.
(continued next page)
23

OPERATING THE SELF-CLEANING OVEN(continued)
How to Set Oven for Cleaning1. Follow steps to prepare the oven for cleaning
2. Close the oven door.
c13. Press the CLEAN pad.
CLEAN
4. Press the INCREASE or DECREASE pad until thedesired Clean Time is displayed.
Clean Time is normally 3 hours. You can changethe Clean Time to any time between 2 and 4 hours,depending on the amount of soil in your oven.
The self-clean cycle will automatically begin after“CLEAN” is displayed and the word “ON” appearsin the display. When the oven heats to a hightemperature, the word “LOCK” will appear in thedisplay. It will not be possible to open the oven dooruntil the temperature drops below the lock temperature.
5. When the LOCK light is off, open the door.
NOTE: A fan may automatically turn on and off tocool internal parts. This is normal and the fan maycontinue to run even after the oven is turned off.
How to Delay Start of Cleaning
Quick Reminder:1. Prepare the oven for cleaning.
2. Close the oven door completely.
3. Press the CLEAN pad.
4. Press the INCREASE or DECREASE pad untilthe desired Clean Time appears.
5. Press the STOP TIME pad.
6. Press the INCREASE or DECREASE pad untilthe desired Stop Time appears in the display.
Delay Start is setting the oven timer to start the cleancycle automatically at a later time than the presenttime of day.
NOTE: Before beginning make sure the oven clockshows the correct time of day.
For example: Let’s say it’s 7:00 and you want theoven to begin self-cleaning at 9:00 after you’re
—
c1 6. Press the STOP TIME pad. 6’10:00”STOP appears in the display and “STOPTIME TIME” flashes.
The control automatically sets the Stop Time byadding the Clean Time to the time of day. In thisexample, the time of day is 7:00 and the CleanTime is 3 hours. Adding 3 hours to the time of day ———equals 10:00.
7. Change the Stop Time from 10:00 to 12:00 bypressing the INCREASE pad until “ 12:()()” appearsin the display. The words “DELAY CLEAN” willalso appear in the display.
The self-clean cycle will automatically begin at 9:00and finish at 12:00. The word “ON” will appear in thedisplay at 9:00.
When the oven heats to a high temperature, the word“LOCK” will be displayed. It will not be possible toopen the oven door until the temperature drops below
finished in~he kitchen. Th~ oven is just soiled a normalthe lock temperature.
amount so the normal Clean Time of 3 hours is preferred. When the clean cycle is finished, the word “CLEAN”
1. Prepare the oven for cleaning.will go out in the display and the oven will begin tocool. When the oven temperature has fallen below the
2. Close the oven door. locking temperature, the word “LOCK” goes out and
n 3. Press the CLEAN pad. the door can be opened.
CLEAN 8. When the LOCK light is off, open the door.
NOTE: A fan may automatically turn on and off to
n
4. Press the INCREASE pad. Three hours cool internal parts. This is normal and the fan may
A cleaning time is automatically set. continue to run even after the oven is turned off.
~ 5. If a longer or shorter Clean Timeis desir=d, press the INCREASE or
~ DECREASE pad until the desired
v Clean Time is displayed.
‘7A

i’ter a Clean CycleAfter a clean cycle, you may notice some white ash If the oven is not clean after one clean cycle, thein the oven. Just wipe it up with a damp cloth. cycle may be repeated.
If white spots remain, remove them with a soap- If the shelves have become hard to slide, wipe thefilled steel wool pad. Be sure to rinse thoroughly with shelf supports with cooking oil.a vinegar and water mixture. These deposits areusually a salt residue that cannot be removed by theclean cycle.
To Stop a Clean CyclePress the CLEAEUOFF pad. When the words “LOCK” and “CLEAN”go out in the display and the oven cools below the locking temperature,open the oven door.
Questions and AnswersQ. If my oven clock is not set to the correct time
of day, can I still self-clean my oven?A. If the clock is not set to the correct time of day you
will not be able to set a delay clean to end at aspecific time.
Can I use commercial oven cleaners on any partof my self-cleaning oven?
A. No cleaners or coatings should be used around anypart of this oven. If you do use them and do notthoroughly rinse the oven with water, wiping itabsolutely clean afterwards, the residue can scarthe oven surface and damage metal parts the nexttime the oven is automatically cleaned.
Q. What should I do if excessive smoking occursduring cleaning?
A. This is caused by excessive soil. Press theCLEAIUOFF pad. Open the windows to rid theroom of smoke. Wait until the oven has cooled andthe word “LOCK” is off in the display. Wipe upthe excess soil and reset the clean cycle.
Q. Is the “crackling” or “popping” sound I hearduring cleaning normal?
A. Yes. This is the sound of the metal heatingand cooling during both the cooking andcleaning functions.
Q. Should there be any odor during the cleaning?A. Yes, there will be an odor during the first few
cleanings. Failure to wipe out excessive soil mightalso cause a strong odor when cleaning.
Q. What causes the hair-like lines on the enameledsurface of my oven?
A. This is a normal condition, resulting from heatingand cooling during cleaning. These lines do notaffect how your oven performs.
Q. Why do I have ash left in my oven after cleaning?A. Some types of soil will leave a deposit which is ash.
It can be removed with a damp sponge or cloth.
Q. My oven shelves do not slide easily. What isthe matter?
A. After many cleanings, the oven shelves will losetheir luster and become hard to slide. To make theshelves slide more easily, wipe the shelf supportswith cooking oil.
Q. My oven shelves have become gray after theself-clean cycle. Is this normal?
A. Yes. After the self-clean cycle, the shelves willlose some luster and discolor to a deep gray color.
Q. Can I cook food on the cooktop while the ovenis self-cleaning?
A. Yes. While the oven is self-cleaning, you can usethe cooktop just as you normally do.
25

CARE AND CLEANING
Proper care and cleaning are important so your range will give you efficientand satisfactory service. Follow these directions carefully in caring for yourrange to assure safe and proper maintenance.
How to Remove Packaging Tape Removing Packing MaterialsTo assure no damage is done to the finish of the Check your range to insure all packaging materialsproduct, the safest way to remove the packaging tape and protective tape covering are removed from areasadhesive on new appliances is an application of a such as the door trim, cooktop frame, end caps, etc.household liquid dishwashing detergent, mineral oil before using.or cooking oil. Apply with a soft cloth and allow tosoak. Wipe dry and then apply an appliance polish tothoroughly clean and protect the surface.
NOTE: The plastic tape must be removed from thechrome trim on range parts. It cannot be removed ifit is baked on.
Control Panel and KnobsIt’s a good idea to wipe the control panel after eachuse. Clean with mild soap and water or vinegar andwater, rinse with clean water and polish dry with asoft cloth.Do not use abrasive cleansers, strong liquid cleansers,plastic scouring pads or oven cleaners on the controlpanel–they will damage the finish. A 50/50 solutionof vinegar and hot water works well.
The control knobs may be removed for easiercleaning. Before removing the knobs for cleaning,please note that the knobs on the left side and theknobs on the right side are in the proper OFF position.When replacing the knobs, check the OFF position toinsure proper alignment.
To remove a knob,pull it straight off thestem. If a knob isdifficult to remove,place a thin cloth (likea handkerchief,) or apiece of string underand around the knobedge and pull up.
Wash the knobs in soap and water but do not soak.Avoid getting water in to the knob stem holes.
Kick Panel (on some models)
To clean the front of the kick panel, wash with soap Do not use cleaning powders or harsh abrasives thatand water. Rinse well. may scratch the surface.
Removable Storage Drawer (on some models)
The storage drawer is a good place to store cookwareand bakeware. Do not store plastics and flammabIematerial in the drawer.
Do not overload the storage drawer, If the drawer istoo heavy, it may slip off the track when opened. Toopen the drawer, grasp the center of the handle andpull straight out.The storage drawer may be removed for cleaningunder the range.
—
To remove: Pull the drawer straight out and lift overthe guide stops.
To replace: Lift over the guide stops and slide thedrawer into place.
To clean both the inside and the outside:Wipe with soap and water. Rinse well.
Do not use cleansing powders or harsh abrasives—
which may scratch the surface.
26

~ift-Up CooktopClean the area under the cooktop often. Built-up soil, After cleaning underespecially grease, may catch fire. the cooktop with hot,To make cleaning easier, the entire cooktop may be mild soapy water and
lifted up and supported in the up position. clean cloth, lower the
Be sure all the surface burners are turned offcooktop. Be careful n
before raising the cooktop. Then remove the gratesto pinch your fingers.
and drip pans, grasp the two front burner wells and lift Support rodup. Dual support rods will hold the cooktop up whileyou clean underneath it.
Brushed Chrome Cooktop (on some models)
Clean the brushed chrome top with warm, soapywater or Bon Ami@ brand cleanser; rinse, andimmediately dry it with a clean, soft cloth. Takecare to dry the surface following the “grain.”
To help prevent finger marks after cleaning, spreada thin film of baby oil on the surface or a chromeprotestant may be used to help reduce spotting orfingerprinting. Wipe away excess oil with a clean,soft cloth.
Porcelain Cooktop (on some models)
The porcelain enamel finish is sturdy butbreakable if misused. This finish is acid-resistant.However, any acidic foods spilled (such as fruitjuices, tomato or vinegar) should not be permitted toremain on the finish.If acids spill on the cooktop while it is hot, use adry paper towel to wipe it up right away. When thesurface has cooled, wash with soap and water orcleansing powders. Rinse well.
For other spills such as fat smatterings, wash withsoap and water or cleansing powders after the surfacehas cooled. Rinse well. Polish with a dry cloth.
Oven ShelvesClean theshelves withan abrasivecleanser orsteel wool. After cleaning, rinse the shelves withclean water and dry with a clean cloth.
NOTE: The oven shelves may also be cleaned in theself-cleaning oven, however, the shelves will darkenin color, lose their luster and become hard to slide ifcleaned during the self-cleaning cycle. Wipe the shelfsupports with cooking oil to make the shelves slidemore easily.
Broiler Pan and RackAfter broiling, remove the broiler pan and rack fromthe oven. Remove the rack from the pan. Carefullypour out grease from the pan into a proper container.Wash and rinse the broiler pan and rack in hot waterwith a soap-filled or plastic scouring pad.
If food has burned on, sprinkle the rack withdetergent while hot and cover with wet papertowels or a dishcloth. Soaking the pan will removeburned-on foods.“he broiler pan may be cleaned with a commercial,ven cleaner. Do not use an oven cleaner on the rack.
Do not store a soiled pan and rack anywhere inthe range.Both the broiler pan and rack can also be cleaned inthe dishwasher.
Do not clean the broiler pan or rack in the self-cleaning oven.
(continued next page)
27

CARE AND CLEANING(continued)
Painted Surfaces Glass SurfacesThe kick panel or storage drawer is a painted surface. To clean the outside glass finish, use a glassClean this with soap and water or a vinegar and water cleaner. Rinse and polish with a dry cloth. Do notsolution. allow the water or cleaner to run down inside the
Do not use commercial oven cleaners, cleansing openings in the glass or the openings in the top of the
powders, steel wool or harsh abrasives on any oven door while cleaning.
painted surface.
Lift-Off Oven DoorThe oven door is removable,but it is heavy. You may needhelp removing and replacing thedoor. Do not lift the door by thehandle. This can cause the glassto break or can cause damage tothe door.
To remove the door, open it afew inches to the special stopposition that will hold the dooropen. Grasp firmly on each sideand lift the door straight up andoff the hinges.
NOTE:
● Be careful not to place hands between the hinge andthe oven door frame as the hinge could snap backand pinch fingers.
● While working in the oven area, cover the hingeswith towels or empty paper towel rolls to preventpinched fingers and chipping the porcelain enamelon the frame.
To replace the door, make sure the hinges are in thespecial stop position. Position the slots in the bottomof the door squarely over the hinges. Then lower thedoor slowly and evenly over both hinges at the sametime. If hinges snap back against the oven frame, pullthem back out.
TO CLEAN THE DOOR:Inside of the door:● Because the area inside the gasket is cleaned during
the self clean cycle, you do not need to clean this byhand. Any soap left on the liner causes additionalstains when the oven is heated.
● The area outside the gasket can be cleaned with ascouring pad.
● Do not rub or clean the door gasket—the fiberglassmaterial of the gasket has an extremely lowresistance to abrasion. An intact and well-fittingoven door gasket is essential for energy-efficientoven operation and good baking results. If younotice the gasket becoming worn, frayed or damagedin any way or if it has become displaced on the door,you should have it replaced.
NOTE: The gasket is designed with a gap at thebottom to allow for proper air circulation.
Inside Gasket
Gasket
Outside Gasket
I I 1 J
Outside of the door:● Use soap and water to thoroughly clean the top,
sides and front of the oven door. Rinse well. Youmay also use a glass cleaner to clean the glass on theoutside of the door.
● Spillage of marinades, fruit juices, tomato saucesand basting materials containing acids may causediscoloration and should be wiped up immediately.When surface is cool, clean and rinse.
● Do not use oven cleaners, cleansing powders orharsh abrasives on the outside of the door.
.
—
—
28

.ange Top BurnersThe holes in the burners must be kept clean at all timesfor proper ignition and an even, unhampered flame.
You should clean the burners routinely, especiallyafter bad spillovers which could clog these holes.Burners lift out for cleaning if the shipping screwswere removed at installation. s Valve
NOTE: A screw holds each burner in place to keep Orifice
them from wobbling around during shipment. Removeand discard the shipping screws. Be careful not toremove the screws from the igniter bracket.
To remove the burners:
1. Grasp the burner head and tilt it to the right torelease the two tabs from slots in the burner support.
2. Lift the end of the burner assembly, then pull awayfrom the front of the range to free the air shutterfrom the gas valve orifice.
To remove burned-on food, soak the burners in asolution of mild liquid detergent and water. Soak theburners for 20 to 30 minutes. If the food doesn’t rinseoff completely, scrub them with soap and water and a
ush or plastic pad. Do not use steel wool or abrasive.ansers because they will clog the burner openings
and scratch the burners. If the holes become clogged,clean them with a small sewing needle or a smallsafety pin.
Do not attempt to clean burners in an automaticdishwasher. Loosened food soil can clog burnerholes, and the strong action of the dishwasherdetergent can damage the burner heads.
Do not clean in self-cleaning oven.Before putting the burners back, shake out excesswater and dry them thoroughly by setting them in awarm oven for 30 minutes.
Lighterr
Flas
r
Air Shu
Ports
support
To replace the burners:1. Slip the air shutter over the gas valve orifice.
2. Lower the burner assembly and hook the tabs in theslots in the burner support.
3. Be sure both tabs are in their slots, that the burnersits level and straight, and that the flash tube formsa straight line from the igniter to the burner.
Burner Grates
spillovers.
Wash them in hot, soapy water or with cleansingpowders and rinse with clean water. Dry the grateswith a cloth—do not put them back on the range wet.when replacing the grates, be sure they’re positioned
urely over the burners.
To get rid of burned-on food, place the grates in acovered container or plastic bag. Add 1/4 cupammonia and let them soak for 30 minutes. Wash,rinse well, and dry.
Although they’re durable, the grates will graduallylose their shine, regardless of the best care you cangive them. This is due to their continual exposure tohigh temperatures.
Do not operate a burner for an extended period oftime without cookware on the grate. The finish on thegrate may chip without cookware to absorb the heat.
Do not clean in the self-cleaning oven.
29
CARE AND CLEANING(continued)
Drip PansThe drip pans can permanently discolor if exposed toexcessively high heat or if soil is allowed to bake on.
Remove the grates. Then lift out the chrome-plateddrip pans.
Never use abrasive cleansers or steel wool—they’llscratch the surface.
To remove brown food stains, wash with soapywater or mild abrasives and soap-filled scouring pads.Rinse well with clean water. Polish dry. If heavilysoiled, place an ammonia-soaked paper towel on thedrip pan to loosen the soil. Then gently scrub with aplastic scouring pad.
Blue/gold heat stains can be lessened with a metalpolish but are usually permanent. To minimizestaining, avoid excessive use of high heat settings anduse flat-bottomed pans that do not extend more thantwo inches from the surface unit.The drip pans may also be cleaned in the dishwasher.
Clean the area under the drip pans often. Built-upsoil, especially grease, may catch on fire.
CAUTION: Be sure all the controls are turned to.OFF and the surface units are cool before attemptingto remove them.
—
Oven Light BulbThe light bulb is located in theupper right corner of the oven.Before replacing the bulb,disconnect electrical power to therange at the main fuse or circuitbreaker panel or unplug the rangefrom the electric outlet. Let thelight bulb cool completely beforeremoving it. Do not touch a hotlight bulb with a damp cloth. Ifyou do, the light bulb will break.
Gasket/ Crvstal
To remove:● Remove the 3 screws in the light
cover.
● Detach the light cover andremove the bulb.
To replace:● Put in a new 40-watt appliance
bulb.
NOTE: A 40-watt appliance bulbis smaller than a standard 40-watthousehold bulb.
● Install the light cover. Replacethe 3 screws and tighten, makingsure the cover fits flush withoven wall.
● Reconnect electrical power tothe range.
Removable Oven BottomThe oven bottomcan be removed ./~— “ — --—y%
to clean large spills,and to enable you ‘~ Lockto reach the oven
Unlock
burner. The oven bottom must bereplaced before using the self-clean cycle.TO REMOVE:1. Slide the tab at the center front of the oven bottom
to the left.2. Lift the oven bottom up and out.TO REPLACE:1. Slip the oven bottom into the oven so the tabs in the
rear of the oven bottom fit into the slots in the ovenback.
2. Lower the front of the oven bottom into place andslide the front tab to the right to lock the ovenbottom into ~lace.
The oven bottom has a porcelain enamel finish. Tomake cleaning easier, protect the oven bottom fromexcessive spillovers. This is particularly importantwhen baking a fruit pie or other foods with high acidcontent. Hot fruit fillings or foods that are acidic(such as milk, tomatoes or sauerkraut, and sauces withvinegar or lemon juice) may cause pitting and damageto the porcelain enamel surface.To protect the oven bottom surface, place a piece ofaluminum foil slightly larger than the baking dish or asmall cookie sheet on a lower shelf or under thebaking dish to catch any spillovers. It should notcotnpletely cover the shelf as this would cause unevenheat in the oven. Aluminum foil should not be placedon the oven bottom. —If a spillover does occur on the oven bottom, allowthe oven to cool first. You can clean the oven bottomwith soap and water, a mild abrasive cleanser or soap-filled abrasive pads. Rinse well.
30.

Before placing range in the counter, notice thelocation of the stability bracket which is alreadyattached to the back of the range. This locationshould work for most installations. However, it maybe more convenient to hook the stability chain tothe unit when the stability bracket is attached tothe upper set of holes in the back of the range. SeeFig. A. The upper level set of holes are intended foruse with a backsplash kit. If the backsplash is notbeing used, make sure that there are no structuralsupports for the countertop which will interferewith the stability bracket when located in theupper set of holes.
oBracketOptionalLocation
BracketLocation
c
Backguard
\
i
‘\
Mainback
2. Fasten one end ofthe stability chain tothe floor or wall withthe long screw andwasher supplied. SeeFig. B. Make certainthe screw is goinginto the wall plate at
o Chain\
Washer andScrew
+!!!!!&
k’ ‘
the base of th~ wall or one of the studs in the baseof the wall. See Fig. C. Whether you attach thechain to the wall or floor, be certain that the screwis in at least 3/4 inch thickness of wood other thanbaseboard and that there are no electrical wires orplumbing in the area which the screw couldpenetrate. Attach the stability chain in a locationwhich will allow the chain to be in line with thebracket side to aide as much as possible whenattached to the unit. Test to see if the chain issecurely fastened by tugging on the chain.
o IIk <chainLong Screw \/
) ,~
Wall Plate
Washer \ ,
\\\\\\\\\\\YA\\\\\\\\\\\\\\\\\
3. Temporarily attach the loose end of the chain to therear of the countertop with the tape from thepackaging. See Fig. D.
4. Place the range in the counter cutout leaving justenough room between the back of the range and thewall to reach the stability bracket.
5. Hook the loose end of the chain onto the bracket bv.slipping the nearest link of the chain into the slot inthe bracket. See Fig. A and make sure the chain ispulled as tight as possible and that there is noexcess slack in the chain after the chain is attachedto the bracket.
A CAUTION: Excessive slack in the chaincould allow the range to tip over.
6. Slide the range all the way back into the counter.Once the range is pushed back in place, there willbe a small amount of slack in the chain. Thisis normal.
.----A--, Tape
NOTE:● If attaching to masonry, you can buy suitable screws
and anchors at hardware stores. Use a masonry drillto drill the required holes.
● If range is removed for cleaning or any other reason,make sure chain is reattached.
31

MINOR ADJUSTMENTS YOU CAN MAKE
Broil and Oven Burner Air Adjustment ShuttersAir adjustment shutters ~>for the broil and ovenburners regulate theflow of air to the flame. ,
The air adjustmentshutter for the topburner is in the centerof the rear wall of ?
Loosen The flames for the
Airtop (broil) burner
adjustment should burn steadyshutter with approximately 1“
blue cones and shouldnot extend out over
\qm the edges of the
//’burner baffle.
the oven. K y y To determine if the
The shutter for thebottom burner is nearthe back wall behindthe storage drawer orkick panel.
To adjust the flow ofair to either burner,ioosen the Phillips headscrew and rotate theshutter to allow more orless air into the burnertube as needed.
I ‘=+, ‘y
bottom burner flamesare proper, remove theoven bottom and theburner baffle. Theflames should have 1/2”to 3/4” blue cones withno yellow tipping.When the b~ffle is backin place, the flames wili resettle.
Visually check the color of the flames every sixmonths. If they look like illustration (A) on theProblem Solver in this guide, call for service.
.
. . . .
Surface Burner Air Adjustment ShuttersAn air adjustment shutter for each surface burner With notregulates the flow of air to the flame. enough air, you
When the right amount of air flows into the won’t see any
burner, the flame will be steady, relatively quiet and sharp blue cones
will have atmroximatelv 3/4” sham blue cones. This is in the flame; you1, . L
usually the case with factory preset shutter settings. may see yellow
With too much air, the flame will be unsteady,tips, and sootmay accumulate on pots and pans.
possibly won’t burn all the way around, and will benoisy, sounding like a blowtorch. The air adjustment shutters sit on the hood of the
valves and are positioned on the burner tubes byfriction fit. ‘
To ad.iust the flow of air to the burners, apply a
Air adjustment shutter
—
blade-~ype screwdriver against the friction-fit shuttersand push to rotate the shutters, allowing more or lessair into the burner tubes as needed.
32

PROBLEM
“F” AND A NUMBERFLASH IN THE DISPLAY
TOP BURNERSDO NOT LIGHT
BURNERS HAVEYELLOW ORYELLOW-TIPPEDFLAMES
BURNER FLAMESVERY LARGEOR YELLOW
SURFACE BURNERKNOBS WILL NOTTURN
FOOD DOES NOTBROIL PROPERLY
POSSIBLE CAUSE
s If the time display flashes “F-” and a number, you have a function error code.Press the CLEAR/OFF pad. Allow oven to cool for one hour. Put oven backinto operation. If the failure code repeats, disconnect all power to the range.Call for service.
● Make sure the electrical plug is plugged into a live, properly groundedpower outlet.
● Gas supply not connected or not turned on.
● Check for power outage.
● Pan sitting on burner grate may be partially blocking the free air flow needed forcombustion. Remove pan and try again.
● Burner holes on side of burner may be clogged. Remove and clean them.
● Burners not seated properly on burner supports. Reinstall them.
m(A) Yellow flames— (B) Yellow tips on inner
“Call for service cones—Norm~l for LP gas(C) Soft blue flames—Normal for natural gas
● If burner flames look like (A), call for service. Normal burner flames shouldlook like (B) or (C), depending on the type of gas you use.
. With LP gas, some yellow tipping on inner cones is normal.
. If range is connected to LP gas, check all steps in the Installation Instructions.
● To turn from OFF position, push the knob in and then turn.
● Oven controis not properly set. See the Broiling section.
● The door is not closed.● Improper shelf position being used. See the. Broiling section.
● Food is being cooked on a hot pan.
● Cookware is not suited for broiling.
9 Aluminum foil used on the broiler pan rack has not been fitted properlyand slit as recommended.
● Oven bottom not securely seated in position.
(continued next page)
33
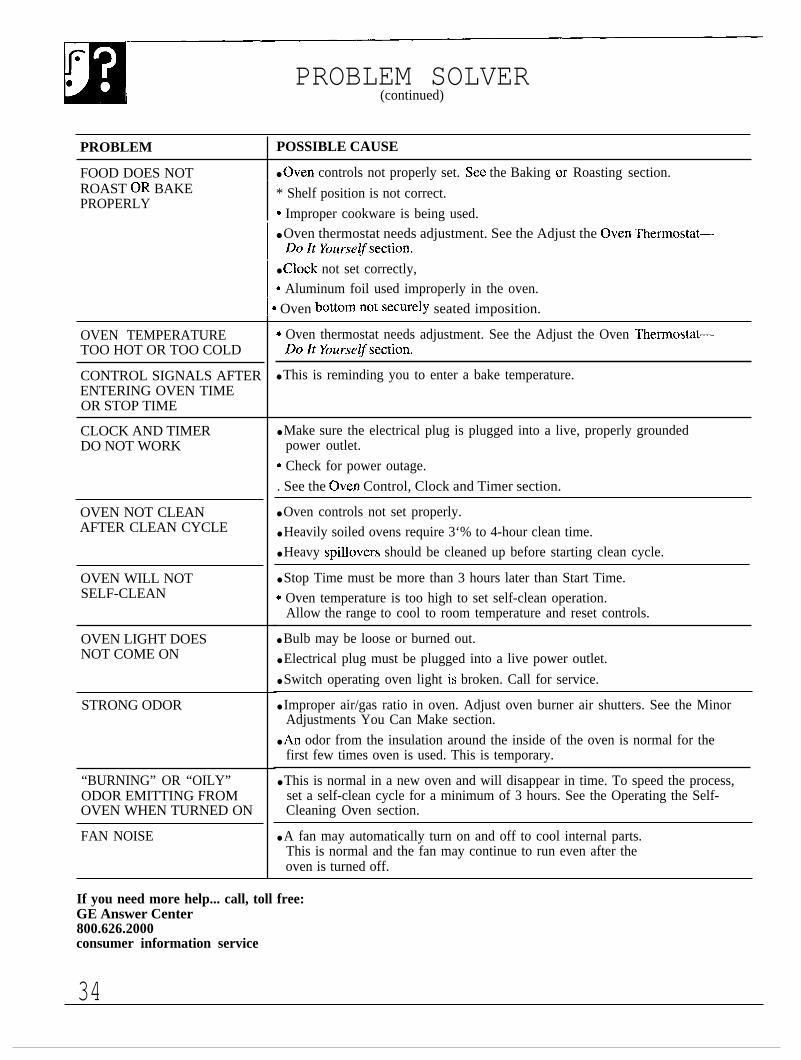
PROBLEM SOLVER(continued)
PROBLEM POSSIBLE CAUSE
FOOD DOES NOT ● oven controls not properly set. See the Baking or Roasting section.ROAST OR BAKEPROPERLY
* Shelf position is not correct.
* Improper cookware is being used.● Oven thermostat needs adjustment. See the Adjust the Oven Thermostat—
Do It YourseZfsection.● Clock not set correctly,* Aluminum foil used improperly in the oven.
I * Oven bottornnotsecurely seated imposition.
OVEN TEMPERATURETOO HOT OR TOO COLD
CONTROL SIGNALS AFTERENTERING OVEN TIMEOR STOP TIME
CLOCK AND TIMERDO NOT WORK
OVEN NOT CLEANAFTER CLEAN CYCLE
OVEN WILL NOTSELF-CLEAN
OVEN LIGHT DOESNOT COME ON
STRONG ODOR
“BURNING” OR “OILY”ODOR EMITTING FROMOVEN WHEN TURNED ON
FAN NOISE
* Oven thermostat needs adjustment. See the Adjust the Oven Thermostat—Do Zt Yx.mse§ion.
● This is reminding you to enter a bake temperature.
● Make sure the electrical plug is plugged into a live, properly groundedpower outlet.
* Check for power outage.
. See the (Xen Control, Clock and Timer section.
● Oven controls not set properly.
● Heavily soiled ovens require 3‘% to 4-hour clean time.
● Heavy spillovers should be cleaned up before starting clean cycle.
● Stop Time must be more than 3 hours later than Start Time.
* Oven temperature is too high to set self-clean operation.Allow the range to cool to room temperature and reset controls.
● Bulb may be loose or burned out.
● Electrical plug must be plugged into a live power outlet.
● Switch operating oven light is broken. Call for service.
● Improper air/gas ratio in oven. Adjust oven burner air shutters. See the MinorAdjustments You Can Make section.
● An odor from the insulation around the inside of the oven is normal for thefirst few times oven is used. This is temporary.
● This is normal in a new oven and will disappear in time. To speed the process,set a self-clean cycle for a minimum of 3 hours. See the Operating the Self-Cleaning Oven section.
● A fan may automatically turn on and off to cool internal parts.This is normal and the fan may continue to run even after theoven is turned off.
If you need more help... call, toll free:GE Answer Center800.626.2000consumer information service
34

We’ll Be There“ ‘~ith the purchase of your new GE appliance, receive the assurance that if you ever need
formation or assistance from GE, we’ll be there. All you have to do is call–toll-free!
I}Home Repair Serwice80WEXARES(80M32-2737)
A C,E consumer service professional will provide expert repair service,scheduled at a time that’s convenient for you. Many GE Consumer Servicecompany-operated locations offer you service today or tomorrow, or at yourconvenience (7:00 a.m. to 7:00 p.m. weekdays, 9:00 a.m. to 2:00 p.m. Saturdays).Our factory-trained technicians know your appliance inside and out–so mostrepairs can be handled in just one visit.
GEAnswer Cente~800,6262000
Whatever your question about any GE major appliance, GE Answer Center@information service is available to help. Your call—and your question—will beanswered promptly and courteously. And you can call any time. GE AnswerCenter@ service is open 24 hours a day, 7 days a week.
I=JTm1 J.For Customers With Special Needs...80116262000
Upon request, GE will provide Consumers with impaired hearing or speech who haveBraille controls for a variety of’ access to a TDD or a conventional teletypewriter mayGE appliances, and a brochure to call 800-TDD-GF~AC (800-833-4322) to requestassist in planning a barrier-free information or service.kitchen for persons with limitedmobility. To obtain these items,free of charge, call 800.626.2000.
Service Contrac13801162&2224
You can have the secure feeling that GE Consumer Service will still be thereafter your warranty expires. Purchase a GE contract while your warranty is stillin effect and you’ll receive a substantial discount. With a multiple-year contract,you’re assured of future service at today’s prices.
Parts andAccessories80116262002
Individuals qualified to service their own appliances User maintenance instructions contained in this booklet-an have needed parts or accessories sent directly to cover procedures intended to be performed by any user.
ir home. The GE parts system provides access to over Other servicing generally should be referred to qualified. i ,000 parts.. and all GE Genuine Renewal Parts are service personnel. Caution must be exercised, since
fully warranted. VISA, MasterCard and Discover cards improper servicing may cause unsafe operation.are accepted.

YOUR GE GAS RANGE Staple sales slip or cancelled check
WARRANTYhere. Proof of original purchase date
is needed to obtain serviceunder warranty.
I I
WHAT IS COVERED FULL ONE-YEAR WARRANTY This warranty is extended to
For one year from date of original the original purchaser and any
purchase, we will provide, free of succeeding owner for products
charge, parts and service labor in purchased for ordinary home use in
your home to repair or replace any the 48 mainland states, Hawaii and
patf of the range that fails because Washington, D.C. In Alaska the
of a manufacturing defect. warranty is the same except that it isLIMITED because you must pay toship the product to the service shopor for the service technician’s travelcosts to your home.All warranty service will beprovided by our Factory ServiceCenters or by our authorizedCustomer Care@ servicers duringnormal working hours.
Should your appliance needservice, during warranty periodor beyond, call 800-GE-CARES(800-432-2737).
WHAT IS NOT COVERED ● Service trips to your home to ● Replacement of house fuses orteach you how to use the product. resetting of circuit breakers.
Read your Use and Care material. ● Failure of the product if it is usedIf you then have any questions for other than its intendedabout operating the product, purpose or used commercially. ,please contact-your dealer or ourConsumer Affairs office at theaddress below, or call, toll free:GE Answer [email protected] information service
. Damage to product caused byaccident, fire, floods or actsof God.
WARRANTOR IS NOTRESPONSIBLE FORCONSEQUENTIAL DAMAGES.
● Improper installation.
If you have an installationproblem, contact your dealer orinstaller. You are responsible forproviding adequate electrical, gas,exhausting and other connectingfacilities as described in theInstallation Instructions providedwith the product.
‘.-.. ,Some states do not allow the exclusion or limitation of incidental or consequential damages, so the above limitation or exclusion
may not apply to you. This warranty gives you specific legal rights, and you may also have other rights which va!y from state to state.To know what your legal rights are in your state, consult your local or state consumer affairs office or your state’s Attorney General.
Warrantor: General Electric Company
If further help is needed concerning this warranty, write:Manager—Consumer Affairs, GE Appliances, Louisville, KY 40225
%3 Recycled Paper
Jti3k’Parl No. 164D2966P049Pub No. 49-8521 Printed in La Fayette, GA
594 CG