g5-5 american indian tunic pages
TRANSCRIPT
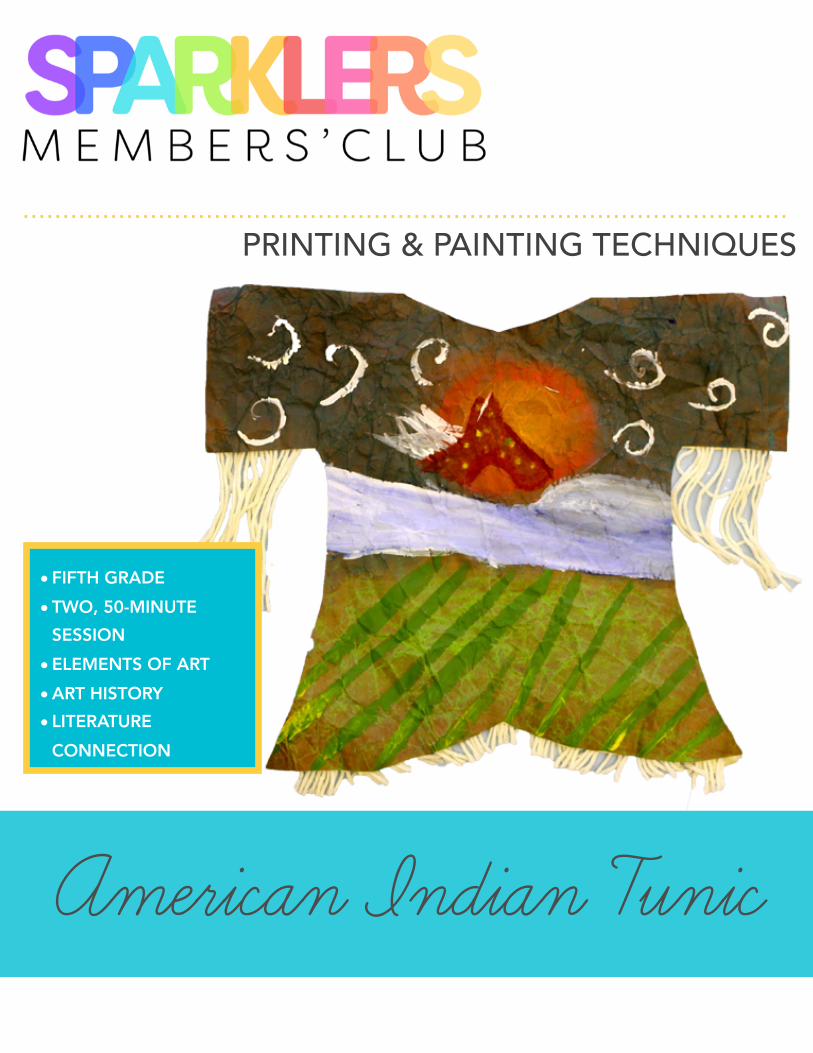
PRINTING & PAINTING TECHNIQUES
American Indian Tunic
• FIFTH GRADE • TWO, 50-MINUTE
SESSION • ELEMENTS OF ART • ART HISTORY • LITERATURE
CONNECTION
D E E P S P A C E S P A R K L E & T H E S P A R K L E R S C L U B !2
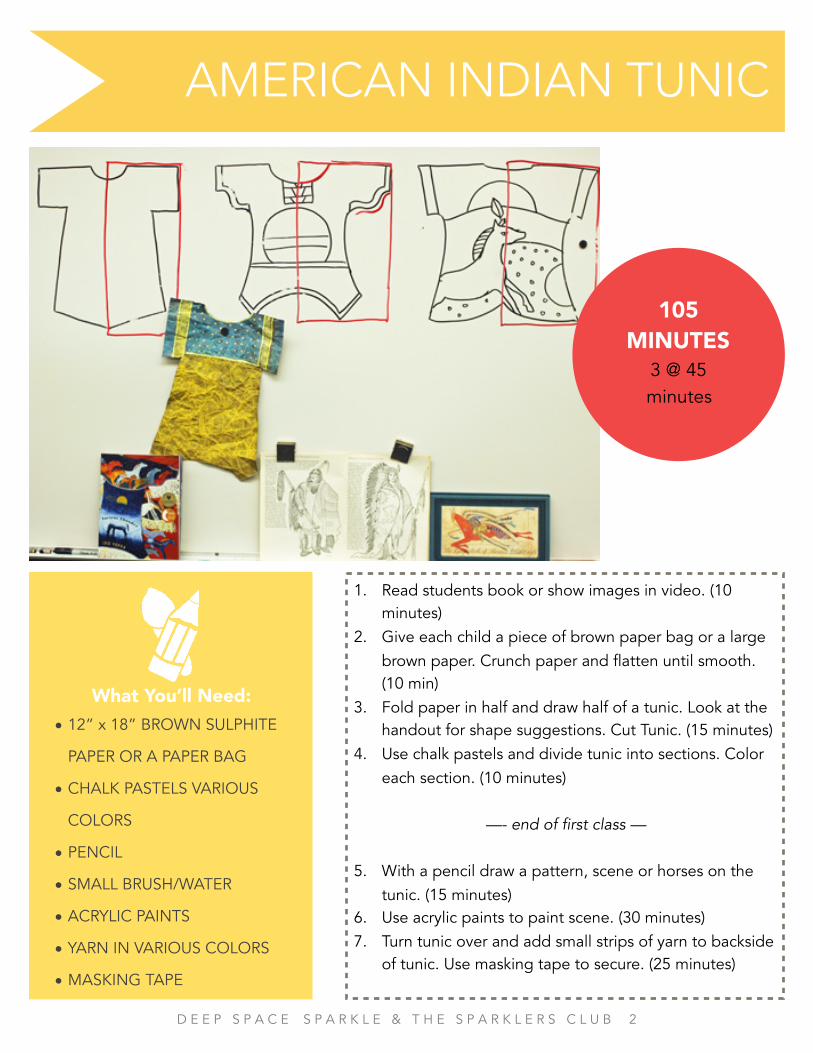
AMERICAN INDIAN TUNIC
1. Read students book or show images in video. (10 minutes)
2. Give each child a piece of brown paper bag or a large brown paper. Crunch paper and flatten until smooth. (10 min)
3. Fold paper in half and draw half of a tunic. Look at the handout for shape suggestions. Cut Tunic. (15 minutes)
4. Use chalk pastels and divide tunic into sections. Color each section. (10 minutes)
—- end of first class —
5. With a pencil draw a pattern, scene or horses on the tunic. (15 minutes)
6. Use acrylic paints to paint scene. (30 minutes) 7. Turn tunic over and add small strips of yarn to backside
of tunic. Use masking tape to secure. (25 minutes)
105 MINUTES
3 @ 45 minutes
What You’ll Need: • 12” x 18” BROWN SULPHITE
PAPER OR A PAPER BAG
• CHALK PASTELS VARIOUS
COLORS
• PENCIL
• SMALL BRUSH/WATER
• ACRYLIC PAINTS
• YARN IN VARIOUS COLORS
• MASKING TAPE
D E E P S P A C E S P A R K L E & T H E S P A R K L E R S C L U B !3
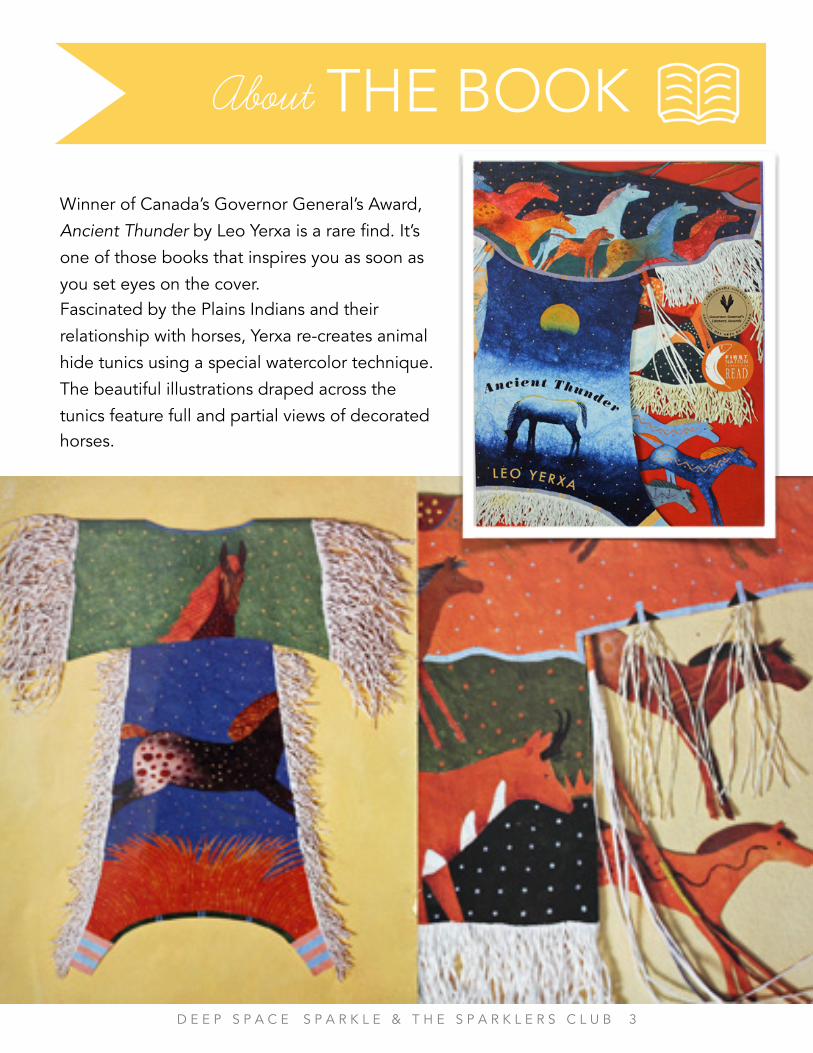
About THE BOOK
Winner of Canada’s Governor General’s Award,
Ancient Thunder by Leo Yerxa is a rare find. It’s
one of those books that inspires you as soon as
you set eyes on the cover. Fascinated by the Plains Indians and their
relationship with horses, Yerxa re-creates animal
hide tunics using a special watercolor technique.
The beautiful illustrations draped across the
tunics feature full and partial views of decorated horses.
D E E P S P A C E S P A R K L E & T H E S P A R K L E R S C L U B !4
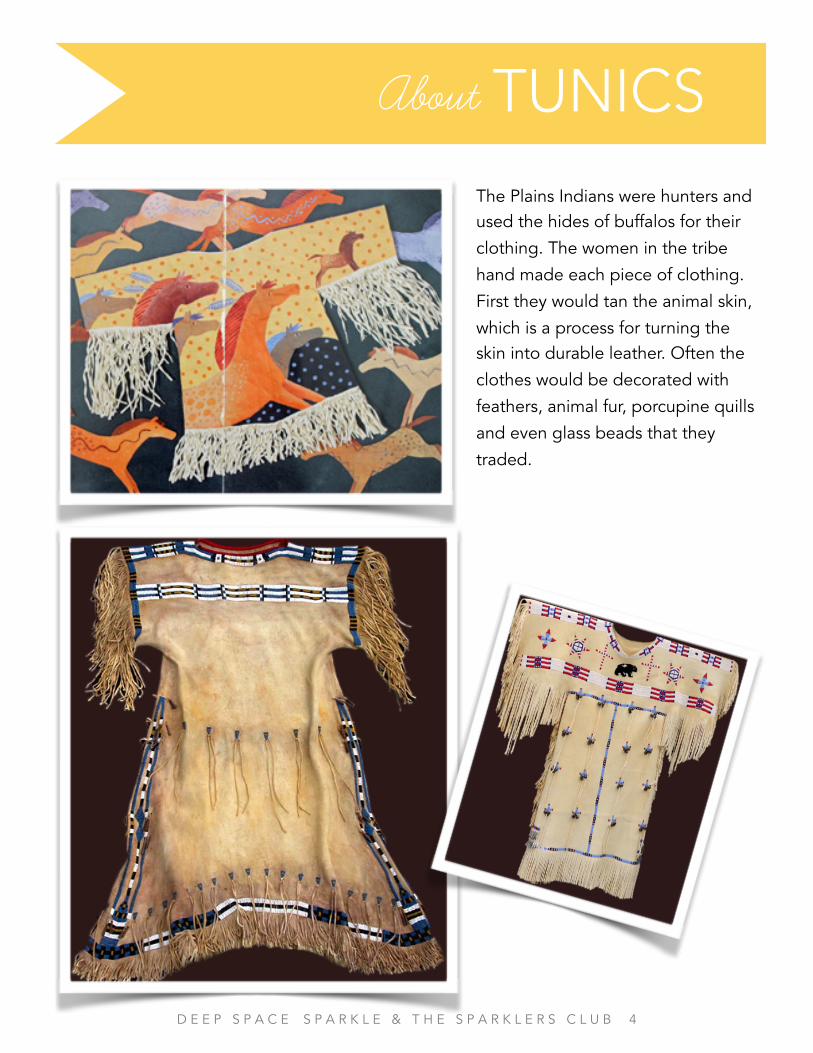
About TUNICS
The Plains Indians were hunters and used the hides of buffalos for their
clothing. The women in the tribe
hand made each piece of clothing.
First they would tan the animal skin,
which is a process for turning the skin into durable leather. Often the
clothes would be decorated with
feathers, animal fur, porcupine quills
and even glass beads that they
traded.
D E E P S P A C E S P A R K L E & T H E S P A R K L E R S C L U B !5
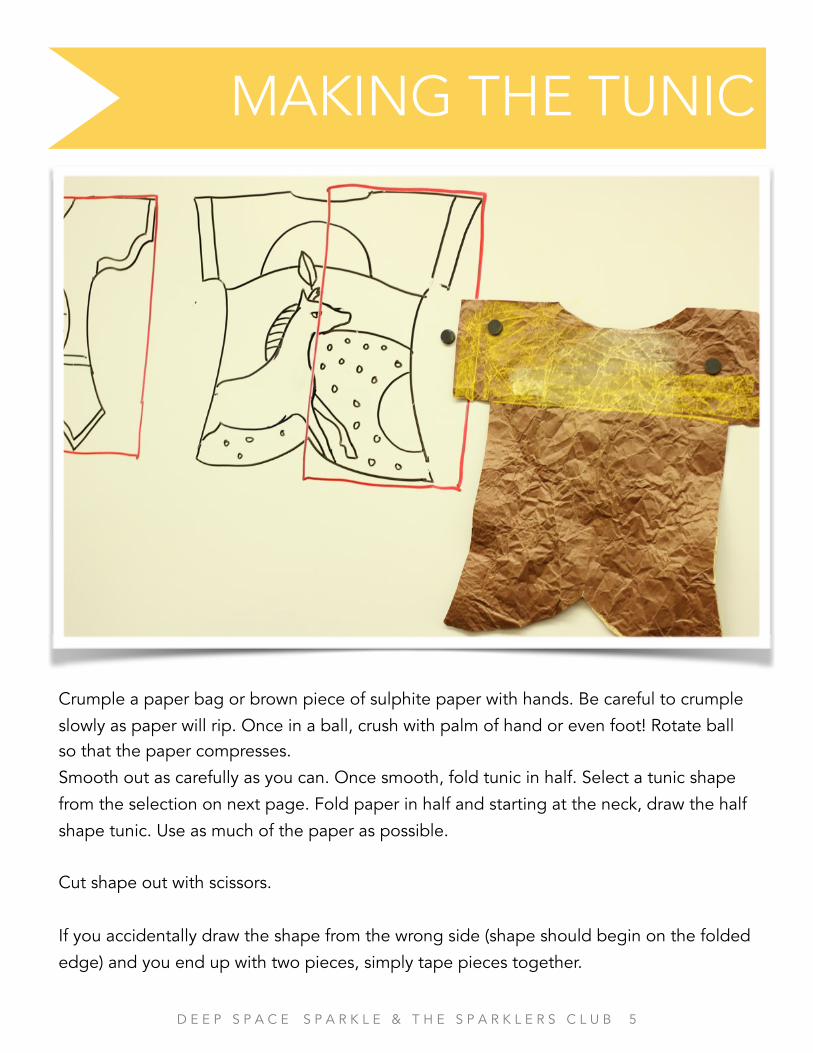
MAKING THE TUNIC
Crumple a paper bag or brown piece of sulphite paper with hands. Be careful to crumple
slowly as paper will rip. Once in a ball, crush with palm of hand or even foot! Rotate ball so that the paper compresses.
Smooth out as carefully as you can. Once smooth, fold tunic in half. Select a tunic shape
from the selection on next page. Fold paper in half and starting at the neck, draw the half
shape tunic. Use as much of the paper as possible.
Cut shape out with scissors.
If you accidentally draw the shape from the wrong side (shape should begin on the folded
edge) and you end up with two pieces, simply tape pieces together.

D E E P S P A C E S P A R K L E & T H E S P A R K L E R S C L U B !6
TUNIC SHAPES

D E E P S P A C E S P A R K L E & T H E S P A R K L E R S C L U B !7
CHALK LAYER
Divide tunic into color sections. A
popular division is to draw a line that
separates the top bodice from the
bottom. Using CHALK, press side of chalk into
crumpled paper. Run chalk over entire
area. Use fingers to smooth chalk and
push chalk particles into crevices.
Use two or more colors of chalk for this step.
D E E P S P A C E S P A R K L E & T H E S P A R K L E R S C L U B !8
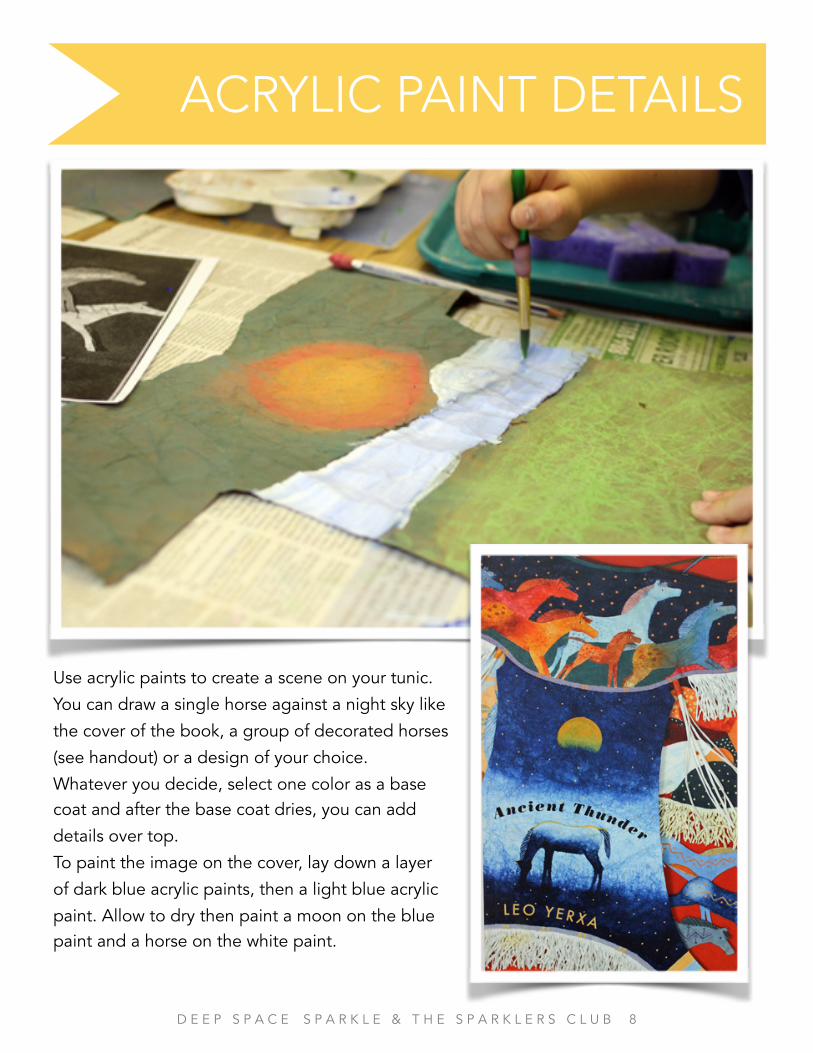
ACRYLIC PAINT DETAILS
Use acrylic paints to create a scene on your tunic.
You can draw a single horse against a night sky like
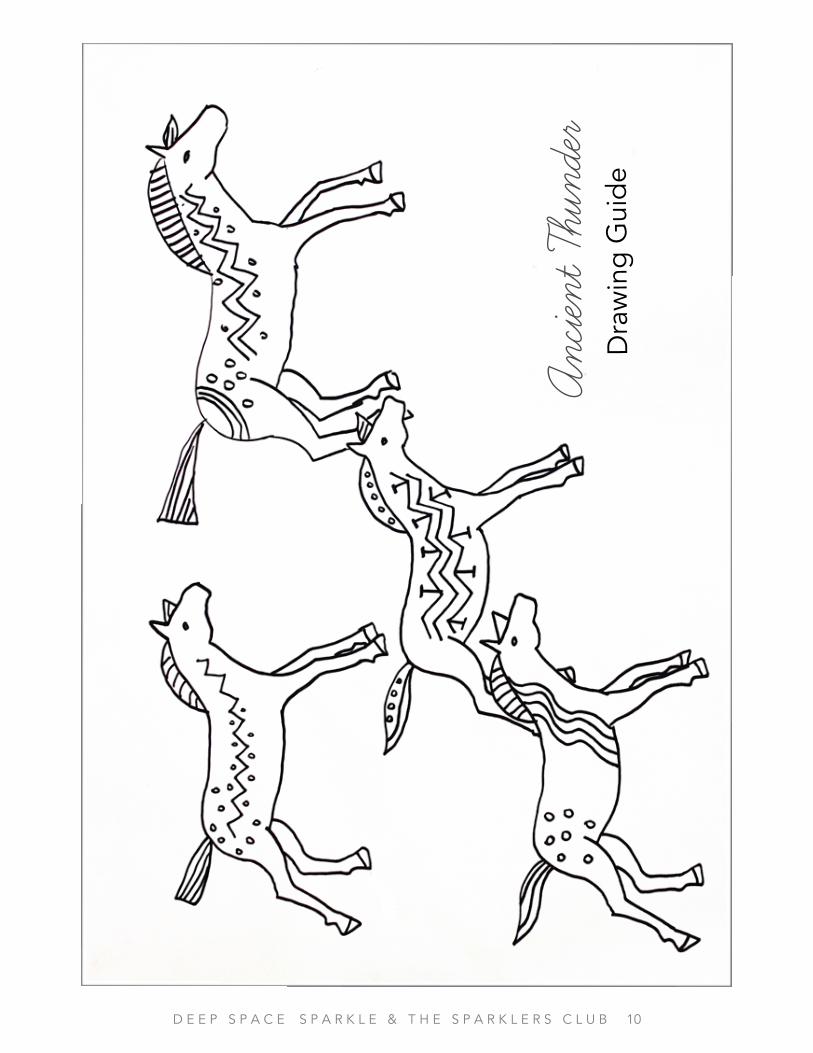
the cover of the book, a group of decorated horses
(see handout) or a design of your choice.
Whatever you decide, select one color as a base coat and after the base coat dries, you can add
details over top.
To paint the image on the cover, lay down a layer
of dark blue acrylic paints, then a light blue acrylic
paint. Allow to dry then paint a moon on the blue paint and a horse on the white paint.
D E E P S P A C E S P A R K L E & T H E S P A R K L E R S C L U B !9
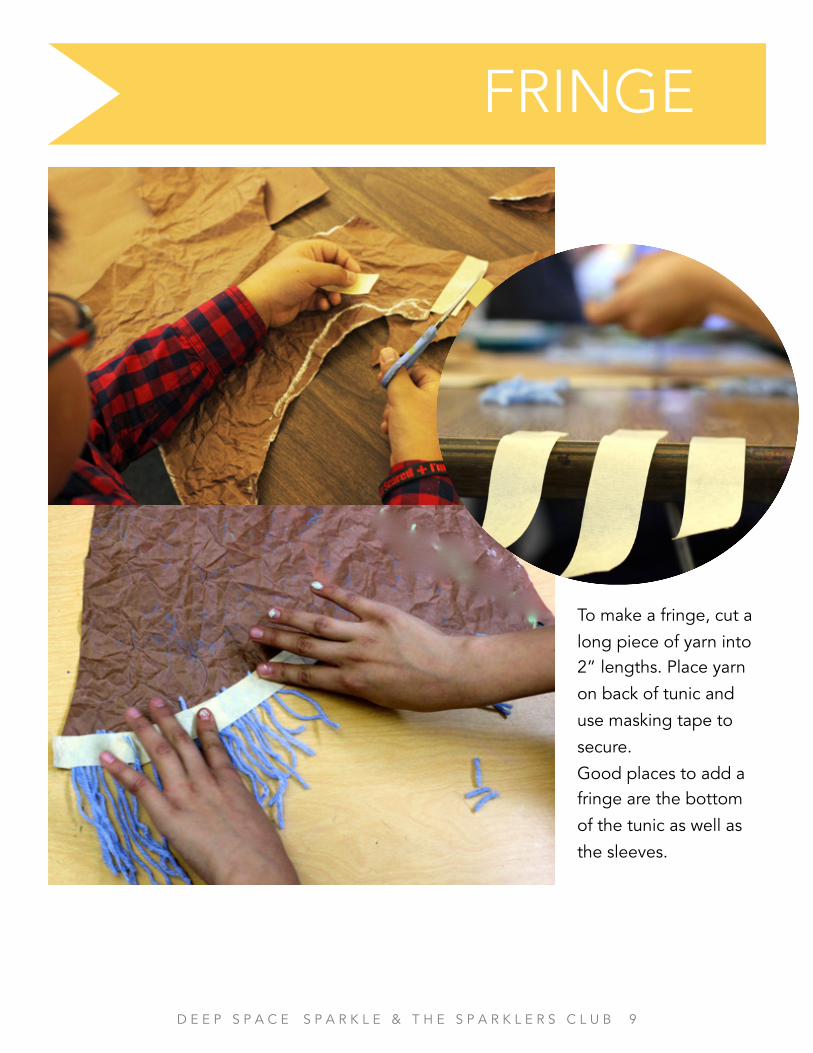
FRINGE
To make a fringe, cut a
long piece of yarn into 2” lengths. Place yarn
on back of tunic and
use masking tape to
secure.
Good places to add a fringe are the bottom
of the tunic as well as
the sleeves.
D E E P S P A C E S P A R K L E & T H E S P A R K L E R S C L U B !10
Ancie
nt Thu
nder
Dra
win
g G
uide
D E E P S P A C E S P A R K L E & T H E S P A R K L E R S C L U B !11
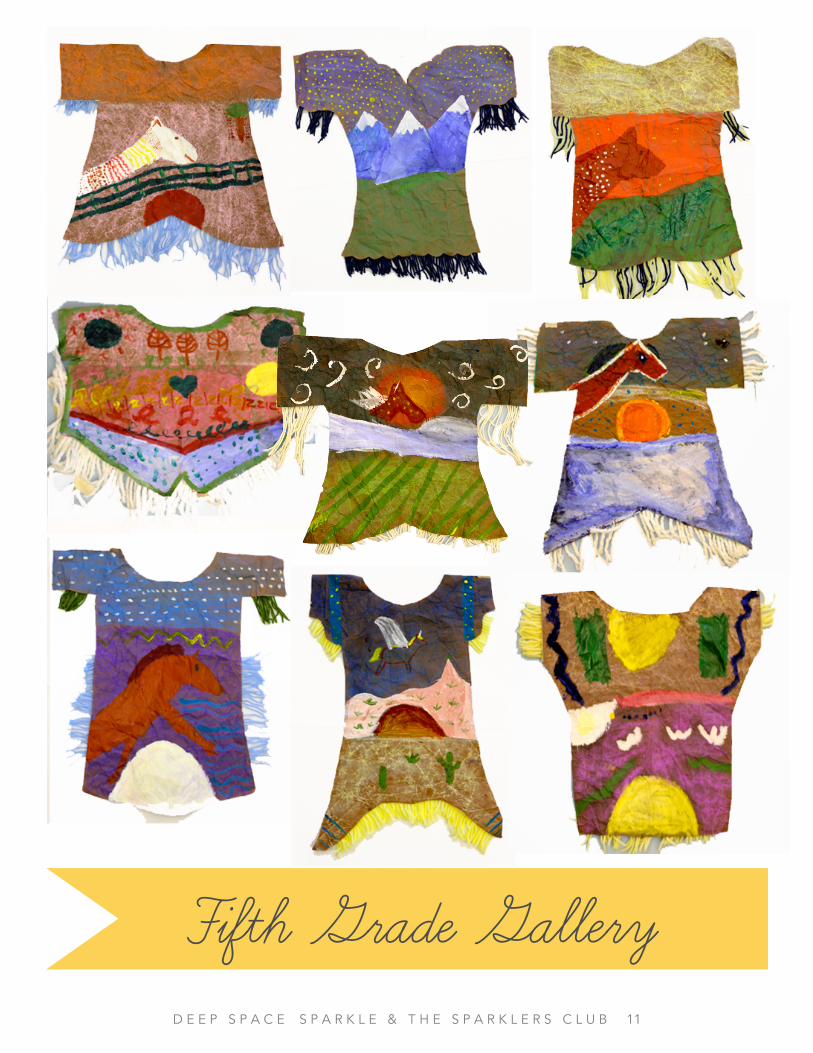
Fifth Grade Gallery

D E E P S P A C E S P A R K L E & T H E S P A R K L E R S C L U B !12
NATIONAL CORE ARTS STANDARDS-fifth grade
CREATING Generate and conceptualize artistic ideas and work — combine ideas to generate an
innovative idea—demonstrate diverse methods to approaching art making
Organize and develop artistic ideas and work — experiment and develop skills in multiple
techniques through practice—show craftsmanship through care—document objects of
personal significance
Refine and complete artistic work—create artists statements using art vocabulary to
describe personal choices in art-making
Presenting/producing Analyze, interpret and select artistic work for presentation— define roles and
responsibilities of a curator—explaining the skills/knowledge needed to preform curation
Develop and refine artistic work for presentation — develop a logical argument for safe
and effective use of materials and techniques for preparing and presenting artwork
Convey meaning through the presentation of artistic work —cite evidence of how an
exhibition in a museum presents ideas and provides information about specific concepts
Responding Perceive and analyze artistic work- compare interpretation of art to another’s interpretation
—analyze cultural associations suggested by visual imagery Interpret intent and meaning in artistic work — interpret art by analyzing form, structure,
context information, subject, visual elements, and use of media to identify mood and ideas
conveyed
Apply criteria to evaluate artistic work— recognize differences in criteria used to evaluate
works of art depending on styles
Connecting Synthesize and relate knowledge and personal experiences to make art- apply formal and
conceptual vocabularies of art and design to view surroundings in new ways through art-
making
Relate artistic ideas and works with societal, cultural and historical context to deepen understanding
X
X
X
X
X
X
X
D E E P S P A C E S P A R K L E & T H E S P A R K L E R S C L U B !13
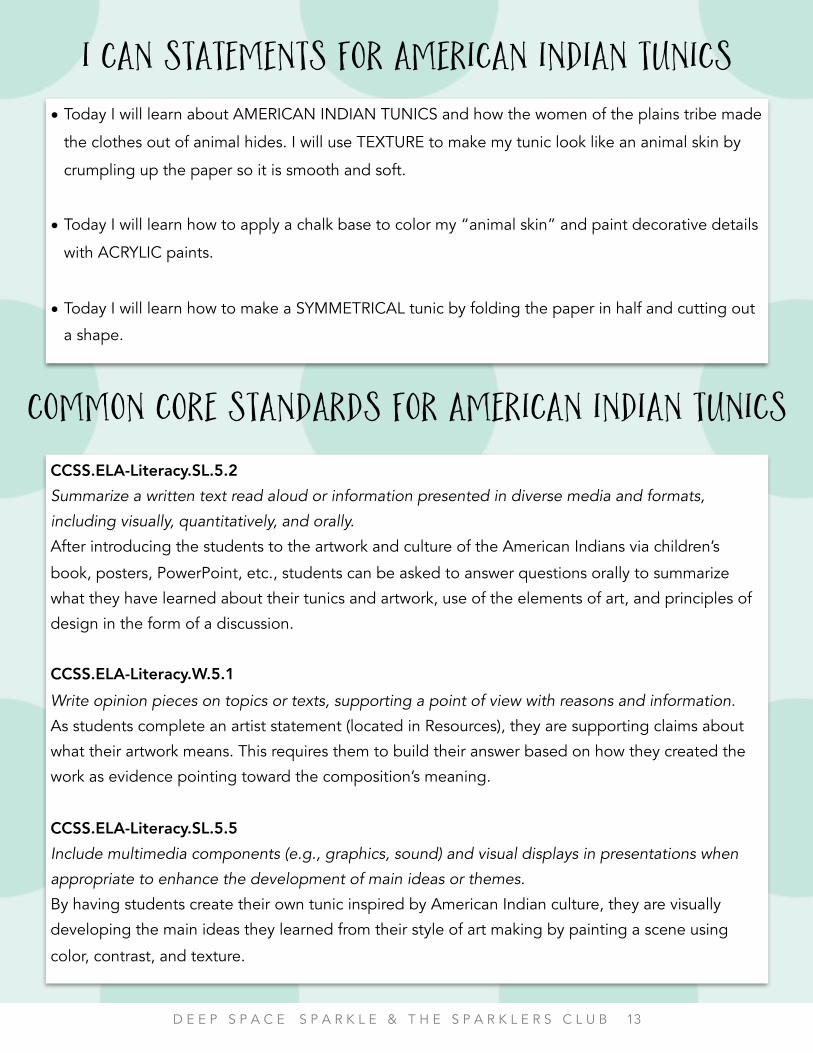
CCSS.ELA-Literacy.SL.5.2 Summarize a written text read aloud or information presented in diverse media and formats,
including visually, quantitatively, and orally.
After introducing the students to the artwork and culture of the American Indians via children’s
book, posters, PowerPoint, etc., students can be asked to answer questions orally to summarize
what they have learned about their tunics and artwork, use of the elements of art, and principles of
design in the form of a discussion.
CCSS.ELA-Literacy.W.5.1 Write opinion pieces on topics or texts, supporting a point of view with reasons and information.
As students complete an artist statement (located in Resources), they are supporting claims about
what their artwork means. This requires them to build their answer based on how they created the
work as evidence pointing toward the composition’s meaning.
CCSS.ELA-Literacy.SL.5.5 Include multimedia components (e.g., graphics, sound) and visual displays in presentations when
appropriate to enhance the development of main ideas or themes.
By having students create their own tunic inspired by American Indian culture, they are visually
developing the main ideas they learned from their style of art making by painting a scene using
color, contrast, and texture.
Common Core STANDARDS for American indian tunics
I can statements for American indian tunics• Today I will learn about AMERICAN INDIAN TUNICS and how the women of the plains tribe made
the clothes out of animal hides. I will use TEXTURE to make my tunic look like an animal skin by
crumpling up the paper so it is smooth and soft.
• Today I will learn how to apply a chalk base to color my “animal skin” and paint decorative details
with ACRYLIC paints.
• Today I will learn how to make a SYMMETRICAL tunic by folding the paper in half and cutting out
a shape.
D E E P S P A C E S P A R K L E & T H E S P A R K L E R S C L U B !14
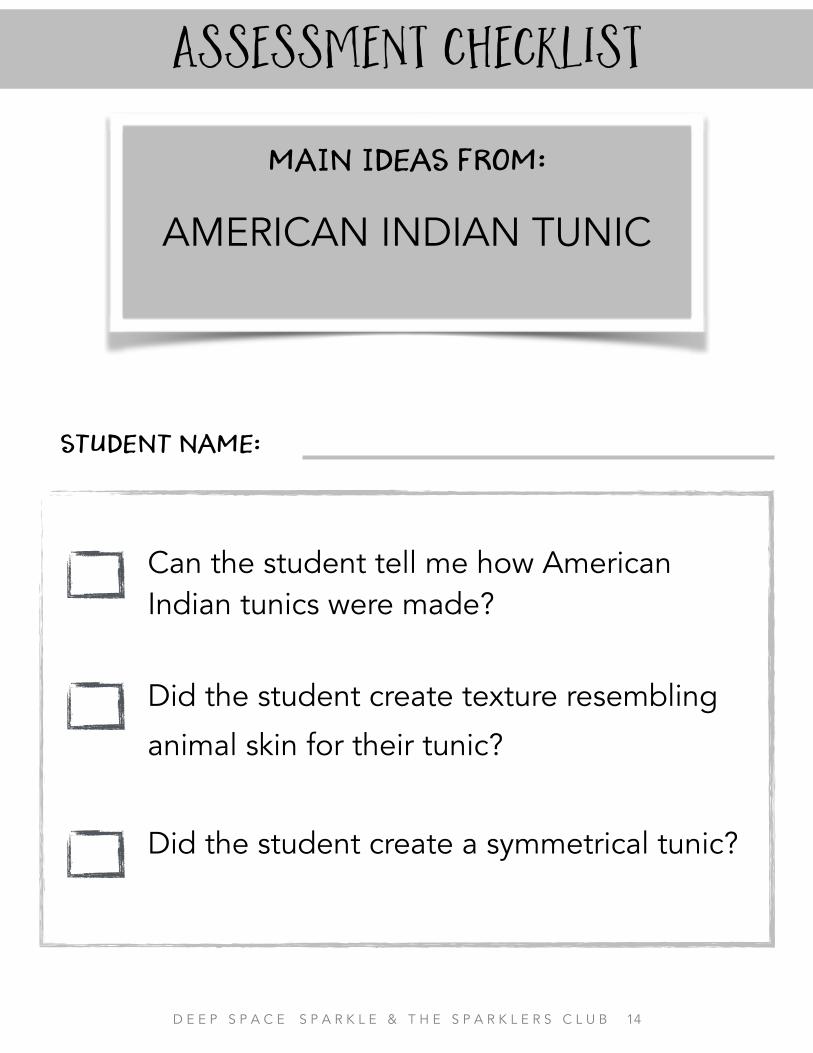
Can the student tell me how American Indian tunics were made?
Did the student create texture resembling
animal skin for their tunic?
Did the student create a symmetrical tunic?
ASSESSMENT CHECKLIST
Student Name:
Main Ideas from:
AMERICAN INDIAN TUNIC