for early childhood education - interior health it manual.pdf · refrigerate fresh fruits and...
TRANSCRIPT

Dry It!
A
Dehydrator
Guide for
Early
Childhood
Education
1
Acknowledgements
The Dehydrator Guide was created through funding from Interior Health’s Community
Food Action Initiative – an initiative of Promotion and Prevention, Public Health.
Contributors
Cindy Bossio RD, Community Nutritionist
Linda Boyd RD, Community Nutritionist
Rose Soneff RD, Community Nutritionist
Assistance provided by
Jerique Arqueza, Dietetic Intern
Selena Devries, Dietetic Intern
Pamela Tran, Dietetic Intern
Clerical assistance provided by
Christel Dahlberg
Prepared in May, 2013
2
Table of Contents Acknowledgements.......................................................................................................................................... 1
Dental Considerations ..................................................................................................................... 4
Prevent Choking................................................................................................................................. 5
Before You Get Started ................................................................................................................. 5
Cleaning and Sanitizing of dehydrators and accessories ..................................................... 5
Food Safety ....................................................................................................................................... 5
A. Clean Hands ................................................................................................................................... 5
B. Clean Fruits and Vegetables ..................................................................................................... 6
C. Clean and Sanitize Surfaces, Counters, and Equipment .................................................. 6
D. Dehydration .................................................................................................................................. 7
E. Allergies ......................................................................................................................................... 7
Dehydrating Foods 101 ................................................................................................................................. 8
Loading Trays ..................................................................................................................................... 8
Testing for Dryness ........................................................................................................................ 8
Storing Dried Food .......................................................................................................................... 8
Cooking and Serving Dried Food: ................................................................................................. 9
Rehydration ........................................................................................................................................ 9
Cooking with Dried Food................................................................................................................. 9
Kids in the Kitchen ....................................................................................................................................... 10
Drying Fruit ...................................................................................................................................... 10
Scrumptious Strawberry Chips: .................................................................................................. 11
Fresh Fruit to Dried Fruit: .......................................................................................................... 11
Drying Fruit Rolls ........................................................................................................................... 12
Banana Rama Time: ......................................................................................................................... 12
Fresh Fruit to Fruit Leather: ..................................................................................................... 13
Drying Vegetables .......................................................................................................................... 14
Yummy Cucumber Chips: ............................................................................................................... 14
Drying Herbs .................................................................................................................................. 14

3
Mother’s Day Fun: Delicious Dill ................................................................................................ 15
Activity #1 Hungry Hikers – A Creative Story Telling Experience ............................... 16
Activity #2 Making Stone Soup or Bean Bag Chowder ...................................................... 17
Activity #3 Farmers’ Market Tour .......................................................................................... 18
Recipes............................................................................................................................................................. 20
Granola ............................................................................................................................................... 20
Nut Free Trail Mix ......................................................................................................................... 21
Fruit Roll Ups ................................................................................................................................... 21
Critters on a Log (for School-age children) ........................................................................... 22
Appendix A Cleaning and Sanitizing of Dehydrators and Accessories ....................................... 23
Appendix B Common Fruit, Vegetable and Herb Drying Guide ...................................................... 24
Storing Dried Food ........................................................................................................................ 24
Appendix C Where to Purchase Local Foods ....................................................................................... 27
4
Dehydrating Vegetables and Fruit with Children
Dehydrating food with children has many benefits. Dehydrating fruit, vegetables, and
herbs can be a fun, interactive, and tasty way to introduce new foods and teach children
about healthy eating. In addition, other themes can be woven in, such as where various
fruit, vegetables and herbs are grown locally, how to use the dehydrated products in other
cooking activities, and the science of food. Participation in dehydrating activities also
increases socialization skills as the children prepare and eat dehydrated vegetables and
fruit with their peers.
This guide can complement the activities from Food Flair™, such as the section “FUN &
LEARNING ABOUT HEALTHY EATING”.
Two and three year old children should have 4 servings of vegetables and fruit each day
while children between the ages of four and eight years old need 5 servings. Dehydrated
vegetables and fruit can contribute to reaching the number of servings recommended for
children.
Dental Considerations What children eat and how often they eat affects their dental health. Sugars and
starches feed bacteria in the mouth that produce an acid. This acid breaks down the tooth
enamel which causes cavities.
Dried foods are concentrated and are, therefore, higher in sugars that can feed bacteria.
They are also very sticky and can get caught in children’s teeth. The acid attack that
takes place on the teeth occurs within 20 minutes of sticky sugary food clinging to the
teeth.
For further information about preschooler’s dental health or to borrow the Dental Resource Kit for Young Children, contact the dental staff at your local health centre.
Quick Tips:
Serve crunchy vegetables or fruit along with dried fruit to help
dislodge sticky food from the teeth.
Serve cheese right after the children have tried dried fruit. It
helps to protect the teeth from decay.
Serve water or milk while offering dried food snacks.
If possible, have children brush teeth right away after trying
very sticky and sweet foods like dried melons, grapes, mangos,
apples, bananas, apricots, figs, nectarines, peaches, plums,
strawberries, and citrus fruit.

5
Prevent Choking Foods that are hard, tough, round or sticky can block a child’s small airway and be a
choking hazard. Cut dried food into small pieces around ½” (1.3 cm) or smaller.
Before You Get Started Use only a retail or commercial dehydrator that has been approved by the Canadian
Standards Association (CSA). Check to see that the dehydrator and equipment are clean
before using. Harmful bacteria, viruses, and fungi can thrive on dirty surfaces, and sticky
residue can attract dirt and dust. All of these can contaminate food in contact with a dirty
dehydrator and cause possible harm. When you have finished using the dehydrator, please
ensure that it has been thoroughly cleaned and sanitized.
Cleaning and Sanitizing of Dehydrators and Accessories Refer to the dehydrator manual for the proper care, use and cleaning of the dehydrator
unit and trays. If the dehydrator manual is not available, please refer to Appendix A.
Food Safety Practicing food safety is extremely important while
involving children in the preparation of dried foods.
Keep food safe from harmful microbes like bacteria,
viruses, and fungi, as well as contamination from
insects and rodents, dirt, dust, chemicals, and hair.
Harmful microbes and contaminants can be spread
throughout the kitchen and get onto hands, cutting
boards, utensils, dish cloths, sponges, counter tops and
food.
Here are some steps to reduce the risk of foodborne illness:
A. Clean Hands Remind children to properly wash their hands with soap and warm running water before,
during and after handling food. Sing the “ABC song” to help children wash for the minimum
of 20 seconds needed for proper hand washing.
Quick Tips:
Direct children to put only one piece of dried fruit in their
mouth at a time and chew well.
Children should only put food into their mouths when seated at
the table.
6
B. Clean Fruits and Vegetables It’s difficult to know if fruits and vegetables have been contaminated before you obtain
them. Always rinse any fresh vegetables and fruit well with clean running water before
eating or dehydrating. If your fruit or vegetable has a rind such as pineapples, citrus
fruit, and melons be sure to wash them before peeling or preparing. Cantaloupe should not
be used for dehydration as it is considered a high risk food. Although the skin and outer
surfaces protect them, microbes can grow if the surface becomes pierced or cut.
Washing helps reduce contamination from dirt, microbes, and traces of pesticides on the
surface. When washing vegetables and fruit, cut away any damaged or bruised areas since
harmful microbes can grow there. Throw away any rotten or moldy vegetables and fruit.
Refrigerate fresh fruits and vegetables after peeling, cutting or cooking. Discard them if
left at room temperature for two hours if they are not already in the dehydrator.
C. Clean and Sanitize Surfaces, Counters, and Equipment Clean and sanitize all surfaces, counters, and equipment:
Step 1: Clean
Wipe the surface firmly (creating friction) and thoroughly using a wet cloth (not
dripping) and an appropriate cleaning solution (i.e. a soap-type product).
Step 2: Rinse
Switch to a clean wet cloth (water only) and wipe thoroughly to rinse.
Step 3: Sanitize
Wet the rinsing cloth with sanitizer, and wipe over the surface again. Let dry for 2
minutes.
Quick Tip:
Ensure that containers of sanitizing solution have a label showing the
contents and are kept away from the reach of children.
Quick Tip:
You can make a sanitizing solution as follows:
• Mix 1 tablespoon (15 ml) of 6 per cent regular unscented household
bleach into 1 gallon (4L) of water; or
• Mix 1 teaspoon (5 ml) of 6 per cent regular unscented household
bleach into 4 cups (1L) of water.
7
For more information on food safety:
Refer to Kitchen Safety, Food Flair™, p. 47-56, and 80 – 82.
Food Safety in Child Care Facilities - HealthLink BC File #59d
Contact an Interior Health Environmental Health Officer through your local health
centre.
D. Dehydration Dehydrate foods well to reduce the risk for bacterial growth. Make sure to follow
temperature guidelines for the dehydrator as specified by the dehydrator’s manual (or
refer to Appendix B for appropriate temperatures).
Do not turn off your dehydrator or leave partially dried food on the trays as it may spoil
or develop off-flavours.
E. Allergies Food allergies are reactions that involve the immune system. The part of the food that
causes the reaction is called an allergen. Allergic reactions to food can range from very
mild to life threatening.
Avoid Allergens:
If you have an allergic child in your care, clean and sanitize (refer to Appendix A)
the dehydrator trays before as well as after use to be sure no residual allergens
remain from a past user.
Avoid working with foods that are known to cause allergy symptoms by a child in
your care.
Ask parents of children with severe food allergies to provide a comparable
alternative food for their child to taste on the day the group will be trying the
dehydrated food.
Follow your center’s guidelines and policies regarding allergies.
Refer to Food Allergies, Food Safety in Food Flair™, pages 50-52.
8
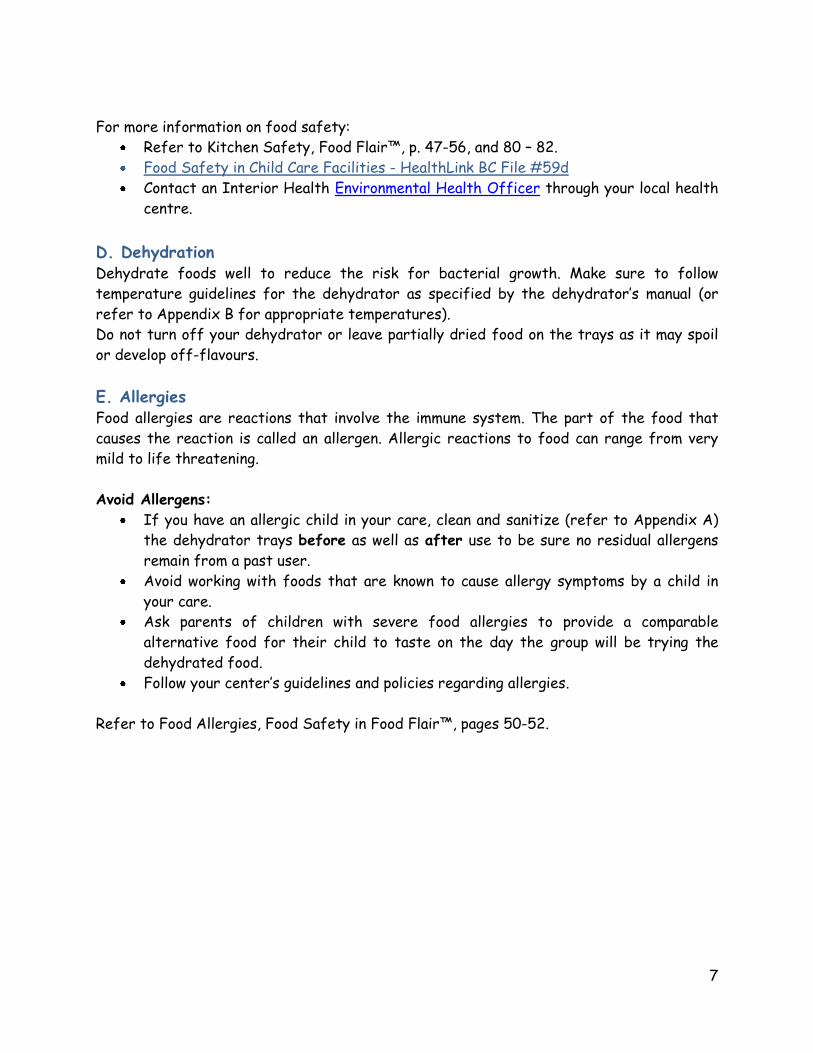
Dehydrating Foods 101
Many varieties of food can be dehydrated. Fruit, vegetables, and herbs are the most
popular and generally pose a lower food safety risk. Do not use this dehydrator to
dehydrate meat products due to a high food safety risk.
Practical Drying Guidelines: Follow the instructions specified by this
dehydrator.
Thinner slices dry quicker; slice evenly for even
drying.
Spread all food evenly to dry in single layers. If
slices overlap, the areas that overlap will take twice as
long to dry.
Do not add fresh produce to a partially dried
batch. It will slow the rate of drying for both products. It is possible to combine
partially dried foods which are at the same level of dryness on to fewer trays.
Loading Trays:
Lay food pieces evenly on trays.
Do not overlap food pieces as this will increase drying times.
As each tray is loaded, place it on the dehydrator to begin drying.
Testing for Dryness: To test for dryness, remove a piece of food, let it cool and feel with your fingers for
dryness. When in doubt, dry longer to ensure food safety.
1. Vegetables and fruit:
Fruits are pliable and leathery with no spots of moisture. Tear in half, pinch and
look for moisture drops along tear. If no moisture shows, then you’re ready for
tasting!
Fruit rolls should be leathery with no sticky spots.
Vegetables should be tough, crisp or brittle.
2. Herbs: Herbs are dry when they snap and crumble easily.
Drying time and temperatures can be found in the Appendix B.
Storing Dried Food:
If you are going to store dried foods, make sure to store them in airtight, moisture proof
containers and place in the refrigerator or freezer. For more information on storage, see
your operating manual.
9
Cooking and Serving Dried Food: Dried fruit can be added to cereal, granola, muffins, or as a substitute for raisins in
baking. Dried vegetables and herbs may require rehydration but can be added to a variety
of savory dishes, soups, breads, baked goods and dips.
Only a small quantity of dried food is needed for taste testing activities with the children.
If you end up drying a large quantity of food, you may want to know how you can use it as
an ingredient in cooking. Below are some guidelines.
Rehydration: Rehydrate by placing dried foods in a container with enough hot water to cover the
food. Soak until soft (no longer than 2 hours) and then use immediately in cooking/baking. Boiling water rehydrates foods more quickly than cold water or
water at room temperature.
Fruit or vegetables rehydrated in liquids other than water (i.e. fruit juice,
vegetable juice, milk, or salt free broth) must be rehydrated in the refrigerator to reduce the risk of spoilage.
Do not add seasoning, especially salt or sugar, during rehydration because they slow
the process.
Cooking with Dried Food:
After rehydration, cook it as you would normally.
Most vegetables and fruit will rehydrate to about 80% of their fresh state, so they
are a little chewier than fresh or frozen fruit or vegetables.
Dried foods used in cooking will absorb additional liquid. Adjust the recipe accordingly by
adding more water:
Vegetables: add one additional cup of water for one cup dried food.
Stewed fruit: add 2 additional cups of water for each cup of fruit; allow to stand 1
hour and simmer until tender.
Pies or fillings: use 1 additional cup (250 ml) of water per 1 cup (250 ml) of fruit, or
less, if you desire a thicker consistency.
See your operating manual for more detailed drying instructions and recipes.
Quick Tip:
To promote healthy eating and foster a healthy relationship with food,
offer but do not force children to try dehydrated food.
Quick Tip:
When rehydrating with hot water, cover the bowl and set the bowl aside
away from the reach of children.
10
Kids in the Kitchen
Drying Fruit Drying fruit together with children is an opportunity to follow the transformation between
fresh and dried fruit. It helps children understand how common foods like raisins and
prunes are made and exposes them to other dried fruits that are less common. You can
experiment with just about any fruit – see the chart in Appendix B or refer to the
operating manual for specific drying instructions. Dried fruit can be eaten on its own or
added to cereal, trail mix, baked goods, cooked dishes and salads.
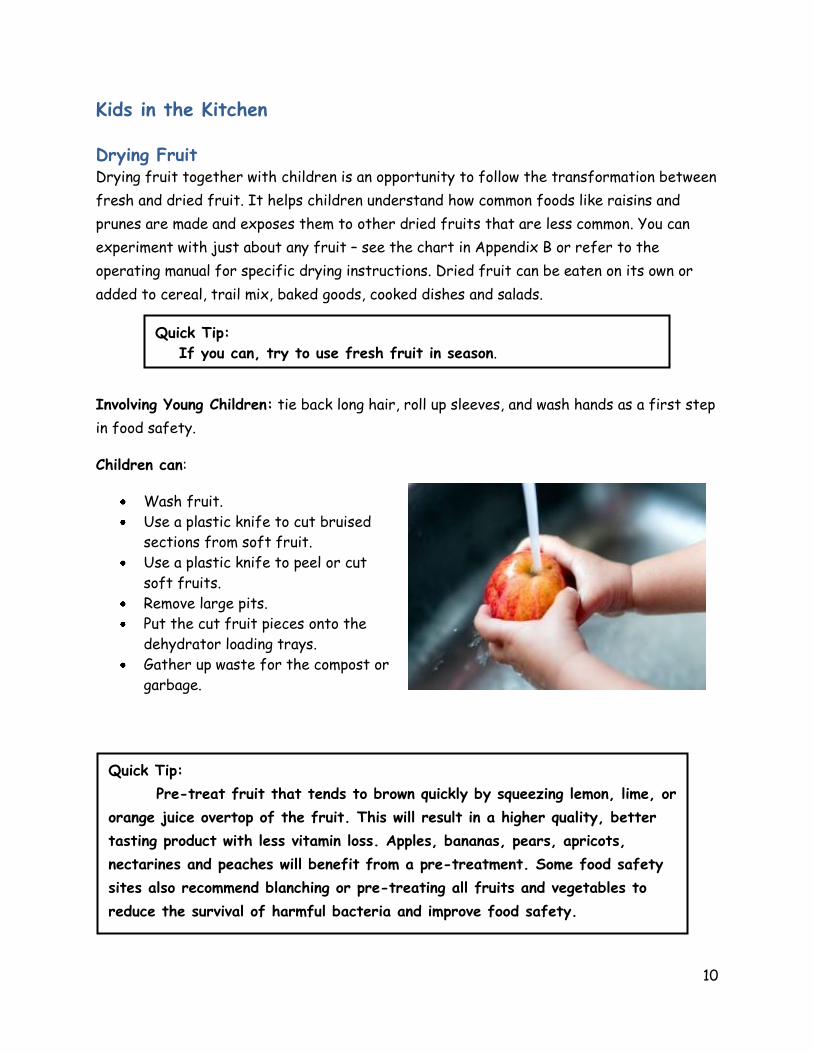
Involving Young Children: tie back long hair, roll up sleeves, and wash hands as a first step
in food safety.
Children can:
Wash fruit.
Use a plastic knife to cut bruised
sections from soft fruit.
Use a plastic knife to peel or cut
soft fruits.
Remove large pits.
Put the cut fruit pieces onto the
dehydrator loading trays.
Gather up waste for the compost or
garbage.
Quick Tip:
If you can, try to use fresh fruit in season.
Quick Tip:
Pre-treat fruit that tends to brown quickly by squeezing lemon, lime, or
orange juice overtop of the fruit. This will result in a higher quality, better
tasting product with less vitamin loss. Apples, bananas, pears, apricots,
nectarines and peaches will benefit from a pre-treatment. Some food safety
sites also recommend blanching or pre-treating all fruits and vegetables to
reduce the survival of harmful bacteria and improve food safety.
11
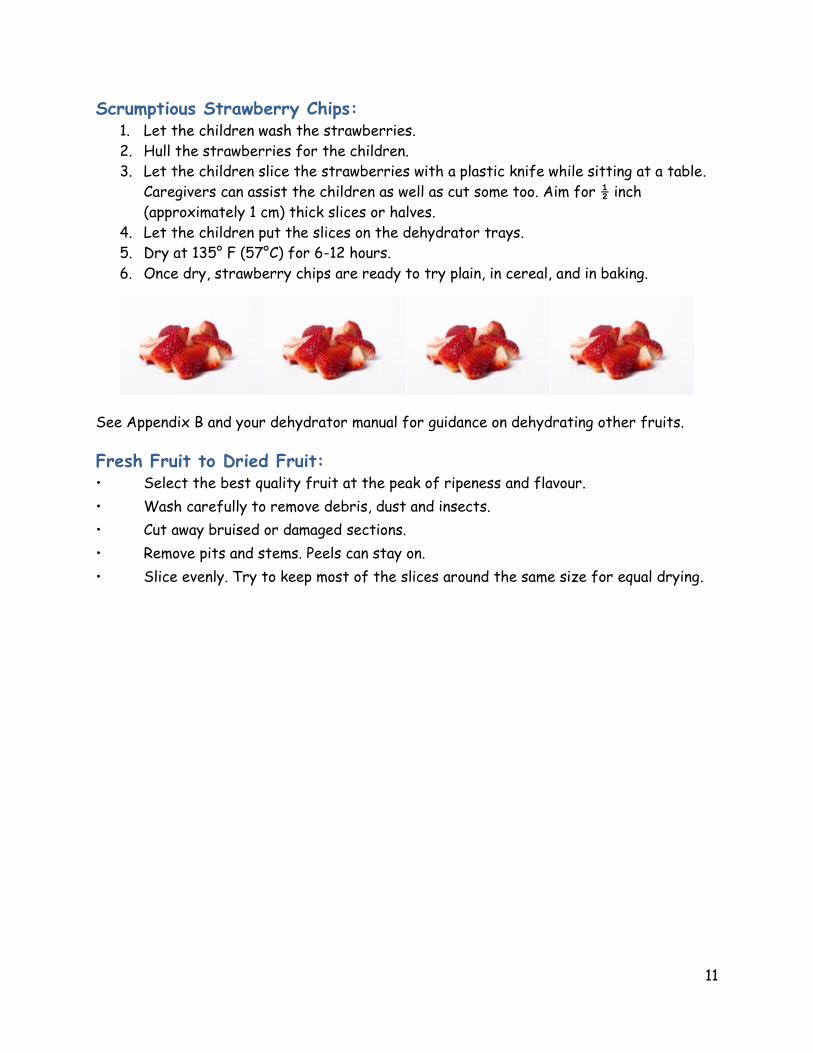
Scrumptious Strawberry Chips: 1. Let the children wash the strawberries.
2. Hull the strawberries for the children.
3. Let the children slice the strawberries with a plastic knife while sitting at a table.
Caregivers can assist the children as well as cut some too. Aim for ½ inch
(approximately 1 cm) thick slices or halves.
4. Let the children put the slices on the dehydrator trays.
5. Dry at 135° F (57°C) for 6-12 hours.
6. Once dry, strawberry chips are ready to try plain, in cereal, and in baking.
See Appendix B and your dehydrator manual for guidance on dehydrating other fruits.
Fresh Fruit to Dried Fruit: • Select the best quality fruit at the peak of ripeness and flavour.
• Wash carefully to remove debris, dust and insects.
• Cut away bruised or damaged sections.
• Remove pits and stems. Peels can stay on.
• Slice evenly. Try to keep most of the slices around the same size for equal drying.
12
Drying Fruit Rolls Making fruit rolls is a fun process of blending, mixing, and drying which gives kids plenty of
chances to learn some basic food preparation skills!
Fruit rolls are a favourite with children, but they are a very chewy and sticky fruit
product which can get stuck in teeth and cause tooth decay. Refer to the dental care
advice given in the Quick Tips section on page 4.
Involving Young Children: tie back long hair, roll up sleeves, and wash hands as a first step
in food safety.
Children can:
Chop soft fruit like peaches, nectarines, banana, and apricots with a plastic knife.
Add in different varieties of fruit into the blender.
Pour 100 per cent fruit juice or water from a cup into the blender.
Press the blend button on the blender.
Lightly oil the fruit roll sheet.
Pour the blenderized fruit onto the fruit roll sheet from a small cup or with
assistance from the caregiver. After, the caregiver can use a wooden spoon to make
sure it is evenly spread out for drying (about a ½ inch or 1 cm thickness).
Banana Rama Time: (6 bananas for 12 children) Give each child a bowl and half of a very ripe banana (with lots of brown spots) and
let them peel and mash the banana.
Let each child pour their mashed banana into the blender.
Let one child press ‘blend’.
The caregiver or another child can add 1/3 cup (80 ml) of 100 per cent fruit juice
(any flavour) to the blender and blend again.
Have one child lightly oil the fruit roll sheet.
Quick Tips:
Some fruit, such as apples, are high in pectin and fiber, and
have an excellent texture when dried. Use your imagination
and have fun!
If you can, try to use fresh fruit in season.
You can use overripe fruits or irregularly shaped fruit,
because they will be blended together.
In the winter, frozen fruits can also be used, although they
tend to be runnier. Simply thaw and drain much of the excess
liquid away.
13
From small cups or with assistance from the caregiver, pour the blenderized fruits
onto the fruit roll sheet. After, the caregiver can use a wooden spoon to make sure
it is evenly spread to about a ½” (1 cm) thickness to dry.
Dry at 135° F (57° C) for 4-8 hours, or until leathery and pliable.
Once dry, you’re ready to try!
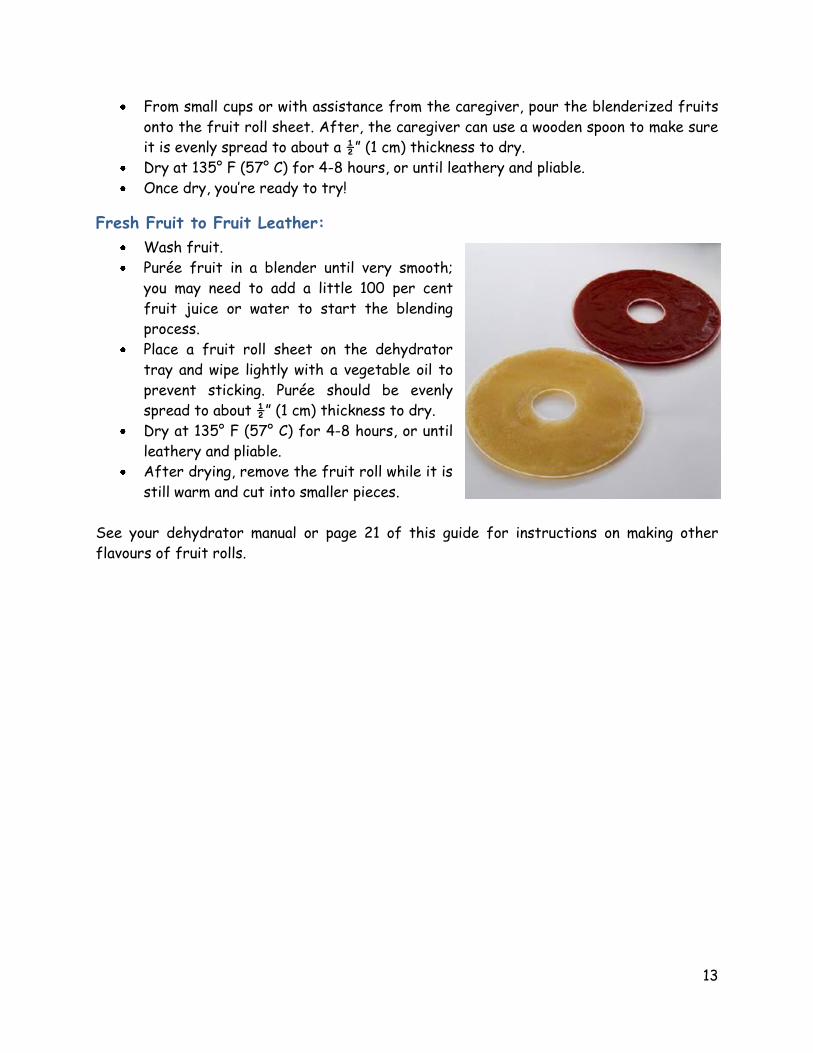
Fresh Fruit to Fruit Leather:
Wash fruit.
Purée fruit in a blender until very smooth;
you may need to add a little 100 per cent
fruit juice or water to start the blending
process.
Place a fruit roll sheet on the dehydrator
tray and wipe lightly with a vegetable oil to
prevent sticking. Purée should be evenly
spread to about ½” (1 cm) thickness to dry.
Dry at 135° F (57° C) for 4-8 hours, or until
leathery and pliable.
After drying, remove the fruit roll while it is
still warm and cut into smaller pieces.
See your dehydrator manual or page 21 of this guide for instructions on making other
flavours of fruit rolls.
14
Drying Vegetables Vegetables can be a great choice to use in the dehydrator because it is a new way of
preparing them that children may have never seen before. The process of drying may
increase acceptance of vegetables because children will have the chance to be involved in
the food preparation, observe the changes during dehydration, and be given the
opportunity to try to the food.
Dried vegetables can be eaten on their own, broken up and brought home to be cooked with
rice, and added to soups, sauces or stews.
Involving Young Children: tie back long hair, roll up sleeves, and wash hands as a first step
in food safety.
Children can:
Chop soft vegetables, like tomatoes, with a plastic knife while sitting down at a
table.
Help wash vegetables before slicing.
Put the cut vegetable slices onto the dehydrator loading trays.
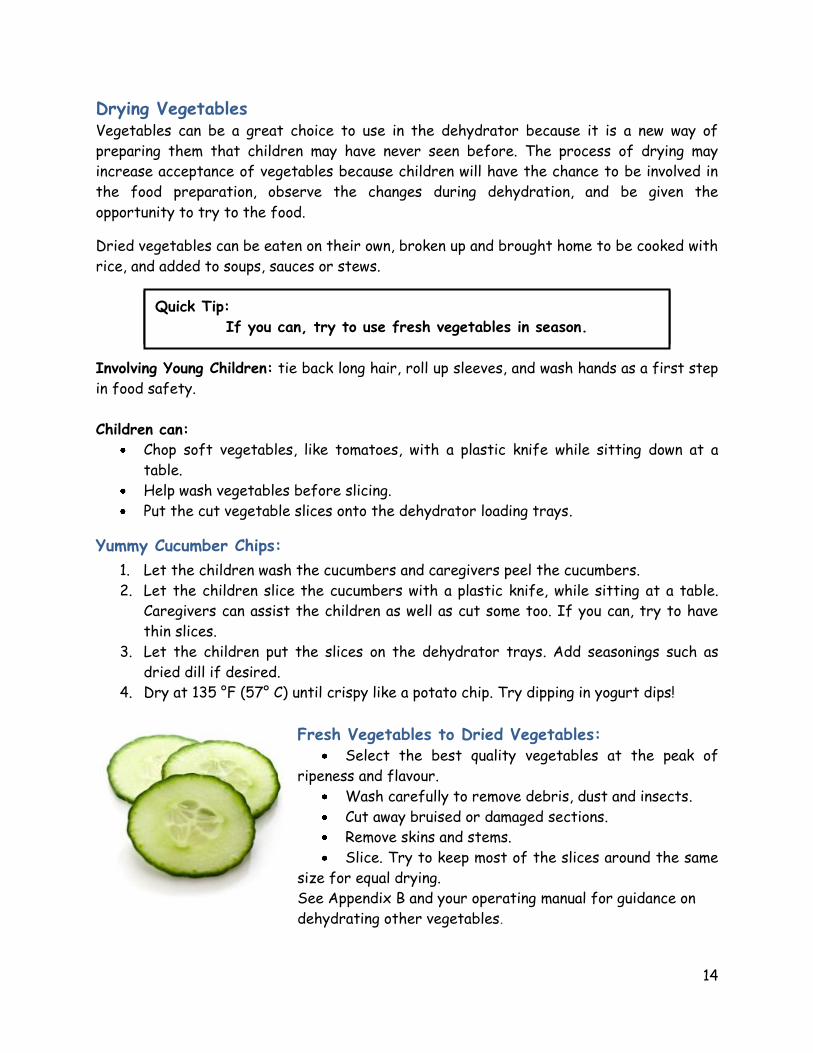
Yummy Cucumber Chips:
1. Let the children wash the cucumbers and caregivers peel the cucumbers.
2. Let the children slice the cucumbers with a plastic knife, while sitting at a table.
Caregivers can assist the children as well as cut some too. If you can, try to have
thin slices.
3. Let the children put the slices on the dehydrator trays. Add seasonings such as
dried dill if desired.
4. Dry at 135 °F (57° C) until crispy like a potato chip. Try dipping in yogurt dips!
Fresh Vegetables to Dried Vegetables: Select the best quality vegetables at the peak of
ripeness and flavour.
Wash carefully to remove debris, dust and insects.
Cut away bruised or damaged sections.
Remove skins and stems.
Slice. Try to keep most of the slices around the same
size for equal drying.
See Appendix B and your operating manual for guidance on
dehydrating other vegetables.
Quick Tip:
If you can, try to use fresh vegetables in season
Quick Tip:
If you can, try to use fresh vegetables in season.
15
Drying Herbs Dried herbs can make a great gift for special occasions like Mother’s or Father’s Day. In
addition to basic food preparation skills, drying also introduces children to a variety of
herbs that can be used in place of salt to flavour dishes!
Involving Young Children: tie back long hair, roll up sleeves, and wash hands as a first step
in food safety.
Children can:
Help wash the herbs.
Pick the leaves off of the stems.
Put the herbs onto the dehydrator loading trays.
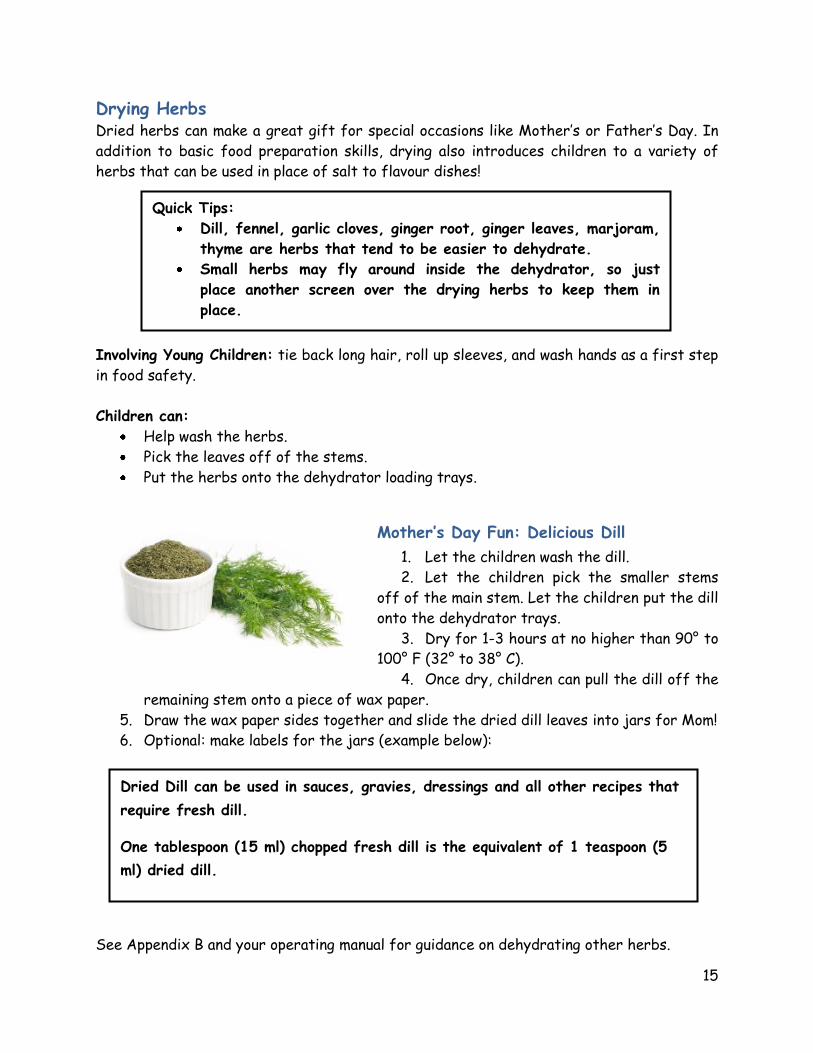
Mother’s Day Fun: Delicious Dill
1. Let the children wash the dill.
2. Let the children pick the smaller stems
off of the main stem. Let the children put the dill
onto the dehydrator trays.
3. Dry for 1-3 hours at no higher than 90° to
100° F (32° to 38° C).
4. Once dry, children can pull the dill off the
remaining stem onto a piece of wax paper.
5. Draw the wax paper sides together and slide the dried dill leaves into jars for Mom!
6. Optional: make labels for the jars (example below):
See Appendix B and your operating manual for guidance on dehydrating other herbs.
Quick Tips:
Dill, fennel, garlic cloves, ginger root, ginger leaves, marjoram,
thyme are herbs that tend to be easier to dehydrate.
Small herbs may fly around inside the dehydrator, so just
place another screen over the drying herbs to keep them in
place.
Dried Dill can be used in sauces, gravies, dressings and all other recipes that
require fresh dill.
One tablespoon (15 ml) chopped fresh dill is the equivalent of 1 teaspoon (5
ml) dried dill.
16
Activities for Drying Vegetables and Fruit
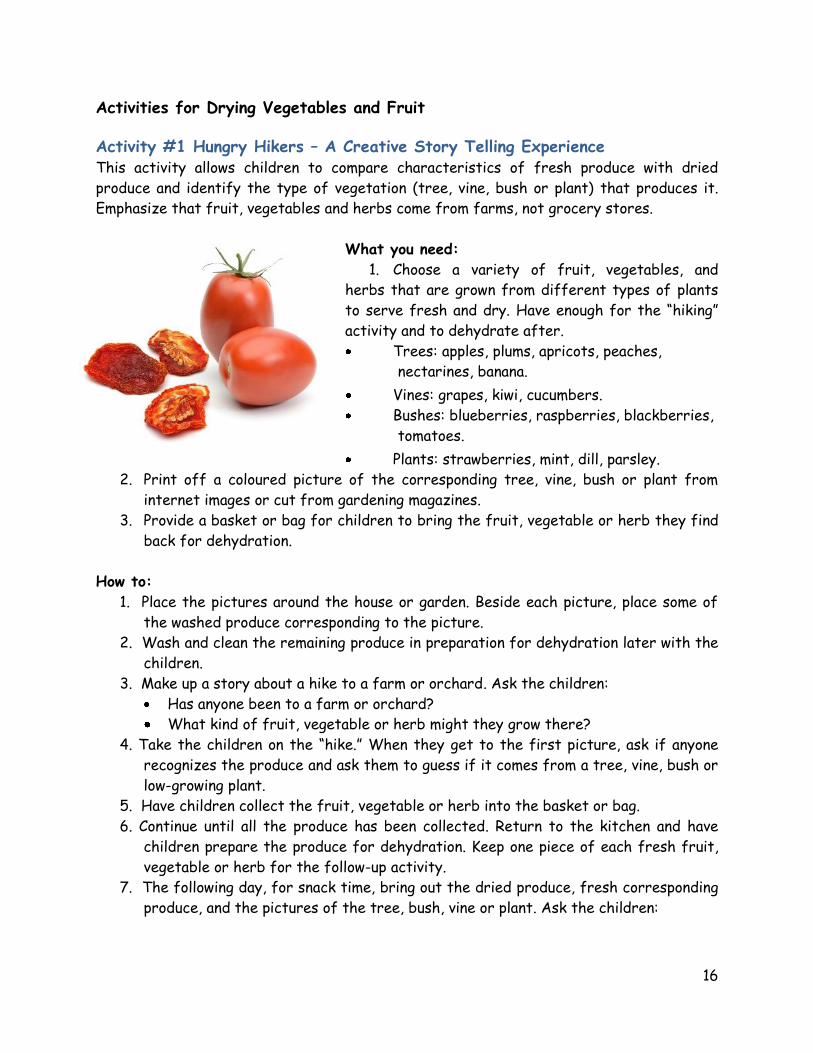
Activity #1 Hungry Hikers – A Creative Story Telling Experience This activity allows children to compare characteristics of fresh produce with dried
produce and identify the type of vegetation (tree, vine, bush or plant) that produces it.
Emphasize that fruit, vegetables and herbs come from farms, not grocery stores.
What you need:
1. Choose a variety of fruit, vegetables, and
herbs that are grown from different types of plants
to serve fresh and dry. Have enough for the “hiking”
activity and to dehydrate after.
Trees: apples, plums, apricots, peaches,
nectarines, banana.
Vines: grapes, kiwi, cucumbers.
Bushes: blueberries, raspberries, blackberries,
tomatoes.
Plants: strawberries, mint, dill, parsley.
2. Print off a coloured picture of the corresponding tree, vine, bush or plant from
internet images or cut from gardening magazines.
3. Provide a basket or bag for children to bring the fruit, vegetable or herb they find
back for dehydration.
How to:
1. Place the pictures around the house or garden. Beside each picture, place some of
the washed produce corresponding to the picture.
2. Wash and clean the remaining produce in preparation for dehydration later with the
children.
3. Make up a story about a hike to a farm or orchard. Ask the children:
Has anyone been to a farm or orchard?
What kind of fruit, vegetable or herb might they grow there? 4. Take the children on the “hike.” When they get to the first picture, ask if anyone
recognizes the produce and ask them to guess if it comes from a tree, vine, bush or
low-growing plant.
5. Have children collect the fruit, vegetable or herb into the basket or bag.
6. Continue until all the produce has been collected. Return to the kitchen and have
children prepare the produce for dehydration. Keep one piece of each fresh fruit,
vegetable or herb for the follow-up activity.
7. The following day, for snack time, bring out the dried produce, fresh corresponding
produce, and the pictures of the tree, bush, vine or plant. Ask the children:
17
Can you point to which fresh fruit, vegetable or herb the dried version belongs
to?
Which type of plant does that fruit, vegetable or herb grow upon – a tree, bush,
vine or plant?
How does it feel or smell?
How does it taste?
Where did the water go?
Literacy Links:
Grapes to Raisins Author: Inez Snyder; ISBN: 0516255282
I am an Apple Author: Jean Marzollo ISBN: 0590372238
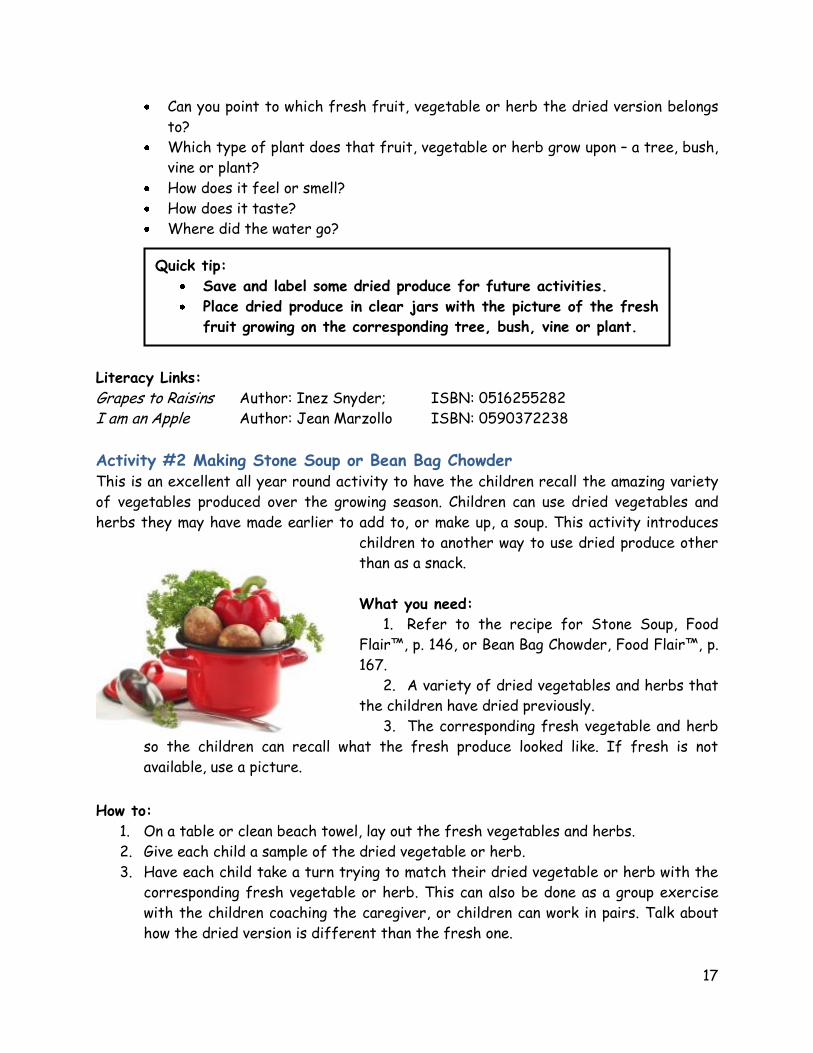
Activity #2 Making Stone Soup or Bean Bag Chowder This is an excellent all year round activity to have the children recall the amazing variety
of vegetables produced over the growing season. Children can use dried vegetables and
herbs they may have made earlier to add to, or make up, a soup. This activity introduces
children to another way to use dried produce other
than as a snack.
What you need:
1. Refer to the recipe for Stone Soup, Food
Flair™, p. 146, or Bean Bag Chowder, Food Flair™, p.
167.
2. A variety of dried vegetables and herbs that
the children have dried previously.
3. The corresponding fresh vegetable and herb
so the children can recall what the fresh produce looked like. If fresh is not
available, use a picture.
How to:
1. On a table or clean beach towel, lay out the fresh vegetables and herbs.
2. Give each child a sample of the dried vegetable or herb.
3. Have each child take a turn trying to match their dried vegetable or herb with the
corresponding fresh vegetable or herb. This can also be done as a group exercise
with the children coaching the caregiver, or children can work in pairs. Talk about
how the dried version is different than the fresh one.
Quick tip:
Save and label some dried produce for future activities.
Place dried produce in clear jars with the picture of the fresh
fruit growing on the corresponding tree, bush, vine or plant.
18
4. Place a soup pot onto the center of the table or beach towel.
5. Tell the children the traditional story of Stone Soup. Each child can take turns
putting their dried vegetable or herb into the pot and taking a turn stirring.
6. Once the story is done, finish assembling the soup to cook for eating later together
at mealtime.
7. Great conversations can occur around the table:
Ask the children what other things could go into soup? For example, whole
grains, meat, cheese and spices.
Ask children what other kinds of vegetable soups they may have tried? For
example, tomato, potato, and mushroom soup.
Ask the children what letter of the alphabet (or letter sound) each vegetable or
herb name starts with.
Literacy Links:
I Will Never, Not Ever, Eat a Tomato Author: Lauren Child ISBN: 0763611883
We Like to Eat Well Author: Elyse April ISBN: 1890772690
We Like to Help Cook Author: Marcu Allsop ISBN: 1935826050
Stone Soup Author: Ann McGovern ISBN: 0590068806
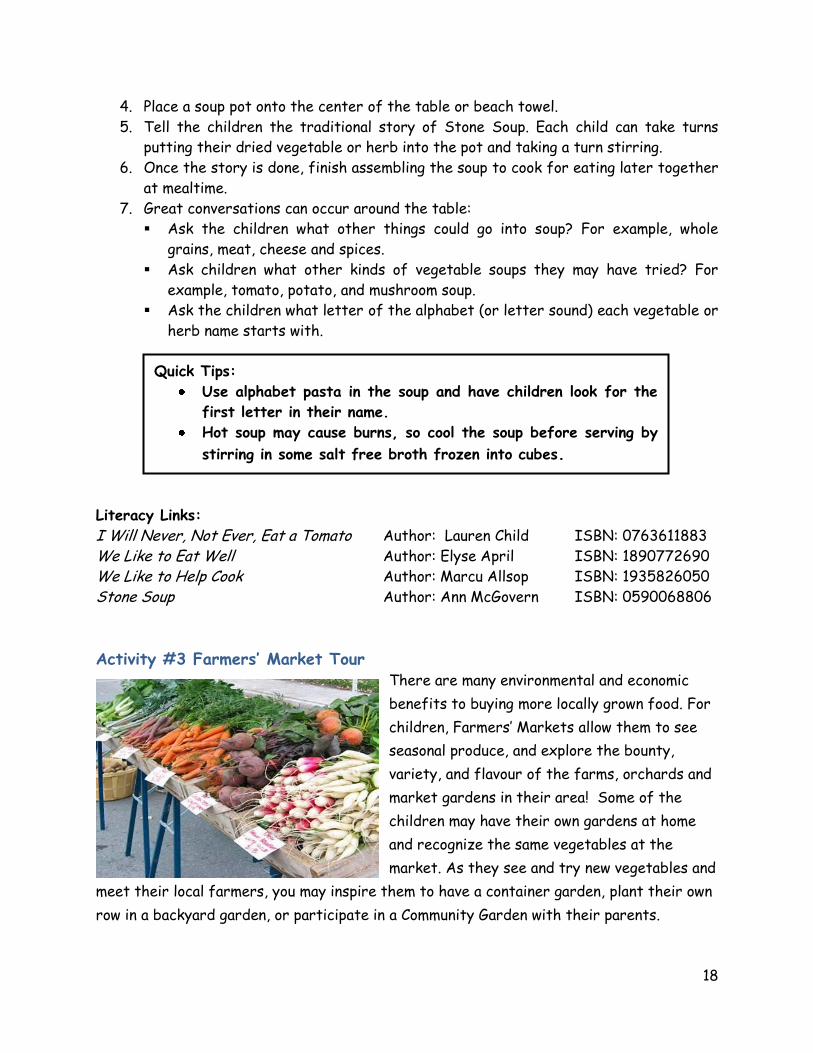
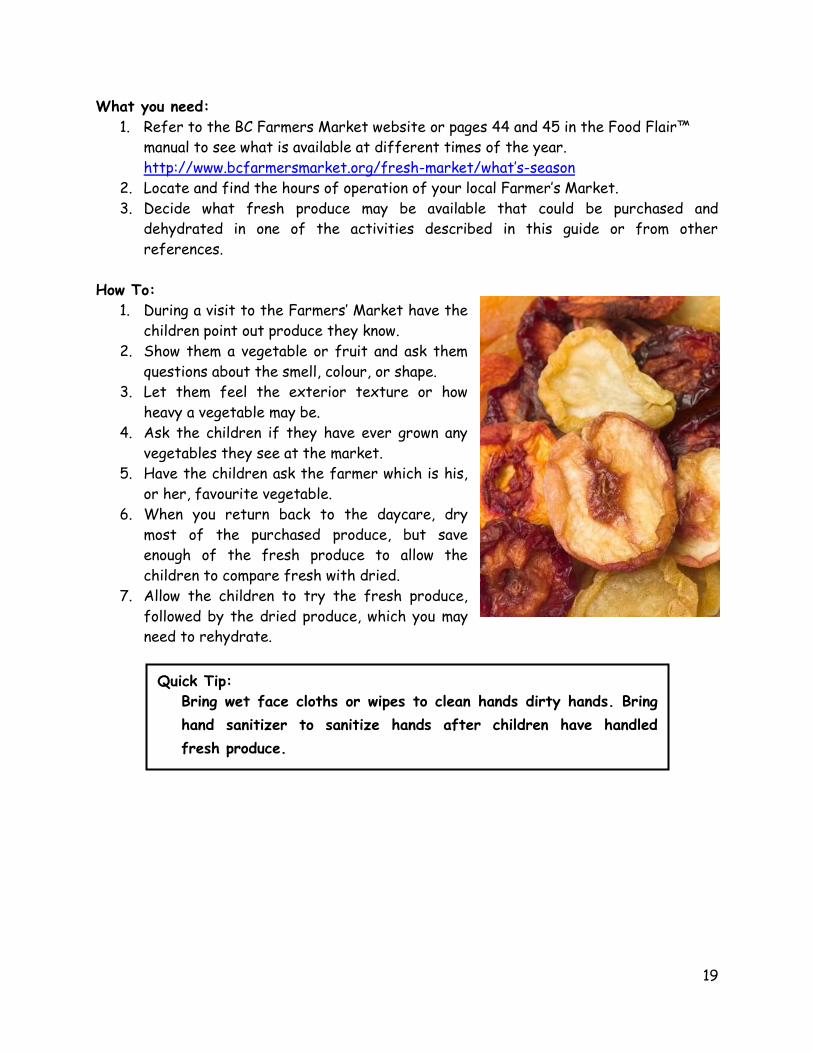
Activity #3 Farmers’ Market Tour There are many environmental and economic
benefits to buying more locally grown food. For
children, Farmers’ Markets allow them to see
seasonal produce, and explore the bounty,
variety, and flavour of the farms, orchards and
market gardens in their area! Some of the
children may have their own gardens at home
and recognize the same vegetables at the
market. As they see and try new vegetables and
meet their local farmers, you may inspire them to have a container garden, plant their own
row in a backyard garden, or participate in a Community Garden with their parents.
Quick Tips:
Use alphabet pasta in the soup and have children look for the
first letter in their name. Hot soup may cause burns, so cool the soup before serving by
stirring in some salt free broth frozen into cubes.
19
What you need:
1. Refer to the BC Farmers Market website or pages 44 and 45 in the Food Flair™
manual to see what is available at different times of the year.
http://www.bcfarmersmarket.org/fresh-market/what’s-season
2. Locate and find the hours of operation of your local Farmer’s Market.
3. Decide what fresh produce may be available that could be purchased and
dehydrated in one of the activities described in this guide or from other
references.
How To:
1. During a visit to the Farmers’ Market have the
children point out produce they know.
2. Show them a vegetable or fruit and ask them
questions about the smell, colour, or shape.
3. Let them feel the exterior texture or how
heavy a vegetable may be.
4. Ask the children if they have ever grown any
vegetables they see at the market.
5. Have the children ask the farmer which is his,
or her, favourite vegetable.
6. When you return back to the daycare, dry
most of the purchased produce, but save
enough of the fresh produce to allow the
children to compare fresh with dried.
7. Allow the children to try the fresh produce,
followed by the dried produce, which you may
need to rehydrate.
Quick Tip:
Bring wet face cloths or wipes to clean hands dirty hands. Bring
hand sanitizer to sanitize hands after children have handled
fresh produce.
20
Recipes
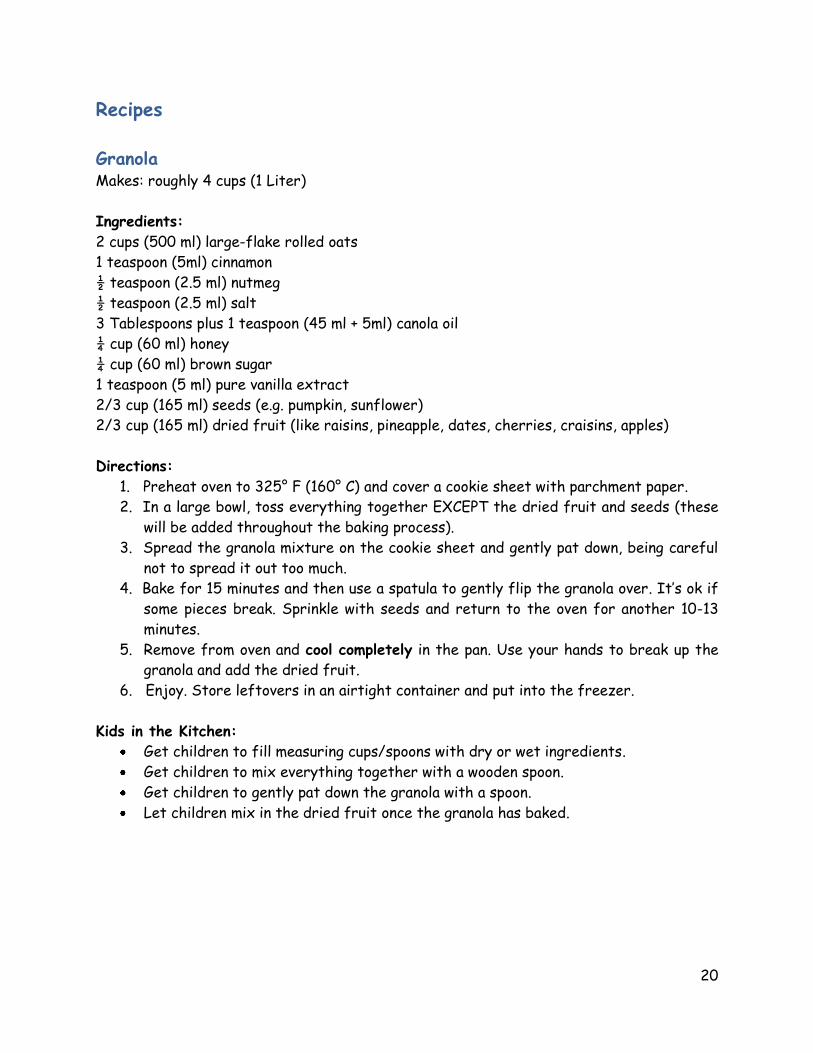
Granola Makes: roughly 4 cups (1 Liter)
Ingredients:
2 cups (500 ml) large-flake rolled oats
1 teaspoon (5ml) cinnamon
½ teaspoon (2.5 ml) nutmeg
½ teaspoon (2.5 ml) salt
3 Tablespoons plus 1 teaspoon (45 ml + 5ml) canola oil
¼ cup (60 ml) honey
¼ cup (60 ml) brown sugar
1 teaspoon (5 ml) pure vanilla extract
2/3 cup (165 ml) seeds (e.g. pumpkin, sunflower)
2/3 cup (165 ml) dried fruit (like raisins, pineapple, dates, cherries, craisins, apples)
Directions:
1. Preheat oven to 325° F (160° C) and cover a cookie sheet with parchment paper.
2. In a large bowl, toss everything together EXCEPT the dried fruit and seeds (these
will be added throughout the baking process).
3. Spread the granola mixture on the cookie sheet and gently pat down, being careful
not to spread it out too much.
4. Bake for 15 minutes and then use a spatula to gently flip the granola over. It’s ok if
some pieces break. Sprinkle with seeds and return to the oven for another 10-13
minutes.
5. Remove from oven and cool completely in the pan. Use your hands to break up the
granola and add the dried fruit.
6. Enjoy. Store leftovers in an airtight container and put into the freezer.
Kids in the Kitchen:
Get children to fill measuring cups/spoons with dry or wet ingredients.
Get children to mix everything together with a wooden spoon.
Get children to gently pat down the granola with a spoon.
Let children mix in the dried fruit once the granola has baked.
21
Nut Free Trail Mix Makes: 3 cups (750 ml)
Ingredients:
1 cup (250 ml) chopped dried fruit (try to include a few different varieties like dried
apples, raisins, craisins or dates)
¼ cup (60 ml) mini chocolate chips (a little goes a long way)
1 cup (250 ml) unsalted sunflower or pumpkin seeds
1 cup (250 ml) granola (see recipe), pretzel sticks, or whole grain cereal
Directions:
1. Mix all together and store in an airtight container.
Kids in the Kitchen:
Get them to fill measuring cups with ingredients, pour into a bowl and mix!
Fruit Roll Ups 1. Choose one of the following recipes.
2. In a blender mix all ingredients until puréed.
3. Pour onto the fruit roll sheets, dry at 135° F (57° C) for 4 to 8 hours or until
leathery and pliable.
4. Remove from sheets while still warm. Let cool and roll in plastic wrap and store
appropriately.
Orange Julius:
1 and ½ cups (375 ml) applesauce
1 small apple, washed, peeled, cored and chopped
2 teaspoons (10 ml) dried orange, ground
1 and ½ teaspoons (7.5 ml) vanilla
Strawberry:
1 quart (4 cups or 1 L) of strawberries, washed, and cored
½ a lime, peeled and quartered (optional)
2 teaspoons (10 ml) honey
Banana:
2 bananas, cut into pieces
2 Tablespoons (30 ml) honey
8 oz (250 ml) vanilla yogurt
(It may take longer to dry using yogurt than other fruit rolls. Store in refrigerator
when dry.)
22
Banana Rama:
6 ripe bananas, peeled and cut into pieces
1 orange, peeled and quartered or 1/3 cup (80 ml) 100 per cent fruit juice (any
flavour)
Kids in the Kitchen:
Let children wash fruit, or help peel and chop soft fruit.
Get children to fill measuring cups or spoons with wet ingredients.
Get children to mix everything together with a wooden spoon.
Get children to gently smooth the mixture over drying sheets.
Let children help clean-up.
Critters on a Log (for School-age children) Makes 9 pieces
3 stalks of washed celery; cut each into 3-inch (7.5 cm) lengths
3 Tablespoons (45 ml) of cream cheese
¼ cup (60 ml) pieces of dried fruit, about the size of a raisin
1. Give each child 1 or 2 pieces of celery.
2. Have them spread cream cheese along the curved side of the celery.
3. Children can place pieces of dried fruit along the length of the cheese filled trough.
4. These pieces of fruit represent the “critters”
Kids in the Kitchen:
Let children wash the celery.
Get children to spread cream cheese.
Get children to break apart whole pieces of dried fruit into smaller pieces.
Let children help clean-up.
23
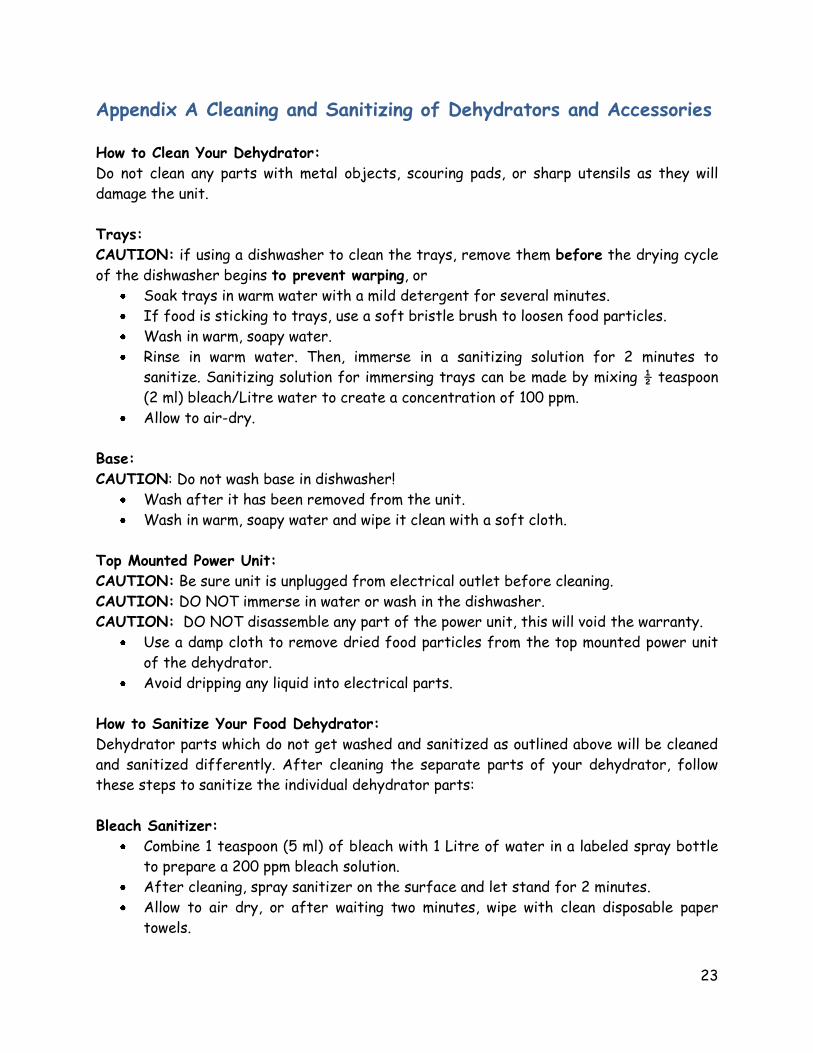
Appendix A Cleaning and Sanitizing of Dehydrators and Accessories
How to Clean Your Dehydrator:
Do not clean any parts with metal objects, scouring pads, or sharp utensils as they will
damage the unit.
Trays:
CAUTION: if using a dishwasher to clean the trays, remove them before the drying cycle
of the dishwasher begins to prevent warping, or
Soak trays in warm water with a mild detergent for several minutes.
If food is sticking to trays, use a soft bristle brush to loosen food particles.
Wash in warm, soapy water.
Rinse in warm water. Then, immerse in a sanitizing solution for 2 minutes to
sanitize. Sanitizing solution for immersing trays can be made by mixing ½ teaspoon
(2 ml) bleach/Litre water to create a concentration of 100 ppm.
Allow to air-dry.
Base:
CAUTION: Do not wash base in dishwasher!
Wash after it has been removed from the unit.
Wash in warm, soapy water and wipe it clean with a soft cloth.
Top Mounted Power Unit:
CAUTION: Be sure unit is unplugged from electrical outlet before cleaning.
CAUTION: DO NOT immerse in water or wash in the dishwasher.
CAUTION: DO NOT disassemble any part of the power unit, this will void the warranty.
Use a damp cloth to remove dried food particles from the top mounted power unit
of the dehydrator.
Avoid dripping any liquid into electrical parts.
How to Sanitize Your Food Dehydrator:
Dehydrator parts which do not get washed and sanitized as outlined above will be cleaned
and sanitized differently. After cleaning the separate parts of your dehydrator, follow
these steps to sanitize the individual dehydrator parts:
Bleach Sanitizer:
Combine 1 teaspoon (5 ml) of bleach with 1 Litre of water in a labeled spray bottle
to prepare a 200 ppm bleach solution.
After cleaning, spray sanitizer on the surface and let stand for 2 minutes.
Allow to air dry, or after waiting two minutes, wipe with clean disposable paper
towels.
24
Appendix B Common Fruit, Vegetable and Herb Drying Guide
Storing Dried Food: If you are going to store dried foods, make sure to store them in airtight, moisture proof
containers and place in the refrigerator or freezer. For more information on storage, see your
operating manual.
Food Average Drying
Time (hours)
Average Temp
(F) & (C)
Preparation Uses
Fruit
Apples 4-10 130°-140° F
(54°-60° C)
Pare, core, cut in
3/8” (1 cm) slices.
Pre-treat.
Applesauce, pies,
cobblers, rings,
snacks, breads
and cookies
Apricots 8-16 130°-140° F
(54°-60° C)
Cut in half,
remove pit and
cut in quarters.
Pre-treat.
Desserts, muesli,
meat dishes, pies
and sauces
Bananas 6-12 130°-140° F
(54°-60° C)
Peel, cut in 3/8”
(1 cm) slices or
divide lengthwise.
Snacks, baby
food, granola,
cookies, and
banana bread
Blueberries 10-18 130°-140° F
(54°-60° C)
Remove stems.
Dip in boiling
water until skins
crack.
Breads, baked
goods, snacks, ice
cream, yogurt
Canned Fruit 6-12 130°-140° F
(54°-60° C)
Drain well. If
small, place on
mesh screen.
Snacks, breads,
granola
Cherries 18-26 130°-140° F
(54°-60° C)
Remove stems and
pit.
Breads, baked
goods and snacks
Cranberries 10-18 130°-140° F
(54°-60° C)
Remove stems.
Dip in boiling
water until skins
crack.
Breads, baked
goods, snacks, ice
cream, yogurt
Grapes 10-36
6-10
130°-140° F
(54°-60° C)
Leave whole,
remove stems.
If blanched.
Raisins; use in
baked goods,
cereals, granola,
snacks, yogurt
Kiwi 5-12 130°-140° F
(54°-60° C)
Peel, slice 3/8” to
½” (1 cm) thick.
Snacks
Melons (do not
use cantaloupe)
8-20 130°-140° F
(54°-60° C)
Remove skin and
seeds. Slice ½” (1
cm) thick.
Snacks
Nectarines 6-16 130°-140° F Quarter or slice Snacks, desserts

25
Food Average Drying
Time (hours)
Average Temp
(F) & (C)
Preparation Uses
(54°-60° C) 3/8” to ½” (1 cm)
thick.
Pre-treat.
and baked goods
Oranges,
tangerines
2-12 130°-140° F
(54°-60° C)
Slice ¼” (1 cm)
thick.
Snacks, baking
Peaches 6-16 130°-140° F
(54°-60° C)
Peel if desired.
Halve or quarter.
Pre-treat.
Snacks, breads,
cobblers, cookies
and granola
Pears 6-12 130°-140° F
(54°-60° C)
Peel, core, and
slice 3/8” (1 cm)
thick.
Pre-treat.
Snacks, breads,
cookies, fritters
and granola
Plums/Prunes 8-16 130°-140° F
(54°-60° C)
Halve or quarter
and remove pit.
Snacks, cookies,
muffins, bread
and granola
Strawberries 6-12 130°-140° F
(54°-60° C)
Halve or slice ½”
(1 cm) thick.
Snacks, cereal
and baked goods
Vegetables
Beans
Green or Wax
6-12 130°-145° F
(54°-63° C)
Remove ends, cut
into 1” (2.5 cm)
pieces. Blanch.
Stews, soups and
casseroles
Broccoli 4-10 130°-145° F
(54°-63° C)
Cut as for
serving. Blanch.
Soups, quiche, or
soufflés, cream
or cheese sauce
Carrots 6-12 130°-145° F
(54°-63° C)
Peel, cut ends,
slice in 3/8” (1
cm) thick or
shred. Blanch.
Salads, soups,
stews and carrot
cake/muffins
Cauliflower 6-14 130°-145° F
(54°-63° C)
Cut as for
serving. Blanch.
Soups, stews
Celery 3-10 130°-145° F
(54°-63° C)
Trim and cut ½” (1
cm) slices. Blanch
in solution of ½
teaspoon (2.5 ml)
soda to 1 cup (250
ml) water.
Soups, stews,
sauces
Corn 6-12 130°-145° F
(54°-63° C)
Husk, remove silk
and blanch.
Remove from cob.
Fritters, soups,
stews, or grind
for cornmeal
Peas 5-14 130°-145° F
(54°-63° C)
Shell and blanch. Soups, stews, and
mixed vegetables
Peppers 5-12 130°-145° F
(54°-63° C)
Remove stem and
seeds. Cut into ½”
Soups, stews, and
mixed vegetables

26
Food Average Drying
Time (hours)
Average Temp
(F) & (C)
Preparation Uses
(1 cm) pieces.
Potatoes 6-12 130°-145° F
(54°-63° C)
Use white
potatoes. Peel and
slice 3/8” (1 cm)
thick. Blanch.
Stews, soups, and
casseroles
Tomatoes 6-12 130°-145° F
(54°-63° C)
Slice 3/8” (1 cm)
circles or dip in
boiling water to
loosen skins, halve
or quarter.
Soups, stews,
sauces.
Zucchini or
squash
5-10 130°-145° F
(54°-63° C)
Remove ends and
slice 3/8” (1 cm)
thick or grate.
Steam if you plan
to rehydrate.
Breads, chips with
dip, soups and
casseroles (1
week shelf life)
Herbs
Basil leaves
(break veins and
stems to aid
drying)
20-24 90°-100° F
(32°-38° C)
Clip leaves 3 to 4
inches (7.5-10 cm)
from top of plant
just as first buds
appear, pat dry.
Italian and
Mediterranean
dishes, tomato
dishes, meal,
salads, soups,
fish, poultry and
egg dishes
Chive leaves 20-24 90°-100° F
(32°-38° C)
Chop, rinse in cold
water, pat dry.
Mild onion
flavour, use in
moist recipes
Cilantro leaves 15-18 90°-100° F
(32°-38° C)
Clip with stems.
Rinse in cold
water, pat dry.
Mexican, Chinese,
& Mediterranean
dishes
Dill leaves 1-3 90°-100° F
(32°-38° C)
Rinse in cold
water, pat dry.
Salads,
vegetables,
potatoes and fish
Mint leaves 20-24 90°-100° F
(32°-38° C)
Rinse in cold
water, pat dry.
Sauces, mint jelly
and lamb dishes
Oregano leaves 15-18 90°-100° F
(32°-38° C)
Rinse in cold
water, pat dry.
Italian, Greek,
Mexican & tomato
dishes
Parsley
leaves/stem
20-24 90°-100° F
(32°-38° C)
Rinse in cold
water, pat dry.
Powder, use
leaves for flakes
Rosemary leaves 20-24 90°-100° F
(32°-38° C)
Rinse in cold
water, pat dry.
BBQ sauces,
meat, egg dishes,
vegetables
27
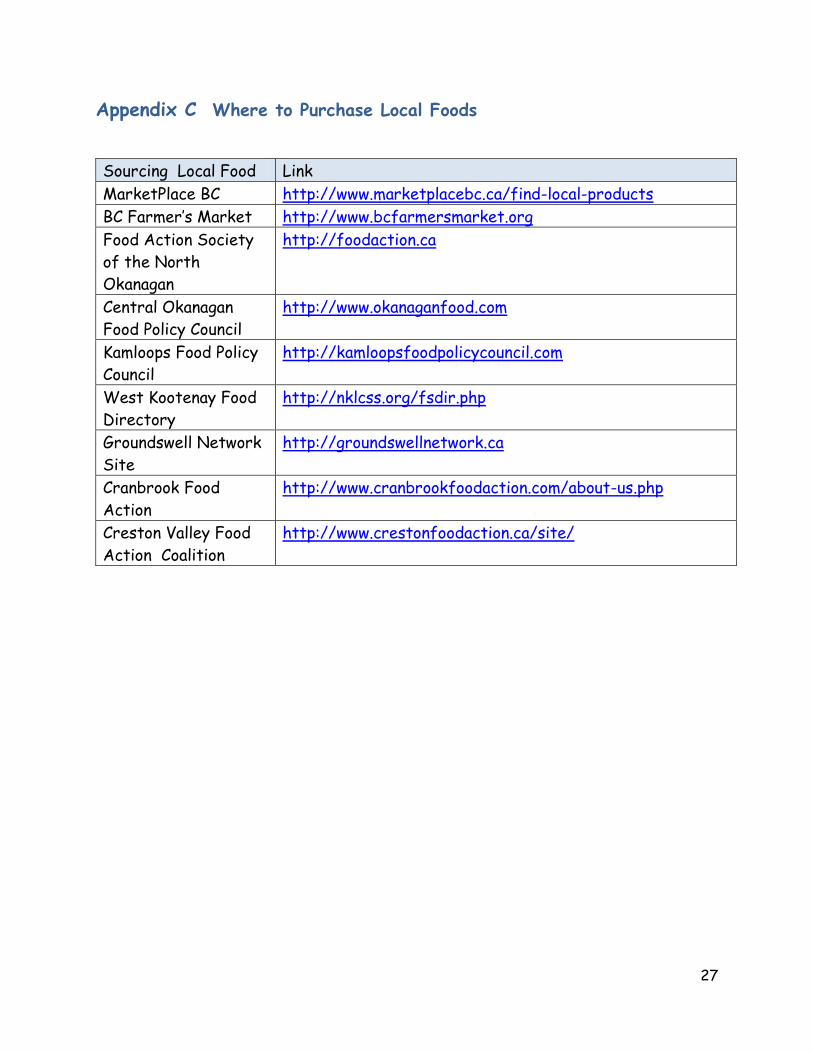
Appendix C Where to Purchase Local Foods
Sourcing Local Food Link
MarketPlace BC http://www.marketplacebc.ca/find-local-products
BC Farmer’s Market http://www.bcfarmersmarket.org
Food Action Society
of the North
Okanagan
http://foodaction.ca
Central Okanagan
Food Policy Council
http://www.okanaganfood.com
Kamloops Food Policy
Council
http://kamloopsfoodpolicycouncil.com
West Kootenay Food
Directory
http://nklcss.org/fsdir.php
Groundswell Network
Site
http://groundswellnetwork.ca
Cranbrook Food
Action
http://www.cranbrookfoodaction.com/about-us.php
Creston Valley Food
Action Coalition
http://www.crestonfoodaction.ca/site/