fold fold handy manny toolbox disneyjunior -...
TRANSCRIPT
DisneyJunior.com
© Disney
Handy Manny Toolbox
CutCut
Cut Cut
FoldFold
Fold
FoldFold
Handle
© D
isne
y
Tab Tab
Tab Tab
Tab Tab
A B
C D
E Fpage 1 of 5

DisneyJunior.com
© Disney
Handy Manny Toolbox
page 2 of 5
© D
isney
© D
isne
y
© D
isne
y©
Dis
ney
DisneyJunior.com
© Disney
Handy Manny Toolbox
page 3 of 5
© D
isne
y
© D
isne
y
© D
isne
y
© D
isne
y

DisneyJunior.com
© Disney
Handy Manny Toolbox
Glue
GlueCutCut
Cut Cut
FoldFold
Fold
FoldFold
Handle
Tab Tab
Tab Tab
Tab Tab
A B
C D
E F
page 4 of 5
Toolbox Instructions
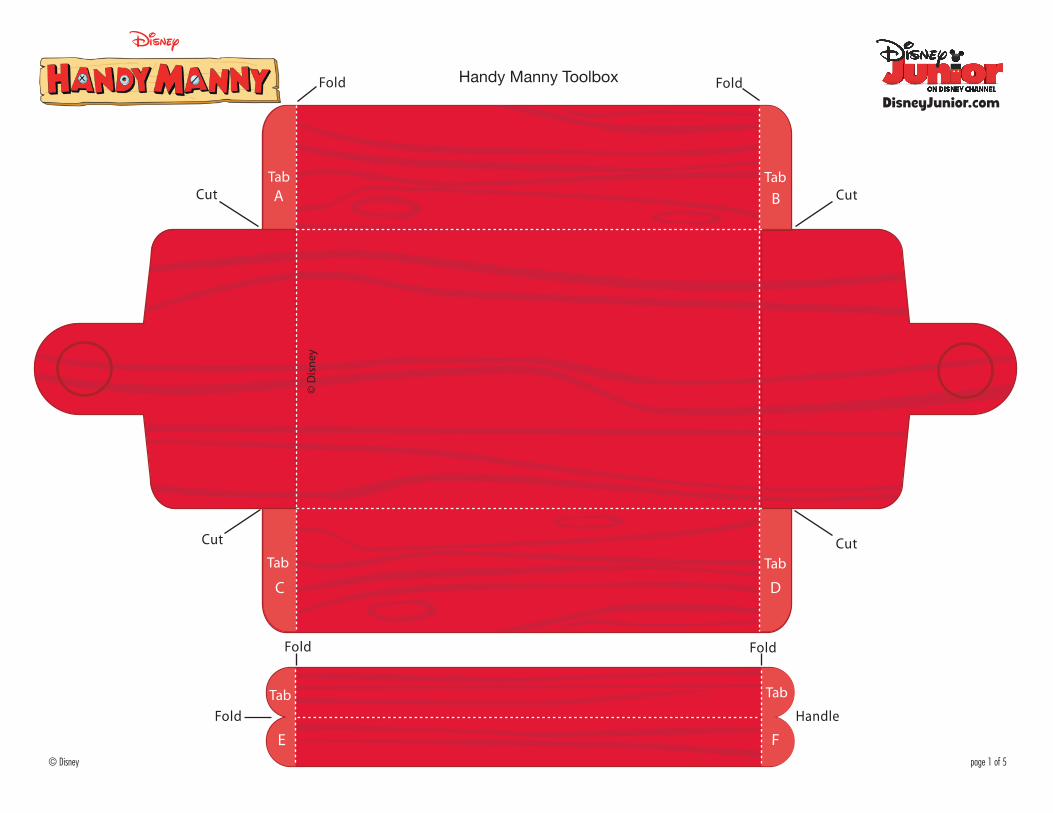
Step 1: Print out the Handy Manny toolbox and tools on cardstock or regular paper. Cut out the toolbox including the four slits indicated (two on each end of the box) and the handle.
Step 2: Fold the toolbox along the dashed white lines away from you so the red color is on the outside. Place glue on tab A and glue it to the inside of the end of the box. Place glue on tab B, and glue it to the inside of the opposite end of the box.
Step 3: Place glue on tabs C and D and glue them to the inside of the ends of the box.
Step 4: Cut out the handle and fold along the center white dashed line so the color is on the outside. Open the two halves and place glue on the white side of the handle. Refold the handle and press firmly.
Cutting is intended for grown-ups only.

DisneyJunior.com
© Disney
Handy Manny Toolbox
page 5 of 5
Toolbox Instructions
Glue
Step 5: Fold the end tabs of the handle marked E and F along the white dashed line. Place glue on the outer side of the tab and glue to the inside ends of the toolbox.
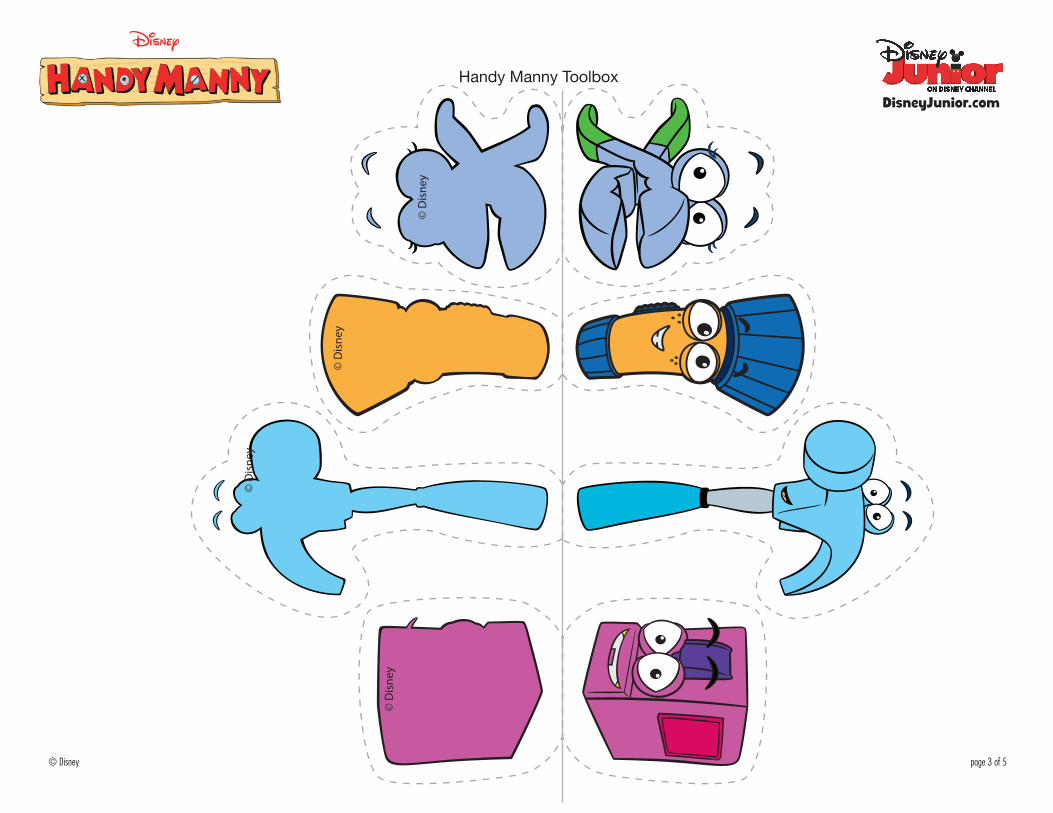
Step 6: Next, take a page with tools and fold it in half along the center grey line. Reopen the page and spread glue over half of the page (on the white side of the page).
Step 7: Refold the page and press down firmly. Let the glue dry, and then cut out each tool along the dashed grey lines. Leave each tool attached at the fold. Repeat this step with the second page of tools. Now you can place the tools in the toolbox and let the fun begin!