focus the world around us -...
TRANSCRIPT

Vikings ICL Key Stage 2
Vikings ICLKey Stage 2
FocusThe focus for this resource is Viking times. Throughout, children will develop an understanding of how people lived in Viking times and explore their legacy.
The World Around Us(aspects of history, geography and science and technology)
• Interdependence• Movement and Energy• Place• Change over Time

2

Vikings ICL Key Stage 2
1
This ICL provides suggestions for connecting learning across the curriculum, with a particular emphasis on The World Around Us (TWAU). This is because some teachers have told us that they can find it difficult to make meaningful connections between history and science and technology in the TWAU. Vikings are a popular topic among Key Stage 2 pupils, so we have used them as the context for this resource. As teachers work through the ICL, choosing ideas to use in the classroom, they will find that the opportunities to connect science and technology are pointed out. There is an emphasis on the importance of a practical approach to STEM learning in teaching science and technology.
There are eleven enquiry ideas to choose from:
1. Why did the Vikings leave their homeland?
2. How did the Vikings keep warm?
3. How did the Vikings dye their clothes?
4. How did the Vikings get food in the winter?
5. How did the Vikings get salt?
6. How long was a longship?
7. Design, build and test a Viking ship.
8. How much cargo can a longship carry?
9. What can skeletons tell us about the Vikings?
10. How do we know about the Vikings?
11. How did the Vikings protect themselves in battle?
There are extra materials to support teachers who have access to Minecraft software:
• CCEA STEM in Minecraft Viking World; and• CCEA Minecraft Quests
We have developed the STEM in Minecraft Ideas for Connected Learning (ICL) to help teachers deliver a flexible curriculum. The Minecraft activities are quests which are signposted within the ICL for teachers to use (in the CCEA Minecraft Viking World). We have carefully designed these activities to align to the curriculum so that pupils are applying learning through online gaming.
In the suite of support materials online, there is a set of resources called Getting Started, which features instructions on how to use Minecraft.
If you are sharing your STEM in Vikings activities through social media then don’t forget to tweet it to us!
@CCEA_info
#theworldaroundus
The Vikings
Throughout this ICL you will find references to Minecraft Quests which are available at www.ccea.org.uk/stemworks. The STEM Enquiries are available in the Resource section of this booklet.
MinecraftQuests
STEMEnquiries

2
Drama Learning IntentionsChildren are learning about:• how to use creative and imaginative role play to
develop their understanding of the world.
Music Learning IntentionsChildren are learning about:• listening and responding imaginatively to music;• different sounds, including vocal, body and
instrumental; and• creating sound effects to accompany myths.
Art and Design Learning IntentionsChildren are learning about:• joining techniques to help them to solve design
and constructional problems;• fabrics and how to construct them;• how to use natural dyes to decorate fabric;• how to manipulate clay in 2D and 3D (pinching,
coiling and slabbing); and• techniques for joining clay (scoring, moistening
and blending) and how to add a finish to work.
History Learning IntentionsChildren are learning about:• aspects of social, artistic, technological and scientific
developments in Viking times;• evidence from Viking times, making links between possible
causes and effects, and drawing conclusions from clues to the past;• different features of Viking society by identifying patterns and relationships;• Viking times by using sources of information to gain
knowledge;• things that have remained the same and things that have
changed since Viking times;• some of the causes and consequences of the Vikings in
Ireland; and• the different points of view that people had about Vikings in Ireland at that time.
Geography Learning IntentionsChildren are learning about:• distances between places by estimating and measuring as well as using compass directions;• directions and routes on maps;• natural and human features of Viking Scandinavia and Ireland;• the origins of Viking settlement in Ireland;• aspects of the environment and natural features in Scandinavia
and how these affected the movement of Vikings to Ireland; and• aspects of the lives of Vikings, on land and at sea.
Science and Technology Learning IntentionsTeachers will find references to learning in science and technology throughout the STEM enquiries in this resource.
Personal Development and Mutual Understanding Learning IntentionsChildren are learning about:• responsible approaches to road safety (use of helmets);• different types of families and communities in the past; and• influences on the views, feelings and behaviours of people in the past.
Opportunities to develop skills in Using Mathematics, Communication and Using ICT have been signposted throughout.
PDMU The ArtsThe WorldAround Us
Connecting the Learning Across the Curriculum

Vikings ICL Key Stage 2
3
Who Were the Vikings?Share a range of images that show various Viking roles, for example:
• male and female warriors;• blacksmiths;• farmers;• shipbuilders;• traders; and/or• children.
Organise the class into groups of three or four. Give each group an image and ask them to use their observation skills to engage in a talking and listening activity.
You can ask the children:
• Who is in the image?• Describe what else you see in the image. What does this tell you?• What do you like about the image? Why?• What do you think the image can tell us about
life at this time?• What do you think this person or people are
doing?• What do you think will happen next?• How does the image make you feel?• What do you think they are thinking/feeling/
saying? How can you tell?• What is the same as life today? What is different?• If you could ask this person or people three
questions, what would you ask?• How many great words can you as a group
come up with? How would you use these words to describe the image?
Explain that these images show Vikings or ‘Norsemen’ who originated in Scandinavia just over 1000 years ago, and came to settle in Ireland from 795AD–1100AD. Create a human timeline to visually represent how long ago the Vikings lived.
Use a map, globe or Google Earth to locate modern Scandinavia (Norway, Sweden and Denmark). Describe the physical features of the landscape. On the map, follow the journey, identifying the ocean routes from Scandinavia to Ireland and comparing the physical landscape here. Estimate and measure distances, and work out directions of the journey.
Explain to the children that the journey to Ireland could have taken 8–9 days, but if the weather was bad it could have taken a couple of months!
Create a 3D map of Scandinavia on a 60 cm x 60 cm base using a variety of materials, such as:• papier mâché• modelling clay• cardboard boxes• plastic containers• fabric.
‘Success criteria – the 3D map’ should include:
• the Kjolen mountains on the border between Norway and Sweden;
• the Baltic Sea;• the Atlantic Ocean;• the Sognefjord in Norway (the longest fjord in
Europe);• the Jelling stones in Denmark; and• the wide forests of Sweden.
Alternatively, create success criteria for a 3D map of Ireland. You may consider reducing the amount of criteria according to resources available and the learners’ ability.

4
Viking RolesUse the CCEA STEM in Minecraft Vikings World to carry out Quest 1: Viking Roles.
Pupils have the opportunity to create their own fully functioning society (similar to the early Vikings) by carrying out tasks such as farming and making bread.
Discuss how farming was one of the main occupations and how the temperature in parts of Scandinavia make farming life difficult.
Carry out STEM Enquiry 1 to examine further: Why Did the Vikings Leave their Homeland?
What Was Life Like as a Viking?Consider aspects of life as a Viking that pupils might still have questions about, for example:
• What was life like for Viking children? What games did they play?• How did they use runes?• What sort of clothes did they wear?• What food did they eat?
Use traditional and digital resources to further explore how Vikings lived. Ask pupils to create a timeline of a day in the life of a Viking and compare this to modern day. Discuss how technology has advanced, and how it has changed the way we live.
Invite pupils to suggest the materials Vikings used in order to make clothing (for example wool, leather, fur, and linen). Look at images of Vikings and discuss what they wore. Discuss the factors Vikings would have considered when making clothes (the availability of materials, the weather, and so on).
Carry out STEM Enquiry 2 to examine further: How Did the Vikings Keep Warm?
Explain to the pupils that even in Viking times, fashion was very important. Experiment with weaving skills by making a cardboard loom or using lollipop sticks and wool. Use a digital microscope to observe weaves in different fabrics.
Vikings loved bright red and blue clothes. The brighter the clothing, the greater the status was of the individual. Ask the pupils to think about how Vikings might have coloured their clothes.
Carry out STEM Enquiry 3 to examine further: How Did the Vikings Dye their Clothes?
Discuss with the class what they have learned about how the Vikings lived. Ask your pupils to research what and how Vikings celebrated by exploring the rich variety of Viking festivals. Research a festival, for example:

Vikings ICL Key Stage 2
5
• Jul, the celebration of the Norse New Year; or• Disting, the celebration of the changing of the
seasons (from winter to spring).
Find out about:
• the feasts that Vikings would have prepared for these celebrations; and
• the utensils Vikings would have used to cook their food.
Consider the following:
• Would the Viking diet be considered a healthy diet today?
• Compare a daily Viking menu with a typical menu today. What are the main similarities and differences?
Practise food preparation skills with the class by trying out some recipes that were used in Viking times, for example:
• pea soup• garlic mushrooms• berry pancakes/oatcakes.
Ask the pupils to use their senses to discuss the types of foods the Vikings prepared.
Explore ways in which Vikings preserved their food. Carry out:
STEM Enquiry 4: How Did the Vikings Get Food in the Winter?
STEM Enquiry 5: How Did the Vikings Get Salt?
Use the CCEA STEM in Minecraft Viking World to carry out Quest 2: Viking Celebration.
Pupils have the opportunity to explore how Vikings lived communally, using a longhouse for gatherings, meals and celebrations. Using this village, ask pupils to prepare a feast for one of the festivals you have researched.
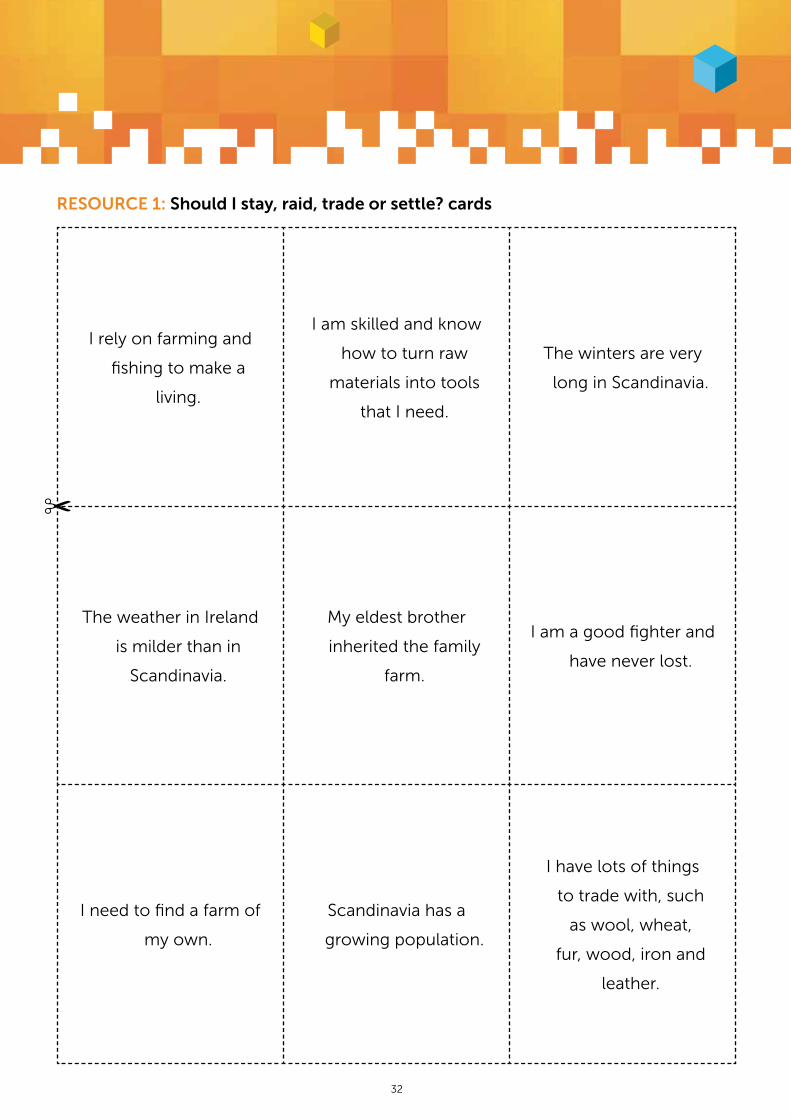
Should I Stay or Should I Go?Explain that 'Norse' was the name given to people living in Scandinavia during Viking times. In the summer, some Norse decided to go on ‘a Viking’, which meant exploring or raiding as a short-term means of earning a living. However, some Norse people decided to go on trading trips or to settle permanently in other lands, including Ireland. Invite the children to work in small groups to discuss the ‘Should I stay, raid, trade or settle in Ireland?’ statements below. Ask them to sort the statements into reasons to stay, raid, trade or settle. Ask them to decide which they would choose, and give reasons why. Ask them ‘Would age or gender make a difference to your decision?’
You could extend this activity by asking the pupils to use role play, such as hot seating or a conscience alley, to decide what they would do.
Should I stay, raid, trade or settle? (See Resource 1 for larger versions of these statements that can be cut-out.)
• I rely on farming and fishing to make a living.• I am skilled and know how to turn raw materials
into tools that I need.• The winters are very long in Scandinavia.• The weather in Ireland is milder than in Scandinavia.• My eldest brother inherited the family farm.• I am a good fighter and have never lost.• I need to find a farm of my own.• Scandinavia has a growing population.• I have lots of things to trade with, such as wool,
wheat, fur, wood, iron and leather.• They speak a different language in Ireland.• Many people in Ireland have Christian beliefs,
these are different to my beliefs.• Exploration would be an adventure.• My family are here in Scandinavia.• My family need me if other tribes attack.• Ireland has rich churches and monasteries with
precious objects and they are not well protected.• There is great farming land in Ireland.
Watch the clip Viking Settlers in Ireland at www.youtube.com to find out more.
6
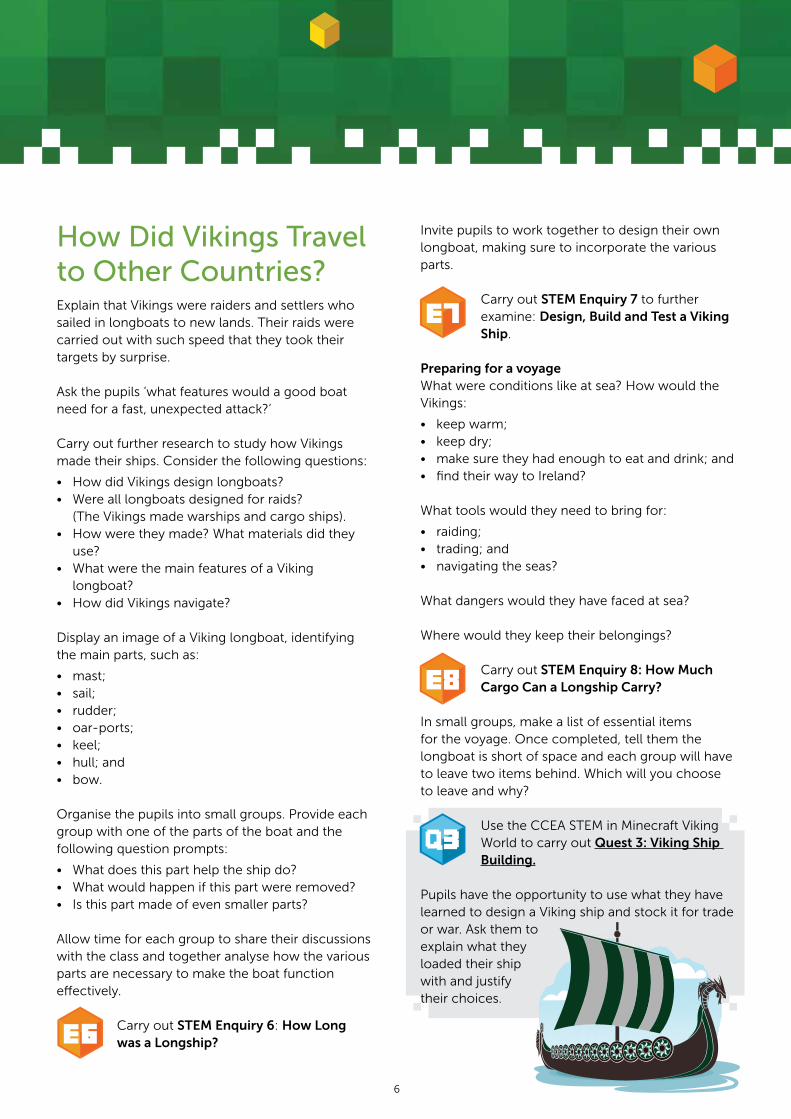
How Did Vikings Travel to Other Countries?Explain that Vikings were raiders and settlers who sailed in longboats to new lands. Their raids were carried out with such speed that they took their targets by surprise.
Ask the pupils ‘what features would a good boat need for a fast, unexpected attack?’
Carry out further research to study how Vikings made their ships. Consider the following questions:
• How did Vikings design longboats?• Were all longboats designed for raids? (The Vikings made warships and cargo ships).• How were they made? What materials did they
use?• What were the main features of a Viking
longboat?• How did Vikings navigate?
Display an image of a Viking longboat, identifying the main parts, such as:
• mast;• sail;• rudder;• oar-ports;• keel;• hull; and• bow.
Organise the pupils into small groups. Provide each group with one of the parts of the boat and the following question prompts:
• What does this part help the ship do?• What would happen if this part were removed?• Is this part made of even smaller parts?
Allow time for each group to share their discussions with the class and together analyse how the various parts are necessary to make the boat function effectively.
Carry out STEM Enquiry 6: How Long was a Longship?
Invite pupils to work together to design their own longboat, making sure to incorporate the various parts.
Carry out STEM Enquiry 7 to further examine: Design, Build and Test a Viking Ship.
Preparing for a voyageWhat were conditions like at sea? How would the Vikings:
• keep warm;• keep dry;• make sure they had enough to eat and drink; and• find their way to Ireland?
What tools would they need to bring for:
• raiding;• trading; and• navigating the seas?
What dangers would they have faced at sea?
Where would they keep their belongings?
Carry out STEM Enquiry 8: How Much Cargo Can a Longship Carry?
In small groups, make a list of essential items for the voyage. Once completed, tell them the longboat is short of space and each group will have to leave two items behind. Which will you choose to leave and why?
Use the CCEA STEM in Minecraft Viking World to carry out Quest 3: Viking Ship Building.
Pupils have the opportunity to use what they have learned to design a Viking ship and stock it for trade or war. Ask them to explain what they loaded their ship with and justify their choices.

Vikings ICL Key Stage 2
7
Vikings in IrelandFind out about some of the Viking raids in Ireland, for example Rathlin Island, Nendrum, Lough Erne, and so on.
Discuss why Irish monasteries were often targets. Share the following poem, Tonight I fear Not the Vikings, which was written in manuscript by an Irish Monk in County Down. You can find it at www.irisharchaeology.ie
Invite the children to think about the poem:
• What do you notice?• Do the words allow you to imagine the feelings
of the monk in the poem? Which words?• What is the structure of the poem?
In pairs, ask the children to write a second verse of the poem using the same tone and poetic structure.
Use role play, for example hot seating, freeze frame, conscience alley and so on to develop empathy from different perspectives. Use thought and speech bubbles to consider different views.
Consider re-enacting a Viking raid and use captured images/footage to create a comic strip or a movie. Create a TV or radio news story about a Viking raid.
Look at a world map to see how far Vikings travelled. Explore the types of items Vikings would have used to trade, including imports and exports. Simulate a Viking trading game which you can find at www.history.org.uk
Use the CCEA STEM in Minecraft Viking World to carry out Quest 4: The Raid.
Pupils have the opportunity to prepare for a battle. In the preparation time they should make armour, swords, and bows and arrows, and plan a raid. Ask them to use the experience of battle to write an account from both perspectives about the raids.
Provide images of Viking artefacts that have been discovered by archaeologists. Ask the pupils to use their imagination to think up plausible explanations
for what the objects might be, what they are made from, and what they were used for. Compare this with archaeologist’s explanations.
Play a game: Provide both imaginary and real explanations to the class. Have the class vote on which they believe before revealing the real one.
Carry out STEM Enquiry 9 to examine further: What Can Skeletons Tell Us About the Vikings?
Use the CCEA STEM in Minecraft Viking World to carry out Quest 5: Mission to Rathlin Island.
Pupils have the opportunity to visit Rathlin Island to carry out an archaeological dig.
Carry out STEM Enquiry 10: How Do We Know About the Vikings?
Using art and design, choose different materials and mediums to model some artefacts and create a classroom museum display. Label the artefacts on display and consider writing an information guide for museum visitors. Items might include:
• jewellery• clothing• a leather bag• coins• cutlery• bowl• jug• helmet• shield.
Hold a class investigation on the legacy of Vikings in Ireland, including:
• language, such as place names, family names and days of the week (both in English and Irish);
• the introduction of coins;• the introduction of rabbits;• the concept of towns;• inventions; and• widespread trade.

8
Explain to the class that much of the written evidence on the Vikings in Ireland came from the Irish monks. Discuss any bias that the monks may have had in their telling of these stories.
Produce a TV documentary or radio podcast from a Viking perspective that disputes the claim that all Norsemen were vicious pillagers!
Look at a selection of images of Viking helmets (horned and not horned). Ask pupils to discuss whether they thought Vikings wore horned helmets or not and ask them to justify their choices. Then explain that there is very little archaeological evidence of Viking helmets, but what little there is suggests that Viking helmets were not horned. Horned helmets would have been impractical and it is thought that they are as a result of artists’ impressions years after the Vikings existed.
Compare Viking helmets to helmets today and discuss the importance of wearing a helmet when cycling.
Carry out STEM Enquiry 11 to examine further: How Did the Vikings Protect Themselves in Battle?
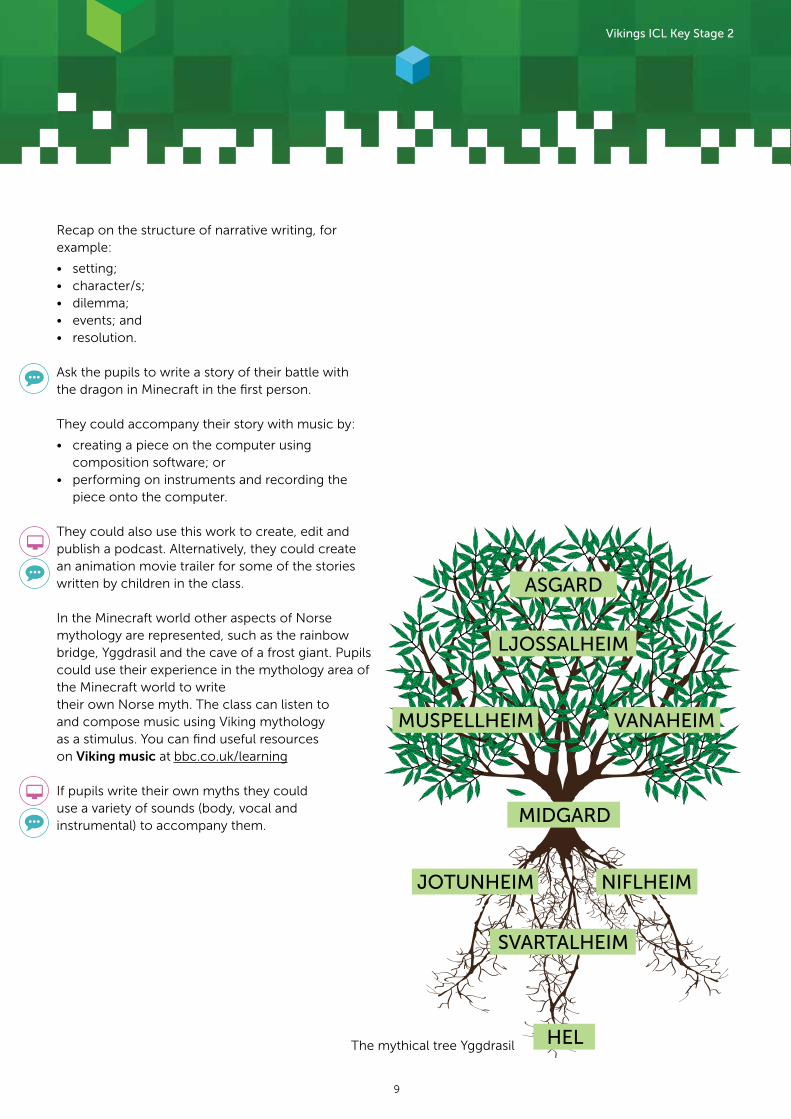
Viking MythologyVikings believed that the universe was made up of many different worlds, all connected by the mythical tree Yggdrasil. Find an image online of Yggdrasil and its connected worlds. Use this image to point out:
• Asgard, which was said to be the land of the gods;
• Midgard, the land of the humans;• a rainbow bridge called Bifrost linking Asgard and
Midgard; and• Niflheim, land of darkness, ice, and fire.
The Vikings believed that Niflheim was the home of Nidhogg, an evil dragon that was said to gnaw on the roots of Ygdrassil. Read some stories from Norse mythology.
Use the CCEA STEM in Minecraft Viking World to carry out Quest 6: Viking Mythology.
Ask players to visit the village in the mountains and prepare for a battle. They should make armour, build village walls of wood and stone, and make swords and bows and arrows in the preparation time and defend it when the Nidhogg appears.
Use freeze frame to explore the emotions evoked in the Minecraft activity, including facial expressions, gestures, and movements. Help the children to develop a bank of vocabulary to describe the emotions. Encourage them to think of words to describe as many of the senses as possible in their list, including sight, sound, touch, taste and smell. Choose a selection of words and practise using them in a simple sentence, then develop it further to make it more interesting.
Consider watching the movie How to Train Your Dragon (Cert: PG) and discuss some of the themes such as courage and teamwork. Compare the movie to the book. Write a character description or a review of the movie/book. Analyse the movie trailer, discussing the features that make it effective.
Vikings ICL Key Stage 2
9
Recap on the structure of narrative writing, for example:
• setting;• character/s;• dilemma;• events; and• resolution.
Ask the pupils to write a story of their battle with the dragon in Minecraft in the first person.
They could accompany their story with music by:
• creating a piece on the computer using composition software; or
• performing on instruments and recording the piece onto the computer.
They could also use this work to create, edit and publish a podcast. Alternatively, they could create an animation movie trailer for some of the stories written by children in the class.
In the Minecraft world other aspects of Norse mythology are represented, such as the rainbow bridge, Yggdrasil and the cave of a frost giant. Pupils could use their experience in the mythology area of the Minecraft world to write their own Norse myth. The class can listen to and compose music using Viking mythology as a stimulus. You can find useful resources on Viking music at bbc.co.uk/learning
If pupils write their own myths they could use a variety of sounds (body, vocal and instrumental) to accompany them.
ASGARD
LJOSSALHEIM
SVARTALHEIM
HEL
MUSPELLHEIM VANAHEIM
JOTUNHEIM NIFLHEIM
MIDGARD
The mythical tree Yggdrasil
10
Vikings: Web Links
Appearance
ScenicNordic: What Vikings really looked like
General
Cross-disciplinary Studies of Migration of Irish,
Hiberno-Norse and other Gaelic-speaking pop-
ulations in the Viking Age
The National Museum of Denmark: The Viking
Age
The Viking World Wiki
ScienceNordic: Immigration in the Viking Era
The Viking Answer Lady: A Timeline of
Scandinavian History Centering Upon the Viking
Age
YourIrish: History of Vikings Invading Ireland
Viking Network Ireland: The Viking Age In
Ireland
Lough Neagh: The Vikings are Coming
National Trust: Strangford Lough through the
ages: Vikings
Cruíthní: Vikings
University College Cork: The Vikings and Ireland
(PDF)
In Armagh: The Search for Vikings
Armagh County Museum: The Vikings and
Armagh (PDF)
Review of Craigavon Historical Society:
The Danes of Lough Neagh
The Guardian: Danes say sorry for Viking raids
on Ireland
Strangford Lough: Nendrum
YouTube: The Vikings in Ulster
YouTube: Viking Settlers in Ireland
How Vikings Lived
History on the Net: Life on a Viking Farm
The Viking Museum: Life in the Viking Times
BBC Primary History: Vikings: Teacher’s
Resources
Loving Learning: Viking Clothes
History on the Net: The Viking Age
Mythology
BBC: Viking Beliefs and Stories
Recipes
Ancient History Et Cetera: Viking Recipes (PDF)
The Viking World Wiki: Traditional Viking Foods
The web links in this resource were active at the time of publishing. CCEA accepts no responsibility or liability for any material supplied by or contained in any of the linked websites and does not necessarily endorse the views expressed within them. We cannot guarantee that these links will work all of the time and we have no control over the availability of the linked pages

Vikings ICL Key Stage 2
11
STEM
ENQUIRIES

12

Vikings ICL Key Stage 2
13
Equipment
Activity 1: Acidic soil Activity 2: Temperature Activity 3: Sandy Soil
• three equal shallow containers or saucers
• cress seeds• kitchen paper• vinegar• wheat/grass seed
• three equal shallow containers or saucers
• ordinary garden soil and peat bog soil
• seeds such as peas, cress, beans, tomatoes, wheat
• two litre plastic bottle with the bottom cut off
• two equal shallow containers or saucers
• garden soil• sand• seeds
STEM Enquiry 1: Why Did the Vikings Leave their Homeland?
Health and Safety
Always follow the health and safety policy in school and carry out a risk assessment.
Background Information
The main reason Vikings left their homes was to find more and better land for farming. In Viking tradition, the eldest son would inherit the family farm, so the younger brothers had the choice of either working for their elder brother, or making their own living independently. However, Viking land was not particularly good for farming. Sweden was covered in forests, Norway was very hilly, and Denmark’s soil tended to be very sandy.
The low temperatures in these countries mean that the growing season was short, and as much of the bedrock in Scandinavian countries tends to be metamorphic or igneous, the soil is often acidic.
How do different conditions affect the germination or growth of plants?
Learning Intention
Children are learning that:• plants can be influenced by seasonal or
environmental change.
14
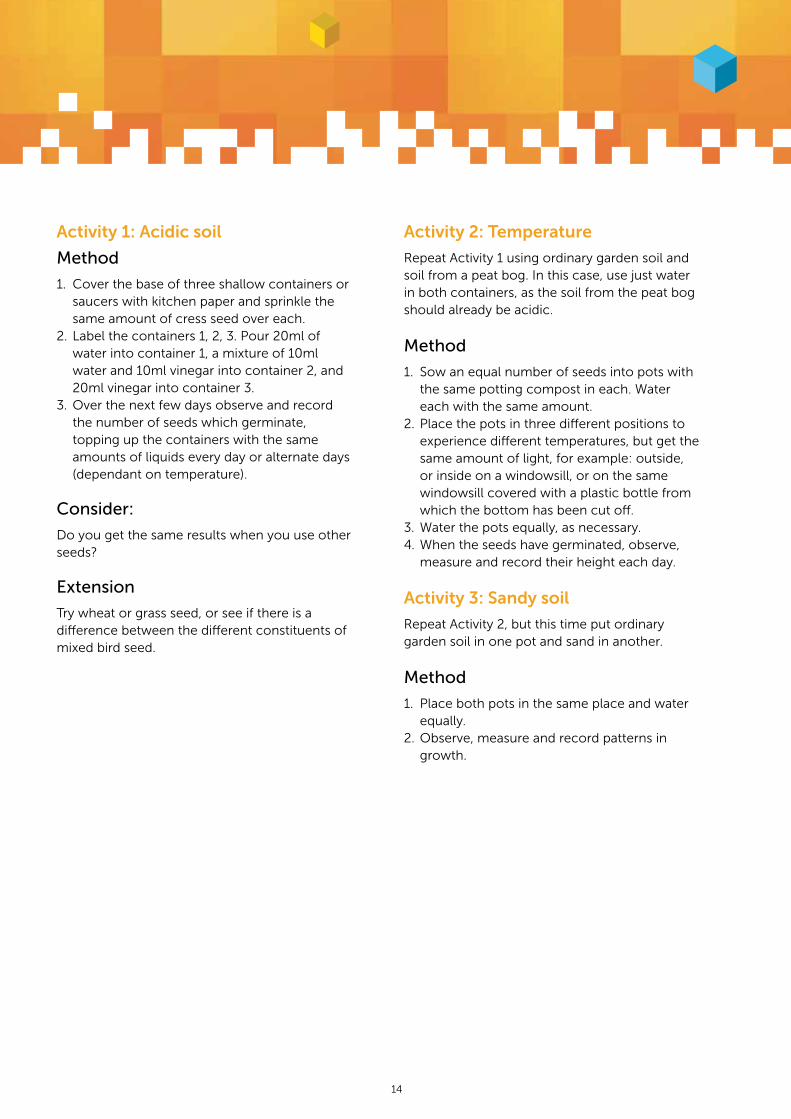
Activity 1: Acidic soil
Method
1. Cover the base of three shallow containers or saucers with kitchen paper and sprinkle the same amount of cress seed over each.
2. Label the containers 1, 2, 3. Pour 20ml of water into container 1, a mixture of 10ml water and 10ml vinegar into container 2, and 20ml vinegar into container 3.
3. Over the next few days observe and record the number of seeds which germinate, topping up the containers with the same amounts of liquids every day or alternate days (dependant on temperature).
Consider:
Do you get the same results when you use other seeds?
Extension
Try wheat or grass seed, or see if there is a difference between the different constituents of mixed bird seed.
Activity 2: Temperature
Repeat Activity 1 using ordinary garden soil and soil from a peat bog. In this case, use just water in both containers, as the soil from the peat bog should already be acidic.
Method
1. Sow an equal number of seeds into pots with the same potting compost in each. Water each with the same amount.
2. Place the pots in three different positions to experience different temperatures, but get the same amount of light, for example: outside, or inside on a windowsill, or on the same windowsill covered with a plastic bottle from which the bottom has been cut off.
3. Water the pots equally, as necessary.4. When the seeds have germinated, observe,
measure and record their height each day.
Activity 3: Sandy soil
Repeat Activity 2, but this time put ordinary garden soil in one pot and sand in another.
Method
1. Place both pots in the same place and water equally.
2. Observe, measure and record patterns in growth.

Vikings ICL Key Stage 2
15
Health and Safety
Always follow the health and safety policy in school and carry out a risk assessment.
Background Information
The countries from which the Vikings came had a climate which is colder than ours. They did not have electricity or central heating, relying only on open fires and their clothing to keep them warm.
Are some materials better at keeping us warm than others?
Learning Intentions
Children are learning that:• all materials come from the earth, the air, the
water, or plants and animals; and• some materials are better insulators than others.
Key Questions
• Do certain fabrics keep you warmer than others?• Which fabrics would have been available to
people in Viking times?• Do you think our modern fabrics are better than
the ones which the Vikings had?
Equipment
• small plastic bottles• elastic bands• thermometers or data loggers• selection of natural fabrics such as wool, linen
and leather.
Method
1. Use small plastic bottles to represent people.2. Cover each of them with a different fabric, using
elastic bands to hold the fabric in place.3. Keep one bottle uncovered as a control.4. Fill each bottle with the same amount of warm
water.5. Use either thermometers or data logger
temperature probes to measure the temperature in each bottle at five minute intervals.
6. Observe and record measurements to see which fabric keeps the water warm for the longest.
Consider:
Use the collected data for data handling activities in numeracy, for example ‘Why do all the bottles finally end up at the same temperature?’(room temperature).
Extension
• Repeat activity using modern fabrics such as nylon, polyester, acrylic and so on.
• Observe different fabrics under a microscope to explore why some materials are better insulators than others.
For the teacher:
The Vikings made their clothes from natural fabrics such as animal skins, wool, fur and linen. Natural fabrics such as wool tend to have a lot of air pockets between the fibres and as air is a good heat insulator, more heat is trapped. Our more modern fabrics tend to be smoother, with fewer air spaces and are therefore not such good insulators. They also tend to be better conductors of heat than the natural fabrics.
STEM Enquiry 2How Did the Vikings Keep Warm?

16
Health and Safety
Always follow the health and safety policy in school and carry out a risk assessment.
Due to the fact that you will use boiling water, you should carry this out as a teacher’s demonstration. Although it is not complicated, it is messy, so ensure that clothes and surfaces are protected before you start.
Background Information
The Vikings dyed woollen and linen fabrics and yarns using natural materials, although their colour range was limited.
The fabric you are going to dye needs to be treated with a mordant to stop the colour from just washing straight out of the fabric again. You can buy chemical mordants, but two which are safe to use in the classroom are vinegar and salt. Use one part of salt to every 16 parts of cold water when dying with berries. Use one part of vinegar to every four parts of cold water when using other plant parts.
Learning Intentions
Children are learning that:• changes in materials can be temporary or
permanent.
Equipment
• possible suitable plants for making natural dyes such as dandelion flowers, kale or red cabbage leaves, blueberries, blackberries, tea, turmeric powder or red onion skins (there are many more)
• large saucepan• vinegar or salt• squares of a natural material (cotton, preferably
unbleached, or lengths of woollen yarn works best)
• aprons (optional) and paper towels• wooden spoon• tongs (optional).
Method
Step 1: Adding a Mordant (fixative)
1. Wash your fabrics. While they are still damp, put them in a large saucepan which already contains the mordant. Cover with water.
2. Bring to the boil and simmer for an hour.3. Remove the saucepan from the heat, let
everything cool down, remove the fabric and rinse in cold water.
Step 2: Dyeing fabric
1. Chop or crush your plant material.2. Add plant material to a pot of water and boil for
anything up to an hour to extract the dye.3. Turn off the heat and let it cool slightly. Strain the
plant material. Add your damp fabric.4. Leave the fabric soaking in the dye solution
overnight.5. Rinse the fabric in cold water and leave to dry.
Extension
• Investigate other plant materials to see which would be suitable for dyes. To do this, add the crumpled material to a transparent container, add hot water, stir and leave to see how much colour comes from the plant.
• Research which plants the Vikings used and what colours they were able to create.
STEM Enquiry 3How Did the Vikings Dye their Clothes?

Vikings ICL Key Stage 2
17
Health and Safety
Always follow the health and safety policy in school and carry out a risk assessment.
Background Information
Most Viking people had to rely on preserving food to survive the winter months. They did not have today’s techniques such as refrigeration, freeze drying and canning, so they used the following methods:
• drying (grain, fruit, fish and meat);• pickling (using an acidic liquid such as vinegar,
soured whey or brine on foods such as soft vegetables and meat);
• cold storage (similar to today, used for hard vegetables such as onions, carrots and turnips); and
• salting (covering foods such as meat, cheese and soft fruit in a thick layer of salt to keep bacteria from entering: as the salt draws the water from the food, it becomes immersed in brine, which helps to preserve it).
Poorer Vikings could not always afford salt, but they could sometimes get it from coastal regions and salt mines.
Drying food
Learning Intentions
Children are learning about:
• how changes in materials can be temporary or permanent; and
• how decay can be accelerated or slowed down.
Key Questions
• Do you think there is water inside foods such as fruit and vegetables? How do you know?
(Think of dried fruit such as raisins.)• Which fruits do you think would have the most
water?• What would happen to the weight of the fruit if
the water was taken away?• How will the fruit look and feel when there is no
water in it?
Equipment
• apples (it is better to use large ones as they shrink considerably: windfall apples are fine as small amounts of bruising can be cut off before drying)
• salt (you need large amounts, so choose the cheapest)
• plastic containers (deep enough to hold the apple and allow it to be covered with the salt)
• blunt knives• scales, bamboo skewers, other fruits, baking
soda (optional)• lemon juice (paint the apple with lemon juice
and pat dry before carving; this prevents it from going brown, but it is not essential).
Method
1. Peel an apple. Leave it whole or cut into slices.2. Put a layer of salt in a plastic container.3. Place the apple in the container and cover it
completely with salt (paint it first with lemon juice to avoid it turning brown).
4. Leave in a warm dry place. (Drying can take up to four weeks, depending on the room temperature and the size and freshness of the apple).
5. If the salt appears very damp or water collects, replace with fresh salt. (The wet salt can be dried out to use again.)
6. When completely dry, the apple will have shrunk in size and feel ‘leathery’ and a lot lighter.
7. Brush off any salt clinging to it. If kept dry, it should last for months, if not years.
STEM Enquiry 4How Did the Vikings Get Food in the Winter?

18
Alternative Approaches
• Weigh the apples before and after the activity to find what percentage of the fruit was water.
• Try different varieties of apple. Do they have varying amounts of water in them?
• Instead of using just salt, a mixture can be made of approximately three parts salt to one part baking soda (sodium bicarbonate).
• Use a variety of fruits to see which contain the most water.
• Cut the top off a tomato. Scoop out the insides. Pack and surround with the salt/bicarbonate mixture and leave to dry as before. You will be left with a hollow, leathery sphere.
• Preserving runner beans in salt is a method which has been used right up until the 1960s. Use a plastic or glass container, not china. Start with a layer of salt at the bottom and then add alternate layers of sliced beans and salt, tapping the container to ensure there are no gaps. Put a lid on the container and keep in a cool, dark place. To use the beans, simply take out what you need, rinse well in cold water and cook as usual.
Extension
• Prepare a recipe such as vegetable garden risotto.
• If you have a school garden, consider growing and harvesting vegetables.
Useful Information
Approximate percentage of water in fruit:
• tomato: 94• strawberry: 92• apple: 84• orange: 87• grape: 8.

Vikings ICL Key Stage 2
19
Health and Safety
Always follow the health and safety policy in school and carry out a risk assessment.
Background Information
The Vikings needed salt to preserve food for the winter months. They could get salt from sea water or salt mines. It would not have been available to poorer families or those who lived inland.
Learning Intention
Children are learning about:• how changes in materials can be temporary or
permanent.
Equipment
• salt• teaspoons• beakers or glasses• warm water• shallow containers or saucers.
Preparation
You can carry out this activity with actual sea water, but the amount of salt obtained will not be as impressive as using a concentrated salt solution.To make this, give each group of pupils a container of very warm water. They then add spoonfuls of salt, stirring well between each spoonful, to ensure that the salt has completely dissolved. Eventually no more salt will dissolve but will settle at the bottom of the container. The resulting solution is then said to be saturated.
Method
1. Pour a thin layer of this salt solution into two shallow containers.
2. Leave one on a warm, sunny windowsill or above a radiator. Put the other somewhere cooler.
3. Observe the formation of the salt crystals, in each dish, over the next couple of weeks.
4. Use magnifying glasses or microscopes to look at them closely.
ConsiderWhat are the similarities and differences between them? (Salt crystals are mainly cuboid.)
Alternative Approaches
1. If the containers are different sizes or shapes, what (if any) difference does it make to the water evaporation?
To test this, pour equal amounts of water into three containers, such as a shallow dish or saucer, a bowl or beaker, and a bottle. After one or two weeks measure the volume of water in each container. Note: water evaporates more quickly from a wide container.
2. Mined salt comes in the form of rock salt, which you can buy. You can crush this using a pestle and mortar, or a rolling pin and plastic bag. Pour warm water onto it, stir, and leave for a short time before carrying out the first investigation.
STEM Enquiry 5How Did the Vikings Get Salt?
Large crystals,grown slowly
Small crystals,where there was
quick evaporation of water

20
Health and Safety
Always follow the health and safety policy in school and carry out a risk assessment.
Background Information
The Vikings were expert ship builders. They designed their ships to be able to sail in rivers, fjords and the sea. Their largest, fastest ships were called longships, which they used for exploring and fighting. They were about 30 m long and 5 m wide.
Activity 1: Estimation and measure
Learning Intentions
Children are learning how to:
• review their work and check for accuracy;• use appropriate mathematical language to
discuss their work and explain their thinking; and• estimate and measure length, working to an
appropriate degree of accuracy.
Equipment
• various measuring devices such as metre rulers, trundle wheels, tapes and string.
Activity
1. Take the class outside or into the assembly hall with a variety of measuring devices.
2. Ask the pupils to work in groups of two or three.3. Ask each group to decide where 30 m is from a
fixed starting point.4. Invite a representative from each group to walk
to and stand at the point they have decided. Another member of each group should then measure out the actual 30 m to see how close their estimate was.
5. Bring the class together and mark out the length of it with string. (Keep the string for Activity 4).
6. Discuss and compare the estimates with the actual measurement. (Keep a record of each group’s estimates for Activity 4).
7. Talk to the pupils about the actual size of a Viking longship:– Would a Viking longship fit into the classroom?– How long is a car? How many of these cars
would fit into a longship?– How long is a bicycle? How many of these
bikes would fit into a longship?– How many of their paces fit into a longship?
Is this the same number for everyone in their group?
Activity 2: Plan drawing and scale
Learning Intentions
Children are learning how to:
• use appropriate mathematical language to discuss their work and explain their thinking;
• decide how an activity might be approached and compare their approaches with others; and
• understand and use scale in the context of simple drawings.
Equipment
• centimetre squared paper, rulers• various measuring devices such as metre rulers,
trundle wheels, tapes and string.• one copy of Resource 2 for each group (plan
view of a Viking longship).
Activity
1. Look at images showing Viking longships. Talk about the shape of the ships.
2. Ask the pupils to get into their groups from the previous activity.
3. Give each group centimetre squared paper and rulers.
4. Remind the pupils that Viking longships were typically 30 m long and measured about 5 m at their widest point.
5. Ask each group to work together to draw a plan for a longship on the squared paper.
STEM Enquiry 6How Long was a Longship?

Vikings ICL Key Stage 2
21
6. Talk to the pupils about what they took into account when drawing the plan:– What were the challenges?– How did they solve these problems?– How well do they think their plan turned out?– Discuss plan features such as scale, accuracy
and detail.7. Give pupils the sample longship plan (Resource 2). Ask pupils to work out what scale
has been used. (Remember that the length is 30 m and the widest point is 5 m).8. They should add the scale to the bottom of the
plan using a standard format. (Keep Resource 2 with the scale marked on it for Activity 3).
Activity 3: Finding the area
Learning Intentions
Children are learning how to:
• use a range of appropriate mathematical techniques;
• estimate area of shapes by counting squares; and• divide whole numbers using a range of mental,
written and calculator methods.
Equipment
• copies of Resource 2 from Activity 2• calculator, if required.
Activity
1. Ask the pupils to get into their groups from the previous activity.
2. Distribute the Viking longship plan from Activity 2.3. Ask each group to estimate the area of the ‘real
life’ longship. Remind them of the scale they marked on the plan in Activity 2.
4. Talk to the pupils about how they estimated the area:– What worked well?– What were the challenges?– How did they solve these problems?– How accurate do they think their estimation is?– Discuss the rule that any square that is half or
more than half inside the longship should be counted as a whole square.
– Ask them to recheck their estimation and compare outcomes across the class.
5. Ask the pupils to agree as a class on what the area of a typical Viking longship would be, and record this on the bottom of the plan. Tell the pupils that it was common for 60 Vikings to be on board one longship at any given time!
6. Ask them to calculate the area available for each Viking to live on board.
7. Discuss how the pupils calculated the area for each Viking:– Are they pleased with the outcome?– What were the challenges?– How did they solve these problems?– Did everyone in the class agree?
8. Ask the pupils to agree as a class on the size of the area available for each Viking and record this on the bottom of the plan. (Keep copies of Resource 2 with the scale and the areas marked on them for Activity 4).
Activity 4: Estimation and measure
Learning Intentions
Children are learning how to:
• use appropriate mathematical language to discuss their work and explain their thinking;
• decide how they might approach an activity and compare their approaches with each other; and
• estimate and measure length, working to an appropriate degree of accuracy.
Equipment
• string and estimates from Activity 1• copies of Resource 2 from previous activities• chalk or skipping ropes to mark the outline of the
longship• schoolbags.
Activity
1. Take the class outside or into the assembly hall with the equipment.
2. Tell the pupils that they are now going to repeat part of Activity 1, when they estimated and then measured where 30 m is from a fixed starting point.
3. Encourage them to reflect on their previous experience: how many paces in 30 m? Ask them to plan how they will approach this task second time around.

22
4. Ask for a volunteer(s) to estimate where 30 m is from a fixed starting point.
5. Give another volunteer one of the strings from Activity 1.
6. Ask the pupils to compare the estimates with the actual measurement:– How accurate was their estimate this time?– Was their estimate closer than during Activity 1?– Why do they think this is?
Ask the class to work together to mark the outline of the whole longship using the chalk or skipping ropes. Remind them to review the scale and area marked on Resource 2.
7. Talk to the pupils about how they marked the outline:– Did their outline look like the plan on Resource 2?– Do they need to make any changes?– What worked well?– Were there any challenges?– How did they solve these problems?– Did everyone in the class agree?
8. Encourage the whole class to get ‘on board’ the longship with their school bags (to represent the personal possessions that each Viking would have brought with them).
9. Discuss with the pupils how cramped it would have been on board and remind them that up to 60 adult Vikings would have been there at one time.

Vikings ICL Key Stage 2
23
Health and Safety
Always follow the health and safety policy in school and carry out a risk assessment.
What ship design features will ensure a fast and unexpected Viking raid?
Learning Intentions
Children are learning that:
• force is needed to make an object move, change speed or change direction; and
• energy is the ability to make things work.
Equipment
• 8–10 lollipop sticks• 1–2 drinking straws• one sheet of cardboard• polystyrene food trays• materials for making a sail (cardboard, fabrics,
paper and so on)• masking tape• adhesive putty/modelling clay• glue gun/glue• scissors• plastic container with water (for design testing)• materials to decorate the ship.
Activity
1. Ask the pupils to work in groups of three or four.2. Explain that they are to take on the role of Viking
shipbuilders, responsible for designing a ship for a planned raid.
3. Discuss with the class what makes an effective longship to generate a shared set of success criteria, for example:
– Is it waterproof?– Is it lightweight?– Does the design include a hull, keel, mast, sail
and rudder?– Can the ship travel through narrow channels?– Is it fast?– Does it use wind power?– Does it instil fear?
Explain to the pupils that they can only use the materials you have provided.
4. Give each group time to plan their ship designs. Remind them to refer to the success criteria and equipment as they plan. Once each group is happy with their design they should build it, testing it as they go along to allow for changes to be made.
5. Ask each group to present their design to the rest of the class and discuss how they met the success criteria.
6. Test the design of each boat using, for example, a small paddling pool. Place objects in the water to create narrow routes. Simulate the wind by blowing the boat.
7. Encourage pupils to consider what they would do differently to improve their design.
STEM Enquiry 7Design, Build and Test a Viking Ship

24
Health and Safety
Always follow the health and safety policy in school and carry out a risk assessment.
Background Information
The Vikings had two main types of ship. Longships were mainly warships while the shorter and wider knarrs were mostly used as merchant ships.Longships were up to 30 m long and would have had approximately 24 to 32 sets of oars. Voyages would not have been pleasant for those on board as the ships were completely open. As well as personal belongings, Vikings transported weapons, food and water in the ships.
Learning Intentions
Children are learning that:
• a push or pull is known as a ‘force’, and force is needed to make an object move;
• if the downward force on a boat is larger than the upward push of the water, then the boat will sink; and
• the shape of a boat is as important as the material used to build it.
Equipment
• shallow containers*• marbles or similar for cargo (you will need quite
a lot as even quite small containers can carry about 20; do not use beads, as they are too light)
• scrap materials such as card, paper, lollipop sticks, matchsticks, plasticine, playdoh, blu tac, elastic bands, drinking straws and so on
• tanks or bowls• water.
* These can be from packaging or you can create them using plasticine or aluminium foil, shaped round the base of a plastic box or wooden brick. Make them no longer than about 6 cm and they must, of course, all be the same.
Activity
1. Ask the pupils to work in groups of two or three.2. Give each group an identical container to
represent a boat and marbles to use as cargo.3. Ask each group to predict how many marbles
they think their boat will hold before sinking.4. Ask them to place their boat in a tank of water
and add marbles, one at a time, into their boat. Pupils will find that the marbles quickly roll to one end and the boat sinks when it contains only a few.
Extension
Ask the pupils to find a way to add as much cargo as possible to their ship, using anything they can think of from the classroom to make this possible.Explain the following ground rules to the pupils at the start:
• They can load the ship only when it is floating.• They cannot hold the ship while they are loading
it.• They must load the cargo one piece at a time.• They cannot add anything to the outside of the
ship.
STEM Enquiry 8How Much Cargo Can a Longship Carry?

Vikings ICL Key Stage 2
25
Health and Safety
Always follow the health and safety policy in school and carry out a risk assessment.
Background Information
Viking skeletons have been discovered and archaeologists can get a lot of information from them:
• Teeth can help us to determine age. If teeth are worn down, it indicates that the person’s diet contained a lot of hard foods.
• Bones can also help to determine age. How worn the bones look help us to estimate how old the person was.
• Injuries can tell us about the cause of death, previous accidents, battle injuries or illness.
Learning Intentions
Children are learning how to:
• estimate and measure length, working to an appropriate degree of accuracy;
• investigate patterns and relationships, using their findings to make predictions; and
• investigate general statements to see if they are true.
Activity 1: Do taller people have bigger feet than shorter people?
1. Ask the pupils to arrange themselves, with their backs to a wall, according to height (you can do this inside or outside).
2. Starting with the shortest pupil, ask them to shout out their shoe size. With a few exceptions, they should see that the taller the person, the longer their feet are.
Activity 2: Can an archaeologist work out the height of a person by knowing how big their foot was?
Let pupils work in small groups to try out their own ideas that they come up with, or facilitate the following method:
• Using appropriate tools, measure the length of each person’s foot, the distance from the ground to their hip bone, and their height.
• Measure to the nearest centimetre. • Next, record measurements into a table. • Is there a pattern? (It might be necessary to
round the numbers up or down).
For the teacher:
An adult’s height is approximately seven times the length of his or her foot. The distance from the ground to your hip bone is approximately four times the length of your foot. However, bear in mind that children’s body proportions are slightly different to those of adults, as they have not finished growing.
Activity 2 can also be used if the class is looking at myths and legends which feature a giant or a dragon. You can invite the pupils to ‘discover’ enormous footprints in the school grounds. You can create these using either a muddy path or paper/card. After predicting the height, the children can then use the method they have learned in Activity 2 to work out the creature’s height.
STEM Enquiry 9What Can Skeletons Tell Us About the Vikings?

26
Activity 3: Can an archaeologist determine height from a partial skeleton?
1. Ask each pupil, working with a partner, to measure their height.
2. They should then measure the distance from the tip of the middle finger on one hand to the tip of the middle finger on the other hand, with their arms stretched out horizontally.
3. Is there a pattern? The two measurements should be similar or the same.
For the teacher:
An easy way to demonstrate this is for each child to stand against the whiteboard, with their partner making a mark at the top of their head. If the child then stretches out their arms and bends so that one fingertip is on the floor and the one on the opposite arm is directly above it, they should find that the top finger is just touching the chalk mark.

Vikings ICL Key Stage 2
27
Health and Safety
Always follow the health and safety policy in school and carry out a risk assessment.
Background Information
Much of what we know about the Vikings comes from archaeological finds such as traces of their settlements, or artefacts. There are relatively few written historical records from this time.People leave behind evidence of their activities. Archaeologists try to determine the following from this evidence:
• the age, sex and status of the skeletons;• the cause of death or existence of disease;• the food they ate;• the objects they used; and• the layout of their buildings.
We can access a limited amount of information about the Vikings from runes and coins. We can also find out more using scientific methods such as carbon dating.
Learning Intentions
Children are learning that:
• changes in materials can be permanent or temporary; and
• decay can be slowed down or accelerated.
Equipment
• one large container, for example a foil lasagne dish or seed tray, or, six smaller containers such as small seed trays, foil dishes or packaging trays
• sand, peat or potting compost• a variety of tools for digging such as plastic
spoons, lolly sticks, or paintbrushes• plastic sheets or newspapers to cover desks• labels• string• paper
• a selection of ‘artefacts’ such as:– small toy/model skeletons (whole or separated
into separate bones)– glass beads– imitation jewels– small pieces of a jewellery chain– tiny shells– piece of leather– small nails– a stone with runes etched into it– dolls’ house cutlery– pieces of pottery (no sharp edges)– pots and weapons made from air drying clay
and sprayed with silver paint if necessary– small pebbles to arrange in a circle, with a
piece of charcoal in the middle.(You can use laminated images if you need to, but these are not as effective).
• a selection of ‘red herrings’ such as:– lego brick– elastic band or loom band– short length of insulated wire– piece of a glossy magazine– ring pull from a can– piece of a plastic bag– button– something organic, such as an acorn or leaf.
Preparation
1. Fill the container(s) with the peat, burying a selection of the artefacts as you do so. If using six separate containers, try to put a red herring in each one.
2. A small skeleton can be put in whole or the separate bones can be buried in a more random way. This would suggest that the body had not been properly buried, but perhaps just thrown into a grave as might happen after a battle. (An example of this can be seen at the Jorvik exhibition in York).
3. You can use a circle of stones with a piece of charcoal in the middle as evidence of the Vikings using a fire.
STEM Enquiry 10How Do We Know About the Vikings?

28
4. Place a pile of small shells nearby to signify that they ate shellfish.
Activity
1. Show the class a photo of an archaeologist at work. Ask them 'What might this person be doing, or what is his job?’
2. Explain that archaeology is a way of learning about history when there are no eye witness accounts. Ask them ‘What kind of things could we find in the ground which could give us information about other civilisations?’
3. Ask the pupils to imagine that someone who does not know them came into their bedroom. What would they be able to tell about the person who lived there, from the available evidence? • Were they a boy or a girl?• Were they sporty or did they like music?• What approximate age were they? Did they
have any siblings?• Would they come to any wrong conclusions?
4. Explain that archaeologists must examine the available evidence and draw reasonable conclusions from what they find.
Method
1. If using one large container, divide it into six parts using string. Label these A1, A2, A3, B1, B2, B3.
2. If using six smaller containers, set them together as if they were one entity and label as above. (Using the smaller dishes makes it easier for a group of children to work in their area. Always put the labels in the top left corner of each dish, so that it will correspond with the drawn grid).
3. Draw a corresponding grid (to scale) on a sheet of A3 paper. Label it to match the container(s).
4. Give each group one area or dish.5. The pupils should carefully use the tools you
have given them to excavate and remove the ‘soil’.
6. When they find something they should place it on the A3 paper grid in the same position as they discovered it (for example, A1).
7. Pupils then examine other groups’ findings before coming together to discuss what they have found and what they can now say about the Vikings, based on their evidence:
– What did they find that was not relevant to the Vikings?
– What items or materials would Vikings have used but were not found in the dig? Why would we not find them years later? (decay)
– What would be the optimum conditions for decay or preservation?
For the teacher:
Waterlogged soil (peat and bog land) helps to preserve organic materials such as wood, bones and clothing, whereas they tend to decay much faster in well-drained, aerated soil. However, artefacts made from metal, steel or iron are better preserved in aerated soils. Acidic soils decompose metals more quickly. The soil type does not affect the rate of decay of pottery.

Vikings ICL Key Stage 2
29
Health and Safety
Always follow the health and safety policy in school and carry out a risk assessment.
Background Information
Only wealthy Vikings and Viking leaders would have worn chainmail or metal helmets. Surviving examples of these are very rare. Most Vikings used thick, padded leather garments for protection, and even those wearing chainmail would have had padding underneath it. Padding under a helmet will reduce the impact of a blow and make it less likely that the head will be penetrated.
Does padding effectively reduce impact?
Learning Intentions
Children are learning that:
• the body has mechanisms to protect itself; and• force is needed to change the shape of an
object.
Equipment
• fresh eggs (to represent a human head)• clear plastic containers• cardboard tubes which will just fit over or sit on
top of the eggs so that the weight is dropped from the same height each time (these tubes ensure that the eggs do not bounce sideways on impact: an inside diameter of 5cm works well here, and you can find this in cheaper ranges of kitchen towels)
• a stone or metal weight which can fit inside the tube (approximately 100 g)
• kitchen towels• fabrics such as leather, wadding, kitchen towels,
cotton wool or mesh.
Method
1. Place an egg horizontally in a clear plastic container.
2. Surround the egg with crumpled up kitchen towel so that it cannot roll.
3. Set a cardboard tube over the egg.4. Drop a stone or metal weight from the top of the
tube.5. Observe/Photograph any damage to the egg.6. Repeat the experiment with a second egg and
clean container, but this time place a layer of a protecting material over the egg, before dropping the weight.
Extension
Repeat with a variety of materials.
For the teacher:
You can simulate chainmail using the metal netting used for rabbit cages (beware of sharp edges.)
STEM Enquiry 11How Did the Vikings Protect Themselves in Battle?

31
RESOURCES
32
I rely on farming and
fishing to make a
living.
I am skilled and know
how to turn raw
materials into tools
that I need.
The winters are very
long in Scandinavia.
The weather in Ireland
is milder than in
Scandinavia.
My eldest brother
inherited the family
farm.
I am a good fighter and
have never lost.
I need to find a farm of
my own.
Scandinavia has a
growing population.
I have lots of things
to trade with, such
as wool, wheat,
fur, wood, iron and
leather.
RESOURCE 1: Should I stay, raid, trade or settle? cards

Vikings ICL Key Stage 2
33
They speak a different
language in Ireland.
Many people in Ireland
have Christian beliefs,
these are different to
my beliefs.
Exploration would be an
adventure.
My family are here in
Scandinavia.
My family need me if
other tribes attack.
Ireland has rich
churches and
monasteries with
precious objects and
they are not well
protected.
There is great farming
land in Ireland.

34
RESOURCE 2: Plan view of a Viking Longship


COUNCIL FOR THE CURRICULUM, EXAMINATIONS AND ASSESSMENT29 Clarendon Road, Clarendon Dock, Belfast BT1 3BGTel: +44(0)28 9026 1200 Fax: +44(0)28 9026 1234Email: [email protected] Web: www.ccea.org.uk
© CCEA 2018
Imag
es
© T
hin
ksto
ckp
ho
tos.
co
m