flashing firmware image files using the rockchip...
TRANSCRIPT

Flashing Firmware Image Files Using The Rockchip ToolFrom wiki
This page describes how to install an image to the nand flash of Marsboard RK3066, ie, how to flash the board. You can choose to either flash the wholeimage (ie, update.img) to the board or just flash the selected partitions. You can download the prebuilt images(http://www.marsboard.com/marsboard_rk3066_download.html) or from our server (http://www.haoyuelectronics.com/service/RK3066) the images.
Contents
1 Before you start2 Windows
2.1 Install driver2.1.1 Install using RK Driver Assistant tools2.1.2 Install Manually
2.2 Flash Image2.2.1 Using AndroidTool to flash update.img (Firmware)2.2.2 Using AndroidTool to falsh image by partition
2.3 Preparing IDB failed3 Linux
3.1 Using Linux Upgrade Tool to flash update.img3.1.1 Flash update.img3.1.2 Lowlevel Format nand3.1.3 Flash parameter3.1.4 Flash bootloader3.1.5 Flash the boot.img3.1.6 Flash the kernel.img3.1.7 Others
3.2 Installing RkFlashKit3.3 Flashing firmware with RkFlashKit3.4 Flash RKBatchTool Firmware File with RkFlashKit

Before you start
Keep in mind that:
You can always flash the MarsBoard, it never bricks (as the name :)) unless some hardware damage occurs.
What you will need to flash the board is:
a MarsBoard RK3066 boarda PC running Windows (XP 32/64bit, Windows 7 32/64 bit) or Linux (32/64bit)a micro USB cable with one side plugged in to the OTG port of MarsBoard and the other side plugged into the USB port on PC.
Windows
The Windows tool for flashing the image is provided by Rockchip. To flash the update.img, you need to use the RKBatchTool and to flash the partitions,you will need to use RKDevelopTool. Both RKBatchTool and RKDevelopTool rely on the RK USB driver so you will need to install it first as below:
Install driver
There two ways to install the driver under Windows:
1. install using RKDriverAssistant tools the easy way2. install manually
If you have already installed the USB driver please skip this step.
Install using RK Driver Assistant tools
There’s no need to connect your Rockchip device during this procedure just download and extract RKDriverAssistant.zip(http://www.haoyuelectronics.com/service/RK3066/tools/windows/RK_DriverAssitant.zip) Then double click on DriverInstall.exe in theRKDriverAssistant directory to start the utility. If you've previously tried to install the Rockchip USB drivers for any Rockchip devices make sure you click“Uninstall Driver” first.
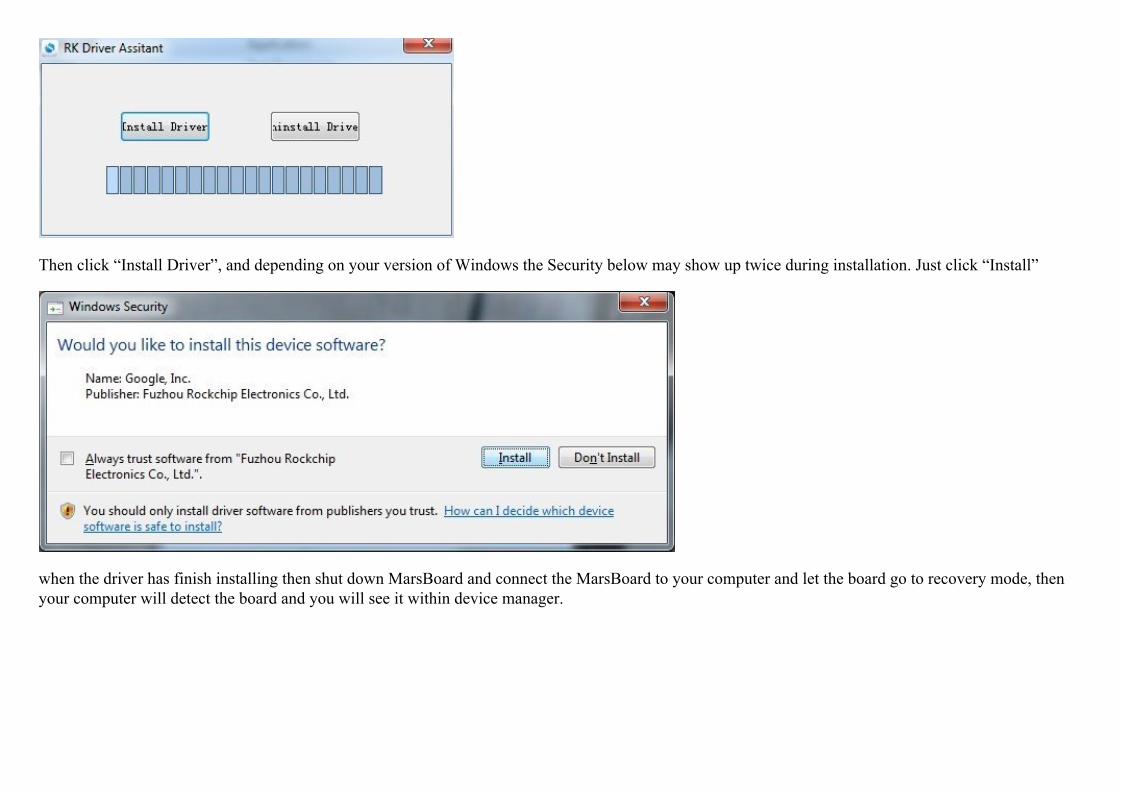
Then click “Install Driver”, and depending on your version of Windows the Security below may show up twice during installation. Just click “Install”
when the driver has finish installing then shut down MarsBoard and connect the MarsBoard to your computer and let the board go to recovery mode, thenyour computer will detect the board and you will see it within device manager.
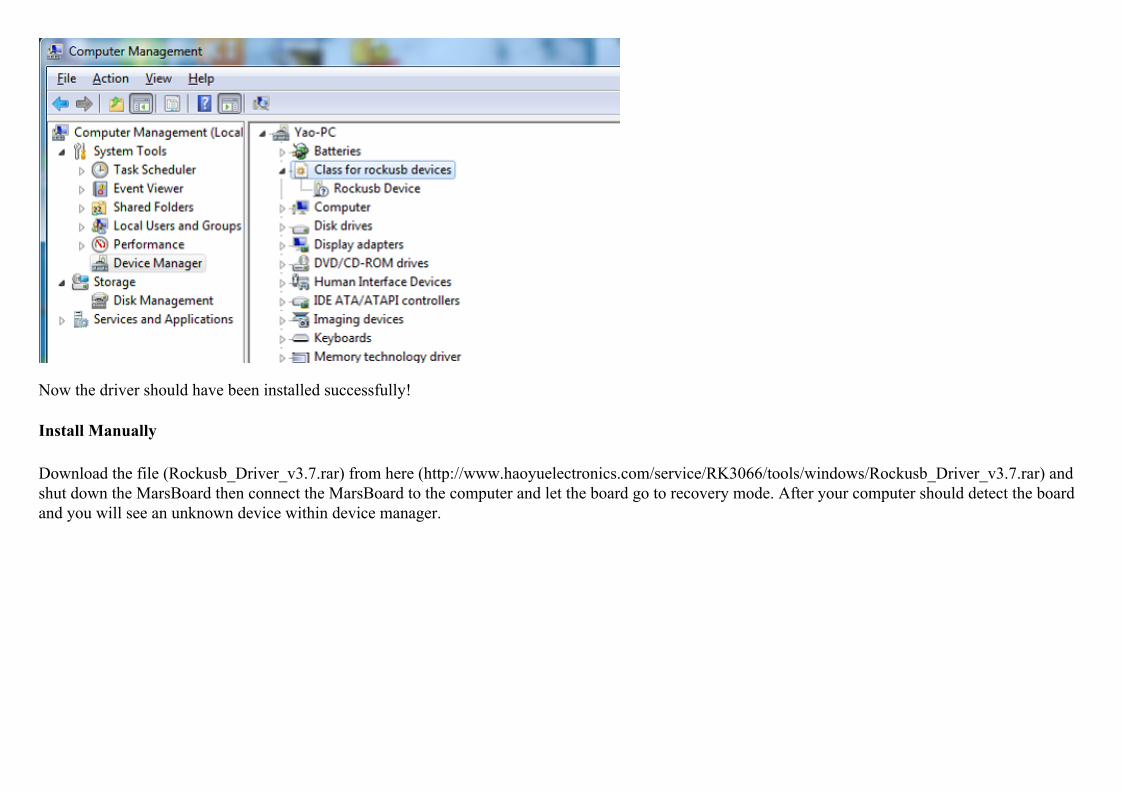
Now the driver should have been installed successfully!
Install Manually
Download the file (Rockusb_Driver_v3.7.rar) from here (http://www.haoyuelectronics.com/service/RK3066/tools/windows/Rockusb_Driver_v3.7.rar) andshut down the MarsBoard then connect the MarsBoard to the computer and let the board go to recovery mode. After your computer should detect the boardand you will see an unknown device within device manager.
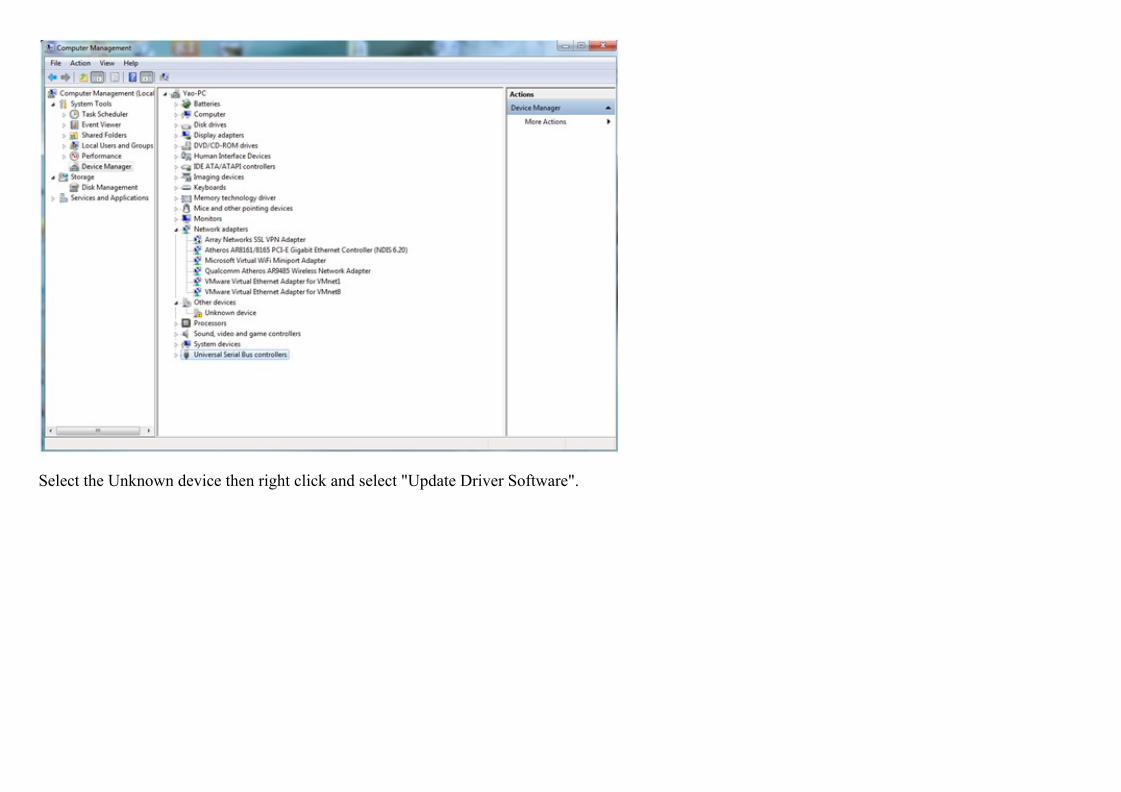
Select the Unknown device then right click and select "Update Driver Software".

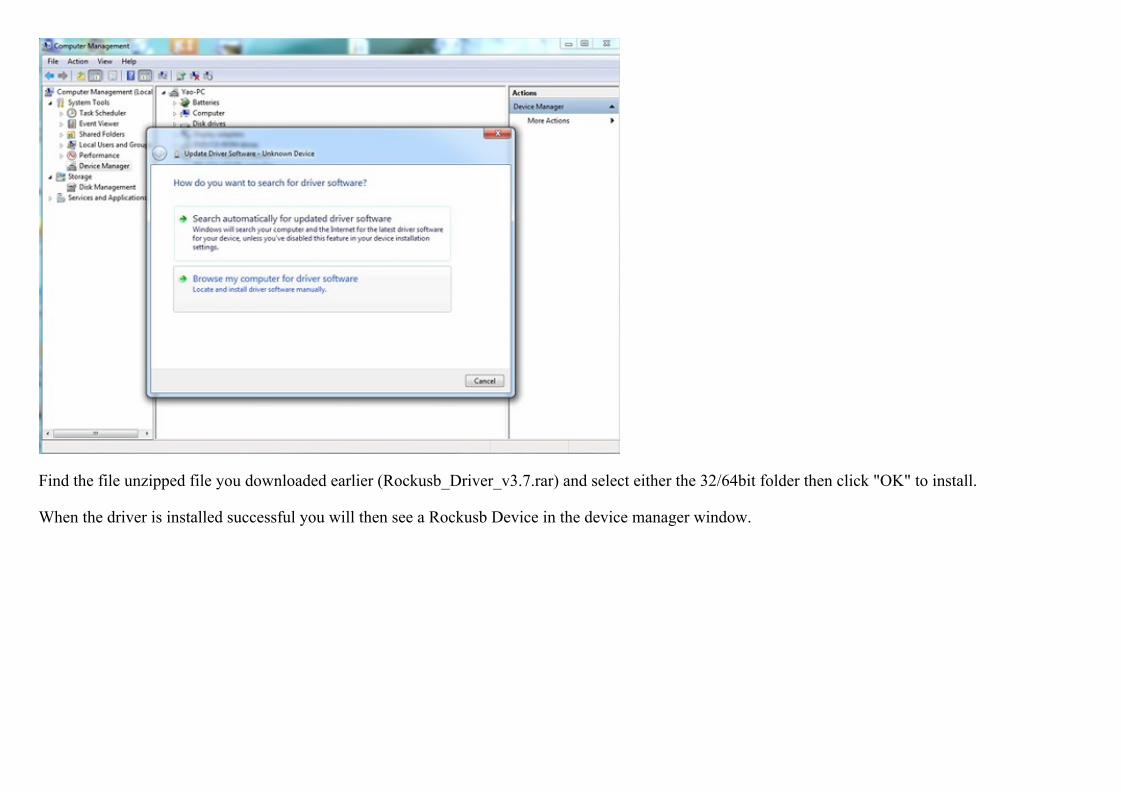
Find the file unzipped file you downloaded earlier (Rockusb_Driver_v3.7.rar) and select either the 32/64bit folder then click "OK" to install.
When the driver is installed successful you will then see a Rockusb Device in the device manager window.

Now the driver is installed successfully.
Flash Image
There are two methods to flash an image use android tools.
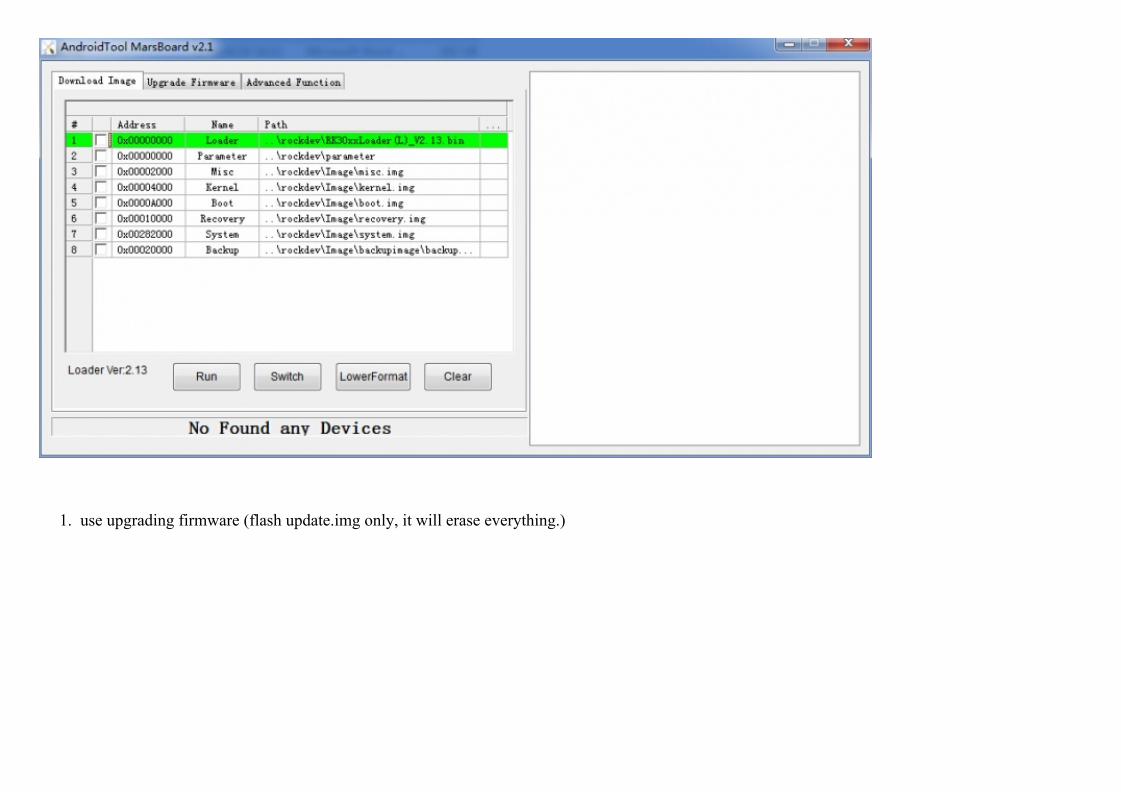
1. use Download Image (can flash by partitions)
1. use upgrading firmware (flash update.img only, it will erase everything.)

Using AndroidTool to flash update.img (Firmware)
Download AndroidTool from here (http://www.haoyuelectronics.com/service/RK3066/tools/windows/) . Then unzip it and double click AndroidTool.exe
Select an image (RK3066 update.img), click Firmware. For information on how to make an update.img see update.img
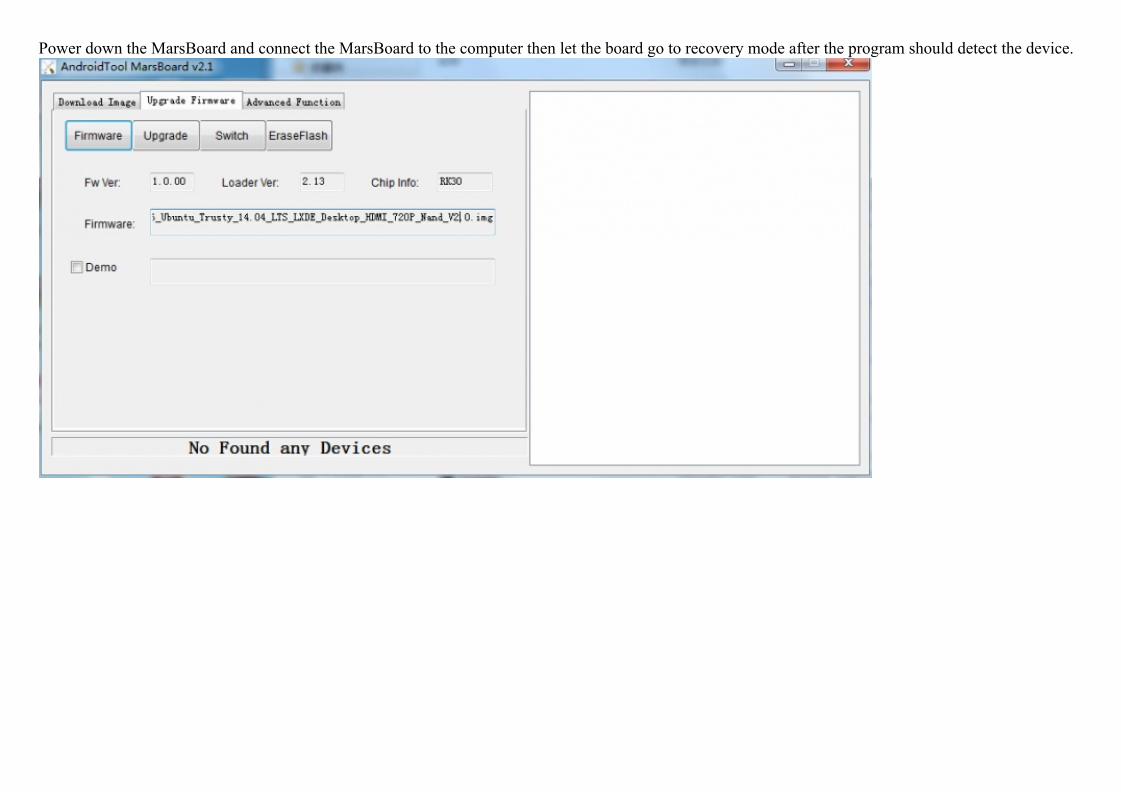
Power down the MarsBoard and connect the MarsBoard to the computer then let the board go to recovery mode after the program should detect the device.

Click the "Upgrade" button to begin flashing and when the flashing process finishes successfully you will see the following interface.
If the flashing has aborted ,it could possibly be an error with the update.img, you can either try to redo the operations above or make the update.img again!
Using AndroidTool to falsh image by partition
Download AndroidTool from here (http://www.haoyuelectronics.com/service/RK3066/tools/windows) . Unzip it the file and double click AndroidTool.exe.
Power down the MarsBoard and connect the MarsBoard to the computer and let the board go to recovery mode then the program will detect it.

There are eight selections to choose from so select the correct row and then select the checkbox to the left of the row to select it. After you must click thecolumn on the right side for the path of the file you want to flash. You can then select one or more files and flash them at once. Finally Click "Run" to flashimages to the device (the right most selection shows the log of the progress).
If successful the board will disconnect from the tool and boot into the system.
Please Note:
1. The kernel is contained within the boot.img when you package the image by "./mkimage.sh ota" please see Android Build for more information.2. you can flash one of more image at one time as needed
Preparing IDB failed

This happens at upgrading bootloader, if you need to upgrade the bootloader or the update.img contains a new bootloader, you probably will meet this. Themarsboard is "bricked". Follow this unbrick instructions to unbrick it.
Linux
Rockchip has provided tools for upgrading within Linux (closed source) since Android 4.4. The initial RE work of the Rockchip bootloader updatingprotocol is by naobsd and has been improved by some in rkflashtool. linuxerwang has made a GUI version of the rkflashtool called rkflashkit.
Warning: both rkflashtool and rkflashkit can not flash the update.img.
Using Linux Upgrade Tool to flash update.img
Download the Rockchip linux upgrade tool here (http://www.haoyuelectronics.com/service/RK3066/tools/linux/Linux_Upgrade_Tool_v1.2.tar.gz) . Unzipit and you will get a file called upgrade_tool which is a binary executable file under Linux.
Flash update.img
Let the board go to recovery mode and run the following command to flash the update.img:
sudo ./upgrade_tool uf /path/update.img #(UF Upgrade Flash)
Lowlevel Format nand
If you have an error with upgrading you can low level format the nand flash first with the following command:
sudo ./upgrade_tool lf #(LF Lowlevel Format) This will erase everything on nand
Flash parameter
sudo ./upgrade_tool di ‐p /path/parameter #(DI Download Image)
Flash bootloader
sudo ./upgrade_tool ul /path/bootloader #(UL Upgrade Loader)
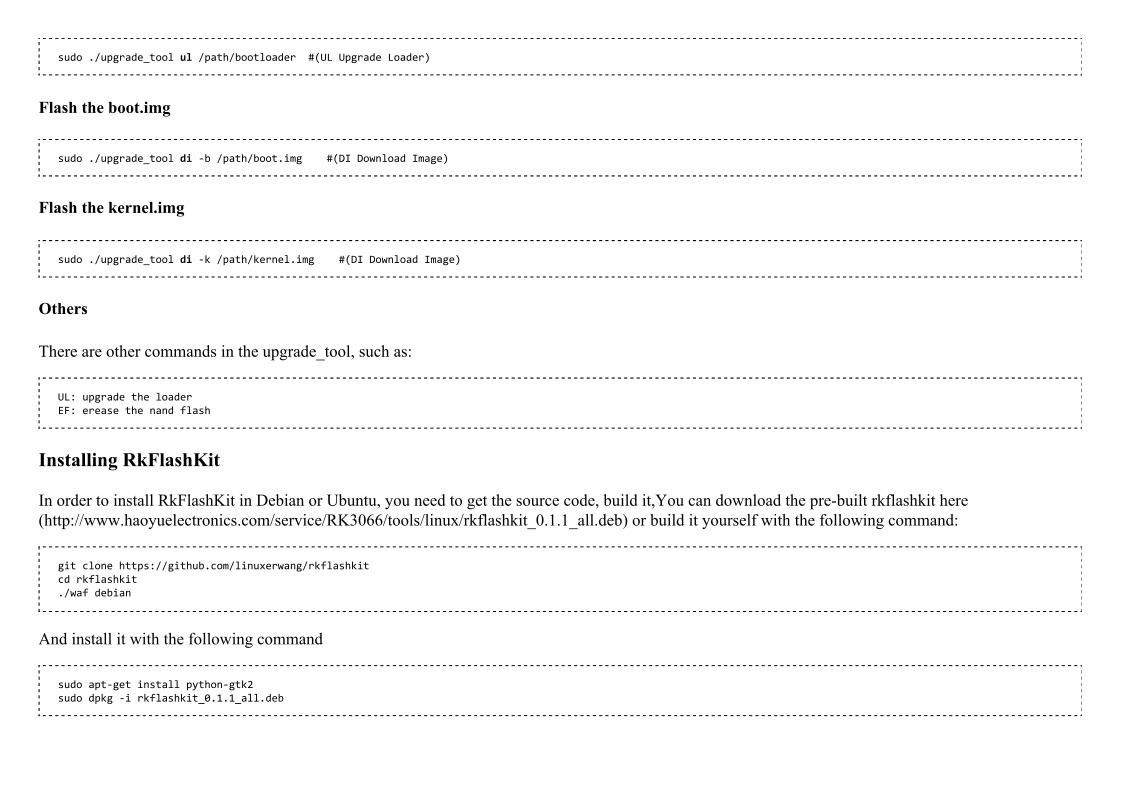
Flash the boot.img
sudo ./upgrade_tool di ‐b /path/boot.img #(DI Download Image)
Flash the kernel.img
sudo ./upgrade_tool di ‐k /path/kernel.img #(DI Download Image)
Others
There are other commands in the upgrade_tool, such as:
UL: upgrade the loader EF: erease the nand flash
Installing RkFlashKit
In order to install RkFlashKit in Debian or Ubuntu, you need to get the source code, build it,You can download the prebuilt rkflashkit here(http://www.haoyuelectronics.com/service/RK3066/tools/linux/rkflashkit_0.1.1_all.deb) or build it yourself with the following command:
git clone https://github.com/linuxerwang/rkflashkit cd rkflashkit ./waf debian
And install it with the following command
sudo apt‐get install python‐gtk2 sudo dpkg ‐i rkflashkit_0.1.1_all.deb
Flashing firmware with RkFlashKit
Run it with the following command
sudo rkflashkit
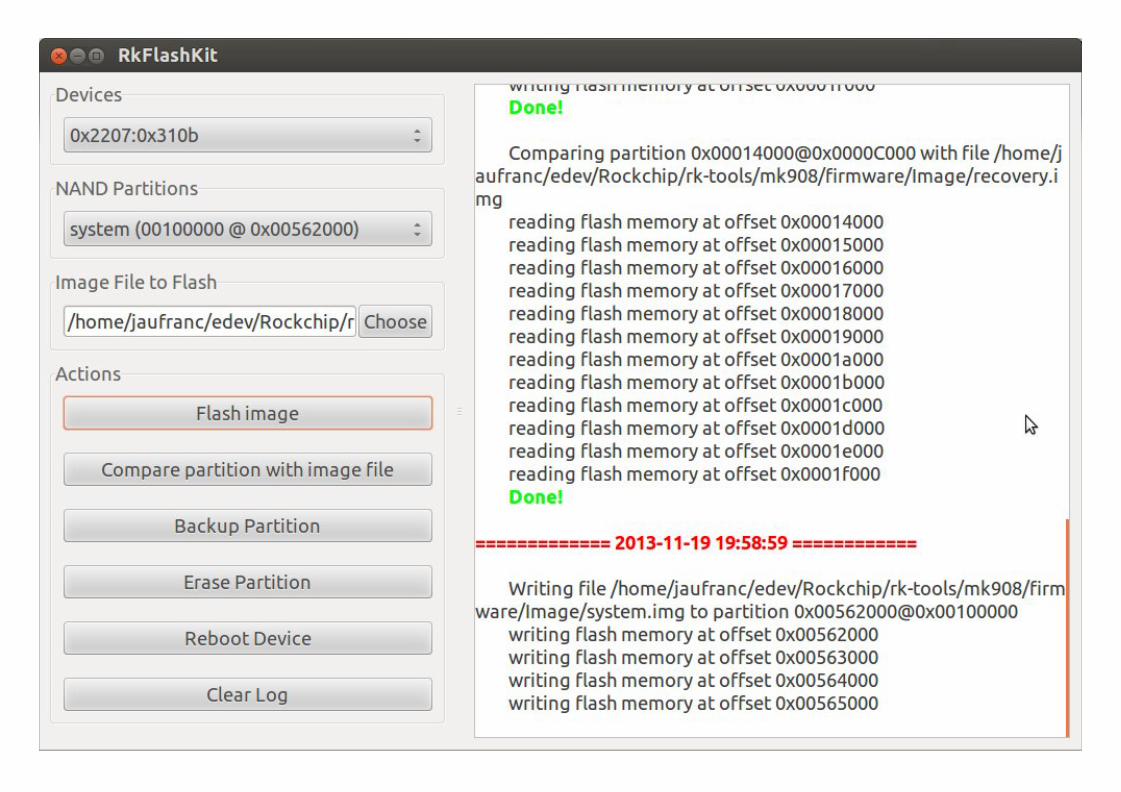
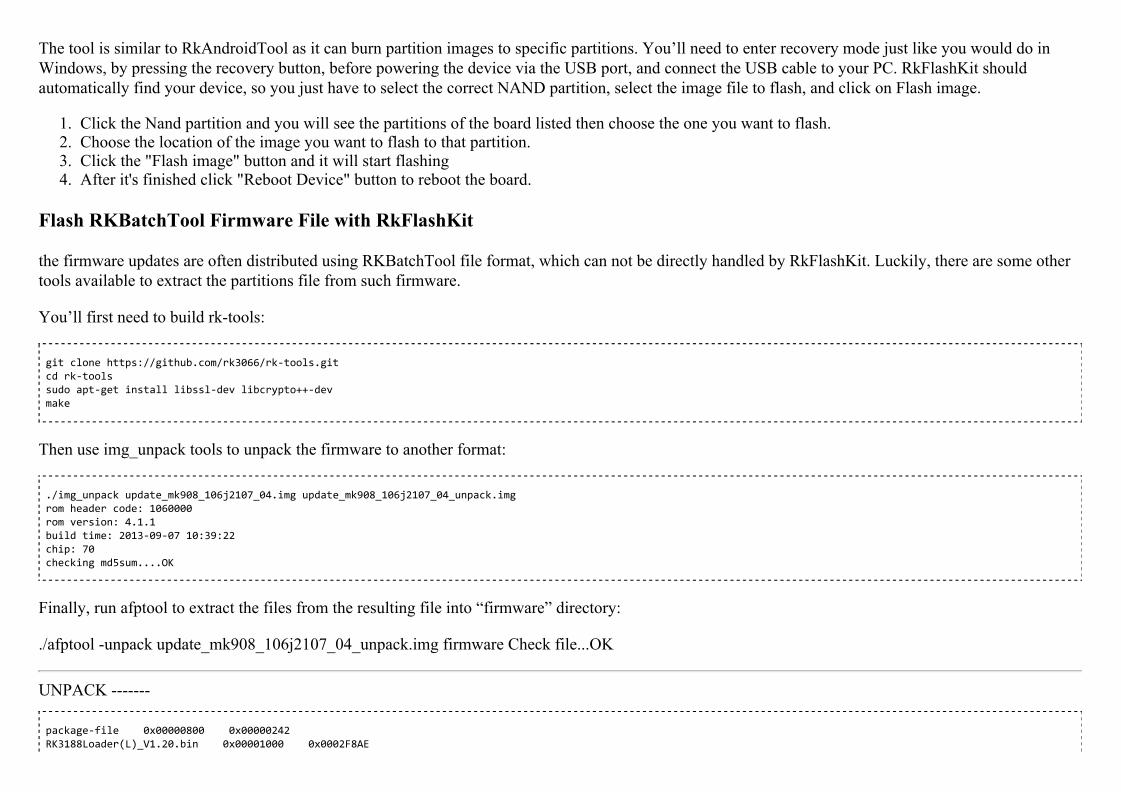
The tool is similar to RkAndroidTool as it can burn partition images to specific partitions. You’ll need to enter recovery mode just like you would do inWindows, by pressing the recovery button, before powering the device via the USB port, and connect the USB cable to your PC. RkFlashKit shouldautomatically find your device, so you just have to select the correct NAND partition, select the image file to flash, and click on Flash image.
1. Click the Nand partition and you will see the partitions of the board listed then choose the one you want to flash.2. Choose the location of the image you want to flash to that partition.3. Click the "Flash image" button and it will start flashing4. After it's finished click "Reboot Device" button to reboot the board.
Flash RKBatchTool Firmware File with RkFlashKit
the firmware updates are often distributed using RKBatchTool file format, which can not be directly handled by RkFlashKit. Luckily, there are some othertools available to extract the partitions file from such firmware.
You’ll first need to build rktools:
git clone https://github.com/rk3066/rk‐tools.git cd rk‐tools sudo apt‐get install libssl‐dev libcrypto++‐dev make
Then use img_unpack tools to unpack the firmware to another format:
./img_unpack update_mk908_106j2107_04.img update_mk908_106j2107_04_unpack.img rom header code: 1060000 rom version: 4.1.1 build time: 2013‐09‐07 10:39:22 chip: 70 checking md5sum....OK
Finally, run afptool to extract the files from the resulting file into “firmware” directory:
./afptool unpack update_mk908_106j2107_04_unpack.img firmware Check file...OK
UNPACK
package‐file 0x00000800 0x00000242 RK3188Loader(L)_V1.20.bin 0x00001000 0x0002F8AE
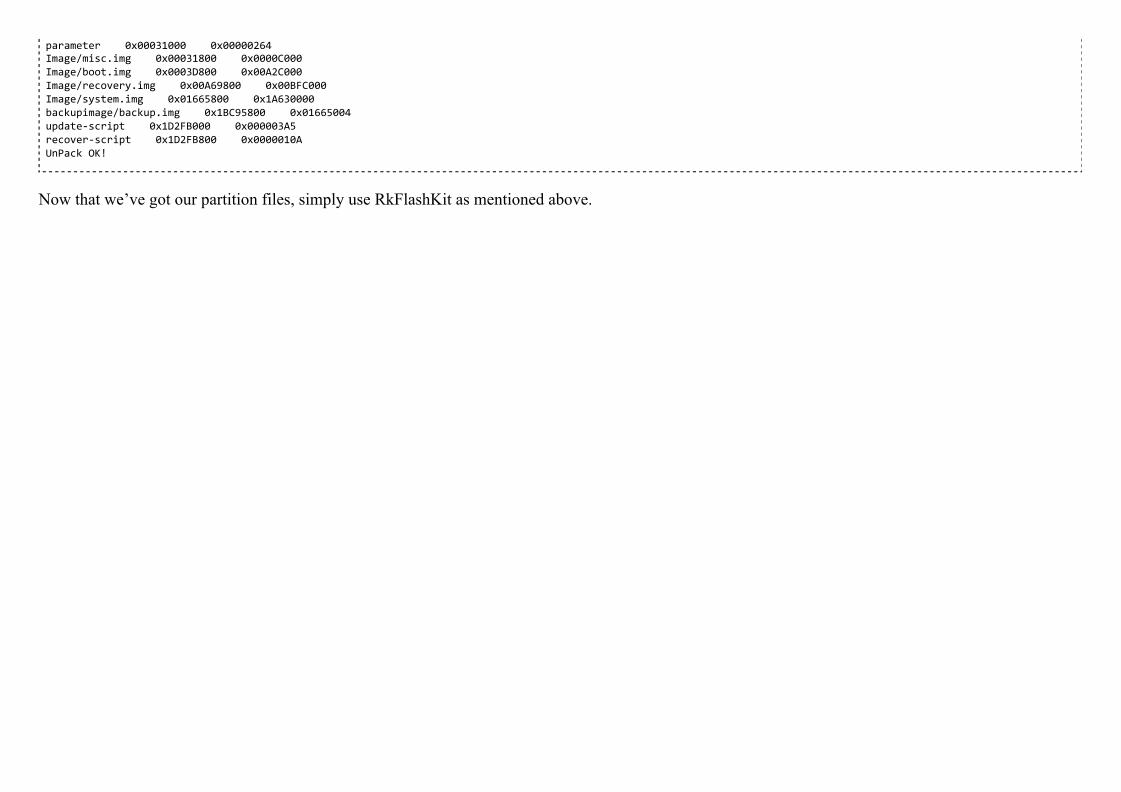
parameter 0x00031000 0x00000264 Image/misc.img 0x00031800 0x0000C000 Image/boot.img 0x0003D800 0x00A2C000 Image/recovery.img 0x00A69800 0x00BFC000 Image/system.img 0x01665800 0x1A630000 backupimage/backup.img 0x1BC95800 0x01665004 update‐script 0x1D2FB000 0x000003A5 recover‐script 0x1D2FB800 0x0000010A UnPack OK!
Now that we’ve got our partition files, simply use RkFlashKit as mentioned above.
Editing MarsBoard Dev Kit1 comment • a year ago
avrman — cool
How to make an Android images build for MarsBoard RK30661 comment • a year ago
jacksen — Using "tar xfz" to untar the above tar balls gives (from aUbuntu 14.04 system)tar: Skipping to next headertar: Archivecontains ‘\332\b\0\0\333\b’ where numeric time_t value expectedtar:\303\b: Unknown file type '�', extracted as …
ALSO ON MARSBOARD
3 Comments marsboard Login
Share⤤ Sort by Best
Join the discussion…
• Reply •
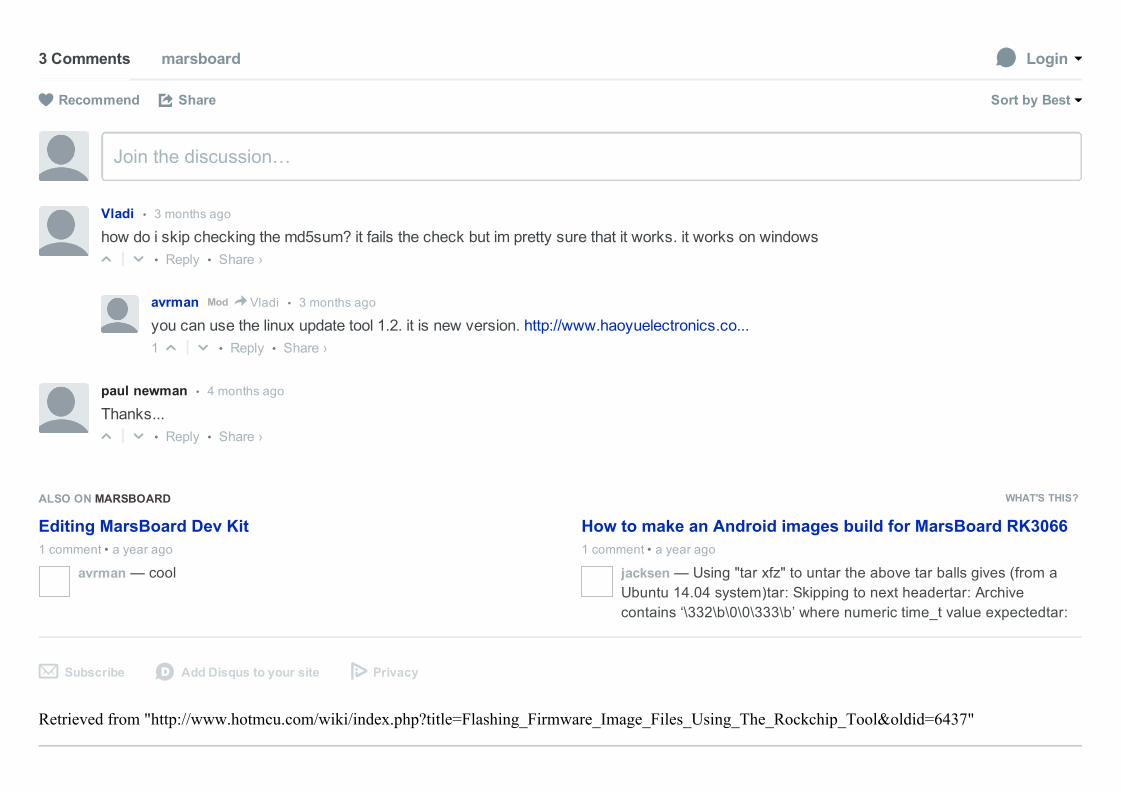
Vladi • 3 months ago
how do i skip checking the md5sum? it fails the check but im pretty sure that it works. it works on windows △ ▽
• Reply •
avrman • 3 months agoMod > Vladi
you can use the linux update tool 1.2. it is new version. http://www.haoyuelectronics.co... 1△ ▽
• Reply •
paul newman • 4 months ago
Thanks... △ ▽
WHAT'S THIS?
Subscribe✉ Add Disqus to your sited Privacy
Recommend
Share ›
Share ›
Share ›
Retrieved from "http://www.hotmcu.com/wiki/index.php?title=Flashing_Firmware_Image_Files_Using_The_Rockchip_Tool&oldid=6437"

This page was last modified on 20 November 2014, at 05:37.