five css techniques - madcap softwareassets.madcapsoftware.com/webinar/presentation... · five css...
TRANSCRIPT
PRESENTED BY
Five CSS Techniques That Every Technical Writer Should Know – Part 1
Mike HamiltonV.P. Product EvangelismMadCap Software

Presenter InformationMike Hamilton
V.P. of Product Evangelism
MadCap Software
Before joining MadCap Software as a founding member of the executive
team, Mike was the Product Manager for the RoboHelp product line since
the days of Blue Sky Software, eHelp, and Macromedia. Mr. Hamilton
joined the RoboHelp team in the mid ’90s as a founding member of the
Training Solutions Program team, where he co-authored the certified
training materials supporting the RoboHelp family.
Mike has over 20 years of experience in training, technical communication,
multimedia development, and software development at several
organizations including Macromedia, eHelp/Blue Sky Software, Cymer, a
leading supplier of laser illumination sources in the semiconductor industry,
National Steel and Shipbuilding, and the US Navy.

Agenda
• Set Your Sizes Correctly
• Decorating the Box Model
• Modifying Pseudo-Classes
• Using Selectors
• Pushing the Limits

Set Your Sizes Correctly

CSS Units
Fixed Sizes
• pt, pica, inch, mm, cm, etc.
Relative Sizes
• em, %, named (xx-small – xx-large)
• (new to CSS3) rem, vh, vw
Keyword Sizes
• auto, initial, inherit

Sizing Text
Print Delivery = Fixed Sizing
• Typically point sizes, pt
Browser Delivery = Relative Sizing
• Typically percentages or em units

Sizing Images
Static Delivery = Fixed Sizing
• Typically pixels, inches, or mm
Responsive Delivery = Relative or
Keyword Sizing
• Typically percentages

Combining Relative/Keyword Sizes
Static Image Sizing
img { width: 600px;
height: 500px; }
Relative/Keyword Sizes
img { max-width: 100%;
}

Decorating the Box Model

The Box Model – Review
• This page contains
three elements
• Each element has
in invisible box
around it
Heading 1 Text
This is paragraph 1
This is paragraph 2
The Box Model – Review
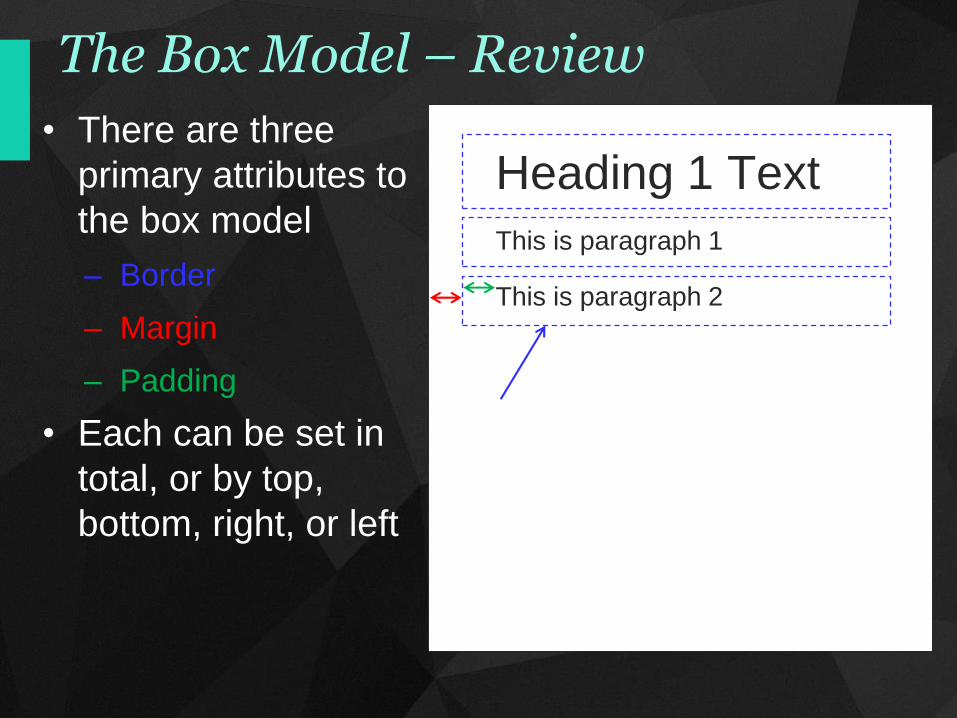
• There are three
primary attributes to
the box model
– Border
– Margin
– Padding
• Each can be set in
total, or by top,
bottom, right, or left
Heading 1 Text
This is paragraph 1
This is paragraph 2

Using the Box Model
Standard Hyperlink
Hyperlink with Box Model Styling
Creating the Basic Button
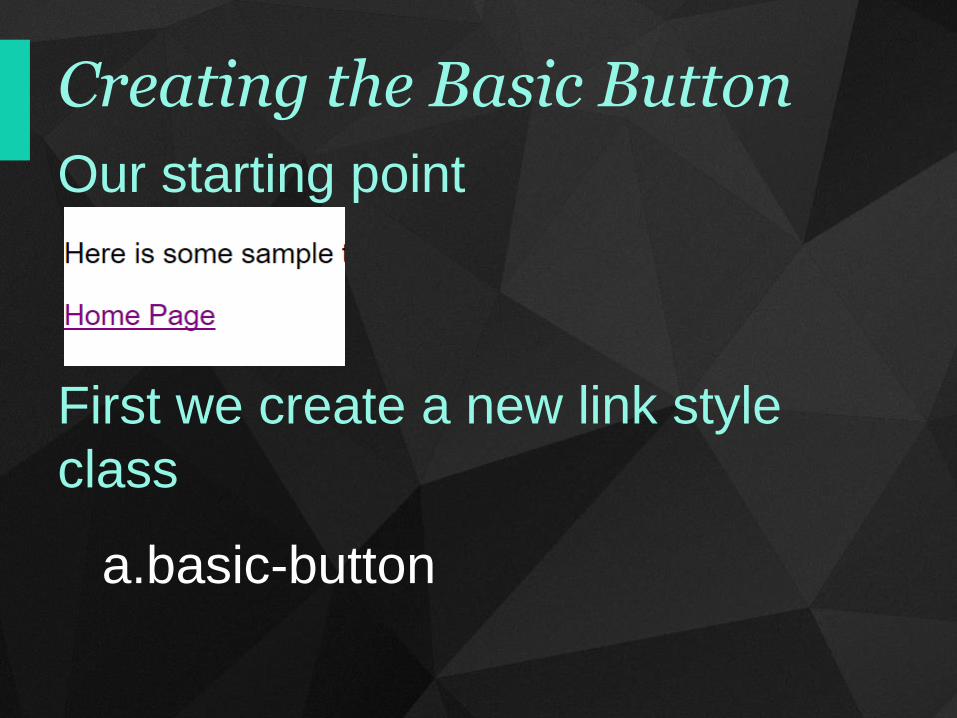
Our starting point
First we create a new link style
class
a.basic-button

Creating the Basic Button
a.basic-button{
background-color: blue;
}

Creating the Basic Button
a.basic-button{
background-color: blue;
color: white;
}
Creating the Basic Button
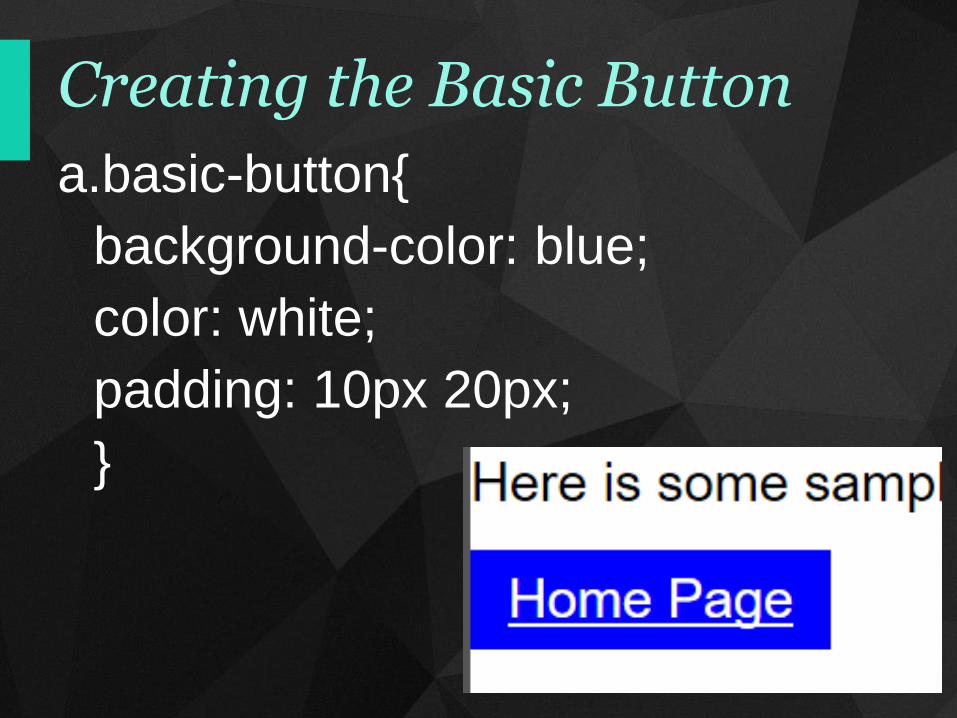
a.basic-button{
background-color: blue;
color: white;
padding: 10px 20px;
}
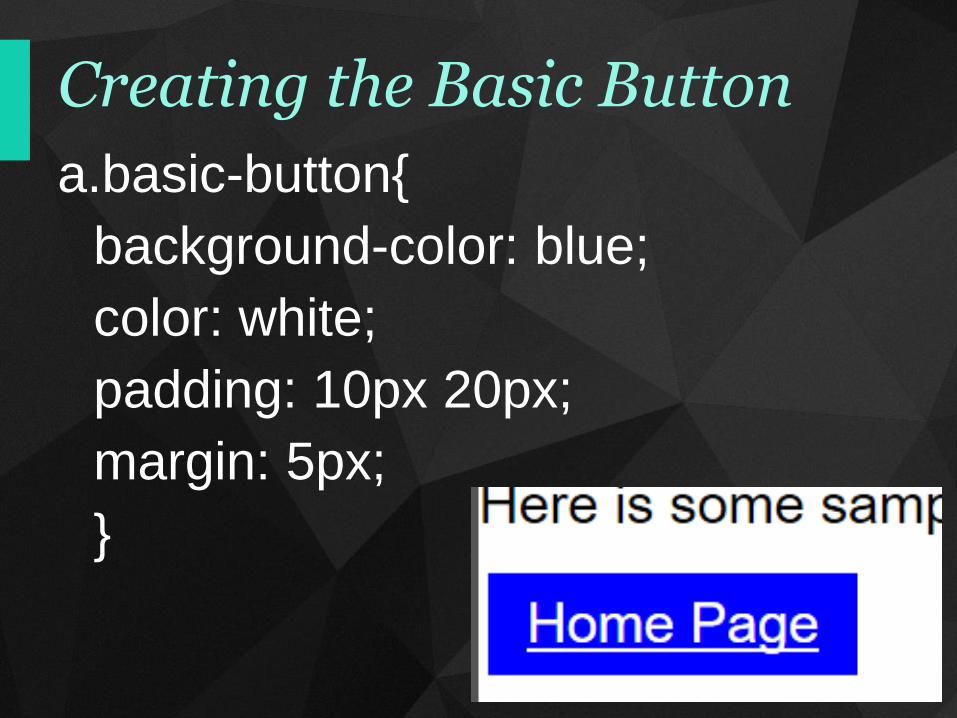
Creating the Basic Button
a.basic-button{
background-color: blue;
color: white;
padding: 10px 20px;
margin: 5px;
}

Creating the Basic Button
a.basic-button{
background-color: blue;
color: white;
padding: 10px 20px;
margin: 5px;
border-radius: 10px; }

Modifying Pseudo-Classes

Definition
Class:
A CSS Class supports styling of
SPECIFIC items on the page
Pseudo-class:
A Pseudo-Class supports styling of
a specific items unique STATE

Pseudo-classes
For links:
a:link
a:visited
a:hover
a:active

Modifying Pseudo-classes
a.basic-button{
background-color: blue;
color: white;
padding: 10px 20px;
margin: 5px;
border-radius: 10px; }

Modifying Pseudo-classes
a.basic-button{
background-color: blue;
color: white;
padding: 10px 20px;
margin: 5px;
border-radius: 10px; }
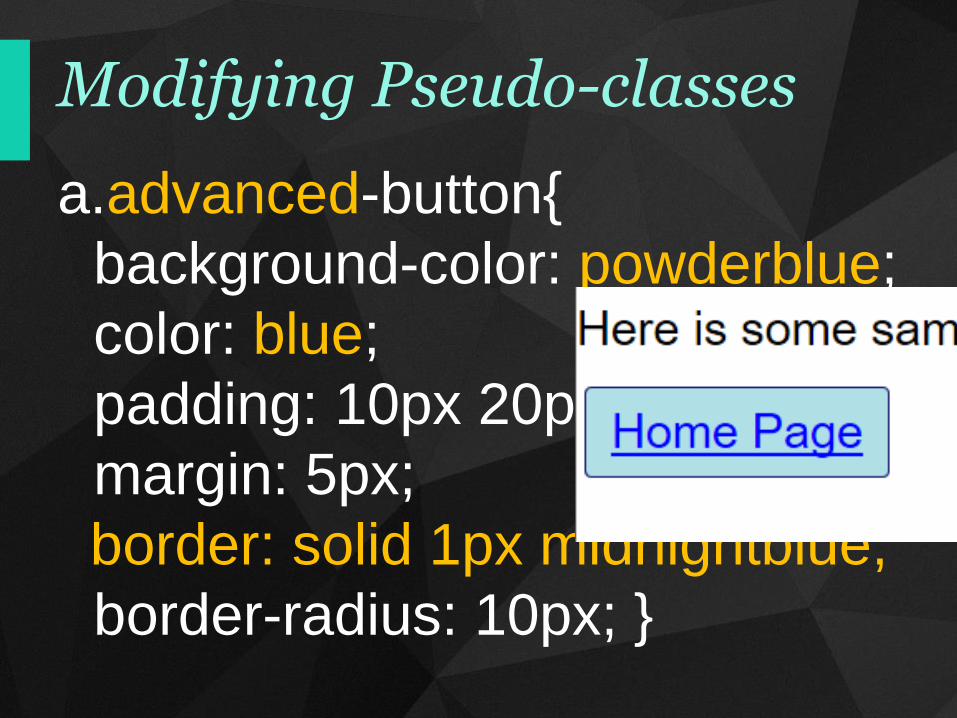
Modifying Pseudo-classes
a.advanced-button{
background-color: powderblue;
color: blue;
padding: 10px 20px;
margin: 5px;
border: solid 1px midnightblue;
border-radius: 10px; }

Modifying Pseudo-classes
a.advanced-button{
background-color: powderblue;
color: blue;
padding: 10px 20px;
margin: 5px;
border: solid 1px midnightblue;
border-radius: 10px; }
a.advanced-button:hover {
}
a.advanced-button:active {
}

Modifying Pseudo-classes
a.advanced-button:hover {
color: powderblue;
border: solid 1px midnightblue;
background: blue;}

Modifying Pseudo-classes
a.advanced-button:active {
border: solid 1px black;
background: midnightblue; }

UsingSelectors

Definition
Selector:
A pattern used to select the
elements you want to style
Selectors we have already seen:
• Class
• Pseudo-Class
New Selectors
String match
If certain characters, then style
::before
Insert before styled element
::after
Insert after styled element

String Match Selector
• Detect links to PDF files
• Auto-add correct icon

String Match Selector
a[href$=".pdf"] {
background-image:
url('../Images/pdf-icon.png');
background-repeat: no-repeat;
background-position: center right;
padding-right: 35px;
}

::before and ::after
• Selector pseudo-classes
• Injects any content before or
after an element
• Two examples
– Smart Quotes
– Header bars

Smart Quotes Example
Standard typed quotes
“Smart Quotes” from a style
NOTE: This is a “Crazy Mike” technique…

First the Class
span.quoted
{
font-style: italic;
}

::before for Opening Quote
span.quoted::before {
content: "“";
font-size: 40px;
color: dimgray;
display: inline-block; }

::after for the Closing Quote
span.quoted::after {
content: "”";
font-size: 40px;
display: inline-block;
color: dimgray; }

Span Quote Stylespan.quoted {
font-style: italic; }
span.quoted::before {
content: "“";
font-size: 40px;
color: dimgray;
display: inline-block; }
span.quoted::after {
content: "”";
font-size: 40px;
display: inline-block;
color: dimgray; }

Header Bars Example
Customer desire:
• H1 left aligned
• H2 centered between
horizontal bars
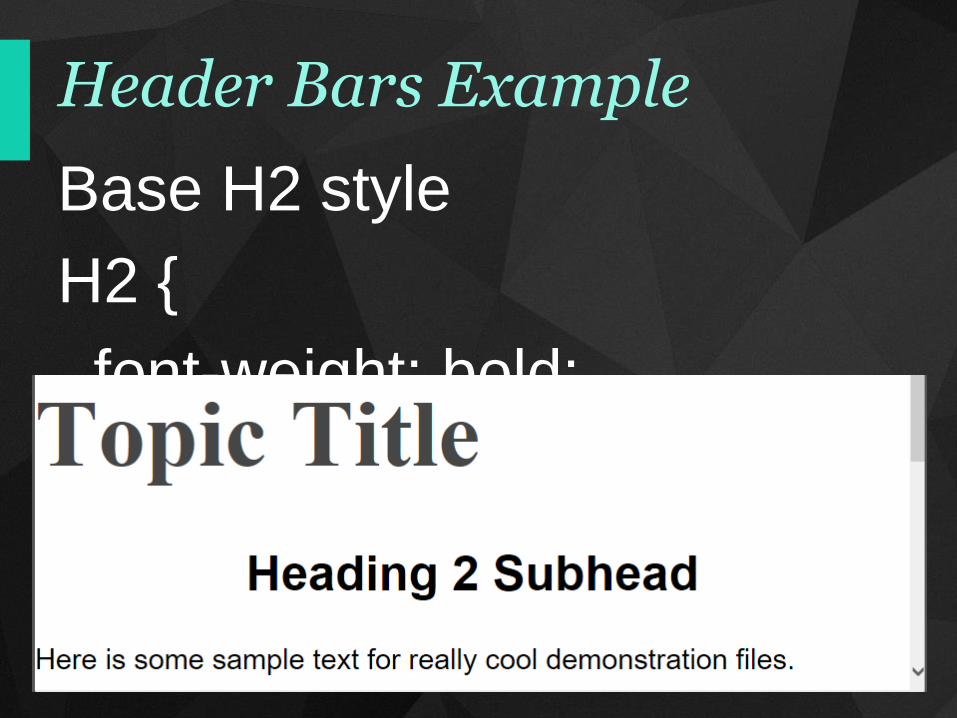
Header Bars Example
Base H2 style
H2 {
font-weight: bold;
font-size: 1.7em;
text-align: center; }

Adding the left bar
h2::before {
display: inline-block;
content: " ";
background-color: dimgray;
width: 140px;
margin: 0px 20px 14px 0px;
height: 4px; }

Adding the right bar
h2::after {
display: inline-block;
content: " ";
background-color: dimgray;
width: 140px;
margin: 0px 0px 14px 20px;
height: 4px; }

Header Bars ExampleH2 {
font-weight: bold;
font-size: 1.7em;
text-align: center; }
H2:before {
display: inline-block;
content: " ";
background-color: dimgray;
width: 140px;
margin: 0px 20px 14px 0px;
height: 4px; }
H2:after {
display: inline-block;
content: " ";
background-color: dimgray;
width: 140px;
margin: 0px 0px 14px 20px;
height: 4px; }

Pushing the Limits

Pushing the Limits
Using CSS:
• Detect the display device
• Dynamically change content

Pushing the Limits
Using CSS:
• Detect the display device
• Dynamically change content

WARNING:
Mike Hamilton is about to
violate the separation of
content and formatting!
A rip in the space time
continuum may result!

CSS Content Control
First, we set up a SPAN class
span.UIcontrol: {
position: absolute;
visibility: hidden; }

CSS Content Control
Apply Span to the space

Inject Text Using ::before
span.UIcontrol::before {
content: "CLICK";
visibility: visible;
}

Change Text for Tablets
@media screen and (max-width:
650px)
{
span.UIcontrol::before
{
content: "TAP";
visibility: visible;
}
}

CSS Content Control
span.UIcontrol: {
position: absolute;
visibility: hidden; }
span.UIcontrol::before {
content: "CLICK";
visibility: visible; }
@media screen and (max-width: 650px) {
span.UIcontrol::before {
content: "TAP";
visibility: visible; }
}


TAKE ADVANTAGE OF CERTIFIED TRAINING
As a webinar attendee, receive $100 OFF your next
advanced training course.
MadCap Flare CSS TrainingNovember 14-15, 2017 (web-based)
MadCap Flare Single Sourcing TrainingNovember 16-17, 2017 (web-based)
For more details, click here or email [email protected]
Note: Courses subject to change. Availability based on student registration. Certain restrictions apply; cannot be combined with any other offer or promotion. Not valid on courses already purchased.


