first steps - x-rite spm looks for and connects the attached spectrophotometer change to...
TRANSCRIPT

First Steps

2
Contents Remarks .............................................................................................................................. 3
Description of toolbar elements ......................................................................................... 4
Settings ................................................................................................................................ 6
General Settings .............................................................................................................. 6
Program Settings ............................................................................................................. 7
Spectrophotometer Settings........................................................................................... 8
Display Settings ............................................................................................................... 9
Check-Area Settings ...................................................................................................... 10
Communication Settings ............................................................................................... 11
CXF Browser Settings .................................................................................................... 11
Setting up a New Job ........................................................................................................ 12
Measurement and Various Display ................................................................................... 17
Using of presets ............................................................................................................ 18
Viewing Samples ........................................................................................................... 20
Modify a Job ...................................................................................................................... 21
Defining a Standard .......................................................................................................... 22
Placing a Standard into a Job ........................................................................................ 23
Quick Compare .................................................................................................................. 24
Backup a Database ............................................................................................................ 25
Restore a Database ........................................................................................................... 26

3
Remarks
• This guide gives an overview of the important functions of the ColorQuality 6.
• The main objective of this document is to get familiar with the functioning of this program.
• As this is only a help document, colorimetric aspects are not discussed.
Trademarks X-Rite ColorQualityTM and X-Rite InkFormulationTM are trademarks of X-Rite. Windows is a registered trademark of the Microsoft Corporation. Copyright 2010 by X-Rite® All rights reserved. Duplicating, processing or translating beyond the scope of the copyright are expressly forbidden without previous written permission.
4
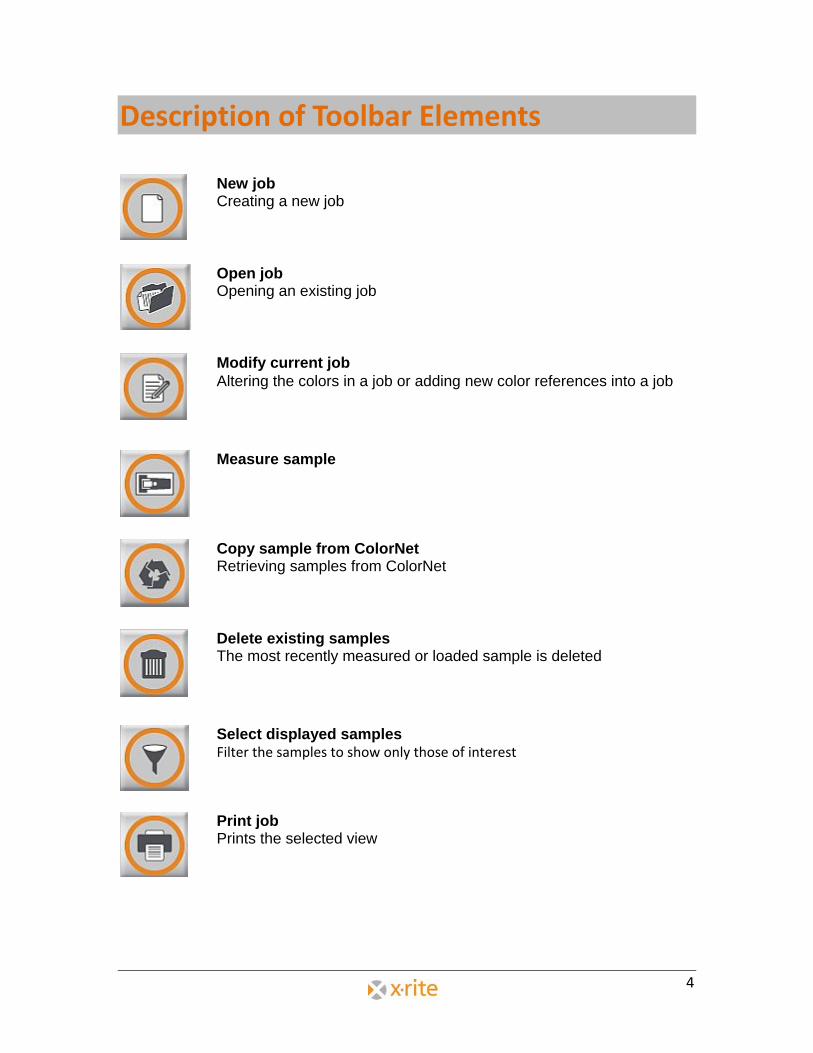
Description of Toolbar Elements
New job Creating a new job
Open job Opening an existing job
Modify current job Altering the colors in a job or adding new color references into a job
Measure sample
Copy sample from ColorNet Retrieving samples from ColorNet
Delete existing samples The most recently measured or loaded sample is deleted
Select displayed samples Filter the samples to show only those of interest
Print job Prints the selected view
5
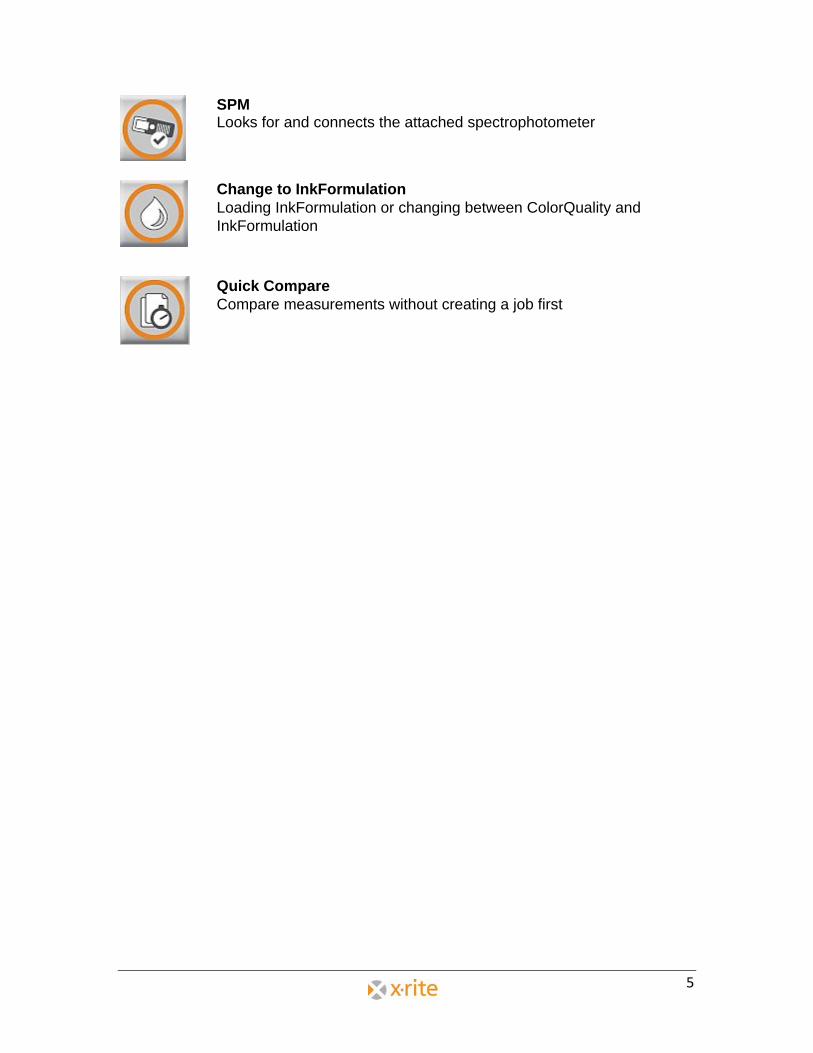
SPM Looks for and connects the attached spectrophotometer
Change to InkFormulation Loading InkFormulation or changing between ColorQuality and InkFormulation
Quick Compare Compare measurements without creating a job first
6
Settings
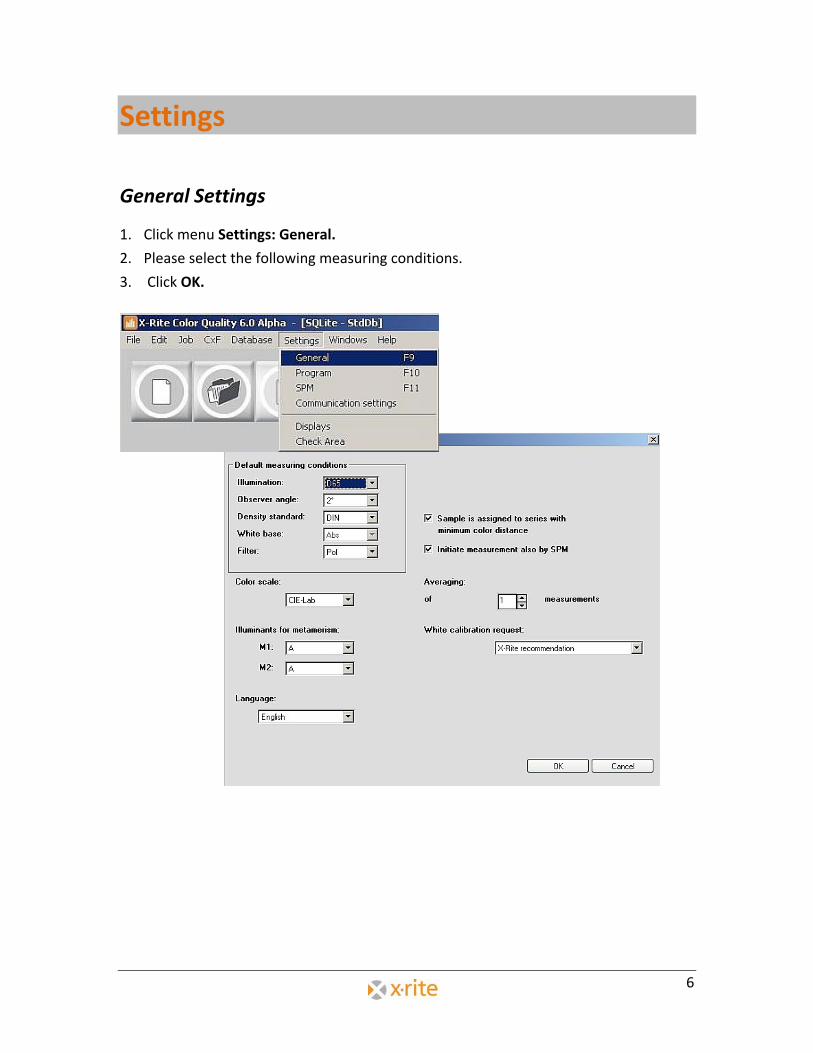
General Settings
1. Click menu Settings: General.
2. Please select the following measuring conditions.
3. Click OK.

7
Program Settings
1. Click menu Settings: Program.
Default tolerance, dE* formula, white base for density calculation, and dye strength calculation are defined in Program settings. New jobs will use these settings.
NOTE: In Graphic Arts, density and dye strength calculations are normally based on the white of the substrate. ColorQuality™ allows you to choose the white base. If "Substrate" is selected, then the substrate would have to be measured in the "Modify current job" window, field "Series"(See arrow "1"). The values of density and dye strength are then relative to the substrate.
Changing the white base has no influence on colorimetric data (e.g. L*a*b* values), as they are always based on absolute white.
2. Exit the window by clicking OK or Cancel.

8
Spectrophotometer Settings
1. Click menu Settings: SPM.
A connected spectrophotometer can be searched and calibrated. The COM port and the baud rate can be selected or changed. At the bottom of the window, information about the connected instrument is displayed.
2. Exit the window by clicking Close.
Please note that NetProfiler can be enabled or disabled from the Setup button.

9
Display Settings
1. Click menu Settings: Displays.
In this window you can define the default displays for the program. If “Accept settings for ‘New job’ ” is activated then all new jobs will appear as defined here.
2. Exit the window by clicking OK or Cancel.
10
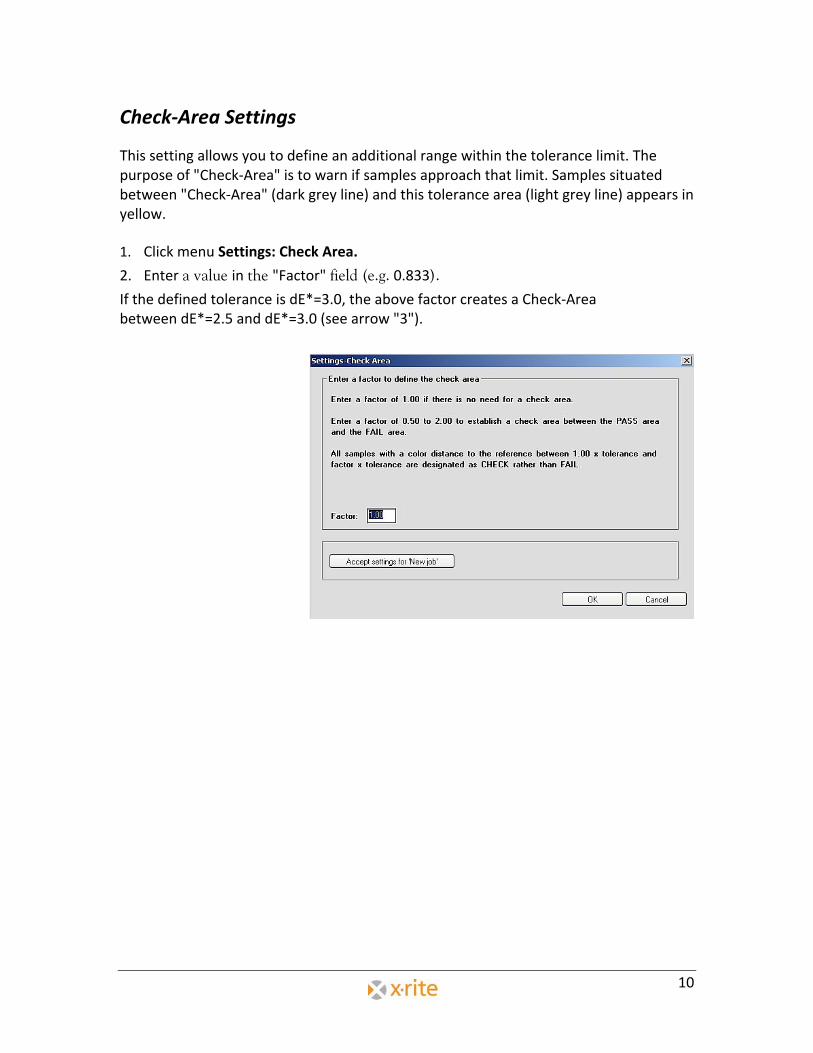
Check-Area Settings
This setting allows you to define an additional range within the tolerance limit. The purpose of "Check-Area" is to warn if samples approach that limit. Samples situated between "Check-Area" (dark grey line) and this tolerance area (light grey line) appears in yellow.
1. Click menu Settings: Check Area.
2. Enter a value in the "Factor" field (e.g. 0.833). If the defined tolerance is dE*=3.0, the above factor creates a Check-Area between dE*=2.5 and dE*=3.0 (see arrow "3").

11
Communication Settings
The input path for the jobs can be defined in this setting. This can also be used for the appropriate CXF Browser.
CXF Browser Settings
Connect to the protocol for Color Communication – CXF Browser. Color information in digital form can be imported to ColorQuality.

12
Setting Up a New Job
1. Click menu Job: New, or click the New Job button.
2. Customer.
• Select a customer for this job and click next (>>) or
• Create a new customer by clicking New Name the customer and click OK Click next (>>)
NOTE: Color Quality is job-related. This means, jobs are assigned to customers. If a customer does not yet exist, it can be created while setting up the job. However, a customer can also be created previously in database "Customers". An already existing customer can simply be highlighted and selected.
13
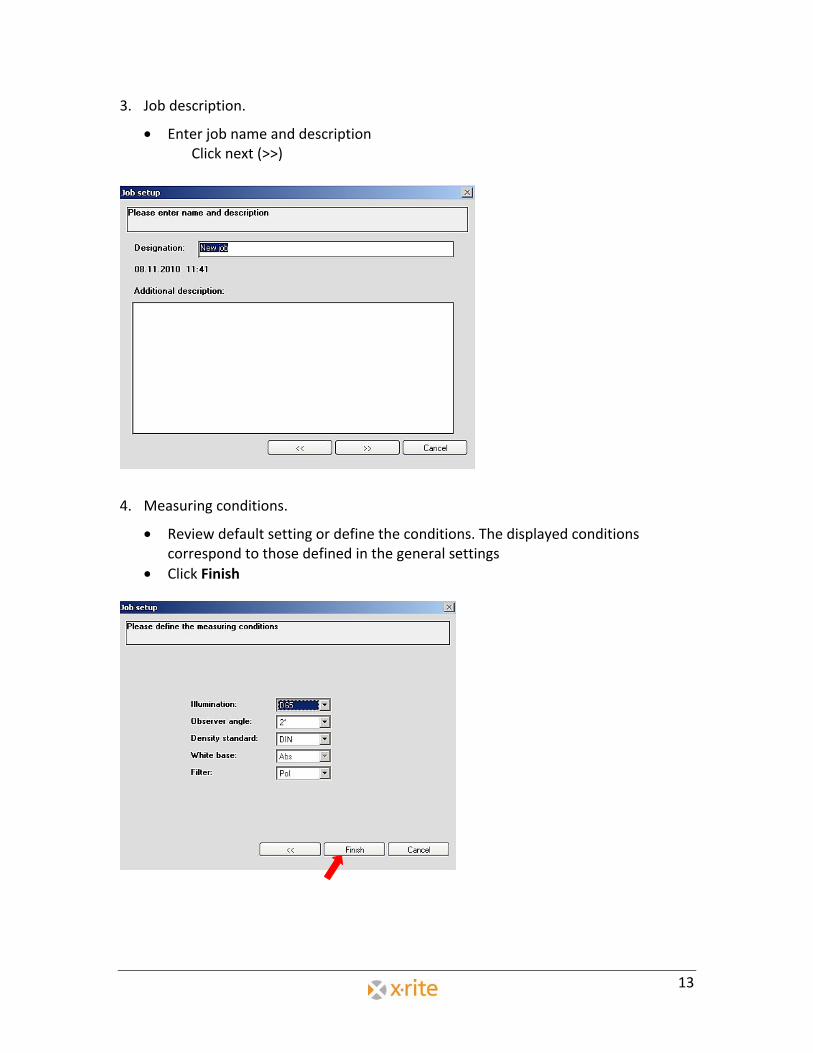
3. Job description.
• Enter job name and description Click next (>>)
4. Measuring conditions.
• Review default setting or define the conditions. The displayed conditions correspond to those defined in the general settings
• Click Finish
14
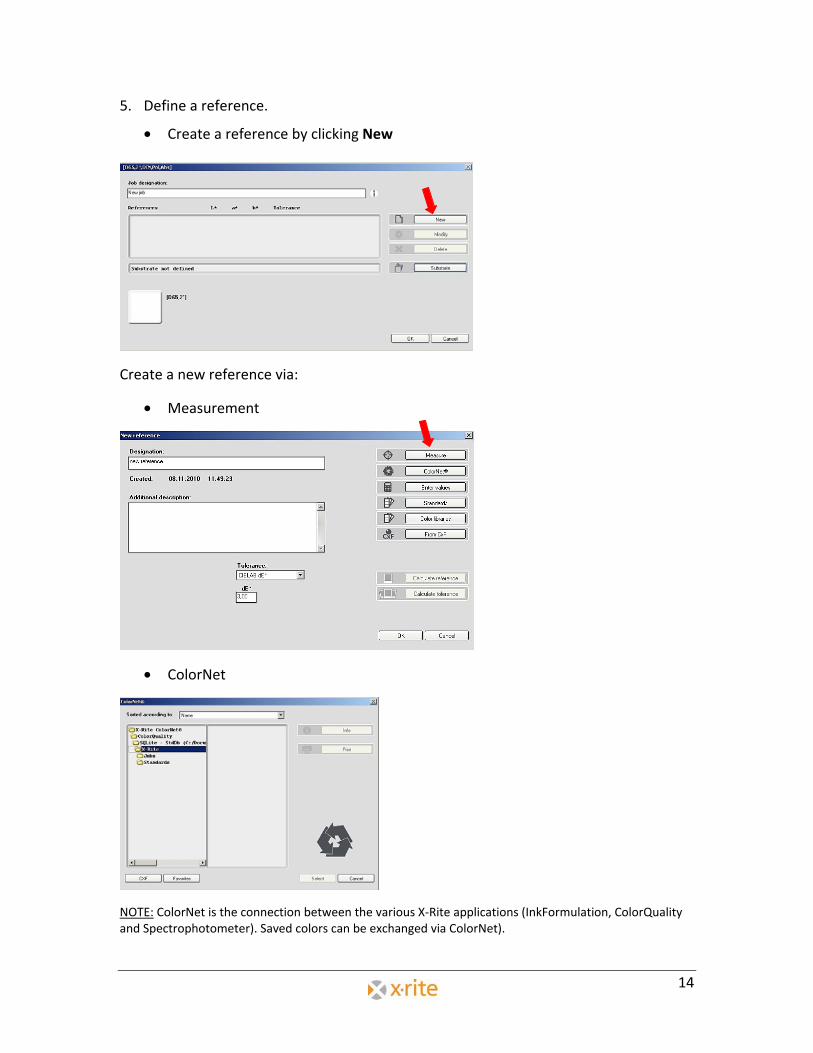
5. Define a reference.
• Create a reference by clicking New
Create a new reference via:
• Measurement
• ColorNet
NOTE: ColorNet is the connection between the various X-Rite applications (InkFormulation, ColorQuality and Spectrophotometer). Saved colors can be exchanged via ColorNet).

15
• Enter Values
NOTE: that if values are defined it will NOT be possible to download this reference to a SpectroEye.
• Standards
• Color Libraries or
• From CXF
Select your option and click on the “reference” and then OK.
• the reference appears in the field • you can define many references, however, the user interface cannot show more
than 50 references • define the substrate if desired (not necessary and only used in density/dye strength
calculations) • click OK to close the window After closing the window, the program switches automatically to the main window where now the samples will be read in by ColorNet or measure.

16
1)Note: ColorNet® is the interconnection between different X-rite applications (e.g. ColorQuality™, Ink Formulation™, spectrophotometer). That means the color can be exchanged between the individual applications via ColorNet.
2)Note: The structure of the folders in ColorNet is similar to the Windows® Explorer. This means that by double-clicking on a folder, the hidden subfolders expand below. By double-clicking on the upmost folder (X-Rite ColorNet), all available applications appear (including a connected measuring device).
17
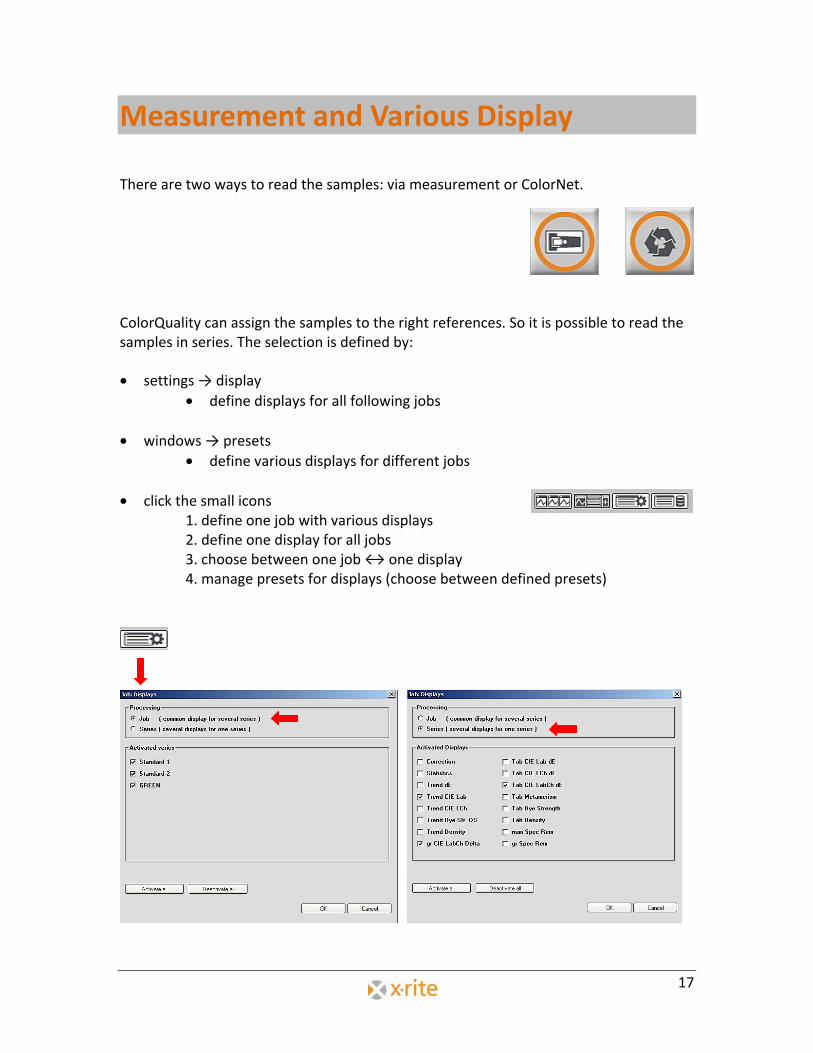
Measurement and Various Display
There are two ways to read the samples: via measurement or ColorNet.
ColorQuality can assign the samples to the right references. So it is possible to read the samples in series. The selection is defined by:
• settings → display • define displays for all following jobs
• windows → presets
• define various displays for different jobs • click the small icons
1. define one job with various displays 2. define one display for all jobs 3. choose between one job ↔ one display 4. manage presets for displays (choose between defined presets)

18
Using of Presets
In ColorQuality you can define various displays for all jobs. There are two functions to select from:
• Store as preset
Click on the Store as preset to saving the current display options.
19
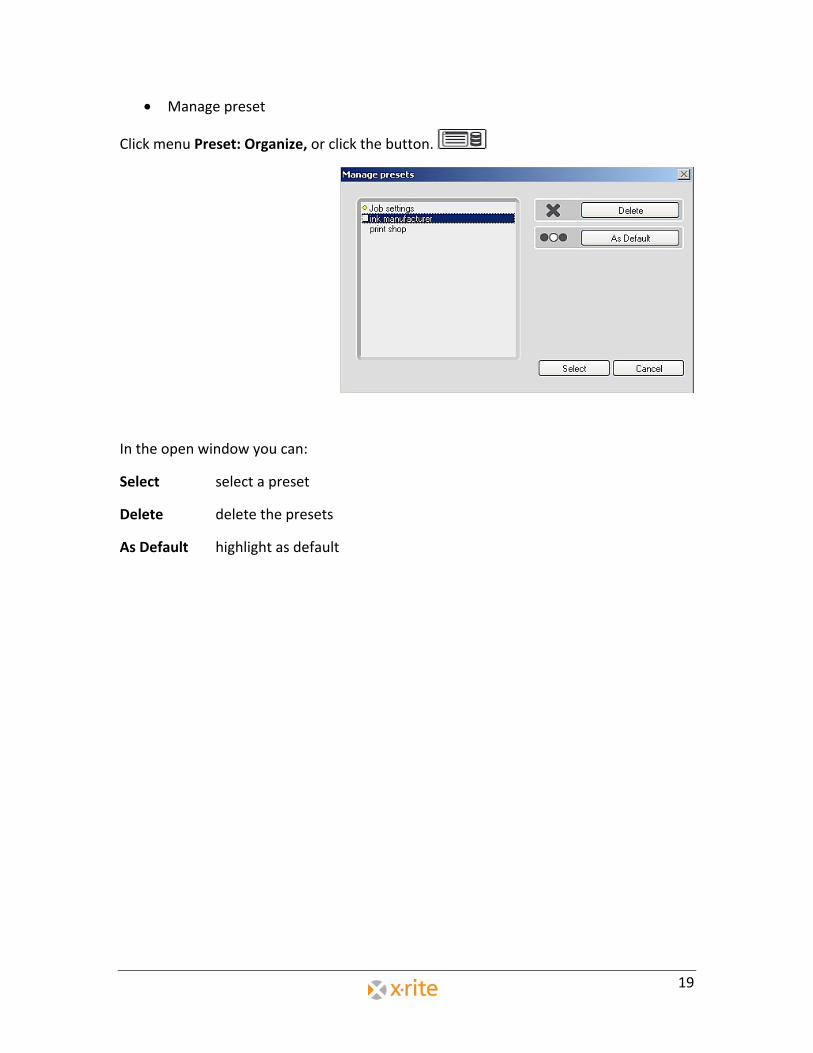
• Manage preset
Click menu Preset: Organize, or click the button.
In the open window you can:
Select select a preset
Delete delete the presets
As Default highlight as default

20
Viewing Samples
1. Click on the left- and right-arrows in the sample selection field several times to page through the samples backward and forward.
2. Position the cursor into the sample information field (i) and type in note if required for the displayed sample. The note will be overwritten each time.
21
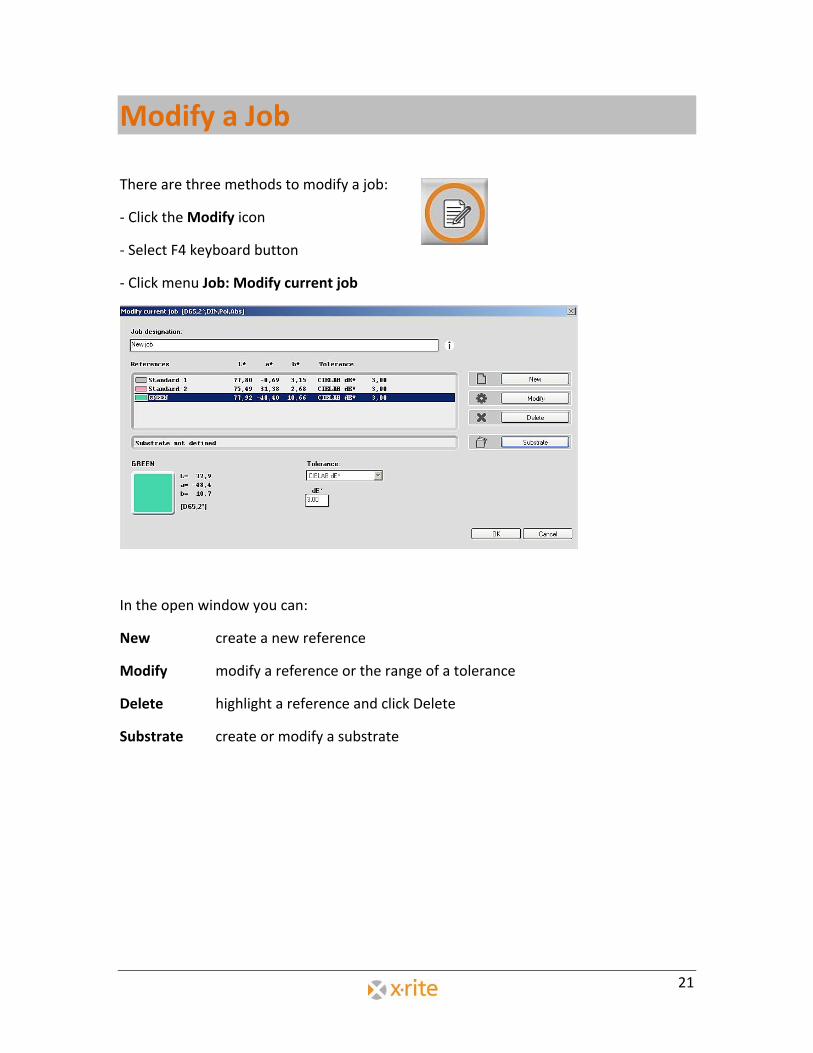
Modify a Job
There are three methods to modify a job:
- Click the Modify icon
- Select F4 keyboard button
- Click menu Job: Modify current job
In the open window you can:
New create a new reference
Modify modify a reference or the range of a tolerance
Delete highlight a reference and click Delete
Substrate create or modify a substrate

22
Defining a Standard
In cases where a customer has specific colors which are always used, they can be assigned to the customer as so-called standards.
1. Click menu Database: Standards.
2. Choose the Customer.
3. Click New.
4. Using Measure or ColorNet you can define a new Standard.
5. Complete the Definition of the Standard and click Close.

23
Placing a Standard into a Job
1. Open the job where you are placing the standard.
• Click menu Job: Open or click the Open Job button.
2. Select the Modify current job icon and click New.
3. The standard can define using ColorNet.
4. Choose the standard by double-clicking on it or by selecting it and then clicking Select.
5. The standard is now “imported” into the job.
6. Click OK to close the window.

24
Quick Compare
The quick compare mode option is used to compare a reference value with sample measurements.
1. Click the Quick Compare icon.
2. Before measuring the reference check the measurement conditions. Select the desired conditions and click OK.
3. Define the reference by measuring or loading using ColorNet and click OK.
The program switches to the main window and is ready for measuring the samples.
Click on Quick Compare again to close this mode. The program asks you whether you want to save as a quick compare job. This gives you the option to save the job for a customer.

25
Backup a Database
As the volume of stored data increases, a regularly performed backup of the data becomes more and more important.
The procedure for backing up data in ColorQuality is very organized and user-friendly.
1. Click menu File: Database: Backup.
2. Highlight the database and click Save.
26
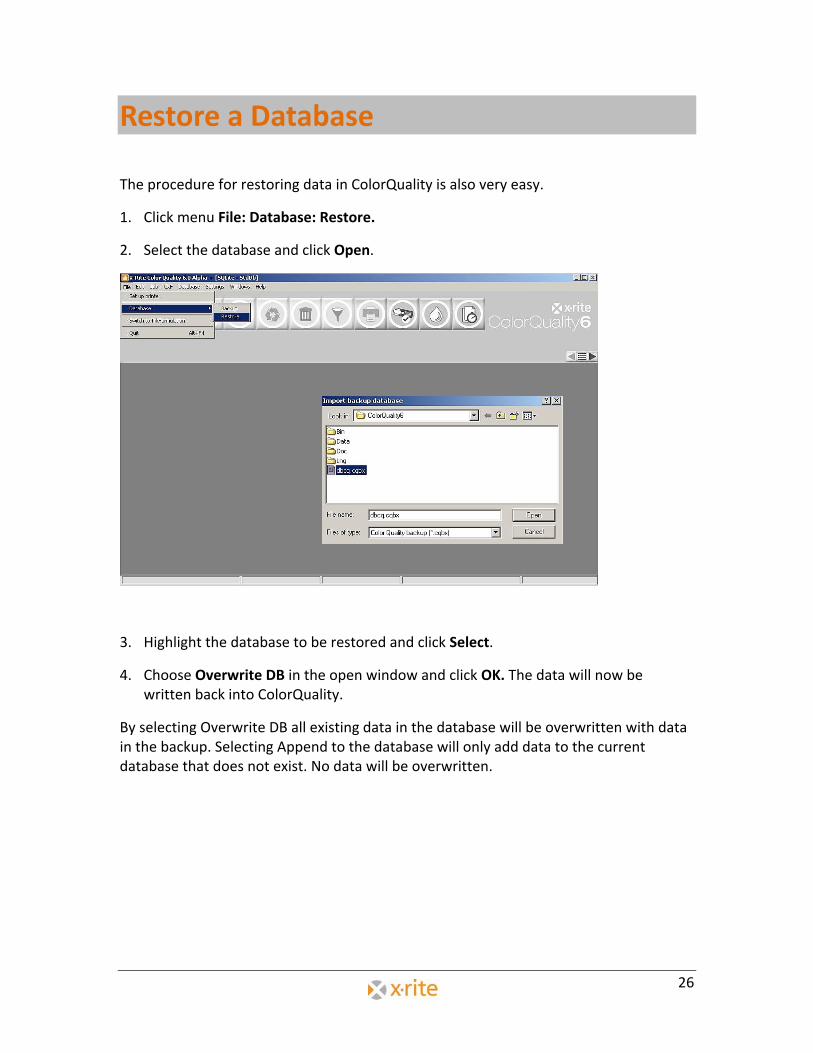
Restore a Database
The procedure for restoring data in ColorQuality is also very easy.
1. Click menu File: Database: Restore.
2. Select the database and click Open.
3. Highlight the database to be restored and click Select.
4. Choose Overwrite DB in the open window and click OK. The data will now be written back into ColorQuality.
By selecting Overwrite DB all existing data in the database will be overwritten with data in the backup. Selecting Append to the database will only add data to the current database that does not exist. No data will be overwritten.