fill out forms, split, combine, sign and search pdfs with ease
TRANSCRIPT

Fill out forms, split, combine, sign and search PDFs with ease! Even correct text and edit graphics!Create fillable forms with PDFpenPro!
what is PDFpen?
what's new?
getting around
editing
editing forms [PDFpenPro only]
importing & saving
searching
printing
AppleScript
tips & tricks
how to purchase [DEMO only]
support
frequently asked questions (FAQ) [web]
visit PDFpen.com [web]
© 2003-2006 SmileOnMyMac, LLC. All rights reserved.
1
Welcome to PDFpen!
Fill out and save PDF forms; split, combine, and reorder pages; mark-up & augment PDFs with text and image overlays. Even correct text and edit graphics!
With PDFpenPro you can also create fillable cross-platform PDF forms.
Read what's new in this version of PDFpen.
Features of PDFpen and PDFpenPro:
● Show PDFs in single, facing-page, multi-page, and
multiple facing-page views
● Re-order pages in a PDF by drag & drop
● Insert pages from one PDF into another (drag & drop
or copy/paste)
● Remove pages from a PDF
● Overlay text and images onto PDF (for example, sign
purchase orders by applying signature image)
● Replace and correct existing PDF text with editable
imprints
● Move, resize, delete embedded PDF images
● Fill out and save PDF forms
● Create cross-platform fillable PDF forms (requires
PDFpenPro)
● Use with pagesender for a complete fax turn-around
solution
● Automate PDF manipulations with AppleScript
System RequirementsUpdates & PurchasingInstallingHelp
2

UninstallDisclaimer
System Requirements
Mac OS X 10.4 or above.
Updates & Purchasing
You can find the latest version of PDFpen/Pro and technical support at:
http://www.pdfpen.com
PDFpen costs US $49.95 and may be purchased from the demo or from:PDFpenPro costs US $94.95 and may be purchased from the demo or from:
the SmileOnMyMac web store
Users of PDFpen 1.X upgrade to PDFpen 2.X for free.
Users of PDFpen 2.X upgrade to PDFpen 3.X for $25, or free if PDFpen 2.X was purchased on or after July 1 2006.
Users of PDFpenPro 2.X upgrade to PDFpenPro 3.X for $25, or free if PDFpenPro 2.X was purchased on or after July 1 2006.
PDFpen users may upgrade to PDFpenPro 3.X for US $45 using the Upgrade to PDFpenPro… menu item in the PDFpen menu of the application.
How do I Install PDFpen/Pro?
Simply drag PDFpen/Pro from its disk image to your Applications folder, or wherever you prefer to put your applications.
Where can I get help with PDFpen/Pro?
PDFpen ships with extensive online help. Select PDFpen/Pro Help (Help Viewer) from the Help menu of PDFpen/Pro to view the help with Apple's Help Viewer application, or select PDFpen/Pro Help (Web Browser) to view the
3

PDFpen help in your default web browser. Browser help is also available.
How do I Uninstall PDFpen/Pro?
Drag the PDFpen/Pro application icon to the Trash.
For complete removal, also move to the trash Trash:[home]/Library/Application Support/PDFpen[home]/Library/PDF Services/Open with PDFpen.app, Open with PDFpenPro.app
Disclaimer
This software is provided "as is" and any express or implied warranties, including, but not limited to, the implied warranties of merchantibility and fitness for a particular purpose are disclaimed. In no event shall the copyright owner or contributors be liable for any direct, indirect, incidental, special, exemplary, or consequential damages (including, but not limited to, procurement of substitute goods or services; loss of use, data, or profits; or business interruption) however caused and on any theory of liability, whether in contract, strict liability, or tort (including negligence or otherwise) arising in any way out of the use of this software, even if advised of the possibility of such damage.
PDFpen and PDFpenPro are produced by:
SmileOnMyMac, LLCPMB 278350 Bay Street, Suite 100,San Francisco, CA 94133
We welcome your inquiries and feedback at: [email protected]
© 2003-2006 SmileOnMyMac, LLC. All rights reserved.
4
help: what's new?
We've been hard at work since PDFpen 1.0 listening to your feedback and continually making PDFpen a better product. We hope you enjoy the results!
PDFpen/Pro 3.0 2006-10-10
● Edit images - move / resize / copy / delete existing
images in PDFs
● Correct / modify text - replace text in PDFs with
editable text blocks
● View table of contents
● Select text in multiple columns
● Copy rich text - retain fonts and formatting when
copying from PDFs
● User interface enhancements
PDFpen/Pro 2.4.2 2006-08-29
● Improved selection behavior for PDF images
● Improved text location and selection
● Fixed problem interpreting Unicode character maps
● Single disk image for all languages
PDFpen/Pro 2.4.1 2006-08-01
● Improved UNICODE support
● Goto links on PDFpenPro are now followed
● Various reliability enhancements
PDFpen/Pro 2.4 2006-06-28
5
● Support for PDF comments
● Display and navigate from a list of comments, notes
and imprints
● Various other fixes and improvements
PDFpen/Pro 2.3.4 2006-04-11
● Enhanced document compatibility
● Updates for password-protected documents on Intel
Universal binary
PDFpen/Pro 2.3.3 2006-03-21
● Updates essential for Intel Universal binary
● Additional keyboard shortcuts for highlighting,
inserting a blank page, and go to page
● Various improvements and performance
enhancements
PDFpen/Pro 2.3.2 2006-01-31
● Universal Binary (runs native on Intel and PowerPC)
PDFpen/Pro 2.3.1 2005-10-04
● Improves quality of printed imprints
PDFpen/Pro 2.3 2005-09-20
● Improved performance for handling complex forms
● Improved interactivity for document display
● Improved display performance
● Fixes problem with disappearing imprints in affected
documents
● Various other fixes and improvements
6

PDFpen/Pro 2.2.2 2005-07-06
● Fixes problem writing annotations to secure PDFs
PDFpen/Pro 2.2.1 2005-06-28
● Open with PDFpen directly from the Print dialog
● Improved compatibility with off-spec PDF files
● Minor bug fixes
PDFpen/Pro 2.2 2005-05-31
● Open secure and password-protected PDF
documents *
● Save documents with password security
● Create multi-stroke freehand imprints
● Create multi-line polygon imprints
● Add links to URLs and pages in document (requires
PDFpenPro)
● Follow remote file links
● Optimized drawing performance
● Improved memory management
● Better handling of off-spec PDFs
● Minor bug fixes and improvements
* PDFpen respects PDF document security permissions PDFpen/Pro 2.1.1 2005-04-25
● Tiger (Mac OS X 10.4) compatible
● PDFpenPro now creates Preview-fillable text fields
(re-save existing PDFpenPro forms to enable)
● Resolved Tiger-specific crash when adding imprints
● Resolved hang with Combine PDF / Split PDF scripts
when called from script menu
7
PDFpen/Pro 2.1 2005-03-30
● View, add, and edit PDF notes
● Crop pages
● Select and copy rectangular areas
● Compress uncompressed images when saving
(requires PDFpenPro)
● Imprinted images retain compression settings when
saved
● Further non-spec PDF issues resolved
● Performance and stability enhancements
PDFpen/Pro 2.0.1 2005-02-15
● Multi-line text in forms is displayed properly
● Size to fit improved for small point sizes
● Precisely horizontal and vertical lines display
properly
● Old-style link annotations function properly
● Performance improvements
● Stability improvements
PDFpen/Pro 2.0 2005-01-04
● Fill out and save filled-out PDF forms
● Create cross-platform fillable PDF forms (requires
PDFpenPro)
● Search, select, and copy full text of PDF documents
● View and follow links in PDF documents
● Add highlighting markup to document text
● Align objects
● Show and snap to grid
● Set default font and size for text imprints
● Check for updates via Internet
● Numerous improvements and fixes 8
PDFpen 1.2.1 2004-06-08
● Enhanced speed and responsiveness of text
operations
● Improved precision and responsiveness of freehand
drawing tool
● Prints at 100% scale unless specified in Page Setup
● Split PDF script fixed
● Unexpected scroll-to-top fixed
● Numerous issues with non-spec PDFs resolved
PDFpen 1.2 2004-03-17
● Freehand drawing tool for making your own scribbles
● Library palette of built-in vector drawings, your
images, and your scribbles
● View and edit PDF document info
● Rotate page(s)
● Open multi-page TIFF files (and other graphics files)
● Ruler support for text imprints
● Right-to-left multi-page view option
● Double-click to set default tool
PDFpen 1.1 2004-02-10
● Hand tool for scrolling
● Combine PDFs and Split PDF scripts (droplets)
● Improved drawing speed
● Outline border for text imprints
● Improved font and bounds size for default text
imprint
● Slimmer text cursor
● Better handling of non-spec PDF files
9

© 2003-2006 SmileOnMyMac, LLC. All rights reserved.
10
help: getting around
PDFpen is a document-based application. With it you can open exisiting PDF documents and create new ones.
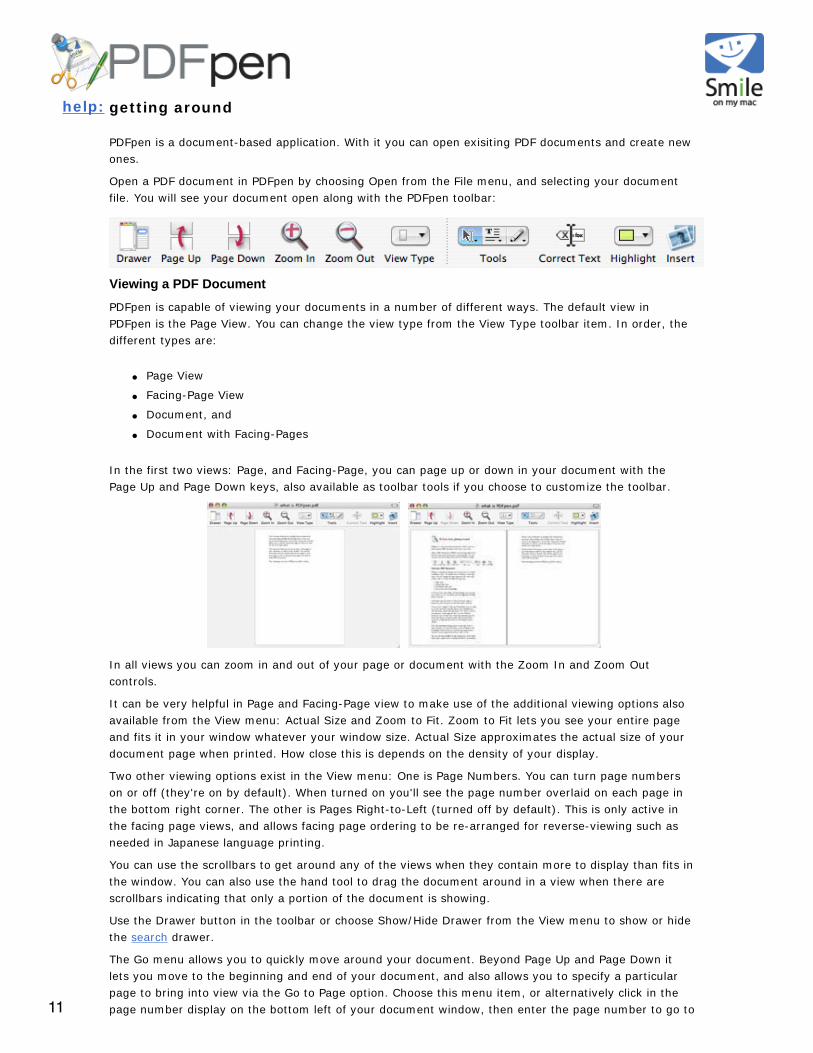
Open a PDF document in PDFpen by choosing Open from the File menu, and selecting your document file. You will see your document open along with the PDFpen toolbar:
Viewing a PDF Document
PDFpen is capable of viewing your documents in a number of different ways. The default view in PDFpen is the Page View. You can change the view type from the View Type toolbar item. In order, the different types are:
● Page View
● Facing-Page View
● Document, and
● Document with Facing-Pages
In the first two views: Page, and Facing-Page, you can page up or down in your document with the Page Up and Page Down keys, also available as toolbar tools if you choose to customize the toolbar.
In all views you can zoom in and out of your page or document with the Zoom In and Zoom Out controls.
It can be very helpful in Page and Facing-Page view to make use of the additional viewing options also available from the View menu: Actual Size and Zoom to Fit. Zoom to Fit lets you see your entire page and fits it in your window whatever your window size. Actual Size approximates the actual size of your document page when printed. How close this is depends on the density of your display.
Two other viewing options exist in the View menu: One is Page Numbers. You can turn page numbers on or off (they're on by default). When turned on you'll see the page number overlaid on each page in the bottom right corner. The other is Pages Right-to-Left (turned off by default). This is only active in the facing page views, and allows facing page ordering to be re-arranged for reverse-viewing such as needed in Japanese language printing.
You can use the scrollbars to get around any of the views when they contain more to display than fits in the window. You can also use the hand tool to drag the document around in a view when there are scrollbars indicating that only a portion of the document is showing.
Use the Drawer button in the toolbar or choose Show/Hide Drawer from the View menu to show or hide the search drawer.
The Go menu allows you to quickly move around your document. Beyond Page Up and Page Down it lets you move to the beginning and end of your document, and also allows you to specify a particular page to bring into view via the Go to Page option. Choose this menu item, or alternatively click in the page number display on the bottom left of your document window, then enter the page number to go to 11
a specific page.
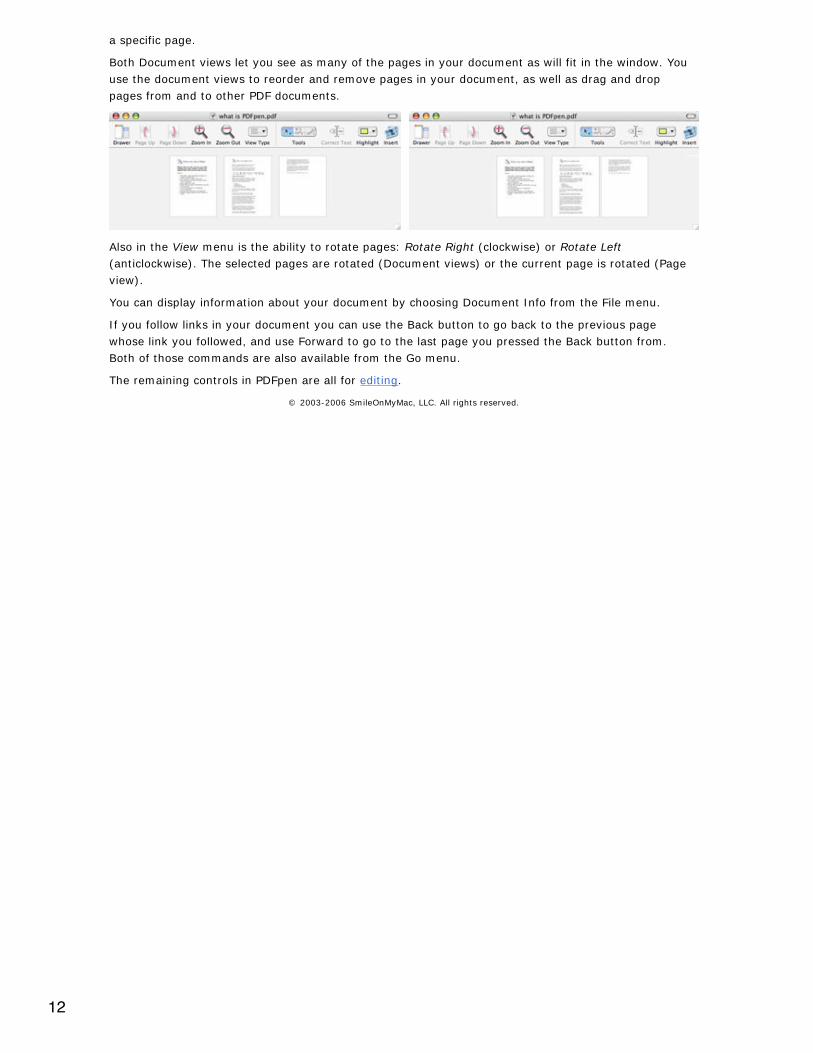
Both Document views let you see as many of the pages in your document as will fit in the window. You use the document views to reorder and remove pages in your document, as well as drag and drop pages from and to other PDF documents.
Also in the View menu is the ability to rotate pages: Rotate Right (clockwise) or Rotate Left (anticlockwise). The selected pages are rotated (Document views) or the current page is rotated (Page view).
You can display information about your document by choosing Document Info from the File menu.
If you follow links in your document you can use the Back button to go back to the previous page whose link you followed, and use Forward to go to the last page you pressed the Back button from. Both of those commands are also available from the Go menu.
The remaining controls in PDFpen are all for editing.
© 2003-2006 SmileOnMyMac, LLC. All rights reserved.
12

help: editing
There are three significant ways of editing & working with PDF documents in PDFpen. The first is text selection and form filling. The second one is Document Editing as it allows you to make overall document changes. The third one we call Editing with Imprints as these allow you to make additions to single pages of a document by overlaying graphics and or text onto any page.
Text Selection and Form Editing
There are four selection tools in PDFpen, and which is chosen determines what you can select, operate, or edit within the single page view of your document. They can also be accessed from the Tools menu, and chosen with the related hotkeys. In order they are:
Select Text Tool: click-drag, double-click-drag, and treble-click-drag to select characters, words, and lines in a page. You can select text across more than one page by changing page, and shift-clicking into the new page to extend the selection. Selected text can be copied and pasted into other applications. Text attributes are copied along with the text and match the original formatting as much as possible. Text is automatically selected in columns if your document is formatted that way. From the Select Text Tool you can also fill PDF forms: enter text data, and operate checkboxes and radio buttons.
Edit Tool: with this tool you can select, move and resize imprints. From PDFpenPro only you can additionally edit form fields to make PDF
13
forms. Only the Edit Tool, and not the Select Text tool is operable in multi-page document views, in which it manipulates pages and the page selection.
Scroll Tool: when zoomed into a page, you can use this tool to scroll around the page and move the area with which you want to work into view.
Select Rectangle Tool: within a page, you can use this tool to select a rectangular region of the page. You can then either copy the selected area as an image, or crop your page or document to the selected area.
Note: with all the following tools you can double-click a tool to lock it and continue working with the tool. Clicking the arrow tool will unlock your choice of tool.
Document Mark-up
Highlighting
You can apply a transparent highlight color to selected text with the color choices found under Highlight in the Format menu. You can use this to mark passages or words of interest in a document. To remove highlighting from text, select at least a portion of the highlighted text and choose the menu item Format–Highlight–Remove.
Notes
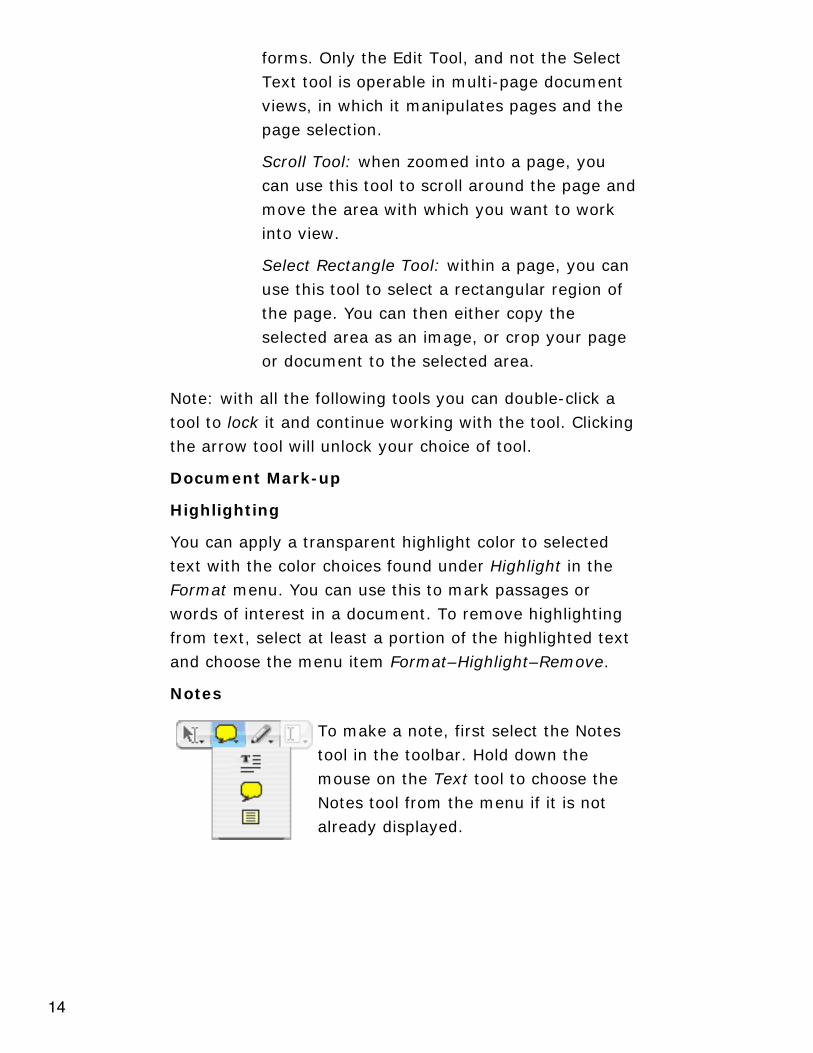
To make a note, first select the Notes tool in the toolbar. Hold down the mouse on the Text tool to choose the Notes tool from the menu if it is not already displayed.
14

Next, click in the page location where you'd like to place a note. The note is inserted as a small icon as indicated. A small window allowing you to enter & edit the text of the note will appear. You can leave the note window open or closed depending on how you want it to appear when you open your document.
A note can be selected by clicking on it with the mouse provided the Edit Tool (arrow) is chosen first. Once selected, you can then drag it around the page to reposition it. Choose Delete from the Edit menu, or press the delete key to remove a selected note.
With either the Edit Tool or the Select Text Tool as the current tool, you can double-click a note to open or close its text window.
Comments
To make a comment, first select the Comments tool in the toolbar. Hold down the mouse on the Text tool to choose the Comments tool from the menu if it is not already displayed.
Next, click in the page location where you'd like to place a comment. You can also click and drag initially in order to size the comment when you place it. Once your comment is placed, just type over the text that appears to edit it.
With either the Edit Tool or the Select Text Tool as the current tool, you can double-click a comment to edit it.
15

Links [PDFpenPro only]
To make a link to a URL, first select the URL Linking tool in the toolbar. Hold down the mouse on the Text tool to choose the URL Linking from the menu if it is not already displayed.
Next, click in the page location where you'd like to place a link. You can also click and drag initially in order to size the link when you place it. Once a link is placed a sheet appears in which you can specify the link location as a URL.
A link can be selected by clicking on it with the mouse provided the Edit Tool (arrow) is chosen first. Once selected, you can then drag it around the page to reposition it. Choose Delete from the Edit menu, or press the delete key to remove a selected link. You can resize a link via the selection handles at its corners.
To make a link to a specific page, first select the Page Linking tool in the toolbar. Hold down the mouse on the Text tool to choose the Page Linking from the menu if it is not already displayed.
With either the Edit Tool selected, you can double-click on a link to change its properties i.e. where it links to. With the Select Text Tool as the current tool, click any link to follow that link.
Document Editing16

The major document editing functions are as follows:
● Delete pages
● Reorder pages
● Duplicate pages
● Insert pages
These are performed in the either of the Document Views as follows:
Delete pages Select the page you wish to delete by clicking on it. Select multiple pages by clicking on the first and dragging through the remainder with the mouse.Choose Delete from the Edit menu, or press the delete key and the pages will be removed.
Reorder pages Select the page you wish to reorder by clicking on it. Select multiple pages by clicking on the first and dragging through the remainder with the mouse.To reorder the page(s) click in any of the selected pages and without releasing the mouse drag them to a new location between other pages in the document. When you release the mouse the pages will be reordered.
17

Duplicate pages
Select the pages you wish to duplicate as if you are going to reorder them (above).To duplicate the pages hold down the option key on the keyboard, click in any of the selected pages and without releasing the mouse drag them to a new location between other pages in the document. When you release the mouse the pages originally selected will be duplicated in the new location.
Insert pages You can insert pages from one document into another, or alternatively you can insert blank pages into a document.
Select the pages you wish to insert into another document as if you are going to reorder them (above). Make sure you have the other document open already. Click the mouse within the selected pages, and drag them into the other document in the desired location. When you release the mouse the pages originally selected will be inserted in the new location in the other document.
To insert a blank page click the mouse between the pages between which you wish to insert a blank page. Choose Insert Blank Page from the Edit menu. Note that if you are in Page View a blank page is inserted after the current page.
Additional Information about Selecting Pages
It is possible to modify the selection of pages with the shift or command (apple) keys. Hold down the shift key and either click or drag through pages in order to select several pages at once. Hold down the command key and either click or drag through pages to toggle selection of 18
those pages.
Note that you can Cut, Copy, and Paste pages within a document and Paste into another document. When you paste pages into a document the selected pages are automatically replaced with the contents of the clipboard. If you select between pages, your pasted pages will be inserted between those pages.
Cropping Pages
To crop a page or pages, you must first make a selection with the Select Rectangle Tool. Crop your page by choosing Crop Page to Selection from the Edit menu. Hold down the option key and choose Crop Document to Selection to crop the entire document
Editing with Imprints
You can use imprints to fill out a form or add a signature to an electronic document before printing. Imprints overlay the page contents. They can be moved around, resized, and also edited.
There are three kinds of imprints you can place on a page in PDFpen:
● Text imprints
● Graphic/Image imprints, and
● Line-drawing and Scribble imprints
To make or edit an imprint you must be in Single Page View.
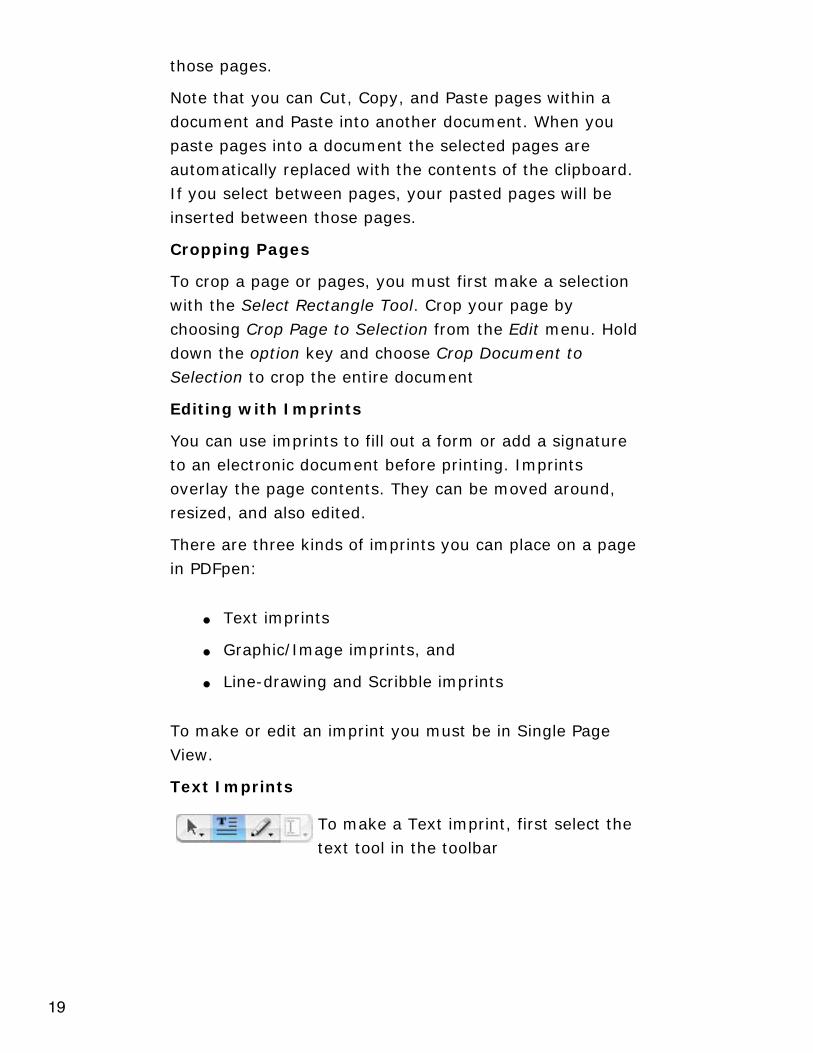
Text Imprints
To make a Text imprint, first select the text tool in the toolbar
19
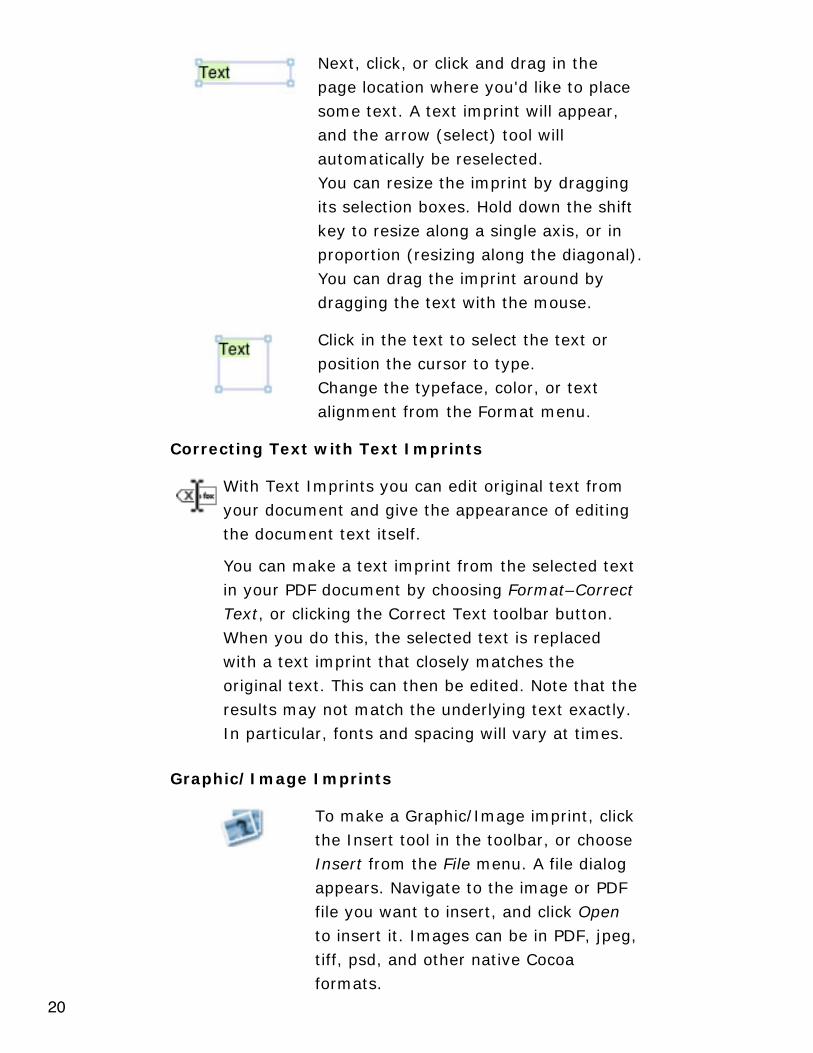
Next, click, or click and drag in the page location where you'd like to place some text. A text imprint will appear, and the arrow (select) tool will automatically be reselected.You can resize the imprint by dragging its selection boxes. Hold down the shift key to resize along a single axis, or in proportion (resizing along the diagonal).You can drag the imprint around by dragging the text with the mouse.
Click in the text to select the text or position the cursor to type.Change the typeface, color, or text alignment from the Format menu.
Correcting Text with Text Imprints
With Text Imprints you can edit original text from your document and give the appearance of editing the document text itself.
You can make a text imprint from the selected text in your PDF document by choosing Format–Correct Text, or clicking the Correct Text toolbar button. When you do this, the selected text is replaced with a text imprint that closely matches the original text. This can then be edited. Note that the results may not match the underlying text exactly. In particular, fonts and spacing will vary at times.
Graphic/Image Imprints
To make a Graphic/Image imprint, click the Insert tool in the toolbar, or choose Insert from the File menu. A file dialog appears. Navigate to the image or PDF file you want to insert, and click Open to insert it. Images can be in PDF, jpeg, tiff, psd, and other native Cocoa formats.
20

The imprint will be placed in the middle of the page by default. Drag it around by clicking in it and dragging.You can resize the imprint by dragging its selection corners. Hold down the shift key to resize along a single axis, or in proportion (dragging along the diagonal).
Choose Crop Image from the toolbar, Crop Image from the Edit Menu, or double-click the image to crop it.In the image cropping tool you can choose a portion of the image by dragging the mouse over it, and then crop it by clicking the Crop button. With it, you can also change the resolution of the image by lowering the slider displayed. Note that this does not affect line art from a PDF when displayed in the page.
Choose Make Transparent Image from the Edit menu if you wish to add transparency to an exisiting imprint.Click in the image displayed in the transparency tool to choose a color to make transparent. Change the tolerance slider to incorporate more or less similar colors into the transparent area of the image. Click Make Transparent when you have your image how you want it.
Choose Expand Image to Fit Page from the Edit menu to expand the selected graphic imprint to fit the page. The image will be expanded to large as possible while remaining fully visible on the page.
21
Editing Existing Images in a PDF document
You can select images within a PDF document when either the Edit tool or the Select Text tool is engaged. Click in an image to select it. Once an image is selected you can remove it entirely by choosing Edit–Delete, or pressing the delete key. You can also copy, drag and resize the selected image. Moving or resizing an image that is part of the original PDF document detaches the image from the original page and lets you work with it with the flexibility of an image imprint.
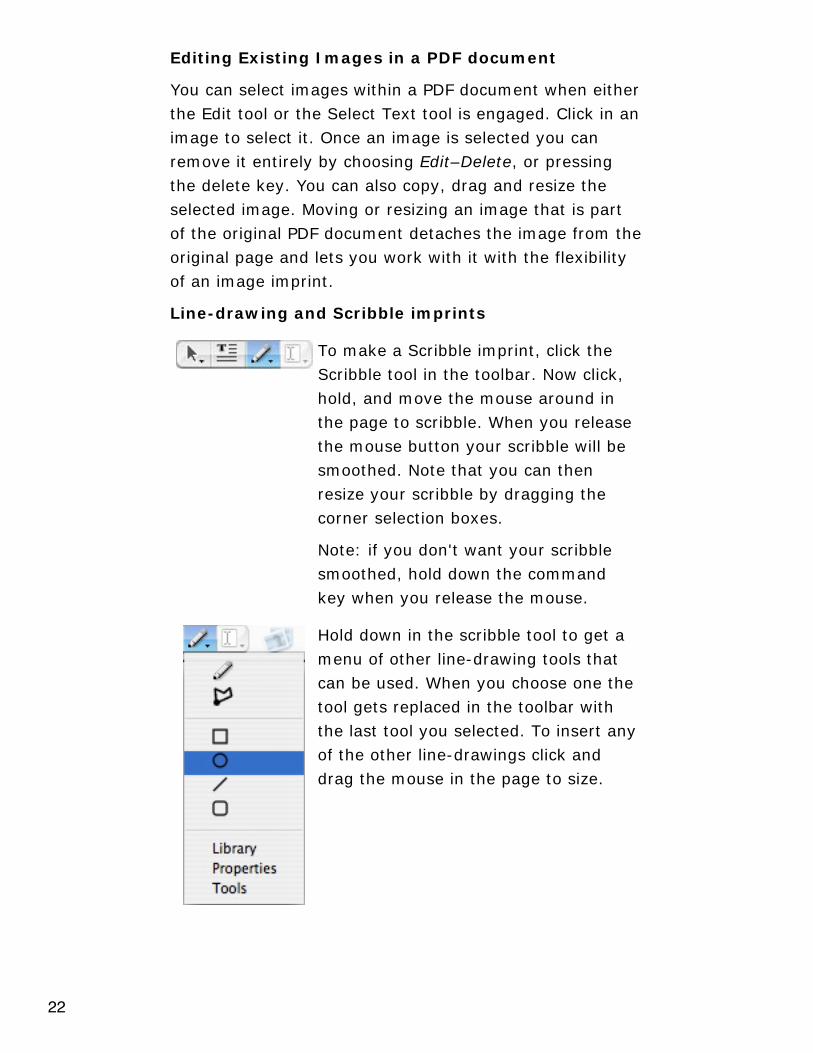
Line-drawing and Scribble imprints
To make a Scribble imprint, click the Scribble tool in the toolbar. Now click, hold, and move the mouse around in the page to scribble. When you release the mouse button your scribble will be smoothed. Note that you can then resize your scribble by dragging the corner selection boxes.
Note: if you don't want your scribble smoothed, hold down the command key when you release the mouse.
Hold down in the scribble tool to get a menu of other line-drawing tools that can be used. When you choose one the tool gets replaced in the toolbar with the last tool you selected. To insert any of the other line-drawings click and drag the mouse in the page to size.
22
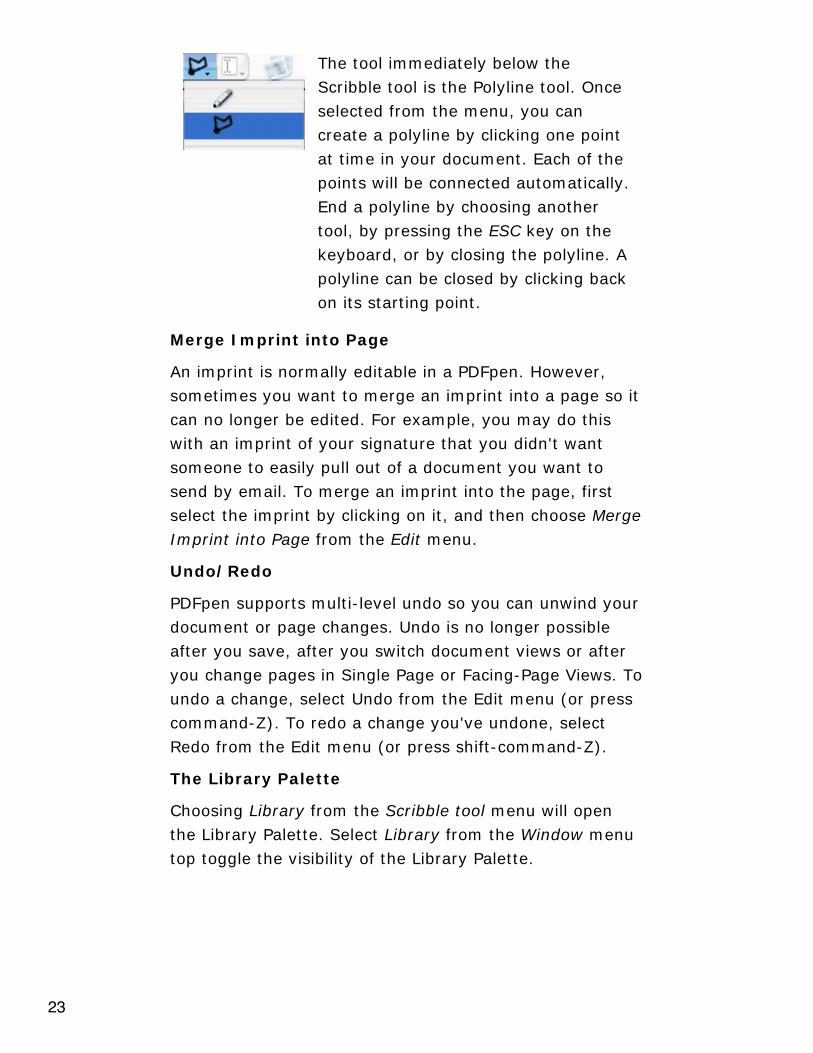
The tool immediately below the Scribble tool is the Polyline tool. Once selected from the menu, you can create a polyline by clicking one point at time in your document. Each of the points will be connected automatically. End a polyline by choosing another tool, by pressing the ESC key on the keyboard, or by closing the polyline. A polyline can be closed by clicking back on its starting point.
Merge Imprint into Page
An imprint is normally editable in a PDFpen. However, sometimes you want to merge an imprint into a page so it can no longer be edited. For example, you may do this with an imprint of your signature that you didn't want someone to easily pull out of a document you want to send by email. To merge an imprint into the page, first select the imprint by clicking on it, and then choose Merge Imprint into Page from the Edit menu.
Undo/Redo
PDFpen supports multi-level undo so you can unwind your document or page changes. Undo is no longer possible after you save, after you switch document views or after you change pages in Single Page or Facing-Page Views. To undo a change, select Undo from the Edit menu (or press command-Z). To redo a change you've undone, select Redo from the Edit menu (or press shift-command-Z).
The Library Palette
Choosing Library from the Scribble tool menu will open the Library Palette. Select Library from the Window menu top toggle the visibility of the Library Palette.
23
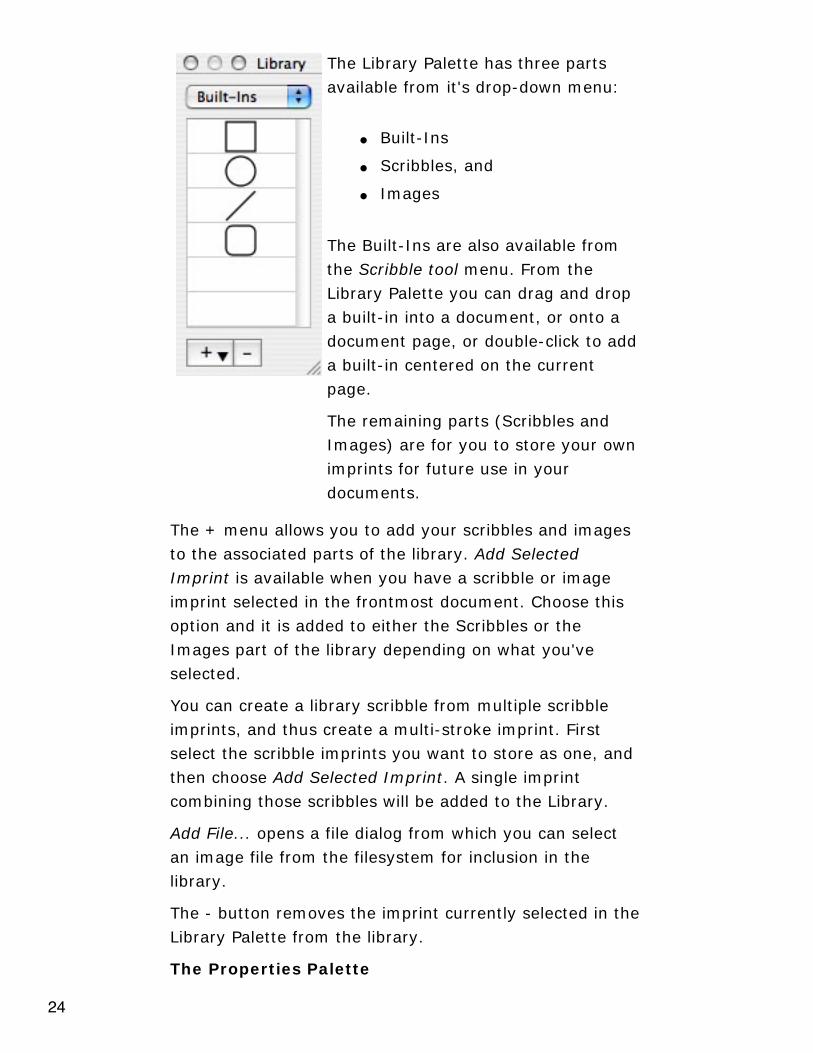
The Library Palette has three parts available from it's drop-down menu:
● Built-Ins
● Scribbles, and
● Images
The Built-Ins are also available from the Scribble tool menu. From the Library Palette you can drag and drop a built-in into a document, or onto a document page, or double-click to add a built-in centered on the current page.
The remaining parts (Scribbles and Images) are for you to store your own imprints for future use in your documents.
The + menu allows you to add your scribbles and images to the associated parts of the library. Add Selected Imprint is available when you have a scribble or image imprint selected in the frontmost document. Choose this option and it is added to either the Scribbles or the Images part of the library depending on what you've selected.
You can create a library scribble from multiple scribble imprints, and thus create a multi-stroke imprint. First select the scribble imprints you want to store as one, and then choose Add Selected Imprint. A single imprint combining those scribbles will be added to the Library.
Add File... opens a file dialog from which you can select an image file from the filesystem for inclusion in the library.
The - button removes the imprint currently selected in the Library Palette from the library.
The Properties Palette
24

Toggle viewing of the Properties Palette by selecting Properties from the Window menu. The Properties Palette of PDFpenPro also incorporates form field properties.
The Properties Palette enables you to change the properties of an imprint.
Line width applies only to line-drawings and scribbles. It changes the line width of the selected imprints.
Color applies to all imprints. It will change the line color of line-drawings and scribbles, the color of text, and the opacity of an image (but not the color of an image). Click the color box to connect the color palette to make color adjustments.
Fill color applies to line-drawings, scribbles, and text. Check the Fill Color checkbox to use a fill color. Click the color well alongside the checkbox to connect the color palette to choose a fill color to make color
25
adjustments.
The Tools Palette
Toggle viewing of the Tools Palette by selecting Tools from the Window menu.
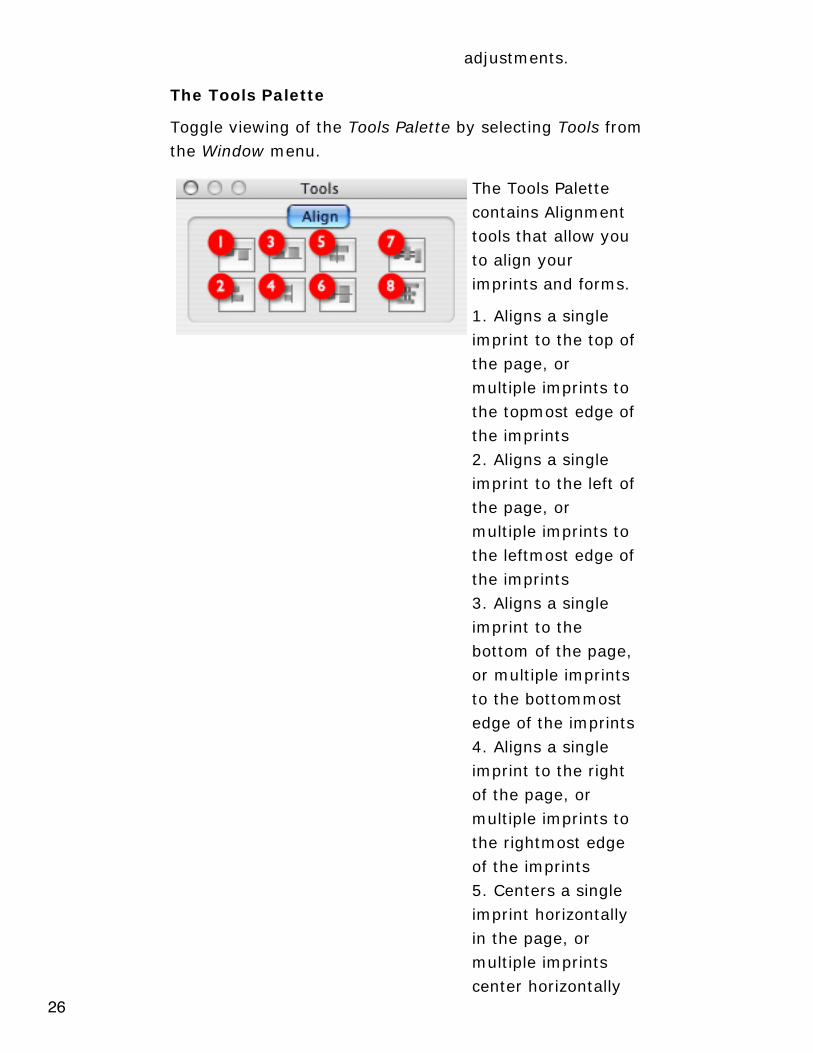
The Tools Palette contains Alignment tools that allow you to align your imprints and forms.
1. Aligns a single imprint to the top of the page, or multiple imprints to the topmost edge of the imprints2. Aligns a single imprint to the left of the page, or multiple imprints to the leftmost edge of the imprints3. Aligns a single imprint to the bottom of the page, or multiple imprints to the bottommost edge of the imprints4. Aligns a single imprint to the right of the page, or multiple imprints to the rightmost edge of the imprints5. Centers a single imprint horizontally in the page, or multiple imprints center horizontally
26
on one another.6. Centers a single imprint vertically in the page, or multiple imprints center vertically on one another.7. With three or more imprints selected, distributes those imprints to be horizontally equally spaced.8. With three or more imprints selected, distributes those imprints to be vertically equally spaced.
The Arrange Menu
Locking
Using the Lock function from the Arrange menu can help with selection when multiple imprints are getting in the way. Locking a troublesome imprint that you don't want to select allows you to select only the imprint you want. Select the menu item Arrange-Unlock All to unlock all locked imprints in the current page so they can be selected and manipulated once again.
Arranging
All imprints are drawn in order (back to front). They are also selected in order (front to back). You can change whether an imprint lies in front of another by using the Arrange menu. Your choices affect only the selected imprints, & imprints cannot be arranged behind the existing text of a PDF document.
Gridding
Use the grid to make new imprints or form fields that you
27
create conform to a measured structure. You can turn on or off the visible grid guidelines, and toggle the conformance of edits to the grid also. Adjust grid spacing via the General pane under the Preferences item of the PDFpen/Pro menu.
© 2003-2006 SmileOnMyMac, LLC. All rights reserved.
28
help: editing forms [PDFpenPro only]
[Purchase PDFpenPro or learn how to upgrade PDFpen to PDFpenPro here]
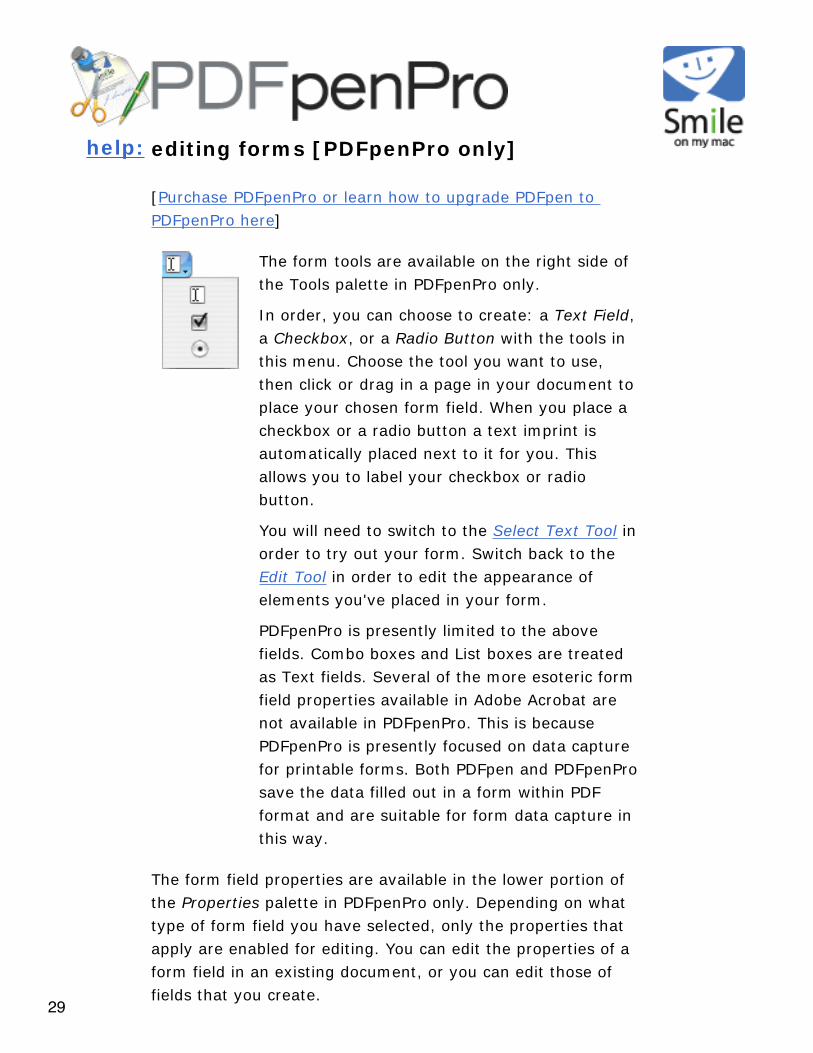
The form tools are available on the right side of the Tools palette in PDFpenPro only.
In order, you can choose to create: a Text Field, a Checkbox, or a Radio Button with the tools in this menu. Choose the tool you want to use, then click or drag in a page in your document to place your chosen form field. When you place a checkbox or a radio button a text imprint is automatically placed next to it for you. This allows you to label your checkbox or radio button.
You will need to switch to the Select Text Tool in order to try out your form. Switch back to the Edit Tool in order to edit the appearance of elements you've placed in your form.
PDFpenPro is presently limited to the above fields. Combo boxes and List boxes are treated as Text fields. Several of the more esoteric form field properties available in Adobe Acrobat are not available in PDFpenPro. This is because PDFpenPro is presently focused on data capture for printable forms. Both PDFpen and PDFpenPro save the data filled out in a form within PDF format and are suitable for form data capture in this way.
The form field properties are available in the lower portion of the Properties palette in PDFpenPro only. Depending on what type of form field you have selected, only the properties that apply are enabled for editing. You can edit the properties of a form field in an existing document, or you can edit those of fields that you create.
29

The properties available are:
Name Every form field has a name to differentiate it from the others. Generally you use a different name for each field, but for a group of radio buttons, the same name should be used for each radio button in the entire group. Each should, however, have a different Checked Value. This allows them to work together and each yield a different result.
30
Default Value
This is the default value for a text field when Reset Form is chosen from the Edit menu.
Checked Value
This is the value yielded when the associated radio button or checkbox is checked.
Character Limit
When checked and a number entered in the related field, this is the max number of characters that can be entered into a text field.
31
Required Check if you require this form field to be filled out by the user. The user will be notified when they try to save a document with form fields that are required but not yet filled.
Size to fit For a text field only, this allows the text field to grow or shrink to fit the text that is entered.
Multi-line For a text field only, this allows the text field to contain more than one line of text.
32

Scroll text For a text field only, this means that the text field will scroll horizontally and/or vertically in a fixed size so that more than just the visible text can be entered.
Check by default
This is the default setting for a checkbox or a radio button field when Reset Form is chosen from the Edit menu.
© 2003-2006 SmileOnMyMac, LLC. All rights reserved.
33

help: importing & saving
Importing Images & PDFs
You can import both bitmap & PDF images into a PDF document in PDFpen. You import an image by choosing Insert from either the toolbar or the File menu, and then selecting which file you want to insert. If the file you choose is a multi-page PDF then the pages are inserted after the current page in Page View, or they replace the selected pages in either of the Document views. In Document view you can also select a gap between pages if you want a pure page insertion.
If the file you insert is an image then it will be inserted as an imprint on the current page in Page View. If you are in Document view it is inserted as a blank page with the image centered on it.
Saving
Image Compression [PDFpenPro only]
When you save your PDF file via Save As from the File menu it's possible to compress uncompressed images in your file by using the Image Compression popup menu within the File dialog.
The None setting saves images as they originally were in your PDF. The other settings compress uncompressed color images without transparency. Typically this reduces the size of your original file. Note that if you save a second time with an alternative compression level the file size is not further reduced. This is because only uncompressed images in the file can be compressed, and so, once compressed, images will not be compressed further.
Document Permissions & Securing a Document34

When you save your PDF file via Save As from the File menu you can choose to secure your document with a password by checking the associated checkbox. Once checked you can enter both a password and a verification for that password, and the document will be saved in a PDF format that is both password-protected and encrypted. The password is required by anyone wishing to open the document. A locked document displays a small lock symbol in the lower left corner of its window.
A PDF document can also have document permissions settings that specify whether certain actions are possible, for example: printing, editing, or rearranging pages. While PDFpen does not let you specify these individual settings at this time, it does respect them. PDFpen displays an error message when you try to perform an action for which the document does not allow permission. A document that disallows editing displays a small pencil symbol with a line through it in the lower left corner of its window.
© 2003-2006 SmileOnMyMac, LLC. All rights reserved.
35

help: searching
You can search a PDF file for a text string by opening the Drawer or by choosing Find from the Edit menu. Enter the string you wish to search for. The results are listed below, and you can click in any of them to traverse the document, and use the up and down arrow keys on the keyboard to move through them. Only the currently selected result is shown highlighted in the document.
The results automatically update as you edit your document, and even allow searching within imprints. Imprints are shown in the search listing in gray at the end of each page.
You can automatically search your entire document for the selected text by choosing the menu item Edit–Find–Use Selection for Find.
Listing Annotations
You can list annotations in your document by clicking the annotations button in the search draw. It will list all 36
the comments notes and text imprints in the document. You can then select them one at a time from the list to reveal them in your document.
Viewing the Table of Contents
You can view the table of contents for your document by clicking the table of contents button in the search draw. You can then navigate your document by clicking items in the table of contents.
© 2003-2006 SmileOnMyMac, LLC. All rights reserved.
37

help: printing
In PDFpen it is important to make sure you choose the correct Page Setup from the File menu before printing your document. PDFpen can handle documents with variable page sizes within the document. Such pages should be printed separately with the appropriate Page Setup for them.
Note: If you are not a registered user, the SmileOnMyMac logo will be stamped on your saved document and prints. This is so that you can work even with the demo version. We strongly encourage you to purchase PDFpen. Once you purchase and register, the stamped logo will be removed from files you open that you had previously saved with the unregistered product.
© 2003-2006 SmileOnMyMac, LLC. All rights reserved.
38
help: AppleScript
PDFpen/Pro includes extensive AppleScript support so that it's possible to automate the PDF manipulation process.
PDFpen example scripts may be found in ~/Library/Application Support/PDFpen/Scripts . PDFpenPro example scripts may be found in ~/Library/Application Support/PDFpenPro/Scripts . The leading ~ represents the Home button in the Finder. The Scripts folder appears after you've run PDFpen/Pro at least once.
The Combine PDFs and Split PDF scripts are implemented as droplets (items onto which you may drop files). You may copy them to your Desktop from the folder above if you wish to combine or split PDF files from the Finder.
You may view the application AppleScript dictionary by dragging the PDFpen or PDFpenPro application onto the Script Editor icon.
If you create a script you'd like to share with other PDFpen customers, please let us know. You're welcome to send such scripts to [email protected].
© 2003-2006 SmileOnMyMac, LLC. All rights reserved.
39
help: tips & tricks
Special Keys
Shift - constrain proportions with image imprints
Option - copy an image or text imprint, or document pages when dragging
Command - hold down this key while scribbling to stop the scribble being smoothed
Locking Tool Choice
With all the toolbar tools (except the selection arrows) you can double-click a tool to lock it and continue working with the tool. Clicking the arrow tool will unlock your choice of tool.
Changing Imprint Opacity
It is possible to change the opacity of an imprint from the Properties palette (available from the Window menu). Click on the color well to connect and display the color palette to make this change. There is a slider to change the opacity at the bottom of the color palette. Imprints, by default, are created 100% opaque. Changing the opacity slider alters the opacity of the selected imprint and allows whatever lies beneath it to show through.
Note that you cannot change the opacity of imprints that were originally in PDF format, and any change to the opacity slider for these is ignored.
Changing Text Color Within a Text Block
You can have multiple colors within a text block. To do this you must make sure the color palette is not connected via the Properties palette. Open the Properties palette (via the Window menu), and make sure neither of the color wells for Color nor Fill Color are pushed in
40
connecting them to the Color palette. Now, open the Color palette via the Format menu if it is not already displayed. Click within your text like you are editing it. Select the text within a block whose color you'd like to change, and then choose a color from the palette.
© 2003-2006 SmileOnMyMac, LLC. All rights reserved.
41
help: how to purchase
PDFpen costs US $49.95 per copy (plus any applicable taxes).PDFpen costs US $94.95 per copy (plus any applicable taxes).
Purchasing removes the SmileOnMyMac stamp from saved and printed PDF documents.
The fastest and easiest way to purchase PDFpen/Pro is:
1. Select Purchase / Register PDFpen/Pro from the
PDFpen/Pro menu
2. Press the Purchase via Kagi button
3. Fill in your particulars and press Purchase
4. Kagi will process your order in 30-60 seconds
You can also buy using one of the following methods:
● Purchase via our eSellerate Web Store
● Purchase via our Kagi Web Store
● Purchase by phone
● Purchase by FAX
© 2003-2006 SmileOnMyMac, LLC. All rights reserved.
42

help: support
We answer common support questions in our FAQ (frequently asked questions).
Please review the FAQ before requesting support.
If the FAQ does not answer your question, please include as much information as you can in an E-mail to [email protected].
© 2003-2006 SmileOnMyMac, LLC. All rights reserved.
43