ff kick-off configure android phones - frog force 503
TRANSCRIPT

Frog Tech University, FRC Team 503 September 1, 2017
Configure the Android Phones 2017 FTC Kick-Off
Course 102

Today’s Goal…..
The goal of todays session is to set up your
Android phones to control your robot

New Point to Point Communication SystemPair of Android phones provide ‘Wi-Fi Direct’ Communication
3

Acknowledgement
4
Many of todays slides are based on the work of Team #2843 in the
PushBot Build Guide Series and the FTC
Training Manual
Many thanks for your efforts!!!!

Android Phone Set-up 7 Easy Steps !!!!
1. Remove the SIM Cards
2. Configure both phones
3. Install USB driver on Robot Controller
4. Update USB driver on Robot Controller
5. Deploy the Robot Controller
6. Deploy the Driver Station
7. Network Cleanup
5
If talking to a robot were this easy …

Step 1 – Remove the SIM Cards 1. To prevent the phones from attempting connections to the Cell Phone network
Guide
• Power off both cell phones
• Remove the back covers leaving the phones face down
• There is a gap between the front and back covers located on the lower right hand corner of the device that can be used to remove the back cover.
• Inserting a fingernail all around the case will cause the case to pop apart.
6

Step 1 – Remove the SIM Cards 2. Remove SIM card
Guide
• The batteries are on the left and the SIM cards are on the right
• Gently push the SIM cards into the phone and release
• Pushing the SIM cards into the phone will activate the spring mechanism allowing the springs to push the SIM card out of the phone.
• Remove the SIM cards and put the min a safe place.
• Replace the back covers
7

Step 1 – Remove the SIM Cards 3. Turn on Phones
Guide
• Turn the phones face up
• Turn the power on each phone by depressing the power button
8

Step 2 – Configure both phones 1. Accept Default Talkback Setting
Guide
• Click ‘Next’ to accept default Talkback setting
9

Step 2 – Configure both phones 2. Accept English
Guide
• Click ‘Next’ to accept language default of ‘English’
10

Step 2 – Configure both phones 3. Configure WI-FI
Guide
• Click ‘Next’ to accept WI-FI
11

Step 2 – Configure both phones 4. Configure WI-FI
Guide
• Do not select a WI-FI connection at this time.
• Click ‘Next’ to continue
12

Step 2 – Configure both phones 5. Resolve UICC Error
Guide
• Ignore UICC Error
• Click ‘OK’ to continue
13

Step 2 – Configure both phones 6. Hands Free Activation
Guide
• When the Hands Free Activation first starts it shows the ability to make an emergency call, but this will change to the second screen on the right.
• Click ‘Activate’ to continue
14

Step 2 – Configure both phones 7. Failed Hands Free Activation
Guide
• The Hands Free Activation will fail as we have removed the SIM cards.
• Click ‘Done’ to continue
15

Step 2 – Configure both phones 8. Select Application Activity
Guide
• Android will return to the home screen.
• Select the application activity icon (shown in red circle)
16

Step 2 – Configure both phones 9. Open Settings Activity
Guide
• Open the settings activity by selecting it’s icon
• It may be necessary to swipe the screen left or right to find the icon.
17
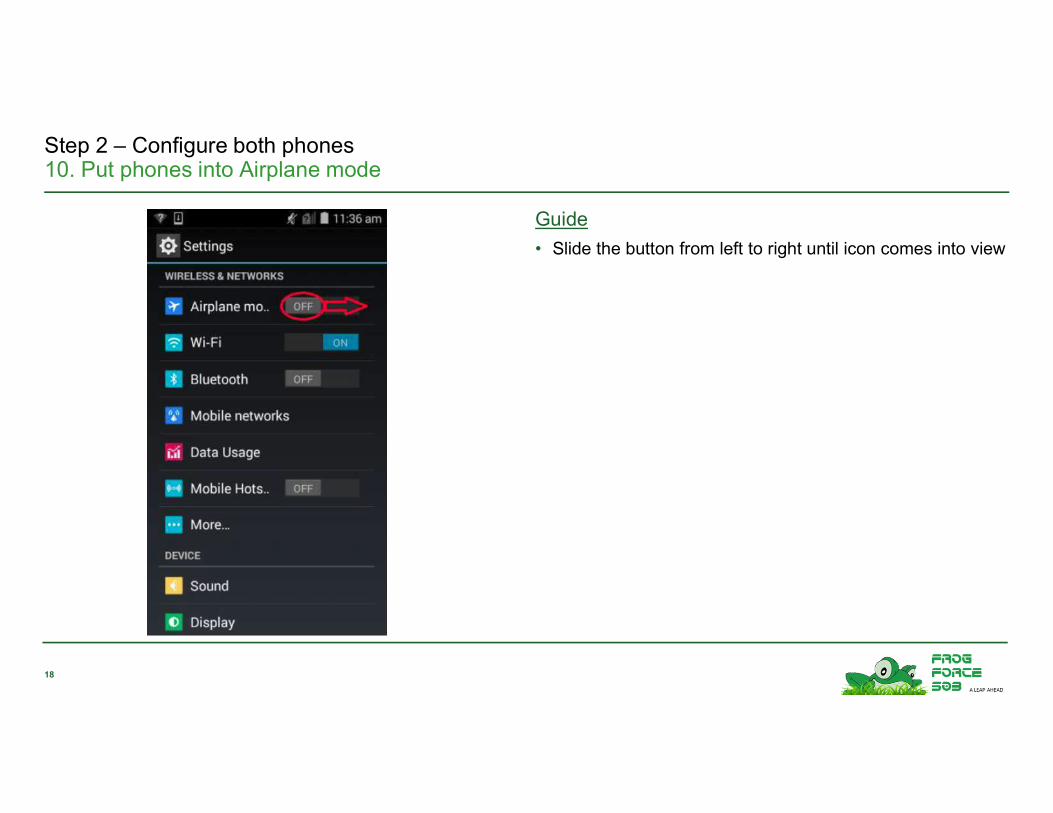
Step 2 – Configure both phones 10. Put phones into Airplane mode
Guide
• Slide the button from left to right until icon comes into view
18

Step 2 – Configure both phones 11. Turn on WI-FI
Guide
• Slide the button from left to right until icon comes into view
19

Step 2 – Configure both phones 12. Select WI-FI
Guide
• Click on the Wi-Fi button
20

Step 2 – Configure both phones 12. Select WI-FI
Guide
• Select the overflow settings (three dots at bottom right)
21

Step 2 – Configure both phones 13. Select WI-FI Direct
Guide
• Select Wi-Fi Direct
22

Step 2 – Configure both phones 14. Select Rename Device
Guide
• If rename device is not shown at the bottom of the screen then select the overflow settings (three dots) and then select “Rename device”
• Note in the image to the left, the phone had already been renamed. New phones will have a generic name
23

Step 2 – Configure both phones 14. Select Rename Device
Guide
• If rename device is not shown at the bottom of the screen then select the overflow settings (three dots) and then select “Rename device”
• Note in the image to the left, the phone had already been renamed. New phones will have a generic name
24
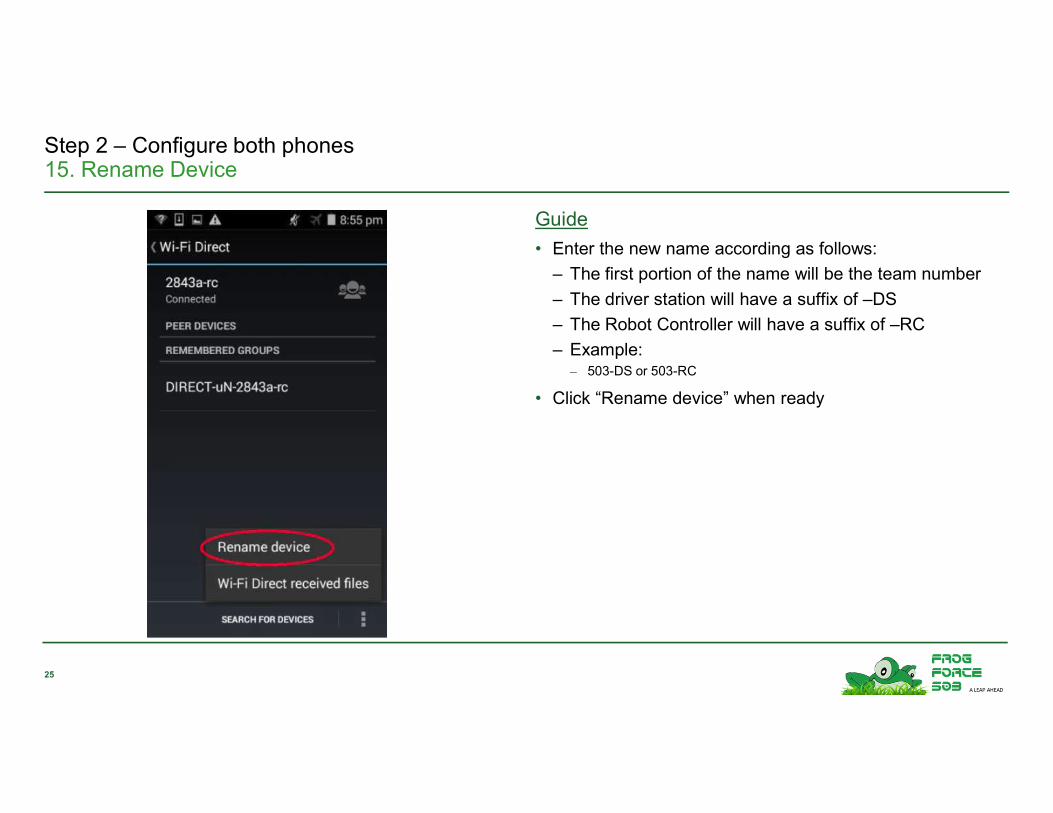
Step 2 – Configure both phones 15. Rename Device
Guide
• Enter the new name according as follows:
– The first portion of the name will be the team number
– The driver station will have a suffix of –DS
– The Robot Controller will have a suffix of –RC
– Example: – 503-DS or 503-RC
• Click “Rename device” when ready
25

Step 2 – Configure both phones 16. Confirm Rename Device
Guide
• Click “OK”
26

Step 2 – Configure both phones 17. Return to Settings Activity
Guide
• From the page shown at the far left, return to the settings activity by pressing the back button.
• It may take several presses to return to the settings activity page.
• The page you are looking for is on the right labelled “Settings”
27

Step 2 – Configure both phones 18. Find About Phone on the Robot Controller
Guide
• Select the Robot controller phone
• Scroll downward on the ‘Settings’ page until you find the ‘About phone’
28

Step 2 – Configure both phones 19. Enable Debugging Mode on the Robot Controller
Guide
• The ‘About phone’ page allows a developer to enable debugging.
• Scroll down until ‘SW Version’ is shown (right image)
– On some Android phones the text says ‘Build Number’
• Tap ‘SW Version’ 7 times
– A toast ( a message that is displayed for a short amount of time) should display as the number of taps increase and finally should indicate that debugging is enabled
– From the page shown at the far left, return to the settings activity by pressing the back button.
29
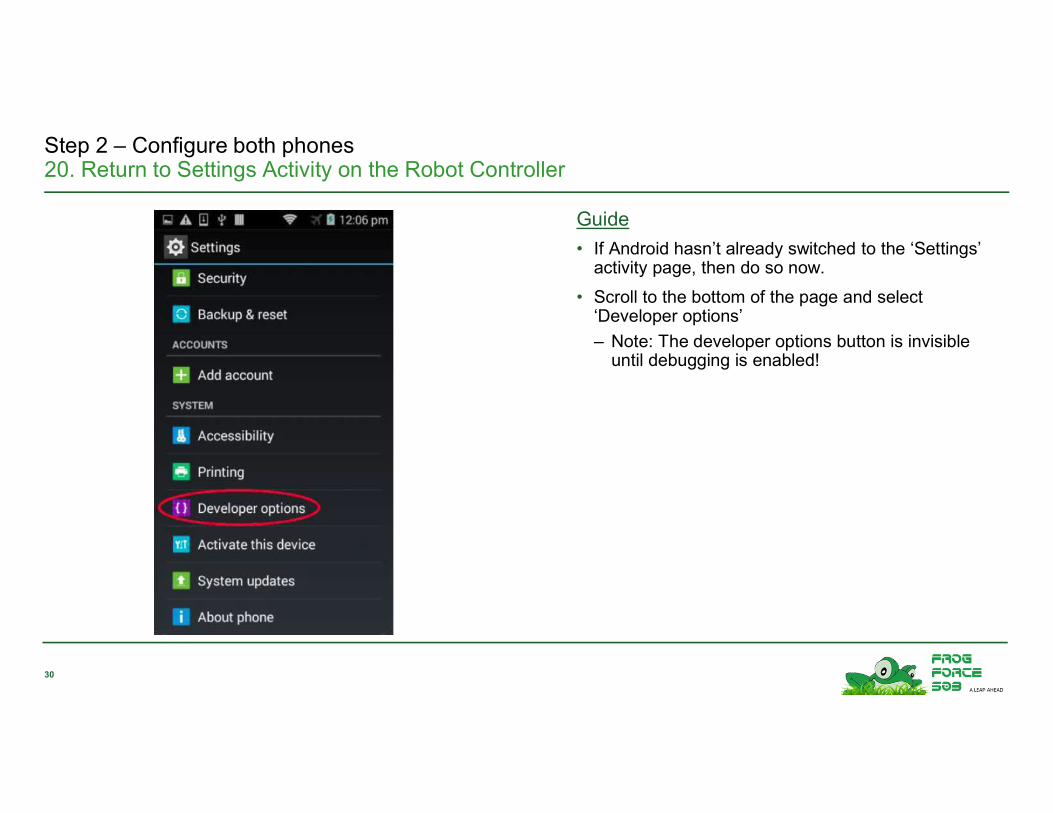
Step 2 – Configure both phones 20. Return to Settings Activity on the Robot Controller
Guide
• If Android hasn’t already switched to the ‘Settings’ activity page, then do so now.
• Scroll to the bottom of the page and select ‘Developer options’
– Note: The developer options button is invisible until debugging is enabled!
30

Step 2 – Configure both phones 21. Enable USB Debugging on the Robot Controller
Guide
• Select the ‘USB debugging’ checkbox
31

Step 2 – Configure both phones 22. Enable USB Debugging on the Robot Controller
Guide
• Select ‘OK’ to allow USB debugging between the phone and a computer when the phone is connected via USB to the computer hosting Android Studio.
• Note that the box has a check in it (right image)
32

Don’t Give Up
33
Don’t give up yet We are almost there …
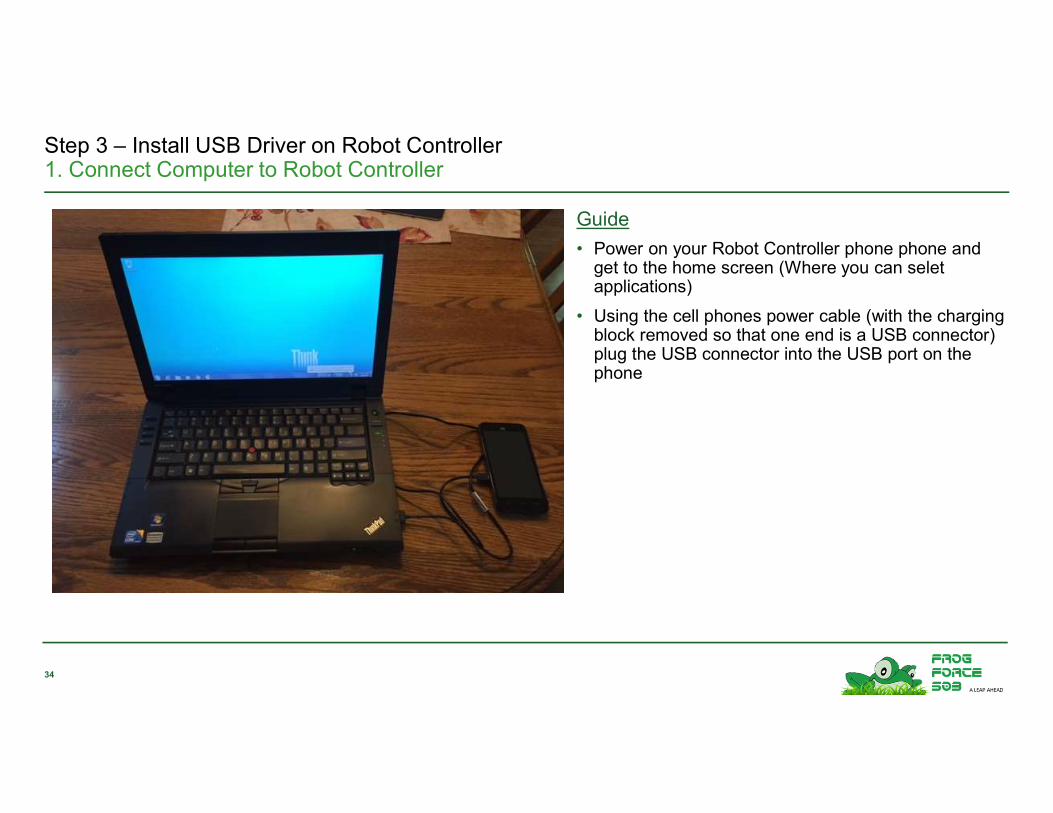
Step 3 – Install USB Driver on Robot Controller 1. Connect Computer to Robot Controller
Guide
• Power on your Robot Controller phone phone and get to the home screen (Where you can seletapplications)
• Using the cell phones power cable (with the charging block removed so that one end is a USB connector) plug the USB connector into the USB port on the phone
34

Step 3 – Install USB Driver on Robot Controller 2. Select “Install Driver” on Phone
Guide
• Once you plug in the USB cable you will see the page on the left on your cell phone.
• Select “Install Driver” on phone
35

Step 3 – Install USB Driver on Robot Controller 3. Confirm Driver Install
Guide
• When the “Install Driver” is selected on the phone the computer will detect the connection.
• Confirm the computers prompt
• Note this will look very different on other versions of Windows
36

Step 3 – Install USB Driver on Robot Controller 4. Confirm Driver Install
Guide
• After confirming the prompt, another prompt will be displayed similar to the page at left.
• Click “Run AutoRun.exe”
37

Step 3 – Install USB Driver on Robot Controller 5. Select Language
Guide
• Set language to “English” (Should be the default)
• Click “OK”
38
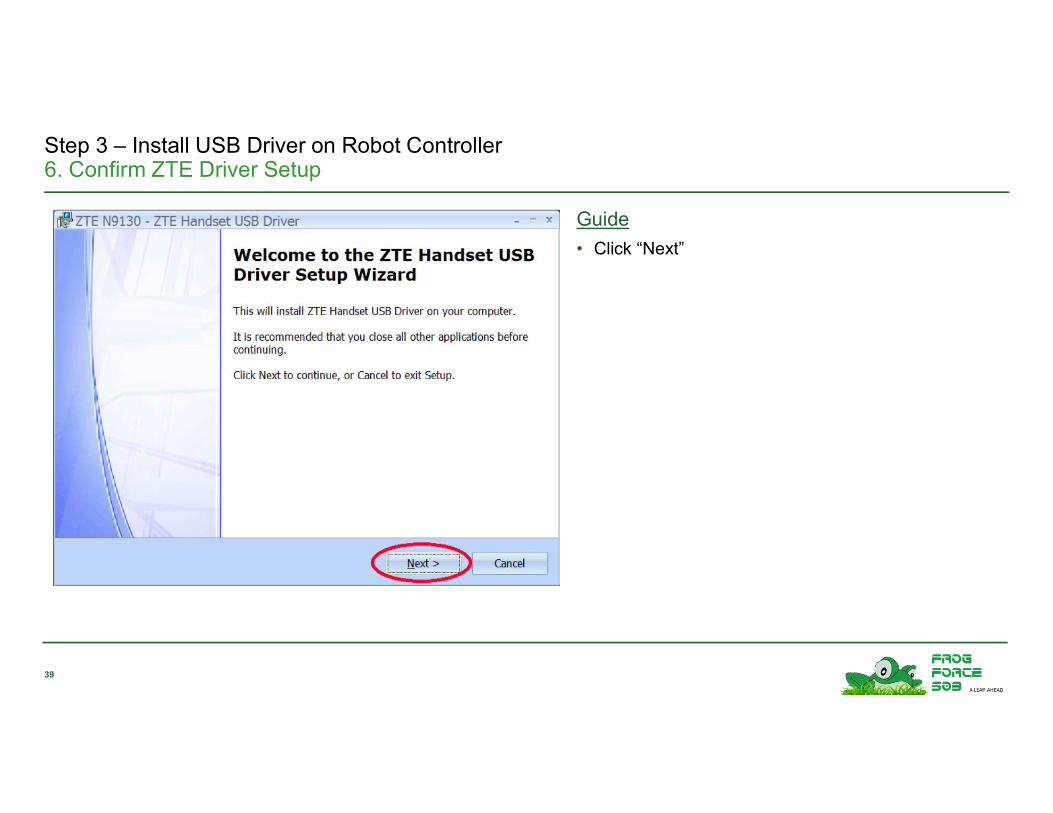
Step 3 – Install USB Driver on Robot Controller 6. Confirm ZTE Driver Setup
Guide
• Click “Next”
39

Step 3 – Install USB Driver on Robot Controller 7. Confirm Install Location
Guide
• Accept default install location for driver
• Click “Next”
40

Step 3 – Install USB Driver on Robot Controller 8. Confirm Shortcut Location
Guide
• Accept default install folder location
• Click “Next”
41

Step 3 – Install USB Driver on Robot Controller 9. Install the Driver
Guide
• Click “Install
42
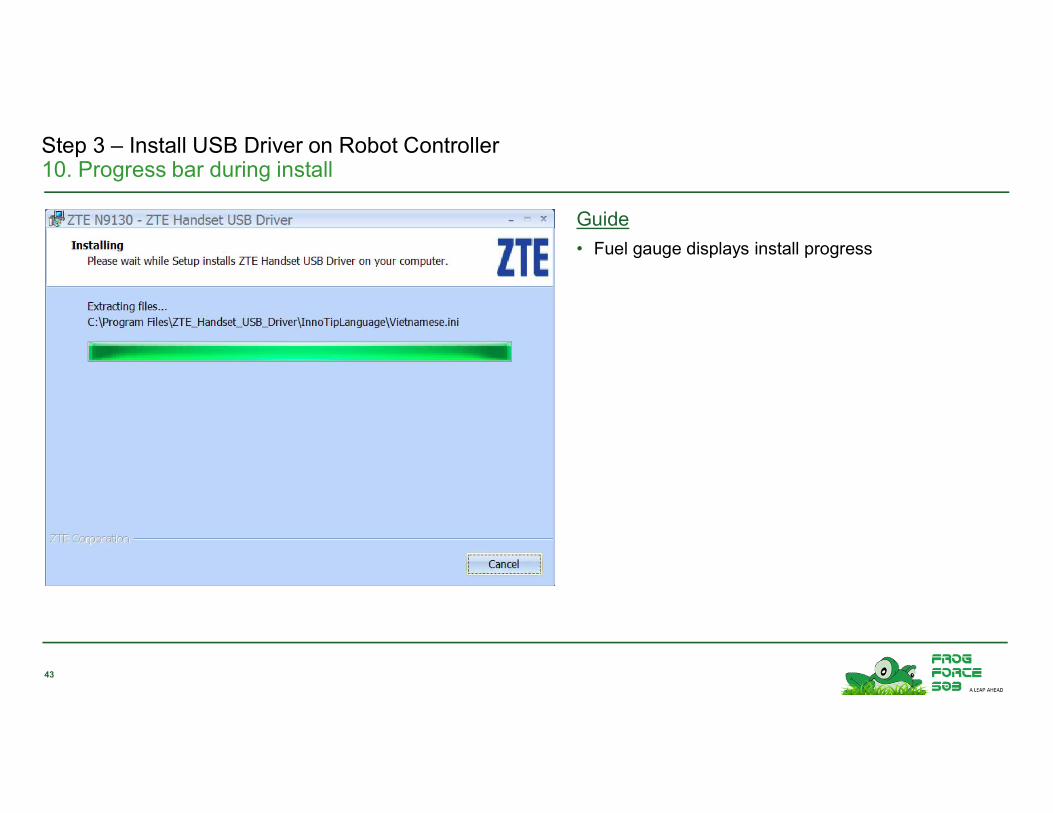
Step 3 – Install USB Driver on Robot Controller 10. Progress bar during install
Guide
• Fuel gauge displays install progress
43

Step 3 – Install USB Driver on Robot Controller 11. Install Confirmation
Guide
• Click ‘Finish’ to close install process
44
Congratulations you have installed the USB Driver!!!

Step 4 – Update USB Driver on Robot Controller 1. Execute Device Manager on Windows PC
Guide
• Press the ‘Windows’ key
• Enter “device manager” in the search box and press “enter”
On Windows 7:
– Click on the Windows key
– Select Devices and Printers
– Select Android
45

Step 4 – Update USB Driver on Robot Controller 2. select Update Driver Software
Guide
• Find ‘Other devices’ in device tree
• Click on ‘Other devices’
• Right click on ‘ADB Interface’
• Select ‘Update Driver Software’
• On Windows 7:
– Right Click on Android icon
– Select Properties
– Select Hardware tab
– Select Properties
– Click “Change Settings”
– Select Driver Tab
– Click “Update Driver”
46

Step 4 – Update USB Driver on Robot Controller 3. Browse Computer for Driver Software
Guide
• Select “Browse my computer for driver software’
47

Step 4 – Update USB Driver on Robot Controller 4. Pick Driver
Guide
• Select “Let me pick from a list of device drivers on my computer”
48

Step 4 – Update USB Driver on Robot Controller 5. Enter Driver Location
Guide
• Ensure that the location is set to : – C:\Program Files\ZTE_Handset_USB_Driver
• Click “Next”
49
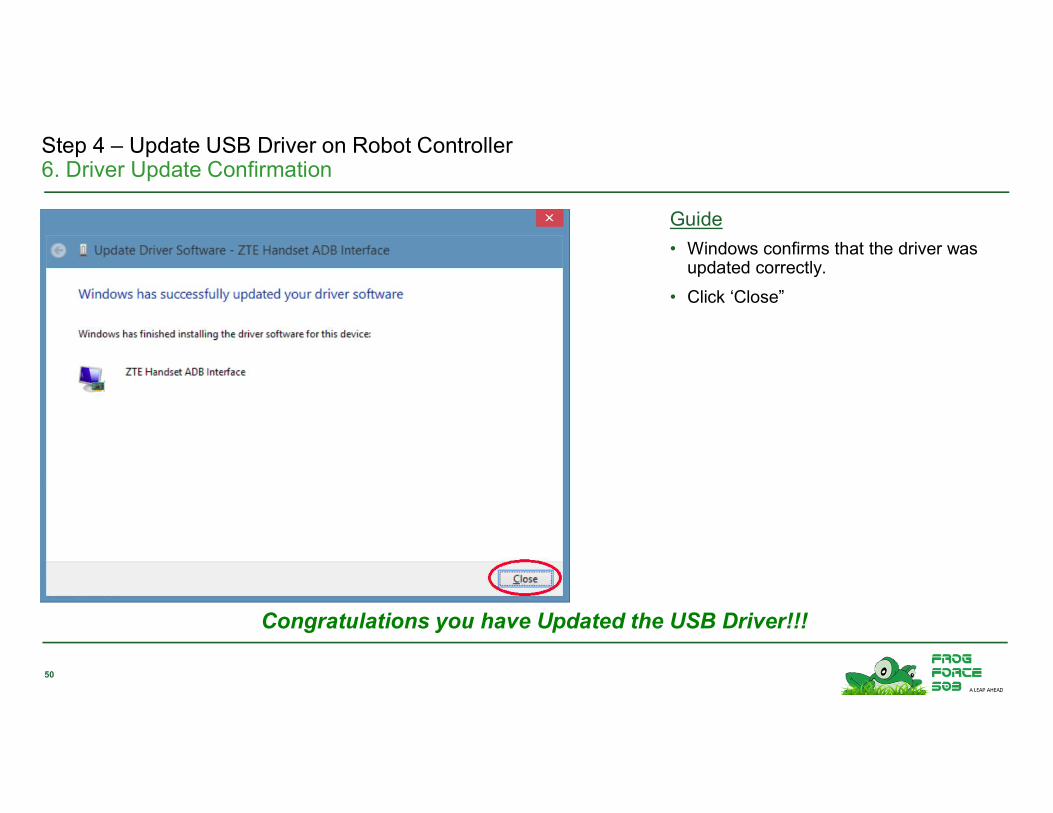
Step 4 – Update USB Driver on Robot Controller 6. Driver Update Confirmation
Guide
• Windows confirms that the driver was updated correctly.
• Click ‘Close”
50
Congratulations you have Updated the USB Driver!!!

Step 4 – Update USB Driver on Robot Controller 7. The Android Phone is now connected to the PC
Guide
• On The PC:
– Note that the device is now connwcted
– This window can be closed.
– Click “X” in upper right hand corner
51

Step 5 – Deploy the Robot Controller 1. Start up Android Studio
Guide
• Go to the Windows Start Menu
• Click on “All Programs”
• Locate the Android Studio folder, click to open folder
• Select Android Studio application by clicking on it
• You should see the start up screen on the left
52

Step 5 – Deploy the Robot Controller 1. Start up Android Studio
Guide
• Android Stuio will pick up where it left off by loading the FTC_app-master project
• Find the green right arrow button (RUN) to run the application
• Click “Run”
53

Step 5 – Deploy the Robot Controller 2. Allow USB Debugging
Guide
• On the Android phone
– Note that the cell phone is now displaying the ‘Allow USB debugging’ window
– Click ‘OK’
• If you see ‘Unauthorized’ message on PC:
– Click the OK on the Android phone Allow USB debugging message
– Click ‘Cancel’ on the windows PC
– Then Click ‘Run’ button again
54

Step 5 – Deploy the Robot Controller 3. Android Studio now shows an Android Device
Guide
• Android Studio has found the Robot Controller phone.
• Click ‘OK’ to download software
55

Step 5 – Deploy the Robot Controller 4. Application Starts on Robot Controller
Guide
• The Android phone will display the page at the left indicating that the application has started.
56
Congratulations you have a working FTC Robot Controller!!!
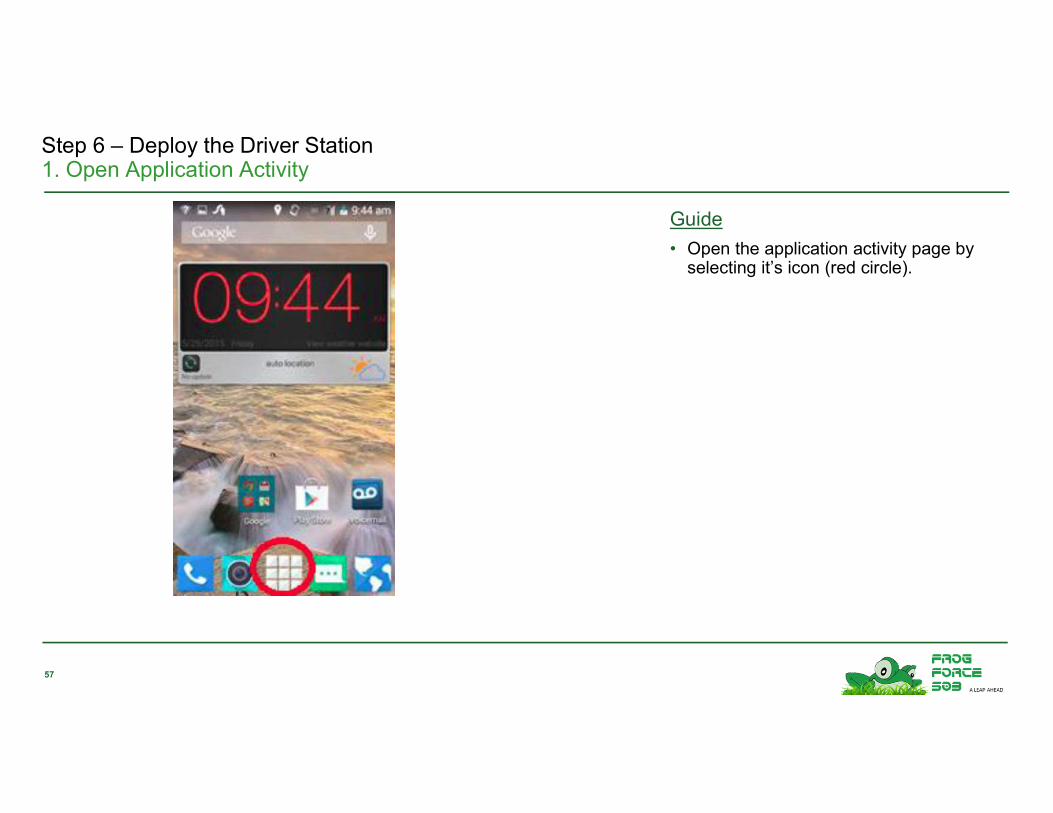
Step 6 – Deploy the Driver Station 1. Open Application Activity
Guide
• Open the application activity page by selecting it’s icon (red circle).
57

Step 6 – Deploy the Driver Station 2. Open Settings Activity
Guide
• Open the settings activity page by selecting it’s icon (red circle).
• Note: it may ne necessary to swiupe left or right until the icon comes into view
58
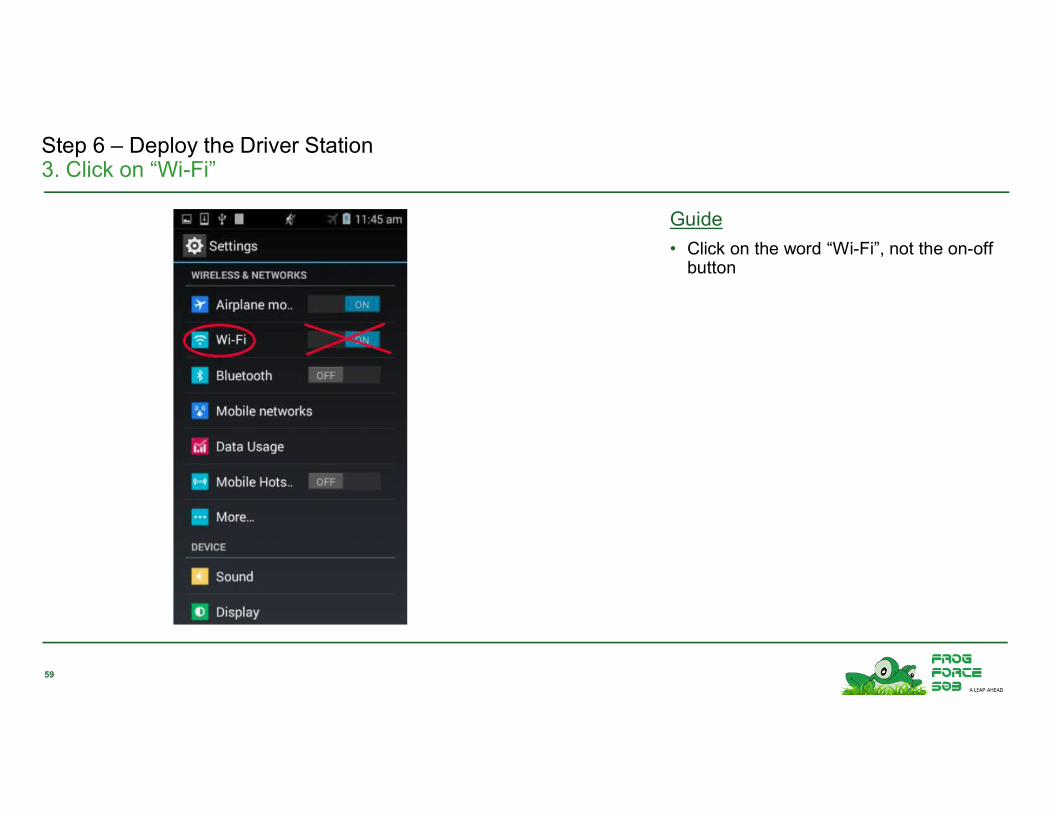
Step 6 – Deploy the Driver Station 3. Click on “Wi-Fi”
Guide
• Click on the word “Wi-Fi”, not the on-off button
59

Step 6 – Deploy the Driver Station 4. Connect to External Internet Connection
Guide
• Connect to a Wi-Fi network that can reach the internet.
• Obtain Wi-FI logon information from host
• Once Provided , network will be shown at page at left.
• Select network and connect to the internet
60
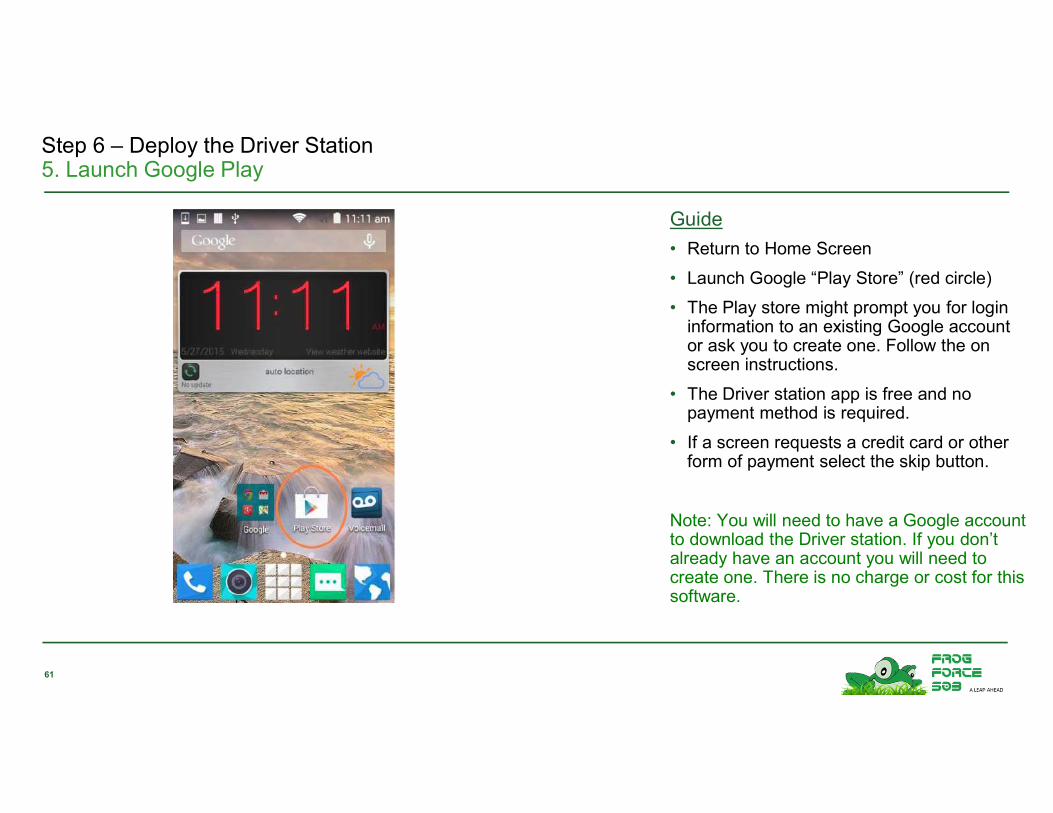
Step 6 – Deploy the Driver Station 5. Launch Google Play
Guide
• Return to Home Screen
• Launch Google “Play Store” (red circle)
• The Play store might prompt you for login information to an existing Google account or ask you to create one. Follow the on screen instructions.
• The Driver station app is free and no payment method is required.
• If a screen requests a credit card or other form of payment select the skip button.
Note: You will need to have a Google account to download the Driver station. If you don’t already have an account you will need to create one. There is no charge or cost for this software.
61

Step 6 – Deploy the Driver Station 6. Select Search
Guide
• Select the Search icon
62
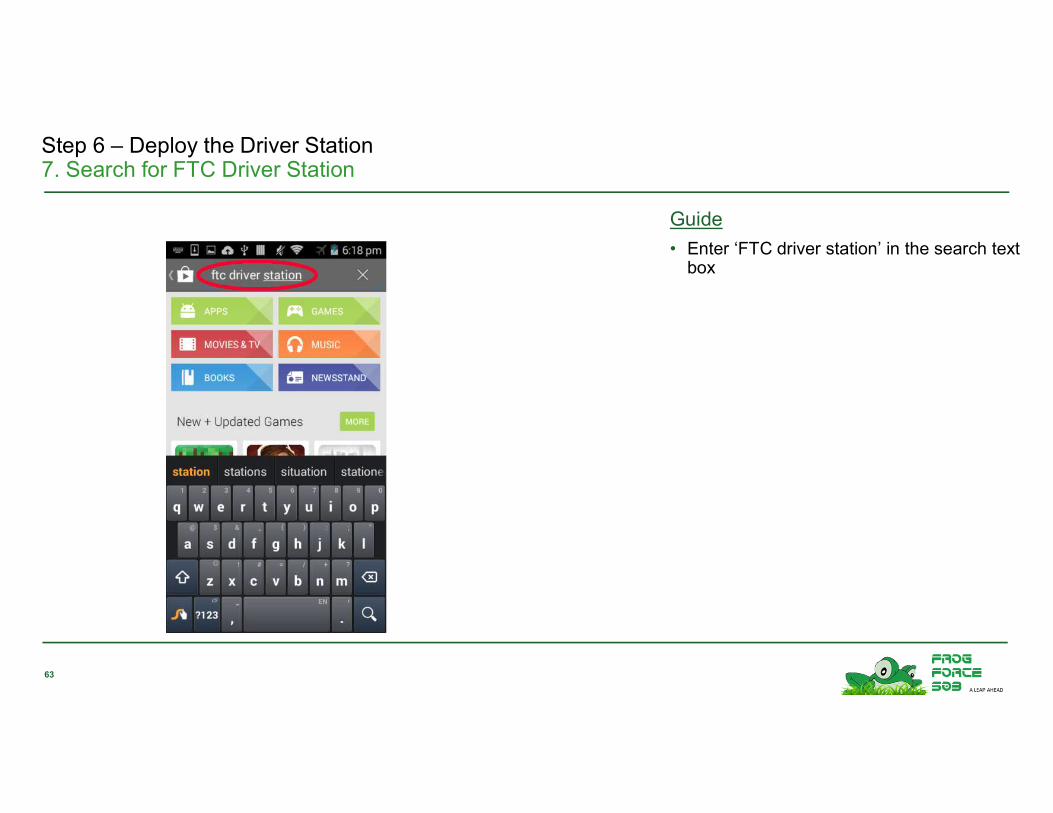
Step 6 – Deploy the Driver Station 7. Search for FTC Driver Station
Guide
• Enter ‘FTC driver station’ in the search text box
63

Step 6 – Deploy the Driver Station 7. Search for FTC Driver Station
Guide
• Enter ‘FTC driver station’ in the search text box
64

Step 6 – Deploy the Driver Station 8. Execute Search
Guide
• Press the magnifying glass in the bottom right corner of the keyboard to execute the search.
65

Step 6 – Deploy the Driver Station 9. Select Driver Station
Guide
• Select the FTC Driver Station block
66
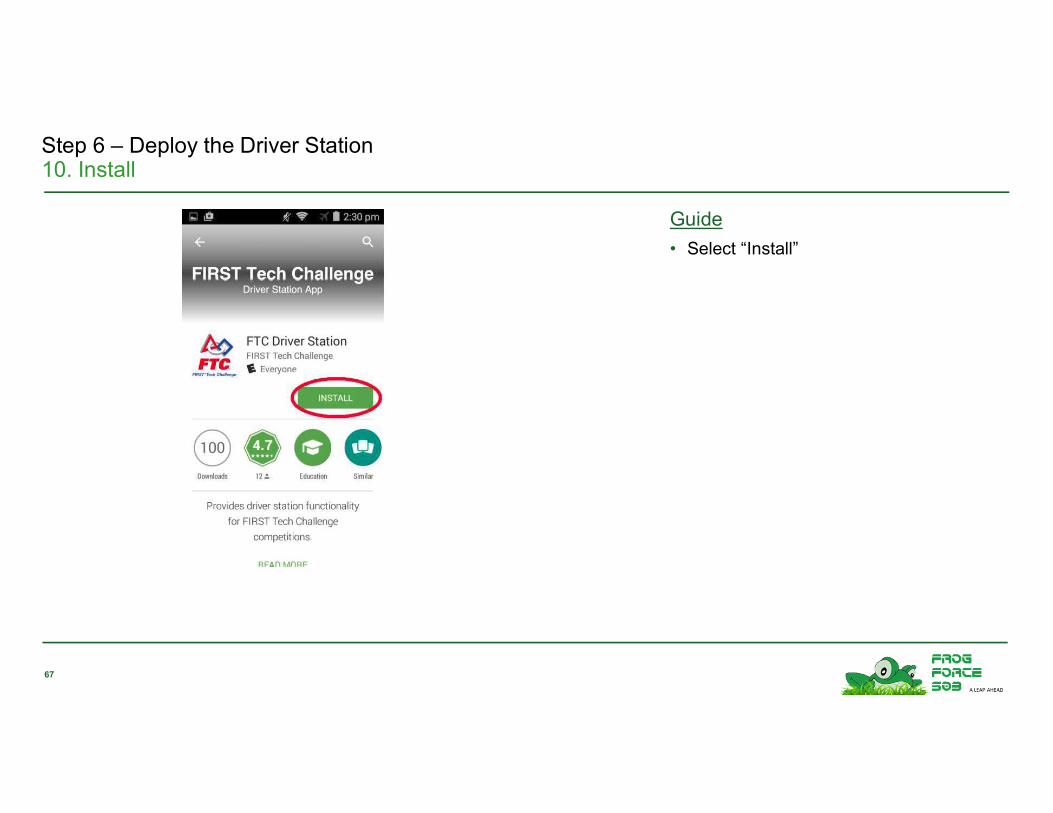
Step 6 – Deploy the Driver Station 10. Install
Guide
• Select “Install”
67

Step 6 – Deploy the Driver Station 11. Accept
Guide
• Select “Accept”
68

Step 6 – Deploy the Driver Station 12. Return to Home Page
Guide
• Return to Home Screen
• Note the FTC Driver Icon has been installed!
• Important
– You must delete (forgotten) the internet connection that you have setup on this device to prevent connection issues between the Driver Station and Robot Controller
– Continue onto next steps
69
Congratulations you have a working FTC Driver Station!!!

Step 7 – Network Cleanup 1. Open Application Activity
Guide
• Open the application activity page by selecting it’s icon (red circle).
70
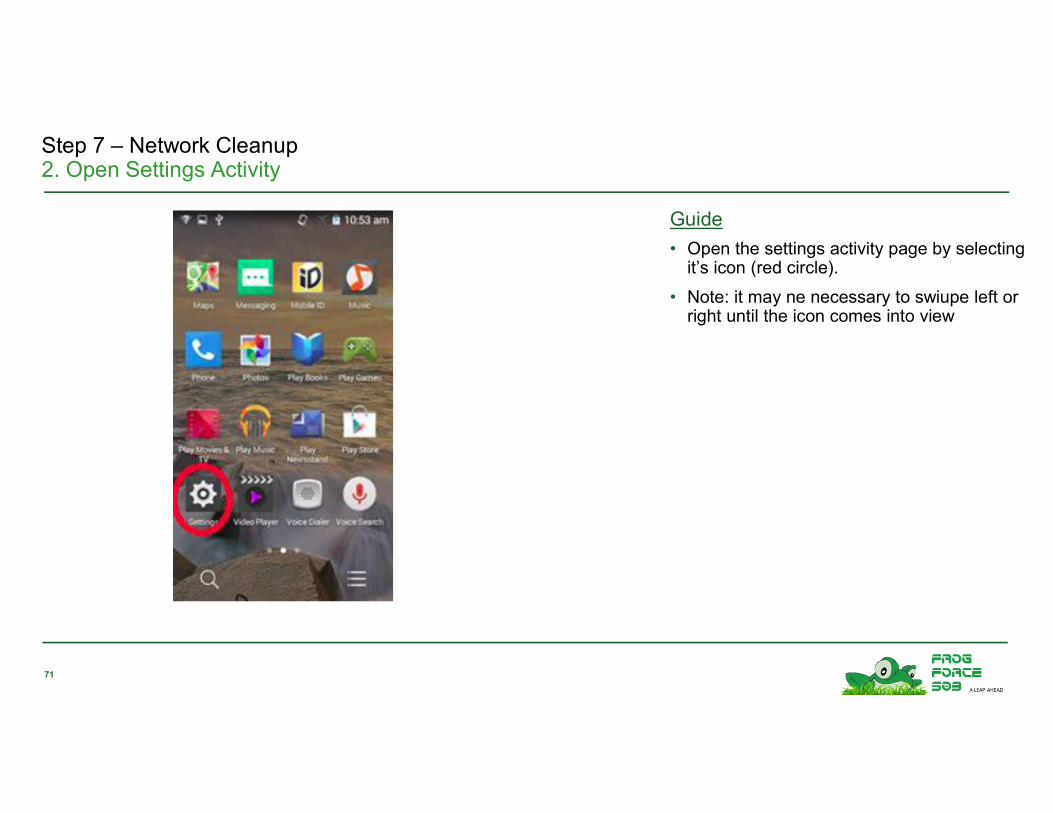
Step 7 – Network Cleanup 2. Open Settings Activity
Guide
• Open the settings activity page by selecting it’s icon (red circle).
• Note: it may ne necessary to swiupe left or right until the icon comes into view
71

Step 7 – Network Cleanup3. Click on “Wi-Fi”
Guide
• Click on the word “Wi-Fi”, not the on-off button
72

Step 7 – Network Cleanup4. Select Wi-Fi Internet Connection
Guide
• Find the Wf-FI network that connects to the Internet
• Long hold the name of the network
73

Step 7 – Network Cleanup5. Forget Wi-Fi Internet Connection
Guide
• Select ‘Forget network’
• In general, the Driver Station and the Robot Controller cell phones should not be connected to any wireless networks with the exception of the ‘Wi-Fi Direct’ connection between the two cell phones.
74

75
Congratulations you have a working robot Communication environment!!!!!!

76
Questions?

77
What we are doing today will transform tomorrow’s culture.