fencing installation guide - metroll newcastle installation guide metline ® 2 please note carefully...
TRANSCRIPT
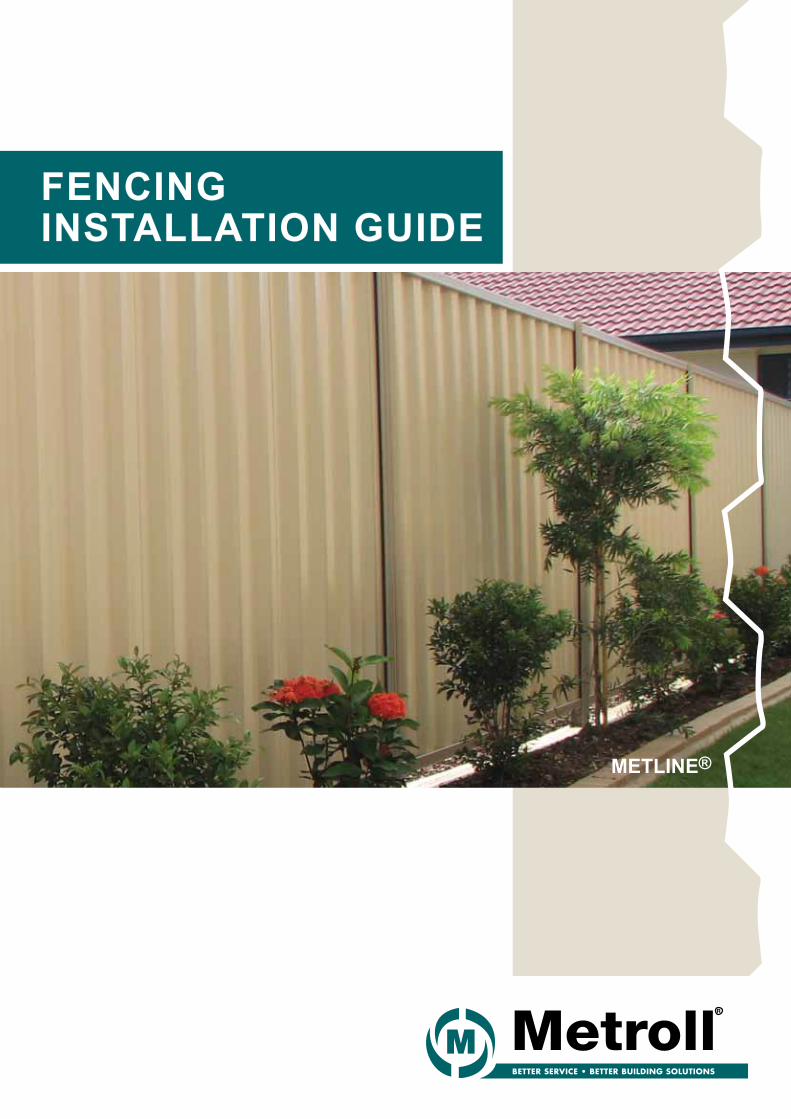
FENCING INSTALLATION GUIDE
METLINE®
2
Please Note Carefully Before You Start• This installation guide does not cover fences above
1.8m. For fences higher than 1.8m, please ring the Metroll office
• Describe your site details when ordering materials • Identify the soil type for your fence site as this will
determine the concrete required for the job• Make sure you know the whereabouts of underground
electricity, gas or water mains before you begin digging• Check with your local council regulations for boundary
fencing• Ensure you read through this guide completely before
you begin, to ensure you fully understand the installation process
• Check the delivered material for the correct number of components & general condition
IMPORTANT!• Ensure post holes are of correct size & filled with
concrete• Ensure that the recommended number of self-
drilling screws is used to join two posts together
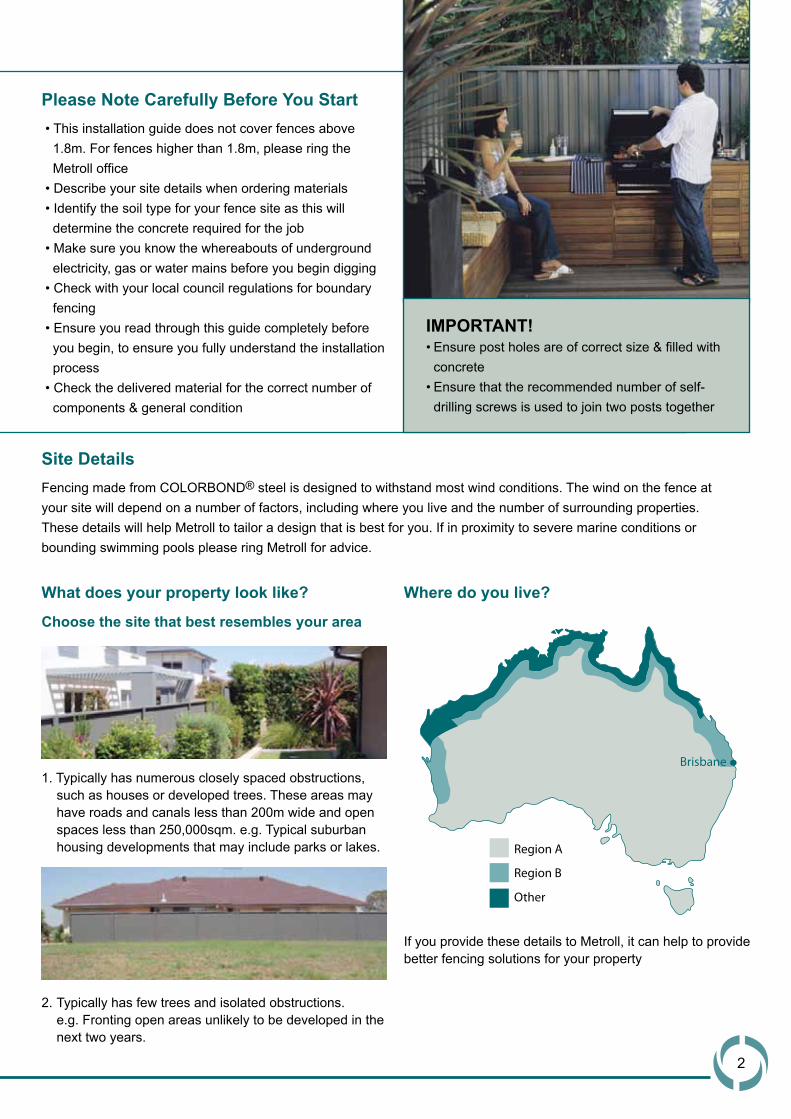
Site DetailsFencing made from COLORBOND® steel is designed to withstand most wind conditions. The wind on the fence at your site will depend on a number of factors, including where you live and the number of surrounding properties. These details will help Metroll to tailor a design that is best for you. If in proximity to severe marine conditions or bounding swimming pools please ring Metroll for advice.
What does your property look like?
Choose the site that best resembles your area
1. Typically has numerous closely spaced obstructions, such as houses or developed trees. These areas may have roads and canals less than 200m wide and open spaces less than 250,000sqm. e.g. Typical suburban housing developments that may include parks or lakes.
2. Typically has few trees and isolated obstructions. e.g. Fronting open areas unlikely to be developed in the next two years.
Where do you live?
If you provide these details to Metroll, it can help to provide better fencing solutions for your property
Brisbane
Region A
Region B
Other

Stepped or Raked FencesThe fence can either be built to step down the slope or sheets can be cut so that it follows the shape of the earth-a raked fence. The raked fence is the preferred option as it leaves no gaps under the fence, is better in appearance and is stronger.
Uneven Sites
Vertical slitting (cutting) of sheets may be required if slope is greater than 1 in 8. The preferred method of installing fencing for best results and most efficient fitment is the slitting method.
Once the fencing panels are placed, the slit can be closed up by driving back along the line of the fence.
This may reduce the three sheet coverage to a point where one of the sheets may require vertical slitting. The top rail angles can be adjusted to create a smoother angle. The post height required will increase, so allow for this when fixing the posts in the ground.
The preferred method of cutting sheets, is to use a nibbler or slot shear. If angle grinders or drop saws are to be used, extra care should be taken to ensure all swarf is cleaned off the sheeting.
START POST MAY BE EXISTING OR
TEMPORARY PEG
MARKER PEGS
ALL HOLES SHOULD BE STRAIGHT
(I.E. SIDES PARALLEL) OR WIDER AT THE
BOTTOM THAN THE TOP
DIG HOLES ACCORDING TO DEPTH CHART BELOW
DIAMETER OF ALL HOLES IS 200mm
IMPORTANT!Post lengths required will
increase accordingly to cater
for these ground conditions
Soil Type Minimum Hole Depth Approx. Concrete Requirements
Rock 300mm 1 bag per hole (20kg bag)
Clay/Firm Earth 600mm 2 bags per hole (20kg bags)
Sand/Loose Fill 900mm 3 bags per hole (20kg bags)
SECTION 3
SECTION 1SET UP TOP AND BOTTOM STRING LINES ESTABLISHING COMMON SLOPING SECTIONSESTABLISH POST
POSITIONS USING THE BOTTOM RAIL AS A MEASURING AID
POST
POST
hh 3
a) Marking our sloping sites
b) Cutting of sheets for a raked fence
2360
The preferred method of cutting sheets is to use a nibbler or tin snips.
STEP 1 – Marking Out Your Post Holes
3

4
APPROX. 40mm
2 FASTENERSAPPROX. 60mm FROM TOP OF
POST
MAXIMUM SCREW
SPACING 300mm
CENTRES
SHEET HEIGHT +10mm
(MAX. HEIGHT 1800mm)
SLOPE TOP OF CONCRETE AWAY
FROM POST (TO DRAIN AWAY
WATER)
BOTTOM RAIL HEIGHT
APPROX. 50mm
ADD WTAER AND MIX WELL
PRIOR TO POURING
ALIGN VERTICALLY WITH SPIRIT
LEVEL IN BOTH DIRECTIONS
DO NOT ALLOW SOIL, GARDEN
FILL AND/OR DIRT TO COME IN
CONTACT WITH POSTS AS THIS
WAY CAUSE THE POST TO
CORRODE
• PLACE FIRST POST IN HOLE• ADJUST TO CORRECT
HEIGHT• SUPPORT POST WITH
TEMPORARY BRACE• FILL HOLE WITH FULLY
MIXED, WET CONCRETE• VIBRATE AND COMPACT THE
CONCRETE TO REMOTE VOIDS
10 - 16x16mm SELF-DRILLING
SCREW PLACINGS
SCREWS TO CONFORM TO
AS3566 CLASS 3
IMPORTANT!If it is not possible to fix posts
as proposed here, please
consult your distributor
STEP 2 – Securing Posts
End Posts, Corner Posts & JunctionsDimensions of the SHS section and fence posts will vary according to the fence supplies. Contact Metroll for details.
Tapering the Front of Your FenceMetroll recommends that you taper the last two panels of your fence at an unsupported end, particularly where your fence extends beyond the front of your house.
Cut sheets as per the instructions in the ‘sloping of uneven sites’ section.
The minimal extra effort in tapering the unsupported end will provide a better-looking fence than a stepped fence and is much stronger than leaving it at full height.
NOTE: A LONGER TOP RAIL WILL BE REQUIRED FOR THE TWO TAPERED PANELS
NORMAL HEIGHT
OF FENCE
h½ h
REMEMBER THAT THE LEADING POST AT THE FREE END SHOULD INCLUDE A SQUARE HOLLOW SECTION (i.e. SHS)
Example For 2365mm Post Centres
Fence Height
Tapered EndHeight
Top Rail Length If Tapered Per Two Panels
1500mm 750mm 2385mm
1800mm 900mm 2400mm
Dwelling 1
Dwelling 2
= SHS Section = Fence Post

5
3 INFILL SHEETS
STEP 3 - Installing Infill Sheets• Insert bottom rail between posts to determine exact
locations of next post• Adjust bottom rail to correct height - it is important to
maintain a minimum gap of 50mm between bottom of rail & ground
• Screw fix the rails at this stage• Place top rail into post & fix with self-drilling screws on both
sides of posts. Ensure that the self-drilling screws are not fully tightened, as they need to be removed when inserting sheets. Ensure the position of the top rail is protruding 2mm above the top of the posts to reduce the risk of injury
• Continue this procedure until fence length is achieved• Allow the concrete to cure overnight. Note: Longer curing
period may be required in very cold and/or wet weather• Unscrew top rail & remove• Fit infill sheets into bottom rail ensuring correct lap as per
diagrams below• Place top rail on infill sheets, working from one end to the
other, locating the profile in the rail. A gentle tap with a rubber mallet may help
• Secure the top rail with self drilling screws on both sides• Hose down with good water pressure when finished to
remove any swarf such as drill filings or remnants from the nibbling process
• Check installation
CORRECT LAP DETAIL FOR VARIOUS INFILL SHEET PROFILES

6
1500mm 1800mm 2100mm1200mm
Metroll® Fencing Profiles
METLINE® TRIMFENCE®
METZAG® MINI CORODEK®
CORODEK®
Fencing Panels• Manufactured from COLORBOND® steel• Available in panel heights 1200mm, 1500mm,
1800mm & 2100mm• Panel heights of 2400mm, 2700mm & 3000mm
are available for slopping sights
7
POST
RAIL
INFILL SHEET
RAIL
POST
RAIL
INFILL SHEET
LATICE PANEL
RAIL
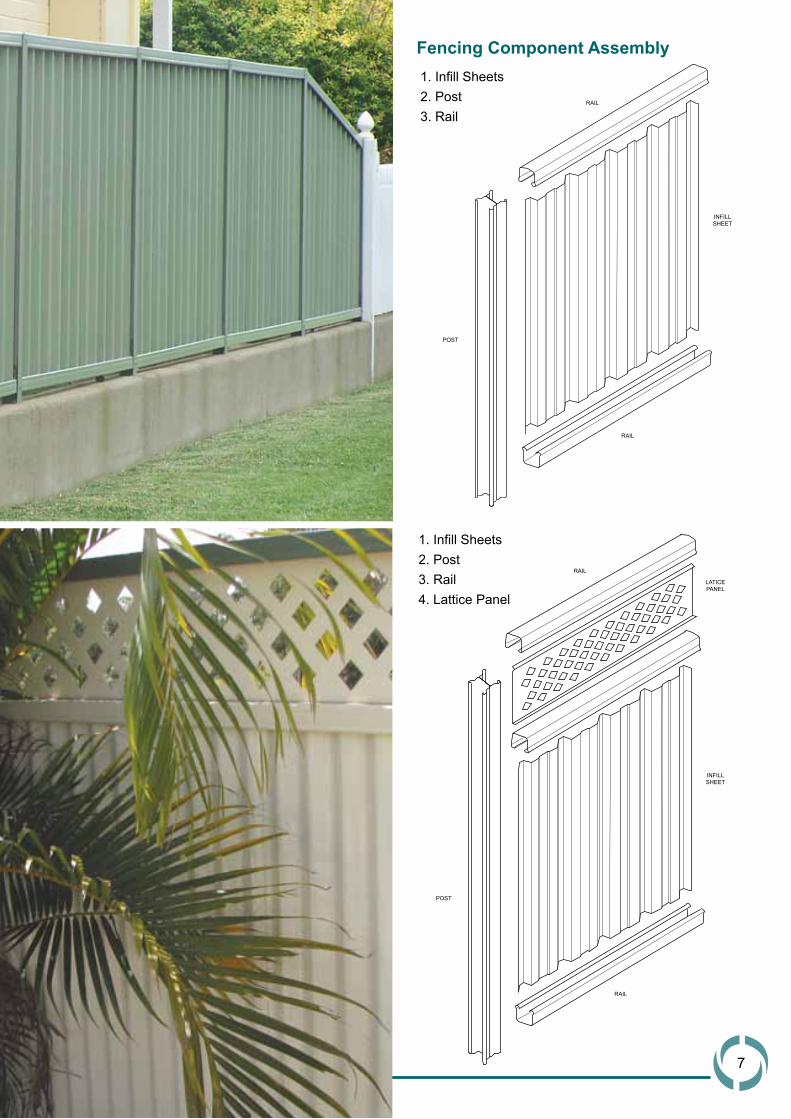
Fencing Component Assembly1. Infill Sheets2. Post3. Rail
1. Infill Sheets2. Post3. Rail4. Lattice Panel

8
1200mm 1500mm 1800mm
Fencing Accessories
Gates• Manufactured from COLORBOND® steel• Gates are suitable for other types of steel & wooden fences• Available heights 1200mm, 1500mm & 1800mm
Post & Rail• Post & rails manufactured form COLORBOND® steel• Suitable for wind loads up to 119km/h• Rails available in 2365mm & 3125mm lengths
Other• Coloured post caps & post balls• Coloured lattice top panels in 2365mm or 3125mm lengths• Shark fins• Gate hinges & latches
100 mm
9
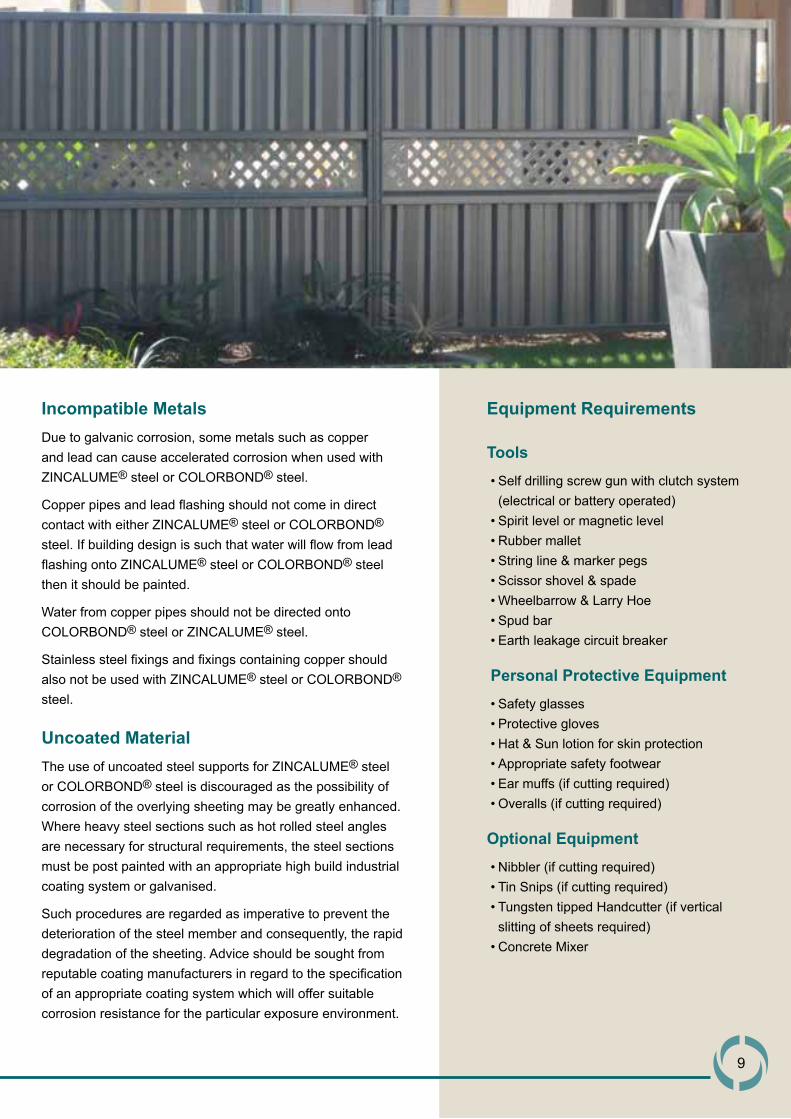
Equipment Requirements
Tools• Self drilling screw gun with clutch system
(electrical or battery operated)• Spirit level or magnetic level • Rubber mallet• String line & marker pegs• Scissor shovel & spade• Wheelbarrow & Larry Hoe• Spud bar• Earth leakage circuit breaker
Personal Protective Equipment• Safety glasses• Protective gloves• Hat & Sun lotion for skin protection• Appropriate safety footwear• Ear muffs (if cutting required)• Overalls (if cutting required)
Optional Equipment• Nibbler (if cutting required)• Tin Snips (if cutting required)• Tungsten tipped Handcutter (if vertical
slitting of sheets required)• Concrete Mixer
Incompatible MetalsDue to galvanic corrosion, some metals such as copper and lead can cause accelerated corrosion when used with ZINCALUME® steel or COLORBOND® steel.
Copper pipes and lead flashing should not come in direct contact with either ZINCALUME® steel or COLORBOND® steel. If building design is such that water will flow from lead flashing onto ZINCALUME® steel or COLORBOND® steel then it should be painted.
Water from copper pipes should not be directed onto COLORBOND® steel or ZINCALUME® steel.
Stainless steel fixings and fixings containing copper should also not be used with ZINCALUME® steel or COLORBOND® steel.
Uncoated MaterialThe use of uncoated steel supports for ZINCALUME® steel or COLORBOND® steel is discouraged as the possibility of corrosion of the overlying sheeting may be greatly enhanced. Where heavy steel sections such as hot rolled steel angles are necessary for structural requirements, the steel sections must be post painted with an appropriate high build industrial coating system or galvanised.
Such procedures are regarded as imperative to prevent the deterioration of the steel member and consequently, the rapid degradation of the sheeting. Advice should be sought from reputable coating manufacturers in regard to the specification of an appropriate coating system which will offer suitable corrosion resistance for the particular exposure environment.
10
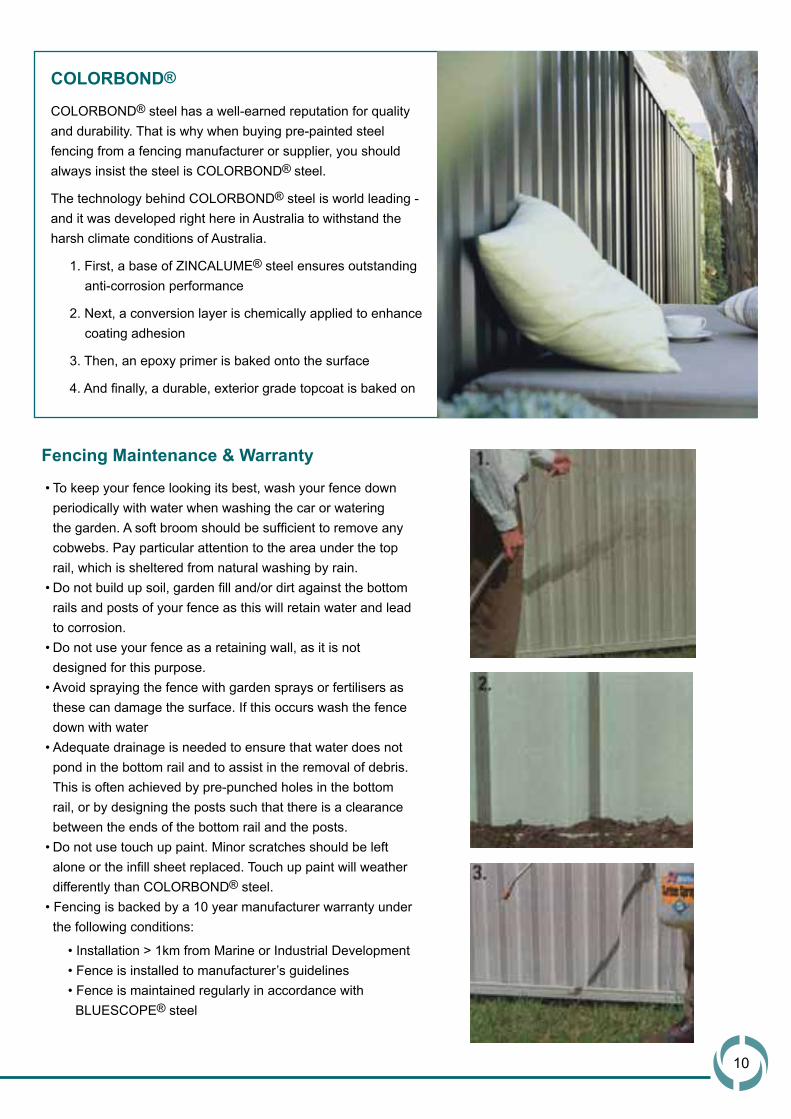
Fencing Maintenance & Warranty
• To keep your fence looking its best, wash your fence down periodically with water when washing the car or watering the garden. A soft broom should be sufficient to remove any cobwebs. Pay particular attention to the area under the top rail, which is sheltered from natural washing by rain.
• Do not build up soil, garden fill and/or dirt against the bottom rails and posts of your fence as this will retain water and lead to corrosion.
• Do not use your fence as a retaining wall, as it is not designed for this purpose.
• Avoid spraying the fence with garden sprays or fertilisers as these can damage the surface. If this occurs wash the fence down with water
• Adequate drainage is needed to ensure that water does not pond in the bottom rail and to assist in the removal of debris. This is often achieved by pre-punched holes in the bottom rail, or by designing the posts such that there is a clearance between the ends of the bottom rail and the posts.
• Do not use touch up paint. Minor scratches should be left alone or the infill sheet replaced. Touch up paint will weather differently than COLORBOND® steel.
• Fencing is backed by a 10 year manufacturer warranty under the following conditions:
• Installation > 1km from Marine or Industrial Development• Fence is installed to manufacturer’s guidelines• Fence is maintained regularly in accordance with
BLUESCOPE® steel
COLORBOND®
COLORBOND® steel has a well-earned reputation for quality and durability. That is why when buying pre-painted steel fencing from a fencing manufacturer or supplier, you should always insist the steel is COLORBOND® steel.
The technology behind COLORBOND® steel is world leading - and it was developed right here in Australia to withstand the harsh climate conditions of Australia.
1. First, a base of ZINCALUME® steel ensures outstanding anti-corrosion performance
2. Next, a conversion layer is chemically applied to enhance coating adhesion
3. Then, an epoxy primer is baked onto the surface
4. And finally, a durable, exterior grade topcoat is baked on

11
Metroll® Fencing Advantages• Double sided profiles• Secure & private• Easy to install• Easy to maintain• Variety of heights• Numerous colours• Fire resistant• Recyclable• 100% BlueScope® Steel
Metroll® Steel Fencing Colours
Contemporary COLOURBOND® Steel colours
Classic COLOURBOND® Steel colours
Summershade®Domain® Estate® Harvest® Riversand®
Bluestone®
Teatree®
Evergreen® Hedge®
Willow® Red Oak®
Meadow®Grey Ridge®
Terrace®
COLORBOND® steel , BLUESCOPE STEEL® and ® colour names are registered trade marks of BlueScope Steel Limited.
The COLORBOND® steel colours shown above have been reproduced to represent actual product colours as accurately as possible. However, we recommend checking your chosen colour against an actual sample of the product before purchasing, as limitations of web palette colours affect colour tones.
Please also note that if you are printing this page the colours will not be accurate using most printers and should not be used for colour matching purposes.

12
Exclusion ClauseThis installation guide utilises information provided by manufacturers of cold-formed steel residential fencing. It has been circulated to the steel fencing industry for feedback and comments prior to publication. Whilst care had been taken in the preparation and compilation of the material contained herein, the Authors and/or BlueScope Steel shall accept no responsibility or liability for any use to which it is put. Information contained in this installation guide is subject to change without notice.
METROLL - Newcastle 268 Macquarie Road, Warners Bay, NSW 2282 PO BOX 267, Cardiff, NSW 2285 P: (02) 4954 5799 F: (02) 4954 0891 E: [email protected] www.metrollnewcastle.com.au