fastest easiest way to play guitar · dedicated to you this e-book is dedicated to you, my fellow...
TRANSCRIPT

Dedicated To You
This e-book is dedicated to you, my fellow guitar enthusiast, and I think it will be especially helpful if you are new to the guitar. My name is Claude Johnson and I've been a serious student of the guitar since 1991. I put this e-book together to help eliminate confusion about the guitar learning process and help you learn the guitar as fast as possible.
Believe it or not, the process of learning guitar is very very simple. However, simplicity does not mean the same thing as “easy”. There is a difference between skill and knowledge. Yet, by understanding the process, we do eliminate confusion, build confidence, and make progress.

Let me give you an analogy. Let's say you are practicing throwing free-throws on the basketball court. Now, I'm not an expert on basketball, but there's only a few things to really know when it comes to shooting free-throws. (don't tilt to the side, bend your knees, aim for just above the rim, etc). Yet, reading and knowing these things does not by itself help you to make more shots. You have to get out there and PRACTICE.
Once you know how to practice, all it takes is a little commitment and dedication, which allows you to engage in the process of repetition. It is this process of repeating the same thing over and over, that builds skill. Don't forget, guitar IS a physical activity, even though we are not literally running around. So, it does take time for the body and specifically the nervous and muscle systems to adapt and let you build the skills you need.
Fortunately, playing guitar is a lot easier than throwing a basketball ball into a hoop. Even professional b-ballers only make 70 to 80% of their free-throws. Yet, once you learn to play a “G” chord on the guitar, you'll play it perfectly 99.9% of the time, no problem.
The Basketball Analogy

So, let's get specific now, and talk about exactly what we need to learn to start playing all of our favorite songs on the guitar. As I see it, there's only three basic steps.
1. Learn to Play Guitar Chords2. Learn to Play Chord Progressions3. Learn to Play Complete Songs
Now, don't get me wrong, ADVANCED guitar playing does have some deep challenges that you can pursue, and it can start to become a lot more complex. However, if you just want to become a respectable player and have the ability to play all your favorite songs, we can just keep it simple and learn the basics. This should be your goal in the beginning. There's absolutely no point in trying to run before we can walk.
It is said that the guitar is one of the easiest things to learn and one of the toughest to master. And we aren't talking about mastering everything. Yes, if you want to become a virtuoso, it is a much longer road. But again, we aren't talking about that. We are talking about mastering the basics, folks.
Basic Mastery Vs. Advanced Mastery
A Sequential Learning Process
But Before We Get Started...But before we even get started learning a chord, let's talk about yourguitar. You want to have a nice sounding instrument. If you'reusing a dusty old guitar from the basement, that may ormay not have intonation problems, don't expect it to soundgood. You want an instrument that is not damaged in any way.If you do have an old instrument, you can take it to the localmusic shop and see what they say about it's condition.
If you're buying a new instrument, you don't necessarily have tospend a lot of money. It also doesn't really matter whether youstart on the electric or the acoustic. Each have their own challenges. The electric is physically easier because you don't have to push down as hard on the strings. However, it is more difficult to get a good tone out of because there's lots of settings on the guitar and the amplifier.
It really depends on your tastes, but if I had to recommend one, I'd say start on the acoustic guitar because its easier to get a good tone out of it.
When guitar players talk about “tone”, they are referring to the actual sound coming out of your instrument. This is very important. Why? Because you can be the best guitarist in the world, but if your tone is bad, its going to sound
Were you expecting that it's more complex than that? It's really not. I think a good teacher makes “difficult” things simple, and that's what I'm trying to do here. So, we are really talking about a step-by-step, sequential learning process. We first learn the chords, then we learn progressions, then we finally learn complete songs. In other words, you can't learn to play chord progressions until you can play your basic chords; we have to go step-by-step.
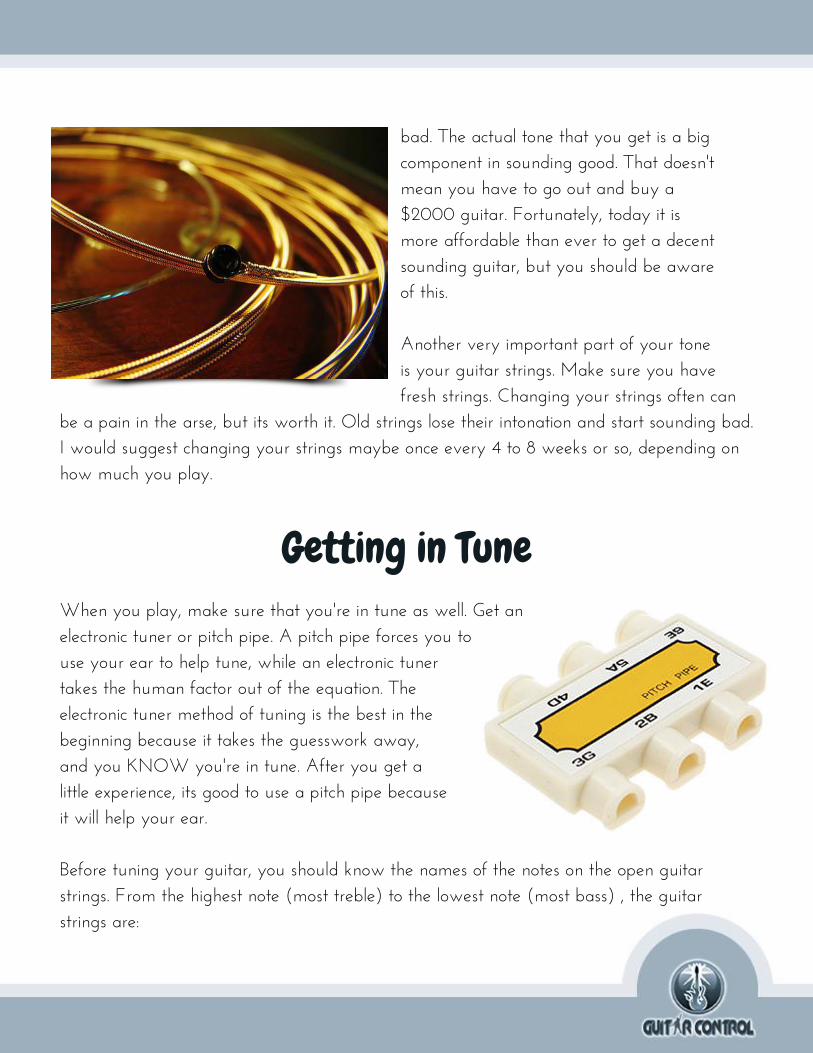
Getting in TuneWhen you play, make sure that you're in tune as well. Get anelectronic tuner or pitch pipe. A pitch pipe forces you touse your ear to help tune, while an electronic tunertakes the human factor out of the equation. Theelectronic tuner method of tuning is the best in thebeginning because it takes the guesswork away,and you KNOW you're in tune. After you get alittle experience, its good to use a pitch pipe becauseit will help your ear.
Before tuning your guitar, you should know the names of the notes on the open guitar strings. From the highest note (most treble) to the lowest note (most bass) , the guitar strings are:
bad. The actual tone that you get is a big component in sounding good. That doesn't mean you have to go out and buy a $2000 guitar. Fortunately, today it is more affordable than ever to get a decent sounding guitar, but you should be aware of this.
Another very important part of your tone is your guitar strings. Make sure you have fresh strings. Changing your strings often can be a pain in the arse, but its worth it. Old strings lose their intonation and start sounding bad. I would suggest changing your strings maybe once every 4 to 8 weeks or so, depending on how much you play.
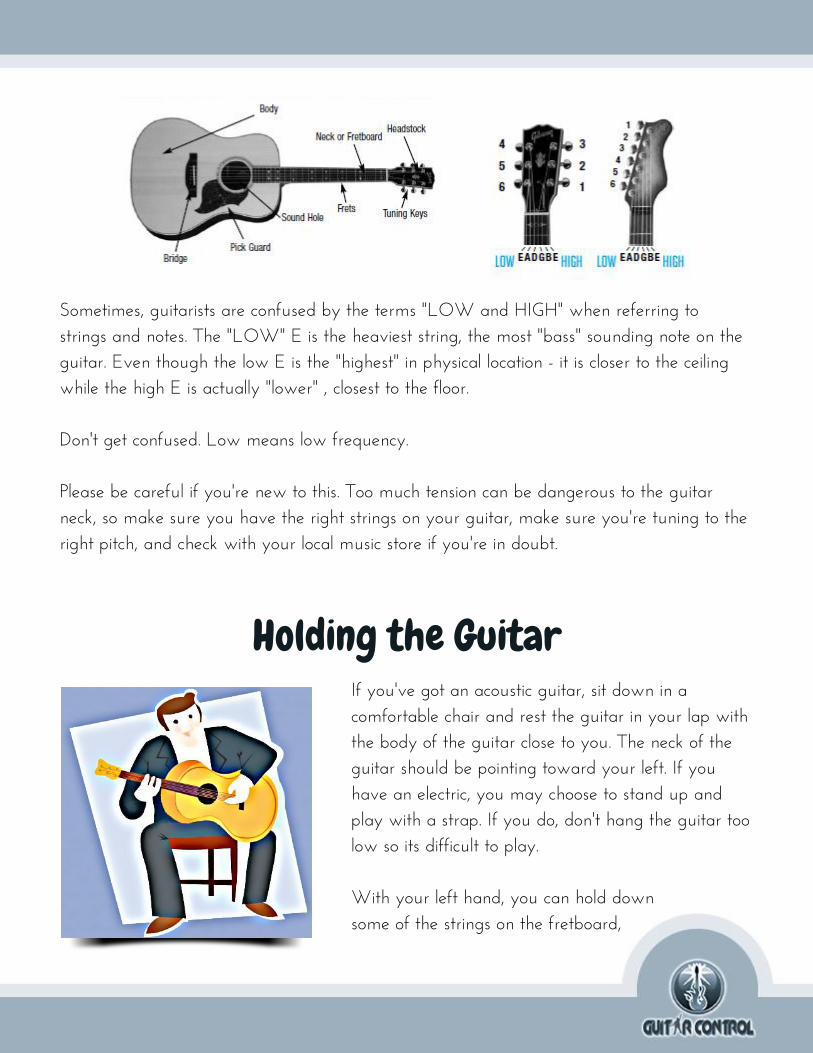
Holding the Guitar If you've got an acoustic guitar, sit down in a comfortable chair and rest the guitar in your lap with the body of the guitar close to you. The neck of the guitar should be pointing toward your left. If you have an electric, you may choose to stand up and play with a strap. If you do, don't hang the guitar too low so its difficult to play.
With your left hand, you can hold downsome of the strings on the fretboard,
Sometimes, guitarists are confused by the terms "LOW and HIGH" when referring to strings and notes. The "LOW" E is the heaviest string, the most "bass" sounding note on the guitar. Even though the low E is the "highest" in physical location - it is closer to the ceiling while the high E is actually "lower" , closest to the floor.
Don't get confused. Low means low frequency.
Please be careful if you're new to this. Too much tension can be dangerous to the guitar neck, so make sure you have the right strings on your guitar, make sure you're tuning to the right pitch, and check with your local music store if you're in doubt.

Your First Chord: E minorNow that you know what the names of the strings are, and what the frets are, you should be able to play your first chord: E minor. Place your middle finger on the 2nd fret (just behind the fret) on the A string, and your ring finger on the 2nd fret on the D string. Then use your pick to strum all 6 strings.
If you're going to be a guitarist, you have to get used to reading chord diagrams. Here's the E minor shown in a diagram:
and with the right hand , you can use a guitarpick to play the strings.
To hold the pick, you grasp it firmly (but withoutexcessive tension) between your thumb and firstfinger.
The small pieces of metal running up and downthe neck of the guitar are called frets. When guitarists talking about playing something “At the 7th fret”, for example, what they really mean is to place your finger on the fretboard just behind the 7th fret, but not touching it. There's usually 22 or 24 frets on an electric guitar and maybe 17 frets or so on an acoustic.
The lowest fret you can play is the first fret. Of course, you can also play a string without fretting it at all. This is called playing the string “open”.

Common Mistakes If you can play an E minor chord successfully, then you are well on your way. If you did, give yourself a well-deserved pat on the back. If it doesn't sound good, then you may be making one of several common mistakes.
This is an obvious one, but should be mentioned. You can't expect to sound good if you're out of tune or if your guitar itself has an intonation problem or fret buzz going on.
Let's examine this diagram. The first thing that's important to know is that the low E string is shown on the left, and the high E string is on the right. Imagine a guitar is placed propped up against the wall, facing you. Well, the low E string would be on the left side, wouldn't it? So, this is the same layout for the chord diagrams.
You will see a few red circles and a few red solid dots. These are not usually drawn in red; I just did that so the picture is easier to see.
The solid dots are where to place your fingers. Notice the 2nd fret on the A string and D string have dots. The circles above the other strings indicate that the string is to be played open. In this case, we are playing all 6 strings. If a string is not to be played, there is usually an “x” above the string, or nothing at all.
Mistake #1: Your guitar is broken or not in tune.
Mistake #2: You are not pressing down hard
enough with your fingers.
Correcting Your MistakesFirst of all, how do you really know if you're playing the chord correctly? The best way is to do what I call a “ring test”, and that means to play each string individually and make sure it is sounding good. When all the strings are sounding good, then the chord as a whole will sound good.
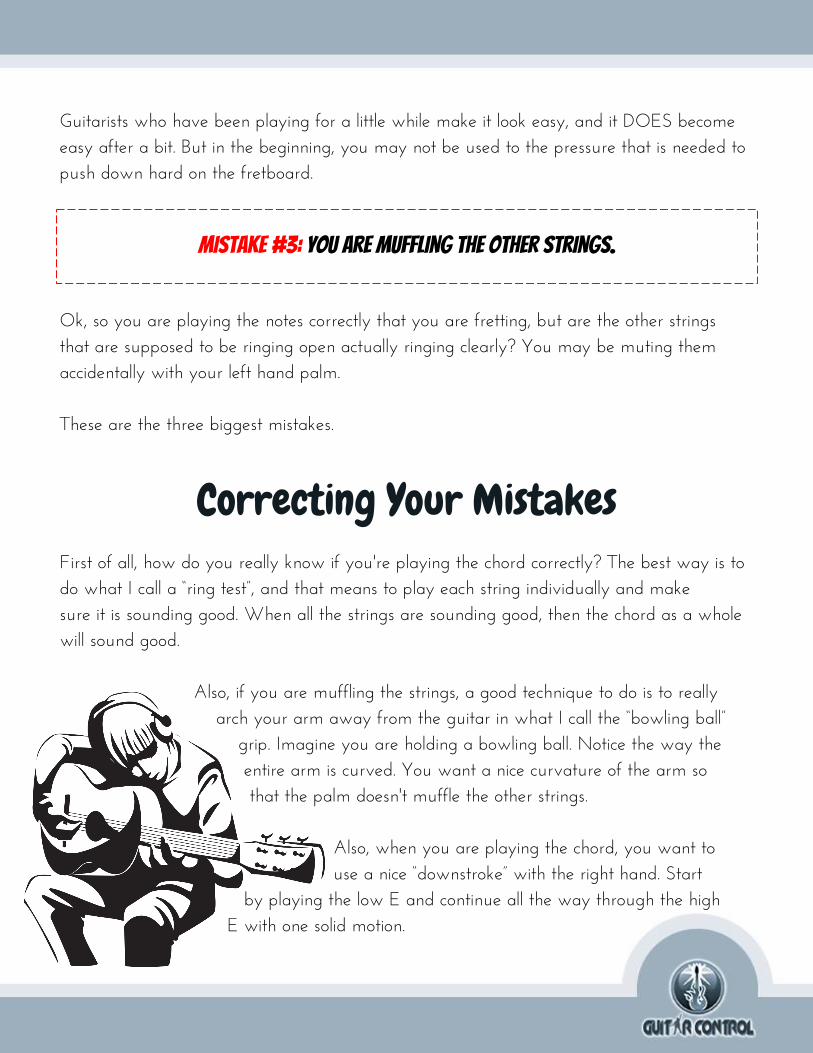
Also, if you are muffling the strings, a good technique to do is to really arch your arm away from the guitar in what I call the “bowling ball” grip. Imagine you are holding a bowling ball. Notice the way the entire arm is curved. You want a nice curvature of the arm so that the palm doesn't muffle the other strings. Also, when you are playing the chord, you want to use a nice “downstroke” with the right hand. Start by playing the low E and continue all the way through the high E with one solid motion.
Guitarists who have been playing for a little while make it look easy, and it DOES become easy after a bit. But in the beginning, you may not be used to the pressure that is needed to push down hard on the fretboard.
Ok, so you are playing the notes correctly that you are fretting, but are the other strings that are supposed to be ringing open actually ringing clearly? You may be muting them accidentally with your left hand palm.
These are the three biggest mistakes.
Mistake #3: You are muffling the other strings.

Your Grab-bag of ChordsRemember, we are learning step by step here. So if you aren't completely comfortable playing the E minor chord, I would suggest not going any further in this e-book. Instead, working on playing the E minor chord. Hey, if you can't master a single chord, you're not ready to continue.
Don't worry if it take you a little while to get it. Just keep working on it, and get that first chord under your belt.
You should learn the following chords:
1. E minor - We just learned this one.
2. G Major
Place your middle finger on the 3rd fret low E string,your first finger on the 2nd fret on the A string, andyour ring finger on the 3rd fret high E string. Then,play all 6 strings. This is slightly more difficult thanthe E minor chord.
3. C Major
Place your ring finger on the 3rd fret A string, your middle finger on the 2nd fret D string, and your first finger on the first fret B string. This chord is different than the G major and E minor chords because you are ONLY playing the top 5 strings. Do not play the low E here. Start your pick on the A string and strum down. Notice the X on the chord diagram that indicates you shouldn't play the low E.

4. D Major
Place your first finger on the 2nd fret G string, your ring fingeron the 3rd fret B string, and the middle finger on the 2nd frethigh E string. The D string rings open and the A string andlow E string are not played.
5. E Major
This is very similar to the E minor, but you are adding one more finger.
Place your middle finger on the 2nd fret on the A string, your ring finger on the 2nd fret on the D string, and add the first finger to the first fret G string.
6. A Major
The difficulty level rises slightly again, so make sure you canplay the previous chords before trying the A major chord.
There's two ways to finger this chord. The first way , is toplace your first finger on the 2nd fret D string, the middlefinger on the 2nd fret G string, and the ring finger on the2nd fret B string.
The second more common way, (but possibly slightly more difficult for the beginner) is to use your first finger to hold down all three notes.
On this chord, the A string and high E are ringing open and the low E isnot played.

7. A minor
Place your middle finger on the 2nd fret D string, ring fingeron the 2nd fret G string, and first finger on the first fret Bstring. On this chord, the A string and high E are ringingopen and the low E is not played.
This completes your beginning chord grab bag. With these 7chords, you are well on your way to mastering the guitar. Sure, there are other chords you need to know, but for now, focus on mastering these.
Learning to Switch Between Chords Can you play all 7 of the chords I showed you above? If so, congrats! You're making excellent progress and you're ready for the next step. If not, please master those 7 chords before continuing.
Now, the next step is to learn to switch between the chords quickly, almost instantly. This will be hard to do at first, but becomes easy after some practice. Do not worry about the rhythm for now. Just learn to switch back and forth quickly between any of the chords.
Chord ProgressionsNow that you can play chords and switch between them with ease, you are ready to start playing chord progressions. Your first chord progression is E minor to G. You'll want to strum the E minor chord 4 times, while counting “ ONE, TWO, THREE,FOUR.” in a steady rhythm.

Then, keeping the same rhythm, switch to the G major chord and count “ONE, TWO, THREE, FOUR” again. Then switch back to the E minor for another 4 counts, then back to the G, and so on. You are playing a chord progression! Woo hoo!
This is the basic idea. Once you can do this, you can add some accents to your strumming, so instead of simply play “ONE , TWO, THREE, FOUR”, you can count “ONE and TWO and THREE and FOUR and”.
On the “ands”, you can strum backwards, bringing your pick up from the high E string and brushing it across the strings toward the low E string. This is called an upstroke. So you're strumming pattern becomes “downstroke, upstroke, downstroke, upstroke”
Keep in mind you don't have to necessarily hit all the strings of the chord on the upstroke.This is called the partial upstroke technique. Just do what sounds natural, and follow your ear and your inner rhythm, but use the counting as a guide to keep you on track.
More Chord ProgressionsOk, so now that you have some chords down, you need to learn several chord progressions. This is really the next step. Remember, we said that mastering the basics of guitar involves learning chords, progressions, and then songs? Well, we have already accomplished part 1, so now we are onto the second part, which is learning the progressions.
Again, I would like to stress here that you should take your time and learn each progression and master it.

1. E minor | G major | E minor | G major
This is the one we just learned. You can actually try this one with a “ONE TWO” count instead of a full ONE TWO THREE FOUR. This chord progression is used by Nirvana in “About a Girl”.
2. E major | A major | E major | A major
This is a simple progression known as the “I IV” progression, which you can build on later to play all kinds of songs.
3. E minor | A minor | E minor | A minor
Here is a minor chord progression used in Bob Marley's tune “so much trouble”
4. G major | D major | C major | C major
This is a cool chord progression, very similar to the one used in “Knocking on Heaven's Door” by Bob Dylan.
5. G major | C major | D major | D major
Here's another progression using the same chords, but in a different order. Really, all the popular songs use all the same chords, just re-arranged in a different way.
6. E minor | C major | D major | G major
This progression is used in Neil Young's song “Heart of Gold”.
7. G major | C major | D major | C major.
This last progression is similar to the one used in Steve Miller's “The Joker”.

What is a song really? A song is made up of severalsections, and each section is really a chord progression.For example, a song may have a verse section, achorus section, perhaps a “bridge” section, possibly anintro section, etc.
In addition to each section that is composed of achordal progression, there is usually a melody that is played over the chords. Most often, the melody is a vocal melody. It is the interplay/harmony between the vocal melody and the underlying chords that gives a song its recognizable, unique quality.
So, how do we learn songs? First, we should have a recording of the song and listen to it, in order to familiarize ourselves with that song, if we have not already.
Next, we have to identify the chords of the song. This is done by buying a book from the music store on the specific songs we want to learn, or much more cheaply, by doing a google search on the song title and “guitar tab” or “guitar chord” next to it.We can find most popular songs have already been studied and the
So, try out these chord progressions. I think you will find that they are not that hard to play. You can hopefully see your guitar skills coming together by now.
Expanding Your Chordal KnowledgeThere's more chords to learn. Specifically, barre chords , “Dom7” “minor7” and “major7” chords. But, don't worry about these for now. You will learn these more advanced chords soon.
I want you to be aware of them. But now, let's talk about the next step.
Learning Complete Songs

chords made publicly available to all.
The third step is to listen carefully to the song and pick which parts we are going to play and which parts we are going to leave out. For example, a song may have a long instrumental introduction that doesn't make sense for us to try to play. Keep in mind that when are we are starting to play songs on our own, on the guitar, we are somewhat limited and so not every part of every song is going to make sense. We have to use a little common sense and pick and choose which parts make sense , based on the song and our current skill level.
After choosing the parts we want to include in our own arrangement, we then learn the chord progression of each section separately and make sure we can master each part.
The next step is to learn to sing (at least on a basiclevel) the melody. Remember, a song consists notmerely of chord progressions, but also of vocalmelodies. So, to just play the chords without the vocalmelody is not really going to capture the essence ofthe song.
Often, it is the vocals which are the most prominentand recognizable part of the song, and the chordsare really just backing that up. Don't worry if you'renot a good vocalist. That hardly matters when youjust want to play your songs in a casual setting. You'll find you are probably better than you thought. Plus, when it comes time to perform in a real setting, you can find a vocalist.
Make sure you print out a copy of the lyrics and memorize them. That'soften where people get stuck on songs – they learn the chord

progressions and then forget the vocals!
Sure, memorizing the lyrics is another step, but you'd be amazed how powerful that is, to actually know all the words to the song. Then, a simple chord progression comes to life, almost like magic.
Ultimate Guitar Song Collections
I put together several videos for you to learn this process of song learning as fast and as easy as possible. I actually created an online course that I call “The Ultimate Beginner Guitar Course”, and the purpose is to teach you how to play all your favorite songs quickly and easily.
Of course, the material presented in this e-book so far will give you a great foundation, but inside the online course, we go deep with examples and actually learn howto play 75 popular songs.

I also demonstrate for you all of the things I've been talking about here, and also talk about Barre chords, picking patterns, and other important guitar topics. Keep an eye on your inbox, because I'll be sending you some cool video clips that will help you to better understand the material presented here.
I also made the online course completely affordable, so that you can learn how to play the guitar properly and save a fortune on private guitar lessons. In addition, it comes with a generous money-back guarantee.
You can check it out here:www.ultimatebeginnerguitar.com/main.php
And you can order your copy here:www.ultimatebeginnerguitar.com/orderpage.php
ConclusionLearning the guitar is a sequential, step-by-step process. First we learn chords, then we learn chord progressions, then we play complete songs. The real key is not to get overloaded with information, and that's what I've tried to accomplish in this ebook.
You can powerfully get started just learning 7 basic chords, and 7 basic chord progressions, and you are well on your way to learning complete songs. To actually learn complete songs is hard to teach in an ebook format however, so that's why I've created cool online videos that are going to help you reach your goals.
I'd like to thank you for downloading this e-book, and I strongly encourage you to pick up a copy of the Ultimate Beginner Guitar Course.
www.ultimatebeginnerguitar.com/orderpage.php
It's loads of fun and you'll be playing your favorite songs in no time.
Claude Johnson

Killer Lead GuitarMade Simple
Killer Guitar Control Secrets
Eclectic ElectricGuitar
Eclectic ElectricGuitar II
Secrets of the Jam Masters
Secrets of theJam Masters II
Play from theHeart
Wicked ChickenPickin’ Chops
101 Wicked Chicken Pickin’ Licks
Smooth SoloSecrets
Supercharged Soloing Made Simple
Fretboard Domination
Virtuoso GuitarSecrets
Fusion GuitarSecrets
Ultimate AcousticBlues
How to PlaySmokin’ Blues
Boogie BluesMagic
Rockin’ the Blues& Slide Guitar
Rockin’ the BluesDeluxe
Blues MasterClass
Blues MasterClass Vol. 2
Ultimate CountryBlues
Deep Delta Blues

Soul of AcousticGuitar
Classical GuitarSecrets
Classical GuitarSecrets II
AcousticMastery
FingerpickingSecrets
Gospel GuitarCourse
Modern AcousticGuitar
AcousticEnlightenment
Reggae RootsGuitar Secrets
Acoustic GuitarToolkit
Bluegrass GuitarSecrets
Flamenco GuitarSecrets
Flamenco GuitarSecrets II
Fast TrackGuitar System
Ultimate GuitarSong Collection 1
Ultimate GuitarSong Collection 2
Epic RhythmGuitar Power
Ultimate GuitarSon Collection 3
Epic Lead GuitarPower
Rock Riffs MadeSimple
Metal Mayhem

Guitar ScaleSystem
Tone Tutor Amazing JamTracks
Larry CoryellJazz
Real Easy JazzGuitar
Real Easy JazzGuitar 2
Essentials ofJazz
Bass Made Simple
Bass Zone Formulas
Bass Zone Formulas 2
Killer KeyboardsMade Simple
Killer KeyboardsMade Simple 2
Killer KeyboardsMade Simple 3

Magno VocalCourse
Harmonica MadeSimple
Drums Made Simple 2
Drums MadeSimple
SaxophoneMade Simple
Ukulele Secrets Amazing SingingLessons
VibraphoneSecrets
Drums MadeSimple 3
http://www.guitargodclub.com/main.php
http://www.guitarcontrolhelp.com