ez display and ez remote for ios - infocus
TRANSCRIPT
009-1454-00
EZ Display and EZ Remote for iOS
User’s Guide
EZ Display-EZ Remote Manual for iOS Page 2
General Description The EZ Display application wirelessly connects your iOS device display to your EZ Suite enabled InFocus projector/display through a WiFi connection. You can enhance your display with rich features like remote control, document and photo viewers, linking with your Dropbox account, web surfing, streaming video, live camera. You can annotate your documents, web pages or photos and save them for later use.
EZ Remote allows you to remotely control your EZ Suite enabled device. EZ Remote and EZ Display cannot be run at the same time.
System Requirements
iOS iOS 5.1 and above
Device All iPhone models after iPhone 3GS All iPad models after iPad 2 All iPod Touch after iPod touch 4th generation
Resolution support iPhone: 480x320~1136x640 iPad: 1024x768~2048x1536
Storage At least 20MB free space needed
Features Specification
EZ Remote Wirelessly control your EZ Display enabled device.
Streaming Doc Supports multiple document formats
• PDF: Adobe PDF 1.6 or later • Office: MS Office 2003, 2007, 2010 • iWorks: iWorks ’09 (Pages ‘09, Numbers ’09, Keynote ’09)
Pix Viewer Wirelessly display photos in multiple formats • JPG, BMP, PNG
Live Cam Wirelessly stream and display live the output of your Rear or Front camera
Web Surf and display the internet wirelessly Dropbox Access and link y o u r Dropbox account to display documents from the
Cloud. Supports multiple formats • PDF: Adobe PDF 1.6 or later • Office: MS Office 2003, 2007, 2010 • iWorks: iWorks ’09 (Pages ‘09, Numbers ’09, Keynote ’09) • JPG, BMP. PNG
Media Streaming Wirelessly stream and view movies with audio. Multiple formats supported • 3GP, AVI, DAT, M4V, MKV, MOV, MP4, MPEG, MPG, RMVB, RM, TS, VOB,
WMV, XVID
Quad Split Control display of up to 4 wireless video sources
Annotate Mark up all your documents, photos, web pages, and save them as JPG
EZ Display-EZ Remote Manual for iOS Page 3
Installation
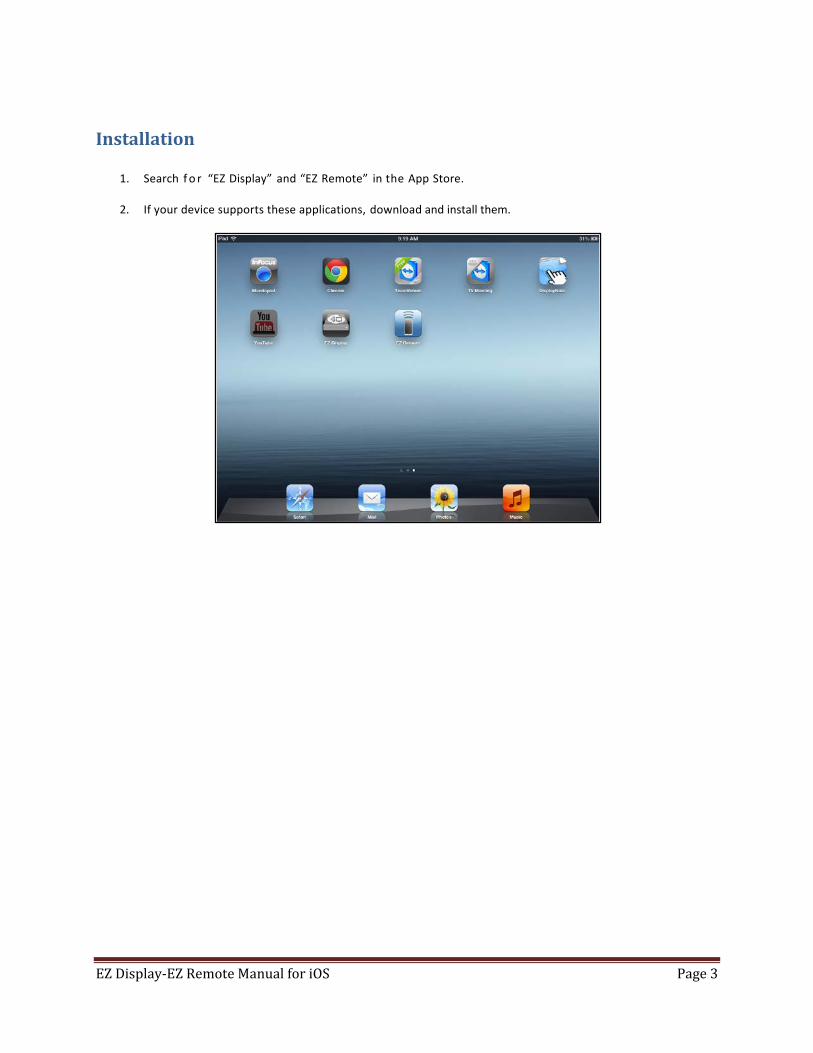
1. Search f o r “EZ Display” and “EZ Remote” in the App Store.
2. If your device supports these applications, download and install them.
EZ Display-EZ Remote Manual for iOS Page 4
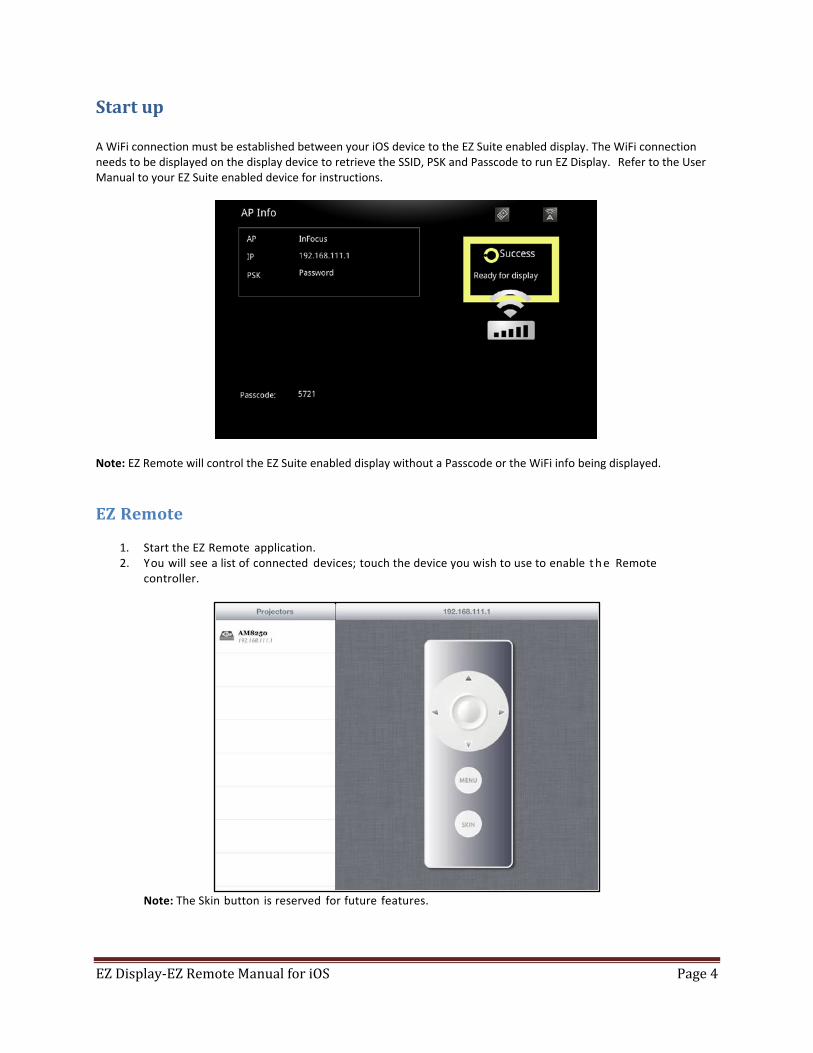
Start up A WiFi connection must be established between your iOS device to the EZ Suite enabled display. The WiFi connection needs to be displayed on the display device to retrieve the SSID, PSK and Passcode to run EZ Display. Refer to the User Manual to your EZ Suite enabled device for instructions.
Note: EZ Remote will control the EZ Suite enabled display without a Passcode or the WiFi info being displayed.
EZ Remote
1. Start the EZ Remote application. 2. You will see a list of connected devices; touch the device you wish to use to enable t h e Remote
controller.
Note: The Skin button is reserved for future features.
EZ Display-EZ Remote Manual for iOS Page 5
3. Use the arrows and Select button to navigate the features of your EZ Suite enabled display. Depending on
the configuration of the display you can show photos, movies, and documents from internal memory, an SD card or USB storage device.
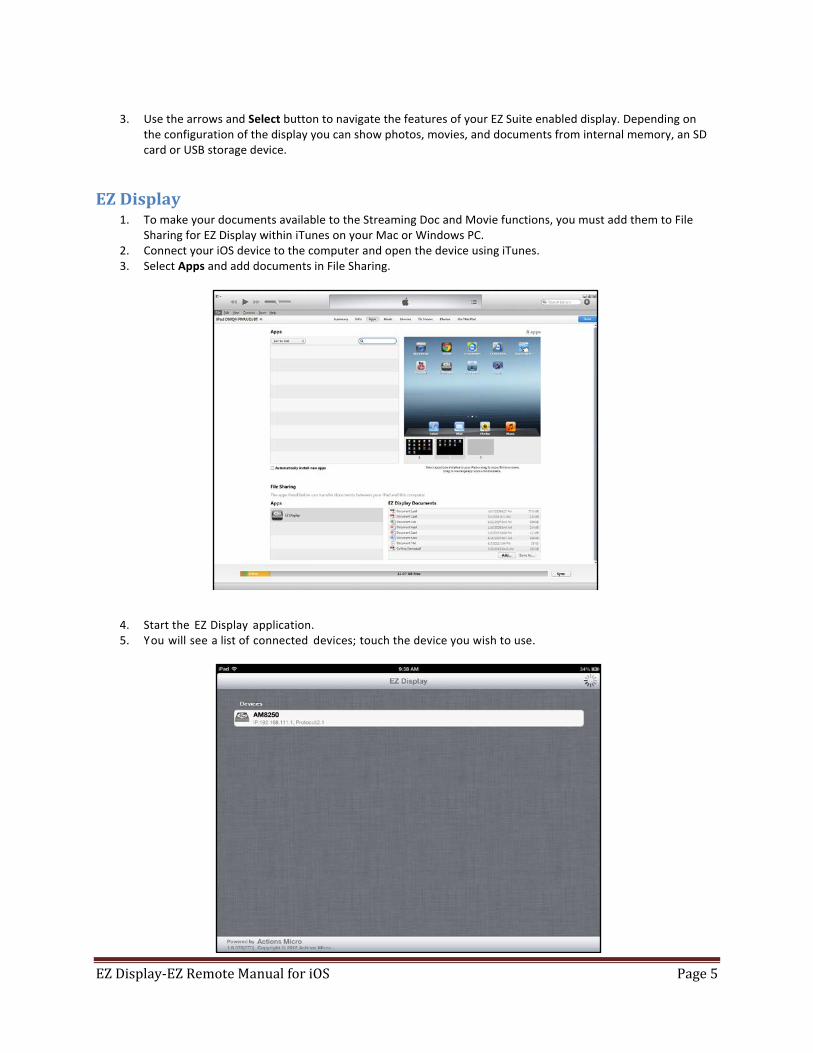
EZ Display 1. To make your documents available to the Streaming Doc and Movie functions, you must add them to File
Sharing for EZ Display within iTunes on your Mac or Windows PC. 2. Connect your iOS device to the computer and open the device using iTunes. 3. Select Apps and add documents in File Sharing.
4. Start the EZ Display application. 5. You will see a list of connected devices; touch the device you wish to use.

EZ Display-EZ Remote Manual for iOS Page 6
6. Enter the 4 digit Passcode shown on your TV/Monitor/Projector.
7. After entering t h e correct Passcode, you will enter Streaming Doc.
EZ Display-EZ Remote Manual for iOS Page 7
Streaming Docs
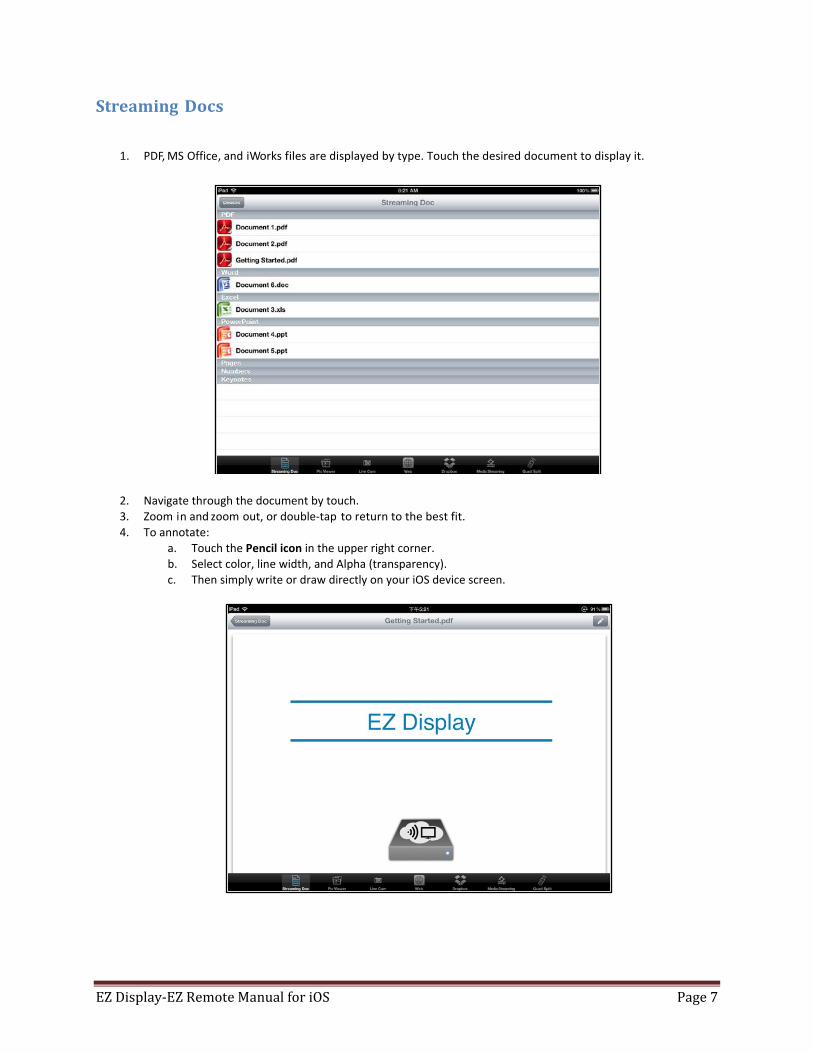
1. PDF, MS Office, and iWorks files are displayed by type. Touch the desired document to display it.
2. Navigate through the document by touch. 3. Zoom in and zoom out, or double-tap to return to the best fit. 4. To annotate:
a. Touch the Pencil icon in the upper right corner. b. Select color, line width, and Alpha (transparency). c. Then simply write or draw directly on your iOS device screen.
EZ Display-EZ Remote Manual for iOS Page 8
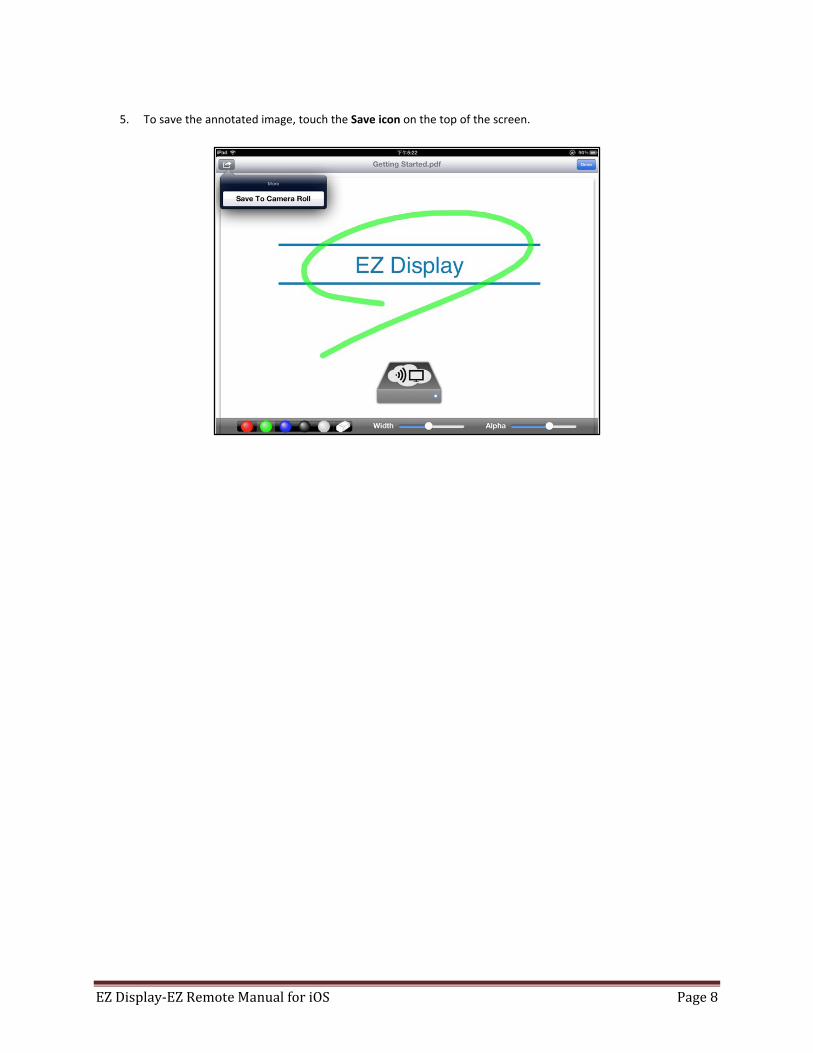
5. To save the annotated image, touch the Save icon on the top of the screen.
EZ Display-EZ Remote Manual for iOS Page 9
Pix Viewer
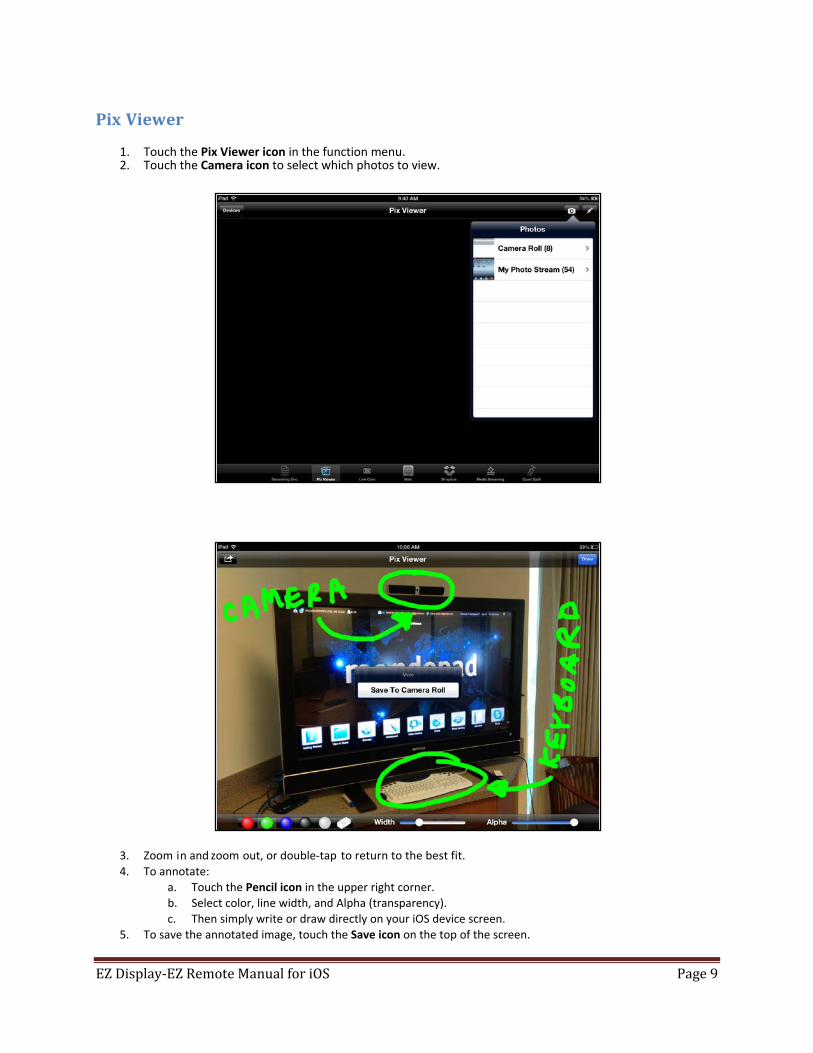
1. Touch the Pix Viewer icon in the function menu. 2. Touch the Camera icon to select which photos to view.
3. Zoom in and zoom out, or double-tap to return to the best fit. 4. To annotate:
a. Touch the Pencil icon in the upper right corner. b. Select color, line width, and Alpha (transparency). c. Then simply write or draw directly on your iOS device screen.
5. To save the annotated image, touch the Save icon on the top of the screen.

EZ Display-EZ Remote Manual for iOS Page 10
Live Cam Live Cam will real-time display what your camera sees.
1. Switch from the rear to the front camera by touching the camera icon. 2. Touch Low or High to adjust image quality.
3. Zoom in and zoom out, or double-tap to return to the best fit. 4. To annotate:
a. Touch the Pencil icon in the upper right corner. b. Select color, line width, and Alpha (transparency). Then simply write or draw directly on your iOS
device screen.
5. To save the annotated image, touch the Save icon on the top of the screen.
EZ Display-EZ Remote Manual for iOS Page 11
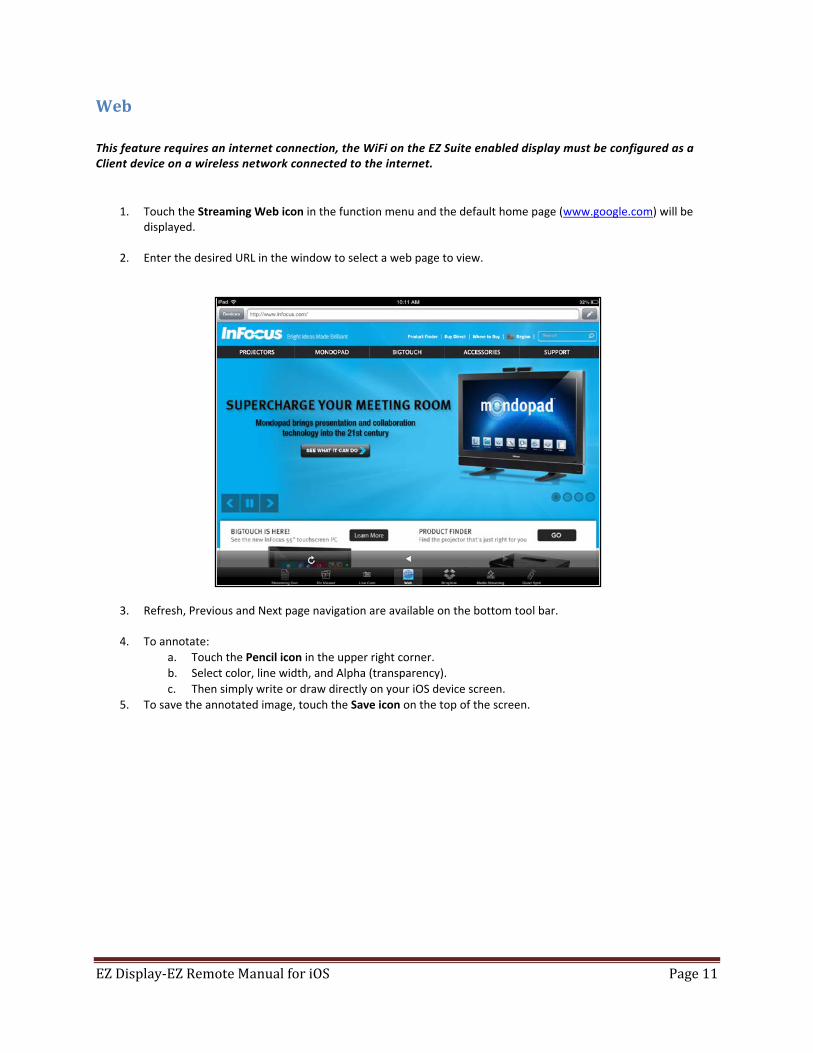
Web This feature requires an internet connection, the WiFi on the EZ Suite enabled display must be configured as a Client device on a wireless network connected to the internet.
1. Touch the Streaming Web icon in the function menu and the default home page (www.google.com) will be displayed.
2. Enter the desired URL in the window to select a web page to view.
3. Refresh, Previous and Next page navigation are available on the bottom tool bar.
4. To annotate:
a. Touch the Pencil icon in the upper right corner. b. Select color, line width, and Alpha (transparency). c. Then simply write or draw directly on your iOS device screen.
5. To save the annotated image, touch the Save icon on the top of the screen.
EZ Display-EZ Remote Manual for iOS Page 12
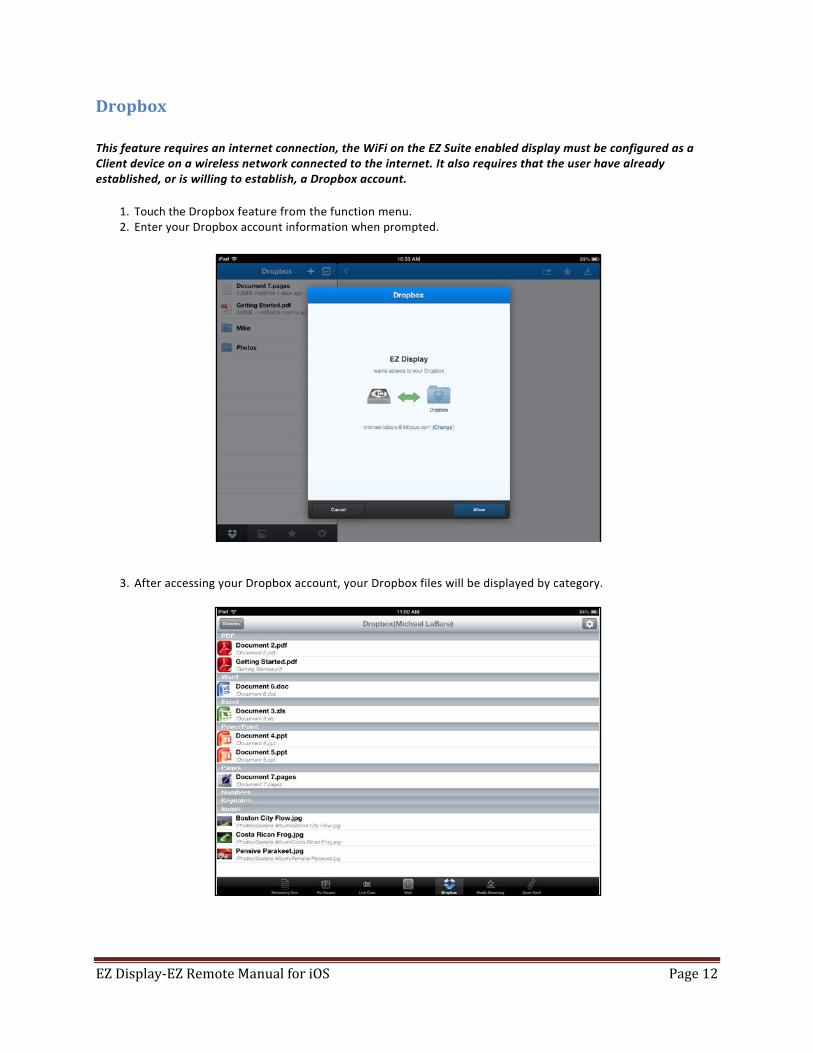
Dropbox This feature requires an internet connection, the WiFi on the EZ Suite enabled display must be configured as a Client device on a wireless network connected to the internet. It also requires that the user have already established, or is willing to establish, a Dropbox account.
1. Touch the Dropbox feature from the function menu. 2. Enter your Dropbox account information when prompted.
3. After accessing your Dropbox account, your Dropbox files will be displayed by category.
EZ Display-EZ Remote Manual for iOS Page 13
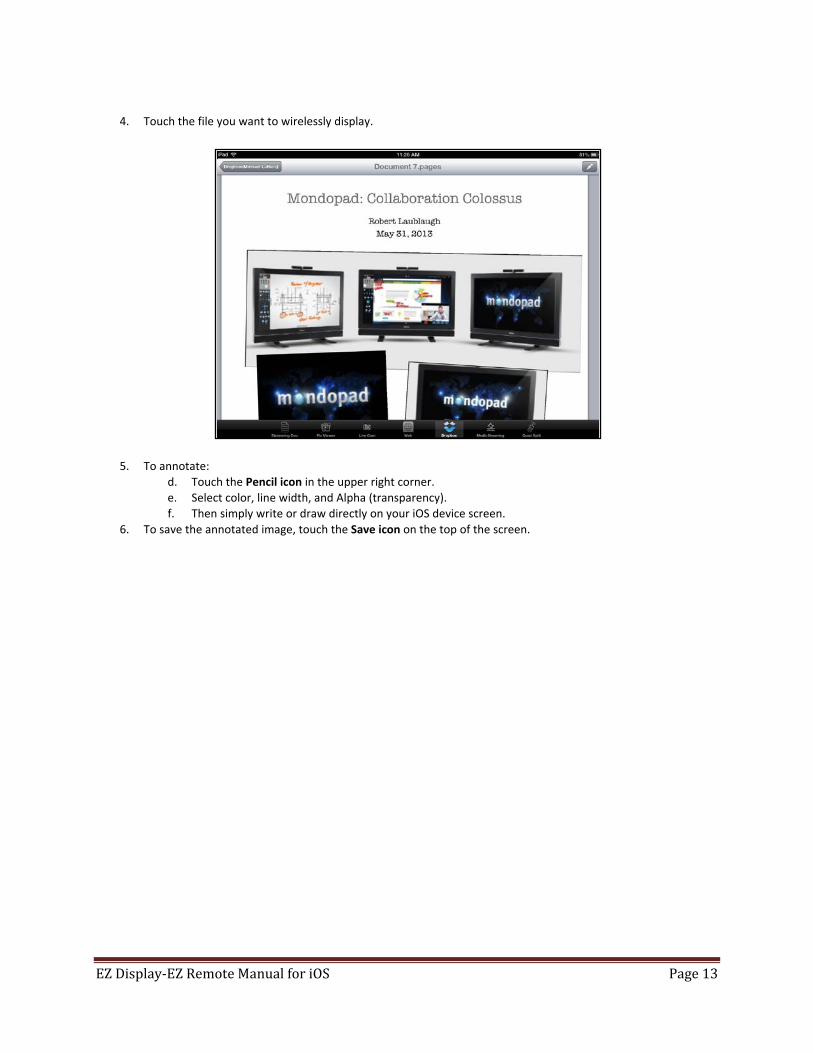
4. Touch the file you want to wirelessly display.
5. To annotate: d. Touch the Pencil icon in the upper right corner. e. Select color, line width, and Alpha (transparency). f. Then simply write or draw directly on your iOS device screen.
6. To save the annotated image, touch the Save icon on the top of the screen.
EZ Display-EZ Remote Manual for iOS Page 14
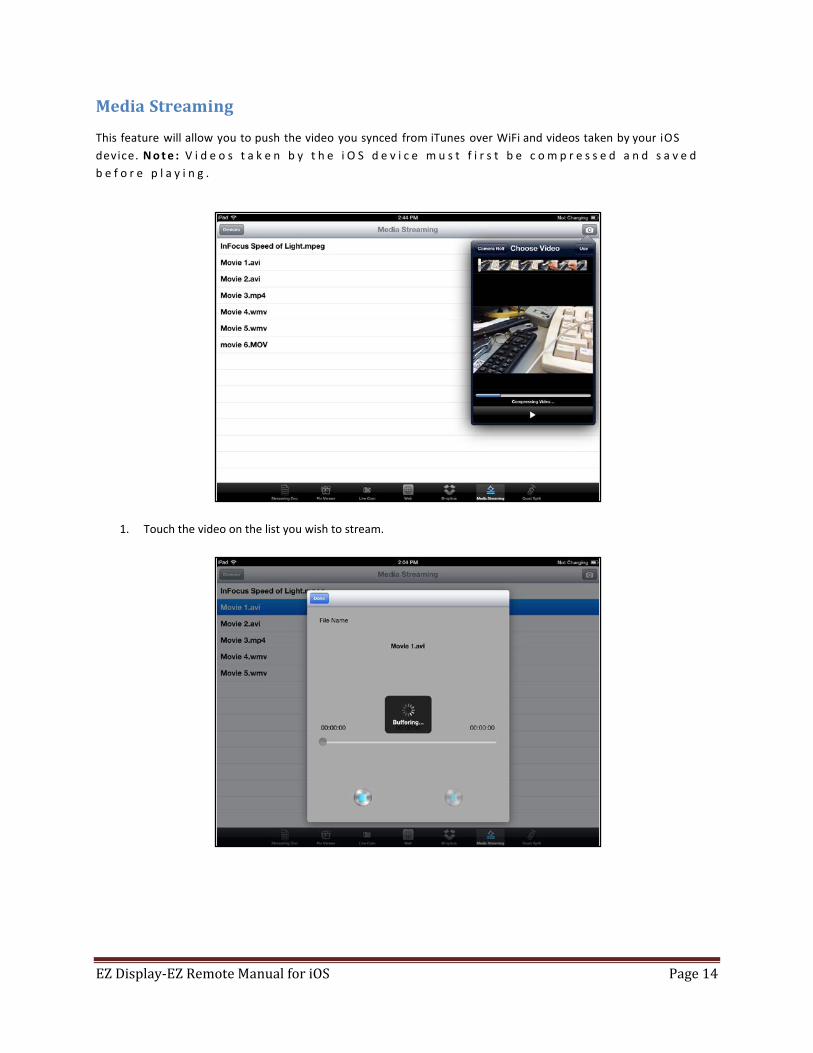
Media Streaming This feature will allow you to push the video you synced from iTunes over WiFi and videos taken by your iOS device. N o t e : V i d e o s t a k e n b y t h e i O S d e v i c e m u s t f i r s t b e c o m p r e s s e d a n d s a v e d b e f o r e p l a y i n g .
1. Touch the video on the list you wish to stream.
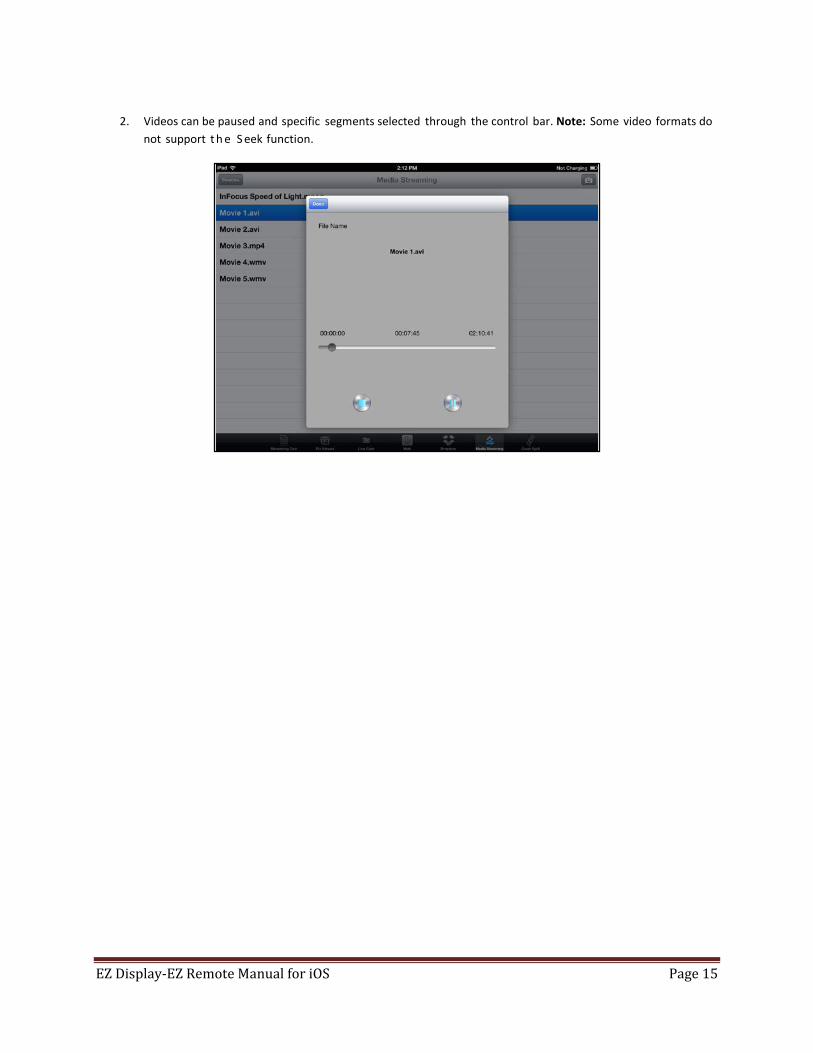
EZ Display-EZ Remote Manual for iOS Page 15
2. Videos can be paused and specific segments selected through the control bar. Note: Some video formats do
not support t h e S eek function.
EZ Display-EZ Remote Manual for iOS Page 16
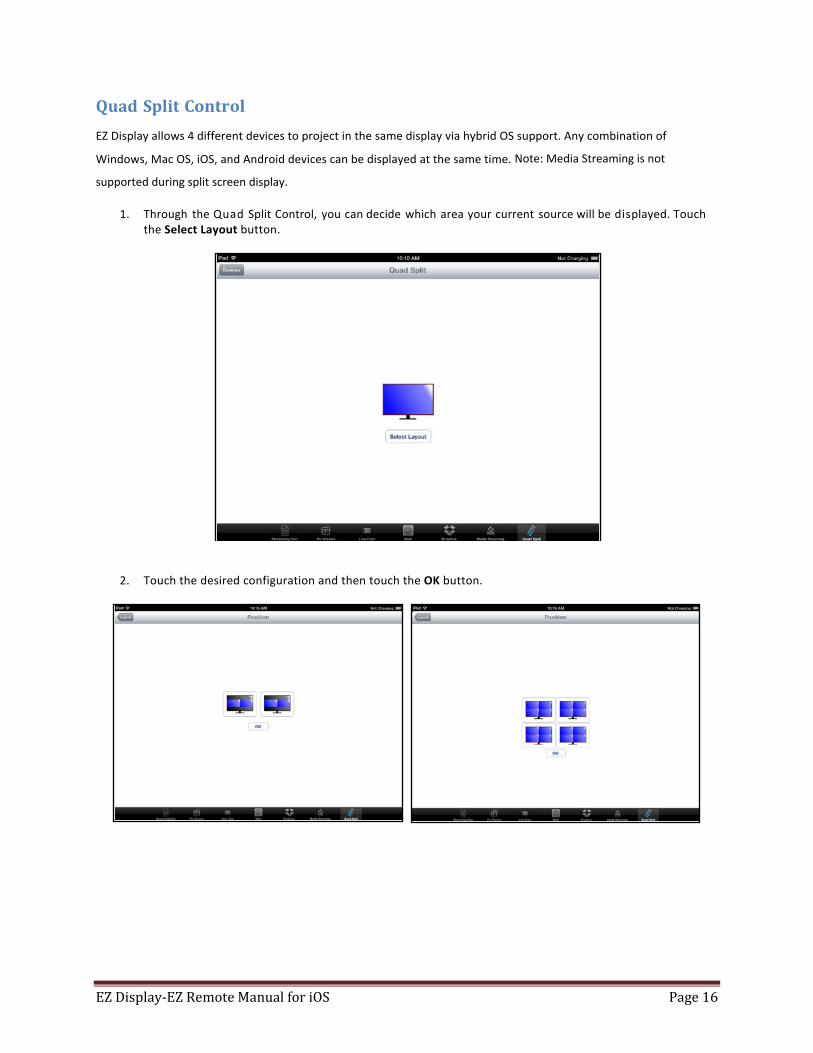
Quad Split Control EZ Display allows 4 different devices to project in the same display via hybrid OS support. Any combination of
Windows, Mac OS, iOS, and Android devices can be displayed at the same time. Note: Media Streaming is not
supported during split screen display.
1. Through the Quad Split Control, you can decide which area your current source will be displayed. Touch the Select Layout button.
2. Touch the desired configuration and then touch the OK button.