explain everything™ help · pdf fileexplain everything help center to ask questions,...
TRANSCRIPT
Help
For more information please visit
For more information please visitexplaineverything.com
.
.
INTRODUCTIONVisually communicate your ideas on Explain Everything s̓ interactive whiteboard platform.Collaborate, share, and learn without boundaries. New and existing media, annotations, andtext combine on an infinite canvas for an engaging, visual story. You can record and captureeverything on the screen, go back and add more context, and share all or part of theexperience for continuous development.
Add new or existing photos and videos. Use PDF, PPT, DOC, XLS, Keynote, Pages, Numbers,and RTF files. Import from GDrive, Evernote, Dropbox, Box, WebDAV, Email, iTunes, and anyapp that allows you to use the 'Open In...' function. Export MP4 movies, PDF documents, PNGimages, or .explain project files directly from your iPad.
To find answers to common questions and usage examples of Explain Everything from aroundthe world, check out:
Facebook LinkedIn Twitter Instagram Explain Everything Help Center
To ask questions, report bugs, or make suggestions please [email protected].
HOME
The Home Screen lets you quickly create new projects, start collaborations, join them, andshare your creations. Recently edited projects will also appear here along with quick tips toinspire and help you jump right into creating.
NEW PROJECT
Explain Everything supports both Portrait and Landscape orientations; the interface willadjust accordingly, providing the ability to switch orientations quickly. When you create anew project, the orientation of the project and associated export formats is set. When youriPad is oriented differently than the project setting, a red frame will appear that indicates thepart of the screen that will be exported when exporting to non-project formats. This framewill only be visible while editing and recording.
Import from cloud: Import a file or image(s) from multiple sources and create a newproject with them. Each photo, slide, or PDF page can be inserted on separateslides or an individual slide.
Blank Project: Starts a new project with the default white background.
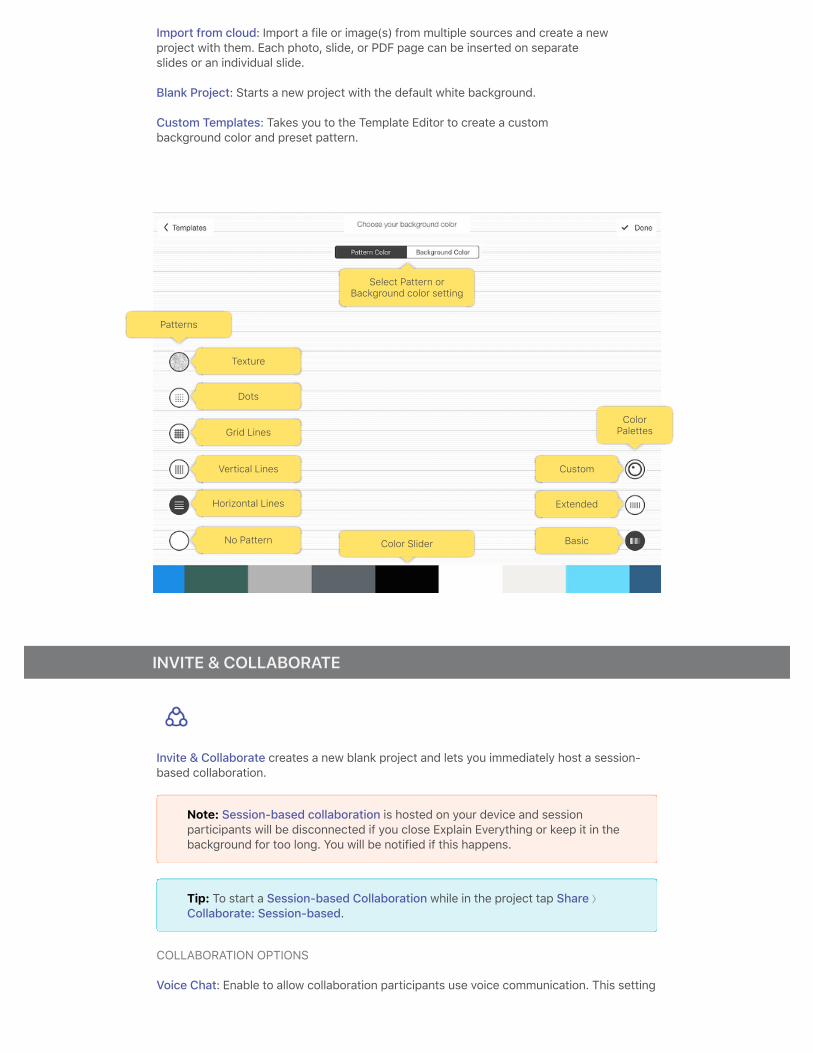
Custom Templates: Takes you to the Template Editor to create a custombackground color and preset pattern.
INVITE & COLLABORATE
Invite & Collaborate creates a new blank project and lets you immediately host a session-based collaboration.
Note: Session-based collaboration is hosted on your device and sessionparticipants will be disconnected if you close Explain Everything or keep it in thebackground for too long. You will be notified if this happens.
Tip: To start a Session-based Collaboration while in the project tap Share ⟩Collaborate: Session-based.
COLLABORATION OPTIONS
Voice Chat: Enable to allow collaboration participants use voice communication. This setting
Select Pattern orBackground color setting
Patterns
Texture
Dots
Grid Lines
Vertical Lines
Horizontal Lines
No Pattern
ColorPalettes
Custom
Extended
BasicColor Slider

can't be changed during the session.
Allow editing: Disable to prevent session participants from editing the project. This is adefault setting for participants and can be changed during the session.
Allow storing project: Disable to prevent session participants from being able to save theproject on their devices after the collaboration ends. This setting can't be changed duringthe session.
Visible on local network: Enable to make your session visible in Nearby Collaborations list inthe menu for users on the same WiFi. This setting can't be changed during the session.
Note: Some WiFi networks might not allow for the Visible on local network option towork properly.
JOIN WITH CODE
Join with CODE allows you to connect to ongoing collaborations, find a project or a folder, oractivate your account.
Tip: You can always access the Enter CODE field from the menu in the top righthand corner of the screen.
SHARE & INSPIRE
Share & Inspire opens the export menu so you can select and share a project in one of theavailable formats.
Tip: To change the video resolution, video quality, and audio export options go to Menu ⟩ Settings ⟩ Export.
SHARING OPTIONS
Web Video Link: Uploads the project to Explain Drive and generates a web link soyou can immediately share it as a video or slideshow. Tap on the generated link toshare it.
Collaborate: Session-based: Lets you host a collaboration on your device andinvite others to join you to work on the project in real-time.
Note: Session-based collaboration is hosted on your device and sessionparticipants will be disconnected if you close Explain Everything or keep it in the
background for too long. You will be notified if it happens.
COLLABORATION OPTIONS
Voice Chat: Enable to allow collaboration participants to use voice communication. Thissetting can't be changed during the session.
Allow editing: Disable to prevent session participants from editing the project. This is adefault setting for participants and can be changed during the session.
Allow storing project: Disable to prevent session participants from being able to save theproject on their devices after the collaboration ends. This setting can't be changed duringthe session.
Visible on local network: Enable to make your session visible in the Nearby Collaborationslist in the menu for users on the same WiFi. This setting can't be changed during thesession.
Note: Some WiFi networks might not allow the Visible on local network option towork properly.
Explain Drive: Uploads the project to Explain Drive and allows you to customize allprivacy and visibility options.
Export: Saves the project in a custom location in one of the available formats:Video, Document, Image, Project.
LIBRARY
In the Library you can find and manage your projects, folders, and access your Explain Drive.
Tap the Select button and then tap on a project thumbnail to Share, Merge, Move, or Deletethe selected project(s).
Tip: To Select a project you can also touch and hold on a project thumbnail.
Share: Share selected projects in a chosen format. If multiple projects are selected onlyExport option will be available.
Merge: Combines selected projects into a new separate project with a new name. Theoriginal projects will not be moved or deleted. Merge is only available when two or moreproject thumbnails are selected.
Tip: Projects can also be merged by dragging one project on top of another and thenselecting Merge projects.
Move: Moves selected project(s) to a different folder. It is possible to create a new folder
from the Move menu.
Delete: Removes selected projects and folders.
You can also manage each project and folder individually. Tap the next to the project's orfolder's name to open the menu with additional options.
Duplicate: Creates a copy of the selected project including slide content and recordings.
Rename: Changes the name of the selected project. To rename a project without openingthe menu tap its title below the thumbnail.
Details: Opens detailed information about the selected project including Orientation andScreen ratio settings.
Tip: It is possible to create Folders in the Library in two ways. Drag and drop oneproject thumbnail on top of the another and choose Create new folder or use theCreate new folder button.
EXPLAIN DRIVE
In My Drive you will find all your projects uploaded to Explain Drive. Here you are able tomanage them, organize them in folders and change their privacy settings.
To manage your Explain Drive tap the next to the project's or folder's name. It will openthe menu with available options.
Share link: Creates a link to the project or folder so you can share it immediately.
Who has access: Opens up sharing settings and access permissions for theselected item.
Download: Downloads the project from Explain Drive to your device and saves it inthe Library.
Activity: Displays list of users that watched or commented on the project.
Rename: Changes the name of the project or folder. To rename them withoutopening the menu, tap the title below the thumbnail.
Details: Opens detailed information about the project. Tap the Edit button tochange the project's name, description, tags, target audience, and category.
Delete: Removes selected projects and folders.
SHARING AND PRIVACY OPTIONS
You can change the visibility and access settings in your Explain Drive by tapping on the under a project or a folder and choosing the Who has access option.
Anyone with the link can VIEW: The shared link allows to view the project as avideo stream only.
Anyone with the link can DOWNLOAD: The shared link allows to view anddownload the project.
Only specified users: This will let only users specified in the Users/Groups tab tobe able to access the project.
Public: Everyone will have access to the project and it will be available to search for,view and download.
Private: Just for you. No one else will have access if you select this option.
You can grant folder and project access to specific users or groups in the Users/Group tab.This set of access options is separate from general Share Settings unless you've chosen theOnly specified users option.
LEARN
Learn is one-stop for all the necessary information about Explain Everything. Find answers toyour questions and get inspired.
Quick Tips: A set of short in-app tutorials about the core features of Explain Everything.Check them out and get started in a snap.
From Our Blog: Find inspiration, tips, news, and update information. This section featuresposts from our blog at explaineverything.com.
Knowledge Base: Comprehensive resources to help you master Explain Everything.
Quick Links: Links to additional information outside the app.
SEARCH
With Search, you can quickly find and get back to a project. Enter the name (or part of thename) of the project you're looking for into the search field and hit Search. A list of localprojects and Explain Drive projects with the name will be displayed.
MAIN MENU
In the Main Menu you are able to access the following options and features:
· Register, sign in, and edit your Profile· Enter a CODE to register, collaborate, or access a shared cloud project
· Find Nearby Collaborations· Change Explain Everything's Settings · Access the Help section· Get more information About the Explain Everything app
PROFILE
Log in and out of your Explain Everytying account and manage it. For advanced accountmanagement and statistics visit drive.explaineverything.com.
NEARBY COLLABORATIONS
Nearby Collaborations allows you to find and join an ongoing collaboration that is takingplace on your WiFi network.
Note: In order to appear on the list, the session's host needs to enable the Visible onlocal network option before starting.
SETTINGS
Settings lets you customize the general behavior of the app, preferences for exporting andrecording, and cloud services.
GENERAL
DISPLAY
Toolbar alignment: Set whether the Toolbar should appear on left or right side of the screen.
Control Bar alignment: Set whether the Control Bar should appear on the top or bottom ofthe screen.
External screen mode: Set the display mode for an external screen when it is present. Mirrorwill mirror the iPad screen maintaining its proportions with visible User Interface. 2nd screenwill display the canvas without User Interface elements and with the ability to select how thecanvas will fit the external screen.
Display on-screen taps and gestures: When ON, Explain Everything will display touchindicators on the screen whenever it is tapped or a gesture is performed. This allows you toguide the audience through Explain Everything when using the External screen mode's 2ndscreen.
Fit inside external screen: Set the format in which Explain Everything will be displayed on anexternal screen when the 2nd screen option is selected. Height will fit the stage to theheight of the external screen. With a 16b9 external screen, black strips will appear on thesides. Width will fit the stage to the width of the external screen. If width is selected on a16b9 external screen, the top and bottom parts of the screen will be cropped to retain theproportions of the stage.
INTERFACE
Display the Save/Discard dialog when leaving a project: When ON, Explain Everything willask whether to Save changes or Discard them when leaving a project. When OFF, changeswill be saved automatically when leaving.
Simple interface: Simplified version of Explain Everything s̓ UI for beginning users of anyage.
DEVICES
Adonit Jot: Slide to ON to pair with your Adonit Jot Bluetooth stylus.
Wacom Stylus: Slide to ON to pair with your Wacom Bluetooth stylus.
PARENTAL CONTROL
Parental Gate: This is an option for restricting children under 13 access to external sources(eg. cloud services). When this is set to ON, a user will have to confirm his/her age beforelogging into external sources and solve a small puzzle.
Require browser password: This option controls access to the in-app web browser via theNew Browser option in the Insert Object menu. To restrict access to the web from withinExplain Everything, enable the switch and create a 4-digit passcode to lock the option. Thispasscode is needed to unlock access to the in-app web browser.
Insert image from web: Turn ON to enable the Image From Web option in the Add Mediamenu. Image From Web allows you to search for and insert images and photos fromOpenClipart.org, an open community driven web collection of free clipart.
EDITING
EDITING PROJECTS
Landscape project ratio: Set the ratio for newly created landscape projects. 4b3 is a defaultiPad ratio and projects created with this ratio will look best when viewed on the iPad screen.The 16b9 project ratio will look best when viewed on a desktop computer or HDTV.
Offset laser pointer: Set to ON to make the Laser Pointer appear slightly above your finger.
Display on-screen guides: Turns ON/OFF a red frame that indicates the part of the screenthat will be exported when exporting to non-project formats. The frame will be visible onlywhen your iPad is in a different orientation than the project setting and only during editingand recording.
Hide video/audio object controls after a while: When ON, audio and video object controlswill be hidden after a brief period of not using them. Tap on the object with the Hand Tool tobring them back up.
Wrist guard: When you are writing and need to rest your hand on the screen, this willprevent accidental drawing on the area covered with the Wrist guard layer.
DEFAULT BEHAVIOR FOR NEW OBJECTS
Auto-group drawings: Set to ON to make drawings automatically group with the objectbelow them. This will make your annotations stick to documents, images, and other objects.
Snap rotation: When ON, objects will be inserted with an activated Snap Rotation option.Use the Inspector ⟩ Lock ⟩ Snap Rotation to toggle the setting manually for selectedobjects.
Add shadow to new objects: When ON, a shadow will be added to newly inserted objects.
Switch to Hand Tool after shape creation: Set to ON to automatically switch to the HandTool after inserting a shape with the Shape Tool. This way you will be able to edit and movethe inserted shape without having to switch tools manually.
Websites in desktop mode: When ON, the inserted browser will try to load desktop versionof the website you're opening.
EXPORT
VIDEO
Resolution: This allows you to change the dimensions of of your exported movies (thedefault is 1024 x 768).
Quality: This setting allows you to decrease the quality of the exported movie which willspeed up compression and reduce the filesize.
File format: Choose whether to save exported movies in the MOV or MP4 format.
Include Audio: When set to OFF, the app will export a silent movie.
Show audio objects in the exported file: When ON, exported movies will not display audioobjects inserted to the canvas with the Add Media > Audio option.
Include slides without recordings: In Explain Everything you can export slides withoutrecording. This option adds 5, 10, or 15 seconds of empty recording time while exporting, soslides without a recording will be present in your video. You can also disable it by setting theadded time to 0 seconds.
PDF DOCUMENTS
Quality: Set the quality of an exported PDF when using the Document option in the Share >Export menu.
GIF
Resolution: Set the resolution of an exported GIF when using the Export as GIF option in theTimeline editing menu.
RECORD
Front and Rear camera resolution: Sets the resolution of video recorded by the iPadcamera. Lower resolutions will result in a lower quality video, but projects will compressmuch faster during exporting.
RECORDING QUALITY
Frames per second: Set your project recording frame rate to 30 or 60 frames per second(FPS). 30 FPS is set as default. 60 FPS causes animation and transitions in your project to besmoother during recording.
BROWSER CAPTURE FREQUENCY
Seconds: Set how frequently an inserted website object will be captured during recording.When set to OFF only automatic captures will be visible during recording. Automaticcaptures are performed when a link is clicked and while scrolling.
OTHER RECORDING SETTINGS
Mirror front camera video: Flips the video recording horizontally.
Timer display: Select whether the Timer should display the recording duration of the currentslide or of the whole project.
Automatic smooth zooming in recording: Set to ON to enable automatic Zoom smoothingduring recording.
MICROPHONE
Mute mic while playing inserted video: When recording while an inserted video is playing,the iPad microphone picks up the sound from the video creating an echo effect. This option,when set to ON, mutes the iPad microphone while a video is playing, though it also meansthat audio narration can't be done at the same time. When this setting is OFF, you canreduce the echo effect by using headphones while recording - or turn down the volume ofthe iPad speakers (or use the volume control on the video itself to turn down the sound fromthe video).
Audio Fade In for external mics: When set to ON this option will mute the very beginning ofeach audio recording so that any 'pops' caused by some external microphones are editedout.
INTEGRATIONS
This panel lets you log in and out of services that can be integrated with Explain Everything.
Note: If using a shared iPad, you might want to log out of the cloud services beforeletting someone else use the device.
HELP
Help: You are here :) If you haven't found an answer to your questions please [email protected] and we will help you directly.
iBook Manual: Download a free Explain Everything iBook guide with video examples, lessonideas, and the story about how it was created.
Video Tutorials: Visit the tutorials website and watch videos we made to help you exploreand learn more about Explain Everything.
ABOUT
Additional information about Explain Everything, rating, and contact forms.
Send us your feedback: Contact us and share your Explain Everything experience so we canimprove it and make it better for you.
Newsletter: Subscribe to the Explain Everything Newsletter and get additional productupdates, news, announcements, tips and tricks.
Visit our website: Opens the Explain Everything website that has product information, news,updates, pricing, and useful resources.
Our Twitter: Visit our Twitter, get in touch, and share your experiences with other users bytagging @explainevrythng.
Rate Explain Everything: Leave an App Store review and let us and others know what yourthoughts are about Explain Everything. We really appreciate every review so thank you inadvance.
PROJECT EDITING
Explain Everything utilizes slide-based storyboarding for preparing explanations andpresentations. When recording, all actions on the screen including drawing, moving, scaling,rotating, and adding objects are recorded along with any audio narration which is capturedthrough the iPad microphone. Projects can be exported and shared as movies, images,documents, and cloud projects. They can also be shared via Email and any other cloudsource connected to your Explain Everything account.
DESIGN TOOLS
Hand tool: Freely move objects around the infinite canvas, scale them with pinch andreverse-pinch gestures. Tap on the Hand Tool while selected to display available options.
HAND TOOL GESTURES
Multi-object movement: Multiple objects can be moved, scaled, and rotated on the canvassimultaneously.
Edit Objects: Tap an object to select and edit it - e.g. change the size of a shape or enter aText Box.
Straighten Object: Double tap an object on the canvas to straighten it to the nearest rightangle.
Group Objects: Triple tap any two overlapping objects to group/ungroup them. By default,drawing objects automatically become grouped to any objects below.
Open the Inspector: Touch and hold an object to activate the Inspector with the objectselected.
TOOL OPTIONS
Snap to objects: When ON, objects moved with the Hand Tool will snap to the center or theedge of other objects. A red guideline will appear to indicate the snap. Guidelines will not bevisible on the recording.
Touch and hold: When ON, you will be able to access the Inspector on an object bytouching and holding it.
Drag and drop: Switch to ON to enable inserting files from other apps using drag and dropon iOS 11.
Zoom and pan: Switch to ON to zoom and pan on the canvas when used on background.
Add Media: Insert various types of media from your iPad and other sources.
NEW MEDIA
New Picture: Opens the Camera and to take a new photo to be added to thecanvas. The Image Editor will appear after taking the picture that will let you scale,rotate, and crop the image (rectangular or free select) before inserting it onto thecanvas.
New Video: Will insert an empty video to the canvas. If you are already recording,you have to press the record button at the bottom of the video object to startrecording. If you are in pause mode, pressing the global record at the bottom of thescreen will simultaneously start recording the video object.
New Browser: Insert a fully functioning web browser onto the canvas. Tap thebrowser to activate it. Press the eraser icon in the top right-hand corner to clearannotations.
Note: Inserted browsers have limited recording capabilities (e.g. Explain Everythingwill not record a YouTube video within a web page). If you see that there are someproblems on specific websites, please use the Quicksnap button in the upper rightcorner, to capture the moment you want to be shown during playback.
Tip: You can adjust the Browser Capture Frequency in Settings under Record tab.
New Equation: Insert a new text object with a special math keyboard that allowsyou to create math formulas.
New Audio: Adds a new audio object to the canvas in the same way you wouldcreate a new video. Press the record button under the object to start recording thesound. This sound file will behave independently from the global project recordingbutton in the control bar on the bottom.
EXISTING MEDIA
Existing Image: Inserts an existing image(s) onto the canvas. Multiple images canbe imported at once. When importing a single image from one of the sources, theImage Editor will appear. It allows for cropping, rotating, and cutting of the image.
Existing Video: Inserts an existing video onto the canvas. You can start playing thevideo while recording globally - and all your actions will be recorded. You canchange the audio volume, scrub the video backwards and forwards or pause it - allwhile recording.
File: Insert any file types onto the canvas. Choose the source of the file from thesources panel.
Clipart: Insert high quality images from the Explain Everything clipart library. Tap aclipart to add it to the canvas.
Tip: To add a custom clipart to your library use the Inspector ⟩ Edit ⟩ Add as clipartoption.
Image From Web: Search for and insert images and photos from OpenClipart.org,an open community driven collection of free clipart.
Existing Sound: Will open the iTunes menu from which you can choose a sound filefrom your iTunes library. The inserted sound file can be controlled just like aninserted video.
Placeholder: Insert a multimedia placeholder object. Tapping on a placeholder thathas been inserted to the canvas will open an import menu with the correspondingmedia.
Video Overlay: Add a link to a website-hosted video and stream it inside theproject. You can use it as an additional instrucional video.
Note: Video overlays are not captured when recording and will not be exported in thevideo. They act as an additional resource when you share the project with otherExplain Everything users. One Video Overlay object can be added per slide of theproject.
Draw Tool: Select to start drawing and annotating. The drawing color is chosen via one ofthe color pickers.
TOOL OPTIONS
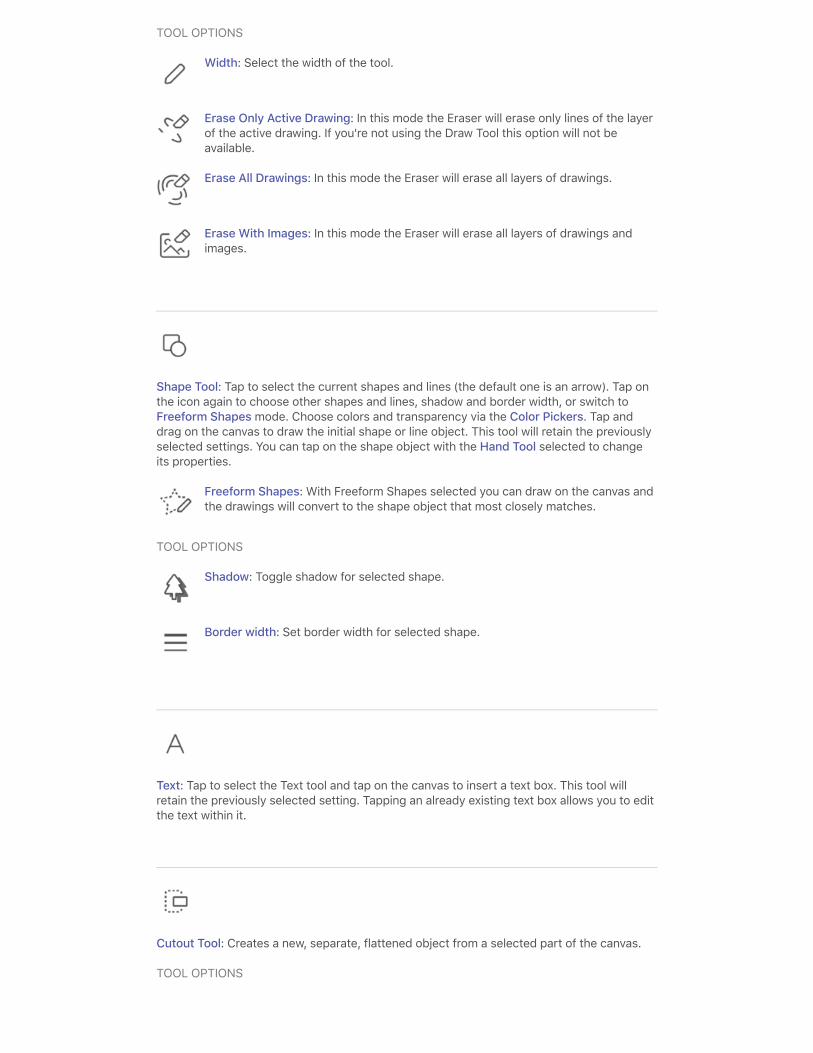
Width: Select the width of the tool.
Style and Options: Switch between drawing styles and toggle moveable Rulerwhich will lead the drawn line along its side.
Draw Fill: Connects drawn lines and fills the drawing with a color selected in theColor Picker under the Fill tab. Once filled, the drawing becomes an object. You canchange the objects color by tapping it with the Hand Tool selected and selecting adifferent color in the Color Picker.
Complete Drawing: Turns the current drawing into movable object and allows youto continue drawing or writing. After the drawing becomes an object, a blue framewill appear around it to indicate the size of the object and you will no longer be ableto erase it with the Active Drawing Eraser. Drawings also automatically becomeobjects when the Draw Tool is changed to a different tool (with the exeption ofHighlighter).
Highlighter: Behaves just like the Draw Tool but with automatic transparency. Tap on theHighlighter a second time to change its width.
TOOL OPTIONS
Width: Select the width of the tool.
Eraser: Erase drawings and images. Select the Eraser mode to choose the desired behavior.
TOOL OPTIONS
Width: Select the width of the tool.
Erase Only Active Drawing: In this mode the Eraser will erase only lines of the layerof the active drawing. If you're not using the Draw Tool this option will not beavailable.
Erase All Drawings: In this mode the Eraser will erase all layers of drawings.
Erase With Images: In this mode the Eraser will erase all layers of drawings andimages.
Shape Tool: Tap to select the current shapes and lines (the default one is an arrow). Tap onthe icon again to choose other shapes and lines, shadow and border width, or switch toFreeform Shapes mode. Choose colors and transparency via the Color Pickers. Tap anddrag on the canvas to draw the initial shape or line object. This tool will retain the previouslyselected settings. You can tap on the shape object with the Hand Tool selected to changeits properties.
Freeform Shapes: With Freeform Shapes selected you can draw on the canvas andthe drawings will convert to the shape object that most closely matches.
TOOL OPTIONS
Shadow: Toggle shadow for selected shape.
Border width: Set border width for selected shape.
Text: Tap to select the Text tool and tap on the canvas to insert a text box. This tool willretain the previously selected setting. Tapping an already existing text box allows you to editthe text within it.
Cutout Tool: Creates a new, separate, flattened object from a selected part of the canvas.
TOOL OPTIONS
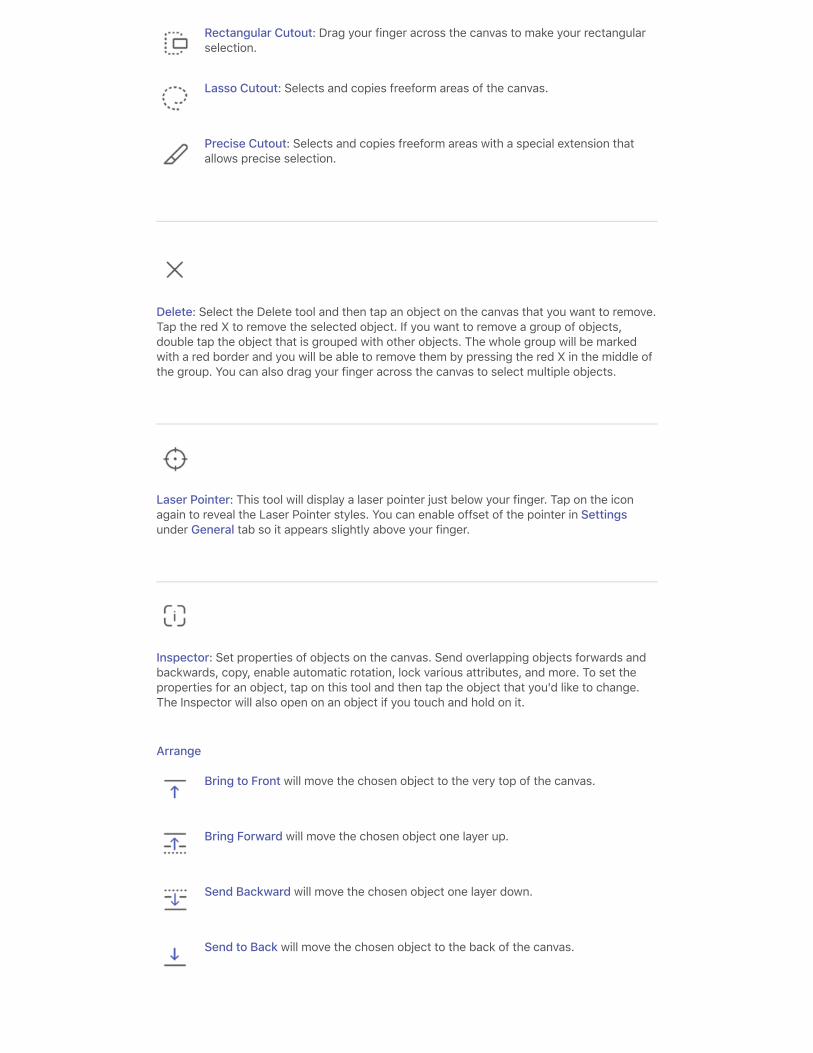
Rectangular Cutout: Drag your finger across the canvas to make your rectangularselection.
Lasso Cutout: Selects and copies freeform areas of the canvas.
Precise Cutout: Selects and copies freeform areas with a special extension thatallows precise selection.
Delete: Select the Delete tool and then tap an object on the canvas that you want to remove.Tap the red X to remove the selected object. If you want to remove a group of objects,double tap the object that is grouped with other objects. The whole group will be markedwith a red border and you will be able to remove them by pressing the red X in the middle ofthe group. You can also drag your finger across the canvas to select multiple objects.
Laser Pointer: This tool will display a laser pointer just below your finger. Tap on the iconagain to reveal the Laser Pointer styles. You can enable offset of the pointer in Settingsunder General tab so it appears slightly above your finger.
Inspector: Set properties of objects on the canvas. Send overlapping objects forwards andbackwards, copy, enable automatic rotation, lock various attributes, and more. To set theproperties for an object, tap on this tool and then tap the object that you'd like to change.The Inspector will also open on an object if you touch and hold on it.
Arrange
Bring to Front will move the chosen object to the very top of the canvas.
Bring Forward will move the chosen object one layer up.
Send Backward will move the chosen object one layer down.
Send to Back will move the chosen object to the back of the canvas.
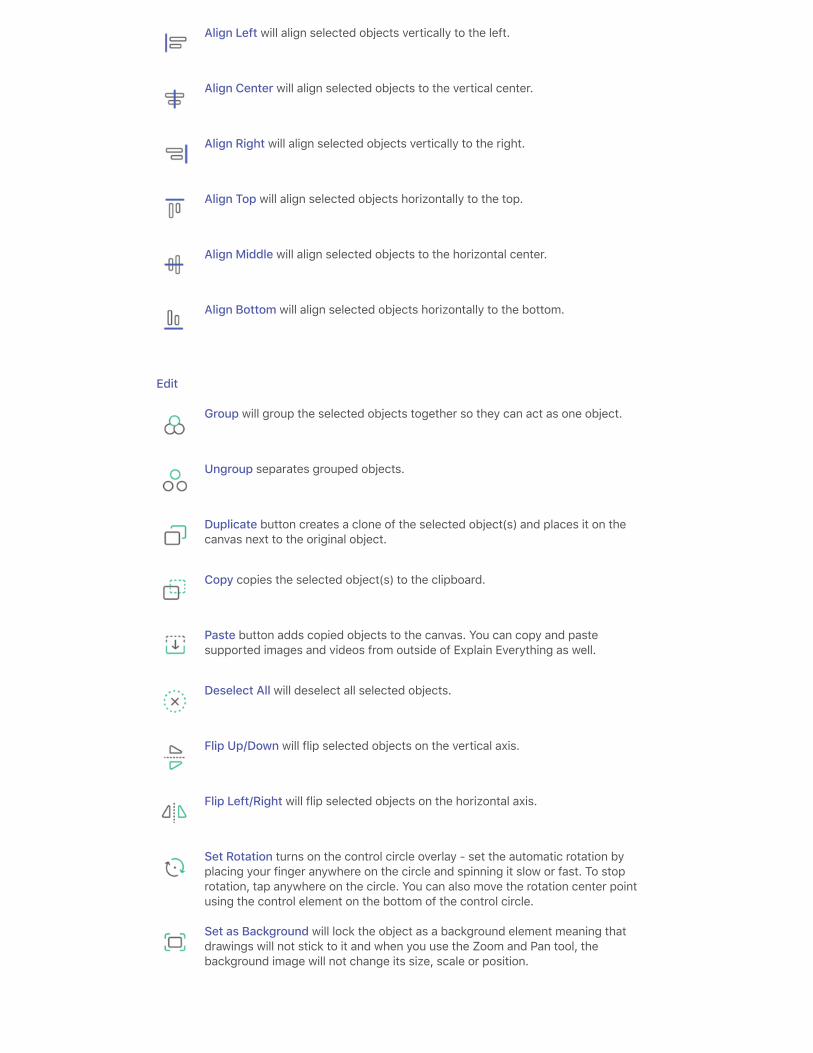
Align Left will align selected objects vertically to the left.
Align Center will align selected objects to the vertical center.
Align Right will align selected objects vertically to the right.
Align Top will align selected objects horizontally to the top.
Align Middle will align selected objects to the horizontal center.
Align Bottom will align selected objects horizontally to the bottom.
Edit
Group will group the selected objects together so they can act as one object.
Ungroup separates grouped objects.
Duplicate button creates a clone of the selected object(s) and places it on thecanvas next to the original object.
Copy copies the selected object(s) to the clipboard.
Paste button adds copied objects to the canvas. You can copy and pastesupported images and videos from outside of Explain Everything as well.
Deselect All will deselect all selected objects.
Flip Up/Down will flip selected objects on the vertical axis.
Flip Left/Right will flip selected objects on the horizontal axis.
Set Rotation turns on the control circle overlay - set the automatic rotation byplacing your finger anywhere on the circle and spinning it slow or fast. To stoprotation, tap anywhere on the circle. You can also move the rotation center pointusing the control element on the bottom of the control circle.
Set as Background will lock the object as a background element meaning thatdrawings will not stick to it and when you use the Zoom and Pan tool, thebackground image will not change its size, scale or position.

Add as clipart will add selected objects as a flattened clipart image that will besaved in Insert Object ⟩ Clipart ⟩ Custom menu.
Infinite Scroll enables infinite scrolling animation for selected object. Swipe onscrolling controllers to make the object infinitely scroll in the direction of yourswipe. Tap the blue dot in the center of the controller to stop the animation.
Lock
Lock button will lock the object and keep it in place until it is unlocked with theUnlock option.
Lock Rotation will prevent the rotation of an object when using the Hand tool.Useful for documents.
Lock Scale will prevent the object from resizing.
Lock Horizontal allows the object to move only up or down. Great for scrollingdocuments in slides when you want them to keep them steady.
Lock Vertical allows the object to move only left and right.
Snap Rotation will make the object snap to the closest right angle when manuallyrotating using the Hand Tool.
Undo: Undoes the last action.
Redo: Redoes the last undone action. The button appears after you Undo anaction.
Zoom and Pan: Zoom in and out on the entire canvas using two finger pinch and reversepinch gestures. Use one finger to move the canvas around. Double tap to return to 100%zoom of objects framed in the view. Every action performed will be registered on theTimeline while recording. As a host of a Collaboration session, using Zoom & Pan will takeover Zoom control on all participants' devices and they will be directed to the view you'recurrently in.
TOOL OPTIONS
Stealth Mode: In this mode, Zoom and Pan actions will not be registered on theTimeline while recording. Also, a red frame will appear indicating the current areathat is being recorded or displayed on 2nd screen if you zoom out.
Reset: Brings Zoom level to the position before the Zoom & Pan tool was selected. In theStealth mode Reset will return the view to the original level and position marked by the redframe.
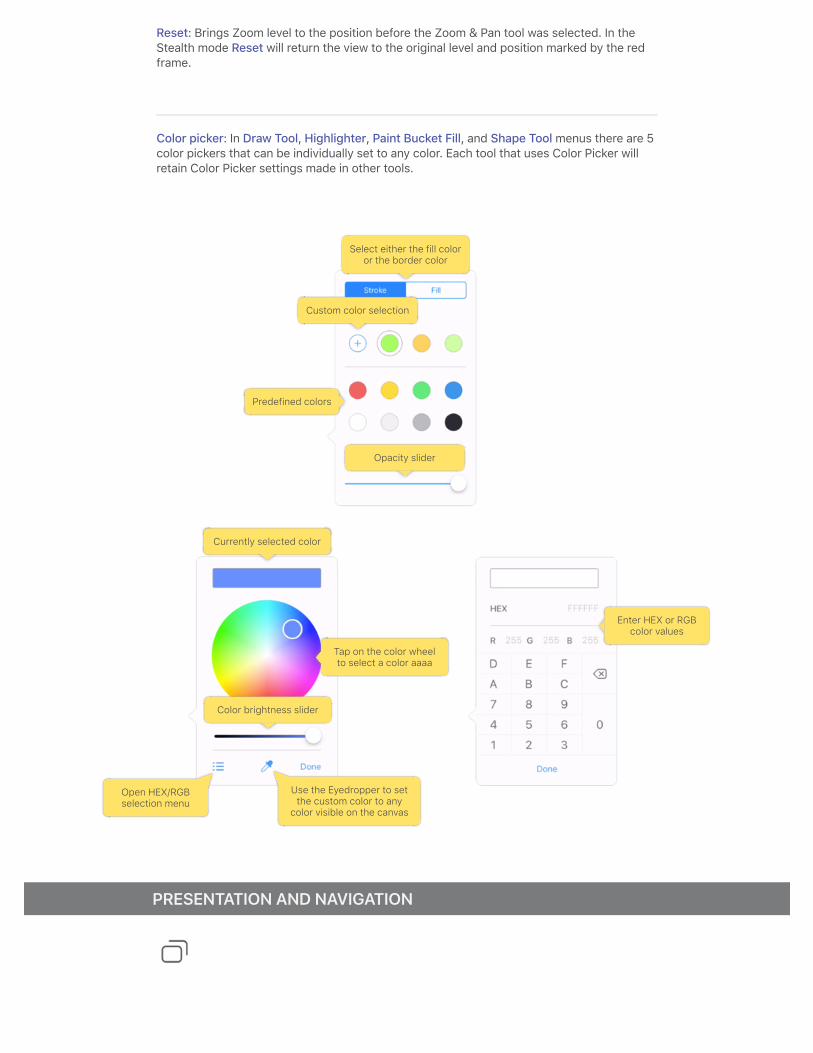
Color picker: In Draw Tool, Highlighter, Paint Bucket Fill, and Shape Tool menus there are 5color pickers that can be individually set to any color. Each tool that uses Color Picker willretain Color Picker settings made in other tools.
PRESENTATION AND NAVIGATION
Predefined colors
Custom color selection
Select either the fill coloror the border color
Opacity slider
Color brightness slider
Currently selected color
Tap on the color wheelto select a color aaaa
Use the Eyedropper to setthe custom color to any
color visible on the canvas
Open HEX/RGBselection menu
Enter HEX or RGBcolor values
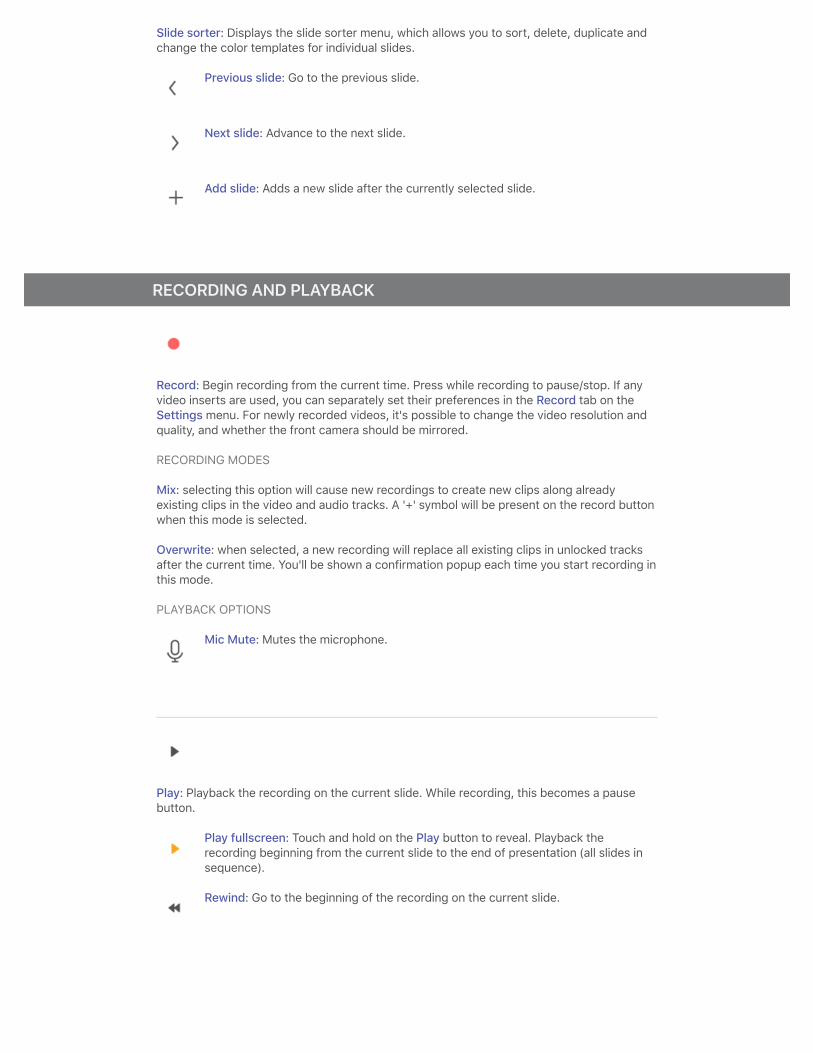
Slide sorter: Displays the slide sorter menu, which allows you to sort, delete, duplicate andchange the color templates for individual slides.
Previous slide: Go to the previous slide.
Next slide: Advance to the next slide.
Add slide: Adds a new slide after the currently selected slide.
RECORDING AND PLAYBACK
Record: Begin recording from the current time. Press while recording to pause/stop. If anyvideo inserts are used, you can separately set their preferences in the Record tab on theSettings menu. For newly recorded videos, it's possible to change the video resolution andquality, and whether the front camera should be mirrored.
RECORDING MODES
Mix: selecting this option will cause new recordings to create new clips along alreadyexisting clips in the video and audio tracks. A '+' symbol will be present on the record buttonwhen this mode is selected.
Overwrite: when selected, a new recording will replace all existing clips in unlocked tracksafter the current time. You'll be shown a confirmation popup each time you start recording inthis mode.
PLAYBACK OPTIONS
Mic Mute: Mutes the microphone.
Play: Playback the recording on the current slide. While recording, this becomes a pausebutton.
Play fullscreen: Touch and hold on the Play button to reveal. Playback therecording beginning from the current slide to the end of presentation (all slides insequence).
Rewind: Go to the beginning of the recording on the current slide.
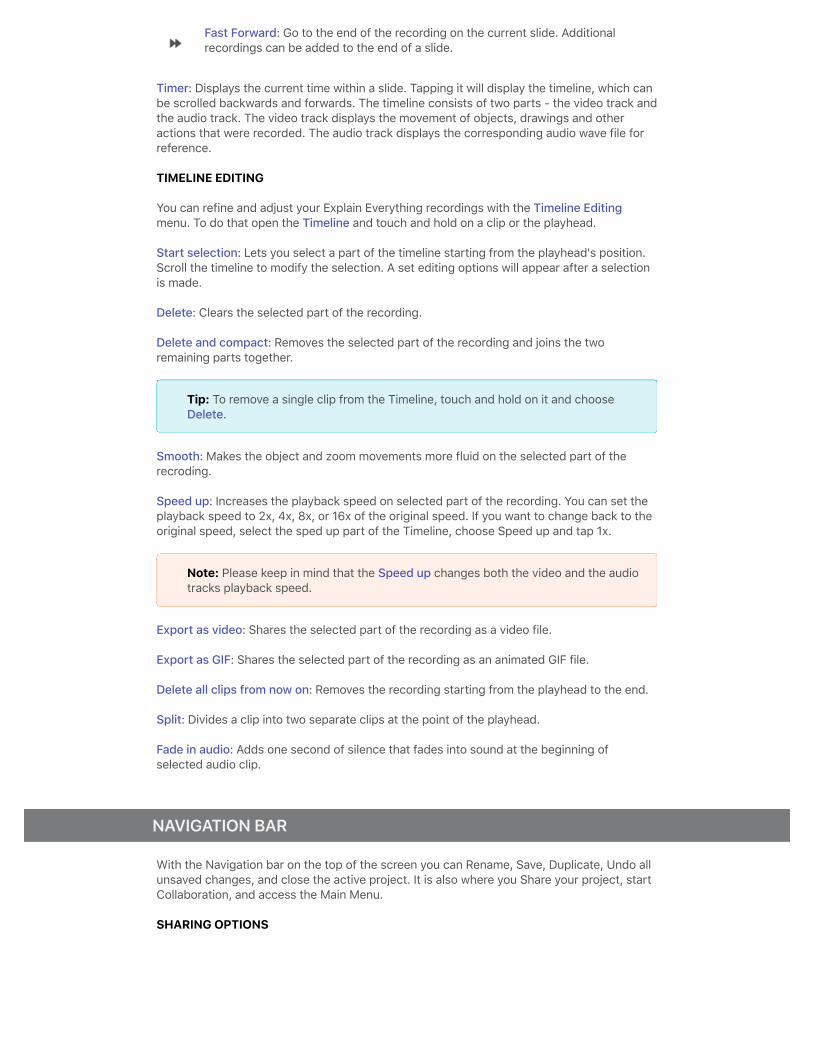
Fast Forward: Go to the end of the recording on the current slide. Additionalrecordings can be added to the end of a slide.
Timer: Displays the current time within a slide. Tapping it will display the timeline, which canbe scrolled backwards and forwards. The timeline consists of two parts - the video track andthe audio track. The video track displays the movement of objects, drawings and otheractions that were recorded. The audio track displays the corresponding audio wave file forreference.
TIMELINE EDITING
You can refine and adjust your Explain Everything recordings with the Timeline Editingmenu. To do that open the Timeline and touch and hold on a clip or the playhead.
Start selection: Lets you select a part of the timeline starting from the playhead's position.Scroll the timeline to modify the selection. A set editing options will appear after a selectionis made.
Delete: Clears the selected part of the recording.
Delete and compact: Removes the selected part of the recording and joins the tworemaining parts together.
Tip: To remove a single clip from the Timeline, touch and hold on it and chooseDelete.
Smooth: Makes the object and zoom movements more fluid on the selected part of therecroding.
Speed up: Increases the playback speed on selected part of the recording. You can set theplayback speed to 2x, 4x, 8x, or 16x of the original speed. If you want to change back to theoriginal speed, select the sped up part of the Timeline, choose Speed up and tap 1x.
Note: Please keep in mind that the Speed up changes both the video and the audiotracks playback speed.
Export as video: Shares the selected part of the recording as a video file.
Export as GIF: Shares the selected part of the recording as an animated GIF file.
Delete all clips from now on: Removes the recording starting from the playhead to the end.
Split: Divides a clip into two separate clips at the point of the playhead.
Fade in audio: Adds one second of silence that fades into sound at the beginning ofselected audio clip.
NAVIGATION BAR
With the Navigation bar on the top of the screen you can Rename, Save, Duplicate, Undo allunsaved changes, and close the active project. It is also where you Share your project, startCollaboration, and access the Main Menu.
SHARING OPTIONS

Web Video Link: Uploads the project to Explain Drive and generates a web link soyou can immediately share it as a video or slideshow. Tap on the generated link toshare it.
Collaborate: Session-based: Lets you host a collaboration on your device andinvite others to join you to work on the project in real-time.
Note: Session-based collaboration is hosted on your device and sessionparticipatns will be disconnected if you close Explain Everything or keep it in thebackground for too long. You will be notified if it happens.
COLLABORATION OPTIONS
Voice Chat: Enable to allow collaboration participants use voice communication. This settingcan't be changed during the session.
Allow editing: Disable to prevent session participants from editing the project. This is adefault setting for participants and can be changed during the session.
Allow storing project: Disable to prevent session participants from being able to save theproject on their devices after the collaboration ends. This setting can't be changed duringthe session.
Visible on local network: Enable to make your session visible in Nearby Collaborations list inthe menu for users on the same WiFi. This setting can't be changed during the session.
Note: Some WiFi networks might not allow Visible on local network option to workproperly.
Explain Drive: Uploads the project to Explain Drive and allows you to customize allprivacy and visibility options.
Export: Saves the project in a custom location in one of the available formats:Video, Document, Image, Project.
Credits
Explain Everything - a team of innovators, artists, learners, and leaders dedicated todeveloping creativity-inspiring applications. Co-founded by Bartosz Gonczarek, PiotrSliwinski, and Reshan Richards, the company consists of 35 talented people based inWroclaw, Poland and New York. Originally the partnership between MorrisCooke Interactive ofWroclaw, Poland and Constructivist Toolkit, LLC of New York, NY, Explain Everything is a newentity devoted entirely to development of the app and new services around it.
Other Credits:
SIL Open Font LicenseCopyright (c) 2010-2014, Łukasz Dziedzic ([email protected]),with Reserved FontName "Lato".
Copyright (c) 2011 Natanael Gama ([email protected]), with Reserved Font Name “Exo”.Copyright (c) 2011, Tart Workshop (a DBA of Font Diner, Inc) (www.fontdiner.com), withReserved Font Name "Fredericka the Great".Copyright (c) 2012, TypeSETit, LLC ([email protected]), with Reserved Font Name "GreatVibes".Copyright (c) 2011, Carolina Trebol, with Reserved Font Name “Marvel”.Copyright (c) 2011 by Jovanny Lemonad (http://www.jovanny.ru) with Reserved Font Name“Nixie One”.Copyright (c) 2011 by Toshi Omagari with Reserved Font Name "Tangerine"”.
This Font Software is licensed under the SIL Open Font License, Version 1.1.This license is available with a FAQ at: http://scripts.sil.org/OFL
Apache 2.0 LicenseExplain Everything includes fonts "Roboto" and "Open Sans" under Apache 2 license.Version 2.0, January 2004 http://www.apache.org/licenses/