examsoft blackboard building block admin guide 1.3it.tu.edu/training/examsoft blackboard building...
TRANSCRIPT
ExamSoft Blackboard Building Block System Administrator Guide Version 1.3.0
[Type text] Page 1 of 11 [Type text]
ExamSoft Blackboard Building Block System Administrator Guide
Version 1.3.0 This guide is intended for Blackboard System Administrators and describes how to install and configure the ExamSoft Building Block. This guide is intended for use with Blackboard Learn Release 9.1. Note that the installation screens may appear slightly different from your instance, depending on browser, Service Pack and theme. Should you require support for Blackboard version 9.0 or earlier, please contact ExamSoft. Those familiar with installing Building Blocks should simply upload the .war file and make it available and then proceed to the Configuration section of this document. Installation ................................................................................................................................................... 1
Upload .WAR File ................................................................................................................................... 1 Configuration ............................................................................................................................................... 3
Sharing an Instance of Blackboard and Using Secondary ExamSoft Accounts ...................................... 5 Specifying Which Course to Synchronize ............................................................................................... 7 Which Course Roles to Include in Operations ........................................................................................ 8
Ongoing Operation .................................................................................................................................... 10 Logs ....................................................................................................................................................... 10 Incremental Changes to Courses and Roster ......................................................................................... 11
Installation
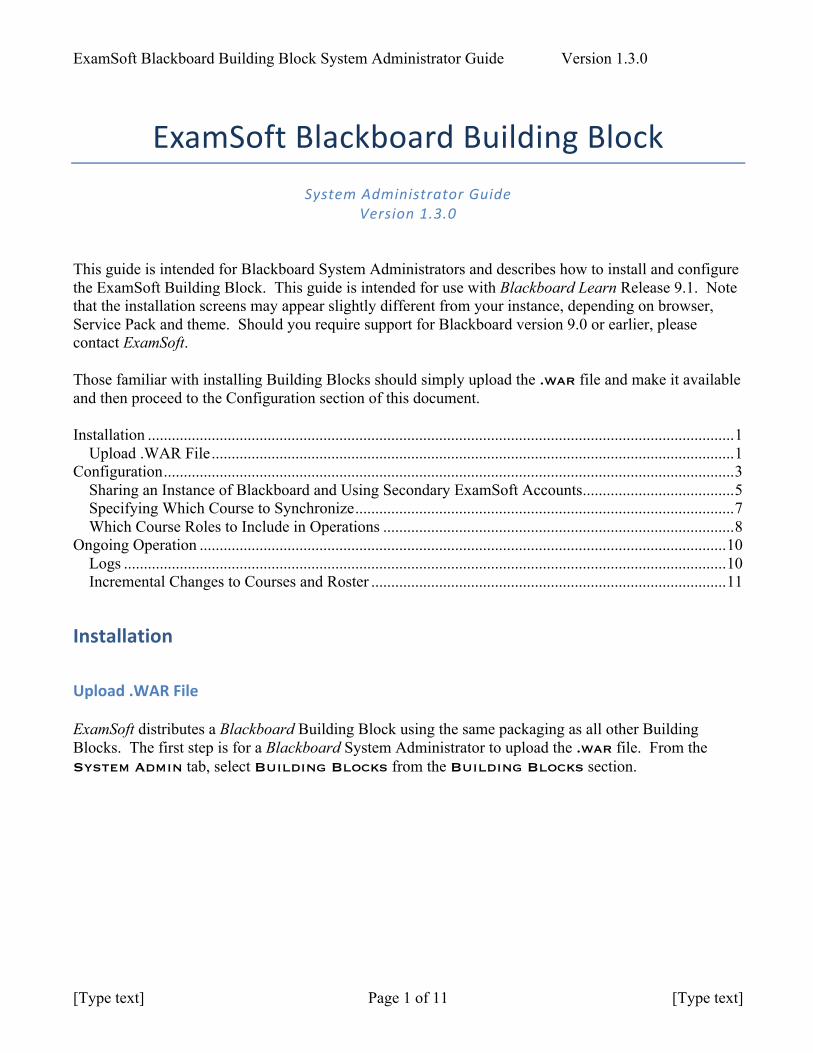
Upload .WAR File ExamSoft distributes a Blackboard Building Block using the same packaging as all other Building Blocks. The first step is for a Blackboard System Administrator to upload the .war file. From the System Admin tab, select Building Blocks from the Building Blocks section.
ExamSoft Blackboard Building Block System Administrator Guide Version 1.3.0
[Type text] Page 2 of 11 [Type text]
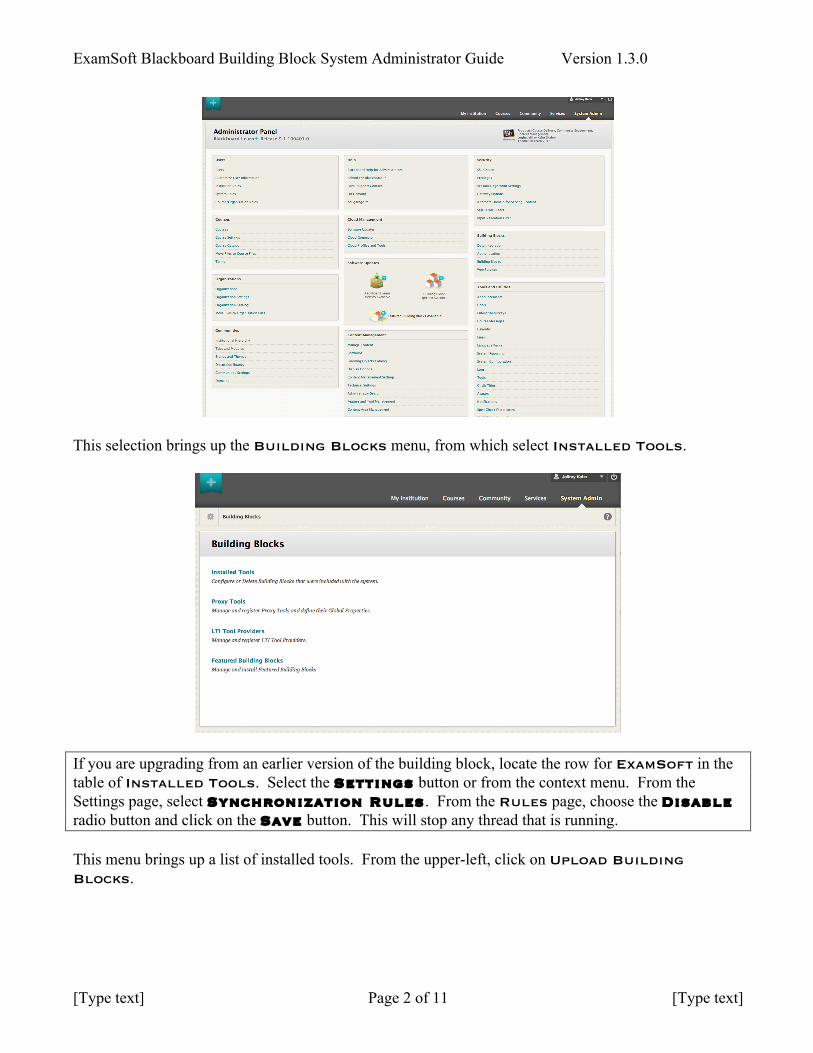
This selection brings up the Building Blocks menu, from which select Installed Tools.
If you are upgrading from an earlier version of the building block, locate the row for ExamSoft in the table of Installed Tools. Select the Settings button or from the context menu. From the Settings page, select Synchronization Rules . From the Rules page, choose the Disable radio button and click on the Save button. This will stop any thread that is running. This menu brings up a list of installed tools. From the upper-left, click on Upload Building Blocks.
ExamSoft Blackboard Building Block System Administrator Guide Version 1.3.0
[Type text] Page 3 of 11 [Type text]
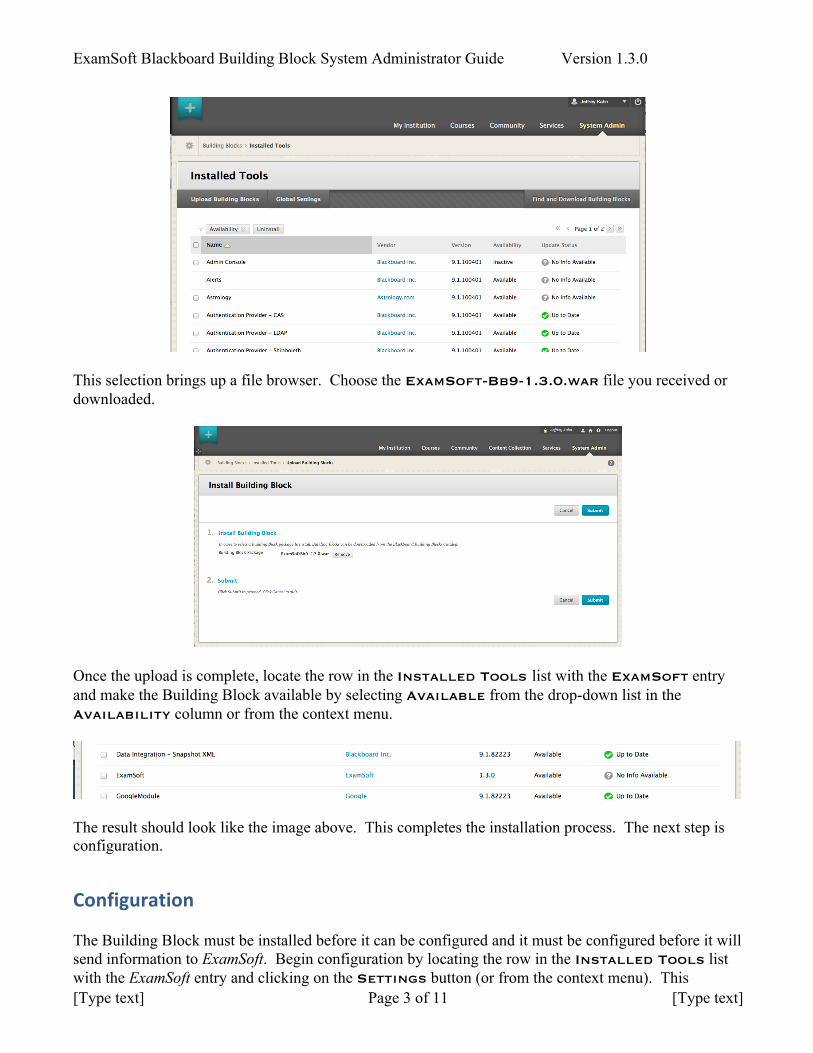
This selection brings up a file browser. Choose the ExamSoft-Bb9-1.3.0.war file you received or downloaded.
Once the upload is complete, locate the row in the Installed Tools list with the ExamSoft entry and make the Building Block available by selecting Available from the drop-down list in the Availability column or from the context menu.
The result should look like the image above. This completes the installation process. The next step is configuration.
Configuration The Building Block must be installed before it can be configured and it must be configured before it will send information to ExamSoft. Begin configuration by locating the row in the Installed Tools list with the ExamSoft entry and clicking on the Settings button (or from the context menu). This
ExamSoft Blackboard Building Block System Administrator Guide Version 1.3.0
[Type text] Page 4 of 11 [Type text]
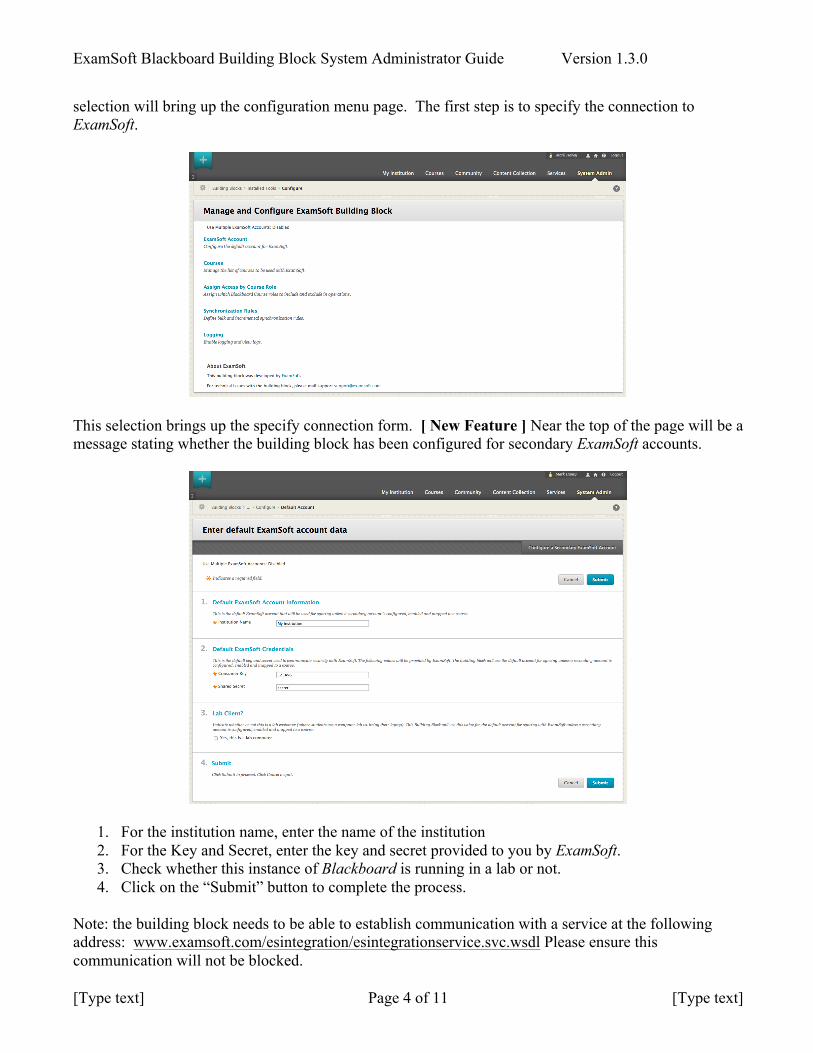
selection will bring up the configuration menu page. The first step is to specify the connection to ExamSoft.
This selection brings up the specify connection form. [ New Feature ] Near the top of the page will be a message stating whether the building block has been configured for secondary ExamSoft accounts.
1. For the institution name, enter the name of the institution 2. For the Key and Secret, enter the key and secret provided to you by ExamSoft. 3. Check whether this instance of Blackboard is running in a lab or not. 4. Click on the “Submit” button to complete the process.
Note: the building block needs to be able to establish communication with a service at the following address: www.examsoft.com/esintegration/esintegrationservice.svc.wsdl Please ensure this communication will not be blocked.
ExamSoft Blackboard Building Block System Administrator Guide Version 1.3.0
[Type text] Page 5 of 11 [Type text]
Sharing an Instance of Blackboard and Using Secondary ExamSoft Accounts
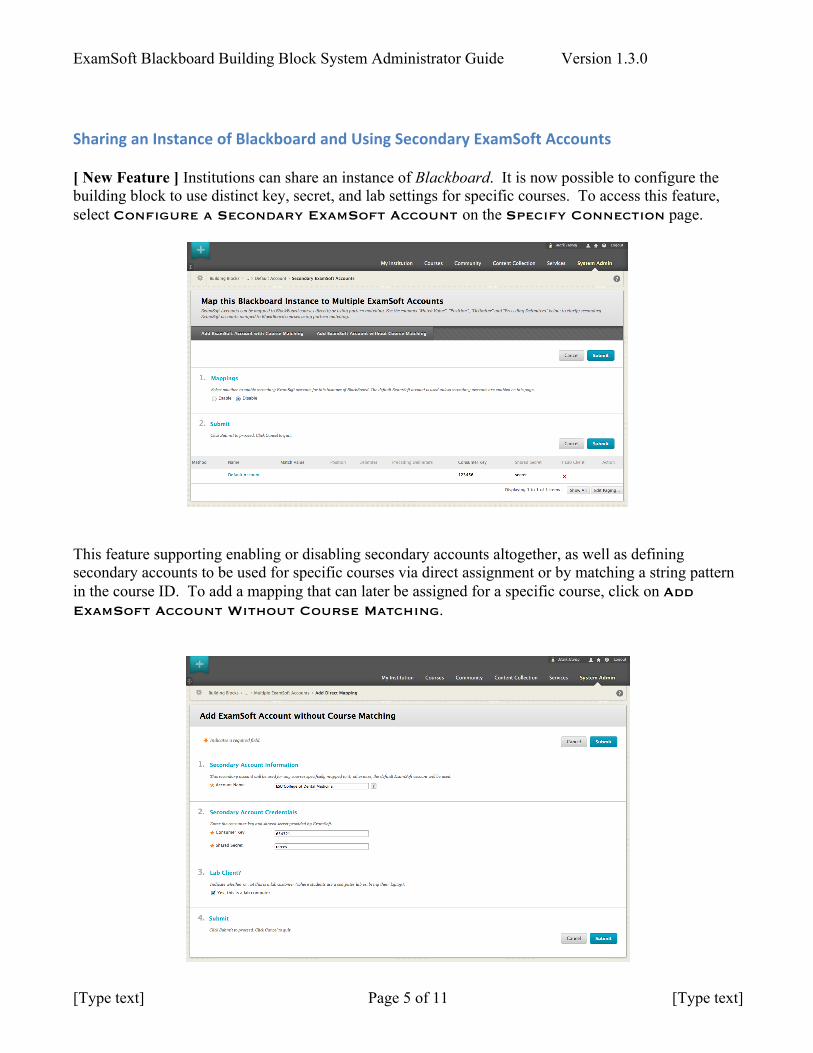
[ New Feature ] Institutions can share an instance of Blackboard. It is now possible to configure the building block to use distinct key, secret, and lab settings for specific courses. To access this feature, select Configure a Secondary ExamSoft Account on the Specify Connection page.
This feature supporting enabling or disabling secondary accounts altogether, as well as defining secondary accounts to be used for specific courses via direct assignment or by matching a string pattern in the course ID. To add a mapping that can later be assigned for a specific course, click on Add ExamSoft Account Without Course Matching.
ExamSoft Blackboard Building Block System Administrator Guide Version 1.3.0
[Type text] Page 6 of 11 [Type text]
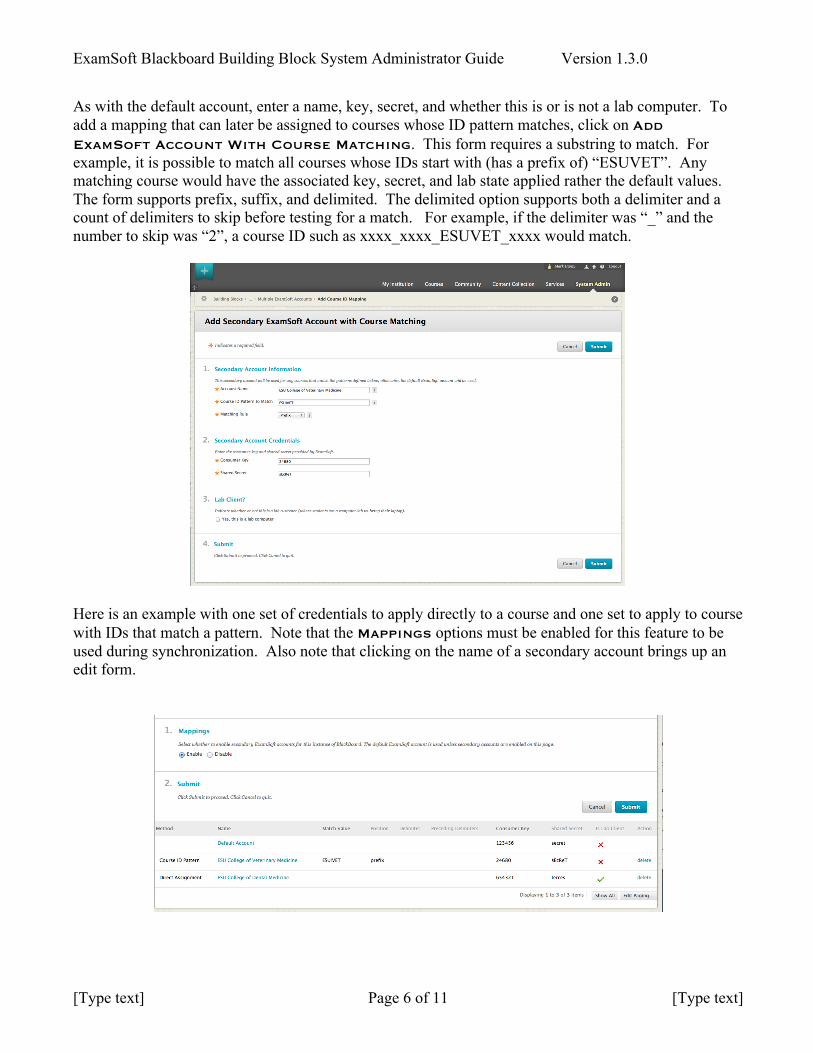
As with the default account, enter a name, key, secret, and whether this is or is not a lab computer. To add a mapping that can later be assigned to courses whose ID pattern matches, click on Add ExamSoft Account With Course Matching. This form requires a substring to match. For example, it is possible to match all courses whose IDs start with (has a prefix of) “ESUVET”. Any matching course would have the associated key, secret, and lab state applied rather the default values. The form supports prefix, suffix, and delimited. The delimited option supports both a delimiter and a count of delimiters to skip before testing for a match. For example, if the delimiter was “_” and the number to skip was “2”, a course ID such as xxxx_xxxx_ESUVET_xxxx would match.
Here is an example with one set of credentials to apply directly to a course and one set to apply to course with IDs that match a pattern. Note that the Mappings options must be enabled for this feature to be used during synchronization. Also note that clicking on the name of a secondary account brings up an edit form.
ExamSoft Blackboard Building Block System Administrator Guide Version 1.3.0
[Type text] Page 7 of 11 [Type text]
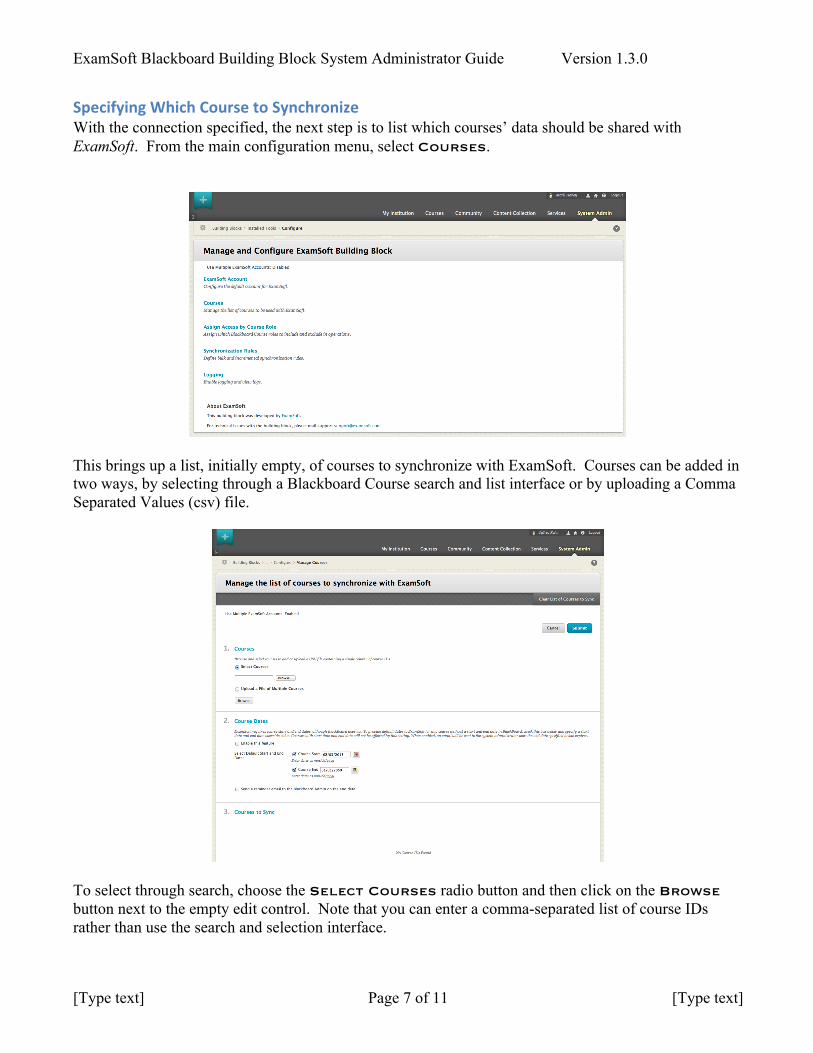
Specifying Which Course to Synchronize With the connection specified, the next step is to list which courses’ data should be shared with ExamSoft. From the main configuration menu, select Courses.
This brings up a list, initially empty, of courses to synchronize with ExamSoft. Courses can be added in two ways, by selecting through a Blackboard Course search and list interface or by uploading a Comma Separated Values (csv) file.
To select through search, choose the Select Courses radio button and then click on the Browse button next to the empty edit control. Note that you can enter a comma-separated list of course IDs rather than use the search and selection interface.
ExamSoft Blackboard Building Block System Administrator Guide Version 1.3.0
[Type text] Page 8 of 11 [Type text]
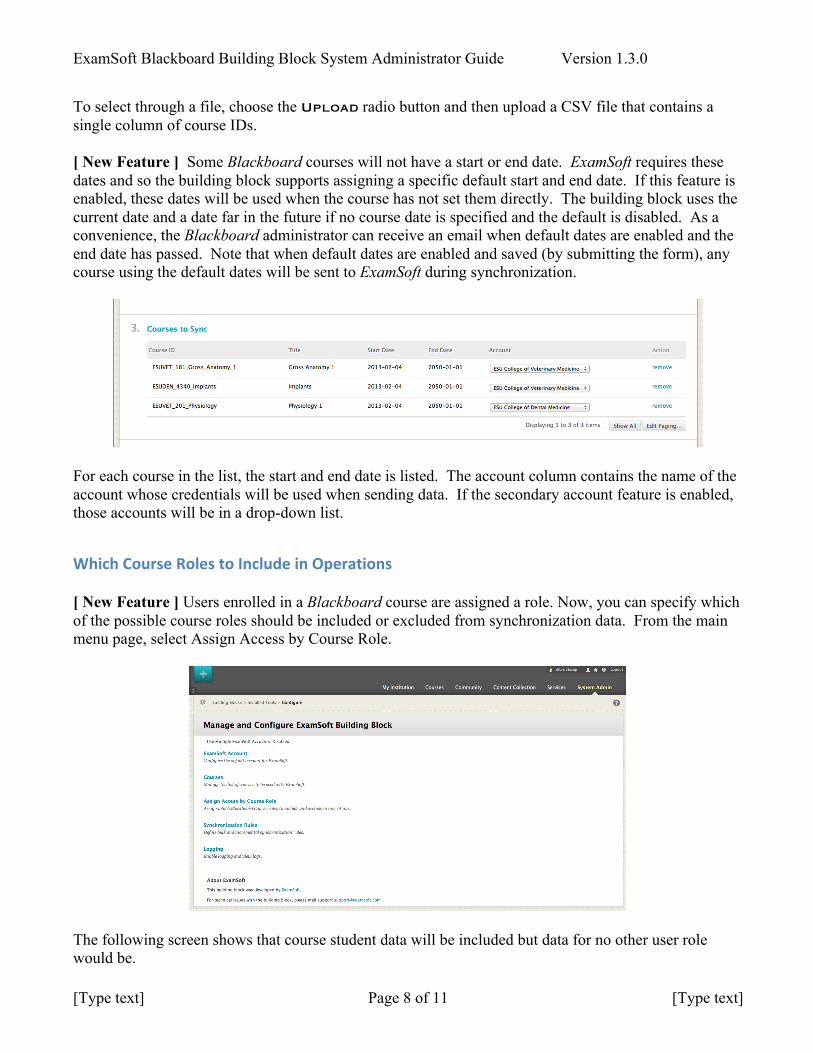
To select through a file, choose the Upload radio button and then upload a CSV file that contains a single column of course IDs. [ New Feature ] Some Blackboard courses will not have a start or end date. ExamSoft requires these dates and so the building block supports assigning a specific default start and end date. If this feature is enabled, these dates will be used when the course has not set them directly. The building block uses the current date and a date far in the future if no course date is specified and the default is disabled. As a convenience, the Blackboard administrator can receive an email when default dates are enabled and the end date has passed. Note that when default dates are enabled and saved (by submitting the form), any course using the default dates will be sent to ExamSoft during synchronization.
For each course in the list, the start and end date is listed. The account column contains the name of the account whose credentials will be used when sending data. If the secondary account feature is enabled, those accounts will be in a drop-down list.
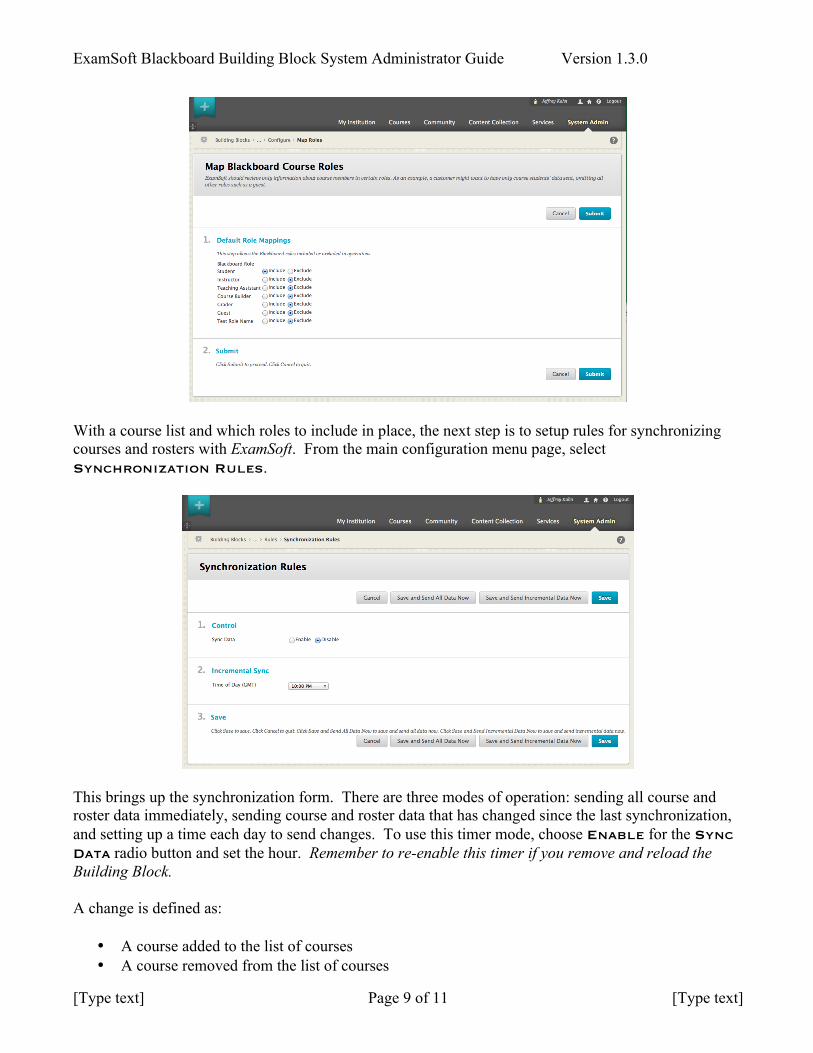
Which Course Roles to Include in Operations [ New Feature ] Users enrolled in a Blackboard course are assigned a role. Now, you can specify which of the possible course roles should be included or excluded from synchronization data. From the main menu page, select Assign Access by Course Role.
The following screen shows that course student data will be included but data for no other user role would be.
ExamSoft Blackboard Building Block System Administrator Guide Version 1.3.0
[Type text] Page 9 of 11 [Type text]
With a course list and which roles to include in place, the next step is to setup rules for synchronizing courses and rosters with ExamSoft. From the main configuration menu page, select Synchronization Rules.
This brings up the synchronization form. There are three modes of operation: sending all course and roster data immediately, sending course and roster data that has changed since the last synchronization, and setting up a time each day to send changes. To use this timer mode, choose Enable for the Sync Data radio button and set the hour. Remember to re-enable this timer if you remove and reload the Building Block. A change is defined as:
• A course added to the list of courses • A course removed from the list of courses
ExamSoft Blackboard Building Block System Administrator Guide Version 1.3.0
[Type text] Page 10 of 11 [Type text]
• A student added to a course on the list • A student removed from a course on the list • A change in the default start or end date for a course when a start or end date is not specified and
the default feature is enabled. If there are no changes, nothing is sent. Note that the following are not changes, but will be reflected in data sent after a change:
• Role change in a course • Change in the indicator of whether Blackboard is running in a lab or not
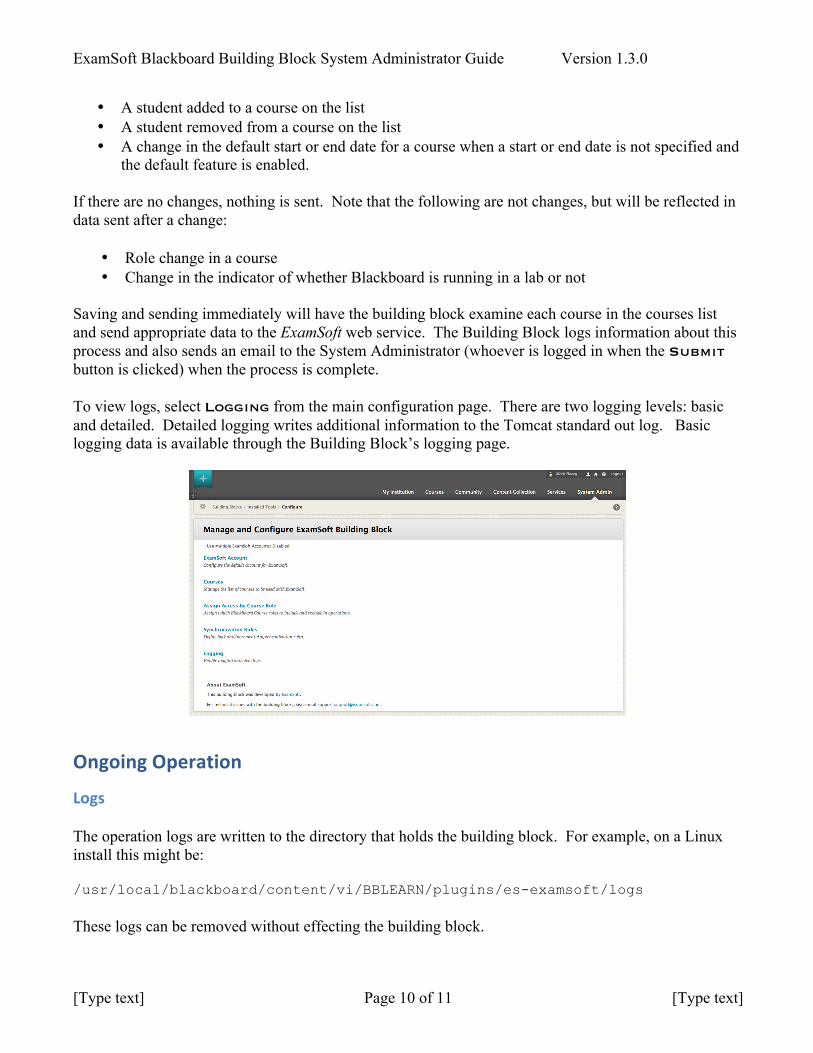
Saving and sending immediately will have the building block examine each course in the courses list and send appropriate data to the ExamSoft web service. The Building Block logs information about this process and also sends an email to the System Administrator (whoever is logged in when the Submit button is clicked) when the process is complete. To view logs, select Logging from the main configuration page. There are two logging levels: basic and detailed. Detailed logging writes additional information to the Tomcat standard out log. Basic logging data is available through the Building Block’s logging page.
Ongoing Operation
Logs The operation logs are written to the directory that holds the building block. For example, on a Linux install this might be: /usr/local/blackboard/content/vi/BBLEARN/plugins/es-examsoft/logs These logs can be removed without effecting the building block.
ExamSoft Blackboard Building Block System Administrator Guide Version 1.3.0
[Type text] Page 11 of 11 [Type text]
If there is detailed logging, or in the event of certain exceptions, content is written to the daily standard out Tomcat logs. For example, on a Linux install this might be in: /use/local/blackboard/logs/tomcat/stdout-stderr-2012-01-01.log
Incremental Changes to Courses and Roster If synchronization is enabled, each day approximately at the time specified, the building block will check for changes to the list of courses as well as roster changes for included courses. Any changes are sent to the ExamSoft web service, along with an email to the system administrator.