eut course accounts payable - capps...
TRANSCRIPT

EUT Course
Accounts Payable
PeopleSoft Version 9.2 Version 1 – September 2015

CAPPS Financials EUT Course
Page i
Table of Contents Accounts Payable .............................................................................................................. 1
Section 2 Adding and Maintaining Suppliers .......................................................................... 1 Adding a Supplier .................................................................................................................................. 1 Viewing and Updating Suppliers ......................................................................................................... 11 Adding Conversation Notes to a Supplier ............................................................................................ 27 Inactivating Suppliers .......................................................................................................................... 29
Section 3 Entering Vouchers ................................................................................................... 33 Entering a PO Voucher ........................................................................................................................ 33 Entering a Non-PO Voucher ................................................................................................................ 42 Entering a Multi-Vendor Voucher ....................................................................................................... 54 Entering Procard Vouchers .................................................................................................................. 71 Entering a Single Payment Voucher .................................................................................................... 76 Entering Template Vouchers................................................................................................................ 84 Entering Adjustment Vouchers ............................................................................................................ 90 Entering Reversal Vouchers ............................................................................................................... 104 Entering PO Vouchers with Assets .................................................................................................... 110
Section 4 Processing Vouchers .............................................................................................. 119 Processing a Single Voucher .............................................................................................................. 119 Running the Matching Process ........................................................................................................... 124 Running the Document Tolerance Process ........................................................................................ 127 Running the Budget Check Request Process ..................................................................................... 132 Posting Vouchers ............................................................................................................................... 136
Section 5 Managing and Maintaining Vouchers ................................................................. 139 Unposting Vouchers ........................................................................................................................... 139 Deleting a Voucher ............................................................................................................................ 141 Reviewing Voucher Information ........................................................................................................ 143 Using the Match Workbench ............................................................................................................. 147 Reviewing Voucher Accounting Entries ............................................................................................ 152
Section 6 Running Financials and SCM Reports ................................................................ 155 Running AP Reports .......................................................................................................................... 156
Knowledge Check ................................................................................................................... 163 Processing Vouchers .......................................................................................................................... 163 Reversal Vouchers ............................................................................................................................. 163 Match Workbench .............................................................................................................................. 164 Voucher Styles ................................................................................................................................... 164 USAS Payment Date .......................................................................................................................... 165 Deleting a Voucher ............................................................................................................................ 165 Agency Number ................................................................................................................................. 166 Inactivating a Supplier ....................................................................................................................... 166 Supplier Conversion ........................................................................................................................... 166 Run Control IDs ................................................................................................................................. 167

CAPPS Financials EUT Course
Page 1
Accounts Payable
Section 2 Adding and Maintaining Suppliers
Adding a Supplier
Section 2 - Lesson 1, Exercise - Adding a Supplier
Procedure
This lesson walks through adding a supplier to CAPPS.
Step Action
1. Click the Main Menu button to navigate to the Supplier page.
2. Note: The menu options in the production system may be different than the menu
options that are in training. All of the steps needed to enter the transaction will be
the same.

CAPPS Financials EUT Course
Page 2
Step Action
3. Click the Scroll Down button to navigate to the Suppliers menu.
4. Click the Suppliers menu.
5. Click the Supplier Information menu.
6. Click the Add/Update menu.
Step Action
7. Click the Supplier link.
8. On the Supplier Information search page, click the Add a New Value tab.
Notice the SetID defaults based on your User Preferences.
9. When the agency is converted to CAPPS the suppliers that the agency has paid for
the last three years will be converted from TINS.

CAPPS Financials EUT Course
Page 3
Step Action
10. The Supplier's Texas Identification Number (TIN) is used as the Supplier ID.
If your Agency enters the Supplier information into CAPPS first, then this number
must be entered. This field should never be left blank.
In this example this Supplier already exists in TINS.
Enter the supplier's TIN "1987654327" into the Supplier ID field.
11. Click the Add button.
Step Action
12. The Supplier page displays.
13. Enter the supplier's complete name in the Supplier Name field.
Note: The Supplier Name and Supplier Short Name fields are for CAPPS purpose
only. This information is not sent to TINS. The name sent to TINS is captured on
the TINS Information tab.
Enter "Maltek Corp." into the Supplier Name field.

CAPPS Financials EUT Course
Page 4
Step Action
14. An additional name for the same supplier can be entered in the Additional Name
field.
The option to enter two names is provided to accommodate subsidiaries and
divisions.
15. Enter a short name for the supplier for easy identification.
Enter "Maltek" into the Supplier Short Name field.
16. Classification is a required field. It defaults to Outside Party. Other valid values
for CAPPS are Employee and Agency. All other values are not valid in CAPPS.
For this example accept the default.
17. The Persistenance field is a required field. It defaults to Regular, accept the
default.
The other value that can be used is Permanent. Do not use the other values.
18. The Supplier Status field defaults based on the Agency's setup. This Agency has
chosen to approve all ne Supplies. In this example, accept the default.
19. If your Agency uses USAS for 1099 withholding, then leave the Withholding
checkbox clear.
If your Agency chooses to use CAPPS for the 1099 withholding then selecting the
Withholding checkbox overrides the USAS 1099 Withholding Indicator.
In this example we will accept the default and leave the checkbox clear.
20. The Open For Ordering checkbox must be checked to use the vendor on
requisitions or purchase orders.
21. The Additional ID Numbers section is used to store a cross reference to the SSN
and Old Vendor Number.
22. Click the Address tab to enter the supplier's address information.

CAPPS Financials EUT Course
Page 5
Step Action
23. Suppliers may have different addresses for different procurement functions. This
page allows multiple addresses to be added for a supplier.
Note: there can be only one address for each location so a supplier with multiple
addresses will need multiple locations.
24. Enter a description for this Address ID, for example, Regional Office, or Sales
Office.
In this example, enter "Headquarters" into the Description field.
25. The Effective Date field identifies the date from which the supplier's address is
valid. If the supplier's address changes, use the plus sign to add another row and
enter the new address with a new Effective Date.
The system defaults to the current date but it can be changed, if needed.
In this example, accept the default.
26. Enter "227 Elman Ln." in the Address 1 field.
27. Enter "Austin" in the City field.
28. Enter "TX" in the State field.
29. Enter "78751" in the Postal field.
30. Note: This address information is not validated within CAPPS. However, it will be
validated in TINS so it is important that the address be accurate. If not, TINS will
generate an error message.

CAPPS Financials EUT Course
Page 6
Step Action
31. Enter Phone Information for the supplier if available.
32. The information on the Location and the Address tab work together.
Click the Location tab.
Step Action
33. On the Location tab you can record one or more supplier locations for invoicing,
remittance and returns.
34. If the supplier is added to CAPPS from the CMBL, the Location field will display
an asterisk followed by two numbers, i.e. *00.
This code can be used on requisitions and purchase orders but are not eligible for
vouchering.
A valid TINS Mail Code must be defined for the supplier to receive payment.

CAPPS Financials EUT Course
Page 7
Step Action
35. Enter the TINS location code in the Location field if the Supplier is already in
TINS.
Note: The number entered here is not transferred to TINS. The location number in
CAPPS must match the TINS Mail Code in order for the Supplier to be paid.
Enter "001" into the Location field.
36. Enter "Maltek Corp." into the Description field.
Note: this description is only used in CAPPS and not set to TINS.
37. Use the TINS Information tab to enter State of Texas specific information. This
information is required for the TINS interface.
Click the TINS Information tab.
38. The TINS Information page contains some specific field information that is
specific to TINS.
If the supplier already exists in TINS then this page can be used to update or
maintain TINS.
The Send to TINS checkbox is required for the information to update TINS.
39. The Business Description, TX Charter #, and Emp Date fields are used in
conjunction with the Vendor Ownership Information.
The Tins Hold Indicator is populated from TINS when suppliers are placed on
hold.
40. Ownership Type is required for each supplier. It identifies the legal business status
(e.g. Texas Corporation, Partnership, etc.).
Click the Look up Ownership Type (Alt+5) button to display the valid values.
41. For this example, select the Out of State Corporation option.
Note: The supplier should provide you with the Ownership Type information. If it
was not provided, you will need to contact the supplier.
Click the Out of State Corporation link.
42. The Owner Name field is only used for individuals and partnerships.

CAPPS Financials EUT Course
Page 8
Step Action
43. Enter the Supplier's name in the Location Name field.
Note: This name will appear on the payment issued by TINS.
Enter the desired information into the Location Name field. Enter "Maltek Corp.".
44. The Send to TINS checkbox is used to update TINS with the new information.
Click the Send to TINS option.
45. When the Send to TINS checkbox is marked, a new TINS T-Code hyperlink is
displayed.
Use this link to supply information that TINS will use in updating the supplier
record.
Click the TINS T-Code link.
46. TINS T-Codes are used to tell TINS what type of transaction is being sent by
CAPPS.
In this example, select the Master Level Setup checkbox to add a new vendor.
Click the Master Level Setup -- 600 option.
47. Note: These T-Codes are for TINS purposes only. This information is not used for
processing within CAPPS.
Click the OK button.
48. The Security Type field is used to identify information that can be seen and updated
in TINS. This does not affect CAPPS, only TINS. There are three TINS security
types:
0 - No security (any agency can see or modify information in TINS)
1 - Low security (any agency can see the information in TINS, but only the securing
agency -- the agency that set the indicator -- can make TINS changes)
2 - Maximum security (only the securing agency can see or modify the information
in TINS)
Click the Look up Security Type (Alt+5) button to view the valid values.

CAPPS Financials EUT Course
Page 9
Step Action
49. An options popup window displays.
Click the No Security link.
50. The Payment Type is used to specify how the vendor is paid.
Click the Look up Payment Type (Alt+5) button.
51. The Look Up Payment Type pop-up window displays.
Click the down arrow on the vertical scrollbar to display more payment types.
52. In this example, the supplier will be set to receive payments via state warrant. A
warrant is a check issued by the State that is guaranteed by the State Treasury.
Click the WARRANT link.
53. Use the PDT look up button to select a Payment Distribution Type.
Click the Look up PDT (Alt+5) button.
54. Click the Warrant link.
55. If a supplier chooses to be paid by direct deposit, then the agency must maintain the
banking information.
This information must be maintained in TINS. If the agency chooses, the
information can also be maintained in CAPPS.
In the event that direct deposit is selected, and the agency chooses to maintain direct
deposit information only in TINS, then 999999999 is put into the DD Bank # and
DD Routing #.
56. The CMBL Information and Hub Information tabs are not used when entering a
new vendor.
57. To move down the page, click the scrollbar.
58. Click the Save button.

CAPPS Financials EUT Course
Page 10
Step Action
59. To validate the supplier has been added, search for the supplier on the Supplier
Information search page.
Click the Supplier link.
Step Action
60. The Supplier Information search page displays.
Enter "1987654327" in the Supplier ID field.
61. Click the Search button.

CAPPS Financials EUT Course
Page 11
Step Action
62. The Supplier page displays.
On the Summary tab, notice that the supplier is now listed.
63. Congratulations! You have successfully completed this lesson.
End of Procedure.
Viewing and Updating Suppliers
Section 2 - Lesson 2 Exercise - Scenario 1: Viewing an Updating Suppliers
Procedure
In this lesson, you will update an existing supplier that was created from the CMBL.

CAPPS Financials EUT Course
Page 12
Step Action
1. Click the Main Menu button to navigate to the Supplier page.

CAPPS Financials EUT Course
Page 13
Step Action
2. Click the Suppliers menu.
3. Click the Supplier Information menu.
4. Click the Add/Update menu.
5. Click the Supplier link.
6. The Supplier Information search displays.
This page allows you to search Supplier ID, Supplier Name, or Short Supplier
Name.
Step Action
7. For this example, the Supplier ID number is used to search for the supplier
information.
Enter the desired information into the Supplier ID field. Enter "1010771554".

CAPPS Financials EUT Course
Page 14
Step Action
8. Click the Search button.
9. Use the Summary tab to view summary information about a supplier, including the
Remit To address, Status of the vendor, when the record was last modified and who
modified it.
Step Action
10. Click the Identifying Information tab.
11. The Identifying Information tab provides the Supplier Status and Withholding
information.

CAPPS Financials EUT Course
Page 15
Step Action
12. Click the Expand section button.
13. The Additional ID Numbers section is used to store a cross reference to the SSN
and Old Vendor Number.
14. Click the Address tab.

CAPPS Financials EUT Course
Page 16
Step Action
15. To update address information for the supplier, click the add button (+) to add a
new row.
Click the Add a new row at row 1 (Alt+7) button.
16. The Description field is used to describe the address.
Enter Remit to in the Description field.
17. Enter 123 Elm Way in the Address 1 field.
Notice the Effective Date defaults to the current date but it can be changed, if
needed.
18. In the City field, enter Austin.
19. Click the Look up State (Alt+5) button to view the valid values.
20. The Look Up State popup window displays.
You can search with a partial value. Ensure the search value is "begins with", then
enter t in the search box.
21. Click the Look Up button.

CAPPS Financials EUT Course
Page 17
Step Action
22. The Search Results lists all state names beginning with the letter "t". Click the
Texas link.
23. In the Postal field, enter 78710.
Step Action
24. Click the Contacts tab.
25. Notice the row indicator shows you are viewing the first of 7 rows of contact
information for this supplier.
26. In the Details section, notice the row indicator of '1 of 1'.
A new effective dated row is created each time the detail of a contact is modified.
Since there is only one, you are viewing the original contact information and no
changes have been made.

CAPPS Financials EUT Course
Page 18
Step Action
27. Because the contact information is effective-dated, you can insert new rows to
reflect changes to the address or phone number before the change goes into effect.
Click the Add a new row at row 1 (Alt+7) button.
28. Add a description of the supplier into the Description field.
Enter Contact for invoices < $1000.
29. In the Details section, the Effective Date indicates when the contact became active
for the customer.
This field enables you to keep a history of changes to the contact and to enter
changes that will go into effect on a future date.
Click the Choose a date (Alt+5) button to select an Effective Date.
30. Select January 3 as the Effective Date by clicking the 3 link in the calendar.
31. Select a Type to define the contact's role.
Click the Type list to view the valid values.

CAPPS Financials EUT Course
Page 19
Step Action
32. Click the Accounts Payable list item.
33. Enter the name of the new contact person into the Name field.
For this example, enter Tom Green in the Name field.
34. Enter the new contact person's title into the Title field.
Enter Account Specialist.
35. The Address field allows you to associate the contact with an address on the
Address tab.
Click the Look up Address (Alt+5) button next to the Address field.
36. The Look Up Address popup window displays.
Click the 1010771554 Remit To address link.
37. Notice the address information is auto-populated.
If any phone numbers were associated with the address, those numbers would
display in the Phone Information section.
38. Enter [email protected] into the Email ID field.
39. To add a new phone number, click the Add a new row at row 1 (Alt+7) button.
40. Click the Type dropdown list in the to select the type of phone number you are
adding.
41. Click the Cellular Phone list item.
42. In the Telephone field, enter 512-999-9999.
43. To review the supplier's location details, click the Location tab.
44. The Location section relates to the supplier's mail code information in TINS.
The Location field matches the TINS Mail Code.

CAPPS Financials EUT Course
Page 20
Step Action
45. The * indicates that the supplier was created in CAPPS through an interface with the
Centralized Master Bidders List (CMBL). In order to pay the supplier, the location
must be associated to an address and setup as a TINS mail code.
A row needs to be added, with a 001 Location, in order for the Supplier to be paid,
and to save the original *00 row of data.
TINS also needs to be updated with the new location information.
46. To link the new address to a location, click the Add a new row at row 1
(Alt+7) button.
47. The Location field is the TINS three digit Mail Code.
Enter 000 into the Location field.
48. The address and location information is a 1 to 1 relationship -- there can only be one
address per location and one location per address.
To view all addresses, click the Look up Address (Alt+5) button.
49. The Look Up Address popup window displays with all of the addresses that have
been created on the Address tab. Link the address you created to the new location.
Click the Remit to link.
50. The Description field can be used to establish different supplier locations, such as
Invoice From, Remit To, and/or Return To locations (and others, as needed).
In the Description field, enter Alliance Tech.
51. There are three locations for this supplier. To view all of the locations, click
the View All link.
52. Click the down arrow on the vertical scrollbar to display more options.
53. Use the Default checkbox to set the default address for the supplier.
Click the Default option.
54. Click the up arrow on the vertical scrollbar to scroll up to the top of the page.

CAPPS Financials EUT Course
Page 21
Step Action
55. To review the TINS information, click the
TINS Information tab.
56. The TINS Information tab contains a mixture of TINS Master and Mail Code level
information.
Notice that some of the information is tied to the vendor directly via the Vendor
Ownership Information section and some is tied to the specific location via
the Vendor Location Information tab.
57. The Business Description, TX Charter #, and Emp Date fields are used in
conjunction with the Vendor Ownership Information.
58. The Texas Charter #, Emp Date and Ownership Information (owner name, etc.)
are required based on the Ownership Type.
Texas Companies require as a charter number.
Enter 67364583737 in the TX Charter # field.
59. The payee ownership type is required on all payees that are set up in TINS.
Click the Look up Ownership Type (Alt+5) button to view all ownership types.
60. All of the valid values display. Click the Texas Corporation link.
61. The Owner Name field is only used for individuals and partnerships.
62. Click the down arrow on the vertical scrollbar to scroll down the page.
63. The Vendor Location Information section is used to update/display information
that is specific to a TINS mail code. If the TINS interface is used, these fields will
be sent to TINS on the mail code setup.
Note: The Location Name field in CAPPS is the TINS Mail Code name.
Enter Alliance Tech in the Location Name field.
64. The Security Type field identifies the security needed if the name and address are
sensitive or classified and need to be protected from unauthorized changes or
inquiries in TINS.
Click the Look up Security Type (Alt+5) button to display all the valid security
type values.

CAPPS Financials EUT Course
Page 22
Step Action
65. All of the valid values display.
0 - No security (any agency can see or modify information in TINS)
1 - Low security (any agency can see the information in TINS, but only the securing
agency -- the agency that set the indicator -- can make TINS changes)
2 - Maximum security (only the securing agency can see or modify the information
in TINS)
In the example, no security is needed. Click the No Security link.
CAPPS Financials EUT Course
Page 23
Step Action
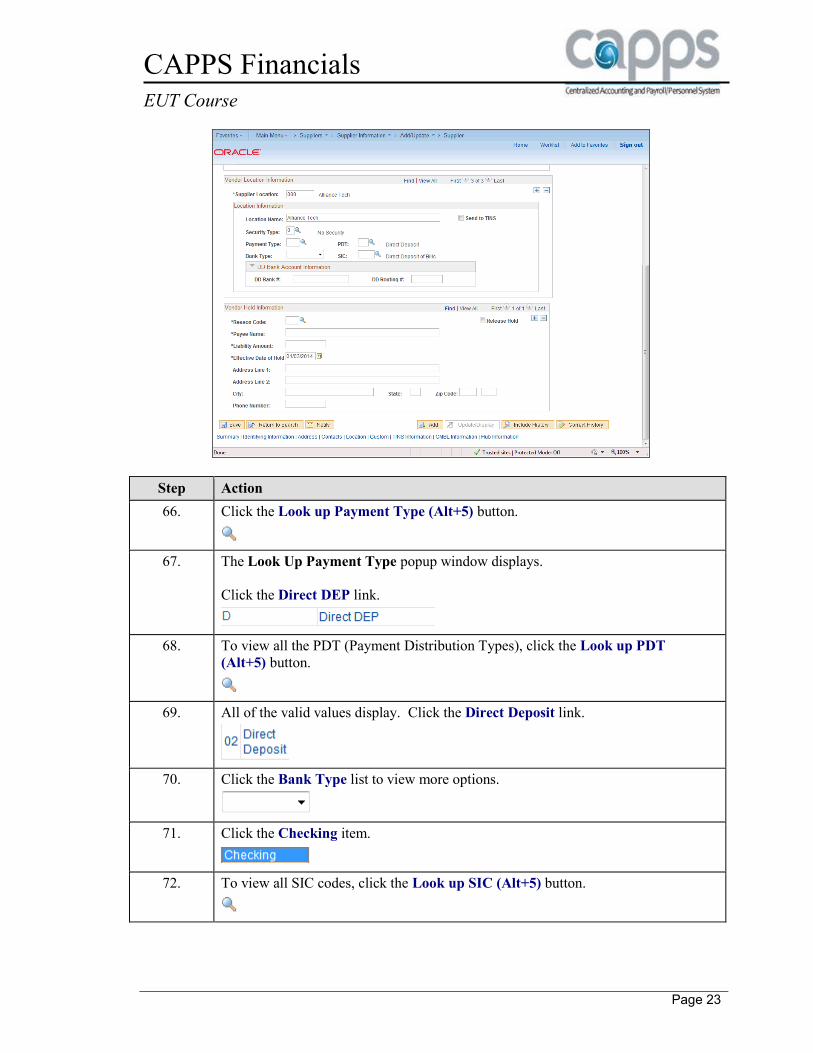
66. Click the Look up Payment Type (Alt+5) button.
67. The Look Up Payment Type popup window displays.
Click the Direct DEP link.
68. To view all the PDT (Payment Distribution Types), click the Look up PDT
(Alt+5) button.
69. All of the valid values display. Click the Direct Deposit link.
70. Click the Bank Type list to view more options.
71. Click the Checking item.
72. To view all SIC codes, click the Look up SIC (Alt+5) button.

CAPPS Financials EUT Course
Page 24
Step Action
73. All of the valid values display.
Important - If this vendor is being paid via Direct Deposit you must select the 9903
value. Otherwise, TINS will flag this vendor as confidential.
Click the 9903 - Direct Deposit of Bills link.
74. This information must be maintained in TINS. If the agency chooses, the
information can also be maintained in CAPPS.
In the event that direct deposit is selected, and the agency chooses to maintain direct
deposit information only in TINS, then 999999999 is put into the DD Bank # and
DD Routing #.
In the DD Bank Account Information section, enter 9999999999 in the DD Bank
# field.
75. Note: The DD Routing # is verified against routing numbers issued by the
American Bankers Association (ABA) once this information is sent to TINS.
In the DD Routing # field, enter 555555555.
76. The Vendor Hold Information section displays information regarding vendor hold
status.
An agency can place a vendor on hold when they have an outstanding state debt to a
State Agency. A hold record will exist for each valid legal liability they have with
the state (e.g. back taxes, child support, student loans, etc.)
The hold information is entered in CAPPS and interfaced to TINS.
77. Click the up arrow on the vertical scrollbar to scroll to the top of the page.
78. Click the CMBL Information tab.
79. The CMBL Information tab displays specific information about a supplier from the
Centralized Master Bidders List.
The CMBL is a master database used by State of Texas purchasing entitites to
develop a mailing list for suppliers to receive bids based on the products or services
they can provide to the State of Texas.
CMBL information will be downloaded into the CAPPS supplier table on a weekly
basis.
80. The Hub Information tab is used only by Hub Agencies.
CAPPS Financials EUT Course
Page 25
Step Action
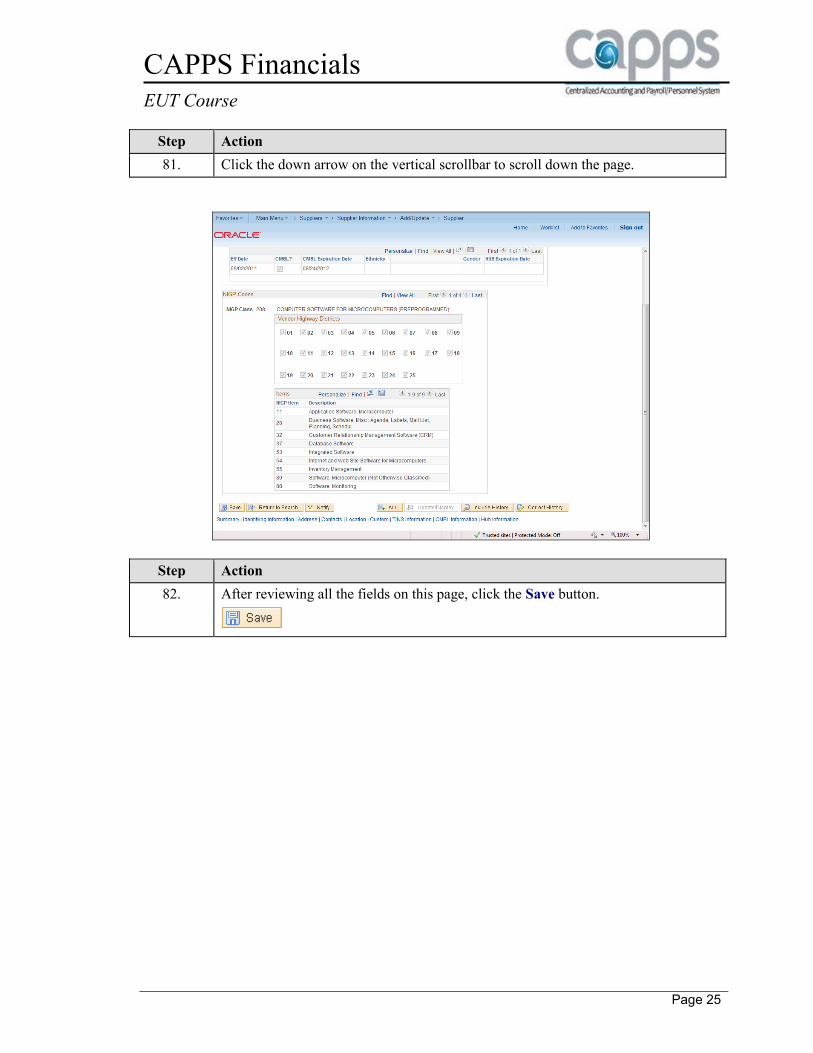
81. Click the down arrow on the vertical scrollbar to scroll down the page.
Step Action
82. After reviewing all the fields on this page, click the Save button.

CAPPS Financials EUT Course
Page 26
Step Action
83. To review the summary information, click the Summary tab.
CAPPS Financials EUT Course
Page 27
Step Action
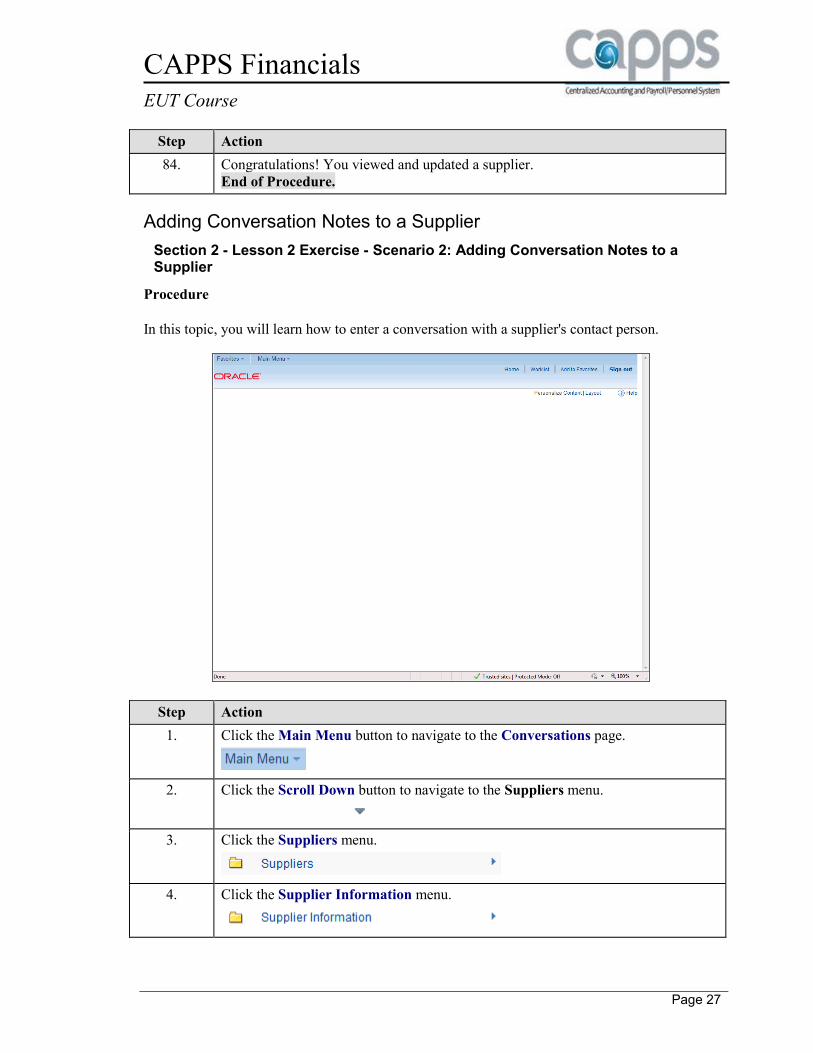
84. Congratulations! You viewed and updated a supplier.
End of Procedure.
Adding Conversation Notes to a Supplier
Section 2 - Lesson 2 Exercise - Scenario 2: Adding Conversation Notes to a Supplier
Procedure
In this topic, you will learn how to enter a conversation with a supplier's contact person.
Step Action
1. Click the Main Menu button to navigate to the Conversations page.
2. Click the Scroll Down button to navigate to the Suppliers menu.
3. Click the Suppliers menu.
4. Click the Supplier Information menu.

CAPPS Financials EUT Course
Page 28
Step Action
5. Click the Maintain menu.
6. Click the Conversations link.
7. On the Conversations page, enter "31300" in the SetID field.
In Production, this value should default based on your User ID and security.
8. Enter "1010771554" in the Supplier ID field.
9. Click the Search button.
10. The Conversations, Supplier Conversation page displays.
The Date field defaults to the current date. Enter the date that the conversation took
place. In this example accept the default.
11. Click the Look up Contact (Alt+5) button.
12. The Look Up Contact popup window displays.
The list of valid contacts is generated from the contacts entered for the supplier on
the Supplier Information - Contacts page.
Click the Kevin Engel link.
13. The Topic field is used to identify the subject of the conversation.
Enter "Invoice Discrepancy" in the Topic field.
14. The Descr (Description) field is used to enter comments about a discussion. These
comments might include issues raised and any resolutions or planned courses of
action.
Enter "Over billed on invoice. Kevin will research and call me back by Friday."
in the Descr field.
15. The Keywords sub-section is used to record key words from a conversation that
clearly identifies the relevant topics to search for or report on categories of
conversations.
The Keywords are configured per agency.

CAPPS Financials EUT Course
Page 29
Step Action
16. The Review section is used to enter the review date and the number of review days
until the next review is scheduled.
These fields are for information only. A report or inquiry page may be created to
assist in identifying reviews scheduled for a particular day or week.
17. To add more conversations, click Add a new row at row 1 (Alt+7) button.
In this example, no more conversations are added.
18. Click the Save button.
19. Congratulations! In this topic, you added conversation notes with a supplier.
End of Procedure.
Inactivating Suppliers
Section 2 - Lesson 2 Exercise - Scenario 3: Inactivating a Supplier
Procedure
Consider this scenario: Management at your agency has decided to change one of its suppliers.
You have been asked to deactivate the supplier to ensure that no new vouchers are entered for the
supplier.
Step Action
1. To inactivate a supplier account set the supplier status to Inactive on the Supplier
Information page.
If a supplier is inactive, CAPPS still posts any existing vouchers for the supplier.

CAPPS Financials EUT Course
Page 30
Step Action
2. Click the Main Menu button to navigate to the Supplier page.
3. Click the Scroll Down button.
4. Click the Suppliers menu.
5. Click the Supplier Information menu.
6. Click the Add/Update menu.
7. Click the Supplier link.

CAPPS Financials EUT Course
Page 31
Step Action
8. Notice the SetID field defaults based on your User Preferences.
Enter Maltek-001 into the Short Supplier Name field.

CAPPS Financials EUT Course
Page 32
Step Action
9. Click the Search button.
10. The Summary tab displays a summary of the supplier's information.
11. Click the Identifying Information tab.
12. The Identifying Information tab includes basic business information about the
supplier such as Supplier Status, Class, etc.
13. Click the Supplier Status list to change the status of the supplier.
14. Click the Inactive list item.
15. Click the down arrow on the vertical scrollbar to display the Save button.
16. Click the Save button.
17. Notice the Supplier Status is now Inactive.
Note: Once a supplier has been inactivated, it cannot be entered or selected when
creating a payment voucher.

CAPPS Financials EUT Course
Page 33
Step Action
18. Congratulations! In this topic, you learned how to inactivate a supplier.
End of Procedure.
Section 3 Entering Vouchers
Entering a PO Voucher
Section 3, Lesson 1, Exercise - Scenario 1 Entering PO Vouchers
Procedure
In this topic, you will add a voucher by copying details from a related purchase order.
Step Action
1. CAPPS enables you to copy source documents into a voucher to expedite voucher
creation and increase accuracy.

CAPPS Financials EUT Course
Page 34
Step Action
2. Click the Main Menu button to navigate to the Voucher Regular Entry page.
3. Click the Accounts Payable menu.
4. Click the Vouchers menu.
5. Click the Add/Update menu.
Step Action
6. Click the Regular Entry link.

CAPPS Financials EUT Course
Page 35
Step Action
7. Notice the Voucher ID defaults to NEXT. When you save the voucher, the system
will assign the next available voucher ID.
Enter 4567890 into the Invoice Number field.
8. When entering a date, enter t for today’s date, enter the date in the format mmddyy
(no slashes) or use the calendar button to select a date.
Click the Choose a date Calendar (Alt+5) button next to the Invoice Date field.
9. Click the January 3 link.
10. Click the Add button.

CAPPS Financials EUT Course
Page 36
Step Action
11. Use the Invoice Information page to enter invoice information, including invoice
header information, non-merchandise charges and voucher line and distribution
information.
12. In this exercise, copy the information from a purchase order as the source document.
Click the Copy From Source document button.
13. Entering PO Vouchers The PO Worksheet allows you to select the PO lines to copy to your voucher. For
vouchers created from a Purchase Order (PO), the voucher Service Date is derived
from the PO Receipt Date (for POs that have been received), and the voucher Order
Date is derived from the PO Date.
14. PO Vouchers without a Receipt For PO vouchers without a receipt, the voucher Service Date must be manually
entered. If a Consumable account is used, the voucher AY may then be inferred. A
warning message will be issued upon saving the record if the voucher AY is
changed to a year other than the original PO AY to notify user of the difference.
Inferring will take place any time the user changes the voucher Service Date or
Account code
15. To find the Purchase Order's Business Unit, click the Look up PO Unit
(Alt+5) button.

CAPPS Financials EUT Course
Page 37
Step Action
16. Click the Dept of Information Resources link.
17. To find the Purchase Order to be copied, click the Look up PO Number
(Alt+5) button.
18. A search using a partial PO number can be done by changing the criteria to
contains.
Click the PO Number begins with dropdown list.
19. Click the contains list item.
20. Enter a partial PO number.
Enter 2108 into the PO Number field.
21. Click the Look Up button.
22. Click the 0000002108 link.

CAPPS Financials EUT Course
Page 38
Step Action
23. The Copy PO option copies all of the PO lines but does not copy receipt
information.
Click the Copy PO button.
24. Notice the Supplier ID and Short Name were copied from the PO.
25. Click the down arrow on the vertical scrollbar.
26. Click the Choose a date Calendar (Alt+5) button next to the Inv Receipt Date
field.
27. Click the January 10 link.
28. Click the Choose a date Calendar (Alt+5) button next to the Service Date field.
29. Click the January 27 link.
30. Click the Choose a date Calendar (Alt+5) button next to the Requested Pmt. Dt.
field.

CAPPS Financials EUT Course
Page 39
Step Action
31. Click the February link in the dropdown list.
32. Click the February 26 link.
33. Click the right arrow on the horizontal scrollbar.
34. A time saving feature is available for copying dates associated with each
invoice/voucher line.
The Copy Dates hyperlink may be used to copy the Inv Receipt Dt, Service Date
and Reqsted Pmt. Dt. across one or multiple invoice/voucher lines.
35. The USAS Payment Due Date field will be 30 calendar days after the later of either
the Inv Receipt Dt or the Service Date. This does not change even if the Reqsted
Pmt. Dt. field is populated.
Step Action
36. Click the left arrow on the horizontal scrollbar.
37. The Invoice Description field information writes to the USAS description field.
Enter ink cartridges into the Invoice Description field.

CAPPS Financials EUT Course
Page 40
Step Action
38. Click the up arrow on the vertical scrollbar.
39. Click the right arrow on the horizontal scrollbar.
40. The Draft Voucher Print is used to print the draft voucher. A new window will
open allowing you to view and/or print in a PDF file format.
Step Action
41. Click the left arrow on the horizontal scrollbar.

CAPPS Financials EUT Course
Page 41
Step Action
42. Click the Voucher Attributes tab to view the accounting entry template assigned to
this voucher.
43. Verify that the defaulted Template entry is correct.
The Template field is used to determine what tcode will be sent to the Uniform
Statewide Accounting System (USAS).
If the correct template is not listed, click the Look up Template (Alt+5) button and
select the appropriate template.
44. After verifying the template, click the Invoice Information tab to save the voucher.
45. Click the down arrow on the vertical scrollbar to display the Save button.
46. Click the Save button.
47. Click the up arrow on the vertical scrollbar to go back to the top of the page.
48. When you saved the voucher, the Voucher ID field changed from NEXT to the next
available number, in this case 0007784.
49. The voucher is now ready for a budget check, document tolerance check, and a
matching check.

CAPPS Financials EUT Course
Page 42
Step Action
50. Congratulations! You successfully entered a PO voucher.
End of Procedure.
Entering a Non-PO Voucher
Section 3, Lesson 2, Exercise - Scenario 1 Entering a Non-PO Voucher
Procedure
In this topic, a regular Non-PO voucher is entered.
Step Action
1. CAPPS enables you to create vouchers for online for quick invoices or payments not
associated to a Purchase Order.
Step Action
2. Click the Main Menu link.

CAPPS Financials EUT Course
Page 43
Step Action
3. Click the Accounts Payable menu.
4. Click the Vouchers menu.
5. Click the Add/Update menu.
6. Click the Regular Entry link.
Step Action
7. The Add a New Value tab displays.
The Business Unit field defaults based on your User Preferences. For this exercise,
accept the default.
8. Each voucher is assigned a unique number for identification purposes.
Notice NEXT defaults into the Voucher ID field. When you save the voucher, the
system will assign the next available voucher ID.

CAPPS Financials EUT Course
Page 44
Step Action
9. The Voucher Style list defaults to Regular Voucher. It can be changed to select a
different voucher style.
For this exercise, accept the default.
10. Click the Look up Short Supplier Name (Alt+5) button to view the valid values.
11. The Look Up Short Supplier Name popup window allows you to search for a
supplier.
Enter XYZ into the Supplier Name field.
12. Click the Look Up button.
13. Click the XYZ CORP link.
14. Notice that the Short Supplier Name, Supplier ID, Supplier Location and
Address Sequence Number fields are auto-populated based on the supplier's setup.
15. Enter 2345678 into the Invoice Number field.
16. For the Invoice Date field, enter t for today’s date, enter the date in the format
mmddyy (no punctuation), or click on the Choose a Date (Alt+5) button to select a
date.
In this case, click the Choose a date Calendar (Alt+5) button.
17. Click the dropdown list for the month.
18. Click the March list item.

CAPPS Financials EUT Course
Page 45
Step Action
19. Click the dropdown list for the year.

CAPPS Financials EUT Course
Page 46
Step Action
20. Click the 2013 list item.
21. Click the 1 date in the calendar to select the 1st day of the month.
22. Enter 100.00 into the Gross Invoice Amount field.
23. Click the Add button.
Step Action
24. Use the Invoice Information tab to enter invoice information, including invoice
header information, non-merchandise charges and voucher line and distribution
information.
25. Click the down arrow on the vertical scrollbar to access the Description field.
26. Enter Accounting services into the Description field.
CAPPS Financials EUT Course
Page 47
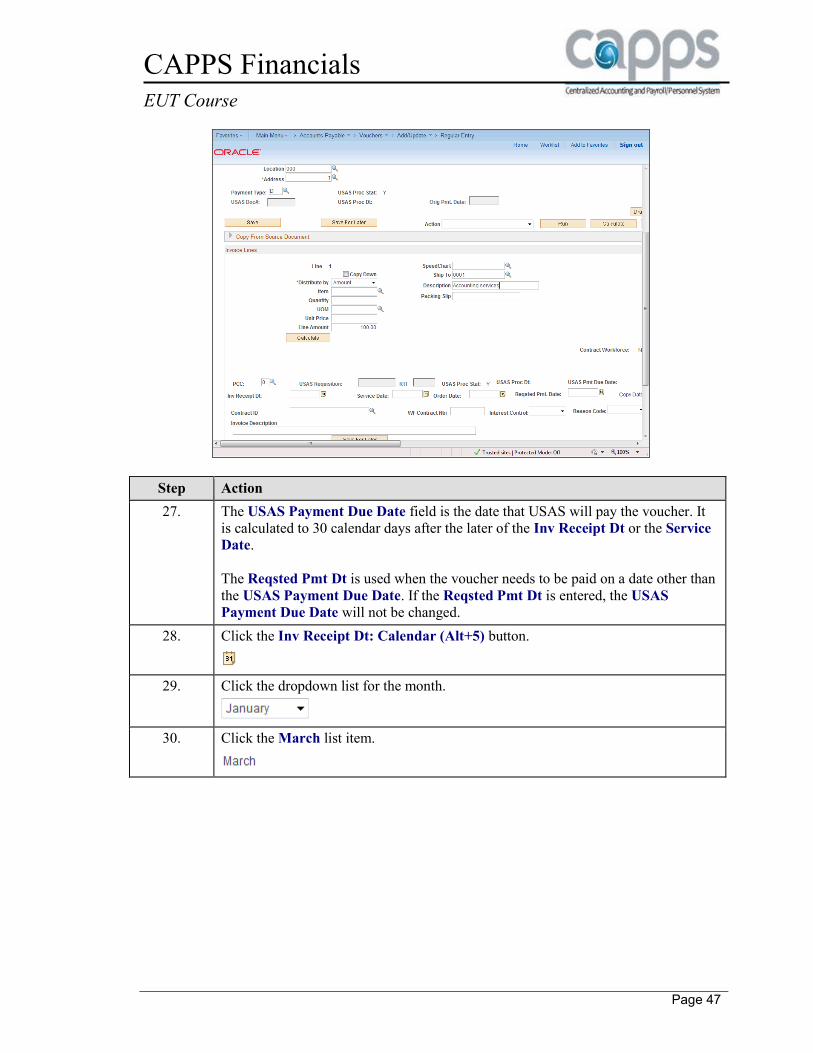
Step Action
27. The USAS Payment Due Date field is the date that USAS will pay the voucher. It
is calculated to 30 calendar days after the later of the Inv Receipt Dt or the Service
Date.
The Reqsted Pmt Dt is used when the voucher needs to be paid on a date other than
the USAS Payment Due Date. If the Reqsted Pmt Dt is entered, the USAS
Payment Due Date will not be changed.
28. Click the Inv Receipt Dt: Calendar (Alt+5) button.
29. Click the dropdown list for the month.
30. Click the March list item.

CAPPS Financials EUT Course
Page 48
Step Action
31. Click the dropdown list for the year.

CAPPS Financials EUT Course
Page 49
Step Action
32. Click the 2013 list item.
33. Select the 4th day of the month.
34. Click the Service Date: Calendar (Alt+5) button.
35. Click the dropdown list for the month.
36. Click the March list item.
Step Action
37. Click the dropdown list for the year.

CAPPS Financials EUT Course
Page 50
Step Action
38. Click the 2013 list item.
39. Select the 1st day of the month.
40. Click the Reqsted Pmt Dt Calendar (Alt+5) button.
41. Click the dropdown list for the month.
42. Click the March list item.

CAPPS Financials EUT Course
Page 51
Step Action
43. Click the dropdown list for the year.
CAPPS Financials EUT Course
Page 52
Step Action
44. Click the 2013 list item.
45. Select the 4th day of the month.
46. The Invoice Description field is used to enter the USAS description. The
information will be sent to USAS through the USAS Outbound interface.
Enter Accounting services into the Invoice Description field.
47. A SpeedChart enables you to group together and name an unlimited number of
frequently used ChartField combinations to increase data entry efficiency by
reducing the number of keystrokes.
SpeedChart codes can be defined with one or multiple accounting distributions.
Enter AP_CHART into the SpeedChart field.
48. Notice that the accounting distribution is now populated.
49. Click the up arrow on the vertical scrollbar to return to the top of the page.
50. Click the Voucher Attributes tab to view the defaulted accounting entry.
51. Review the Template field to verify that the defaulted accounting entry is correct.
The Template field is used to determine what T-code will be sent to USAS.

CAPPS Financials EUT Course
Page 53
Step Action
52. Click the Invoice Information tab to save your entries.

CAPPS Financials EUT Course
Page 54
Step Action
53. Click the down arrow on the vertical scrollbar to view the Save button.
54. Click the Save button to save the voucher.
55. Notice that the Voucher ID was assigned and the following three new tabs display
after the voucher was saved: Summary, Related Documents and Error Summary.
Those tabs provide additional information related to the voucher:
- Summary: summarizes information from the other voucher pages such as voucher
header information, statuses and payment terms.
- Related Documents: displays related document information including payment
details, purchase order information, receiver information and voucher adjustment
details.
- Error Summary: provides Voucher Build processing errors, matching errors,
duplicate invoices and out-of-balance and combination edit errors on the voucher.
56. Congratulations! In this topic, you successfully entered a regular (non-PO) voucher.
End of Procedure.
Entering a Multi-Vendor Voucher
Section 3, Lesson 2, Exercise - Scenario 2 Entering Multi-Vendor Vouchers
Procedure
In this topic, you will enter a multi-vendor voucher.

CAPPS Financials EUT Course
Page 55
Step Action
1. The multi-vendor voucher style is a voucher style used to pay multiple suppliers on
a PO or Non-PO voucher.
For PO Vouchers, the multi-vendor voucher style can be used to copy PO
information into a voucher. PO multi-vendor vouchers can pay at the header level
including a travel reimbursement payment using tcode 264 (Doc Type 1) or to pay
suppliers at the invoice line level using tcode 225.
For Non-PO Vouchers, the multi-vendor voucher style can be used to pay suppliers
without encumbering funds; e.g. no PO. Either the line supplier or header supplier
can be paid depending on the tcode inferred by the accounting entry template.
The total dollar amount of the lines must always equal the total dollar amount of the
voucher header.
Step Action
2. When entering a multi-vendor voucher, the supplier is assigned to each voucher line
instead of the voucher header.
Click the Main Menu button.

CAPPS Financials EUT Course
Page 56
Step Action
3. Click the Accounts Payable menu.
4. Click the Vouchers menu.
5. Click the Add/Update menu.
6. Click the Regular Entry link.
Step Action
7. The Business Unit defaults based on your User Preferences.
The Voucher ID defaults with NEXT; the system will assign the next available
voucher ID when the voucher is saved.
The Voucher Style defaults with Regular Voucher; this can be changed.
8. Click the Voucher Style list to identify the type of voucher you are entering.

CAPPS Financials EUT Course
Page 57
Step Action
9. Click the Multi-Vendor Voucher list item.
10. Click the Look up Short Supplier Name (Alt+5) button.
11. Enter XYZ into the Short Supplier Name field.
12. Click the Look Up button.
13. Click the XYZ Corporation link.
14. Enter 56458 into the Invoice Number field.
15. In the Invoice Date field, enter t for today’s date, enter the date in the format
mmddyy (no slashes), or click on the Choose a date Calendar (Alt+5) button to
select a date.
In this example, click the Choose a date Calendar (Alt+5) button.
16. Notice the month defaulted to January and the year defaulted to 2014 but both can
be changed, if needed. For this example, accept the default month and year.
Click the 1 link to select the first day of the month.
17. In the Gross Invoice Amount field, enter 500.00.
Note: This is the total amount that will be paid to the supplier listed in the voucher
header.
18. Click the Add button.

CAPPS Financials EUT Course
Page 58
Step Action
19. Use the Invoice Information tab to enter or view invoice information, including
invoice header information, non-merchandise charges and voucher line and
distribution information.
20. The Copy From Source Document section allows you to copy existing information
(purchase order, receiver, or another voucher) into the voucher.
21. Note that the information you entered on the Add a New Value tab appears in the
header section and can be updated.
22. Click the down arrow on the vertical scrollbar to view the Invoice Line section.
23. Enter Paper into the Description field.
24. In the Invoice Description field, enter Paper.
Note: The system will send the information in the Invoice Description field to
USAS and store it as the USAS description field.
25. In the Inv Receipt Dt field, enter t for today’s date, enter the date in the format
mmddyy (no punctuation), or click on the Choose a date (Alt+5) button to select a
date.
In this example, enter t into the Inv Receipt Dt field.
26. In the Service Date field, enter t for today’s date, enter the date in the format
mmddyy (no punctuation), or click on the Choose a date (Alt+5) button to select a
date.
In this example, enter t into the Service Date field.

CAPPS Financials EUT Course
Page 59
Step Action
27. Enter t into the Requested Pmt Date field.
Step Action
28. Click the right arrow on the horizontal scrollbar to view the USAS Pmt Due Date
field.
29. The date in the USAS Pmt Due Date field is the date that USAS will pay a
voucher. It is calculated as 30 calendar days after the later of the Inv Receipt Dt or
the Service Date.
The Reqsted Pmt Dt is used to override the USAS Pmt Due Date.

CAPPS Financials EUT Course
Page 60
Step Action
30. Click the left arrow on the horizontal scrollbar to continue.
31. Click the Look up Short Vendor Name (Alt+5) button to search for a vendor
name.
32. Click the Acme, Inc link.
33. In the Invoice field, enter 9785185.
34. In the Invoice Date field, click the Choose a date Calendar (Alt+5) button.
35. Click the 2 link to select the second day of the month.

CAPPS Financials EUT Course
Page 61
Step Action
36. For each Voucher Line that you enter, you must also enter the distribution
information in the Distribution Lines section. Each Voucher Line must have one or
more Distribution Lines.
Enter the accounting distribution details by populating each chartfield (e.g. account,
fund, PCA, etc.) individually, or you can use a Speedchart to populate the fields with
a preset combination of chartfield values.
37. Note that the GL Chartfields are blank to begin with.

CAPPS Financials EUT Course
Page 62
Step Action
38. Click the up arrow on the vertical scrollbar to view the SpeedChart button.

CAPPS Financials EUT Course
Page 63
Step Action
39. Click the Look up SpeedChart (Alt+5) button.
Step Action
40. Click the down arrow on the vertical scrollbar to view the AP_Chart link.

CAPPS Financials EUT Course
Page 64
Step Action
41. Click the AP_CHART link.

CAPPS Financials EUT Course
Page 65
Step Action
42. Notice the GL ChartFields are now populated. Even if a SpeedChart does not
represent the exact combination of ChartFields needed, you can still save time by
choosing one that is close.
The system will populate the fields and then you only need to change the fields that
are not correct.
43. In this case, change the amount.
In the Distribution Lines section, enter 400.00 into the Merchandise Amt field.
44. Click the right arrow on the horizontal scrollbar to view more fields.
Step Action
45. Click the up arrow on the vertical scrollbar to return to the top of the page.

CAPPS Financials EUT Course
Page 66
Step Action
46. Next you need to enter another Invoice Line.
In the Invoice Lines section, click the Add multiple new rows at row 1
(Alt+7) button to begin entering a second invoice line.

CAPPS Financials EUT Course
Page 67
Step Action
47. A prompt popup window displays to identify how many new rows you want to add.
The Enter number of rows to add field defaults to 1 but can be changed, if
needed. In this example, accept the default.
Click the OK button.

CAPPS Financials EUT Course
Page 68
Step Action
48. Click the down arrow on the vertical scrollbar to begin entering the next voucher
line's details.
49. In the Invoice Lines section of the new row, enter Pencils into the
Description field.
50. In the Invoice Description field, enter Pencils.
51. Enter t into the Inv Receipt Dt field to populate today's date.
52. Enter t into the Service Date field.
53. Enter t into the Reqsted Pmt. Date field.
54. Enter 125684 into Invoice field.
55. Click the Choose a date Calendar (Alt+5) button.
56. Click the 3 link to select the third day of the month.
57. Click the Look up Short Vendor Name (Alt+5) button.
58. Click the ABC Company link.
59. Click the Look up SpeedChart (Alt+5) button to select the appropriate GL
ChartField.

CAPPS Financials EUT Course
Page 69
Step Action
60. Click the down arrow on the vertical scrollbar to locate the AP_Chart link.
61. Click the AP_CHART link.
62. Click the down arrow on the vertical scrollbar to view the Distribution Lines
section.
63. In the Distribution Lines section, enter the amount due to the second vendor.
Enter 100.00 into the Merchandise Amt field.
64. Click the up arrow on the vertical scrollbar to return to the top of the page.
65. Click the Voucher Attributes tab to view the accounting instructions.
Step Action
66. Click the Look up Template (Alt+5) button next to the Template field to select a
different Template.

CAPPS Financials EUT Course
Page 70
Step Action
67. Use the 247/904 T-code combination to pay the vendor at the header while
maintaining a reference to the vendors at the line level.
Click the SUM REIM DOC TYPE 9 TC 247/904 link.
68. A warning Message popup window displays advising the Confidentiality Indicators
will be changed based on the new Template selection.
Click the OK button to accept the changes to the Template and the Confidentiality
Indicators.
69. Notice the Voucher ID is still shown as NEXT.
Click the down arrow on the vertical scrollbar to view the Save button.
70. Click the Save button.
71. Click the up arrow on the vertical scrollbar to return to the top of the page.
Step Action
72. Notice that the Voucher ID was assigned and the following three new tabs display
after the voucher was saved: Summary, Related Documents and Error Summary.

CAPPS Financials EUT Course
Page 71
Step Action
73. The following information related to the voucher is available on the new tabs:
- Summary: summarizes information from the other voucher pages such as voucher
header information, statuses and payment terms.
- Related Documents: displays related document information including payment
details, purchase order information, receiver information and voucher adjustment
details.
- Error Summary: provides Voucher Build processing errors, matching errors,
duplicate invoices, and out-of-balance and combination edit errors on the voucher.
74. Congratulations! In this topic, you successfully entered a multi-supplier voucher.
End of Procedure.
Entering Procard Vouchers
Section 3, Lesson 2, Exercise - Scenario 3 Entering Procard Vouchers
Procedure
In this topic, you will enter a Procard voucher. A Procard voucher is entered when a purchase is
made on an agency credit card.

CAPPS Financials EUT Course
Page 72
Step Action
1. Click the Main Menu button to navigate to the Regular Entry page.
2. Click the Accounts Payable menu.
3. Click the Vouchers menu.
4. Click the Add/Update menu.
5. Click the Regular Entry link.
6. On the Add a New Value tab, notice the following defaults:
Business Unit defaults based on your User Preferences; this can be changed if you
have the appropriate security.
Voucher ID defaults with NEXT; the system will assign the next available voucher
ID when the voucher is saved.
Voucher Style defaults with Regular Voucher; this can be changed.
7. Click the Voucher Style list to identify the type of voucher you are entering.

CAPPS Financials EUT Course
Page 73
Step Action
8. Click the Procard Voucher list item.
9. Notice that all the supplier and invoice information is auto-populated.
CAPPS is configured to populate that information when the Procard Voucher style is
chosen from the list. It is sometimes possible to have more than one Procard vendor.
In that case the vendor information will need to be entered manually.
10. Click the Add button.
11. Use the Invoice Information tab to enter or view invoice information, including
invoice header information, non-merchandise charges, and voucher line and
distribution information.
12. Click the Expand Section button.
13. The Copy From Source Document section allows you to copy existing information
(entire source documents or portions) into the voucher that you are creating. When
creating a regular voucher, you can copy the following:
- Non PO Receipt
- PO Receipt
- Purchase Order
- Template

CAPPS Financials EUT Course
Page 74
Step Action
14. In the PO Unit field, enter 31300.
15. Click the Look up PO Number (Alt+5) button.
16. The Look Up PO Number popup window displays.
Click the down arrow on the vertical scrollbar.
17. Click the purchase order 0000002117 link.
18. Click the Copy PO button.
19. Click the down arrow on the vertical scrollbar.
20. Click the right arrow on the horizontal scrollbar and scroll all the way to the right.
21. Click the up arrow on the vertical scrollbar.
22. 1 of 2 indicates there are two invoice lines.
Click the View All link.
23. Click the left arrow on the horizontal scrollbar.
24. Notice the Short Vendor Name, Ref Supplier ID, and Supplier Location fields.
These fields indicate where the goods were purchased using the procurement card.
25. The USAS Pmt Due Date field will be calculated as 30 calendar days after the later
of the Inv Receipt Dt or the Service Date.
26. In the Invoice Lines section, enter Books - Technical, Computer into the Invoice
Description field.
27. Click the right arrow on the horizontal scrollbar.
28. The Copy Dates link can be used to copy the Invoice Date, Service Date
and Reqsted Pmt Dt fields to additional invoice lines.
Click the Copy Dates link.
29. The Default Voucher Dates popup window displays.
You may enter t for today’s date, enter the date in the format mmddyy (no
punctuation) or click on the Choose a Date (Alt+5) button to select a date.
In this case, enter t in the Invoice Receipt Date field.

CAPPS Financials EUT Course
Page 75
Step Action
30. Enter t in the Service Date field.
31. Enter t into the Requested Pmt Date field.
32. Click the OK button.
33. Notice that the Inv Receipt Dt, Service Date and Reqsted Pmt Date fields are
populated.
34. Enter t in the Invoice Dt field.
35. Click the down arrow on the vertical scrollbar to display the next invoice line.
36. Notice the Short Vendor Name, Ref Supplier ID and Supplier Location fields
were copied in from the purchase order via the Copy Down button functionality.
37. Enter Felt Tip Markers into the Invoice Description field.
38. Enter t into the Invoice Date field.
39. Click the up arrow on the vertical scrollbar to return to the top of the page.
40. Click the Voucher Attributes tab.
41. The Voucher Attributes tab is used to select the accounting template.
42. The Template field identifies the accounting entry template associated with this
voucher.
The accounting entry template controls the offset accounts such as sales tax, freight
and discount accounts. It also determines the USAS T-code, DocType and USAS
generated T-code.
Notice that the template is set to PROCARD for a procurement card payment.
43. Click the Invoice Information tab.
44. In the header information, notice the Voucher ID is still NEXT.
Click the down arrow on the vertical scrollbar to save the voucher.
45. Click the Save button.
46. Notice that the Voucher ID was assigned and the following three new tabs display
after the voucher was saved: Summary, Related Documents and Error Summary.
Those tabs provide additional information related to the voucher.
47. Congratulations! In this topic, you successfully entered a Procard voucher.
End of Procedure.

CAPPS Financials EUT Course
Page 76
Entering a Single Payment Voucher Section 3, Lesson 2, Exercise - Scenario 4 Entering Single Payment Vouchers
Procedure
In this topic, you will enter a single payment voucher. The Single Payment Voucher is used to
create summary payments in USAS.
Step Action
1. Single Payment Vouchers are created for one time suppliers or one time refunds.
A Single Payment Supplier is used for the header of the voucher and the payment is
made based on the line information that is entered.
Step Action
2. Click the Main Menu button.
3. Click the Accounts Payable menu.

CAPPS Financials EUT Course
Page 77
Step Action
4. Click the Vouchers menu.
5. Click the Add/Update menu.
6. Click the Regular Entry menu.
Step Action
7. The Voucher Style needs to change from a Regular Voucher style to Single
Payment Voucher style.
Click the Voucher Style list.
8. Click the Single Payment Voucher list item.

CAPPS Financials EUT Course
Page 78
Step Action
9. Enter the name of the agency's single payment supplier. The supplier will be a
summary payment number.
In this example, the supplier is set up as Refund.
Enter the desired information into the Supplier Name field. Enter "Refund".
10. Click the REFUND-001 object.
11. The Supplier ID and Supplier Location populate from the Supplier Name.
12. Enter the Invoice Number from the payment paperwork.
For this example, enter "123456789".
13. Enter the date of the invoice or use calendar button to look up the date.
Click the Choose a date (Alt+5) button.
14. Click the 29 link.
15. Enter the invoice amount. In this example, enter "25.00".
16. Click the Add button.
17. The information that was entered on the Search page transfers to the Invoice
Information page.
18. Direct Deposit can not be used for Single Payment vouchers.

CAPPS Financials EUT Course
Page 79
Step Action
19. Use the Description field in the Invoice Lines section to enter a description of the
voucher. This is field is 19 characters long.
Enter the desired information into the Description field. Enter "Refund for...".
20. To move down the page,
Click the scrollbar.
21. Enter the date that the invoice is received.
Enter t for today’s date, enter the date in the format mmddyy (no slashes) or click on
the Choose a date (Alt+5) button to select a date.
in this example enter "t".
22. Enter the Service Date.
Enter the desired information into the Service Date field. Enter "t".

CAPPS Financials EUT Course
Page 80
Step Action
23. Enter the Requested Payment Date.
Enter the desired information into the Reqsted Pmt. Date field. Enter "t".
24. This description field is 50 characters long
Enter the desired information into the Invoice Description field. Enter "Refund for
...".
25. The Single Payee Vendor is where the name and address for the warrent is entered.
Click the Single Payee Vendor Info link.
Step Action
26. Enter the desired information into the Name field. Enter "John Doe".
27. Enter the desired information into the Address 1 field. Enter "123 Any St.".

CAPPS Financials EUT Course
Page 81
Step Action
28. Enter the desired information into the City field. Enter "Austin".
29. Enter the desired information into the Postal field. Enter "78728".
30. Enter the desired information into the State field. Enter "TX".
31. Click the OK button.
32. The Distribution Lines section is used to enter the account code information so the
system can process and post the voucher.
33. The Merchandise Amt. populates with the invoice amount that was entered on the
Add a New Voucher page.
The GL Unit is populated with the agency's business unit number.

CAPPS Financials EUT Course
Page 82
Step Action
34. Enter the GL account code or use the look up feature to search for the correct code.
Click the Look up Account (Alt+5) button.
35. This example enters a partial code.
Enter the desired information into the Account field. Enter "733".
36. Click the Look Up button.
37. Select the correct code from the list.
Click the 7330 link.
38. Enter the Fund associate with the account code.
Enter the desired information into the Fund field. Enter "0010".
39. Enter the desired information into the Dept field. Enter "3000".
40. Enter the desired information into the Program field. Enter "20".
41. Enter the desired information into the Appn Year field. Enter "201301".
42. To move across the page, click the scrollbar.
43. Enter the agency's chartfield numbers.
In this example enter "B1" into the Agy Chartfield 1 field.
44. To move back across the page, click the scrollbar.
45. To move up to the top of the page, click the scrollbar.
46. Click the Voucher Attributes tab.

CAPPS Financials EUT Course
Page 83
Step Action
47. The Template field is used to determine what tcode will be sent to the Uniform
Statewide Accounting System (USAS).
Click the Look up Template (Alt+5) button.
48. A list of possible templates displays. Select the appropriate template for the
situation. In this example, click the 245 SUM link.
49. A warning Message displays advising the Confidentiality Indicators will be changed
based on the new Template selection.
Click the OK button to accept the changes to the Template and the Confidentiality
Indicators.
50. Click the Save button.
51. The Voucher will not be sent to USAS until Budget Check and Journal Generate
have completed.
52. Congratulations! In this topic, you successfully entered a single payment voucher.
End of Procedure.

CAPPS Financials EUT Course
Page 84
Entering Template Vouchers
Section 3, Lesson 2, Exercise - Scenario 4 Entering Template Vouchers
Procedure
In this topic, you will create a voucher template. This template can be used as a model in the
future to expedite the voucher entry process.
Step Action
1. CAPPS lets you automate the creation of recurring vouchers. Items such as rent,
utilities, lease payments and regular shipments are often made to the same suppliers
for consistent amounts. As with all invoices, these regular invoices require vouchers
for payment.
A template voucher allows you to use an existing voucher as a model for other
vouchers that will be created in the future. Creating a template voucher reduces
keystrokes and increases data entry efficiency. A template voucher is never paid or
posted and is only available for use for the same supplier.

CAPPS Financials EUT Course
Page 85
Step Action
2. Click the Main Menu button.
3. Click the Accounts Payable menu.
4. Click the Vouchers menu.
5. Click the Add/Update menu.
6. Click the Regular Entry link.

CAPPS Financials EUT Course
Page 86
Step Action
7. The Regular Entry, Voucher search page displays.
On the Add a New Value tab, notice the following defaults:
Business Unit defaults based on your User Preferences; this can be changed if you
have the appropriate security.
Voucher ID defaults with NEXT; the system will assign the next available voucher
ID when the voucher is saved.
Voucher Style defaults with Regular Voucher; this can be changed.
8. Click the Voucher Style list to display the valid values.
9. A Template Voucher is used for generating regular vouchers that share voucher
information.
Click the Template Voucher list item.
10. Click the Look up Supplier ID (Alt+5) button next to the Supplier ID field.
11. Enter ABC Company into the Short Supplier Name field.
12. Click the Look Up button.
13. Click the ABC Company link.
14. Enter 293847 into the Invoice Number field.
15. In the Invoice Date field, enter t for today’s date, enter the date in the format
mmddyy (no punctuation), or click the Choose a Date (Alt+5) button to select a
date.
In this example, click the Choose a date (Alt+5) button.
16. Notice the month defaulted to February and the year defaulted to 2014 but both can
be changed, if needed. For this example, accept the default month and year.
Click the 7 link to select the seventh day of the month.
17. Enter 525.00 into the Gross Invoice Amount field.

CAPPS Financials EUT Course
Page 87
Step Action
18. Click the Add button.
Step Action
19. Use the Invoice Information tab to enter or view invoice information, including
invoice header information, non-merchandise charges and voucher line and
distribution information.
20. Click the right arrow on the horizontal scrollbar.
21. In the header information section, click the Template link.
22. Enter Server into the Template ID field.
23. Enter Monthly Server Lease Payment into the Description field.
24. Click the OK button.
25. Click the left arrow on the horizontal scrollbar.
26. Click the down arrow on the vertical scrollbar to view the Invoice Lines section.

CAPPS Financials EUT Course
Page 88
Step Action
27. In the Invoice Line section, enter Monthly Server Payment into the Invoice
Description field.
Note: The system will send the information in the Invoice Description field to
USAS and store it as the USAS description field.
28. For each Invoice Line that you enter into the voucher, you must also enter the
distribution information in the Distribution Lines section.
The fields in this section can be entered manually or populated by using a
SpeedChart.
SpeedCharts enable an unlimited number of ChartField combinations to increase
data entry efficiency.
29. Enter AP_CHART into the SpeedChart field.
30. Click the up arrow on the vertical scrollbar to return to the top of the page.
31. Click the Voucher Attributes tab.

CAPPS Financials EUT Course
Page 89
Step Action
32. The Template field is used to identify the accounting entry template associated with
the voucher.
The accounting entry template controls the offset accounts such as sales tax, freight
and discount accounts. It also determines the USAS T-code, DocType and USAS
generated T-code.
To change the Template, you would click the Look up Template (Alt+5) button
and select the appropriate template.
In this example, accept the defaulted Template.
33. Click the Invoice Information tab.
34. Notice the Voucher ID in the header information section is still NEXT.
Click the down arrow on the vertical scrollbar to save the voucher.
35. Click the Save button.

CAPPS Financials EUT Course
Page 90
Step Action
36. Notice that the Voucher ID was assigned and the following three new tabs display
after the voucher was saved: Summary, Related Documents and Error Summary.
Those tabs provide additional information related to the voucher:
- Summary: summarizes information from the other voucher pages such as voucher
header information, statuses and payment terms.
- Related Documents: displays related document information including payment
details, purchase order information, receiver information and voucher adjustment
details.
- Error Summary: provides Voucher Build processing errors, matching errors,
duplicate invoices and out-of-balance and combination edit errors on the voucher.
37. Congratulations! You successfully created a voucher template. This template can be
used as a model in the future to expedite the voucher entry process.
End of Procedure.
Entering Adjustment Vouchers
Section 3, Lesson 3, Exercise - Scenario 1 Entering Adjustment Vouchers
Procedure
In this topic, you will enter an adjustment voucher.
Step Action
1. An adjustment voucher is used to make corrections to an existing voucher. The
adjustment can be entered manually, or the original voucher information can be
copied into the adjustment voucher using a copy worksheet.
Voucher adjustments are vouchers that are created with positive or negative amounts
representing the adjustment, then "linked" to the voucher that required the
adjustment. The result is updated accounting entries when the adjustment voucher is
posted. So that the net effect is a $0.00 voucher.
In this exercise, an adjustment voucher will be created to fix the accounting
distribution for a previously posted voucher.

CAPPS Financials EUT Course
Page 91
Step Action
2. Adjustment vouchers are used to record corrections to previously posted vouchers.
Click the Main Menu button.
3. Click the Accounts Payable menu.
4. Click the Vouchers menu.
5. Click the Add/Update menu.
6. Click the Regular Entry link.

CAPPS Financials EUT Course
Page 92
Step Action
7. Notice that Business Unit defaults based on your User Preferences.
Also, notice NEXT defaults into the Voucher ID field. When you save the Voucher,
the system will assign the next available Voucher ID.
8. Click the Voucher Style list to display the valid values.
9. In this example, enter an adjustment to a voucher.
Click the Adjustments list item.
10. Enter ACME into the Short Supplier Name field.
11. Enter Adjustment into the Invoice Number field.

CAPPS Financials EUT Course
Page 93
Step Action
12. Notice the Supplier Name, Supplier ID and Supplier Location were auto-
populated after you entered the Short Supplier Name.
13. Enter the invoice date into the Invoice Date field.
For this exercise, enter t into the Invoice Date field.
14. Click the Add button.

CAPPS Financials EUT Course
Page 94
Step Action
15. This Invoice Information tab enables you to enter or view invoice information,
including invoice header information, non-merchandise charges and voucher line
and distribution information.
16. Click the Copy From Source Document expansion section option to view more
fields.
17. The Copy From Source Document section used to copy source documents to save
data entry time.
Click the Copy From Worksheet link.
18. This section will display only the types of source documents you are allowed to
copy for that voucher style. For adjustments, only vouchers can be copied.
The Voucher Worksheet provides various search capabilities:
- Search by Supplier ID
- Search by Voucher ID
- Search for lines within a voucher
- Search for vouchers within a date range
Enter 00008802 into the Voucher ID field.

CAPPS Financials EUT Course
Page 95
Step Action
19. Click the Search button.
Step Action
20. The vouchers and/or voucher lines that meet the search criteria are listed.
21. Select the lines to be copied. If the search had resulted in multiple lines, select only
the ones to be copied.
In this example, the search resulted in only one line.
Click the Select.

CAPPS Financials EUT Course
Page 96
Step Action
22. You can update the prior quantity and amount matched against the purchase order
by selecting the Reverse Qty/Amt field.
Note: If you needed the Budget Processor to restore or liquidate the encumbrance
budget, select the Adjust Matched Values option.
In this example, reverse the original voucher line because it was posted to the wrong
Chartfield. You do not need to change the encumbrance budget.
Click the Reverse Qty/Amt.
23. Click the Copy Selected Lines button to copy the selected lines to the voucher.
24. Click the down arrow on the vertical scrollbar to view the voucher information that
was copied.
Step Action
25. Notice that the Invoice Lines and Distribution Lines from the original voucher
have been copied.
26. The Related Voucher field displays the original Voucher ID.
27. In the Invoice Lines section, enter t into the Inv Receipt Dt field.

CAPPS Financials EUT Course
Page 97
Step Action
28. Enter t into the Service Date field.
29. You need to add another line. Click the right arrow on the horizontal scrollbar to
add another invoice line.
30. To correct the Distribution Lines, you must add another Invoice Line with the
correct entry.
Click the Add multiple new rows at row 1 (Alt+7) button.
Step Action
31. A Prompt popup window appears to specify how many rows you want to add. The
default is 1 but can be changed, if needed.
In this example, you only need to add 1 row so you will accept the default.
Click the OK button.

CAPPS Financials EUT Course
Page 98
Step Action
32. Click the left arrow on the horizontal scrollbar.
33. Click the down arrow on the vertical scrollbar to display all of the newly inserted
Invoice Line.
34. In the Invoice Lines section under Line 2, enter 50.97 into the Line Amount field.
35. In the Description field, enter Adjustment to voucher.
36. Enter t into the Inv Receipt Dt field to auto-populate the current date.
37. Enter t into the Service Date field to auto-populate the current date.
38. Notice 50.97 defaulted into the Merchandise Amt for Line 2.
39. Enter 721001 into the Account field.
40. Enter 6011 (the correct fund number) into the Fund field.
41. Enter 00009 (the correct PCA) into the Appn/PCA field.
42. Enter 201301 into the Appn Year field.
43. Enter 3320 into the Dept field.
44. Click the right arrow on the horizontal scrollbar to display more fields.
45. Enter unallo into the Product field.
46. Click the left arrow on the horizontal scrollbar. to return to the beginning of the
Distribution Line.
47. Click the up arrow on the vertical scrollbar.

CAPPS Financials EUT Course
Page 99
Step Action
48. Click the right arrow on the horizontal scrollbar to display the Invoice Total section
on the Invoice Information tab.
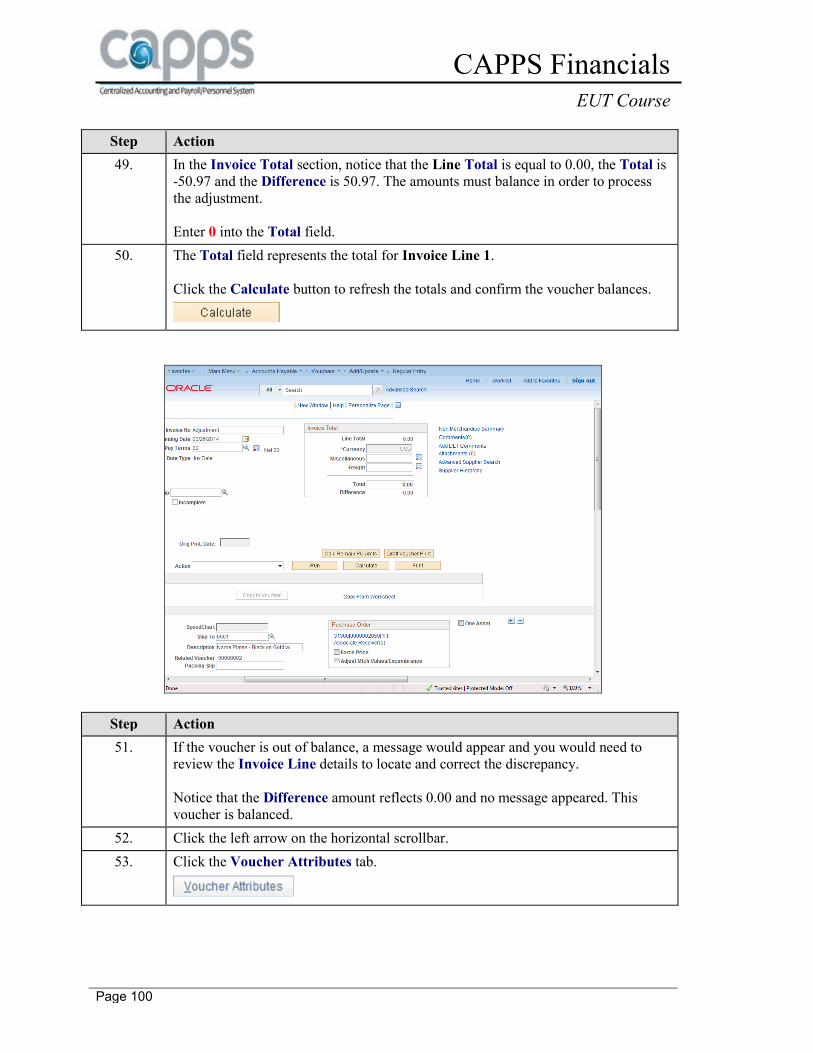
CAPPS Financials EUT Course
Page 100
Step Action
49. In the Invoice Total section, notice that the Line Total is equal to 0.00, the Total is
-50.97 and the Difference is 50.97. The amounts must balance in order to process
the adjustment.
Enter 0 into the Total field.
50. The Total field represents the total for Invoice Line 1.
Click the Calculate button to refresh the totals and confirm the voucher balances.
Step Action
51. If the voucher is out of balance, a message would appear and you would need to
review the Invoice Line details to locate and correct the discrepancy.
Notice that the Difference amount reflects 0.00 and no message appeared. This
voucher is balanced.
52. Click the left arrow on the horizontal scrollbar.
53. Click the Voucher Attributes tab.

CAPPS Financials EUT Course
Page 101
Step Action
54. Use the Voucher Attributes page to view the processing options, the Accounting
Instructions, the match status in the Match Action section, and the voucher
approval setting in the Workflow Approval section.
55. Confirm the Post Voucher checkbox is selected.
56. The Template field identifies the accounting entry template that is associated with
this voucher.
The accounting entry template controls the offset accounts such as sales tax, freight
and discount accounts. It also determines the USAS T-code.
In this example, the correction does not need to be sent to USAS so, change the
Template.
Click the Look up Template (Alt+5) button.
57. The AP_ACT_ADJ template creates an internal correction to CAPPS. When this
template is used, the correction will not be sent to USAS through the interface.
In the Accounting Template column, click the AP_ACT_ADJ link.
58. The Voucher Attributes tab displays with the new Template.
Click the down arrow on the vertical scrollbar to display the Save button.
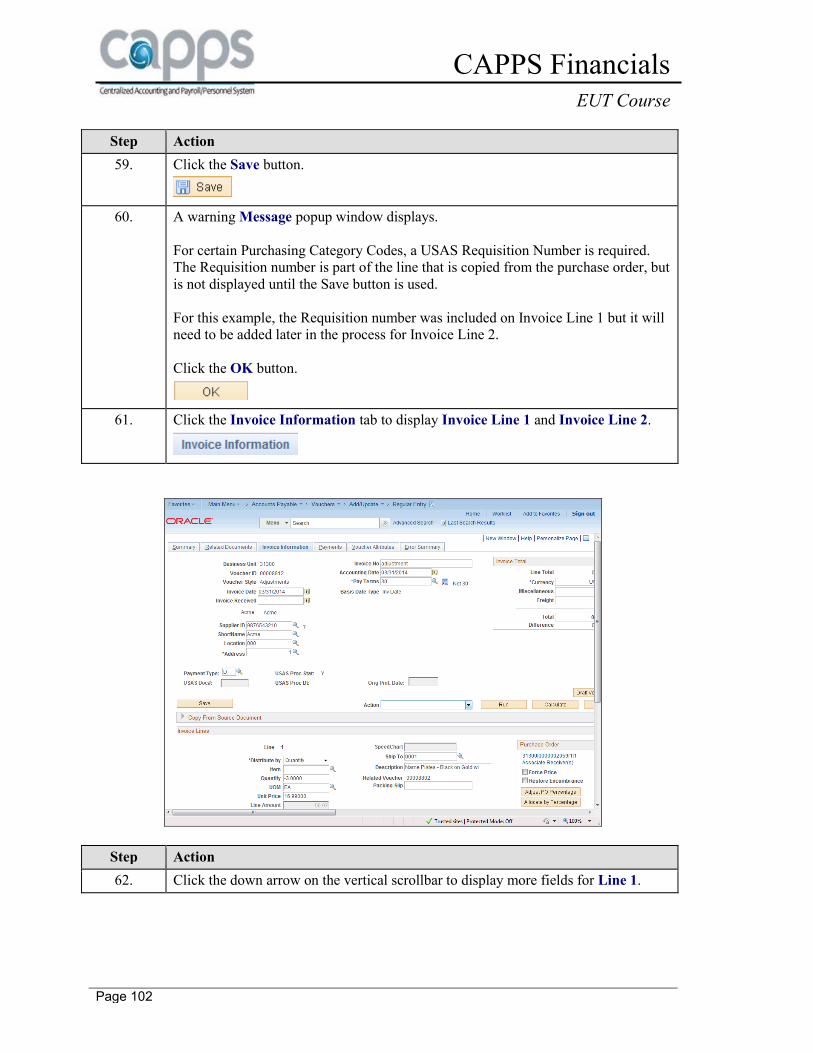
CAPPS Financials EUT Course
Page 102
Step Action
59. Click the Save button.
60. A warning Message popup window displays.
For certain Purchasing Category Codes, a USAS Requisition Number is required.
The Requisition number is part of the line that is copied from the purchase order, but
is not displayed until the Save button is used.
For this example, the Requisition number was included on Invoice Line 1 but it will
need to be added later in the process for Invoice Line 2.
Click the OK button.
61. Click the Invoice Information tab to display Invoice Line 1 and Invoice Line 2.
Step Action
62. Click the down arrow on the vertical scrollbar to display more fields for Line 1.

CAPPS Financials EUT Course
Page 103
Step Action
63. Notice the USAS Requisition number is displayed and protected for Line 1.
The USAS Requisition number for Line 2 needs to be added.
64. Click the right arrow on the horizontal scrollbar to view Line 2.

CAPPS Financials EUT Course
Page 104
Step Action
65. Notice you are currently viewing the first of two Invoice Lines.
Click the Show next row (Alt+.) button.
66. Notice you are now viewing the second of two Invoice Lines.
Click the left arrow on the horizontal scrollbar.
67. In the Invoice Lines section for Line 2, enter 0000001865 into the USAS
Requisition field.
68. Click the Save button.
69. Notice the Voucher ID number has been assigned.
70. Congratulations! You successfully entered a voucher adjustment.
End of Procedure.
Entering Reversal Vouchers
Section 3, Lesson 3, Exercise - Scenario 2 Entering Reversal Vouchers
Procedure
In this topic, you will record a reversal voucher.
Step Action
1. Reversal vouchers enable you to:
• back out incorrect vouchers and start over
• restore the encumbrance for actuals and budgets
• reduce the purchase order’s matched quantity or amount to re-open the purchase
order
CAPPS uses Commitment Control, so a reversal voucher must be used to re-instate
encumbrances. Closing a voucher does not re-instate the encumbrance, but using a
reversal voucher does.
During the matching process, if you restore the encumbrance and reduce the
purchase order’s matched quantity or amount, the purchase order and receiver status
will be partial.

CAPPS Financials EUT Course
Page 105
Step Action
2. Consider this situation: a voucher has been paid in USAS but the supplier was
incorrect. A cancellation voucher has been created in USAS. To reverse the payment
in CAPPS, you need to create a reversal voucher.
A reversal voucher can be entered for the unpaid portion of a partially paid voucher.
However, the system issues a warning message if you attempt to reverse more than
the unpaid balance.
Step Action
3. Click the Main Menu button.
4. Click the Accounts Payable menu.
5. Click the Vouchers menu.
6. Click the Add/Update menu.
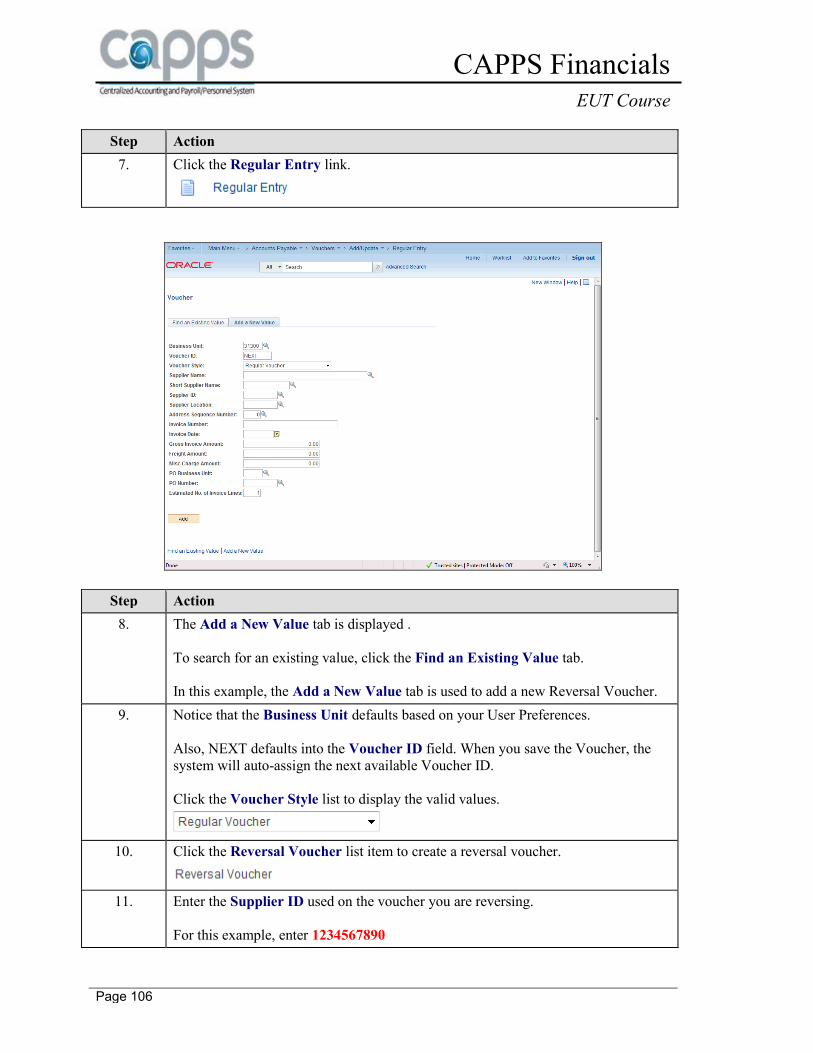
CAPPS Financials EUT Course
Page 106
Step Action
7. Click the Regular Entry link.
Step Action
8. The Add a New Value tab is displayed .
To search for an existing value, click the Find an Existing Value tab.
In this example, the Add a New Value tab is used to add a new Reversal Voucher.
9. Notice that the Business Unit defaults based on your User Preferences.
Also, NEXT defaults into the Voucher ID field. When you save the Voucher, the
system will auto-assign the next available Voucher ID.
Click the Voucher Style list to display the valid values.
10. Click the Reversal Voucher list item to create a reversal voucher.
11. Enter the Supplier ID used on the voucher you are reversing.
For this example, enter 1234567890

CAPPS Financials EUT Course
Page 107
Step Action
12. In the Invoice Number field, enter the invoice number of the voucher you are
reversing.
Note: As an option, you can distinguish this reversal voucher from the original
voucher by adding an "R" at the end of the Invoice number.
For this example, enter 1234R
13. When entering a date, enter t for today’s date, enter the date in the format mmddyy
(no slashes), or click on the Choose a date (Alt+5) button to select a date.
For this example, enter t into the Invoice Date field.
14. Click the Add button.
Step Action
15. The Invoice Information tab on the Regular Entry page enables you to enter or
view invoice information, including invoice header information, non-merchandise
charges, voucher line and distribution line information.
16. Click the Copy From Source Document Expand Section button to view additional
voucher information.

CAPPS Financials EUT Course
Page 108
Step Action
17. The Copy From a Source Document section allows you to copy an entire voucher,
a document (such as a purchase order), or parts of each into the reversal voucher.
Note: The available information changes depending on the voucher style you
selected. Only the types of source documents that you are allowed to copy for that
voucher style will be displayed.
Click the Look up Voucher ID (Alt+5) button to locate the voucher you want to
reverse.
18. In this example, reverse voucher 00008646.
Click the 00008646 link.
19. Select the Reverse Voucher checkbox.
20. Click the Copy to Voucher button to copy the details of voucher ID 00008646.
21. The Invoice Lines section for voucher 00008646 is displayed. Click the down
arrow on the vertical scrollbar to view more information.
22. The Adjust Mtch Values/Encumbrance checkbox restores the encumbrance and
will adjust the purchase order matched quantity or amount.
The option is available only if you are creating a reversal voucher, and if the related
purchase order has not been reconciled.
23. Use the Inv Receipt Dt field to indicate when you received the invoice from the
vendor.
Enter t into the Inv Receipt Dt field.
24. Enter t into the Service Date field.
25. Click the down arrow on the vertical scrollbar.
26. Click the Save button to save.
Note: This just saves the voucher; it does not affect the budget or encumbrances
and does not reverse the budget.
27. Click the up arrow on the vertical scrollbar to return to the top of the page.
28. Click the Voucher Attributes tab to continue.

CAPPS Financials EUT Course
Page 109
Step Action
29. Use the Voucher Attributes page to view and, if applicable, update the match
status, the voucher approval setting, voucher processing options and accounting
instructions.
30. The Template field identifies the Accounting Entry Template that is associated with
the voucher. The Accounting Entry Template controls the offset accounts as well as
the USAS Transaction Code.
Notice the Template STD 225 S auto-assigns the USAS Transaction Code of 225.
31. Click the Look up Template (Alt+5) button to view the valid options.
32. The CANCEL template is the Accounting Entry Template used in CAPPS when a
voucher was canceled in USAS (USAS doc type "c").
Click the CANCEL link.
33. A Message popup window displays advising the Confidentiality Indicators will
change.
For this example, change the Confidentiality Indicators.
Click the OK button.

CAPPS Financials EUT Course
Page 110
Step Action
34. Notice the Template CANCEL auto-assigns the USAS Transaction Code of MAN.
35. Click the Save button.
36. Note: The T-code "MAN" is used to tell CAPPS not to send the transactions
associated with the voucher to USAS.
Click the OK button.
37. Click the Invoice Information tab to continue.
38. The Action list allows you to process the voucher on demand.
Click the Action list to display the valid values.
39. The Match, Doc Tol, Bdgt option performs matching, document tolerance and
budget-checking on the voucher. Once the process completes, the voucher will be
available for posting.
Click the Match, Doc Tol, Bdgt list item.
40. Click the Run button to initiate the process.
41. Click the No button.
42. Click the OK button.
43. Congratulations! You successfully recorded a reversal voucher.
End of Procedure.
Entering PO Vouchers with Assets
Section 3, Lesson 1, Exercise - Scenario 2 Entering PO Vouchers with Assets
Procedure
In this topic, a voucher with a receiver worksheet and asset information is entered into CAPPS.

CAPPS Financials EUT Course
Page 111
Step Action
1. CAPPS enables you to copy source documents (including PO information with
assets) into a voucher to expedite voucher creation and increase accuracy. The PO
worksheet allows you to select the PO lines to copy to your voucher.
Step Action
2. Click the Main Menu button to navigate to the Invoice Information page.
3. Click the Accounts Payable menu.
4. Click the Vouchers menu.
5. Click the Add/Update menu.

CAPPS Financials EUT Course
Page 112
Step Action
6. Click the Regular Entry link.
7. When looking for an existing voucher, click the Find an Existing Value tab.
In this example, a new PO with assets is being added, so the Add a New Value tab
is used.
Notice that in this example, the new voucher will be created in Business Unit 31300.
NEXT defaults into the Voucher ID field. When the Voucher is saved, the system
will assign the next available Voucher ID.
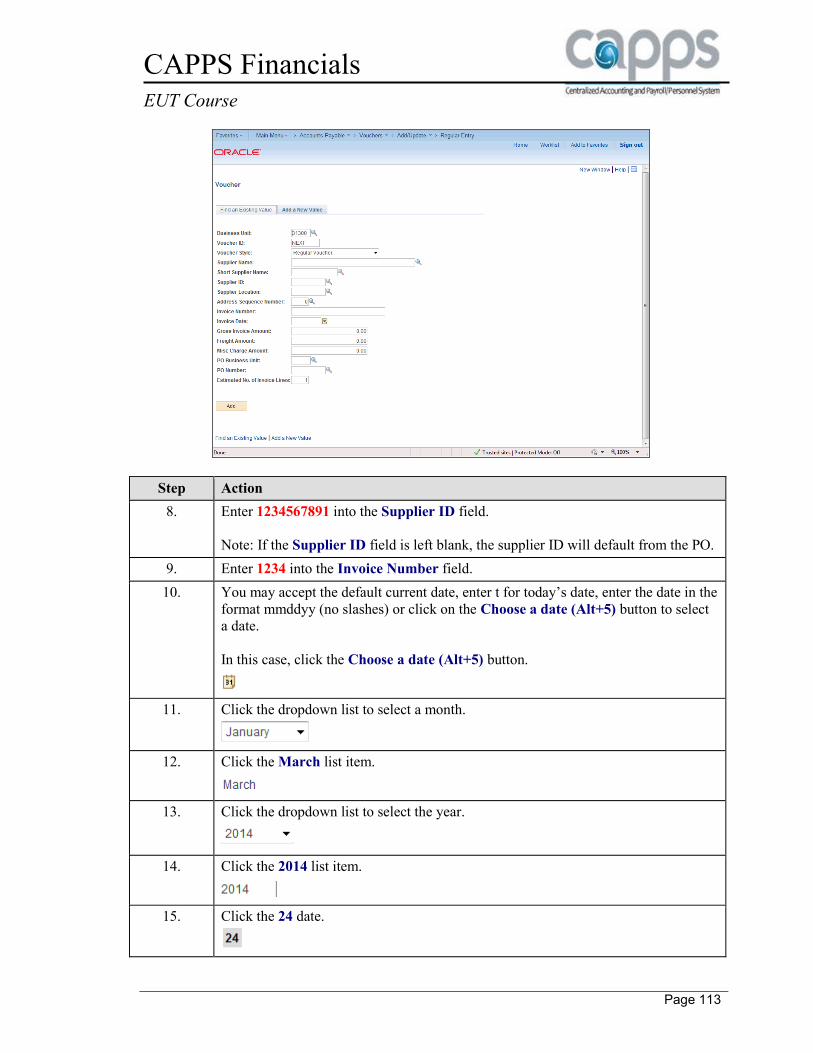
CAPPS Financials EUT Course
Page 113
Step Action
8. Enter 1234567891 into the Supplier ID field.
Note: If the Supplier ID field is left blank, the supplier ID will default from the PO.
9. Enter 1234 into the Invoice Number field.
10. You may accept the default current date, enter t for today’s date, enter the date in the
format mmddyy (no slashes) or click on the Choose a date (Alt+5) button to select
a date.
In this case, click the Choose a date (Alt+5) button.
11. Click the dropdown list to select a month.
12. Click the March list item.
13. Click the dropdown list to select the year.
14. Click the 2014 list item.
15. Click the 24 date.

CAPPS Financials EUT Course
Page 114
Step Action
16. Click the Add button to continue to the Invoice Information tab.
Step Action
17. Use the Invoice Information tab to enter invoice information including invoice
header, non-merchandise charges and voucher line and distribution information.
18. Note that the Voucher ID is still NEXT as the new voucher has not yet been saved.
19. The Copy from Source Document section is used to copy existing information into
the voucher from the following source documents:
- Non PO Receipt (non purchase order receipt)
- PO Receipt (purchase order receipt)
- Purchase Order Only
- Template
It will allow you to copy the entire source document or portions of it.
If you are creating an adjustment voucher, you can also copy the original voucher.
Click on the Copy from Source Document link.

CAPPS Financials EUT Course
Page 115
Step Action
20. To copy a receipt from a purchase order, click the Copy From dropdown list.
21. The PO Receipt option copies the PO's receipt details.
Use this option when a receipt is required.
Click the PO Receipt list item.
22. Click the right arrow on the horizontal scrollbar to view the Go link.
23. Click the Go link.
Step Action
24. The Copy Worksheet page is used to enter criteria needed to locate the receipt
transaction.
Once the receipt is located, you can select and copy individual lines to the voucher.
25. For this exercise, you will search using the PO Business Unit field and PO number
field.
Enter 31300 into the PO Business Unit field.

CAPPS Financials EUT Course
Page 116
Step Action
26. Enter 0000002113 into the PO Number field.
27. Click the Search button to search for receipts recorded for the PO specified.
28. Click the down arrow on the vertical scrollbar to review the receiver details.
Step Action
29. In the Select Receiver Lines section, view general information about the purchase
such as the supplier, PO number, PO date and receipt date.
30. Use the Select Receiver Lines section to review the line(s) and verify they are the
ones related to the voucher being entered.
31. Click the Select option on the line to be copied into the new PO voucher.
32. Click the Copy Selected Lines button to copy the selected line to the new PO
voucher.
33. After copying the receiver's details, review the voucher lines and update data such as
the Invoice Receipt Date field.
Click the down arrow on the vertical scrollbar to view the voucher line details.

CAPPS Financials EUT Course
Page 117
Step Action
34. Use the Inv Receipt Dt field to indicate when the invoice was received from the
supplier.
Click the Choose a date (Alt+5) button next to the Inv Receipt Dt field.
35. Click the dropdown list to select the month.
36. Click the January list item.
37. Click the dropdown list to select the year.
38. Click the 2014 list item.
39. Click the 28 date.
40. Notice that the Service Date is populated with the receipt date when a receipt is
copied.
41. Notice that the Order Date is populated with the purchase order date when a receipt
is copied.

CAPPS Financials EUT Course
Page 118
Step Action
42. Click the right arrow on the horizontal scrollbar to view the USAS Pmt Due Date.
43. The USAS Pmt Due Date will be 30 calendar days after the later of either the
invoice receipt date or the service date.
Note: This does not change even if the Reqsted Pmt. Date field is populated.
Step Action
44. Click the left arrow on the horizontal scrollbar to view the Invoice Description.
45. The Invoice Description is used as the USAS description field.
Enter Smart Car into the Invoice Description field.
46. Note that the details from the receiver have been copied into the Distribution Line.
47. When creating a PO voucher to purchase an asset, the asset information must be
verified.
Click the Assets tab in the Distribution Lines section.

CAPPS Financials EUT Course
Page 119
Step Action
48. The Asset checkbox must be marked to identify the item purchased as an asset.
The Asset Business Unit, Profile ID and Asset ID will also ensure that the Asset
checkbox is checked identifying the item purchased as an asset.
49. Click the up arrow on the vertical scrollbar to return to the top of the page.
50. Click the Voucher Attributes tab.
51. In the Template field, verify that the defaulted accounting entry is correct. The
accounting template provides the tcode that is used when creating a payment in the
USAS.
To change the template, click the Look up Template (Alt+5) button and select the
appropriate template.
52. Click the Save button.
53. Notice that a Voucher ID number was assigned after saving the new PO voucher.
54. Note that there are three new tabs: the Summary tab, the Related Documents tab,
and the Error Summary tab. These tabs display additional information related to
the PO voucher.
55. Click the Summary tab.
56. The Summary tab provides general information about the voucher, such as the
posting status, the budget checking status, payment status, invoice amount, voucher
source, etc.
57. Congratulations! You successfully entered a PO voucher to purchase an asset.
End of Procedure.
Section 4 Processing Vouchers
Processing a Single Voucher
Section 4, Lesson 1, Exercise - Scenario 1 Processing a Single Voucher
.
Procedure

CAPPS Financials EUT Course
Page 120
In this topic, you will run the Budget Check, Matching, Document Tolerance and Post processes
on a single voucher.
Step Action
1. Click the Main Menu button to navigate to the Regular Entry page.
2. Click the Accounts Payable menu.
3. Click the Vouchers menu.
4. Click the Add/Update menu.
5. Click the Regular Entry link.
6. The Voucher search page displays.
In this exercise, you will work with an existing Voucher ID.
Click the Find an Existing Value tab.

CAPPS Financials EUT Course
Page 121
Step Action
7. The Business Unit defaults based on your User Preferences.
Enter 00008815 into the Voucher ID field.
8. Click the Search button.
9. The Regular Entry page displays.
Click the Invoice Information tab to view more information about the voucher.
10. In the header information section, click the Action list to view the valid values.
11. The Action list displays all of the voucher processes that you are authorized to run.
The Matching process is used to compare vouchers with purchase orders and
receiving documents to ensure that you are paying for goods and services that were
ordered and received.
Click the Matching list item.
12. Click the Run button to run the matching process.
13. You can wait while a process runs or have it run in the background.
In this case, click the Yes button to wait for the process to finish.
14. The Refresh icon in the header information section is used to refresh the page in
order to determine if the process has finished.
Click the Refresh button.
15. The process has completed when the Action field is displayed again in the header
information section.
Click the Action list.

CAPPS Financials EUT Course
Page 122
Step Action
16. Notice that Matching is no longer an available process option.
Click the Document Tolerance list item.

CAPPS Financials EUT Course
Page 123
Step Action
17. Click the Run button to run the Document Tolerance process.
18. The Document Tolerance process is only used on procurement vouchers. Document
tolerances are allowable percentages or amounts by which related procurement
documents can differ.
You can set dollar tolerances between pre-encumbrances and encumbrances or
between encumbrances and expenses.
If the allowable percentage or amount is exceeded, the system creates a document
tolerance exception.
You cannot post a voucher if its document tolerance status is not valid.
Click the Yes button to wait for the process to finish.
19. Click the Refresh icon in the header information section to determine if the process
has finished.
20. The process has completed when the Action field is displayed again in the header
information section.
Click the Action list.
21. Notice that Matching and Document Tolerance are no longer available process
options.
Click the Budget Checking list item.
22. Click the Run button to run the Budget Checking process.
23. The Budget Checking process checks to see if the voucher to be posted is over
budget.
When processing vouchers in CAPPS Accounts Payables, budget checking occurs at
voucher creation, deletion, closing and posting.
Click the Yes button to wait for the process to finish.

CAPPS Financials EUT Course
Page 124
Step Action
24. Click the Refresh icon in the header information section to determine if the process
has finished.
25. The process has completed when the Action field is displayed again in the header
information section.
Click the Action list.
26. Notice that Matching, Document Tolerance and Budget Checking are no longer
available process options.
Click the Voucher Post list item.
27. Click the Run button to run the Voucher Post process.
28. The Voucher Post process creates balanced accounting entries and posts them to the
Accounts Payable subledger. Once the vouchers are posted, the information is
available for distribution to the General Ledger.
Click the Yes button to wait for the process to finish.
29. Click the Summary tab.
30. Notice the Entry Status, Match Status, Post Status, Doc Tol Status, and Budget
Status.
The voucher is completed and ready to be posted to the General Ledger. The
voucher will also be picked up by the USAS interface after it has been journal
generated to GL.
31. Congratulations! You successfully ran the Budget Check, Matching, Document
Tolerance and Post processes on a voucher.
End of Procedure.
Running the Matching Process
Section 4, Lesson 1, Exercise - Scenario 2 Running the Matching Process
Procedure

CAPPS Financials EUT Course
Page 125
This topic reviews the steps for running the Matching Process. This process runs all vouchers that
need to be matched at one time.
Your agency may choose to run these processes automatically at predetermined times. Or the
agency may choose to run this process manually. This topic contains the steps to run the process
manually.
Step Action
1. Click the Main Menu button to navigate to the Match Request page.
2. Click the Accounts Payable menu.
3. Click the Batch Processes menu.
4. Click the Vouchers menu.
5. Click the Matching link.

CAPPS Financials EUT Course
Page 126
Step Action
6. A Run Control ID is an identifier that, when paired with your User ID, uniquely
identifies the process you are running.
The Run Control ID defines parameters that are used when a process is run. This
ensures that when a process runs in the background, the system does not prompt you
for additional values.
7. Creating a Run Control ID name that is relevant to the process may help you
remember it for future use.
Click the Add a New Value tab.
8. In this example a number was used for an ID.
Enter 01 into the Run Control ID field.
9. Click the Add button.
10. Use the Match Request page to enter the request parameters. These parameters will
be used to define the processing rules and data to be included when the process is
run.
11. Enter Matching into the Description field.
12. Click the Process Frequency list to specify how often the system processes a
request.
13. Use the Process Frequency field to specify the frequency of job execution.
• Always Process – Executes the request every time that the process runs.
• Don’t Run – Ignores the request when the process runs. To run the process, you
would change the option to Process Once or Always Process.
• Process Once – Executes the request the next time the process runs.
Click the Always Process list item.
14. Click the Look up Business Unit (Alt+5) button to find the business unit whose
vouchers will be matched.
15. Click the Dept of Information Resources link.

CAPPS Financials EUT Course
Page 127
Step Action
16. Click the Run button to schedule the matching process.
17. In CAPPS, you do not need to enter a Server Name. It will be assigned according to
the process you are running.
18. Click the OK button to initiate processing immediately.
19. Jot down the Process Instance number, in this case 16966. This number helps you
identify the process to check the status.
20. Click the Process Monitor link to monitor the status of the process.
21. Use the Process List page to view the status of submitted process requests.
Instance 16966 appears on the first line of the Process List section.
22. Click the Refresh button until the status is Success and Posted.
23. The matching process completed successfully.
24. Congratulations! You successfully ran the matching process.
End of Procedure.
Running the Document Tolerance Process
Section 4, Lesson 1, Exercise - Scenario 3 Running the Document Tolerance Process
Procedure
In this topic, you will run the Document Tolerance process. The process runs all vouchers that
need to be run through the Document Tolerance process at one time.
Your agency may choose to run these processes automatically at predetermined times. Or the
agency may choose to run this process manually. This topic contains the steps to run the process
manually.
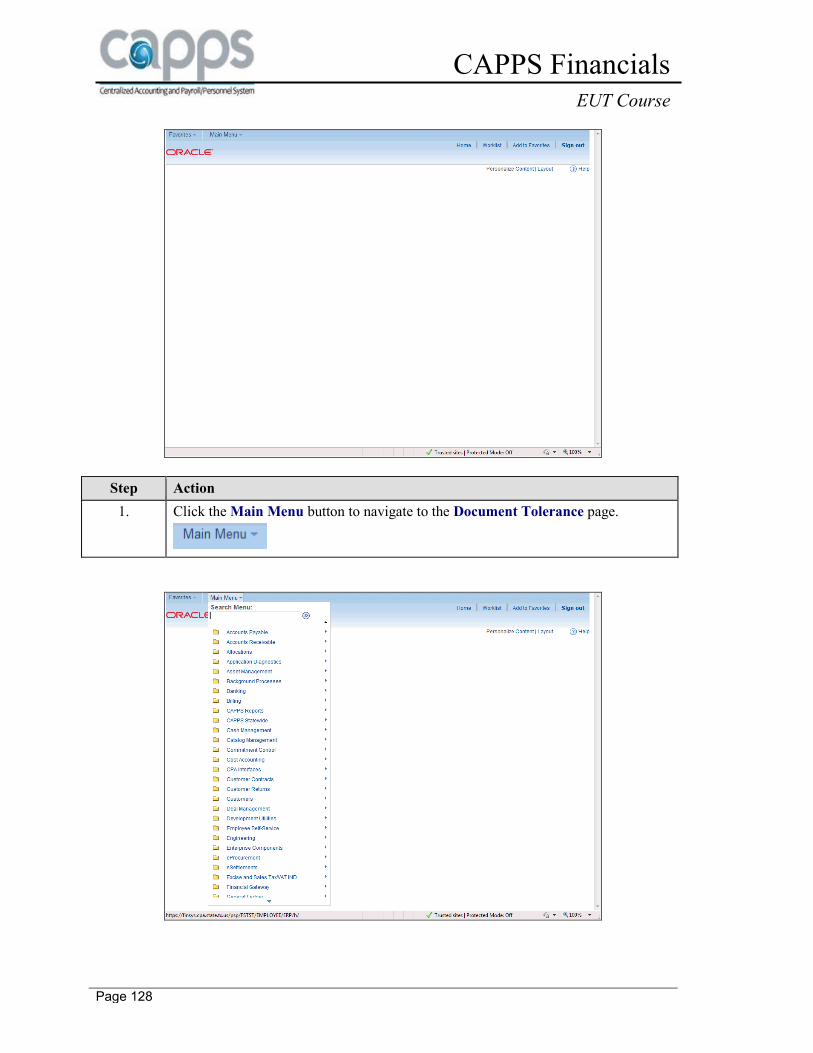
CAPPS Financials EUT Course
Page 128
Step Action
1. Click the Main Menu button to navigate to the Document Tolerance page.

CAPPS Financials EUT Course
Page 129
Step Action
2. Click the Accounts Payable menu.
3. Click the Batch Processes menu.
4. Click the Vouchers menu.
5. Click the Document Tolerance link.
6. A Run Control ID is an identifier that, when paired with your User ID, uniquely
identifies the process you are running.
The Run Control ID defines parameters that are used when a process is run. This
ensures that when a process runs in the background, the system does not prompt you
for additional values.
7. You may run the Document Tolerance Requests process by searching for an
existing Run Control ID on the Find an Existing Value tab.
In this case, you need to create a new Run Control ID.
Click the Add a New Value tab.
8. The Run Control ID should be a meaningful name to help you remember it for
future use.
Enter Document_Tol into the Run Control ID field.
9. Click the Add button.
10. Enter Document Tolerance into the Description field.
11. Click the Process Frequency list to specify the number of times the process will
run.

CAPPS Financials EUT Course
Page 130
Step Action
12. Use the Process Frequency field to specify the frequency of job execution.
• Always Process– Executes the request every time the process runs.
• Don’t Run – Ignores the request when the process runs. To run the process, you
would change the option to Process Once or Always Process.
• Process Once – Executes the request the next time the process runs.
Click the Always Process list item.

CAPPS Financials EUT Course
Page 131
Step Action
13. Click the Look up Business Unit (Alt+5) button.
14. Click the 31300 link.
15. Click the Save button.
16. Click the Run button to schedule the Document Tolerance process.
17. Click the OK button to initiate processing.
18. Notice the Process Instance number appears, in this case 16853.
This number helps you identify the process to check its status.
19. Click the Process Monitor link to check the status.

CAPPS Financials EUT Course
Page 132
Step Action
20. Instance 16853 appears on the first line.
The current Run Status is Processing.
Click the Refresh button until the Run Status is Success and the Distribution
Status is Posted.
21. The Document Tolerance process completed successfully.
22. Congratulations! You successfully ran the Document Tolerance process.
End of Procedure.
Running the Budget Check Request Process
Section 4, Lesson 1, Exercise - Scenario 4 Running the Budget Checking Request Process
Procedure
In this topic, you will run the Budget Check process. The process runs all vouchers that need to
be run through the Budget Check process at one time.
Your agency may choose to run these processes automatically at predetermined times. Or the
agency may choose to run this process manually. This topic contains the steps to run the process
manually.

CAPPS Financials EUT Course
Page 133
Step Action
1. Click the Main Menu button to navigate to the Budget Check page.
2. Click the Accounts Payable menu.
3. Click the Batch Processes menu.
4. Click the Vouchers menu.
5. Click the Budget Check link.
6. A Run Control ID is an identifier that, when paired with your User ID, uniquely
identifies the process you are running.
The Run Control ID defines parameters that are used when a process is run. This
ensures that when a process runs in the background, the system does not prompt you
for additional values.

CAPPS Financials EUT Course
Page 134
Step Action
7. In this example, you need to create a new Run Control ID.
Click the Add a New Value tab.
Step Action
8. Enter 03 into the Run Control ID field.
9. Click the Add button.
10. Use the Budget Check page to enter the request parameters. These parameters will
be used to define the processing rules and data to be included when the process is
run.
11. Click the Process Frequency list.

CAPPS Financials EUT Course
Page 135
Step Action
12. Use the Process Frequency field to specify the frequency of job execution.
• Always Process – Executes the request every time the process runs.
• Don’t Run – Ignores the request when the process runs. To run the process, you
would change this option to Process Once or Always Process.
• Process Once – Executes the request only the next time the process runs.
In this example, you want to execute the request every time the process runs.
Click the Always Process list item.
13. Enter a description for the process in the Description field.
Enter Budget Check into the Description field.
14. Use the Transaction Type field to select the type of source transaction on which
you want to run the Budget Check process.
Click the Look up Transaction Type (Alt+5) button to view the valid values.
15. In the Search Results grid, click the AP_VOUCHER link.
16. Use the Field Name list to specify the criteria for selecting vouchers on which to
run the Budget Check process.
The list of available fields depends on the transaction type selected and whether you
process all Business Units.
Click the Field Name list.
17. Click the Business Unit list item.
18. Use the Value Type list to specify whether the Budget Check process reviews a
range of values or a single value.
If you choose Value, then you can enter a single value.
If you choose Range, then two fields will appear to the right of the Value Type
field where you can enter a beginning and ending value range.

CAPPS Financials EUT Course
Page 136
Step Action
19. Depending on your selection in the Value Type list, use the From/To field to either
specify the first value of a range or a single value.
Click the Look up From/To (Alt+5) button.
20. Click the Dept of Information Resources link.
21. Click the Run button to navigate to the Process Scheduler Request page.
22. Click the OK button to initiate processing immediately.
23. Jot down the Process Instance number. This number helps you identify the process
to check its status.
24. To verify the process has been initiated and to check its status, click the Process
Monitor link.
25. Use the Process List section to view the status of submitted process requests.
Notice the Instance number for the process you submitted is in the Instance column.
26. Notice the Run Status is Processing and the Distribution Status is N/A.
27. Click the Refresh button until the Run Status is Success and the Distribution
Status is Posted.
28. Notice the Run Status is now Success and the Distribution Status is Posted.
29. Congratulations! In this topic, you successfully ran the Budget Check process.
End of Procedure.
Posting Vouchers
Section 4, Lesson 1, Exercise - Scenario 5 Posting Vouchers
Procedure
In this topic, you will run the voucher posting process.

CAPPS Financials EUT Course
Page 137
Step Action
1. Click the Main Menu button to navigate to the Voucher Posting Request page.
2. Click the Accounts Payable menu.
3. Click the Batch Processes menu.
4. Click the Vouchers menu.
5. Click the Voucher Posting link.
6. In this example, you need to create a new Run Control ID.
Click the Add a New Value tab.
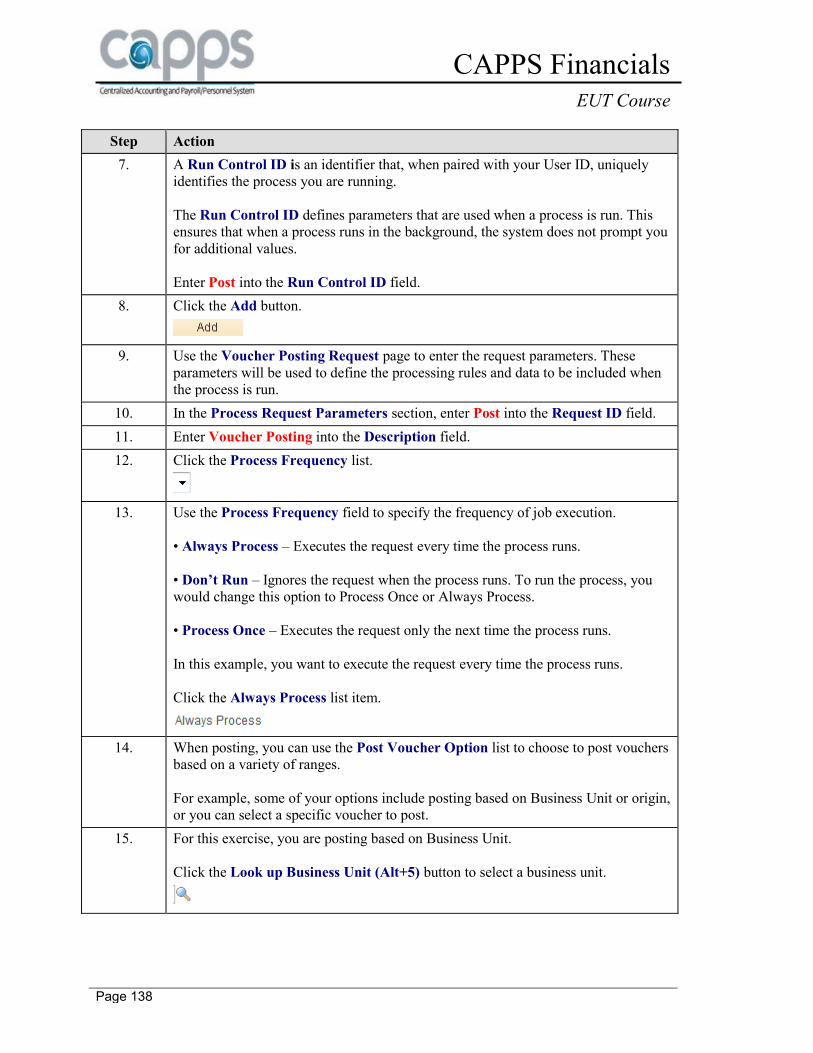
CAPPS Financials EUT Course
Page 138
Step Action
7. A Run Control ID is an identifier that, when paired with your User ID, uniquely
identifies the process you are running.
The Run Control ID defines parameters that are used when a process is run. This
ensures that when a process runs in the background, the system does not prompt you
for additional values.
Enter Post into the Run Control ID field.
8. Click the Add button.
9. Use the Voucher Posting Request page to enter the request parameters. These
parameters will be used to define the processing rules and data to be included when
the process is run.
10. In the Process Request Parameters section, enter Post into the Request ID field.
11. Enter Voucher Posting into the Description field.
12. Click the Process Frequency list.
13. Use the Process Frequency field to specify the frequency of job execution.
• Always Process – Executes the request every time the process runs.
• Don’t Run – Ignores the request when the process runs. To run the process, you
would change this option to Process Once or Always Process.
• Process Once – Executes the request only the next time the process runs.
In this example, you want to execute the request every time the process runs.
Click the Always Process list item.
14. When posting, you can use the Post Voucher Option list to choose to post vouchers
based on a variety of ranges.
For example, some of your options include posting based on Business Unit or origin,
or you can select a specific voucher to post.
15. For this exercise, you are posting based on Business Unit.
Click the Look up Business Unit (Alt+5) button to select a business unit.

CAPPS Financials EUT Course
Page 139
Step Action
16. Click the Dept of Information Resources link.
17. Click the Save button.
18. Click the Run button to navigate to the Process Schedule Request page.
19. Click the OK button to run the process immediately.
20. Jot down the Process Instance number appears. This number helps you identify the
process to check its status.
21. Click the Process Monitor link to verify the process has been initiated and to view
the status of the process.
22. Use the Process List tab to view the status of submitted process requests.
Notice the Instance number for the process you submitted is in the Instance column
of the Process List section.
23. The instance number of your process is displayed on the first line.
The Run Status is Processing and the Distribution Status is N/A.
24. Click the Refresh button until the Run Status is Success and the Distribution
Status is Posted.
25. Click the Go back to Voucher Posting Request link to return to the previous page.
26. Congratulations! In this topic, you successfully ran the voucher posting process.
End of Procedure.
Section 5 Managing and Maintaining Vouchers
Unposting Vouchers
Section 5 Lesson 1, Exercise - Scenario 1 Unposting Vouchers
Procedure
In this topic, you will unpost a voucher.

CAPPS Financials EUT Course
Page 140
Step Action
1. Click the Main Menu button to navigate to the UnPost Voucher page.
2. Click the Accounts Payable menu.
3. Click the Vouchers menu.
4. Click the Add/Update menu.
5. Click the UnPost Voucher link.
6. Notice the Business Unit defaults based on your User Preferences.
Enter 00004747 into the Voucher ID field.
7. Click the Search button to display the selected voucher.
8. The UnPost Voucher tab allows you to specify the Accounting Date and Reversal
Accounting Date information for a voucher.

CAPPS Financials EUT Course
Page 141
Step Action
9. If needed,review additional details on the voucher by selecting the Voucher Details
tab.
10. On the UnPost Voucher page, the Reversal Accounting Date group box is used to
indicate which accounting date should be assigned to the reversal accounting entries
that will be created during the unpost process.
You can choose from the following options:
- Business Unit Default: defaults to the date specified at the Business Unit level.
- Use Current Date: will use the current system date.
- Use Specific Date: will activate the Accounting Date field where a specific date
can be entered.
11. The unpost process creates reversing entries that reverses out the original posting of
the voucher.
Unposting happens immediately when you click the Unpost button.
Click the Unpost button.
12. A warning message popup window displays, prompting you to confirm or cancel the
unpost. In this example, click OK to to upost or reverse the voucher.
Click the OK button.
13. A message popup window appears notifying you that the voucher has been
unposted.
Click the OK button.
14. Congratulations! You have successfully unposted a voucher.
End of Procedure.
Deleting a Voucher
Section 5 Lesson 1, Exercise - Scenario 2 Deleting a Voucher
Procedure
In this topic, you will delete a voucher.

CAPPS Financials EUT Course
Page 142
Step Action
1. Click the Main Menu button to navigate to the Delete Voucher page.
2. Click the Accounts Payable menu.
3. Click the Vouchers menu.
4. Click the Add/Update menu.
5. Click the Delete Voucher link.
6. The Voucher Delete Search page allows you to enter or search for the voucher to
be deleted.
Notice the Business Unit defaults based on your User Preferences.
Vouchers that are eligible for deletion cannot have been posted or selected for
payment, or have had any portion of the voucher paid. Only eligible vouchers can be
selected.
Enter 00008809 into the Voucher ID field.

CAPPS Financials EUT Course
Page 143
Step Action
7. Click the Search button to locate the voucher to be deleted.
8. Use the Delete Voucher tab to delete the selected voucher.
9. Notice the Entry Status of the voucher is Postable. This will change when the
voucher is deleted.
10. Verify the information is for the voucher that you want to delete.
Click the Delete button.
11. A warning Message popup window is displayed to confirm that you want to delete
the voucher.
Caution! When you click the OK button, the voucher is deleted immediately. You
will not be able to retrieve the voucher or undo the deletion. You will also not be
able to reuse the voucher number.
Click the OK button to confirm the voucher deletion.
12. The Delete Voucher page is re-displayed. Notice the Entry Status for the voucher
is now deleted.
13. Congratulations! In this topic, you deleted a voucher.
Remember, a voucher can only be deleted if it is unposted and unpaid.
End of Procedure.
Reviewing Voucher Information
Section 5 Lesson 1, Exercise - Scenario 3 Reviewing Payment Information
Procedure
In this topic, you will review a voucher.
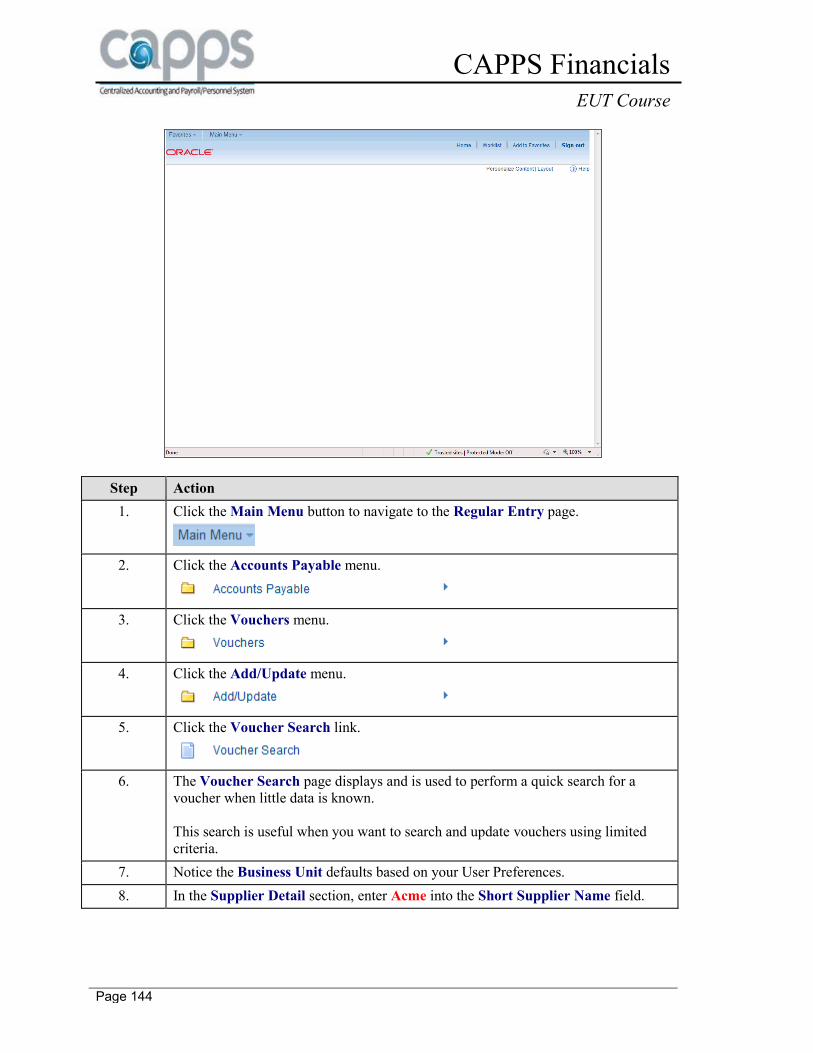
CAPPS Financials EUT Course
Page 144
Step Action
1. Click the Main Menu button to navigate to the Regular Entry page.
2. Click the Accounts Payable menu.
3. Click the Vouchers menu.
4. Click the Add/Update menu.
5. Click the Voucher Search link.
6. The Voucher Search page displays and is used to perform a quick search for a
voucher when little data is known.
This search is useful when you want to search and update vouchers using limited
criteria.
7. Notice the Business Unit defaults based on your User Preferences.
8. In the Supplier Detail section, enter Acme into the Short Supplier Name field.

CAPPS Financials EUT Course
Page 145
Step Action
9. The New Window checkbox lets you choose where you want to see the voucher.
If it is checked, the voucher details will open in a new window. If it is not checked,
the voucher details will display in the current window.
In this example, you will view the voucher details in a new window.
10. Click the Search button.
Step Action
11. The Search Results grid displays all the vouchers created for the supplier selected.
You can drill down to the voucher detail by clicking on a Voucher ID.
Click the link for Voucher ID 00000007.
12. The Regular Entry page displays.
The Summary tab displays voucher information summarized from the three primary
voucher pages. It provides the voucher header information and various statuses
including the USAS status.

CAPPS Financials EUT Course
Page 146
Step Action
13. On the Summary tab, the USAS Process Status shows where the voucher is in the
USAS process. There are three possible statuses:
1) Y - the voucher has been created but not yet sent to USAS. This is the status of
the voucher when it is initially created.
2) U - the voucher has been sent to USAS but not yet processed. When the USAS
interface picks up a voucher, it will update the process to this status.
3) P - the voucher was processed in USAS. The USAS interface updates the voucher
with this status when USAS has processed it.
14. The USAS Processing Date field shows when the voucher has been updated by the
USAS interface.
The data is updated when the voucher is sent to USAS. It changes when the voucher
is processed and sent back to CAPPS.
Step Action
15. Click the Related Documents tab.
16. The Related Documents tab displays related document information including
payment details, purchase order information, receiver information and voucher
adjustment details.
CAPPS Financials EUT Course
Page 147
Step Action
17. In the Payment Details section, you can access detailed information by clicking the
Actions dropdown or Details icon to the right of the Actions dropdown.
18. Click the Invoice Information tab.
19. The Invoice Information tab displays all the header, line, and distribution
information for the voucher. It also displays the USAS process information.
20. The USAS Doc# field is automatically assigned when the voucher interfaces to
USAS. The first digit indictes the USAS document type and the last seven digits are
the Vourcher ID number.
The document type is determined by a combination of the T-code and purchase
category code used on the voucher.
21. Click the Voucher Attributes tab.
22. The Voucher Attributes tab provides the accounting instructions.
The Accounting Instructions identify the accounting entry Template associated with
the voucher.
23. Click the Error Summary tab.
24. The Error Summary tab displays any voucher-build processing errors, matching
errors, duplicate invoices, out-of-balance and combination edit errors on the budget.
If the voucher has errors, the errors will be grouped into different scroll areas such
as header errors, invoice line errors and distribution errors. Only scroll areas that
contain errors will display.
25. Congratulations! In this lesson, you successfully reviewed a payment.
End of Procedure.
Using the Match Workbench
Section 5 Lesson 2, Exercise - Scenario 1 Using the Match Workbench
Procedure
In this topic, you will use the Match Workbench to review a voucher's matching status.

CAPPS Financials EUT Course
Page 148
Step Action
1. Click the Main Menu button to navigate to the Match Workbench page.
2. Click the Accounts Payable menu.
3. Click the Review Accounts Payable Info menu.
4. Click the Vouchers menu.
5. Click the Match Workbench link.
6. Use the Match Workbench page to search and view a list of vouchers and match
information.
7. In this exercise, search for vouchers assigned to a specific Business Unit that have
match exceptions.
Enter 31300 in the Business Unit field.

CAPPS Financials EUT Course
Page 149
Step Action
8. The Match Status can be selected to search only for vouchers with that status in the
search results.
Match statuses include:
- Matched: The voucher is successfully matched.
- To Be Matched: Vouchers have not gone through the matching process or
vouchers have been unmatched.
- Match Exceptions Exist: Exceptions occurred when applying the match rules to
the voucher.
- Manually Overridden: Match exception has been overridden.
- Match Dispute: Item is in dispute and no further match processing is done on
these vouchers until you change the match status.
- Overridden - Credit Note: Voucher has been matched with a credit memo
adjustment voucher.
9. Click the Match Status dropdown list.
10. Click the Match Exceptions Exist list item.
11. The Supplier SetID defaulted to match the Business Unit.
12. Click the Personalize Search link to access additional search fields that you can
select to display on the Match Workbench page.
13. The Personalize Search Settings window displays all the available fields that can
be displayed on the Match Workbench.
If you select fields that have dependencies on other fields not selected, you will
receive a warning message.
Click the Close button.
14. Click the Search button.
15. The Search Results grid displays vouchers that have gone through the matching
process and have exceptions.
The results grid displays information about the vouchers, links to view additional
information and a way to perform actions.
CAPPS Financials EUT Course
Page 150
Step Action
16. The Match Exceptions Exist link under the Match column is used to view
additional details regarding a voucher's exceptions.
When you click this link, the Match Exception Workbench Details page opens in
a new window.
17. The Match Exception Workbench Details page is used to view match information
for associated vouchers, purchase orders and receipts. It can be used to override
exceptions, correct errors, create debit memos, put vouchers on a match hold and
initiate the matching process.
Only authorized users can override an exception.
18. The header shows summary information about the voucher such as the Matched
Date (the matching process date) and the Match Status.
19. Click the Match Exception Summary link to view the Match Exception
Workbench Summary page.
20. The Match Exception Workbench Summary page displays all invoice line errors.
Click the Return button to return to the Match Exception Workbench Details
page.
21. Click the Document Details link to view additional document details.
22. The Associated Document Information page displays voucher, purchase order and
receiver attributes for all lines. This link accesses the first line of the voucher. All
lines are available for viewing by using the Line Document Details link.
23. Click the Return button to return to the Match Exception Workbench Details
page.

CAPPS Financials EUT Course
Page 151
Step Action
24. The Voucher Match Action field is used to apply a change to the voucher such as
override the match exception. Comments about the action can be entered in the
Match Action Comments field below it.
The Voucher Match Action options are:
- Credit Note: Changes the match status on the voucher to Overridden - Credit
Note. Once the matching process runs, the match status will change to Matched and
the match type to Matched with Credit Note.
- Match Dispute: Places the entire voucher on hold. No further matching will be
applied to the voucher until the match status has been changed to Override or To
Be Matched.
- Override: Changes the match status to Manually Overridden. Once the matching
process runs, the match status will be changed to Matched and the match type
changed to Matched with Override.
You must have override authority to enter the Voucher Match Action and Match
Action Comments.
25. The Line Details group box is used to view or perform actions to the voucher lines.
26. The Voucher Line Match Action field is used to apply an override at the line level.
27. The Match Rules group box displays the match rules that were applied to the
voucher line in the order that they were applied.
An exclamation mark is displayed next to the match rules in error and indicates the
voucher line has a match exception.
28. Click the Drill Down button for the row containing an exclamation mark to view an
explanation of the Match Rule for the exception on that line.
29. The Match Rule Details page provides a detailed description of the match rule.
30. Click the Return button.
31. Notice that the Voucher, Purchase Order and Receiver information used in the
comparison is displayed next to the Match Rule column.
32. Click the Override Options tab.
33. Match exceptions can also be overridden at the Match Rule level. This is also
controlled by security.
34. When you finish reviewing the match exceptions, you would close the Match
Exception Workbench Details page using the red Close button ("X") in the upper
right corner of the page. This will return you to the Match Workbench page.

CAPPS Financials EUT Course
Page 152
Step Action
35. The Match Workbench page is displayed.
For each exception, determine how to resolve it and make adjustments accordingly.
For example: if a vendor was billed for more than the purchase order, then the
voucher might need to be adjusted.
The Match Workbench page provides a Vouchers link on the Details tab to access
the voucher component. This link will allow you to view or change the voucher.
If the amount billed is less than the purchase order, you might need to override the
exception and process the bill.
36. Use the Match Exceptions Exist link to view the Match Exceptions page where
you can override the exception at the header, line or Match Rule level.
37. If a voucher needs to be changed, selecting the Vouchers link would open the
voucher where it can be viewed or modified.
38. Congratulations! In this topic, you used the Match Workbench to review a
voucher's matching status.
You also located vouchers that have match exceptions and viewed the related
details.
End of Procedure.
Reviewing Voucher Accounting Entries
Section 5 Lesson 2, Exercise - Scenario 2 Reviewing Voucher and Accounting Entries
Procedure
In this lesson, you will learn about the various inquiries available with CAPPS. These inquiries
provide valuable information in the managing of your suppliers, vouchers and payments.

CAPPS Financials EUT Course
Page 153
Step Action
1. Click the Main Menu button to navigate to the Voucher Accounting Entries page.
2. Click the Accounts Payable menu.
3. Click the Review Accounts Payable Info menu.
4. Click the Vouchers menu.
5. Click the Accounting Entries link.
6. Use the Voucher Accounting Entries page to search for voucher information based
on Business Unit and Voucher ID or Invoice Number.
Results will display for vouchers run through the Voucher Posting Application
Engine process.

CAPPS Financials EUT Course
Page 154
Step Action
7. Use the Business Unit field to enter or select the Business Unit for the voucher
whose accounting entries you want to review.
Note: The Business Unit defaults based on your user preference setup.
For this exercise, accept the default.
8. Click the Look up Voucher ID (Alt+5) button to select the voucher to be reviewed.
9. You are not sure of the exact Voucher ID but know it contains 115.
Click the Voucher ID begins with list.
10. Click the contains list item.
11. Enter 115 into the Voucher ID field.
12. Click the Look Up button.
13. A list of Voucher IDs containing 115 is displayed.
Click the second ABC Corp link.
14. If preferred, you may also search based on the supplier's invoice number.
15. In this case, click the Search button to retrieve information on Voucher ID
00000115 in Business Unit 31300.
16. The Voucher ID, Invoice Number, Invoice Date, Supplier ID and Supplier
Name are displayed at the top of the page.
Each posting process appears in its own view in the Accounting Information
section.
17. The Posting Process field displays the posting process for the specific entry.
In this example, AP Accrual indicates the information displayed is related to the
posting of the original voucher's accounting entry.
Depending on the voucher, you may also see entries related to voucher payments,
voucher cancellation and voucher closure.

CAPPS Financials EUT Course
Page 155
Step Action
18. The GL Dist Status field indicates whether the information has been loaded into GL
via the Journal Generation process.
If the information has been loaded into GL, then the status will be Distributed. If it
hasn't, then the status will be Not Distributed.
19. If multiple processes have been run for this voucher, then you will use the scroll
feature associated with the Accounting Information section to view the entries.
Note: In this exercise, only one process has been run (1 of 1).
20. On the Main Information tab, debit and credit amounts are displayed (credits are
reflected as a negative amount).
21. The Ledger column displays the ledger book used when posting the journal entry to
GL.
22. Click the Chartfields tab to view details such as the account, fund code and
department.
23. The Chartfields tab displays the individual chartfield values used when recording
the entry.
24. If the entry has been loaded (i.e. distributed) to the General Ledger, then you can use
the Journal tab to view journal entry details, such as the journal entry number.
Click the Journal tab.
25. The Journal ID column displays the general ledger journal ID assigned by the
Journal Generator process for this accounting entry.
If these fields are blank, then this accounting entry has not been journal-generated
(i.e. loaded into the GL) yet.
26. The Budget Status column displays the budget status for this accounting entry.
Possible values include:
• Not Chk'd -- Not budget checked.
• V -- Valid i.e. passed budget checking.
• Error -- The budget check process has detected errors. When Error appears, the
Budget Check Exception link also appears. Use the link to access the exception
pages and review the error.
27. Congratulations! You successfully reviewed voucher and posted accounting entries.
End of Procedure.
Section 6 Running Financials and SCM Reports

CAPPS Financials EUT Course
Page 156
Running AP Reports
Section 6, Lesson 1, Exercise - Running Payable Reports
Procedure
In this topic, you will learn the basics of report processing and viewing.
Step Action
1. Click the Main Menu button to navigate to the Voucher Print report page.
2. Click the CAPPS Reports menu.
3. Click the Statewide Reports menu.
4. Click the Accounts Payable menu.

CAPPS Financials EUT Course
Page 157
Step Action
5. Click the Voucher Print link.

CAPPS Financials EUT Course
Page 158
Step Action
6. A Run Control ID is an identifier that, when paired with a User ID, uniquely
identifies the process you are running.
The Run Control ID defines parameters that are used when a process runs. This
ensures that when a process runs in the background, the system does not prompt you
for additional values.
7. If you had run the Voucher Print report before, you would search for the Run
Control ID on the Find an Existing Value tab.
To create a new Run Control ID, click the Add a New Value tab.
8. A Run Control ID cannot contain spaces. Use letters or numbers up to 30
characters long. Special characters are not allowed with the exception of the
underscore.
9. In this example, use Voucher_Print as the ID.
Enter Voucher_Print in the Run Control ID field.
Step Action
10. Click the Add button.

CAPPS Financials EUT Course
Page 159
Step Action
11. Running this report requires some data entries so that the correct items print.
12. Enter the Agency's Business Unit.
Enter the desired information into the Business Unit field. Enter "03200".

CAPPS Financials EUT Course
Page 160
Step Action
13. Enter the Voucher number.
Enter the desired information into the Voucher ID field. Enter "00000061".
Step Action
14. Click the Run button to initiate the Voucher Print process.

CAPPS Financials EUT Course
Page 161
Step Action
15. Use the Process Scheduler Request page to enter or update parameters, such
as report output type and format.
For this report, no information needs to be updated.
16. The Description field helps to uniquely identify a process.
17. The Process Name field displays the name of the process as it appears in the
technical definition.
18. Click the Type list item to view the options.

CAPPS Financials EUT Course
Page 162
Step Action
19. Click the Window list item.

CAPPS Financials EUT Course
Page 163
Step Action
20. To accept the parameters and submit the report request, click the OK button.
21. The Queued page shows the report request is queued up for processing.
The window will update automatically as the status changes.
22. The Processing page shows the report request is being processed.
The window will update automatically as the status changes.
23. The Success page shows the report request was completed and the report is being
produced.
The window will update automatically as the status changes.
24. The report is automatically displayed and may be printed using the print option in
your Web browser.
25. Congratulations! You successfully ran and viewed an Accounts Payable report -
Voucher Print.
End of Procedure.
Knowledge Check
Processing Vouchers
Question
Vouchers must be processed in the following order:
Response
A. Matching, Posting, Budget Check, Document Tolerance
B. Budget Check Matching, Posting, Document Tolerance
C. Any order as long as Posting is first.
D. Any order as long as Posting is last.
Reversal Vouchers

CAPPS Financials EUT Course
Page 164
Question
Reversal Vouchers are only used to re-instate encumbrances.
Response
A. True
B. False
Match Workbench
Question
The Match Workbench feature in CAPPS is only used to view
vouchers that have a matching dispute.
Response
A. True
B. False
Voucher Styles

CAPPS Financials EUT Course
Page 165
Question
Match the Voucher Type with the scenario.
Response
_____ Template Vouchers
_____ Single Payment Vouchers
_____ Procard Vouchers
_____ Multi-Vendor Vouchers
_____ PO Vouchers with Assets
1. Used to pay vendor for any spot
purchases made by agency staff.
2. Used as a model for creating
future vouchers.
3. Used to copy information into a
voucher to expedite voucher
creation.
4. Used to pay a vendor at the
header level while referencing
different vendors at the voucher line
level.
5. Used for one time payments.
USAS Payment Date
Question
The USAS Payment Date is the same as the Requested Payment
Date in CAPPS.
Response
A. True
B. False
Deleting a Voucher

CAPPS Financials EUT Course
Page 166
Question
Vouchers can be deleted at anytime.
Response
A. True
B. False
Agency Number
Question
The Agency number and the Business Unit in CAPPS are the same.
Response
A. True
B. False
Inactivating a Supplier
Question
Once a Supplier has been inactivated in CAPPS, Only invoices
attached to current POs will be paid.
Response
A. True
B. False
Supplier Conversion

CAPPS Financials EUT Course
Page 167
Question
The Agency's Suppliers will be converted when the Agency goes
live on CAPPS. How many years of information will be converted?
Response
A. 1 Year
B. 2 Years
C. 3 Years
D. 4 Years
Run Control IDs
Question
Run Control IDs are used for running processes and reports. What is
the maximum number of characters that can be used in a Run
Control ID?
Response
A. 15
B. 20
C. 25
D. 30