ess synlok photo install guide
TRANSCRIPT

www.engineeredsportfield.com
410.878.6341 “Innovations that protect today’s
athletes”

www.engineeredsportfield.com – [email protected] - 410-878-6341
Seam RepairsIf you have Turf then you have Seams to repair

www.engineeredsportfield.com – [email protected] - 410-878-6341
ESS SynLok Repair
Adhesives
SL-400 Repair System SL-400-D Repair System Turf Claw Adhesive
www.engineeredsportfield.com – [email protected] - 410-878-6341
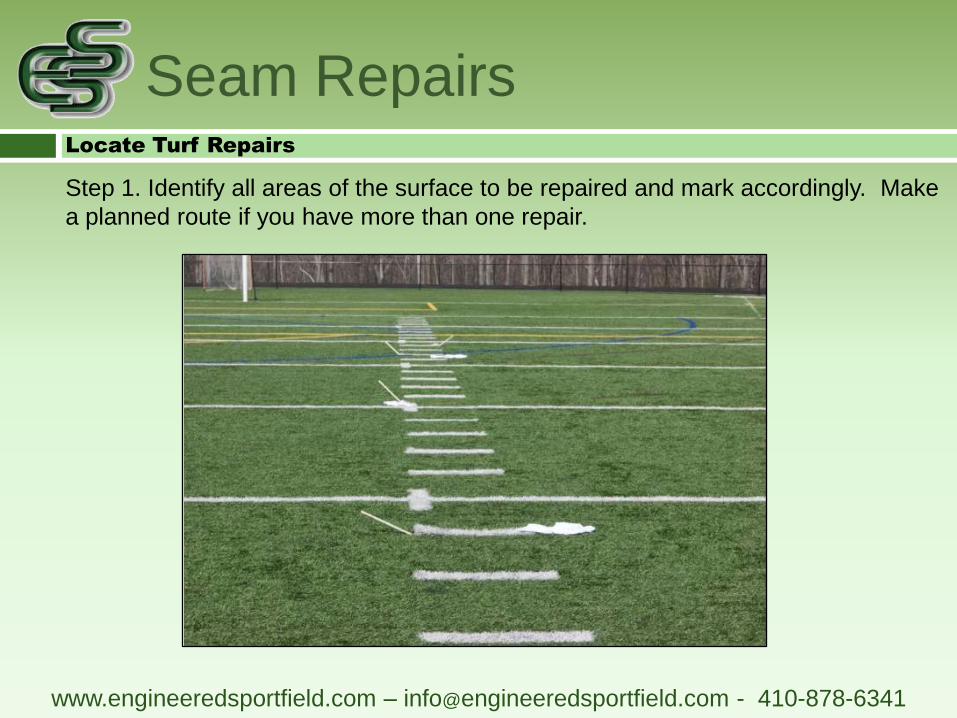
Seam RepairsLocate Turf Repairs
Step 1. Identify all areas of the surface to be repaired and mark accordingly. Make
a planned route if you have more than one repair.

www.engineeredsportfield.com – [email protected] - 410-878-6341
Seam RepairsPrep Repairs
Locate Repairs
Remove Infill from seam

www.engineeredsportfield.com – [email protected] - 410-878-6341
Seam RepairsSet aside infill to replace once repair is completed
Step 2. Clean the area inside of the damaged seam. Be careful when opening
the seam as to prevent infill from falling into the opening. Brushing or blowing
loose material out of the area will suffice. In cases where the tape has failed or
degraded, cut out the damaged section of tape and replace it with approved
Tape. Remove loose or failed pieces of cured adhesive as your objective is to
create a permanent bond with the backing of the synthetic turf.

www.engineeredsportfield.com – [email protected] - 410-878-6341
Seam RepairsPreparing the cartridge
Step 4. After removing a SL-420 cartridge from its pouch, hold
in an upright position and remove seal over cap as well as the
cap itself. If you will not be using the entire Cartridge be sure
to save the Cap as you can replace it and save the remaining
adhesive on a future repair. Line up the Static Mixer holes and
attach the Static Mixer, then place the cap over the Static
Mixer and tighten down securely.
Step 3. Place a piece of plastic (such as an ordinary garbage
bag, or piece of cardboard) next to the seam beginning at one
end if it is a long seam repair. Include a small bucket for
excess mixing ratio and potential drips. Place your SeamLok
Repair System on the plastic before opening cartridges.
www.engineeredsportfield.com – [email protected] - 410-878-6341
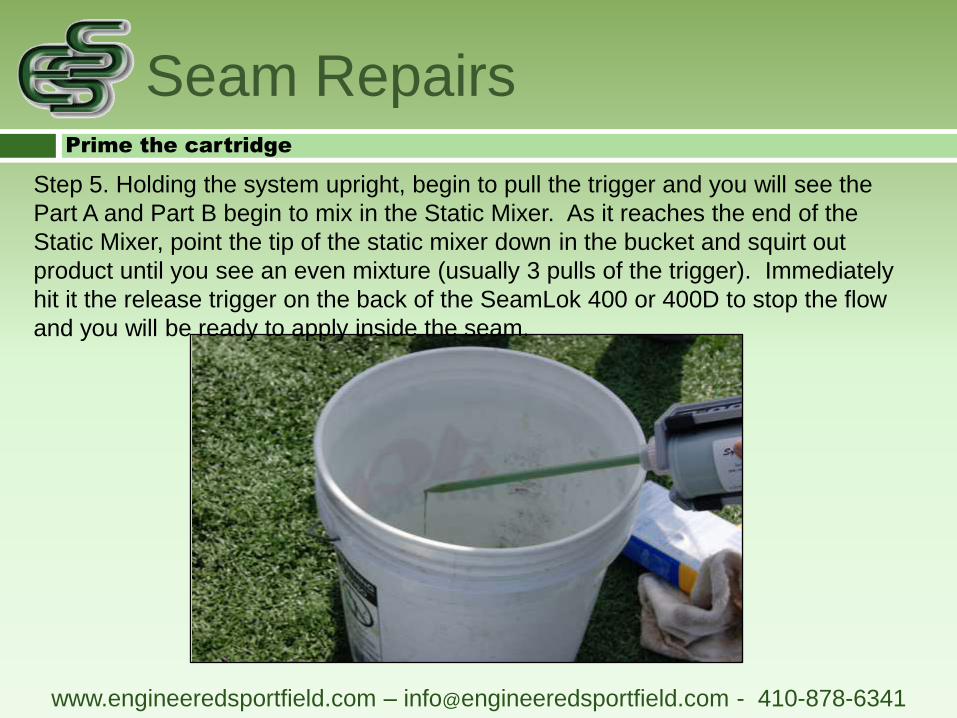
Seam RepairsPrime the cartridge
Step 5. Holding the system upright, begin to pull the trigger and you will see the
Part A and Part B begin to mix in the Static Mixer. As it reaches the end of the
Static Mixer, point the tip of the static mixer down in the bucket and squirt out
product until you see an even mixture (usually 3 pulls of the trigger). Immediately
hit it the release trigger on the back of the SeamLok 400 or 400D to stop the flow
and you will be ready to apply inside the seam.
www.engineeredsportfield.com – [email protected] - 410-878-6341
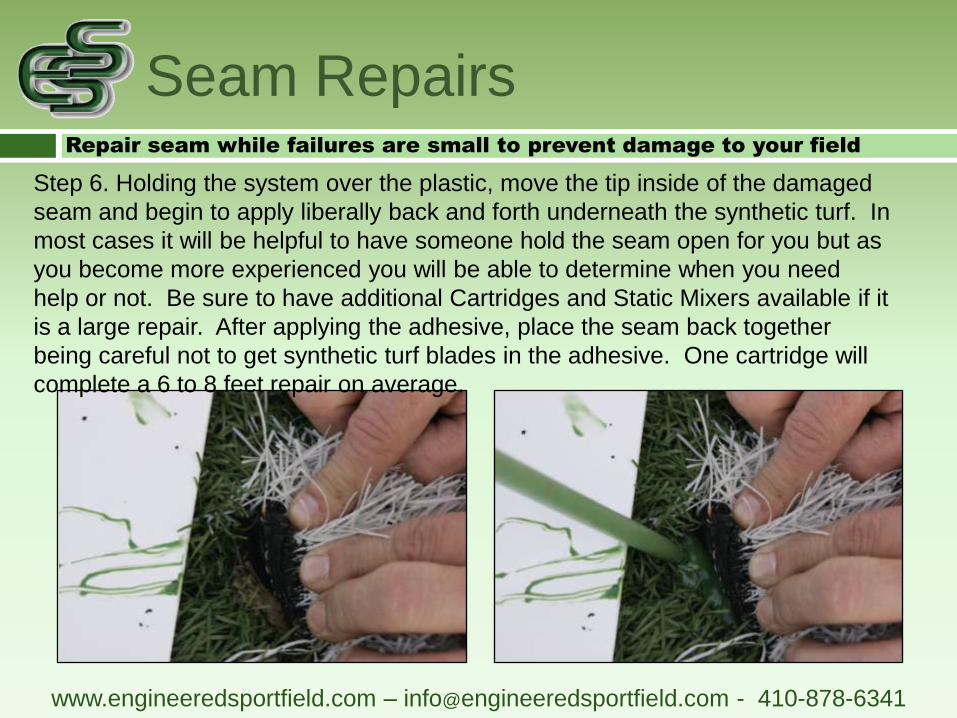
Seam RepairsRepair seam while failures are small to prevent damage to your field
Step 6. Holding the system over the plastic, move the tip inside of the damaged
seam and begin to apply liberally back and forth underneath the synthetic turf. In
most cases it will be helpful to have someone hold the seam open for you but as
you become more experienced you will be able to determine when you need
help or not. Be sure to have additional Cartridges and Static Mixers available if it
is a large repair. After applying the adhesive, place the seam back together
being careful not to get synthetic turf blades in the adhesive. One cartridge will
complete a 6 to 8 feet repair on average.


www.engineeredsportfield.com – [email protected] - 410-878-6341
Seam RepairsApply adhesive to existing tape

www.engineeredsportfield.com – [email protected] - 410-878-6341
Seam RepairsApply pressure to repair
Step 7. Ballast the repair, wait 5-10 minutes and apply pressure again.

www.engineeredsportfield.com – [email protected] - 410-878-6341
Seam RepairsReplace Infill
Step 8. Put back the infill that you previously removed and your repair is complete.

www.engineeredsportfield.com – [email protected] - 410-878-6341
Seam RepairsJust a few reminders
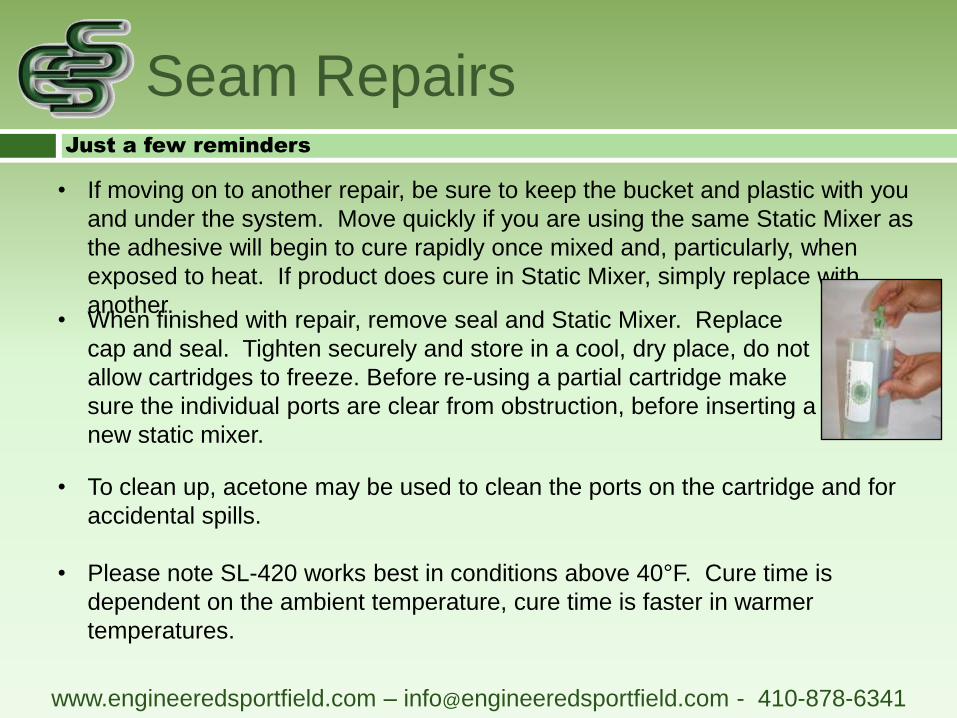
• If moving on to another repair, be sure to keep the bucket and plastic with you
and under the system. Move quickly if you are using the same Static Mixer as
the adhesive will begin to cure rapidly once mixed and, particularly, when
exposed to heat. If product does cure in Static Mixer, simply replace with
another.
• To clean up, acetone may be used to clean the ports on the cartridge and for
accidental spills.
• Please note SL-420 works best in conditions above 40°F. Cure time is
dependent on the ambient temperature, cure time is faster in warmer
temperatures.
• When finished with repair, remove seal and Static Mixer. Replace
cap and seal. Tighten securely and store in a cool, dry place, do not
allow cartridges to freeze. Before re-using a partial cartridge make
sure the individual ports are clear from obstruction, before inserting a
new static mixer.