emc document sciences xeditor 4.6 user guide · file sendto,version,properties view...
TRANSCRIPT

EMC® Document Sciences®
xEditorVersion 4.6
User Guide
EMC CorporationCorporate Headquarters
Hopkinton, MA 01748-91031-508-435-1000www.EMC.com

Legal Notice
Copyright © 2003-2016 EMC Corporation. All Rights Reserved.
EMC believes the information in this publication is accurate as of its publication date. The information is subject to changewithout notice.
THE INFORMATION IN THIS PUBLICATION IS PROVIDED “AS IS.” EMC CORPORATIONMAKES NO REPRESENTATIONSOR WARRANTIES OF ANY KINDWITH RESPECT TO THE INFORMATION IN THIS PUBLICATION, AND SPECIFICALLYDISCLAIMS IMPLIED WARRANTIES OF MERCHANTABILITY OR FITNESS FOR A PARTICULAR PURPOSE.
Use, copying, and distribution of any EMC software described in this publication requires an applicable software license.
For the most up-to-date listing of EMC product names, see EMC Corporation Trademarks on EMC.com. Adobe and Adobe PDFLibrary are trademarks or registered trademarks of Adobe Systems Inc. in the U.S. and other countries. All other trademarksused herein are the property of their respective owners.
Documentation Feedback
Your opinion matters. We want to hear from you regarding our product documentation. If you have feedbackabout how we can make our documentation better or easier to use, please send us your feedback directly [email protected]

Table of Contents
Preface ................................................................................................................................. 7
Chapter 1 Getting Started with xEditor ......................................................................... 9Multiple Microsoft Word Versions ...................................................................... 9The xEditor Interface ......................................................................................... 9Limits in a Work Item ........................................................................................ 9Logging Out..................................................................................................... 10Copy and Paste ................................................................................................ 10
Chapter 2 Working in xEditor for xResponse ............................................................... 11xEditor Working with xResponse....................................................................... 11The Document Actions Panel............................................................................. 12The xResponse Toolbar ................................................................................. 12The Table of Contents: Optional Paragraphs Section ....................................... 13The xResponse Menu .................................................................................... 13Properties .................................................................................................... 13
Working With Optional Paragraphs ................................................................... 14Universal Content............................................................................................. 14Empty Line Processing...................................................................................... 14Multi-page TIFF ............................................................................................... 15Form Fields ...................................................................................................... 15Tab Leaders...................................................................................................... 16Finding Existing Content .................................................................................. 16Subdocument Merge......................................................................................... 16Start/End-Page Stub Content Groups ................................................................. 16Microsoft Word Features and Functions ............................................................. 16Protection .................................................................................................... 18
Limitations....................................................................................................... 19Undo ........................................................................................................... 19
Chapter 3 Working in xEditor for xRevise and Custom Applications ........................... 21xEditor Working with xRevise ........................................................................... 22The xEditor Interface ........................................................................................ 22The Document Actions Pane.......................................................................... 22The xRevise Toolbar...................................................................................... 23The Table of Contents Section ........................................................................ 24TOC Icons ................................................................................................ 26
The Information Panel .................................................................................. 26The Command Bar........................................................................................ 27The xRevise Menu ........................................................................................ 28
Carry Forward ................................................................................................. 28
3
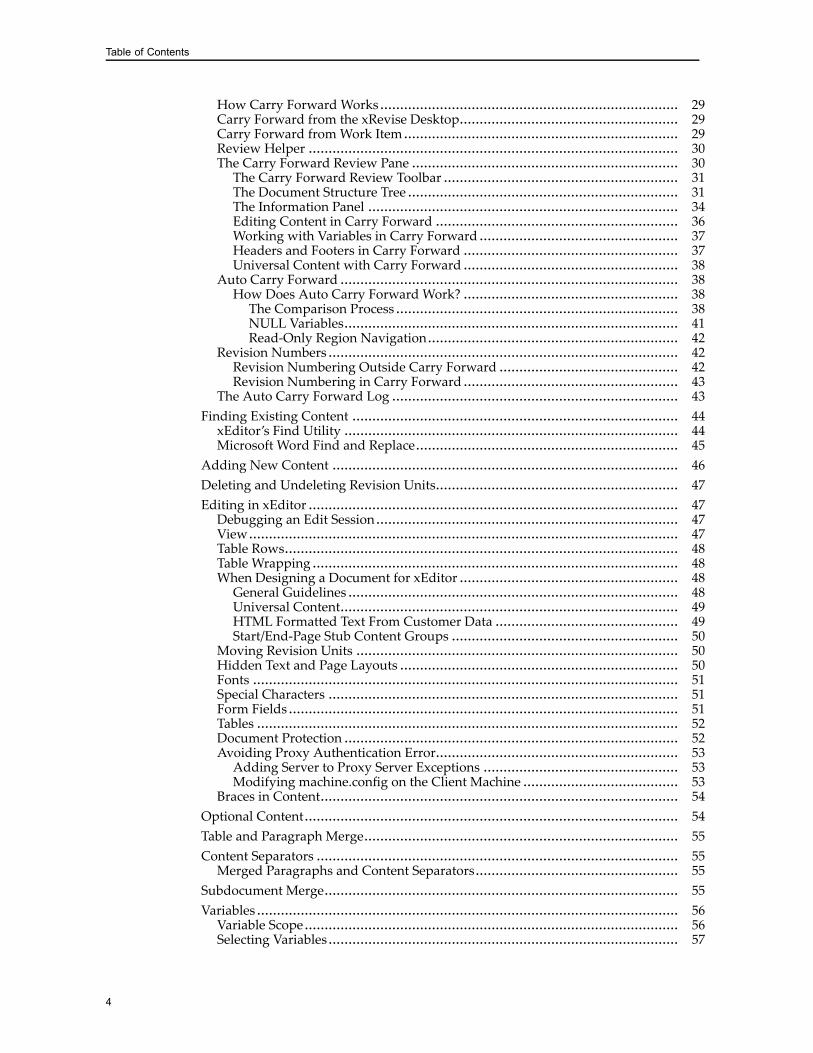
Table of Contents
How Carry Forward Works ........................................................................... 29Carry Forward from the xRevise Desktop....................................................... 29Carry Forward fromWork Item ..................................................................... 29Review Helper ............................................................................................. 30The Carry Forward Review Pane ................................................................... 30The Carry Forward Review Toolbar ........................................................... 31The Document Structure Tree .................................................................... 31The Information Panel .............................................................................. 34Editing Content in Carry Forward ............................................................. 36Working with Variables in Carry Forward .................................................. 37Headers and Footers in Carry Forward ...................................................... 37Universal Content with Carry Forward ...................................................... 38
Auto Carry Forward ..................................................................................... 38How Does Auto Carry Forward Work? ...................................................... 38The Comparison Process ....................................................................... 38NULL Variables.................................................................................... 41Read-Only Region Navigation............................................................... 42
Revision Numbers ........................................................................................ 42Revision Numbering Outside Carry Forward ............................................. 42Revision Numbering in Carry Forward ...................................................... 43
The Auto Carry Forward Log ........................................................................ 43Finding Existing Content .................................................................................. 44xEditor’s Find Utility .................................................................................... 44Microsoft Word Find and Replace.................................................................. 45
Adding New Content ....................................................................................... 46Deleting and Undeleting Revision Units............................................................. 47Editing in xEditor ............................................................................................. 47Debugging an Edit Session ............................................................................ 47View ............................................................................................................ 47Table Rows................................................................................................... 48Table Wrapping ............................................................................................ 48When Designing a Document for xEditor ....................................................... 48General Guidelines ................................................................................... 48Universal Content..................................................................................... 49HTML Formatted Text From Customer Data .............................................. 49Start/End-Page Stub Content Groups ......................................................... 50
Moving Revision Units ................................................................................. 50Hidden Text and Page Layouts ...................................................................... 50Fonts ........................................................................................................... 51Special Characters ........................................................................................ 51Form Fields .................................................................................................. 51Tables .......................................................................................................... 52Document Protection .................................................................................... 52Avoiding Proxy Authentication Error............................................................. 53Adding Server to Proxy Server Exceptions ................................................. 53Modifying machine.config on the Client Machine ....................................... 53
Braces in Content.......................................................................................... 54Optional Content.............................................................................................. 54Table and Paragraph Merge............................................................................... 55Content Separators ........................................................................................... 55Merged Paragraphs and Content Separators................................................... 55
Subdocument Merge......................................................................................... 55Variables .......................................................................................................... 56Variable Scope .............................................................................................. 56Selecting Variables ........................................................................................ 57
4

Table of Contents
Variable Color .............................................................................................. 60Editing Variables .......................................................................................... 61Copy and Paste ............................................................................................ 62Drag and Drop ............................................................................................. 63Variable Formats .......................................................................................... 63Protection and Variables ............................................................................... 63Variable Navigator ....................................................................................... 64NULL Variables............................................................................................ 64
Subtotals, Index Headings, and Table Headings and Footers ............................... 65Variables in Optional Content............................................................................ 65Track Changes.................................................................................................. 65Microsoft Word Features and Functions ............................................................. 65Microsoft Word Features Altered by xEditor .................................................. 66Unsupported Microsoft Word Functions ........................................................ 67Editing Actions in xEditor ............................................................................. 68Microsoft Word Styles................................................................................... 68Content Controls .......................................................................................... 68
Form Fields ...................................................................................................... 68Protection ........................................................................................................ 70Read-Only Protection........................................................................................ 71xEditor Focus While Loading ............................................................................ 71Tab Leaders...................................................................................................... 72
Chapter 4 xEditor Web Services .................................................................................. 73Authentication ................................................................................................. 73About the requestContext Parameter ............................................................. 74Using requestContext with Documentum-Based Documents ....................... 74requestContext Examples .......................................................................... 75
Setting Up Your Application.............................................................................. 75Adding Your Application Definition .............................................................. 76Configuring Your Application with xAdmin................................................... 77Associating Attribute Sets with Your Application ....................................... 77Assigning Data Sources to Your Application .............................................. 77Setting Up Access Rights for Your Application ........................................... 78Configuring Workflow for Your Application............................................... 78
Error Messages................................................................................................. 78The IDocumentItem Web Service ....................................................................... 79Calling the xEditor StartUp Application ............................................................. 79
Chapter 5 Administering xEditor ................................................................................. 81Administering xEditor for xResponse ................................................................ 82Temporary Files............................................................................................ 82The Log ....................................................................................................... 82Troubleshooting ........................................................................................... 82Opening xEditor After “Failed to start editor” Error ................................... 82
Administering xEditor for xRevise and Custom Applications .............................. 83Spell Check for Form Fields........................................................................... 83Variable Color .............................................................................................. 84Track Changes.............................................................................................. 84The Log ....................................................................................................... 84Localization ................................................................................................. 85Customizing Carry Forward.......................................................................... 85DEFAULT_CONFIG.xml........................................................................... 85
5
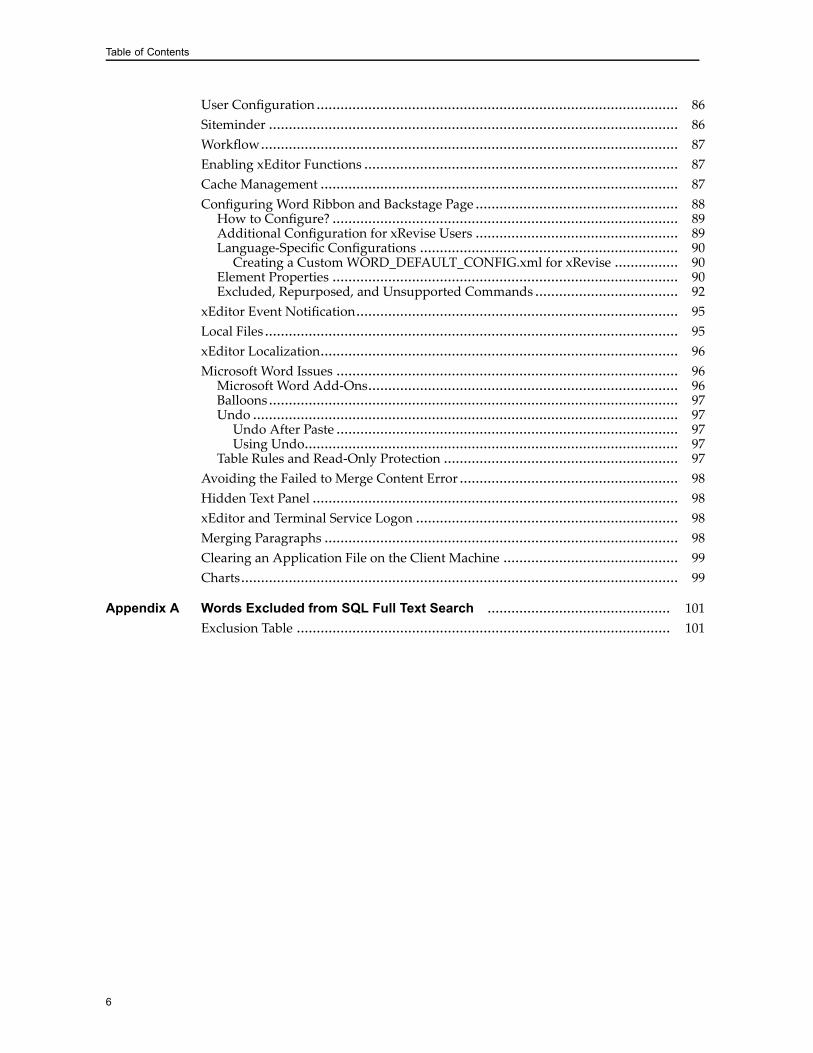
Table of Contents
User Configuration ........................................................................................... 86Siteminder ....................................................................................................... 86Workflow......................................................................................................... 87Enabling xEditor Functions ............................................................................... 87Cache Management .......................................................................................... 87Configuring Word Ribbon and Backstage Page ................................................... 88How to Configure? ....................................................................................... 89Additional Configuration for xRevise Users ................................................... 89Language-Specific Configurations ................................................................. 90Creating a CustomWORD_DEFAULT_CONFIG.xml for xRevise ................ 90
Element Properties ....................................................................................... 90Excluded, Repurposed, and Unsupported Commands .................................... 92
xEditor Event Notification................................................................................. 95Local Files ........................................................................................................ 95xEditor Localization.......................................................................................... 96Microsoft Word Issues ...................................................................................... 96Microsoft Word Add-Ons.............................................................................. 96Balloons ....................................................................................................... 97Undo ........................................................................................................... 97Undo After Paste ...................................................................................... 97Using Undo.............................................................................................. 97
Table Rules and Read-Only Protection ........................................................... 97Avoiding the Failed to Merge Content Error ....................................................... 98Hidden Text Panel ............................................................................................ 98xEditor and Terminal Service Logon .................................................................. 98Merging Paragraphs ......................................................................................... 98Clearing an Application File on the Client Machine ............................................ 99Charts.............................................................................................................. 99
Appendix A Words Excluded from SQL Full Text Search .............................................. 101Exclusion Table .............................................................................................. 101
6

Preface
xEditor is a Microsoft Word-based editor that enables you to use Microsoft Word’s powerful editingand composition features while modifying or building documents from approved content createdin xDesign.
Intended AudienceThis guide is intended for document designers who can access xDesign documents via xResponseor xRevise.
ConventionsThe following conventions are used in this document:
Font Type Meaning
boldface Graphical user interface elements associated with an action
italic Book titles, emphasis, or placeholder variables for which you supply particularvalues
monospace Commands within a paragraph, URLs, code in examples, text that appears on thescreen, or text that you enter
xPressionHome
The term “xPressionHome” refers to the location where xPression was installed on your server. OnWindows servers, the default location is C:\xPression
Revision HistoryThe following changes have been made to this document.
7

Preface
Revision Date Description
December 2016 Updated The Comparison Process, page 38.
October 2016 Updated xEditor’s Find Utility, page 44 with anote about revision unit searches.
November 2015 Initial publication
8
Chapter 1Getting Started with xEditor
xEditor is used for editing by xResponse, xRevise, and custom applications created with the xPressionWeb Services. xResponse uses a subset of xEditor features while xRevise and your custom applicationare able to use the entire xEditor feature set. For this reason, the user interface is slightly differentfor xResponse.
Multiple Microsoft Word VersionsMultiple versions of Microsoft Word on the same computer may have potential issues with xEditor.EMC Document Sciences recommends that you avoid this usage.
If you have multiple versions installed, xEditor always uses the latest version that it supports. SeexPression Release Notes for the supported Microsoft Word versions. xEditor will also try to set theWord version that it will use as the default version on your computer as necessary.
The xEditor InterfaceThe main difference between the Microsoft Word interface and xEditor is the addition of theDocument Actions panel, which is displayed in Microsoft Word Task Pane. See detailed informationin Chapter 2, Working in xEditor for xResponse and Chapter 3, Working in xEditor for xReviseand Custom Applications.
Note: When editing in xEditor, do not make any changes before loading of the work item is complete.
Limits in a Work ItemIf you are using xEditor with Microsoft Word 2010, ensure that the items in the table below do notexceed their limits for each work item. Otherwise, xEditor may fail to open. xEditor with MicrosoftWord 2013 does NOT have these limits.
Item Maximum Number
Sub documents 1000
9
Getting Started with xEditor
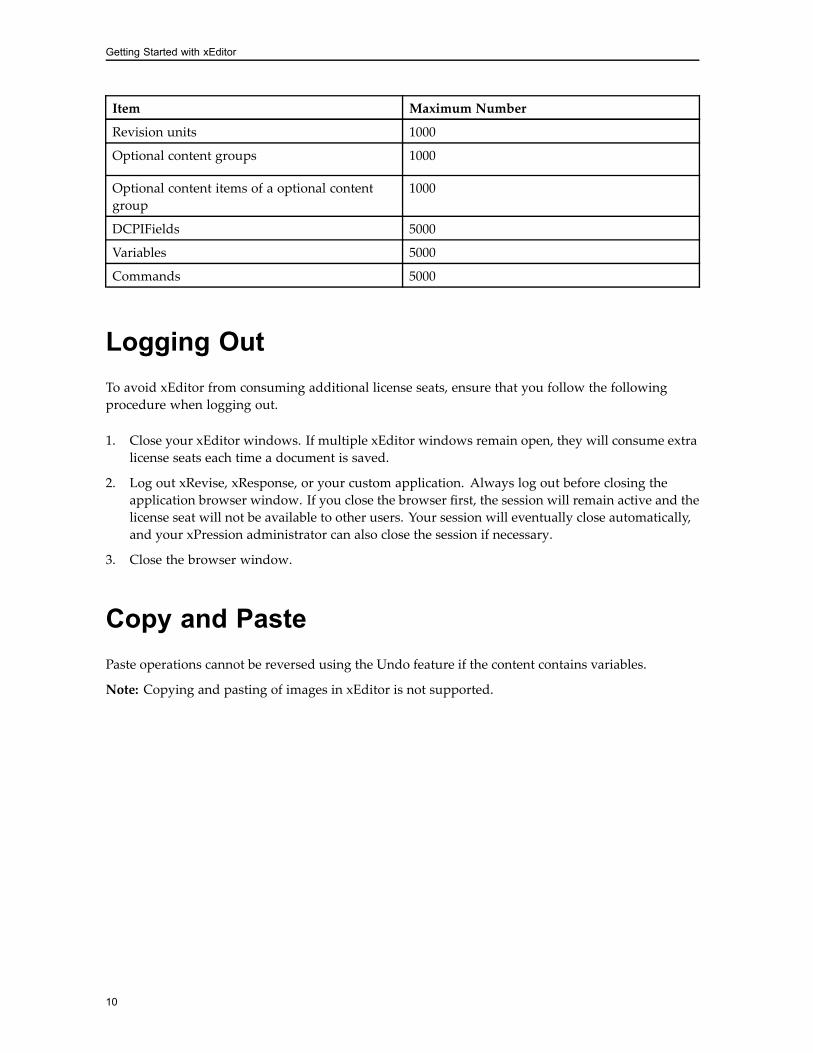
Item Maximum Number
Revision units 1000
Optional content groups 1000
Optional content items of a optional contentgroup
1000
DCPIFields 5000
Variables 5000
Commands 5000
Logging OutTo avoid xEditor from consuming additional license seats, ensure that you follow the followingprocedure when logging out.
1. Close your xEditor windows. If multiple xEditor windows remain open, they will consume extralicense seats each time a document is saved.
2. Log out xRevise, xResponse, or your custom application. Always log out before closing theapplication browser window. If you close the browser first, the session will remain active and thelicense seat will not be available to other users. Your session will eventually close automatically,and your xPression administrator can also close the session if necessary.
3. Close the browser window.
Copy and PastePaste operations cannot be reversed using the Undo feature if the content contains variables.
Note: Copying and pasting of images in xEditor is not supported.
10

Chapter 2Working in xEditor for xResponse
Editing documents in xEditor is very similar to editing documents in Microsoft Word. Most MicrosoftWord functions are fully supported, and the interface is virtually identical except as noted above.However, certain limitation do apply and should be considered when working with xEditor.
Note: If an xEditor work item contains many Word style changes, Microsoft Word may unexpectedlyremove all Word styles and apply Normal style to the entire document. If Word displays thefollowing message, click No:Recording Clipboard style sheet will require copying many styles.Do you want to use Normal style instead?
This section contains the following topics:• xEditor Working with xResponse, page 11
• The Document Actions Panel, page 12
• Working With Optional Paragraphs, page 14
• Universal Content, page 14
• Empty Line Processing, page 14
• Multi-page TIFF, page 15
• Form Fields, page 15
• Tab Leaders, page 16
• Finding Existing Content, page 16
• Microsoft Word Features and Functions, page 16
• Limitations, page 19
xEditor Working with xResponseWhen you enter into an editing session, Microsoft Word will load and open your document forediting. When a document is open in xEditor, it is locked for all other activity. You or other xResponseusers will be unable to use the Submit, Delete, or Assign features with the locked document. IfxEditor stops without properly closing the document, the same user can reopen the locked document.
If the xResponse session closes, whether by user action or timeout, and a work item remains open inxEditor, the work item will remain locked until the xEditor session is closed. A message displays
11

Working in xEditor for xResponse
when the xResponse session closes with a work item locked reminding the user to close the editorwhen finished editing.
You must log out xEditor whenever your user session closes. xEditor will not close automatically. Itis possible to continue working even though the xResponse session has timed out.
The Document Actions PanelThe Document Actions panel resides in the Task Pane. It opens docked to the right side of thewindow by default, but you can relocate it if desired. You can access all xRevise functions throughthe Document Actions panel. Word provides a number of functions through the Task pane, suchas the XML Structure pane. You can switch panes by clicking the title bar currently displayed andselecting the desired pane from the list.
Clicking the x button in the upper-right corner of the Task pane will close it. To reopen the Task pane,select Task Pane from the Viewmenu or right-click in the toolbar area, below the menus, and selectTask Pane from the menu.
The Document Actions panel contains task pane controls, a toolbar and two display areas.
• The xResponse Toolbar, page 12
• The Table of Contents: Optional Paragraphs Section, page 13
• The xResponse Menu, page 13
• Properties, page 13
The xResponse Toolbar
The buttons on the xResponse toolbar, near the top of the panel, perform these functions.
Button Description
xResponse Opens a drop-down list that provides access to administrative features:• Cache Settings opens the Cache Settings dialog box. See Cache Managementfor details.
• xResponse Log opens the xResponse log in a text editor. See The Log.
• About xResponse opens a pop-up with the current xResponse.dll version.This information can be useful when troubleshooting your xResponseinstallation.
Save Saves the document. This increments the revision number for any section thathas been changed since the last time that the document was saved. This alsocreates a new xPression database object. Note that xPression removes unusedxPression database objects to prevent problems with search and other issues.
Preview Opens the document in the PDF preview window.
12

Working in xEditor for xResponse
Button Description
Publish Enables you to select an output profile and publish the document.
Annotation Displays any annotations associated with the document. Annotations cannotbe edited in xEditor. After creating an annotation xEditor will not allowanother annotation to be added until the work item is saved. Annotations canalso be attached in the xResponse client interface or xDesign.
The Table of Contents: Optional Paragraphs Section
This section displays a table of contents, or work item structure, when your document makes use ofOptional Paragraphs. This section does not appear when the document does not contain OptionalParagraphs. Optional Paragraphs are created in xDesign. They enable you to choose which textappears in the final document. When text is marked as “optional” by your document designers inxDesign, it appears in the xEditor Table of Contents with a check box (for multi-select content) or radiobutton (for single-select content). See Working With Optional Paragraphs, page 14 for instructions onhow to use this feature. For more background on Optional Paragraphs, see the xDesign User Guide.
The xResponse Menu
The Microsoft Word ribbon includes an xResponse tab. This ribbon enables you to open the TaskPane. It also provides functions that are also available in the xResponse menu on the Task Pane.
• Show xResponse — opens the Task Pane.
• Show Log — opens the xResponse log in a text editor. See The Log.
• About xResponse — opens a pop-up with the current xResponse.dll version. This information canbe useful when troubleshooting your xResponse installation.
Properties
Properties are established when the document is created. Once created, they cannot be changed inxResponse, so this part of the Document Actions panel is read-only. The following properties aredisplayed when the highest level node is selected:
• Name
• Work ID
• Last Saved Time
• Customer Key
• Category Name
• Publisher Type
• Document Protection
13

Working in xEditor for xResponse
Working With Optional ParagraphsA section of text can be designated as “optional” when it is created in xDesign. You are neverrequired to include optional material in the xResponse work item. Optional Paragraphs enable youto choose which text appears in the final document. When text is marked as “optional” by yourdocument designers in xDesign, it appears in the xEditor Table of Contents with a check box (formulti-select content) or radio button (for single-select content).
The following buttons are used with work items that include optional paragraphs.
Icon Description
Multi Select Multi-select Optional Paragraph Group - This type of Optional Paragraph isidentified by the use of checkboxes. You can select one or more OptionalParagraphs from the Optional Paragraph group. You could also choose toselect none of the Optional Paragraphs for inclusion in the final document.
Single Select Single-select Optional Paragraph Group - This type of Optional Paragraphis identified by the use of radio buttons. You can select only one OptionalParagraph from the Optional Paragraph Group.
Universal ContentThe document designer can include external content, such as PDFs, multi-page TIFFs, and others. Insome cases editing opportunities for external content are limited. There is no indication in xResponsewhat type of external content is present. Inline universal content is not supported in xEditor, anduniversal content cannot be used as an optional paragraph. xResponse will not allow a documentwith inline universal content or universal content being used as optional paragraphs to be usedas a work item.
Page numbering preferences, Even/Odd page settings, and Inherit Layout settings are not honored inUniversal Content (UC) for documents used with xEditor. Universal Content is converted to an imagefor viewing and previewing, so when UC is viewed in xEditor or opened for “Preview as Word” itwill appear exactly as it would if the UC were opened directly, but output will be correct.
The Use Master Definition option is not respected in documents intended for use in xEditor. Elementsin the Universal Content will not be included in the master document table of contents in xEditordocuments.
Any table styles contained in a Word Doc or Word Docx universal content will not appear in anytable style list in xEditor.
Empty Line ProcessingEmpty lines are normally discarded. This is typically preferred in cases where there may be textin some cases, but when there is no text there should be no blank line either. For example, manydocuments include an ADDR2 line, but if there is no second address line the resulting blank is
14

Working in xEditor for xResponse
discarded so that there is no space between ADDR1 and the City, State, Zip Code line that typicallyfollows the address lines.
Under certain circumstances xEditor inserts a non-printing character in blank lines, which results inthe blank line being retained. To avoid this, use a paragraph style for the line that may not containtext which indents the line.
Multi-page TIFFMulti-page TIFFs (images in the Tagged Image File Format) can be included by the documentdesigner as external content. External TIFFs are not indicated in the xEditor TOC for xResponseand the xResponse user does not have the ability to specify which pages are included in output ormodify the external content in any way.
Form FieldsThe document designer can include form fields in the document. Only check box, text box, anddrop-down list form fields from the Legacy Tools selection are supported. Form fields are usedto enable users of the document to make limited changes to the document. The section of thedocument that contains the form fields must be under Filling in Forms protection. Since xResponsedocuments may be assembled from multiple xDesign content items, and Filling in Forms protectionis not compatible with Read-only protection, any document that contains form fields cannot useRead-only protection. The document designer can create a document with unprotected sections alongwith sections under Filling in Forms protection.
Multiple paragraphs are supported in text box form fields, but are not supported for fillable PDFoutput.
The xDesign document designer can use variables to populate drop-down lists and text boxes.xResponse converts all variables to static text when the document is assembled, so the consequencesfor changing variables in xResponse are the same as editing any other content.
The xEditor user can modify the contents of form fields, but cannot modify text outside of the formfields in sections that are under Filling in Forms protection.
New form fields cannot be added in xEditor. Content that includes form fields can be searched andinserted into other sections as long as the target section is under Filling In Forms protection.
The content of form fields cannot be automatically spell-checked in xResponse, regardless of whicheditor is used.
Bookmarks are mandatory for form fields. Never remove the bookmark for a form field.
Form fields are functional in Fillable PDF output. The xPression administrator can provide an outputprofile that supports fillable PDF output.
15

Working in xEditor for xResponse
Tab LeadersThe document designer can choose to use tab leaders in indexes to provide a uniform appearance.However, because of the method used to prepare the document for use with xEditor, tab leadersettings cannot be passed. So it will be necessary to reset the index and apply any desired tab leaderfor any document using tab leaders in an index.
Finding Existing ContentxEditor for xResponse does not provide a search function other than Word’s native Search feature.There are some limitations to Word’s Search feature, along with some others. See Microsoft WordFeatures and Functions.
Subdocument MergeWhen you create a work item, xPression automatically creates a revision unit and inserts a paragraphbreak when a subdocument is encountered. If the subdocument is a paragraph that is marked tobe merged with the paragraph preceding it, the paragraph merge is ignored either in xEditor orin the publishing output. If you want to merge paragraphs in this situation, set the value of theTreatSubdocAsAutomaticRevisionUnit property in revise.properties to false. When the value isset to false, xPression does not create a revision unit for a subdocument. However a revision unit isstill created for a subdocument that starts with a section, which is assigned a unique revision unitname. This property works for work item creation only, and has no impact on existing work items.Any changes of this property value will not take effect until you restart the server.
Start/End-Page Stub Content GroupsxEditor does not support this feature. When you launch xEditor from xResponse to open or edit thedocument, the stub might be displayed incorrectly in xEditor or in the publishing output.
Microsoft Word Features and Functions
Caution: It is possible to open multiple instances of MS Word, so be sure to save your work andclose xEditor when finished. Many add-ons are available for Microsoft Word. Using xEditorwith third-party add-ons may produce unexpected results.
Microsoft Word will occasionally display document Auto Recovery task pane when launched inxEditor. xEditor does not support the Auto Recovery feature. When presented with the AutoRecovery pane, close the pane. Do not attempt to recover any files.
16

Working in xEditor for xResponse
xEditor supports most Microsoft Word features and functions. Some functions are not supportedbecause xEditor provides a similar function for use within the xPression environment. For example,Word’s New function is not supported because work items for xResponse must be created in xDesign;they cannot originate in xResponse.
By default Microsoft Word displays comments and changes in balloons. If balloons are displayedand adjacent sections have different page settings, Word will break the page between these sections.This may result in an extra page being added to the document. This effect will occur in cases wheresubdocuments have different page settings than adjacent sections, and so the unexpected pagebreak may have no apparent cause without understanding this behavior. To prevent the unexpectedbreak, either turn off balloons or redesign the document and all subdocuments to have the samepage settings.
The following Word functions are either not available with xEditor, or the stock functionality ismodified by xEditor. It may be possible to enable toolbar buttons or menu item for those that are notsupported, but the function is still overridden by xEditor. It is also possible disable others, see thexRevise User Guide for more information on enabling and disabling toolbar and menu items.
The following functions are not supported by xEditor, but cannot be suppressed in the interface.
Function Description
Create or ModifyStyle
xEditor does not support creating new styles. When xEditor detects a newstyle, the style is deleted and a message is displayed. xEditor does not supportmodifying styles. Users should not modify styles because satisfactory resultscannot be guaranteed.
New Window Word does not allow this option while running with xEditor because an XMLexpansion pack is attached. This limitation is imposed by Word.
The following Word features work differently in xEditor.
Feature Description
Created On The Created On option for Insert Auto Text does not insert the actual date thedocument was created. It always inserts “Created on 6/19/2007 10:14:00 AM.”It is recommended that users avoid using this option.
Ctrl+A The Ctrl+A hotkey combination selects the entire document in Word. Ctrl+Abehaves differently in xEditor. In xEditor Ctrl+A selects the current sectionbut never selects optional paragraphs.
Protection xEditor supports Read-only and Forms Fill-In protection types for work itemcontent with some restrictions. See Protection.
The following Word functions are overridden or modified by custom xEditor functions.
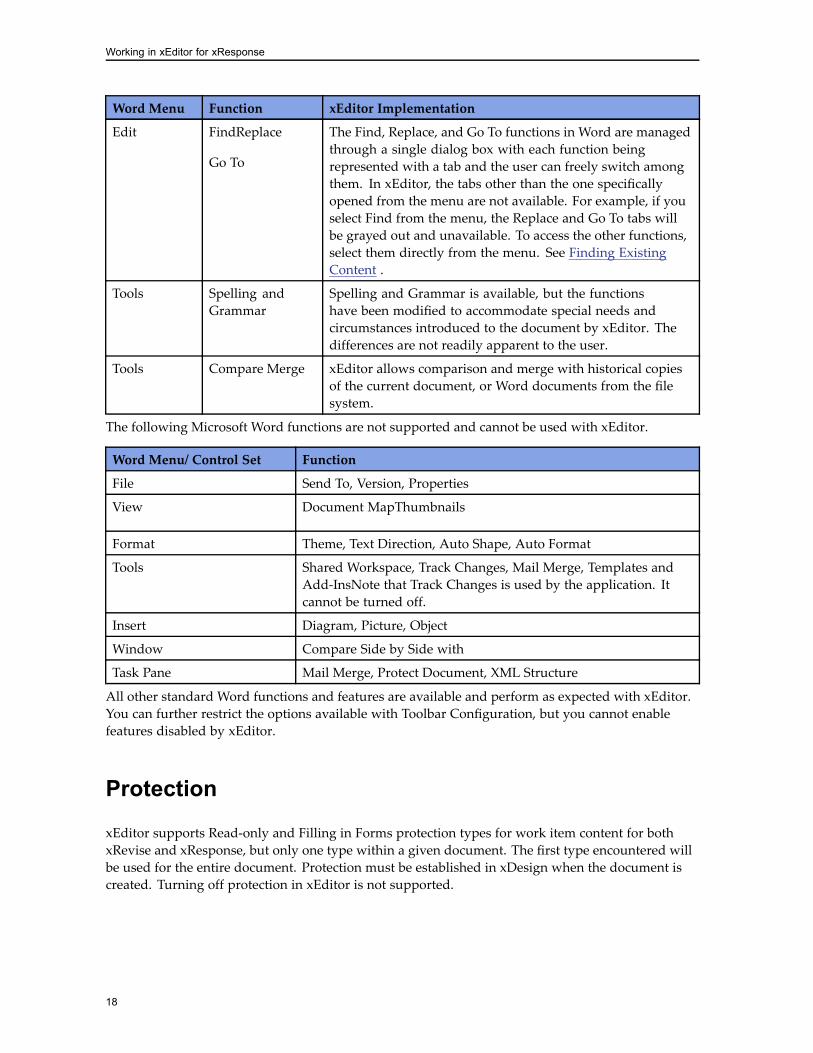
Word Menu Function xEditor Implementation
File SaveSave As Saves work item to the xPression database rather than thefile system
17
Working in xEditor for xResponse
Word Menu Function xEditor Implementation
Edit FindReplace
Go To
The Find, Replace, and Go To functions in Word are managedthrough a single dialog box with each function beingrepresented with a tab and the user can freely switch amongthem. In xEditor, the tabs other than the one specificallyopened from the menu are not available. For example, if youselect Find from the menu, the Replace and Go To tabs willbe grayed out and unavailable. To access the other functions,select them directly from the menu. See Finding ExistingContent .
Tools Spelling andGrammar
Spelling and Grammar is available, but the functionshave been modified to accommodate special needs andcircumstances introduced to the document by xEditor. Thedifferences are not readily apparent to the user.
Tools Compare Merge xEditor allows comparison and merge with historical copiesof the current document, or Word documents from the filesystem.
The following Microsoft Word functions are not supported and cannot be used with xEditor.
Word Menu/ Control Set Function
File Send To, Version, Properties
View Document MapThumbnails
Format Theme, Text Direction, Auto Shape, Auto Format
Tools Shared Workspace, Track Changes, Mail Merge, Templates andAdd-InsNote that Track Changes is used by the application. Itcannot be turned off.
Insert Diagram, Picture, Object
Window Compare Side by Side with
Task Pane Mail Merge, Protect Document, XML Structure
All other standard Word functions and features are available and perform as expected with xEditor.You can further restrict the options available with Toolbar Configuration, but you cannot enablefeatures disabled by xEditor.
Protection
xEditor supports Read-only and Filling in Forms protection types for work item content for bothxRevise and xResponse, but only one type within a given document. The first type encountered willbe used for the entire document. Protection must be established in xDesign when the document iscreated. Turning off protection in xEditor is not supported.
18
Working in xEditor for xResponse
LimitationsWhen you are previewing and editing documents in xResponse, be aware that once xEditor has beenlaunched for a document, you cannot return to the Preview page to make changes to your optionalparagraphs. After the xEditor has been launched for a document, the only place where you can makechanges to optional paragraphs for that document is in xEditor.
For example, when you are at the Preview page, you have the ability to:• Make changes to your optional paragraphs
• Edit the document
• Distribute the document
If you choose to edit the document, xResponse will launch xEditor. Once this occurs, you cannotreturn to the Preview page to make changes to your optional paragraphs. However, if you choose todistribute the document, bypassing the editor, you are allowed to return to the Preview page to makechanges to your optional paragraphs. This is allowed because xEditor was never launched.
Undo
In some cases it is necessary to click Undo twice to restore the document to its status prior to makingan edit. For example, if a word is selected and then replaced by typing a new word, the first undowill delete all but the first letter of the new word and the second undo will replace the remainingletter with the original word. This behavior is because of the way Microsoft Word records the actions.The select action is an action and the replace action is another action, so Word requires two undoactions to completely restore the original text. The same behavior can be observed in MicrosoftWord without xEditor.
19

Working in xEditor for xResponse
20

Chapter 3Working in xEditor for xRevise andCustom Applications
Editing documents in xEditor is very similar to editing documents in Microsoft Word. Most MicrosoftWord functions are fully supported, and the interface is virtually identical to Microsoft Word.However, certain limitation do apply and should be considered when working with xEditor.
Note: If an xEditor work item contains many Word style changes, Microsoft Word may unexpectedlyremove all Word styles and apply Normal style to the entire document. If Word displays thefollowing message, click No:Recording Clipboard style sheet will require copying many styles.Do you want to use Normal style instead?
• xEditor Working with xRevise, page 22
• The xEditor Interface, page 22
• Carry Forward, page 28
• Finding Existing Content, page 44
• Adding New Content, page 46
• Deleting and Undeleting Revision Units, page 47
• Editing in xEditor, page 47
• Optional Content, page 54
• Table and Paragraph Merge, page 55
• Content Separators, page 55
• Variables, page 56
• Subtotals, Index Headings, and Table Headings and Footers, page 65
• Variables in Optional Content, page 65
• Track Changes, page 65
• Microsoft Word Features and Functions, page 65
• Form Fields, page 68
• Protection, page 70
• Read-Only Protection, page 71
21

Working in xEditor for xRevise and Custom Applications
• xEditor Focus While Loading, page 71
• Tab Leaders, page 72
xEditor Working with xReviseWhen you open an editing session, Microsoft Word will load and open your document for editing.When a document is open in xEditor, it is locked for all other activities. You or other xResponse userswill be unable to use the Submit, Delete, or Assign features with the locked document. If xEditorstops without properly closing the document, the same user can reopen the locked document.
If the xResponse session closes, whether by user action or timeout, and a work item remains open inxEditor, the work item will remain locked until the xEditor session is closed. A message displayswhen the xResponse session closes with a work item locked reminding the user to close the editorwhen finished editing.
You must log out xEditor whenever your user session closes. xEditor will not close automatically. It ispossible to continue working even though the xResponse session has timed out. It is possible to openmultiple instances of Microsoft Word, so be sure to save your work and close xEditor when finished.
Microsoft Word will occasionally display document Auto Recovery task pane when launched inxEditor. xEditor does not support the Auto Recovery feature. When presented with the AutoRecovery pane, close the pane. Do not attempt to recover any files.
xEditor is an extension of Microsoft Word. To close xEditor, simply close the Word instance hostingit. For example, clicking the Close button in the upper-right corner of the Word window will closeWord and xEditor. Ensure that all work is saved before closing the application. Note that Word’s autosave feature does not save your work to the xPression database.
The xEditor InterfaceSee the following topics:• The Document Actions Pane, page 22
• The xRevise Toolbar, page 23
• The Table of Contents Section, page 24
• The Information Panel, page 26
• The Command Bar, page 27
• The xRevise Menu, page 28
The Document Actions Pane
The Document Actions pane resides in the Task Pane. It opens docked to the right side of thewindow by default, but you can relocate it if desired. You can access all xRevise functions throughthe Document Actions pane. Word provides a number of functions through the Task pane, such as
22

Working in xEditor for xRevise and Custom Applications
the XML Structure pane. You can switch panes by clicking the title bar currently displayed andselecting the desired pane from the list.
Tip: Clicking the x button in the upper-right corner of the Task pane will close it. To reopen the Taskpane, select Task Pane from the View menu or right-click in the toolbar area, below the menus,and select Task Pane from the menu.
The Document Actions pane contains task pane controls, a toolbar and display areas.
The xRevise Toolbar
The buttons on the xRevise toolbar, near the top of the pane, perform these functions.• xRevise
Opens a drop-down list that provides the following options:— Search Results displays Search Results in the lower pane.
— Show/Hide deleted revision units toggles showing and hiding deleted revision units. SeeDeleting and Undeleting Revision Units.
— Cache Settings opens the Cache Settings dialog box. SeeCache Management for details.
— xEditor log opens the xEditor log in a text editor. SeeThe Log .
— About xRevise opens a pop-up with the current xRevise.dll version. This information can beuseful when troubleshooting your xRevise installation.
— Preferences opens the Preferences dialog box where the user can designate a key combinationto navigate to the next region that is not under Read-only protection.
• Debug
The Debug button is not normally displayed, but xEditor can be configured to display it by thexPression administrator. This feature should be enabled and used only as directed by EMCDocument Sciences Technical Support.
• Forward/Backward
Moves the focus to the next or previous variable in the document. Clicking repeatedly will scrollthrough all variables in the work item until the end of the document, beginning or end dependingon which button is being used, at which point scrolling will stop.
• Save
Saves the document. This increments the revision number for any section that has been changedsince the last time that the document was saved. This also creates a new xPression databaseobject. Note that xPression removes unused xPression database objects to prevent problemswith search and other issues.
• Preview
Opens the document in the PDF preview window.
• Publish
Enables you to select an output profile and publish the document.
23

Working in xEditor for xRevise and Custom Applications
• Spell check for form field
Opens the spell check for form fields. This is an extension of Microsoft Word’s spell check feature.See Spell Check for Form Fields. This button appears if the work item contains form fields and asection under Filling In Forms protection only.
• Insert RU
Opens the Insert RU window in the Task pane where you provide a name, jurisdiction(s), andlanguage for the new revision unit. The new RU is inserted after the element that is currentlyselected in the TOC, either an RU or the root element. See Adding New Content.
• Search
Opens the Search window in the Task pane. See Finding Existing Content, page 44 for details onusing the Search function.
• Goto Next Editable Region
Microsoft Word’s Read-only protection option provides the ability to prevent edits in thedocument except in designated regions. Clicking this button moves the focus to the next regionthat is not under Read-only protection.
The Table of Contents Section
The TOC shows the document structure. Nodes in the tree represent Revision Units. or RUs. RUs areestablished in the document when it is created in xDesign, and function as content items or sections.All xRevise work items contain at least one RU. An asterisk is appended to the node’s name when anychange is made that affects the assembly, such as adding or moving an RU. You can add new contentitems, which are displayed in the same manner as those created in xDesign.
When you select a Revision Unit in the TOC, the cursor is moved to the beginning of the RU in theedit pane and the Revision Unit’s properties are displayed in the Properties window as shown inbelow. Double-clicking an RU in the TOC selects the entire RU in the edit pane. RUs with unsavedchanges are indicated with an asterisk in the TOC.
Move RUs in the TOC by clicking the RU and dragging it to the desired location. Moved RUs aremarked with an asterisk showing that there was a change, even if the content of the RU remainsthe same.
Multi-page TIFFs and PDFs can be included in the document by the document designer. The externalcontent item is represented as an RU in the TOC. If the document designer does not establish an RUfor the external content, an RU will be created when the work item is created. The external content’sRU is represented in the TOC by a distinctive icon. The external content’s RU will include a childnode for each page, if the content includes multiple pages. Each page can be excluded if desired.To skip a page right-click the page’s node and select Exclude from the context menu. To restore apage that had been marked for exclusion, right-click the node and select Include. Page selections areretained for subsequent sessions. External PDF other than universal content PDF does not supportExclude/Include.
The document designer can add a variety of document types as external content in addition toPDF and TIFF, including universal content and other xDesign documents. The distinction betweenexternal content and master document content is not apparent to the xEditor user, except in the casesof PDF and TIFF external content. External content cannot be added by the xEditor user.
24

Working in xEditor for xRevise and Custom Applications
The Table of Contents is disabled when working in headers and footers, so navigating with the TOCis not possible when in Header/Footer mode. To exit Header/Footer mode, click outside the headeror footer region, or click Close Header/Footer.
Some xEditor functions are not available through the toolbar, but can be accessed by right-clickingthe document node or any RU in the TOC. The right-click menu for the document node providesthe following options.• Save As
Opens the Save dialog box and enables you to save the document as a file to any selected location.Saving the file in this way allows you to open the file without going through xRevise, but changeswill not be available to xRevise.
• Annotation
Displays any annotations associated with the document. Annotations cannot be edited in xEditor.After creating an annotation xEditor will not allow another annotation to be added until the workitem is saved. Annotations can also be attached in the xRevise client interface or xDesign. Newannotations can be added to the work item using the New Annotation button on the CommandBar.
• Compare to File
Opens the Compare window where you can compare the current work item with either a workitem stored in the xRevise history for this item, or a Word document stored on the local file system.The work item must be saved before this feature can be used.
• Compare to Work Item
Opens the Microsoft Word Compare feature to compare the current document to another workitem using this Microsoft Word feature rather than Carry Forward.
• Carry Forward
Opens the xRevise Carry Forward utility to compare the current document to another work itemusing this xRevise feature.
The right-click menu for the RUs provides the following options.• Delete/Undelete
Deletes or undeletes the selected revision unit. The title of the option changes appropriately withthe delete status of the RU. You cannot delete the last RU in the document, so this option isavailable only if there is another RU in the document. See Deleting and Undeleting Revision Units .
• Annotation
Displays any annotations for the work item. Annotations cannot be edited or deleted oncecreated. Annotations can be added to xRevise work items through the xRevise desktop or theNew Annotation button on the Command Bar in xEditor. Annotations can be as long as desired.Only one annotation can be added at a time. Save the work item to add a new annotation.
• Revert
Discards all unsaved changes to the RU.
• Include/Exclude
These options are available for each page in a multi-page TIFF. Select the appropriate option toinclude or exclude the page. All pages are included by default.
25

Working in xEditor for xRevise and Custom Applications
TOC Icons
The following icons appear in the xEditor Table of Contents.• Document Node
The top node of the current document representing the entire document. All other nodes in theTOC are below this node.
• Revision Unit
xRevise documents are divided into Revision Units. Each RU is represented with this icon. SomeRUs have further child nodes.
• External Content
The document designer can include external content in the document. Each piece of externalcontent is contained in its own RU represented by this icon. Multi-page TIFF and PDF contentrepresents each page in the external item as a child node of this icon.
• External Content Page
Each page in a multi-page external content item is represented by this icon under the ExternalContent RU node. If the external content is a multi-page TIFF right-clicking the child node opens acontext menu that provides the option of skipping the page.
• Multi Select
Multi-select Optional Content Group - Any combination of optional content under a MultiselectOptional Content Group can be selected. Clicking a selected item deselects it. You are neverrequired to select optional content. See Optional Content, page 54.
• Single Select
Single-select Optional Content Group - Only one optional content item under a Single-selectOptional Content Group can be selected. Selecting an item deselects any currently selected item.Clicking a selected item deselects it. You are never required to select optional content. SeeOptional Content, page 54.
The Information Panel
Immediately below the TOC section is the Information Panel, which consists of several grids thatshow details related to the current selection. Each grid in this panel displays the indicated informationrelated to the selected element. By default the Variables grid is expanded and the Properties andAttributes grids are collapsed. Click the maximizer icon to maximize or collapse each section.
Properties are established when the document or revision unit is created. Once created, they cannotbe changed in xRevise, so this grid is read-only except when creating a new revision unit. Thefollowing properties are displayed when the highest level node is selected:
• Name
• Work ID
• Last Saved Time
• Customer Key
26

Working in xEditor for xRevise and Custom Applications
• Category Name
• Publisher Type
• Document Protection
When a Revision Unit is selected the following properties are displayed:
• Name
• Create Date
• Revision
Optional content that has been marked for Merge by the document designer is indicated with a MergeParagraphs section. The xEditor user cannot designate content for merge.
If the Revision Unit includes an annotation the date the annotation was created and a portion ofthe annotation is displayed. If the Revision Unit was inserted from search results and containsvariables, then the variables are displayed as well. If an optional content group is selected the nameand optional group type (single or multi) is displayed.
The Create Date for a revision unit is established as the current date when the RU is created or whenit is manually inserted into xRevise. RUs created from content item search are initially assigned theCreate Date for the content item, but are changed to the current date when the RU is saved or edited,or upon exit. Note that xDesign content items do not necessarily correlate to an xRevise revision unit.
Attributes depend on the attribute set used by the document that created the work item. The RUcannot be renamed if the Revision is 1 or greater.
Note: The value for an attribute may be blank (nothing indicated for the attribute) or <none> if thereis no value for the attribute. If the value is blank it indicates that either the value was set to “no value”in xDesign, or that a search and insert was performed and the value never set. If the value is <none> itindicates that the value was not set at all, not even to “no value,” in xDesign.
The Variables grid displays the type, name, value, and source for each variable used in the documentif the document node is selected or the RU if an RU is selected. Refer to Variables for moreinformation on using the Variables grid.
The Command Bar
The Command Bar, located at the top of the Information Panel of the Task Pane, provides accessto several features provided for working with variables, and enables adding a new annotation tothe work item.• Toggle Variable Editing
The Variables grid must be in Edit mode to allow variable editing. Click this button to toggle Editmode on and off. Toggling the Edit mode cannot override certain protections that may be imposedon variables: some variables can never be edited, some variables may be under protectionestablished by the document designer, and the xPression administrator can prevent any variableediting. See Editing Variables for more information on working with variables and variable values.
• Variable Navigator
27

Working in xEditor for xRevise and Custom Applications
Opens the Variable Navigator, which displays all values that have been applied to the selectedvariable and where it is used within the work item. Values must have been saved to appear in thehistory. See Variable Navigator for more information on the Revision History dialog box.
• New Annotation
Opens the New Annotation dialog box, enabling you to add a new annotation to the work item.
The xRevise Menu
When running xEditor, Word’s menu bar includes an xRevise menu. The main purpose for this menuis to provide a convenient means of opening the Task Pane in the event that it closes. It also providessome functions that are also available in the xRevise menu on the Task Pane.
• Show xRevise opens the Task Pane.
• Show Log opens the xEditor log in a text editor. SeeThe Log .
• About xRevise opens a pop-up with the current xRevise.dll version. This information can beuseful when troubleshooting your xRevise installation.
Carry ForwardThe xRevise Carry Forward utility enables you to compare your current table of contents to any otherversion (earlier or later) of the same customer’s document stored in the Completed Work queue,or other documents of the same type. You can copy items or sections from archived versions tothe current table of contents.
Note: Carry Forward uses highlighting to indicate the Word content associated with the selectedRevision Unit. Any highlighting that has been applied by the user may be overwritten or discardedduring Carry Forward.
The Carry Forward Utility is part of xEditor. You can open the Carry Forward utility from the Workin Progress page or from an open work item. Regardless of how Carry Forward is opened, theoptions are the same.
See the following topics about Carry Forward:• How Carry Forward Works, page 29
• Carry Forward from the xRevise Desktop, page 29
• Carry Forward from Work Item, page 29
• Review Helper, page 30
• The Carry Forward Review Pane, page 30
• Auto Carry Forward, page 38
• Revision Numbers, page 42
• The Auto Carry Forward Log, page 43
28
Working in xEditor for xRevise and Custom Applications
How Carry Forward Works
Three documents are involved in any Carry Forward action; Baseline, Compare, and an Activedocument. When a document is opened in Carry Forward the Baseline document is compared tothe Compare document. As many conflicts as possible are resolved automatically. In most casesall conflicts are resolved automatically, and any resolutions can be changed if necessary. If CarryForward encounters a revision unit with a name that conflicts with another revision unit, it ishandled as a new RU.
Note: Automatic resolution has limitations. If revision units have been moved, for example, it ispossible that Carry Forward will not be able to correctly identify which revision units in the baselinedocument correspond to which revision units in the compare document.
When working in Carry Forward the only document subject to change is the active document. Thecompare and baseline documents can be displayed for reference, but cannot be modified.
If a Carry Forward is attempted and the document is locked for editing an error will display in apopup window.
Carry Forward from the xRevise Desktop
Access Carry Forward from the xRevise desktop by clicking the Carry Forward icon for the workitem. A dialog box with the following options opens.• Carry Forward with Most Recent Version
Compares the document with the most recent document in the Completed Work list that has thesame document type and key. Select this option and click Continue to open Carry Forward.
• Carry Forward with the approved item(s)
Opens an intermediate screen with a list of approved documents available in the Work in Progresslist. Select the document that you want to use for comparison and click Continue.
• Find a Document in the Completed Works
Opens an intermediate screen which enables you to search for a completed document based onone or more keys. Provide the desired values for the keys and click Continue.
Carry Forward from Work Item
You can also access the Carry Forward utility from an open work item in xEditor by right-clickingthe document (top-level) node in the Document Actions pane and selecting either Compare to fileor Compare to Work Item. The Compare to File option opens a dialog box where the desired filecan be selected. The Compare to Work Item opens the Compare pane where the desired work itemcan be selected.
29

Working in xEditor for xRevise and Custom Applications
Review Helper
Regardless of which method to start the carry forward operation is used, when the baseline andcompare documents have been assessed the Review Helper dialog box opens. This dialog box enablesthe user to scroll through all instances where a change was identified. The user can choose to acceptthe automatic resolution or switch to the other option.
The name of the RU, the Current State of the RU and the state indicator icon (see The DocumentStructure Tree for a description of the icons), and the reason for the automatic selection. If the userhas chosen to override the automatic selection, this is indicated in the Current State field. The ShowCarry Forward details button toggles displaying the Carry Forward Data and Content Compatibilitysections.
The following options are available on the Review Helper dialog box.• Show/hide side-by-side compare documents
Toggles the side-by-side compare view. In this view all three revision units involved in the carryforward operation are displayed: Active, Baseline, and Compare. The Review Helper dialog boxremains open. This view can also be opened from the Carry Forward Review Toolbar.
• Show Carry Forward details
Toggles the expanded Review Helper dialog box. When expanded the dialog box shows CarryForward Data and Content Compatibility.
• Navigation Buttons
Use the navigation buttons to scroll through the identified changes in the document.
• Confirm
Confirms the current selection. When a decision is confirmed the only option available for the RUis to undo the confirmation. Options can also be confirmed from the right-click menu for each RU.
• Use Compare
This option is available if Use Baseline is the current state, or the RU has been removed. Click thisbutton to use the RU from the Compare document.
• Use Baseline
This option is available if Use Compare is the current state, or the RU has been removed. Clickthis button to use the RU from the Baseline document.
• Remove
This option is available unless the RU has been removed. Click this button to remove the RU.
The Review Helper closes when the Close button in the upper-right corner of the dialog box is clicked.It can be reopened by clicking the Review Helper button in the Carry Forward Review toolbar.
The Carry Forward Review Pane
The Carry Forward Review Pane is the main interface for working with documents in Carry Forward.It consists of a toolbar, a document tree for the working document, a Properties section, andinformation sections for the Baseline and Compare documents.
30

Working in xEditor for xRevise and Custom Applications
The Carry Forward Review Toolbar
The Carry Forward Review toolbar is located at the top of the pane. Use these buttons to performactions in the Carry Forward Review pane.• Logs
Opens a menu from which the Editor log or the Auto Carry Forward log can be opened.
• Show Variable Values or Variable Names
Toggles the working document to display either variable names or values. Baseline and Comparedocuments always show the variable values.
• Show/Hide Compare and Baseline Side-by-side
Carry Forward can display Baseline and Compare documents in frames below the workingdocument. Click this button to toggle displaying the other documents. They are for referenceonly; they cannot be edited in Carry Forward.
Always use this button to close the comparison documents; do not close the extra windows usingthe window’s Close button. The comparison windows may adversely affect overall performancewhen open.
• View Filter
Determines what is displayed in the working document and the document tree. Click the downarrow, to the right of the funnel icon, to display a list of the available options:— Show Conflict Only
— Show Auto-Resolved Only
— Show All Differences
— Show All
• Finish
Saves changes and finishes the comparison. This action is not available if the work item containsa conflict.
• Cancel
Discards all changes and closes the comparison.
The Document Structure Tree
The Document Structure Tree displays the document structure and enables a variety of actions. Thehighest-level node in the tree represents the document. Under the document node are any RUs thatshould be displayed based on the selection made with the View Filter on the toolbar. By default onlyRUs with differences between baseline and compare documents are displayed.
The following icons may appear in the Document Structure Tree.• Document Node
The highest level node in the tree; represents the entire active work item.
• RU Using Baseline
31

Working in xEditor for xRevise and Custom Applications
The Revision Unit differed in the baseline and compare documents. Revisions in the baselineversion are being used. The green arrow in the icon points to the left, indicating that baseline isused.
32

Working in xEditor for xRevise and Custom Applications
• RU Using Compare
The Revision Unit differed in the baseline and compare documents. Revisions in the compareversion are being used. The green arrow in the icon points to the right, indicating that compare isused.
• RU Identical
The Revision Unit was identical in both baseline and compare documents.
• Change from Baseline
There is a tracked change and the baseline version is being used.
• Change from Compare
There is a tracked change and the compare version is being used.
• Inserted
The Inserted icon indicates that the item exists in a completed work item, but not the active workitem, or exists in the active work item but not a completed work item.
• Conflict
There is a conflict that cannot be resolved automatically, so it must be resolved manually. Thedocument cannot be finished until the conflict is resolved. The specific conflict will be indicated inthe tree as tracked changes.
Whenever any node is selected in the tree the corresponding content is highlighted in the workingdocument and appropriate information is displayed in the Information section near the bottom ofthe pane.
Each node except the document node provides a context, or “right-click”, menu for working with thecorresponding content. The options depend on the selected node and its current status.
The following options are available on Revision Unit nodes.• Confirm
Confirms changes to the revision unit. When confirmed all other options become unavailableexcept Undo Confirm, which reverses the confirmation.
• Remove
Removes the revision unit. This action can be reversed by Revert.
• Use Baseline
This action is available if the Compare version is currently being used. It changes the revisionunit to the Baseline version.
• Use Compare
This action is available if the Baseline version is currently being used. It changes the revisionunit to the Compare version.
• Use Both
This action is available when revisions exist in both baseline and compare work items that do notoverlap or result in a conflict. When selected both revisions are used.
• Edit
33

Working in xEditor for xRevise and Custom Applications
Allows editing in the active document. Only unprotected text can be edited. Variables cannotbe edited, either in Name or Value display mode. When selected the Carry Forward toolbaris replaced with the Finish Edit button. Click Finish Edit to restore the toolbar. See EditingContent in Carry Forward.
• Revert
Discards all changes, restoring the document to its starting condition.
• Choose Variables
Replaces the Carry Forward Review pane with the Variables pane and the Carry Forward Reviewtoolbar with the Choose Command Bar. See Working with Variables in Carry Forward.
• Undo Confirm
This action is available if the Confirm action has been applied. It reverses the Confirm action andrestores the remaining options when opening the context menu.
The context menu for tracked changes in the tree provides a single option that enables removingchanges or restoring changes that have been removed; the menu toggles between the two actions.When removing a change a Comment dialog box opens that enables adding a comment for theremoval. To create a comment for the removal, type the text of the comment in the text field and thenclick Add Comment. To proceed with the removal without adding a comment, click Dismiss. Thecomment appears in a comment balloon in the active document. The comment balloon is discardedwhen the change is re-inserted and cannot be recovered.
The Information Panel
The Information panel, located below the Document Structure pane, displays information relevantto the selected element. Information in this panel is read-only.
The following information is available in the upper section of the information panel when thedocument node is selected.• Properties
The upper section contains information about the document.
• Category Name
The name of the category that contains the document.
The following information is available in the Baseline section of the information panel when thedocument node is selected.• Baseline
This section contains information about the Baseline document.
• Name
The name of the baseline document.
• Customer Key
The customer key used to produce the document.
34

Working in xEditor for xRevise and Custom Applications
• Publisher Type
The publisher, either xPublish or CompuSet.
• Last Saved Time
The last time the baseline document was saved.
• Annotations
Any annotations attached to the baseline document
The following information is available in the Compare section of the information panel when thedocument node is selected.• CompareThis section contains information about the Compare document.
• Name
The name of the compare document.
• Customer Key
The customer key used to produce the document.
• Publisher Type
The publisher, either xPublish or CompuSet.
• Last Saved Time
The last time the compare document was saved.
• Annotations
Any annotations attached to the compare document
The following information is displayed in the upper section of the Information panel when a revisionunit is selected.• Properties
The upper section contains information about the revision unit in the active document.
• Name
The name of the revision unit.
• Current State
The current state of the revision unit. The revision unit can be Using Baseline, Using Compare,Using Both, or Not Used.
The following information is displayed in the Baseline section of the Information panel when arevision unit is selected.• Baseline
This section contains information about the revision unit in the Baseline document.
• Revision
The revision level of the revision unit.
35

Working in xEditor for xRevise and Custom Applications
• Create Date
The date the revision unit was created in the baseline document.
• Annotations
Any annotations associated with the revision unit in the baseline document.
• Deleted
Indicates whether the revision unit has been deleted in the compare document. Can be True orFalse.
The following information is displayed in the Compare section of the Information panel when arevision unit is selected.• Baseline
This section contains information about the revision unit in the Baseline document.
• Revision
The revision level of the revision unit.
• Create Date
The date the revision unit was created in the baseline document.
• Annotations
Any annotations associated with the revision unit in the baseline document.
• Deleted
Indicates whether the revision unit has been deleted in the compare document. Can be True orFalse.
Editing Content in Carry Forward
The Carry Forward feature is intended as a means of efficiently combining content in differentversions of a document, but it does provide the ability to edit content. Editing is performed on a singlerevision unit at a time. When editing a revision unit no other Carry Forward action can be performed.To edit a revision unit, right-click the revision unit in the tree and then click Edit. The Carry ForwardReview toolbar is replaced with a single button, Finish Edit, and all context menu items are disabled.
If the document contains form fields then Filling In Forms protection is mandatory for any section thatcontains a form field. In this case, the text can be edited, but variables and form fields are protectedfrom editing. If the document does not contain form fields, the document may have been protectedwith Read-Only protection, in which case only designated text can be edited. Text that can be editedis surrounded with brackets and subtly highlighted. When finished editing, click Finish Edit.
The Carry Forward utility may not display expected changes to headers and footers under certaincircumstances when removing a section with a header or footer and then replacing the removedsection. The expected change may not be displayed in the Carry Forward view when the headeror footer uses the Link to Previous property.
Inserted data in the header or footer will always be correct in the Carry Forward view. This issueaffects sections after inserted data if the section is set to Link to Previous. Since the affected sections
36

Working in xEditor for xRevise and Custom Applications
may not be visible, and the change may be subtle, this behavior may not be easily apparent. Theheader or footer will be updated when the user completes the carry forward operation and returnsto the normal xEditor view. This behavior is specific to the xEditor-based Carry Forward Utility. Itdoes not occur when publishing or when previewing documents outside of Carry Forward. Thisbehavior also occurs when using Revert.
Working with Variables in Carry Forward
The Carry Forward Review toolbar enables the option of showing either variable names or variablevalues. In addition to this there is an option to directly interact with variables in Carry Forward.To work with variables, right-click a revision unit that contains variables and then click ChooseVariables. This replaces the Carry Forward Review Toolbar with the Choose Command Bar.
The toolbar contains the following options.• Source
Opens a drop-down list where the source of the variable values can be selected. Variables can besourced from either the Baseline Values or Compare Values.
• Reset to the entry variable values
Restores the values of the variables to the values at the beginning of the current action. Valuescannot be reset after they have been applied.
• Apply the variable values to the Revision Unit and resume Review
Applies any changes to variables, closes the Choose Variables session, and returns to the CarryForward Review. Once applied variable values cannot be restored automatically, but they can bechanged manually in a subsequent Choose Variables session.
• Cancel
Discards all changes and returns to the Carry Forward Review.
In addition to offering a choice between Baseline and Compare documents for variable values, CarryForward also allows manual changes to individual values. All variables and their current values aredisplayed beneath the Choose Command Bar. To manually change a variable value, type the desiredvalue in the value cell for the variable. The variable name cannot be changed.
Headers and Footers in Carry Forward
The xEditor-based Carry Forward utility may not display expected changes to headers and footersunder certain circumstances when removing a section with a header or footer and then replacing theremoved section. The expected change may not be displayed in the Carry Forward view when theheader or footer uses the Link to Previous property.
Inserted data in the header or footer will always be correct in the Carry Forward view. This issueaffects sections after inserted data if the section is set to Link to Previous. Since the affected sectionsmay not be visible, and the change may be subtle, this behavior may not be easily apparent.
37

Working in xEditor for xRevise and Custom Applications
The header or footer will be updated when the user completes the carry forward operation andreturns to the normal xEditor view. This behavior is specific to the xEditor-based Carry ForwardUtility. It does not occur when publishing or when previewing documents outside of Carry Forward.
This behavior also occurs when using Revert.
Universal Content with Carry Forward
If the content of a revision unit is universal content or external content, some Carry Forwardoperations are not available.
Auto Carry Forward
The xRevise Carry Forward utility compares two versions of a work item and chooses which RevisionUnits to include in a final version based on meeting predefined conditions. When the comparisonis complete, the final version is produced and the user is given the opportunity to review all of thedecisions made by the Carry Forward utility and change them as desired.
The xPression Administrator can choose to use Auto Carry Forward. When selected, the CarryForward Review part of the process is bypassed, so that the user does not review the decisionsmade by Carry Forward.
How Does Auto Carry Forward Work?
When a user initiates a Carry Forward operation and Auto Carry Forward is configured in xAdmin,the specified documents are compared and a final version is produced based on the Carry ForwardConfiguration. The standard Carry Forward Review is omitted from the process, so the featurerequires no additional action on the part of the xRevise user; the xRevise user is relieved of the needto perform the Carry Forward Review.
The Comparison Process
All xRevise work items are divided into Revision Units, or RUs. In the simplest case a work itemconsists of a single revision unit, but most xRevise work items should consist of multiple revisionunits. In the Carry Forward comparison process the baselinework item is compared to another versioncalled the compare work item. You can choose either the baseline or compare version.
Each RU in the baseline work item is compared to the RU of the same name in the compare work item.RUs in the compare work item that do not have a corresponding RU in the baseline work item areidentified. The following scenarios describe the expected result from choosing baseline or compare.• RUC_1
38
Working in xEditor for xRevise and Custom Applications
An RU with a given name exists in the compare work item but that same named RU does not existin the baseline work item. Set Compare or None:— None — The RU is excluded and will not exist in the final version.
— Compare — (Default) xRevise uses the Compare version, so the RU is included in the finalversion.
• RUC_2
An RU with a given name exists in the baseline version but does not exist in the compare workitem. Set Baseline or None:— Baseline — (Default) xRevise uses the baseline version, so the RU is included in the finalversion.
— None — The RU is excluded and will not exist in the final version.
• RUC_3
An RUwith a given name exists in both versions and the content is identical. Set Baseline or None:— Baseline — (Default) xRevise uses the baseline version, so the RU is included in the finalversion.
— None — All RUs will be removed in the final document except the edited RUs. If no RUshave been edited in the baseline or compare document, the following error message appears:“Carry forward failed, no content qualified from the Carry Forward Result. All RUs aredeleted or not in use”.
• RUC_106
Both the baseline and compare work items were modified in the non-variable text portion ofthe document (an area of text not pre-populated with schema data) prior to the Carry Forwardaction. Set Baseline, Compare or None:— Baseline — (Default) xRevise uses the baseline version.
— Compare — xRevise uses the compare version.
— None — The RU is removed.
• RUC_107
An RU with a given name exists in the compare version and the non-variable text portion (an areaof text not pre-populated with schema data) was modified, and an RU with the same name existsin the baseline version. Set Baseline, Compare or None:— Baseline — xRevise uses the baseline version and the modifications will not appear in thefinal output.
— Compare — (Default) the compare version with modification will appear in the final output.
— None — The RU is removed.
• RUC_108
39

Working in xEditor for xRevise and Custom Applications
An RU with a given name exists in the baseline version and the non-variable text portion (an areaof text not pre-populated with schema data) was modified, and an RU with the same name existsin the compare version. Set Baseline, Compare or None:— Baseline — (Default) xRevise uses the baseline version.
— Compare — xRevise uses the compare version.
— None — The RU is removed.
• RUC_109
An RU with the same name exists in both versions. xDesign content modifications were made Inthe baseline version. Set Baseline, Compare or None:— Baseline — (Default) The baseline RU with the modified content will appear in the final output.
— Compare — xRevise uses the compare version, the modifications will not appear in the finaloutput.
— None — The RU is removed.
• RUC_110
The baseline content was edited in xDesign and xEditor. The compare content was modified inthe xEditor. Set Baseline, Compare or None:— Baseline — (Default) the xDesign changes and the custom xEditor changes will appear inthe final output.
— Compare—Only the xEditor changes from the compare version will appear in the final output.
— None — The RU is removed.
• RUC_111
An RU with the same name exists in both versions. In the compare version the non-variable textportion of the content was modified in xEditor. In the baseline version the content in xDesignwas modified. Set Baseline, Compare or None:— Baseline — (Default) The xDesign changes will appear in the final output, but the xEditorchanges will not appear in the final output.
— Compare — The xEditor changes will be applied. The changes made in xDesign must bereapplied.
— None — The RU is removed.
• RUC_112
In the baseline version, changes were made in xDesign and in xEditor. In the compare version, nochanges were made. Set Baseline, Compare or None:— Baseline — (Default) The xDesign and xEditor changes will appear in the final output.
— Compare — The changes will not appear in the final output.
— None — The RU is removed.
• RUC_4
40

Working in xEditor for xRevise and Custom Applications
An RU exists in the baseline version. In the compare version, the same named RU was deleted inthe xEditor interface. Select Baseline or None:— Baseline — (Default) The baseline version will appear in the final output.
— None — The RU is removed.
• RUC_5
An RU exists in the compare version. In the baseline version, the same named RU was deleted inthe xEditor interface. Select Baseline, Compare or None:— Baseline — (Default) The baseline version will appear in the final output, the deleted RU keepsits Deleted status, and the RU content will not appear in the final Word document.
— Compare — The compare version will appear in the final output.
— None — The RU is removed.
• RUC_6
The RU was deleted in both the baseline and compare versions. Set Baseline or None:— Baseline — (Default) The RU is deleted.
— None — The RU is deleted.
• RUC_101
The RU was inserted into the compare version and then deleted, and it does not exist in thebaseline version or did not qualify for assembly in the baseline version. Only supports None:— None — (Default) The RU is deleted.
• RUC_102
The RU was inserted into the baseline version and then deleted, and it does not exist in thecompare version or did not qualify for assembly in the compare version. Set Baseline or None:— Baseline — (Default) The RU is deleted.
— None — The RU is deleted.
Rules can be changed if desired. The system for identifying the rules, RUC_1 and so forth, was usedwhen the Carry Forward logic was in development and is used internally. The nomenclature has nofunction except to differentiate the various rules.
Note: xEditor requires at least one RU in the work item, and this rule also applies to Carry Forward.If a carry forward configuration deletes all RUs in a work item, the carry forward fails.
NULL Variables
A “NULL variable” is an xDesign variable or an xPression Customer Data field that has no valueassigned. This is not the same as a variable with a value of “0”, or “ “ (space), or some other value thatcan be interpreted as “nothing”, but no value applied at all. Usually variables are initialized withsome value, but in some cases this is not desirable, so these variables will be null variables.
For example, data that should be manually entered for each new version of a work item can have aNULL value, and so will be readily identified in xEditor by their placeholders in the document and inthe Information panel. They can be modified in the Information panel as any other variable. Theycannot be modified in the main text. If a value is applied, it is immediately updated in the editwindow. If the changed value is deleted, the placeholder is restored.
41

Working in xEditor for xRevise and Custom Applications
Values can also be applied to NULL variables with an external application when the work item iscreated, in which case the xRevise user may not be aware that the value was applied when thework item was created.
By default NULL variables are not displayed in the document, but they exist and may be displayed inthe variable name format as a placeholder in the document. To make null variables visible, select theShow NULL variables in Word on the Variables tab of the xRevise Configuration page in xAdmin.NULL variables are not included in output even if they are displayed in the editor.
Note: If the work item uses Filling in Forms protection and contains form fields, the NULL variablefeature is not available and the xAdmin setting is ignored. In these documents, NULL variables willnot be accessible through the xEditor interface.
Read-Only Region Navigation
Read Only protection is used to prevent xEditor users from making changes to the document. Thedocument designer can designate regions of the document as editable in xDesign. To scroll throughthe editable regions of the document, click the Goto Next Editable Region on the xRevise tool bar.Also, the xEditor user can designate a key combination that will scroll through the editable regionswhen pressed.
Revision Numbers
This section applies to Revision Unit numbering in Carry Forward and elsewhere in xRevise asindicated.
Revision Numbering Outside Carry Forward
The revision number for a Revision Unit is applied when a new Revision Unit is created or an existingRevision Unit changes following these rules.• Insert Revision Unit from Search—A Revision Unit that is inserted from a Search is assignedthe revision number of the searched Revision Unit. This remains the same after saving if thereare no changes to the inserted Revision Unit, but is the searched Revision Unit’s revision numberplus 1 if any changes are made to the inserted Revision Unit.
• Insert Content from Search—When an xDesign content item is added from a Search it isconsidered a new RU with a revision number of 0, and it remains 0 after saving even if editedbefore the save.
• Edit Existing Revision Unit—An Existing Revision Unit is one that was created when the workitem was created or one that was inserted and previously saved. After saving any changes therevision number is the current revision number plus 1.
42

Working in xEditor for xRevise and Custom Applications
Revision Numbering in Carry Forward
Revision numbering is applied when performing a carry forward operation according to thefollowing logic.• Use Baseline. The baseline number is applied before saving and is retained after saving, unlessedited. If the RU was edited then 1 is added to the revision number.
• Use Compare. The compare revision number is applied before saving and is retained after saving,unless edited. If the RU was edited then 1 is added to the revision number.
• Edit any result Revision Unit. The current revision number is applied before saving the change,the revision number is increased by 1 after saving the change.
The Auto Carry Forward Log
An Auto Carry Forward log is generated during the compare process detailing the decisions madeby the carry forward engine.
The Carry Forward log can be deleted at any time and a new one will be created if necessary. Newactions are appended to the existing log if one is available. The Carry Forward log can be accessedfrom the Logs menu on The Carry Forward Review Toolbar or by opening the file in a text editor.The log file is located in C:\Documents and Settings\[USER]\Application Data\EMC DocumentSciences\[xRevise]\[server]\CF.log.
The Carry Forward log provides the following for each revision unit:• Revision unit Name
• Which revision unit was selected (baseline/compare)
• Reason the revision unit was selected
• If the revision unit preceding and/or following the revision unit are not the same in the compareand baseline work item, the names of the adjacent revision units are detailed (this can happen inthe case of a move or an inserted revision unit).
For example:
Revision Unit Name: xPub2Baseline was auto selected because:The Baseline revision unit is the default when both the Compare and the Baseline revision units areidentical
** Reference siblings have changed **Baseline previous revision unit: xPub1Baseline next revision unit: RU4Compare previous revision unit: xPub1Compare next revision unit: xPub3
43
Working in xEditor for xRevise and Custom Applications
Finding Existing ContentContent that you, or other xRevise users, have created for other work items can be reused. Use theFind utility to locate any combination of text, content item descriptions, or content attributes. Clickthe Search button to open the Content Search dialog box. Configure your search statement, then clickSearch. Microsoft Word’s Find and Replace feature is also available, but is significantly modified foruse with xEditor. See Microsoft Word Find and Replace.
xEditor’s Find Utility
Full Text Search must be enabled in the database if you want to search using the In Content option.Refer to the xPression Installation Guide for more information on enabling Full Text Search. Word’sSearch feature is available for searching for content in the current document without Full Text Searchbeing enabled.
Note: To enable searches on Revision Units, you must uncomment "AddUsageDataForReviseRUs=true" in revise.properties. For more information, see revise.properties in the xPression ServerAdministration Guide.
The Content Search dialog box consists of three sections with the indicated options.
For?• In Name
Type the name of the Revision Unit in this field.
• In Content
Type all, or a portion, of the search string. Full Text Search must be enabled to use this feature.Refer to the xPression Installation Guide for instructions on enabling Full Text Search.
How?• Match
Choose whether you want to return any item that contains Any word or phrase in For?, or Exactword or phrase in For?.
• In
By default, both standard and custom content for all versions is included in the search. You canlimit the potential size of the search results by choosing an option other than the default.— All Content returns content regardless of origin or revision number.
— Standard Content only returns content created in xDesign with revision number of 0. Doesnot return Revision Units.
— Standard Content - Latest Version only searches xDesign content for the most recent version(highest version number). Does not return Revision Units.
— Revision Unit (revised) returns any standard or custom content, and Revision Units with arevision number of 0.
With Attributes
• Jurisdiction
44

Working in xEditor for xRevise and Custom Applications
Choose the desired jurisdiction(s) or click All to choose all jurisdictions.
• Language
Select the language attribute from the list.
• Customer Defined Attribute
Specify the value for any customer defined attributes. Since these attributes are created inxAdmin, specific usage and valid values depend upon how these custom attributes are designed.
Click Search when you are ready to start the search. Search results display in a window below theTOC. Search results are sorted by last modified date, from latest to earliest. Double-click the item fora detailed view. Properties are displayed below the item.
You can drag content from the Search Result window to the TOC and drop it to the desired location.The content item will become a new Revision Unit. When you drag an item into the document youwill be prompted to rename it and choose attributes. Duplicate names are not allowed.
The Search Results toolbar provides these functions:
If the searched item exists in multiple documents each document is listed in the Owner Documentsection of the Search Results. In addition to the customer key, which would identify the work itemwhere the content is used, the Owner Document section shows the following for each work item:Status, Current State, Last Modified time stamp, and whether it is in use. This information is forthe document, not the specific RU.• Preview Search Result
Opens a document viewer and shows the selected search item.
• Insert to Cursor
Inserts the selected content item into the document at the current cursor location.
The xEditor Find utility is limited to 101 return items. In addition, databases have the ability toexclude certain common words. SQL and Oracle provide similar support to exclude noise. SeeWords Excluded from SQL Full Text Search for a complete list of excluded words for SQL. DB2 doesnot support stop word processing. See DB2 Text Search and Net Search Extender Comparison forinformation on DB2 full text search noise filtering support.
Microsoft Word Find and Replace
Microsoft Word’s Find and Replace feature is also available for searching, with some modifications.The Find and Replace dialog box, as modified by xEditor, is identical for all supported MicrosoftWord versions. Find and Replace will not find variables, hidden text, or DCPI fields, such as subtotalsand indexes. Features that are available in xEditor have the same functionality as provided inMicrosoft Word. Find and Replace is accessed in the same manner as in Microsoft Word.
The following standard Search features are not available in xEditor.
• Format— Formatting information, such as font settings, paragraph settings, tab settings, and soforth are not supported for searching in xEditor.
• Special— Special characters, such as paragraph marks, tab characters, fields, and so forth are notsupported for searching in xEditor.
45
Working in xEditor for xRevise and Custom Applications
• Sounds Like— Searching for phonetically similar text is not supported in xEditor.
• All Word Forms— Searching for all word forms, such as verb tenses, is not supported in xEditor.
• Ignore Whitespace— This option, available on some versions of Microsoft Word, is not availablein xEditor, regardless of the Microsoft Word version used with xEditor.
• Ignore Punctuation— This option, available on some versions of Microsoft Word, is not availablein xEditor, regardless of the Microsoft Word version used with xEditor.
• Match Prefix— This option, available on some versions of Microsoft Word, is not available inxEditor, regardless of the Microsoft Word version used with xEditor.
• Match Suffix— This option, available on some versions of Microsoft Word, is not available inxEditor, regardless of the Microsoft Word version used with xEditor.
The Replace function will not replace text in variables or hidden text. The following standard Replaceoptions are not available in xEditor.
• Format— Formatting information, such as font settings, paragraph settings, tab settings, and soforth are not supported for replace in xEditor.
• Special— Special characters, such as paragraph marks, tab characters, fields, and so forth arenot supported for replace in xEditor.
• Match Case— All searches are case-insensitive.
• Find whole words only— Find and Replace in xEditor cannot distinguish whole words.
• Use Wildcards—Wildcard searches are not supported in Find and Replace with xEditor.
• Search Up— Searches in xEditor always proceed top to bottom.
The only choices in theWhere list are All Content and Main Body Text only.
The only elements available on the Find and Replace dialog box are Find what, Where, and Replacewith (on the Replace tab only). The Goto tab is not available.
Adding New ContentYou can add new content to the document with the New RU function. Creating a new revision unit,rather than adding content to an existing one, can help in managing content that was added inthe transactional application.
To add a new RU:
1. In the TOC, select the element after which the new RU should appear. You will be able to movethe RU after it is created if necessary.
2. From the xEditor toolbar, click the New RU button. The Insert RU pane opens.
3. Define the Name, Jurisdiction, and Language for the RU. If you use the optional jurisdictionattribute, select at least one Jurisdiction from the list, or click All to select all jurisdictions.
Once the RU is created the Name, Jurisdiction, or Language cannot be changed.
46

Working in xEditor for xRevise and Custom Applications
4. Provide any customer defined attributes as required. Since customer defined attributes arespecific to your category, information on their correct usage must be provided by the xPressionadministrator or another resource familiar with details of the category.
5. Click Insert.
The name of a new revision unit in the TOC is includes an asterisk until saved.
New external content RUs cannot be added in xEditor.
Note: With an earlier version of xEditor, a section break is automatically added at the beginning ofthe document when you create a new revision unit. From 4.5 SP1, no section break is added at thebeginning of the document for a new revision unit.
Deleting and Undeleting Revision UnitsTo delete a revision, right-click the revision unit in the TOC and then click Delete/Undelete. DeletedRUs appear in the TOC with a deleted mark. You can toggle between showing and not showingdeleted sections by clicking Hide deleted TextPieces.
Revision units containing Universal Content cannot be moved, inserted or deleted. A message openswhen attempting to perform an action on an RU that contains Universal Content.
Note: The xPression administrator can configure xEditor so that deleted RUs are not shown.
To restore a deleted RU, right-click the RU and then click Delete/Undelete.
Editing in xEditorxEditor is the editor application used by xRevise and xResponse. Although it is the same editor inboth applications, this chapter is concerned with xEditor for xRevise. Some of the recommendationshere may not be applicable in xResponse. xEditor extends and modifies Microsoft Word. MostMicrosoft Word features and functions are supported.
Debugging an Edit Session
xRevise saves a cache of the changes to your document in Your_drive:\Users\[user]\AppData\Roaming\EMC Document Sciences
View
Use Word’s Print Layout view when editing in xEditor. This will give a closer representation of thefinal output. There are nuances within Word when copying styled paragraphs when in Normal view.
The PDF Preview is a representation of the document as it will be published, not as it appearsin Microsoft Word through xEditor.
47

Working in xEditor for xRevise and Custom Applications
Images in the Microsoft Word preview may not be the same size as in the final output.
Subdocument icons in the TOC are for informational purposes. If all subdocuments are removedfrom the document, a subdocument icon will remain in the TOC. This remaining icon will haveno impact on the output or the revision unit.
Table Rows
Clear formatting on newly added table rows. When a row is inserted in Word, the cell attributesof the row which was highlighted prior to the insert will be used in the newly added row. If thesource cell had hidden text for formatting a customer file replacement, the new cell will also havethe hidden text attribute on.
Table Wrapping
Table wrapping around text boxes is not supported.
When Designing a Document for xEditor
This section contains general guidelines for creating a document in xDesign that is intended for usewith xEditor for xRevise. Some of the guidelines here will not apply to documents intended for usewith xResponse or custom IDDK applications that use xEditor.
General Guidelines
When designing a document in xDesign for xRevise, or similar custom applications created in IDDKthat use xEditor, preview the xDesign assembly in Microsoft Word to see what the end users will seein xEditor. Then, preview it in the published output format (for example: PDF, PS, AFP, and so forth).
If leading or trailing spaces are needed on a Rule Variable, be sure to select to Format the replacementin the content item in xDesign. Uncheck all the options for formatting and the format option"KEEPSPACES" will be generated. If this is not done, then leading spaces may or may not besuppressed. Suppression will be determined by what precedes the rule variable.
Variables for xEditor can be global or local. Any variable from the primary table of the primary datasource are global variables. Any other variables, whether from secondary tables or from variablerules, are local variables for the xEditor user. The xEditor user can change the values of variables inmost cases. When a global variable value is changed, it is changed for each instance of the variablethroughout the document. When a local variable value is changed, it is changed for all instances ofthe variable within the selected RU. The xEditor user will not be able to change variable values insome cases, such as when protection is applied or the variable is a primary key for its table. Note thatthe xPression administrator can configure xEditor so that variables can always be changed, never bechanged, or to honor protection in the document.
48

Working in xEditor for xRevise and Custom Applications
Variables can be linked to OP variables. When the xEditor user changes these variables the OPvariable is updated accordingly. This is invisible to the xEditor user.
Variables can be used to populate Text and Drop-down List form fields. Variables used in form fieldsbehave more like static text in xEditor, so changes to a variable in a form field will not impact otherinstances of that variable elsewhere in the document or RU. There is no indication to the xEditor userthat a form field has been populated with a variable.
If you insert a CompuSet image though a variable, the image does not appear in xEditor. The imagevariable is only resolved during Compuset publishing.
xEditor does not allow carriage returns in any variable.
Section rules that define the beginning of a revision unit cannot be included inside a documentloop, unless the revision unit name includes a variable so that the RU name is unique in eachiteration of the loop.
xEditor supports multi-page TIFF, but all pages must be the same size.
When an image is referenced from a file path and the image name contains a space, xEditormay incorrectly process the file name. File names containing multiple consecutive spaces are notsupported. It is not recommended to use spaces in image names.
Universal Content
Page numbering preferences, Even/Odd page settings, and Inherit Layout settings are not honored inUniversal Content (UC) for documents used with xEditor. Universal Content is converted to an imagefor viewing and previewing, so when UC is viewed in xEditor or opened for “Preview as Word” itwill appear exactly as it would if the UC were opened directly, but output will be correct.
“Use Master Definition” is not respected in documents intended for use in xEditor. Elements inthe Universal Content will not be included in the master document table of contents in xEditordocuments.
Total Page number is not accurate for Universal Content when using Preview as Word, but is accuratewhen published or Previewed as PDF.
In work items containing Universal Content the Move, Insert, and Delete RU options will not beavailable. A message opens when attempting to perform any of these actions on a work item thatcontains Universal Content.
HTML Formatted Text From Customer Data
In some cases, it is useful to use HTML formatting in customer data and then apply that formattedtext to the document with a variable rule in xDesign. However, the text introduced into thedocument in this fashion need not be handled as variable content in xEditor, and in many casescannot be handled as variable content effectively. There are specific requirements for the documentdesigner when introducing variable content in this way. Refer to the xDesign User Guide for detailedinformation on designing documents.
Note: If an HTML formatted variable contains <br> or <p> tags, the revision unit that contains thevariable may be saved incorrectly with xEditor. To solve this problem, ensure that the static for
49

Working in xEditor for xRevise and Custom Applications
xRevise option is selected in xDesign. xResponse converts all variables to static text, and thereforedoes not have this issue.
Start/End-Page Stub Content Groups
xEditor does not support this feature. When you launch xEditor from xRevise to open or edit thedocument, the stub might be displayed incorrectly in xEditor or in the publishing output.
Moving Revision Units
Revision units can be moved in the TOC by dragging to the desired location, or deleted as required.Moved RUs are marked with an asterisk to indicate a change, even if the only change was to movethe RU.
To ensure proper RU performance certain factors should be considered when creating a documentwith subdocuments, in particular if it is intended that the document should include subdocumentsbeing used as RUs that are intended to be moveable in xEditor. Revision units should be definedwithin the subdocument rather than defining the subdocument as an RU in the master document.RUs may be system generated otherwise, and this may cause problems when trying to move theseRUs. Any required section breaks must be inside the subdocument to maintain integrity of thesubdocument.
Revision units containing Universal Content cannot be moved.
If header and footer design is to be maintained throughout a document that includes multiple revisionunits, and these RUs are independent of one another, then the headers and footers must be definedwithin each RU. To keep headers and footers blank use a non-printing character, such as an En Space.
If the RU should start with an even or odd page breaking section break, the section break should be atthe start of the subdocument rather than the master document.
Subdocuments intended to be moveable should have the same RU name as the subdocument name.
Ensure that the first subdocument includes a Section Break Continuous at the top of the firstcontent item. This will ensure that, if this subdocument is moved, it will not inherit formattingfrom a preceding RU.
Hidden Text and Page Layouts
When you click Show/Hide in xRevise, Word will repaginate the document. If there is a significantamount of hidden text above the cursor position, a different text location in the document willprobably be displayed. The physical page location will remain the same but the text location willbe different (for example, if on page 7 before the Show/Hide is selected, you will still be on page 7after selecting Show/Hide).
50

Working in xEditor for xRevise and Custom Applications
Fonts
xEditor obtains fonts from the xPression server. Ensure that any fonts needed by xRevise usersare installed on the xPression server.
Special Characters
Certain characters have special properties when used in form fields and so cannot be used directly.Instead they must be represented in customer data using symbolic entities:• < (Less Than) - &lt;
• > (Greater Than) - &gt;
• “ (Double Quotes) - &quot;&quot;
• ’ (Single Quotes) - &quot;
• & (Ampersand) - &amp;
• • (Carriage Return) - &amp;#13;
For example, to use the Less Than symbol (<) in form fields make an element, custdata.lessthan forexample, in the customer data equal to &lt;. Then, place the value as a variable in the form fieldby typing {custdata.lessthan} in the form field default content. This will appear as “<” wherever thevariable “{custdata.lessthan}” appears.
Form Fields
Variables are supported in Text and Drop-down list form fields. Variables cannot be used to set thestate of a Check Box form field. The xEditor user cannot add form fields to the document, so therequirements for using them in form fields are outside the scope of this class. Any variables that thedocument designer includes in form fields are dynamic and the value will change as the referencechanges. The xEditor user can change values in the form field, but if the value of a variable is changedthen it becomes static text and is no longer updated if the value of the variable changes. Variableformatting is not supported in form fields. Variables in form fields appear in black rather than red asis the case with variables elsewhere in the document.
Variables and static text in form fields can be combined in any conceivable permutation. For example:• {Variable}
• Static Text
• Static Text {Variable}
• {Variable} Static Text
• {Variable} Static Text {Variable}
• Static Text {Variable} Static Text{Variable}…
• {Variable}{Variable}…
51

Working in xEditor for xRevise and Custom Applications
When published as Fillable PDF output form fields are published as the appropriate type of fieldwith the value selected or specified by the xRevise user presented as the default. When publishedas any other output format form fields are converted to static text when published. Form fields arepresented as static text in PDF preview.
Note: Fillable PDF documents enable the user to change the values in the form fields, but AdobeReader does not support saving PDFs with the changed field values. The changed document can beprinted with the changed values. Adobe Acrobat Professional supports saving the PDF file with thechanged values.
Tables
The font size in tables that are located in optional content may not be correct in xEditor with MicrosoftWord. This condition can be corrected by applying a custom table style to the table. Although theproblem is seen in xEditor, it must be repaired in xDesign.
To correct a font size problem by applying a custom table style:
1. In xDesign, create a new version of the content item with the font size problem and open itfor editing.
2. Select (highlight) the entire table.
3. In the Table Styles group of the Design ribbon, click theMore arrow located immediately tothe right of the table style graphics.
4. Click New Table Style. The Create New Style from Formatting dialog box opens.
5. Provide a name for the new style in the Name field.
6. Ensure thatWhole table is selected from the Apply formatting to list.
7. Select the desired font size from the font size list.
8. Ensure that New documents based on this template is selected.
9. Click OK.
10. With the entire table still selected click theMore button in the Table Styles group of the Designribbon.
11. Locate the Custom table styles. The table style created in steps 4 through 9 will be present inthis group. If other custom table styles have been created, you can identify the one that youcreated by hovering the cursor over the style until the tooltip with the style name displays.Click the newly-created style.
12. Save, submit, approve, generate XML for, and update the document version.
Document Protection
Documents with form fields must use Filling in Forms protection. Form fields are not compatiblewith Read-only protection. Read-only protection applies to the entire document, but Filling in Forms
52

Working in xEditor for xRevise and Custom Applications
protection applies to individual sections. Therefore, a document with Filling in Forms protection mayinclude sections that are not protected as long as those sections do not contain a form field.
xRevise documents assemble as a single, large document. If the document includes sub-documents,it is important that the sub-documents are not under Read-only protection if there are form fieldselsewhere in the document. It is possible for a sub-document with Read-only protection to causeRead-only protection to be applied to the rest of the document, even if no protection was appliedto the master document or other sub-documents in the work item. Form fields are supported inoptional content.
If a document contains content items that use Filling in Forms protection, ensure that you applyFilling in Forms Protection to all content items and external documents of the document.
Avoiding Proxy Authentication Error
If the xEditor client machine has a proxy server enabled in the Internet Explorer settings, and thatproxy server requires user authentication, a ReviseWebServices.xEditorLogin failed error may occur.There are two methods to avoid this error.
Adding Server to Proxy Server Exceptions
In most cases, the authentication error can be avoided by adding the proxy server name to theExceptions list. To add the proxy server, complete the following steps:
1. From the Internet Explorer Tools menu, select Internet Options.
2. On the Connections tab click LAN Settings.
3. In the Proxy Server area click the Advanced button.
4. Type the name of the proxy server in the field in the Exceptions section.
5. Click OK as required to close all Internet Options dialog boxes that were opened during thisprocedure.
Modifying machine.config on the Client Machine
If the rights to add the proxy server as in Adding Server to Proxy Server Exceptions, page 53 are notavailable, modify the machine.config file on the client machine via the following procedure:
1. Open machine.config in a text editor. This file is located in the following directories:• C:\WINDOWS\Microsoft.NET\Framework\v2.0.50727\CONFIG if you are usingMicrosoft Office 2010.
• C:\WINDOWS\Microsoft.NET\Framework\v4.0.30319\CONFIG if you are usingMicrosoft Office 2013.
2. Add the following section to machine.config:
53

Working in xEditor for xRevise and Custom Applications
<system.net><defaultProxy enabled="true" useDefaultCredentials="true"><proxyproxyaddress="http://Proxy Server Name or IP:Proxy Server Port"bypassonlocal="false"/><bypasslist>
<add address="xPressionServer\.Company\.Com"/></bypasslist></defayltProxy></system.net>
where italicized items should be replaced with actual values.
3. Save the file.
Braces in Content
The use of braces (curly brackets, {}) in content is discouraged. xPression uses braces to identifyvariables and any other use may cause errors in the document.
Optional ContentA section can be designated as optional when it is created in xDesign. Optional sections are indicatedin the xRevise TOC by a checkbox. If you clear the checkbox, the section is not included when thedocument is published. You are never required to choose any optional content.
Revision units must contain some content other than optional content. If a revision unit contains onlyoptional content an error will occur when the xEditor user selects any optional content in that RU.
The document designer can mark content for Merge. When adjacent content is marked for mergethe items are combined into a single paragraph. Optional content that has been marked for merge isindicated along with Properties in the Merge Paragraphs section of the grid. Paragraphs must beadjacent to be merged. If one of the content items includes form fields then both must be protectedwith Filling In Forms protection; xEditor will not apply protection.
If optional content that includes any variables is selected, and the variables exist elsewhere in the RU,the variable instances will remain editable variables as long as all instances of the variable have thesame value throughout the RU. If the variable has different values within the RU, all instances will beconverted to static text. In this case the static text will be editable, but will no longer be treated as avariable. See Variables, page 56 for more information on working with variables in xEditor.
Note: Variables in work items that were created in earlier version of xPression and upgraded toxPression 4.0 or later will be converted to static text in most cases, regardless of value.
Refer to Administering the xPression Server for information on changing xRevise properties, and thexDesign User Guide for information on establishing Optional Content.
54

Working in xEditor for xRevise and Custom Applications
Table and Paragraph MergeParagraph and table merges across Revision Units are ignored when assembling for the editor, butnot when assembling for xPublish. If possible it is recommended that paragraphs and tables formerge occupy the same RU to avoid confusion when working in the editor.
Content SeparatorsAlthough a work item may look like a single, continuous document when you’re previewing orediting it, what you’re actually working with is a series of concatenated content items separated bya series of HTML tags. These protected content separators mark the “boundaries” of each contentitem. Every content separator consists of the content item information sandwiched between twocontinuous page breaks.
xPression doesn’t insert a separator before the first content item in a work item. Why? Because it’s thefirst content item in a document that decides the initial page layout. For example, if you start withtext having no particular margins, Word will choose a default for you.
Merged Paragraphs and Content Separators
The Paragraph Insert function in xDesign enables the document designer to indicate to xPressionthat a series of paragraphs, possibly from separate content items, should be merged into a singleparagraph at the time of assembly. xRevise treats merged content items as one object. Only the firstof a set of merged content items will have a separation marker. If you make a change anywhere inthe merged text, xRevise replaces the first content item, and marks all subsequent merged contentitems as deleted in the table of contents.
Subdocument MergeWhen you create a work item, xPression automatically creates a revision unit and inserts a paragraphbreak when a subdocument is encountered. If the subdocument is a paragraph that is marked tobe merged with the paragraph preceding it, the paragraph merge is ignored either in xEditor orin the publishing output. If you want to merge paragraphs in this situation, set the value of theTreatSubdocAsAutomaticRevisionUnit property in revise.properties to false. When the value isset to false, xPression does not create a revision unit for a subdocument. However a revision unit isstill created for a subdocument that starts with a section, which is assigned a unique revision unitname. This property works for work item creation only, and has no impact on existing work items.Any changes of this property value will not take effect until you restart the server.
55

Working in xEditor for xRevise and Custom Applications
VariablesThe document designer can use variables to customize the document with customer information.When you create a new work item, xRevise retrieves values for the variables in the document. Thedocument designer can insert variables with the Insert Variable tool in xDesign, or by using a variablerule. When working with the document, the values are displayed and the variables are retained untildeleted. Instances of the same variable with different values in a given RU are converted to plain textwhen the document is assembled for xRevise.
The Variable Navigation buttons on the xEditor Task Pane toolbar enable you to move through allvariables in the document sequentially, either forward (top to bottom) or backward (bottom to top).
A “NULL variable” is an xDesign variable or an xPression Customer Data field that has no valueassigned. This is not the same as a variable with a value of “0”, or “ “ (space), or some other valuethat can be interpreted as “nothing”, but no value applied at all. Usually variables are initializedwith some value, but in some cases this is not desirable, so these variables will be null variables. Bydefault NULL variables are not displayed in the document, but they exist and may be displayed inthe variable name format as a placeholder in the document. Refer to the xAdmin User Guide fordetails on configuring xEditor to display NULL variables. NULL variables are not included in outputeven if they are displayed in the editor.
The xPression administrator can configure xEditor so that the TOC is disabled. The TOC mustbe enabled to work with variables in xEditor.
Variable Scope
Variables can be either global or local. Global variables are drawn from the primary table of theprimary data source and local variables are either from secondary tables or variable rules. When thevalue of a global variable is changed in xEditor all instances of the variable throughout the documentare updated to reflect the change. When the value of a local variable is changed all instances of thevariable in the selected RU are updated to reflect the change. So, for example, the same local variablemay appear in any number of RUs, and may initially have the same value in each, but the value canbe changed in xEditor so that the value differs from one RU to another, but a global variable willalways have the same variable wherever it is used in the document.
Variables are displayed in the Variable section of the Task Pane arranged in groups. Variables fromvariable rules appear in the first group, variables from the primary table (global variables) next,and any variables from secondary tables (local variables) after the global variables. Only relevantvariables are shown in the Task Pane, so when the document node is selected in the TOC, onlyglobal variables are shown. Only variables that are actually used in the document or selected RU aredisplayed; the entire table membership is not shown unless all variables in the table are used.
The Variable Navigator shows all instances of the variable and enables you to update the values ofindividual instances of local variables. See Variable Navigator for more details.
56
Working in xEditor for xRevise and Custom Applications
Selecting Variables
To maintain variable integrity, it is necessary to modify Microsoft Word’s standard behavior whenyou make selections. This impact is most apparent in certain navigation keys and key combinationsand in triple-click behavior. The standard behavior for triple-click is to select the entire paragraph,but if the point where the triple-click is directed is a variable the result will be to select the variableonly. Triple-click in a paragraph that contains a variable will select the entire paragraph, includingthe variable.
Some keys and key combinations behave somewhat differently in xEditor when a variable isinvolved. Microsoft Word provides the ability to map key combinations to other actions. Mappingkey combinations to specific actions overrides the effects noted here. Some keys and combinationshave slightly different effects when a range is selected than when only the insertion point cursor is inuse. In some cases, mapping key combinations is not supported.
The following key combinations should not be overridden with mapping.• Shift+Backspace
The entire variable will be selected. This key combination should not be mapped to any otheraction.
• Ctrl+Semicolon
Shifts focus from the edit window to the Variables grid entry for the selected variable. This keycombination should not be mapped to any other action.
The following keys and key combinations have the effect indicated with the cursor insertion pointonly. That is, no range of text is selected.• Shift+Left Arrow
When a user enters a variable from the right by using the Shift + Left Arrow key combination, theentire range of the variable will be selected.
• Right ArrowShift+Right ArrowCtrl+Right Arrow
When a user enters a variable from the left by using the Right Arrow key, alone or in the notedcombinations, the entire range of the variable will be selected.
• Down Arrow
When a user enters a variable from the top by using the Down Arrow key, the entire range ofthe variable will be selected.
• Up ArrowCtrl+Up Arrow
When a user enters a variable from the bottom by using the Up Arrow key or Ctrl+Up Arrow, theentire range of the variable will be selected.
• Shift+Down Arrow
When a user enters a variable from the top by using the Shift+Down Arrow key, the entire range ofthe variable will be selected and will also select from the start position.
• Shift+Up Arrow
57

Working in xEditor for xRevise and Custom Applications
When a user enters a variable from the bottom by using the Shift+Up Arrow key, the entire rangeof the variable will be selected and will also select from the end position.
• Ctrl+Shift+Left Arrow
When a user enters a variable from the right by using the Ctrl+Shift+Left Arrow key, the selectedrange will start at the original position and include the entire variable plus any content precedingthe variable until a space character is encountered.
• Ctrl+Shift+Right Arrow
When a user enters a variable from the left by using the Ctrl+Shift+Right Arrow key, the selectedrange will start at the original position and include the entire variable plus any content followingthe variable until a space character is encountered.
• Ctrl+Shift+Down Arrow
When a user enters a variable from the top by using the Ctrl+Shift+Down Arrow key, the selectedrange will start at the original position and include the entire variable.
• Ctrl+Shift+Up Arrow
When a user enters a variable from the bottom by using the Ctrl+Shift+Up Arrow key, the selectedrange will start at the original position and include the entire variable.
• Shift+Page Up
When the selection insertion point lands in a variable, the entire variable will be selected inaddition to other standard Word selection
• Shift+Page Down
When the selection insertion point lands in a variable, the entire variable will be selected inaddition to other standard Word selection
• Backspace
The entire variable will be selected.
• Ctrl+Backspace
The entire variable will be deleted and any content preceding the variable until a space isencountered.
• Ctrl+Shift+Backspace
No effect.
• Delete
The entire variable will be selected
• Ctrl+Delete
The entire variable will be deleted
• Ctrl+Shift+Delete
No effect.
The following keys and combinations have the effect indicated when a range of text is selected.• Left Arrow
58

Working in xEditor for xRevise and Custom Applications
When a user enters a variable from the right by using the Left Arrow key, the entire range ofthe variable will be selected.
• Right ArrowCtrl+Right Arrow
When a user enters a variable from the left by using the Right Arrow key, alone or in the notedcombinations, the entire range of the variable will be selected.
• Down ArrowCtrl+Down Arrow
When a user enters a variable from the top by using the Down Arrow key or Ctrl+Down Arrow,the entire range of the variable will be selected.
• Up ArrowCtrl+Up Arrow
When a user enters a variable from the bottom by using the Up Arrow key or Ctrl+Up Arrow, theentire range of the variable will be selected.
• Shift+Left Arrow
When a user enters a variable from the right by using the Shift+Left Arrow key, the entire range ofthe variable will be selected in addition to the existing selection.
• Shift+Right Arrow
When a user enters a variable from the left by using the Shift+Right Arrow key, the entire range ofthe variable will be selected in addition to the existing selection
• Shift+Down Arrow
When a user enters a variable from the top by using the Shift+Down Arrow key, the entire range ofthe variable will be selected and will also select from the start position.
• Shift+Up Arrow
When a user enters a variable from the bottom by using the Shift+Up Arrow key, the entire rangeof the variable will be selected and will also select from the end position.
• Ctrl+Shift+Left Arrow
When a user enters a variable from the right by using the Ctrl+Shift+Left Arrow key, the selectedrange will start at the original position and include the entire variable plus any content precedingthe variable until a space character is encountered.
• Ctrl+Shift+Right Arrow
When a user enters a variable from the left by using the Ctrl+Shift+Right Arrow key, the selectedrange will start at the original position and include the entire variable plus any content followingthe variable until a space character is encountered.
• Ctrl+Shift+Down Arrow
When a user enters a variable from the top by using the Ctrl+Shift+Down Arrow key, the selectedrange will start at the original position and include the entire variable.
• Ctrl+Shift+Up Arrow
When a user enters a variable from the bottom by using the Ctrl+Shift+Up Arrow key, the selectedrange will start at the original position and include the entire variable.
59

Working in xEditor for xRevise and Custom Applications
• Page UpCtrl+Page Up
When the Selection IP lands in a variable, the entire variable will be selected and the formerselection will be collapsed.
• Page DownCtrl+Page Down
When the Selection IP lands in a variable, the entire variable will be selected and the formerselection will be collapsed.
• Shift+Page Up
When the selection insertion point lands in a variable, the entire variable will be selected inaddition to other standard Word selection
• Shift+Page Down
When the selection insertion point lands in a variable, the entire variable will be selected inaddition to other standard Word selection
• Backspace
The entire selection range will be deleted.
• Ctrl+Shift+Backspace
No effect.
• Delete
The entire variable will be deleted.
• Ctrl+Delete
Collapses the selection range to the start and then the entire variable will be deleted
• Ctrl+Shift+Delete
No effect.
Variable Color
Variables can be displayed either in standard text color or in a special color, such as red or tan. You canapply a special color to variables to distinguish them from ordinary text using the variable coloringfeature. However, for documents containing many variables, turning on the variable coloring mightaffect the loading performance. When you open a work item, you can turn on or turn off the variablecoloring by clicking the Turning on or off variable coloring button in xEditor. For a new work item,whether the variable coloring is turned on and in which color is determined by the default settingsconfigured in xAdmin. For a work item that was previous opened, whether the variable coloring isturned on is determined by the toggle state of the Turning on or off variable coloring button.
You also can define a paragraph style to apply colors on variables, which does not affect the loadingperformance.
60

Working in xEditor for xRevise and Custom Applications
Editing Variables
Variable values can be changed, and variable instances can be deleted, unless the variable is protectedor the primary key for the table. See Protection and Variables for more information on how protectionaffects editing variables. Variable instances can be deleted as any other content; select the variableinstance and press Backspaceor DELETE for example. It is not possible to delete part of a variable,but the same effect can be achieved by editing the variable value.
Note: When a variable instance is deleted it cannot be restored after the document has been saved.However, it will be included in xRevise reports along with its entire history, including when it wasdeleted and by whom. See the xRevise User Guide for more information on the xRevise reportingfeature.
Only one variable instance can be selected at a time, except when selecting a range of text, which caninclude multiple variables. In any case, only the entire variable instance can be selected. Variableinstances can be placed directly next to one another. It is possible to insert text between adjacentvariables without impacting either of the variables.
Note: Since selecting the entire variable is forced, selecting surrounding characters can be difficultunder certain circumstances. If the variable contains a space and there is a character to the immediateright of the variable, and you try to select the character to the right of the variable with a mouse actionmoving from right to left, the variable will also be selected. It is possible to select the character byplacing the cursor between the variable and the following character and using a mouse action fromleft to right, but this can be difficult. To select the consecutive character to the right of a variable it isrecommended to select the variable, press RIGHT ARROW and then press Shift+Right Arrow.
Variable values cannot be changed in the same way as other content. All changes to variable values,except date variables, are made in the Variable grid section of the Task Pane. Date variables arechanged using the Date Picker. To begin editing a variable other than a date variable, double-click thevariable or select the variable and press Ctrl+Semicolon. The cursor is moved to the variable’s editfield in the Task Pane where the desired changes can be made as required. When complete, pressENTER or click anywhere in the edit window and the cursor is returned to the document. To exit theVariable grid and abandon any changes, press ESC. If a variable is selected without choosing to editthe variable, any typing is added as plain text just prior to the variable instance in the edit window.
Note: If a variable is selected double-clicking will not behave as expected. Normally, whenediting in the body of a document, double-clicking in the header or footer will switch to edit theheader/footer. But if a variable is selected while editing the body of the document, double-clicking inthe header or footer will activate variable editing in the grid. Also, when editing in the header/footer,double-clicking outside the header or footer will switch to editing in the body of the document. Butif a variable is selected while editing in the header or footer, double-clicking outside the header orfooter will activate variable editing in the grid.
Most variables are changed by typing in the edit field of the Variables Grid, but date variables providea date picker. Date variables cannot be edited directly; the only way to edit a date variable is withthe Date Picker. Note that the date picker does not close automatically; click outside the edit area(in the TOC or menu areas for example) to close the date picker. See Variable Formats for moreinformation on how xEditor handles variable formats.
The Toggle Variable Editing button toggles Edit mode off and on in the Variables grid. When inVariable Edit mode the edit fields for the variables in the Task Pane are clear and the variable typeicons are bold, when not in edit mode the edit fields are shaded and the variable type icons aredimmed. Some variables, such as primary key variables for the table, cannot be edited at all and are
61

Working in xEditor for xRevise and Custom Applications
indicated with a lock icon. The xPression administrator can configure xEditor so that variables cannever be edited, always be edited, or to honor the protection status established by the documentdesigner.
Note: To apply changes to a variable value press the ENTER key. Navigating away from the variable’sedit field with a mouse action will discard any changes to the variable. When navigating away from avariable with a mouse action the value indicated in the variable’s edit field will return to the originalvalue either when another RU is selected or another variable is selected for editing.
Changes must be saved to be applied. Unsaved changes to variable values are shown in bold in theTask Pane, and an asterisk at the document node in the TOC indicates unsaved changes are present.Note that unlike other content no asterisk appears for the RU containing the changed variable, even ifthe variable change is local to an RU. The current value applied to the variable is displayed, even ifnot saved, but other unsaved changes to variable values do not appear in the revision history.
Variables can be used to populate Text and Drop-down List form fields. When variables in form fieldsare changed in xEditor they are converted to static text. Variable values that were used to populateform fields are edited directly in the form field rather than the variable grid. Changing these instancesdoes not change the value in the grid or in any other instances of the variable, but will be reflectedin the preview. Likewise, changes to the value of a variable used to populate form fields made inthe grid do not change the value in the form fields. So, if a variable is used to populate both a formfield and an instance outside of the form field, these values can initially be the same but changedindependently of one another. Note that variables in form fields are not displayed in red as is thecase with variables outside of form fields, and the fact that the same variable was used both insideand outside of a form field is not necessarily obvious in xEditor.
Date variables (See Variable Formats, page 63 for details on variable formats) can be modified eitherdirectly or with the Date Picker. Click the Date icon to open the Date Picker and select the desireddate from the calendar-formatted Date Picker. The Date Picker is a standard Microsoft user interfacedevice; simply select the desired date and it is applied to the selected variable. Direct changes to thedate are allowed in the Variables grid as well, but there are some restrictions:• The Backspacekey cannot be used to go back one character.
• Arrow keys move from element to element rather than character to character. For example, fromthe Day element to the Month element rather than the end of the day element to the middleas may be expected.
• Pressing ENTER or ESC while manually editing have no effect. Click outside the grid to applychanges and remove focus from the Variable grid.
Copy and Paste
Variables can be copied and pasted, either alone or along with surrounding text. However, whenpasted the variable is converted to static text and will not be updated if the variable value issubsequently changed.
62
Working in xEditor for xRevise and Custom Applications
Drag and Drop
Drag and drop cannot be used with variables or DCPI fields, such as subtotals or indexes. Drag anddrop is not allowed when the current selection contains a variable or DCPI field. Dropping data into avariable or DCPI field is not allowed.
Variable Formats
Each variable has a specific format. There are many variable formats available, such as string, date,integer, float, and so forth. The format for each variable is indicated in the Variable grid by an icon.Each variable format has certain limitations. String format, for example, is the least limited formatin that it can contain virtually any character. By contrast, date variables can contain only dates andnumeric variable types can contain only numeric values. xEditor strictly enforces variable formats, soit will not allow a variable to be changed in a manner not supported by the variable’s format. Forexample, placing letters of the alphabet into a numeric variable is not allowed. Some variable typeshave length limits and xEditor will not permit values that exceed the limit.
Certain variable types have formatting options that the document designer can define. For example,“12/31/2010” and “December 31, 2010” both refer to the same day and could be expressed in a datevariable. The document designer can use the same date variable throughout the document, but applydifferent date formats in different places. xEditor will honor the variety of formats and display thedate in the specified format for each instance. The document designer can also specify the number ofdecimal places for numeric variables, and this is honored as well. So if the xEditor changes a numericvalue to “99.09” and the document designer had limited that variable to a single decimal place,xEditor would display it as “99.1”.
The xEditor user cannot change the format of any variable. If the output needs to show some valuethat is not supported by the variable, the xEditor user has no choice but to delete the variable andreplace it with static text.
Note: xEditor generally imposes no restrictions on variable types and honors restrictions imposedby the database from which they are obtained, but carriage returns cannot be used in any variable,regardless of format.
Protection and Variables
The xPression administrator can configure xEditor to allow or not allow editing of variables. Thefollowing options are available in xEditor Configuration in xAdmin.• Auto-detect protected variables
Allows editing variables that are not otherwise protected. This setting is recommended for mostcases where document protection is to be used. When this setting is selected and the documentcontains a variable with instances in both protected and unprotected regions, the variable isconsidered protected throughout and cannot be edited.
• All variables are editable
63
Working in xEditor for xRevise and Custom Applications
Allows editing of any variable, even if that variable is in a region is protected from editing.
• No variables are editable
Does not allow editing any variable.
The variable editing option applies to all xEditor users for the specified application. So if xEditor isconfigured for xRevise to allow all variables to be edited, then all variables in all xRevise documentsin that xPression environment can be edited by any xEditor user, except primary key variables thatcan never be edited. However, in that same xPression environment, there can be a custom applicationcreated with the Interactive Document Development Kit (IDDK) where no variable editing is allowed,and users of that application would not be able to edit any variable in any document.
Variable Navigator
The Variable Navigator displays the history of changes to the selected variable and where the variableis used in the work item (global variables) or revision unit (local variables). Saved changes to variablerevisions are recorded in the revision history. Each change is assigned a version number, which isincremented with each saved change. The value used in a previous version can be restored from theVariable Navigator by selecting the desired value and clicking Set. This does not revert to the selectedversion. Rather, it creates a new version with a new version number that is a copy of the selectedversion. In no case does the actual value in the data source change. You can also apply changes tothe selected variable, subject to the same limitations as apply to making changes in the Variablesgrid. Variable scope is clearly indicated in the Variable Navigator. If the variable is global, then anychanges made are applied to all instances of the variable. If the variable is local then instances ofthe variable can be selected can be selected so that changes are applied to selected instances only.As with applying a historic version, clicking Set applies the new value. In any case clicking Canceldiscards any changes and closes the Variable Navigator, and Reset discards changes without closingthe Variable Navigator.
NULL Variables
A “NULL variable” is an xDesign variable or an xPression Customer Data field that has no valueassigned. This is not the same as a variable with a value of “0”, or “ “ (space), or some other value thatcan be interpreted as “nothing”, but no value applied at all. Usually variables are initialized withsome value, but in some cases this is not desirable, so these variables will be null variables.
For example, data that should be manually entered for each new version of a work item can have aNULL value, and so will be readily identified in xEditor by their placeholders in the document and inthe Information panel. They can be modified in the Information panel as any other variable. Theycannot be modified in the main text. If a value is applied, it is immediately updated in the editwindow. If the changed value is deleted, the placeholder is restored.
Values can also be applied to NULL variables with an external application when the work item iscreated, in which case the xRevise user may not be aware that the value was applied when thework item was created.
By default NULL variables are not displayed in the document, but they exist and may be displayed inthe variable name format as a placeholder in the document. To make null variables visible, select the
64

Working in xEditor for xRevise and Custom Applications
Show NULL variables in Word on the Variables tab of the xRevise Configuration page in xAdmin.NULL variables are not included in output even if they are displayed in the editor.
Note: If the work item uses Filling in Forms protection and contains form fields, the NULL variablefeature is not available and the xAdmin setting is ignored. In these documents, NULL variables willnot be accessible through the xEditor interface.
Subtotals, Index Headings, and Table Headingsand FootersThe document designer can use xPublish commands to create table headings and footers and indexheadings. These elements are not automatically protected in xEditor, but can be protected usingsupported Word protection features. Note that Filling In Forms protection is required if the documentincludes form fields and that Read-only protection is not compatible with Filling In Forms protection.
The document designer can use a variety of functions to provide subtotals in the document. The valueof subtotals, table headings and footers, and indexes are resolved when the document is published.Therefore they are shown as placeholders in xEditor. They cannot be modified in xEditor, but canbe deleted.
Variables in Optional ContentIf an optional content is selected that includes any variables, and the variables exist elsewhere in theRU, the variable instances will remain editable variables as long as all instances of the variable havethe same value throughout the RU. If the variable has different values within the RU, all instanceswill be converted to static text. In this case the static text will be editable, but will no longer be treatedas a variable. See Optional Content, page 54 for more information on working with optional content.
Track ChangesxEditor uses the Microsoft Word Track Changes feature. Changes made to documents in xEditor willappear red and underlined by default. To stop showing changes in the edit window, select the Finaldisplay option, rather than the default Final Showing Markup option. The Accept and Reject optionsare not available for Track Changes in xEditor.
Microsoft Word Features and FunctionsxEditor supports most Microsoft Word features and functions. Some functions are not supportedbecause xEditor provides a similar function for use within the xPression environment. For example,Word’s New function is not supported because work items for xRevise must be created in xDesign;they cannot originate in xRevise. Microsoft Word’s selection logic has been modified to maintainvariable integrity. See Selecting Variables.
65

Working in xEditor for xRevise and Custom Applications
Some Microsoft Word functions are not supported by xEditor. In some cases, your administrator canremove the function from xEditor, but some unsupported functions cannot be removed. Additionally,xEditor alters the standard behavior of some functions. For a complete list of unsupported andaltered functions, see Microsoft Word Features Altered by xEditor, page 66 and UnsupportedMicrosoft Word Functions, page 67.
Review the following topics for information about how xEditor interacts with Microsoft Word.• Microsoft Word Features Altered by xEditor, page 66
• Unsupported Microsoft Word Functions, page 67
• Editing Actions in xEditor, page 68
• Microsoft Word Styles, page 68
• Content Controls, page 68
Microsoft Word Features Altered by xEditor
The following Word features work differently in xEditor.• Created On
The Created On option for Insert Auto Text does not insert the actual date the document wascreated. It always inserts “Created on 6/19/2007 10:14:00 AM.” It is recommended that usersavoid using this option.
• Ctrl+A
The Ctrl+A hotkey combination selects the entire document in Word. Ctrl+A behaves differentlyin xEditor, depending on whether the document includes optional content or not. If the documentdoes not include any optional content, then the entire RU is selected. If the document includesoptional content, then the text of the current node is selected.
• Protection
xEditor supports Read-only and Forms Fill-In protection types with some restrictions. SeeProtection.
• Drag and Drop
Drag and drop is not allowed if the current selection includes a variable or a DCPI field. xEditorwill not permit data to be dropped into a variable or DCPI field.
The following Word functions are overridden or modified by custom xEditor functions.
Word Menu Function xEditor Implementation
File Save
Save As
Saves a work item to the xPression database rather than thefile system.
Edit Find
Replace
Go To
The Find, Replace, and Go To functions in Word are modifiedsignificantly from the standard implementation. See FindingExisting Content.
66
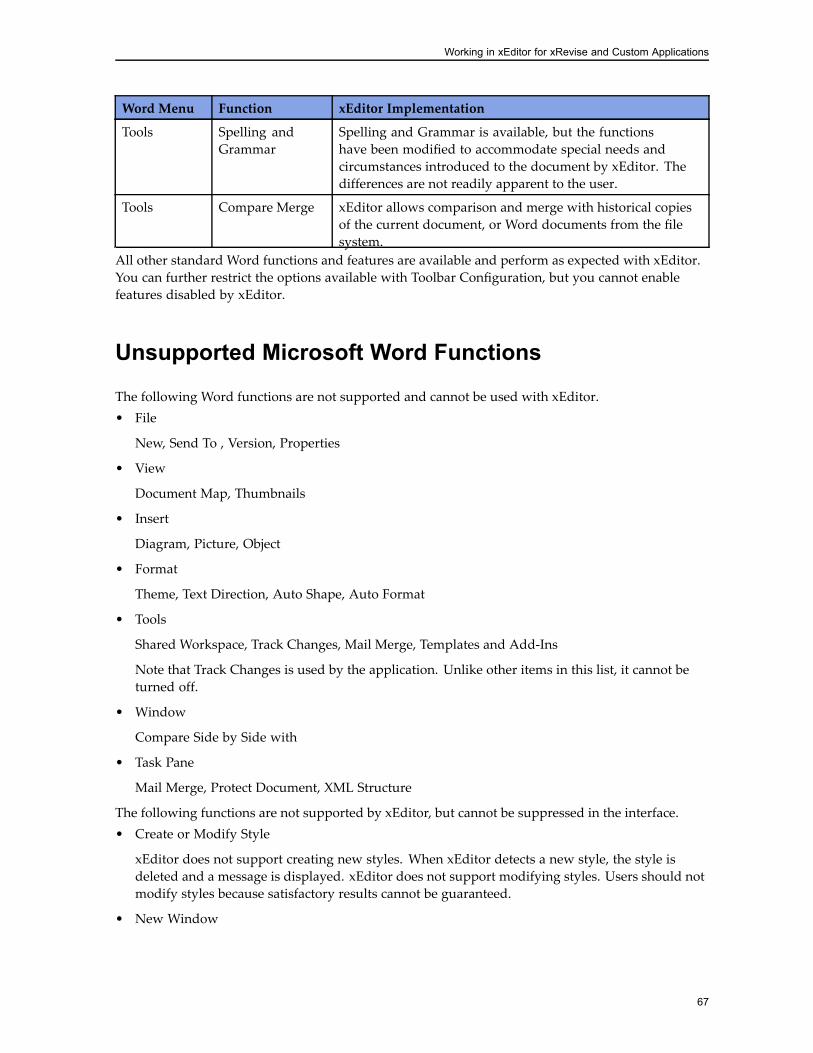
Working in xEditor for xRevise and Custom Applications
Word Menu Function xEditor Implementation
Tools Spelling andGrammar
Spelling and Grammar is available, but the functionshave been modified to accommodate special needs andcircumstances introduced to the document by xEditor. Thedifferences are not readily apparent to the user.
Tools Compare Merge xEditor allows comparison and merge with historical copiesof the current document, or Word documents from the filesystem.
All other standard Word functions and features are available and perform as expected with xEditor.You can further restrict the options available with Toolbar Configuration, but you cannot enablefeatures disabled by xEditor.
Unsupported Microsoft Word Functions
The following Word functions are not supported and cannot be used with xEditor.• File
New, Send To , Version, Properties
• View
Document Map, Thumbnails
• Insert
Diagram, Picture, Object
• Format
Theme, Text Direction, Auto Shape, Auto Format
• Tools
Shared Workspace, Track Changes, Mail Merge, Templates and Add-Ins
Note that Track Changes is used by the application. Unlike other items in this list, it cannot beturned off.
• Window
Compare Side by Side with
• Task Pane
Mail Merge, Protect Document, XML Structure
The following functions are not supported by xEditor, but cannot be suppressed in the interface.• Create or Modify Style
xEditor does not support creating new styles. When xEditor detects a new style, the style isdeleted and a message is displayed. xEditor does not support modifying styles. Users should notmodify styles because satisfactory results cannot be guaranteed.
• New Window
67

Working in xEditor for xRevise and Custom Applications
Word does not allow this option while running with xEditor because an XML expansion pack isattached. This limitation is imposed by Word.
Editing Actions in xEditor
Access to headers and footers and to the spell check and grammar check features are accessed directlythrough the Microsoft Word interface. Headers and footers are accessed either by double-clicking inthe header or footer or from the Header or Footer tools on the Insert ribbon.
Note: When a variable is selected double-clicking will not transition to or from headers and footers.This restriction is necessary to maintain variable integrity.
Spelling and Grammar are available from the Review ribbon in Microsoft Word. The options forautomatic grammar and spelling are available in xEditor.
Editing options for CompuSet content has not changed with xEditor. CompuSet code can be modifiedas before. CompuSet code can be shown or hidden using the Show/Hide hidden text button. Referto the CompuSet documentation for information on working directly with CompuSet. Exercisecaution when working with CompuSet code; documents with faulty CompuSet commands will mostlikely be rendered unusable.
Microsoft Word Styles
Paragraph styles should not be created in xRevise. They should be added to the xDesign templateand made available to xRevise through the xPression server. Character styles should not be usedin xRevise.
Content Controls
Microsoft Word offers several content control options. xEditor supports only the Check Box, TextForm Field, and Drop-Down Form Field options from the Legacy Tools list. Any of the other contentcontrols will produce unexpected results and should be avoided.
Form FieldsxPression supports Drop Down, Text, and Check Box form fields in documents. Form fields areadded to the document in xDesign; they cannot be added in xEditor, but they can be modified.Variables are supported in Drop Down and Text form fields. Variables, whether in form fields ornot, return the value of the variable when the document is assembled regardless of the protectedstate of the document. Variables cannot be used to establish the state of Check Boxes. The supportedform fields must be selected from the Legacy Tools list in the Controls section of the Developerribbon in Microsoft Word.
68

Working in xEditor for xRevise and Custom Applications
Documents that include form fields and are intended for use with xResponse or xRevise must useFilling In Forms protection in any section that includes a form field. Since Read-only protection isapplied to the entire document if it is applied to any part of the document, documents with formfields cannot include any section with Read-only protection.
Form fields in documents that have been properly added and protected in xDesign are included inthe document when used to create a work item in xResponse or xRevise. If the default value of thevariable is changed in xEditor then the variable is converted to static text and will no longer behandled as a variable in Carry Forward and Search operations.
Note: Variables located within iterative structures, such as loops and table rules, are cached when thedocument is assembled and converted to static text, so the variables will not update after the workitem is created. Also, if a variable is repeated within a Revision Unit the value of the first instance ofthe variable is applied to all instances of the variable within that RU, even if the variable changeswhile the RU is being processed.
Documents with Word form fields can be used as work items in xEditor. When the xEditor useropens a work item with form field values are set to the default values, which are established by thedocument designer. The xEditor user can change the values of the fields normally. The TAB key canbe used to move through form fields in the document.
The xEditor user can change the value by selecting or typing the desired value, depending on the typeof form field. The selected or specified value is retained for future sessions. xEditor users cannotmodify any form field property except the value. xEditor will retain the variables as default valuesand drop list items only if the default value, that is the value established in xDesign, of the form fieldhas not been modified. If the default value is changed, then the default value and the drop list itemswill be converted to static text. This will be apparent in Carry Back, Carry Forward (if variables arechanged) and search and insert of customized revision units. In these cases changes in variable valueswill not be applied to the modified form fields.
Content that includes form fields can be searched and inserted into other sections as long as thetarget section is under Filling In Forms protection.
xRevise users cannot specify an output profile for previews, so the preview PDF will always showform fields as static text. xResponse users can choose to define an output profile for previews, but ifnone is specified the preview will show form fields as static text.
When the document is published as standard PDF the form field is converted to static text with theselected value. When published as Fill-in PDF the field is published as a form field with the valueselected or specified by the xEditor user presented as the default. If the value of a variable used in aform field is not set the field will publish as empty.
Variables in search results can be dragged into content as is the case with other search results.
It is possible to create the Form Field and then remove the bookmark from the Form Fields Optionsdialog box under Field Settings. The bookmark is required for Form Fields. Ensure that the field’sBookmark setting has some value, if the default is not desired.
Multiple paragraphs, sections of text separated by a carriage return, are supported in text formfields except for Fillable PDF output.
Variables and static text can be combined in any conceivable permutation in a form field. For example:• {Variable}
• Static Text
• Static Text {Variable}
69
Working in xEditor for xRevise and Custom Applications
• {Variable} Static Text
• {Variable} Static Text {Variable}
• Static Text {Variable} Static Text{Variable}……
• {Variable}{Variable}……
Form fields are established in xDesign. Form Fields cannot be added in xEditor, but limitations onform fields apply for any document used in xEditor.
ProtectionxEditor supports Read-only and Forms Filling in Forms protection types for work item contentfor both xRevise and xResponse, but only one type within a given document. Protection must beestablished in xDesign when the document is created.
Documents should be protected with only one form of protection. Mixing protection type within adocument is not recommended. If an xPublish master document includes an xPublish sub-documentwith Read-only protection, then the entire document is protected with Read-only protection.CompuSet sub-documents are processed in a way that makes any protection applied irrelevant to themaster document. Specific selections in documents with Read-only protection can be made availablefor editing. Documents using Filling In Forms protection can have sections that are not protected.
The reason mixed protection types are not recommended is because of the way protection isapplied when the document is merged. Only the first protection type encountered is honored, andRead-only protection applies to the document while Filling In Forms protection applies to individualsections. So if a Read-only section follows a Filling In Forms section, the Read-only section will notbe protected. However if a Filling In Forms section follows a Read-only section then the entiredocument is read-only except for any regions marked as available for editing in designated Read-onlysections. There may be cases where this behavior can be exploited, but there is a high potential forunintended results, especially in complex documents, and so the use of mixed protection typeswithin a document is not recommended. The xEditor user cannot resolve problems that arise fromimproper use of protection, but should be aware that they may occur and should be referred tothe document designer for resolution.
There is no validation for protection; it is the document designer’s responsibility to ensure that theproper protection is applied to the document.
In xRevise when an RU is added through the Search and Insert feature the current work itemprotection is extended to the inserted content:• If the work item content is protected with ’read-only’, the inserted revision unit content will alsobe protected with read-only protection. This means if there are no editable regions identified inthe inserted content, all the content will be protected from edit.
• If the work item content is protected with ’forms fill-in’ (Section) protection, the inserted revisionunit content will also be protected with ’forms fill-in’ protection, if there is a section in the insertedcontent marked as protected.
• If the work item content is not protected, the inserted revision unit content will also not beprotected - regardless of the protection state of the inserted content.
70

Working in xEditor for xRevise and Custom Applications
The xEditor user cannot apply protection to the work item content if it is not already protected.Turning protection off in xEditor is not supported.
Read-Only ProtectionRead-only protection enables you to apply protection to the entire document and to designate certainregions–from a single word to a series of paragraphs–as available for editing to any users. You candesignate multiple, non-continuous sections as available for editing.
To scroll through the editable regions of the document, click the Goto Next Editable Region on thexRevise tool bar. Also, the xEditor user can designate a key combination that will scroll throughthe editable regions when pressed.
xEditor Focus While LoadingUnder certain circumstances focus will shift from the current application to xEditor when workingwith certain non-xPression applications while loading a work item in xEditor. For example, if a userswitches to an e-mail application while loading a document in xEditor and composes an e-mailmessage, in some cases the focus will shift to xEditor and typing begin to be applied to the documentin xEditor instead of the e-mail application. This is a known issue related to a value in the registrybeing changed from its default to 0. The registry setting is changed when certain applications areloaded and xPression is not able to change the value back to the default. Because of this the problemcannot be solved by a code change in xEditor or any other xPression component.
To avoid this issue it is recommended that users avoid using any application that may impact thisregistry setting. In cases where this cannot be avoided, it is possible to manually change the registrysetting.
Caution: Changes to the registry can result in unexpected results and can be difficult totroubleshoot, so changing registry settings should be attempted by qualified personnel only.Always make a backup before making changes to the registry.
This procedure involves making a change to the registry. Since this should be attempted by qualifiedpersonnel only, the minimum information is provided rather than complete information on workingwith the registry.
To Prevent Switching Focus to xEditor1. In the Windows registry, locate and make a backup of the HKEY_CURRENT_USER\CONTROL
PANEL\DESKTOP\ForegroundLockTimeout entry.
2. Change the value of HKEY_CURRENT_USER\CONTROL PANEL\DESKTOP\ForegroundLockTimeout from 0 to 30d40.
3. Save and close the registry editor.
71

Working in xEditor for xRevise and Custom Applications
Tab LeadersThe document designer can choose to use tab leaders in indexes to provide a uniform appearance.However, because of the method used to prepare the document for use with xEditor, tab leadersettings cannot be passed. So it will be necessary to reset the index and apply any desired tab leaderfor any document using tab leaders in an index.
72

Chapter 4xEditor Web Services
The xEditor Web Services serve as an extension of IQuickDoc for solution-specific capabilities. TheseWeb Services methods add considerable power to how you assemble, edit/manipulate, publish,and return data about published documents. They allow external systems to query, and in somecases, update information in xPression without accessing the xPression database. The Web Servicesmethods are more powerful, and therefore more complex, using complex types and requiring moresophistication in coding.
• Authentication, page 73
• Setting Up Your Application, page 75
• Error Messages, page 78
• The IDocumentItem Web Service, page 79
• Calling the xEditor StartUp Application, page 79
AuthenticationxPression uses a new authentication model that enables easier integration with a with variety of singlesign-on products and security models. All entry points into xPression will take an XML documentwhich contains user credentials and any other information needed to authenticate and authorize therequest. You can specify these credentials in any compatible format, for example: encrypted, plaintext, and token. The XML document is passed through the requestContext parameter that mustbe defined for all Web Service calls.
This new authentication model eliminates the need to pass hard-coded parameters for everysecurity-sensitive request, and enables you to integrate without having to change the signatureof any xPression entry points. It also enables you to create Java User Exit code to perform moresophisticated integrations.
Note: Single Sign-On (Trusted UserID/Groups) can only be used when the enableTrustedUserparameter in the systemconfig.properties file is set to True. This properties file is located in yourxPressionHome directory. By default, this directory is C:\xPression and is located on your server.
73

xEditor Web Services
About the requestContext Parameter
This parameter is used in all Web Service methods. It enables you to pass an XML documentcontaining user credentials for authentication.
It also passes the name of the xPression application for which the user is authenticated. In xPression,users are granted access rights to specific applications because some applications have different setsof access rights. By specifying the application name, you are requesting the access rights granted tothe user for that specific application.
Please be aware that the application name you use must grant permissions that are appropriate foryour request. In general, for core xPression services (client and server functions), you can supplycredentials for the user under any application for which the user is authenticated. For solutionapplications (xPressForms, xPression DevKit, xResponse, xRevise), you must supply credentials forthe exact application you are using.
The xPression Web Service methods that use the requestContext parameter can determine theapplication name even if you do not supply the name in the parameter. xPression uses the followinglogic, based on the type of document you are using, to determine the application name:• CompuSet Documents— xPression chooses xPression Design as the application.
• xPublish Documents— xPression chooses xPression Design as the application.
• xPresso for InDesign Documents— xPression chooses xPresso for InDesign as the application .
• xPresso for Word Documents— xPression chooses xPresso for Word as the application.
• xPresso for Dreamweaver Documents— xPression chooses xPresso for Dreamweaver as theapplication.
Using requestContext with Documentum-Based Documents
When attempting to access documents stored on a Documentum repository, ensure that the user inthe requestContext parameter passes both xPression server authentication (usually LDAP or NTauthentication) as well as Documentum authentication. This means that the user name should existon both the server and the Documentum Repository. To publish a document on Documentum, theuser needs to have the Documentum role of xpression_dashboard.
Additionally, do not use the <Group> element when accessing Documentum-based documentsthrough Single Sign-On (Trusted UserID and Groups).
Example:<RequestContext><Credentials method="Trusted UserID and Groups"><UserID>t1</UserID></Credentials><ApplicationName></ApplicationName></RequestContext>
74

xEditor Web Services
requestContext Examples
The following examples show how to structure your XML document for the requestContextparameter.
Unencrypted userid/password<RequestContext><Credentials method="UserID and Password"><UserID>John</UserID><Password>pass</Password></Credentials><ApplicationName>xPression Framework</ApplicationName></RequestContext>
Weak encrypted userid/password<RequestContext><Credentials method="Weak Encrypted UserID and Password"><UserID><EncryptedData xmlns='http://www.w3.org/2001/04/xmlenc#'Type='http://www.w3.org/2001/04/xmlenc#Content'><CipherData><CipherValue>A23B45C67</CipherValue></CipherData></EncryptedData></UserID><Password><EncryptedData xmlns='http://www.w3.org/2001/04/xmlenc#'Type='http://www.w3.org/2001/04/xmlenc#Content'><CipherData><CipherValue>A2KS4SLDK6DKOQWI</CipherValue></CipherData></EncryptedData></Password></Credentials><ApplicationName>xPression Response</ApplicationName></RequestContext>
Single Sign-On (Trusted UserID/Groups)<RequestContext><Credentials method="Trusted UserID and Groups"><UserID>John</UserID><Group>Administrator</Group><Group>xPression Design User</Group><Group>xPression Revise User</Group></Credentials><ApplicationName>xPression Revise</ApplicationName></RequestContext>
Setting Up Your ApplicationWhen you create your own application, you must add that application to the applist.xml file storedon your server. This file contains a list of the xPression applications installed in your environment.It also contains attribute, workflow, and access rights information for the xPression applicationsdefined to this file. The xPression installation program generates this file upon installation. Creatinga new application name is optional. For the vast majority of users, one of the existing applicationnames will be sufficient.
75

xEditor Web Services
Adding Your Application DefinitionTo add the application definition to AppList.xml:1. Locate AppList.xml on your xPression server. It is located in the xPressionHome directory.
By default, this file is stored in: C:\xPression.
2. Open the file for editing.
3. Type the application element between the <AppList></AppList> tags. Your application namemust not contain apostrophes (’). For example:<AppList><Application name="xPression Custom Application"></Application></AppList>
4. If your application supports workflow, type the workflow element. For example:<AppList><Application name="xPression Custom Application"><WorkFlow fromStatus="SUBMITTED" toStatus="APPROVED" enterAction="Write"promoteAction="Approve" /></Application></AppList>
5. Type the access rights your application supports, including whether or not they’re hierarchical.For example:<AccessRights heirarchical="yes"><Access name="Read" /><Access name="Write" /><Access name="Approve" /></AccessRights>
6. Type the required attributes, if any. For example:<RequiredAttributes><Attr name="TEXTCLASS_ID" type="integer" min="0" max="0"ValidValueExist="0" Default_Value="" isMappable="0" stringlength="0"RangeExist="0" DefaultExist="0" multisingle="single" validValue=""/><Attr name="PRODUCT_ID" type="integer" min="0" max="0"ValidValueExist="0" Default_Value="" isMappable="0" stringlength="0"RangeExist="0" DefaultExist="0" multisingle="single" validValue=""/>
</RequiredAttributes><RequiredAttributes condition="SupportApproval"><Attr name="STATUS" type="string" min="0" max="0" ValidValueExist="1"Default_Value="PENDING" isMappable="0" stringlength="255" RangeExist="0"DefaultExist="0" multisingle="multi" validValue="PENDING;SUBMITTED;APPROVED"/><Attr name="EFFECTIVE_DATE" type="DateTime" min="0" max="0"ValidValueExist="0" Default_Value="" isMappable="1" stringlength="0"RangeExist="0" DefaultExist="0" multisingle="multi" validValue=""/><Attr name="WITHDRAW_DATE" type="DateTime" min="0" max="0"ValidValueExist="0" Default_Value="" isMappable="1" stringlength="0"RangeExist="0" DefaultExist="0" multisingle="multi" validValue=""/>
</RequiredAttributes>
7. Type the closing </Application> element at the bottom of your application definition.
8. Save AppList.xml and exit your text editor.Once complete, your application definition should appear similar to the following:
76

xEditor Web Services
<Application name="xPression Custom Application"><WorkFlow fromStatus="SUBMITTED" toStatus="APPROVED" enterAction="Write"promoteAction="Approve" /><AccessRights heirarchical="yes"><Access name="Read" /><Access name="Write" /><Access name="Approve" /></AccessRights></Application>
This sample application definition has workflow and access rights, but no required attributes.
Configuring Your Application with xAdmin
Now that you’ve added your application definition to AppList.xml, it’s time to configure it withxAdmin.
To configure your application in xAdmin:1. Associating Attribute Sets with Your Application, page 77
2. Assigning Data Sources to Your Application, page 77
3. Setting Up Access Rights for Your Application, page 78
4. Configuring Workflow for Your Application, page 78 (optional)
Associating Attribute Sets with Your Application
Before you can configure categories, data sources, access rights, and workflow for your application,you must first associate one or more attribute sets with your application.
To associate attributes with your application:1. Start xAdmin.
2. Click Category Management > Attribute Sets.
3. Click an attribute set that you want to associate with your application. When you click theattribute set name, the Attribute Set page appears. Alternatively, you can also create a newattribute set. For more information about creating attribute sets, see the xAdmin User Guide.
4. Select your application from the list and click Save.
5. To assign more categories to your application, repeat step 1 to 4.
Assigning Data Sources to Your Application
To assign data sources to your application:1. Select a category you’ve already assigned to your application.
2. Click the Data Sources tab.
77
xEditor Web Services
3. Select a data source group from the list and click Set Application.
4. Select your application from the drop-down list.
5. A page appears that enables you to associate your available data sources with your application.Select the data sources you want to assign to your application and click Add.
6. In the Default Data Source list, select a default data source for your application and click Save.
7. To assign additional data sources to your application, repeat step 2 to 7.
Setting Up Access Rights for Your Application
To set up access rights for your application:1. Click the Access Rights tab for a category you’ve assigned to your application.
2. Click view/change for your application, then click Add.
3. Select users from the list of available users and click Add. The users will appear in the SelectedUsers list.
4. Click Save. The selected users for the category now have access to your application.
5. When the list of users reappears, select the access levels for each user and click Save.
6. To add additional users, repeat step 1 to 5.
Configuring Workflow for Your Application
If your application supports workflow, you can configure your application to assign users assubmitters and approvers. See the xAdmin User Guide to assist you in setting up workflow for yourapplication.
Error MessagesEach Web Service returns error messages in the following format:<error code> - <error message>
For example:3143 - Unable to retrieve the next customer record. Check the connection tothe customer data source.
If an error code cannot be found, it will return the following text:1001 - There is an unidentified error in the Java code.
78

xEditor Web Services
The IDocumentItem Web ServiceThis web service provides methods that work with editable document work items. TheIDocumentItem web service WSDL will be found at:http://<server>:<port>/xDevKit/services/DocumentItem?wsdl
See the xFramework Development Guide for methods of this web service.
Calling the xEditor StartUp ApplicationThe xEditor StartUp application is a ClickOnce application that installs xEditor to the client machine,sets up a data directory for xEditor, and launches xEditor with the correct initialization data. You callthe xEditor StartUp application through an HTTP query string. Before calling the xEditor StartUpapplication, you must first call the createAuthenticationToken method to create an authenticationtoken.
See the xFramework Development Guide for detailed information.
79

xEditor Web Services
80

Chapter 5Administering xEditor
This chapter contains information for administrators of xEditor. The chapter provides some generaladministrative topics, as well as separate sections for administering xEditor in xResponse, xRevise, orcustom applications.• Administering xEditor for xResponse, page 82
• Administering xEditor for xRevise and Custom Applications, page 83
• User Configuration, page 86
• Siteminder, page 86
• Workflow, page 87
• Enabling xEditor Functions, page 87
• Cache Management, page 87
• Configuring Word Ribbon and Backstage Page, page 88
• xEditor Event Notification, page 95
• Local Files, page 95
• xEditor Localization, page 96
• Microsoft Word Issues, page 96
• Avoiding the Failed to Merge Content Error, page 98
• Hidden Text Panel, page 98
• xEditor and Terminal Service Logon, page 98
• Merging Paragraphs, page 98
• Clearing an Application File on the Client Machine, page 99
• Charts, page 99
81

Administering xEditor
Administering xEditor for xResponseThis section contains the following issues pertaining to the administration of xEditor for xResponse.Ensure you also review the general xEditor administrative topics in this chapter.
• Temporary Files, page 82
• The Log, page 82
• Troubleshooting, page 82
Temporary Files
xResponse uses temporary (temp) folders to hold documents while processing work items. Thesefolders are cleared when the user logs off or the browser is closed. There is now an option to retainthe contents of temp folders. This is primarily intended as a troubleshooting tool. To retain thecontent of temp folders set the following property in eCor.properties:deleteResponseTempFolders = false
By default this property is treated as true, and should only be changed as required for troubleshootingpurposes to avoid accumulating excessive temporary files.
The Log
xResponse creates a log file that records the configuration setting used to start xEditor, the elapsedtime for all web service calls, and errors with stack traces. When a failure occurs, a message openswith a link that opens the file in a text editor.
You can also open the log file by selecting xResponse Log from the xResponse menu on the xEditortoolbar. The log file is located in C:\Documents and Settings\[USER]\Application Data\EMCDocument Sciences\[xResponse]\[server]\xResponse.log.
Troubleshooting
This section provides workarounds for some issues.
Opening xEditor After “Failed to start editor” Error
In some cases xEditor will fail to start with “Failed to start editor. Exception from HRESULT:0x8004063B.” This usually occurs when the Primary Editing Language is set to a language other thanEnglish. The issue can be avoided with the following procedure. This procedure does not affect thesetting in Microsoft Word.
82

Administering xEditor
To Reset the Default Language Setting for xEditor1. Press Ctrl+ALT+DEL.
2. Select Task Manager.
3. On the Processes tab, locate and select xEditorManager.exe, and then click End Process.
4. Staying on the Processes tab, locate and selectWinWord.exe, and then click End Process.
5. Close Task Manager.
6. Click Start and point to Startup.
7. Right-click xEditorManager.exe and then click Delete.
8. Restart the computer.
9. Open a document in Microsoft Word and then close it. The document should be a standardMicrosoft Word document, not an xDesign or other xPression document.
10. Click Start and then click Control Panel.
11. Click Add or Remove Programs.
12. Select xEditor and then click Remove. Confirm the request to remove xEditor as required.
13. Open xResponse.
14. Open a Letter. xEditor will automatically install as a first-time installation.
Administering xEditor for xRevise and CustomApplicationsThis section contains the following issues pertaining to the administration of xEditor for xReviseand your custom application. Ensure you also review the general xEditor administrative topicsin this chapter.• Spell Check for Form Fields, page 83
• Variable Color, page 84
• Track Changes, page 65
• The Log, page 84
• Localization, page 85
• Customizing Carry Forward, page 85
Spell Check for Form Fields
Microsoft Word does not provide the ability to spell check form fields. xEditor has been enhancedto provide spell checking for form fields. Spell checking of form fields can be done on demandor automatically when the document is saved.
83

Administering xEditor
Note: Since Microsoft Word does not support spell check in form fields there is a limitation whenmaking corrections to the content through the Spelling and Grammar dialog box. When makingcorrections do not delete the entire content of the form field. If the content is empty Word willimmediately delete the form field. When this occurs xPression will record an error indicating “Atleast one form field is deleted by spell check process.” To avoid this error type the correction firstand then delete the incorrect content.
To run a spell check, turn off Track Changes and then click Spell check for form field on the xRevisetoolbar. This button is available only if the document contains form fields and only if the documentincludes a section with Filling In Forms protection.
xEditor can be configured to automatically spell check form fields whenever the document is saved.Refer to xAdmin User Guide for more information xEditor configuration options.
Note: The protected text outside of the form field can be changed from this dialog box, even though itcannot be changed in the Editor itself. To avoid making text associated with form fields vulnerable tochange in this manner place the form field in a table cell.
Variable Color
The default setting of variable color is configured in xAdmin. Refer to the xAdmin User Guide formore information on the xEditor configuration.
Track Changes
Track Changes configuration is done in xAdmin. Refer to the xAdmin User Guide for more informationon the xEditor configuration.
The Log
xRevise creates a log file that records the configuration setting used to start xEditor, the elapsedtime for all web service calls, and errors with stack traces. When a failure occurs, a message openswith a link that opens the file in a text editor.
You can also open the log file by selecting xEditor log from the xRevise menu on the xEditor toolbar.The log file is located in C:\Documents and Settings\[USER]\Application Data\EMC DocumentSciences\[xRevise]\[server]\xEditor.log.
84

Administering xEditor
Localization
xEditor determines what language resource file to load based on the Windows language and regionsettings of the machine where it is installed. xEditor selects the appropriate language resources inthe following manner:
• First it tries to find a resource file with the exact match for language and region
• If it cannot find an exact match then it will try to find a resource file to match the language
• If it cannot find the exact match or a language match, then it will use the default languageresource: US English.
Customizing Carry Forward
Carry Forward determines which RUs should be included in the final version of a work item beingcarried forward as described in The Comparison Process. These decisions are made based onDEFAULT_CONFIG.xml, located in {xPressionHomeDir}\\xEditor\\CarryForwardConfig bydefault, or the configuration file identified in xAdmin.
DEFAULT_CONFIG.xml
The location of the file is fixed, but a different file can be specified. It is possible to modify theDEFAULT_CONFIG.xml file, but it is recommended that a new file be created and identified inxAdmin for custom configurations. There is no option to restore DEFAULT_CONFIG.xml to itsoriginal state after it has been modified.
The DEFAULT_CONFIG.xml file establishes the values for each possible case to be considered.Cases can have a value of Compare, Baseline, or none, but not all cases support each possiblevalue. For example:<BaselineNo><Compare id="RUC_1" value="Compare" variables="default"/><CompareDeleted id="RUC_101" value="None" variables="default"/><!-- RUC_101 only supports: None --></BaselineNo>
RUC_1 and RUC_101 are located in a node called BaselineNo. Referring to the case descriptions inThe Comparison Process we see that RUC_101 is not relevant at this time, so the only value supportedfor RUC_101 is “none”. Referring again to The Comparison Process we see that RUC_1 is a case wherethere is no version of the RU in the baseline version. Since there is no baseline version of the RU,this case supports “Compare” and “none” only. If the case value refers to a version where no RUexists, an error will be recorded in the CF.log.
An example of a case where all three values are valid is RUC_107:<RevisionsCompare id="RUC_107" value="Compare" variables="default"/>
In this case there is an RU with the same name in each version, but they are not identical. The“Compare” (LY) version is carried forward to preserve changes made to the non-variable portion of
85
Administering xEditor
the RU. In this case the value could be changed to “baseline” to discard the changes to non-variablecontent, or the RU could be discarded entirely by changing the value to “none”.
Note: DEFAULT_CONFIG.xml, or the designated configuration file, establishes Carry Forward logicwhether the Carry Forward Review is skipped or not.
There is a Reset to Defaults button that will reset the configuration file to DEFAULT_CONFIG.xml.This button does not restore the file to the original configuration if it has been changed, so it isrecommended to use a different file for custom configurations and leave the DEFAULT_CONFIG.xmlfile unchanged.
To customize the Carry Forward comparison:
1. Create a custom configuration file. You can make a copy of the default file as a starting point, orcreate a new file using your stock file as a guide.
Note: It is possible to modify the default configuration file, but there is no mechanism to restore itto its original state, so the recommended policy for using a custom configuration is to create acustom file and change the reference in xAdmin. The default file should be left unchanged tosimplify returning to the default configuration.
2. In your new custom file set the values for each case in your active configuration file. Supportedvalues are “Compare”, “Baseline”, and “none”.
Caution: Not all cases support all values. Cases that find that there is no RU with the namein question in one of the versions cannot use that version as a value. The “none” value isalways supported.
3. Log on to xAdmin and open the xEditor Configuration page.
4. Open the Carry Forward tab.
5. In the Configuration Options section, click Find File.
6. Locate and select the file created in step 1.
7. Save the file, restart the xPression server, and test the Carry Forward feature to ensure that thedesired results are achieved without errors.
User ConfigurationThe only configuration requirement is that the user must have read, write, and create access to thedirectory ’C:\Documents and Settings\[user]\Application Data\EMC Document Sciences’ to use thexEditor application. xEditor needs to write log and other files to this location.
SiteminderxPression supports Siteminder for single-sign on authentication. In environments where Siteminderis used it may be necessary to configure the xRevise client so that an authentication error can be
86

Administering xEditor
avoided. There are two methods for avoiding this condition. Refer to the xPression Installation Guidefor details on configuring your system to work with Siteminder.
WorkflowUser groups as well as individual users can be identified as approvers and submitters. Exercisecaution when making user groups approvers. When a document is submitted to a group for approval,then no individual user will own the work item and so the hyperlink to open the document in xEditorwill be inactive for all users. This design feature ensures that work items are available for editing to aspecific individual only. To activate the hyperlink select the work item, click the Reassign button onthe Actions bar, and then assign the work item to the current user or another user as desired.
When a document is locked for editing and a user attempts to Submit, Delete, or Carry Forward thedocument an error will be generated.• If a Submit is attempted and the submitter has multiple approvers the error is displayed in a popupwindow. If the submitter has only one approver the error is displayed on the xRevise desktop.
• If a Delete or Carry Forward is attempted the error will display in a popup window regardlessthe number of approvers for the submitter.
Workflow is optional. If no workflow is established then the Submit and Approve actions will haveno effect. The buttons are active, but a message will display indicating that no workflow exists for thecategory. The Complete button is available and work items can be completed even if no workflowhas been established.
Enabling xEditor FunctionsYou can enable or disable functions in the xEditor interface through the Resource Management menuin xAdmin. See the xAdmin User Guide for instructions.
Cache ManagementxResponse caches work items locally to improve performance. First-time load performance for awork item may be somewhat slower due to the need for web service calls to retrieve the work itemfrom the xPression server.
The xPression Administrator can configure the system to clear the cache automatically. The primaryreason for automatically clearing the local cache is for security. In cases where xEditor users workwith documents that contain sensitive information, deleting local copies of the document helps toprevent unauthorized access to this information. The administrator can configure the system todelete cached files after a set amount of time or when the cache size exceeds a specified amount.The administrator can also disable local caching.
If the system is not configured to automatically delete cached files, the cache should be clearedmanually as required to prevent an excessive accumulation of files. You can clear the xResponse cachemanually, through the Windows file system, or through the xResponse interface.
87

Administering xEditor
To Clear the Cache from the Windows File System1. Close xEditor. It is not necessary to close xResponse or xRevise, but if you have a work item open
the associated cache file will not be deleted.
2. On the client machine, locate the cache files in the following directories:• For xResponse: Your_drive:Users\Username\AppData\Roaming\EMC Document
Sciences\xResponse
• For xRevise: Your_drive:\Users\Username\AppData\Roaming\EMC DocumentSciences\xEditor
3. Delete some or all of the cached files. You can delete work item folders if necessary.The xPression Administrator can configure the system so that the Local Work Item Cache dialogbox is available to the local user. If the dialog box is available the local user can use it to clear thecache manually.
To Clear the Document Cache from the Local Work Item Cache Dialog Box1. Log on to xResponse or xRevise and open any work item. When using this method the entire
cache will be cleared, so the current work item does not matter.
2. From the xResponse or xRevise menu, select Cache Settings. The Local Work Item CacheSettings dialog box opens showing the current settings. If the dialog box has not been enabledit will still open, but will indicate that the feature is disabled.
3. Click Clear Now.
Configuring Word Ribbon and Backstage PageYou can enable or suppress the ribbon buttons and the backstage menu options of Microsoft Word inxEditor. Changes that you make through the Word interface are limited to the current session, whilechanging a configuration file will affect all users of the application on the xPression Server where theconfiguration file is located. Each server can have a different configuration.
The configuration files are located in the xEditor folder of your xPressionHome directory. EMCDocument Sciences provides a sample configuration file (WORD_DEFAULT_CONFIG.xml) to helpyou get started.
Copy and rename the appropriate configuration file to create your custom configuration file. Onceyour file is configured, you must specify the configuration file in xAdmin to enable it for the server.
To configure the options on the Word ribbon and backstage page, see the following topics:• How to Configure?, page 89
• Additional Configuration for xRevise Users, page 89
• Language-Specific Configurations, page 90
• Creating a Custom WORD_DEFAULT_CONFIG.xml for xRevise, page 90
• Element Properties, page 90
• Excluded, Repurposed, and Unsupported Commands, page 92
88

Administering xEditor
How to Configure?
Disabling a button or an option also disables the corresponding keyboard shortcut. For example, ifyou disable the Bold option using the following setting, the Ctrl+B shortcut is also disabled.<command idMso="Bold" enabled="false"/>
To configure the backstage page, locate the <backstage> element in the configuration file and makethe changes. For example, the following setting hides the File > Save As option:<backstage>
<button idMso="FileSaveAs" visible="false"/></backstage>
To Configure the Ribbon and Backstage Page1. Locate the xEditor folder in your xPressionHome directory and open the appropriate
configuration file.
2. Copy and rename the file.
3. Locate the appropriate item and set the value for the enabled parameter. The following examplehides the Font and Bold options on the ribbon in xEditor.<command idMso="Font" enabled="false"/><command idMso="Bold" enabled="false"/>
4. Make all your changes, and save the file.
5. Log on to xAdmin.
6. Click Resource Management > xEditor Configuration, and click the configuration for theapplication you want to configure.
7. Click theWord tab. In theWord Configuration Options section, click Find File for your versionof Microsoft Word.
8. xAdmin displays a pop-up window that shows the files located in the xEditor folder of yourxPressionHome directory. Select the file that your have customized and click OK.
9. Save your configuration.
Additional Configuration for xRevise Users
The configurations may not take effect if the server IP address is not correctly identified inxRevise.dll.manifest.
To Set the Server IP Address in xRevise.dll.manifest1. Locate and open xRevise.dll.manifest.
2. Ensure that all IP address references are correct for your server.
3. Save xRevise.dll.manifest.
89

Administering xEditor
Language-Specific Configurations
You can create language-specific configuration files for non-English implementations.
Creating a Custom WORD_DEFAULT_CONFIG.xml for xRevise
You can create a custom toolbar of any language. If the language-specific configurationfile that matches the language that the user uses for Word is not available, the defaultWORD_DEFAULT_CONFIG.xml file is used.
Note: White space is not supported between an XML node attribute name and its value when youconfigure WORD_DEFAULT_DONFIG.xml.
To Create a Custom WORD_DEFAULT_CONFIG.xml1. Open WORD_DEFAULT_CONFIG.xml and save a copy with the appropriate name as in these
examples:• German — German_WORD_DEFAULT_CONFIG.xml
• French — French_WORD_DEFAULT_CONFIG.xml
• English — USEnglishUS_WORD_DEFAULT_CONFIG.xml
• Spanish — Spanish_WORD_DEFAULT_CONFIG.xml
Refer to http://msdn2.microsoft.com/en-us/library/Aa432635.aspx for a detailed list of languagenames. For example, Canadian French would be FrenchCanadian.
2. Translate the toolbar names to the name used by Word. You can determine the name used byright-clicking the toolbar. The name is not necessarily the typical translation of the English name.
3. Translate the name of each toolbar control in the <Command> sections. You do not need totranslate names for buttons that you want to remain displayed and active. As with the toolbarnames, you must use the name that Word uses for the control and this is not necessarily the mostcommon translation of the English name. You can determine the name by holding your cursorover the button momentarily and using the name shown in the tooltip.
4. Translate menus as required using the labels that appear in your version of Word.
5. Save the configuration file in .../xPression_Revise/html/xReviseFatClient/xRevise_version/Utility/.
Element Properties
The following table lists all of the available elements and their properties.• ToolBars
Contains all of the Toolbar elements, which establish the configuration for each individual toolbar.This element has no properties.
• Toolbar
90

Administering xEditor
Located between the opening and closing ToolBars tags, this tag establishes the configuration fora specific toolbar. In addition to its properties, the HideControls and DisableControls elementsreside between its opening and closing tags.— Name is the name of the toolbar.
— Visible can be either true or false and determines whether the toolbar is visible or not.
— DisableAllChild disables all controls on the toolbar. When this property is true, you do notneed to specify individual controls to be disabled.
• HideControls
Located between the opening and closing Toolbar tag, controls identified with this tag are hiddenon the toolbar identified in the Toolbar tag.
Name is the name of the control to be hidden.
• Disable- Controls
Located between the opening and closing Toolbar tag, controls identified with this tag are disabledon the toolbar identified in the Toolbar tag.
Name is the name of the control to be disabled. The control remains visible.
• Control
Each Control element located within a HideControls or DisableControls section identifies a controlto be hidden or disabled.
ShortCuts disables any keyboard shortcuts associated with the control. This is necessary if youwant to eliminate the function entirely since the shortcut will still work even if the control hasbeen hidden or disabled. You must identify each shortcut combination, separating keys withcommas and different shortcut combinations with the pipe symbol as in this example.<Control Name="Save" ShortCuts="(control,s)|(shift,f12)|(alt,shift,f12)"></Control>
• Menus
Contains all of the Menu elements, which establish the configuration for each individual menu.This element has no properties.
• Menu
Located between the opening and closing Menus tags, this tag establishes the configuration for aspecific menu. In addition to its properties, the HideControls and DisableControls elements residebetween its opening and closing tags. This element only applies to xResponse.— Name is the name of the menu.
— Visible can be either true or false and determines whether the menu is visible or not.
— DisableAllChild disables all controls on the menu. When this property is true, you do notneed to specify individual controls to be disabled.
• HideControls
Located between the opening and closing Menu tag, controls identified with this tag are hiddenon the menu identified in the Menu tag.
Name is the name of the control to be hidden.
• Disable- Controls
91

Administering xEditor
Located between the opening and closing Menu tag, controls identified with this tag are disabledon the menu identified in the Menu tag.
Name is the name of the control to be disabled. The control remains visible.
• Control
Each Control element located within a HideControls or DisableControls section identifies a controlto be hidden or disabled.
ShortCuts disables any keyboard shortcuts associated with the control. This is necessary if youwant to eliminate the function entirely since the shortcut will still work even if the control hasbeen hidden or disabled. You must identify each shortcut combination, separating keys withcommas and different shortcut combinations with the pipe symbol as in this example.<Control Name="Save" ShortCuts="(control,s)|(shift,f12)|(alt,shift,f12)"></Control>
Excluded, Repurposed, and Unsupported Commands
The following Word functions are either not available with xEditor, or the stock functionality ismodified by xEditor. It may be possible to enable toolbar buttons or menu item for those that are notsupported, but the function is still overridden by xEditor.
The following functions are not supported by xEditor, but cannot be suppressed in the interface.• Create or Modify Style
xEditor does not support creating new styles. When xEditor detects a new style, the style isdeleted and a message is displayed. xEditor does not support modifying styles. Users should notmodify styles because satisfactory results cannot be guaranteed.
• New Window
Word does not allow this option while running with xEditor because an XML expansion pack isattached. This limitation is imposed by Word.
The following Word features work differently in xEditor.• Created On
The Created On option for Insert Auto Text does not insert the actual date the document wascreated. It always inserts “Created on 6/19/2007 10:14:00 AM.” It is recommended that usersavoid using this option.
• Ctrl+A
The Ctrl+A hotkey combination selects the entire document in Word. Ctrl+A behaves differentlyin xEditor, depending on whether the document includes optional content or not. If the documentdoes not include any optional content, then the entire RU is selected. If the document includesoptional content, then the text of the current node is selected.
• Protection
xEditor supports Read-only and Forms Fill-In protection types with some restrictions. SeeProtection.
• Drag and Drop
92

Administering xEditor
Drag and drop is not allowed if the current selection includes a variable or a DCPI field. xEditorwill not permit data to be dropped into a variable or DCPI field.
The following Word functions are suppressed, not supported, and cannot be enabled with a customribbon configuration.
From the Office menu:• Send Menu
All items including E-mail, E-mail as PDF Attachment, E-mail as XPS Attachment, and Internet Fax
• Version History
• Properties
• Save As Menu
All items including Save as Word Document, Save as Word Template, Save as Word 97–2003Document, PDF or XPS, and Other Formats
• Publish Menu
Create Document Workspace
• Office Menu
Find add-ins for other file formats
From the Home tab:• Paragraph section
Distributed toggle
• Quick Styles
Save Selection as New and Save Quick Style Set
From the Insert tab:• Insert Picture from File
• Insert Shapes
• Insert Drawing Canvas
• Insert Smart Art
• Ink Group
• Property
• Building Blocks Organizer
• Get More on Office Online
• Save Selection To Quick Part Gallery
• WordArt
From Page Layout tab:• Themes
• Text Direction
93

Administering xEditor
From Review tab:• Track Changes
• Accept All Changes in Document
• Accept All Changes Shown
• Accept and Move to Next
• Reject All Changes in Document
• Reject All Changes Shown
• Reject and Move to Next
From View tab:• Document Map
• Thumbnails
• Side by Side
From Developer tab:• XML group
• Structure
• Schema
• Transformation
• Expansion Packs
• Templates group
• Document
• Document Panel
From Table Tools Layout tab:• Text Direction
• Web Component
• Auto Format
• Auto Format as you Type
• Auto Format Now
• Auto Format Options
• Microsoft Office PowerPoint
The following functions have been repurposed for xEditor. They can be disabled, but the originalfunction cannot be restored.
From the Office menu:• Save
• Save As
• Application Options
94

Administering xEditor
From the Home tab:• Find
• Replace
• GoTo
• Paste
• Paste Special
• Paste Hyperlink
From the Page Layout tab:• Page Setup
From the Review tab:• Spelling and Grammar
• Restrict Formatting
• Compare Two Versions
• Accept Change
• Reject Change
All other standard Word functions and features are available and perform as expected with xEditor.You can further restrict the options available with Toolbar Configuration, but you cannot enablefeatures disabled by xEditor.
xEditor Event NotificationxEditor event notification is an optional feature that provides a means of informing applications thatuse xEditor that Open, Save and Close actions have occurred with xEditor. xRevise, xResponse, andcustom applications created with IDDK can use the event notification feature as long as a listenerhas been created and the listener has been identified for the application in xAdmin. The applicationuser must have read/write access to C:\Documents and Settings\%CURRENT_USER%\ApplicationData\EMC Document Sciences.
For more information, see the Resource Management section of the xAdmin User Guide.
Local FilesxEditor creates a file structure on the client to avoid excessive calls to the server,and so to improve performance. The files stored here are the application filesdownloaded from the server, not the assembled document files. The structure
95

Administering xEditor
is located under C:\Users\Username\AppData\Roaming\EMC DocumentSciences\server_port\document. The variable parts are as follows:
• Username - The name of the current Windows user (not necessarily the xResponse user)
• server_port - The server name and port, localhost_8080 for example
• document - The work ID of the document
This process means that loading a document will take longer the first time than in subsequent sessions.
If the WORD_DEFAULT_CONFIG.xml file is changed, the local copy for each document on each clientmachine must be deleted to apply the changes. It is possible that different documents can havedifferent ribbon configurations in xEditor if this file is not deleted when changes are made on theserver. Smart Client automatically replaces the file on the client machine if the file is necessary.
xEditor saves a Word-format (.doc) copy of the document in the \[document] folder. This file cannotbe opened outside of xEditor. A message opens when the user attempts to open this file directly inWord.
xEditor LocalizationxEditor determines what language resource file to load based on the Windows language and regionsettings of the machine where it is installed. The server locale need not match the client locale.xEditor selects the appropriate language resources in the following manner:
• First it tries to find a resource file with the exact match for language and region
• If it cannot find an exact match then it will try to find a resource file to match the language
• If it cannot find the exact match or a language match, then it will use the default languageresource: US English.
Microsoft Word IssuesReview the following Microsoft Word topics:• Microsoft Word Add-Ons, page 96
• Balloons, page 97
• Undo, page 97
• Table Rules and Read-Only Protection, page 97
Microsoft Word Add-Ons
Many add-ons are available for Microsoft Word. Using xEditor with third-party add-ons mayproduce unexpected results.
96

Administering xEditor
Balloons
By default Microsoft Word displays comments and changes in balloons. If balloons are displayedand adjacent sections have different page settings, Word will break the page between these sections.This may result in an extra page being added to the document. This effect will occur in cases wheresubdocuments have different page settings than adjacent sections, and so the unexpected pagebreak may have no apparent cause without understanding this behavior. To prevent the unexpectedbreak, either turn off balloons or redesign the document and all subdocuments to have the samepage settings.
Undo
See the following limitations:• Undo After Paste, page 97
• Using Undo, page 97
Undo After Paste
Using Undo after pasting into the editor is not supported.
Using Undo
In some cases it is necessary to click Undo twice to restore the document to its status prior to makingan edit. For example, if a word is selected and then replaced by typing a new word, the first undowill delete all but the first letter of the new word and the second undo will replace the remainingletter with the original word. This behavior is because of the way Microsoft Word records the actions.The select action is an action and the replace action is another action, so Word requires two undoactions to completely restore the original text. The same behavior can be observed in MicrosoftWord without xEditor.
Table Rules and Read-Only Protection
Table rules under Read-only protection with an exception region in the table will cause an error whenattempting to open the document in xEditor. It is recommended to avoid placing table rules underRead-only protection. Consider using a content read loop instead.
97

Administering xEditor
Avoiding the Failed to Merge Content ErrorA Failed to Merge Content error will occur when opening the work item in xEditor if a variablewith a value of NULL is preceded by a combination of page fields and tabs. To avoid this, set thevariable value to a blank space rather than NULL.
Hidden Text PanelThe Hidden Text panel is displayed when the cursor is positioned in a region of hidden text. This canhelp prevent inadvertently inserting hidden text, which is used for document formatting.
You can set the following two options from the xEditor Configuration section in xAdmin to determinethe Hidden Text panel’s behavior:• Enable hidden text monitoring — Hidden Text Monitoring is not enabled by default. Whenenabled, the Hidden Text panel is displayed in a document when the cursor is positioned in aregion of hidden text.
• Allow users to un-hide the selection — When selected the Unhide button on the Hidden TextPanel is available. Normally, any text added to an area of hidden text will be hidden text, but ifthe Unhide button is clicked any text added following the point where the Unhide button wasclicked will be normal text.
For more information, see xAdmin User Guide
xEditor and Terminal Service LogonxEditor will not start if a mandatory profile is used to launch xEditor through a Terminal Serviceconnection, unless .NET Framework 3.5 is installed. To resolve this problem, install the appropriateversion of .NET Framework, which is available for download from the Microsoft Download Center.
Merging ParagraphsEnabling multiple paragraphs in text form fields involved changes to the function that parses content,so paragraph merge does not produce the same results as in previous versions. When paragraphsare merged, the paragraph end character for the earlier paragraph in the merge should be removed,but was not necessarily removed in earlier versions of xPression, including some xPression 3 SP1builds. In cases where the earlier result is desired it is recommended that a space be added to thebeginning of the customer data. for example:"<SAMPLE_TAG>sample_data </SAMPLE_TAG>" "<SAMPLE_TAG>sample_data </SAMPLE_TAG>"
98

Administering xEditor
Clearing an Application File on the ClientMachineThe WORD_DEFAULT_CONFIG.xml file is used to customize the Word toolbars and ribbon availablein xEditor. The file is downloaded to the client machine for performance reasons. If deleted fromthe client machine the file will be automatically downloaded from the server. The only performanceimpact of this is when loading xEditor since the file must be downloaded again. There are no otherapplication files downloaded and cached on the client machine.
ChartsCharts (DDGs) are not supported in xEditor. Documents that use charts cannot be used to createxRevise work items.
99

Administering xEditor
100

Appendix A
Words Excluded from SQL Full TextSearch
The following words are excluded from SQL full text searches. Including these words will limit thenumber of returned items in some searches. In addition, individual letters are excluded.
Exclusion Tableabout because did have its never said the very who 7
after been do her just no same their want will 8
all before does here like now see them was with 9
also being each him make of should then way would 0
an between else him-self
many on since there we you $
and both for his me only so these well your
another but from how might or some through were 1
any by get if more other still to what 2
are came got in most our such too when 3
as can has into much out take under where 4
at come had is must over than up which 5
be could he it my re that use while 6
101