emailing reports and forms from...
TRANSCRIPT

Emailing Reports and Forms
From CounterPoint
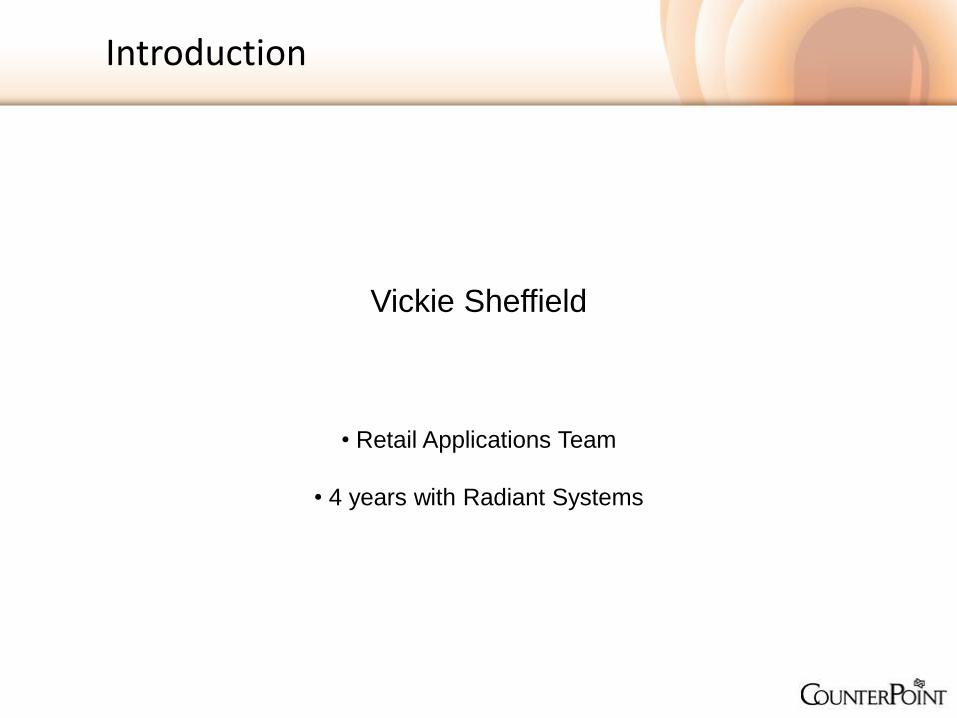
Introduction
Vickie Sheffield
• Retail Applications Team
• 4 years with Radiant Systems

Objective & Overview
Retailers of all sizes are expanding their use of email.
• Customer demand
• Customer relationship and customer service
• One step closer to paperless
• Cost-effective
After completing this session, you should be able to:
• Set up CounterPoint to email receipts, A/R statements, and reports
• Set up user rights for email functionality
• Use email within POS and Order Management, and to send A/R
statements and reports

Agenda
1. View Email Settings in Radiant Management Console
2. Configure Store Settings and Form Group Settings for emailing
Receipts
3. View Store and Form Group Settings in CounterPoint 8.4
4. Configure Customer Control and Customer Settings for emailing
A/R Statements
5. View Custom Control and Customer Settings in CounterPoint 8.4
6. Configure User Security and Company Settings for emailing
Reports and Purchase Orders
7. View User Security and Company Settings in CounterPoint 8.4

Email Settings
• Connect to your CounterPoint Server
• Under the Mail tab, enter the SMTP host name
• Specify the SMTP port
• Set up login credentials, if necessary
• Enter the default From email address
• Save your changes
Step 1
Configure Email Settings in
Radiant Management
Console

Email Settings, continued
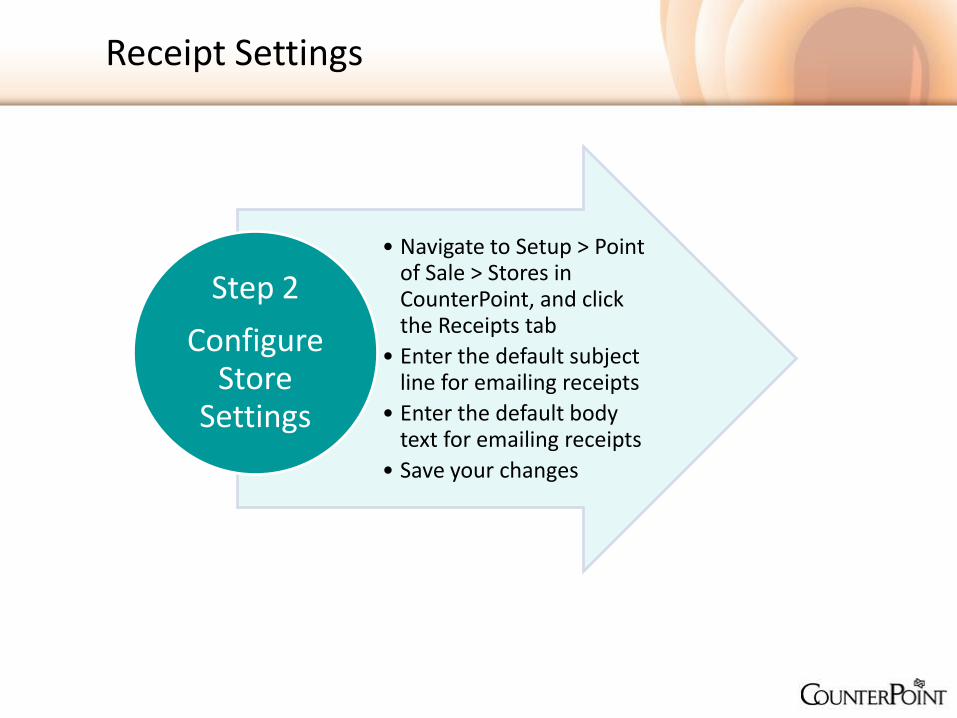
Receipt Settings
• Navigate to Setup > Point of Sale > Stores in CounterPoint, and click the Receipts tab
• Enter the default subject line for emailing receipts
• Enter the default body text for emailing receipts
• Save your changes
Step 2
Configure Store
Settings
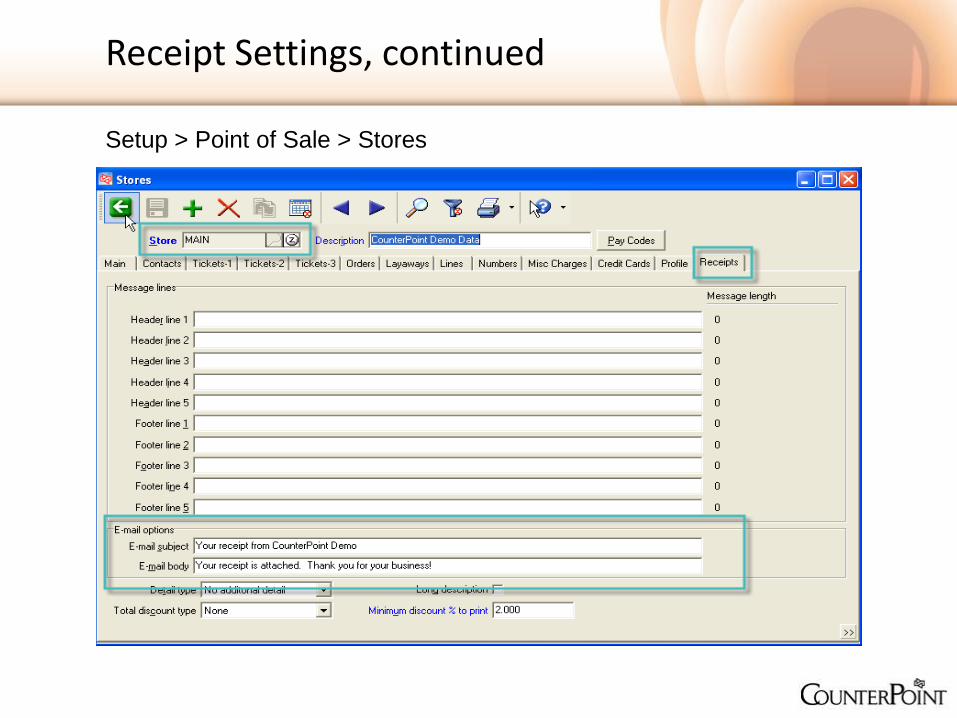
Receipt Settings, continued
Setup > Point of Sale > Stores
Receipt Settings, continued
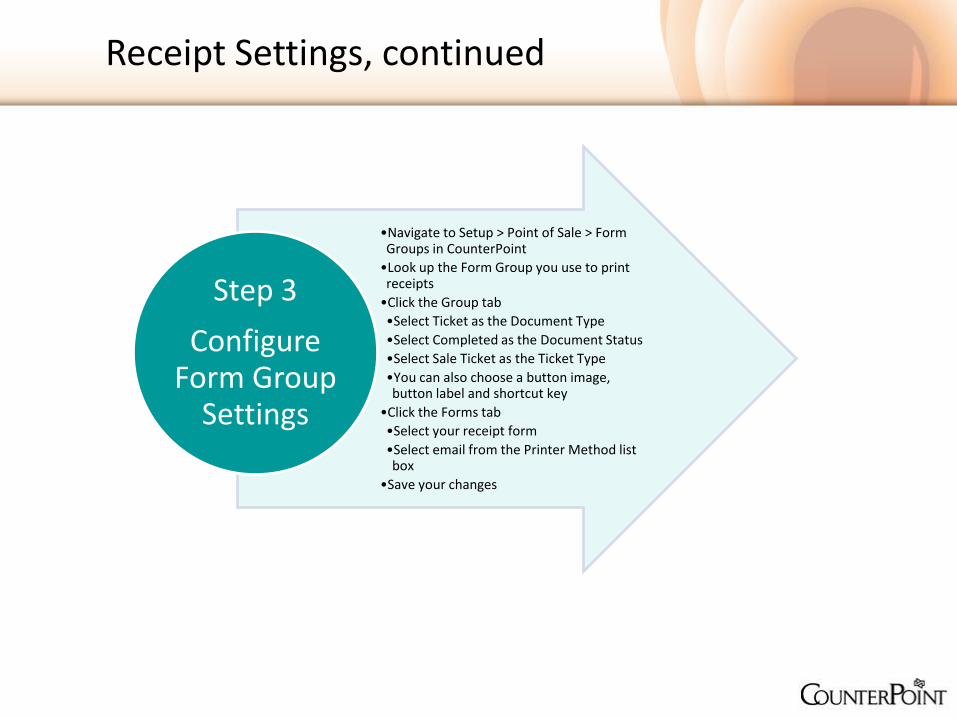
•Navigate to Setup > Point of Sale > Form Groups in CounterPoint
•Look up the Form Group you use to print receipts
•Click the Group tab
•Select Ticket as the Document Type
•Select Completed as the Document Status
•Select Sale Ticket as the Ticket Type
•You can also choose a button image, button label and shortcut key
•Click the Forms tab
•Select your receipt form
•Select email from the Printer Method list box
•Save your changes
Step 3
Configure Form Group
Settings
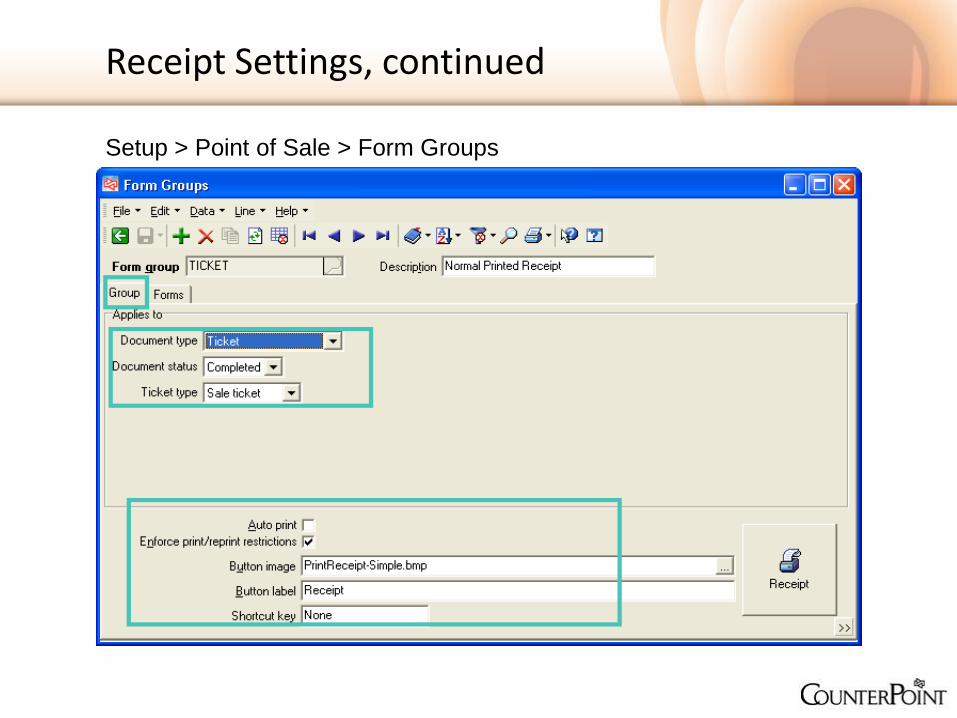
Receipt Settings, continued
Setup > Point of Sale > Form Groups

Receipt Settings, continued

Email Receipt at Point-of-Sale after
Tendering a Transaction
Emailing Receipts
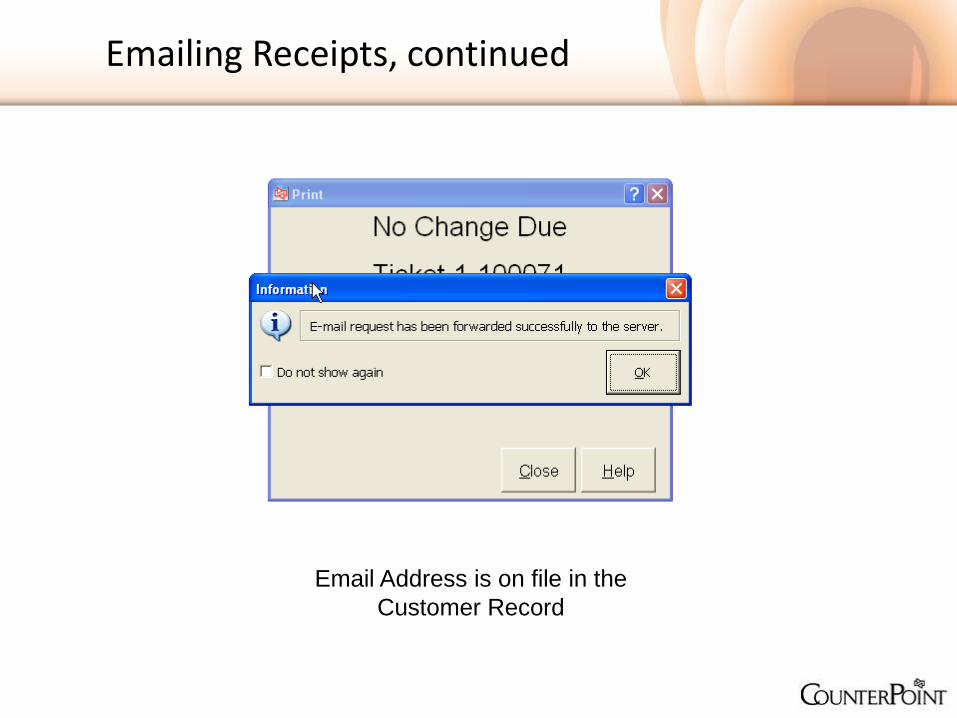
Emailing Receipts, continued
Email Address is on file in the
Customer Record

Emailing Receipts, continued
No email address is on file in the
Customer Record.

Emailing Receipts, continued
No email address is on file, but the
customer has given you one at POS.
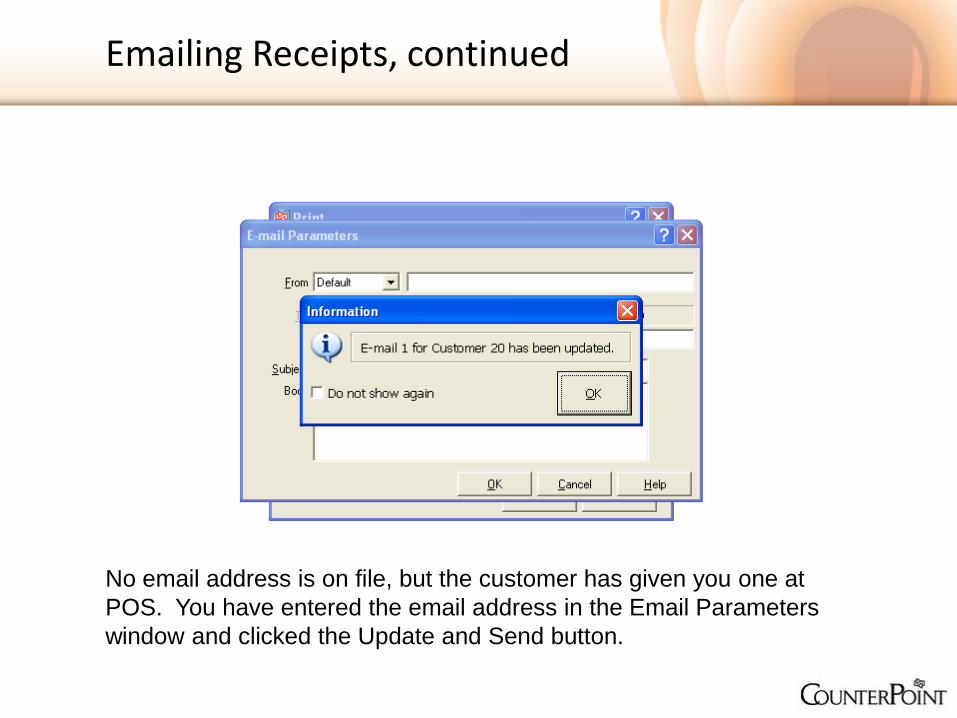
Emailing Receipts, continued
No email address is on file, but the customer has given you one at
POS. You have entered the email address in the Email Parameters
window and clicked the Update and Send button.
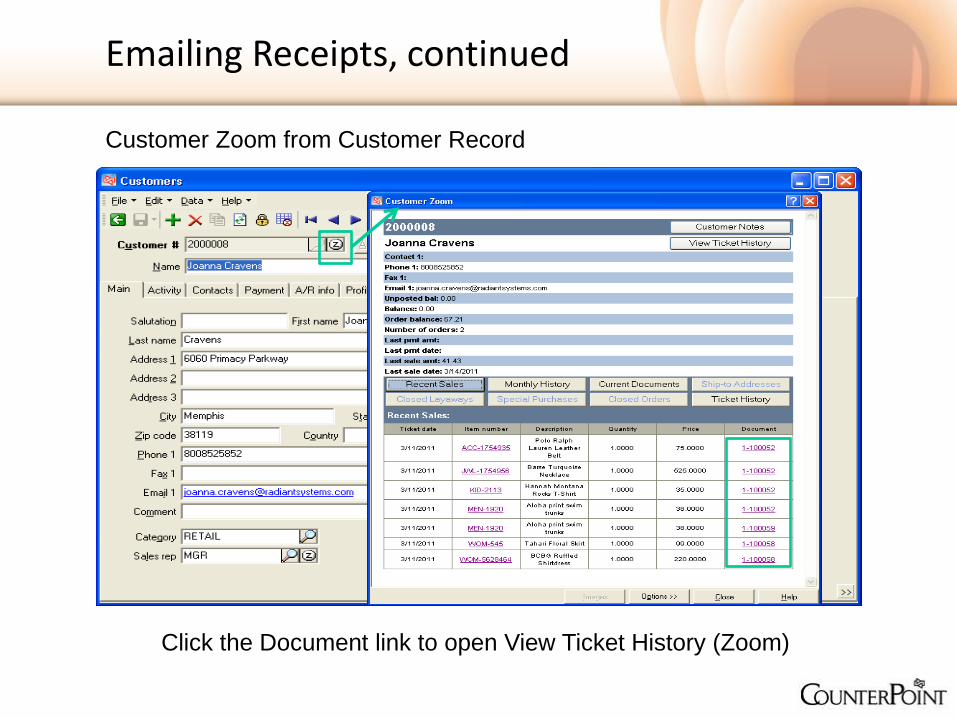
Customer Zoom from Customer Record
By clicking the Recent
Sales button, you can
see detailed
information about
purchases.
Select the document
for which you want to
reprint a receipt.
Doing so will take you
to View Ticket History.
Emailing Receipts, continued
Click the Document link to open View Ticket History (Zoom)
Emailing Receipts, continued
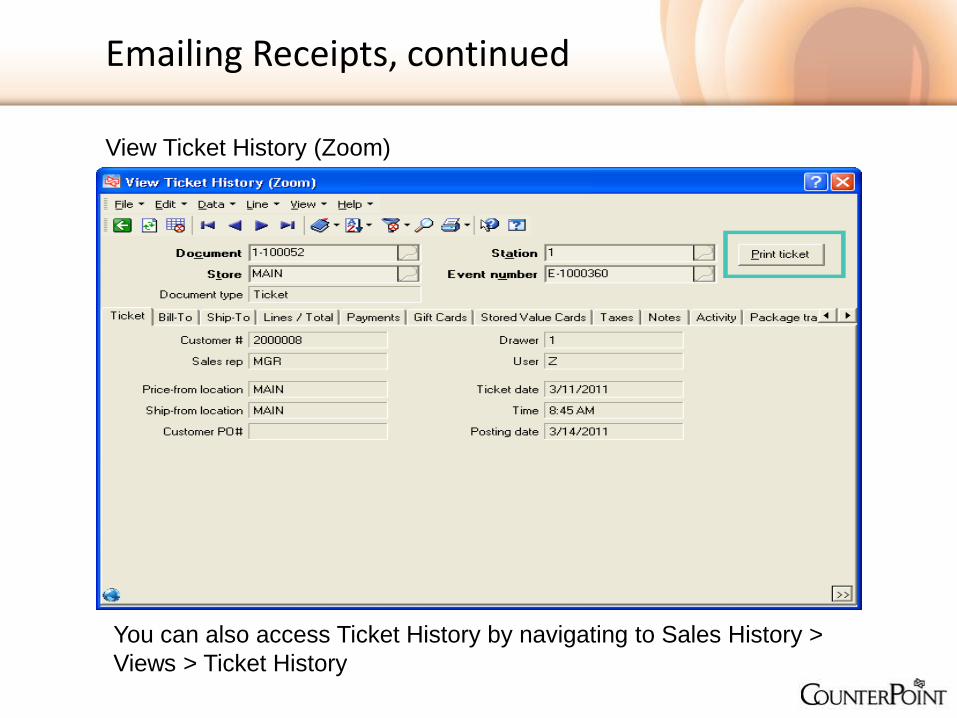
View Ticket History (Zoom)
You can also access Ticket History by navigating to Sales History >
Views > Ticket History

Emailing Receipts, continued
If you arrive at this screen by using Customer Zoom at POS, you can
simply click the email button.
If you arrive at this screen by using Sales History > Views > Ticket History,
you will need to choose the Lookup options you want to use to find the
receipt, then click the email button.

A/R Statement Settings
• Navigate to Setup > Customers > Control in CounterPoint
• Click the A/R Processing tab
• Select the Allow e-mail statements check box
• Type your default email subject line
• Type your default email body text
• Save your changes
Step 4
Configure Customer
Control Settings

A/R Statement Settings, continued
Setup > Customers > Control
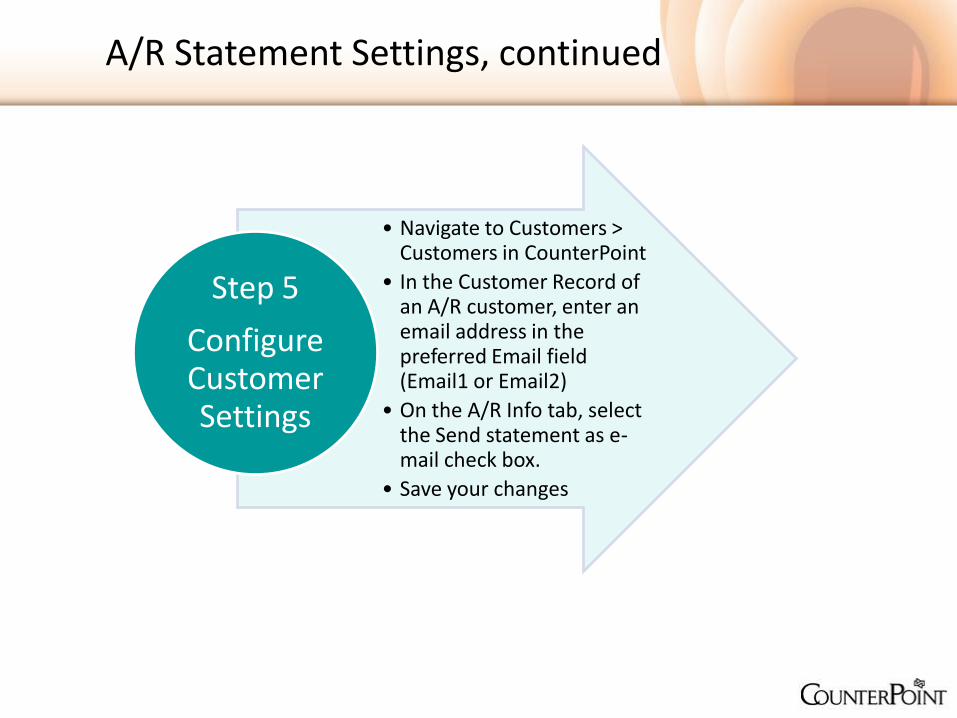
• Navigate to Customers > Customers in CounterPoint
• In the Customer Record of an A/R customer, enter an email address in the preferred Email field (Email1 or Email2)
• On the A/R Info tab, select the Send statement as e-mail check box.
• Save your changes
Step 5
Configure Customer Settings
A/R Statement Settings, continued

A/R Statement Settings, continued
Customers > Customers

A/R Statement Settings, continued
A/R Statement Settings, continued
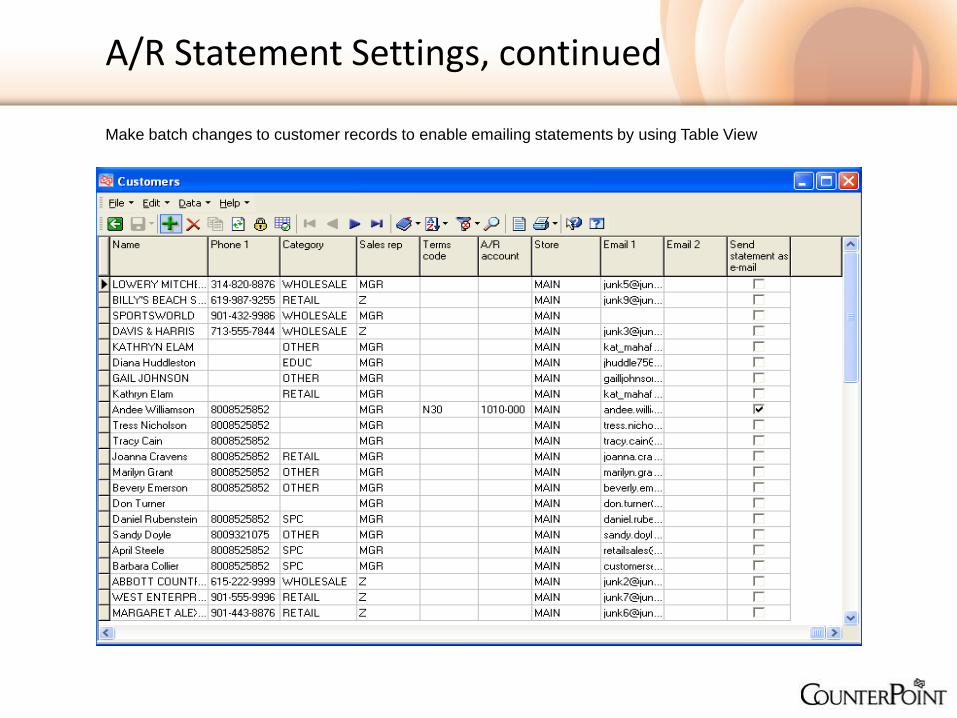
Make batch changes to customer records to enable emailing statements by using Table View

Customers > Reports > Statements
A/R Statement Settings, continued
Use for batch processing of customer A/R statements

User Security Settings
•Navigate to Setup > System > Security Codes in CounterPoint
•Under the Authorizations tab, click the check boxes to allow whichever of the following should apply
•Emailing of reports
•Emailing to non-system addresses (outside your email system)
•Updating of email addresses
•Save your changes
Step 6
Configure User Security
Settings

Setup > System > Security Codes
User Security Settings, continued
• Navigate to Setup > System > Company in CounterPoint
• Click the Other tab
• Type your default body text
• Save your changes
Step 7
Configure Company Settings
Report Settings

Setup > System > Company
Report Settings, continued
Emailing Reports
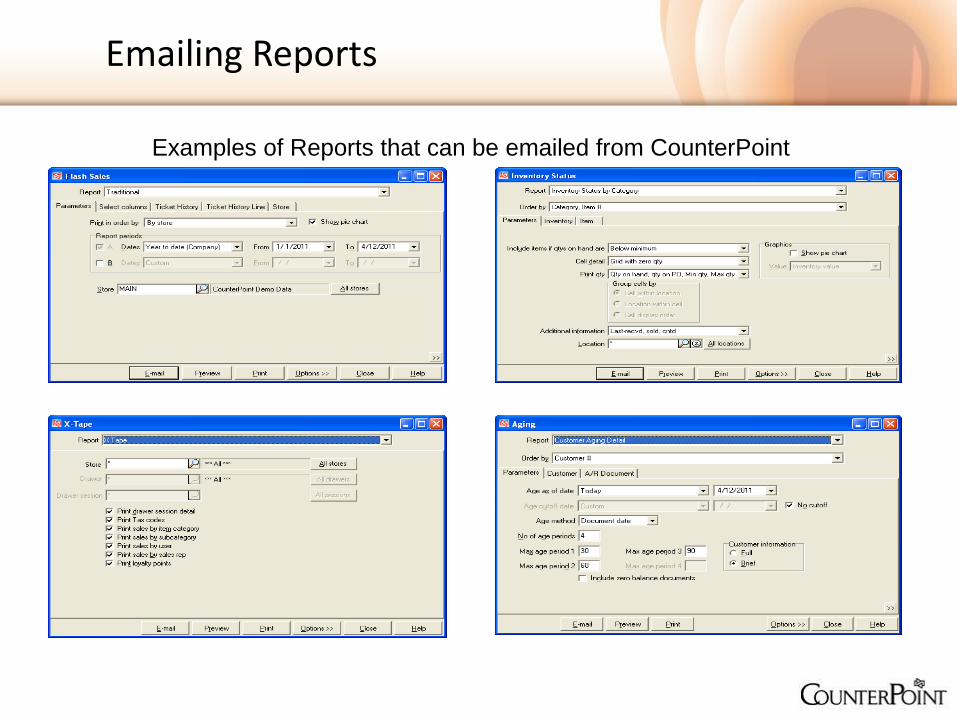
Examples of Reports that can be emailed from CounterPoint

Emailing Reports, continued
Recap
Key Learning Highlights:
• Management Console is used for central setup of email server settings.
• To email receipts, you must enter a default email subject and body text. You must also
add email as a printer method in your Form Group.
• To email A/R statements, you must allow email statements to be sent, enter a default
email subject and body text, and enable statements to be sent in the A/R customer
records.
• Users must be given access to be able to email reports.
• To email reports, you must enter the default body text.