editing my trailer
TRANSCRIPT
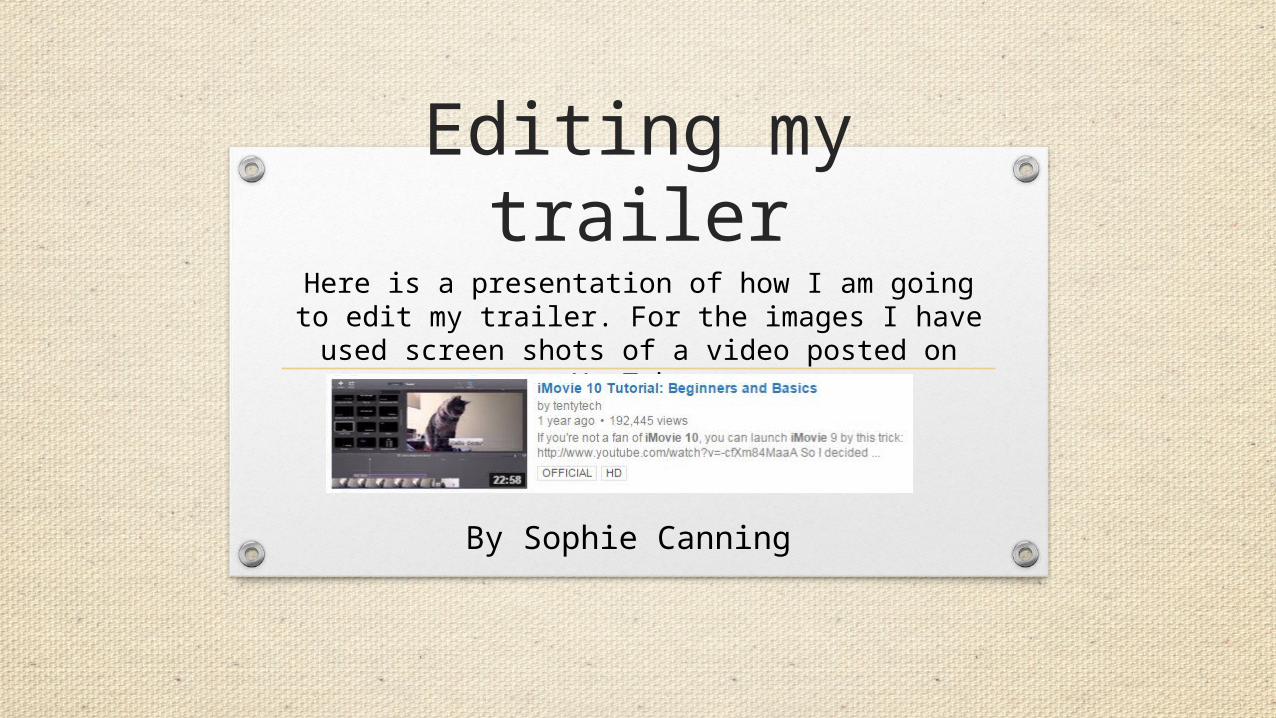
Editing my trailerHere is a presentation of how I am going to edit
my trailer. For the images I have used screen shots of a video posted on YouTube:
By Sophie Canning

Creating a new project
• Even though I will be creating a movie trailer, on iMovie I will be selecting the ‘movie option’ as I will be able to have more freedom to insert more clips as trailers on iMovie are restricted to 30/ 40 seconds. After selecting to create a movie, I had to then imports the files that I wanted in my movie trailer.
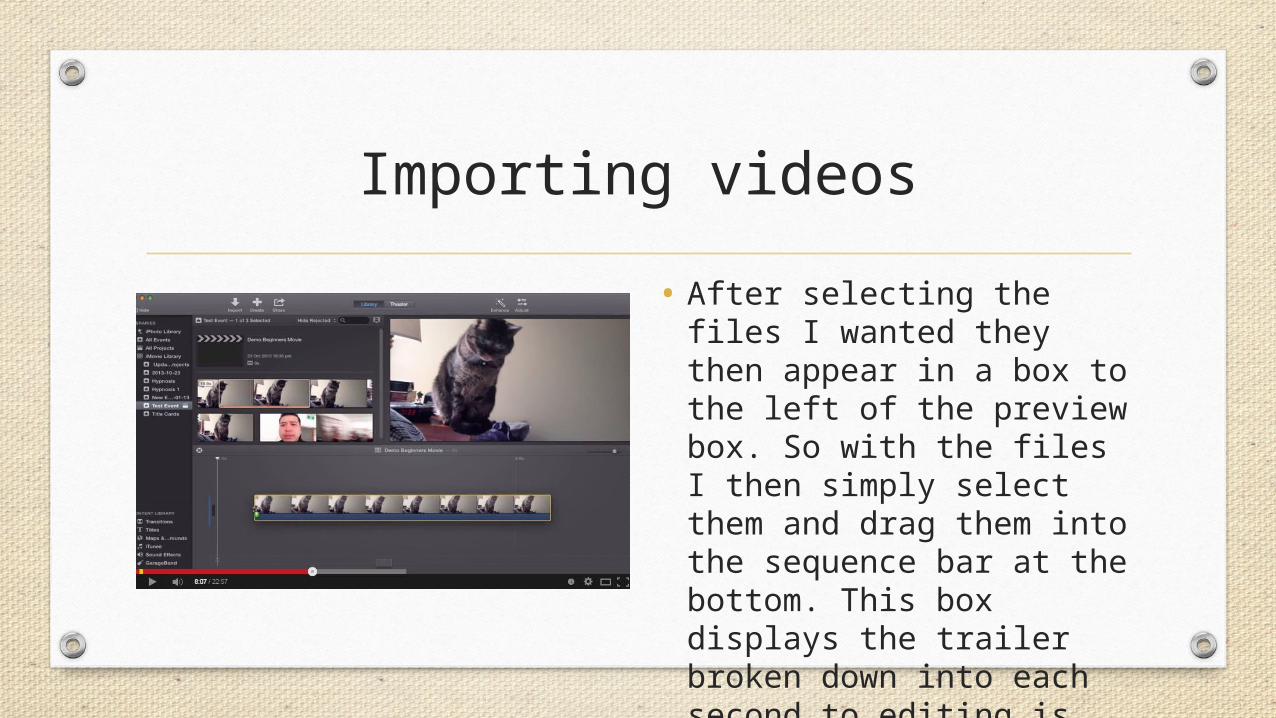
Importing videos
• After selecting the files I wanted they then appear in a box to the left of the preview box. So with the files I then simply select them and drag them into the sequence bar at the bottom. This box displays the trailer broken down into each second to editing is made easier.
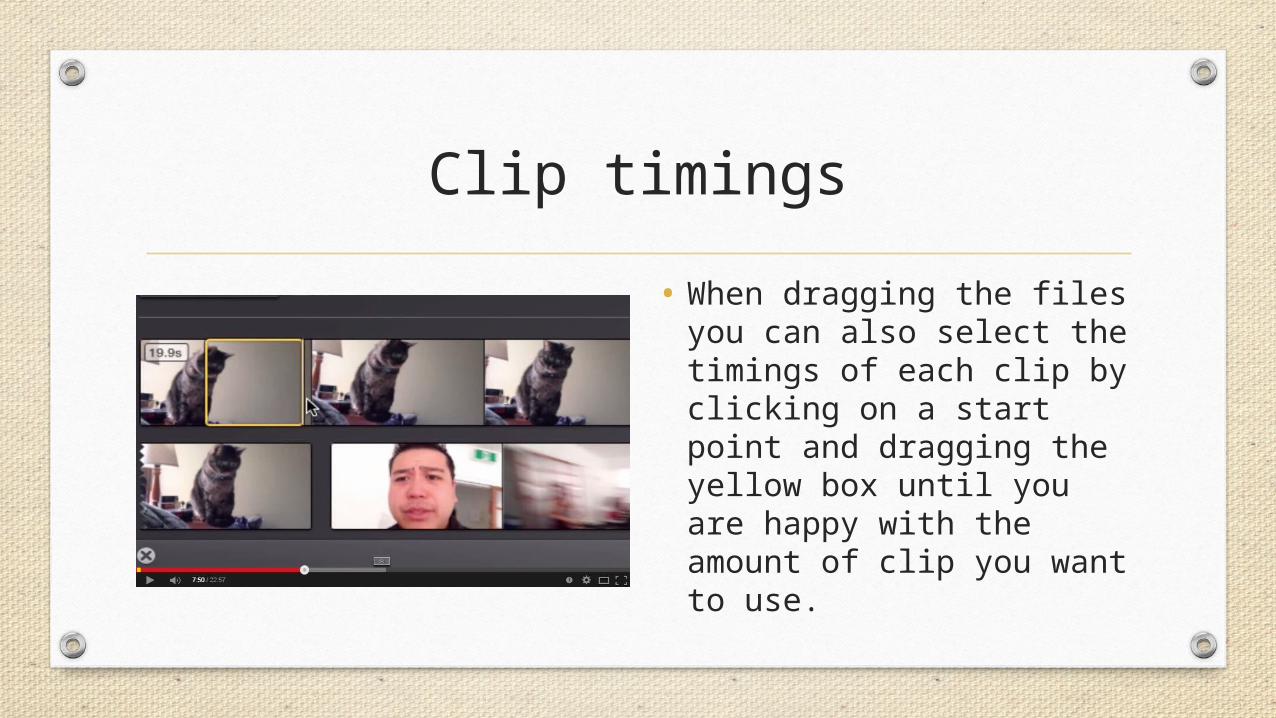
Clip timings
• When dragging the files you can also select the timings of each clip by clicking on a start point and dragging the yellow box until you are happy with the amount of clip you want to use.
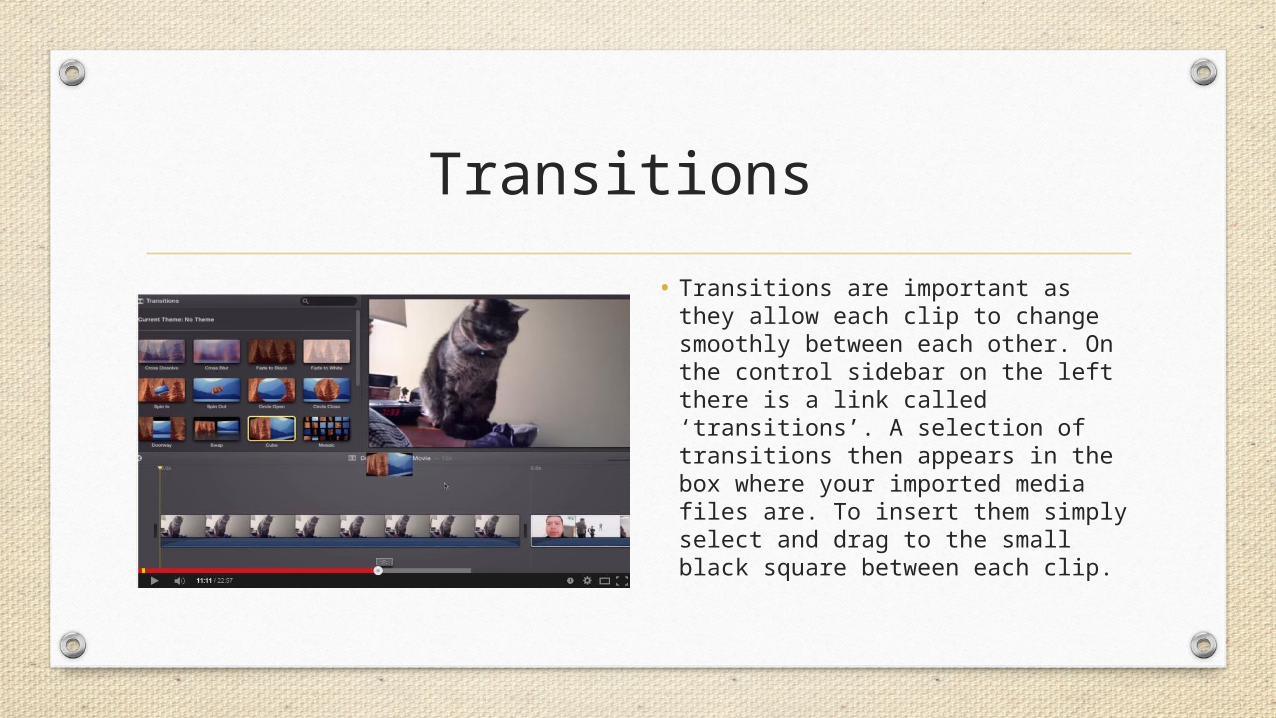
Transitions
• Transitions are important as they allow each clip to change smoothly between each other. On the control sidebar on the left there is a link called ‘transitions’. A selection of transitions then appears in the box where your imported media files are. To insert them simply select and drag to the small black square between each clip.
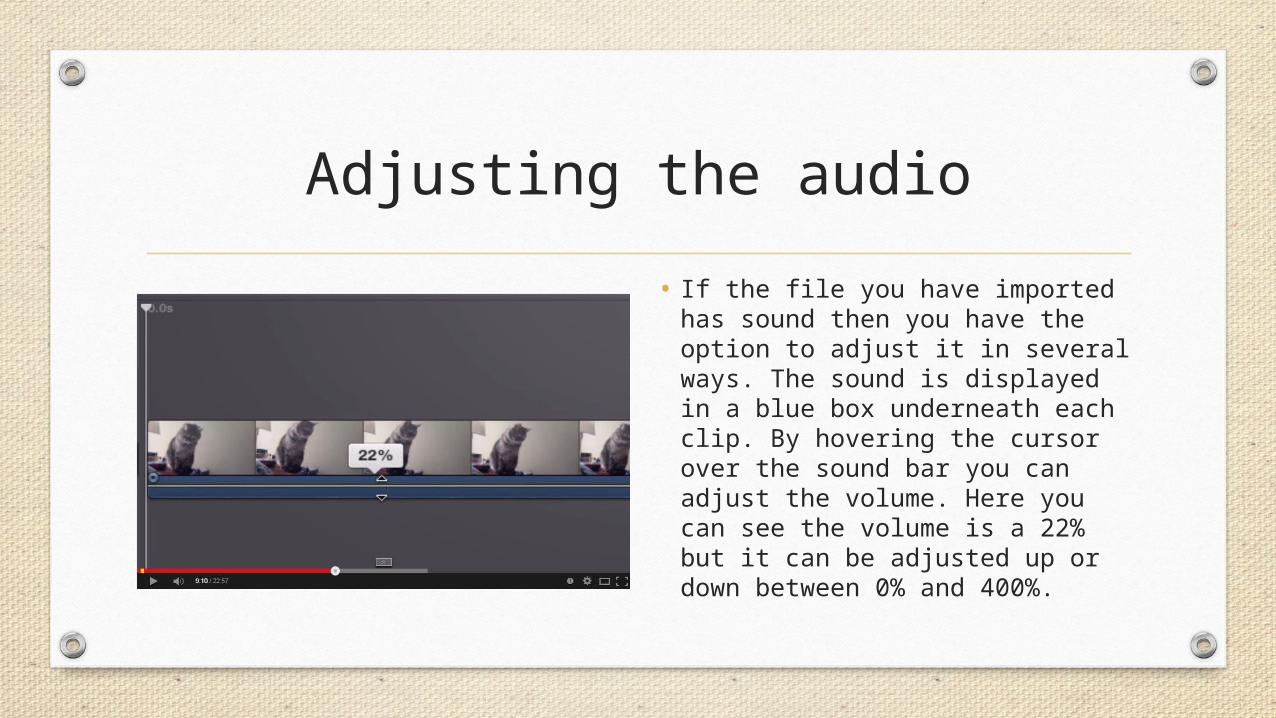
Adjusting the audio
• If the file you have imported has sound then you have the option to adjust it in several ways. The sound is displayed in a blue box underneath each clip. By hovering the cursor over the sound bar you can adjust the volume. Here you can see the volume is a 22% but it can be adjusted up or down between 0% and 400%.
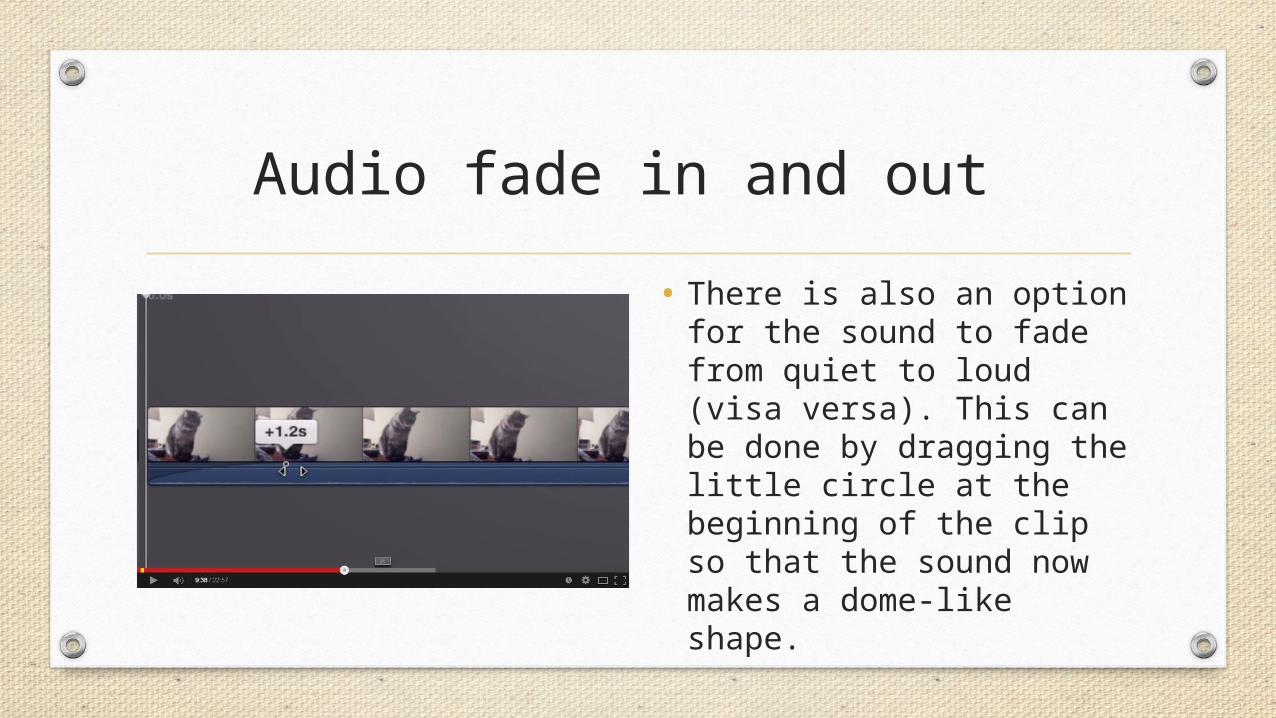
Audio fade in and out
• There is also an option for the sound to fade from quiet to loud (visa versa). This can be done by dragging the little circle at the beginning of the clip so that the sound now makes a dome-like shape.
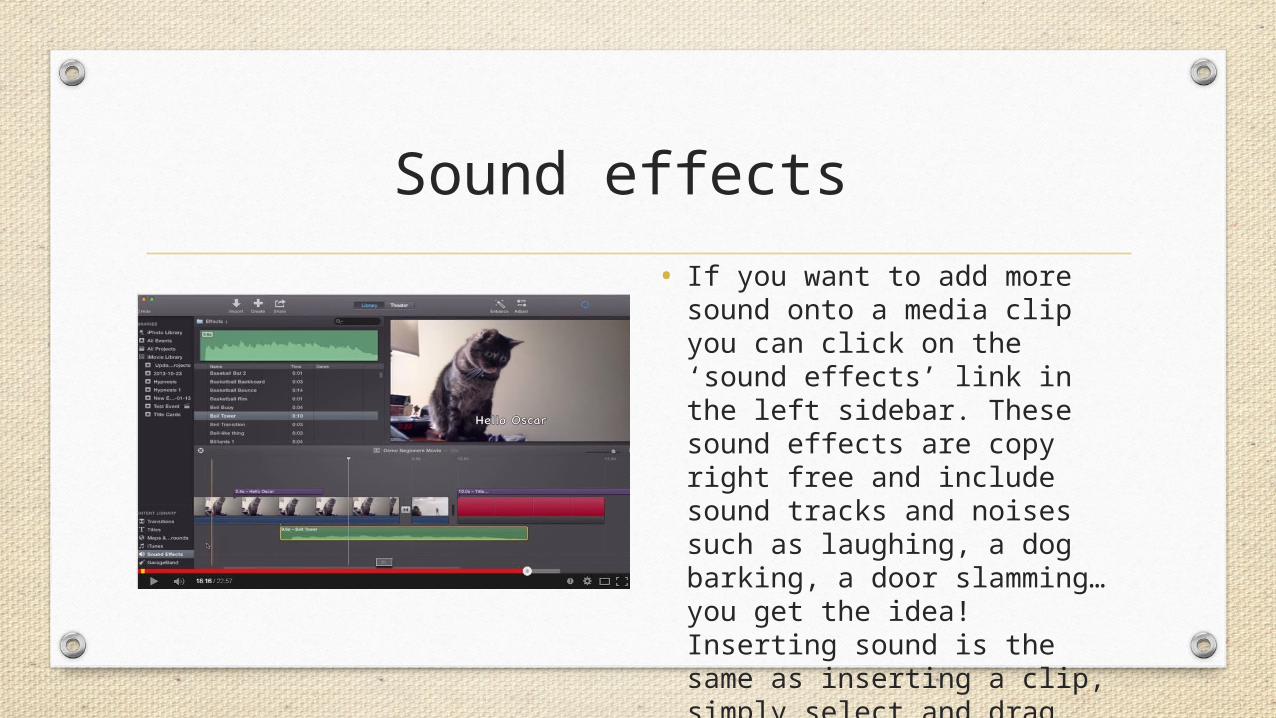
Sound effects
• If you want to add more sound onto a media clip you can click on the ‘sound effects’ link in the left sidebar. These sound effects are copy right free and include sound tracks and noises such as laughing, a dog barking, a door slamming… you get the idea! Inserting sound is the same as inserting a clip, simply select and drag down to the sequence bar. You can also adjust the volume and length of the clip by hovering over the ends with our cursor.
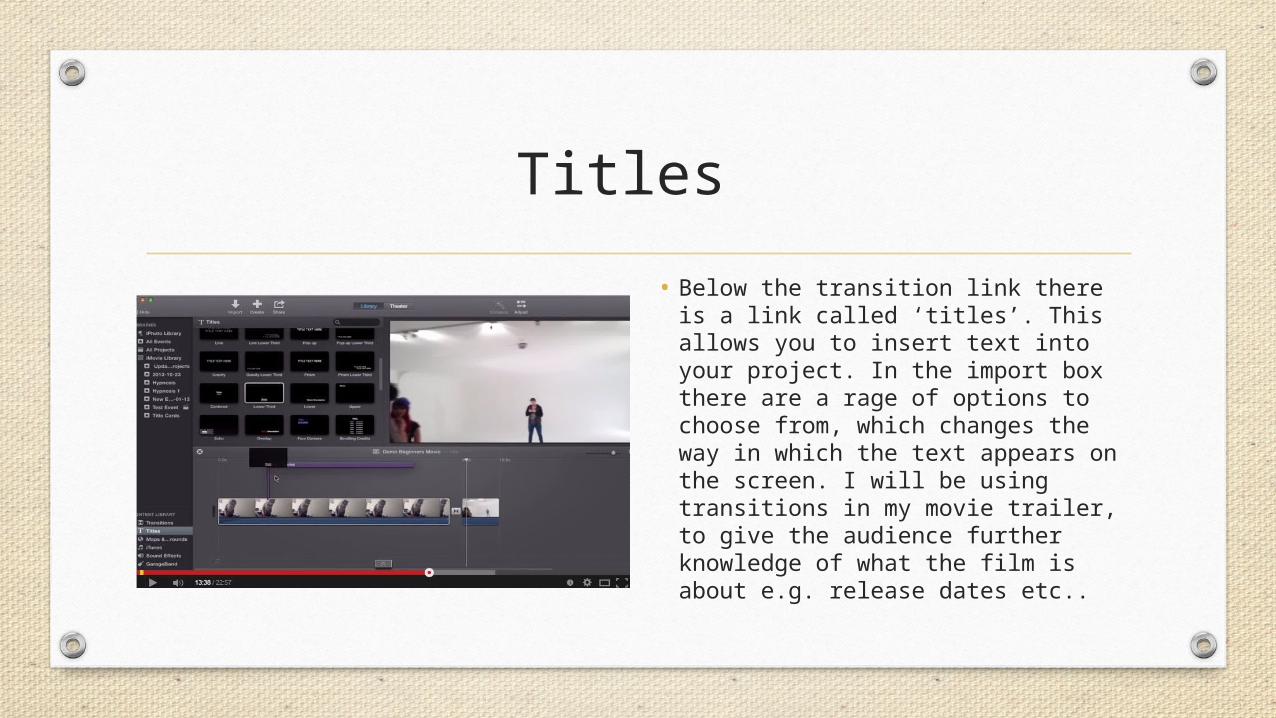
Titles
• Below the transition link there is a link called ‘titles’. This allows you to insert text into your project. In the import box there are a rage of options to choose from, which changes the way in which the text appears on the screen. I will be using transitions in my movie trailer, to give the audience further knowledge of what the film is about e.g. release dates etc..
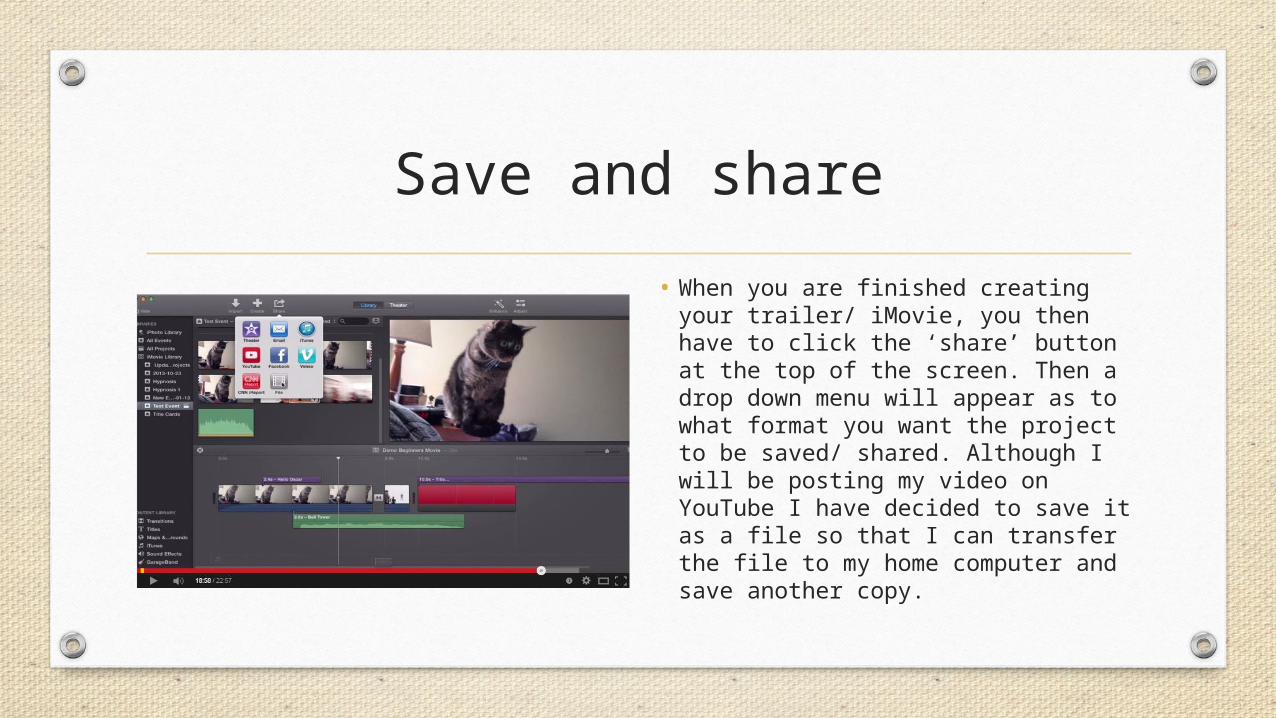
Save and share
• When you are finished creating your trailer/ iMovie, you then have to click the ‘share’ button at the top of the screen. Then a drop down menu will appear as to what format you want the project to be saved/ shared. Although I will be posting my video on YouTube I have decided to save it as a file so that I can transfer the file to my home computer and save another copy.