ecom smart-ex english 1 yourself with the terminology and symbols used in the guide to help you use...
TRANSCRIPT

1
USERGUIDE
ECOM SMART-EX 201
English

2
Copyright © 2015 Sonim Technologies, Inc.
SONIM and the Sonim logo are trademarks of Sonim Technologies, Inc. Other company and product names may be trademarks or registered trade-marks of the respective owners with whom they are associated.
Third Party TrademarksGoogle, Android, Google Calendar, Google Now, Google Play and other marks are trademarks of Google Inc.
Disposal of Old Electrical and Electronic Equipment
The symbol of the crossed-out wheeled bin indicates that within the countries in the European Union, this product, and any enhancements marked with this symbol, can not be disposed as unsorted waste but must be taken to separate collection at their end- of-life.
Disposal of Battery
Please check local regulations for disposal of batteries. The battery should never be placed in municipal waste. Use a battery disposal facility if available.
Guideline for Headphone and EarphoneThis device have been tested to comply with the Sound Pressure Level requirement laid down in the applicable EN 50332-1and/or EN 50332-2 standards. Permanent hearing loss may occur if earphones or headphones are
used at high volume for prolonged periods of time.
To prevent possible hearing damage, do not listen at high volume levels for long periods.
A pleine puissance, l’écoute prolongée du baladeur peut endommager l’oreille de l’utilisateur.
Operation Temperature
Ensure the temperature for adapter and ECOM Smart-Ex 201 will not be higher than 55 ˚C.Adapter shall be installed near the equipment and shall be easily accessible.

3
Conte
ntsGeneral Information———————— 6
Phone Models CoveredNetwork Services Sonim Support Information Use the Guide EffectivelyOptions Commonly Used across Menu Items
Safety Guidelines———————— 8SAR InformationAvoid High TemperaturesBattery DisposalPersonal Medical Devices
Battery Usage Guidelines———————— 12Child SafetyEmergency CallsBattery UsageWARNINGCharging the BatteryWARNING
Getting Started———————— 14Verifying and Optimizing Battery UsageExtend the life of your batteryWhat Is In the Box ?Phone SpecificationsYour SIM CardInserting the SIM Card
Your ECOM SMART-Ex 201———————— 17Switching On the PhoneSetting Up Your PhoneNeed for a Google +™ AccountTouch and Type OperationsHome ScreenKey DescriptionHome Screen IndicatorsPhone Operations Without SIM CardSetting up and Using Lock Screen
Changing the WallpaperTaking a ScreenshotVoice Input for Text Entry
Managing Phone Settings———————— 24Time and Date SettingsUsing Glove ModeLanguage Settings Mouse/TrackpadDisplay SettingsConnecting to a PC Through USBViewing Device DetailsManaging Memory Utilized by Applications
Managing Wireless and Network Settings———————— 28
Optimizing Memory UsageConnecting to Wi-Fi NetworkConnecting to Bluetooth DevicesOptimizing Data UsageActivating Airplane Mode Default SMS App and NFCSetting Up Tethering & Portable HotspotSetting Up Wi-Fi HotspotActivating Bluetooth TetheringSetting Up VPN Connection
Managing Security Settings———————— 33Managing Mobile NetworkManaging Cell BroadcastAbout Android™ SecurityManaging Security SettingsEncrypting Your Phone DataLocking Your SIM CardDevice Administrator Settings
Managing Personal, Account and System Settings———————— 35
Protecting Your Phone from Harmful Applications

4
Managing Credential CertificatesEnable Widgets and Owner InfoLocation AccessApps Accessing Your LocationBackup & Reset OptionsManaging AccountsAccount Sync Options
Managing Contacts———————— 38Adding a New ContactView the Contact DetailsSending a Message from ContactsDialing a Number from ContactsEditing the Contact DetailsImporting SIM Card Contacts to PhoneImporting SIM Card Phone Contacts to StorageExporting Phone Contacts to SIM CardExporting Phone Contacts to StorageSharing Contacts Via MMS, Bluetooth, Drive and E-mailManaging Contact SettingsManaging Phonebook SettingsSearching ContactsDeleting a Contact
Managing Calls———————— 42Deleting Frequently Called Contacts ListMaking a CallCalling a Number Via PeopleAnswering an Incoming CallAdding a Contact From Phone ScreenViewing All Contacts from Phone ScreenViewing Call HistoryDeleting Call HistoryManaging Call SettingsRingtone and VibrateOther Call SettingsSetting Up Your Voicemail
Dial Pad Touch TonesEditing Quick ResponsesMonitoring Fixed Dial NumbersMonitoring Incoming and Outgoing CallsAuto RetryTurn on Proximity SensorSettings TTY ModeDTMF TonesCall BarringAdditional SettingsCaller IDCall WaitingCall Forwarding
Sending Messages and E-mails———————— 48Sending SMS/MMS Message Managing Message SettingsDeleting MessagesSetting Up E-mail AccountsSending an E-mail from POP3/IMAP AccountReading an E-mail
Using the Keyboard———————— 53Enter and Edit TextGesture TypingKeyboard Dictionaries
Using Android™ Applications———————— 54Downloading Android Applications and Media FilesAccessing Gmail™CameraMultimedia Player Music PlayerCalendarAlarmClockCalculatorSound Recorder
Conte
nts
5
Google Search™ and Google Now™——————— 58About Google Search™ and Google Now™Activate Google NowUse Google NowVoice Search and ActionVoice Actions
End User License Agreement———————— 59LicensePhone CareWarranty
Federal Communication Commission Interference (FCC) Statement———————— 60
FCC Statement
Règlement FCC———————— 61Règlement FCC
Industry Canada (IC) Statement———————— 62IC StatementFOR PORTABLE DEVICE DEVICE USAGE (<20cm from body/SAR)
Règlement IC———————— 63Règlement ICFOR PORTABLE DEVICE USAGE (<20cm from body/SAR needed)
CE Statement———————— 64CE StatementCE Mark & NB Identification NumberCountries Where ECOM SMART-Ex 201 Model Available
Declaration of Conformity———————— 67EC - Declaration of Conformity
Index———————— 68
Conte
nts

6
Congratulations on the purchase of ECOM Smart-Ex 201 mobile phone. This phone is a GSM/GPRS/EDGE/UMTS and LTE enabled handset with an intuitive, feature-rich user interface, which allows you to make the best use of the offered functions.
Phone Models CoveredThis user guide only covers ECOM Smart-Ex 201 phone model. The model name can be viewed on the back of the phone and just above the charging socket.
ECOM Smart-Ex 201 supports the following RF bands:
• GSM: 850/900/1800/1900MHz
• UMTS Band: 850/900/1900/2100MHz
• LTE Band: B1/ B3/ B7/ B8/ B20/ B38 (TD-LTE) (EU)
• or LTE Band: B1/ B2/ B3/ B4/ B5/ B7/ B8/ B12/ B17 (US)
Network Services
These are additional services that you can add through your network service provider. To make the best of these services, you must subscribe to them through your service provider and obtain instructions for their use from your service provider.
Sonim Support Information
For additional product and support information, visit www.sonimtech.com.
Use the Guide EffectivelyFamiliarize yourself with the terminology and symbols used in the guide to help you use your phone effectively.
HOME SCREEN
This is the screen displayed when the phone is in standby mode.
TOUCH & HOLD
Touch and hold an item on the screen by touching it and not lifting your finger until an action occurs.
DRAG Touch and hold an item for a moment and then, without lifting your finger, move your finger on the screen until you reach the target position.
SWIPE OR SLIDE
Quickly move your finger across the surface of the screen, without pausing when you first touch. For example, you can slide a home screen left or right to view the other home screens.
DOUBLE TAP Tap quickly twice on a webpage, map or other screen to zoom. For example, double-tap a webpage in Browser to zoom in, and double-tap again to zoom out.
PINCH In some applications, you can zoom in and out by placing two fingers on the screen at once and pinching them together or spreading them apart.
Gene
ral In
forma
tion

7
Options Commonly Used across Menu ItemsThe following are common actions used across various menu items:
BACK Displays the previous screen. Usethe Left Selection Key to performthis function.
HOME Moves the current workingapplication to the recentapplications list/background anddisplays home screen.
RECENT Displays the thumbnails of theapplications that you have workedon recently. To remove anyapplication from this list, swipe theapplication to left or right.
Gene
ral In
forma
tion

8
Please read and understand the following safety guidelines before you use the phone. These guidelines provide details to enable you to operate your phone safely and conform to any legal requirements regarding the use of cellular phones.
Electrical interference may obstruct the use of your phone. Observe restrictions in hospitals and near medical equipment.
Switch off your cellular phone when in an aircraft. Wireless phones can cause interference or danger to an aircraft. In an aircraft, the phone can be used in flight mode.
Do not expose the device to high temperatures in excess of 55°C for ECOM Smart-Ex 201.
Adhere to road safety laws. Do not hold/use a phone while you are driving; find a safe place to stop first. Use hands-free microphone while you are driving.
Avoid using the phone in close proximity to personal medical devices, such as pacemakers and hearing aids.
Use only ECOM Smart-Ex 201 approved charging equipment to charge your phone and avoid damage to your phone.
The symbol of the crossed-out wheeled bin indicates that this product, and any enhancements marked with this symbol, can not be disposed as unsorted waste but must be taken to separate collection at their end-of-life.
Safet
y Guid
eline
s

9
Ensure that only qualified personnel install or repair your phone.
ECOM Smart-Ex 201 is water-proof and can be submerged to 2 metres for 30 minutes.
• Ensure to close the audio connector and SIM slot properly. This will prevent the deposit of water droplets on the connectors, when the phone is immersed in water.
• Water droplets may condense under the display cover if the phone is immersed in water with significant drop in temperature. This does not indicate water leakage. The droplets will disappear at room temperature.
The ECOM Smart-Ex 201 is dust-resistant, rugged and shock-resistant. However, it is not dust-proof or unbreakable if subjected to overwhelming impact. For best results and long product life, one should protect the ECOM Smart-Ex 201 from salt water, dust and strong impacts.
Safet
y Guid
eline
s

10
SAR InformationThe Smart-Ex 201 has been certified in compliance with the Government’s requirements for exposure to Radio Waves.
When communicating over the wireless network, the mobile phone emits via the radio frequency waves low levels of radio energy. The Specific Absorption Rate, or SAR, is the amount of RF energy absorbed by the body while using the phone and is expressed in watts/kilogram (W/kg).
Governments around the world have adopted comprehensive international safety guidelines, developed by scientific organizations, for example, ICNIRP (International Commission on Non-Ionizing Radiation Protection) and IEEE (The Institute of Electrical and Electronics Engineers Inc.). These guidelines establish permitted levels of radio wave exposure for the general population.
Tests for SAR are conducted using standardized methods with the phone transmitting at its highest certified power level in all used frequency bands.
SAR Data Information for residents in the United States and Canada
The limit recommended by ICNIRP is 1.6 W/kg averaged over one (1) gram of tissue.
The highest SAR value for the Smart-Ex 201 phones when tested by Sonim for use:
• By the ear is 0.64 W/1g.
• Worn on the body is 0.68 W/1g provided that the phone is used with a non-metallic accessory with the handset at least 1cm from the body, or with the original Sonim accessory intended for this phone
and worn on the body.
HAC Rating
The FCC has created a rating system for cellular phones regarding their HAC-related performance. This rating helps consumers with hearing disabilities to find phones that work well with their hearing aid devices. The HAC rating and measurement procedure are described in the American National Standards Institute (ANSI) C63.19:20011.
ANSI C63.19 contains two rating standards: an “M” rating from 1 to 4 for hearing aids operating in microphone mode, and a “T” rating from 1 to 4 for hearing aids operating in telecoil mode.
M-Rating stands for Microphone rating and indicates the amount of reduction of RF interference between the telephone and the hearing aid in acoustic coupling mode (also called microphone mode).
Phones rated M3 or M4 meet FCC requirements and generate less interference to hearing devices set in microphone mode. T-Rating stands for telecoil rating and represents inductive coupling with hearing aids that are operating in telecoil mode. A telecoil is a small piece of tightly wrapped wire, built into some hearing aids. While the microphone of a hearing aid picks up all sounds, the telecoil only picks up an electromagnetic signal from the telephone. Thus, users of telecoil-equipped hearing aids are able to communicate over the telephone without the amplification of unwanted background noise.
Phones rated T3 or T4 meet FCC requirements and generate less interference to hearing devices set in telecoil mode.
A combination of M-rating and T-rating defines the final HAC rating and is a deciding factor in selecting
Safet
y Guid
eline
s

11
Safet
y Guid
eline
scellular phones for people with hearing problems. A HAC compliant phone could be rated:
• M3/T3
• M3/T4
• M4/T3
• M4/T4
These ratings assist hearing device users to find phones that are compatible with their hearing devices. Ratings are shown on the phone’s box or label. The ratings are not guaranteed for suitability. The results vary depending on the individual’s hearing loss and the immunity characteristics of the used hearing device, i.e. its resistance to interference. The best way to evaluate the suitability of the phone is to try it with the intended hearing aid device.
The Smart-Ex 201 have been tested for hearing aid device compatibility and complies with the Federal Communications Commission (FCC) requirements.
These devices are rated M4/T4.
Avoid High TemperaturesLeaving the device in hot or cold places, such as in a closed car in summer or winter conditions, reduces the capacity and lifetime of the battery. For the best results, try to use the device ECOM Smart-Ex 201 at 55°C (131°F). A device with a hot or cold battery may not work temporarily, even when the battery is fully charged. Battery performance is particularly limited in temperatures well below freezing.
Battery DisposalDo not dispose off batteries in a fire as they may explode. Batteries may also explode if damaged. Dispose of batteries according to local regulations and recycle when possible. Do not dispose as household waste. Do not dismantle, open or shred cells or batteries. In the event of a battery leak, do not allow the liquid to come in contact with the skin or eyes. In the event of leak or a hazard seek medical help immediately.
Personal Medical DevicesMobile phones may affect the operation of cardiac pacemakers and other implanted equipment. Please avoid placing the mobile phone over the pacemaker, for example in your breast pocket. When using the mobile phone, place it at the ear opposite the pacemaker. If a minimum distance of 15 cm (6 inches) is kept between the mobile phone and the pacemaker, the risk of interference is limited. If you suspect that interference is taking place, immediately turn off your mobile phone. Contact your cardiologist for more information. For other medical devices, consult your physician and the manufacturer of the device. Comply with instructions to switch off the device or deactivate the RF transmitter when required, especially when posted in hospitals and aeroplanes. Equipment used in these places may be sensitive to radio waves emitted from the device and adversely affect their operation. Also, observe restrictions at gas stations or other areas with flammable atmosphere or when close to electro-explosive devices.

12
Batte
ry Us
age G
uideli
nes
Child SafetyDo not allow children to play with your mobile phone or its accessories. Keep it out of their reach. They could hurt themselves or others, or could accidentally damage the mobile phone or accessories. Your mobile phone and its accessories may contain small parts, which could be detached and create a choking hazard.
Emergency CallsMobile phones operate using radio signals, which cannot guarantee connection under all conditions. Therefore you should never rely solely upon any mobile phone for essential communications (e.g. medical emergencies). Emergency calls may not be possible in all areas, on all cellular networks, or when certain network services and/or mobile phone features are in use. Check with your local service provider.

13
Batte
ry Us
age G
uideli
nes
Battery UsageThe ECOM Smart-Ex 201 phone comes with a built-in battery. For any battery related queries contact Sonim customer support.
• Use only the ECOM Smart-Ex 201 certified battery that is designed for this phone model.
• The use of other batteries may void the warranty terms of your phone and cause damage.
• It is recommended to protect the battery from extreme temperature environments and moisture.
• Please keep the battery out of the reach of children.
WARNINGONLY use the USB Data Cable PC S201 with your ECOM SMART-EX 201.
Charging the BatteryThe battery delivered with your mobile phone is not fully charged. We recommend that you charge your mobile for 4 hours before you use your mobile phone for the first time.
There is a risk of explosion while charging if the battery has been replaced by an incorrect type.
1Insert ChargerInsert the charger plug into a power outlet
2Connect to PhoneThe charging port is located in lower side of the phone, below the back cover. Insert the charger connector to the charging port.
3Charging Animation/IconIf the battery is being charged when the phone is switched off, a battery charging animation with charged percentage is displayed.If the battery is being charged while the phone is switched on, the battery charge icon on the home screen shows animation indicating that the battery is being charged. After the phone is fully charged the charging animation stops and you can disconnect the charger from the phone.
WARNINGDO NOT charge your ECOM Smart-EX 201 inside hazardous areas and/or with anything other than the provided USB Data Cable PC S201.
Charging your ECOM Smart-EX 201 with a different cable/Charger and/or in a hazardous environment will

14
Gettin
g Star
tedcompromise the intrinsically safe nature of the device.
Verifying and Optimizing Battery UsageYou can check the battery usage status and also close some applications to save battery power. In the home screen, select Settings ( ) > Device > Battery ( ).
The current battery level (charging or not charging) is displayed on the top of the screen.
The discharge graph on the top of the screen shows the battery level over time since you last charged the device, and how long you have been running on battery power.
The list at the bottom of the screen shows the breakdown of battery usage for individual apps and services. Touch any listed items for more details. The details screen for some apps includes buttons that allow you to adjust settings affecting power usage, or stop the application completely.
If you stop some apps or services, your device may not work correctly.
Extend the life of your batteryFollow these tips to extend your phone’s battery life.
• If you are not using Wi-Fi, Bluetooth, or GPS, use the Settings to turn them off. The GPS setting is located in Settings > Personal > Location.
• Move Maps or Navigation apps to background when you are not using them. They use GPS (and thus more power) only when they’re running.
• Set screen brightness to Auto and set a shorter
Sleep time-out (1 minute). The display settings are located in Settings > Display.
• If you are travelling and do not have access to use mobile data or Wi-Fi network, switch to Airplane mode: Press and hold the power key until the Phone options dialog appears. Then touch to enable Airplane Mode.

15
Gettin
g Star
tedWhat Is In the Box ?The list of items in the ECOM Smart-Ex 201 phone box are:
• Smart-Ex 201 phone with rechargeable built-in battery
• Wall Charger
• USB Data Cable "PC S201"
• Multi-tool
• Belt Clip
• Documentation
Phone Specifications
Feature DescriptionDimension 137*72.1*20.8 mm
Weight 290 gm
Camera • Front camera - 1MP (Fixed focus)
• Rear camera - 8MP (Auto focus)
Memory 16 GB ROM1 GB RAM
Sensors AccelerometerProximityAmbient lightE-Compass
Feature DescriptionNetwork • GSM 850/900/1800/1900MHz
• UMTS Band 850/900/1900/2100MHz
• LTE Band B1/ B3/ B7/ B8/ B20/ B38(TD-LTE) (EU)
• or LTE Band B1/ B2/ B3/ B4/ B5/ B7/ B8/ B12/ B17 (US)
Wireless Wi-Fi - 802.11 a/b/g/n/r with hotspot functionBluetooth - BT4.0/BLE
Connectivity Charger port name: 5pins water-proof magnetic USB2.03.5 mm headphone jack
Battery 4800mAh
Operating system
Android (4.4), Kitkat®

16
Your SIM CardThe SIM card associates your network services (for example, phone number, `data services, and so on) with your phone.
Inserting the SIM Card
1. Remove screw A using the screwdriver and Remove the headset port cover.
`
2. Remove screw B using the screwdriver and Remove SIM cover.
3. Insert the pin into the pinhole and press inside. The SIM card tray will pop-up. Use the pin to hook into the loop on top of the SIM card tray and remove the tray completely.
4. Insert the SIM card in the tray and return the tray into the slot by pushing it in, making sure the pinhole is aligned next to the headset port.
5. Refix both the covers and screws in place using the screwdriver.
Gettin
g Star
ted

17
ECOM SMART-EX 201Yo
ur EC
OM SM
ART-E
x 201
Loudspeaker
Display screenLock/Power ON key
Charger/USB port
Microphone
Headset portSIM card slot
Receiver
PTT
Camera
Return key`
Volume Up
Home key
Proximity sensor
Front camera
Volume Down
Notification LED
Recent keyDouble-tap launches menu options of any application.
Sonim Protect (®) AlarmThis key is activated when the service is available.
18
Your
ECOM
SMAR
T-Ex 2
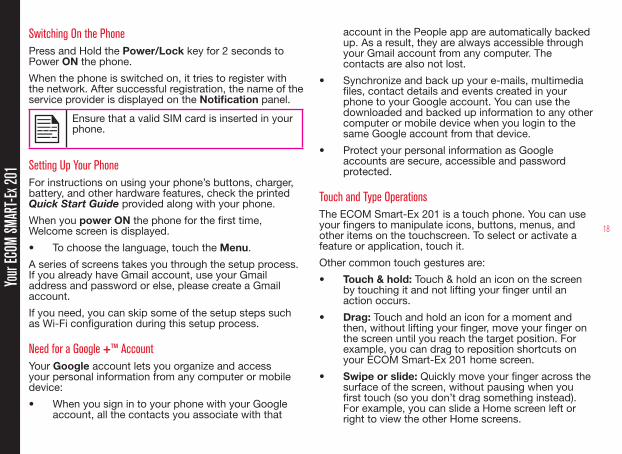
01Switching On the PhonePress and Hold the Power/Lock key for 2 seconds to Power ON the phone.
When the phone is switched on, it tries to register with the network. After successful registration, the name of the service provider is displayed on the Notification panel.
Ensure that a valid SIM card is inserted in your phone.
Setting Up Your PhoneFor instructions on using your phone’s buttons, charger, battery, and other hardware features, check the printed Quick Start Guide provided along with your phone.
When you power ON the phone for the first time, Welcome screen is displayed.
• To choose the language, touch the Menu.
A series of screens takes you through the setup process. If you already have Gmail account, use your Gmail address and password or else, please create a Gmail account.
If you need, you can skip some of the setup steps such as Wi-Fi configuration during this setup process.
Need for a Google +™ AccountYour Google account lets you organize and access your personal information from any computer or mobile device:
• When you sign in to your phone with your Google account, all the contacts you associate with that
account in the People app are automatically backed up. As a result, they are always accessible through your Gmail account from any computer. The contacts are also not lost.
• Synchronize and back up your e-mails, multimedia files, contact details and events created in your phone to your Google account. You can use the downloaded and backed up information to any other computer or mobile device when you login to the same Google account from that device.
• Protect your personal information as Google accounts are secure, accessible and password protected.
Touch and Type OperationsThe ECOM Smart-Ex 201 is a touch phone. You can use your fingers to manipulate icons, buttons, menus, and other items on the touchscreen. To select or activate a feature or application, touch it.
Other common touch gestures are:
• Touch & hold: Touch & hold an icon on the screen by touching it and not lifting your finger until an action occurs.
• Drag: Touch and hold an icon for a moment and then, without lifting your finger, move your finger on the screen until you reach the target position. For example, you can drag to reposition shortcuts on your ECOM Smart-Ex 201 home screen.
• Swipe or slide: Quickly move your finger across the surface of the screen, without pausing when you first touch (so you don’t drag something instead). For example, you can slide a Home screen left or right to view the other Home screens.

19
• Double-tap: Tap quickly twice on a webpage, map, or other screen to zoom. For example, double-tap a webpage in Browser to zoom in, and double-tap again to zoom out.
Home ScreenAfter you complete the phone setup, the home screen is displayed. The home screen is the beginning point to access all the device’s features. The home screen can have multiple panels. Swipe to move between the home panels.
1. Message/Alert Notifications
2. Service Indicator and Signal Strength bar
3. Battery charge indicator and time
4. Home screen
5. Application Grid or Menu
Key Description
Keys DescriptionBack - Opens the previous screens in the working sequence till the home screen is displayed. Once the home screen is displayed it will remain there even when you press the back key.
Home - Short press on any app: Shows the home screen.Long press: Google Now
Recent - Displays the thumbnails of the applications that you have worked on recently. To remove any application from this list, swipe the application to left or right.Double tap on the Recent key launches the menu options for any application.
The Application Menu or Grid is located above the hard key panel on the home screen. The app icons you keep in the tray remain visible on every Home screen panel.
The All Applications icon ( ) is always positioned in the centre of the favorites tray. Touch it to view all the installed applications and widgets.
The Alert notification area in the status bar on the top of the display screen provides details about various notifications such as missed call, new messages, alarms, events and software updates.
Your
ECOM
SMAR
T -Ex
201
5
4
1 2
3

20
Your
ECOM
SMAR
T -Ex
201
• To view the notifications, swipe your finger down from the top of the screen.
The System icons ( ) on the right side of the display the current device status such as wireless and network connection strength, battery level and time.
The Google Search bar is just below the status bar and lets you search the items in your phone or the Internet. Touch Google Search bar to type your search terms, or to speak and give a voice input.
You can create shortcuts for application and add widgets on your home screen panel.
Adding an Application Icon to Home Screen
1. On the home screen, tap on All Apps icon ( ).
2. Swipe left or right to locate the application for which you require a shortcut on the home screen.
3. Touch and hold the application icon and drag it to the home screen.
4. To open an app, tap on its shortcut on the home screen.
5. To view other Home screens, swipe your finger quickly left or right.
Creating a Folder on the Home Screen
Folder helps you to keep the icons in an organized fashion. To create folders,
1. Touch and hold an icon on the home screen or Applications.
2. Drag and position it on another icon that should be included in the same folder.
3. Tap on the folder. Both the icons are grouped together in an unnamed folder.
4. Tap on the name area and give a suitable name.
Moving an Icon/Folder from the Home Screen
1. Touch and hold the application icon and drag it to the new location.
2. To move it to another home screen, drag it to the side of the screen.
Removing an Icon/Folder from the Home Screen
1. Touch and hold the application icon. A ( )
text is displayed on the top of the home screen.
2. Drag the icon and position it on the ( ) text till it turns red.
3. Drop the icon and it will be deleted from the home screen.
Deleting a downloaded application icon from the home screen will not delete the application. You must go to Settings > Apps > ALL, select a particular application and uninstall it.
Home Screen IndicatorsThe icons displayed at the top of the screen provides information about the status of the device. The details such as time, battery charge status, and data service and Wi-Fi connectivity and network status are displayed when the phone is in standby mode. Other indicators such as Bluetooth connectivity status, airplane mode, alarm and call forward are displayed, if the feature is activated.

21
Your
ECOM
SMAR
RT- E
x 201
Icons DescriptionBattery level indicator
Battery charging in progress
No signal
Signal strength
No SIM card
Roaming
LTE network connected
HSPA or UMTS network connected
EDGE network connected
GPRS network connected
Icons DescriptionWi-Fi connected
Bluetooth activated
Call in progress
Missed call
New SMS or MMS
Alarm activated
New E-mail
FM Radio
Silent mode activated
Vibration mode activated

22
Your
ECOM
SMAR
T-Ex 2
01
Icons DescriptionFlight mode activated
Error/information notification - attention required
Synced with the associated account such as Google
Screenshot captured
Music is played
Device storage space is running out
Phone Operations Without SIM CardYou can perform the following operations without inserting a SIM card in your phone.
• Make an emergency call.
• View and modify all settings except few data usage and mobile network related settings.
• Activate and share files through Bluetooth.
• Activate and access the Internet, and all your synced accounts using Wi-Fi connectivity.
• Access your phonebook, files and applications.
• View and modify your profile settings.
Setting up and Using Lock ScreenYou must lock your phone to protect it from unauthorized access.
1. From the Home or All Apps icon ( ), tap on Settings ( ).
2. Scroll down and tap on Security ( ) , located under Personal settings.
3. Tap on Screen lock and select one of the following options to configure phone :
• None: Disables the phone lock.
• Pattern: When enabled, enter your own pattern. When the phone is locked, unlock it using the pattern.
• Slide: When the phone is locked, slide to your right or left to unlock the phone.
• PIN: When enabled, enter your own PIN value. When the phone is locked, unlock it using the PIN.
• Password: When enabled, enter your own password. When the phone is locked, unlock it using the password.
• Face Unlock: Face Unlock is one of the locks available. After you’ve set it up, you can unlock your device just by looking at it. It is convenient and fun to use.
When the phone is locked, you can answer an incoming call, without unlocking the phone. Touch the white phone icon and slide over one of these icons:

23
Icons DescriptionAnswer the call.
Disconnect the call.
Disconnect the call and respond with a default text message from a list of response text messages.
Changing the WallpaperYou can set an image or a photo stored in your phone as your home screen wallpaper. To change the wallpaper,
1. Tap and hold on the Home screen. Choose Wallpapers option.
2. Select from one of the following Wallpaper collections:
• Gallery: Includes the photos taken using camera, screenshots and downloaded photos.
• Photos: includes photos saved in Google account like Picasa web Album.
• Wallpapers: includes images that are pre-bundled with the phone.
Taking a ScreenshotYou can take the screenshot of the current screen and it is stored in your phone’s gallery. To take a screenshot:
1. Open the screen which has to be captured.
2. Press the Power button and Volume down button simultaneously. The screenshot is captured and stored in the gallery.
3. A screenshot capture icon ( ) is also displayed in the home screen status bar.
The screenshot is saved automatically in the Gallery.
Voice Input for Text EntryYou can use voice input to enter text by speaking. This feature uses Google’s speech-recognition service. It is necessary to have data connection on a mobile or Wi-Fi network to use it.
Your
ECOM
SMAR
T-Ex 2
01

24
Time and Date SettingsYou can set and display the date and time on the phone. You can also select the display format.
1. From the Home or All Apps icon ( ), tap on Settings ( ).
2. Scroll down and tap on Date & Time ( ), located under System settings.
3. Select one of the following options to configure Date & Time:
• To synchronize the date and time with the network provided time, enable Automatic date & time.
• To synchronize the time zone with the network provided time, enable Automatic time zone.
• To set the date manually, (Automatic date & time should be disabled) tap on Set date. Scroll and select the day, month and year. Tap on Done.
• To set the time manually, (Automatic date & time should be disabled) tap on Set time. Scroll and select the hour and minute. Tap on Done.
• To set the time zone, (Automatic time zone should be disabled) tap on Select time zone. Scroll and select your time zone.
• To set the clock to 24-hour format enable Use 24-hour format.
• To set your preferred date format, tap on Choose date format. The date formats supported are Regional (the standard format supported by that country or region, MM DD
YYYY, DD MM YYYY, YYYY MM DD with / as the date separator.
Using Glove ModeThe ECOM Smart-Ex 201 phone is equipped with a glove touch screen. In order to be able to use the glove mode, enable the glove mode on the device.
1. From the Home or All Apps icon ( ), tap Settings ( ).
2. Scroll down and tap Accessibility ( ) located under System.
3. Go to Glove mode and check the box.
The glove mode is enabled and you can use the touch screen with the gloves.
Language Settings You can set the phone’s language to any of the languages displayed in the language list.
1. From the Home or All Apps icon ( ), tap Settings ( ).
2. Scroll down and tap Language & input ( ) , located under Personal settings.
3. Go to Language and select any language from the list as your preferred language.
All the menu items, user feedback messages are displayed in the set language.
The following languages can be set as a preferred language:
• English
Mana
ging P
hone
Settin
gs

25
Mana
ging P
hone
Settin
gs• French
• Chinese
• Finnish
• Hungarian
• Swedish
• Czech
• Danish
• Russian
• Deutsch
• Eesti
• Español
• Greek
• Italian
• Latvian
• Lithuanian
• Maltese
• Polish
• Portuguese
• Slovenian
• Slovak
All the menu items, user feedback messages and will get displayed in the set language.
Spell checker
Enable Spell checker, to verify and change the spellings
when you type your text message or mail.
Personal Dictionary
You can add your own words to your personal dictionary so that your device remembers them.
To add a word or phrase, including an optional shortcut,
1. Tap on Language & Input located under Personal settings.
2. Tap on Personal dictionary and then Add ( ) icon.
3. Add a required word and respective shortcut which is optional.
Keyboard and Input Method Settings
The default keyboard input language is set to English(US)-Google keyboard.
Speech Settings
• The Speech engine is set to Text-to-speech.To change the Google Text-to-speech engine settings and install new language packs. Tap on Settings icon ( ) provided in the Text-to-speech output menu next to the engine (Google Text-to-Speech).
• Tap on Speech rate to set the speed at which text to be spoken.
• Tap on Listen to an example to verify the set speech rate.
• Tapping on Default language status, displays the language set for speech output.
• Select Language & Input > Text-to-speech output> > Google Text-to-speech settings ( )

26
> Language to change the voice search language. You can search anything on Google, send message or can use for navigation using voice command in your own set language.
Mouse/TrackpadMinimize or Maximize the pointer speed as per comfort level
Display Settings1. From the Home or All Apps icon ( ), tap on
Settings ( ).
2. You can activate and modify the display settings. Select Settings > Display.
3. Set one of the following options to configure your phone’s display:
• Brightness: Set the brightness of the phone display. It is recommended to set to Auto so that the display brightness is adjusted automatically based on the brightness of the surroundings. This will also optimize the battery power consumed.
4. Select from one of the following Wallpaper collections:
• Gallery : Includes the Photos taken using camera, screenshots and downloaded photos
• Photos: includes photos taken from phone camera ,downloaded,and the photos synced from google account.
• Wallpapers: includes images that are pre-bundled with the phone.
• Auto-rotate screen: Allows you to rotate the screen automatically.
• Sleep: Set the sleep time so that the backlight turns off after specified time of phone inactivity. This setting will also help you to optimize battery power.
• Daydream: Enable this option to activate to daydream while docked ,charging or either after specified time of phone inactivity
• You can set the screen saver to one of the following options.
Tap on the Settings icon ( ) next to each option, to customize the screen saver.
• Clock: Displays the current system clock.
• Colors: Displays the seven colors of spectrum with various transition effects.
• Photo Frame: Displays the photos present in the gallery and screenshots as full screen images.
• Photo Table: Displays the photos present in the gallery and screenshots as assorted images.
• Google Photos: Displays a photo collage of Google + account.
• Font size: Set the font size of the text displayed in the screen.
• Press Home Wake Up: When the phone display is off or in sleep mode, you can activate the display by pressing the home key.
Mana
ging P
hone
Settin
gs

27
Mana
ging P
hone
Settin
gs
The green LED light on the top of the phone blinks for all the notifications.
Connecting to a PC Through USBWhen the phone is connected to the computer via USB data cable "PC S201", connected as a media device, message is displayed in the notification bar. Drag down the notification bar and tap on the option Connected as a media device, then following two options are displayed:
• Media Device (MTP): Select this to use the phone to transfer media files on Windows, or using Android file transfer on MAC. The audio files can be transferred or synced using Windows Media Player.
• Camera (PTP): Lets you transfer photos using camera software and transfer any files that do not support MTP."
USB Tethering:
To perform USB tethering,
Select Settings > More > Tethering & Portable hotspot > Enable USB Tethering.
The user should activate the mobile data or get connected to Wi-Fi network.
When the phone is connected to the computer via USB data cable "PC S201" in Media device (MTP) mode, the phone memory is displayed as a drive in the computer.
When the phone is connected to the computer as a media device, you can access File Explorer in the phone.
Viewing Device DetailsTo view the device details such as system update status, model number, Android version, Kernel and baseband versions.
1. From the Home or All Apps icon ( ), tap on Settings ( ).
2. Scroll down and tap on About phone ( ) located under System settings.
Managing Memory Utilized by ApplicationsThe Apps screen allows you to optimize memory usage for all the applications To view these settings,
1. From the Home or All Apps icon ( ), tap on Settings ( ).
2. Scroll down and tap on Apps, located under Device settings. The following tabs are displayed.
• Downloaded: Displays apps you have downloaded from Google Play store or other sources.
• Running: Displays all apps, processes, and services that are currently running or that have cached processes, and how much RAM utilized by each application. The graph at the bottom of the Running tab shows the total RAM in use and the available RAM to use. Touch SHOW CACHED PROCESSES or SHOW RUNNING SERVICES to switch back and forth.

28
Mana
ging W
ireles
s and
Netw
ork Se
ttings
• All: Displays all applications that are pre-bundled with Android and downloaded from Google Play Store or other sources.
Optimizing Memory UsageYou can optimize your phone’s memory by performing the following tasks.
• Uninstall apps that are not required.
• Delete unwanted files that are downloaded or created.
• Transfer files that would be required later to your computer.
• Delete offline content on Google Play and stream it via a Wi-Fi or mobile network.

29
Mana
ging W
ireles
s and
Netw
ork Se
ttings
Connecting to Wi-Fi NetworkWi-Fi is a wireless network technology that can provide Internet access at distance upto 100 feet, depending on the Wi-Fi router and surroundings.
You can access Internet when you connect your ECOM Smart-Ex 201 to a Wi-Fi network. To connect your phone to a Wi-Fi network,
1. From the Home or All Apps icon ( ), tap on Settings ( ).
2. Enable Wi-Fi , located under Wireless & Networks settings.
3. Tap on Wi-Fi. A list of Wi-Fi routers present within your phone’s accessible range are displayed.
4. Tap on your preferred network. Enter the password (if it is a secured network) and tap on Connect. To verify the password before connecting, enable Show password."
It is always recommended to make your Wi-Firouter secure and also to connect your phoneto a secure network.
Adding a New Network
To add a new Wi-Fi network,
1. In the Wi-Fi settings screen, touch Add network button ( ).
2. Enter the following details:
• Network SSID: The wireless network ID.
• Security: Set the security type to None, WEP, WPA/WPA2 PSK, 802.1x EAP.
3. Enable Show Advanced Options to set the Proxy details and IP settings.
Editing a Network
1. Touch and hold the connected network.
2. Select Modify Network. The network setting details
such as connection status, signal strength, Link
speed, security type, IP address and password are
displayed.
3. Tap on Save to Save the settings or Cancel to exit
to the previous screen.
Forgetting a Network
Touch and hold the connected network. The device will
be disconnected from the selected network.
Enabling WPS For your Router
To setup a secure Wi-Fi network,
Tap WPS Push button ( ) in the Wi-Fi network settings and press the WPS button in your router, when prompted.
Connecting to Bluetooth DevicesBluetooth is a short-range wireless communication technology used to communicate between the devices over a distance of about 8 meters.
You can perform the following tasks using Bluetooth paired devices:
30
Mana
ging W
ireles
s and
Netw
ork Se
ttings
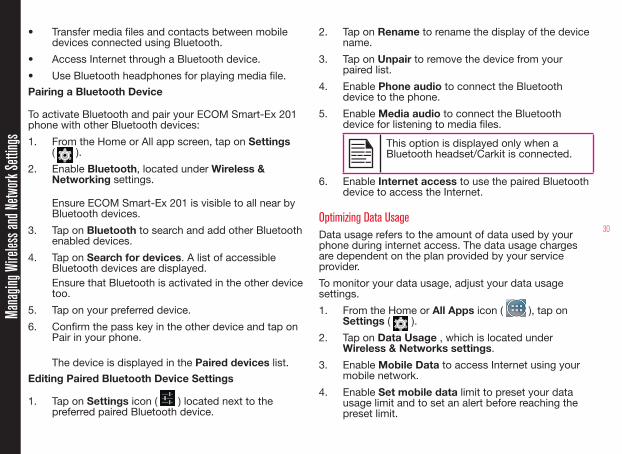
• Transfer media files and contacts between mobile devices connected using Bluetooth.
• Access Internet through a Bluetooth device.
• Use Bluetooth headphones for playing media file.
Pairing a Bluetooth Device
To activate Bluetooth and pair your ECOM Smart-Ex 201 phone with other Bluetooth devices:
1. From the Home or All app screen, tap on Settings ( ).
2. Enable Bluetooth, located under Wireless & Networking settings.
Ensure ECOM Smart-Ex 201 is visible to all near by Bluetooth devices.
3. Tap on Bluetooth to search and add other Bluetooth enabled devices.
4. Tap on Search for devices. A list of accessible Bluetooth devices are displayed.Ensure that Bluetooth is activated in the other device too.
5. Tap on your preferred device.
6. Confirm the pass key in the other device and tap on Pair in your phone.
The device is displayed in the Paired devices list.
Editing Paired Bluetooth Device Settings
1. Tap on Settings icon ( ) located next to the preferred paired Bluetooth device.
2. Tap on Rename to rename the display of the device name.
3. Tap on Unpair to remove the device from your paired list.
4. Enable Phone audio to connect the Bluetooth device to the phone.
5. Enable Media audio to connect the Bluetooth device for listening to media files.
This option is displayed only when a Bluetooth headset/Carkit is connected.
6. Enable Internet access to use the paired Bluetooth device to access the Internet.
Optimizing Data UsageData usage refers to the amount of data used by your phone during internet access. The data usage charges are dependent on the plan provided by your service provider.
To monitor your data usage, adjust your data usage settings.
1. From the Home or All Apps icon ( ), tap on Settings ( ).
2. Tap on Data Usage , which is located under Wireless & Networks settings.
3. Enable Mobile Data to access Internet using your mobile network.
4. Enable Set mobile data limit to preset your data usage limit and to set an alert before reaching the preset limit.

31
Mana
ging W
ireles
s and
Netw
ork Se
ttings
5. Drag the red bar to set the Data usage limit.Mobile data access is disconnected automatically as soon as you reach this limit. You are not able to access the Internet and related phone features do not work. You receive a notification once you reach the set data usage limit.
6. Drag the yellow bar to set data usage warning so that you will get an alert before reaching your set data usage limit.
Activating Airplane Mode When your phone is set to airplane mode, you will not have network connectivity or mobile data connectivity. But you can access your camera, media files and other features that do not require mobile data connectivity."
To activate the airplane mode.
1. From the Home or All Apps icon ( ), tap on Settings ( ).
2. Tap on More located under Wireless & Networks settings.
3. Enable Airplane mode.
Default SMS App and NFCTo enable the default SMS app as Messaging,
1. From the Home or All Apps icon ( ), tap on Settings ( ).
2. Tap on More located under Wireless & Networks Settings.
3. Tap on Default SMS app.
4. Select Messaging ( ) as default SMS app.
To enable NFC,
1. From the Home or All Apps icon ( ), tap on Settings ( ).
2. Tap on More located under Wireless & Networks Settings.
3. Enable NFC to allow data exchange when the phone touches another device.
Setting Up Tethering & Portable HotspotUsing tethering and portable hotspot, you can share your device’s Internet connection with a computer or with other devices.
The USB Tethering option can be enabled only on connecting the USB cable to the PC.
To Activate USB Tethering,
1. From the Home or All Apps icon ( ), tap on Settings ( ).
2. Tap on More located under Wireless & Networks Settings.
3. Tap on Tethering & Portable hotspot.
4. Enable USB tethering.
Setting Up Wi-Fi HotspotWhen you setup your phone as a Wi-Fi hotspot you can connect other devices to this phone through Wi-Fi and access Internet.
1. Tap on More located under Wireless & Networks settings.

32
Mana
ging W
ireles
s and
Netw
ork Se
ttings
2. Tap on Tethering & Portable hotspot.
3. Tap on Set up Wi-Fi Hotspot.
4. Enter Network SSID, security details and password and tap on Save.
Activating Wi-Fi Hotspot
1. From the Home or All Apps icon ( ), tap on Settings ( ).
2. Tap on More located under Wireless & Networks settings.
3. Tap on Tethering & Portable hotspot.
4. Enable Portable Wi-Fi hotspot.
Activating Bluetooth TetheringWhen you activate Bluetooth tethering, you can share your phone’s Internet connection with other Bluetooth paired devices.
1. Tap on More located under Wireless & Networks settings.
2. Tap on Tethering & Portable hotspot.
3. Enable Bluetooth Tethering.
Setting Up VPN ConnectionUsing a Virtual private network (VPN) connection, you can access websites and other resources within a secured local network, even when you are outside of that network.
To setup a VPN connection,
1. From the Home or All Apps icon ( ), tap on
Settings ( ).
2. Tap on More located under Wireless & Networks settings.
3. Tap on VPN.Ensure lock screen PIN or password is set.
4. Tap on Add network icon ( ). Edit VPN profile screen is displayed.
5. Enter the following details:
• Name: VPN connection name.
• Type: Select the connection type.
• Server address: Address of the secure server for connection.
• PPP encryption: Enable to perform a secure point-to-point encryption between your device and the VPN server.
• Select Advanced to enter DNS server details.
Connecting to a VPN Network
• Tap on the required VPN name from the list of VPN networks configured.
• Enter the required credentials.
• Tap on Connect.When the phone is connected to the VPN network , the icon is displyed in notifcation bar..
Editing VPN Network Details
• Touch and hold the required VPN profile to be edited, from the list of VPN networks configured.

33
Mana
ging S
ecuri
ty Se
ttings
• Tap on Edit profile.
• Modify the required information.
• Tap on Save to save the changes.
Deleting a VPN Network
To delete a VPN profile from the VPN screen,
1. Touch and hold the VPN profile to be deleted from the list of VPN networks configured.
2. Tap on Delete profile.
Managing Mobile NetworkYou can view and modify your mobile service provider settings. To view and modify your mobile network settings,
1. From the Home or All Apps icon ( ), tap on Settings ( ).
2. Tap on More located under Wireless & Networks settings.
3. Tap on Mobile networks.
4. Enable Data enabled to access the Internet using your mobile network.
5. Enable Data roaming to have network connectivity when you are in a roaming network.
6. Select the Preferred network type. You can set it to either UMTS only, GSM Only, 2G/3G, 3G/LTE or 2G/3G/LTE.
7. Tap on Access Point Names to view,add and edit the network access points.
8. Tap on Add network icon ( ) to add a new
access point.
9. Tap on Network operators to choose network operator.
Managing Cell BroadcastYou can activate cell broadcasts to get emergency and important broadcast messages from your service provider.
1. From the Home or All Apps icon ( ), tap on Settings ( ).
2. Tap on More located under Wireless & Networks settings.
3. Tap on Cell Broadcasts. The broadcast message settings such as Show extreme threats, Show severe threats, Show AMBER alerts, Turn on notifications, Vibrate and Speak alert message are enabled by default.
4. Set the Alert sound duration.

34
Mana
ging S
ecuri
ty Se
ttings
About Android™ SecurityAndroid takes a multi-layered approach to the security.
• Prevent: Apps in Google Play are scanned continuously to block harmful apps and policy violators. You can also choose to have apps installed from other sources verified.
• Control: App sandboxes keep apps from accessing other parts of your device’s operating system, or each other, unless you give permission at installation. Screen lock and encryption helps to prevent an unauthorized access to the entire device.
• Defend: Once identified, dangerous apps can be removed remotely.
Managing Security SettingsYou can activate and protect your phone from unauthorized access by configuring the security settings.
1. From the Home or All Apps icon ( ), tap on Settings ( ).
2. Tap on Security located under Personal settings. Enable the required settings to preferred security settings from the following options:
Encrypting Your Phone DataYou can encrypt your accounts, settings, downloaded apps and their data, media, and other files.
• Tap on Encrypt phone to encrypt your phone. Once you encrypt your phone, you need to type a numeric PIN or Password to decrypt it each time you power it on.
Encryption takes an hour or more .You must start with a charged battery and keep your phone plugged in untill encryption is complete.If you interrupt the encryption process,you will lose some or all of your data.
Locking Your SIM CardYou can set SIM lock for your SIM.
1. Tap on Setup SIM/RUIM card lock.
2. Tap on Lock SIM card. To disable this option you must enter your SIM lock PIN.
3. Enter SIM PIN and tap OK.
4. Tap on Change SIM PIN. Enter the old SIM PIN and tap OK.
Device Administrator SettingsYou can enable device administrators and allow the App launcher to perform the following tasks:
• Erase all data without alert, when you perform a factory reset.
• Change the screen unlock password.
• Set specific password rules.
• Monitor the screen-unlock attempts.
• Lock the screen.
To activate device administrator, tap on Device Administrators > enable Launcher > Activate.

35
Protecting Your Phone from Harmful ApplicationsSome applications can harm your device. It is recommended to verify apps in order to help prevent harmful software from being installed on your device To prevent installation of application from unknown sources, disable the option Unknown sources.
If you want to install applications from unknown sources, enable Verify apps under Settings > Security, to verify if the application is safe for installation.
Managing Credential CertificatesYou can view, install, verify and manage the certificates installed in your phone.
• Tap on Trusted Credentials to view the verified system and user certificates.
• Tap on Install from Storage to install certificates from storage if any.
Enable Widgets and Owner InfoCheck Enable Widgets to view the selected widget shortcuts in the lock screen.
Tap on Owner Info to add and display owner information.
Mana
ging P
erson
al, Ac
coun
t and
Syste
m Se
ttings

36
Location AccessYou can let your device access GPS, Wi-Fi networks, and mobile networks to estimate your location.
1. From the Home or All Apps icon ( ), tap on Settings ( ).
2. Tap on Location located under Personal settings. Enable and modify required security settings.
3. Enable Location.
4. Set the Location mode using assisted GPS and select one of the following options:
• High accuracy: High accuracy mode uses GPS, Wi-Fi, mobile networks, to get the highest-accuracy location for your device.
• Batter saving: Battery saving mode allows your device to estimate your location using low battery-intensive location sources, such as Wi-Fi and mobile networks.
• Device only: Device only mode allows your device to estimate your location using GPS only. This mode may use more battery power and take longer to determine your location.
When the location switch from the notification screen is OFF, your device location is not shared with any apps.
Apps Accessing Your LocationYou can view and force stop the apps that are accessing or have recently accessed your location.
1. In the Location screen, view the list of applications that are accessing or recently accessed the location data of your phone, under Recent location
requests.
2. Tap an application to view the application info . You can stop, disable or uninstall it. The following applications are system applications that access the location services by default.
• High battery use: Apps which are tagged under High battery use receives location information from sources that may use more battery power.
• Low battery use: Apps which are tagged under Low battery use receives location information from only low battery-intensive sources.
Selecting an app brings you to its App info page, where you can view app permissions and uninstall an app.
Backup & Reset OptionsYou can back up data and connect to one or more of your Google accounts using Android backup services. If you need to replace your device or erase its data, you can restore your data for any accounts that were previously backed up.
To backup your data:
1. From the Home or All Apps icon ( ), tap Settings ( ).
2. Tap on Backup & reset located under Personal settings.
3. Enable the option Back up my data.
If you do not have a backup account on your device, you can touch Backup account to add an account.
Mana
ging P
erson
al, Ac
coun
t and
Syste
m Se
ttings

37
Managing AccountsYou can link an existing Google account to your phone to organize and access your personal information from any computer or mobile device.
Adding an Account
1. From the Home or All Apps icon ( ), tap on Settings ( ).
2. Tap on Add Account located under Account settings.
3. Select the type of account. You can create a Corporate account, Google or POP3/IMAP account.
4. Complete the on-screen instructions.
The account will be displayed under one of the following list:
• Google accounts shown under Settings > Accounts > Google.
• Other accounts shown under Settings > Accounts.
Deleting an Account
You can remove any account and all information associated with it from your device, including e-mail, contacts, settings, and other data backed up in that account.
1. To remove a Google account, tap Settings on home page > Accounts - Google > Select the account to be deleted.
2. Tap on Menu > Remove account.
To remove any other type of account, tap Settings - Accounts > account-name and tap the suitable Remove option.
Account Sync OptionsTo reach sync settings for Google Accounts, start from Settings - Accounts > Google.
Configure Auto-Sync for all Apps
To control auto-sync for all apps that use it, open Settings - Wireless & Networks > Data usage > Menu and check or uncheck Auto-sync data.
If this option is not checked, you can sync the data manually. You can also sync manually to collect messages, e-mail, and other recent information. Leaving auto-sync off can help extend your battery life, but will prevent you from receiving notifications when updates occur.
Configure Google Account Sync Settings
To adjust a single Google Account’s sync settings:
1. Go to Settings - Accounts > Google.
2. Tap the account whose sync settings has to be changed.
3. If your account is set to auto-sync, you can check or uncheck items as needed. If auto-sync is off which is located under Settings > Data Usage > Options > Auto-sync data, touch an item to manually sync its data.
Sync a Google Account Manually
1. Go to Settings - Accounts > Google.
Mana
ging P
erson
al, Ac
coun
t and
Syste
m Se
ttings
38
2. Tap on the account whose data has to be synced.
3. Tap on Menu > Sync now.
Mana
ging C
ontac
ts
39
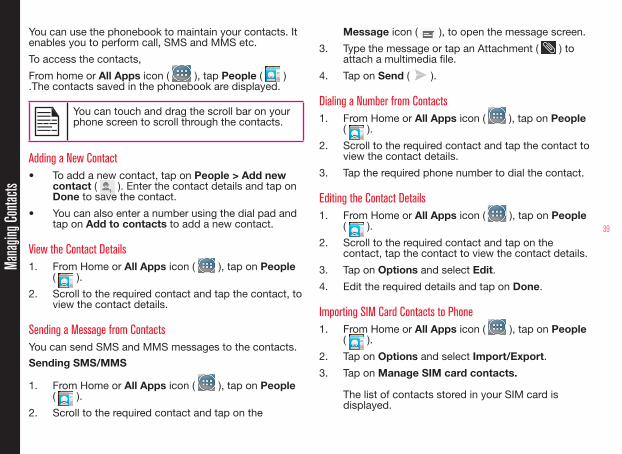
You can use the phonebook to maintain your contacts. It enables you to perform call, SMS and MMS etc.
To access the contacts,
From home or All Apps icon ( ), tap People ( ) .The contacts saved in the phonebook are displayed.
You can touch and drag the scroll bar on your phone screen to scroll through the contacts.
Adding a New Contact• To add a new contact, tap on People > Add new
contact ( ). Enter the contact details and tap on Done to save the contact.
• You can also enter a number using the dial pad and tap on Add to contacts to add a new contact.
View the Contact Details1. From Home or All Apps icon ( ), tap on People
( ).
2. Scroll to the required contact and tap the contact, to view the contact details.
Sending a Message from ContactsYou can send SMS and MMS messages to the contacts.
Sending SMS/MMS
1. From Home or All Apps icon ( ), tap on People ( ).
2. Scroll to the required contact and tap on the
Message icon ( ), to open the message screen.
3. Type the message or tap an Attachment ( ) to attach a multimedia file.
4. Tap on Send ( ).
Dialing a Number from Contacts1. From Home or All Apps icon ( ), tap on People
( ).
2. Scroll to the required contact and tap the contact to view the contact details.
3. Tap the required phone number to dial the contact.
Editing the Contact Details1. From Home or All Apps icon ( ), tap on People
( ).
2. Scroll to the required contact and tap on the contact, tap the contact to view the contact details.
3. Tap on Options and select Edit.
4. Edit the required details and tap on Done.
Importing SIM Card Contacts to Phone1. From Home or All Apps icon ( ), tap on People
( ).
2. Tap on Options and select Import/Export.
3. Tap on Manage SIM card contacts.
The list of contacts stored in your SIM card is displayed.
Mana
ging C
ontac
ts

40
Mana
ging C
ontac
ts4. Tap on the contact to be moved to the phone.
The contact is imported to the phone address book.
Importing SIM Card Phone Contacts to Storage1. From Home or All Apps icon ( ), tap on People
( ).
2. Tap on Options and select Import/Export.
3. Tap on Import to Storage.The list of contacts stored in your SIM card is displayed.
4. Tap on the contact to be moved to the phone from the SIM card memory.
The contact is imported to the phone address book.
Exporting Phone Contacts to SIM Card1. From Home or All Apps icon ( ), tap on People
( ).
2. Tap on Options and select Import/Export.
3. Tap on Export to SIM card.The list of contacts stored in your phone address book is displayed.
4. Check the contacts to be exported to the SIM.
The contacts are exported to the SIM card.
5. Tap on OK.
Exporting Phone Contacts to Storage1. From Home or All Apps icon ( ), tap on People
( ).
2. Tap on Options and select Import/Export.
3. Tap Export to storage.All the contacts are exported to your storage as .VCF file.
4. Tap on OK.
Sharing Contacts Via MMS, Bluetooth, Drive and E-mailYou can send contact information by MMS, e-mail or Bluetooth.
1. From Home or All Apps icon ( ), tap on People ( ).
2. Tap on Options and select Import/Export.
3. Tap Share visible contacts.
4. Select one of the following options to share the required contact and tap Just Once to select the transfer mode each time or Always to send the contact using the same method:
• Bluetooth: Send the contact details to a Bluetooth device paired with your phone. Select the Bluetooth device to share the contact.
• E-mail: Send the contact details as an e-mail message. Ensure to setup your e-mail account before sending e-mail messages. Else you are requested to setup the e-mail account.
• Messaging: Send a contact as a multimedia message to any mobile phone.
41
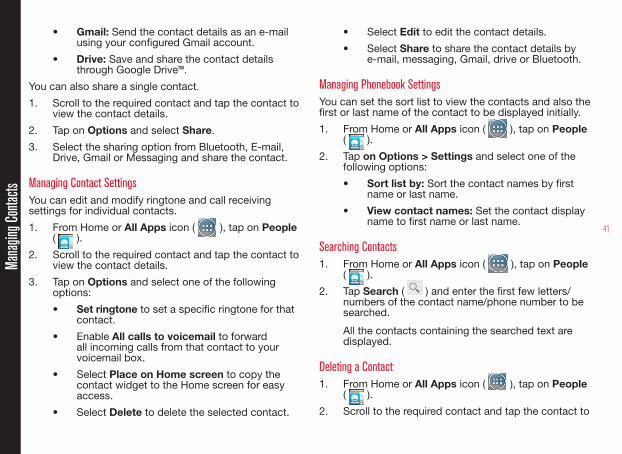
• Gmail: Send the contact details as an e-mail using your configured Gmail account.
• Drive: Save and share the contact details through Google Drive™.
You can also share a single contact.
1. Scroll to the required contact and tap the contact to view the contact details.
2. Tap on Options and select Share.
3. Select the sharing option from Bluetooth, E-mail, Drive, Gmail or Messaging and share the contact.
Managing Contact SettingsYou can edit and modify ringtone and call receiving settings for individual contacts.
1. From Home or All Apps icon ( ), tap on People ( ).
2. Scroll to the required contact and tap the contact to view the contact details.
3. Tap on Options and select one of the following options:
• Set ringtone to set a specific ringtone for that contact.
• Enable All calls to voicemail to forward all incoming calls from that contact to your voicemail box.
• Select Place on Home screen to copy the contact widget to the Home screen for easy access.
• Select Delete to delete the selected contact.
• Select Edit to edit the contact details.
• Select Share to share the contact details by e-mail, messaging, Gmail, drive or Bluetooth.
Managing Phonebook SettingsYou can set the sort list to view the contacts and also the first or last name of the contact to be displayed initially.
1. From Home or All Apps icon ( ), tap on People ( ).
2. Tap on Options > Settings and select one of the following options:
• Sort list by: Sort the contact names by first name or last name.
• View contact names: Set the contact display name to first name or last name.
Searching Contacts1. From Home or All Apps icon ( ), tap on People
( ).
2. Tap Search ( ) and enter the first few letters/ numbers of the contact name/phone number to be searched.
All the contacts containing the searched text are displayed.
Deleting a Contact1. From Home or All Apps icon ( ), tap on People
( ).
2. Scroll to the required contact and tap the contact to
Mana
ging C
ontac
ts

42
view the contact details.
3. Tap on Options and select Delete.
4. Tap on OK to delete the contact.
Deleting Frequently Called Contacts List1. From Home or All Apps icon ( ), tap on Phone
( ).
2. Tap on Call Options ( ).
3. Tap Clear frequents.
This option will appear only when there are a few calls made frequently in the list.
Mana
ging C
alls

43
Mana
ging C
alls
Making a Call1. From Home or All Apps icon ( ), tap on Phone
( ).The Phone screen with last dialed number, frequently called contacts, call history ( ), dial pad ( ) and Call Options ( ) are displayed.
To dial a number use one of the following options:
• Call history: Tap on Call History icon ( ). Tap on the contact/number and tap the phone icon ( ).
• Dial pad: Tap on the dial pad. The numeric touch keypad is displayed. Dial the phone number and tap the phone icon to make a call.
To dial an international number, prefix the phone number with the respective country code.
• Frequently called contacts/numbers: Tap the specific contact/number from the frequently called numbers to make a call.
Calling a Number Via People1. From Home or All Apps icon ( ), tap on People
( ).
2. Scroll to the contact and tap the contact. The contact details are displayed.
3. Tap the required phone number to call the contact.
Answering an Incoming CallTo answer/reject an incoming call, touch the white phone icon and slide over one of these icons:
Icons DescriptionAnswer the call.
Disconnect the call.
Disconnect the call and respond with a default text message from a list of response text messages.
Adding a Contact From Phone Screen1. From Home or All Apps icon ( ), tap on Phone
( ).
2. Tap on Call options ( ).
3. Tap on New contact.
4. Enter the contact details and tap on Done.
Viewing All Contacts from Phone Screen1. From Home or All Apps icon ( ), tap on Phone
( ).
2. Tap on Call options ( ).
3. Tap on All contacts.
Viewing Call History1. From Home or All Apps icon ( ), tap on Phone
( ).
44
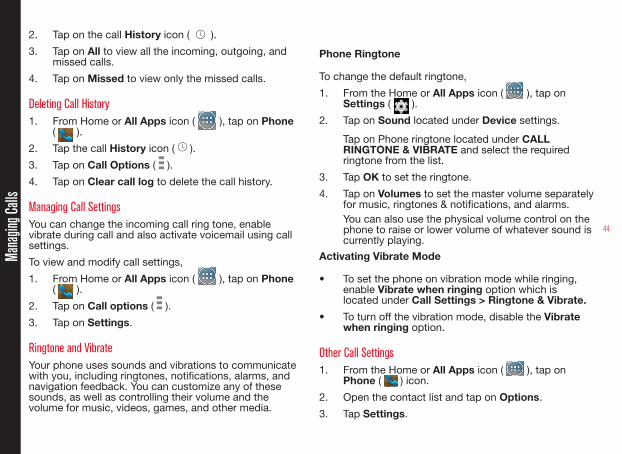
2. Tap on the call History icon ( ).
3. Tap on All to view all the incoming, outgoing, and missed calls.
4. Tap on Missed to view only the missed calls.
Deleting Call History1. From Home or All Apps icon ( ), tap on Phone
( ).
2. Tap the call History icon ( ).
3. Tap on Call Options ( ).
4. Tap on Clear call log to delete the call history.
Managing Call SettingsYou can change the incoming call ring tone, enable vibrate during call and also activate voicemail using call settings.
To view and modify call settings,
1. From Home or All Apps icon ( ), tap on Phone ( ).
2. Tap on Call options ( ).
3. Tap on Settings.
Ringtone and VibrateYour phone uses sounds and vibrations to communicate with you, including ringtones, notifications, alarms, and navigation feedback. You can customize any of these sounds, as well as controlling their volume and the volume for music, videos, games, and other media.
Phone Ringtone
To change the default ringtone,
1. From the Home or All Apps icon ( ), tap on Settings ( ).
2. Tap on Sound located under Device settings.
Tap on Phone ringtone located under CALL RINGTONE & VIBRATE and select the required ringtone from the list.
3. Tap OK to set the ringtone.
4. Tap on Volumes to set the master volume separately for music, ringtones & notifications, and alarms. You can also use the physical volume control on the phone to raise or lower volume of whatever sound is currently playing.
Activating Vibrate Mode
• To set the phone on vibration mode while ringing, enable Vibrate when ringing option which is located under Call Settings > Ringtone & Vibrate.
• To turn off the vibration mode, disable the Vibrate when ringing option.
Other Call Settings1. From the Home or All Apps icon ( ), tap on
Phone ( ) icon.
2. Open the contact list and tap on Options.
3. Tap Settings.
Mana
ging C
alls

45
4. Scroll down to locate Other call Settings.
The following options are displayed.
Setting Up Your Voicemail1. From the Home or All Apps icon ( ), tap on
Phone ( ), tap Options > Settings.
2. Tap on Voicemail located under Other Call Settings.
3. View or enter the following details:
• Service:Service provider name
• Setup: Enter your voicemail number.
• Sound: Set alert tone for voicemail message
• Vibrate: Enable this option to receive an vibrating alert for voicemail messages.
Dial Pad Touch Tones1. From the Home or All Apps icon ( ), tap on the
Settings ( ), and tap Sound.
2. Enable Dial pad touch tones located under System Settings. These tones control the keypad sound while dialing a phone number.
Editing Quick ResponsesThe quick responses are the messages that can be used instead of answering a call. (to reject a call).
1. From the Home or All Apps icon ( ), tap on Phone ( ), and select Options > Settings.
2. Tap on Quick responses located under Other Call settings.
The list of quick responses are displayed.
3. Tap on the required quick responses from the list to edit that particular message and tap on OK to save the message to the list.
4. While an incoming call arrives, to reject the call, tap on the white phone icon and select the required quick response from the list and the same response is sent to the caller.
Monitoring Fixed Dial NumbersFDN (fixed dialing numbers) is a SIM card-enabled feature. It restricts outgoing calls to phone numbers which are not listed in the FDN list. This feature can be activated only if PIN2 is entered. Contact your network operator if you do not have a PIN2. Set up your phone to place outgoing calls only to the fixed dialing numbers (FDN) that you save on the phone’s SIM card.
1. From the Home or All Apps icon ( ), tap on the Phone ( ) and select Options > Settings.
2. Tap on Fixed Dialing Numbers located under Other Call Settings.
3. Tap on Enable FDN, and then enter the PIN2 supplied with the SIM card.
4. Change PIN2 allows you to change the PIN2 number supplied with the SIM card.
5. Tap on FDN list and add numbers.
Monitoring Incoming and Outgoing CallsCall screening options helps you to monitor and regulate
Mana
ging C
alls

46
your incoming and outgoing calls.
Screening Incoming Calls
1. In the Call Settings screen, enable Call Screening.
2. Tap on Call Screening and enable Screening Incoming Calls to receive or reject calls from unknown numbers.
3. To block incoming calls from certain numbers, tap Screening incoming call setting and select one of the following options:
• Allow only contacts: Allows calls only from numbers stored in the contacts.
• Block black list: Blocks calls from contacts added to the black list.
• Allow white list: Allows calls from contacts added to the white list.
Screening Outgoing Calls
1. In the Call Settings screen, enable Call Screening.
2. Tap on Call Screening and enable Screening Outgoing calls to call only numbers stored in the FDN list.
Managing Black List
If you add a number to the black list and enable block black list in the incoming call screening option, all incoming calls from a black listed number will be blocked.
1. In the Call Settings screen, tap on Call Screening and tap on Manage black list to add a number to the black list.
2. Enter the phone number and tap Save. The number
is added to the black list.
Managing White List
If you add a number to the white list and enable allow white list in the incoming call screening option, all incoming calls from a white listed number is allowed.
1. In the Call Settings screen, tap on Call Screening and tap on Manage white list to add a number to the white list.
2. Enter the phone number and tap Save. The number is added to the white list.
Auto RetryWhen this option is enabled, it prompts an option for the user to redial the same number when a call is not answered.
Turn on Proximity SensorYou can save battery power by switching off the display when you are in a call. Enable Turn on proximity sensor to switch off the display, when you answer a call.
1. From the Home or All Apps icon ( ), tap on Phone ( ) icon.
2. Tap Options > Settings.
3. Scroll down to select Turn on proximity sensor located under Other call Settings.
4. Enable Turn on proximity sensor to save phone power.
Settings TTY Mode
Mana
ging C
alls

47
Mana
ging C
alls
If you enable TTY mode, hearing-impaired individuals can send and receive phone calls as text over the phone.
1. In the call settings screen, tap TTY mode to view and modify TTY mode settings.
2. Set one of the following options:
• TTY Off: disables TTY mode.
• TTY Full: enables TTY mode for both incoming and outgoing calls.
• TTY HCO: enables TTY mode only for incoming calls.
• TTY VCO: enables TTY mode only for outgoing calls.
DTMF TonesIn the call settings screen, tap on DTMF tones under Other call Settings to set the DTMF tone length to Normal or Long.
Call BarringYou can set the Call barring feature for all incoming and outgoing calls, international calls, local and home only calls.
To access call barring settings, in the call settings screen under Other Call Settings, tap Call Barring. Select one of the following call barring options:
Option FunctionIncoming call barring
All voice calls or voice calls when roaming.
Outgoing call barring
All voice calls or International voice calls or International calls except to home country.
Change call barring password
Set a new password.
Additional Settings
Caller IDWhile making a call, you can decide whether your number should be displayed to the receiver or not, provided your network operator supports this service.
To enable the caller ID in the call settings screen, tap Additional settings. Enable Caller ID.
Call WaitingWhen call waiting is enabled and the phone is in some other call, the new incoming call is notified and the user can switch to a new incoming call.
To activate call waiting, in the call settings screen, tap on Additional settings. Enable Call waiting.
Call ForwardingYou can forward your incoming calls to a number in the contacts or a new number, provided your network operator supports this service. The device can be set to send incoming calls to a specified number based on the following conditions. Enter a specific number and tap on Enable.

48
Send
ing M
essa
ges a
nd E-
mails
Option FunctionAlways forward
Forward all incoming calls to a predesignated number.
Forward when busy
Forward calls when your phone isbusy.
Forward when unanswered
Forward calls when you do notanswer incoming calls.
Forward when unreachable
Forward calls when your phone isswitched off or is in out of coverage area.

49
Send
ing M
essa
ges a
nd E-
mails
You can use the Messaging in your phone to send an SMS and MMS message to other mobile phones or any other equipment that can receive SMS and MMS.
The MMS feature is available only if you subscribe it from your network operator.
To access the message function, from the home screen or All applications screen, tap on Messaging ( ).
Sending SMS/MMS Message You can send SMS and MMS messages to contacts in your phonebook and to new numbers that are not present in the phonebook.
1. To create a SMS message, from the home screen or
All Apps icon ( ), tap on Messaging ( ).
2. Tap on New message ( ).
3. Enter the contact name or the phone number in the To field.
If you enter an alphabet, all the contact names starting with that alphabet is displayed as a list. Scroll down to select the contact.
4. Enter the message and tap on Send ( ).
When you add a multimedia attachment, the message is automatically converted to a multimedia message. MMS charges will apply, based on the operator.
5. To add an attachment, tap on Attach ( ). Select
the attachment type from the following options.
Browse the operation type from below list and select the multimedia file to be attached.
Attachment Type
Description
Pictures Attach a photo from the phone memory.
Capture Photo Take a new photo using the mobile camera and attach.
Videos Attach a video from the phone memory.
Capture video Record a new video using the camcorder and attach.
Audio Attach an audio file from the phone memory.
Record audio Record a new audio file using the voice recorder and attach.
Slideshow Add new slide or edit the existing slides and attach.
Managing Message SettingsYou can customize the way you want to view and filter the messages. You can also set the default messaging application.
To view and modify the message settings,
1. From the home screen or All Apps icon ( ), tap

50
Send
ing M
essa
ges a
nd E-
mails
on Messaging ( ).
2. Tap on Message options ( ) > Settings.
3. View and edit the following settings:
Settings DescriptionSMS enabled Set the default messaging
application.
Delete old messages
Delete the old messages automatically when the storage limit is reached.
Text message limit
Set the number of SMS messages per conversations to be stored.
Multimedia message limit
Set the number of MMS messages per conversation to be stored.
Multimedia message settings
Manage the group messaging option.
The display of Group Messaging option is SIM dependant.
Delivery reports for SMS/MMS
Enable this option to receive a delivery confirmation, once the message is delivered successfully.
Message template
Create, view or edit quick response messages.
Read reports Enable this option to request a read report for each sent message.
Auto retrieve Enable this option to download the messages automatically.
Roaming auto-retrieve
Enable this option to retrieve the MMS messages automatically, while you are in a roaming network.
MMS size limit Set the maximum size to download MMS messages.
Notifications Enable notification alert for incoming messages.
Sound Set the default alert tone for incoming messages.
Vibrate Enable vibrate alert for incoming messages.
Manage SIM card messages
Manages the messages stored in the SIM card.
Deleting MessagesTo delete all the messages,
1. From the home screen or All Apps icon ( ), tap on Messaging ( ).
2. Tap on Message options ( ).
3. Tap Delete all threads. All the message threads are deleted after the confirmation.
4. You can delete a particular message by long tap on the message and tapping on the Trash ( ) icon.
Setting Up E-mail AccountsYou have to configure and create an e-mail account to access the e-mail functionalities.

51
Send
ing M
essa
ges a
nd E-
mails
1. To create an E-mail account, from the home screen
or All Apps icon ( ), tap on Settings ( ).
2. Tap on Add account ( ) which is located under
Accounts.
3. Select the type of account: Corporate, Google, or POP3/IMAP.
4. Enter the e-mail address and password. Tap Next for a private email account, such as Google Mail, or tap Manual setup for a company e-mail account. After that, follow on-screen instructions to complete the setup.
5. To setup another e-mail account, follow the same procedure.
Sending an E-mail from POP3/IMAP Account1. Select E-mail account from E-mail application.
2. Press Options > Compose.
3. Enter the mail recipient in To field, subject, and message in the Compose screen.
4. Enter the message in Compose e-mail and tap on
Send ( ).
5. To use the functions, tap Options. The following are
the options:
Option DescriptionAttach picture Attach a photo from the phone
memory.
Attach video Attach a video from the phone memory.
Attach audio Attach an audio from the phone memory.
Add Cc/Bcc Add other recipients.
Save draft Save the composed mail as a draft.
Discard Delete the mail.
Settings Set the general settings.
Insert quick response
Send the required quick responses from the list.
Reading an E-mail1. Select an e-mail account to use, and new e-mails
are retrieved.
2. To manually retrieve a new e-mail, tap on the
Options ( ) > Refresh to sync new e-mails.
3. Tap a message to read. The following options are available when a message is opened:
• Reply or Reply All to the message
• Forward the message
• Delete the message

52
Send
ing M
essa
ges a
nd E-
mails
• Open attachement
• Add the starred folder
• Moving the message to some other folder
• Mark as unread

53
Using
the K
eybo
ardEnter and Edit TextYou can use the virtual Keyboard to enter text quickly and easily. Type faster and more accurately on your device with Keyboard’s word recognition and next-word predictions.
The key features are:
• Personalized suggestions, corrections, and completions
• Gesture Typing with dynamic floating preview
• Voice typing
• Advanced keyboard layouts
Gesture Typing1. Touch the location where you want to type to open
the keyboard.
2. Slide your finger slowly across the letters of the word you want to input.
3. Release your finger when the word you want is displayed in the floating preview or in the middle of the suggestion strip. To select one of the words in the suggestion strip, tap on it.
Use Gesture Typing without the space bar
When you use Gesture Typing, there’s no need to use the space bar—just continue to slide your finger across the letters you want to input, then lift your finger to start the next word.
Keyboard DictionariesTo manage keyboard dictionaries,
1. From the Home or All Apps icon ( ), tap on
Settings ( ).
2. Tap Language & Input located under Personal settings.
Personal Dictionary
You can add your own words to your personal dictionary so that your device remembers them.
To add a word or phrase, including an optional shortcut,
1. Tap on Language & Input located under Personal settings.
2. Tap on Personal dictionary and then Add ( ) icon.
3. Add a required word and respective shortcut which is optional and press Back key.
4. The word will be saved.
Add-on Dictionary
1. From the Home or All Apps icon ( ), tap on Settings ( ).
2. Tap on Language & Input located under Personal settings.
3. Tap on Settings ( ) icon next to Google Keyboard.
4. Tap on Add-on dictionaries.
The dictionaries for other languages that you can download to your device are displayed.

54
Using
Andro
id™ Ap
plica
tions
Downloading Android Applications and Media FilesYou can download and install/view your android applications/media files, when your phone is connected to the Internet through Wi-Fi or mobile data connection. You can also download files from Gmail or other sources.
To manage application downloads, tap the Downloads icon ( ) located on the All Apps icon ( ).
Use the Downloads screen to view, reopen, or delete the downloaded files.
From the Downloads app,
1. Tap an item to open it.
2. Long tap on the items you want to share. Then touch the Share icon and choose a sharing method from the list.
3. Long tap on the items you want to delete. Then touch the Trash icon ( ).
4. At the top of the screen, touch the 3 horizontal lines to sort your downloads by name, by date modified, or by size.
The downloaded applications can be viewed in two different ways:
Grid view
1. Tap on the Downloads icon ( ) located on the All Apps icon ( ).
2. Tap the Options icon ( ) to get the view options.
3. Tap on Grid view to view the downloads.The downloads are displayed with the details such as the size, downloaded date etc.
List view:
1. Tap on the Downloads icon ( ) located on the All Apps icon ( ).
2. Tap the Options icon ( ) to get the view options.
3. Tap on List view to view the downloads.
The downloads are listed with the downloaded date details.
Accessing Gmail™Gmail application is used to read and write e-mail from any mobile device.
Gmail account can be used to sign in to all Google applications and services which includes;
• Google Now - for getting the right information at the right time
• Calendar - for keeping track of events in the calendar
• People - for keeping track of your accounts
• Google Drive - for working with documents
While reading a message,
• Touch the icons and menus along the top of the screen to refresh, label or perform other actions on that message.
• Swipe left or right to archive the message and undo the action.

55
Using
Andro
id™ Ap
plica
tions
CameraThe Sonim ECOM Smart-Ex 201 has rear camera with 8 MP (mega pixel) auto focus and a front camera with 1MP (mega pixel) fixed focus for taking pictures. These pictures are saved in Gallery ( ) of your phone memory.
You can access Gallery from All Apps icon ( ).
• To take a picture, long press the Camera button (yellow button located on the left side of your phone) or tap the Camera icon ( ) present in the All Apps icon ( ).
The camera screen with touch controls ( ) is displayed.
• Tap on Camera mode ( ), to set one of the following modes:
• Normal - ( ): To capture a picture in normal mode. Tap the Capture icon ( ) to capture the picture. Touch to zoom in and out using the pinch gestures. You can touch, then pinch in to zoom in and pinch out to zoom out, to take a clear picture.
• Video ( ): To shoot a video, tap the Record icon ( ). Tap the Stop icon ( ) to end the recording. You cannot pause the recording in the middle.
• Panoramic ( ): To shoot a picture in panoramic view, tap the Capture icon ( ) to capture the picture. Start from the left most edge of the image and move towards the right most edge to capture the complete panaromic image.
To change camera settings such as flash, exposure, and others, touch the circle to the right of the Capture icon ( ).
Multimedia Player You can play music files and voice memos stored in your phone using the Music application or Play Music application. The music files are by default stored in the music folder in File explorer.
To play music files,
Tap on Music ( ) or Play Music ( ) located in All Apps icon ( ).
Music Player1. Tap Playlist to access the default playlists in the
music folder.
2. Tap Recently Added playlist to view the music files that are recently added to the music folder.
3. Tap My recordings playlist to access all your voicememo files.
4. Tap FM recordings playlist to access all your FM recorder files.
FM Recordings playlist is displayed only when FM recordings have been done.
5. Tap Artists to view the music files sorted based on the artists.
6. Tap Albums to view the music files sorted based on the albums.

56
Using
Andro
id™ Ap
plica
tions
7. Tap Songs to view the complete list of songs stored in your phone.
8. Tap the required song/memo to play.
CalendarThe calendar enables you to set appointments, schedule reminders when required, set alerts and repeat specific settings. Tasks can be viewed on daily, weekly, monthly and agenda basis.
When you first set up your ECOM Smart-Ex 201 device, you can configure it to use a Google Account (such as Gmail). The first time you open the Calendar app on your phone or tablet, it displays any existing calendar events from that Google Account on the web.
1. Tap All Apps icon ( ) on home screen.
2. Tap on Calendar icon ( ) on the Apps screen.
3. To change the calendar view, choose Day, Week, Month, Agenda from the top of the screen in a drop-down list.
4. Select Options button to view the list of available options:
• New event: When Google Calendar is synced with your Google account, new event can be generated using the Google account.
• Refresh: Refresh the calendar for the updates.
• Search: You can search for a particular event.
• Calendars to display: Displays the calendar which is synced with your Google account.
• Settings: Displays the General settings of the calendar.
AlarmYou can set an alarm for a particular time.
1. Tap on All Apps icon ( ) on home screen.
2. Tap on the Clock icon ( ) located under Apps.
3. Tap on the Alarm activation icon ( ) on the top of the screen.
4. To set a simple alarm, tap on Add Alarm ( ) icon. Enter the time and tap Done.
5. To set a reccuring alarm, enable the checkbox Repeat.
• Its selects every day of the week.
• Unselect the day in a week by tapping that particular day for which you don’t want a reoccurring alarm.
6. To set the alarm tone, select the type of alarm from the Ringtone list. Tap on the selected ringtone and select OK.
The alarm works even if the phone is in silent mode.
ClockYou can view the time of major cities in different time zones using this function. You also have the option to use Daylight Saving Time (DST).
The local time is displayed in the upper half of the screen.
1. Tap on All Apps icon ( ) on home screen.
2. Tap on the Clock icon ( ) located under Apps.
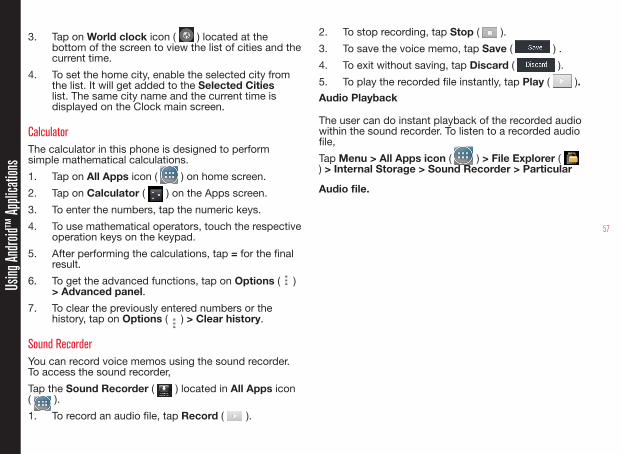
57
Using
Andro
id™ Ap
plica
tions
3. Tap on World clock icon ( ) located at the bottom of the screen to view the list of cities and the current time.
4. To set the home city, enable the selected city from the list. It will get added to the Selected Cities list. The same city name and the current time is displayed on the Clock main screen.
CalculatorThe calculator in this phone is designed to perform simple mathematical calculations.
1. Tap on All Apps icon ( ) on home screen.
2. Tap on Calculator ( ) on the Apps screen.
3. To enter the numbers, tap the numeric keys.
4. To use mathematical operators, touch the respective operation keys on the keypad.
5. After performing the calculations, tap = for the final result.
6. To get the advanced functions, tap on Options ( ) > Advanced panel.
7. To clear the previously entered numbers or the history, tap on Options ( ) > Clear history.
Sound RecorderYou can record voice memos using the sound recorder. To access the sound recorder,
Tap the Sound Recorder ( ) located in All Apps icon ( ).
1. To record an audio file, tap Record ( ).
2. To stop recording, tap Stop ( ).
3. To save the voice memo, tap Save ( ) .
4. To exit without saving, tap Discard ( ).
5. To play the recorded file instantly, tap Play ( ).
Audio Playback
The user can do instant playback of the recorded audio within the sound recorder. To listen to a recorded audio file,
Tap Menu > All Apps icon ( ) > File Explorer ( ) > Internal Storage > Sound Recorder > Particular
Audio file.

58
Goog
le Se
arch™
and G
oogle
Now
™About Google Search™ and Google Now™Google Now gives the right information at the right time. Google Now does not require any elaborate setting. The information is at your fingertips.
Get updates on weather and traffic before you leave home.
When Google Now is activated, it also activates the Location reporting and Location history.
• Location Reporting: allows Google to periodically store and use your device’s most recent location data in connection with your Google Account. Location Reporting is a per-device setting.
• Location History: allows Google to store a history of your location data from all devices where you are logged into your Google Account and have enabled location reporting.
Activate Google NowGoogle Now can be setup on your phone when you switch On the phone for the first time. You can turn it ON and OFF at any time.
1. Tap on the Google Search bar on a home screen.
2. Touch Get Google Now if you do not have already. To access menu for the next step, perform a Google Search.
3. Select Options ( ) > Settings > Disable Google Now, to turn off Google now.
Use Google NowTo use Google Now, long press the Home button.
Voice Search and ActionYou can speak to your phone to search, get directions, send messages and perform other tasks.
To initiate the voice search, tap on the microphone ( ) icon in the Google search bar.
After you touch the Microphone icon or say OK Google, Google listens as you speak and initiates the search or action you describe. If voice search does not understand you, it lists some suggestions. Select the one you want from the list.
Spoken answers are supported for English language only.
Voice ActionsTo set the language in Google voice search,
Select Options ( ) > Settings > Voice > Languages from the Google home screen. Voice Actions are supported in English, French, German, Spanish, Italian, Afrikaans, Bahasa Indonesia, Bahasa Melayu, Catala, Cestina, Dansk, Deutsch, Euskara, Filipino, Hindi, Urdu and others.
You can use Voice Actions to perform common tasks, such as sending an email or opening an application.
After touching the Microphone icon ( ), speak the voice action you want to use.

59
End U
ser L
icens
e Agre
emen
tLicenseThis wireless device, (the “Device”) contains software owned by Sonim Technologies, Inc. (“Sonim”) and its third party suppliers and licensors (collectively, the “Software”). As user of this Device, Sonim grants you a non-exclusive, non-transferable, non-assignable license to use the software solely in conjunction with the Device on which it is installed and/or delivered with. Nothing herein shall be construed as a sale of the Software to a user of this Device.
You shall not reproduce, modify, distribute, reverse engineer, decompile, otherwise alter or use any other means to discover the source code of the Software or any component of the Software. For avoidance of doubt, you are at all times entitled to transfer all rights and obligations to the Software to a third party, solely together with the Device with which you received the Software, provided always that such third party agrees in writing to be bound by these rules.
You are granted this license for a term of the useful life of this Device. You can terminate this license by transferring all your rights to the Device on which you have received the Software to a third party in writing. If you fail to comply with any of the terms and conditions set out in this license, it will terminate with immediate effect Sonim and its third party suppliers and licensors are the sole and exclusive owner of and retain all rights, title and interest in and to the Software. Sonim, and, to the extent that the Software contains material or code of a third party, such third party, shall be entitled third party beneficiaries of these terms. The laws of Delaware, United States shall govern the validity, construction and performance of this license.
Phone CareEach Sonim Phone has a designated IP class for dust and water protection, according to the IEC Ingress Protection (IP) Standard 60529. This means that the phone is dust protected and can be submerged into 6.5 feet/2 m deep water for up to 30 minutes. Immersion in deeper water can damage it and must be avoided.
Sonim/ECOM phones are built for heavy duty use. Its design protects against disassembly or mechanical damage when subjected to forces equal to free fall from the height of 6.5 feet/2 meters. Subjecting the phone to stronger impact and forces can damage it and must be avoided.
WarrantyPlease observe the safety instructions provided in the Sales kit of this device for details about the warranty.

60
WARNING: Changes or modifications made to this equipment not expressly approved by ECOM Instruments GmbH for compliance could void the user’s authority to operate the equipment.
FCC Statement• This device complies with part 15 of the FCC rules
(FCC ID: XAM500059GR02). Operation is subject to the following two conditions:
• This device may not cause harmful interference.
• This device must accept any interference received, including interference that may cause undesired operation.
• This device has been tested and found to comply with the limits for a Class B digital device, pursuant to Part 15 of the FCC Rules. These limits are designed to provide reasonable protection against harmful interference in a residential installation. This equipment generates, uses, and can radiate radio frequency energy, and, if not installed and used in accordance with the instructions, may cause harmful interference to radio communications. However, there is no guarantee that interference will not occur in a particular installation If this equipment does cause harmful interference to radio or television reception, which can be determined by turning the equipment off and on, the user is encouraged to try to correct the interference by one or more of the following measures:
• Reorient or relocate the receiving antenna.
• Increase the separation between the equipment and receiver.
• Connect the equipment into an outlet on a
circuit different from that to which the receiver is connected.
• Consult the dealer or an experienced radio/TV technician for help.
The country code selection is for non-US model only and is not available to all US model. Per FCC regulation, all WiFi product marketed in US must fixed to US operation channels only.
FCC Caution
Any Changes or modifications not expressly approved by the party responsible for compliance could void the user‘s authority to operate the equipment.
The antenna(s) used for this transmitter must not be co-located or operating in conjunction with any other antenna or transmitter.
Fede
ral C
ommu
nicati
on C
ommi
ssion
Inter
feren
ce (F
CC) S
tatem
ent
61
AVERTISSEMENT: toute modification apportée à cet appareil sans l’accord exprès de conformité de ECOM Instruments GmbH. peut annuler l’autorisation d’utilisation accordée initialement pour cet appareil.
Règlement FCC• Cet appareil Smart-Ex 201 est conforme à l’article
15 du règlement FCC (FCC ID: XAM500059GR02). Son utilisation est sujette aux deux conditions suivantes.
• Cet appareil ne doit provoquer aucune interférence nuisible.
• Cet appareil doit accepter toutes les interférences reçues, y compris celles susceptibles d’entraver son bon fonctionnement.
• Cet équipement a été testé et s’est avéré conforme aux limites définies dans l’article 15 du règlement FCC pour un équipement numérique de classe B. Ces limites ont été choisies afin d’assurer une protection raisonnable contre les interférences nuisibles dans un environnement résidentiel. Cet équipement génère, utilise et peut émettre des énergies de fréquence radio, et, s’il n’est pas installé et utilisé conformément au guide d’utilisateur, perturber les communications radio. Nous ne garantissons pas l’absence de toute interférence dans une installation privée. Si cet équipement s’avère perturber la bonne réception de la radio ou de la télévision, ce qui peut facilement être vérifié en allumant puis éteignant l’équipement, nous encourageons l’utilisateur à essayer d’éliminer ces interférences à l’aide des conseils suivants:
• Réorientez ou déplacez l’antenne réceptrice.
• Augmentez la distance séparant l’équipement du récepteur.
• Branchez l’équipement sur une autre ligne électrique que celle utilisée pour le récepteur.
• Demandez conseil à votre revendeur ou à un technicien radio/TV compétent.
La sélection de code de pays est pour le modèle non-US et ne est pas disponible pour tous les modèles US. Par la réglementation FCC, tous les produits WiFi commercialisé aux États-Unis doit fixe aux canaux d’exploitation États-Unis uniquement.
FCC Caution
Tous changements ou modifications non expressément approuvés par la partie responsable de la conformité pourraient annuler l’autorité de l’utilisateur à utiliser l’équipement.
L’antenne (s) utilisé pour cet émetteur ne doit pas être co-localisées ou opérant en conjonction avec une autre antenne ou émetteur.
Règle
ment
FCC

62
IC StatementThis device complies with RSS-310 of Industry Canada (IC ID: 8311A-500059GR02). Operation is subject to the following two conditions:
1. This device does not cause harmful interference.
2. This device must accept any interference, including interference that may cause undesired operation of the device.
FOR PORTABLE DEVICE DEVICE USAGE (<20cm from body/SAR)Radiation Exposure Statement:
The product comply with the Canada portable RF exposure limit set forth for an uncontrolled environment and are safe for intended operation as described in this manual. The further RF exposure reduction can be achieved if the product can be kept as far as possible from the user body or set the device to lower output power if such function is available.
• The device for operation in the band 5150-5250 MHz is only for indoor use to reduce the potential for harmful interference to co-channel mobile satellite systems.
• High-power radars are allocated as primary users (i.e. priority users) of the bands 5250-5350 MHz and 5650-5850 MHz and that these radars could cause interference and/or damage to LE-LAN devices.FOR MOBILE DEVICE USAGE (>20cm/low power).
.
Indus
try C
anad
a (IC)
State
ment
63
Règlement ICLe présent appareil est conforme aux CNR d’Industrie Canada (IC ID: 8311A-500059GR02) applicables aux appareils radio exempts de. L’exploitation est autorisée aux deux conditions suivantes:
1. L’appareil ne doit pas produire de brouillage, et
2. L’utilisateur de l’appareil doit accepter tout brouillage radioélectrique subi, même si le brouillage est susceptible d’en compromettre le fonctionnement.
Cet appareil numérique de la classe B est conforme à la norme NMB-003 du Canada.
FOR PORTABLE DEVICE USAGE (<20cm from body/SAR needed)Déclaration d’exposition aux radiations:
Le produit est conforme aux limites d’exposition pour les appareils portables RF pour les Etats-Unis et le Canada établies pour un environnement non contrôlé.
Règle
ment
IC

64
CE St
ateme
ntCE StatementThis device complies with the R&TTE Directive (1999/5/EC), the EMC Directive (2004/108/EC), and the Low Voltage Directive (2006/95/EC) issued by the Commission of the European Community. Operations in the 5.15-5.25 GHz band are restricted to indoor usage only.
A minimum separation distance of 1.5 cm must be maintained between the user’s body and the device, including the antenna during body-worn operation to comply with the RF exposure requirements in Europe.
This device have been tested to comply with the Sound Pressure Level requirement laid down in the applicable EN 50332-1and/or EN 50332-2 standards. Permanent hearing loss may occur if earphones or headphones are used at high volume for prolonged periods of time.
Language CE StatementČesky [Czech]
ECOM Instruments GmbH,tímto prohlašuje, že tento Smart-Ex 201 je ve shodě se základními požadavky a dalšími příslušnými ustanoveními směrnice 1999/5/ES.
Dansk [Danish]
Undertegnede ECOM Instruments GmbH, erklærer herved, at følgende udstyr Smart-Ex 201 overholder de væsentlige krav og øvrige relevante krav i direktiv 1999/5/EF.
Deutsch [German]
Hiermit erklärt ECOM Instruments GmbH, dass sich das Gerät Smart-Ex 201 in Übereinstimmung mit den grundlegenden Anforderungen und den übrigen einschlägigen Bestimmungen der Richtlinie 1999/5/EG befindet.
Eesti [Estonian]
Käesolevaga kinnitab ECOM Instruments GmbH, seadme Smart-Ex 201 vastavust direktiivi 1999/5/EÜ põhinõuetele ja nimetatud direktiivist tulenevatele teistele asjakohastele sätetele.
English Hereby, ECOM Instruments GmbH, declares that this Smart-Ex 201 is in compliance with the essential requirements and other relevant provisions of Directive 1999/5/EC.
Español [Spanish]
Por medio de la presente ECOM Instruments GmbH, declara que el Smart-Ex-201 cumple con los requisitos esenciales y cualesquiera otras disposiciones aplicables o exigibles de la Directiva 1999/5/CE.
Ελληνική [Greek]
ΜΕ ΤΗΝ ΠΑΡΟΥΣΑ ECOM Instruments GmbH, ΔΗΛΩΝΕΙ ΟΤΙ Smart-Ex-201 ΣΥΜΜΟΡΦΩΝΕΤΑΙ ΠΡΟΣ ΤΙΣ ΟΥΣΙΩΔΕΙΣ ΑΠΑΙΤΗΣΕΙΣ ΚΑΙ ΤΙΣ ΛΟΙΠΕΣ ΣΧΕΤΙΚΕΣ ΔΙΑΤΑΞΕΙΣ ΤΗΣ ΟΔΗΓΙΑΣ 1999/5/ΕΚ.
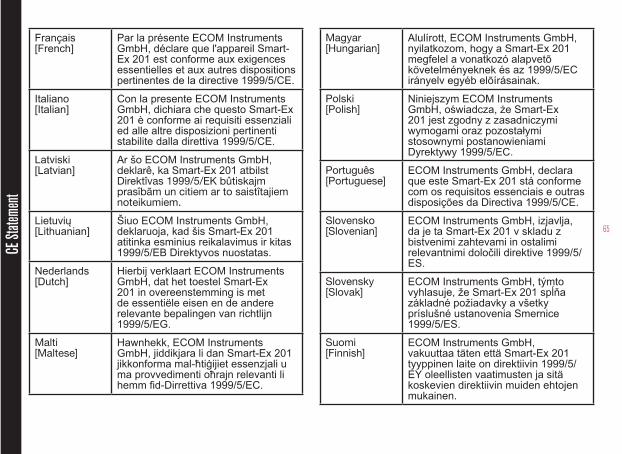
65
Français [French]
Par la présente ECOM Instruments GmbH, déclare que l'appareil Smart-Ex 201 est conforme aux exigences essentielles et aux autres dispositions pertinentes de la directive 1999/5/CE.
Italiano [Italian]
Con la presente ECOM Instruments GmbH, dichiara che questo Smart-Ex 201 è conforme ai requisiti essenziali ed alle altre disposizioni pertinenti stabilite dalla direttiva 1999/5/CE.
Latviski [Latvian]
Ar šo ECOM Instruments GmbH, deklarê, ka Smart-Ex 201 atbilst Direktîvas 1999/5/EK bûtiskajm prasîbãm un citiem ar to saistîtajiem noteikumiem.
Lietuvių [Lithuanian]
Šiuo ECOM Instruments GmbH, deklaruoja, kad šis Smart-Ex 201 atitinka esminius reikalavimus ir kitas 1999/5/EB Direktyvos nuostatas.
Nederlands [Dutch]
Hierbij verklaart ECOM Instruments GmbH, dat het toestel Smart-Ex 201 in overeenstemming is met de essentiële eisen en de andere relevante bepalingen van richtlijn 1999/5/EG.
Malti [Maltese]
Hawnhekk, ECOM Instruments GmbH, jiddikjara li dan Smart-Ex 201 jikkonforma mal-ħtiġijiet essenzjali u ma provvedimenti oħrajn relevanti li hemm fid-Dirrettiva 1999/5/EC.
Magyar [Hungarian]
Alulírott, ECOM Instruments GmbH, nyilatkozom, hogy a Smart-Ex 201 megfelel a vonatkozó alapvetõ követelményeknek és az 1999/5/EC irányelv egyéb elõírásainak.
Polski [Polish]
Niniejszym ECOM Instruments GmbH, oświadcza, że Smart-Ex 201 jest zgodny z zasadniczymi wymogami oraz pozostałymi stosownymi postanowieniami Dyrektywy 1999/5/EC.
Português [Portuguese]
ECOM Instruments GmbH, declara que este Smart-Ex 201 stá conforme com os requisitos essenciais e outras disposições da Directiva 1999/5/CE.
Slovensko [Slovenian]
ECOM Instruments GmbH, izjavlja, da je ta Smart-Ex 201 v skladu z bistvenimi zahtevami in ostalimi relevantnimi določili direktive 1999/5/ES.
Slovensky [Slovak]
ECOM Instruments GmbH, týmto vyhlasuje, že Smart-Ex 201 spĺňa základné požiadavky a všetky príslušné ustanovenia Smernice 1999/5/ES.
Suomi [Finnish]
ECOM Instruments GmbH, vakuuttaa täten että Smart-Ex 201 tyyppinen laite on direktiivin 1999/5/EY oleellisten vaatimusten ja sitä koskevien direktiivin muiden ehtojen mukainen.
CE St
ateme
nt

66
Svenska [Swedish]
Härmed intygar ECOM Instruments GmbH, att denna Smart-Ex 201 står I överensstämmelse med de väsentliga egenskapskrav och övriga relevanta bestämmelser som framgår av direktiv 1999/5/EG.
CE Mark & NB Identification Number
Countries Where ECOM SMART-Ex 201 Model AvailableAll countries in Europe and Middle East Asia.
CE St
ateme
nt

67
EC - Declaration of Conformity The EC-Declaration of Conformity is provided as a separate document in the sales kit. The latest version can be downloaded via www.ecom-ex.com on the respective product page.
Decla
ration
of C
onfor
mity

68Index
IndexAAdding a New Contact 39
Airplane Mode 31
Alarm 56
All Applications icon 19
Android Security 34
Auto Retry 46
BBackup 36
BatteryCharging indicator 13
Battery usageCharging 13Improving battery life 14Optimize power 14
Black List 46
Bluetooth Devices 29
Bluetooth Tethering 32
CCalculator 57
Calendar 56
Call Barring 47
Call Forwarding 47
Camera 55
Cell Broadcast 33
Child Safety 12
Clock 56
DData Usage 30
Declaration of Conformity 67
Default SMS App 31
Deleting a Contact 41
Device Administrator 34
Display Settings 26
DTMF Tones 47
EECOM SMART-EX 201 17
Encrypt 34
FFavorites tray 19
Fixed Dial Numbers 45
G
Gesture Typing 53
Glove Mode 24
Google Account 18
Google Account Sync 37
Google Now 58
Google Search 58
HHAC Rating 10
Harmful Applications 35
High Temperatures 11
Home Screen Indicators 20
LLanguage Settings 24
Location Access 36
MMemory Usage 28
Mobile Network 33
Multimedia Player 55
Music Player 55
NNFC 31

69Index
OOur Warranty 64
PPairing a Bluetooth Device 30
Personal Dictionary 25
Phone Models Covered 6
Phone specifications 15
Power Optimization 14
Proximity Sensor 46
QQuick Responses 45
RReset 36
SSAR 10
SMART EX-201 15
SMS/MMS Message 49
Sound RecorderAudio Playback 57
Speech Settings 25
Spell checker 25
TTaking a Screenshot 23
Tethering & Portable Hotspot 31
Time and Date Settings 24
Touch and Type 18
TTY Mode 46
UUsing Lock Screen
Face Unlock 22
VVibrate Mode 44
Voice Actions 58
Voice Input 23
Voicemail 45
Voice Search 58
VPN ConnectionEditing VPN 32
WWallpaper 23
White List 46
Wi-Fi 31
Without SIM Card 22