duplo 490p hydraulic paper cutter · at this time you can lower the blade and re-make a cut. á á...
TRANSCRIPT

Provided By
http://www.MyBinding.com http://www.MyBindingBlog.com
DUPLO 490P HYDRAULIC PAPER CUTTER
Instruction Manual
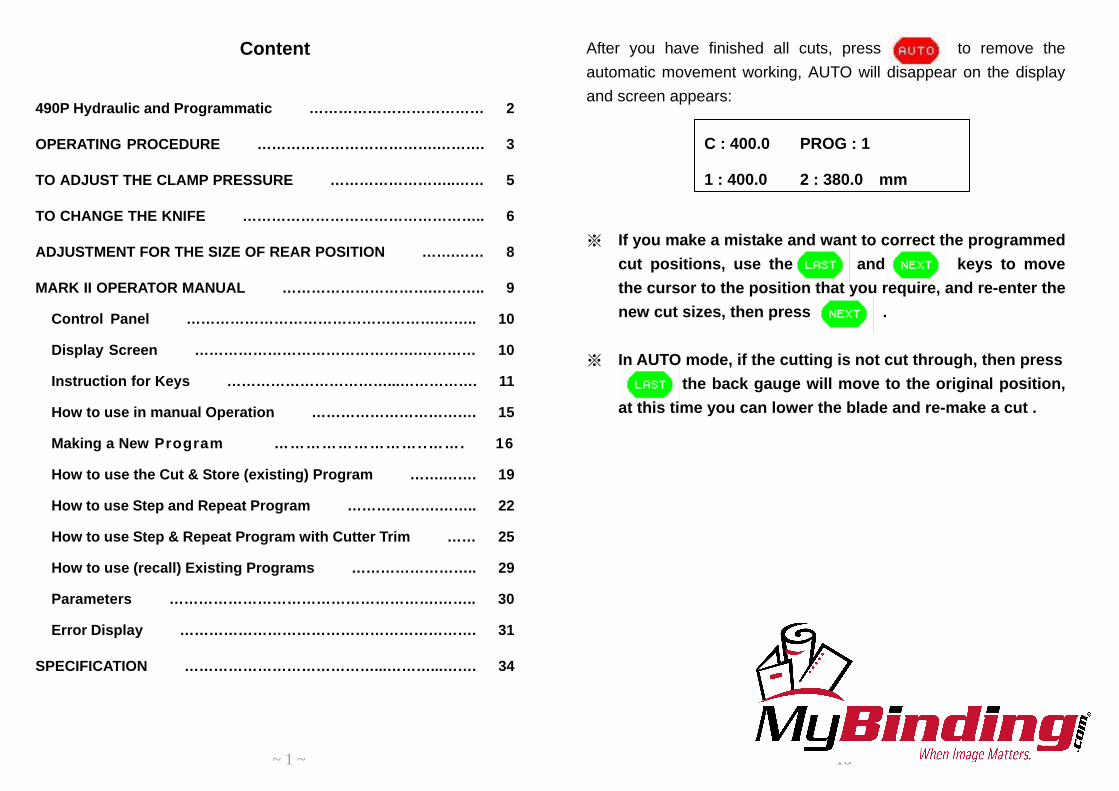
Content
490P Hydraulic and Programmatic ……………………………… 2
OPERATING PROCEDURE ……………………………….………. 3
TO ADJUST THE CLAMP PRESSURE ……………………..…… 5
TO CHANGE THE KNIFE ………………………………………….. 6
ADJUSTMENT R THE SIZE OF REAR POSITION …….…… 8
MARK II OPER OR MANUAL ………………………….……….. 9
Control Pan …………………………………………….…….. 10
Display Scr ……………………………………….………… 10
Instruction Keys ……………………………...……………. 11
How to use manual Operation ……………………………. 15
Making a Ne
How to use
How to use
How to use
How to use
Parameters
Error Displa
SPECIFICATIO
After you have finished all cuts, press to remove the automatic movement working, AUTO will disappear on the display and screen appears:
C : 400.0 PROG : 1
1 : 400.0 2 : 380.0 mm
※ If you make a mistake and want to correct the programmed
cut positions, use the and keys to move the cursor to the position that you require, and re-enter the new cut sizes, then press .
※ In AUTO mode, if the cutting is not cut through, then press
the back gauge will move to the original position, at this time you can lower the blade and re-make a cut .
FO
AT
el
een
for
in
~ 1 ~ ~ 18 ~
w Program ………………………..……. 16
the Cut & Store (existing) Program …….……. 19
Step and Repeat Program ……………….…….. 22
Step & Repeat Program with Cutter Trim …… 25
(recall) Existing Programs …………………….. 29
……………………………………………….…….. 30
y ……………………………………………………. 31
N …………………………………...………...……. 34


OPERATING PROCEDURE 1. Mains Switch
Three positions: 0 = Off
1 Start back gauge e Start tart hydraulic mo
After tallation of the m ns electric su ly, turn the mainswitch ) to position 1. Th will activate th ack gauge motorcircuit d the back gauge ill move backw d to the rear andstop, recalibrate the p ition. The cut light shows andthe dig l display glows.
2. To ini e a cut, the mai witch must b urned to START
positiopilot (after otime, tMark-using
PS: If
n 3. Place
simultturn thbackg
Move the back gauge to the second cut position say 300.0 then make a cut and the following screen appears:
C : 300.0 PROG : 2 C&S
3 : 000.0 4 : 000.0 mm
Move the b k gauge to the third cut position, say 205.0 and make a cut, the fol ing screen is displayed:
C : 205.0 PROG : 2 C&S
3 : 205.0 4 : 000.0 mm
After you f h storing all cuts, press and screen appears:
C : 205.0 PROG : 2
3 : 205.0 4 : 000.0 mm
= = S
ins (1 anandita
tiat
n to start the hydra12) glows and the prne second. Now thehe back gauge can bII control panel (9).the back gauge micr
you don’t start thot be functional.
the paper against taneously by pressine back gauge microauge lock handle (4)
drivtor
aiis wos
n s
ulic motor, the rogram Mark-II w machine is reade moved to any Fine adjustmento adjustment (5).e main motor, th
he back gauge ag the dual cut but adjustment (5), is locked up.
~ 3 ~
ppe bar
line
e t
un operate indicateill start automaticallyy to operate. At thisposition by using thes can then be made
e back gauge will
nd initiate a cut bytons (7). If you can’tplease inspect if the
Press program, a If you wanto the first
aclow
inis
it will beep twice, then re-press to store the nd the screen appears:
C : 205.0 PROG : 2
1 : 400.0 2 : 300.0 mm
t to make a cut, press , the back gauge will move cut position and the following screen appears:
C : 400.0 PROG : 2 AUTO
1 : 400.0 2 : 300.0 mm
~ 20 ~

4. To check whether the paper is in correct position before cutting, press the hydraulic foot clamp pedal (10) to lower the clamp until the clamp press the paper.
5. Press the dual cut buttons (7) until the clamp pressed the paper
tightly, the knife will cut the paper automatically. (during operation, if you release either of the cut buttons, the knife will stop function. You must reset the cutter by releasing both buttons and let the blade and clamp return to its home position.) After completing a cut, release both cut buttons, the knife will return to its home position automatically.
PS: Dual cut buttons with safety activation margin of 0.5
seconds.
~ 4 ~ ~ 21 ~
NOTE: (a) Automatic cut-off: As a further safety precaution, when you
walk away from the machine or do not use the machine continuously, it will automatically shut off in 15 minutes saving power.
(b) While operating, if you turn off the guillotine when the blade or the clamp is not returned to the top position. Once you re-switch on the machine and start the main motor, the machine keeps alarming all the time, at this time, you have to press any one of both cut buttons, then the blade or the clamp will return to its home position automatically, and you can start cutting.
Place your paper and make the first cut, when completing the cut, the back gauge moves to the second cut position.
Adjust the paper to the 2nd cut & make a cut, the back gauge will move to the 3rd cut position.
Adjust the paper for the 3rd cut & make the cut, the back gauge will then “push-out” your stack automatically. Then it moves to the first cut position and readies itself for the next cut cycle.
After you have finished all cuts, press to move the automatic back gauge movement, AUTO will disappear on the display, and screen appears: C : 400.0 PROG : 2
1 : 400.0 2 : 300.0 mm

TO ADJUST THE CLAMP PRESSURE 1. Press the dual cut buttons (7) simultaneously to lower the
clamp until the clamp press the paper tightly, and read off the clamp pressure on the clamping pressure gauge (8).
PS: Normal setting: min. 35 kg/cm², max. 50 kg/ cm² 2. Turning the clamp pressure adjustment switch (6):
~ 5 ~ ~ 22 ~
To increase pressure, turn the adjuster clockwise.※
To decrease pressure, turn the adjuste※ r anti-clockwise.
Re-press the cut buttons simultaneously until the clamp presses the paper tightly to read the new revised pressure.
PS: Do not adjust the pressure too low (normal setting: 30 kg/
cm² or more); otherwise, the guillotine will beep.
How to use Step and Repeat Program ( even parts cutting for name card & label etc.)
Turn on the power to the cutter, wait until the back gauge moves back and will recalibrate itself and the display appears:
(There will be a cursor flashing over at the last number, this is the work area.) C : 490.0 PROG : 1
1 : 000.0 2 : 000.0 mm Select a program number from 1-9, if you press screen appears: C : 490.0 PROG : 3
1 : 000.0 2 : 000.0 mm If the first cut is at 400.0 and you would like to divide it into 50.0 label for 7 times, please do as follows: (i) Press and , the
following screen appears: C : 490.0 PROG : 3
1 : 400.0 2 : 000.0 mm

~ 6 ~ ~ 23 ~
TO CHANGE THE KNIFE
1) Turn the knife change switch (2), set the Mark-II control in “MANUAL” mode.
2) Turn the knife depth micro adjustment (3) anti-clockwise to 0, (minimum position).
3) Press both cut buttons until the knife down to the bottom position.
(Don’t release any one of the cut buttons during the operation, otherwise you will have to re-start the procedure from the first step.)
4) Using the tools provided, remove all knife holding bolts. Insert the two knife change handles into the knife through the two open ended slotted holes in the knife carrier tightly.
5) Turn off the knife change switch, the knife carrier will return to the top position.
6) Holding the knife change handles and loose it slightly, remove the knife from the knife carrier.
7) Change the cutting stick to a fresh un-used side.
8) Using the knife change handles to insert the new knife into the knife carrier and push the knife to the top of the slots and tighten the handle against the carrier.
9) Turn the knife change switch on.
10) Press both cut buttons until the knife down to the bottom position.
(ii) Press and , screen
appears:
(iii) Press and the screen will change to:
(iv) Press it will beep twice, then re-press to store
the program, and the screen will change to:
If you want to start cutting, press , the back gauge will move
to the position 400.0 and the following screen appears:
C : 490.0 PROG : 3
3 : 000.0 4 : 000.0 mm
C : 490.0 PROG : 3
3 : X 07 4 : 000.0 mm
C : 490.0 PROG : 3
1 : 400.0 2 : 050.0 mm
C : 400.0 PROG : 3 AUTO
1 : 400.0 2 : 050.0 mm

~ 7 ~ ~ 24 ~
11) Remove the handles and replace with all knife bolts.
12) Trying to put the knife to the right side until the position of knife
beam equal to the cutting stick. Then tighten all knife holding
bolts.
13) Remove all tools. Turn off the knife change switch. The knife
carrier and the clamp will automatically return to its top position.
14) Test cut a full stack of paper. If the bottom sheets are not cut,
then adjust the knife micro adjustment clockwise. This will lower
the knife towards the cutting stick.
Note:
(1) When making a cut and the guillotine is beeping, you need to
check the following:
(a) The knife is blunt.
(b) The clamp pressure adjustment is too low.
(c ) A thick paper pile height (over) is used.
Warning for Knife Change:
When you complete 2,000 cuts operation, it will beep “PI” “PI” -----
at intervals of one second, at this time you have to replace a sharp
blade for use, after replacing the blade, the alarm will disappear. If
you don’t want to change the blade, please turn on the knife change
switch to the knife change position and then make a knife change
operation, the sound disappears. Then the counter will resets to
zero and re-start.
After finishing the first cut, the back gauge will move in forward 50.0
and the following screen appears:
After you have made 7 consecutive cuts, the back gauge will
automatically “push-out” your stack of paper and moves to the first
cut position at 400.0, then you can start the second cutting cycle:
After you have finished all cuts, press to remove the
automatic movement working, AUTO will disappear on the display,
and the screen appears:
If you make a mistake and want to correct the programmed
cut positions, use the and keys to move the
cursor to the position that you require, and re-enter the
new cut sizes, then press .
In AUTO mode if the cutting is not cut through then press
the back gauge will move to the original position,
at this time you can lower the blade and re-make a cut.
If you use & press the keys , the cutter will
make “n” times the same size consecutive cuts till it
completes all cuts. “(1)” means “n” times.
C : 350.0 PROG : 3 AUTO
3 : X 07 4 : 000.0 mm
C : 400.0 PROG : 3 AUTO
1 : 400.0 2 : 050.0 mm
C : 400.0 PROG : 3
1 : 400.0 2 : 050.0 mm

ADJUSTMENT FOR THE SIZE OF REAR POSITION If there is a difference between the actual cut size and the back gauge display size, it indicates the rear position is incorrect. Make the required adjustment as the following procedure: 1. Re-switch on the machine and move the back gauge to the rear
position, then to measure the size with a rule (by metric system). Adjust the rear position size by call out program t “0”, adjust the first setting figure to the correct size.
~ 8 ~ ~ 25 ~
2. Cut a piece of paper to two even parts. (Cut pape ize 200 mm
into two 100 mm paper) 3. Put the outside paper on the inside one and mak comparison
between these two parts. 4. If the inside paper is larger than the outside one, you have to
increase the correction size (i.e. 0.5mm, then do the adding 0.5 to the rear position).
5. If the inside paper is smaller than the outside one, the
correction size should be decreased and do the subtracting. 6. When the correction is made, turn the power off and back on.
inside > outside (make the correction to add) inside < outside (make the correction to subtract)
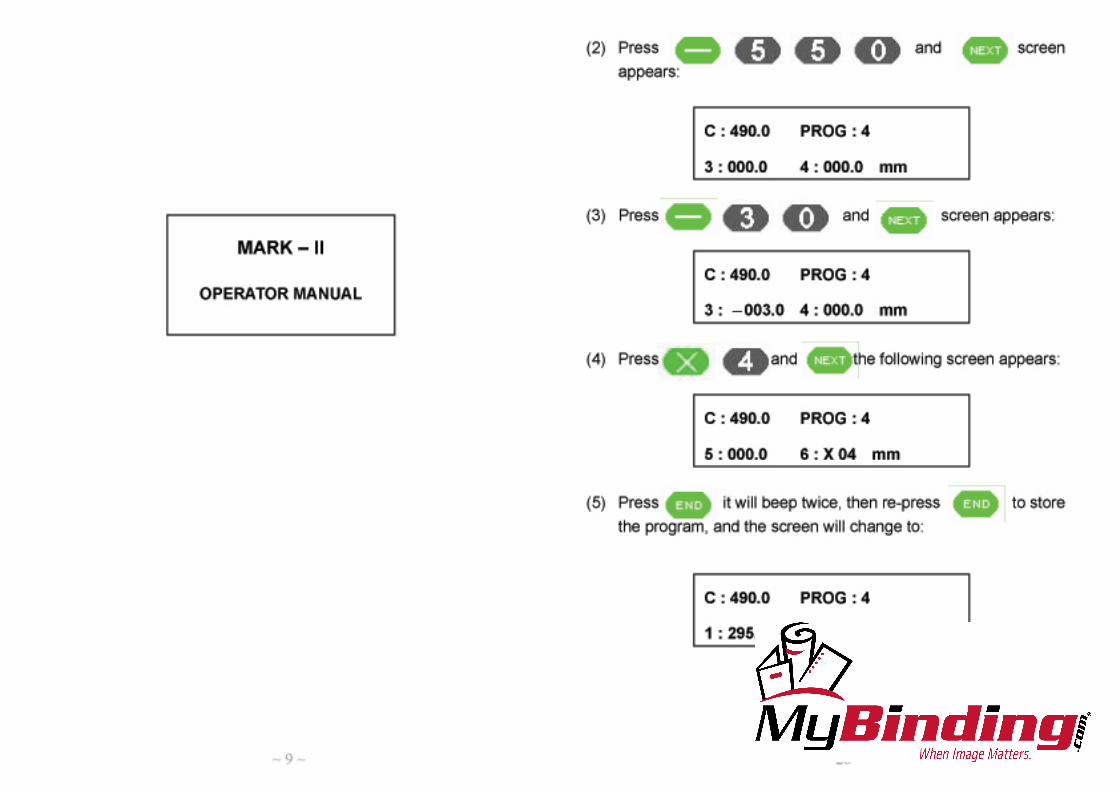
How to use Step & Repeat Program with Cutter Trim: (even parts cutting for name card & label etc.)
Turn on the power to the cutter, wait until the back gauge moves back And will recalibrate the position and display appears: (There will be a cursor flashing over at the last number, this is the work area.)
C : 490.0 PROG : 1
1 : 000.0 2 : 000.0 mm Select a pro m number from 1 - 9, if you press screen appe :
C : 490.0 PROG : 4
1 : 000.0 2 : 000.0 mm If the first cut is at 295.0 and you would like to divide it into 55.0 name cards with a 3.0 trim in between for four times each, please do as below: (1) Press and , the
following screen appears:
C : 490.0 PROG : 4
1 : 295.0 2 : 000.0 mm
se
r s
e a
graars

Control Panel
~ 10 ~ ~ 27 ~
Display S een C : Current cut position. The back gauge current position. PROG : Program number. There are 9 programs from 1 – 9. The PROG : 0 is for parameter setting, any changes on the parameter should be made in cipher code. 1: 2: 3: 4: 5: 6: 7: 8: Cut position. It allows for 9 programs with 8 cuts each. Two or more Programs can be combined. A total of 72 cuts can be stored.
If you want to make a cut, press , the back gauge will move to 295.0 position and the following screen appears:
C : 295.0 PROG : 4 AUTO
1 : 295.0 6 : -055.0 mm Make the rst cut and the back gauge moves in forward 55.0, the following on the screen:
C : 240.0 PROG : 4 AUTO
3 : -003.0 4 : X 04 mm After the cond cut is made, the back gauge moves in forward 3.0 and the f wing appears: C : 490.0 PROG 1
1 : 000.0 2 : 000.0 mm
C : 237.0 PROG : 4 AUTO
3 : -003.0 4 : X 04 mm After you finish your 55.0 & 3.0 for four consecutive cuts each, the back gauge moves to the first cut position 295.0, then you can make the second cut cycle:
C : 295.0 PROG : 4 AUTO
1 : 295.0 6 : -055.0 mm
fi is
seollo
cr
:
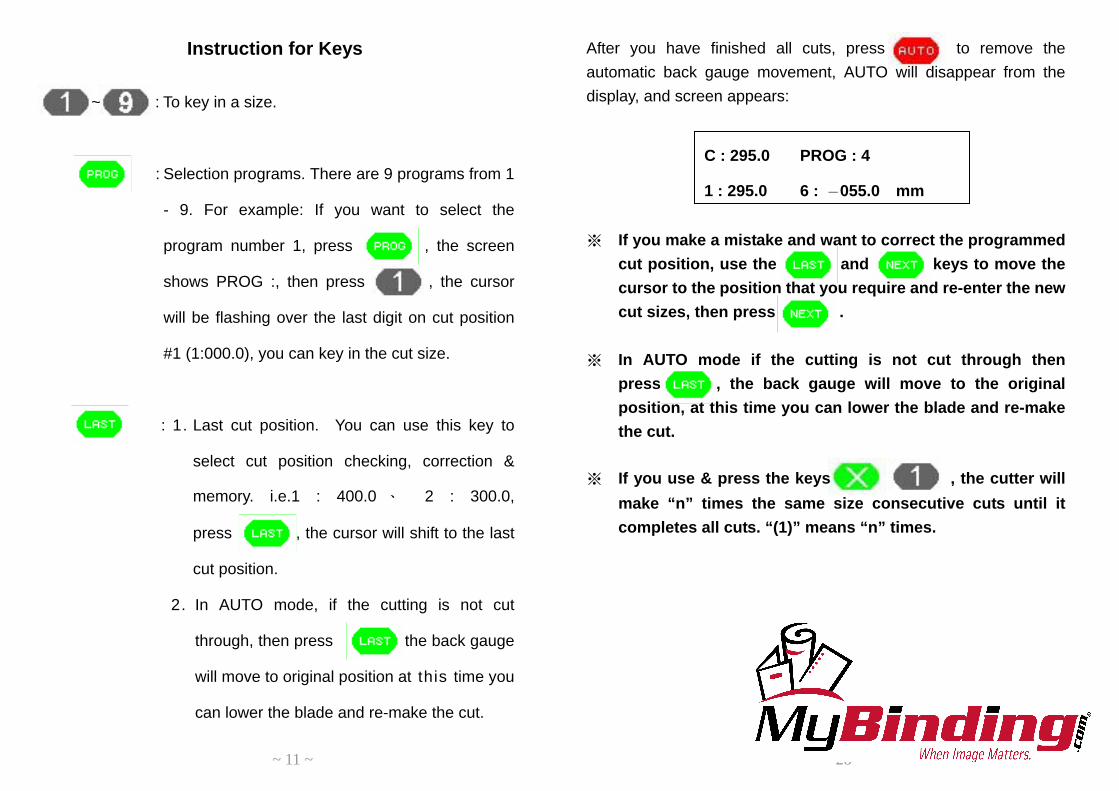
Instruction for Keys
~ : To key in a size.
: Selection programs. There are 9 programs from 1
- 9. For example: If you want to select the
program number 1, press , the screen
shows PROG :, then press , the cursor
will be flashing over the last digit on cut position
#1 (1:000.0), you can key in the cut size.
After you have finished all cuts, press to remove the automatic back gauge movement, AUTO will disappear from the display, and screen appears:
C : 295.0 PROG : 4
1 : 295.0 6 : -055.0 mm ※ If you make a mistake and want to correct the programmed
cut position, use the and keys to move the cursor to the position that you require and re-enter the new cut sizes, then press .
※ In AUTO mode if the cutting is not cut through then
press , the back gauge will move to the original position, at this time you can lower the blade and re-make
~ 11 ~ ~ 28 ~
: 1. Last cut position. You can use this key to
select cut position checking, correction &
memory. i.e.1 : 400.0 、 2 : 300.0,
press , the cursor will shift to the last
cut position.
2. In AUTO mode, if the cutting is not cut
through, then press the back gauge
will move to original position at this time you
can lower the blade and re-make the cut.
the cut. ※ If you use & press the keys , the cutter will
make “n” times the same size consecutive cuts until it completes all cuts. “(1)” means “n” times.
~ 12 ~ ~ 29 ~
: Next cut position. Use the key to select cut
position numbers, checking, correction, and
memory.
: 1. End/Memory. When you finish a program,
press the button. It will make “PI”
“PI” sounds. Once the key is pressed it will
clear all cut numbers in the back also the
screen will be back to the first cut mark and
memorize all the setting.
2. Clear. Press it will make “PI” “PI”
sounds, once the key is pressed again, all
programs under the shift will be erased.
: Fast forward. Press & hold down the key, the
back gauge will move fast forward.
: Slow forward. Press and hold down the key, the
back gauge will move forward slowly.
How to use (recall) Existing Programs
Turn on the power to the guillotine, press ~
to select the program numbers which have been stored in your
controller, and select the required program, then press .
Please refer to previous pages for operation procedures. After you
have finished all cuts, re-press to remove the automatic
movement working.

: When the key is pressed and hold down, the
back gauge moves fast to the rear and stops at
the rear point, after the key is released the back
gauge moves forward 2 mm automatically
~ 13 ~ ~ 30 ~
: Press and hold down the key, the back gauge
moves slowly to the rear and stops at the rear
point. And it will move forward 2 mm
automatically when you released the key.
: When you make micro adjustment, you should
press & hold the key.
: First select the program number, press
the screen appears C&S. You can now setup the
required cut size. When the cut size is selected,
make a cut and the cut position will be auto
stored in the memory.
Parameters: (to set up)
If you want to enter the parameter it must be in Cipher Code, say (1234) as listed below:
Press , it appears X X X X
Press and , you can
select the following parameters on PROG 0:
1 : Rear calibration position size - If the size is incorrect, calibrate the rear position.
2 : Back gauge push-out size - To push out the paper forward when back gauge moves in reverse.
3 : Front safety size - smallest cutting length (with false clamp plate fitted)
4 : Empty slot - No function, setup as 0000. 5 : The size for high speed transition to low speed - The setting
for the slow movement distance before the back gauge fast moves to the desired cut position.
6 : The timing position for brake - The setting for the back gauge stops in advance before the back gauge moves to the rear end position.
7 : Back gauge moving back setting - The setting size for the back gauge to move in reverse, then slow forward (1.0 = 16 mm).
8 : Convert mm & inch - 0011 mm / 1111 inch ※ Any revisions on the parameter, you have to press or
key. ※ After revised the above mentioned parameters, press the
key to re-start the Mark-II programmatic.

: You have to confirm the start position of the shift
before the key is pressed. Press the key, it will
store the desired cut positions in order.
~ 14 ~
: In AUTO mode, press un (or
skip) over a certain cut size whic used,
and will go to the next cut in mem
: can be used together with
keys are used for making multiple
pieces (i.e. business cards) or for
: Press to re-star
programmatic and calibrate the po
Error Display
REAR SWITCH ERROR CHECK REAR SWITCH
Reason:
The back gauge has go over the back safety length range, touches the safety switch, so the back gauge can not be operate.
Solution:
, it will r
h is not
ory.
. These
cuts into more
1. Turn off the power.
2. turn the handle manually, move forward the back gauge into the safety range.
3. Turn on the power and the back gauge will be able to operate
~ 31 ~
two cuts trim.
t the Mark-II
sition size .
again. If not, please contact the nearest dealer for service.
PLEASE CHECK TOP SWReason:
1. The knife or the clamp is not back up at the top position.
2. The top switch of the knife or the clamp is not function.
Solution:
1. Check if the top knife / clamp switch faulty or functional.
2. Adjust the knife / clamp switch to the right position.

~ 15 ~ ~ 32 ~
How to use in MANUAL Operation
Turn on the power to the cutter, wait until the back gauge moves back and will recalibrate the position and display appears: (T will be a cursor flashing over at the last number, this is th k area.) M mode has two operating controls: 1. ack gauge moves with the manual keys below: If you press - entering 400.0, the screen appears: Press , the back gauge will move to the requested position.
ENCODER ERROR PLEASE CHECK ENCODER
Reason:
1. Display when switching on the power: Encoder faulty.
2. Display during operation: The bush could be too dry or too tight.
C : 490.0 PROG : 1
1 : 000.0 2 : 000.0 mmSolution:
1. Apply grease or oil on the bush, or do some necessary adjustment to it.
2. If it still not function, please contact the nearest dealer for service.
ENCODER ERROR CHASE A (g) B (w)
C : 490.0 PROG : 1
1 : 400.0 2 : 000.0 mm
Reason:
1. Wrong connection for the encoder wires.
(Only occur after changing the encoder )
Solution:
1. Switch the green wire and the white wire connection.
here e wor
anual
The b

Making a New Program
~ 16 ~ ~ 33 ~
Turn on the power to the cutter, wait until the back gauge moves back and will recalibrate the position and display appears: (There will be a cursor flashing over at the last number, this is the work area.) Select a program number from 1-9, if you press screen appears: If you want to make 3 cuts, the first cut is at 400.0, the second cut at 380.0, and the last cut at 205.0, follow the procedure as listed below: (I) Press , the following
screen appears: (II) Press screen appears:
DISPLAY
OVER TIME Reason: 1. Faulty of the encoder or the MRII PC board. C : 490.0 PROG : 1
1 : 000.0 2 : 000.0 mmSolution: 1. Please contact the nearest dealer for service.
PLEASE PRESS FAST REV KEYC : 490.0 PROG : 1
1 : 000.0 2 : 000.0 mmReason: 1. The back gauge is out of the safety length range at the front. Solution: 1. Please press to move backward the gauge into the
safety length range.
PLEASE PRESS FAST FWD KEYC : 490.0 PROG : 1
1 : 400.0 2 : 000.0 mmReason: 1. The back gauge is out of the safety length range at the back. Solution:
C : 490.0 PROG : 1
3 : 000.0 4 : 000.0 mm
1. Please press to move forward the gauge into the safety length range.
