dupioni silk 9-patch table topper skill level: intermediate · dupioni silk 9-patch table topper...
TRANSCRIPT
Designed ByDarlene Christopherson
Fabrics NeededDupioni Silk or cotton Eighteen 5 1/2” squares of various colored silk or cottonBacking - Cotton or silk 15 1/2” square
Materials NeededPellon® Fusible Sheerweight™ #906F 1/4 yardRick Rack Trim 3/4” wide 2 yardsThread 50 weight sewing thread - gray
Tools NeededSewing machine and related suppliesGeneral sewing suppliesRotary Cutting RulerRotary CutterRotary MatIronAccquilt® Go! Cutter** optionalGo!Cutter Heart Die optional
**http://accquilt.com
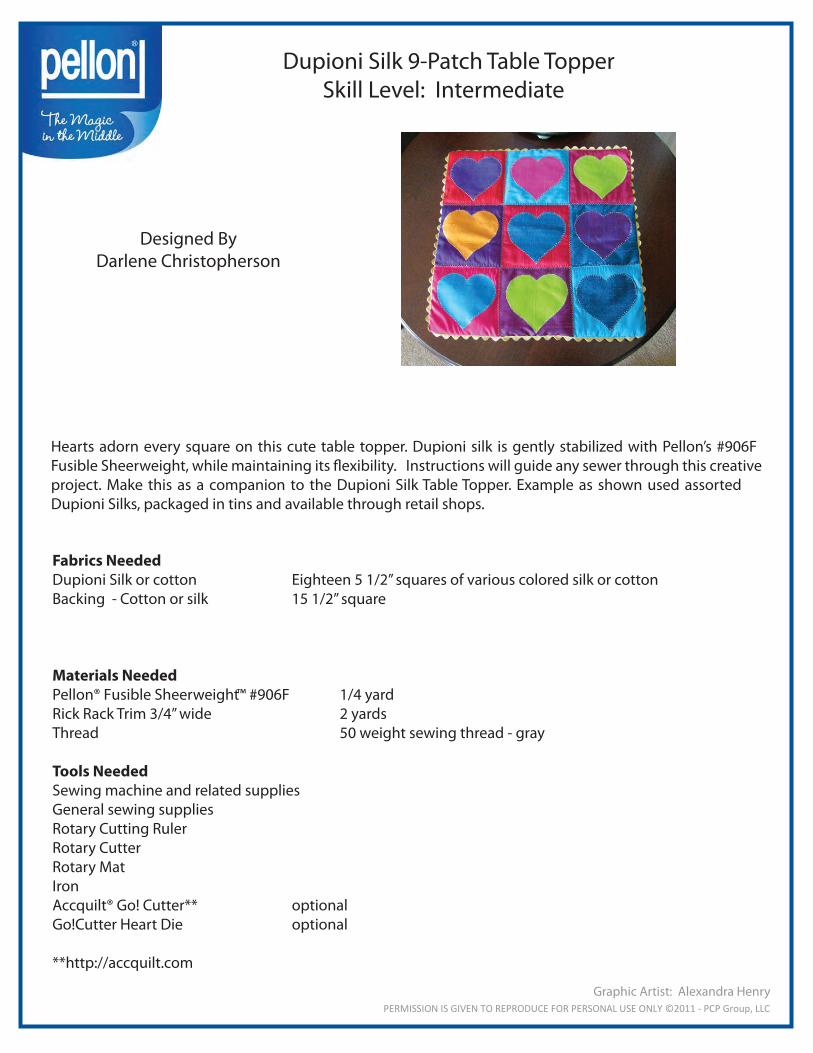
Hearts adorn every square on this cute table topper. Dupioni silk is gently stabilized with Pellon’s #906F
project. Make this as a companion to the Dupioni Silk Table Topper. Example as shown used assorted Dupioni Silks, packaged in tins and available through retail shops.
Dupioni Silk 9-Patch Table TopperSkill Level: Intermediate
PERMISSION IS GIVEN TO REPRODUCE FOR PERSONAL USE ONLY ©2011 - PCP Group, LLC Graphic Artist: Alexandra Henry

Graphic Artist Alexandra HenryPERMISSION IS GIVEN TO REPRODUCE FOR PERSONAL USE ONLY ©2011 - PCP Group, LLC
Cut nine 5 1/2” squares out of the Pellon® Sheerweight fusible interfacing. Fuse one piece on one side of each dupioni square following manufacturer’s instructions.
Cutting the Hearts
Use the large heart die and your Go! Cutter to cut 9 hearts from the 5 1/2” squares (optional).
OR
Use the heart template from the template page and trace and cut 9 hearts from the 5 1/2” squares.
Center a heart on one of the 5 1/2” squares, using two contrast-ing fabrics. Fuse in place. Do decorative stitching around the edge of the heart, such as blanket/buttonhole stitch, feather-stitch, or straight line stitching.
Page Two
Cutting and Sewing Instructions

Layout
Arrange the blocks as shown above. Sew rows across. Press seams for rows 1 and 3 to the right. Press seams for rows 2 to the left. Sew rows together. Press seams open.
Center and pin the rick rack onto the right side of the table topper along the outer perimeter seam line beginning at the middle of one side (1/4” from cut edge). Pin rick rack all the way around paying attention to the curve at the corners. Overlap the rick rack 1/2” when back at the beginning fold-ing under the top edge. Stitch in place through the center of the rick rack.
Page Three
Pin piping onto the right side of the table topper along the outer perimeter seam line beginning at the middle of one side. Pin piping all the way around paying attention to the curve at the corners. Overlap the piping 1/2” when back at the beginning. Stitch 1/8” from piping using a zipper foot.

Cut backing piece 15 1/2” square. Place on table topper, right sides together. Pin on all side, leaving a space on one side (not the side where the rick rack starts and stops) for turning topper. Stitch on the topper side right on top of the previous seam. Trim seam.
Turn right side out. Shape the edges with your �ngers. Slip stitch opening together.
PERMISSION IS GIVEN TO REPRODUCE FOR PERSONAL USE ONLY ©2011 - PCP Group, LLC
Graphic Artist: Alexandra HenryPage Four
Opening for turning

Template for Heart
Trace around heart only.