dual 11g/b poe access point - airlivefs.airlive.com/manual/airlive_g.duo_qsg.pdf · puede ser...
TRANSCRIPT

AirLive G.DUODual 11g/b PoE Access Point
Declaration of ConformityWe, Manufacturer/Importer
Declare that the productDual 11g/b PoE Access PointAirLive G.DUOis in conformity withIn accordance with 1999/5 EC-R & TTE Directive
Clause
Manufacturer/Importer
Description
OvisLink Corp.5F., NO.6, Lane 130, Min-Chuan Rd., Hsin-Tien City, Taipei County, Taiwan
■
■
■
■ CE marking
Signature:
Name:Albert Yeh
Position/ Title : Vice President Date:2009/09/01
EN 300328 V1.7.1 (2006-10)
EN 301489-1 V1.8.1(2008-04)
EN 60950-1 :2006+A11:2009
Electromagnetic compatibility and Radio spectrum Matters (ERM); Wideband transmission equipment operating in the 2.4GHz ISM band And using spread spectrum modulation techniques; Part 1:technical Characteristics and test conditions Part2:Harmonized EN covering Essential requirements under article 3.2 of the R&TTE Directive.
Electromagnetic compatibility and Radio spectrum Matters (ERM);
■ EN 301489-17 V1.3.2(2007-06) Electromagnetic compatibility(EMC) standard for radio equipment and Services; Part 17:Specific conditions for wideband data and HIPERLAN equipment
Safety for information technology equipment including electrical
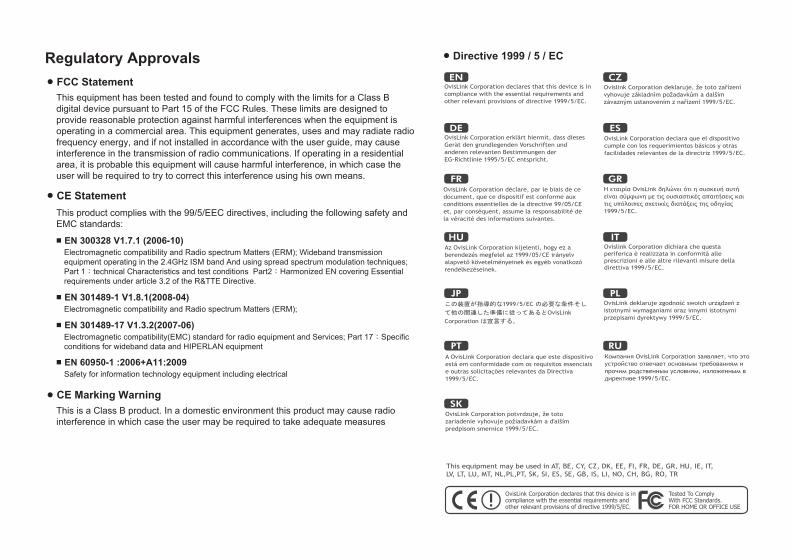
Regulatory ApprovalsFCC StatementThis equipment has been tested and found to comply with the limits for a Class B digital device pursuant to Part 15 of the FCC Rules. These limits are designed to provide reasonable protection against harmful interferences when the equipment is operating in a commercial area. This equipment generates, uses and may radiate radio frequency energy, and if not installed in accordance with the user guide, may cause interference in the transmission of radio communications. If operating in a residential area, it is probable this equipment will cause harmful interference, in which case the user will be required to try to correct this interference using his own means.
CE Marking WarningThis is a Class B product. In a domestic environment this product may cause radio interference in which case the user may be required to take adequate measures
CE StatementThis product complies with the 99/5/EEC directives, including the following safety and EMC standards:
EN 300328 V1.7.1 (2006-10) ■Electromagnetic compatibility and Radio spectrum Matters (ERM); Wideband transmission equipment operating in the 2.4GHz ISM band And using spread spectrum modulation techniques; Part 1:technical Characteristics and test conditions Part2:Harmonized EN covering Essential requirements under article 3.2 of the R&TTE Directive.
EN 301489-1 V1.8.1(2008-04)■Electromagnetic compatibility and Radio spectrum Matters (ERM);
EN 301489-17 V1.3.2(2007-06) ■Electromagnetic compatibility(EMC) standard for radio equipment and Services; Part 17:Specific conditions for wideband data and HIPERLAN equipment
EN 60950-1 :2006+A11:2009■Safety for information technology equipment including electrical
Directive 1999 / 5 / EC
Tested To ComplyWith FCC Standards.FOR HOME OR OFFICE USE
This equipment may be used in AT, BE, CY, CZ, DK, EE, FI, FR, DE, GR, HU, IE, IT, LV, LT, LU, MT, NL,PL,PT, SK, SI, ES, SE, GB, IS, LI, NO, CH, BG, RO, TR
OvisLink Corporation declares that this device is incompliance with the essential requirements andother relevant provisions of directive 1999/5/EC.

English
Important Notice:The default IP address is 192.168.1.254 DHCP server is "on" by default The default SSID for Radio 1 is: airlive1 The default SSID for Radio 2 is: airlive2 The default wireless mode is : "WISP Router + AP" mode The Passive POE Port is "LAN1". The Passive POE injector is not included. This is necessary only if you install the device in outdoor enclosure. Please set Radio 1 and Radio 2's channels as far apart as possible. It might be necessary to adjust the angle of the antennas to get the best performance
Installation Procedure:Connect the antennas to the G.DUO device. Connect the power adapter to the "Power" plug on the unit. Connect your PC to one of the "LAN" port using an Ethernet cable. Open your browser and type "192.168.1.254" to access the web management interface For more information, please refer to the User's Guide on the CD.
Česky
Důležité upozorněníDefaultní IP adresa je 192.168.1.254 Defaultně je DHCP server "on" Tovární SSID pro Radio 1 je: airlive1 Tovární SSID pro Radio 2 je: airlive2 Defaultní bezdrátový mód je : "WISP Router + AP" Pasivní POE Port je "LAN1". Pasivní POE injector není přiložen. toto je důležité, pokud budete instalovat zařízení do venkovního krytu. Prosím nastavte kanály Rádia 1 a Rádia 2 daleko od sebe, jak to jen jde. Pro zlepšení signálu je dobré nastavit úhly antén.
Installation Procedure:Připojte antény k zařízení G.DUO. Připojte napájení elektrickou energií. Připojte k počítači pomocí LAN kabelu. Otevřete webový prohlížeč a napište adresu "192.168.1.254" a vstupte do nastavení zařízení. Pro více informací se podívejte do návodu na instalačním CD.
Deutsch Español
Wichtiger Hinweis:Die voreingestellte IP lautet 192.168.1.254 Der DHCP Server ist standarmäßig eingeschaltet Die voreingestellte SSID des Senders 1 lautet: airlive1 Die voreingestellte SSID des Senders 2 lautet airlive2 Der voreingestellte WLAN Modus ist: "WISP Router + AP" ModusDer passive POE Port ist "LAN1". Der passive POE Injektor wird nicht mitgeliefert. Er wird nur benötigt, wenn das Gerät im Außengehäuse genutzt wird. Bitte halten sie den Kanal-Abstand der Sender 1 und Sender 2 so hoch wie möglichUnter Umständen ist es nötig, den Winkel der Antennen anzupassen.
Installation Procedure:Verbinden Sie die Antennen mit dem G.DUO.Verbinden Sie das Stromkabel mit dem Gerät. Verbinden Sie einen PC mit einem "LAN" Port unter Verwendung eines normalen Ethernet Kabels. Öffnen Sie einen Browser und geben als Adresse "192.168.1.254" ein, um din das Web Management zu gelangen. Für mehr Informationen sehen Sie bitte im Benutzerhandbuch auf der beiliegenden CD nach.
Noticia importante: La dirección IP por default es 192.168.1.254 El servidor DHCP está en "on" por default SSID por default para Radio 1 es: airlive1 SSID por default para Radio 2 es: airlive2 Modo inalámbrico por default es: "WISP Router + AP" mode El puerto del POE pasivo es "LAN1". El inyector POE pasivo no está incluído. Su uso es necesario si instala el dispositivo en el exterior Favor de fijar los canales de Radio 1 y Radio 2 lo más apartado posible Puede ser necesario ajustar el ángulo de la antena para obtener un mejor rendimiento
Pasos de la instalación:Conecte la antena al dispositivo G.DUO Conecte al adaptador de corriente al "Power" de la unidad Conecte su PC a uno de los puertos "LAN" usando el cable Ethernet Abra el buscador y tipee "192.168.1.254" para acceder a la interfaz de administración de web Para mayor información, favor de referirse a la Guía del Usuario(User's Guide) en el CD
Quick Setup Guide
AirLive G.DUODual 11g/b PoE Access Point
1.2.3.4.
5.
1.2.3.4.
5.
1.2.3.
4.
5.
1.2.3.4.
5.
P1
RESET RF1POWERDC 12V
WAN / LAN1
PoE
LAN2LAN3LAN4
LAN PowerPC
IP: 192.168.1.1
G.DUO IP: 192.168.1.254
1 12
3RF2 RF2

Quick Setup Guide
AirLive G.DUODual 11g/b PoE Access Point
Importante Notícia:O endereço IP padrão é 192.168.1.254 O DHCP Server está por defeito "on" O SSID padrão para o Rádio 1 é: airlive1 O SSID padrão para o Rádio 2 é: airlive2 O modo wireless por defeito é : modo "WISP Router + AP" A Porta Passive POE é "LAN1" O injector POE Passivo não está incluído. Isto é somente necessário se instalar o dispositivo num recinto ao ar livre Por favor, defina os canais do Rádio 1 e do Rádio 2 tão distantes quanto possível. Poderá ser necessário ajustar o angulo das antenas para obter um melhor desempenho
Procedimento de Instalação:Conecte as antenas ao dispositivo G.DUO Conecte o adaptador de energia no orificio "Power" da unidade Conecte o seu PC a um Porta "LAN" usando um cabo Ethernet Abra o seu explorador e digite "192.168.1.254" a fim de aceder ao interface do gestor web Para mais informação, consulte por favor o Guia de Utilizador no seu CD.
Ważne informacje:Standardowy adres IP urządzenia 192.168.1.254 Serwer DHCP jest domyślnie włączony SSID dla Radia 1 ustawiono na: airlive1 SSID dla Radia 2 ustawiono na: airlive2 Tryb urządzenia ustawiony domyślnie to : "WISP Router + AP" mode Port POE pasywnego obsługuje "LAN1". Zestaw nie zawiera injectora POE. Jest on niezbędny tylko w przypadku montowania urządzenia na zewnątrz. Proszę o ustawienie skrajnie możliwych kanałów dla Radia 1 i 2. Proszę pamiętać o ustawieniu anteny urządzenia w pozycji, zapewniającej najlepszy sygnał WiFi.
Procedura Instalacji :Podłącz anteny do urządzenia G.DUO. Podłącz kabel zasilający do portu "Power" urządzenia. Podłącz komputer PC do jednego z portów "LAN" za pomocą kabla typu Ethernet. Otwórz dowolną przeglądarkę internetową i w pisz adres "192.168.1.254", by dostać się do panelu zarządzania urządzeniem. Szczegółowa instrukcja znajduje się na dołączonej płycie „CD”
PolskiPortuguês
1.2.3.4.
5.
1.2.3.
4.
5.
Dôležité upozornenie:Predvolená IP adresa je 192.168.1.254.DHCP je podľa výrobných nastavení zapnuté.Predvolené SSID pre vysielač 1 je „airlive1“.Predvolené SSID pre vysielač 2 je „airlive2“.Predvolený bezdrôtový režim je: „WISP smerovač + AP".Pasívny POE port je „LAN1“. Pasívny POE adaptér nie je súčasťou balenia. Je potrebný iba v prípade, že inštalujete zariadenie vo vonkajšom puzdre.Prosím nastavte pracovné kanály vysielaču 1 a vysielaču 2 čo najďalej od seba ako to je len možné.Pre získanie najvyššieho výkonu môže byť nevyhnutné prispôsobiť uhol antén.
Procedúra inštalácie:K zariadeniu G.DUO pripojte antény.Do konektoru „Power“ pripojte napájací adaptér.S použitím sieťového káblu pripojte jeden počítač do LAN portu.Otvorte prehliadač internetu a pre prístup k web manažmentu zadajte adresu „192.168.1.254“.Viac informácií nájdete v manuáli na priloženom disku CD.
Важное примечание:IP адрес по умолчанию: 192.168.1.254 DHCP сервер по умолчанию включен SSID для радио 1 по умолчанию: airlive1 SSID для радио 2 по умолчанию: airlive2 Беспроводной режим по умолчанию: «WISP маршрутизатор + точка доступа» Пассивный POE порт: LAN1 Пассивный POE инжектор не прилагается. Он необходим только при установке устройства в наружном корпусе. Пожалуйста, настройте каналы радио 1 и радио 2 на максимально разные величины. Возможно, Вам придется подрегулировать угол антенны для лучшей работы устройства.
Установка:Подключите антенну к G.DUO устройству.Подключите адаптер питания к соответствующему разъему устройства.Подключите Ваш компьютер к одному из LAN портов используя Ethernet кабель.Откройте браузер и введите "192.168.1.254". Откроется страница web менеджмента.Для дополнительной информации, пожалуйста, обратитесь к «руководству пользователя» доступном на компакт-диске.
РусскийSlovensky
1.2.3.4.
5.
1.2.
3.
4.
5.
Fontos információk:Az alapértelmezett IP-cím: 192.168.1.254.A DHCP alapértelmezés szerint be van kapcsolva.Az 1-es jeladó alapértelmezett SSID-je: airlive1A 2-es jeladó alapértelmezett SSID-je: airlive2Az alapértelmezett vezeték nélküli mód: WISP Router + APA passzív POE port a LAN1 csatlakozó.A passzív POE porthoz az injektor nem tartozék. Erre a kiegészítőre csak akkor lesz szüksége, ha az eszközt kültéren szeretné üzembe helyezni.Az 1-es és 2-es jeladó működési csatornáját, amennyire lehet, állítsa egymástól távol.Lehetséges, hogy az optimális jelminőség eléréséhez az antennák pozícióját módosítania kell.
A telepítés lépései:Csatlakoztass az antennákat a készülékhez.Csatlakoztassa a tápegységet, majd dugja be a hálózati csatlakozóba.Kösse a számítógépet a G.DUO egyik LAN csatlakozójához.Nyissa meg az Internet Explorert majd a címsorba gépelje be: 192.168.1.254: így hozzáférhet a webes kezelőfelülethez.További információkat a telepítő CD-n talál.
Σημείωση:Η εργοστασιακη IP διευθυνση είναι 192.168.1.254 Ο DHCP server είναι ενεργοποιημενος Το 1ο ασυρματο δίκτυο SSID εχει όνομα airlive1 Το 2ο ασυρματο δίκτυο SSID εχει όνομα airlive2 Η εργοστασιακή ρυθμιση της συσκευης είναι "WISP Router + AP" Η θυρα POE είναι η "LAN1". Ο παροχέας POE δεν περιλαμβανετε στην συσκευη. Είναι απαραιτητος μονο για την εξωτερικη τοποθετηση της συσκευης. Ορίστε τα καναλια των 2 ασυρματων δικτύων οσο πιο μακρια γίνετε. Όρίστε την κατευθυνση των κεραιων για να μεγιστοποιήσετε την αποδοση του σήματος σας.
Διασικασία εγκαταστασης:Συνδεστε τις κεραίες στην συσκευη G.DUO. Συνδεστε τον μετασχηματιστη στην συσκευη και την πριζα. Συνδεστε μεσω καλωδίου LAN το PC σας σε μια από τις θυρες "LAN". Ανοιξτε τον browser σας και πληκτρολογίστε "192.168.1.254" για να συνδεθείτε και να ρυθμίσετε το router σας Για περισσοτερες πληροφορίες συμβουλευτειτε το εγχειρίδιο χρήσης.
Magyar Ελληνικός
1.2.3.4.
5.
1.2.3.4.
5.
P2