
VCARA Presentation
November 25, 2014 By Cliff Pulis, KE0CP
What the heck is an Arduino anyway?
What are they useful for?
How do they work?
The lightning sensor
The hardware
The software
Putting it all together
The Arduino Lightning Detector KE0CP 2

The gory details
How to write an Arduino program
How to work with a breadboard
How to solder
The Arduino Lightning Detector KE0CP 3
The idea for this project came from Arduino for Ham Radio by Glen Popiel, KW5GP, an ARRL publication.
The ides for enhancement came from your’s truly, KE0CP
The Arduino Lightning Detector KE0CP 4

This is an overview, not a tutorial! If you want more detail get the Arduino for
Ham Radio book
But, if you’re curious as I was, you can get lots of information from the official Arduino site: http://arduino.cc/
And from https://adafruit.com and https://www.sparkfun.com …and others.
These sites have training materials too.
The Arduino Lightning Detector KE0CP 5
A small microprocessor, or microcontroller, (computer chip) on a board with additional components so you can breadboard projects that typically read sensors
Arduino is one of many such microcontrollers
It was developed in Italy as a computer teaching platform and is Open Source
The popular Arduino Uno R3 is about $25.
It is programmed with a simple software language
The Arduino Lightning Detector KE0CP 6
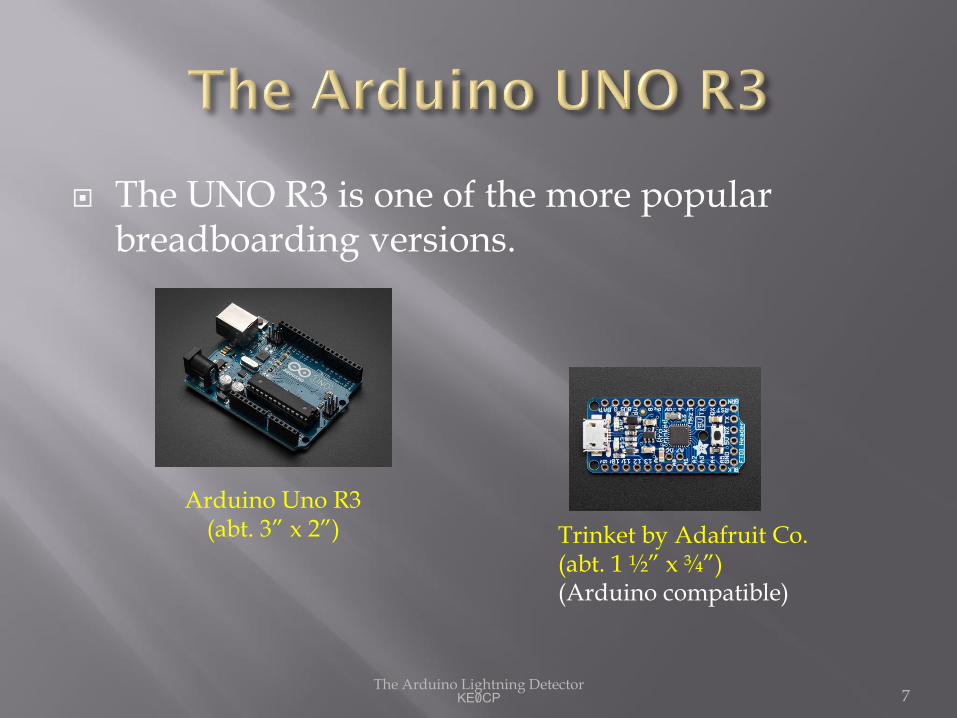
The UNO R3 is one of the more popular breadboarding versions.
The Arduino Lightning Detector KE0CP 7
Arduino Uno R3 (abt. 3” x 2”) Trinket by Adafruit Co.
(abt. 1 ½” x ¾”) (Arduino compatible)
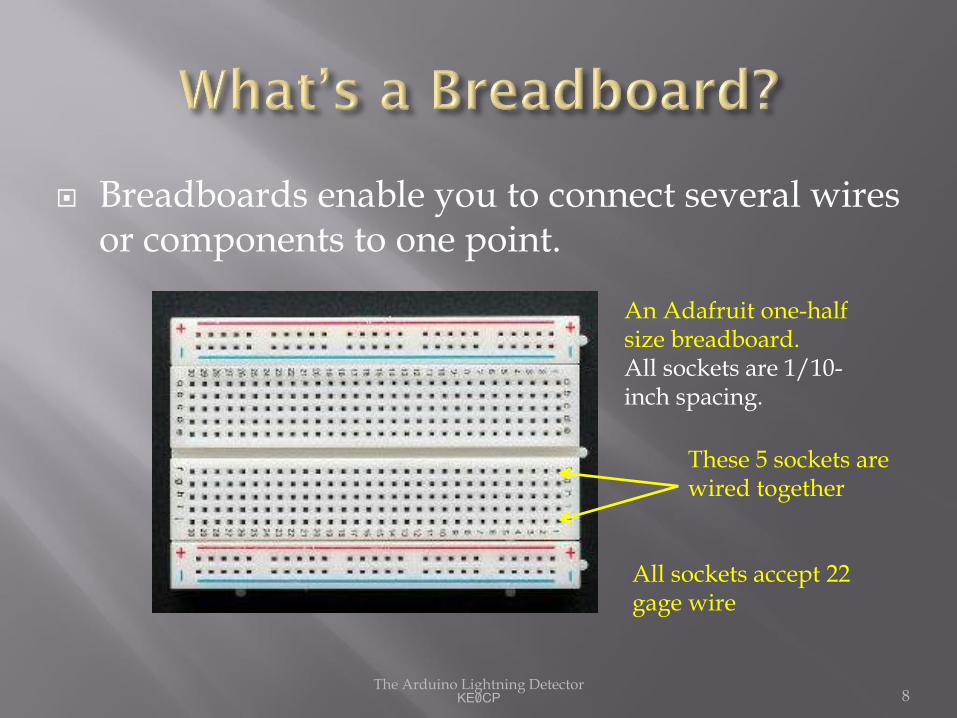
Breadboards enable you to connect several wires or components to one point.
The Arduino Lightning Detector KE0CP 8
An Adafruit one-half size breadboard. All sockets are 1/10-inch spacing.
These 5 sockets are wired together
All sockets accept 22 gage wire

Some boards can be stacked to save wiring time.
When your project is working you can build the final version with a smaller board (like the Trinket mentioned earlier)
The Arduino Lightning Detector KE0CP 9
An Arduino Proto shield with headers – fits on top of the Arduino Uno R3 board

Some breadboarding can get pretty crazy while you wire and test the project.
The Arduino Lightning Detector KE0CP 10
Arduino board One-half size
Breadboard
Display inserted into
breadboard
You can build a project around almost anything you can sense in the physical world.
There are lots of sensors available:
Weather parameters
Motion, speed and positon detection
Electrical sensing
Fluid sensing
Etc.
All it takes is some inexpensive hardware and relatively simple programming.
The Arduino Lightning Detector KE0CP 11

In addition to the sensor and microcontroller you need some type of display.
Some are the size of a cell phone display, or smaller.
The Arduino Lightning Detector KE0CP 12
Nokia 5110 84x48 pixels (abt. 1 ½” x 1 ¾”)
16x2-line display
(abt. 1” x 3”)
Microcontroller projects are useful for indicating what is being sensed in the world around you and for controlling things.
They can read sensors, like reporting lightning strikes, distance and intensity.
My next project is to read and report how much energy is being drawn from our RV batteries. It will report instantaneous voltage, current drain and kilowatt-hours used since last reset. Estimated cost: under $70.
The Arduino Lightning Detector KE0CP 13

A short software program, a sketch, is written that tells the microcontroller what to do.
The sketch is written on a PC using free development software and downloaded to the microcontroller through a USB cable.
If it doesn’t work, change the sketch and download again.
The Arduino Lightning Detector KE0CP 14
The sketch for the lightning sensor does the following:
The Arduino Lightning Detector KE0CP 15
Declare storage places for values needed in the sketch
Tell the microcontroller how various pins will be used (input, output, etc.)
Begin the main loop
If a strike is detected, compute the strength and distance & send information to the display
Else compute time lapsed since last strike & display.
Loop again

The completed lightening detector project
The Arduino Lightning Detector KE0CP 16
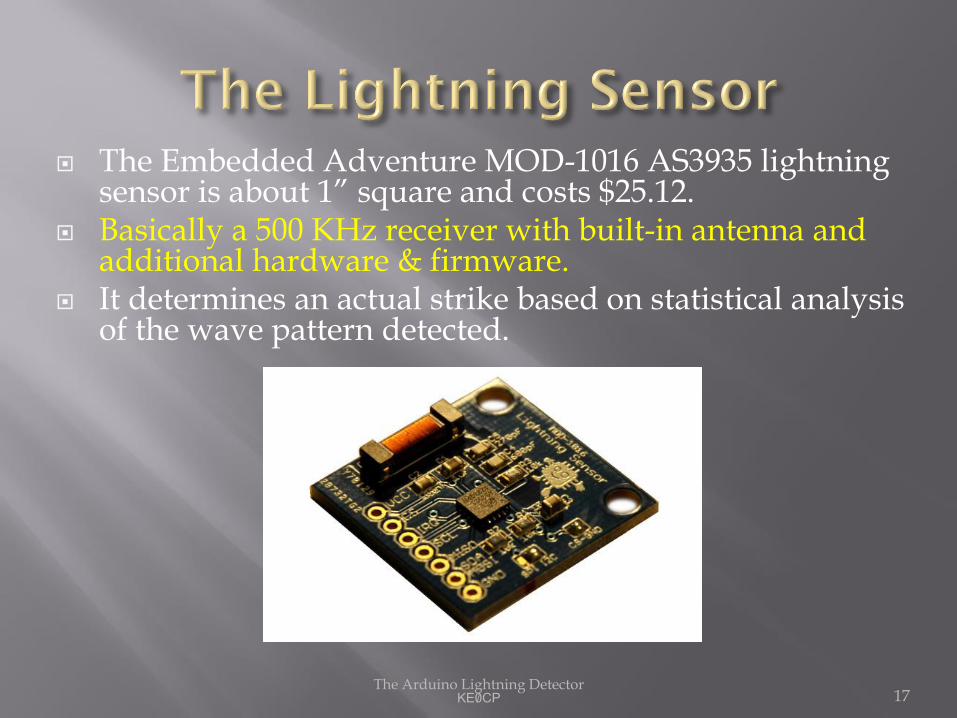
The Embedded Adventure MOD-1016 AS3935 lightning sensor is about 1” square and costs $25.12.
Basically a 500 KHz receiver with built-in antenna and additional hardware & firmware.
It determines an actual strike based on statistical analysis of the wave pattern detected.
The Arduino Lightning Detector KE0CP 17
The Arduino Lightning Detector KE0CP 18
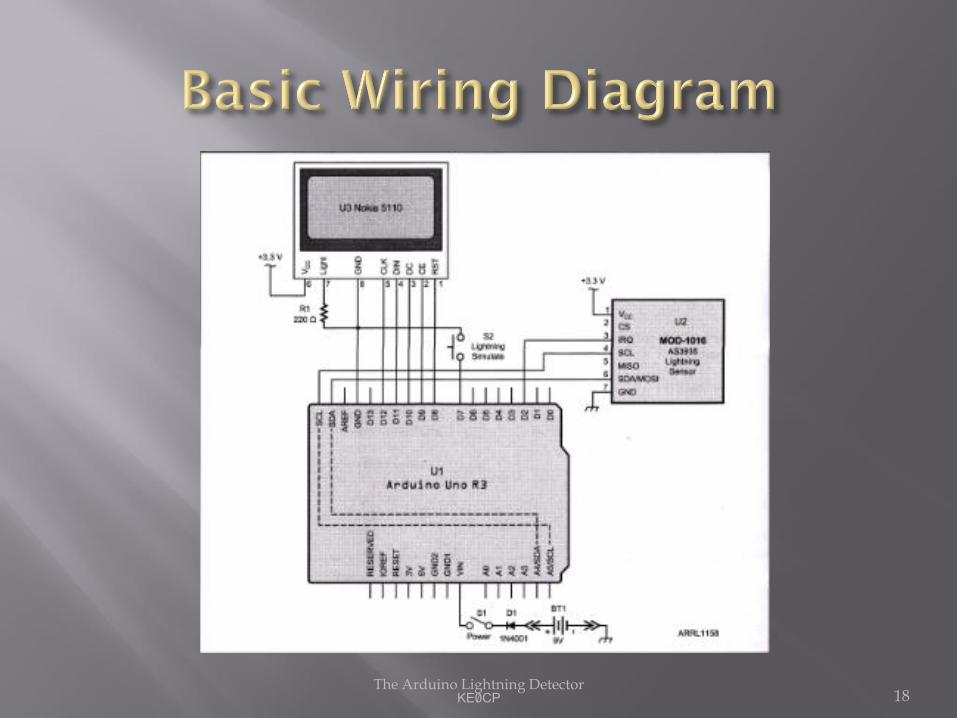
As you saw from the diagram there isn’t much wiring needed.
The Arduino, display and sensor do the work.
Once wired, connect the Arduino’s USB to the PC’s USB port.
Transfer the sketch to the Arduino.
The sketch runs automatically once it’s loaded.
The Arduino Lightning Detector KE0CP 19
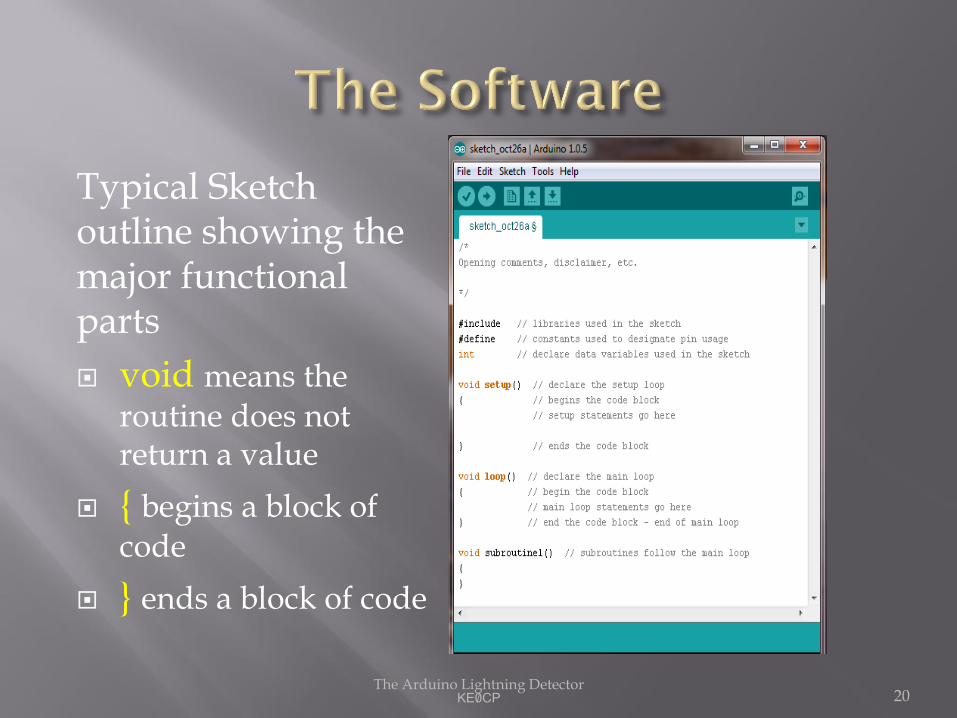
Typical Sketch outline showing the major functional parts
void means the routine does not return a value
{ begins a block of code
} ends a block of code
The Arduino Lightning Detector KE0CP 20

#include identifies library routines used in the sketch
#define defines constant values such as microcontroller pin numbers
The Arduino Lightning Detector KE0CP 21

int, string, etc define names of data storage locations used in the sketch and declare the data type such as integer and string
The Arduino Lightning Detector KE0CP 22
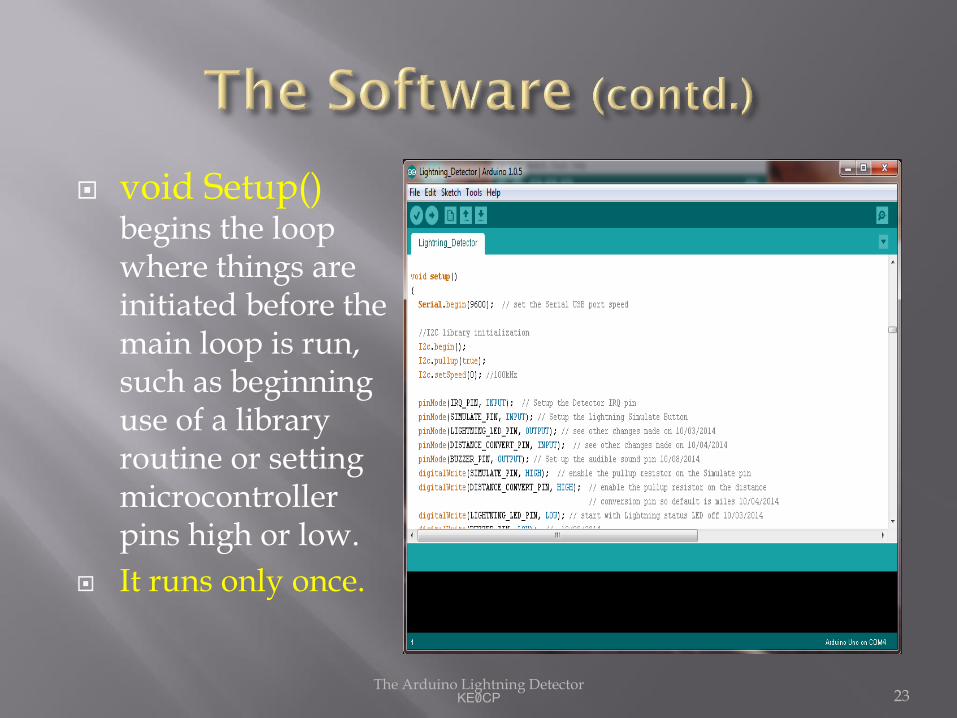
void Setup() begins the loop where things are initiated before the main loop is run, such as beginning use of a library routine or setting microcontroller pins high or low.
It runs only once.
The Arduino Lightning Detector KE0CP 23

void loop() begins the main program loop where the bulk of the work is done.
It runs until the sketch is stopped by removing power to the Arduino.
The Arduino Lightning Detector KE0CP 24

The detector reports actual lightning strikes (as
opposed to man-made noise) up to 40km (24mi) away.
It detects cloud-to-ground and cloud-to-cloud lightning.
It reports the relative intensity of the strike. The sketch scales the intensity to 1 through 10 (lowest to highest.)
It reports the lapsed time since the last strike, the average intensity and total number of all strikes detected since last reset.
The Arduino Lightning Detector KE0CP 25
It gives audible and visible indication of a strike.
It has a simulate/reset mode so you can test the detector.
The Arduino Lightning Detector KE0CP 26
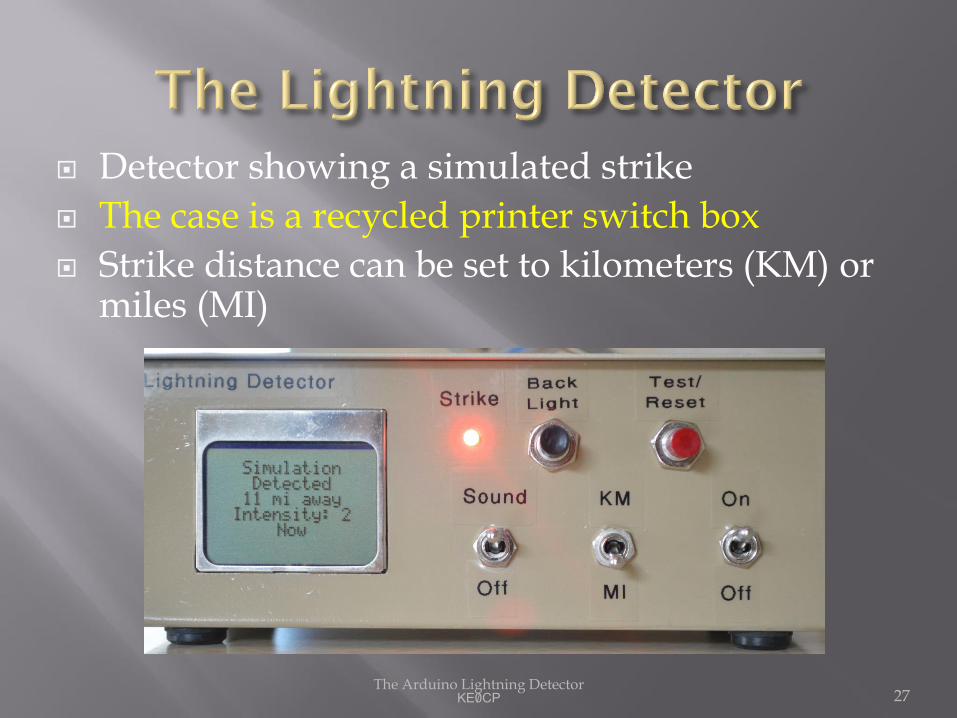
Detector showing a simulated strike
The case is a recycled printer switch box
Strike distance can be set to kilometers (KM) or miles (MI)
The Arduino Lightning Detector KE0CP 27

Inside the box showing inner Altoids shielding box & 9-volt battery
The Arduino Lightning Detector KE0CP 28
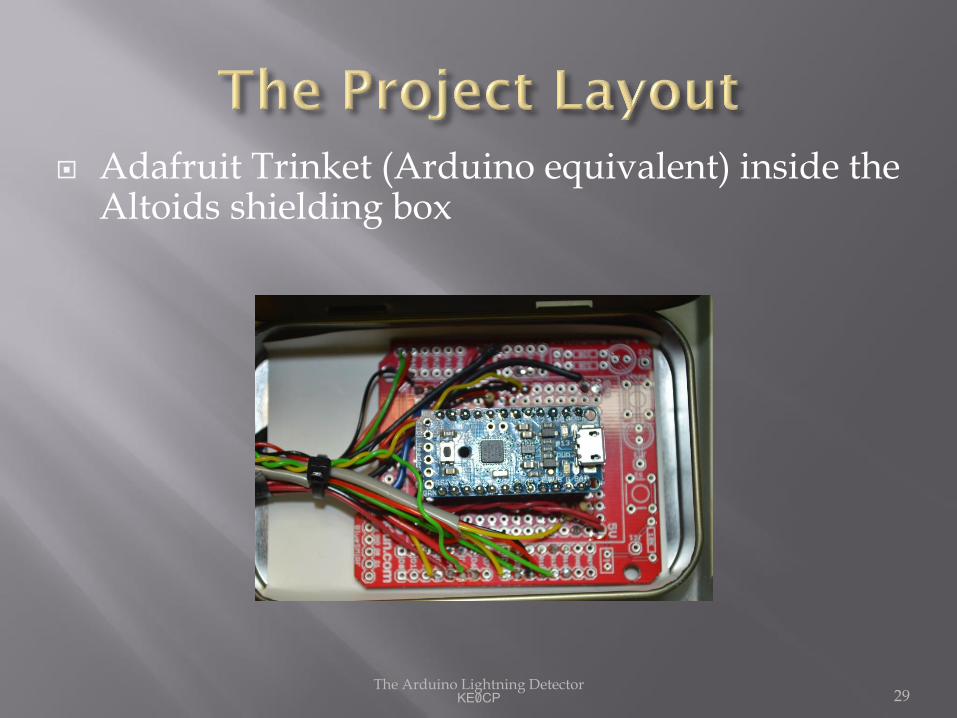
Adafruit Trinket (Arduino equivalent) inside the Altoids shielding box
The Arduino Lightning Detector KE0CP 29

MOD-1016 AS3935 lightning sensor inside a plastic candy bubble
The Arduino Lightning Detector KE0CP 30
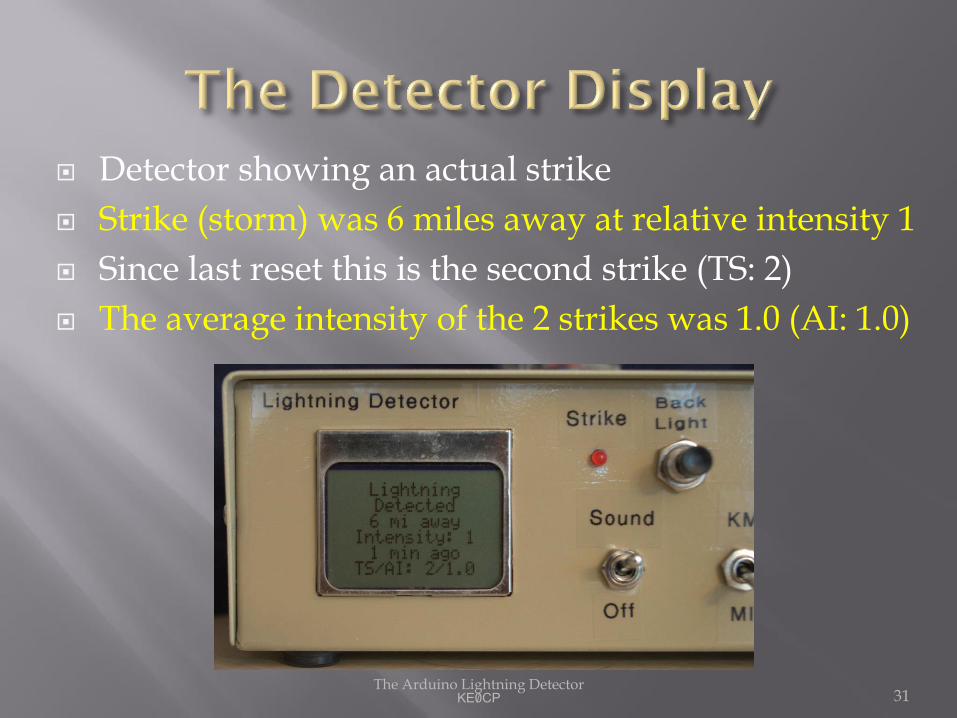
Detector showing an actual strike
Strike (storm) was 6 miles away at relative intensity 1
Since last reset this is the second strike (TS: 2)
The average intensity of the 2 strikes was 1.0 (AI: 1.0)
The Arduino Lightning Detector KE0CP 31
It works very well and can even detect lightning that is not heard because of the strike’s distance from the sensor (> 6 miles).
It’s great to have on hand so you can disconnect antenna cables before lightning gets close.
It’s battery operated (9-volt typical, 7 to 16 volts if using
an Adafruit Trinket) , so you can take it with you on outings.
The Arduino Lightning Detector KE0CP 32
While the lightning detector does a fine job of detecting lightning you should never depend on it in situations where your life could be in danger.
It is not intended to be a substitute for exercising common sense and good judgment when severe weather is near.
The Arduino Lightning Detector KE0CP 33

The Arduino Lightning Detector KE0CP 34
QTY Item Cost
1 Adafruit Trinket 3.3-volt version $9.95
1 Nokia 5110 84x48 pixels $9.95
1 Embedded Adventure MOD-1016 AS3935 lightning sensor
$25.12
3 SPST toggle switches $10.47
2 Momentary pushbutton switches $5.00
1 Red LED $0.20
1 Recycled printer switch box
1 Outer Case & Altoids tin (inner shield)
1 Clear plastic bubble (Candy Wrapper Favors)
$0.50
Misc Trinket header pins, socket, wire
Total Approximate Cost $61.19
www.blitzortung.org – map of lightning strikes, world-wide (click on Cover your Area tab for info on building a lightning detector to participate in their program)
www.lightningmaps.org/realtime/ - zoomable maps of strikes, world-wide
www.embeddedadventures.com/as3935_lightning_sensor_module_mod-1016.html - for info on the lightning sensor & how it works
“Listening for Lightning at VLF”, Steve Ford; QST – December 2014, p. 54.
The Arduino Lightning Detector KE0CP 35


