
QUIZMAKER ’09
Documentation
a
Quizmaker ’09 Documentation
General 4
System Requirements for Quizmaker ’09 4
Installing Quizmaker ’09 5
Activating Quizmaker ’09 6
Creating & Opening Quizzes 8
Creating Quizzes from Design Templates 9
Printing & Emailing Quizzes 10
Running the Spell Check 11
Inserting Symbols 12
Quizmaker Options 13
Managing Questions 16
Managing the Question List 16
Inserting Questions 18
Inserting a Blank Slide 19
Inserting a Question Group 21
Editing Questions 22
Randomizing Groups & Locking Questions 23
Importing Questions 25
Form View 26
Formatting Text in Form View 26
Adding Hyperlinks in Form View 27
Adding Media in Form View 29
Adding Audio in Form View 31
Supported Audio Formats 35
Graded Questions 36
Creating a Graded Question 36
True/False 37
Multiple Choice 39
Multiple Response 42
Fill in the Blank 45
Word Bank 47
Matching Drag and Drop 50
Matching Drop-down 52
Sequence Drag and Drop 54
© 2009 Articulate Global, Inc. articulate.com Page 1 of 155
Quizmaker ’09

Sequence Drop-down 56
Numeric 58
Hotspot 61
Survey Questions 64
Creating a Survey Question 64
Likert Scale 65
Pick One 67
Pick Many 70
Which Word 72
Short Answer 75
Essay 77
Ranking Drag and Drop 79
Ranking Drop-down 81
HowMany 83
Results 85
Question Results Feedback and Branching 85
Quiz Results Slide 86
Quiz Pass Result Slide 87
Quiz Fail Result Slide 89
Slide View 91
Customizing Questions in Slide View 91
Home Tab 92
Insert Tab 95
Options Tab 96
Design Tab 97
Animations Tab 101
View Tab 104
Format Tab 106
Timeline 107
Drawing Tools 109
Picture Tools 111
Formatting Shapes 114
Movie Tools 120
Sound Tools 123
Player Templates 125
Managing Player Templates 125
Layout 127
Navigation 129
© 2009 Articulate Global, Inc. articulate.com Page 2 of 155
Quizmaker ’09

Text Labels 131
Colors and Effects 133
Other 135
Quiz Properties 137
Managing Quiz Properties 137
Quiz Info 138
Question Defaults 139
Publishing 140
Previewing Quizzes 140
Publishing Quizzes 141
Publish to Articulate Presenter 142
Publish to Web 144
Publish to Articulate Online 146
Publish to Your LMS 148
Publish to CD 151
Publish to Word 153
Publish Success 155
© 2009 Articulate Global, Inc. articulate.com Page 3 of 155
Quizmaker ’09
General
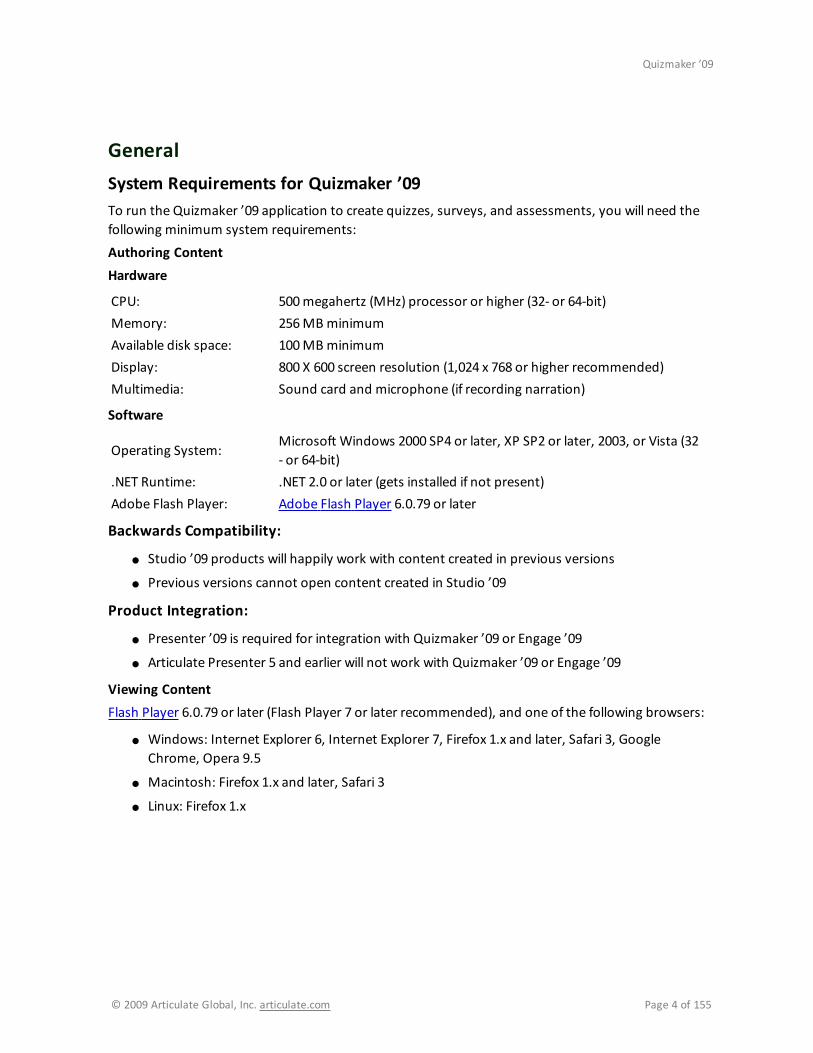
System Requirements for Quizmaker ’09
To run the Quizmaker ’09 application to create quizzes, surveys, and assessments, you will need the
following minimum system requirements:
Authoring Content
Hardware
CPU: 500megahertz (MHz) processor or higher (32- or 64-bit)
Memory: 256MBminimum
Available disk space: 100MBminimum
Display: 800 X 600 screen resolution (1,024 x 768 or higher recommended)
Multimedia: Sound card and microphone (if recording narration)
Software
Operating System:Microsoft Windows 2000 SP4 or later, XP SP2 or later, 2003, or Vista (32
- or 64-bit)
.NET Runtime: .NET 2.0 or later (gets installed if not present)
Adobe Flash Player: Adobe Flash Player 6.0.79 or later
Backwards Compatibility:
● Studio ’09 products will happily work with content created in previous versions
● Previous versions cannot open content created in Studio ’09
Product Integration:
● Presenter ’09 is required for integration with Quizmaker ’09 or Engage ’09
● Articulate Presenter 5 and earlier will not work with Quizmaker ’09 or Engage ’09
Viewing Content
Flash Player 6.0.79 or later (Flash Player 7 or later recommended), and one of the following browsers:
● Windows: Internet Explorer 6, Internet Explorer 7, Firefox 1.x and later, Safari 3, Google
Chrome, Opera 9.5
● Macintosh: Firefox 1.x and later, Safari 3
● Linux: Firefox 1.x
© 2009 Articulate Global, Inc. articulate.com Page 4 of 155
Quizmaker ’09

Installing Quizmaker ’09
Here’s how to install Quizmaker ’09 on your system:
1. Download the Studio ’09 installer.
2. Double-click Studio09.exe to run the installation program (any previous version will be
automatically uninstalled).
3. When the installer completes, double-click the Articulate Quizmaker ’09 icon on your desktop.
4. During your 30-day trial (or until you’re ready to purchase the software), click Activate Laterwhen prompted to activate the software.
5. After you have purchased the software, Activate Quizmaker ’09.
© 2009 Articulate Global, Inc. articulate.com Page 5 of 155
Quizmaker ’09

Activating Quizmaker ’09
After you’ve installed Quizmaker ’09, you’ll have 30 days of trial period, after which you need to
activate your software using the serial number you received when you purchased it.
Here’s how to do it:
Automatic Activation
1. Click the button to Activate Now.
2. Copy and paste your serial number into the field provided.
3. Click theActivate button to complete the activation process.
4. Optionally, click Register Now to register your software.
You will not be prompted to activate again.
Note: You may need to configure your firewall to allowQuizmaker.exe to communicate with the
Articulate activation servers.
If you have difficulty activating using the automatic method, refer to the below section for how to
request an email-based activation.
Manual Activation
1. Click the button to Activate Now.
2. Copy and paste your serial number into the field provided.
3. Click theActivate button to attempt automatic activation.
4. After you see that the automatic activation method has failed — you will see this message:
“We are unable to contact our activation server. Please try manual activation.” — click OK.
5. On themanual activation screen, click the link to Send an email to Articulate Support to
get an activation code.
6. A new email message should open in your email program; if one does not, email the following
details to [email protected]:
● Serial Number (copy and paste from themanual activation screen into email)
● Machine Code (copy and paste from themanual activation screen into email)
● Any comments about your request
7. After sending the email to Articulate Support, you should receive an automated case
confirmation email within 1minute (60 seconds) of submission.
8. Wewill process your manual activation request as quickly as possible, typically within 30 to 60
minutes (24×7).
9. When you receive theActivation Code from Articulate Support, paste it into themanual
activation screen in the specified field.
10. Click Activate Now to complete themanual activation process.
© 2009 Articulate Global, Inc. articulate.com Page 6 of 155
Quizmaker ’09

You will not be prompted to activate again.
If you are still having difficulty activating after trying both of the abovemethods, please contact
Articulate Support.
© 2009 Articulate Global, Inc. articulate.com Page 7 of 155
Quizmaker ’09
Creating & Opening Quizzes
A quiz or survey can be stand-alone or integrated into your Presenter ’09 presentation or elearning
course. A quiz or survey can contain any number and any combination of questions.
Creating new quizzes or surveys
There are threemethods for creating a new quiz or survey:
1. Click Create a new quiz from the welcome screen:
2. SelectNew from the Articulate Button.
3. Press Ctrl-N on your keyboard.
Next, theNew Quiz windowwill open. You can choose to create a graded quiz or a survey:
● Click Graded Quiz for a quiz that will be scored. Graded quizzes contain one or more graded
questions and can also contain survey questions. Click OK to create a graded quiz. To learn
more about graded questions, see Creating a Graded Question.
● Click Survey for a quiz made up entirely of survey questions. A survey quiz will not be scored.
Click OK to create a survey quiz. To learn more, see Creating a Survey Question.
Opening existing quizzes or surveys
There are threemethods for opening an existing quiz or survey:
1. Click the name of one of your most recent quizzes on the welcome screen.
2. SelectOpen from the Articulate Button.
3. Press Ctrl-O on your keyboard.
Quizmaker ’09 can open the following types of files:
● Quizmaker ’09 files (.quiz)
● Quizmaker ’09 templates (.quiztemplate)
● Legacy Quizmaker 2.x and Quizmaker 1.x files (.aqm)
© 2009 Articulate Global, Inc. articulate.com Page 8 of 155
Quizmaker ’09

Creating Quizzes from Design Templates
Quizmaker ’09 design templates contain everything you want to have in your quizzes by default,
including the following:
● Quiz properties
● Quiz design (Master view layout)
● Quiz fonts
● Player Template
● Any quiz questions that you always want to include
To create a Quizmaker ’09 design template:
1. Launch Quizmaker ’09 and create a quiz with the desired default properties, design, questions,
etc. (refer to above list).
2. Click theArticulate menu and Save As to save your quiz as a template.
3. Provide a File name for your quiz template.
4. SelectQuizmaker Template (*.quiztemplate) from the Save as type drop-down menu.
5. Click Save to save your newQuizmaker ’09 design template.
To open a Quizmaker ’09 design template:
1. Launch Quizmaker ’09 and click the name of the desired template beneath theNew from
design template area of the welcome screen.
2. Alternatively, click theMore… link beneath theNew from design template area of the
welcome screen.
3. Create your quiz as you would normally do.
4. Save your new quiz, and by default, it will save as a .quiz file.
© 2009 Articulate Global, Inc. articulate.com Page 9 of 155
Quizmaker ’09

Printing & Emailing Quizzes
In Quizmaker ’09, you can print or email a quiz or survey.
To print a quiz or survey in Quizmaker ’09:
1. Click theArticulate Button.
2. Click the Print option. Keyboard shortcut: Ctrl+P.
3. The Publish dialog will open with theWord tab selected.
4. Under Publish Location, specify the Folder where you would like your quiz or survey to be
published as a Word document, or click the ellipsis (…) button to Browse for Folder.
5. Under Properties, specify Output type as either Full quiz details orQuestions only.
6. Click Publish to publish your quiz or survey to Word, or click Cancel to exit without printing.
7. When publishing completes, click View Document to open your quiz or survey in Word,
where you can then print the document via Word.
You can send your source .quiz file to other Quizmaker ’09 authors. If you want to email the
published quiz to someone, you should go to Publish ->Web and select the email option.
To email a source quiz or survey (.quiz) in Quizmaker ’09:
1. Click theArticulate Button.
2. Click the Send option.
3. An email message should open in your default email program with the source quiz file (.quiz)
attached to the email and the quiz name in the subject line.
4. Type the recipient’s email address(es) in the To and/or CC fields.
5. Click Send to email the quiz or survey to the recipient(s).
© 2009 Articulate Global, Inc. articulate.com Page 10 of 155
Quizmaker ’09
Running the Spell Check
The Spelling feature allows you to either scan the spelling in your entire quiz or survey, or to check the
spelling of a specific word. To quickly spell check your quiz or survey, simply press the F7 key on the
keyboard.
To scan the whole quiz or survey, press F7 or select Spelling from themain ribbon. To check specific
words, simply right-click the word flagged with a wavy red line. Any word not found in the Quizmaker
’09 dictionary will have a wavy red underline.
When the spell checker finds a spelling error, you have options such as ignoring the word, changing
the word in one instance or all instances, or adding the word to the dictionary. You can also create a
custom dictionary with words that you use frequently.
Spelling Options
The spelling options dialog allows a lot of customization of how the spelling is handled in Quizmaker
’09. Check or uncheck the options as needed. This dialog also allows you to add custom
dictionaries as well as changing what language to use as themain dictionary.
Any changes made can be easily reverted by clicking the Restore Defaults button.
Learn more about Spelling Options in Quizmaker Options.
AutoCorrect Options
The AutoCorrect feature corrects misspelled words as you type them. To set up a list of words that
you typically misspell and want the spell check to AutoCorrect, click theAutoCorrect Optionsbutton.
TheAutoCorrect dialog allows for adding, replacing and deleting AutoCorrection words.
© 2009 Articulate Global, Inc. articulate.com Page 11 of 155
Quizmaker ’09

Inserting Symbols
Quizmaker ’09 allows you to insert symbols into your quiz text while editing a quiz.
If you wish to insert a symbol not included in the list of common symbols, you can access the Symbol
dialog by following the below instructions.
To insert a symbol from the Symbol dialog into your interaction text:
1. Click the symbol button.
2. The following options are available in the Symbol dialog:
● An available font
● A character set:
● Unicode (hex)
● ASCII (decimal)
● ASCII (hex)
● Unicode subset (if selected):
● Basic Latin
● Latin-1 Supplement
● Latin Extended-A
● Latin Extended-B
● Spacing Modifier Letters
● General Punctuation
● Kharoshthi
● Letter-like Symbols
● Mathematical Operators
● Character code input field
3. After clicking your selected symbol, click the Insert button to insert it into your quiz text, or
Cancel to cancel without inserting a symbol.
© 2009 Articulate Global, Inc. articulate.com Page 12 of 155
Quizmaker ’09
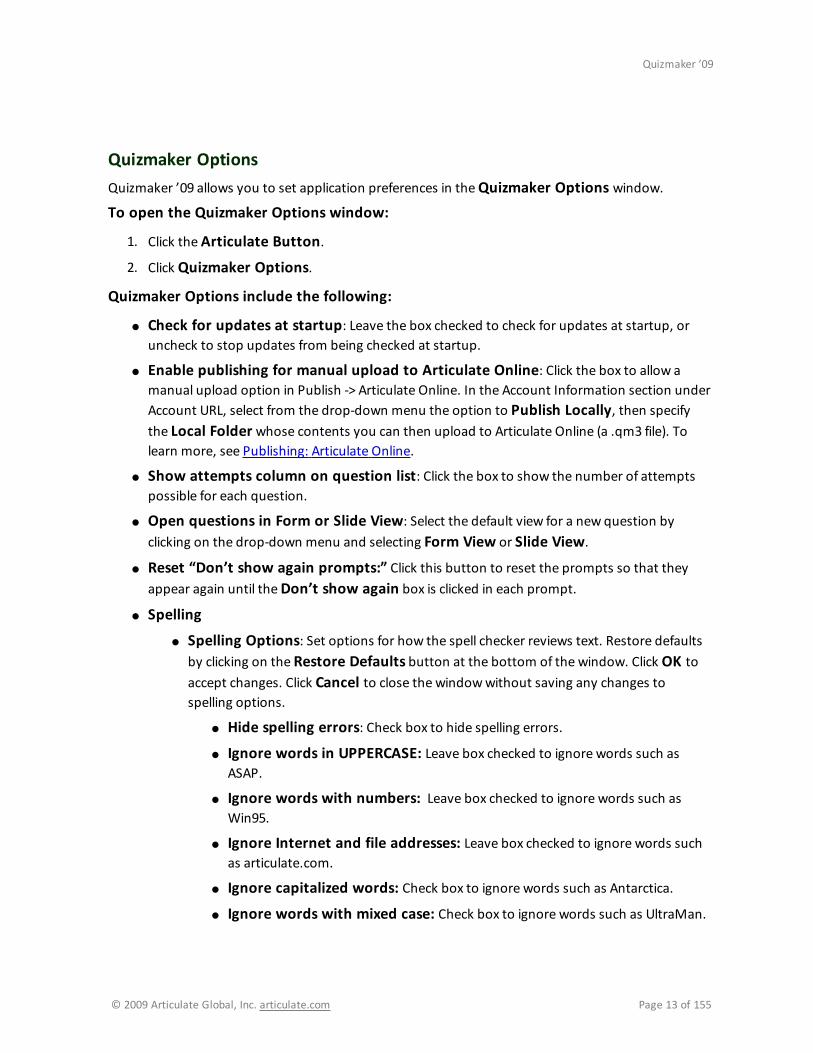
Quizmaker Options
Quizmaker ’09 allows you to set application preferences in theQuizmaker Options window.
To open the Quizmaker Options window:
1. Click theArticulate Button.
2. Click Quizmaker Options.
Quizmaker Options include the following:
● Check for updates at startup: Leave the box checked to check for updates at startup, or
uncheck to stop updates from being checked at startup.
● Enable publishing for manual upload to Articulate Online: Click the box to allow a
manual upload option in Publish -> Articulate Online. In the Account Information section under
Account URL, select from the drop-down menu the option to Publish Locally, then specify
the Local Folder whose contents you can then upload to Articulate Online (a .qm3 file). To
learn more, see Publishing: Articulate Online.
● Show attempts column on question list: Click the box to show the number of attempts
possible for each question.
● Open questions in Form or Slide View: Select the default view for a new question by
clicking on the drop-down menu and selecting Form View or Slide View.
● Reset “Don’t show again prompts:” Click this button to reset the prompts so that they
appear again until theDon’t show again box is clicked in each prompt.
● Spelling
● Spelling Options: Set options for how the spell checker reviews text. Restore defaults
by clicking on the Restore Defaults button at the bottom of the window. Click OK to
accept changes. Click Cancel to close the windowwithout saving any changes to
spelling options.
● Hide spelling errors: Check box to hide spelling errors.
● Ignore words in UPPERCASE: Leave box checked to ignore words such as
ASAP.
● Ignore words with numbers: Leave box checked to ignore words such as
Win95.
● Ignore Internet and file addresses: Leave box checked to ignore words such
as articulate.com.
● Ignore capitalized words: Check box to ignore words such as Antarctica.
● Ignore words with mixed case: Check box to ignore words such as UltraMan.
© 2009 Articulate Global, Inc. articulate.com Page 13 of 155
Quizmaker ’09

● Ignore HTML markups: Leave box checked to ignore words such as
<Strong></Strong>.
● Allow accented words: Leave box checked to ignore words such as Être.
● Report doubled words: Leave box checked to report doubled words such as
the the.
● Suggest split words: Check box to suggest words such as “boy” for “theboy”.
● Phonetic suggestions: Check box to offer phonetic suggestions. This feature is
only available in English.
● Typographical suggestions: Leave box checked to offer suggestions for
correct spellings.
● Casesensitive: Leave box checked to determine words by case patterns.
● AutoCorrect: Leave box checked to automatically perform spell checks. Click
Options to open the AutoCorrect dictionary. Leave the Replace text as you
type box checked to automatically correct misspellings. Here you can add or
remove the words you want automatically replaced. Enter the word you want
replaced in the Replace field and the word you want it replaced with in theWith
field. Click Add to add it to the AutoCorrect dictionary. To remove a word from
the AutoCorrect dictionary, either type the word in the Replace field or find the
word by scrolling through the AutoCorrect dictionary and clicking on it; click
Delete to remove themisspelling from the AutoCorrect dictionary. Click OK to
save changes to the AutoCorrect dictionary or Cancel to close the AutoCorrect
windowwithout saving changes.
● Dictionary:
● Main Dictionary language: Select from the drop-down menu a
dictionary to use in spell checks. Available dictionaries include the
following:
● English (Canada)
● English (U.K.)
● English (U.S.) (default)
● French
● German (Post-reform)
● German (Pre-reform)
● Italian
● Spanish
© 2009 Articulate Global, Inc. articulate.com Page 14 of 155
Quizmaker ’09
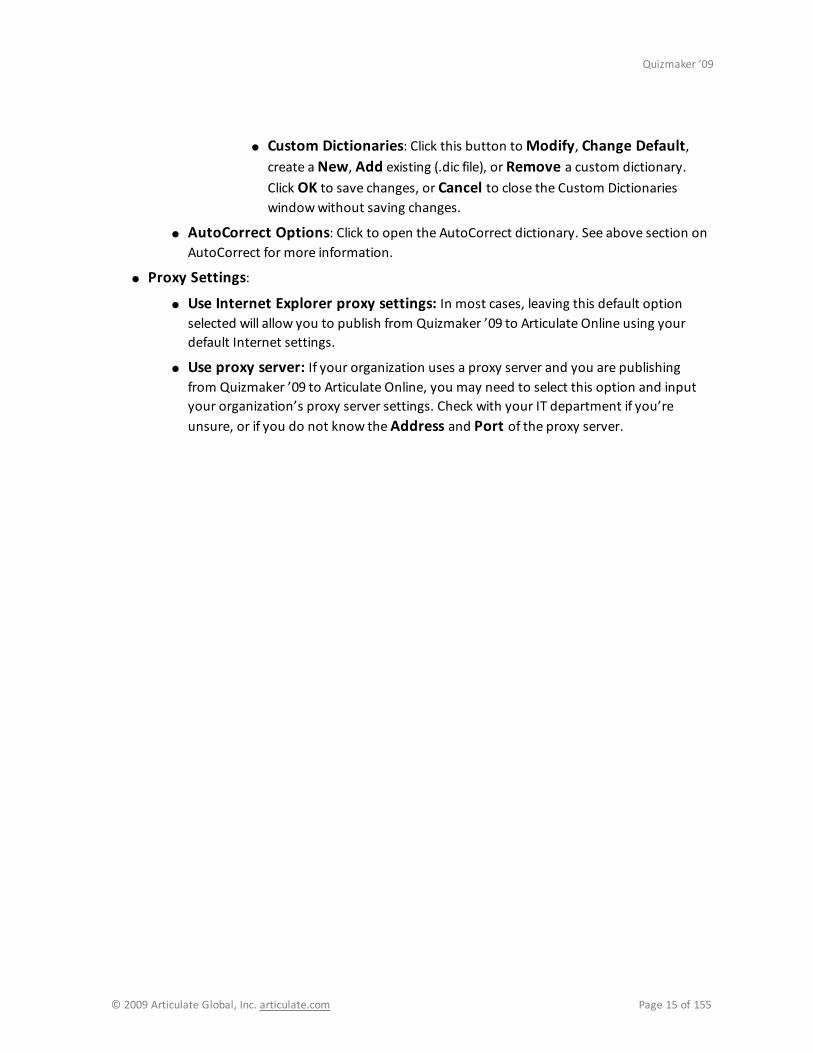
● Custom Dictionaries: Click this button toModify, Change Default,
create aNew, Add existing (.dic file), or Remove a custom dictionary.
Click OK to save changes, or Cancel to close the Custom Dictionaries
windowwithout saving changes.
● AutoCorrect Options: Click to open the AutoCorrect dictionary. See above section on
AutoCorrect for more information.
● Proxy Settings:
● Use Internet Explorer proxy settings: In most cases, leaving this default option
selected will allow you to publish from Quizmaker ’09 to Articulate Online using your
default Internet settings.
● Use proxy server: If your organization uses a proxy server and you are publishing
from Quizmaker ’09 to Articulate Online, you may need to select this option and input
your organization’s proxy server settings. Check with your IT department if you’re
unsure, or if you do not know theAddress and Port of the proxy server.
© 2009 Articulate Global, Inc. articulate.com Page 15 of 155
Quizmaker ’09

Managing Questions
Managing the Question List
The question list shows you all questions, blank slides, and question groups in your quiz or survey, as
well as details about each question, including the number of permitted Attempts and the Pointvalue of graded questions.
Creating a new question will add it after the selected question (click a question to select it and
determine where the new question should appear), or to the end of the selected group if no question
is selected.
The question list displays the following details:
● Question Group: Questions are organized within question groups.
● Group Title: To change the group title, click the title to select it and click again to edit it.
● Minimize/Maximize Button: Click on theminimize button (-) to collapse the
questions and display just the group title. Once collapsed, click themaximize button
(+) to display the questions in the group again.
● You can drag and drop questions between question groups.
● Question Details:
● Question Number: The question number appears to the left of the question.
Question order can be rearranged by dragging and dropping the questions into the
desired order, or their order can be randomized by clicking the Randomize Groupbutton. To learn more, see Randomizing a Group.
● Question Type: The question type appears in bold next to the question.
● Question Preview: A preview of the question is beneath the question type. To edit a
question, select it and press the Edit Question button in the toolbar, or double-click
the question.
● Attempts: The number of attempts the user is permitted to attempt each graded
question before getting it right (survey questions are assigned 1 attempt and cannot be
changed to another value). To change the number of attempts for graded questions,
click the number and select a value from the drop-down menu. You can specify a value
from 1 to 10 orUnlimited.
● Points: The point value is a score assigned to a graded question (survey questions are
assigned 0 cannot be changed to another value). To change the point value for a graded
question, click the points value and enter a new value in the points field or click the up
and down arrows until you’ve reached the desired value.
Explore the following help topics to learn more:
● Inserting Questions
● Inserting a Blank Slide
© 2009 Articulate Global, Inc. articulate.com Page 16 of 155
Quizmaker ’09

● Inserting a Question Group
● Importing Questions
● Editing Questions
● Results Slides
© 2009 Articulate Global, Inc. articulate.com Page 17 of 155
Quizmaker ’09
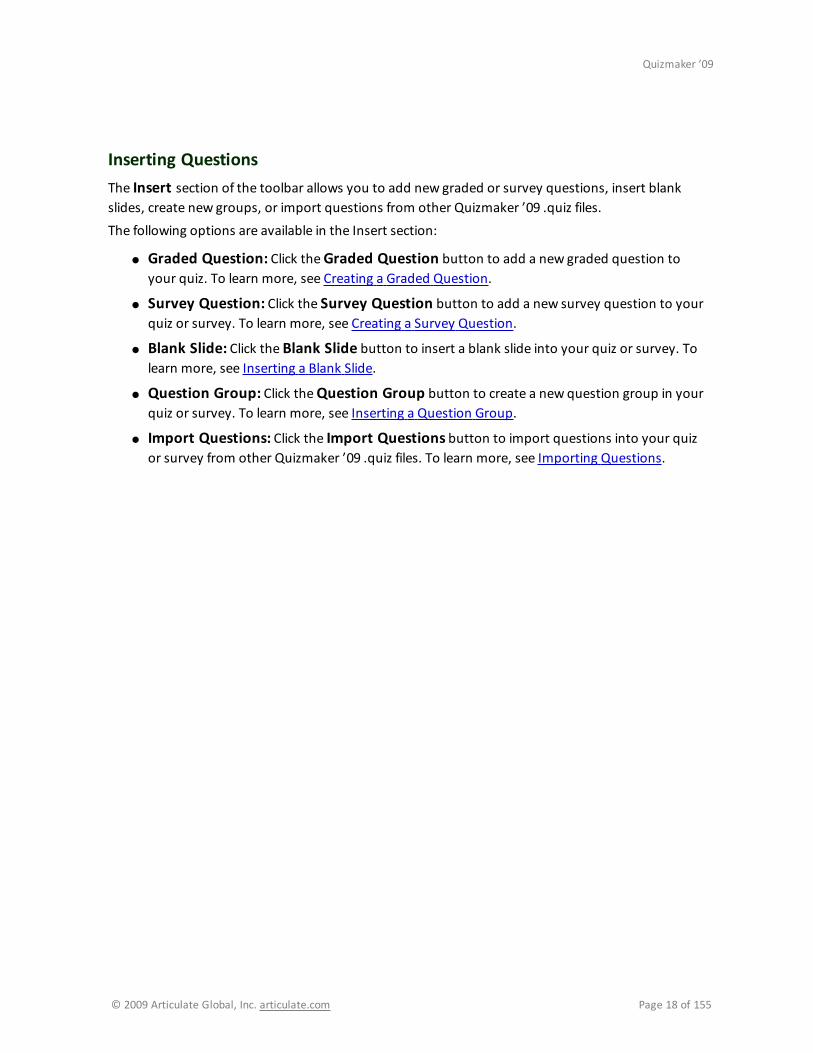
Inserting Questions
The Insert section of the toolbar allows you to add new graded or survey questions, insert blank
slides, create new groups, or import questions from other Quizmaker ’09 .quiz files.
The following options are available in the Insert section:
● Graded Question: Click theGraded Question button to add a new graded question to
your quiz. To learn more, see Creating a Graded Question.
● Survey Question: Click the Survey Question button to add a new survey question to your
quiz or survey. To learn more, see Creating a Survey Question.
● Blank Slide: Click the Blank Slide button to insert a blank slide into your quiz or survey. To
learn more, see Inserting a Blank Slide.
● Question Group: Click theQuestion Group button to create a new question group in your
quiz or survey. To learn more, see Inserting a Question Group.
● Import Questions: Click the Import Questions button to import questions into your quiz
or survey from other Quizmaker ’09 .quiz files. To learn more, see Importing Questions.
© 2009 Articulate Global, Inc. articulate.com Page 18 of 155
Quizmaker ’09

Inserting a Blank Slide
A blank slide can be inserted anywhere in the question order. As a slide, it can hold text, an image, a
movie, and/or audio. It can be used in any number of ways. For example, use a blank slide to
introduce or summarize a question, a question group, or quiz. Or use it mid-way through a quiz or
survey to provide supplemental material to your users.
To insert a blank slide:
1. Click on the Blank Slide button.
2. Enter the Title of the blank slide.
3. Enter the Text of the blank slide.
4. Click on Save & Close to save your blank slide, or continue editing your slide as outlined
below.
To edit a blank slide:
● Save & Close
● Save & Closewill save your blank slide and close the slide window, bringing you back
to your Question List.
● Show
● Form View allows you to work on the blank slide in the form view.
● Slide View allows you to customize your blank slide in greater detail. To learn more,
see Customizing Questions in Slide View.
● Clipboard
● Cut: Select text and click Cut in order to cut the selection from the slide and put it on
the clipboard. Keyboard shortcut: Ctrl+X.
● Copy: Select text and click Copy in order to copy the selection to the clipboard.
Keyboard shortcut: Ctrl+C.
● Paste: Click in the slide and click Paste where you want the contents of the clipboard to
be pasted. Keyboard shortcut: Ctrl+V.
● Text
● Formatting: Learn more in Formatting Text in Form View.
● Hyperlink: Learn more in Adding Hyperlinks in Form View.
● Spelling: Click Spelling to check the spelling of text. Keyboard shortcut: F7. Learn
more in Running the Spell Check.
© 2009 Articulate Global, Inc. articulate.com Page 19 of 155
Quizmaker ’09
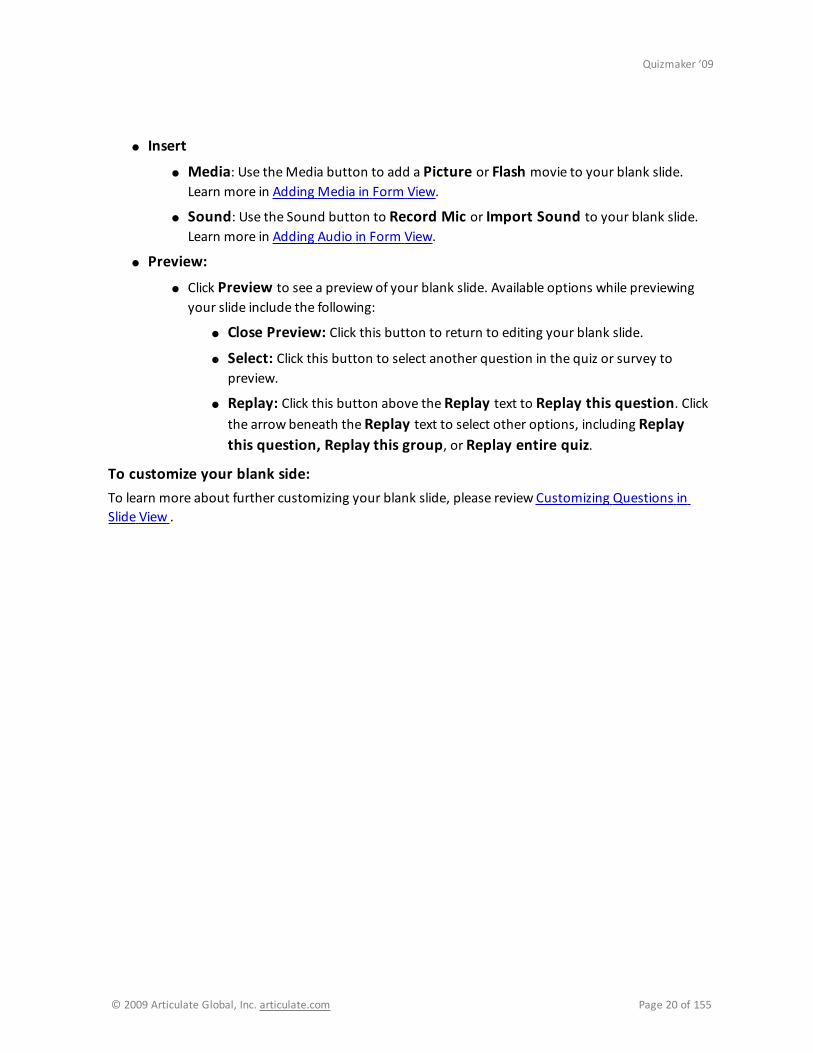
● Insert
● Media: Use theMedia button to add a Picture or Flash movie to your blank slide.
Learn more in Adding Media in Form View.
● Sound: Use the Sound button to Record Mic or Import Sound to your blank slide.
Learn more in Adding Audio in Form View.
● Preview:
● Click Preview to see a preview of your blank slide. Available options while previewing
your slide include the following:
● Close Preview: Click this button to return to editing your blank slide.
● Select: Click this button to select another question in the quiz or survey to
preview.
● Replay: Click this button above the Replay text to Replay this question. Click
the arrow beneath the Replay text to select other options, including Replay
this question, Replay this group, or Replay entire quiz.
To customize your blank side:
To learn more about further customizing your blank slide, please review Customizing Questions in
Slide View .
© 2009 Articulate Global, Inc. articulate.com Page 20 of 155
Quizmaker ’09
Inserting a Question Group
Question Groups help organize questions in your quiz. Groups of questions can more easily be
moved, copied, cut, randomized, and previewed.
To insert a new question group:
1. Click theQuestion Group button and a new group will be added to the end of the question
list.
2. Name the new question group by clicking on the new group’s default name (Question Group
X) and typing it into the text field.
3. Create new graded or survey questions in your group by clicking theGraded Question or
Survey Question button, or by dragging and dropping questions into the new group.
To delete a question group:
1. Click the title of the question group.
2. Click theDelete button on the toolbar (or right-click and select Delete Group).
3. Confirm your selection by clickingOK, or don’t delete by clicking Cancel. Note that deleting a
question group deletes all questions in the group.
4. Optionally, click the checkbox to Don’t show this message again (which you can restore in
Quizmaker Options).
© 2009 Articulate Global, Inc. articulate.com Page 21 of 155
Quizmaker ’09
Editing Questions
The Edit section of the toolbar allows questions and groups to be deleted or moved, and questions
to be edited.
To edit, delete, or move questions in your question list:
● Edit Question: Select a question and then click the Edit Question button to open the
question window (or double-click a question to edit it. Please see Creating a Graded Question
or Creating a Survey Question to learn more.
● Delete Question(s) orGroup(s): Select question(s) and/or question group(s) and click the
Delete button. Click OK to delete or Cancel to return to the question list without deleting.
● Move Question(s) orGroup(s): Select question(s) and/or question group(s) and click the
Move drop-down menu. Click theUp orDown arrow to move the question(s) or group(s) up
or down. Questions or groups can also bemoved by dragging and dropping the question or
group into the desired spot on the question list.
© 2009 Articulate Global, Inc. articulate.com Page 22 of 155
Quizmaker ’09

Randomizing Groups & Locking Questions
With Quizmaker ’09, you can create groups of questions, and randomize the order in which questions
from a particular group are presented to your users (also known as question group pooling). You can
also specify the number of questions from each group to be asked. A question can be locked within a
group.
To Randomize a Group:
1. Open Quizmaker ’09 and create a new quiz or survey, or open an existing one.
2. Click the group title or a question in the group you want to randomize and click the
Randomize Group button.
3. The button color will appear with a yellow highlight to indicate that the currently selected
group will be randomized. You will also see a message next to the corresponding group title:
Randomize all questions.
4. Specify the number of questions from the group to be asked:
1. Click the drop-down box next to Include.
2. Select the desired number of questions to be asked, All or 1 through X, where X is 1
less than the total number of questions in the current group.
5. To remove the Randomized Group setting, select a question in a randomized group, then
click the Randomize Group button again. The yellow highlight on the button will disappear
along with themessage next to the question group title.
Question locking allows you to specify that a particular question within a randomized group will
always be asked in the specified position, or will always be included in the group of randomized
questions.
To lock a question within a randomized group:
1. Randomize a Group by following the above instructions.
2. Click a question in the randomized group and select the Lock Question drop-down menu.
Select from the available choices below (note that some choices may be grayed out, depending
on the question’s relative position within the group):
● To Question Above: Always ask the current question after the question above it in
this randomized group of questions.
● To Question Below: Always ask the current question before the question below it in
this randomized group of questions.
● To Top of Group: Always ask the current question as the first one in this randomized
group of questions. Only one question can be locked to the top of each group.
© 2009 Articulate Global, Inc. articulate.com Page 23 of 155
Quizmaker ’09

● To Bottom of Group: Always ask the current question as the last one in this
randomized group of questions. Only one question can be locked to the bottom of each
group.
3. Remove a question lock by clicking the locked question and selecting Remove Lock.
© 2009 Articulate Global, Inc. articulate.com Page 24 of 155
Quizmaker ’09

Importing Questions
The Import Questions feature allows questions to be imported from other Quizmaker ’09 quizzes
or surveys.
To import a question:
1. Click the Import Questions button or click theArticulate Button and select Import…
2. Select the quiz or survey from which you want to import questions. Click Open to select the
quiz.
3. In the Import Questions dialog, select questions to import either by quiz, question group, or
individual question:
● By Quiz: Click the Check all button to select every question in the quiz. Click OK to
import your questions, or Cancel to close the Import Questions dialog without
importing anything.
● By Question Group: Check the Include All checkbox to select every question in the
question group. Click OK to import to import your question group, or Cancel to close
the Import Questions dialog without importing anything.
● By Individual Question: Check the box next to each question to select it for import.
Click OK to import to import your questions, or Cancel to close the Import Questions
dialog without importing anything.
● Uncheck All: The Uncheck All button will uncheck every selection.
© 2009 Articulate Global, Inc. articulate.com Page 25 of 155
Quizmaker ’09

Form View
Formatting Text in Form View
All types of Quizmaker ’09 quiz and survey questions, as well as blank slides allow you to edit text
using the rich-text editor.
To format quiz and survey text using the rich-text editor, use the formatting options available in the
toolbar directly above the text input field:
● Bold: Click on Bold to make the selected text bold. Keyboard shortcut: Ctrl+B.
● Italics: Click on Italics to make the selected text italics. Keyboard shortcut: Ctrl+B.
● Underline: Click on Underline to make the selected text underlined. Keyboard shortcut:
Ctrl+U.
You can further customize your text and questions, as well as add images, video, and audio to your
quiz or survey in Slide View mode. Learn more in Customizing Questions in Slide View.
© 2009 Articulate Global, Inc. articulate.com Page 26 of 155
Quizmaker ’09

Adding Hyperlinks in Form View
Quizmaker ’09 allows you to link any selected text or object to a webpage, picture, an email address,
or a program. When you click the , the Hyperlink windowwill open.
To use the Insert or Edit Hyperlink dialog:
1. Highlight or select the text or object you wish to link.
2. Click theHyperlink button to open the Insert or Edit Hyperlink dialog.
3. Input or edit the text in the Text to display field (only applicable when linking text, not other
objects).
4. Enter the link in theAddress field.
5. Click the Test button to test if the address is valid.
6. Click the desired radio button to specify where the hyperlink should launch:
● Display in new browser window: Select this option to launch your link in a new
browser window. Optionally, click theDefault browser controls at default size link
to change newwindow preferences. New Browser Window Properties include thefollowing:
● Browser controls: Select from the following options:
● Default
● No Address Bar
● No Browser Controls
● Window size: Select from the following options:
● Default
● Full-screen
● Custom, which allows you to specifyWidth and Height values (in pixels)
of the new browser window by inputting the values or by using the up and
down arrows to specify the values
● Display in current browser window: Select this option to launch your link in the
current browser window (same as the quiz or survey). Note that if you choose this
option, a user who clicks on the link will be taken to the link, leaving the quiz or survey
behind, so typically you’d only want to use this option at the end of a quiz or survey, or
at a point where you’re comfortable having your users exit the quiz or survey.
7. Click Save to create the hyperlink.
To edit or remove a hyperlink:
© 2009 Articulate Global, Inc. articulate.com Page 27 of 155
Quizmaker ’09

1. Click on or highlight the hyperlinked text or object.
2. Click theHyperlink button.
3. The Edit Hyperlink windowwill open and you can edit the link in theAddress field, or you
can remove the link by clicking the Remove Link button.
Keyboard shortcut: Press Ctrl+K to launch the Insert or Edit Hyperlink dialog.
© 2009 Articulate Global, Inc. articulate.com Page 28 of 155
Quizmaker ’09
Adding Media in Form View
In Quizmaker ’09 you are able to add images or video to any question or slide.
Supported media types:
● .FLV Flash
● .SWF Flash
● .EMF
● .WMF
● .JPG
● .PNG
● .BMP
● .GIF
● .TIF
To add an image (except Hotspot):
1. Click theMedia button and select Picture.
2. The Insert Picture windowwill open, and you can either browse to the image file and select
it, or you can type the name in the file name field.
3. Click Open to insert the picture in your question.
4. AMedia panel with a thumbnail of your image will appear to the right of your question
5. By default, when you preview or publish, your image will appear to the right of your question.
6. You can further customize your image or add other media in Slide Viewmode. To learn more,
see Customizing Questions in Slide View.
To add a video (except Hotspot):
1. Click theMedia button and select Flash.
2. The Insert Movie windowwill open, and you can either browse to the Flash file (.SWF or .FLV)
and select it, or you can type the name in the file name field.
3. Click Open.
4. Use the Flash Movie Options window to preview the video with the Play and Stopbuttons, and to set the following display and behavior preferences:
● Play: Press the play button to play a preview of your inserted video.
● Pause: Pause the preview playback of your inserted video.
● Stop: Press the stop button to stop playback of your inserted video.
© 2009 Articulate Global, Inc. articulate.com Page 29 of 155
Quizmaker ’09
● Browse: Click the name of your inserted video to open the Insert Movie window and
select a newmovie to replace the current one.
● How do you want to display this movie?
● Display in slide: Your video will display in the question slide alongside the
question. Control placement in Slide View mode. To learn more, see
Customizing Questions in Slide View.
● Display in a new browser window: Your video will launch in a newwindow
when the user reaches this question.
● How should the movie behave?
● Movie starts playing automatically: Check this box if you want your video to
start playing automatically.
● Show movie controls: Check this option to include a playbar with your video.
● Sound volume: Click the icon to specify Volume for the video or toMute it.
5. Click OK to confirm your preferences and insert the video in your question, or Cancel to close
the windowwithout inserting the video.
6. By default, when you preview or publish, your video will appear to the right of your question (if
you selected to Display in Slide above).
7. You can further customize your video or add other media in Slide View mode. To learn more,
see Customizing Questions in Slide View.
To delete an image or video:
1. Click theMedia button
2. Select Remove Media.
3. You will not be prompted to confirm the removal of your media.
To customize your image or video:
To learn more about further customizing your media, switch to Slide View mode and refer to the
following help topics:
● Slide View: Picture Tools
● Slide View: Movie Tools
© 2009 Articulate Global, Inc. articulate.com Page 30 of 155
Quizmaker ’09

Adding Audio in Form View
Quizmaker ’09 allows you to record, import, or edit audio using the built-in audio feature.
Recording Audio
To record audio in a Quizmaker ’09 question or slide:
1. Click the Sound button and select Record Mic.
2. Click the Record button in the Record Audio window to begin recording.
3. The audio status bar changes from a status ofNo Audio (or Ready if you have existing audio)
to Recording and the timewill begin counting.
4. Click the Stop button to stop recording.
5. Click the Play button to review the audio you just recorded.
6. Click theDelete button to delete recorded (or imported) audio or just click the Recordbutton to overwrite existing audio with the new recording.
Other options in the Record Audio window include Edit audio, Narration script, and Import
audio file. To learn more, see below for each of these features.
You can also record audio using theAudio pane in theQuestion Feedback window.
Importing Audio
To import audio in Quizmaker ’09:
1. Click the Sound button and select Import Sound.
2. The Insert Sound windowwill open, and you can either browse to the audio file(s) (.MP3 or
.WAV format) and select it, or you can type the name in the file name field.
3. Click Open to import the audio file(s).
Learn more about supported audio formats.
Playing Audio
To play audio you’ve already recorded or imported in Quizmaker ’09:
1. Click the Sound button and select Play Sound.
2. The audio will play and automatically stop at the end.
3. To stop playback before the end, click the Sound button and select Stop Sound.
Note that you can also play audio via the Record Audio window (see above section on Recording
Audio).
Deleting Audio
To delete audio you’ve already recorded or imported in Quizmaker ’09:
© 2009 Articulate Global, Inc. articulate.com Page 31 of 155
Quizmaker ’09
1. Click the Sound button and select Remove Sound.
2. The audio will be removed. You will not be asked to confirm your choice, so use this feature
carefully.
Note that you can also delete audio via the Record Audio window (see above section on Recording
Audio).
Editing Audio
Quizmaker ’09 includes a built-in audio editor. To edit audio in a Quizmaker ’09 question or slide:
1. Click the Sound button and select Edit Sound (or click the Edit audio icon from the Record
Audio window).
2. The toolbar shows you available commands to edit your audio. Themain area of the
Articulate Audio Editor displays the waveform of the audio for the selected question or
slide.
3. Use the audio editor to perform the following actions:
● Save & Close
● Save & Closewill save your audio and close the Articulate Audio Editor, bringing
you back to your question.
● Clipboard
● Cut: Click and drag with your mouse on a selection of the waveform, then click
Cut in order to cut the selection from the waveform and put it on the clipboard.
Keyboard shortcut: Ctrl+X.
● Copy: Click and drag with your mouse on a selection of the waveform, then click
Copy in order to copy the selection to the clipboard. Keyboard shortcut: Ctrl+C.
● Paste: Click in the waveform on the desired location and click Paste where you
want the contents of the clipboard to be pasted. Keyboard shortcut: Ctrl+V.
● Edit
● Import: Select this option from the toolbar or from the Articulate menu to
import existing audio into the current position in waveform. Navigate to the
desired audio file (.MP3 or .WAV), select it, and click Open to import the file, or
Cancel to exit without importing the file.
● Export: Select this option from the Articulate menu to export audio for each
slide into a .WAV or .MP3 file. After clicking Export, choose to export the audio to
.WAV or .MP3 file(s) (or to Both .WAV and .MP3), then specify the folder to
which you would like to export the audio tracks. You can Create New Folder or
specify an existing folder. Click OK to export all audio tracks, or Cancel to cancel
the export process.
© 2009 Articulate Global, Inc. articulate.com Page 32 of 155
Quizmaker ’09

● Delete: Click and drag your mouse to select a specific section of your waveform,
then click theDelete button to delete the selection. You will not be prompted to
confirm your deletion. Keyboard shortcut: Delete.
● Crop: Click and drag your mouse to select a specific section of your waveform,
then click the Crop button to delete all of the audio except that which you have
selected. You will not be prompted to confirm the Crop action.
● Volume
● Silence: Click the Silence button or right-click in the desired location in your
waveform and select Insert Silence to launch the Insert Silence dialog. Specify
the Duration of silence to insert by inputting the numeric value of the desired
silence in seconds, up to the 1,000th decimal (for example, 5.584s), or by using
the up and down arrows to specify the value. Click OK to insert the specified
duration of silence into the current location, or Cancel to exit without inserting
silence. You can also click and drag to select an area of your waveform, then right-
click to Silence Selection. Note that this will add silence to that part of the
timeline but will not change the total audio duration.
● Volume: Specify a section of your waveform (or all of it), then click the Volume
button to open the Change Volume dialog, where you can use the slider to
Increase or decrease volume by X%. Click and drag the slider to specify the
desired volume change (on a scale of -100% to 100%), then click OK to apply the
volume change or Cancel to exit without changing the volume.
● View
● Show All: Click the ShowAll button to show the entire waveform for all recorded
or imported audio in the current question, slide, or question feedback.
● Zoom Selection: Click and drag your mouse on a specific selection of your
waveform, then click the Zoom Selection button to zoom in on the selection.
4. Click the Save & Close button to save your changes and exit the audio editor, or click the red
X in the upper right-hand corner (or under theArticulate Button) to close and be given the
option to save your changes. Click Yes to save and exit, No to discard your changes, or Cancelto take no action and return to the audio editor.
You can also edit audio you’ve added to question feedback by clicking the Edit audio button in the
Audio pane of theQuestion Feedback window.
To learn more about editing audio in slide viewmode, see Slide View: Sound Tools.
Narration Script
Quizmaker ’09 gives you the option to use a narration script when working with audio. To use the
narration script in Quizmaker ’09:
© 2009 Articulate Global, Inc. articulate.com Page 33 of 155
Quizmaker ’09
1. Click the Sound button and select Record Mic.
2. Click theNarration Script icon.
3. Type, edit, or paste you script into the window.
4. Begin recording your audio (see above section on Recording Audio).
5. Click Close when you are done (your script is automatically saved).
© 2009 Articulate Global, Inc. articulate.com Page 34 of 155
Quizmaker ’09

Supported Audio Formats
When importing audio into Quizmaker ’09, you can choose to import either .WAV or .MP3 format.
The specific types of supported audio formats include the following:
Supported .WAV File Types:
● PCM -Microsoft Pulse-CodeModulation.
● Microsoft ADPCM -Microsoft Adaptive Delta Pulse CodeModulation
● GSM 6.10 -Microsoft Groupe Spécial Mobile
● IMA ADPCM -Microsoft InteractiveMultimedia Association (4 bits per sample)
● CCITT A-Law/G.711 CCITT u-Law -Microsoft International Telecommunications Union
Supported .MP3 File Types:
● MP3 -MPEG-1 Audio Layer 3
© 2009 Articulate Global, Inc. articulate.com Page 35 of 155
Quizmaker ’09
Graded Questions
Creating a Graded Question
A graded question is a type of question with a correct or incorrect response. The question has a
defined point value and the user is assigned a score based on response.
To create a graded question:
1. Click theGraded Question button in Quizmaker ’09.
2. Select the type of graded question you’d like to create:
3. Click OK to begin creating your chosen type of graded question.
Explore the following help topics to learn more about each question type:
● True/False
● Multiple Choice
● Multiple Response
● Fill in the Blank
● Word Bank
● Matching Drag and Drop
● Matching Drop-down
● Sequence Drag and Drop
● Sequence Drop-down
● Numeric
● Hotspot
© 2009 Articulate Global, Inc. articulate.com Page 36 of 155
Quizmaker ’09

True/False
True/False is a graded question that requires the user to select the single correct choice from two
choices. It is usually written in the form of a statement that is either true or false.
To add a True/False question to your quiz:
1. Click theGraded Question button in Quizmaker ’09.
2. Select True/False.
3. Click OK.
4. Enter your question in the Enter the question field.
5. Enter the Choices for your question. Note that after you have clicked in the answer grid, you
can navigate through your answers by using the Tab key to move forward and Shift-Tab to
move backward.
6. Click the radio button next to the correct choice in the Correct column to specify the correct
answer for this question.
7. Click Save & Close to save your question, or set question feedback and/or continue editing
your question as outlined below.
To set question results feedback and branching:
You can define question feedback for your users based on a correct or incorrect response. You can
also direct your users to another question in your quiz based on a correct or incorrect response. To
learn more, see Question Results Feedback and Branching.
To edit the question:
● Save & Close
● Save & Closewill save your question and close the question window, bringing you
back to your Question List.
● Show
● Form View allows you to work on a question in the form view.
● Slide View allows you to customize your question in greater detail. To learn more, see
Customizing Questions in Slide View .
● Clipboard
● Cut: Select text and click Cut in order to cut the selection from the question and put it
on the clipboard. Keyboard shortcut: Ctrl+X.
● Copy: Select text and click Copy in order to copy the selection to the clipboard.
Keyboard shortcut: Ctrl+C.
● Paste: Click in the question and click Paste where you want the contents of the
clipboard to be pasted. Keyboard shortcut: Ctrl+V.
© 2009 Articulate Global, Inc. articulate.com Page 37 of 155
Quizmaker ’09
● Text
● Formatting: Learn more in Formatting Text in Form View.
● Hyperlink: Learn more in Adding Hyperlinks in Form View.
● Spelling: Click Spelling to check the spelling of text. Keyboard shortcut: F7. Learn
more in Running the Spell Check.
● Display
● Feedback: Click the drop-down menu and specify feedback type for this question:
● None: No feedback will be provided to your users after answering the question.
● By Question: Feedback will be provided to your users after answering the
question. This method allows you to provide different feedback depending on
whether the answer was correct or incorrect. To learn more, see Question Results
Feedback and Branching.
● Shuffle: In a True/False question, the Shuffle answers option is not available.
● Scoring
● Score: In a True/False question, the question can only be scored By Question.
● Attempts: Set the number of attempts a user will be given to guess the correct answer
to the question. Click the drop-down menu and specify a value from 1 through 10 or
unlimited.
● Insert
● Media: Use theMedia button to add a Picture or Flash movie to your question. Learn
more in Adding Media in Form View.
● Sound: Use the Sound button to Record Mic or Import Sound to your question.
Learn more in Adding Audio in Form View.
● Click Preview to see a preview of your question. Available options while previewing your
question include the following:
● Close Preview: Click this button to return to editing your question.
● Select: Click this button to select another question in the quiz to preview.
● Replay: Click this button above the Replay text to Replay this question. Click the
arrow beneath the Replay text to select other options, including Replay this
question, Replay this group, or Replay entire quiz.
To customize your question:
To learn more about further customizing your question, please review Customizing Questions in Slide
View.
© 2009 Articulate Global, Inc. articulate.com Page 38 of 155
Quizmaker ’09
Multiple Choice
Multiple Choice is a graded question that requires the user to select the single correct choice from a
maximum of 10 possible choices.
To add a Multiple Choice question to your quiz:
1. Click theGraded Question button in Quizmaker ’09.
2. Select Multiple Choice.
3. Click OK.
4. Enter your question in the Enter the question field.
5. Enter the Choices for your question. Note that after you have clicked in the answer grid, you
can navigate through your answers by using the Tab key to move forward and Shift-Tab to
move backward.
6. Click the box in the Correct column next to the correct choice for this question.
7. Click Save & Close to save your question, or set question feedback and/or continue editing
your question as outlined below.
To set question results feedback and branching:
You can define question feedback for your users based on a correct or incorrect response. You can
also direct your users to another question in your quiz based on a correct or incorrect response. To
learn more, see Question Results Feedback and Branching.
To edit the question:
● Save & Close
● Save & Closewill save your question and close the question window, bringing you
back to your Question List.
● Show
● Form View allows you to work on a question in the form view.
● Slide View allows you to customize your question in greater detail. To learn more, see
Customizing Questions in Slide View.
● Clipboard
● Cut: Select text and click Cut in order to cut the selection from the question and put it
on the clipboard. Keyboard shortcut: Ctrl+X.
● Copy: Select text and click Copy in order to copy the selection to the clipboard.
Keyboard shortcut: Ctrl+C.
● Paste: Click in the question and click Paste where you want the contents of the
clipboard to be pasted. Keyboard shortcut: Ctrl+V.
© 2009 Articulate Global, Inc. articulate.com Page 39 of 155
Quizmaker ’09

● Text
● Formatting: Learn more in Formatting Text in Form View.
● Hyperlink: Learn more in Adding Hyperlinks in Form View.
● Spelling: Click Spelling to check the spelling of text. Keyboard shortcut: F7. Learn
more in Running the Spell Check.
● Display
● Feedback: Click the drop-down menu and specify feedback type for this question:
● None: No feedback will be provided to your users after answering the question.
● By Question: Feedback will be provided to your users after answering the
question. This method allows you to provide different feedback depending on
whether the answer was correct or incorrect. To learn more, see Question Results
Feedback and Branching.
● By Answer: Feedback will be provided to your users after selecting an answer.
This method allows you to provide feedback based on each guess the user
attempts, whether correct or incorrect. Specify feedback in the Feedback field
next to each choice, and click the ellipsis button (…) to format text, insert
hyperlinks , add or import audio, or configure branching.
● Shuffle: You can choose to have the answers appear in random order for your users.
Click the drop-down menu and specify one of the following:
● Answers: Select this option to shuffle the answers in this question.
● None: Select this option if you don’t want the the answers in this question to be
shuffled.
Scoring
● Score: You can choose how to score this question. Click the drop-down menu and
specify one of the following:
● By Question. Select this option to score this question as a whole. Assign a point
value in theQuestion Result section by clicking in the corresponding Pointsfield and inputting a whole integer value greater than or equal to 0, or by clicking
the up or down arrows.
● By Answer. Assign a point value to each choice in the Choices section by
clicking in the corresponding Points field and inputting a whole integer value
greater than or equal to 0, or by clicking the up or down arrows.
● Attempts: Set the number of attempts a user will be given to guess the correct answer
to the question. Click the drop-down menu and specify a value from 1 through 10 or
unlimited.
© 2009 Articulate Global, Inc. articulate.com Page 40 of 155
Quizmaker ’09

● Insert
● Media: Use theMedia button to add a Picture or Flash movie to your question. Learn
more in Adding Media in Form View.
● Sound: Use the Sound button to Record Mic or Import Sound to your question.
Learn more in Adding Audio in Form View.
● Click Preview to see a preview of your question. Available options while previewing your
question include the following:
● Close Preview: Click this button to return to editing your question.
● Select: Click this button to select another question in the quiz to preview.
● Replay: Click this button above the Replay text to Replay this question. Click the
arrow beneath the Replay text to select other options, including Replay this
question, Replay this group, or Replay entire quiz.
To customize your question:
To learn more about further customizing your question, please review Customizing Questions in Slide
View .
© 2009 Articulate Global, Inc. articulate.com Page 41 of 155
Quizmaker ’09

Multiple Response
Multiple Response is a graded question that requires the user to select all of the correct choices from
a maximum of 10 possible choices. Any number of choices can be correct, and the user must select all
correct choices for the question to be graded as correct.
To add a Multiple Response question to your quiz:
1. Click theGraded Question button in Quizmaker ’09.
2. Select Multiple Response.
3. Click OK.
4. Enter your question in the Enter the question field.
5. Enter the Choices for your question. Note that after you have clicked in the answer grid, you
can navigate through your answers by using the Tab key to move forward and Shift-Tab to
move backward.
6. Click the box(es) in the Correct column next to each correct choice for this question.
7. Click Save & Close to save your question, or set question feedback and/or continue editing
your question as outlined below.
To set question results feedback and branching:
You can define question feedback for your users based on a correct or incorrect response. You can
also direct your users to another question in your quiz based on a correct or incorrect response. To
learn more, see Question Results Feedback and Branching.
To edit the question:
● Save & Close
● Save & Closewill save your question and close the question window, bringing you
back to your Question List.
● Show
● Form View allows you to work on a question in the form view.
● Slide View allows you to customize your question in greater detail. To learn more, see
Customizing Questions in Slide View.
● Clipboard
● Cut: Select text and click Cut in order to cut the selection from the question and put it
on the clipboard. Keyboard shortcut: Ctrl+X.
● Copy: Select text and click Copy in order to copy the selection to the clipboard.
Keyboard shortcut: Ctrl+C.
● Paste: Click in the question and click Paste where you want the contents of the
clipboard to be pasted. Keyboard shortcut: Ctrl+V.
© 2009 Articulate Global, Inc. articulate.com Page 42 of 155
Quizmaker ’09
● Text
● Formatting: Learn more in Formatting Text in Form View .
● Hyperlink: Learn more in Adding Hyperlinks in Form View.
● Spelling: Click Spelling to check the spelling of text. Keyboard shortcut: F7. Learn
more in Running the Spell Check.
● Display
● Feedback: Click the drop-down menu and specify feedback type for this question:
● None: No feedback will be provided to your users after answering the question.
● By Question: Feedback will be provided to your users after answering the
question. This method allows you to provide different feedback depending on
whether the answer was correct or incorrect. To learn more, see Question Results
Feedback and Branching.
● Shuffle: You can choose to have the answers appear in random order for your users.
Click the drop-down menu and specify one of the following:
● Answers: Select this option to shuffle the answers in this question.
● None: Select this option if you don’t want the the answers in this question to be
shuffled.
● Scoring
● Score: In a Multiple Response question, the question can only be scored By Question.
● Attempts: Set the number of attempts a user will be given to guess the correct answer
to the question. Click the drop-down menu and specify a value from 1 through 10 or
unlimited.
● Insert
● Media: Use theMedia button to add a Picture or Flash movie to your question. Learn
more in Adding Media in Form View.
● Sound: Use the Sound button to Record Mic or Import Sound to your question.
Learn more in Adding Audio in Form View.
● Click Preview to see a preview of your question. Available options while previewing your
question include the following:
● Close Preview: Click this button to return to editing your question.
● Select: Click this button to select another question in the quiz to preview.
● Replay: Click this button above the Replay text to Replay this question. Click the
arrow beneath the Replay text to select other options, including Replay this
question, Replay this group, or Replay entire quiz.
To customize your question:
© 2009 Articulate Global, Inc. articulate.com Page 43 of 155
Quizmaker ’09

To learn more about further customizing your question, please review Customizing Questions in Slide
View.
© 2009 Articulate Global, Inc. articulate.com Page 44 of 155
Quizmaker ’09
Fill in the Blank
Fill in the Blank question is a graded question followed by a blank field into which the user must type
an answer. You can input a minimum of one and maximum of 10 acceptable answers. There is only
one correct answer to this type of question, although you may want to account for variations in
response.
To add a Fill in the Blank question to your quiz:
1. Click theGraded Question button in Quizmaker ’09.
2. Select Fill in the Blank.
3. Click OK.
4. Enter your question in the Enter the question field.
5. Enter the Choices for your question in theAcceptable Answers fields. Note that after you
have clicked in the answer grid, you can navigate through your answers by using the Tab key
to move forward and Shift-Tab to move backward.
6. Click theAnswers are case sensitive box if you want the answers to be case sensitive.
7. Click Save & Close to save your question, or set question feedback and/or continue editing
your question as outlined below.
To set question results feedback and branching:
You can define question feedback for your users based on a correct or incorrect response. You can
also direct your users to another question in your quiz based on a correct or incorrect response. To
learn more, see Question Results Feedback and Branching.
To edit the question:
● Save & Close
● Save & Closewill save your question and close the question window, bringing you
back to your Question List.
● Show
● Form View allows you to work on a question in the form view.
● Slide View allows you to customize your question in greater detail. To learn more, see
Customizing Questions in Slide View.
● Clipboard
● Cut: Select text and click Cut in order to cut the selection from the question and put it
on the clipboard. Keyboard shortcut: Ctrl+X.
● Copy: Select text and click Copy in order to copy the selection to the clipboard.
Keyboard shortcut: Ctrl+C.
© 2009 Articulate Global, Inc. articulate.com Page 45 of 155
Quizmaker ’09
● Paste: Click in the question and click Paste where you want the contents of the
clipboard to be pasted. Keyboard shortcut: Ctrl+V.
● Text
● Formatting: Learn more in Formatting Text in Form View.
● Hyperlink: Learn more in Adding Hyperlinks in Form View.
● Spelling: Click Spelling to check the spelling of text. Keyboard shortcut: F7. Learn
more in Running the Spell Check.
● Display
● Feedback: Click the drop-down menu and specify feedback type for this question:
● None: No feedback will be provided to your users after answering the question.
● By Question: Feedback will be provided to your users after answering the
question. This method allows you to provide different feedback depending on
whether the answer was correct or incorrect. To learn more, see Question Results
Feedback and Branching.
● Shuffle: In a Fill in the Blank question, the Shuffle answers option is not available.
● Scoring
● Score: In a Fill in the Blank question, the question can only be scored By Question.
● Attempts: Set the number of attempts a user will be given to guess the correct answer
to the question. Click the drop-down menu and specify a value from 1 through 10 or
unlimited.
● Insert
● Media: Use theMedia button to add a Picture or Flash movie to your question. Learn
more in Adding Media in Form View.
● Sound: Use the Sound button to Record Mic or Import Sound to your question.
Learn more in Adding Audio in Form View.
● Click Preview to see a preview of your question. Available options while previewing your
question include the following:
● Close Preview: Click this button to return to editing your question.
● Select: Click this button to select another question in the quiz to preview.
● Replay: Click this button above the Replay text to Replay this question. Click the
arrow beneath the Replay text to select other options, including Replay this
question, Replay this group, or Replay entire quiz.
To customize your question:
To learn more about further customizing your question, please review Customizing Questions in Slide
View.
© 2009 Articulate Global, Inc. articulate.com Page 46 of 155
Quizmaker ’09

Word Bank
Word Bank is a graded question that requires the user to drag and drop the correct choice into the
empty box. The user must select the single correct choice from a maximum of 10 possible choices.
To add a Word Bank question to your quiz:
1. Click theGraded Question button in Quizmaker ’09.
2. Select Word Bank.
3. Click OK.
4. Enter your question in the Enter the question field.
5. Enter the Choices for your question. Note that after you have clicked in the answer grid, you
can navigate through your answers by using the Tab key to move forward and Shift-Tab to
move backward.
6. Click the box in the Correct column next to the correct Choice for this question.
7. Click Save & Close to save your question, or set question feedback and/or continue editing
your question as outlined below.
To set question results feedback and branching:
You can define question feedback for your users based on a correct or incorrect response. You can
also direct your users to another question in your quiz based on a correct or incorrect response. To
learn more, see Question Results Feedback and Branching.
To edit the question:
● Save & Close
● Save & Closewill save your question and close the question window, bringing you
back to your Question List.
● Show
● Form View allows you to work on a question in the form view.
● Slide View allows you to customize your question in greater detail. To learn more, see
Customizing Questions in Slide View .
● Clipboard
● Cut: Select text and click Cut in order to cut the selection from the question and put it
on the clipboard. Keyboard shortcut: Ctrl+X.
● Copy: Select text and click Copy in order to copy the selection to the clipboard.
Keyboard shortcut: Ctrl+C.
● Paste: Click in the question and click Paste where you want the contents of the
clipboard to be pasted. Keyboard shortcut: Ctrl+V.
© 2009 Articulate Global, Inc. articulate.com Page 47 of 155
Quizmaker ’09
● Text
● Formatting: Learn more in Formatting Text in Form View.
● Hyperlink: Learn more in Adding Hyperlinks in Form View.
● Spelling: Click Spelling to check the spelling of text. Keyboard shortcut: F7. Learn
more in Running the Spell Check.
● Display
● Feedback: Click the drop-down menu and specify feedback type for this question:
● None: No feedback will be provided to your users after answering the question.
● By Question: Feedback will be provided to your users after answering the
question. This method allows you to provide different feedback depending on
whether the answer was correct or incorrect. To learn more, see Question Results
Feedback and Branching.
● By Answer: Feedback will be provided to your users after selecting an answer.
This method allows you to provide feedback based on each guess the user
attempts, whether correct or incorrect. Specify feedback in the Feedback field
next to each choice, and click the ellipsis button (…) to format text, insert
hyperlinks, add or import audio, or configure branching.
● Shuffle: You can choose to have the answers appear in random order for your users.
Click the drop-down menu and specify one of the following:
● Answers: Select this option to shuffle the answers in this question.
● None: Select this option if you don’t want the the answers in this question to be
shuffled.
● Scoring
● Score: You can choose how to score this question. Click the drop-down menu and
specify one of the following:
● By Question. Select this option to score this question as a whole. Assign a point
value in theQuestion Result section by clicking in the corresponding Pointsfield and inputting a whole integer value greater than or equal to 0, or by clicking
the up or down arrows.
● By Answer. Assign a point value to each choice in the Choices section by
clicking in the corresponding Points field and inputting a whole integer value
greater than or equal to 0, or by clicking the up or down arrows.
● Attempts: Set the number of attempts a user will be given to guess the correct answer
to the question. Click the drop-down menu and specify a value from 1 through 10 or
unlimited.
© 2009 Articulate Global, Inc. articulate.com Page 48 of 155
Quizmaker ’09
● Insert
● Media: Use theMedia button to add a Picture or Flash movie to your question. Learn
more in Adding Media in Form View.
● Sound: Use the Sound button to Record Mic or Import Sound to your question.
Learn more in Adding Audio in Form View.
● Click Preview to see a preview of your question. Available options while previewing your
question include the following:
● Close Preview: Click this button to return to editing your question.
● Select: Click this button to select another question in the quiz to preview.
● Replay: Click this button above the Replay text to Replay this question. Click the
arrow beneath the Replay text to select other options, including Replay this
question, Replay this group, or Replay entire quiz.
To customize your question:
To learn more about further customizing your question, please review Customizing Questions in Slide
View.
© 2009 Articulate Global, Inc. articulate.com Page 49 of 155
Quizmaker ’09

Matching Drag and Drop
Matching Drag and Drop is a graded question that requires the user to drag and drop items in the
second column to match items in the first column. There is a maximum of 10matching pairs. All items
in thematch column must correctly correspond to all items in the choice column for the question to
be graded as correct.
To add a Matching Drag and Drop question to your quiz:
1. Click theGraded Question button in Quizmaker ’09.
2. Select Matching Drag and Drop.
3. Click OK.
4. Enter your question in the Enter the question field.
5. Enter the Choices for your question, along with the correctMatch for each. Note that after
you have clicked in the answer grid, you can navigate through your answers by using the Tab
key to move forward and Shift-Tab to move backward.
6. Click Save & Close to save your question, or set question feedback and/or continue editing
your question as outlined below.
To set question results feedback and branching:
You can define question feedback for your users based on a correct or incorrect response. You can
also direct your users to another question in your quiz based on a correct or incorrect response. To
learn more, see Question Results Feedback and Branching.
To edit the question:
● Save & Close
● Save & Closewill save your question and close the question window, bringing you
back to your Question List.
● Show
● Form View allows you to work on a question in the form view.
● Slide View allows you to customize your question in greater detail. To learn more, see
Customizing Questions in Slide View.
● Clipboard
● Cut: Select text and click Cut in order to cut the selection from the question and put it
on the clipboard. Keyboard shortcut: Ctrl+X.
● Copy: Select text and click Copy in order to copy the selection to the clipboard.
Keyboard shortcut: Ctrl+C.
● Paste: Click in the question and click Paste where you want the contents of the
clipboard to be pasted. Keyboard shortcut: Ctrl+V.
© 2009 Articulate Global, Inc. articulate.com Page 50 of 155
Quizmaker ’09

● Text
● Formatting: Learn more in Formatting Text in Form View.
● Hyperlink: Learn more in Adding Hyperlinks in Form View.
● Spelling: Click Spelling to check the spelling of text. Keyboard shortcut: F7. Learn
more in Running the Spell Check.
● Display
● Feedback: Click the drop-down menu and specify feedback type for this question:
● None: No feedback will be provided to your users after answering the question.
● By Question: Feedback will be provided to your users after answering the
question. This method allows you to provide different feedback depending on
whether the answer was correct or incorrect. To learn more, see Question Results
Feedback and Branching.
● Shuffle: In a Matching Drag and Drop question, the Shuffle answers option is not
available.
● Scoring
● Score: In a Matching Drag and Drop question, the question can only be scored By
Question.
● Attempts: Set the number of attempts a user will be given to guess the correct answer
to the question. Click the drop-down menu and specify a value from 1 through 10 or
unlimited.
● Insert
● Media: Use theMedia button to add a Picture or Flash movie to your question. Learn
more in Adding Media in Form View.
● Sound: Use the Sound button to Record Mic or Import Sound to your question.
Learn more in Adding Audio in Form View.
● Click Preview to see a preview of your question. Available options while previewing your
question include the following:
● Close Preview: Click this button to return to editing your question.
● Select: Click this button to select another question in the quiz to preview.
● Replay: Click this button above the Replay text to Replay this question. Click the
arrow beneath the Replay text to select other options, including Replay this
question, Replay this group, or Replay entire quiz.
To customize your question:
To learn more about further customizing your question, please review Customizing Questions in Slide
View.
© 2009 Articulate Global, Inc. articulate.com Page 51 of 155
Quizmaker ’09

Matching Drop-down
Matching Drop-down is a graded question that requires the user to select items from drop-down
menus to match items in the first column. There is a maximum of 10matching pairs. All items in the
match column must correctly correspond to all items in the choice column for the question to be
graded as correct.
To add a Matching Drop-down question to your quiz:
1. Click theGraded Question button in Quizmaker ’09.
2. Select Matching Drop-down.
3. Click OK.
4. Enter your question in the Enter the question field.
5. Enter the Choices for your question, along with the correctMatch for each. Note that after
you have clicked in the answer grid, you can navigate through your answers by using the Tab
key to move forward and Shift-Tab to move backward.
6. Click Save & Close to save your question, or set question feedback and/or continue editing
your question as outlined below.
To set question results feedback and branching:
You can define question feedback for your users based on a correct or incorrect response. You can
also direct your users to another question in your quiz based on a correct or incorrect response. To
learn more, see Question Results Feedback and Branching.
To edit the question:
● Save & Close
● Save & Closewill save your question and close the question window, bringing you
back to your Question List.
● Show
● Form View allows you to work on a question in the form view.
● Slide View allows you to customize your question in greater detail. To learn more, see
Customizing Questions in Slide View.
● Clipboard
● Cut: Select text and click Cut in order to cut the selection from the question and put it
on the clipboard. Keyboard shortcut: Ctrl+X.
● Copy: Select text and click Copy in order to copy the selection to the clipboard.
Keyboard shortcut: Ctrl+C.
● Paste: Click in the question and click Paste where you want the contents of the
clipboard to be pasted. Keyboard shortcut: Ctrl+V.
© 2009 Articulate Global, Inc. articulate.com Page 52 of 155
Quizmaker ’09

● Text
● Formatting: Learn more in Formatting Text in Form View.
● Hyperlink: Learn more in Adding Hyperlinks in Form View.
● Spelling: Click Spelling to check the spelling of text. Keyboard shortcut: F7. Learn
more in Running the Spell Check.
● Display
● Feedback: Click the drop-down menu and specify feedback type for this question:
● None: No feedback will be provided to your users after answering the question.
● By Question: Feedback will be provided to your users after answering the
question. This method allows you to provide different feedback depending on
whether the answer was correct or incorrect. To learn more, see Question Results
Feedback and Branching.
● Shuffle: In a Matching Drop-down question, the Shuffle answers option is not
available.
● Scoring
● Score: In a Matching Drop-down question, the question can only be scored By
Question.
● Attempts: Set the number of attempts a user will be given to guess the correct answer
to the question. Click the drop-down menu and specify a value from 1 through 10 or
unlimited.
● Insert
● Media: Use theMedia button to add a Picture or Flash movie to your question. Learn
more in Adding Media in Form View.
● Sound: Use the Sound button to Record Mic or Import Sound to your question.
Learn more in Adding Audio in Form View.
● Click Preview to see a preview of your question. Available options while previewing your
question include the following:
● Close Preview: Click this button to return to editing your question.
● Select: Click this button to select another question in the quiz to preview.
● Replay: Click this button above the Replay text to Replay this question. Click the
arrow beneath the Replay text to select other options, including Replay this
question, Replay this group, or Replay entire quiz.
To customize your question:
To learn more about further customizing your question, please review Customizing Questions in Slide
View.
© 2009 Articulate Global, Inc. articulate.com Page 53 of 155
Quizmaker ’09
Sequence Drag and Drop
Sequence Drag and Drop is a graded question that requires the user to drag and drop items to
arrange in sequence. There is a maximum of 10 sequence items. All items must be in the proper
sequence for the question to be graded as correct.
To add a Sequence Drag and Drop question to your quiz:
1. Click theGraded Question button in Quizmaker ’09.
2. Select Sequence Drag and Drop.
3. Click OK.
4. Enter your question in the Enter the question field.
5. Enter the answers in Correct Order. Note that after you have clicked in the answer grid,
you can navigate through your answers by using the Tab key to move forward and Shift-Tabto move backward.
6. Click Save & Close to save your question, or set question feedback and/or continue editing
your question as outlined below.
To set question results feedback and branching:
You can define question feedback for your users based on a correct or incorrect response. You can
also direct your users to another question in your quiz based on a correct or incorrect response. To
learn more, see Question Results Feedback and Branching.
To edit the question:
● Save & Close
● Save & Closewill save your question and close the question window, bringing you
back to your Question List.
● Show
● Form View allows you to work on a question in the form view.
● Slide View allows you to customize your question in greater detail. To learn more, see
Customizing Questions in Slide View .
● Clipboard
● Cut: Select text and click Cut in order to cut the selection from the question and put it
on the clipboard. Keyboard shortcut: Ctrl+X.
● Copy: Select text and click Copy in order to copy the selection to the clipboard.
Keyboard shortcut: Ctrl+C.
● Paste: Click in the question and click Paste where you want the contents of the
clipboard to be pasted. Keyboard shortcut: Ctrl+V.
© 2009 Articulate Global, Inc. articulate.com Page 54 of 155
Quizmaker ’09
● Text
● Formatting: Learn more in Formatting Text in Form View .
● Hyperlink: Learn more in Adding Hyperlinks in Form View.
● Spelling: Click Spelling to check the spelling of text. Keyboard shortcut: F7. Learn
more in Running the Spell Check.
● Display
● Feedback: Click the drop-down menu and specify feedback type for this question:
● None: No feedback will be provided to your users after answering the question.
● By Question: Feedback will be provided to your users after answering the
question. This method allows you to provide different feedback depending on
whether the answer was correct or incorrect. To learn more, see Question Results
Feedback and Branching.
● Shuffle: In a Sequence Drag and Drop question, the Shuffle answers option is not
available.
● Scoring
● Score: In a Sequence Drag and Drop question, the question can only be scored By
Question.
● Attempts: Set the number of attempts a user will be given to guess the correct answer
to the question. Click the drop-down menu and specify a value from 1 through 10 or
unlimited.
● Insert
● Media: Use theMedia button to add a Picture or Flash movie to your question. Learn
more in Adding Media in Form View.
● Sound: Use the Sound button to Record Mic or Import Sound to your question.
Learn more in Adding Audio in Form View.
● Click Preview to see a preview of your question. Available options while previewing your
question include the following:
● Close Preview: Click this button to return to editing your question.
● Select: Click this button to select another question in the quiz to preview.
● Replay: Click this button above the Replay text to Replay this question. Click the
arrow beneath the Replay text to select other options, including Replay this
question, Replay this group, or Replay entire quiz.
To customize your question:
To learn more about further customizing your question, please review Customizing Questions in Slide
View.
© 2009 Articulate Global, Inc. articulate.com Page 55 of 155
Quizmaker ’09

Sequence Drop-down
Sequence Drop-down is a graded question that requires the user to select items from drop-down
menus to arrange in sequence. There is a maximum of 10 sequence items. All items must be in the
proper sequence for the question to be graded as correct.
To add a Sequence Drop-down question to your quiz:
1. Click theGraded Question button in Quizmaker ’09.
2. Select Sequence Drop-down.
3. Click OK.
4. Enter your question in the Enter the question field.
5. Enter the answers in Correct Order. Note that after you have clicked in the answer grid,
you can navigate through your answers by using the Tab key to move forward and Shift-Tabto move backward.
6. Click Save & Close to save your question, or set question feedback and/or continue editing
your question as outlined below.
To set question results feedback and branching:
You can define question feedback for your users based on a correct or incorrect response. You can
also direct your users to another question in your quiz based on a correct or incorrect response. To
learn more, see Question Results Feedback and Branching.
To edit the question:
● Save & Close
● Save & Closewill save your question and close the question window, bringing you
back to your Question List.
● Show
● Form View allows you to work on a question in the form view.
● Slide View allows you to customize your question in greater detail. To learn more, see
Customizing Questions in Slide View.
● Clipboard
● Cut: Select text and click Cut in order to cut the selection from the question and put it
on the clipboard. Keyboard shortcut: Ctrl+X.
● Copy: Select text and click Copy in order to copy the selection to the clipboard.
Keyboard shortcut: Ctrl+C.
● Paste: Click in the question and click Paste where you want the contents of the
clipboard to be pasted. Keyboard shortcut: Ctrl+V.
© 2009 Articulate Global, Inc. articulate.com Page 56 of 155
Quizmaker ’09

● Text
● Formatting: Learn more in Formatting Text in Form View.
● Hyperlink: Learn more in Adding Hyperlinks in Form View.
● Spelling: Click Spelling to check the spelling of text. Keyboard shortcut: F7. Learn
more in Running the Spell Check.
● Display
● Feedback: Click the drop-down menu and specify feedback type for this question:
● None: No feedback will be provided to your users after answering the question.
● By Question: Feedback will be provided to your users after answering the
question. This method allows you to provide different feedback depending on
whether the answer was correct or incorrect. To learn more, see Question Results
Feedback and Branching.
● Shuffle: In a Sequence Drop-down question, the Shuffle answers option is not
available.
● Scoring
● Score: In a Sequence Drop-down question, the question can only be scored By
Question.
● Attempts: Set the number of attempts a user will be given to guess the correct answer
to the question. Click the drop-down menu and specify a value from 1 through 10 or
unlimited.
● Insert
● Media: Use theMedia button to add a Picture or Flash movie to your question. Learn
more in Adding Media in Form View.
● Sound: Use the Sound button to Record Mic or Import Sound to your question.
Learn more in Adding Audio in Form View.
● Click Preview to see a preview of your question. Available options while previewing your
question include the following:
● Close Preview: Click this button to return to editing your question.
● Select: Click this button to select another question in the quiz to preview.
● Replay: Click this button above the Replay text to Replay this question. Click the
arrow beneath the Replay text to select other options, including Replay this
question, Replay this group, or Replay entire quiz.
To customize your question:
To learn more about further customizing your question, please review Customizing Questions in Slide
View.
© 2009 Articulate Global, Inc. articulate.com Page 57 of 155
Quizmaker ’09

Numeric
Numeric is a graded question that requires the user to enter the correct numeric value. Specify a
single number, a range of numbers, or any combination thereof. The user is restricted to entering
only numbers when answering this question.
To add a Numeric question to your quiz:
1. Click theGraded Question button in Quizmaker ’09.
2. SelectNumeric.
3. Click OK.
4. Enter your question in the Enter the question field.
5. Enter up to eight acceptable numeric values, specifying the number and/or range(s)
permitted for your question. Available value options include the following:
● Equal to
● Between
● Greater than
● Greater than or equal to
● Less than
● Less than or equal to
● Not equal to
● Not between
Note that after you have clicked in the answer grid, you can navigate through your answers by
using the Tab key to move forward and Shift-Tab to move backward.
6. Clicking theAnswer is correct if X of the above is true drop-down menu and selecting Allcreates an AND statement, so all the conditions must bemet to make the answer correct.
Selecting Any creates an OR statement, so any of the conditions can bemet to make the
answer correct.
7. Click Save & Close to save your question, or set question feedback and/or continue editing
your question as outlined below.
To set question results feedback and branching:
You can define question feedback for your users based on a correct or incorrect response. You can
also direct your users to another question in your quiz based on a correct or incorrect response. To
learn more, see Question Results Feedback and Branching.
To edit the question:
© 2009 Articulate Global, Inc. articulate.com Page 58 of 155
Quizmaker ’09

● Save & Close
● Save & Closewill save your question and close the question window, bringing you
back to your Question List.
● Show
● Form View allows you to work on a question in the form view.
● Slide View allows you to customize your question in greater detail. To learn more, see
Customizing Questions in Slide View.
● Clipboard
● Cut: Select text and click Cut in order to cut the selection from the question and put it
on the clipboard. Keyboard shortcut: Ctrl+X.
● Copy: Select text and click Copy in order to copy the selection to the clipboard.
Keyboard shortcut: Ctrl+C.
● Paste: Click in the question and click Paste where you want the contents of the
clipboard to be pasted. Keyboard shortcut: Ctrl+V.
● Text
● Formatting: Learn more in Formatting Text in Form View.
● Hyperlink: Learn more in Adding Hyperlinks in Form View.
● Spelling: Click Spelling to check the spelling of text. Keyboard shortcut: F7. Learn
more in Running the Spell Check.
● Display
● Feedback: Click the drop-down menu and specify feedback type for this question:
● None: No feedback will be provided to your users after answering the question.
● By Question: Feedback will be provided to your users after answering the
question. This method allows you to provide different feedback depending on
whether the answer was correct or incorrect. To learn more, see Question Results
Feedback and Branching.
● Shuffle: In a Numeric question, the Shuffle answers option is not available.
● Scoring
● Score: In a Numeric question, the question can only be scored By Question.
● Attempts: Set the number of attempts a user will be given to guess the correct answer
to the question. Click the drop-down menu and specify a value from 1 through 10 or
unlimited.
● Insert
● Media: Use theMedia button to add a Picture or Flash movie to your question. Learn
more in Adding Media in Form View.
© 2009 Articulate Global, Inc. articulate.com Page 59 of 155
Quizmaker ’09
● Sound: Use the Sound button to Record Mic or Import Sound to your question.
Learn more in Adding Audio in Form View.
● Click Preview to see a preview of your question. Available options while previewing your
question include the following:
● Close Preview: Click this button to return to editing your question.
● Select: Click this button to select another question in the quiz to preview.
● Replay: Click this button above the Replay text to Replay this question. Click the
arrow beneath the Replay text to select other options, including Replay this
question, Replay this group, or Replay entire quiz.
To customize your question:
To learn more about further customizing your question, please review Customizing Questions in Slide
View.
© 2009 Articulate Global, Inc. articulate.com Page 60 of 155
Quizmaker ’09
Hotspot
Hotspot is a graded question that requires the user to click on the correct area within the image.
Specify the correct area with a rectangle, an oval, or a freeform shape.
To add a Hotspot question to your quiz:
1. Click theGraded Question button in Quizmaker ’09.
2. Select Hotspot.
3. Click OK.
4. Enter your question in the Enter the question field.
5. Click the Choose Image button to open the Insert Picture window and select an image.
Click Open to insert the picture.
6. Click theAdd Hotspot button to add a hotspot to the image. From the drop-down menu
select one of the following options:
● Add Oval: Select this option to create an oval hotspot. Click and drag on the image to
add the oval in the desired place and size.
● Add Rectangle: Select this option to create a rectangular hotspot. Click and drag on
the image to add the rectangle in the desired place and size.
● Add Freeform Select this option to draw a custom-shaped hotspot. or rectangular
hotspot. Click on the image to add points for a freeform shape. Click back on the first
point to complete the freeform shape.
7. If you want to delete your current hotspot and redo it, click the Remove Hotspot button,then repeat Step 6 above.
8. Click Save & Close to save your question, or set question feedback and/or continue editing
your question as outlined below.
To set question results feedback and branching:
You can define question feedback for your users based on a correct or incorrect response. You can
also direct your users to another question in your quiz based on a correct or incorrect response. To
learn more, see Question Results Feedback and Branching.
To edit the question:
● Save & Close
● Save & Closewill save your question and close the question window, bringing you
back to your Question List.
© 2009 Articulate Global, Inc. articulate.com Page 61 of 155
Quizmaker ’09

● Show
● Form View allows you to work on a question in the form view.
● Slide View allows you to customize your question in greater detail. To learn more, see
Customizing Questions in Slide View.
● Clipboard
● Cut: Select text and click Cut in order to cut the selection from the question and put it
on the clipboard. Keyboard shortcut: Ctrl+X.
● Copy: Select text and click Copy in order to copy the selection to the clipboard.
Keyboard shortcut: Ctrl+C.
● Paste: Click in the question and click Paste where you want the contents of the
clipboard to be pasted. Keyboard shortcut: Ctrl+V.
● Text
● Formatting: Learn more in Formatting Text in Form View.
● Hyperlink: Learn more in Adding Hyperlinks in Form View.
● Spelling: Click Spelling to check the spelling of text. Keyboard shortcut: F7. Learn
more in Running the Spell Check.
● Display
● Feedback: Click the drop-down menu and specify feedback type for this question:
● None: No feedback will be provided to your users after answering the question.
● By Question: Feedback will be provided to your users after answering the
question. This method allows you to provide different feedback depending on
whether the answer was correct or incorrect. To learn more, see Question Results
Feedback and Branching.
● Shuffle: In a Hotspot question, the Shuffle answers option is not available.
● Scoring
● Score: In a Hotspot question, the question can only be scored By Question.
● Attempts: Set the number of attempts a user will be given to guess the correct answer
to the question. Click the drop-down menu and specify a value from 1 through 10 or
unlimited.
● Insert
● Media: In a Hotspot question, use the Choose Image button to change the primary
image. To add supplemental Pictures or Flash movies, switch to Slide View -> Insert. To learn more, see Slide View: Insert Tab.
● Sound: Use the Sound button to Record Mic or Import Sound to your question.
Learn more in Adding Audio in Form View.
© 2009 Articulate Global, Inc. articulate.com Page 62 of 155
Quizmaker ’09
● Click Preview to see a preview of your question. Available options while previewing your
question include the following:
● Close Preview: Click this button to return to editing your question.
● Select: Click this button to select another question in the quiz to preview.
● Replay: Click this button above the Replay text to Replay this question. Click the
arrow beneath the Replay text to select other options, including Replay this
question, Replay this group, or Replay entire quiz.
To customize your question:
To learn more about further customizing your question, please review Customizing Questions in Slide
View .
© 2009 Articulate Global, Inc. articulate.com Page 63 of 155
Quizmaker ’09
Survey Questions
Creating a Survey Question
A survey question is a type of question with no correct or incorrect response. The question has no
point value and the user is not scored on response.
To create a survey question:
1. Click the Survey Question button in Quizmaker ’09.
2. Select the type of survey question you’d like to create:
3. Click OK to begin creating your chosen type of survey question.
Explore the following help topics to learn more:
● Likert Scale
● Pick One
● Pick Many
● Which Word
● Short Answer
● Essay
● Ranking Drag and Drop
● Ranking Drop-down
● HowMany
© 2009 Articulate Global, Inc. articulate.com Page 64 of 155
Quizmaker ’09

Likert Scale
Likert Scale is a survey question that allows the user to choose the response that best represents his
or her opinion relative to a series of statements. There is a maximum of 10 statements for each Likert
Scale question.
To add a Likert Scale question to your quiz or survey:
1. Click the Survey Question button in Quizmaker ’09.
2. Select Likert Scale.
3. Click OK.
4. Enter your instructions in the Enter the instructions field.
5. Enter a maximum of 10 Statements in the statements fields. Note that after you have clicked
in the statements grid, you can navigate through your statements by using the Tab key to
move forward and Shift-Tab to move backward.
6. To customize Likert scale labels, click on the Scale button. The Likert Scale Labels dialog willopen with the default labels. You can edit or replace any of the scale labels by entering text into
each of the label fields. If you don’t want numbers to show on the scale, uncheck the Show
numbers on scale box. Click on OK to finish.
7. Click Save & Close to save your question, or set question feedback and/or continue editing
your question as outlined below.
To set question results feedback and branching:
You can define question feedback for your users after they respond. You can also direct your users to
another question in your quiz using branching. To learn more, see Question Results Feedback and
Branching.
To edit the question:
● Save & Close
● Save & Closewill save your question and close the question window, bringing you
back to your Question List.
● Show
● Form View allows you to work on a question in the form view.
● Slide View allows you to customize your question in greater detail. To learn more, see
Customizing Questions in Slide View.
● Clipboard
● Cut: Select text and click Cut in order to cut the selection from the question and put it
on the clipboard. Keyboard shortcut: Ctrl+X.
© 2009 Articulate Global, Inc. articulate.com Page 65 of 155
Quizmaker ’09

● Copy: Select text and click Copy in order to copy the selection to the clipboard.
Keyboard shortcut: Ctrl+C.
● Paste: Click in the question and click Paste where you want the contents of the
clipboard to be pasted. Keyboard shortcut: Ctrl+V.
● Text
● Formatting: Learn more in Formatting Text in Form View.
● Hyperlink: Learn more in Adding Hyperlinks in Form View .
● Spelling: Click Spelling to check the spelling of text. Keyboard shortcut: F7. Learn
more in Running the Spell Check.
● Display
● Feedback: Click the drop-down menu and specify feedback type for this question:
● None: No feedback will be provided to your users after answering the question.
● By Question: Feedback will be provided to your users after answering the
question. To learn more, see Question Results Feedback and Branching.
● Shuffle: In a Likert Scale question, the Shuffle answers option is not available.
● Require: Click the drop-down menu and specify whether to require that the user
answer this question:
● User may skip: User may bypass this question in your quiz or survey.
● User must answer: User must answer this question in your quiz or survey
before proceeding.
● Insert
● Media: Use theMedia button to add a Picture or Flash movie to your question. Learn
more in Adding Media in Form View.
● Sound: Use the Sound button to Record Mic or Import Sound to your question.
Learn more in Adding Audio in Form View.
● Click Preview to see a preview of your question. Available options while previewing your
question include the following:
● Close Preview: Click this button to return to editing your question.
● Select: Click this button to select another question in the quiz to preview.
● Replay: Click this button above the Replay text to Replay this question. Click the
arrow beneath the Replay text to select other options, including Replay this
question, Replay this group, or Replay entire quiz.
To customize your question:
To learn more about further customizing your question, please review Customizing Questions in Slide
View.
© 2009 Articulate Global, Inc. articulate.com Page 66 of 155
Quizmaker ’09

Pick One
Pick One is a survey question that allows the user to choose a single item from amaximum of 10
choices.
To add a Pick One survey to your quiz or survey:
1. Click the Survey Question button in Quizmaker ’09.
2. Select Pick One.
3. Click OK.
4. Enter your question in the Enter the question field.
5. Enter all possible choices for your question in the Enter the choices field. Amaximum
number of 10 choices can be entered. Note that after you have clicked in the answer grid, you
can navigate through your answers by using the Tab key to move forward and Shift-Tab to
move backward.
6. Click Save & Close to save your question, or set question feedback and/or continue editing
your question as outlined below.
To set question results feedback and branching:
You can define question feedback for your users after they respond. You can also direct your users to
another question in your quiz using branching. To learn more, see Question Results Feedback and
Branching.
To edit the question:
● Save & Close
● Save & Closewill save your question and close the question window, bringing you
back to your Question List.
● Show
● Form View allows you to work on a question in the form view.
● Slide View allows you to customize your question in greater detail. To learn more, see
Customizing Questions in Slide View.
● Clipboard
● Cut: Select text and click Cut in order to cut the selection from the question and put it
on the clipboard. Keyboard shortcut: Ctrl+X.
● Copy: Select text and click Copy in order to copy the selection to the clipboard.
Keyboard shortcut: Ctrl+C.
● Paste: Click in the question and click Paste where you want the contents of the
clipboard to be pasted. Keyboard shortcut: Ctrl+V.
© 2009 Articulate Global, Inc. articulate.com Page 67 of 155
Quizmaker ’09

● Text
● Formatting: Learn more in Formatting Text in Form View.
● Hyperlink: Learn more in Adding Hyperlinks in Form View.
● Spelling: Click Spelling to check the spelling of text. Keyboard shortcut: F7. Learn
more in Running the Spell Check.
● Display
● Feedback: Click the drop-down menu and specify feedback type for this question:
● None: No feedback will be provided to your users after answering the question.
● By Question: Feedback will be provided to your users after answering the
question. To learn more, see Question Results Feedback and Branching.
● By Answer: Feedback will be provided to your users after selecting an answer.
This method allows you to provide feedback based on each answer the user
selects. Specify feedback in the Feedback field next to each choice, and click the
ellipsis button (…) to format text, insert hyperlinks, add or import audio, or
configure branching.
● Shuffle: You can choose to have the answers appear in random order for your users.
Click the drop-down menu and specify one of the following:
● Answers: Select this option to shuffle the answers in this question.
● None: Select this option if you don’t want the the answers in this question to be
shuffled.
● Require: Click the drop-down menu and specify whether to require that the user
answer this question:
● User may skip: User may bypass this question in your quiz or survey.
● User must answer: User must answer this question in your quiz or survey
before proceeding.
● Insert
● Media: Use theMedia button to add a Picture or Flash movie to your question. Learn
more in Adding Media in Form View.
● Sound: Use the Sound button to Record Mic or Import Sound to your question.
Learn more in Adding Audio in Form View.
● Click Preview to see a preview of your question. Available options while previewing your
question include the following:
● Close Preview: Click this button to return to editing your question.
● Select: Click this button to select another question in the quiz to preview.
© 2009 Articulate Global, Inc. articulate.com Page 68 of 155
Quizmaker ’09

● Replay: Click this button above the Replay text to Replay this question. Click the
arrow beneath the Replay text to select other options, including Replay this
question, Replay this group, or Replay entire quiz.
To customize your question:
To learn more about further customizing your question, please review Customizing Questions in Slide
View .
© 2009 Articulate Global, Inc. articulate.com Page 69 of 155
Quizmaker ’09
Pick Many
Pick Many is a survey question that allows the user to choosemany items from a maximum of 10
choices.
To add a Pick Many survey to your quiz or survey:
1. Click the Survey Question button in Quizmaker ’09.
2. Select Pick Many.
3. Click OK.
4. Enter your question in the Enter the question field.
5. Enter all possible choices for your question in the Enter the choices field. Amaximum
number of 10 choices can be entered. Note that after you have clicked in the answer grid, you
can navigate through your answers by using the Tab key to move forward and Shift-Tab to
move backward.
6. Click Save & Close to save your question, or set question feedback and/or continue editing
your question as outlined below.
To set question results feedback and branching:
You can define question feedback for your users after they respond. You can also direct your users to
another question in your quiz using branching. To learn more, see Question Results Feedback and
Branching .
To edit the question:
● Save & Close
● Save & Closewill save your question and close the question window, bringing you
back to your Question List.
● Show
● Form View allows you to work on a question in the form view.
● Slide View allows you to customize your question in greater detail. To learn more, see
Customizing Questions in Slide View.
● Clipboard
● Cut: Select text and click Cut in order to cut the selection from the question and put it
on the clipboard. Keyboard shortcut: Ctrl+X.
● Copy: Select text and click Copy in order to copy the selection to the clipboard.
Keyboard shortcut: Ctrl+C.
● Paste: Click in the question and click Paste where you want the contents of the
clipboard to be pasted. Keyboard shortcut: Ctrl+V.
© 2009 Articulate Global, Inc. articulate.com Page 70 of 155
Quizmaker ’09

● Text
● Formatting: Learn more in Formatting Text in Form View.
● Hyperlink: Learn more in Adding Hyperlinks in Form View .
● Spelling: Click Spelling to check the spelling of text. Keyboard shortcut: F7. Learn
more in Running the Spell Check.
● Display
● Feedback: Click the drop-down menu and specify feedback type for this question:
● None: No feedback will be provided to your users after answering the question.
● By Question: Feedback will be provided to your users after answering the
question. To learn more, see Question Results Feedback and Branching.
● Shuffle: You can choose to have the answers appear in random order for your users.
Click the drop-down menu and specify one of the following:
● Answers: Select this option to shuffle the answers in this question.
● None: Select this option if you don’t want the the answers in this question to be
shuffled.
● Require: Click the drop-down menu and specify whether to require that the user
answer this question:
● User may skip: User may bypass this question in your quiz or survey.
● User must answer: User must answer this question in your quiz or survey
before proceeding.
● Insert
● Media: Use theMedia button to add a Picture or Flash movie to your question. Learn
more in Adding Media in Form View.
● Sound: Use the Sound button to Record Mic or Import Sound to your question.
Learn more in Adding Audio in Form View.
● Click Preview to see a preview of your question. Available options while previewing your
question include the following:
● Close Preview: Click this button to return to editing your question.
● Select: Click this button to select another question in the quiz to preview.
● Replay: Click this button above the Replay text to Replay this question. Click the
arrow beneath the Replay text to select other options, including Replay this
question, Replay this group, or Replay entire quiz.
To customize your question:
To learn more about further customizing your question, please review Customizing Questions in Slide
View.
© 2009 Articulate Global, Inc. articulate.com Page 71 of 155
Quizmaker ’09
Which Word
Which Word is a survey question that allows the user to drag and drop the word that best represents
his or her opinion. There is a maximum of 10 choices.
To add aWhich Word survey to your quiz or survey:
1. Click the Survey Question button in Quizmaker ’09.
2. Select Which Word.
3. Click OK.
4. Enter your question in the Enter the question field.
5. Enter all possible choices for your question in the Enter the choices field. Amaximum
number of 10 choices can be entered. Note that after you have clicked in the answer grid, you
can navigate through your answers by using the Tab key to move forward and Shift-Tab to
move backward.
6. Click Save & Close to save your question, or set question feedback and/or continue editing
your question as outlined below.
To set question results feedback and branching:
You can define question feedback for your users after they respond. You can also direct your users to
another question in your quiz using branching. To learn more, see Question Results Feedback and
Branching.
To edit the question:
● Save & Close
● Save & Closewill save your question and close the question window, bringing you
back to your Question List.
● Show
● Form View allows you to work on a question in the form view.
● Slide View allows you to customize your question in greater detail. To learn more, see
Customizing Questions in Slide View.
● Clipboard
● Cut: Select text and click Cut in order to cut the selection from the question and put it
on the clipboard. Keyboard shortcut: Ctrl+X.
● Copy: Select text and click Copy in order to copy the selection to the clipboard.
Keyboard shortcut: Ctrl+C.
● Paste: Click in the question and click Paste where you want the contents of the
clipboard to be pasted. Keyboard shortcut: Ctrl+V.
© 2009 Articulate Global, Inc. articulate.com Page 72 of 155
Quizmaker ’09
● Text
● Formatting: Learn more in Formatting Text in Form View.
● Hyperlink: Learn more in Adding Hyperlinks in Form View.
● Spelling: Click Spelling to check the spelling of text. Keyboard shortcut: F7. Learn
more in Running the Spell Check.
● Display
● Feedback: Click the drop-down menu and specify feedback type for this question:
● None: No feedback will be provided to your users after answering the question.
● By Question: Feedback will be provided to your users after answering the
question. To learn more, see Question Results Feedback and Branching.
● By Answer: Feedback will be provided to your users after selecting an answer.
This method allows you to provide feedback based on each answer the user
selects. Specify feedback in the Feedback field next to each choice, and click the
ellipsis button (…) to format text , insert hyperlinks, add or import audio, or
configure branching.
● Shuffle: You can choose to have the answers appear in random order for your users.
Click the drop-down menu and specify one of the following:
● Answers: Select this option to shuffle the answers in this question.
● None: Select this option if you don’t want the the answers in this question to be
shuffled.
● Require: Click the drop-down menu and specify whether to require that the user
answer this question:
● User may skip: User may bypass this question in your quiz or survey.
● User must answer: User must answer this question in your quiz or survey
before proceeding.
● Insert
● Media: Use theMedia button to add a Picture or Flash movie to your question. Learn
more in Adding Media in Form View.
● Sound: Use the Sound button to Record Mic or Import Sound to your question.
Learn more in Adding Audio in Form View.
● Click Preview to see a preview of your question. Available options while previewing your
question include the following:
● Close Preview: Click this button to return to editing your question.
● Select: Click this button to select another question in the quiz to preview.
© 2009 Articulate Global, Inc. articulate.com Page 73 of 155
Quizmaker ’09

● Replay: Click this button above the Replay text to Replay this question. Click the
arrow beneath the Replay text to select other options, including Replay this
question, Replay this group, or Replay entire quiz.
To customize your question:
To learn more about further customizing your question, please review Customizing Questions in Slide
View.
© 2009 Articulate Global, Inc. articulate.com Page 74 of 155
Quizmaker ’09
Short Answer
Short Answer is a survey question that allows the user to enter a short, freeform response. User
responses can be up to 256 characters long.
To add a Short Answer survey to your quiz or survey:
1. Click the Survey Question button in Quizmaker ’09.
2. Select Short Answer.
3. Click OK.
4. Enter your question in the Enter the question field.
5. Click Save & Close to save your question, or set question feedback and/or continue editing
your question as outlined below.
To set question results feedback and branching:
You can define question feedback for your users after they respond. You can also direct your users to
another question in your quiz using branching. To learn more, see Question Results Feedback and
Branching.
To edit the question:
● Save & Close
● Save & Closewill save your question and close the question window, bringing you
back to your Question List.
● Show
● Form View allows you to work on a question in the form view.
● Slide View allows you to customize your question in greater detail. To learn more, see
Customizing Questions in Slide View.
● Clipboard
● Cut: Select text and click Cut in order to cut the selection from the question and put it
on the clipboard. Keyboard shortcut: Ctrl+X.
● Copy: Select text and click Copy in order to copy the selection to the clipboard.
Keyboard shortcut: Ctrl+C.
● Paste: Click in the question and click Paste where you want the contents of the
clipboard to be pasted. Keyboard shortcut: Ctrl+V.
● Text
● Formatting: Learn more in Formatting Text in Form View.
● Hyperlink: Learn more in Adding Hyperlinks in Form View.
© 2009 Articulate Global, Inc. articulate.com Page 75 of 155
Quizmaker ’09

● Spelling: Click Spelling to check the spelling of text. Keyboard shortcut: F7. Learn
more in Running the Spell Check.
● Display
● Feedback: Click the drop-down menu and specify feedback type for this question:
● None: No feedback will be provided to your users after answering the question.
● By Question: Feedback will be provided to your users after answering the
question. To learn more, see Question Results Feedback and Branching.
● Shuffle: In a Short Answer question, the Shuffle answers option is not available.
● Require: Click the drop-down menu and specify whether to require that the user
answer this question:
● User may skip: User may bypass this question in your quiz or survey.
● User must answer: User must answer this question in your quiz or survey
before proceeding.
● Insert
● Media: Use theMedia button to add a Picture or Flash movie to your question. Learn
more in Adding Media in Form View.
● Sound: Use the Sound button to Record Mic or Import Sound to your question.
Learn more in Adding Audio in Form View.
● Click Preview to see a preview of your question. Available options while previewing your
question include the following:
● Close Preview: Click this button to return to editing your question.
● Select: Click this button to select another question in the quiz to preview.
● Replay: Click this button above the Replay text to Replay this question. Click the
arrow beneath the Replay text to select other options, including Replay this
question, Replay this group, or Replay entire quiz.
To customize your question:
To learn more about further customizing your question, please review Customizing Questions in Slide
View.
© 2009 Articulate Global, Inc. articulate.com Page 76 of 155
Quizmaker ’09

Essay
Essay is a survey question that allows the user to enter a long, freeform response. The default
response length is limited to 5,000 characters.
To add a Essay survey to your quiz or survey:
1. Click the Survey Question button in Quizmaker ’09.
2. Select Essay.
3. Click OK.
4. Enter your question in the Enter the question field.
5. Set themaximum number of characters by typing the number in theMaximum number of
characters field or by clicking on the up and down arrows.
6. Click Save & Close to save your question, or set question feedback and/or continue editing
your question as outlined below.
To set question results feedback and branching:
You can define question feedback for your users after they respond. You can also direct your users to
another question in your quiz using branching. To learn more, see Question Results Feedback and
Branching.
To edit the question:
● Save & Close
● Save & Closewill save your question and close the question window, bringing you
back to your Question List.
● Show
● Form View allows you to work on a question in the form view.
● Slide View allows you to customize your question in greater detail. To learn more, see
Customizing Questions in Slide View.
● Clipboard
● Cut: Select text and click Cut in order to cut the selection from the question and put it
on the clipboard. Keyboard shortcut: Ctrl+X.
● Copy: Select text and click Copy in order to copy the selection to the clipboard.
Keyboard shortcut: Ctrl+C.
● Paste: Click in the question and click Paste where you want the contents of the
clipboard to be pasted. Keyboard shortcut: Ctrl+V.
© 2009 Articulate Global, Inc. articulate.com Page 77 of 155
Quizmaker ’09
● Text
● Formatting: Learn more in Formatting Text in Form View.
● Hyperlink: Learn more in Adding Hyperlinks in Form View.
● Spelling: Click Spelling to check the spelling of text. Keyboard shortcut: F7. Learn
more in Running the Spell Check.
● Display
● Feedback: Click the drop-down menu and specify feedback type for this question:
● None: No feedback will be provided to your users after answering the question.
● By Question: Feedback will be provided to your users after answering the
question. To learn more, see Question Results Feedback and Branching.
● Shuffle: In an Essay question, the Shuffle answers option is not available.
● Require: Click the drop-down menu and specify whether to require that the user
answer this question:
● User may skip: User may bypass this question in your quiz or survey.
● User must answer: User must answer this question in your quiz or survey
before proceeding.
● Insert
● Media: Use theMedia button to add a Picture or Flash movie to your question. Learn
more in Adding Media in Form View.
● Sound: Use the Sound button to Record Mic or Import Sound to your question.
Learn more in Adding Audio in Form View.
● Click Preview to see a preview of your question. Available options while previewing your
question include the following:
● Close Preview: Click this button to return to editing your question.
● Select: Click this button to select another question in the quiz to preview.
● Replay: Click this button above the Replay text to Replay this question. Click the
arrow beneath the Replay text to select other options, including Replay this
question, Replay this group, or Replay entire quiz.
To customize your question:
To learn more about further customizing your question, please review Customizing Questions in Slide
View.
© 2009 Articulate Global, Inc. articulate.com Page 78 of 155
Quizmaker ’09
Ranking Drag and Drop
Ranking Drag and Drop is a survey question that allows the user to drag and drop items to rank in
preferential order. There is a maximum of 10 ranking items.
To add a Ranking Drag and Drop survey to your quiz or survey:
1. Click the Survey Question button in Quizmaker ’09.
2. Select Ranking Drag and Drop.
3. Click OK.
4. Enter your question in the Enter the question field.
5. Enter all possible choices for your question in the Enter the choices field. Amaximum
number of 10 choices can be entered. Note that after you have clicked in the answer grid, you
can navigate through your answers by using the Tab key to move forward and Shift-Tab to
move backward.
6. Click Save & Close to save your question, or set question feedback and/or continue editing
your question as outlined below.
To set question results feedback and branching:
You can define question feedback for your users after they respond. You can also direct your users to
another question in your quiz using branching. To learn more, see Question Results Feedback and
Branching.
To edit the question:
● Save & Close
● Save & Closewill save your question and close the question window, bringing you
back to your Question List.
● Show
● Form View allows you to work on a question in the form view.
● Slide View allows you to customize your question in greater detail. To learn more, see
Customizing Questions in Slide View.
● Clipboard
● Cut: Select text and click Cut in order to cut the selection from the question and put it
on the clipboard. Keyboard shortcut: Ctrl+X.
● Copy: Select text and click Copy in order to copy the selection to the clipboard.
Keyboard shortcut: Ctrl+C.
● Paste: Click in the question and click Paste where you want the contents of the
clipboard to be pasted. Keyboard shortcut: Ctrl+V.
© 2009 Articulate Global, Inc. articulate.com Page 79 of 155
Quizmaker ’09

● Text
● Formatting: Learn more in Formatting Text in Form View.
● Hyperlink: Learn more in Adding Hyperlinks in Form View.
● Spelling: Click Spelling to check the spelling of text. Keyboard shortcut: F7. Learn
more in Running the Spell Check.
● Display
● Feedback: Click the drop-down menu and specify feedback type for this question:
● None: No feedback will be provided to your users after answering the question.
● By Question: Feedback will be provided to your users after answering the
question. To learn more, see Question Results Feedback and Branching.
● Shuffle: In a Ranking Drag and Drop question, the Shuffle answers option is not
available.
● Require: Click the drop-down menu and specify whether to require that the user
answer this question:
● User may skip: User may bypass this question in your quiz or survey.
● User must answer: User must answer this question in your quiz or survey
before proceeding.
● Insert
● Media: Use theMedia button to add a Picture or Flash movie to your question. Learn
more in Adding Media in Form View.
● Sound: Use the Sound button to Record Mic or Import Sound to your question.
Learn more in Adding Audio in Form View.
● Click Preview to see a preview of your question. Available options while previewing your
question include the following:
● Close Preview: Click this button to return to editing your question.
● Select: Click this button to select another question in the quiz to preview.
● Replay: Click this button above the Replay text to Replay this question. Click the
arrow beneath the Replay text to select other options, including Replay this
question, Replay this group, or Replay entire quiz.
To customize your question:
To learn more about further customizing your question, please review Customizing Questions in Slide
View.
© 2009 Articulate Global, Inc. articulate.com Page 80 of 155
Quizmaker ’09

Ranking Drop-down
Ranking Drop-down is a survey question that allows the user to select items from drop-down menus
to rank in preferential order. There is a maximum of 10 ranking items.
To add a Ranking Drop-down survey to your quiz or survey:
1. Click the Survey Question button in Quizmaker ’09.
2. Select Ranking Drop-down.
3. Click OK.
4. Enter your question in the Enter the question field.
5. Enter all possible choices for your question in the Enter the choices field. Amaximum
number of 10 choices can be entered. Note that after you have clicked in the answer grid, you
can navigate through your answers by using the Tab key to move forward and Shift-Tab to
move backward.
6. Click Save & Close to save your question, or set question feedback and/or continue editing
your question as outlined below.
To set question results feedback and branching:
You can define question feedback for your users after they respond. You can also direct your users to
another question in your quiz using branching. To learn more, see Question Results Feedback and
Branching.
To edit the question:
● Save & Close
● Save & Closewill save your question and close the question window, bringing you
back to your Question List.
● Show
● Form View allows you to work on a question in the form view.
● Slide View allows you to customize your question in greater detail. To learn more, see
Customizing Questions in Slide View.
● Clipboard
● Cut: Select text and click Cut in order to cut the selection from the question and put it
on the clipboard. Keyboard shortcut: Ctrl+X.
● Copy: Select text and click Copy in order to copy the selection to the clipboard.
Keyboard shortcut: Ctrl+C.
● Paste: Click in the question and click Paste where you want the contents of the
clipboard to be pasted. Keyboard shortcut: Ctrl+V.
© 2009 Articulate Global, Inc. articulate.com Page 81 of 155
Quizmaker ’09

● Text
● Formatting: Learn more in Formatting Text in Form View.
● Hyperlink: Learn more in Adding Hyperlinks in Form View.
● Spelling: Click Spelling to check the spelling of text. Keyboard shortcut: F7. Learn
more in Running the Spell Check.
● Display
● Feedback: Click the drop-down menu and specify feedback type for this question:
● None: No feedback will be provided to your users after answering the question.
● By Question: Feedback will be provided to your users after answering the
question. To learn more, see Question Results Feedback and Branching.
● Shuffle: In a Ranking Drop-down question, the Shuffle answers option is not available.
● Require: Click the drop-down menu and specify whether to require that the user
answer this question:
● User may skip: User may bypass this question in your quiz or survey.
● User must answer: User must answer this question in your quiz or survey
before proceeding.
● Insert
● Media: Use theMedia button to add a Picture or Flash movie to your question. Learn
more in Adding Media in Form View.
● Sound: Use the Sound button to Record Mic or Import Sound to your question.
Learn more in Adding Audio in Form View.
● Click Preview to see a preview of your question. Available options while previewing your
question include the following:
● Close Preview: Click this button to return to editing your question.
● Select: Click this button to select another question in the quiz to preview.
● Replay: Click this button above the Replay text to Replay this question. Click the
arrow beneath the Replay text to select other options, including Replay this
question, Replay this group, or Replay entire quiz.
To customize your question:
To learn more about further customizing your question, please review Customizing Questions in Slide
View .
© 2009 Articulate Global, Inc. articulate.com Page 82 of 155
Quizmaker ’09
How Many
HowMany is a survey question that allows the user to enter a numeric response. The user is
restricted to entering only numbers in response to the question.
To add a How Many survey to your quiz or survey:
1. Click the Survey Question button in Quizmaker ’09.
2. Select How Many.
3. Click OK.
4. Enter your question in the Enter the question field. The question restricts the user to a
numeric response, so your question should be phrased to solicit a number.
5. Click Save & Close to save your question, or set question feedback and/or continue editing
your question as outlined below.
To set question results feedback and branching:
You can define question feedback for your users after they respond. You can also direct your users to
another question in your quiz using branching. To learn more, see Question Results Feedback and
Branching.
To edit the question:
● Save & Close
● Save & Closewill save your question and close the question window, bringing you
back to your Question List.
● Show
● Form View allows you to work on a question in the form view.
● Slide View allows you to customize your question in greater detail. To learn more, see
Customizing Questions in Slide View.
● Clipboard
● Cut: Select text and click Cut in order to cut the selection from the question and put it
on the clipboard. Keyboard shortcut: Ctrl+X.
● Copy: Select text and click Copy in order to copy the selection to the clipboard.
Keyboard shortcut: Ctrl+C.
● Paste: Click in the question and click Paste where you want the contents of the
clipboard to be pasted. Keyboard shortcut: Ctrl+V.
● Text
● Formatting: Learn more in Formatting Text in Form View.
● Hyperlink: Learn more in Adding Hyperlinks in Form View.
© 2009 Articulate Global, Inc. articulate.com Page 83 of 155
Quizmaker ’09

● Spelling: Click Spelling to check the spelling of text. Keyboard shortcut: F7. Learn
more in Running the Spell Check.
● Display
● Feedback: Click the drop-down menu and specify feedback type for this question:
● None: No feedback will be provided to your users after answering the question.
● By Question: Feedback will be provided to your users after answering the
question. To learn more, see Question Results Feedback and Branching.
● Shuffle: In a HowMany question, the Shuffle answers option is not available.
● Require: Click the drop-down menu and specify whether to require that the user
answer this question:
● User may skip: User may bypass this question in your quiz or survey.
● User must answer: User must answer this question in your quiz or survey
before proceeding.
● Insert
● Media: Use theMedia button to add a Picture or Flash movie to your question. Learn
more in Adding Media in Form View.
● Sound: Use the Sound button to Record Mic or Import Sound to your question.
Learn more in Adding Audio in Form View.
● Click Preview to see a preview of your question. Available options while previewing your
question include the following:
● Close Preview: Click this button to return to editing your question.
● Select: Click this button to select another question in the quiz to preview.
● Replay: Click this button above the Replay text to Replay this question. Click the
arrow beneath the Replay text to select other options, including Replay this
question, Replay this group, or Replay entire quiz.
To customize your question:
To learn more about further customizing your question, please review Customizing Questions in Slide
View.
© 2009 Articulate Global, Inc. articulate.com Page 84 of 155
Quizmaker ’09
Results
Question Results Feedback and Branching
Quizmaker ’09 allows you to include results feedback and to set up branching in questions.
To set question feedback and branching:
1. Create a new or edit an existing question.
2. In the Set Feedback and Branching section at the bottom of the question, enter text in the
feedback field (leave blank for no prompt).
3. To format text, add audio feedback, or configure branching, click the ellipsis button (…) next to
the feedback field to open theQuestion Feedback window.
1. Format text, as desired. Learn more in Formatting Text in Form View.
2. Add any hyperlinks, as desired. Learn more in Adding Hyperlinks in Form View.
3. Record or import audio for your question feedback, as desired. Learn more in Adding
Audio in Form View.
4. Configure Branching, as desired, by using the Branch to the following slide drop-
down menu. By default, the user will progress to the next question or slide after
answering a question. Instead of the next question or slide, you can specify which
question or slide a user will go to after a correct or incorrect answer to a question (or
after any response to a survey question). Options include the following:
● Next question (->) (default)
● Finish Quiz (->|)
● Specific question
5. Click OK to save your feedback and branching settings, or Cancel to exit without saving
changes.
4. If you recorded any audio feedback or configured branching, you will see icons to indicate your
choice(s) next to each feedback field in the question view.
5. You can also assign a point value to a correct or incorrect answer (graded questions only) by
clicking in the corresponding Points field and inputting a whole integer value greater than or
equal to 0, or by clicking the up or down arrows.
© 2009 Articulate Global, Inc. articulate.com Page 85 of 155
Quizmaker ’09

Quiz Results Slide
The results slide is a customizable slide you can choose to enable at the end of your quiz. You can
choose to display a pass and/or fail results slide, which will display based on quiz results.
Learn more about the results slides:
● Pass Result: To change the results slide for a pass message, click the Pass Result button on
the toolbar. To learn more, see Quiz Pass Result Slide
.
● Fail Result: To change the results slide for a fail message, click the Fail Result button on the
toolbar. To learn more, see Quiz Fail Result Slide
.
© 2009 Articulate Global, Inc. articulate.com Page 86 of 155
Quizmaker ’09

Quiz Pass Result Slide
The Pass Results slide is a slide the user sees at the end of a quiz that is successfully passed.
To edit the Pass Result slide of a quiz or survey:
1. Click the Pass Result button on the Quizmaker ’09 toolbar. This will open the Pass Result
Slidewindow.
2. Ensure you are viewing in Form View by selecting the Form View button in the top ribbon.
3. Check theDisplay passing result slide box to enable the pass result slide; uncheck the box
to disable the pass results slide.
4. Set other options for your pass results slide:
● Show user’s score: Check this option to display the user’s score on the slide; uncheck
to hide the user’s score on the slide.
● Show passing score: Check this option to display the passing score on the slide;
uncheck to hide the passing score on the slide.
● Allow user to review quiz: Check this option to allow the user to review the quiz;
uncheck to disallow the user from reviewing the quiz.
● Allow user to email results to: Check this box to allow a user to email the results of
the quiz to an email address that you specify in the email field.
● Allow user to print results: Check this box to allow a user to print results.When
checked, you can also enable the below option:
● Prompt the user for their name before printing: Check to prompt users
for name; uncheck this box to disable a prompt for name before printing.
5. Set the Finish Action for your slide. This is what will happen when the user finishes the quiz
or survey. Choose from the following options:
● Close browser window: Select this option to make the finish button close the
windowwhen the user clicks it.
● Go to URL: Select this option and specify a URL to make the finish button link to it
when the user clicks it.
6. Click Save & Close to save your slide, or continue editing your slide as outlined below.
To edit the results slide:
● Save & Close
● Save & Closewill save your slide and close the slide window, bringing you back to your
Question List.
© 2009 Articulate Global, Inc. articulate.com Page 87 of 155
Quizmaker ’09

● Show
● Form View allows you to work on your slide in the form view.
● Slide View allows you to customize your slide in greater detail. To learn more, see
Customizing Questions in Slide View.
● Clipboard
● Cut: Select text and click Cut in order to cut the selection from the question and put it
on the clipboard. Keyboard shortcut: Ctrl+X.
● Copy: Select text and click Copy in order to copy the selection to the clipboard.
Keyboard shortcut: Ctrl+C.
● Paste: Click in the question and click Paste where you want the contents of the
clipboard to be pasted. Keyboard shortcut: Ctrl+V.
● Text
● Formatting: Learn more in Formatting Text in Form View.
● Hyperlink: Learn more in Adding Hyperlinks in Form View.
● Spelling: Click Spelling to check the spelling of text. Keyboard shortcut: F7. Learn
more in Running the Spell Check.
● Insert
● Media: In a results slide, add Pictures or Flash movies by switching to Slide View ->
Insert. To learn more, see Slide View: Insert Tab.
● Sound: Use the Sound button to Record Mic or Import Sound to your slide. Learn
more in Adding Audio in Form View.
● Click Preview to see a preview of your slide. Available options while previewing your slide
include the following:
● Close Preview: Click this button to return to editing your slide.
● Select: Click this button to select another question or slide in the quiz to preview.
● Replay: Click this button above the Replay text to Replay this question. Click the
arrow beneath the Replay text to select other options, including Replay this
question, Replay this group, or Replay entire quiz.
To customize your question:
To learn more about further customizing your slide, please review Customizing Questions in Slide
View.
© 2009 Articulate Global, Inc. articulate.com Page 88 of 155
Quizmaker ’09
Quiz Fail Result Slide
The Fail Results slide is a slide the user sees at the end of a quiz that is not passed.
To edit the Fail Result slide of a quiz or survey:
1. Click the Fail Result button on the Quizmaker ’09 toolbar. This will open the Fail Result Slidewindow.
2. Ensure you are viewing in Form View by selecting the Form View button in the top ribbon.
3. Check theDisplay failing result slide box to enable the fail result slide; uncheck the box to
disable the fail results slide.
4. Set other options for your fail results slide:
● Show user’s score: Check this option to display the user’s score on the slide; uncheck
to hide the user’s score on the slide.
● Show passing score: Check this option to display the passing score on the slide;
uncheck to hide the passing score on the slide.
● Allow user to review quiz: Check this option to allow the user to review the quiz;
uncheck to disallow the user from reviewing the quiz.
● Allow user to email results to: Check this box to allow a user to email the results of
the quiz to an email address that you specify in the email field.
● Allow user to print results: Check this box to allow a user to print results.When
checked, you can also enable the below option:
● Prompt the user for their name before printing: Check to prompt users
for name; uncheck this box to disable a prompt for name before printing.
5. Set the Finish Action for your slide. This is what will happen when the user finishes the quiz
or survey. Choose from the following options:
● Close browser window: Select this option to make the finish button close the
windowwhen the user clicks it.
● Go to URL: Select this option and specify a URL to make the finish button link to it
when the user clicks it.
6. Click Save & Close to save your slide, or continue editing your slide as outlined below.
To edit the results slide:
● Save & Close
● Save & Closewill save your slide and close the slide window, bringing you back to your
Question List.
© 2009 Articulate Global, Inc. articulate.com Page 89 of 155
Quizmaker ’09
● Show
● Form View allows you to work on your slide in the form view.
● Slide View allows you to customize your slide in greater detail. To learn more, see
Customizing Questions in Slide View.
● Clipboard
● Cut: Select text and click Cut in order to cut the selection from the question and put it
on the clipboard. Keyboard shortcut: Ctrl+X.
● Copy: Select text and click Copy in order to copy the selection to the clipboard.
Keyboard shortcut: Ctrl+C.
● Paste: Click in the question and click Paste where you want the contents of the
clipboard to be pasted. Keyboard shortcut: Ctrl+V.
● Text
● Formatting: Learn more in Formatting Text in Form View .
● Hyperlink: Learn more in Adding Hyperlinks in Form View.
● Spelling: Click Spelling to check the spelling of text. Keyboard shortcut: F7. Learn
more in Running the Spell Check.
● Insert
● Media: In a results slide, add Pictures or Flash movies by switching to Slide View ->
Insert. To learn more, see Slide View: Insert Tab.
● Sound: Use the Sound button to Record Mic or Import Sound to your slide. Learn
more in Adding Audio in Form View.
● Click Preview to see a preview of your slide. Available options while previewing your slide
include the following:
● Close Preview: Click this button to return to editing your slide.
● Select: Click this button to select another question or slide in the quiz to preview.
● Replay: Click this button above the Replay text to Replay this question. Click the
arrow beneath the Replay text to select other options, including Replay this
question, Replay this group, or Replay entire quiz.
To customize your question:
To learn more about further customizing your slide, please review Customizing Questions in Slide
View.
© 2009 Articulate Global, Inc. articulate.com Page 90 of 155
Quizmaker ’09

Slide View
Customizing Questions in Slide View
One of themore remarkable features of Quizmaker ’09 is the ability to customize the appearance of
your questions or quizzes.
Selecting Slide View from the ribbon when editing a question brings up a host of settings and
options which can allow you to import images, sounds, text and videos, set animations and
transitions for slides and individual objects, choose a theme, edit and create custom themes, choose
a background style and edit and create custom background styles, format a background, create
Master Slideswith their own animations, transitions, background styles and objects.
On top of all the above features, Quizmaker ’09 introduces the new Timeline tool, enabling
authors to time actions and events within individual questions.
To manage Slide View customization:
1. Select and open an existing question in your quiz or survey or create a new question.
2. Click the Slide View from the top ribbon.
Explore the following help topics to learn more:
● Home Tab
● Insert Tab
● Options Tab
● Design Tab
● Animations Tab
● View Tab
● Format Tab
● Timeline
© 2009 Articulate Global, Inc. articulate.com Page 91 of 155
Quizmaker ’09
Home Tab
Use theHome tab of Slide View to specify text and basic drawing settings for your quizzes.
To manage the Home tab:
1. Select and open an existing question in your quiz or survey or create a new question.
2. Click the Slide View from the top ribbon.
3. TheHome tab is opened by default and is divided into the following sections:
● Clipboard
● Paste: Click on Paste to paste the contents of your clipboard into the
document. Keyboard shortcut: Ctrl+V.
● Cut: Click on Cut (icon) to cut the selection from the document and place it on
the clipboard. Keyboard shortcut: Ctrl+X.
● Copy: Click on Copy (icon) to copy the selection from the document and place on
the clipboard. Keyboard shortcut: Ctrl+C.
● Format Painter: Click on Format Painterto copy formatting from one place to
another. Double-click this button to apply the same formatting to multiple places
in the document. No keyboard shortcut
● Text: This sections contains the following options to format your text.
● Font: Click Font to change the font face.
● Font size: Click Font size to specific a size for the font.
● Grow Font: Click this button to increase the font size. Keyboard shortcut:
Ctrl+>.
● Grow Font: Click this button to decrease the font size. Keyboard shortcut:
Ctrl+<.
● Bold: Click Bold to make the selected text bold. Keyboard shortcut: Ctrl+B.
● Italics: Click Italics to make the selected text italics. Keyboard shortcut: Ctrl+B.
● Underline: Click Underline to make the selected text underlined. Keyboard
shortcut: Ctrl+U.
● Strikethrough: Click Strikethrough to draw a line through themiddle of the
selected text.
● Subscript: Click Subscript to create small letters below the text baseline.
Keyboard shortcut: Ctrl+=.
● Superscript: Click Superscript to create small letters above the text baseline.
Keyboard shortcut: Ctrl+Shift++.
© 2009 Articulate Global, Inc. articulate.com Page 92 of 155
Quizmaker ’09
● Change Case: Click Change Case to change all the selected text to UPPERCASE,
lowercase or other common capitalizations.
● Text Highlight Color: Click Text Highlight Color to make text look like it was
marked with a highlighter pen. Click the down arrow to the right to change color.
● Font Color: Click Font Color to apply the font color. Select the down arrow to
change the color.
● Spelling: Click Spelling to check the spelling of text. Keyboard shortcut: F7. To
learn more, see Running the Spell Check.
● Clear Formatting: Click Clear Formatting to clear all the formatting from the
text, leaving only the plain text.
● Paragraph
● Bullets: Click Bullets to start a bulleted list
● Numbering: Click Numbering to start a numbered list. Click the arrow to choose
different numbering formats.
● Decrease Indent: Click Decrease Indent to decrease the indent level of the
paragraph.
● Increase Indent: Click Increase Indent to increase the indent level of the
paragraph.
● Line Spacing: Click Line Spacing to specify the line spacing to use.
● Align Text Left: Click Align Text Left to align text to the left. Keyboard shortcut:
Ctrl+L.
● Center: Click Center to center text. Keyboard shortcut: Ctrl+E.
● Align Text Right: Click Align Text Right to align text to the right. Keyboard
shortcut: Ctrl+R.
● Justify: Click Justify to align paragraph to both the left and right margins by
adding extra space between characters as necessary. This creates a document
with a clean look.
● Align Text: Click Align Text to change how the text is aligned within the shape.
● Drawing
● Arrange: Click Arrange to arrange objects on the slide by changing their order,
position, and rotation.
● Shape Quick Styles: Click Quick Styles to arrange objects on the slide by
changing their order, position, and rotation.
● Shape Fill: Click Shape Fill to choose a visual style for the shape or line.
© 2009 Articulate Global, Inc. articulate.com Page 93 of 155
Quizmaker ’09
● Shape Outline: Click Shape Outline to specify the color, width, and line style for
the outline of the selected shape.
● Shape Effects: Click Shape Effects to apply a visual effect to the selected shape,
such as shadow, glow, reflection, or rotatio.
● Format Shape: Click Format Shape to show the Format Shape dialog box.
© 2009 Articulate Global, Inc. articulate.com Page 94 of 155
Quizmaker ’09

Insert Tab
Use theView tab of Slide View to insert text, shapes, callouts, video and sound to your quiz layout.
To manage the Insert tab:
1. Select and open an existing question in your quiz or survey or create a new question.
2. Click the Slide View from the top ribbon.
3. Select Insert tab from themenu.
The Insert tab is divided into the following sections:
1. Choices
● TheAdd Choice button allows you to add an extra choice to a question (applies only to
Multiple Choice andMultiple Response quiz type questions and Pick One and
Pick Many survey type questions).
2. Illustrations
● Picture: Select this button to insert a picture from a file.
● Shapes: Select this option to insert ready-made shapes, such as rectangles, circles,
arrows, lines, and callouts.
3. Text
● Text Box: Insert a text box into the slide.
● Hyperlink: Select this option to create a link to aWeb page, a picture, an e-mail
address, or a program. To learn more, see Adding Hyperlinks in Form View.
● Symbol: Click this button to insert characters that are not on your keyboard, such as
copyright symbols, trademark symbols, paragraph marks, and Unicode characters.To
learn more, see Inserting Symbols.
4. Media Clips
● Flash: Click the Flash button to add a .SWF or .FLV video into the slide.
● Sound: Click the Sound button to import or record a sound clip or music into the slide.
● Record Mic to open the Record Audio box.
● Import Audio to select either a WAV file or MP3.
To learn more, see Adding Audio in Form View.
© 2009 Articulate Global, Inc. articulate.com Page 95 of 155
Quizmaker ’09
Options Tab
The Options tab gives you the same options that are available when editing a question in the Form
View.
To manage the Options tab:
1. Select and open an existing question in your quiz or survey or create a new question.
2. Click the Slide View from the top ribbon.
3. Select theOptions tab.
Refer to the help topics on creating questions to learn more about availableDisplay and Scoringsettings by question type:
● Creating a Graded Question
● Creating a Survey Question
© 2009 Articulate Global, Inc. articulate.com Page 96 of 155
Quizmaker ’09
Design Tab
Use theDesign tab of Slide View to define settings for your design parameters.
To manage the Design tab:
1. Select and open an existing question in your quiz or survey or create a new question.
2. Click the Slide View from the top ribbon.
3. Select theDesign tab from themenu.
There are two main sections to the Design tab:
● Themes
● Backgrounds
Themes
This section allows you to define a theme for a particular question. (If you want to define a theme for
a series of questions or an entire quiz, you can set the theme via the SlideMaster -> Slide View -> Slide
Master.)
● Select a Theme: Choose one of the seven visible themes or click on the up or down arrows to
scroll up and down through the available selection of themes. Clicking the bottom arrow brings
up all the available themes as well as options to Browse for themes on your computer
(keyboard shortcut: M when all theme drop-down is expanded), or to save a theme for later
use. Themes are saved in the format: Articulate Themes and Themed Documents (.athm).
● Change the Color of a Theme: You can apply different color palettes to a theme by clicking
on the Color button to the right of the Theme selection window. A variety of ready-made
palettes are available which will change how shapes, hyperlinks or other aspects of your theme
will appear. If you prefer, you can create your own color palette by clicking on Create New
Theme Colors (keyboard shortcut: C when Colors drop-down is expanded).This open a new
dialog box called Customizing the theme colors. You can select which colors to apply to
which parts of your template and then save you selection under a new name by clicking on the
Save button.
● Theme Fonts: Clicking the Theme Fonts button allows you to define a group of fonts for a
particular theme. A selection of Theme Fonts are available to choose from or you can create a
new Theme font by clicking on Create New Theme Fonts (keyboard shortcut: C when Fonts
drop-down is expanded). This opens a new dialog box where you can choose a Heading font
and a Body font that make up the Theme Font. You can save your customized Theme Font
by clicking on Save.
Background
The Background section of the Design Tab allows you to apply affects to the Theme that you have
selected.
Background styles
© 2009 Articulate Global, Inc. articulate.com Page 97 of 155
Quizmaker ’09

Background Styles are powerful tools to alter the overall appearance of your question or quiz.
Clicking on Background Styles brings up a selection of 12 background styles, which, when applied
to a particular theme, will change its appearance. Right-clicking on one of the available styles allows
you to apply this style to Only This Question orAll Questions.
Format Background
Clicking on Format Background (keyboard shortcut: B from the Background Styles dialog box)
brings up a new dialog box called Format Background.
Available options include:
● Fill: The Fill tab has a number of options:
● Solid Fill: Selecting Solid Fill gives you a plain color background style to your question
or quiz. You can opt to hide the background graphics giving you just a plain color as
background.
● Colors: You can also define the color of your background style by clicking on
Color, and selecting a color from a Theme Color, a Standard Color or by
creating a Custom Color (selectMore Colors - keyboard Shortcut: M when the
color palette drop-down is expanded).
● Transparency: You can define the transparency of your background style by
moving the cursor from left to right. Alternatively you can define the
transparency you desire by entering a figure in the box to the right, and
increasing and decreasing this figure by selecting the up and down arrows.
● Gradient Fill: This option enables you to have a gradient effect in your background
style. There are a number of parameters available to customize your gradient effect.
● Preset Colors: You can choose to use Preset Colors by clicking on the Preset
Colors button. Twenty-four preset gradient colors are available.
● Type: You can choose from four types of gradient; Linear, Radial, Rectangular
and Path.
● Direction: According to the Type of gradient chosen (see above), various
settings are available to fix the direction of the gradient. These include up to eight
preset directions settings and the possibility to fix the angle oneself. Not all
Direction types allow the customization of the direction settings.
● Gradient Stops: You can add and remove Gradient Stops to give a further effect
to your background style by clicking on the Add and Remove buttons, and define
the Stop position for each Gradient Stop by dragging the cursor from left to right
or by entering a percentage to the right.
● Colors: You can also define the color of your background style by clicking on
Color, and selecting a color from a Theme Color, a Standard Color or by
© 2009 Articulate Global, Inc. articulate.com Page 98 of 155
Quizmaker ’09
creating a Custom Color (selectMore Colors - keyboard Shortcut: M when the
color palette drop-down is expanded).
● Transparency: You can define the transparency of your background style by
moving the cursor from left to right. Alternatively you can define the
transparency you desire by entering a figure in the box to the right, and
increasing and decreasing this figure by selecting the up and down arrows.
● Picture or Texture Fill: Selecting this option allows you to define an image or texture
rather than a plain color or gradient as your background style.
● Texture: Clicking the Texture button brings up a choice of 35 textures which you
can apply to your question or quiz. These are preset textures.
● Insert from:: You can customize your texture background by selecting a file
from your computer or by importing an image. Click the File… button to import
an image from your computer. Click the Clipboard button to paste an image
from your Clipboard.
● Tile picture as Texture: This option allows you to tile the image file over the
entire background style. It therefore allows you to apply a background while
minimizing the image file size, as the same image is copied several times. it can
also be useful to create certain effects.
● Tiling Options: You can apply X and Y Offset parameters, X and Y Scaling,
choose from a variety of Alignment options as well as choose one of four Mirror
type options: Horizontal, Vertical, Both or None.
● Transparency: You can define the transparency of your background style by
moving the cursor from left to right. Alternatively you can define the
transparency you desire by entering a figure in the box to the right, and
increasing and decreasing this figure by selecting the up and down arrows.
● Picture: If you’ve inserted a picture, click the Picture tab to set options for your picture.
● Recolor: You can recolor your picture by clicking the Recolor drop-down and choosing
one of the options under 4 categories of recoloring: No Recolor, Color Modes, Dark
Variations, or Light Variations.
● Brightness: You can define the brightness of your picture by moving the cursor from
left to right. Alternatively you can define the brightness you desire by entering a figure in
the box to the right, and increasing and decreasing this figure by selecting the up and
down arrows.
● Contrast: You can define the contrast of your picture by moving the cursor from left to
right. Alternatively you can define the contrast you desire by entering a figure in the box
to the right, and increasing and decreasing this figure by selecting the up and down
arrows.
© 2009 Articulate Global, Inc. articulate.com Page 99 of 155
Quizmaker ’09

● Transparency: You can define the transparency of your picture by moving the cursor
from left to right. Alternatively you can define the transparency you desire by entering a
figure in the box to the right, and increasing and decreasing this figure by selecting the
up and down arrows.
© 2009 Articulate Global, Inc. articulate.com Page 100 of 155
Quizmaker ’09
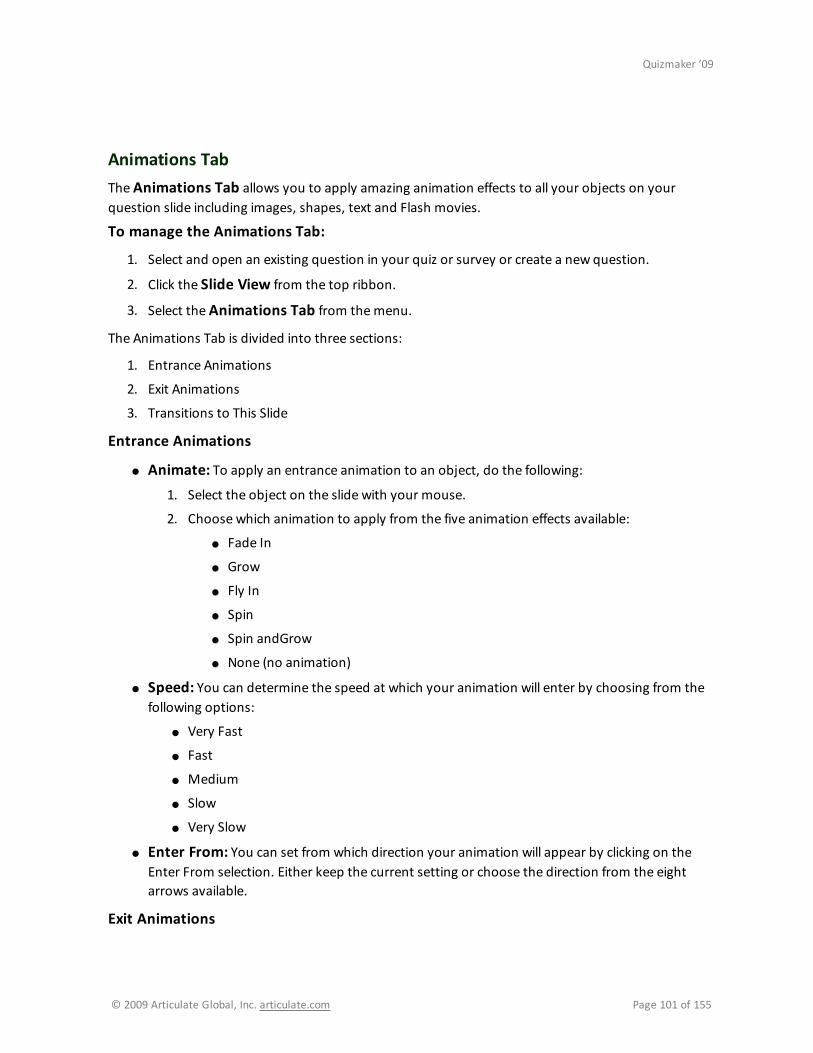
Animations Tab
TheAnimations Tab allows you to apply amazing animation effects to all your objects on your
question slide including images, shapes, text and Flash movies.
To manage the Animations Tab:
1. Select and open an existing question in your quiz or survey or create a new question.
2. Click the Slide View from the top ribbon.
3. Select theAnimations Tab from themenu.
The Animations Tab is divided into three sections:
1. Entrance Animations
2. Exit Animations
3. Transitions to This Slide
Entrance Animations
● Animate: To apply an entrance animation to an object, do the following:
1. Select the object on the slide with your mouse.
2. Choose which animation to apply from the five animation effects available:
● Fade In
● Grow
● Fly In
● Spin
● Spin andGrow
● None (no animation)
● Speed: You can determine the speed at which your animation will enter by choosing from the
following options:
● Very Fast
● Fast
● Medium
● Slow
● Very Slow
● Enter From: You can set from which direction your animation will appear by clicking on the
Enter From selection. Either keep the current setting or choose the direction from the eight
arrows available.
Exit Animations
© 2009 Articulate Global, Inc. articulate.com Page 101 of 155
Quizmaker ’09
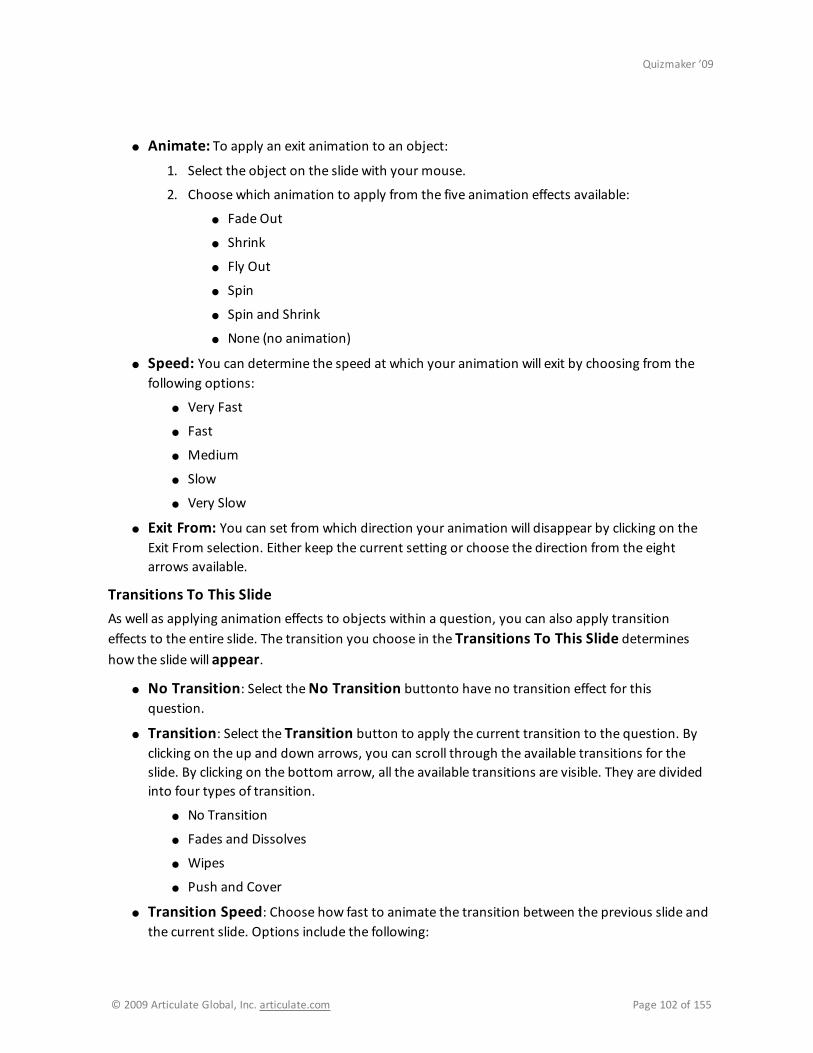
● Animate: To apply an exit animation to an object:
1. Select the object on the slide with your mouse.
2. Choose which animation to apply from the five animation effects available:
● Fade Out
● Shrink
● Fly Out
● Spin
● Spin and Shrink
● None (no animation)
● Speed: You can determine the speed at which your animation will exit by choosing from the
following options:
● Very Fast
● Fast
● Medium
● Slow
● Very Slow
● Exit From: You can set from which direction your animation will disappear by clicking on the
Exit From selection. Either keep the current setting or choose the direction from the eight
arrows available.
Transitions To This Slide
As well as applying animation effects to objects within a question, you can also apply transition
effects to the entire slide. The transition you choose in the Transitions To This Slide determines
how the slide will appear.
● No Transition: Select theNo Transition buttonto have no transition effect for this
question.
● Transition: Select the Transition button to apply the current transition to the question. By
clicking on the up and down arrows, you can scroll through the available transitions for the
slide. By clicking on the bottom arrow, all the available transitions are visible. They are divided
into four types of transition.
● No Transition
● Fades and Dissolves
● Wipes
● Push and Cover
● Transition Speed: Choose how fast to animate the transition between the previous slide and
the current slide. Options include the following:
© 2009 Articulate Global, Inc. articulate.com Page 102 of 155
Quizmaker ’09

● Very Fast
● Fast
● Medium
● Slow
● Very Slow
● Apply To All: Select this button to set the transition between all slides in the project to be like
the transition you have set up for the current slide.
Preview
At any point, you can preview your animations and transitions by clicking the Preview button.
© 2009 Articulate Global, Inc. articulate.com Page 103 of 155
Quizmaker ’09

View Tab
TheView Tab allows you to set how the application displays the slide on your computer while you
are working on it. It also gives you access to the Slide Master View.
To manage the View Tab:
1. Select and open an existing question in your quiz or survey or create a new question.
2. Click the Slide View from the top ribbon.
3. Select theView Tab from themenu.
There are three sections in the View Tab:
1. Master
2. Show/Hide
3. Zoom
Master
Selecting the Slide Master icon opens the Slide Master View to change the design and layout of
theMaster Slides.
The Slide Master View enables you to apply themes, background styles, fonts and colors in much
the sameway as you would for one unique slide, except that you can use the Slide Master View to
apply these effects to several slides. By creating aMaster Slide, you can use the formatting and
layout to produce a consistent style for all your questions.
Available options in the Edit Master section include the following:
● ● Insert Slide Master: Click this button to add a new SlideMaster.
● Delete: Click this button to remove the layout from the project.
● Rename: Click this button to rename the custom layout. The name is shown in the
layout gallery when adding slides to the project.
● Preserve: Click this button to preserve the selected master so that it remains with the
project even if it is not used.
Just as with a single slide, you can edit the theme or the background of a SlideMaster and format the
background.
Show/Hide
You can show or hide various features of your slide to help you work more effectively. Options
include the following:
© 2009 Articulate Global, Inc. articulate.com Page 104 of 155
Quizmaker ’09

● Ruler: View the rulers, used to measure and line up objects on the stage.
● Gridlines: Turn on gridlines to which you can align objects on the stage (keyboard shortcut:
Shift+F9).
● Notes: Show the notes. This displays a bar to the right of the slide on which you can click to
show a notes windowwhere you can write your own personal notes for this question.
● Timeline: Show the Timeline to help select individual objects and to change their order,
visibility, and timing.
● Player: View the player on the stage.
Zoom
● Zoom: Open the Zoom dialog box to specify the zoom level of the stage. In most cases, you
can also use the zoom controls in the status bar at the bottom of the window to quickly zoom
the stage.
● Fit to Window: Zoom the stage so that the content fills the window.
© 2009 Articulate Global, Inc. articulate.com Page 105 of 155
Quizmaker ’09

Format Tab
The Format Tab allows you to apply formatting to all your objects on your question slide including
images, shapes, text, Flash movies, and audio.
To manage the Format Tab:
1. Select and open an existing question in your quiz or survey or create a new question.
2. Click the Slide View from the top ribbon.
3. Select an object on your slide.
4. According to the type of object you select, a Format tab will appear in the top menu for one
of four sets of tools:
● Drawing Tools
● Picture Tools
● Movie Tools
● Sound Tools
5. Click the Format tab to access these tools.
You can move from one set of tools to another by clicking on an appropriate object on your question
slide.
For example, to view theMovie Tools, click on a movie (a .SWF or .FLV file) on your slide.
© 2009 Articulate Global, Inc. articulate.com Page 106 of 155
Quizmaker ’09
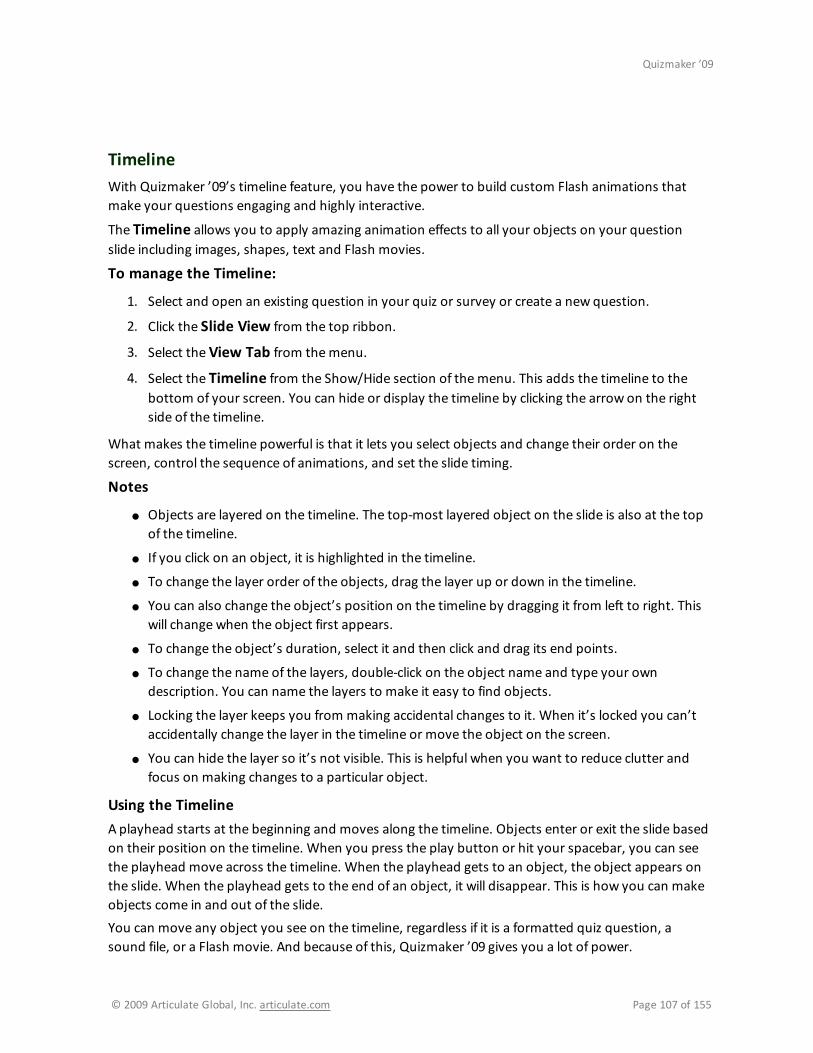
Timeline
With Quizmaker ’09’s timeline feature, you have the power to build custom Flash animations that
make your questions engaging and highly interactive.
The Timeline allows you to apply amazing animation effects to all your objects on your question
slide including images, shapes, text and Flash movies.
To manage the Timeline:
1. Select and open an existing question in your quiz or survey or create a new question.
2. Click the Slide View from the top ribbon.
3. Select theView Tab from themenu.
4. Select the Timeline from the Show/Hide section of themenu. This adds the timeline to the
bottom of your screen. You can hide or display the timeline by clicking the arrow on the right
side of the timeline.
What makes the timeline powerful is that it lets you select objects and change their order on the
screen, control the sequence of animations, and set the slide timing.
Notes
● Objects are layered on the timeline. The top-most layered object on the slide is also at the top
of the timeline.
● If you click on an object, it is highlighted in the timeline.
● To change the layer order of the objects, drag the layer up or down in the timeline.
● You can also change the object’s position on the timeline by dragging it from left to right. This
will change when the object first appears.
● To change the object’s duration, select it and then click and drag its end points.
● To change the name of the layers, double-click on the object name and type your own
description. You can name the layers to make it easy to find objects.
● Locking the layer keeps you from making accidental changes to it. When it’s locked you can’t
accidentally change the layer in the timeline or move the object on the screen.
● You can hide the layer so it’s not visible. This is helpful when you want to reduce clutter and
focus on making changes to a particular object.
Using the Timeline
A playhead starts at the beginning and moves along the timeline. Objects enter or exit the slide based
on their position on the timeline. When you press the play button or hit your spacebar, you can see
the playhead move across the timeline. When the playhead gets to an object, the object appears on
the slide. When the playhead gets to the end of an object, it will disappear. This is how you can make
objects come in and out of the slide.
You can move any object you see on the timeline, regardless if it is a formatted quiz question, a
sound file, or a Flash movie. And because of this, Quizmaker ’09 gives you a lot of power.
© 2009 Articulate Global, Inc. articulate.com Page 107 of 155
Quizmaker ’09
If you right-click on a layer, you’ll find additional timing and display options.
● Cut
● Copy
● Paste
● Bring to Front
● Send to Back
● Align to Playhead
● ShowUntil End
● ShowAlways
● Timing
Quizmaker ’09’s timeline gives you a lot of power to create animated sequences for your quizzes and
surveys. You are empowered to build sophisticated Flash-based animations for you quiz and survey
questions.
© 2009 Articulate Global, Inc. articulate.com Page 108 of 155
Quizmaker ’09

Drawing Tools
TheDrawing Tools allow you to apply formatting to the text boxes and shapes on your question
slide.
To manage the Drawing Tools:
1. Select and open an existing question in your quiz or survey or create a new question.
2. Click the Slide View from the top ribbon.
Select a text box or a shape on your slide.
3. Select the Format Tab which appears on themenu with the labelDrawing Tools.
The Drawing Tools are divided into four sections:
1. Insert Shapes
2. Shape Styles
3. Arrange
4. Size
Insert Shapes
This section allows you to insert ready-made shapes, such as rectangles, circles, arrows, lines, and
callouts or a text box. To view other shapes and options, click on the up and down arrows to the right
of the section. To view all the options, click the bottom arrow.
Shape Styles
This section allows you to define a particular style for your shape or text box.
● Preset StylesA selection of 7 preset Shape Styles is visible. The colors available are determined by the Color
Theme you have selected (Slide View -> Design). Clicking the arrows to the right allows you
to scroll through the 35 preset Shape Styles available. Clicking the bottom arrow brings up all
of the 35 styles from which you can choose.
● Customize Your Styles: You can also customize your Shape Style by selecting one of the
three tools to the right of the Shape Styles section:
● Shape Fill: Fill the selected shape or text box with a solid color, gradient, picture, or
texture. Clicking the icon will fill the shape with the default color as shown in the button
itself. Clicking the down arrow to the right will allow you to define the color, gradient,
picture or texture.
● Shape Outline: Specify the color, width, and line style for the outline of the selected
shape or text box. Selecting the icon will apply the default color. Clicking the down arrow
to the right allows you to define a color to apply.
© 2009 Articulate Global, Inc. articulate.com Page 109 of 155
Quizmaker ’09

● Shape Effects: Apply a visual effect to the selected shape, such as shadow, glow,
reflection, or rotation. A number of styles are available for each, and further options are
available for defining Shadows.
Arrange
This section allows you to organize and set the object layers with which your slide will be viewed and
the alignment and rotation of objects within your slide. The following options are available:
● Bring to Front: Bring the selected object in front of all other objects so that no part of it is
hidden behind another object. Clicking the right arrow gives the option Bring Forward. Thisbrings the object one layer forward rather than right to the very front.
● Send to Back: Send the selected object behind all other objects. Clicking the right arrow gives
the option Send Backward. This sends the object one layer down rather than straight to the
very back.
● Timeline Pane: Show the Timeline to help select individual objects and to change their order,
visibility, and timing.
● Align: Align the edges ofmultiple selected objects. You can also center them or distribute
them evenly across the slide.
● Rotate: Rotate or flip the selected object. Under the rotatemenu is the option to selectMore
Rotation Options. See below for more details on this dialog.
Size
This section allows you to define the width and height (in pixels) of your shape or text box. You can
input the size in pixels directly or use the arrows to reach the desired values. Clicking the small arrow
at the bottom right of the Size section brings up the Size and Position dialog box. The Size and
Position dialog includes the following options:
● Size
● Size and rotate (height, width, rotation)
● Scale (height, width, lock aspect ratio)
● Crop from (left, right, top, bottom)
● Original Size (height and width in pixels)
● Reset button
● Position
● Position on slide (horizontal from, vertical from)
© 2009 Articulate Global, Inc. articulate.com Page 110 of 155
Quizmaker ’09

Picture Tools
The Picture Tools allow you to apply formatting to pictures on your question slide.
To manage the Picture Tools:
1. Select and open an existing question in your quiz or survey or create a new question.
2. Click the Slide View from the top ribbon.
Select a picture on your slide.
3. Select the Format Tab which appears on themenu with the label Picture Tools.
The Picture Tools are divided into four sections:
1. Adjust
2. Picture Styles
3. Arrange
4. Size
Adjust
This section allows you to make adjustments to your pictures, including making changes to the
brightness and the contrast of your pictures. The following options are available:
● Brightness: Increase or decrease the brightness of the picture. Nine settings are available thatallow you to lighten or darken your picture as well as a link to other Picture Correction Options
within Format Shape dialog.
● Contrast: Increase or decrease the contrast of the picture. Nine settings are available that
allow you to increase or reduce the contrast of your picture as well as a link to other Picture
Correction Optionswithin the Format Shape dialog.
● Recolor: Recolor the picture to give it a stylized effect, such as grayscale or sepia tone. A
number of color modes and variations are available. You also have the option to set a
transparent color.
● Click on the Set Transparent Color icon. The cursor changes form.
● Click on a particular color on your picture.
● That color becomes transparent in your picture.
This option can be useful when you want to remove a background color from an object in a
picture.
● Change Picture: Change to a different picture, preserving the formatting and size of the
current picture.
● Reset Picture: Remove all formatting to the picture and return it to its original state when
being inserted into the slide.
Picture Styles
© 2009 Articulate Global, Inc. articulate.com Page 111 of 155
Quizmaker ’09
● Preset Styles: A selection of preset Picture Styles is visible. Clicking the arrows to the right
allows you to scroll through the preset Picture Styles available. Clicking the bottom arrow
brings up all of the styles from which you can choose.
● Customize Your Styles: You can also customize your Picture Style by selecting one of the
three tools to the right of the Picture Styles section:
1. Picture Shape: Change the shape of the picture, preserving all the formatting. A
variety of shapes are available, including callouts.
2. Picture Border: Specify the color, width, and line style for the outline of the selected
picture. Selecting the icon will apply the default color. Clicking the down arrow to the
right allows you to define a color to apply as well as the type of border. You can vary the
width of your border as well as its nature.
3. Picture Effects: Apply a visual effect to the selected picture, such as shadow, glow,
reflection, or rotation. A number of styles are available for each, and further options are
available for defining Shadows.
Arrange
This section allows you to organize and set the object layers with which your slide will be viewed and
the alignment and rotation of objects within your slide. The following options are available:
● Bring to Front: Bring the selected object in front of all other objects so that no part of it is
hidden behind another object. Clicking the right arrow gives the option Bring Forward. Thisbrings the object one layer forward rather than right to the very front.
● Send to Back: Send the selected object behind all other objects. Clicking the right arrow gives
the option Send Backward. This sends the object one layer down rather than straight to the
very back.
● Timeline Pane: Show the Timeline to help select individual objects and to change their order,
visibility, and timing.
● Align: Align the edges ofmultiple selected objects. You can also center them or distribute
them evenly across the slide.
● Rotate: Rotate or flip the selected object. Under the rotatemenu is the option to selectMore
Rotation Options. See below for more details on this dialog.
Size
This section allows you to add a zoom option, crop your picture, as well as to define the width and
height (in pixels) of your shape or text box.
● Zoom Picture: Allow user to zoom picture, if picture is smaller than original. This feature
allows you to place a zoom button on your slide if you want the student to be able to zoom
the picture while they are taking the quiz. First select the picture and then click on Zoom
Picture. Amagnifying glass symbol indicating that a zoom is possible is placed on the slide next
to the picture.
© 2009 Articulate Global, Inc. articulate.com Page 112 of 155
Quizmaker ’09
● Crop: Crop the picture to remove any unwanted parts.
● Width and Height: You can input the size in pixels directly or use the arrows to reach the
desired values. Clicking the small arrow at the bottom right of the Size section brings up the
Size and Position dialog box. The Size and Position dialog includes the following options:
● Size
● Size and rotate (height, width, rotation)
● Scale (height, width, lock aspect ratio)
● Crop from (left, right, top, bottom)
● Original Size (height and width in pixels)
● Reset button
● PositionPosition on slide (horizontal from, vertical from)
© 2009 Articulate Global, Inc. articulate.com Page 113 of 155
Quizmaker ’09

Formatting Shapes
The Format Shape dialog box allows you to apply formatting to shapes, pictures, text boxes, and
movies on your question slide.
To manage the Format Shapes dialog box:
1. Select and open an existing question in your quiz or survey or create a new question.
2. Click Slide View on the toolbar.
3. Select a shape, picture, text box or movie on your slide.
4. Click the Format tab underDrawing Tools.
5. On the Shape Styles section of the Format toolbar, click the arrow in the bottom right-hand
corner (or right-click your object and choose Format Shape).
6. The Format Dialog box will open.
The Format Shape dialog box has the following six sections:
Fill
The Fill tab in the Format Shapes dialog box allows you to apply fill effects to a shape, picture, text box
or movie.
● No Fill: SelectingNo Fill will not fill your object.
● Solid Fill: Selecting Solid Fill gives you a plain color background style to your shape, picture
or text box.
● Colors: You can define the color of your shape, picture, or text box by clicking Color,
and selecting a color from a Theme Color, a Standard Color, or by creating a
Custom Color (selectMore Colors - keyboard Shortcut: M when the color palette
drop-down is expanded).
● Transparency: You can define the transparency by moving the cursor from left to
right. Alternatively you can define the transparency you desire by entering a figure in
the box to the right, and increasing and decreasing this figure by selecting the up and
down arrows.
● Gradient Fill: This option enables you to have a gradient effect in your shape or text box.
There are a number of parameters available to customize your gradient effect:
● Preset Colors: You can choose to use Preset Colors by clicking on the Preset Colorsbutton. Twenty-four preset gradient colors are available.
● Type: You can choose from four types of gradient; Linear, Radial, Rectangular, and
Path.
● Direction: According to the Type of gradient chosen (see above), various settings are
available to fix the direction of the gradient. These include up to eight preset directions
© 2009 Articulate Global, Inc. articulate.com Page 114 of 155
Quizmaker ’09

settings and the possibility to fix the angle oneself. Not all direction types allow the
customization of the direction settings.
● Gradient Stops: You can add and remove Gradient Stops to give a further effect to
your shape or text box by clicking on the Add and Remove buttons, and define the Stop
position for each Gradient Stop by dragging the cursor from left to right or by entering a
percentage to the right.
● Colors: You can also define the color of your shape or text box by clicking on Color, and
selecting a color from a Theme Color, a Standard Color or by creating a Custom
Color (selectMore Colors - keyboard Shortcut: M when the color palette drop-down
is expanded).
● Transparency: You can define the transparency of your shape or text box by moving
the cursor from left to right. Alternatively you can define the transparency you desire by
entering a figure in the box to the right, and increasing and decreasing this figure by
selecting the up and down arrows.
● Rotate with shape: Check this box if you wish the background to stay aligned should
you wish to rotate the shape or text box. Rotating the shape or text box will cause the
background effect to rotate, too.
● Picture or Texture Fill: Selecting this option allows you to define an image or texture rather
than a plain color or gradient for the background of your shape or text box.
● Texture: Clicking the Texture button brings up a choice of 35 textures that you can
apply. These are preset textures.
● Insert from:: You can customize your texture by selecting a file from your computer or
by importing an image. Click the File… button to import an image from your computer.
Click the Clipboard button to paste an image from your Clipboard.
● Tile picture as Texture: This option allows you to tile the image file over the entire
shape or text box. It therefore allows you to apply a background while minimizing the
image file size, as the same image is copied several times. It can also be useful to create
certain effects.
● Tiling Options: You can apply X and Y Offset parameters, X and Y Scaling, choose from
a variety of Alignment options as well as choose one of four Mirror type options:
Horizontal, Vertical, Both, or None.
● Transparency: You can define the transparency of your background style in the shape
or text box by moving the cursor from left to right. Alternatively you can define the
transparency you desire by entering a figure in the box to the right, and increasing and
decreasing this figure by selecting the up and down arrows.
● Slide Background Fill: Select this option if you want the background of your text box or
shape to be the same as the background you have defined for the question or slide.
Line Color
© 2009 Articulate Global, Inc. articulate.com Page 115 of 155
Quizmaker ’09
The Line Color tab in the Format Shapes dialog box allows you to apply line colors to the lines around
your shape, text object, or picture.
● No line: Select this option to have no line appear around your shape, text object, or picture.
● Solid line Select this option to have a solid line around your shape, text object, or picture.
You can define the color and the transparency of the line:
● Color: You can define the color of the line by clicking on Color, and selecting a color
from a Theme Color, a Standard Color or by creating a Custom Color (selectMore
Colors - keyboard Shortcut: M when the color palette drop-down is expanded).
● Transparency: You can define the transparency of the line by moving the cursor from
left to right. Alternatively you can define the transparency you desire by entering a
figure in the box to the right, and increasing and decreasing this figure by selecting the
up and down arrows.
● Gradient line To apply a gradient effect to the line and border surrounding your shape,
picture or text object, select Gradient Line.
● Preset Colors: You can choose to use Preset Colors by clicking on the Preset Colorsbutton. Twenty-four preset gradient colors are available.
● Type: You can choose from four types of gradient; Linear, Radial, Rectangular, and
Path.
● Direction: According to the Type of gradient chosen (see above), various settings are
available to fix the direction of the gradient. These include up to eight preset directions
settings and the possibility to fix the angle oneself. Not all Direction types allow the
customization of the direction settings.
● Gradient Stops: You can add and remove Gradient Stops to give a further effect to
your shape or text box by clicking on the Add and Remove buttons, and define the Stop
position for each Gradient Stop by dragging the cursor from left to right or by entering a
percentage to the right.
● Colors: You can also define the color of your gradient line by clicking on Color, and
selecting a color from a Theme Color, a Standard Color or by creating a Custom
Color (selectMore Colors - keyboard Shortcut: M when the color palette drop-down is
expanded).
● Transparency: You can define the transparency of the gradient line by moving the
cursor from left to right. Alternatively you can define the transparency you desire by
entering a figure in the box to the right, and increasing and decreasing this figure by
selecting the up and down arrows.
Line Style
This setting allows you to define the style of your line around shapes, pictures and text boxes, as well
as for special shapes like arrows.
© 2009 Articulate Global, Inc. articulate.com Page 116 of 155
Quizmaker ’09
● Width: Enter the width in pixels of your line or arrow or click on the arrows to increase or
decrease the width by 1 pixel at a time.
● Compound type: Click the Compound type button to reveal five options for your line:
● Simple
● Double
● Thick Thin
● Thin Thick
● Triple
● Dash type: Click the Dash type button to reveal eight possible dash types for the line or
arrow:
● Solid
● Round Dot
● Square Dot
● Dash
● Dash Dot
● Long Dash
● Long Dash Dot
● Long Dash Dot Dot
● Cap type: This represents how the ends of the line are capped. Three possible caps are
offered:
● Square
● Round
● Flat
● Join type: This defines how different lines are joined, like on the corners of a triangle. There
are three options:
● Round
● Bevel
● Miter
● Arrow settings: These settings allow you to specify specific characteristics for the arrows that
you have drawn:
● Begin type: Choose a type of arrow head from six options for the beginning of your
arrow.
● End type: Choose a type of arrow head from six options for the end of your arrow.
● Begin size: Choose a size from nine options for the beginning of your arrow.
● End size: Choose a size from nine options for the end of your arrow.
© 2009 Articulate Global, Inc. articulate.com Page 117 of 155
Quizmaker ’09
Shadow
The Shadow tab in the Format Shapes dialog box allows you to apply shadow effects to a shape,
picture, text box or movie.
● Presets: Four types of preset shadow effects are available.
1. No Shadow: No shadow effect at all
2. Outer
3. Inner: Not available for movies
4. Perspective
● Color: You can define the color of the shadow by clicking on Color, and selecting a color from
a Theme Color, a Standard Color or by creating a Custom Color (selectMore Colors -keyboard Shortcut: M when the color palette drop-down is expanded).
● Transparency: You can define the transparency of the shadow by moving the cursor from left
to right. Alternatively you can define the transparency you desire by entering a figure in the
box to the right, and increasing and decreasing this figure by selecting the up and down
arrows.
● Size: You can define the size of the shadow by moving the cursor from left to right.
Alternatively you can define the size you desire by entering a figure in the box to the right, and
increasing and decreasing this figure by selecting the up and down arrows.
● Blur: You can define the blur of the shadow by moving the cursor from left to right.
Alternatively you can define the blur you desire by entering a figure in the box to the right, and
increasing and decreasing this figure by selecting the up and down arrows. The larger the
number, the greater the shadow appears blurred.
● Angle: You can define the angle of the shadow in degrees relative to its object by moving the
cursor from left to right. Alternatively you can define the angle you desire by entering a figure
in the box to the right, and increasing and decreasing this figure by selecting the up and down
arrows.
● Distance: You can define the distance of the shadow from the object by moving the cursor
from left to right. Alternatively you can define the distance you desire by entering a figure in
the box to the right, and increasing and decreasing this figure by selecting the up and down
arrows.Its position relative to the object will be dependent on the distance and the angle (see
above).
Picture
If you’ve inserted a picture, click the Picture tab to set options for your picture.
● Recolor: You can recolor your picture by clicking the Recolor drop-down and choosing one of
the options under 4 categories of recoloring: No Recolor, Color Modes, Dark Variations, or
Light Variations.
© 2009 Articulate Global, Inc. articulate.com Page 118 of 155
Quizmaker ’09

● Brightness: You can define the brightness of your picture by moving the cursor from left to
right. Alternatively you can define the brightness you desire by entering a figure in the box to
the right, and increasing and decreasing this figure by selecting the up and down arrows.
● Contrast: You can define the contrast of your picture by moving the cursor from left to right.
Alternatively you can define the contrast you desire by entering a figure in the box to the right,
and increasing and decreasing this figure by selecting the up and down arrows.
● Transparency: You can define the transparency of your picture by moving the cursor from
left to right. Alternatively you can define the transparency you desire by entering a figure in the
box to the right, and increasing and decreasing this figure by selecting the up and down
arrows.
● Reset Picture: Click on this button to reset the picture to its original state when you imported
it into the slide.
Text Box
The Text box tab in the Format Shape dialog box allows you to apply certain parameters to how your
text box will appear in the slide.
● Text layout:This section allows you to fix the vertical alignment of the text relative to the text box. Three
options are available:
1. Top
2. Middle
3. Bottom
● Autofit: This setting defines how you want the text box to react if your text is too large to fit in
the text box.
● Do not Autofit: Select this to make no changes to either the text or the text box. Any
text that does not fit in the box will not appear on the slide.
● Shrink text on overflow: Select this to make the text smaller so that it will correctly fit
in the text box. The text will only be reduced if there is too much text for the box.
Otherwise, it will remain at its original size.
● Resize shape to fit text: Select this option if you want to maintain the text size you
have chosen, and fit the text box around the text.
● Internal margin: You can apply a margin to your text box such that the text will not appear
on the immediate edge of the box but at a margin or distance you define from the border of
the box. You can define a margin on all four sides of the text box: Left, Right, Top, Bottom by
entering a figure in pixels or clicking on the up and down arrows.
● Wrap text in shape: Check the box to have the text wrapped in the shape.
© 2009 Articulate Global, Inc. articulate.com Page 119 of 155
Quizmaker ’09

Movie Tools
TheMovie Tools allow you to apply formatting to movies (.SWF and .FLV files) on your question
slide.
To manage the Movie Tools:
1. Select and open an existing question in your quiz or survey or create a new question.
2. Click the Slide View from the top ribbon.
3. Select a movie on your slide.
4. Select the Format Tab which appears on themenu with the labelMovie Tools.
TheMovie Tools are divided into four sections:
1. Play
2. Movie Options
3. Arrange
4. Size
Play
The Play section consists of a single Preview button which plays the selected movie so that you can
preview it. Clicking on the Preview button again stops themovie.
Movie Options
This section allows you to make various settings for your inserted movie.
● Movie Volume: Change the volume of themovie. The following four levels are available:
● Low
● Medium (default)
● High
● Mute
● Play Movie: Two choices are available:
● Automatically: Play themovie automatically upon switching to this slide. When the
user reaches this slide, themovie begins automatically.
● When Clicked: Play themovie only when the user clicks themovie. Themovie does
not play automatically when the user reaches the slide. The user must click on the play
button next to themovie for it to begin.
● Show Movie: Two choices are available:
● In the slide: Play themovie in themain slide
● In new browser window: Play themovie in a new browser window.
© 2009 Articulate Global, Inc. articulate.com Page 120 of 155
Quizmaker ’09
● Show Movie Controls: Check the box if you want movie controls to show for the selected
movie.
Clicking the small arrow at the bottom right of theMovie Options section launches the Flash
Movie Options dialog box. This dialog box basically groups together the above options and allows
you to specify the volumemore precisely for your movie. It is the same dialog you see when you
insert a new Flash movie into your quiz slide.
Arrange
This section allows you to organize and set the object layers with which your slide will be viewed and
the alignment and rotation of objects within your slide including your movies. The following options
are available::
● Send to Back: Send the selected movie behind all other objects. Clicking on the right arrow
gives the option Send Backward. This sends the object one layer down rather than straight
to the very back.
● Bring to Front: Bring the selected movie in front of all other objects so that no part of it is
hidden behind another object. Clicking on the right arrow gives the option Bring Forward.This brings the object one layer forward rather than right to the very front.
● Timeline Pane: Show the Timeline to help select individual objects and to change their order,
visibility, and timing.
● Align: Align the edges ofmultiple selected objects. You can also center them or distribute
them evenly across the slide. You will also find options to View Gridlines and set Grid and
Guides options under this menu. Grid and Guides options include the following:
● Snap to:
● Snap objects to grid
● Snap objects to other objects
● Grid settings:
● Spacing
● Display grid on screen
● Guide settings:
● Display drawing guides on screen
● Set as Default
Size
This section allows you to define the width and height (in pixels) of your movie. You can input the size
in pixels directly or use the arrows to reach the desired values.
Clicking the small arrow at the bottom right of the Size section brings up the Size and Positiondialog box. Options include the following:
© 2009 Articulate Global, Inc. articulate.com Page 121 of 155
Quizmaker ’09
● The Size tab gives you extra detailed options on rotation, scaling and cropping, including the
following:
● Size and rotate (height, width, rotation)
● Scale (height, width, lock aspect ratio)
● Crop from (left, right, top, bottom)
● Original Size (height and width details)
● Reset button
● The Position tab allows you to specify the position of themovie relative to either the top left
corner of your slide or its center.
© 2009 Articulate Global, Inc. articulate.com Page 122 of 155
Quizmaker ’09
Sound Tools
The Sound Tools allow you to apply formatting to audio on your question slide.
To manage the Sound Tools:
1. Select and open an existing question in your quiz or survey or create a new question.
2. Click the Slide View from the top ribbon.
3. Select a sound on your slide by clicking the speaker icon.
4. Select theOptions tab which appears on themenu with the label Sound Tools.
The Sound Tools are divided into two sections:
1. Play
2. Sound Options
Play
The Play section consists of a single Preview button which plays the selected sound so that you can
preview it. Clicking on the Preview button again stops and resets the sound.
Sound Options
This section allows you to change settings for your inserted sound file:
● Sound Volume: Change the volume of the sound. The following four levels are available:
● Low
● Medium (default)
● High
● Mute
● Audio Editor: Record, import and edit your audio using the audio editor. To learn more, see
Adding Audio in Form View.
● Change Sound: Change to a different sound, preserving the options of the current sound.
● Export Audio: Export the current sound. Choose to export to both .WAV and .MP3 formats,
or select to export either to .WAV or .MP3.
● Reset Sound: Discard all of the option changes you made to this sound.
Audio Options
Clicking the small arrow at the bottom right of the Sound Options section launches theAudio
Options dialog box.
Audio Options allow you to define the following:
1. Sound playback default device
2. Sound recording default device
© 2009 Articulate Global, Inc. articulate.com Page 123 of 155
Quizmaker ’09

3. Sound recording line
4. Sound recording volume
© 2009 Articulate Global, Inc. articulate.com Page 124 of 155
Quizmaker ’09
Player Templates
Managing Player Templates
Quizmaker ’09 lets you easily customize the look and features of your quiz player. With Player
Templates, you can modify how the player looks and choose which features you want available in
your quizzes and surveys.
Quizmaker ’09 comes with 4 pre-configured player templates:
● Quiz - Submit one at a time (default)
● Quiz - Submit all at once
● Survey
● Branched Scenario
If, after selecting one of the default templates, you make custom configurations to the template and
click theOK button, you will be prompted with a message asking if you want to save your
configuration changes.
If you want to save your configuration changes, click Yes and, when prompted, enter a name for the
new template and click OK. This is to avoid overwriting the default template.
Note that you cannot delete the default templates.
To access the Player Templates:
1. Click the Player Templates button on the toolbar.
2. The Player Template Manager will open and a list of existing Player Templates will be
displayed.
3. Select from the following options:
● New: To create a new Player Template.
● Edit: To edit an existing Player Template.
● Delete: To delete an existing Player Template.
● Rename: To rename an existing Player Template.
● Duplicate: To copy an existing Player Template.
● Click Closewhen you are donemanaging your templates, or to exit the Player Template
Manager without making a selection
To create a new template:
1. SelectNew from themenu.
2. You will be prompted to enter the name for your new template as shown below:
3. Enter the name for your new template and click OK.
© 2009 Articulate Global, Inc. articulate.com Page 125 of 155
Quizmaker ’09

4. Customize your template as desired (refer to the links at the bottom of this page for more
details on each of the customization tabs).
5. When you are finished making your customizations, click theOK button. To exit without
saving your changes, click Cancel.
To edit an existing template:
1. Select the template you would like to edit and click Edit.
2. Modify your template as desired (refer to the links at the bottom of this page for more details
on each of the customization tabs).
3. When you are finished making your customizations, click theOK button. To exit without
saving your changes click Cancel.
To delete an existing template:
1. Select the template you would like to delete and click Delete.
2. You will be prompted with a message asking if you want to permanently delete the
template.
3. Click Yes to do so, or click No to cancel the deletion.
To rename an existing template:
1. Select the template you would like to rename and click Rename.
2. You will be prompted for theNew Template name.
3. Click OK to save your changes or Cancel to exit without saving your changes.
To duplicate an existing template:
1. Select the template you would like to duplicate and click Duplicate.
2. You will be prompted for the name of yourDuplicate Template.
3. Click OK to save your changes or Cancel to exit without saving your changes.
At any time, you can select a Template from the list provided and click Apply to Project to enable it
for the currently open quiz or survey.
Learn more on customizing the Player Template in the following help topics:
● Layout
● Navigation
● Text Labels
● Colors and Effects
● Other
© 2009 Articulate Global, Inc. articulate.com Page 126 of 155
Quizmaker ’09
Layout
Quizmaker ’09 lets you easily customize the look and features of your quiz player. With Player
Templates, you can modify how the player looks and choose which features you want available in
your quizzes and surveys.
To access the Player Templates:
1. Click the Player Templates button on the toolbar.
2. The Player Template Builder will open and a list of existing Player Templates will be
displayed.
3. Select from the following options:
● New: To create a new Player Template.
● Edit: To edit an existing Player Template.
● Delete: To delete an existing Player Template.
● Rename: To rename an existing Player Template.
● Duplicate: To copy an existing Player Template.
4. You’ll see the Player Template Builder open with 5 tabs, which you can use to build and
customize your player templates.
Elements of the Layout Section:
The elements of the Layout section of the Player Template Builder are below. Use the checkboxor drop-down menu next to each element to determine if this element should be available in your
player template.
6. Display Settings
● Display question point value:Whether or not the numeric point value of each question
should be shown to your users.
● Display cumulative score with each question:Whether or not your user should be
shown the cumulative score with each question.
● Display quiz title:Whether or not to display the quiz title to your users.
● Question numbering style: The question numbering display format to show to your users.
Style options include the following:
● Question 3 of 9
● Question 3
● 3 of 9
● 3
● (No numbering)
7. Question List
© 2009 Articulate Global, Inc. articulate.com Page 127 of 155
Quizmaker ’09
● Display question list navigation panel: Specify whether or not you want to display your
question list in a navigation panel. This panel will allow users to easily jump around from
question to question in any order. If you enable this option, you can then choose to enable
the following:
● Display correct/incorrect icons
● Display question point value
● Display actual points awarded
8. Timer
● Display timer: To include the timer icon.
● Time format: Select from one of the following format options:
● Remaining
● Elapsed out of total
● Elapsed
● Do not show time
Click Preview at any time to review the template with its current settings. Click OK to exit the
Preview or Replay to review again.
Click OK to save the template with the current settings or Cancel to exit without saving.
© 2009 Articulate Global, Inc. articulate.com Page 128 of 155
Quizmaker ’09

Navigation
Quizmaker ’09 lets you easily customize the look and features of your quiz player. With Player
Templates, you can modify how the player looks and choose which features you want available in
your quizzes and surveys.
To access the Player Templates:
1. Click the Player Templates button on the toolbar.
2. The Player Template Builder will open and a list of existing Player Templates will be
displayed.
3. Select from the following options:
● New: To create a new Player Template.
● Edit: To edit an existing Player Template.
● Delete: To delete an existing Player Template.
● Rename: To rename an existing Player Template.
● Duplicate: To copy an existing Player Template.
4. You’ll see the Player Template Builder open with 5 tabs, which you can use to build and
customize your player templates.
Elements of the Navigation Section:
The elements of theNavigation section of the Player Template Builder are below. Use thecheckbox next to each element to determine if this element should be available in your player
template.
Answer Submission
● Submit one question at a time: Select this option if you want questions to be submitted
by users one at a time. If you’re incorporating question-level or answer-level feedback, you will
want to use this option.
● Submit all at once: Select this option if you want questions submitted all at once. If you
select this option, you can also choose to enable the following:
● Allow user to finish without answering all questions
● Require user to scroll to bottom on longer questions: Select this option to require
users to scroll to the end of longer questions before submitting an answer. This is useful to
ensure that users take the time to review all available options.
Resume
● Prompt to resume on quiz restart:Whether or not the user should be prompted to
resume the quiz or survey from where he or she left off last time. If you enable this option, you
can also choose to enable the following:
© 2009 Articulate Global, Inc. articulate.com Page 129 of 155
Quizmaker ’09

● When running in LMS, ignore Flash cookie: If checked, the quiz will always resume
by using the LMS’ bookmarking feature (if your LMS supports it). If unchecked, your
content will resume using the LMS’ resume data, but will use the Flash cookie if the LMS
does not support resume.
Click Preview at any time to review the template with its current settings. Click OK to exit the
Preview or Replay to review again.
Click OK to save the template with the current settings or Cancel to exit without saving.
© 2009 Articulate Global, Inc. articulate.com Page 130 of 155
Quizmaker ’09

Text Labels
Quizmaker ’09 lets you easily customize the look and features of your quiz player. With Player
Templates, you can modify how the player looks and choose which features you want available in
your quizzes and surveys.
To access the Player Templates:
1. Click the Player Templates button on the toolbar.
2. The Player Template Builder will open and a list of existing Player Templates will be
displayed.
3. Select from the following options:
● New: To create a new Player Template.
● Edit: To edit an existing Player Template.
● Delete: To delete an existing Player Template.
● Rename: To rename an existing Player Template.
● Duplicate: To copy an existing Player Template.
4. You’ll see the Player Template Builder open with 5 tabs, which you can use to build and
customize your player templates.
Elements of the Text Labels:
Every text element of the quiz interface— buttons and messages — can be customized to display any
text you’d like. This is particularly useful when targeting additional languages or regions.
Click the Custom Text field corresponding to the Button/Message you’d like to modify. Download
a spreadsheet containing the full list of text that can be customized:
Quizmaker ’09 Player Text Labels
By default, you see English language labels, but Quizmaker ’09 provides 11 additional language
choices for easy conversion of the text labels for non-English quizzes and surveys. Below are available
languages:
● English (modified)
● Chinese Simplified
● Chinese Traditional
● Dutch
● English
● French
● German
● Italian
● Japanese
© 2009 Articulate Global, Inc. articulate.com Page 131 of 155
Quizmaker ’09

● Korean
● Portuguese (Brazil)
● Spanish
10. Save: Click this button to save your latest revisions.
1. Click the Save button.
2. Assign a name to your custom Text Labels.
3. Click Save.
11. Load: Click this button to open a previously-saved custom Text Label file.
1. Click the Load button.
2. Navigate to the custom Player Text Labels file (.labels) you wish to load for your quiz.
3. Click Open.
4. Click OK to make this custom set active.
Click Preview at any time to review the template with its current settings. Click OK to exit the
Preview or Replay to review again.
Click OK to save the template with the current settings or Cancel to exit without saving.
© 2009 Articulate Global, Inc. articulate.com Page 132 of 155
Quizmaker ’09

Colors and Effects
Quizmaker ’09 lets you easily customize the look and features of your quiz player. With Player
Templates, you can modify how the player looks and choose which features you want available in
your quizzes and surveys.
To access the Player Templates:
1. Click the Player Templates button on the toolbar.
2. The Player Template Builder will open and a list of existing Player Templates will be
displayed.
3. Select from the following options:
● New: To create a new Player Template.
● Edit: To edit an existing Player Template.
● Delete: To delete an existing Player Template.
● Rename: To rename an existing Player Template.
● Duplicate: To copy an existing Player Template.
4. You’ll see the Player Template Builder open with 5 tabs, which you can use to build and
customize your player templates.
Elements of Colors and Effects:
The elements of the Colors and Effects section of the Player Template Builder are below. Usethe checkbox or drop-down menu next to each element to determine if this element should be
available in your player template.
Quizmaker ’09 comes with a number of preset color schemes that are coordinated with Presenter ’09
and Engage ’09 color schemes. You can quickly choose one of those preset schemes or create your
own.
Color Scheme
● Color Scheme: Select from the drop-down list to choose the color scheme to use in your
player template. Included color schemes include the following:
● Black
● Dark Blue
● Forest Green
● Light Blue
● Medium Blue
● Olive
● Orange
● Silver
© 2009 Articulate Global, Inc. articulate.com Page 133 of 155
Quizmaker ’09

● Slate
● White (default)
● Edit: Click this button to open the Color Scheme Editor, then do the following options to
create your custom color scheme:
1. Using the drop-down menu at the bottom, choose a part of the Player template to edit.
Available areas to customize include the following:
● Frame
● Text
● Buttons
● Timer
● Scrollbar
2. Select the preferred color for that part of the Player. Add Custom Colors as necessary by
selectingMore Colors.
3. Set the preferred Transparency.
4. Click OK to save the template with the current settings or Cancel to exit without
saving.
● New: Click this button to create a new Color Scheme, then do the following:
1. Enter a Color scheme name and click OK to save or Cancel to exit without saving.
2. Follow the above steps (Color Scheme -> Edit) to customize and save your new color
scheme.
Fonts and Effects
● Sound Effects:Use this drop-down menu to modify your quiz Sound effects. Options include
the following:
● Enable (default): Your quiz will include sound effects.
● Disable: Your quiz will not include sound effects.
● Player font: Select the preferred font from the drop-down menu.
● Use rounded corners: Check this box to use rounded corners in your quiz.
● Display likert scale tooltips after: X milliseconds: Add the preferred timing in this field by
inputting a value or by using the up and down arrows.
Click Preview at any time to review the template with its current settings. Click OK to exit the
Preview or Replay to review again.
Click OK to save the template with the current settings or Cancel to exit without saving.
© 2009 Articulate Global, Inc. articulate.com Page 134 of 155
Quizmaker ’09
Other
Quizmaker ’09 lets you easily customize the look and features of your quiz player. With Player
Templates, you can modify how the player looks and choose which features you want available in
your quizzes and surveys.
To access the Player Templates:
1. Click the Player Templates button on the toolbar.
2. The Player Template Builder will open and a list of existing Player Templates will be
displayed.
3. Select from the following options:
● New: To create a new Player Template.
● Edit: To edit an existing Player Template.
● Delete: To delete an existing Player Template.
● Rename: To rename an existing Player Template.
● Duplicate: To copy an existing Player Template.
4. You’ll see the Player Template Builder open with 5 tabs, which you can use to build and
customize your player templates.
Elements of the Other Section:
The elements of theOther section of the Player Template Builder are below. Use the checkbox ordrop-down menu next to each element to determine if this element should be available in your player
template.
Browser Settings
● Browser size: Select from the drop-down menu the desired browser option:
● Display at user’s current browser size:Do not change the user’s browser size.
● Resize browser to optimal size: Resize the user’s browser to 720 pixels wide x 540
pixels tall.
● Resize browser to fill screen:Maximize the user’s browser to fill the screen.
● Player size: Select from the drop-down menu the desired quiz size:
● Scale player to fill browser window: Enlarge the quiz to fill the user’s browser.
● Lock player at optimal size: Lock the quiz at 720 pixels wide x 540 pixels tall.
● Launch player in new window (creates launch page): If checked, quiz will launch in a
newwindow via a launch page. When checked, you can choose to enable the following
options:
© 2009 Articulate Global, Inc. articulate.com Page 135 of 155
Quizmaker ’09

● Display window with no browser controls:Whether or not to display browser
controls (stop, refresh, forward, backward, etc.).
● Allow user to resize browser:Whether or not the user should be able to resize the
browser containing the Articulate Player.
Background Color
● Page background: Choose from the available theme colors or add a custom color.
Click Preview at any time to review the template with its current settings. Click OK to exit the
Preview or Replay to review again.
Click OK to save the template with the current settings or Cancel to exit without saving.
© 2009 Articulate Global, Inc. articulate.com Page 136 of 155
Quizmaker ’09
Quiz Properties
Managing Quiz Properties
In Quizmaker ’09, the Quiz Properties dialog box allows you to set defaults and essential information
about your quiz, including the title of the quiz, the passing score, a time limit, and default scoring
information.
To manage the Quiz Properties:
1. Click theQuiz Properties button from the toolbar.
2. TheQuiz Properties dialog box opens with two tabs (click to learn more about each section):
● Quiz Info
● Question Defaults
© 2009 Articulate Global, Inc. articulate.com Page 137 of 155
Quizmaker ’09

Quiz Info
Use quiz info to set options such as quiz title, passing score, and time limit in your Quizmaker ’09 quiz
or survey.
To access Quiz Info:
1. Open an existing quiz or survey or create a new one.
2. Click theQuiz Properties button on the toolbar.
3. Select theQuiz Info tab (opens by default the first time you access Quiz Properties).
Elements of the Quiz Info tab:
● Quiz Title: Choose the title of your quiz or survey.
● Passing Score: Choose a passing score for your quiz in the form of a percentage (a whole
integer between 0 and 100) by inputting the value or by using the up and down arrows.
Passing score does not apply to surveys.
● Time Limit: Check the box next to End quiz after X minutes X seconds to apply a time
limit for the user when taking the quiz or survey. Indicate a quiz time limit in minutes and
seconds by inputting the values in each field or by using the up and down arrows.
● Quiz Type: Select from the drop-down menu from the following options:
● Graded Quiz: Select this option if your quiz has at least one graded question.
● Survey: Select this option if your quiz consists of only survey (non-graded) questions.
© 2009 Articulate Global, Inc. articulate.com Page 138 of 155
Quizmaker ’09
Question Defaults
Use question defaults to set default properties for new questions you add to your Quizmaker ’09 quiz
or survey.
To access Question Defaults:
1. Open an existing quiz or survey or create a new one.
2. Click theQuiz Properties button on the toolbar.
3. Select theQuestion Defaults tab.
Question Defaults: Note that changes to any of the below settings only apply to questions that you
create after changing the setting. Any settings you change in an ndividual question will overrule the
defaults you select here.
● Question Properties:
● Points Awarded: Use this field to set the default number of points awarded for a
correct answer.
● Attempts Permitted: Use this field to set the default number of attempts permitted
before the user is forced to move to the next question.
● Shuffle Answers: Check the box to have the answers appear in a different order each
time a user attempts the question rather than in the order the answers appear in the
Quizmaker ’09 question list.
● Allow user to skip survey questions: Check this box to allow users to skip survey
questions included in your quiz.
● Prompt Font:
● Font to use for propmts in the player: Select the default font you wish to use for
the prompts that appear in the player.
● Default Feedback:
● Provide Feedback by Default: Check this box if you wish to supply default feedback
responses for correct and incorrect answers to your questions. You can format your
feedback text using the formatting options above the feedback fields.
© 2009 Articulate Global, Inc. articulate.com Page 139 of 155
Quizmaker ’09
Publishing
Previewing Quizzes
If you would like to review changes you’vemade prior to publishing the entire quiz or survey,
Quizmaker ’09 offers a Preview option.
From within the quiz or survey or from a specific question, choose the Preview button on the
toolbar.
From the Preview player you can interact with the Quizmaker ’09 player using all controls that you’ve
enabled in your active player template (via Player Templates). Additionally, you can select the
following options:
● Select: To choose a question or slide to preview.
● Replay: To replay a question, group, or entire quiz.
● Edit Question: To make changes to the Preview selection.
● Close Preview: To close the Preview dialog box.
© 2009 Articulate Global, Inc. articulate.com Page 140 of 155
Quizmaker ’09

Publishing Quizzes
Quizmaker ’09 provides simple, 1-click publishing for generating your Flash-based quiz or survey.
Delivery options includeWeb, CD, Articulate Online, LMS, Word, or via an Articulate Presenter
presentation.
1. Click the Publish button on the toolbar (or from theArticulatemenu).
2. Select the preferred publish option (the default is Articulate Presenter).
Learn more about each publish tab in the following help topics:
● Publish to Articulate Presenter
● Publish to theWeb
● Publish to Articulate Online
● Publish to Your LMS
● Publish to CD
● Publish to Word
© 2009 Articulate Global, Inc. articulate.com Page 141 of 155
Quizmaker ’09

Publish to Articulate Presenter
Quizmaker ’09 provides simple, 1-click publishing for generating your Flash-based quiz or survey. If
you’re creating a quiz to incorporate into an existing or newArticulate Presenter e-learning course or
presentation, use the Publish for Articulate Presenter option.
To Publish for Articulate Presenter:
1. Click the Publish button on the toolbar (or from theArticulatemenu).
2. Select theArticulate Presenter publish tab.
3. Select a presentation to publish into by choosing from the active presentations listed or
select the ellipsis button (…) to browse to a different presentation.
4. Choose to insert the quiz or survey as a Slide in the Presentation or as a Tab in the
Player.
● If you wish to modify theQuiz Title, click the corresponding link.
● Questions: This field displays the number of questions (and any randomization and
pooling you’ve enabled) in your quiz or survey.
● If you wish to modify the Passing Score, click the corresponding link. To learn more,
seeManaging Quiz Properties.
● If you wish to modify Player Templates, click the corresponding link. To learn more,
seeManaging Quizmaker ’09 Player Templates.
● If you wish to modify theQuality, click the corresponding link.
● Set your desired Compression settings:
● Optimize for Web Delivery: If this quiz will be delivered on aWeb
server — on either the Internet or an intranet — then choose this as your
compression setting.
● Optimize for CD-ROM Delivery: If this quiz will be delivered via CD-
ROM, then choose this as your compression setting.
● Custom (Advanced): This option is recommended only for users with
advanced knowledge of compression settings. Set the JPEG factor for
Compression using the sliding percentage scale. A quality factor of 75 is
the default image setting when using Optimize for Web Delivery. You can
also specify an Audio bitrate using the drop-down menu. The range is
between 16 kbps and 160 kbps; the default is 24 kbps (Web).
● Click OK to accept your settings or Cancel to exit without saving.
5. Click Publish.
6. When the Publish process is complete, you will receive a Publish Successmessage and you
will now have a placeholder slide in your presentation. TheQuizzes and Interactions dialog
© 2009 Articulate Global, Inc. articulate.com Page 142 of 155
Quizmaker ’09

box will open, allowing you to establish the properties of your quiz or survey within the
presentation:
● When user passes, ’Finish’ button: Available options include the following:
● Closes Window
● Goes to URL (specify a URL)
● Goes to Next Slide
● Goes to Previous Slide
● Goes to X (specify a slide in your presentation)
● When user fails, ’Finish’ button: Available options include the following:
● Closes Window
● Goes to URL (specify a URL)
● Goes to Next Slide
● Goes to Previous Slide
● Goes to X (specify a slide in your presentation)
● Allow user to leave quiz: Available options include the following:
● At any time
● After user has completed quiz
● User may view slides after quiz: Available options include the following:
● At any time
● After attempting quiz
● After passing quiz.
● User may attempt quiz: Available options include the following:
● Unlimited times
● Just once
● 2 through 10 times
© 2009 Articulate Global, Inc. articulate.com Page 143 of 155
Quizmaker ’09

Publish to Web
Quizmaker ’09 provides simple, 1-click publishing for generating your Flash-based quiz or survey. If
you’re creating a quiz or survey to view on your computer or share on aWeb site, use the Publish
for Web option.
To Publish for Web:
1. Click the Publish button on the toolbar (or from theArticulatemenu).
2. Select theWeb publish tab.
3. Specify a Publish location for your quiz. The default location is in this directory:My
Documents\My Articulate Projects. Click the ellipsis button (…) or type a directory path if
you want to pick a different location on your computer.
4. Modify the Properties as necessary.
● If you wish to modify theQuiz Title, click the corresponding link.
● Questions: This field displays the number of questions (and any randomization and
pooling you’ve enabled) in your quiz or survey.
● If you wish to modify the Passing Score, click the corresponding link. To learn more,
seeManaging Quiz Properties.
● If you wish to modify Player Templates, click the corresponding link. To learn more,
seeManaging Quizmaker ’09 Player Templates.
● If you wish to modify theQuality, click the corresponding link.
● Set your desired Compression settings:
● Optimize for Web Delivery: If this quiz will be delivered on aWeb
server — on either the Internet or an intranet — then choose this as your
compression setting.
● Optimize for CD-ROM Delivery: If this quiz will be delivered via CD-
ROM, then choose this as your compression setting.
● Custom (Advanced): This option is recommended only for users with
advanced knowledge of compression settings. Set the JPEG factor for
Compression using the sliding percentage scale. A quality factor of 75 is
the default image setting when using Optimize for Web Delivery. You can
also specify an Audio bitrate using the drop-down menu. The range is
between 16 kbps and 160 kbps; the default is 24 kbps (Web).
● Click OK to accept your settings or Cancel to exit without saving.
5. Click Publish.
6. When the Publish process is complete, you will receive the following Publish Success dialogbox to choose the next step:
© 2009 Articulate Global, Inc. articulate.com Page 144 of 155
Quizmaker ’09

● View Quiz: Allows you to see the published output in your Web browser.
● Email: Automatically generates a message with the .zipped output attached to send
content via e-mail.
● FTP: To publish directly to your server via FTP.
● Provide the following information for FTP Upload (example credentials
shown in italics):
● Server: yourserver.com
● Port: default is 21
● Username: your login
● Password: secure password
● Directory: /users/jsmith/public_html/quizzes/newhire***
***Path is relative to starting point when logging in via FTP
● Click Test Connection to confirm FTP access.
● Select Save username and password as necessary.
● Zip: To create and save a .zipped version of the output.
● Open Folder:Opens the published output folder.
● Choose Closewhen you are done or to exit without selecting one of the above options.
© 2009 Articulate Global, Inc. articulate.com Page 145 of 155
Quizmaker ’09
Publish to Articulate Online
If you have an Articulate Online trial or paid account and wish to publish content directly to your
account, then follow the Publish to Articulate Online instructions below.
In order to Publish to Articulate Online, you must already have an existing account. You can learn
more about Articulate Online, including how to create a free 30-day trial account or how to purchase a
paid account, here.
To Publish for Articulate Online:
1. Click the Publish button on the toolbar (or from theArticulatemenu).
2. Select theArticulate Online publish tab.
3. Title and Description
● In the Title field, type the name for your published quiz or survey.
● In theDescription field, type a description for your published quiz or survey that will
appear along with the quiz or survey in your Articulate Online account.
4. Properties
● Questions: This field displays the number of questions (and any randomization and
pooling you’ve enabled) in your quiz or survey.
● If you wish to modify the Passing Score, click the corresponding link. To learn more,
seeManaging Quiz Properties.
● If you wish to modify Player Templates, click the corresponding link. To learn more,
seeManaging Quizmaker ’09 Player Templates.
● If you wish to modify theQuality, click the corresponding link.
● Set your desired Compression settings:
● Optimize for Web Delivery: If this quiz will be delivered on aWeb
server — on either the Internet or an intranet — then choose this as your
compression setting.
● Optimize for CD-ROM Delivery: If this quiz will be delivered via CD-
ROM, then choose this as your compression setting.
● Custom (Advanced): This option is recommended only for users with
advanced knowledge of compression settings. Set the JPEG factor for
Compression using the sliding percentage scale. A quality factor of 75 is
the default image setting when using Optimize for Web Delivery. You can
also specify an Audio bitrate using the drop-down menu. The range is
between 16 kbps and 160 kbps; the default is 24 kbps (Web).
● Click OK to accept your settings or Cancel to exit without saving.
© 2009 Articulate Global, Inc. articulate.com Page 146 of 155
Quizmaker ’09

5. Reporting
● Click the Reporting button to determine how your quiz or survey’s status will be
tracked and deemed complete by Articulate Online. Select from the Report status to
AO as drop-down the option you would like Articulate Online to use in reporting the
status of this quiz or survey. Options include the following:
● Passed/Incomplete
● Passed/Failed
● Completed/Incomplete
● Completed/Failed
6. Account and Information
● Account URL: The full URL of your account. The subdomain is unique to your account.
The format should be http://<accountname>.articulate-online.com. If you have a
professional-level account, you might also have a custom root-level domain. If so, input
that here. For example, http://<accountname>.elearningserver.com.
● E-mail: The administrator or publisher e-mail address/login associated with your
account. Only administrators and publishers have permission to publish to Articulate
Online accounts.
● Password: The password you selected when you created your account, or the current
password if you’ve changed it.
● Save my password: Check this box to save your password for subsequent publishing
to your Articulate Online account.
When you are finished with your choices, click Publish to publish your quiz or survey. Next time you
publish, your last-used selections will be saved.
After you begin publishing to Articulate Online, Quizmaker ’09will automatically upload your quiz or
survey to your account.
When the upload is complete, you will have the option toManage Content, which will launch your
Web browser and display the content item you just published, or Close, which closes the Publish
Successfulwindow.
© 2009 Articulate Global, Inc. articulate.com Page 147 of 155
Quizmaker ’09
Publish to Your LMS
Quizmaker ’09 provides simple, 1-click publishing for generating your Flash-based quiz or survey. If
you’re creating a quiz to host in your SCORM- or AICC-compliant Learning Management System
(LMS), use the Publish for LMS option.
To Publish for LMS:
1. Click the Publish button on the toolbar (or from theArticulatemenu).
2. Select the LMS publish tab.
3. Specify a Publish location for your quiz. The default location is in this directory:My
Documents\My Articulate Projects. Click the ellipsis button (…) or type a directory path if
you want to pick a different location on your computer.
4. Modify the Properties as necessary.
● If you wish to modify theQuiz Title, click the corresponding link.
● Questions: This field displays the number of questions (and any randomization and
pooling you’ve enabled) in your quiz or survey.
● If you wish to modify the Passing Score, click the corresponding link. To learn more,
seeManaging Quiz Properties.
● If you wish to modify Player Templates, click the corresponding link. To learn more,
seeManaging Quizmaker ’09 Player Templates.
● If you wish to modify theQuality, click the corresponding link.
● Set your desired Compression settings:
● Optimize for Web Delivery: If this quiz will be delivered on aWeb
server — on either the Internet or an intranet — then choose this as your
compression setting.
● Optimize for CD-ROM Delivery: If this quiz will be delivered via CD-
ROM, then choose this as your compression setting.
● Custom (Advanced): This option is recommended only for users with
advanced knowledge of compression settings. Set the JPEG factor for
Compression using the sliding percentage scale. A quality factor of 75 is
the default image setting when using Optimize for Web Delivery. You can
also specify an Audio bitrate using the drop-down menu. The range is
between 16 kbps and 160 kbps; the default is 24 kbps (Web).
● Click OK to accept your settings or Cancel to exit without saving.
© 2009 Articulate Global, Inc. articulate.com Page 148 of 155
Quizmaker ’09

5. Define theOutput Options.
● Select from the LMS drop-down the industry standard you wish to use:
● SCORM 1.2
● SCORM 2004
● AICC
● Click the Reporting and Tracking button to specify your metadata.
● Provide LMS Course Information that will be passed to your LMS:
1. Title: The title of your quiz.
2. Description: A description of your quiz.
3. Identifier: A brief identifier for your quiz.
4. AICC only Creator: The author’s name.
5. SCORM only Version: The version of your quiz, if applicable.
6. SCORM only Duration:How long it will take the average user to complete
the quiz.
7. SCORM only Keywords: Keywords for your quiz.
8. AICC only Filename (URL): The location where the quiz will be hosted
with your LMS.
● SCORM only LMS Lesson SCORM Information that will be passed to your
LMS (can be the same as above):
1. Title: The title of your quiz.
2. Identifier: A brief identifier for your quiz.
● Select LMS Reporting options that will be passed to your LMS (leave at default
settings if you’re not sure):
1. Passed/Incomplete
2. Passed/Failed
3. Completed/Incomplete
4. Completed/Failed
● Click OK to save your LMS Metadata.
6. Click Publish to publish your quiz or survey.
7. When the Publish process is complete, you will receive the following Publish Success dialogbox to choose the next step:
© 2009 Articulate Global, Inc. articulate.com Page 149 of 155
Quizmaker ’09

● View Quiz: Allows you to see the published output in your Web browser.
● Email: Automatically generates a message with the zipped output attached to send
content via e-mail.
● FTP: To publish directly to your server via FTP.
● Provide the following information for FTP Upload (example credentials
shown in italics):
● Server: yourserver.com
● Port: default is 21
● Username: your login
● Password: secure password
● Directory: /users/jsmith/public_html/quizzes/newhire***
***Path is relative to starting point when logging in via FTP
● Click Test Connection to confirm FTP access.
● Select Save username and password as necessary.
● Zip: To create and save a zipped version of the output.
● Open Folder:Opens the published output folder.
● Choose Closewhen you are done or to exit without selecting one of the above options.
© 2009 Articulate Global, Inc. articulate.com Page 150 of 155
Quizmaker ’09
Publish to CD
Quizmaker ’09 provides simple, 1-click publishing for generating your Flash-based quiz or survey. If
you’re creating a quiz or survey to distribute via CD or DVD, use the Publish for CD option.
To Publish for CD:
1. Click the Publish button on the toolbar (or from theArticulatemenu).
2. Select the CD publish tab.
3. Specify a Publish location for your quiz. The default location is in this directory:My
Documents\My Articulate Projects. Click the ellipsis button (…) or type a directory path if
you want to pick a different location on your computer.
● If you wish to modify theQuiz Title, click the corresponding link.
● Questions: This field displays the number of questions (and any randomization and
pooling you’ve enabled) in your quiz or survey.
● If you wish to modify the Passing Score, click the corresponding link. To learn more,
seeManaging Quiz Properties.
● If you wish to modify Player Templates, click the corresponding link. To learn more,
seeManaging Quizmaker ’09 Player Templates.
● If you wish to modify theQuality, click the corresponding link.
● Set your desired Compression settings:
● Optimize for Web Delivery: If this quiz will be delivered on aWeb
server — on either the Internet or an intranet — then choose this as your
compression setting.
● Optimize for CD-ROM Delivery: If this quiz will be delivered via CD-
ROM, then choose this as your compression setting.
● Custom (Advanced): This option is recommended only for users with
advanced knowledge of compression settings. Set the JPEG factor for
Compression using the sliding percentage scale. A quality factor of 75 is
the default image setting when using Optimize for Web Delivery. You can
also specify an Audio bitrate using the drop-down menu. The range is
between 16 kbps and 160 kbps; the default is 24 kbps (Web).
● Click OK to accept your settings or Cancel to exit without saving.
4. Click Publish.
5. When the Publish process is complete, you will receive the following Publish Success dialogbox to choose the next step:
© 2009 Articulate Global, Inc. articulate.com Page 151 of 155
Quizmaker ’09

● View Quiz: Allows you to see the published output.
● Email: Automatically generates a message with the zipped output attached to send
content via e-mail.
● FTP: To publish directly to your server via FTP.
● Provide the following information for FTP Upload (example credentials
shown in italics):
● Server: yourserver.com
● Port: default is 21
● Username: your login
● Password: secure password
● Directory: /users/jsmith/public_html/quizzes/newhire***
***Path is relative to starting point when logging in via FTP
● Click Test Connection to confirm FTP access.
● Select Save username and password as necessary.
● Zip: To create and save a zipped version of the output.
● Open Folder:Opens the published output folder.
● Choose Closewhen you are done or to exit without selecting one of the above options.
© 2009 Articulate Global, Inc. articulate.com Page 152 of 155
Quizmaker ’09

Publish to Word
If you’re collaborating with others to create your quiz and want to collect input while your quiz is still
in development, or if you want to generate a question-only version of your quiz to provide to your
users, use the Publish for Word option.
To Publish for Word:
1. Click the Publish button on the toolbar (or from theArticulatemenu).
2. Select theWord publish tab.
3. Specify a Publish location for your quiz. The default location is in this directory:My
Documents\My Articulate Projects. Click the ellipsis button (…) or type a directory path if
you want to pick a different location on your computer.
4. Select from the drop-down list whatOutput type you would like:
● Full quiz details (default): Creates a Word document with all quiz details.
● Questions only: Creates a Word document with questions only (ideal if you want to
create a printable version of your quiz to distribute to quiz takers as a paper-based
quiz).
5. Click Publish.
6. When the Publish process is complete, you will receive the following Publish Success dialogbox to choose the next step:
● View Document: Allows you to see the published output in Word.
● Email: Automatically generates a message with the zipped output attached to send
content via e-mail.
● FTP: To publish directly to your server via FTP.
● Provide the following information for FTP Upload (example credentials
shown in italics):
● Server: yourserver.com
● Port: default is 21
● Username: your login
● Password: secure password
● Directory: /users/jsmith/public_html/quizzes/newhire***
***Path is relative to starting point when logging in via FTP
● Click Test Connection to confirm FTP access.
● Select Save username and password as necessary.
● Zip: To create and save a zipped version of the output.
© 2009 Articulate Global, Inc. articulate.com Page 153 of 155
Quizmaker ’09

● Open Folder:Opens the published output folder.
● Choose Closewhen you are done or to exit without selecting one of the above options.
© 2009 Articulate Global, Inc. articulate.com Page 154 of 155
Quizmaker ’09
Publish Success
After publishing your project, you will see a Publish Successful dialog. You will also have the choice
to take action — for example, to view the published content after you’ve Published for theWeb.
Refer to the final step of each of the following help topics to learn more about the options available
on each Publish Successful dialog:
● Publish to Articulate Presenter
● Publish to theWeb
● Publish to Articulate Online
● Publish to Your LMS
● Publish to CD
● Publish to Word
© 2009 Articulate Global, Inc. articulate.com Page 155 of 155
Quizmaker ’09


