
PATRAN 303 Exercise Workbook - Release 7.5 9-1
LESSON 9
Post Processing of Displacement Results
Objectives:
■ Examine the deformation of the MSC/NASTRAN model to evaluate the validity of the assumptions made in the creation of the mesh density and selection of element type.
■ Use the “Basic” and “Advanced” results post-processing forms.

9-2 PATRAN 303 Exercise Workbook - Release 7.5

LESSON 9 Post Processing of Displacement Results
Model Description:In this exercise you will examine the analysis results of a clevis model,similar to the one you created during the previous labs, by rendering avariety of deformed shape plots of the model. In particular, you willcreate Deformed, Fringe, and Vector plots of the displacement.
Suggested Exercise Steps:
■ Open clevis.db.
■ Create a deformed shape plot of the Displacement result values.
■ Turn off the undeformed plot of the clevis model. Change the orientation of the deformed image of the clevis model to an Isometric view. Render the deformed plot using a Hidden Line render style.
■ Return to the Default view of the clevis model. Increase the Deformation Scale Factor to 0.25.
■ Produce a fringe plot of the displacement in the y-direction, (uy). Render the plot with the element edges turned off.
■ Produce a vector plot of the y-component of the displacements superimposed on the fringe plot of the clevis model. Change the render style of the clevis model to wire frame. Change the vector Scale Factor to 0.25 and use a Model Scale Length.
■ Turn off the result vectors and the spectrum color bar in the viewport.
Exercise Procedure:1. Open clevis.db.
There are two approaches for post processing results in MSC/PATRAN. One approach is to use the multi-purpose (e.g. fringe,deformation, and animate) Quick Plot form. The other is to useresponse type specific forms, e.g. deformation.
File/Open...
Existing Database Name clevis.db
OK
PATRAN 303 Exercise Workbook - Release 7.5 9-3

Create a Deformed Shape Plot
Create a Deformed Shape Plot
These advanced forms, are designed to allow the user more flexibilityon the manipulation and rendering of the model, however this requiresmore user input compared to the Quick Plot form.
2. Create a deformed shape plot of the Displacement resultvalues.
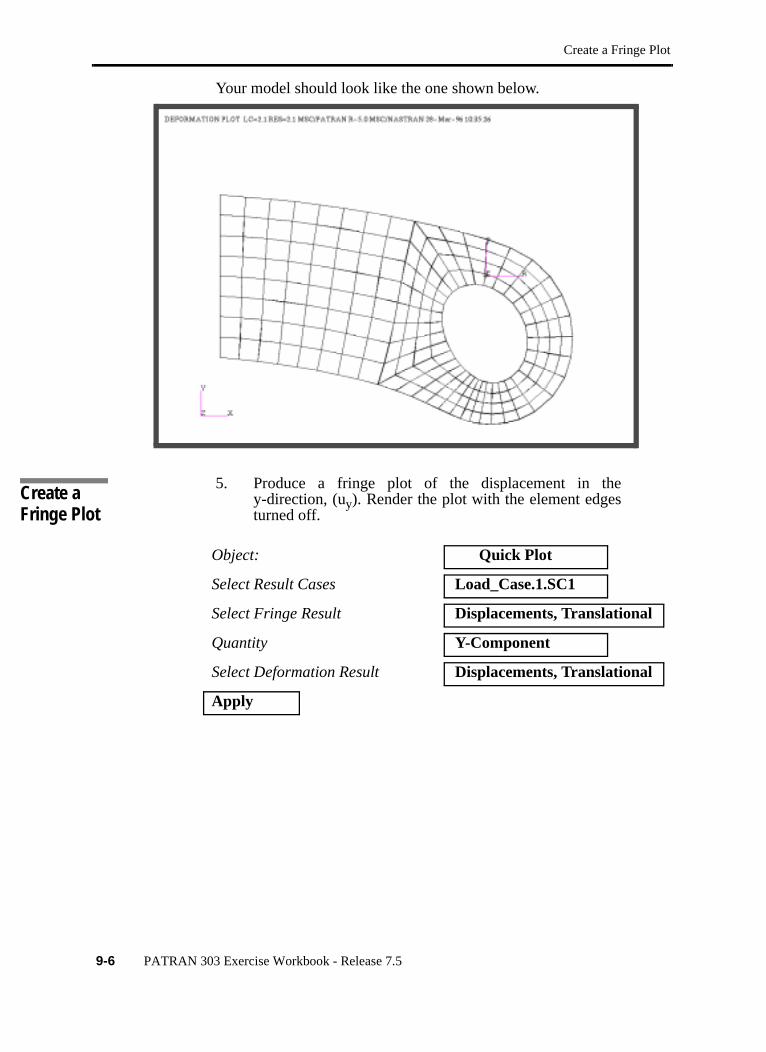
Your model should look like the one shown below.
3. Turn off the undeformed plot of the clevis model.
By default the deformed and undeformed plots are superimposed.Turn off the undeformed plot using Create, Deformation, DisplayAttributes under Results.
Results
Action: Create
Object: Quick Plot
Select Result Case(s) Load_Case.1.SC1
Select Deformation Result Displacements, Translational
Apply
Action: Create
Object: Deformation
Select Result Case(s) Load_Case.1.SC1
Select Deformation Result Displacements, Translational
9-4 PATRAN 303 Exercise Workbook - Release 7.5

LESSON 9 Post Processing of Displacement Results
To change the Display Attributes click on the Display Attributes iconin the results form.
Change the view to Iso 1 View by clicking on this icon in the toolbar.
4. Return to the Front view of the clevis model, and increasethe Deformation Scale Factor to 0.25.
Click on the Front View icon from the toolbar.
Show Undeformed
Apply
Scale Factor: 0.25
Apply
PATRAN 303 Exercise Workbook - Release 7.5 9-5
Create a Fringe Plot
Create a Fringe Plot
Your model should look like the one shown below.
5. Produce a fringe plot of the displacement in they-direction, (uy). Render the plot with the element edgesturned off.
Object: Quick Plot
Select Result Cases Load_Case.1.SC1
Select Fringe Result Displacements, Translational
Quantity Y-Component
Select Deformation Result Displacements, Translational
Apply
9-6 PATRAN 303 Exercise Workbook - Release 7.5
LESSON 9 Post Processing of Displacement Results
urn off inite lement dges
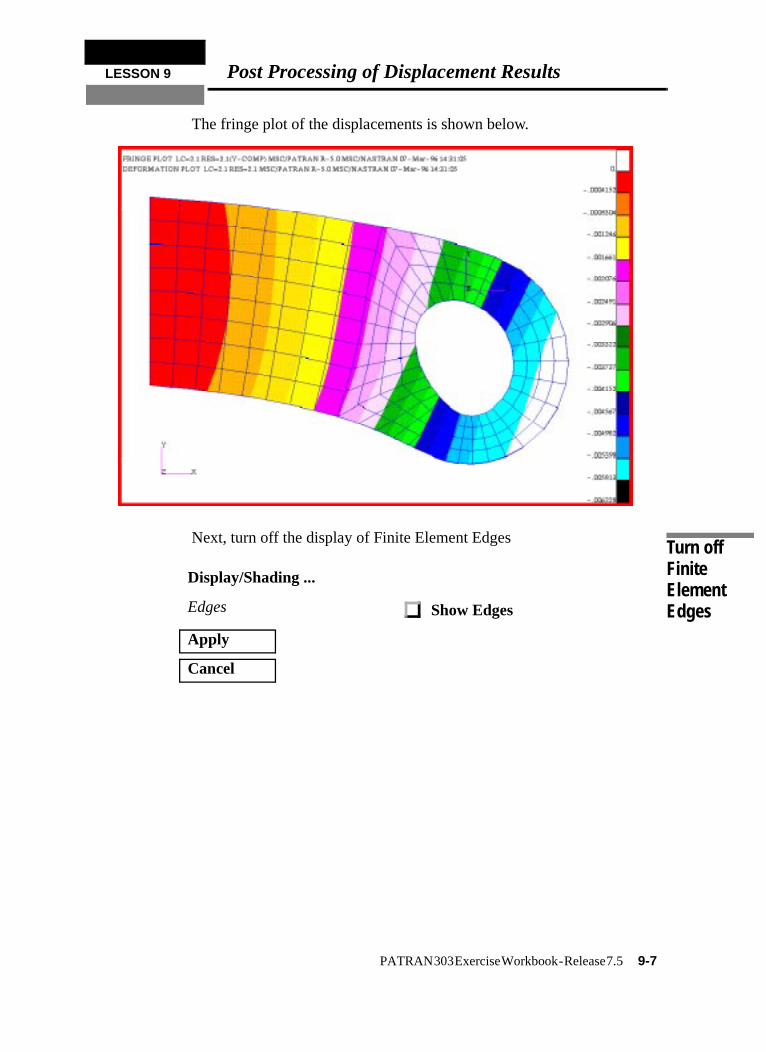
The fringe plot of the displacements is shown below.
Next, turn off the display of Finite Element Edges
Display/Shading ...
Edges Show Edges
Apply
Cancel
TFEE
PATRAN 303 Exercise Workbook - Release 7.5 9-7
Turn off Finite Element Edges
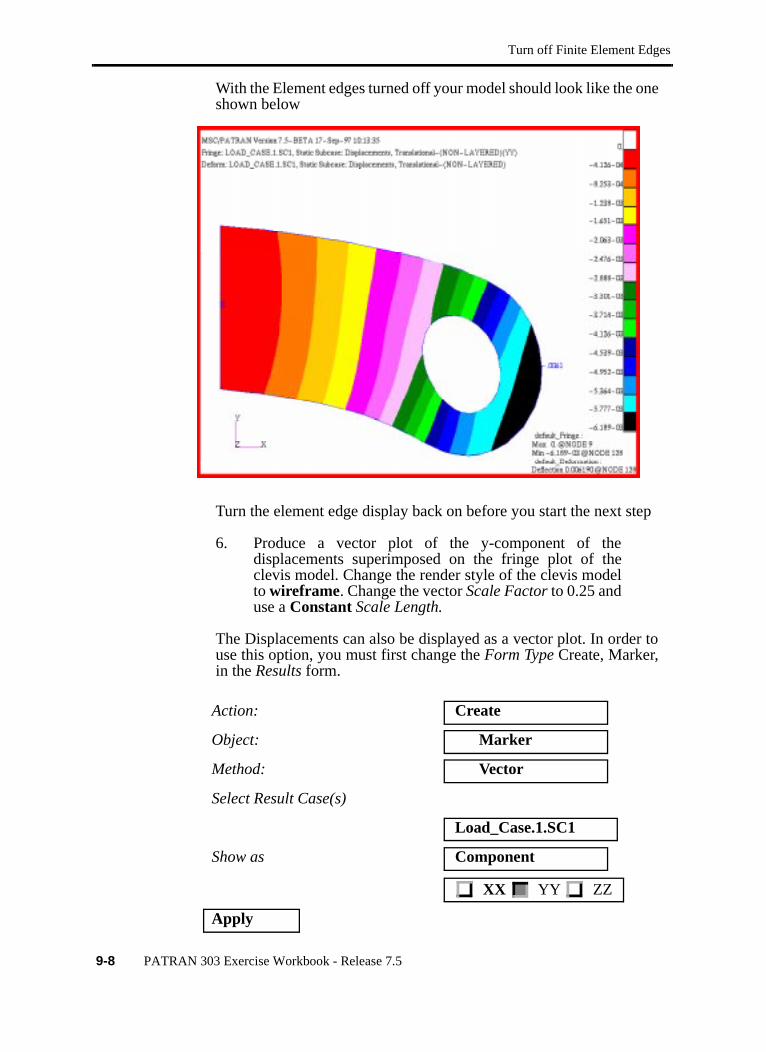
With the Element edges turned off your model should look like the oneshown below
Turn the element edge display back on before you start the next step
6. Produce a vector plot of the y-component of thedisplacements superimposed on the fringe plot of theclevis model. Change the render style of the clevis modelto wireframe. Change the vector Scale Factor to 0.25 anduse a Constant Scale Length.
The Displacements can also be displayed as a vector plot. In order touse this option, you must first change the Form Type Create, Marker,in the Results form.
Action: Create
Object: Marker
Method: Vector
Select Result Case(s)
Load_Case.1.SC1
Show as Component
XX YY ZZ
Apply
9-8 PATRAN 303 Exercise Workbook - Release 7.5
LESSON 9 Post Processing of Displacement Results
Display a Vector Plot
Turn off the Fringe and Deformation plots you created in the previousstep by changing the Action to Post and the Object to Plots. Selectthe vector plot in the Existing Plot Types databox,
7. Adjust the vectors attributes and scale.
Vector Attributes such as color, size, and magnitude scaling can bealtered in the Results, Create, Marker, Vector form. Click the DisplayAttributes button, and then try changing the vector Scale Factor to0.25 using a Constant-Model Scaled Length. Change view to iso 1view.
8. Click on the Display Attributes.
Action: Post
Object: Plots
Existing Plot Types: VEC_default_Vector
Apply
Action: Create
Object: Marker
Method: Vector
Show as Component
Constant
Vector definition
Length: Model Scaled
Anchor Style:
Show vector label
Show on deformed
Apply
PATRAN 303 Exercise Workbook - Release 7.5 9-9
Turn off Vector Plot
Turn off Vector Plot
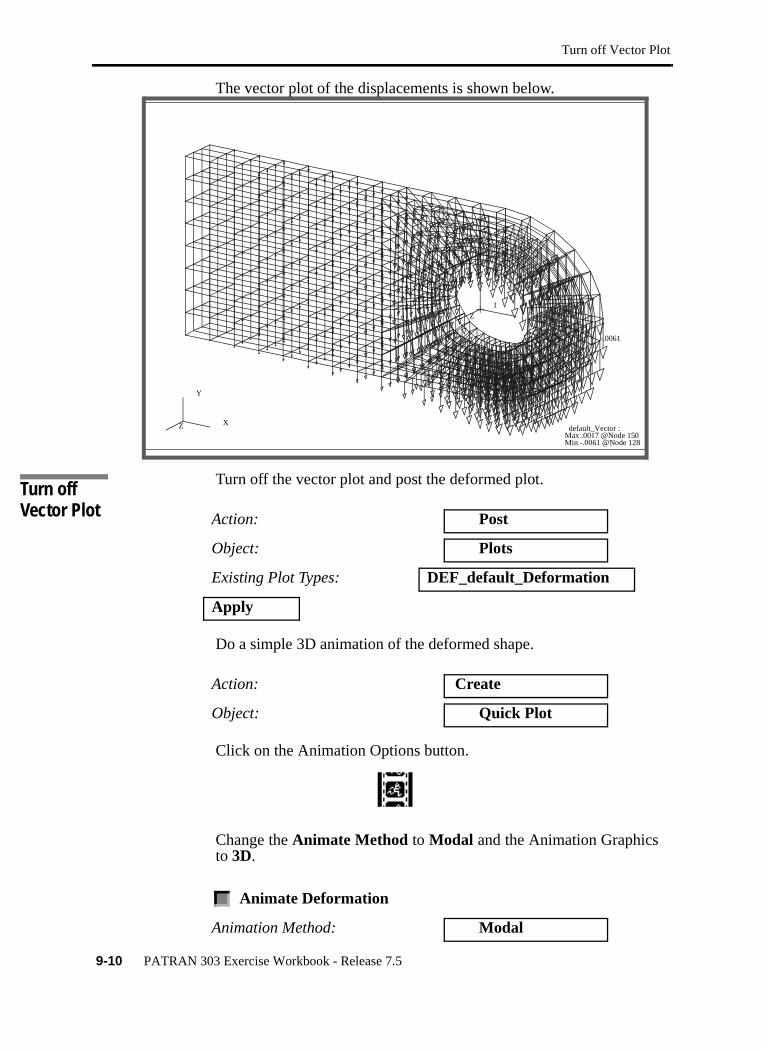
The vector plot of the displacements is shown below.
Turn off the vector plot and post the deformed plot.
Do a simple 3D animation of the deformed shape.
Click on the Animation Options button.
Change the Animate Method to Modal and the Animation Graphicsto 3D.
Action: Post
Object: Plots
Existing Plot Types: DEF_default_Deformation
Apply
Action: Create
Object: Quick Plot
Animate Deformation
Animation Method: Modal
X
Y
Z
1
T
RZ
-.0061
default_Vector :Max .0017 @Node 150Min -.0061 @Node 128
9-10 PATRAN 303 Exercise Workbook - Release 7.5

LESSON 9 Post Processing of Displacement Results
Select the Results Button
Try using the middle mouse button to rotate the model while it isanimating. Hit Stop Animation when done.
This ends the lesson. Close the database and quit Patran.
Animation Graphics 3D
Number of Frames 15
Apply
Select Result Case(s)
Load_Case.1.SC1
Select Deformation Result Displacements, Translational
Animate
Apply
File/Quit
PATRAN 303 Exercise Workbook - Release 7.5 9-11

Turn off Vector Plot
9-12 PATRAN 303 Exercise Workbook - Release 7.5

![[Mudcrab] post-harvet, processing - Aquatic Commonsaquaticcommons.org/20147/1/DagoonNJ1997-post-harvest-processing… · Crab processing Fresh, ... 1967. Biological evaluation of](https://cdn.vdocuments.us/doc/165x107/5aa2bf3b7f8b9a46238d75e6/mudcrab-post-harvet-processing-aquatic-c-crab-processing-fresh-1967.jpg)


