Download - Patriot Armory - Making the Best of Basics

8/7/2019 Patriot Armory - Making the Best of Basics
http://slidepdf.com/reader/full/patriot-armory-making-the-best-of-basics 1/188
MAKING THE. BEST OF BASICS
FAMILY PREPAREDNESS HANDBOOK
BY
JAMES TALMAGE STEVENS

8/7/2019 Patriot Armory - Making the Best of Basics
http://slidepdf.com/reader/full/patriot-armory-making-the-best-of-basics 2/188
Tower Investment Company
MAKING THE BEST OF BASICSFIFTH EDITION, ELEVENTH PRINTING -1977
Copyright r[) 1975 by JAMES TALMAGE STEVENS, All rights reserved, Printed in the United States of
America, No part of this publication may be reproduced, stored in a retrieval system, or transmitted, in any
form or by any means, electronic, mechanical, photocopying, recording, or otherwise, without prior written
permission,
Library of Congress Catalog Card Number 75-953
8/7/2019 Patriot Armory - Making the Best of Basics
http://slidepdf.com/reader/full/patriot-armory-making-the-best-of-basics 3/188
MAKING THE BEST OF BASICS
CHAPTER 1
CHAPTER 2
CHAPTER 3
CHAPTER 4
CHAPTER 5
CHAPTER 6
CHAPTER 7
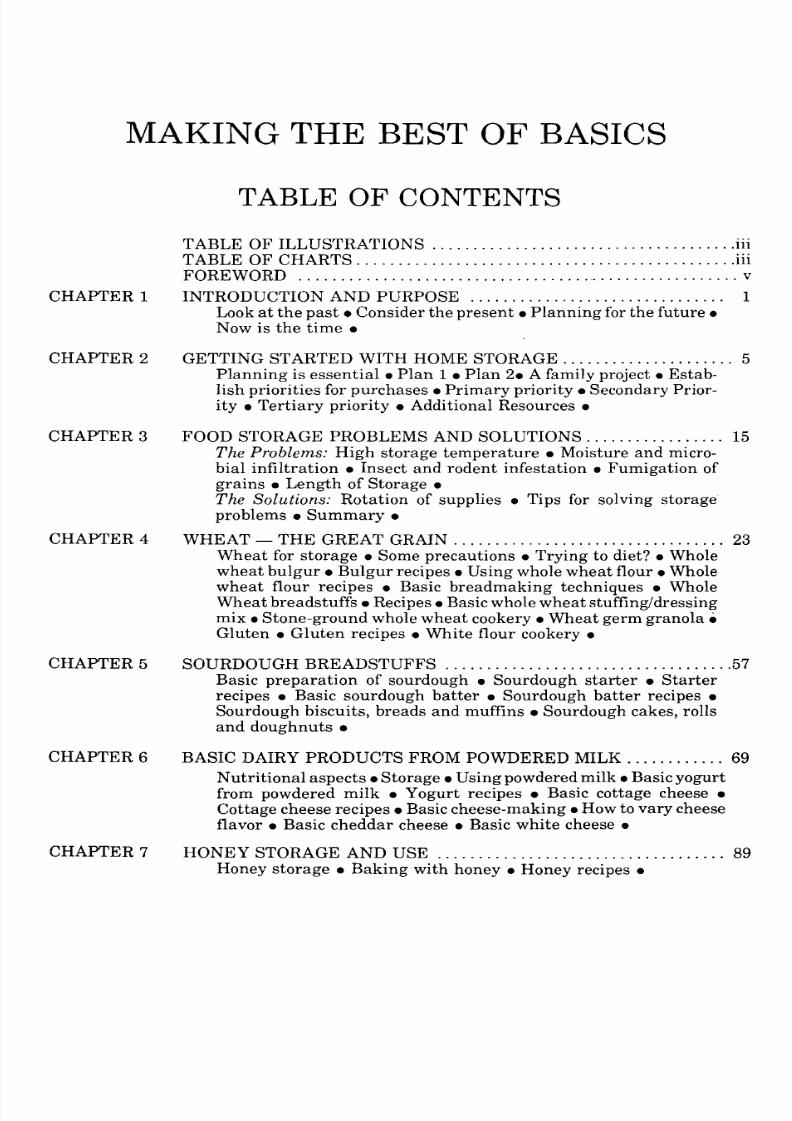
TABLE OF CONTENTS
TABLE OF ILLUSTRATIONS .iiiTABLE OF CHARTS .iiiFOREWORD v
INTRODUCTION AND PURPOSE 1Look at the past. Consider the present. Planning for the future.Now is the time •
GETTING STARTED WITH HOME STORAGE 5Planning is essential. Plan 1 • Plan 2. A family project. Estab-lish priorities for purchases. Primary priority. Secondary Prior-ity • Tertiary priority. Additional Resources.
FOOD STORAGE PROBLEMS AND SOLUTIONS 15The Problems: High storage temperature. Moisture and micro-bial infiltration. Insect and rodent infestation. Fumigation of
grains • Length of Storage •The Solutions: Rotation of supplies • Tips for solving storageproblems. Summary.
WHEAT - THE GREAT GRAIN 23Wheat for storage. Some precautions. Trying to diet? • Wholewheat bulgur • Bulgur recipes. Using whole wheat flour. Wholewheat flour recipes. Basic breadmaking techniques. WholeWheat breadstuffs. Recipes. Basic whole wheat stuffing/dressingmix. Stone-ground whole wheat cookery. Wheat germ granola.Gluten. Gluten recipes. White flour cookery.
SOURDOUGH BREADSTUFFS 57Basic preparation of sourdough • Sourdough starter • Starterrecipes. Basic sourdough batter. Sourdough batter recipes.Sourdough biscuits, breads and muffins. Sourdough cakes, rollsand doughnuts.
BASIC DAIRY PRODUCTS FROM POWDERED MILK 69
Nutritional aspects. Storage. Using powdered milk. Basic yogurtfrom powdered milk • Yogurt recipes • Basic cottage cheese •
Cottage cheese recipes. Basic cheese-making. How to vary cheeseflavor. Basic cheddar cheese. Basic white cheese.
HONEY STORAGE AND USE 89Honey storage. Baking with honey. Honey recipes.

8/7/2019 Patriot Armory - Making the Best of Basics
http://slidepdf.com/reader/full/patriot-armory-making-the-best-of-basics 4/188
11
CHAPTER 8 VITAMIN AND MINERAL SUPPLEMENTS 95
CHAPTER 9 WATER STORAGE. . . . . . . . . . . . . . . . . . . . . . . . . . . . . . . . . . . . . . . . . . . . .. 97Methods ofpurification. Safe sources ofwater for storage. How to
purify water. Storing water reserves.
CHAPTER 10 KITCHEN GARDENING WITH SPROUTS 101
Introduction to basic sprouting. A few basic rules for sprouting.
Basic sprouting chart. Sprout recipes.
CHAPTER 11 YARD GARDENING 107Garden space. Save time bymulching. Keep it simple. Compan-
ion gardening. High-rise gardening. Installment gardening.
Climate. Basic family garden. Preparation offresh vegetables.
Vegetable recipes. Alternative seasonings chart. Dressings.
CHAPTER 12 DRYING FRUITS AND VEGETABLES 125
Selection. Preparation. Treating. Drying. Packaging and stor-
ing • Rehydration • Summary •
CHAPTER 13 SOYBEANS - THE VERSATILE VEGETABLE 131
Green soybeans. Dried soybeans .Dried bean recipes. Soybean
sprouting. Soy flour. Soy flour recipes. Textured vegetable
protein. Unflavored TVP recipes. Beef-flavored TVP recipes.
Ham-flavored TVP recipes. Chicken-flavored TVP recipes.Other resources •
CHAPTER 14 PREPARING GAME MEATS, FISH AND FOWL 143
Venison recipes. Fish recipes. Wild fowl recipes. Small gamerecipes. Miscellaneous preparations.
CHAPTER 15 PERSONAL CARE AND HOUSEHOLD CLEANING PRODUCTS .. 153
General directions for basic soapmaking • Preparation of fats •
Mixing fats and lye. Soap recipes. Personal care product recipes.Household cleaning product recipes.
CHAPTER 16 BASIC MEDICAL SUPPLIES 159
CHAPTER 17 ENERGY AND FUELS STORAGE GUIDELINES 161
Gas lantern • Kerosene lantern • Tallow candles • Gas stove •
Flashlight. Charcoal. Coal. Newspaper fuel.
CHAPTER 18 TRITICALE..... . . . . . . . . . . . . . . . . . . . . . . . . . . . . . . . . . . . . . . . . . . . . .. 165
Derived grain. Breads, biscuits, rolls, muffins and waffles. Cakes, gin-
gerbread, torte and pies. Brownies, cookies and granola. Casserole
main dish.
CHAPTER 19 WHEY POWDER or "MILK SUGAR" 171
Explanation. Guidelines for use. Storage.
INDEX 174

8/7/2019 Patriot Armory - Making the Best of Basics
http://slidepdf.com/reader/full/patriot-armory-making-the-best-of-basics 5/188
iii
MAKING THE BEST OF BASICS
TABLE OF ILLUSTRATIONS
6 - A BASIC YOGURT MAKER. . . . . . . . . . . . . . . . . . . . . . . . . . . . . . .. . . . . . . . . . . . . . .. 726 - B USING THE BASIC YOGURT MAKER 736 - C BASIC CHEESE PRESS. . . . . . . . . . . . . . . . . . . . . . . . . . . . . . . . . . . . . . . . . . . . . . . .. 83
12 - A FRUIT AND VEGETABLE DEHYDRATOR 13014 - A BASIC SMOKEHOUSE ' 145
TABLE OF CHARTS
2 - A PRIMARY PRIORITY - THE BASIC FOOD STORAGE PLAN. . . . . . . . . . .. 92 - B SUGGESTED HIGH-PRIORITY NON-FOOD STORAGE ITEMS 10
2 - C SECONDARY PRIORITY - SUPPLEMENTAL FOODS AND PRODUCTS. 112 - D SUGGESTED LIST OF LOW PRIORITY NON-FOOD STORAGE ITEMS 132 - E USDA HOME & GARDEN BULLETINS 143 - A SHELF LIFE OF CANNED FRUITS & VEGETABLES . . . . . . . . . . . . . . . . . . .. 184 - A BASIC STUFFING/DRESSING MIX CHART 449 - A USING BLEACH FOR WATER PURIFICATION 999 - B USING IODINE FOR WATER PURIFICATION . . . . . . . . . . . . . . . . . . . . . . . . . .. 99
10 - A BASIC SPROUTING CHART 10311 - A GOOD COMPANION GARDEN CROPS 11011 - B GOOD INSTALLMENT GARDEN CROPS 111
11 - C BASIC FAMILY GARDEN PLAN 11211 - D BASIC FAMILY GARDEN LAYOUT (ILLUSTRATED) 11311 - E SUGGESTED VEGETABLE PREPARATION GUIDE 11511 - F ALTERNATIVE SEASONINGS FOR VEGETABLES 11812 - A BASIC DRYING OF FRUITS 12712 - B BASIC DRYING OF VEGETABLES 12812 - C CHEMICAL SOLUTIONS FOR TREATING FRUITS 12913 - A BASIC SOYBEAN USAGE CHART 13215 - A CLASSIFICATION OF FATS 15415 - B TEMPERATURE CHART 15516 - A SUGGESTED ITEMS FOR A BASIC MEDICAL CHEST 160

8/7/2019 Patriot Armory - Making the Best of Basics
http://slidepdf.com/reader/full/patriot-armory-making-the-best-of-basics 6/188
FOREWORD
We want to point out a number of things, so we point them out here:
We are not trying to be a part ofthe "Chicken Little" complex. The sky isn't falling,
at least as long as we can keep it propped up with information to help you copewith
family preparedness problems.
This is not the only bookon the subject, but we're happy somany find our Handbookuseful.
Wehaven't met or solved all the problems related to family preparedness activities,
but we are continually searching for additional basic solutions to problems.
The knowledge pertaining to family preparedness is constantly changing. Therefore, what is
published herein is current information as of publication, but may shortly be outdated byadditional research, new products, improved methods, and advanced technology.
In the areas of food storage and its utilization, the depth of discussion could be virtually
limitless. Therefore, recognizing the law of diminishing returns - that beyond a·certainpoint discussion of technicalities becomes more confusing than enlightening - this FamilyPreparedness Handbook endeavors to achieve some direction and application without sac-
rificing thoroughness.
Our thanks and gratitude to those contributors whose knowledge, ideas, methods and recipeshave made this volume possible. These contributions are shared with the readers to help
facilitate family preparedness activities.
Special appreciation to my wife. On many occasions she surely felt embattled by assortedparaphernalia on the range, in the refrigerator, spread over the countertops and strewn over
the floor while the experimentation proceeded for the recipes and techniques summarized inthis edibon.
Also, special thanks to our four children. They greeted the onslaught ofmany new ideas and
recipes - most ofwhich were more exciting to me than to them, generally over-seasoned, and
often underwhelming- with nomore than "Yecch!" and "Oh no, dowehave to eat this? . " astheir loudest protest. Bless them, they always had more tolerance for my antics than I had for
theirs.
The Family Preparedness Handbook serves as a compendium of family preparedness ideas,
and was not intended to deal in a scholarly manner with the details of nutritional aspects of
wheat as compared to T.V.P., or powdered milk compared to whole milk, etc. Others havetreated those subjects with expert knowledge, based on expert training. The main purpose ofthe Handbook has been to organize some of the many ideas and methods currently availableinto a single volume to provide a framework on which families may rely formaking the best ofbasics.

8/7/2019 Patriot Armory - Making the Best of Basics
http://slidepdf.com/reader/full/patriot-armory-making-the-best-of-basics 7/188
CHAPTER 1
INTRODUCTION AND PURPOSE
There's a story about an old man who always loved to listen to a clock strike, so one day he
went out and bought an old clock and hung it on the wall in his living room. Each night, when
he retired he would lie there halfawake and listen for the striking ofthe clock.When the clock
would strike, he would count. One night something went wrong with the mechanism in the
clock. It began to strike as usual and he began to count. He counted up to ten, eleven, twelve,thirteen, fourteen, fifteen - then suddenly he realized something was wrong. He quicklyreached over, shook his wife and said, "Wake up Ma! It's later than I've ever knowed it to be!"
It's later than a lot of us realize. As we survey the number of crises in the world today, it isevident the need for a family's self-reliance was never greater. As inflation causes prices to
skyrocket, there will probably never again be a better time than now to provide for the
security of the family. For those families who have not yet begun, waste no more valuable
time! The information assembled in this Family Preparedness Handbook is designed to help
families adequately store, preserve and prepare food for use during forthcoming times ofneed.
We must realize there cannot be security without labor; there cannot be progress without
experience; there is no prosperity without adhering to sound advice and counsel of wise
leaders. Wealth and security seem to grow whenever people exert energy in the right
direction.
Ifwe want to be self-sustaining, we must first look to ourselves for the genius to provide our
sustenance. Our first obligation is to provide for our own family. How this can be accomp-
lished has been considered in this Handbook. Careful preparation is the only method by

8/7/2019 Patriot Armory - Making the Best of Basics
http://slidepdf.com/reader/full/patriot-armory-making-the-best-of-basics 8/188
2 • INTRODUCTION
which this task can be accomplished. The preparations need not be elaborate, nor be made all
at once, but must be a continual process with watchful planning and timely execution.
Opportunity is a haughty goddess who wastes no time with those who are unprepared.
Depressions show no mercy on empty pantries and empty stomachs. The planning process for
family preparedness can be most interesting and stimulating to one's thinking, as well asproviding the members of the family the opportunity to work together with their own hands
for their own good.
LOOK AT THE PAST
While we were growing up, some ofour most cherished memories remind us ofthe kitchen -
good smells, cheery chatter, and lots oflaughing and fun times around the table. We still have
warm memories of our favorite dishes being prepared and sharing with family and friends
those special meals and holidays. These memories are a vital part of our past, and we often
return comfortably to them when we need a point of reference for our own personal security-like calling home to touch base with the folks.
It's unfortunate we didn't appreciate our parents' efforts in providing us the feeling ofsecurity
as we grew up. Some ofus never knew the agony and pain ofwant. Others whose parents were
less capable of controlling their lives have fewer good memories, and maybe even some bad
ones. Many remember their youth sadly because they lacked food or other necessities beingavailable.
However, whether our past was happy or sad, almost all of us desire a better life for our
children and we want to be able to give our families more happiness than we had.
CONSIDER THE PRESENT
Perhaps at no time in history has somuch been known about and somany have been aware of
the overwhelming possibility that our foodsupply, as well as other essential supplies, could be
curtailed or eliminated. We live in a time of constant crisis; each of us can easily recall a
recent crop failure, strike, personal illness or other problem which struck at our feeling ofsecurity.
We want to provide security for our children so their memories oftheir youth will be as warm,if not more so, than ours. As we've come to appreciate the effort behind stringing along a
sometimes meager existence, we realize the constant pressure on us to set aside a portion ofour resources now for future security.
Fortunately, there has never been more available information to guide today's parents in
their quest for security. Unfortunately, there has probably never been somuch temptation to
take our eyes off the goal of family security!
PLANNING FOR THE FUTURE
We need to be prepared to meet the future problems of increasing demand and decreasing
supply ofbasic commodities with some degree ofconfidence and security. The only waywe canachieve this position is by retaining control over our economic security. An adequate food
supply for the family could be a major part of the family's economic security, and possibly the
key to survival. There is a general feeling of security deri ved from knowing the family will be
able to eat, whether the national economy or our job in particular remains stable.

8/7/2019 Patriot Armory - Making the Best of Basics
http://slidepdf.com/reader/full/patriot-armory-making-the-best-of-basics 9/188
INTRODUCTION. 3
Having an adequate supply of material goods and the means to meet physical needs, both in
the present, as well as the future, will certainly play an important part in the family's
security. Minor emergencies occur in every family, posing a threat to family security. The
ever-present threat of major emergencies such as drought, crop failure, strikes, wars, loss of
job, sickness, or death makes planning for the future even more important.
Planning for future emergencies has not been the strong suit of most families. We naturally
avoid negative possibilities, usually in an effort to cope with an already tough existence.
However, if the positive aspects of family preparedness could be kept in mind, the easier it
will become. There's a real challenge to having an adequate supply of food O~ hand, and it's
considerably more complicated than just being able to pay for it. Considering the difference in
likes and dislikes of any two individuals, storing for a family is possibly the toughest thing a
family will ever have to do!
This Family Preparedness Handbook has been prepared to help you pinpoint what to store
and how to maximize the utilization of what you've stored. As the old saying goes, "The
longest journey begins with the first step." You, too, can make this long journey by stepping
out smartly, gaining confidence and ability in your efforts as you march along the path
marked herein.
NOW IS THE TIME!
The most important part of your family preparedness program is getting started. It is indeed,
as the old man said, "... later than we've ever knowed it to be!", and it's getting later all the
time! Too many of us store in our heads and not on our shel ves. We are always wai ting for
some more opportune moment which somehow never comes. Some families store items which
would make life impossible - no one could eat beans every meal! Then again, some familiesconcentrate so much on purely survival aspects of storage they have not allowed for variety in
their diets. Proper analysis of the family's needs and planning for those particular needs can
help maintain nutritious and attractive menus during the worst of times.
Then there are those diligent individuals who buy every book (such as this one) and read
every article about the virtues of an adequate storage program, but neglect to begin their own
storage program! Books and articles are certainly worthwhile, though quite unpalatable,
even after long boiling! Other frugal souls wait for sales that never happen, no doubt hoping
the last price increase was temporary. Others are just cock-eyed optimists who don't believe
they'll ever need to rely on stored food, so they go blithely on.
Perhaps some of the most difficult families to persuade to begin active storage programs are
those with "Mother Earth complex." These hardy return-to-nostalgia types are certain that in
times of emergency they will be able to find adequate sustenance from the woods and fields of
nature. For their sake, when the balloon goes up, may it be in the Spring!
This Handbook was compiled to provide you and your family with some guidelines and
suggestions for a basic storage program. From many alternative programs we have tried to
pull together an effecti ve and practical guide to make your family preparedness efforts less
challenging and more rewarding. The importance of any beginning is " ... beginning with the
first step." As you gain confidence in your decision-making ability and understanding ofthe
program, you will gain a more positive attitude and feel good about your success. A workablehome program for food storage, not to mention possible survival, is our primary concern-
and should be yours. Once you get started, you'll find the whole area of family preparedness
presents not only an interesting challenge, but becomes an absorbing hobby. (By the way, it's
the only hobby we know you can literally absorbl)

8/7/2019 Patriot Armory - Making the Best of Basics
http://slidepdf.com/reader/full/patriot-armory-making-the-best-of-basics 10/188
4 • INTRODUCTION
ome storage, properly planned, should and will be more than an emergency or "make do"
Plan to use and learn to use fooditems in storage, especially those which are not too
amiliar, i.e.: TVP, soybeans, sprouts, herbs, dehydrated foods, etc. Get cookbooks, cut outecipes to try, have fun! The challenge of cooking is probably the most adventurous and
reative part of family preparedness activities.
ake a cookbook by using a loose-leaf notebook with index dividers and plain paper. Cut out
ecipes from the newspaper homemaking section and tape them in the appropriate section of
our "personal" collection. Discipline yourself to use and try at least one new recipe everyeek using food that needs rotating.
NOTES AND QUOTES
lace here thoughts, ideas or clippings which motivate you to action in your own familyeparedness program.

8/7/2019 Patriot Armory - Making the Best of Basics
http://slidepdf.com/reader/full/patriot-armory-making-the-best-of-basics 11/188

8/7/2019 Patriot Armory - Making the Best of Basics
http://slidepdf.com/reader/full/patriot-armory-making-the-best-of-basics 12/188

8/7/2019 Patriot Armory - Making the Best of Basics
http://slidepdf.com/reader/full/patriot-armory-making-the-best-of-basics 13/188
GETTING STARTED. 7
FAMILY PREPAREDNESS - A FAMILY PROJECT
Make this effort a family project. The enthusiasm, family unity, and feeling of security this
project offers will prove rewarding. What, how, and where we store is to some degree eachfamily's particular problem. Each family must decide how it will solve this problem. The
responsibility for action is upon the head of each family, even though the responsibility isoften delegated to Mom!Each family should give serious thought and action to the goal of at
least a one year's advance supply of items which will sustain life should normal supplychannels be interrupted.
Itis most difficult to estimate the quantity of foods a family should store. Eating habits, ages,
occupation, nutritional state, health, climate, and other factors may alter the kind of foodsdesired and the amount to be stored. Thus, the details of such, a storage plan are left to the
family. However, the general recommendations in this Handbook for the kind offoods and the
amounts are guidelines to be varied according to the family'S particular tastes, situation and
circumstances. These are suggestions compiled from knowledge available as of publicationdate.
ESTABLISH PRIORITIES FOR PURCHASES
Most families are limited in the amount ofmoney available for their food storage and family
preparedness program. Therefore, purchasing priorities need to be established to assure the
proper sequence for acquisition of essential or basic food items. Those who store non-edible
and non-essential items may starve to death! Trading, exchanging and bartering are olden-
time techniques for acquiring needed items, and may become a means of"buying" in the near
future. But, if you have foodwhen little is available, you'd be very reluctant to trade for either
gold or silver unless there were ample left for your family's needs. If you couldn't trade your
gold or silver for foodwhen you needed it, even large stocks of precious metals would provefairly useless to your family during a famine! Let's put it another way - you can't eat gold orsilver!
This edition of the Family Preparedness Handbook recommends a program of primary,
secondary, and tertiary storage priorities. Buy all of the primary or basic items before buying
any ofthe secondary ones, and all ofthe secondary items before any of the tertiary ones. This
system is based on having all life-sustaining and health-maintaining foodstuffs on handbefore purchasing any non-edible items. This method of storage is analogous to building by
starting with the foundation. Don't try to build by starting with the roof!
The cha~ts in this Chapter suggest categories of priority for acquisition of primary or basicstorage Items, secondary or supplemental storage items, and tertiary or non-essential storageItems.

8/7/2019 Patriot Armory - Making the Best of Basics
http://slidepdf.com/reader/full/patriot-armory-making-the-best-of-basics 14/188
. GETTING STARTED
RIMARY PRIORITY: A SUGGESTED BASIC FOOD STORAGE PLAN
he basic items providing adequate calories, proteins, vitamins and minerals without great
xpense are: (1) wheat, (2) powdered milk, (3) sugar and/or honey, (4) salt, (5) a vitamin
upplement program, and (6)water. Add to this basic survival diet other grains and legumes,eanut butter, dried or canned fruits and vegetables, canned meats, some seeds for sprouting,
owdered eggs, etc., and you add variety to an otherwise boring subsistence-level diet.
hart 2-A details the amounts needed in each food category of the Primary Priority storage
lan. A list of high priority non-food items which might prove necessary to your family
reparedness program is found in Chart 2-B.
heat. Wheat is a primary item for any foodstorage program. The amount to store will vary
ith ages and appetites. Also, the amount stored assumes the family will have some other
asic foods, as suggested in this Handbook, from which to draw. A goodwheat grinder or mill
a necessary part ofthe storage program. Hand-powered or electric models using stones arecommended. Further details on wheat utilization are found in Chapter 4.
owdered Milk. Powdered milk may be stored as whole milk or skim (nonfat) milk. The
tter is preferred and should be non-instant, because it stores better. Skim milk does not
ave as much fat or as much Vitamin Acontent and is somewhat lowerin caloric content than
hole milk. Milk solids and vitamins in skim milk, with the exception ofVitamin A, are very
imilar to those of whole milk. Skim milk contains about half as many calories and more
arbohydrates per volume as compared to whole milk. Keep in mind that powdered milk is not
qual to raw milk. Chapter 6 is an informative section to help you utilize powdered milk in
ays you've probably never known before.
ugar and Honey. Sugar is easily stored, but has also become very expensive lately. Pure
rystalline honey keeps indefinitely, has nutrients which refined sugar lacks, and contains
4uu calories per pound less than sugar. Honey is also much sweeter to the taste than
ugar. Five gallon cans of honey are mote economical. Rebottle or repack bulk honey for
onvenience in using. No processing is required - harmful bacteria cannot live in pureoney. Chapter 7 has ideas for special ways to use honey in your storage program.
alt. Salt is essential to the diet, and is one of the least expensive items to store. In hotlimates the amount needed may be double that ofcooler climates. Iodized salt is required forse in many regions of the country. Salt stored in a dry, coolplace in a sealed container willeep for many years.
itamin and Mineral Supplements. Supplements for both preventive adequate nutri-
onal needs are a must for those on a basic diet, especially when accompanied by stressful
tuations. Vitamins A and Cmust be supplemented at all ages when on a basic diet. Vitamin
should be added to the basic diet for the fast-growing younger age groups. The B complex
ill need strengthening. The higher the temperature and the longer preserved foodstuffs are
tored, the less vitamins they contain. Natural vitamins and minerals are recommended to
eplace those lost during processing. Vitamins sealed in a gelatin capsule will store longer
an ordinary tablets. See Chapter 8 for additional information on vitamins.
Itwould be difficult to store enough water for more than a temporary emergency. Hotater heaters, soft water tanks and the reserve portion of water closets would be sources of
afe water. Awater purifier should be included in the storage program. Chapter 9 deals withater storage problems and solutions.

8/7/2019 Patriot Armory - Making the Best of Basics
http://slidepdf.com/reader/full/patriot-armory-making-the-best-of-basics 15/188
CHART 2-APRIMARY PRIORITY - THE BASIC FOOD STORAGE PLAN
GETTING STARTED. 9
QL\:lOTlTY IN POUNDS HEQUIRED FOR EACH FA:\IILY MEi\1HEH
(Rounded to nearest 5Ibs.)TOTAL
FOOD STORAGE ADULTS CHILDREN TEENAGERSI
AMOUNT
ITEM NEEDED
13-15 yrs 16-20 yrs. FOR FAMILY
Male Fern. 1-3 4-6 7·9 10-12
Girl Boy Girl Boy
Wheat 300 200 70 100 160 210 220 280 200 335
Nonfat dried milk 55 45 100 100 100 100 100 100 100 100
Sugar and/or honey 30 20 15 20 25 30 30 40 30 50
Salt 5 5 5 5 5 5 5 5 5 5
Vitamin supplements Check with your physician for his advice on this storage item
Vegetable25 I
!
30 Ihortening & salad 30 25 20
20 I
30 .40 25 45
oils
Variety of grains,
rice, oats, corn, 90 75 35 45 65 85 90 115 85 140
barley, millet, etc.
Variety of dried
beans, peas, soy 25 20 5 10 20 25 25 35 25 45
beans, lentils, etc.
Peanut butter 10 10 5 10 10 10 15 15 15 15
Variety of vegetables35 30 20 25 25 35 35
I
45 35 55(fresh equivalent)
Potatoes (fresh50 50 25 25 50
I
50 50 75 75 100equivalent!
Variety of canned
fruit juice25 20 15 20 20 25 25 35 25 30
concentrates
equivalent)
Variety of fruits100 100 50 75 75 100 100 100 100 150
(fresh equivalent)
Variety ofgelatin,
jello, tapioca,
chocolate, banana15 10 5 10 10 10 10 15 10 20
flakes, margarine,
butter,
I
powdered eggs, etc.
Variety of 20 15 5 5 10 15 15 20 15 25canned meats
Water (emergency7 gallons per person
use only)
8/7/2019 Patriot Armory - Making the Best of Basics
http://slidepdf.com/reader/full/patriot-armory-making-the-best-of-basics 16/188
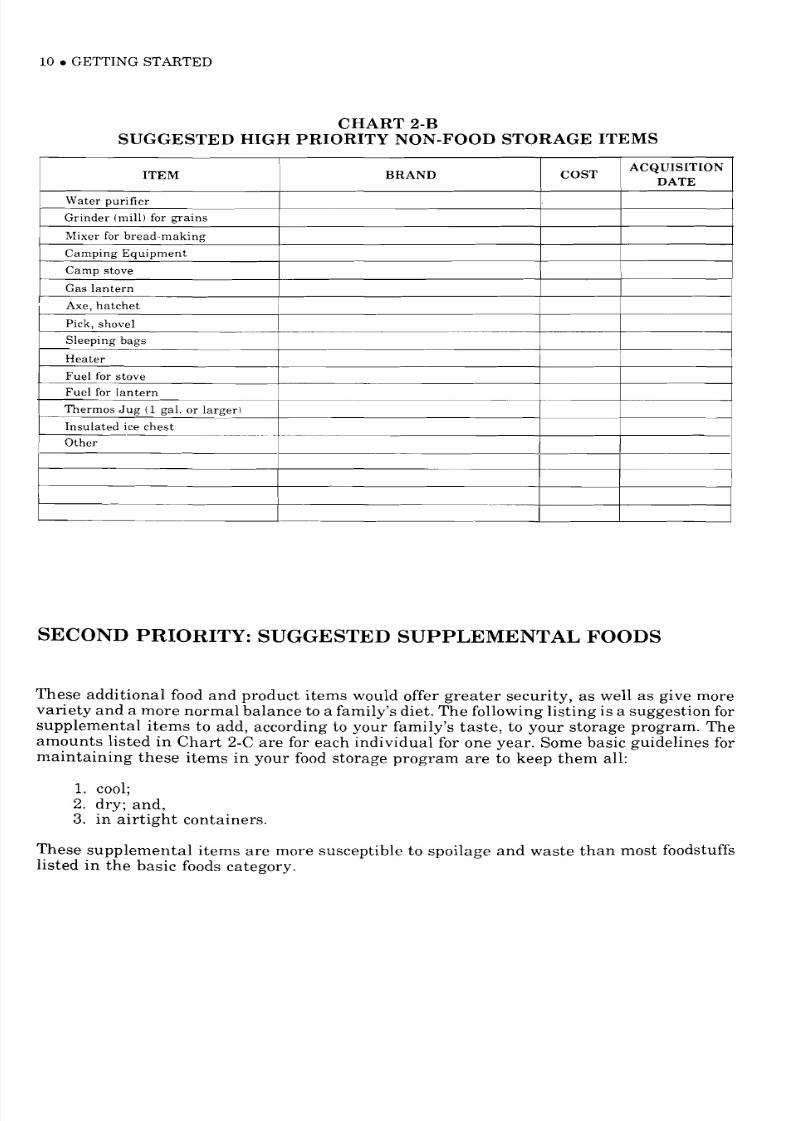
10 • GETTING STARTED
CHART 2-BSUGGESTED HIGH PRIORITY NON-FOOD STORAGE ITEMS
ITEM BRAND COSTACQUISITION
DATE
Water purifier
Grinder (mill) for grains
Mixer for bread-making
Camping Equipment
Camp stove
Gas lantern
Axe, hatchet
Pick, shovel
Sleeping bags
Heater
Fuel for stove
Fuel for lantern
Thermos Jug (1gal. or larger)
Insulated ice chest.-~~------.- ~
Other
I I I
~~
SECOND PRIORITY: SUGGESTED SUPPLEMENTAL FOODS
hese additional food and product items would offer greater security, as well as give more
variety and a more normal balance to a family's diet. The following listing is a suggestion for
supplemental items to add, according to your family's taste, to your storage program. The
amounts listed in Chart 2-C are for each individual for one year. Some basic guidelines for
maintaining these items in your food storage program are to keep them all:
1. cool;
2. dry; and,3. in airtight containers.
These supplemental items are more susceptible to spoilage and waste than most foodstuffslisted in the basic foods category.

8/7/2019 Patriot Armory - Making the Best of Basics
http://slidepdf.com/reader/full/patriot-armory-making-the-best-of-basics 17/188
GETTING STARTED. 11CHART 2-C
SECONDARY PRIORITY - SUPPLEMENTAL FOODSAVERAGE
'~l'A:-;TITY FOilAPPROX.
STORAGE NO.I'i TOTAL F.UlILY ACQLlSITIO'iITE~I O'iE YEAR STORAGE
PER PERSO'iLIFE FA'lILY :-<EEDS DATE
IE'~CI\,ALENTSI(~IO'iTHSI
STAPLES
Baking Powder 1 lb. 18
Bouillon cubes 1 lb. 12
{ liquid 1 lb. 12
Chocolate semi-sweet 1 lb. 24
unsweetened 1 lb. 18
Condensed and evaporated Milk 1 case 12
Jams 4lbs. 12
Margarine 25 Ibs. 6
Molasses syrup 1 gal. 24 +Non-dairy creamer 2lbs. 6
Pasta 25 Ibs. 24 +Rice, white 25 lbs. 24 +
Salad dressings (all types) 6 qts. 3 +
Soda 2 packages 12
Sugar{ brown 3lbs. 12 +confectioners
2lbs. 6 +
Syrup 1 gal. 24
Yeast lIb. 6
MIXES AND PACKAGED FOODS
Cake mixes 12 boxes 12
Cereals{ ready-to-eat 12 boxes 9
cooked 5lbs. 12 +
Crackers 12 boxes 3 +Corn meal 5lbs. 12
, Pudding mixes 48 boxes 12
CANNED AND DRIED FOODS
(EQUIVALENTS)
Gravies, liquid or powder 6 cans/pkg. 12
Fish & poultry 48 cans 12
Pickles, olives 2 qts. 12
Soups, canned 144 cans 12
HERBS. SPICES AND
CONDIMENTS
Catsup 12 bottles 12 +
{ whole spices As needed 12 +
Herbs and spices ground spices As needed 6 +herbs As needed 6 +
Soy sauce 2 bottles 24 +Worcestershire sauce 1 bottle 24 +Vinegar 2 gal. 24 +
OTHER FOODS
Coconut 2lbs. 12
Low-calorie products,
instant breakfasts As needed 6Onions, dried 20 lbs, 36
Sweet potatoes, canned 20 Ib8. 12
Nuts 10 Ibs. 6
Parmesan cheese, grated 2lbs. 12
Soft drinks 6 ctns. 3
Whipped topping mix 12 packages 12 +

8/7/2019 Patriot Armory - Making the Best of Basics
http://slidepdf.com/reader/full/patriot-armory-making-the-best-of-basics 18/188
12 • GETTING STARTED
ERTIARY PRIORITY: LOW PRIORITY NON-FOOD STORAGE ITEMS
If the family is able and wants to go further, of course, it would be desirable to have a year'ssupply or more of everything imaginable. Certainly, a few months' supply of the staple items
is a convenience, offers an advantage economically, and will serve as a part of your foodinsurance program. To finance such a supply could present financial problems unless carefulplanning is undertaken. Specificinformation regarding foodsand variable storage factors for
specific geographical localities may be obtained from local government agencies, colleges,
universities, or those professionally engaged in food and family preparedness enterprises.
Acquiring a year's supply should be done in an orderly and systematic manner, consistent
with a family'S income. Borrowing money to acquire food storage is not advocated. Inflationalone will make food a fairly reasonable investment.
Sufficient durable clothing also should be included in a home storage program to take care of
family requirements for at least a year's time. This clothing inventory should accommodate
the seasonal needs for each family member. Store sufficient fabrics, thread, needles, andother sewing items. The provident housewife will take advantage of sales of materials
suitable for making clothing the family may require and will store purchases until such time
as they are needed. Savings are also possible in keeping clean, used clothing on hand which
can be remodeled, cut down for a younger member of the family, or refurbished as needed.
When possible, a reserve of fuels, (coal, oil, wood, etc.) should be part of the storage plan.
Various types of supplementary heating and cooking units, some of which are portable, are
available on the market. Those should be selected that would, in an emergency, serve both for
the preparation offood and forwarmth. Ashort section offuels storage is found in Chapter 17.
In addition to the previously mentioned storage items, first aid articles, prescribed medicines
(as directed by a physician), soaps and cleaning agents, matches, and other such necessaryitems may be considered. Chapter 16 has suggestions for medical storage. Chapter 15 has
instructions for soap-making, etc. A reserve of bedding should be included in your storageprogram. Chart 2-D on the following page contains a listing of low priority non-food storage
items you may want to have. It is a goodchecklist, but by no means all-inclusive. Care should
be exercised in selecting items and arranging them for storage.
REMEMBER: AN ADEQUATE FOOD SUPPLY COULD BE THE KEY TO YOURFAMILY'S SURVIVAL. Wise budgeting will help minimize costs and also permit savings.
Replenish supplies as they are used and/or needed.
The next chapter discusses the problems normally encountered in food storage and family
preparedness and how to solve some of them. The biggest problem is financing or budgeting
for a storage program. No time is better than now - tomorrow may be too late!
Additional storage space is usually the next problem to be solved. Even though there may besome disagreement with the listing of some of the basic items previously discussed in this
chapter, there is little doubt each family should store a rotated one year's supply. The items
suggested herein may not be perfect for your family's health, ages, occupation(s), nutritionalstatets), and geographical location or climate. However, they present a jumping-off place foryour planning. Most of us can accomplish this goal if we put our minds to it. The money and
storage space involved will not be insurmountable problems for most of us if we truly acceptthe challenge in the right spirit - that of providing security for our loved ones.

8/7/2019 Patriot Armory - Making the Best of Basics
http://slidepdf.com/reader/full/patriot-armory-making-the-best-of-basics 19/188

8/7/2019 Patriot Armory - Making the Best of Basics
http://slidepdf.com/reader/full/patriot-armory-making-the-best-of-basics 20/188
14 • GETTING STARTED
ADDITIONAL RESOURCES
There are many sources for family preparedness and home storage activities.
Knowing how to organize and maintain a sensible, continuing, workable storage program is a
matter of self-education for each family.
The best knowledge ofwhat a family requires for its sustenance during a time of particular
need is after the experience is over. That could be far too late for many. The U.S. Government
provides bulletins for special subjects to aid in food storage through the Department of
Agriculture. Chart 2-Ewill prove invaluable in helping combat today's increasing prices and
decreasing food availability.
Land grant colleges and state universities provide many free brochures, bulletins, and evengive lectures about home storage and family preparedness subjects.
The local libraries have many books on foodsfor preparation and storage. And now, as never
before, bookstores have increasing numbers of food storage books, pamphlets, and guides
from which to select.
CHART 2-E
SELECTED USDA HOME AND GARDEN BULLETINS
NO. TITLEI
BRIEF DESCRIPTION COST
list of quantities of food for 1 week, based
I Family Fare on good nutrition according to age and sex 25c
I(see pp. 14-15 particularly)
8Home Canning of basic booklet full of good tips for preserving
20cFruits and Vegetables garden crops
10Home Freezing of booklet describing what to freeze, how to
35c !Fruits and Vegetables freeze it, and how to use it when thawed
40Freezing Combination booklet describing cooking equipment,
25cMain Dishes packaging materials and recipes
70I
Home Freezing of companion bulletin to No. 10, with details for15c
Poultry packaging poultry products
Family Food StockpileI
USDA's opinion of what constitutes a family's77
I25c
for Survival food storage needs - a good booklet
78Storing Perishable how to select foods for storage, and how,
20cFoods where, and how long to store it
93 Freezing Meat and I a very good booklet on techniques of freezing 35cFish in the Home
106Home Canning of a booklet informing how to can meat and
15cMeat and Poultry poultry products
119Storing Vegetables a how-to booklet dealing with vegetable and
25cand Fruits fruit storage in basements, cellars, outbuildings and pits
Keeping Food Safea booklet concerning proper storage of foods;
162with general tips for preparing and cooking
to Eat foods: general discussion on proper freezing10c
and canning in the home-
To buy USDA bulletins, write to:
CONSUMER INFOR.\'IATION CENTER
PUEBLO
COLORADO 81009
Send correct change, money order or check for the full amount. Stamps are not acceptable!

8/7/2019 Patriot Armory - Making the Best of Basics
http://slidepdf.com/reader/full/patriot-armory-making-the-best-of-basics 21/188
CHAPTER 3
FOOD STORAGE PROBLEMS ANDSOLUTIONS
THE PROBLEMS
Food has many "enemies" which destroy its quality. These enemies work at different rates
with different effects on different foods. Their net effect is to destroy the eating quality ortaste and the nutritional values of stored foods.
The major enemies of food quality and nutrition are:
a. High storage temperature;
b. Moisture and microbial infiltration;c. Insect and rodent infestation; and,
d. Length of storage.
High Storage Temperature
Warm temperatures cause a variety of chemical reactions and changes in foods apparent to
those who eat it. A rule of thumb is for every 20° increase, the shelf life of affected food isdecreased by one half. Keeping temperatures below 70° are especially important for longshelf-life of canned fruits and vegetables. In fact, the closer to 40°, the better. Most food
products store well and some foodscan be kept for several years if stored in a cool,dry place. Atwarmer temperatures many different reactions can occur. For example, the texture ofcanned
fruits may soften and become mushy; and the flavor may even become offensive. Generally,
changes in color, flavor, and texture are accompanied by loss of nutritional value.
In dried foods, increasingly high temperatures also cause food quality losses at increasedrates. Foods which have the natural structure broken up, such as cracked wheat and flour

8/7/2019 Patriot Armory - Making the Best of Basics
http://slidepdf.com/reader/full/patriot-armory-making-the-best-of-basics 22/188
16 • PROBLEMS AND SOLUTIONS
from whole wheat, meal and flour from corn, polished rice, etc., may become rancid when
stored unsealed. The warmer the air, the more rapidly rancidity develops. Small amounts ofnatural fats in these foodsbecome foul-smelling and slightly toxic as when the protective hull
is cracked.
Dried vegetables, including corn, green beans, and green peas are also subject to ranciditywhen kept in unsealed containers. Rancidity in these foods may be minimized by storing in
properly sealed containers.
Remember: All canned goods should be stored in a cool, dry place. The cooler and dryer
canned goods are kept, the longer they will last. Place the oldest canned goods on the shelves
so they will be used first. Fruits, vegetables, and meats properly processed in glass jars andstored properly will keep as long as canned goods. Some fruits will keep longer in glass
containers than in metal cans.
Due to the range oftemperatures where canned foodsmight possibly be stored, it is difficult to
determine the definite period of time for which any canned foodwill store. See Chart 3-A forthe shelf life of typical canned fruits and vegetables.
Moisture and Microbial Infiltration
Moisture can be a problem with dried foods, sugar, salt, and baking powder. Moisture is
excluded only by an airtight seal. Chemical reactions cause food quality loss and generallyoccur when dried foods pick up moisture. Flavor may be lost and color bleached out when
moisture condenses in dried foods. Most foods containing sugar, especially fruit sugar,
deteriorate rapidly when excess moisture builds up in containers.
Canned foods often pick up moisture when placed on a concrete floor in a cool place, thuscausing metal containers to rust. In time, the metal cans may rust completely through from
the outside and spoil the foodinside. Rust can be prevented by placing cardboard, plywood or
other lumber beneath metal cans to prevent direct contact with concrete floors.
One method forminimizing metal container corrosion is by coating the containers with a very
thin layer of paraffin wax. Another method to extend the life of tin containers in high
humidity areas is to immerse cans in a solution made of one quart mineral spirits and
one-eighth pound ofjelly wax. Warm the minerals spirits in a can by placing it in a bucket of
hot water. After dissolving the wax, dip the can with its label into the solution. Make certain
the entire can is covered. Place onwoodblocks to dry. Choose lowhumidity days for this task,
and be sure to do this project outside.The worst effect ofmoisture on foodis allowing and encouraging microbial activity. Moldcan
grow within a very low moisture level range and is the prime cause of spoilage in low-moisture foods.Mold spores are abundant in the air, and they can live on almost any type of
food. Molds produce some of the most poisonous toxins to man. In seeds, cereals, and nuts,
molds are known to produce toxins which can cause permanent damage to internal organs.Moldy foodsshould be discarded. Ifmold isgrowing on the surface ofcheese, however, it can be
cut off rather than discarding the entire piece of cheese.
Moisture below 10% in wheat and other grains and seeds and derived products will prevent
weevil fromIiving in them. Moisture-content information should be supplied by the seller.
Soy beans, if they are lowmoisture content, will store well. Textured vegetable protein madefrom soy beans will store for six months or more when kept dry and cool. Nuts store well, butshould be kept in a cool, dry place. Raw nuts are a good storage item, as they normally do not
turn rancid too quickly. However, blanched nuts store for longer periods of time.

8/7/2019 Patriot Armory - Making the Best of Basics
http://slidepdf.com/reader/full/patriot-armory-making-the-best-of-basics 23/188
PROBLEMS AND SOLUTIONS. 17
Remember: Prevent moisture from accumulating in stored foodand microbes will generally
be excluded from your foodstorage program. There is a multiplier effect ofhigh temperaturesand high moisture conditions in a storage program - when both conditions exist, the
probability of contamination is greatly increased.
Insect and Rodent Infestation
Pests generally contaminate much more food than they eat. They are usually excluded by
proper packaging. Insects packaged with food products feed and multiply easily in the
captivity of a package.
Most foods are-intact in packages and are generally free from insects. However, in a paper
package such as a paper flour sack, a very tiny hole may permit newly-hatched larvae to
enter. If experience has shown no contamination in packages from local supermarkets, it
would probably be safe to conclude the packages are free from insects.
Plastic containers are popular today. Caution should be exercised to make sure they are
rodent-proof. A very rigid container will protect its contents ..The round plastic bucket can bechewed through by rats, but mice will not generally attack plastic buckets. Aplastic garbage
liner in a new garbage can gives a lot of storage space capable of excluding both rodents and
insects.
Glass bottles are good storage packages, but they break, they don't stack well, they let in
light, and they are generally quite expensive, and always heavy.
Fumigation of Grains
In dry climates, cleaned grain need not be fumigated. However, ifcontamination is suspected,
grains may be fumigated with dry ice. Approximately 1 f z lb. of dry ice will be enough for 100lbs. of grain. Place 1-2 inches of grain in container, place the dry ice in, then pour the rest of
the grain on top. Close or place the lid on the container, but do not seal or an explosion will
result. Seal after 1hour. The seal should be airtight or this method of fumigation will not beeffective.
An alternate method ofdestroying insects, etc., is to heat a small quantity ofgrain at 150°for
approximately 20 minutes. Keep door ajar to prevent over-heating and destruction of the
nutrient content ofthe grain. Use a shallow biscuit pan or cookie sheet with sides. As long asthe temperature does not exceed 150°,the grain will not be damaged. Allowto coolcompletely
before returning grain to storage containers. Check with local State University extension
agents for best method for fumigation in your geographic area, especially in high humidityareas.
Remember: Any foodwill be more wholesome and delicious ifit is properly stored in a cool,
dry place, out of the sunlight, away from heat, and unavailable to pests.
Length of Storage
Canned foods will remain usable, ifnot wholesome, as long as the containers remain intact
and not bulged. Under ideal storage conditions, most canned foodswould remain usable many
years. Damp storage, leading to rusting of metal containers, would limit storage time.
Storage next to a furnace, steam pipe, heating duct, or other heat source will keep food
abnormally warm, leading to more rapid deterioration of the canned foods.
Another enemy of long storage life for metal containers (and metal closures on glass jars) is
the chemical reaction of foods with metal. The inherent differences in foods have to be

8/7/2019 Patriot Armory - Making the Best of Basics
http://slidepdf.com/reader/full/patriot-armory-making-the-best-of-basics 24/188
18 • PROBLEMS AND SOLUTIONS
recognized in predicting storage life. The following chart indicates the shelf life of variousfood products in metal cans.
CHART 3-A ,;:SHELF LIFE OF CANNED FRUITS AND VEGETABLES
(Western United States at 70°)
Ipr~ductShelf Life Shelf Life
in monthsProduct
in months
Apples & applesauce 36 Asparagus 36 plus
Apricots 36 Beans, lima 96 plus
Blackberries 12 plus Beans, stringless 36 plusBlueberries 12 plus Beets 48 plus
Cherries, maraschino 12 plus Brussol sprouts, cabbage,
Cherries, sweet 12 plus cauliflower 48 plus
Cherries, black 12 plus Carrots 96 plus
Cranberry sauce 12 plus Corn 96 plus
Fruit salad 36 Hominy 96 plus
Grapes 12 plus Peas 96 plus
Grapefruit 36 plus Pickles 12 plus
Peaches 36 Pumpkin and squash 48 plus
Pears 36 Sauerkraut 12 plus
Pineapple 36 Spinach 36 plus
Plums 12 plus Sweet potatoes 48 plus
Rhubarb 12 plus Tomatoes 48 plus
As can be seen, differences in foods are pointed out: colored fruits, rhubarb, pickles, and
sauerkraut have a shorter container life expectancy. These foods have a maximum storage
life of one year. Some foods are storable for at least three years, and others last longer, up toeight years or more.
Approximately 2%-5%offood value is lost each year, so it'sjust a matter oftime before all food
value is lost. Dried fruit will last in a closed, dry container as long as it looks and smells good.
Shelf-life ofdry powdered milk is one to two years if kept in a cool,dry place. However, in most
instances, rotation every. three months is desirable. Dry milk should be stored in metal
containers, or foil-lined, airtight bags. Honey can be stored for long periods in sealed contain-ers without affecting flavor or food value significantly.
Remember: All foods are subject to deterioration as time passes. The rate food deteriorates
depends upon the particular food, its purity, the way it's stored, and especially upon itsenvironmental temperature. There is always some deterioration occuring in stored foods. Of
course, foodsmust be clean at the time they are stored, and must be stored in clean containersfree from insects, and sealed so insects cannot gain entrance. Chemical changes are con-
tinual, causing changes in texture, color and loss of vitamins and minerals.
*From "Progress in the Tin Plate Industry", Food Technology.

8/7/2019 Patriot Armory - Making the Best of Basics
http://slidepdf.com/reader/full/patriot-armory-making-the-best-of-basics 25/188
PROBLEMS AND SOLUTIONS. 19
THE SOLUTIONS
Rotation of Supplies
One ofthe fundamental tenets ofa successful storage program is the rotation ofsupplies. Foodsupplies must be rotated for the following reasons:
(1) To prevent spoilage;
(2) To minimize loss of food value and flavor; and,
(3) To keep the taste buds acquainted with foods upon which one would depend to
sustain life.
Eating from the stored supplies regularly as part ofthe daily diet helps maintain or develop a
taste for the foods available in the storage program.
The belief that a person will eat anything under emergency situations has been proven faulty.Dr. Norman Wright, of the British Food Ministry, after experiencing conditions following
World War II stated, "A sudden emergency is no time for introducing untried novelties." He
indicated people were more likely to reject unfamiliar or distasteful foods during times of
stress than under normal conditions. Is not this the usual response of any aspect of human
behavior at times of trouble? When we are frightened, upset and insecure, dowe not tend to
return to things with which we are acquainted or familiar?
The only way to be certain foods being stored will be acceptable to the palate during times ofneed is to assure our tastes are acquainted with and tolerate them during normal times. The
choice of foods being stored must take into consideration foodvalue, storage qualities, and in
most cases, the taste buds! Cultivate now a taste for the food in storage to maintain a highlevel of tolerance for them.
Make this statement a truism: Store what you eat and eat what you store. This can be
accomplished by storing what is enjoyed by the members of your family.
These are the common-sense reasons for storing what you normally eat:
eliminates food spoilage;
minimizes food deterioration:
stabilizes diet during stressful situations;
provides insurance against malnutri tion; and,
year's food supply will not exceed original investment.
Remember: Rotation is the key to a successful storage program. Proper rotation will
overcome the enemies offood quality and nutrition. Rotation becomes almost automatic if thefood storage program consists of your favorite food selections.
Tips for Solving Storage Problems
Dried fruits should be repacked loosely in clean glass jars and placed without lids in an oven,
then heated for 20 minutes at 150°, then sealed properly. This will protect them from insectsand deteriora tion.
Bulk-packaged flour, granulated sugar, or dried powdered milk should be immediately
repacked in clean and dry metal or glass containers, and sealed with airtight lids.
Wheat, rice, oats and other grains should be clean and free from insects or their eggs before
8/7/2019 Patriot Armory - Making the Best of Basics
http://slidepdf.com/reader/full/patriot-armory-making-the-best-of-basics 26/188
20 • PROBLEMS AND SOLUTIONS
storage in clean containers with airtight lids. The addition offumigant chemicals ought to be
according to the best knowledge of local county extension agents or food storage experts.
Beans and peas do not require a fumigant, but should be sealed in an airtight container.
Some food items do not need a cool place, such as sugar, jello, and some dehydrated foods. Ifspace is a problem these may be stored in the warmer areas of the house - under beds, in
closets, etc.
Use iodized salt to protect pasta products fromweevil. Use 1cup poured over each large box of
macaroni or noodle products. Recover the salt after using pasta. The salt won't hurt the pasta,
since all pasta requires salty water in initial preparation.
Turn canned milk upside down every other month to prevent lumps from forming. Turning
revents the fats from separating. (Use evaporated, condensed sweetened, and other cannedilks within one year.)
anned goods should be turned over each 3 to 6months. This prevents solids from settling toe bottom.
ats and oils in original sealed containers should keep for many years in a cool place.
ood supplies and other needed articles should be stored in readily portable containers in caseof emergency.
Containers should be of appropriate sizes so contents will not spoil before being consumedafter opening.
As a further precaution for glass containers, hot paraffin wax may be poured over the contact
point of friction-type lids to insure protection. With other types oflids, masking tape may be
used for sealing cracks where corrosions could begin.It is important to label all containers with contents and date.
Some foods deteriorate more rapidly when exposed to light, so when foods are stored in glass
containers, a dark environment should be provided.
Baking powder should be kept in original metal containers.
Baking soda should be repacked in metal or glass containers and sealed.
iscolored iodized salt is still good for seasoning food.
arge cans ofyeast should be divided into smaller amounts in bottles and stored in the freezer
refrigerator.Honey may beput in glassjars as is. The only requirement is to leave a little space at the top to
allow for expansion when it turns to sugar. (If stored honey does not eventually turn to sugar,
it is not pure honey.) Itshould not be stored in tin cans: cans may rust, discoloring the honeyand affecting its flavor.
Brown sugar should be placed in jars and tightly sealed. When brown sugar becomes hard,
place a small piece of apple in the jar for a day before using.
Save all glass jars and bottles from salad dressings, pickles, even odd-shaped jars, and use
them for storage containers. Save gallon jugs and jars and put rice, beans, powdered milk,
etc., in them. Don't let empty bottles remain unused. Pack with fruit, vegetables, or water.
Keep a supply of glass jars and lids on hand. They're a good investment.
Buy cleaned wheat for storage. Directions to clean and de-bug wheat are given in other more
specialized books, such as Passport to Survival, by Esther Dickey, etc. References to otherublications for specific storage or usage details are found in the various chapters of the

8/7/2019 Patriot Armory - Making the Best of Basics
http://slidepdf.com/reader/full/patriot-armory-making-the-best-of-basics 27/188
PROBLEMS AND SOLUTIONS. 21
Let children help with the family preparedness program. Let them help make labels, itemizefoods, bottle fruit and pickles in the summer, grind wheat, make bread, and package items
that need repackaging.
SUMMARYSuccessful food storage is dependent on the following:
1. Quality of products. Always obtain top grade foodproducts.
2. Proper containers. Metal storage cans or heavy plastic containers with airtight lids are
necessary.
3. Storage facilities. Areas should permit easy access, provide functional utilization and
provide temperature, moisture and pest control.
4. Temperature. Foods store best at from 400-60°.Foodsmay be stored in a higher temper-
ature range, but the shelf life diminishes in proportion to the higher temperatures.
5. Rotation. The fundamental tenet ofa successful storage program ispreventing spoilageand minimizing loss of foodvalue and flavor by storing what you use and using what youstore.
Nowyou should know how to get started, what to store, and how to store it. The remaining
chapters describe in detail how to utilize your food storage supply. The purpose of this
Handbook is to minimize your family preparedness problems and to increase your ability toachieve a high-quality life-style with basic foods stored in your home storage program.
List your specific problems and solutions here:
Problems Solutions

8/7/2019 Patriot Armory - Making the Best of Basics
http://slidepdf.com/reader/full/patriot-armory-making-the-best-of-basics 28/188
22. PROBLEMS AND SOLUTIONS
Problems and Solutions (continued)

8/7/2019 Patriot Armory - Making the Best of Basics
http://slidepdf.com/reader/full/patriot-armory-making-the-best-of-basics 29/188
CHAPTER 4
WHEAT - THE GREAT GRAIN
Wheat is considered by many experts to be one of the most basic food storage items. It is
certainly easy to store and has high value in the diet. Wheat is also very nutritious, and can be
easily prepared in an extremely wide variety of dishes - from bread to the main course to
desserts.
WHEAT FOR STORAGE
Some years ago Mr. Bob R. Zabriskie outlined the value of wheat in his publication "Family
Storage Plan." His suggestions for consideration when storing wheat were in the following
categories, and were concerned with determining:
1. Variety & condition;
2. Protein content;
3. Moisture content;
4. Quantity; and,
5. Container and storage techniques.
Variety: Dark Hard Winter or Spring Wheat store best. Grain should be cleaned for human
consumption and free from all foreign matter possible.Protein content: Protein should be 11.507c or higher, according to most authorities.
Moisture content: No more than 10% moisture content in the grain. This will inhibit insect
infestation. Wheat draws moisture, so take precautions to protect wheat from exposure to
high humidity and high temperatures.
8/7/2019 Patriot Armory - Making the Best of Basics
http://slidepdf.com/reader/full/patriot-armory-making-the-best-of-basics 30/188
24. WHEAT
Quantity: Amount varies according to age, weight, size, sex and appetite of each person for
whom the storage is intended. Chart 2-A details the suggested quantities for each of the
various age groups, etc.
Container and storage techniques: Wheat will keep indefinitely when properly stored.
Use older wheat first and replace it annually with new wheat at harvest times when pricesare generally lower. If possible, store wheat in round cans. When wheat is stored in squarecans and stacked side by side, the heat from the wheat cannot easily escape, thus causing the
can to sweat and the wheat's moisture content to increase. When storing wheat in square
cans, allow several inches open space on all sides ofthe cans. Never store wheat in a containercontaining more than 2 bushels or 120pounds. Use enamel-lined cans with a suitable plastic
liner. Aluminum garbage cans are generally not goodforwheat storage, since an airtight sealis not possible in them.
When stored at 65°, wheat will store almost indefinitely. Commercially-sealed wheat re-
quires neither turning nor aerating. Do not put salt in wheat when storing it. Store cans of
wheat on boards, not directly on cement floors, as wheat draws moisture from cementsurfaces.
If you store wheat, you must have access to a wheat grinder. There are many models on the
market, both hand-operated and electric models. The electric models are fine, but quite
expensive. The more use a grinder gets the better it becomes because it grinds itself to a
perfect fit. All grinders should have instructions, so be sure to follow the operating instruc-
tions for best results.
SOME PRECAUTIONS
Natural whole wheat flour has practically no foodvalue after being stored for 30 days at roomtemperature. Keep flour in the refrigerator or in some other cool, dry place. Grind only
enough wheat for use in one week's time. When buying whole wheat flour from the store, buy
it only if it has been refrigerated, and be sure to keep it refrigerated until used.
Don't try to goonwhole wheat all at oncebecause the digestive system cannot normally adapt
immediately to the dietary change. Get accustomed towheat by using some whole wheat flour
in white flour recipes the family already likes, working up to all whole wheat flour.
Check with your localUSDAofficeor the local county extension service agent. They will have
additional information onthe best storage techniques and hints for utilization in recipes, etc.
TRYING TO DIET?
Bread can help in dieting so don't be afraid to use your stored wheat. The starch in bread
provides bulk which absorbs water on contact, filling the stomach cavity, thus satisfyinghunger long after the meal is over.
It's the calorie-rich things spread on the bread that can wreck your diet, such as butter, jamand jellies, etc. Use these high-calorie foods sparingly and you'll be able to keep your diet
under control, and enjoy breads, too!

8/7/2019 Patriot Armory - Making the Best of Basics
http://slidepdf.com/reader/full/patriot-armory-making-the-best-of-basics 31/188
WHEAT. 25
USINGWHEAT
One of the reasons wheat is recommended as one of the major staple items of a food storage
program is because of its versatility in the diet. Wheat may be used in any of its forms, from
whole kernel to the finest flour which can be milled. The remainder ofthis chapter has recipesand ideas for preparation ofwheat in any ofits forms. Keep in mind that all the uses for wheat
are yet to be uncovered. A book could be written on any particular use ofwheat - as indeed
some have.
One of the most interesting forms of wheat is whole wheat kernels as they come naturally
from the field, with only the chaff stripped off.
WHOLE WHEAT BULGUR
Sometimes called wheat berries, these whole kernels need soaking or steam cooking to
becometender. When cooked they have a sweet, nut-like flavor and a slightly chewy texture.There are many ways to prepare dishes with wheat bulgur, and many ways aren't discovered
yet - so experiment!
The versatility of wheat bulgur is demonstrated here in recipes from cereals to breads, to
casseroles and to stuffing for fowl. These recipes call for cookedwheat berries. Bulgur can be
prepared ahead of need and the ready-to-use cooked wheat may be stored airtight in therefrigerator for about 2 weeks.
Basic Bulgur
Bulgur is probably the easiest whole wheat foodto prepare, and certainly ranks as one ofthe
most versatile foods in use. None ofthe measurements are critical, and there's no fussing withstirring, continual watching, etc.
To make basic bulgur, simply:
1. Take a large pot with a tight-fi tting lid (such as a cold packer).
2. Place a rack in bottom of pot.3. Add water almost to level of the rack.
4. In smaller pot, put 1 C. wheat, 1 C. water and 1 / 2 tsp. salt.
5. Place smaller pot on rack in large pot.
6. Place cover on large pot.7. Put large pot on high heat for 15 minutes.8. Reduce heat and steam until wheat absorbs water in smaller pot.
9. Use or store in refrigerator, tightly covered, for no more than 2 weeks.
Bulgur can be made from whole kernel or cracked wheat and can be used to replace rice in
most dishes, substituted for mashed potatoes, or baked to make a delightful and nutritiouscrunchy TV snack.
RECIPES FOR USING BASIC BULGUR
Breakfast Bowl3 C. cooked basic bulgur milkV 2 C. water sugar or honey
Heat cooked bulgur in water. Serve hot with milk and sweeten to taste. Makes a chewybreakfast cereal. Add dried fruit for additional flavor and nutrition.

8/7/2019 Patriot Armory - Making the Best of Basics
http://slidepdf.com/reader/full/patriot-armory-making-the-best-of-basics 32/188
26. WHEAT
6 C. basic bulgurV 2 C. sugar
% C. raisins
Bulgur Porridge
1 C. milk
milk
honey (brown sugar, maple syrup, etc.)
Heat bulgur and raisins to boil, reduce heat. Stir in milk and sugar, simmer approximately
3-5 minutes. Serve porridge hot, with additional milk and honey to taste. Brown sugar or
maple syrup may also be used to sweeten porridge.
Bulgur Bouillon
basic bulgur
milk
vanilla flavoring
Parch bulgur in broiler until dark brown. Grind to powder. Add remaining ingredients until
flavor meets taste.
lternate method: Parch bulgur in warm oven until completely dried out. Grind, addliquidand flavor to taste.
2 C. basic bulgur
honey
nutmeg
Cracked Bulgur Cereal
2 C. water
pread basic bulgur on cookie sheet in single layer, and dry completely in 200° oven for
pprox. 1hour. Crack bulgur in mill or blender. Heat in steam for 10-20minutes or boil for 5
inutes in water. Serve hot and sweeten to taste.
C. basic bulgur
Crunchy Bulgur Snacks
seasonings
pread bulgur 1layer thick on cookie sheet. Bake at 325°,stirring occasionally, until very dry
and crunchy. Add seasonings to taste. Serve as TV snacks.
B ulgur Minestrone Soup
1V 2 tsp. saltl, 4 tsp. pepper
l, 4 tsp. oregano
1 C. green beans or peas
% C. kidney beans
1 C. sliced zucchini
1 /2 C. sliced carrots
2 T. oil
% C. chopped onions
1 lb. hamburger
1 C. chopped celery
1 1 / 2 quarts water1 C. basic bulgur
% C. shredded cabbageV 2 C. minced parsley
Heat oil, add ground beef and onion; saute until onions are straw-colored. Drain grease from
beef, add celery and water. Cover and simmer slowly until celery is tender. Add bulgur,cabbage, parsley and carrots; cover and simmer 15minutes. Then add remaining ingredients
and simmer an additional 15minutes. Serve hot with parmesan cheese sprinkled generously
on top. Add croutons to make a nice finishing touch! Yield: 8-10 servings.

8/7/2019 Patriot Armory - Making the Best of Basics
http://slidepdf.com/reader/full/patriot-armory-making-the-best-of-basics 33/188
WHEAT. 27
Beef- Vegetable Soup with Bulgur
21;2qt. water
1 1 / 2 lbs. ground beef
1-2 lbs. beef knuckle bones1 C. basic bulgur
1 C. diced or shredded carrots
1/ 2 C. chopped onions or leeks1 C. sliced celery
Brown ground beef and pour off grease. Remove fat from bones. Simmer together water,
ground beef, and bones for 2-3hours. Add remaining ingredients. Cover and continue cooking
until vegetables are tender, 15-20minutes. Removemeat from bones, dice and return to soup
mixture. Heat to boiling. Yield: 6-8 servings.
Y4C. chopped parsley2 to 3 tsp. pepper
1 / 8 tsp. powdered cloves% tsp. fine herbes
Y4tsp. salt
1 can tomato soup
Bulgur Salad
1/ 2 C. basic bulgur
4 tomatoes, cubed1 C. fresh mint
1 C. chopped parsley1 C. chopped green onions
1 green pepper, cut in strips
Soak bulgur in water to cover for 30 minutes. Squeeze out water and transfer to a bowl.
Combine remaining ingredients, add salad dressing and toss. Serves 4.
Dressing
1 / 3 - 1 / 2 C. lemon juice 3 T. oilMix ingredients and pour over Bulgur Salad, salt & pepper to taste.
B ulgur Seafood Salad
1 C. basic bulgur
2 T. diced green pepper
% C. diced celery
1 tomato cut in wedges
Marinate bulgur in mayonnaise. Add remaining ingredients. Arrange greens around a bowl,pile seafood on top of leaves.
2-3 T. mayonnaise
1/4 C. chopped green pepper
1 C. tuna or shrimp
BULGUR MAIN DISHES
B ulgur Stuffed Peppers
2Y2C. basic bulgur
1 / 2 lb. hamburger (or sausage)
1% C. beef (or ham) bouillon1 / 2 tsp. salt
1 tsp. seasoned salt
Blend basic bulgur, choice of meat, 1 C. of the same flavor reconstituted bouillon, andseasonings. Cut peppers in halves lengthwise; remove all seeds and white portions. Fill
pepper halves with mixture and place in shallow baking dish. Pour mixture of tomato puree
and remaining bouillon over stuffed peppers. Cover and bake 3750
for 30 minutes. Remove
cover and continue baking for approximately 45 minutes. Serves 6.
3 green or red bell peppers
% C. tomato puree1) ; tsp. Worcestershire sauce
1 / 4 tsp. pepper

8/7/2019 Patriot Armory - Making the Best of Basics
http://slidepdf.com/reader/full/patriot-armory-making-the-best-of-basics 34/188
28. WHEAT
Bulgur Beef Casserole
1lb. ground beef1C. basic bulgur
1large onion, diced2 cans tomato soup% C. catsup or tomato sauce
1 clove garlic, crushed1 T. parsley flakes
1tsp. celery flakessalt and pepper to tastegrated cheese
Saute meat and seasonings with onion. Combine bulgur with meat mixture, soup and catsup,pour into casserole. Sprinkle with cheese. Bake 350° for 30 minutes. Serves 6-8.
Bulgur Tomato Casserole
3 C. basic bulgur
1tsp. salt6 slices bacon, diced & fried4 T. flour
Fry diced bacon; add flour, tomato juice and onion to make a sauce. Remove from heat and add% C. grated cheese. Pour over bulgur placed in buttered baking dish. Top with remainingcheese, add bread crumbs if desired. Bake 350° for approx. 45 minutes.
3 C. tomato juice
1C. grated cheese1 ,4 small onion, finely chopped
Tuna And Bulgur Casserole
1T. butter or margarine2 T. chopped onion2 C. basic bulgur1C. cream of mushroom soup1 can (6 oz.) tunaV 2 tsp. salt
Saute onion in butter on moderate heat until onion is straw-colored. Mix in baking dish withbulgur, soup, tuna, salt, pepper, and egg. Top with mixture of crackers and melted butter.Sprinkle with paprika. Bake in moderate oven (350°) for 30 minutes. Serves 6.
V s tsp. pepper2 eggs, slightly beaten1 T. melted butter or margarineV 3 C. crisp cracker crumbspaprika
1 ,4 C. butter or margarine1 ,4 C. finely chopped onionV i C. flour2 C. chicken broth1 C. milk1 tsp. saltV B tsp. pepper
Melt butter, add celery and onions. Cook until tender, but not brown. Blend in flour. Stir inchicken broth and milk. Cook over low heat, stirring constantly until thickened. Add season-ings, bulgur, poultry and cheese. Pour into buttered 2-qt. casserole. Sprinkle with butteredcrumbs, and bake 35-40 minutes in 3500 oven. Serves 10-12.
Bulgur Poultry Casserole
1tsp. MSGY 2 tsp. poultry seasoning1V 2 C. basic bulgur5 C. cooked and cubed turkey or chickenV 2 C. chopped celery1 C. grated cheddar cheese

8/7/2019 Patriot Armory - Making the Best of Basics
http://slidepdf.com/reader/full/patriot-armory-making-the-best-of-basics 35/188
WHEAT.29
B ulgur Jambalaya
8 oz. sausage cut in %" lengths1%C. diced haml/Z C. chopped onion
2 lbs. ground beef2 1 / Z C. basic bulgur
2 T. chopped parsley1 / 4 tsp. thyme
l/Z C. chopped green bell pepper
% C. thinly sliced celery
% C. salt
1 f 4 tsp. pepperdash of cayenne
VBsp. powdered cloves
V 4 tsp. chili powder
Saute sausage, ground beef, ham, onion, bell pepper and celery in heavy skillet until lightly
browned. Drain grease. Add remaining ingredients. Cover and bring to boil; reduce heat andsimmer, stirring occasionally, until mixture is thickened, about 45 minutes. Makes 5-6
servings.
Mid-East Chicken Casserole with Bulgur
2 T. butter (margarine)
2 T. vegetable oil
2 chickens (2% lbs. each), cut up
salt and pepper to taste
3 medium onions, chopped1 clove garlic, chopped
1V 2 C. basic bulgur
% tsp. ground cardamom
1/2 tsp. ground coriander
V z tsp. cumin
grated rind and juice of 1 lemon
3 cups boiling chicken broth
In large skillet, heat butter and oil and brown chicken. Season with salt and pepper and
remove. In remaining fat, cook onions and garlic until translucent. Add bulgur, stirring toglaze. Add remaining ingredients except broth, stirring to mix well. Place chicken in large
casserole; cover with bulgur mixture and pour broth over. Bake, covered, in preheated 3500
oven 1 hour, or until tender. Yield: 6 servings.
STOVE-TOP BULGUR CASSEROLES
Here are a number 'of special stove-top casserole recipes using basic bulgur.
Italian Bulgur Casserole
1 f 4 C. salad oil
1 chopped onion
% lb. thinly-sliced mushrooms
2 tsp. beef stock base
V z C. water
Heat salad oil in large frying pan over medium heat. Saute onion and mushrooms until limp
and liquid has evaporated. In a small cup stir together beef stock base and hot water. Add
liquid to the pan with basil leaves, pepper, and cooked drained bulgur. Cover and bring to
simmer. Add zucchini. Cover and simmer until bulgur is heated through and liquid isabsorbed, about 10 minutes. Serves 6.
V 2 tsp. basil leaves
1 f 4 tsp. pepper
3 C. bulgur2 thinly-sliced zucchini

8/7/2019 Patriot Armory - Making the Best of Basics
http://slidepdf.com/reader/full/patriot-armory-making-the-best-of-basics 36/188
30. WHEAT
Cantonese Chicken over Bulgur
3 T. oil
1C. Chinese pea pods, cut 1;2"
% C. sliced water chestnuts1%C. sliced mushroomsV s C. slivered almonds
1% C. chicken stock
V z tsp. salt1 f s tsp. white pepper
% tsp. MSG2 T. cornstarch
% C. water
2 C. sliced cooked chicken
Heat oil in heavy skillet; add pea pods, chestnuts, mushrooms, and almonds. Saute over
moderate heat 2 minutes, then add chicken stock salt, pepper and MSG. Cover and cook 6minutes. Make a paste of cornstarch and water. Stir into pea pod mixture. Add chicken and
return to heat. Stir frequently until mixture thickens and reaches a boil, 2-3minutes. Serve
over Taiwan bulgur pilaf. Yield: 4-6 servings.
Spanish Bulgur Casserole
4 slices bacon, cut into thin strips
1 large chopped onion
V 2 C. chopped celery
V z C. chopped green bell pepper
1 clove garlic, finely minced
1 lb. can tomatoes
2 C. water
Saute bacon in heavy skillet over moderate heat. Add onion, celery, green pepper, and garlic.
Continue cooking until onion is straw-colored. Blend in tomatoes, water, salts, pepper, sugar,
Worcestershire sauce and bulgur. Cover and simmer over low heat until most of liquid is
absorbed, 20-25 minutes.
% tsp. salt1 tsp. seasoned salt1 4 tsp. pepper
1 tsp. sugar1 tsp. Worcestershire sauce
1 C. basic bulgur
BULGUR PILAF RECIPES
Pilaf, as commonly understood, is a rice dish combined with seasonings, meat, fish or poultry.
There are many variations. Pilaf made from wheat is more economical, and certainly more
nutri tious. The following pilaf variations and main dishes will again prove the usefulness of
wheat in the diet.
Basic Pilaf Recipe (Mixture)
2 T. butter (margarine)
3 T. chopped onion
1 C. basic bulgur
1 dash MSG
Heat butter in heavy skillet; add onion and saute until straw-colored. Addbulgur, water, salt,
pepper, and MSG. Cover and simmer over lowheat until all liquid is absorbed. Serves 4. Usethis basic pilaf mixture to make flavored variations.
V 4 C. water
% tsp. salt
1 f s tsp. pepper

8/7/2019 Patriot Armory - Making the Best of Basics
http://slidepdf.com/reader/full/patriot-armory-making-the-best-of-basics 37/188
WHEAT.31
Beef-Flavored Bulgur Pilaf
1 basic pilaf mixture
2 C. beef bouillon or stock
Substitute beef bouillon or stock for water in basic pilaf recipe; add Worcestershire sauce.Serves 4-6.
1 T. Worcestershire sauce
Chicken-Flavored Bulgur Pilaf
basic pilaf mixture 2 C. chicken bouillon or stock
Substitute chicken bouillon or stock for water in basic pilaf recipe. Serves 6.
Fresh Herbs* Bulgur Pilaf
basic pilaf mixture 1 T. fresh herbs
Stir fresh herbs into chicken-flavored bulgur pilaf just before serving. Serves 4-6.
"Fresh herbs (fines herbes is the French name) are usually equal parts of fresh parsley,
chives, tarragon, and chervil, when and where available. Sometimes, marjoram and thyme,
and even basil may be thrown into the mixture. The essence of fresh herbs is achieved by
mincing them together with a sharp knife, then added at the last mnute to the pilaf- thusimparting the essential oils to the food.
Parmesan Bulgur Pilaf
chicken-flavored pilaf mixture
14C. chopped onion1 ,4 tsp. garlic salt
Add onion and garlic salt to chicken-flavored pilaf recipe. After cooking, stir in cheese andparsley. Serves 4-6.
1/'3 C. parmesan cheese
1 T. chopped parsley flakes
Taiwan Bulgur Pilaf
chicken-flavored pilaf mixture 2 T. soy sauce
Add soy sauce just before serving pilaf. Serves 4-6.
Tomato-Flavored Bulgur Pilaf
basic pilaf mixture
1 C. tomato juice
Mix all ingredients and simmer. Serves 4-6.
1 C. chicken bouillon or stock

8/7/2019 Patriot Armory - Making the Best of Basics
http://slidepdf.com/reader/full/patriot-armory-making-the-best-of-basics 38/188
32. WHEAT
USING WHOLE WHEAT FLOUR
From the preceding pages on the use ofbulgur, you can begin to grasp the enormity ofwheat's
versatility and capability in the food storage program. This part of the chapter introduces a
basic whole wheat mix for use in preparing biscuits and pancakes; recipes for whole wheat
waffles, crackers, sweet breads, loaf breads, pretzels and a number ofother baked items. Alsoincluded in the next few pages is a special section on basic bread making techniques.
WHOLE WHEAT FLOUR RECIPES
Basic Whole Wheat Mix
8 C. unsifted whole wheat flour3 heaping T. baking powder
4 tsp. salt
1 ; 4 C. sugar2 C. dry powdered milk
2 C. margarine or shorteningSift dry ingredients together twice. Cut in margarine or shortening until dry mix is very fine.
Mix thoroughly. Basic mix will store well in refrigerator for quick use later.
VARIATIONS USING BASIC WHOLE WHEAT MIX
Basic Whole Wheat Mix Biscuits
1 C. basic mix I f 2 C. water
Combine basic mix and water. Drop onto greased baking sheet. Bake 12-15 minutes at375°-400°. Yield: 8-12 biscuits.
Basic Whole Wheat Mix Pancakes
1Y3C. basic mix
1 egg
1 T. sugar
1 C. water
Combine ingredients. Pour onto hot greased griddle. Yield: 10-12 pancakes.
Basic Whole Wheat Mix Breakfast Bread
2 C. basic mix
2 eggs, slightly beaten
1 ; 4 C. brown sugar
lend mix and sugar. Combine eggs and water and stir into mix. Add raisins. Pour into
reased 9" pan. Sprinkle topping (recipe below) on top for sweet roll. Bake 350° for 35-40minutes.
% C. water
V 2 C. raisins
Breakfast Bread Topping
V 2 C. brown sugar
V 2 tsp. cinnamon V 2 C. chopped nuts
ombine sugar, cinnamon, and nuts. Sprinkle over top of Breakfast Bread. Bake 350° for
5-40 minutes. Serve hot.

8/7/2019 Patriot Armory - Making the Best of Basics
http://slidepdf.com/reader/full/patriot-armory-making-the-best-of-basics 39/188
WHEAT. 33
WHOLE WHEAT "SCRATCH" RECIPES
Almost everyone loves pancakes. Whole wheat pancakes (and waffles, too) are so delicious,
the following "scratch" recipes just couldn't be left out. Experiment with whole wheat
pancake batter to find out which kind your family likes best - add bananas, nuts, apple
cubes, or any other fruit or flavoring to the batter for a taste treat.
Whole Wheat Flour Pancake-Waffle Mix
11,4C. sifted whole wheat flour 2-3 eggs, well beaten3 tsp. baking powder 114 C. milk
3 T. brown sugar 3 T. oil
% tsp. salt
Sift together dry ingredients. Combine liquid ingredients in separate bowl. Stir liquid
mixture into flour mixture. Bake on greased hot griddle until golden brown.
lVholesome Whole Wheat Pancakes
1 C. oats 1 T. honey
1 C. whole wheat flour 2 eggs14C. soda 2 C. buttermilk1,4tsp. salt 1/4 C. melted butter
Stir dry ingredients to mix well. Add remaining ingredients and stir. Aging in refrigerator
improves flavor. Add 1 ,4 C.wheat germ to dry ingredients for extra nutrition and flavor. Cook
on greased hot griddle until brown.
Whole Wheat Saltine Crackers
4 C. whole wheat flour2 tsp. salt
% C. dry powdered milk
1Y 2 C. warm water
Mix together flour, salt and powdered milk. In 1 cup warm water dissolve honey and yeast.
Add to the dry ingredients along with salad oil. Add remaining (or a little more) warm water.
Form into a ball. Place in a greased bowl, cover and let rise Y 2 to 1 hour. Knead for a few
minutes. Return to bowl. Use a piece of dough the size of a lemon at a time, keeping theremaining dough covered. Roll out on lightly floured board. Roll each piece as thin as possible.
Bake onungreased cookie sheet in 3500oven about 6minutes. Turn pan around, turn crackers
over and bake 2-3 minutes more. Watch browning very carefully. Coolslowly. Break by hand
into irregular shaped crackers.
l / 3 C. salad oil1T. honey
1T. yeast
Whole Wheat Graham Crackers
Y2C. margarine
% C. dark brown sugar, firmly packed
2% C. whole wheat flour
1 f z tsp. baking powder% tsp. ground cinnamon
Cream butter and sugar well. Mix remaining ingredients and add to creamed mixture,
alternating with Y2C. water. Mix well. Let stand 30minutes. Roll out dough on floured boardto lis" thickness, cut in I" squares and put on oiled cookie sheet. Bake in preheated 350
0
oven
for 20 minutes or until slightly browned.
8/7/2019 Patriot Armory - Making the Best of Basics
http://slidepdf.com/reader/full/patriot-armory-making-the-best-of-basics 40/188
34. WHEAT
BASIC BREADMAKING TECHNIQUES
The prospect of making homemade bread should not make you nervous at the thought. It is
not too difficult to find what you need to know to succeed in making every yeast bread recipe
in this section. This section on basic breadmaking techniques covers the how-to of bread
making, along with the whys and wherefores of certain steps. There are lots of dollars to besaved by making your own bread from your stored wheat. Itdoes take time, but the rewardsare well worth it. The whole breadmaking scene is made more attractive by the use of a
commecial-type bread mixer. There are many on the market, and we suggest every familyeventually buy one - but only after the basic fooditems are in the larder! Ifyou have a bread
mixer, the rest ofthis section onbreadmaking how-to is superfluous -just read the directions
with the mixer. If you don't have a bread mixer yet, read on!
Mixing: The yeast and flour manufacturers have discovered that just as consistent and even
quicker preparation will result if you just stir together about half the flour and the undis-
solved yeast in the mixer bowl.By eliminating the step ofdissolving the yeast inwarm water
separately, the preparation time is significantly shortened. (Most recipes work either way,though, if you prefer the separate steps method. Some ofthe directions in the Handbook are
not modified to this new concept, so choose the better way for you.)
Next, add the warm liquid ingredients and beat with an electric mixer. This beating stagebegins the important process of developing the gluten, the bread's framework. Now stir in as
much flour as necessary, by hand, to make a moderately stiff dough that comesout ofthe bowl
in a mass. There should be some flour left over for the next step.
Kneading. Turn the dough out on a lightly floured surface. The flour used for kneading is
part ofthe measured amount. Youwill want to flour your hands too, because a moderatly stiff
dough is still rather sticky. Note: when your recipe gives a range for the amount offlour, startwith the smaller amount, adding only enough extra flour to make the dough easy to handle.Using more flour than necessary makes the dough stiff and less manageable during kneadingand shaping, thus producing heavier bread or rolls.
To knead dough, curve your fingers over the dough, pull it toward you, pushing it down andaway from you with the heel ofyour hand. Then give the dough a quarter turn, foldthe dough
toward you, and push it down again. Add flour till the dough loses its stickiness. Note on highhumidity days, dough takes more flour. Keep repeating the kneading motions until the dough issmooth.
Kneading is the key step to a good loaf ofbread. This process develops he gluten in the flour
into long thin strands. In the dough, firm kneading strokes develop long strands of gluten,givig bread small uniform holes and a fine texture. Rough or too vigorous kneading breaks
and shortens the gluten strands, causing large holes in the bread, and resulting in poor rising.Knead till the dough develops a "life" of its own. Itwill feel elastic and respond to your touch.
Kneading usually takes about eight to ten minutes. Don't worry about too much kneading;
you won't knead dough too long, it'll wear you out.
Rising. Aconstant temperature of80°is ideal for the rising ofyeast bread. During rising, the
yeast grows and gives off carbon dioxide which is trapped in the gluten strands, causing the
mass of dough to be stretched. This gives the bread its fine texture.
Place dough in a warm place for rising. Place it on the top rack ofa coldoven, and put a pan of
hot water on the lower rack. Or, if you prefer, just set the bowl of dough on your kitchen
counter, making sure the rising dough is protected from drafts. Rising times given in recipesare approximate - actual rising time depends upon temperature and humidity in yourkitchen.

8/7/2019 Patriot Armory - Making the Best of Basics
http://slidepdf.com/reader/full/patriot-armory-making-the-best-of-basics 41/188
WHEAT. 35
Toprevent the surface ofthe dough from becoming dry and hard as it rises, place it in a lightly
greased bowl, turning once to completely coat its surface. Cover the coated dough looselywithwaxed paper or a dampened kitchen towel. Rising is completed and the dough is ready for
shaping when the it has doubled n bulk and 2 fingers passed lighty V z " into the dough leaves
an indentation. Punch the dough down by pushing your fist into the center once. Then, pullthe edges of the dough to the center, turn the dough over, and place it on a lightly-flouredsurface.
Shaping. Various methods can be used to shape dough, but first let the dough rest covered forabout ten minutes after it has been punched down and divided into manageable portions. This
resting period allows the gluten strands to relax, making the dough less elastic and much
easier to handle. Handling the dough during shaping bursts the large air bubbles and
produces bread with a smooth, even exterior. To shape dough into a loaf, roll into a 12" x 8"
rectangle. Be sure to roll to outer edges to pop any air bubbles. Roll rectangle up tightly,starting with the 8" edge. As you roll, seal with fingertips. Seal the seam completely by
pinching the dough together. Also seal the ends by pinching each into a thin sealed strip. Foldstrips under the loaf into the seam side. Place loaf seam-side down ino a greased baking pan.
Grease and cover the surface and let rise again till it's almost doubled in size.When checkingthe second rising, press fingers lightly against the edge ofthe loaf. The dough should feel light
and spongy. It will have lost its elasticity and won't bounce back.
If you prefer, you can shape loaves into empty fruit juice cans, or make rolls or bake them in
layer cake pans or on cookie sheets. Braided bread is popular, but be sure to braid the bread
very loosely so the interwoven effect is not lost as the bread doubles in bulk.
Baking. Bake bread at the temperature specified in the particular recipe. During the firstfew minutes of baking, the leavening gas in the dough expands rapidly giving the bread its
greatest volume. That's why the oven should be preheated to the correct temperature beforeputting the raised loaf in to bake. As bread bakes, the gluten framework is set, the yeast isdestroyed, and this in turn stops the rising action. At this point, the flavor ofthe bread is fully
developed. (That's when the kids start hanging around the kitchen, tool) After the suggested
time for baking has elaped, test the bread for doneness by tapping the top crust with your
finger. When there is a hollow sound, the bread is thoroughly baked, and the crust should benicely browned. If the bread browns too quickly, cover the loaf with aluminum foil to prevent
the crust from burning. Also, use the foil cover after the top has browned but sides are still
light. Note: if you consistently have problems with crusts browning too quickly, check oventemperature with an oven thermometer to make sure the oven reading is correct.
Remove yeast breads from baking pans immediately after taking them from the oven. Thisprevents the crust from being "steamed" in the pan. Place bread on a wire rack to cool, or be
devoured, whichever comes first.
How to keep bread fresh. Wrap cooledbreads in foil or clear plastic wrap before storing in awell-ventilated bread box. Do not refrigerate baked yeast breads or rolls - refrigerator
temperature cause breads to gostale. However, refrigeration doesprevent mold from forming
and may be your best bet during hot weather, depending onhow fast bread disappears in your
house. Store crisp-crusted bread and rolls unwrapped and plan to use them the day you makethem.
For "just baked" freshness when things are hectic, freeze bread. The fresh quality is retained
up to 3months in fully-baked products. Unbaked homemade dough will freeze well for only a
few weeks.
Frozen bread is not convenient to use unless it is sliced before going into the freezer.
Otherwise, you have to wait for the whole loaf to thaw to get one slice. To use frozen bread

8/7/2019 Patriot Armory - Making the Best of Basics
http://slidepdf.com/reader/full/patriot-armory-making-the-best-of-basics 42/188
36. WHEA'r
thaw and then unwrap. There's no need to thaw bread formaking toast or sandwiches going in
the lunch box. Bread and rolls only need to be reheated to restore their crispness. Dinner rollsand sweet rolls may be frozen satisfactorily up to three months. Glazes, icings, and frostings
ith powdered sugar don't freeze well. Put the topping on after you thaw the breads or rolls.
y following these timely suggestions, you should have no trouble becoming a basic bread-
maker.
WHOLE WHEAT BREADSTUFFS
The previous section provided explantions for basic bread making techniques. This section
provides the recipes for some basic breads, as well as favorite' not-quite-so-basic treats.
Basic One-Rise Whole Wheat Bread
3Y 2 C. scalded milk (powdered, 2%,
or diluted canned)1 1 / 2 T. salt
2 T. molasses3 T. shortening
2 T. yeast
Dissolve yeast in warm water and sugar. Addsalt, honey, molasses and shortening to scalded
milk and cool to lukewarm. Stir 2 C. flour in liquid and beat with mixer. Add yeast and beat
well. Add rest of flour one cup at a time (just enough so you can handle it)Knead 15minutes.
Put in pans and let rise 45 minutes (doesn't need to rise twice). Bake at 4250
for 15minutes
then turn down to 3250 for 45 minutes. Makes 3 small loaves.
% C. warm water
1 / 4 tsp. sugar5 V 2 - 6 C. whole wheat flour
4 T. honey
2%C. white flour
Basic Whole Wheat Bread # 2
2 T. yeast
374C. water
2 T. brown sugar
1 C. powdered milk
1 to 2 C. white flour
6 to 8 C. flour
In a large bowl, mix % cup warm water with sugar, add yeast, and let stand about 5minutes.
Add honey, molasses, butter or margarine, salt, powdered milk, and 2%cups warm water.
Stir in white flour, and then enough wheat flour until dough is easy to knead - not too stiff
and not too sticky ..Knead about 10minutes, using oil. Divide into loaves, shape, and place in
greased pans. Let rise about 45 minutes, then bake 45 minutes in 3500 oven. Let coolslightly,then brush tops of loaves with butter or margarine.
2 T. honey
2 T. molasses2 T. butter or margarine
1 T. salt2 T. vegetable oil

8/7/2019 Patriot Armory - Making the Best of Basics
http://slidepdf.com/reader/full/patriot-armory-making-the-best-of-basics 43/188
WHEAT.37
Basic Whole Wheat Rolls
2 T. yeast
l/ z C. warm water
Y :3 C. vegetable oil1 / 3 C. brown sugar
2 eggs, beaten
1 f 2 tsp. salt
1 / 2 C. dry powdered milk4 1 1 2 - 5 C. whole wheat flour
Mix yeast and warm water, set aside for 5minutes. Mix together oil, brown sugar, eggs, and
salt. Then add powdered milk, mixing well. Add enough flour to make a soft dough which
leaves the side of the bowl. Turn onto well-floured board, turn dough over to coat with flour
and knead 10minutes or until smooth and satiny. Place in a greased bowl, cover and allow to
rise until almost double in bulk (1-2 hours). Shape as desired and place in greased pans. Let
rise again. Bake 4000
for 1 5 minutes.
Whole Wheat Onion Buns
3 T. butter or margarine
3 C. all purpose flour (unsifted)
3 C. whole wheat flour2 T. yeast
% C. finely chopped onion
3 T. sugar1 1 1 2 tsp. salt
2 C. hot water
In fry pan, saute onion in butter until golden. Set aside. In large mixer bowl, blend 1C.
regular flour, 1 C. whole wheat flour, sugar, salt, and yeast. Add onion mixture (saving 2 T.
for topping buns) and the hot water. Beat at low speed 2 minutes. Add 1C. whole wheat flour
and beat at high speed 2 minutes. Stir in remaining whole wheat flour and enough regularflour (about 9 C.) to make a soft dough. Sprinkle V 3 C. regular flour on a board - turn dough
out and knead until smooth and elastic, about 5minutes, adding more flour as needed. Place
in greased bowl, turn over to grease top. Cover. Let rise in warm place until double, about 1
hour. Punch down and divide into 2 equal pieces. Roll each into a ball and place 4" apart on
greased baking sheets. With greased fingers flatten each into a 4" circle. Spread some of the
reserved onion mixture on each. Let rise until double, about 50 minutes. Bake 3750 for 20-25minutes.
3 T. yeast1C. lukewarm water
1T. sugar
1z qt. tap water
1C. tomato juice
4 T. salt
Tomato Juice-Whole Wheat Bread
1C. honey
1 1 2 C. molasses
1 f 2 C. shortening
18-20 C. whole wheat flour
butter or margarine
Add yeast and sugar to lukewarm water. Set aside while mixing the other ingredients. In a
large mixing bowl beat together water, tomato juice, salt, honey, molasses, and shortening.
Add yeast mixture. Beat in 10 C. whole wheat flour. Knead in 8 to 10more cups whole wheatflour. Cover and let rise until double in size. Knead down again and shape into loaves. Place inwell-greased loaf tins. Let rise to the top of the pans. Bake 3500 for 40 minutes. Cool slightly
and grease the tops of the loaves with butter, then turn loaves on their sides to cool. Yield: 7medium-sized loaves.

8/7/2019 Patriot Armory - Making the Best of Basics
http://slidepdf.com/reader/full/patriot-armory-making-the-best-of-basics 44/188
38. WHEAT
Whole Wheat Dilly Bread
1 T. yeast1 ,4 C. warm water
V 3 C. powdered milkV 2 C. water4 tsp. sugar1 T. dehydrated onion slices
1tsp. margarine2 tsp. dill seed
1 tsp. saltV s tsp. soda1egg, unbeaten2 C. whole wheat flour
Dissolve yeast in warm water. Combine powdered milk and water to make thick milk. (Basiccottage cheese may be substituted.) Add egg and yeast and beat well. Add flour in thirds,beating well after each addition. Cover. Let rise in warm place until doubled in bulk. Stirdown dough. Turn into well greased 1% qt. casserole dish. Let rise in warm place until light.about 30-40 minutes. Brush with butter, sprinkle with salt. Bake 350°-400° for 50-60 mi-nutes. Yield: 1loaf.
Whole Wheat Zucchini Bread
2 C. sugar1C . vegetable oil3 eggs, beaten2 zucchini (unpeeled and grated)3 tsp. vanilla3 C. whole wheat flour
Mix sugar, oil, eggs, zucchini and vanilla in large bowl. Sift together in separate bowl wholewheat flour, salt, soda, cinnamon and baking powder. Add dry ingredients to first bowl,stirring to combine well. Add chopped nuts. Bake 3500 for 45-60 minutes. Yield: 2 loaves.
1 tsp. salt1tsp. soda3 tsp. cinnamon1 ,4 tsp. baking powderV 2 C . chopped nuts
Basic Whole Wheat Noodles
6 eggsY 2 tsp. salt
1tsp. vegetable oil2 C. whole wheat flour
Beat eggs thoroughly, add salt, oil and flour. Mix well. Roll mixture out on floured board withwax paper between rolling pin and dough. When Vs" thick, cut with sharp knife, needle orcutter, roll up and put into boiling broth or salted water.
Noodle Casserole Main Dish
basic whole wheat noodle recipe1#303 can peas
1can mushroom soup, undiluted
1can tuna1 ;4 tsp. salt
dash MSG
Mix ingredients in greased casserole dish. Bake 3500 for 30 minutes. Serves 6.
Basic Whole Wheat Cake Mix
% C. vegetable shortening (margarine)1 Y 2 C. brown sugar (packed tightly)P/2 tsp. vanilla3 eggs
3 C. whole wheat flour (sifted)4 V 2 tsp. baking powder1tsp. saltI V 2 C. milk

8/7/2019 Patriot Armory - Making the Best of Basics
http://slidepdf.com/reader/full/patriot-armory-making-the-best-of-basics 45/188
WHEAT.39
Creqm together shortening, brown sugar and vanilla. Add eggs and beat thoroughly. Sift
together whole wheat flour, baking powder and salt. Combine wet and dry mixtures, addingmilk. After thorough mixing, pour into greased 11" x 17" pan. Bake 3500 for 25-30 minutes.
(In .9" x 9" pans or for cupcakes, bake 20-25 minutes. This recipe makes 24-28 cupcakes.)
Whole Wheat ~~Quickie"Cake
1 1 2 C. whole wheat flour
3 T. cocoa1 tsp. soda
1 C. sugar1/2 tsp. salt
Put all ingredients into a bowl. Beat until nearly smooth and no flour remains on bowl. Pour
batter into greased 9" x 9" x 2" pan. Bake 3500
for 30 minutes.
5 T. vegetable oil
1 T. vinegar
1 T. vanilla
1 C. cold water
Whole Wheat Fruit Cocktail Cake
1 egg 1 C. sugar
2 C. fruit cocktail 1 C. whole wheat flour
1 tsp. soda 1 4 tsp. salt
1 / 2 C. brown sugar l / z C. chopped nuts
Beat egg and add sugar; beat together well. Stir in fruit cocktail not drained. Mix flour, salt,and soda together. Combine mixtures. Put in greased 7" x 12" or 8" x 13" pan and sprinkle
with brown sugar and nuts. Bake at 3500 for 50-60 minutes. Serves about 8.
Whole Wheat Apple Cake
4 fresh, diced apple
2 C. sugar
l / z C. vegetable oil2 tsp. vanilla
2 tsp. soda
1 tsp. salt
Place diced apples (not grated) in bowl. Add sugar, oil, vanilla, soda, salt and eggs and mixthoroughly. Sift dry ingredients together, then add to wet mixture. Pour into greased 9" x 13"
pan. Bake in 3500 oven for 60 minutes or until cake shrinks from sides of pan. Frost with
frosting recipe.
2 eggs
2 C. whole wheat flour
2 tsp. cinnamon1 C. nuts (optional)
1 C. raisins (optional)
Frosting2 C. powdered sugar1/2 C. butter
4 oz. cream cheese1 tsp. vanilla
Combine ingredients and beat well. Spread topping with knife or spatula.

8/7/2019 Patriot Armory - Making the Best of Basics
http://slidepdf.com/reader/full/patriot-armory-making-the-best-of-basics 46/188
40. WHEAT
Whole Wheat Applesauce Cake
1 C. sugar1/2 C. shortening
1 egg2 C. sifted whole wheat flour
I, 4 tsp. salt% tsp, soda
Cream shortening and sugar until light and fluffy. Add egg and beat thoroughly. Add sifted
dry ingredients, then nuts and raisins. Heat applesauce and stir into batter. Pour into
well-greased and floured 8" x 8" pans. Bake 50 minutes at 350°.
l/Z tsp. cloves
1tsp. cinnamon
1C. chopped nuts1C . raisins1C. thick unsweetened applesauce (heated)
Whole Wheat Pie Crust Mix
2 C. whole wheat flour1tsp. salt % C . vegetable shorteningice water
Mix whole wheat flour and salt. Cut li z C . of the shortening into flour mixture until fine as
meal. Cut remaining shortening into mix until mixture is the size ofa green pea. Sprinkle 4-8
tsp. ice water on mixture, stirring in lightly with a fork. Then mix well, shaping into a ball.
Roll out to fit pan. Bake 4000 for 8-12 minutes.
WHOLE WHEAT SWEET TREATS
These sweet treats made with whole wheat flour are as nutritious as they are delicious. They
are good for quick energy, and help children adapt to whole wheat cookery. These particular
cookie recipes have proven to be favorites for children ofall ages. These are classified assmorecookies - that's short for "I want some more cookies, Mom."
Whole Wheat Yogurt Cookies
1 C. brown sugar
1C. white sugar
1 C. margarine1 tsp. vanilla
2 eggs, beaten
1tsp. baking powder
I, 4 tsp. salt
liz tsp. nutmeg1 C. yogurt
4 C. sifted whole wheat flour
Cream margarine and sugars. Add vanilla and beaten eggs. Sift dry ingredients together
twice and add, alternately with yogurt, to the egg mixture. Working with li z the dough at a
time, roll out on floured board to V B " thickness. Cut in small rounds with cookie cutter. Place
on greased cookie sheet and bake at 4000 for 8-10 minutes. Yield: 24-30 cookies.
Whole Wheat Molasses Cookies
I, 4 C. butter or margarineV 4 C. sugar
V 2 C. molasses1/2 tsp, salt
2 tsp. baking soda
1 tsp. cinnamon1 tsp. ground ginger
% tsp. cloves
1V 2 C. whole wheat flour
2 T. vinegar

8/7/2019 Patriot Armory - Making the Best of Basics
http://slidepdf.com/reader/full/patriot-armory-making-the-best-of-basics 47/188
WHEAT.41
Meltbutter or margarine with sugar and molasses in small sauce pan over lowheat, then cool.
Combine salt, baking soda, ginger, cinnamon and cloves with whole wheat flour in mixing
bowl. Stir in butter, then molasses mixture. Add vinegar and stir in. Drop by teaspoon ontogreased cookie sheets. Bake in moderate oven (350°) for 7 minutes or until cookies are set.
Remove carefully with spatula. Store in covered jar.
Whole Wheat Sugar Cookies
1 C . shortening2 powdered sugar
2 eggs
~~C . buttermilk
Mix shortening, powdered sugar and eggs together thoroughly. Stir in remaining ingre-dients. Drop rounded teaspoonfuls about 2" apart on lightly greased baking sheet. Bake 4000
for 8-10 minutes. Makes about 6 dozen cookies.
3% C. whole wheat flour
1tsp. soda1tsp. salt
Whole Wheat Chocolate Chip Cookies
214 C . whole wheat flour1tsp. soda1tsp. salt
% C. soft butter or margarine1V z C. brown sugar (packed)3 eggs, beaten
4 V 2 T. powdered dry milk1 T. water1pkg. chocolate or carob chips
% C. chopped peanuts
1C . sunflower seeds, unsalted1tsp. vanilla
Stir together dry ingredients, cream the butter and sugar. Add to eggs, vanilla, powdered
milk and water. Beat until fluffy. Add flour and blend well. Stir in chocolate chips and nuts.
Drop onto greased cookie sheet. Bake 375° for 10-15 minutes.
Whole Wheat K iddy-Pleasers
V 2 C. vegetable shortening
% C. brown sugar (packed)V 2 C. honey
2 eggs, beaten well
1 tsp. vanilla
2 C. sifted whole wheat flour
Cream shortening, brown sugar and honey. Add well-beaten eggs and vanilla, beating welltogether into mixture. In another bowl, sift together flour, soda and salt. Add part of flourmixture to sugar mixture alternately with milk, mixing well. Add remaining flour, thenremaining milk. Add nuts and raisins, if desired, mixing in well. Drop onto greased baking
sheet. Bake 3500 for 10-12 minutes.
1tsp. soda1/2 tsp. salt
V 2 C . milk1 C. chopped nuts
1 C. raisins (optional)
8/7/2019 Patriot Armory - Making the Best of Basics
http://slidepdf.com/reader/full/patriot-armory-making-the-best-of-basics 48/188
2. WHEAT
Whole Wheat Applesauce Cookies
1 C. brown sugar
lI 2 C. vegetable shortening
1egg, beaten well1C. applesauce1tsp. soda
C. whole wheat flour
lI 2 tsp. saltlI 2 tsp. nutmeg
lI 2 tsp. cinnamon1 M tsp. cloves1 C. raisinsljz C. chopped nuts
ream brown sugar and vegetable shortening. Add beaten egg; mix well. Add in applesauce
nd soda, mixing thoroughly. Add remaining ingredients, mixing well. Drop spoonfuls onto
reased cookie sheet. Bake 3750 for 15-20 minutes.
Whole Wheat Chocolate Cookies
C. margarineC. sugar
C. cocoa
C. raisins
C. chopped nuts
2 C. milk2 tsp. salt2 tsp. vanilla
6 C. whole wheat flour1 1 / 2 tsp. soda
ix cocoa with enough water to make a medium-thick paste. Cream margarine and sugar
ogether in separate bowl. Sift together all dry ingredients. Add to sugar mixture alternately
ith milk. Finally, add cocoa mixture, raisins and nuts. Drop onto greased cookie sheets.ake at 3500 for 10 minutes. (As an added treat and to heighten eye-appeal, frost withwdered sugar.)
OTHER COOKIE RECIPES

8/7/2019 Patriot Armory - Making the Best of Basics
http://slidepdf.com/reader/full/patriot-armory-making-the-best-of-basics 49/188
WHEAT.43
BASIC WHOLE WHEAT STUFFING/DRESSING MIX
Perhaps your family enjoys stuffing/dressing with a number of their favorite entrees. Thissection contains a basic whole wheat bread that's easy to make and economical besides. This
easy bread is used as the filler base for the basic whole wheat stuffing/dressing recipe chartedfor quick reference and use.
Basic Easy Whole Wheat Bread
3 C. warm water1 T. dry yeast
~ C.honeyDissolve yeast in ~ C. ofthe warm water and 1 tsp. of the honey. Let stand 5minutes. Stir in
remaining water, honey and salt. Add flour. Knead 10minutes. Put dough in lightly greased
bowl. Cover with damp cloth and place in unheated oven over large pan of hot water until
double in bulk. Divide and form into loaves. Place in greased pans, allowing to rise untildouble. Bake 3500 for 1 hour. After allowing to cool fully, cut into Y z " slices, then cut into
cubes. Dry bread in oven, allow to cool, then place dried bread cubes and crumbs into sealedplastic bags.
1 T. salt9 C. whole wheat flour (approx.)
Basic Easy Bread Stuffing/Dressing Mix
4 C. whole wheat bread, cubed and dried 1 tsp. salt% C. stock 1 tsp. pepper1 egg, beaten V a tsp. thyme
Y z C. butter (margarine) V a tsp. sage
Y z C celery V 2 T. parsley flakesV 2 C. chopped onion 1 dash MSG
Mix lightly all dry ingredients. Saute celery and onion in butter, pour over dry mix. Add stock
and egg, tossing lightly so as not to crush bread cubes. Yield: approximately 1 qt. stuffing or
dressing. (See chart for other amounts.)
To embellish the basic recipe and the flavor of the stuffing/dressing, add any additionalingredients - chopped nuts, sliced raw apples, sausage (cooked and crumbled), chopped
green or red bell peppers (sauteed), choppsd pinapple, canned or frozen oysters, mushrooms,
dried prunes or apricots (chopped or sliced), and giblets (cooked and chopped).
Diluting the stock with water or milk, or substituting powdered milk will change the flavor,
also. This basic recipe can be used to stuff wild poultry (duck, goose, cornish hen, rock hen,etc.), as well as pork chops, ham slices, leg of lamb, lamb chops, fish, or bell peppers.
The following chart is used to determine the amount of dressing needed to fill the neck andbody cavity of poultry.

8/7/2019 Patriot Armory - Making the Best of Basics
http://slidepdf.com/reader/full/patriot-armory-making-the-best-of-basics 50/188
44. WHEAT
CHART 4-ABASIC STUFFING/DRESSING CHART
INGREDIENTSUNCOOKED POULTRY WEIGHT
FOR BASIC RECIPE
3-6Ibs. 10-12 lbs. 16-181bs. 22-24Ibs.
I whole wheat bread, cubed4 C. 6 C. 12 C. 16 C.
I and dried
stock (vary for moistness)% C. I V 2 C. 2V. C. 3 C.
(broth, milk, etc.)
egg, beaten 1 2 2 3
ibutter (margarine) % C. V 2 C. 1 C. I V z C.
i
r
celery, chopped Y 2 C. 1 C. 1'/2C. 2 C.
onion, chopped Y z C.I
1 C. IV z C. 2 C.
salt 1 tsp. 2 tsp. 3 tsp. 4 tsp.
pepper 1 tsp. 2 tsp. 3 tsp. 4 tsp.--.
thyme V 8 tsp. V . tsp. V 2 tsp. 1 tsp.
sage llR tsp. V . tsp. '1 2 tsp. 1 tsp.
parsley flakes % T. 1 T. 1'h tsp. 2 T.
MSG 1 dash 2 dashes V 2 tsp. 1tsp.
Stuffing For Poultry
Spoon into salted body cavity, but do not overstuff. Close openings, bake according to poultry
roasting directions.
Dressing
Spoon dressing into greased covered dish. Bake 3500for 30-40 minutes. Tocrispen top, remove
lid during final 5 minutes of baking.
Dressing Meatloaf
Cr~sh dry mixture and substitute for bread crumbs and herbs in your favorite meatloafrecipe.
OTHER USES FOR DRESSING MIX

8/7/2019 Patriot Armory - Making the Best of Basics
http://slidepdf.com/reader/full/patriot-armory-making-the-best-of-basics 51/188
WHEAT.45
STONE-GROUND WHOLE WHEAT COOKERY
These stone-ground whole wheat recipes require freshly-ground whole wheat flour. Stone-
grinding is the best way to get a better-tasting product, since all the wheat kernel is ground
into the flour. The freshness really comes through, and there is a resultant health benefit instone-ground flour, too. There's no need to fear the stone-ground flour is not as fine or asdelicate as white flour - it is, and you can even make sponge cake with it! Refer back to thebasic bread making techniques to bolster your courage if you feel you're still too much a
novice.
It takes more time to make stone-ground whole wheat bread than a bread made withall-purpose flour. Since stone-ground whole wheat flour is coarser and heavier, the dough
must be kneaded for 10 to 15minutes to produce loaves with an even texture. Each rising also
takes longer. However, the taste difference is ample reward for the extra effort.
Basic Stone-Ground Whole Wheat Bread
2 T. dry yeast
5-6 C. lukewarm waterY2C. honey
20 C. stone-ground whole wheat flour
Make yeast mixture with yeast, % C. warm water, and 1 tsp. honey and let stand for 10
minutes. Mix dry ingredients in large mixing bowl, making a well in the center. Pour in
remaining liquids and yeast mixture. Stir with spoon as long as possible, then continuemixing with hands. Mix until stickiness begins to leave the dough. Grease the sides of the
bowIand your hands with shortening or margarine and continue to work the dough, kneading
it very thoroughly. Use considerable pressure when forming the loaves in order to remove all
air bubbles. Place loaves in well greased pans and cover with wax paper. Allow to rise until
almost double in size. Place in a pre-heated oven at 3000 and bake for 1V J hours. Remove
loaves from pans and leave uncovered for 15minutes, then cover with wax paper and a heavy
towel to finish cooling. Yield: 5 loaves.
2 T. salt5 C. dry powdered milk
V3C. shortening or margarine
VARIATIONS USING STONE-GROUND WHOLE WHEAT BREAD
Raisin Bread
stone-ground whole wheat bread recipe1% C. raisins
Add raisins and spices to dough before first mixing of dough and follow directions for
stone-ground whole wheat bread recipe.
1 tsp. ginger
Cinnamon Rolls
stone-ground whole wheat bread recipe1 tsp. ginger1 T. soft butter
1 tsp. grated orange peel% C. brown sugar1 T. cinnamon
Add ginger and grated orange peel to dough before first mixing of dough in stone-ground
whole wheat bread recipe. When shaping rolls, sprinkle surface of dough before rolling withmixture of sugar, cinnamon and soft butter. Place on greased baking pans. Bake 4000 for30-40 minutes. Serve piping hot.

8/7/2019 Patriot Armory - Making the Best of Basics
http://slidepdf.com/reader/full/patriot-armory-making-the-best-of-basics 52/188
46. WHEAT
Carrot-Raisin Wheat Bread
1 T. yeast% C. warm water
2 C. milk - scalded and cooled
5 T. melted butter or margarine
V 2 C. honey6% C. stone-ground whole wheat flour (approx.)
1 C. finely shredded carrots
1 C. raisins
Dissolve yeast in water in a large bowl. Add milk, 3 tablespoons of butter, salt, honey and
gradually stir in 5 C. of the flour to make a soft dough; stir in the carrot and raisins. Spread
about % C. of the remaining flour on a board. Turn out the dough, and knead until dough is
elastic and not sticky, for 10-15minutes. Sprinkle additional flour on the board and hands as
needed to prevent sticking. Place dough in a greased bowl, turn over to grease the top, coverwith a towel and let rise in a warm place until almost doubled, then let rise 40minutes more
and punch down; let rise 20 minutes then punch down; let rise 10minutes then punch downand squeeze to release air bubbles; divide it in two equal portions. Knead each for about 30
seconds on a lightly floured board and shape into a smooth round loaf. Place each loaf on agreased cookie sheet. Cover and let rise until almost doubled -, about 1 hour.
Brush tops with the remaining butter. Bake 3500 for about 30 minutes, or until browned and
the loaves sound hollow when tapped. Let coolon racks. Wrap airtight. Can be stored at room
temperature for up to 3 days. Freeze for longer storage. Yield: 2 loaves.
STONE-GROUND WHEAT PRETZELS
Pretzels are usually made from regular white flour, but the following recipes use whole wheat
and wholesome rye flours. Before baking, dip each pretzel in boiling salted water, which give
the familiar shiny crust, then sprinkle with coarse salt.
Soft pretzels are delicious with a soup or salad lunch or with sausages and cheese for a late
supper. Serve them warm or at room temperature, spread with butter. Pretzels can be refrig-
erated or frozen, then reheated for serving.
Soft Whole Wheat Pretzels
1 T. yeastV 2 C. sugar
% C. warm water
2 C. milk, scalded and cooled to room tempY4C. salad oil
3 C. stone-ground whole wheat flour (approx.)
3 C. reg. all-purpose flour, unsifted (approx.)
% tsp. baking powder
IV 2 tsp. salt
2 qts. boiling water1 egg white, slightly beaten
4 T. coarse (kosher-style) salt
In a large bowl, dissolve yeast in the warm water. Then stir in sugar, 1V z tsp. salt, milk and
salad oil. With a wooden spoon gradually mix in 1V 2 C. stone-ground whole wheat flour and 1C. of the regular flour.
Cover and let rise in a warm place until bubbly, about 40 minutes. Sift IV z C. more of the
regular flour with baking powder; add to dough with remaining 1%C.of stone-ground whole
wheat flour. Mix with wooden spoon, then turn out dough on a lightly floured board.
Knead for about 5 minutes or until dough is no longer sticky, adding a little more regularflour if necessary. Roll out and pat dough into a 9" by 15"rectangle. Press a large French knife
straight down through dough to cut into strips V z" wide and 15" long. With your palms roll
each strip back and forth on the board into a strand about 20" long; twist each into pretzelshape. Let rise, uncovered, for 30 minutes.

8/7/2019 Patriot Armory - Making the Best of Basics
http://slidepdf.com/reader/full/patriot-armory-making-the-best-of-basics 53/188
WHEAT 1147
Dissolve 3 T. coarse salt in boiling water. With a slotted spoon, lower 1 pretzel at a time intoboiling water; after about 2 seconds, lift out, wipe the bottom of the spoon on paper towels todrain briefly. Set pretzels on a liberally greased baking sheet, arrange lh" apart. Brush with
egg white and sprinkle lightly with remaining coarse salt.
Bake at 4000 for 20minutes or until crust is golden brown. Serve warm or transfer to a rack to
cool.Wrap airtight for storage. To reheat, set pretzels directly on oven rack in 3500 forabout 5minutes (8 minutes if frozen) or until crusty. Makes approximately 18 pretzels.
Soft Rye Pretzels
Follow directions for soft whole wheat pretzels, simply substituting rye flour for whole wheat
flour. Add 3 tablespoons crushed dill seed, if desired.
Stone-Ground Wheat Sponge Cake
6 eggs, separated
I V 2 C. sugar1 f z C. water1 f z tsp. salt
1 4 tsp. almond extract
1V 2 C. sifted whole wheat flour
V z tsp. lemon juics or extract
1 tsp. cream of tartar
Using mixer beat yolks, water, sugar and flavoring 5-7minutes until very thick and creamy.
Sift flour and salt twice. Beat egg whites until stiff, and fold into batter. Add remaining
ingredients gradually, continuing to beat. Pour into cake pans. Bake 325°-350°for approx. 1
hour until top springs back to touch.
Stone-Ground Wheat Pie Shell
1 C. stone-ground whole wheat flour14tsp. salt
V 3 C. vegetable shortening
cold water
Mix stone-ground whole wheat flour and salt in bowl. Cut in vegetable shortening until
mixture resembles coarse meal. Mixing with fork, add enough coldwater to hold ingredientstogether. Gather into ball and roll on floured board to fit pie pan. Trim edges and flute. Bake4000 for 8-12 minutes.

8/7/2019 Patriot Armory - Making the Best of Basics
http://slidepdf.com/reader/full/patriot-armory-making-the-best-of-basics 54/188
48. WHEAT
WHEAT GERM GRANOLA
The following granola recipes use wheat germ for additional nutrition and taste. This basic
granola is tasty and healthful, and easy to make.
Basic Granola
4 C. rolled oats (uncooked) V z tsp. salt1 C. wheat germ 1 C. vegetable oil1C. coconut (shredded) % C. honeyY < l C. sesame seeds 2 C. dried fruit and nuts (mixed)
Combine dry ingredients in a large bowl. Mix honey and oil together and heat until honey isthinned. Stir into dry mixture. Spread on two greased cookie sheets or two cake pans. Bake
300
0
until lightly browned (15-20 min.) Stir every five minutes during baking and severaltimes while cooling. Add mixed dried fruits using any of the following: raisins, dried apples,dried bananas, dried apricots, toasted sunflower nuts, walnuts, pecans, almonds, etc.
Granola No.2
1C. warm vegetable oil1% C. honey5 C. oatmeal1C. sliced almonds1 C. sesame seeds
1C. sunflower seeds1C. soy flour1C. dry powdered milk1C. wheat germ1C. shredded coconut
Mix dry ingredients in large bowl. Combine cookie sheets or two cake pans. Bake at 3000 untillightly browned (15-20 minutes). Stir every five minutes during baking and several timeswhile cooling.
Granola No. 3
4 C. oatmeal1 C. coconut1C. wheat germ1 C. sesame seeds
1~. oil (cooking)
Mix all ingredients together and spread thin on 2 cookie sheets. Bake at 3000 for 20 minutes.Stir every 5 minutes to avoid burning. When cool add chopped nuts and raisings. Cool beforetaking off cookie sheet.
% C. honey1tsp. vanilla% C. chopped nuts% C. raisins
Granola No. 4
8 C. rolled oats1 C. nuts (pieces)1 C. wheat germ
1 C. shredded coconutY2C. brown sugar
Mix all ingredients together and place on large tray. Bake 2500 for 2 hours, stirring every halfhour or so.
1 f z C. date nuggets1 C. oil1 f z C. water
V 2 tsp. salt.

8/7/2019 Patriot Armory - Making the Best of Basics
http://slidepdf.com/reader/full/patriot-armory-making-the-best-of-basics 55/188
WHEAT. 49
Basic Granola Cookies
1 C. butter (margarine)1 C. brown sugar
2 eggs2 T. water3 C. basic granola1% C. flour
Cream butter, brown sugar and eggs until fluffy. Add water and blend well. Sift flour, soda
and salt together and add to creamed mixture. Stir in Basic Granola, vanilla, chocolate
morsels, nuts or coconut. Mix until well blended. Drop by teaspoon onto greased cookie sheetand bake at 3500 for 12 minutes.
1 tsp. baking soda
1tsp. salt
2 tsp. vanilla12 oz. chocolate morsels
1 C. chopped nuts or coconut
OTHER FAVORITE GRANOLA RECIPES

8/7/2019 Patriot Armory - Making the Best of Basics
http://slidepdf.com/reader/full/patriot-armory-making-the-best-of-basics 56/188
50. WHEAT
GLUTEN
No chapter on wheat is complete without reference to gluten. Gluten is a vegetable protein
product, high in nutrition and quite tasty when seasoned properly.
Wheat stored in your foodstorage program takes on a new dimension when it can be used as asubstitute for meat. Gluten can be seasoned by adding meat or meat juices while cooking.
Basic gluten is fairly easy to make, and the task can be delegated to a younger member ofthe
family, since no subtle or delicate handlings are required. In fact, the success ofa gluten batch
depends on the thoroughness of the beating it gets - the rougher the better.
There are a number ofvery goodbooks on gluten. The best available volume is THE GLUTENBOOK, by LeArta Moulton. The following improved basic recipe and instructions are ade-quate for beginning gluten-making. Have fun in experimenting with gluten and its uses;
there are many ways to use gluten in the diet. The best gluten is made from freshly-ground,
hard, whole wheat flour and water. You only need fresh stone-ground whole wheat flour and
hot and cold water for making gluten in this basic 3~stepmethod.
BASIC GLUTEN - 3-step Method
16 C. stone-ground whole wheat flour 3 C. water (approx.)
[1.J Combine flour and water into a ball-like mass. Then knead, pound or beat (ormix in
bread mixer if you have one) for 10-15minutes. (Remember: success depends upon a
very thorough beating).
[2.] Cover gluten with coldwater for about an hour. Then wash out the starch by holding
the soft dough in your hands under water as hot as your hands can tolerate. When the
dough is firm the starch has been removed. Continue rinsing until the bran, which
feels like sand, has been washed out. Let drain 30minutes more for easier handling.
If too wet, dry out in 2000 oven approximately 30 minutes.
[3.] The final step cooks and flavors the gluten. If you've decided what you'll make with
the gluten, both can be done simultaneously. Any seasoning you prefer may be used.
For example, use bacon, sausage, or beef juices for frying the gluten strips, rolls or
patties. However, most people prefer "boiling in" the flavor. The following flavoring
recipes will help make gluten more palatable. The storage period for cookedgluten is
about two weeks in the refrigerator.
Basic Gluten Flavoring
7 C. water1/2
C. soy saucesalt and pepper to taste
1can consomme soup (or substitute 12 beef
bouillon cubes)
Bring water to boil, reduce heat, then add soup and soy sauce. Roll out gluten, cut into l/~"
strips with sharp knife or heavy scissors. Drop strips into broth. Simmer 30 minutes.

8/7/2019 Patriot Armory - Making the Best of Basics
http://slidepdf.com/reader/full/patriot-armory-making-the-best-of-basics 57/188
WHEAT. 51
Basic Beef Flavoring
2 T. beef base granules
1T. soy sauce
V 2 C. chopped onion
% T. pepper
4 tsp. seasoned salt
% tsp. MSG
Mix all ingredients and bring to a boil. Add gluten strips and simmer 30 minutes.
Basic Gluten Steakettes
Form gluten into steak-shaped forms and season with basic beef flavoring. Then followthesedirections for delicious-tasting meat substitutes.
Pan-Fried Steakettes
basic gluten steakettes
1 C. sliced mushrooms
% C. butter (margarine)
salt and pepper to taste
Fry steakettes in butter. Reduce heat to low. Sprinkle mushrooms over steakettes, coverwith
lid for 5 minutes. Serve immediately.
Skillet Steakettes
basic gluten steakettes
1 egg, beaten
2 C. bread crumbs, crushed fine
1 C. butter (margarine)
6 slices bacon1 can mushroom soup, undiluted
Dip steakettes in egg, roll in bread crumbs. Fry bacon in pan, remove and chop fine. Return
bacon to pan, add butter. Brown steakettes. Pour mushroom soup over steakettes. Serve hot.
(This dish may be baked in the oven for 15 minutes at 425°.)
Basic Gluten Ground Beef Substitute
After simmering basic gluten in beef flavoring, grind gluten in meat grinder and substitute in
recipes using ground beef.
Basic Gluten Burger
basic gluten ground beef substitute 1 medium onion, chopped fine1 egg salt and pepper to tasteflour 1 fz C. butter (margarine)
Stir egg and chopped onion into ground beef substitute. Add enough flour to make patties. Fry
in butter, browning both sides. Cover and steam 5 minutes to bring out full flavor.

8/7/2019 Patriot Armory - Making the Best of Basics
http://slidepdf.com/reader/full/patriot-armory-making-the-best-of-basics 58/188
52. WHEAT
Basic Gluten Patties in Mushroom Sauce
2 eggs1 onion, medium (chopped)
1 ;2 C. soy saucedash garlic saltdash MSG
Y 2 tsp. sage2 C. basic gluten ground beef substitute
2 C. cooked rice1 can mushroom soup, undiluted
Mix egg, onion, soy sauce, garlic salt and sage together, then add, basic gluten and rice. Form
into patties. Fry in oil slowly until browned. Add undiluted mushroom soup, simmering 10-15
minutes.
Basic Gluten Sausage
basic gluten ground beef substitute
sausage seasoning to taste
1 T. flour1 ;2 C. butter (margarine)
Season gluten with sausage seasoning until the flavor suits you. Then stir in egg and flour.
Form into patties and fry, browning both sides.
ADDITIONAL GLUTEN RECIPES

8/7/2019 Patriot Armory - Making the Best of Basics
http://slidepdf.com/reader/full/patriot-armory-making-the-best-of-basics 59/188
WHEAT. 53
WHITE FLOUR COOKERY
This section on white flour cookery is included because this Handbook does not advocate the
use ofonly whole wheat. As long as there's wheat, there are those who'll have white flour. This
section is not lengthy because practically every cookbook is filled with recipes using whiteflour.
WHITE FLOUR RECIPES
Basic White Flour Biscuit Mix
8 C. sifted white flour1 C. non fat dry milk
14C. baking powder
4 tsp. salt
11/3 C. shortening
1/3-% C. water or milk
Sift together dry ingredients. Cut in shortening with 2 knives until fine as flour, then addwater or milk. Drop onto greased baking sheet. Bake 4500 for 12-15 minutes.
Dumplings
Use basic white flour biscuit mix for excellent dumplings. Roll 'em out and pop 'em in boilingliquid.
Vegetable-Filled Biscuits
basic white flour biscuit mix
2 C. chopped celery
2 C. coarsely grated carrots
1 large onion, finely chopped
In covered pan, cook celery, carrots, onion, salt and margarine for 10 minutes, stirring
occasionally. Roll biscuit mix into a square or rectangle and cut in 5" squares. Fill each square
with V3cup cooked vegetables. Fold up the corners to meet in the center and pinch edges
together to seal. Place biscuits on greased baking sheet. Brush with melted margarine and
bake at 4000
for 15 minutes or until lightly browned. Makes 9 to 12 biscuits.
2 T. margarine
1 f z tsp. salt
1 f z tsp. melted margarine
Beef Pie
basic white flour biscuit mix ljg tsp. garlic salt
1 lb. lean ground beef 2 4 oz. cans sliced mushrooms
% C. chopped onion 1 tsp. salt
2 8 oz. cans tomato sauce 1 tsp. chili powder
Brown beef in skillet. Add onion and cook until tender. Add 1 can of tomato sauce and
mushrooms, salt, garlic salt and chili powder; heat until bubbly. Meanwhile, combine basicbiscuit mix with milk. Knead eight to ten times on floured board. Divide dough in half. Roll
out one-half to fit.9" pie pan and line pan; pour in hot filling. Roll out remaining dough andplace over filling. Crimp edge; slit top. Bake at 4250 for 15-20 minutes, or until done. Heatremaining tomato sauce and mushrooms. Serve over wedges ofbeef pie. Yield: 4-6 servings.

8/7/2019 Patriot Armory - Making the Best of Basics
http://slidepdf.com/reader/full/patriot-armory-making-the-best-of-basics 60/188
54. WHEAT
Basic Pizza Crust
2 T. yeast1% C. lukewarm water
1 tsp. salt
pinch sugar
3V2 C. flour
% C. oil
Mix all ingredients well. Knead until smooth and shiny. Let rinse I -V2 hours. Coverwith pizza
sauce. Bake 4250 at 15-20 minutes.
WHITE FLOUR BREADS AND SWEET ROLLS
Basic French Bread
2 T. (pkg.) dry yeast
2lh C. warm water3 tsp. salt
Dissolve yeast in 1/2 C. warm water. While yeast is rising put shortening, salt, and remaining
water into bowIand mix. Addyeast mixture. Gradually add flour to form stiff dough. Knead 5
to 10minutes. Cover and let rise until double in bulk (about 1hour). Punch down and let rise
again in bowl until double in bulk (about % hour longer). Punch down again. Remove from
bowl and form into loaves as follows: divide dough in two parts and roll each part into arectangle about 10"x 14".Roll doughjelly- roll fashion to form a loaf about 14"long. Slash top
and place on cooky sheets which have been sprinkled with corn meal. Cover and let rise untildouble in bulk. Bake at 4000 for 15 minutes and 3500 for about 45 minutes longer. Brush
loaves with egg white while baking for a golden brown crust.
2 T. shortening
6-7 C. flour
Raisin Bread2 T. (pkg.) dry yeast
% C. warm water1 box raisins
2 C. scalded milk
2 T. butter or margarine2 T. sugar
1 tsp. salt
V s tsp. mace1 tsp. lemon extract
2 eggs, beaten
6 C. flour (approx.)
Soak raisins 1hour in 2 C. coldwater. Drain well. Dissolve yeast in warm water. Put butter,
sugar, spice, salt and flavoring into bowl. Pour scalded milk over all. When lukewarm, add
eggs, yeast mixture and raisins. Gradually, add flour, kneading to make a smooth ball. Coverand let rise until double in bulk. Punch down, and form into 2 loaves. Put into greased breadpans and let rise until double in bulk. Bake at 4000 for 15minutes and 3500 for 35 minuteslonger. Remove from pans, brush with melted butter. Coolon racks.

8/7/2019 Patriot Armory - Making the Best of Basics
http://slidepdf.com/reader/full/patriot-armory-making-the-best-of-basics 61/188
WHEAT. 55
Basic Sweet Roll Dough
2T. (pkg.) yeast
1/ 2 C. lukewarm water
1/ 2 C. scalded milkV 2 C. sugar
1 tsp. salt2 eggs, slightly beaten
V 2C. butter or margarine4Yzto 5 V 2 C. flour
Dissolve yeast in warm water. Put scalded milk, sugar, salt and butter into bowl and mix.When lukewarm, add yeast. Add 1 cut flour and eggs. Slightly mix. Continue adding flour
until a firm ball is formed. Cover and let rise until double in bulk. Punch down and let rise 1
hour. Punch down once again and turn out onto floured board and form as desired. Bake 4000
for 25 minutes.
VARIATIONS USING BASIC SWEET ROLL DOUGH
Cinnamon Nut Coffee Cake'
1 1 . 1 C. flour
V 3 C. sugar
2 tsp. cinnamon
After second rising ofbasic sweet roll dough, roll Y 3 ofdough into circle to fit 9" pan. Sprinkle
top with mixture of flour, sugar, cinnamon, butter, and chopped nuts. Cover and let rise until
double in bulk. Bake at 4000
for about 25 minutes. Serve warm.
3 T. soft butter1 ,4 C. chopped nuts
Honey Twist
1 ,4 C'.butter, creamed
2 T. honey1 egg white
1 C. confectioners sugar
After second rising ofbasic sweet roll dough, roll into a long cylinder I" in diameter. Coil into
buttered 9" layer pan beginning at outer edge and covering the bottom. Cover and let rise
until double in bulk. Bake at 3750 for 20 to 25 minutes. While hot, spread with mixture of
butter, honey, egg white, and sugar.
ADDITIONAL RECIPES

8/7/2019 Patriot Armory - Making the Best of Basics
http://slidepdf.com/reader/full/patriot-armory-making-the-best-of-basics 62/188
56. WHEAT
Before closing this chapter, there are 2 publications worthy of special mention. Each of them
can further expand your knowledge concerning the use ofwheat. One ofthese books deserving
particular mention is Wheat for Man, Why and How, by Vern ice G. Rosenvall, Mabel H.Miller, and Dora D. Flack. This book is a standard in the field and an excellent treatise on
wheat and how to use it.
The other book is The Magic of Wheat Cookery, by Lorraine Dilworth Tyler, distributed by the
Magic Mill wheat grinder manufacturer. It's a great cookbookwith beautiful colored photosillustrating wheat recipes.
NOTES

8/7/2019 Patriot Armory - Making the Best of Basics
http://slidepdf.com/reader/full/patriot-armory-making-the-best-of-basics 63/188
CHAPTER 5
SOURDOUGH BREADSTUFFS
For many years during the growth of the Old West, sourdough was known as the
frontiersman's staff of life. It was such a major part of the prospector's diet that he was
eventually called a "Sourdough". In later years, it became a complimentary and hard-won
title. The pioneers carried sourdough pots West and guarded them jealously. Sourdough was
found in every chuckwagon and probably every other kind of wagon crossing the plains, too.
Even today, sheepherders and prospectors find sourdough the indispensable leavener for
those crusty, aromatic breadstuffs so dear to the taste of our Western life-style.
A little sourdough goes a long way. By adding just flour and warm water to sourdough
"starter," you can make pancakes, breads, rolls, cakes and cookies. By saving a cup of the
sourdough from each batch, you have your "starter" for the next time. (Remember: put in acup - take out a cup!) Ifyou protect sourdough starter, it will become a true kitchen friend
and could ultimately make a billion pancakes - if you have the time and patience.
BASIC PREPARATION OF SOURDOUGH
With reasonable care, and allowing enough time and warmth to provide proper fermentation,
there are no mysteries to sourdough cookery.
Allow sufficient time for preparation and follow directions until you feel comfortable with the
difference in sourdough leavening compared to other forms ofleavening; the only limits to the
use of sourdough are those of your imagination. Sourdough cookery can be fun and can
provide more satisfaction than almost any other field ofcooking. Sourdough is a ofyeast - it

8/7/2019 Patriot Armory - Making the Best of Basics
http://slidepdf.com/reader/full/patriot-armory-making-the-best-of-basics 64/188
58 • SOURDOUGH
reacts to the same conditions all other yeasts do. However, sourdough is slower and always
needs more warmth for a longer period of time to insure best results. Most beginner failures
are the result ofthe starter being too coolat night, preventing the sourdough leavening action
from occuring normally.
For best results in making sourdough bread, use unbleached hard winter wheat flour. It
makes a better-tasting and nutritious loaf of bread. This type flour may not be easily
available at your local grocery store. Most flour in grocery stores today is all-purpose flour-
good enough for ordinary pancakes, cookies and cakes, but not good enough for sourdough
bread flour. Grind fresh flour from your food storage program to get best results with
sourdough.
SOURDOUGH STARTER
A good starter has a strong, sour milk odor. The sour smell is a part of normal "aging", The
liquid separates from the batter when it goes too long without use. To restore the sourdoughstarter, just use it, or "sweeten" it with a teaspoon ofsugar stirred in. Ifreplenished (byusing)
regularly, the starter stays fresh. Ifstarter is not to be used forseveral weeks, freeze or dry itto keep it from spoiling. Tocarry it to camp, add enough flour to shape it into a ball and place it
in a sack of flour. In the dried form the yeast goes into a spore stage, with the ability to stay
inert for a long time. Water and warmth bring the yeast back to the active stage. There are a
variety of starters, and recipes for all sourdough items can be used with any type starter.
Obtain a starter from someone who has one going - in fact, the genealogy of an aged starter
can be as prestigious to the cook as the prepared food is to the delight of the person eating!
Get a crockery pot (ceramic cheese pots are perfect) for the sourdough starter. Scald the pot
before putting in the starter. Always keep the sourdough pot in the refrigerator. Storingsourdough at room temperature invites the growth of undesirable bacteria and molds in it.
The presence of other yeast, bacteria, and molds is not bad, but their growth should not be
encouraged. Storing at cold temperatures is important because the starter is not a sterile
yeast culture. The cold temperature does not harm the yeast, it merely reduces its reproduc-
tion rate considerably. Ifyour starter becomes too sour, addjust a pinch ofsoda to sweeten it.
BASIC SOURDOUGH STARTER RECIPES
Prepare your own sourdough starter by using one of the following recipes.
Basic Water-base Sourdough Starter2 C. flour
2 C. water
Mix ingredients well. Keep in a warm place overnight. Next morning, put 1 C. of starter
mixture in a scalded container with a tight cover and store in the refrigerator for future use.
This is basic sourdough starter. The remaining batter can be used immediately for pancakes,
muffins, bread, or cake. This starter, when replenished every week with flour and water, willlast years.
1 package dry yeast
1 C. buttermilk
Basic Milk-base Sourdough Starter
1 C. flour
After mixing ingredients, let stand for 48 hours or until fermentation begins. For each use of
the starter, add equal amounts offlour and condensed milk. Be sure to save 1C.ofthe mixturefor starter.

8/7/2019 Patriot Armory - Making the Best of Basics
http://slidepdf.com/reader/full/patriot-armory-making-the-best-of-basics 65/188
SOURDOUGH. 59
Basic Rye Sourdough Starter
1 1 / 2 C. rye flour
V 2 C. water
Mix ingredients together well. Place in warm spot for 24 hours to ferment. Place 1C. starter
in crock pot and refrigerate.
V 2 T. yeast
Basic San Francisco-Type Sourdough Starter
31/2 C. unsifted whole wheat flour
1T. sugar
1 package active dry yeast
2 C. warm water
Combine flour, sugar and undissolved yeast in a large bowl. Gradually add warm water to dry
ingredients and beat until smooth. Cover with transparent wrap; let stand in warm place for 2
days. This starter is usually somewhat more sour than other sourdough starters. Put 1 C.starter in crock pot and refrigerate. To replenish starter, add 1V2C.whole wheat flour and 1C.
warm water. Beat until smooth, then place in warm spot to ferment. Remove 1 C. for starter,
then use balance, stirring before using.
Basic Honey Sourdough Starter
3 C. water
3 C. flour1 tsp. honey
Mix ingredients in blender or stir very well. Let stand in warm room in open crock or jar for
three days or until it smells yeasty and is full of bubbles. Stir often during aging process.
Leave 1C. starter in a tightly covered crock in the refrigerator. Starter will keep for several
weeks. Freeze starter ifnot used often. To activate the starter again, add 3 C. water and 3 C.
flour (formaking up two loaves ofbread). Stir often and keep in warm room. Itwill be ready to
use in about 6 hours; allow 24 hours if starter was frozen.
BASIC SOURDOUGH BATTER
The traditional basic sourdough batter should be prepared the evening before you want
pancakes for breakfast or wish to make bread. Basic sourdough batter is used in almost every
sourdough cookery recipe. Basic batter is made from your choice of sourdough type, i.e.,
adding water to water-base starter or milk to milk-base starter, etc.
1 C. sourdough starter of choice
2 C. warm water or milk
2 C. flour (wheat, rye, etc.)
Place sourdough starter in a large mixing bowl (large enough to allow for any expansion that
may take place, depending on how warm it is), preferably of glass, pottery, wood or plastic.
Don't use a metal container or leave a metal spoon in the starter, as the chemical reaction can

8/7/2019 Patriot Armory - Making the Best of Basics
http://slidepdf.com/reader/full/patriot-armory-making-the-best-of-basics 66/188

8/7/2019 Patriot Armory - Making the Best of Basics
http://slidepdf.com/reader/full/patriot-armory-making-the-best-of-basics 67/188
SOURDOUGH. 61
BISCUITS, BREADS, AND MUFFINSSUGGESTIONS FOR PREPARATION OF SOURDOUGH BREADSTUFFS
1. The basic sourdough batter is placed in a non-metal bowl, and the required sugar, salt, and
flavorings are stirred in gently. The yeast is already active and in suspension in the batter.
2. The flour is added a little at a time and stirred in until the dough pulls away from the sides
of the bowl. Flour quantities, especially in sourdough recipes are approximate because of
differences in liquid absorption, compactness, and the amount ofliquid alcohol present in thebatter. The variation in liquid is peculiar to sourdough since the yeast breaks the flour starch
down into alcohol and carbon dioxide gas during fermentation. Although this occurs in all
yeast breads, the long and variable fermentation period of sourdough starter produces
substantially more liquid alcohol, depending on starter strength.
3. The dough is turned out on a floured board and kneaded until it feels smooth and elastic.
Dough should not be sticky and should spring back when pressed with the finger when
properly kneaded.
4. As with all yeast breads, the dough may be given one or two risings. Two risings give a
somewhat finer textured loaf, but one rising produces a highlysatisfactory bread, especially
when it is well kneaded. If one rising is preferred, skip now to suggestion #6. To let rise twice,
shape the dough into a ball and place in a greased bowl. Roll the dough in the bowl to coat its
entire surface. Cover with a clean dish towel and place in a warm place to rise until dough
doubles. Sourdough usually takes 1% to 2 times longer to rise than other yeast doughs.
5. Punch the dough down and turn out onto a lightly floured board. Knead gently.
6. If a double recipe or a recipe for two loaves is used, divide the dough into two equal parts.
Shape the dough and place in a greased loaf pan.
7. Cover the dough with a clean dish towel and put in warm spot to rise. Allow the dough torise until about double in bulk or until the top of the dough reaches V 2 " to %" above the rim of
the pan. The bread will rise even slightly more during baking.
8. Preheat oven while dough rises.
9. The dough may be brushed with a glaze just before placing in the oven.
10. Bake at appropriate temperature until done. Test with wooden toothpick - when it
comes out clean, the dough is cooked.
Basic Sourdough Biscuits
V 2 C. basic batter 1'l4tsp. baking powder
1 C. milk % tsp. soda
2V 2 C. sifted flour 2 T. yellow cornmeal
1 T. sugar 2 T. salad oil
% tsp. salt 3 T. melted butter or margarine
Night before: Measure basic batter into large bowl. Add milk and 1C. flour; mix well. Let
stand covered over night.
Next morning: Beat in 1 C. flour; mix well. Add sugar, salt, baking powder soda and
remaining V 2 C. flour in sifter. Sift evenly over dough. With wooden spoon, beat into dough to
mix well; beat until dough is stiff enough to clean side of bowl. On lightly floured surface,knead dough about 15 times until light (dough will be soft). Let dough rest, covered with
inverted bowl for 10 minutes. Roll dough V2" thick. Cut biscuits with lightly floured cutter.
Sprinkle bottom of9" x 9" x 2" pan with 1T. cornmeal. Dip each biscuit into combined oil and
butter. Arrange close together in prepared pan. Sprinkle tops of biscuits with remainingcornmeal. Let rise in warm place. When almost doubled, bake in 3750 oven until browned.

8/7/2019 Patriot Armory - Making the Best of Basics
http://slidepdf.com/reader/full/patriot-armory-making-the-best-of-basics 68/188
62 • SOURDOUGH
Basic Sourdough Bread
2 C. basic batter4 C. sifted flour (more if needed)2 T. sugar
Sift dry ingredients into a bowl, making a well in the center. Add oil to basic batter and mixwell. Pour into the well of flour. Add enough flour to make a soft dough for kneading. Kneadon a floured board for 10 to 15 minutes. Place in a greased bowl. Cover and let rise until
doubled. Bake 375° for 1hour. Makes 1loaf.
1 tsp. salt2 T. vegetable oil or shortening
Variations: Substitute 1 C.wholewheat for 1C. ofthe white flour; use honey, brown sugar ormolasses instead of sugar; or add juice of one orange and grated orange rind for Orange
Sourdough Bread.
Sourdough Bread #2
11(2 C. basic batter% C. milk
3 T. sugar
1tsp. salt
2 T. margarineV ! C. warm water (105°-115°)
1package active dry yeast
5-6 C. unsifted flour
Prepare basic batter. Scald milk. Stir in sugar, salt and margarine; cool to lukewarm.
Measure warm water into large warm bowl. Sprinkle in yeast; stir until dissolved. Add
lukewarm milk mixture, basic batter and 2% C. dough. Turn out onto lightly floured board;
knead until smooth and elastic, about 8-10 minutes. Place in greased bowl, turning to grease
top. Cover; let rise in warm, draft-free location until doubled in bulk.
Punch dough down; divide into three equal pieces. Form each piece into a smooth round ball ora 14" tapered roll. Place on greased baking sheets. With a sharp knife make several crisscross
cuts on tops of round loaves, or make several diagonal cuts on tops oflong loaves. Cover; let
rise. in warm, draft-free location until doubled in bulk again.
Bake at 400° about 25 minutes, or until done. Remove from baking sheets and coolon wireracks. Makes 3 loaves.
Basic Sourdough Honey Bread
4 C. basic batter
2 C. milk2 T. butter
2 tsp. salt2 T. sugar
% C. honey
Scald milk, then melt butter and honey in milk. Allow to cool to lukewarm, mix yeast in milk
and stir to dissolve. Add to basic batter. Sift wheat flour and wheat germ into dough. Blendsugar, salt and soda in another bowl until smooth and sprinkle over top ofdough, stirring in
gently. Set dough in warm spot for 30 minutes, covered with cloth. Break down and sift in
remaining flour until the dough is too stiff to stir with spoon. Turn out on floured board and
begin to knead with hands. (Note: Flour required may vary from quantity indicated-guage thefeel - rather too little than too much.) Work in the remaining flour, kneading with heels of
hands 100 times until the dough is light and satiny to the touch. (Caution: Do not knead too
2 tsp. baking soda
V 4C. wheat germ2 C. wheat flour
4 C. white flour1 package acti ve dry yeast

8/7/2019 Patriot Armory - Making the Best of Basics
http://slidepdf.com/reader/full/patriot-armory-making-the-best-of-basics 69/188
SOURDOUGH. 63
long or include too much flour.) Separate into loaves. Flour lightly, foldover, seal and place in
greased pans. Pans should be half full. Grease tops, set in warm spot and let double in bulkagain. Preheat oven to 4008
; bake for 20 minutes, then reduce to 325° and continue to bakeuntil bread shrinks from sides of pans. Bread will give a hollow sound when thumped on top.
Remove from oven, turn out onto rack or towel and butter top and sides.
3 C. basic batter1hC. warm water
3 V 2 C. whole wheat flour2 tsp. salt
Mix ingredients together until satiny and smooth, reserving the oil for the final mixing. Let
rise for one hour. Mold in two loaves, or use 46 oz.juice cans. Let dough rise again until double
in bulk. Bake 30 minutes at 400°, then 30 minutes more at '325°.
Sourdough Honey Bread #2
2 T. dry milk
2 T. vegetable oil
1 T. honey
Sourdough Banana-Nut Bread
1 C. basic batter
V 3 C. shortening
1 C. sugar
1 egg1 C. mashed bananas
2 C. flour1 tsp. salt
1 tsp. baking powder
1htsp. soda% C. chopped walnuts
Cream together shortening and sugar; add egg, mixing until blended. Stir in banana and
basic batter. Sift flour, measure, and sift again with salt, baking powder and soda. Add flour
mix tobatter, then add walnuts, stirring until blended. Pour into greased loaf pan. Bake 350°
for 1 hour, or until toothpick comes out clean.
Sourdough Rye Buns
1 C. basic batter 1 T. salt
3% C. warm water V4C. all-purpose flour
4 C. rye flour 1egg white, beaten
V 2 C. vegetable oil Coarse salt or caraway seedc I\ ...:...,,-~-$~
In large bowl, combine basic batter and warm water. Stir in WheIe-wfleat flour. Beat well.
Cover and let stand several hours or refrigerate overnight. Add rye flour, oil, and salt. Mix
well. Dough will be a bit sticky. Knead on lightly floured surface about 5 minutes, adding
more all-purpose flour as necessary to make a soft dough. Place in greased bow1 ; turn once to
grease surface. Cover and let rise till double. Punch dough down; divide dough into 3portions.Cover; let rest 5 minutes. Divide each portion into 8 balls. Turn each ball in hands foldingedges under to make circle. Press ball flat between hands. Place on greased baking sheet,pressing into 3"-4" circles. Brush with egg white; sprinkle with coarse salt or caraway seed.
Let rise till double. Bake in 375° oven 25-30 minutes. Makes 24 buns.
8/7/2019 Patriot Armory - Making the Best of Basics
http://slidepdf.com/reader/full/patriot-armory-making-the-best-of-basics 70/188
64 • SOURDOUGH
Sourdough Blueberry Muffins
% C. basic batter
Ij 2 C. whole wheat flour1lj2 C. white flour
Ij 2 C. cooking oil% C. sugar
Stir the above ingredients into basic batter in the order oflisting, to make the mixture moist
and hold together nicely. Do not beat vigorously. If necessary, add more batter. Bake in
greased muffin tins at 3750 for 30-35 minutes. This recipe cooks more slowly than othersourdough muffins, so be sure they are done before removing from oven.
1 egg
1 C. drained blueberries
% tsp. baking soda
Y z C. undiluted canned milk
Sourdough English Muffins
1 C. basic batter
% C. buttermilk2% to 3 C. flour
6 T. yellow cornmeal
1 tsp. baking soda14tsp. salt
Mix together basic batter and buttermilk. Combine flour, 4 T. cornmeal, soda, salt and add to
buttermilk mix. Stir to combine, using hands when necessary. Turn out and knead until
smooth. Roll%" thick. Cover and let rise a few minutes. Cut muffins with 3" cutter. Sprinkle
sheet ofwaxed paper with 1T.cornmeal. Place muffins on paper and sprinkle with remaining
cornmeal. Cover and let rise 45 minutes. Cook on medium hot griddle for 30 minutes turning
often. Cool and split. Makes 12-14 muffins.
Sourdough Limpa Muffins
% C. basic batter 1 tsp. soda1% C. sifted flour 1 egg, slightly beatenIj 2 C. rye flour Ij 2 C. cultured buttermilk
Ij 2 C. brown sugar, firmly packed % C. salad oil
1 tsp. salt 2 tsp. grated orange peel
1 tsp. fennel seed % tsp. anise seed
Mix together flours, brown sugar, salt and soda. Make a well in the center. Blend egg,
buttermilk, and oil together; stir in orange peel and basic batter. Pour this mixture all at once
into the flour well. Stir just to moisten ingredients. Batter will be lumpy. Grease muffin cups
or line with baking cup liners; fill about % full, bake 3750
for 30-35 minutes. Makes 12-15muffins.
Sourdough Oatmeal Muffins
% C. basic batter
1lj2 C. sifted flour
1 C. rolled oatsIj 2 C. brown sugar, firmly packed1 tsp. salt
Mix together flours, brown sugar, salt and soda. Make a well in the center. Blend egg, milk,
and oil together; stir in basic batter. Pour this mixture all at once into the flour well. Stir
lightly to moisten ingredients. Batter will be lumpy. Grease muffin cups or line with baking
cup liners; fill about 2/3 full. Bake 3750 for 30-35 minutes. Makes 12-15 muffins.
1 tsp. soda
1 egg, slightly beatenIj 2 C. buttermilk1/2 C. salad oil
8/7/2019 Patriot Armory - Making the Best of Basics
http://slidepdf.com/reader/full/patriot-armory-making-the-best-of-basics 71/188
SOURDOUGH. 65
Sourdough Raisin Muffins
1 C. basic batter
Y2C. whole wheat flour
V 2 C. white flour
V 2 C. sugar% tsp. baking soda
Combine dry ingredients in bowl. Make a well in the center and add all of the liquids at once.
Stir just to moisten. Add raisins and enough basic batter to make the mixture moist and hold
together nicely. Do not beat vigorously. Bake in greased muffin tins at 3750 for 30-35 minutes.
These muffins bake slowly so check to be sure they are done. Makes 16-18 muffins.
Y2C. cooking oil
ljz C. undiluted canned milk
Legg
1 C. raisins
SOURDOUGH CAKES, ROLLS, AND DOUGHNUTS
Sourdough Almond Spice Cake
1 C. basic batter
Y2C. shortening
I V 2 C. sugar2 eggs
1 1 / 2 C. unsifted flour1V 2 tsp. baking powder
1 tsp. salt
1 tsp. soda
ljz tsp. cinnamon
1 ,4 tsp. nutmeg
V 8 tsp. cloves1 / 2 C. milkljz C. ground almonds
powdered sugar
In large bowl cream shortening and sugar. Add eggs, one at a time, beating well after each
addition. Blend in basic batter. Mix together flour, baking powder, salt, soda, cinnamon,
nutmeg, and cloves. Add dry ingredients alternately. Add ground almonds and mix until well
blended. Turn into a greased and floured 1V 2 qt. tube mold. Bake 3500 for 50-60 minutes or
until done. Allow cake to coolfor 10minutes, then invert on cooling rack, removing the moldcarefully. Cool until slightly warm to touch and sprinkle with powdered sugar.
Soughdough Glazed Apricot Cake
1 C. basic batter
V 2 C. shortening
1%C. sugar
2 eggs
1V 2 C. unsifted flour
1 tsp. salt
In large bowl cream shortening and sugar. Add eggs, one at a time, beating well. Add dry
ingredients to batter alternately with milk, mixing after each addition until blended. Add
chopped apricots, lightly floured, and until well blended. Turn into a greased and floured 1V 2
qt. tube mold. Bake in 3500 50-60 minutes. Allow cake to cool for 10minutes, then invert on
cooling rack, removing the mold carefully. Allow to coolcompletely. Brush with apricot glaze
made from 3'T. apricot jam warmed over low heat until soft enough to spread.
1 tsp. soda
V B tsp. nutmeg
% C. milk
% C. finely chopped/diced apricots
powdered sugar

8/7/2019 Patriot Armory - Making the Best of Basics
http://slidepdf.com/reader/full/patriot-armory-making-the-best-of-basics 72/188
6 • SOURDOUGH
Sourdough Chocolate Cake #1
1C. basic batter
1C. sugar1C. shortening2 eggs1C. milk2 C. flour
ream sugar and shortening until light and fluffy. Beat in eggs, one at a time. Stir in basic
atter, milk, vanilla, cinnamon and beat with mixer for 2 minutes. Mix salt and soda andprinkle over batter. Fold in gently. Stir in flour until batter is smooth. Pour into three
reased and lightly floured 8" or 9" cake pans. Bake at 350° for 20-25minutes or until done.
1 tsp. vanilla1 1 2 tsp. cinnamon
3 squares unsweetened choc., melted
Ih tsp. salt
1V 2 tsp. baking soda
Sourdough Chocolate Cake#2
To make sourdough mix:Ih C. thick basic batter1 C. water
I V 2 C. flour
% C. nonfat dry milk
ix and let ferment 2-3 hours in a warm spot until bubbly and there is a strong sour milk
d following ingredients:C. sugar
2 C. shortening
h tsp. salt
tsp. vanilla
2 eggs
1 tsp. cinnamon
1V 2 tsp. soda
3 squares melted chocolate
ream shortening, sugar, flavorings, salt and soda. Add eggs one at a time, beating well after
ach addition. Combine with sourdough mix. Beat well. Pour mixture in deep cake pan. Bake0° for 25-30 minutes.
Sourdough Doughnuts
o make sourdough mix:
/2 C. basic batter
C. lukewarm water
1 C. flour
2 T. sugar
ombine basic batter, water, flour and sugar in bowl and let stand at least six hours
d following ingredients:
T. brown sugar
1 tsp. soda dissolved in 1 T. water2 tsp. salt
1 tsp. baking powder
Y2tsp. nutmeg
1 egg
2 T. melted shortening
Ilh C. flour
nead on lightly floured board 25 times. Roll V2" thick and cut with doughnut cutter. Drop inot fat (380°)and fry until golden brown on each side. Drain on paper bag. Roll in powdered orranulated sugar. Serve warm. Makes about 12 doughnuts.

8/7/2019 Patriot Armory - Making the Best of Basics
http://slidepdf.com/reader/full/patriot-armory-making-the-best-of-basics 73/188
SOURDOUGH. 67
Sourdough Cinnamon Rolls
To make sourdough mix:
V 2 C. basic batter1 C. undiluted evaporated milk
Night before: Combine basic batter, evaporated milk and flour in large bowl; leave over-
night.
2 C. unsifted flour
Next morning: Add following ingredients to sourdough mixture.
l,4 C. soft butter
3 T. sugar
1 egg1% C. unsifted flour (or more)
1 tsp. baking powder
1 f z tsp. soda
1 tsp. salt2 T. butter, meltedl,4 C. brown sugar
1V z tsp. cinnamonl,4 C. raisins (optional)melted butter
Beat together butter, sugar, and egg; blend into Sourdough mixture. Combine the dryingredients flour, soda, baking powder, and salt; mix with batter. Turn onto a floured board
and knead until the surface is satiny and doesn't stick to board (add flour if necessary). Place
ball of dough in the center of board and roll out to a rectangle 8" x 16". Brush surface withmelted butter and sprinkle with a mixture of brown sugar and cinnamon (and raisins, if you
wish). Roll up dough, starting on one of the long sides; cut roll at %" intervals. Dip top and
bottom of each roll in melted butter, place in a square 9" pan, cover loosely, and let rise in a
warm spot for about 1hour, or until nearly doubled. Bake at 3750
for 30-35 minutes or untilcrust is golden brown. Makes 9 large rolls.
Sourdough Cornbread
1 C. basic batter
1 V z C. yellow cornmeal
1%C. evaporated milk
2 eggs, beaten
2 T. sugar1 ,4 C. melted butter
V z tsp. salt
% tsp. soda
Thoroughly mix the basic batter, cornmeal, milk, eggs, and sugar in large bowl. Stir in melted
butter, salt, and soda. Turn into a 10" greased frying pan and bake 4500 for 25 minutes. Servehot with butter and honey.
Sourdough Cornbread Sticks
Prepare Sourdough Cornbread batter according to the directions in the preceding recipe.
Spoon batter into a buttered cornbread stick pan, filling each cup % full. Bake 4250 for 20
minutes or until done.
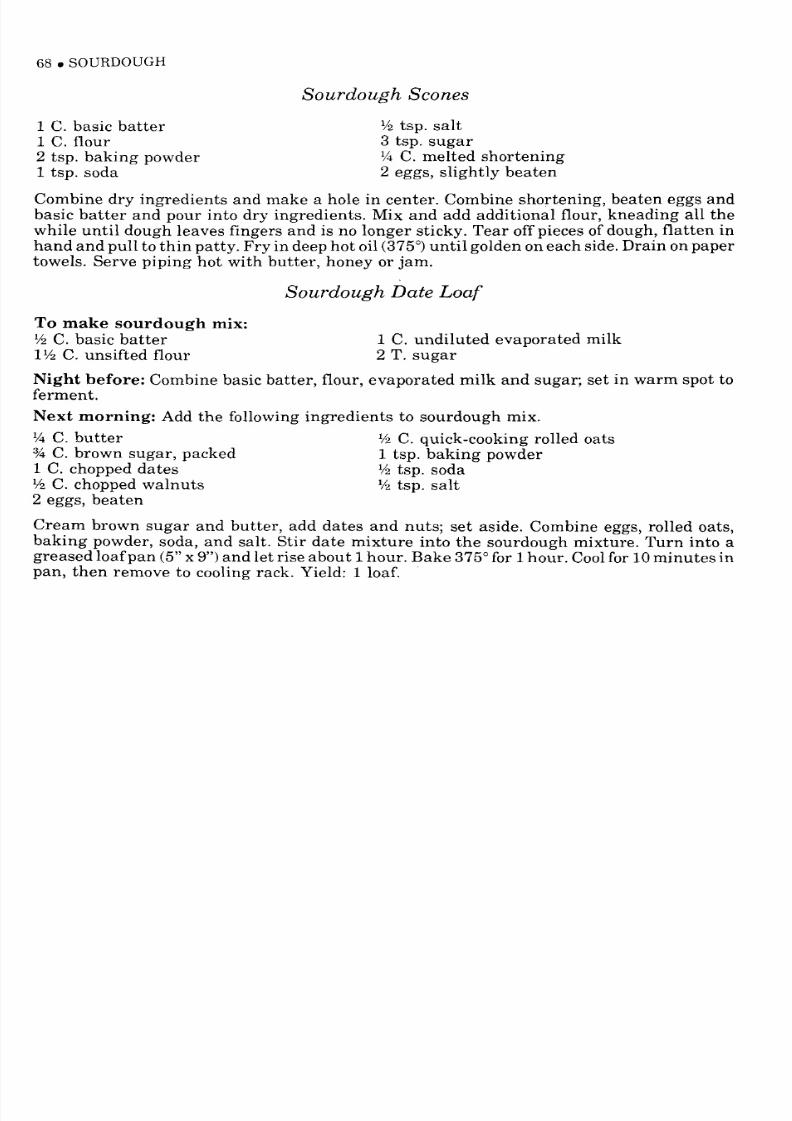
8/7/2019 Patriot Armory - Making the Best of Basics
http://slidepdf.com/reader/full/patriot-armory-making-the-best-of-basics 74/188
68. SOURDOUGH
Sourdough Scones
1 C. basic batter1C. flour
2 tsp. baking powder1tsp. soda
V 2 tsp. salt3 tsp. sugar
~ C. melted shortening2 eggs, slightly beaten
ombine dry ingredients and make a hole in center. Combine shortening, beaten eggs andasic batter and pour into dry ingredients. Mix and add additional flour, kneading all the
hile until dough leaves fingers and is no longer sticky. Tear off pieces of dough, flatten inand and pull to thin patty. Fry in deep hot oil (375°) until golden on each side. Drain on paper
owels. Serve piping hot with butter, honey or jam.
Sourdough Date Loaf
o make sourdough mix:C. basic batter
C. unsifted flour
1 C. undiluted evaporated milk
2 T. sugar
ght before: Combine basic batter, flour, evaporated milk and sugar; set in warm spot to
xt morning: Add the following ingredients to sourdough mix.
C. butter V z C. quick-cooking rolled oatsC. brown sugar, packed 1 tsp. baking powderC. chopped dates V z tsp, soda
2 C. chopped walnuts 1 f z tsp. salteggs, beaten
ream brown sugar and butter, add dates and nuts; set aside. Combine eggs, rolled oats,
aking powder, soda, and salt. Stir date mixture into the sourdough mixture. Turn into aeased loafpan (5" x 9")and let rise about 1hour. Bake 375° for 1hour. Coolfor 10minutes inan, then remove to cooling rack. Yield: 1 loaf.

8/7/2019 Patriot Armory - Making the Best of Basics
http://slidepdf.com/reader/full/patriot-armory-making-the-best-of-basics 75/188
CHAPTER 6
BASIC DAIRY PRODUCTS FROM
POWDERED MILK
Few foodsare as valuable as milk and milk products. It is important in storing powdered milk
that the best quality be chosen. The best quality product will be more nutritious and store
longer. Dry skim milk is recommended, and comes in several grades. The best grade is termed
"extra". The "extra" dry skim milk should contain no more than 471 moisture. Lowmoisture
content ofdry skim milk is very important because moisture determines the period powdered
milk may be stored and remain nutritious. Be sure to buy non-instant dry milk.
NUTRITIONAL ASPECTS
Dry milk, whether whole or skim (non-fat), provides some minerals and vitamins. Most
notably, calcium is made available to the diet. However, dry milk is not the equivalent of rawmilk. Most dry milk is made from grade Bmilk sources. That's one ofthe reasons it's cheaper.
Also, many people have allergic reactions to dry milk products. The heating, pasteurizing,
and drying processes destroy not only the bacteria, but also some of the essential enzymes.
This is one of the reasons vitamin supplements are essential as a basic item in a food storage
program - the natural vitamins have been destroyed by processing.
STORAGE
The "extra" grade dry skim milk may be purchased in double-sealed 5 lb. cans or in double-wrapped paper-foil bags. This grade will store for about 36-60 months if kept dry and cool(40°).Storage at temperatures of 60°-70°will reduce effective storage time to 12-24 months.

8/7/2019 Patriot Armory - Making the Best of Basics
http://slidepdf.com/reader/full/patriot-armory-making-the-best-of-basics 76/188
70 • POWDERED MILK
USING POWDERED MILK
Most dairy products can be made from powdered milk. The sections in this chapter explain
how to use powdered dry milk for reconstituted milk, cottage cheese, yogurt, cream cheese,
and even hard cheeses. Very few foods taste better, or are better for you, than freshly-madecottage or cream cheese. Or, if you really want to get into the cheese-making thing,
homemade Cheddar, Farmer, or Italian-style cheeses will absorb you completely.
Some of the West's best and most experienced dairy experts have contributed their ideas to
make this chapter interesting and useful.
Reconstituted Powdered Milk
As there are many brands of powdered skim milk on the market, there are instructions on
every package to indicate method and amounts of powder and water for reconstitution. The
following recipe is a guideline for reconstitution - don't be -afraid to experiment with
quantities to derive the best mixture for your palate.
Reconstituted Milk
4 C. cold water 1% C. powdered milk
Beat ingredients with beater or mixer until smooth. Makes1qt. milk.
To improve the flavor of powdered milk, mix it half-and-half with whole milk. Honey,
powdered cream mixes, fruit juices, sugar, powdered sugar, vanilla flavoring, or any other
flavoring the family likes may be used to improve the somewhat flat taste ofreconstituted drymilk.
Vitality Cooler
1C. reconstituted milk
% C. sugar (or honey)6 oz. frozen orange juice concentrate
Put milk, sugar and orange juice in blender; blend until mixed. Add water and ice, blending
until mushy. Serve with snacks or for breakfast. Makes approximately 1 qt. May be thinned
with additional water and ice, then sweetened to taste.
2 C. water
Ice
Soft Ice Cream
1 C. non-instant dry milk3 C. water
3 T. honey
Mix in blender, put in shallow tray and freeze until solid. To serve, break into small chunks
and beat until soft. Serve with chocolate syrup, jams or jellies or other flavorings.

8/7/2019 Patriot Armory - Making the Best of Basics
http://slidepdf.com/reader/full/patriot-armory-making-the-best-of-basics 77/188
POWDERED MILK. 71
YOGURT FROM POWDERED MILK
Yogurt is a very flexible food-it can be a drink; mixed with fruit for a dessert; set injello; and
used in place of sour cream in stroganoff, sauces, chip dips, and fruit salads. It's not hard to
make at home and the flavor can be varied from very mild to quite strong. This is anadvantage over commercial yogurt, and it's cheaper, too.
Yogurt is a cultured milk product made with enriched milk to which a yogurt culture or start
has been added. The milk must be concentrated from 1/2 to % its original volume. For this
reason powdered milk is used when making yogurt at home. The milk with culture added isthen kept at a temperature of 1000 to 1200 for about three hours.
Yogurt is a tasty healthful food,with all the advantages ofmilk - and is lower in lactose forthose who don't tolerate milk very well. It's proven helpful to children and adults withdiarrhea. Yogurt is a great way to vary the daily diet, adding a gourmet touch to recipes.
SUGGESTIONS FOR MAKING YOGURT SUCCESSFULLY
In yogurt recipes, use plain or commercial yogurt for the starter or use yogurt from the last
batch (it shouldn't be more than a week old). Pure yogurt culture can be obtained from health
food stores. Most authorities recommend a fresh start every month or two.
In using powdered milk, whether instant or non-instant, reconstitute it just a little short of
being double in strength. Use two tablespoons yogurt start for every three cups of doubly-
reconstituted milk. Using this rule of thumb, make as much or as little yogurt wanted.
STORAGE
Yogurt will keep in the refrigerator for a week or longer. However, the longer yogurt sets in therefrigerator the more pronounced the flavor becomes. Make a batch of yogurt at least once a
week to keep the start fresh.
TEMPERATURE
The lower the temperature, the longer the yogurt takes to set. Temperatures between 1100
and 1200will produce firm yogurt in about three hours.
There are several methods for keeping the yogurt mixture at the correct temperature.
Perhaps the easiest way to maintain the proper temperature is to buy a commercial yogurt
maker, available at most health food stores.
However, if you are truly converted to making the best of basics, you can make your own
yogurt maker for pennies. On the following page is an illustration of a basic yogurt makermade from a #10 can, a light socket and a bulb. Remove completely one end ofthe can. Punch
a hole in the remaining end ofthe can. Secure the lamp socket. Punch holes in the base and top
to provide a draft to heat pan of water. Vary the wattage of the light bulb to stabilize
temperature of 1100
-120°, generally, 25 to 50 watt bulbs will maintain the proper tempera-ture.
Or, the yogurt mixture can beplaced over a heat register, pilot light, or hot plate. In using any
of these methods, test the temperature by setting a covered pan ofwarm water over the heat
Sourcefor several hours, checking the temperature periodically to assure 1100
-1200 range.

8/7/2019 Patriot Armory - Making the Best of Basics
http://slidepdf.com/reader/full/patriot-armory-making-the-best-of-basics 78/188
72 • POWDERED MILK
ILLUSTRATION 6-A
BASIC YOGURT MAKER

8/7/2019 Patriot Armory - Making the Best of Basics
http://slidepdf.com/reader/full/patriot-armory-making-the-best-of-basics 79/188
POWDERED MILK. 73
JARS IN WATER
ILLUSTRATION 6-B
USING THE BASIC YOGURT MAKER

8/7/2019 Patriot Armory - Making the Best of Basics
http://slidepdf.com/reader/full/patriot-armory-making-the-best-of-basics 80/188
74. POWDERED MILK
If yogurt doesn't set up properly, check for the following indicators:
(1) yogurt was disturbed or stirred while setting up;
(2) yogurt start was added to hot instead of warm milk;
(3) temperature was too hot (kills yogurt bacteria) or too cool causes ordinary sour milkbacteria to develop);
(4) yogurt start was too old or was inactive for some other reason;
(5) jars or other equipment were not clean;
(6) fresh, raw milk was not boiled; or
(7) yogurt was in yogurt maker too long (noticable when yogurt is bubbly and starts to
separate).
Basic Powdered Milk Yogurt
2 C. warm water
1C. non-instant powdered milk
2 T. yogurt (unflavored)
Pour warm water 100°)in the blender and turn on lowspeed; add powdered milk slowly. Blend
until smooth. Add yogurt and blend a fewmore seconds. (This whole process can be done byhand, but be sure to beat all the lumps out.) Pour into jars or glasses. Place jars neck-deep in
warm (100°) water. Cover pan with lid. Set on yogurt maker or any place a temperature of
100°-120°can be maintained for 3-4hours. Check at the end ofthree hours to se ifmixture has
set up. Ifnot set up, check each 20 minutes until set. (If not set up in 4 hours, you probablyhave a failure.) Chill immediately when set up. Keeps in refrigerator up to 1 week.
Fresh Milk Yogurt Recipe
4 C. fresh raw milk
Y z C. non-instant powdered milk2 T. yogurt starter (unflavored)
Boil fresh, raw milk in a saucepan for a few seconds (180°). Cool until warm (100°). Stir in
powdered milk. Thoroughly mix yogurt with a little warm milk, then add to the rest of thewarm milk and stir well. Pour mixture into jars or glasses and let stand neck-deep in yogurt
maker at 110°- 120°until set (about three hours). Chill immediately after yogurt sets. Keepsin refrigerator approximately 1 week.
Evaporated Milk Yogurt Recipe
2 C. tepid water
3 C. instant powdered milk1Y z C. non-instant powdered milk
3 T. yogurt starter
1 qt. tepid water1 large can evaporated milk
Blend or beat 2 C. tepid water with powdered milk and yogurt culture. Pour mixture into a
pitcher containing 1 qt. tepid water and can of evaporated milk. Stir well and pour into pint
jars. Set glasses or jars in pan ofwarm water; bring water level to rim ofjars. Cover pan andmaintain temperature of 100°_120°.
Check consistency after 3hours. Chill immediately after mixture thickens. Will keep approx-imately 1 week in refrigerator.
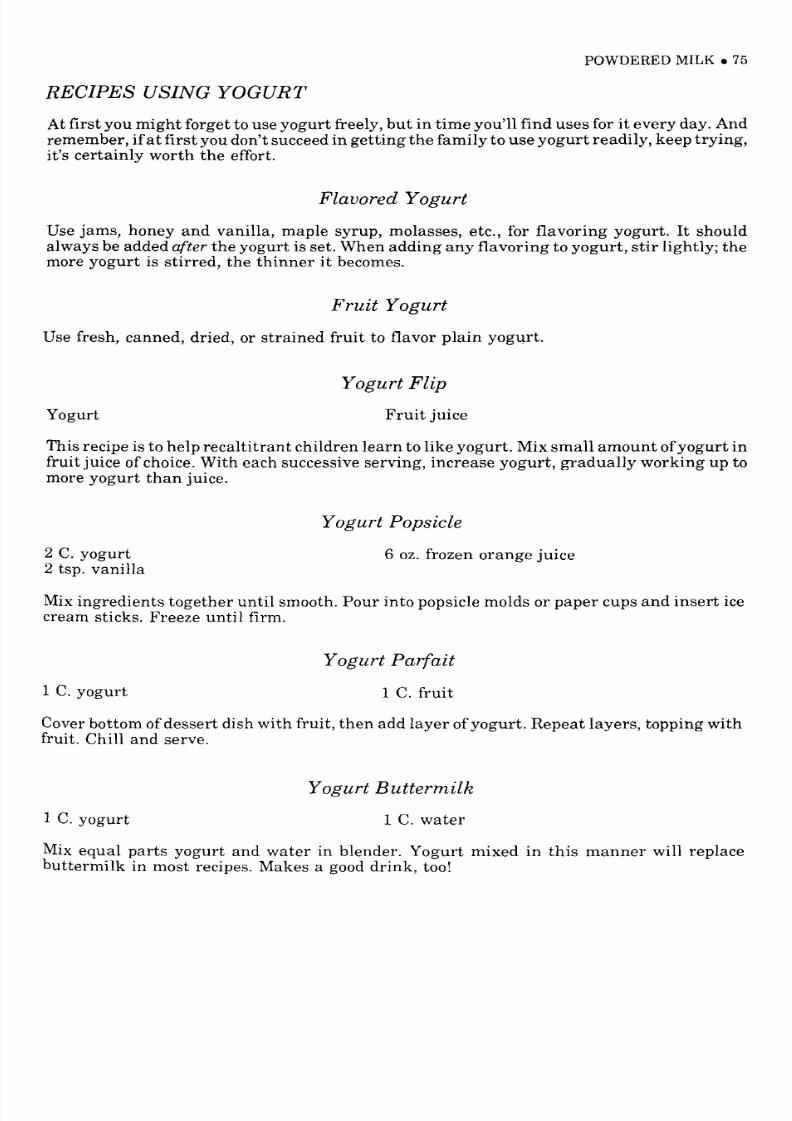
8/7/2019 Patriot Armory - Making the Best of Basics
http://slidepdf.com/reader/full/patriot-armory-making-the-best-of-basics 81/188
POWDERED MILK. 75
RECIPES USING YOGURT
At first you might forget to use yogurt freely, but in time you'll find uses for it every day. And
remember, if at first you don't succeed in getting the family to use yogurt readily, keep trying,
it's certainly worth the effort.
Flavored Yogurt
Use jams, honey and vanilla, maple syrup, molasses, etc., for flavoring yogurt. It shouldalways be added after the yogurt is set. When adding any flavoring to yogurt, stir lightly; themore yogurt is stirred, the thinner it becomes.
Fruit Yogurt
Use fresh, canned, dried, or strained fruit to flavor plain yogurt.
Yogurt Flip
Yogurt Fruit juice
This recipe is to help recaltitrant children learn to like yogurt. Mix small amount ofyogurt in
fruit juice of choice. With each successive serving, increase yogurt, gradually working up to
more yogurt than juice.
Yogurt Popsicle
2 C. yogurt2 tsp. vanilla
6 oz. frozen orange juice
Mix ingredients together until smooth. Pour into popsicle molds or paper cups and insert ice
cream sticks. Freeze until firm.
Yogurt Parfait
1 C. yogurt 1 C. fruit
Cover bottom ofdessert dish with fruit, then add layer ofyogurt. Repeat layers, topping with
fruit. Chill and serve.
Yogurt Buttermilk
1 C. yogurt 1 C. water
Mix equal parts yogurt and water in blender. Yogurt mixed in this manner will replacebuttermilk in most recipes. Makes a good drink, too!

8/7/2019 Patriot Armory - Making the Best of Basics
http://slidepdf.com/reader/full/patriot-armory-making-the-best-of-basics 82/188
76 • POWDERED MILK
Yogurt J ello
J ello, partially set 1 C. yogurt
When mixing Jello, leave out ~~C. water. Add 1C. yogurt to partially-set Jello. Fruit may beadded. Lemon-lime and orange Jello are especially good with yogurt added.
Yogurt Cream Sauce
Use on vegetables or in stroganoff recipes. Do not heat above 120°. Heat will kill the yogurtbacteria beneficial to good health.
Yogurt Sour Cream
Yogurt replaces commercial sour cream in most recipes. Use plain or add chives, bacon bits,
onion flakes, onion or garlic salt, seasoning salt, or ground pepper to flavor yogurt, Use as abase for chip dips or gourmet dressings by adding herbs and spices.
Yogurt Cream Cheese
Make cream cheese from yogurt. This is perhaps the simplest cream cheese method and the
result is tangy and delicious. Simply pour homemade yogurt into a cheese bag and let drain
for an hour or two. This drained yogurt can be used in recipes for dips, spreads, sauces anddressings. A thicker consistency than that ofordinary yogurt is obtained by draining offtheexcess water.
Yogurt Avocado Dip
V 2 C. yogurt
1 large avocado
3 T. lemon juice
Mash avocado, add lemon juice and seasonings; add yogurt and beat well. Serve with fresh
crisp vegetables. (Cauliflower, carrots, turnips, celery, etc.)
garlic powder
salt to taste
Health Dip
2 C. unflavored yogurt
2 C. skim milk cottage cheese
14C. toasted sesame seeds1 ;4 C. wheat germ
In a medium bowl blend yogurt and cottage cheese thoroughly. Sprinkle in sesame seeds,wheat germ, celery salt and garlic powder. Blend well. Salt to taste. Chill. Makes 4 cups.
V z tsp. celery salt
1 ;4 tsp. garlic powder
salt
Serve as a dip accompanied by vegetable relishes or crisp crackers.
Vegetable relishes: Raw cauliflowerettes, carrot and celery sticks, and green pepper chunks.

8/7/2019 Patriot Armory - Making the Best of Basics
http://slidepdf.com/reader/full/patriot-armory-making-the-best-of-basics 83/188
POWDERED MILK. 77
Roquefort Dressing
1 C. yogurt 4 oz. Roquefort cheese
V z C. cottage cheese, fine curd garlic saltground pepper dash MSG
Mix yogurt and cottage cheese, adding crumbled cheese. Season to taste, then chill to allow
seasonings to mingle. Serve cold.
Yogurt & Honey Dressing
1 C. yogurt
1 T. lemon juice
2 T. honey1 T. sugarBlend salt, pepper, dry mustard and sugar into a bowl with honey. Add yogurt, stirring
lightly. Then stir in gently lemon juice. Goes well with cheese salads.
dash salt
dash pepperdash dry mustard
Green Goddess Dressing
1 soft, ripe avodado1 C. yogurt
1 T. parsley flakes
2 tsp. instant minced onion
Put all ingredients in mixing bowl. Blend ingredients with wire whip. Mix thoroughly. Yield:approximately 2 C.
12 tsp. salt
1:2 tsp. seasoning salt
1~ C. mayonnaise
Bleu Cheese Dressing
1 C. yogurt cream cheese4 oz. bleu cheese1 T. chives
Put all ingredients in bowl.
buttermilk as needed.l
1 T. worcestershire sauce12-1 C. buttermilk
Mix until desired consistency is attained. (Add additional
MAIN DISHES
Yogurt Beef Stroganoff
1 lb. ground beef
5 slices bacon, diced1/ 2 C. chopped onion
V 2 tsp. salt
Y i tsp. paprika
Hot buttered noodlesIn skillet brown ground beef with bacon. Add onion and cook until tender but not brown.Drain off excess fat.
dash of pepper1~ tsp. sweet basil
1 tsp. garlic salt
1 can ( lOV2 oz.) cream of mushroom soup
1 C. yogurt
Add salt, basil, paprika, garlic and pepper. Stir in cream ofmushroom soup and cook slowly,uncovered, 20 minutes, stirring frequently.
Stir in yogurt. Heat, but donot boil. Serve meat sauce over hot buttered noodles. Makes 4 to 6servings.
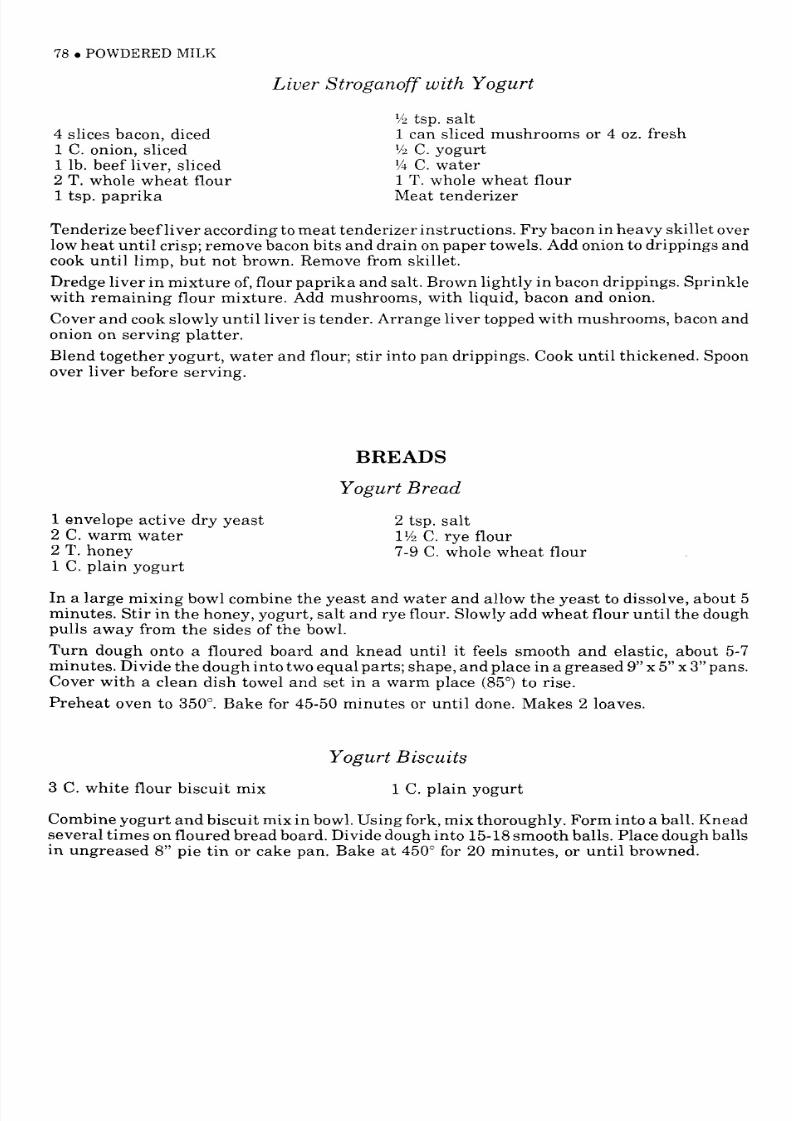
8/7/2019 Patriot Armory - Making the Best of Basics
http://slidepdf.com/reader/full/patriot-armory-making-the-best-of-basics 84/188
78 • POWDERED MILK
Liver Stroganoff with Yogurt
4 slices bacon, diced
1C. onion, sliced1lb. beef liver, sliced2 T. whole wheat flour1tsp. paprika
V 2 tsp. salt1 can sliced mushrooms or 4 oz. fresh1/2 C. yogurt
1 4 C. water1 T. whole wheat flour
Meat tenderizer
Tenderize beefli ver according tomeat tenderizer instructions. Fry bacon in hea vy skillet over
lowheat until crisp; remove bacon bits and drain on paper towels. Add onion to drippings and
cook until limp, but not brown. Remove from skillet.
Dredge liver in mixture of,flour paprika and salt. Brown lightly in bacon drippings. Sprinklewith remaining flour mixture. Add mushrooms, with liquid, bacon and onion.
Cover and cookslowly until liver is tender. Arrange liver topped with mushrooms, bacon andonion on serving platter.
Blend together yogurt, water and flour; stir into pan drippings. Cook until thickened. Spoon
over liver before serving.
BREADS
Yogurt Bread
1envelope acti ve dry yeast
2 C. warm water2 T. honey
1 C. plain yogurt
2 tsp. salt
1V 2 C. rye flour
7-9 C. whole wheat flour
In a large mixing bowl combine the yeast and water and allow the yeast to dissolve, about 5
minutes. Stir in the honey, yogurt, salt and rye flour. Slowly add wheat flour until the dough
pulls away from the sides of the bowl.
Turn dough onto a floured board and knead until it feels smooth and elastic, about 5-7
minutes. Divide the dough into two equal parts; shape, and place in a greased 9"x 5" x 3"pans.
Cover with a clean dish towel and set in a warm place (85°) to rise.
Preheat oven to 350°. Bake for 45-50 minutes or until done. Makes 2 loaves.
Yogurt Biscuits
3 C. white flour biscuit mix 1 C. plain yogurt
Combine yogurt and biscuit mix in bowl. Using fork, mix thoroughly. Form into a ball. Knead
several times on floured bread board. Divide dough into 15-18smooth balls. Place dough balls
in ungreased 8" pie tin or cake pan. Bake at 450° for 20 minutes, or until browned.
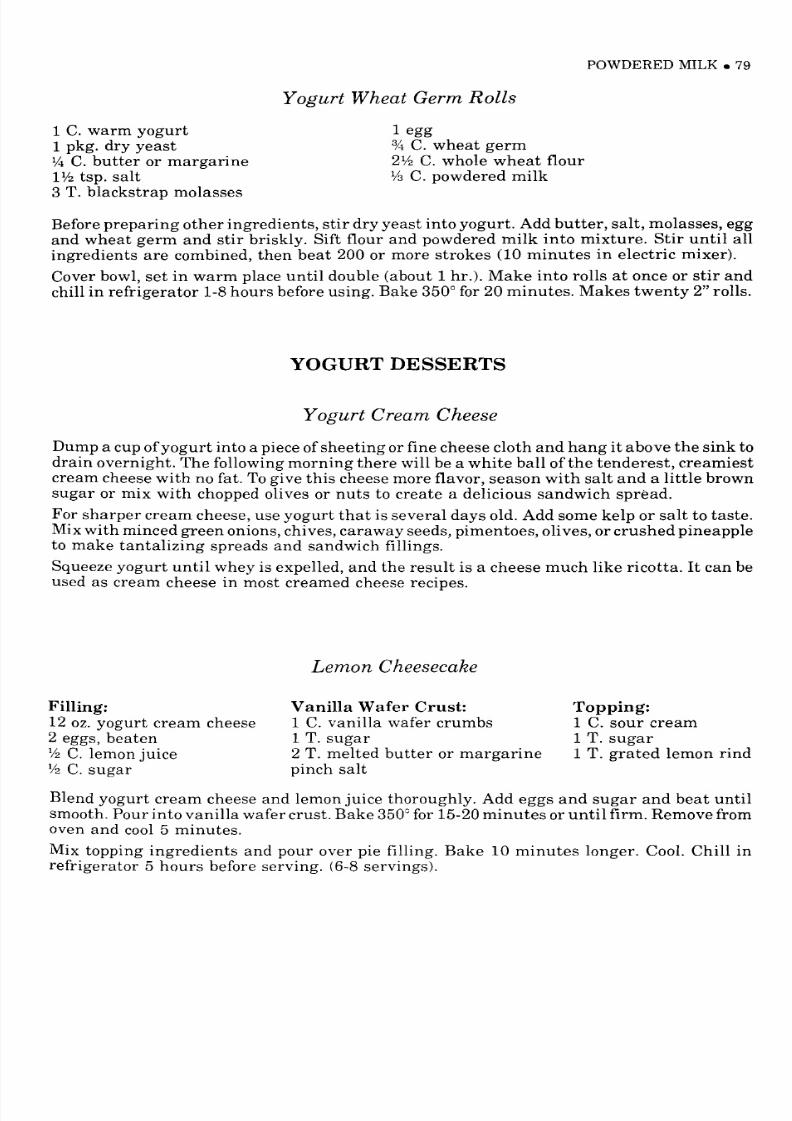
8/7/2019 Patriot Armory - Making the Best of Basics
http://slidepdf.com/reader/full/patriot-armory-making-the-best-of-basics 85/188
POWDERED MILK. 79
Yogurt Wheat Germ Rolls
1 C. warm yogurt
1 pkg. dry yeast
1 4 C. butter or margarine1 1 / 2 tsp. salt
3 T. blackstrap molasses
1 egg
% C. wheat germ
2lh C. whole wheat flour1 / 3 C. powdered milk
Before preparing other ingredients, stir dry yeast into yogurt. Add butter, salt, molasses, eggand wheat germ and stir briskly. Sift flour and powdered milk into mixture. Stir until all
ingredients are combined, then beat 200 or more strokes (10 minutes in electric mixer).
Cover bowl, set in warm place until double (about 1 hr.). Make into rolls at once or stir and
chill in refrigerator 1-8hours before using. Bake 3500 for 20 minutes. Makes twenty 2" rolls.
YOGURT DESSERTS
Yogurt Cream Cheese
Dump a cup ofyogurt into a piece ofsheeting or fine cheese cloth and hang it above the sink to
drain overnight. The following morning there will be a white ball of the tenderest, creamiest
cream cheese with no fat. Togive this cheese more flavor, season with salt and a little brownsugar or mix with chopped olives or nuts to create a delicious sandwich spread.
For sharper cream cheese, use yogurt that is several days old. Add some kelp or salt to taste.
Mixwith minced green onions, chives, caraway seeds, pimentoes, olives, or crushed pineappleto make tantalizing spreads and sandwich fillings.
Squeeze yogurt until whey is expelled, and the result is a cheese much like ricotta. Itcan beused as cream cheese in most creamed cheese recipes.
Lemon Cheesecake
Filling:
12 oz. yogurt cream cheese
2 eggs, beaten
% C. lemon juice
1 / 2 C. sugar
Vanilla Wafer Crust:
1 C. vanilla wafer crumbs
1 T. sugar2 T. melted butter or margarine
pinch salt
Topping:
1 C. sour cream
1 T. sugar1 T. grated lemon rind
Blend yogurt cream cheese and lemon juice thoroughly. Add eggs and sugar and beat untilsmooth. Pour into vanilla wafer crust. Bake 350
0for 15-20minutes or until firm. Remove from
oven and cool 5 minutes.
Mix topping ingredients and pour over pie filling. Bake 10 minutes longer. Cool. Chill in
refrigerator 5 hours before serving. (6-8 servings).

8/7/2019 Patriot Armory - Making the Best of Basics
http://slidepdf.com/reader/full/patriot-armory-making-the-best-of-basics 86/188
80 • POWDERED MILK
BASIC COTTAGE CHEESE
Cottage cheese is made commercially from skim milk, reconstituted concentrated skim milk,or from non-fat dry milk solids. The only reason for not making it from whole milk is the cost.You can make cottage cheese at home from any kind ofmilk you have on hand. Cottage cheese
is full ofbody-building protein and calcium, but lowin butterfat. This makes it filling withoutthe attendant high-caloric intake problems. Cottage cheese makes foodtaste rich and fatten-
ing without being either. This recipe utilizes rennet or junket to help in producing low-acid
cottage cheese.
Tomake your own delicious and nutritious basic cottage cheese, follow the easy directions on
the following pages.
Basic Cottage Cheese
1 gallon milk
1 rennet tablet (or 1 ,4 Junket tablet)1 pt. buttermilk of' basic yogurt
Dissolve rennet tablet in warm water. Pour milk into a large heavy pot and heat to 90°.Add
buttermilk or yogurt, stirring to mix. Then add dissolved rennet. Cover pot and leave
overnight in a warm place.
The next day, you will find a gelatinous, almost solid mass-like firm yogurt in the pot. This is
the curd. With a silver knife cut through this curd to break it into small pieces. Now set thebowl with the curd into a pan ofwarm water and bring the curd up to 110°.A thermometer is
essential in the making ofany cheese product. Shake the bowl gently while it is being heatedto help distribute the heat more evenly.
When the curd temperature reaches 110°, turn off the heat but leave the cheese bowl in the
water for about a half an hour. Then pour the cheese into a cloth bag or several layers ofcheese
cloth and hang it up to drain. Use a bowl to catch the whey if you wish to use it.
Later, when the curds have drained, mash the cheese with a fork, work in a little sweet or sour
cream if you have used skim milk, or moisten it with a little yogurt if you do not want the
extra fat in the cream. You now have a delicious cottage cheese!
Season basic cottage cheese with a little kelp, salt, caraway seeds, chopped chives, dill or
parsley. Put basic cottage cheese in a blender, chopfor a few seconds, and it makes a deliciouscream cheese.
Following is another method for making cottage cheese - made without using either rennet
or Junket. This cottage cheese is somewhat higher in acid content, but still delicious.
Raw Milk Cottage Cheese (Alternate Method)
1 qt. certified raw milk 1 T. lemon juice
Heat milk until warm (900),then add lemon juice. Stir while heating to 110°. When the
mixture curdles, remove pan from stove and pour mixture into a muslin bag or several layersof cheese cloth and drain over sink.

8/7/2019 Patriot Armory - Making the Best of Basics
http://slidepdf.com/reader/full/patriot-armory-making-the-best-of-basics 87/188
POWDERED MILK. 81
RECIPES USING COTTAGE CHEESE
If you're stumped for ways to get high-nutrition foodsinto the family's diet, try these recipes
using basic cottage cheese. Substitute basic cottage cheese for basic yogurt in the recipes in
the first section of this chapter. Cottage cheese is generally interchangeable with yogurt inmost recipes, and "softens" the taste of the recipe.
Cottage Cheese Cornbread
1 C. cornmeal (yellow or white)
% C. skim milk
'1 2 C. cream cottage cheese1 egg
1 tsp. salt
1 tsp. baking powder
'1 2 tsp. baking soda1 T. sugar
Stir together all ingredients well and spoon into an 8" square greased cake pan. Bake in
preheated 4250 oven for 20-25 minutes. Cut into squares.
Cottage Cheese Clam Dip1 C. cottage cheese1 tsp. lemon juice
% tsp. horseradish
1 can (7%oz.) minced clams, drained
1 T. cream1 T. grated onion
dash of garlic salt
parsley
Combine cottage cheese, lemon juice, horseradish, clams, cream, onion and garlic salt. Mix
well and whip. Pour into serving bowl and sprinkle with paprika. Garnish with parsley.
Cottage Cheese Cornmeal Hot Cakes
'1 2 C. flour
'1 2 C. cornmeal1 tsp. baking powder1 tsp. salt
% tsp. baking soda
1 egg'1 2 C. cream cottage cheese% C. water
Stir all ingredients together; add more water if needed. Use a teflon-coated frypan or griddlefor cooking. Preheat griddle until a drop of water "dances".
Pour batter to make 4" diameter hot cakes. Turn with a spatula when bubbly. Makes 10-12
hot cakes. Serve with syrup, jam, or powdered sugar topping.
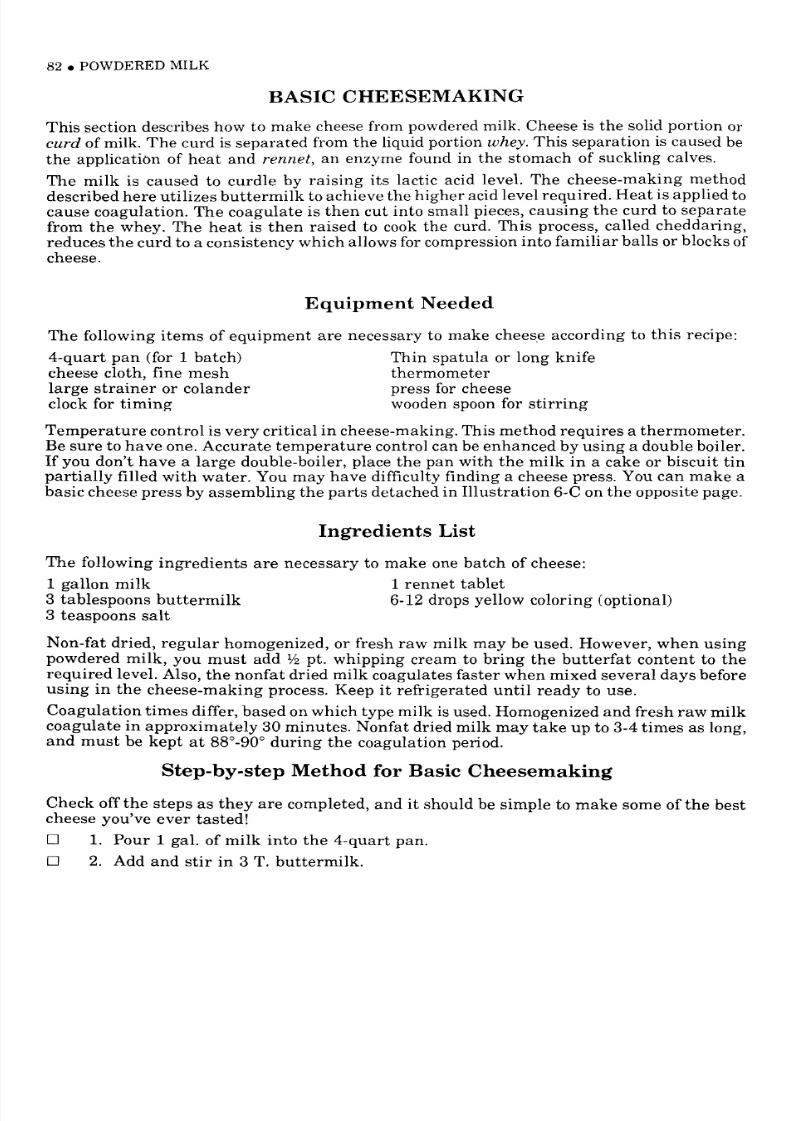
8/7/2019 Patriot Armory - Making the Best of Basics
http://slidepdf.com/reader/full/patriot-armory-making-the-best-of-basics 88/188
82 • POWDERED MILK
BASIC CHEESEMAKING
This section describes how to make cheese from powderedmilk. Cheese is the solid portion or
curd of milk. The curd is separated from the liquid portion whey. This separation is caused be
the application of heat and rennet, an enzyme found in the stomach of suckling calves.The milk is caused to curdle by raising its lactic acid level. The cheese-making method
described here utilizes buttermilk to achieve the higher acid level required. Heat is applied to
cause coagulation. The coagulate is then cut into small pieces, causing the curd to separatefrom the whey. The heat is then raised to cook the curd. This process, called cheddaring,
reduces the curd to a consistency which allows for compression into familiar balls or blocks of
cheese.
Equipment Needed
The following items of equipment are necessary to make cheese according to this recipe:
4-quart pan (for 1 batch) Thin spatula or long knife
cheese cloth, fine mesh thermometer
large strainer or colander press for cheeseclock for timing wooden spoon for stirring
Temperature control is very critical in cheese-making. This method requires a thermometer.
Be sure to have one. Accurate temperature control can be enhanced by using a double boiler.
If you don't have a large double-boiler, place the pan with the milk in a cake or biscuit tin
partially filled with water. You may have difficulty finding a cheese press. You can make abasic cheese press by assembling the parts detached in Illustration 6-C on the opposite page.
Ingredients List
The following ingredients are necessary to make one batch of cheese:
1 gallon milk 1 rennet tablet
3 tablespoons buttermilk 6-12 drops yellow coloring (optional)3 teaspoons salt
Non-fat dried, regular homogenized, or fresh raw milk may be used. However, when usingpowdered milk, you must add ¥ 2 pt. whipping cream to bring the butterfat content to the
required level. Also, the nonfat dried milk coagulates faster when mixed several days beforeusing in the cheese-making process. Keep it refrigerated until ready to use.
Coagulation times differ, based onwhich type milk is used. Homogenized and fresh raw milkcoagulate in approximately 30 minutes. Nonfat dried milk may take up to 3-4 times as long,and must be kept at 88°_90°during the coagulation period.
Step-by-step Method for Basic Cheesemaking
Check off the steps as they are completed, and it should be simple to make some of the bestcheese you've ever tasted!
o 1. Pour 1 gal. of milk into the 4-quart pan.
o 2. Add and stir in 3 T. buttermilk.

8/7/2019 Patriot Armory - Making the Best of Basics
http://slidepdf.com/reader/full/patriot-armory-making-the-best-of-basics 89/188
POWDERED MILK. 83
NOTE: Use Brass,
Chrome-plated or
Stainless Steel
Metal Parts
-I--_- W1NGNUT
ASHER
.... WOODEN SPOOL
OZ. CAN (Cans with enamelled
or coated interior are best)
'-----~--LARGE WASHER
ILLUSTRATION 6-C
BASIC CHEESE PRESS

8/7/2019 Patriot Armory - Making the Best of Basics
http://slidepdf.com/reader/full/patriot-armory-making-the-best-of-basics 90/188
84 • POWDERED MILK
o 3. Cover and leave at room temperature at least 4hours. (Mixture can safely remain at
room temperature for up to 12 hours. Keep out of direct sunlight.)
o 4. Place pan of prepared milk mixture over low to medium heat. Slowly raise the
temperature of the mixture to 86°.
D 5. Add coloring to obtain desired tint. (This coloring is optional- if you desire whitecheese, omit this step.)
D 6. Place rennet tablet in 2 T. cold water. Dissolve by stirring. (Hot water will destroythe rennet's enzymatic action.)
o 7. Raise the temperature to 88°-90°.
o 8. While stirring the mixture, add the rennet solution. Continue stirring 1-2minutes.
o 9. Cover the pan, remove from heat, and allow to stand undisturbed for at least 30minutes. (If you use nonfat dried milk in this recipe, you must leave the mixture on
the heat, maintaining 88°_900, to facilitate coagulation.)
o 10. When coagulation is completed, cut the curd into small pieces. Using the thin
spatula, cut curd to bottom of pan in parallel lines approximately Y2"apart.
o 11. Turn pan 900and repeat cutting of 1/2" squares.
o 12. Turn pan 45° and cut diagonally through the curd, intersecting the cuts previouslymade.
o 13. Turn pan 90° and repeat cutting procedure.
o 14. Stir the curd gently with your hand, using long slow movements around and up
through the curd. Stir and sift the curd byhand for 15minutes. Carefully cut up any
larger pieces that come up from the bottom, but do not squeeze the curd.Youwill see and feel the curd begin to separate from the whey. The curd will begin to
shrink in size. Stirring keeps the curd from sticking together too soonin the process.
o 15. To cook the curd, slowly apply heat to raise the temperature of the developing curds
and whey to 102° over a 20-30 minute period and hold at 102° for another 30-40
minutes. Continue to gently stir with a spoon every 3-5 minutes.
Cooking is complete when the curd holds its shape and readily falls apart on yourhand without squeezing. The curd will look like scrambled eggs. Curd will be aboutthe size of small curd cottage cheese.
o 16. To firm the curd, remove from heat and let the curds and whey stand for 1 hour,stirring every 5-10 minutes.
o 17. To drain the curd, line a large strainer with a doubled piece of cheese cloth, approxi-
mately 24" square. Pour curds and whey into the cheese cloth. Thoroughly drain offthe whey.
o 18. Flavor the cheese by sprinkling salt over the curd.
o 19. Wrap the cheese cloth around the curd, making a ball. Squeeze out as much whey aspossible and drain for 10 minutes over the sink.
o 20. Put ball of cheese into cheese press, pressing firmly. Apply pressure until curds
begin to show through drain holes.

8/7/2019 Patriot Armory - Making the Best of Basics
http://slidepdf.com/reader/full/patriot-armory-making-the-best-of-basics 91/188
POWDERED MILK. 85
o 21. Increase pressure about every 5minutes for the next li z hour. The harder the cheese
is pressed, the firmer it will be when taken out of the press.
o 22. Remove cheese cloth and allow cheese to remain at room temperature until thesurface is dry. Drying usually takes 4-8hours. Yield: 1-2Ibs, depending on butterfat
content.o 23. Cheese is ready to eat or store. The «green" cheese is rather bland, and approximates
pot cheese in consistency. Cheese spreads can bemade from the cheese at this point.
o 24. To"age" the cheese, wrap the cheese tightly in plastic wrap. Be sure to mark the date
on wrapper. The wrap is necessary to prevent drying out and/or contamination.Wrap will prevent mold from forming for a considerable length oftime. Store cheesein the crisper section of the refrigerator (approximately 35°_40°).The flavor will
strengthen as the cheese ages.
How to Vary Cheese Flavor
Once you've acquired the knack for making basic cheese, the challenge and thrill of flavor
variation lies ahead. The fun begins as you learn to make creative changes, some ofwhich will
produce rather significant results in flavor, texture, moistness, and consistency. The follow-ing paragraphs detail how the basic cheese-making method may be altered to produce
different kinds of cheeses. Basically, flavor and appearance variations can occur in two
general areas - ingredients and techniques.
Ingredient Variations
Milk base. One ofthe first ways to change the end result is by changing the milk base. Milk
base for cheese comes from fresh raw milk, regular milk, 2%milk, evaporated milk, powdered
milk, cream, or even goat's milk. By combining any two or more ofthe milk base possibilities,
thete will be a resultant taste difference in the final product.
Starter. There are two starters for cheese-making - buttermilk or yogurt. By increasing the
percent of starter, or by combining them, there will be some change in the coagulation time
and also the final taste.
Coloration. Even though coloring will not generally affect the final taste, it will heighten the
eye appeal of the final product.
Seasoning. Perhaps the most startling taste differences may be achieved by adding salt,
herbs, spices and molding agents to the basic cheese method. Salt, onion and garlic salt,
seasoning salt, parsley, chives, caraway or sesame seeds, hot pepper, olives, pimiento, or
roquefort, bleu, or other cheese molds heighten flavor and give each cheese "personali ty". Theflavor determined by the seasonings determines the range of each cheese's use.
Technique Variations
Curd development. How the reduction of the gelatinous curd is handled determines the
consistency ofthe final cheese product. Different temperature levels ofthe curd while cooking
produces different characteristics, also. The amount of time the curd cooks determines
further the consistency and compression qualities of the cheese. If anyone of these variables
is varied, one consistency develops - any two, another consistency - all three, yet anotherconsistency results.

8/7/2019 Patriot Armory - Making the Best of Basics
http://slidepdf.com/reader/full/patriot-armory-making-the-best-of-basics 92/188
86 • POWDERED MILK
Pressure. The amount of pressure applied while the cheese is in the press determines
whether a cheese will be moist or dry, soft or hard. Again, these variables, in tandem with
other technique variations, will produce different results, depending on the combinationused.
Aging. The "tang" or "bite" of a cheese may be enhanced by longer aging periods. The moldswhich create the strong-flavored cheeses require weeks to expand throughout the cheese.Storage temperature of aging cheese will determine the Heuringtime" of cheese. The higher
the temperature, the faster the cheese ages. However, the cheese will sour or spoil in
temperatures much in excess of 50°. As in all other phases of cheese production, you decide
what you like - then produce your own favorite cheeses.
Experimentation is the key to full enjoyment of this fascinating and money-saving facet of
home storage basics. The following sections explain how to produce two favorite types ofcheeses.
BASIC CHEDDAR CHEESE
Cheddar cheese is different from the basic cheese method in firming the curd. Follow the steps
in the basic cheese method through step 15, then follow these directions:
o A. Drain whey from curd by straining through double layers of cheese cloth in a sieve,
colander or strainer.
o B. Spread cheesecloth on broiler pan rack, spreading pile of curd on the cheesecloth toabout %"-1" thick.
o C. Place rack with broiler pan beneath onburner, maintaining a 98°_100°temperature.
Curd will mat into a rather solid, rubbery mass within 30 minutes.
o D. Slice curd mass into %"-1" strips.
o E. Turn strips over once each side for 15 minutes, maintaining 98°-100° constanttemperature for approximately 1 hour.
o F. Remove cheddar from heat and cut into cubes. Sprinkle salt lightly over cheddar
cheese, allowing to cool to room temperature.
o G. Press cheddar cheese into mold.
o H. Cheese may be eaten immediately, or aged, according to your taste.
RECIPES USING CHEDDAR CHEESE
Chees-O-Lets
Chees-o-Iets are a cross between pancakes and cheese omelettes.
4 oz. cheddar cheese, grated 1T. grated onion3 eggs 1 T. dried parsley
2 heaping T. whole wheat flour salt and pepper
112sp. baking powder Salad oil for frying
Blend all ingredients together. Heat oil in skillet and drop in spoonsful ofmixture. Fry until
crisp and golden brown. Turn to brown on other side. Drain well on absorbent paper. Servehot.

8/7/2019 Patriot Armory - Making the Best of Basics
http://slidepdf.com/reader/full/patriot-armory-making-the-best-of-basics 93/188
POWDERED MILK. 87
BASIC WHITE CHEESE
Tomake a smooth white cheese, much like Italian mozarella, vary the basic cheese method as
follows:
o A. Prepare milk mixture, doubling buttermilk starter. (Steps 1,2,3,4)
o B. Do not add coloring. (Step 5) Continue with directions. (Steps 6,7,8,9)
o C. After the curd forms, use your hands to break up the mass, squeezing firmly.
o D. Add 1-2teaspoons salt to curds while squeezing through hands. (Ifyou want a sweet,
bland cheese, leave out salt.)
o E. While squeezing curds in whey, raise temperature until hot as your hands can
tolerate. Then, gather curds. pressing them in cupped hands until a large firm ball isformed. Line press with cheese cloth.
o F. Remove cheese ball from whey and place in press. Press firmly. You may want topour whey over ball to get remaining curds, but capture whey in a container for uselater.
o G. Put pressed cheese back into whey, bringing temperature to approximately 200°, or
just below boiling point.
o H. Remove pan from heat, and let cheese stand in whey until cool.
o I. Take pressed cheese from whey, hang to dry for 8-24 hours in cheese cloth, then it's
ready to eat.
RECIPES USING BASIC WHITE CHEESE
Basic White Cheese Lasagna
Meat Sauce1 8 oz. pkg. lasagna noodles, cooked1 lb. ground beef
1 clove garlic, minced
1 med. onion, finely chopped
Brown beef in oil.Addgarlic, onion, steet basil, pizza topping, tomato paste, salt and pepper to
taste. Simmer for 20 minutes, stirring ocassionally till done.
1 ,4 tsp. sweet basil
2 cans pizza topping mix
1 can (6 OZ) tomato paste
Cheese Filling2 lbs. basic white cheese, grated
1 tsp. parsley flakes2 eggs
salt and pepper
Mix all ingredients together, salt and pepper to taste.
Topping
6 oz. Mozarella, sliced V 2 cup parmesan cheese(or use more white cheese)
Lightly grease baking dish and spoon in enough meat sauce to cover the bottom. Top withstrips of lasagna, then spread layer of cheese with part of the cheese filling mixture. Repeatlayers, with meat sauce on top.
Sprinkle with parmesan cheese and top with mozarella cheese slices. Bake in oven for 30
minutes. Let stand 5-10 minutes so all layers set before serving. Serves 6.

8/7/2019 Patriot Armory - Making the Best of Basics
http://slidepdf.com/reader/full/patriot-armory-making-the-best-of-basics 94/188
88 • POWDERED MILK
ADDITIONAL CHEESE RECIPES

8/7/2019 Patriot Armory - Making the Best of Basics
http://slidepdf.com/reader/full/patriot-armory-making-the-best-of-basics 95/188
CHAPTER 7
HONEY STORAGE AND USE
Honey is one of the basic storage items recommended in this Handbook. Honey is a natural
food.Itstores well; it's sweeter, measure formeasure, than sugar; baked products stay fresher
longer when used; and, is good for your health.
Use mild-flavored, clover-type honey in most recipes. Stronger-flavored honey is best utilized
in spice cake, gingerbread, brownies, in fruit punches, and over ham - where its pronounced
flavor is not so overpowering.
Always mix honey thoroughly with other recipe ingredients before turning mixture intobaking pans. This will prevent a too-moist, over-sweetened layer from collecting on the top.
Make it a rule to combine honey with the liquid ingredients to assure complete distribution inthe mixture. Freezing bread with honey used as sweetening is not advised, since honey
deteriorates when frozen. This can cause "mushiness" upon thawing. When using honey in
substitution for sugar in standard recipes, a general rule is to reduce the amount of another
liquid ingredient by lj 4 C. for each cup of honey used to replace sugar.
HONEY STORAGE
Different kinds of honey are available. The following paragraphs explain how to store thevarious kinds most effectively.

8/7/2019 Patriot Armory - Making the Best of Basics
http://slidepdf.com/reader/full/patriot-armory-making-the-best-of-basics 96/188
90. HONEY
COMB HONEY
Comb honey keeps best in covered containers in a cool,dark and dry place. It is the purest
form ofhoney, and requires no preservatives. However, be sure to keep honey covered. When
left uncovered, honey picks up other odors and loses its own aroma. Honey in storage usuallygets darker in color and stronger in flavor, but remains useful as ever.
Pure honey usually becomes granulated as it ages, or ifstored at coldtemperatures. Granula-tion is a natural aging process and does not affect the honey except for color and flavor. To
bring granulated honey back to liquid form simply place the container of honey in a pan ofwarm water until the granules disappear. Ifmore heat is required, keep the container offthe
bottom of the pan ofwater by putting a rack under it, and setting the pan over low heat. Be
careful not to overheat granulated honey, since too much heat causes the honey to change
color and flavor. It's easier to de-granulate smaller amounts of honey, and less frustrating,too.
CREArYIED HONEY
Creamed honey may be stored at room temperature or in the refrigerator. Creamed honey
may partially liquify if stored at too high a temperature. Fceezing or refrigeration will not
harm honey, but may speed granulation. The granulation can be "cured" by warming, asexplained in the previous paragraph.
DILUTED HONEY
Honey diluted with water or any other liquid should be kept covered in the refrigerator. As
with other syrups, it may ferment or mold quickly if not kept cold. Usually the label on thehoney container will indicate the best means of storage for the particular kind of honeycontent you've purchased.
AKING WITH HONEY
The following paragraphs outline some tips and suggestions forsubstituting honey in recipes.
MEASURE-FaR-MEASURE SUBSTITUTION FOR SUGAR
Honey may be used, measure-far-measure, in place of sugar in the following preparations:
baked apples glazes
baked ham lemonadecandied vegetables pie fillings
cinnamon toast puddings
custards punch drinksdressings for salads sweet-sour dishes
IN CAKES
oney can generally replace one-half ofthe required sugar without changing the proportions
fthe other ingredients in the recipe. Honey absorbs and retains moisture, thus retarding the

8/7/2019 Patriot Armory - Making the Best of Basics
http://slidepdf.com/reader/full/patriot-armory-making-the-best-of-basics 97/188
HONEY.91
drying out and staling ofbaked goods. This is especially important when you want to bake inadvance or save baked goods for any length oftime. Some honey-flavored cakes are improved
in flavor and texture when aged a few days.
IN COOKIESThe amount of honey used to substitute for sugar in cookie recipes is directly related to the
hardness or crispness desired in the final product.
For hard cookies, substitute no more than V 3 of the required sugar. Keep in mind hard
cookies will probably lose their crispness if not eaten in a short time. Most honey cookies,
candies and frostings become too soft during high-humidity weather.
For soft cookies, substitute up to % the required sugar with honey. For moist-type fruit bars
and soft, "gooey" mixtures, substitute up to % of the required sugar with honey.
RECIPES USING HONEY
Basic Honey Butter
% C. butter 1 C. bland honeyCombine ingredients with electric mixer until creamy and smooth.
Cinnamon Honey Butter
1 C. basic honey butter 1 tsp. cinnamon
Combine ingredients with electric mixer on high speed.
Honey Butter Cinnamon Buns
% C. very warm water 2 T. dry nonfat milk1 T. yeast l/~C. raisins
V z C. cinnamon honey butter 1 ,4 C. chopped pecans1 egg 2 C. sifted flour
% tsp. salt Additiona I cinnamon if desired
Measure very warm water into large mixing bow1 . Sprinkle or crumble yeast over water; stir
until dissolved. Combine cinnamon honey butter, egg, salt and dry milk. Add to yeastmixture; blend well. Add fruit, nuts and flour. Stir to mix; then beat until batter is shiny and
smooth, about 2 minutes. Scrape sides of bowl. Cover and let rise in a warm place, free from
draft, until double in size, about 45 minutes. Stir down and drop by spoonfuls into 12 greased
muffin pans. Let rise in warm place, free from draft until doubled, about 30 minutes. Bake
3500 for 20-25 minutes. Remove from pan, serve warm. Makes 12.
Honey French Toast
2 eggs, slightly beatenI V 4 C. honey
14C. milk
V 4 tsp. salt
Combine beaten eggs, milk, l J ! C. honey and salt. Dip bread in mixture and fry in butter until
golden brown. Combine remaining honey, lemon juice, and 2 T. butter. Heat and serve overtoast. Makes 4-6 servings.
8 slices breadbutter
2 T. lemon juice
8/7/2019 Patriot Armory - Making the Best of Basics
http://slidepdf.com/reader/full/patriot-armory-making-the-best-of-basics 98/188
92. HONEY
Honey Oatmeal Bread
1 C. rolled oats (regular)
2 C. boiling water
2 T. yeast1/3 C. lukewarm water
I f z C. honey
Place rolled oats in large bowl or pan and add boiling water. Let stand until lukewarm (about
20minutes). Dissolve yeast in lukewarm water, and let stand 5minutes, then add to mixture.
Add honey and oil. Sift together dry ingredients twice and then add to mixture. Knead well for
5 minutes. Let rise until double in bulk, then knead again. Shape into two loaves. Let rise 10minutes and bake in well-greased loaf pans 3250 for 1 hour. Turn out and brush tops with
butter.
1 ,4 C. vegetable oil
% dry milk
6-6V2 C. sifted whole wheat flour
2V z tsp. salt
Honey Butter Cookies
2 C. butter
1 C. honey
2 eggs, separated
1 T. grated lemon peel
8 C. sifted flour11,4sp. baking powder
2 T. lemon juice
1 C. almonds, chopped
Cream butter and gradually add honey. Beat in egg yolks and lemon peel, flour, baking
powder, and lemon juice. Stir well and chill. Shape into small balls with beaten egg whites
and sprinkle with almonds. Bake 3500 for 10-15 minutes. Makes 8 dozen cookies.
Honey Chip Cookies
V z C. butterV z C. honey1 egg
11,4 C. sifted flour
% tsp. baking soda
V2 tsp. salt
1 C. chocolate chips
% C. chopped pecans
Cream butter and honey together; add egg and beat well. Sift together dry ingredients and
add to creamed mixture. Stir in pecans. Drop by rounded teaspoons onto greased cookie sheet.Bake 3750 for 12-15 minutes. Makes 3 dozen.
Honey Crispy Cookies
1/2 C. butter
2 T. milk
1 C. flour
% C. honey
1,4 tsp. salt
1 C. coconut1 tsp. vanilla
2 C. Rice Krispies cereal
Combine all ingredients except vanilla and cereal in saucepan. Cook over medium heat,
stirring constantly until dough leaves sides ofpan and forms a ball. Remove from heat. Cool.Add vanilla and cereal. Shape in balls; roll in additional coconut. If not eaten at once, store inrefrigerator.
8/7/2019 Patriot Armory - Making the Best of Basics
http://slidepdf.com/reader/full/patriot-armory-making-the-best-of-basics 99/188
HONEY. 93
Honey-Pecan Butter Cookies
1 C. butter14C. honey2 C. sifted flour1 / 2 tsp. salt
Cream butter; gradually add honey and beat well. Stir in flour, salt, and vanilla. Mix well.
Add chopped nuts. Form into very small balls and place on greased baking sheet. Bake at 3000
for 40-45 minutes. Roll in confectioners' sugar while still hot. Makes 6 dozen cookies.
2 tsp. vanilla extract2 C. finely chopped pecans
Confectioners' sugar
Honey Peanut Chompers
1 C. honey
1 C. peanut butter
Add peanut butter to warm honey and mix well. Stir in 1 to 1 1 / 2 C. dry milk. (The amount of
powdered milk depends on the peanut butter's oiliness.) Form into small balls.
114C. nonfat dry milk (non-instant)
Honey Fruit Cup Mix
4 C. mixed fruit
1 f z C. honey1T. chopped candied ginger
1 T. lemon juice
Place fruit in serving bowl or refrigerator dish. Combine honey, candied ginger and lemon,juice.-pour mixture over fruit and chill for 2 hours before serving. Makes 4-6 servings.
A typical winter mix could include grapefruit and orange sections, fresh pineapple, bananas,
red grapes, etc. A summer mix might include melon, berries, peaches, pears, etc.
Honey Pearalilli
7 C. firm ripe pears 1 T. grated lemon peel
1 f z C. diced green pepper 1 tsp. salt
1 can (4 oz.) diced pimiento V t tsp. ground ginger2 C. golden raisins 1 4 tsp. whole cloves
4 C. mild-flavored honey 1 f z tsp. ground allspice1 f z C. lemon juice 4 sticks cinnamon
Put unpeeled, cored pears through food grinder, using coarse knife. Add balance of ingre-
dients. Tie whole spices in a cloth so they may be easily removed. Stir well to blend. Over
medium heat, bring to boil, stirring. When rolling boil is reached, reduce heat and simmer,
stirring often to prevent sticking, until relish is thick enough to spoon into sterilized pint jars.
Remove spice bag. Seal lids at once. Makes about 4 pts.
Basic Honey Taffy
1 C. honeyCook honey to hard crack stage (285°), stirring occasionally. Pour onto buttered marble slab.As soon as outside edges cool enough to touch, fold to center and make a long roll. Startstretching or "pulling" while still hot. Pull until honey becomes light and porous and small
strings develop. Cut into short pieces. Place in paper-lined metal cans for 2 days to soften.

8/7/2019 Patriot Armory - Making the Best of Basics
http://slidepdf.com/reader/full/patriot-armory-making-the-best-of-basics 100/188
94. HONEY
Baked Honey Custard
2 eggs
2 C. milk
1 ; 4 C. honey
ljg tsp. salt
Beat eggs slightly. Add milk, honey and salt. Pour into individual molds and set in a pan ofwater. Bake 3500 for 30 minutes.
Basic Honey Jelly
1 C. honey
% C. water
Heat honey and water to boiling, stirring constantly. Add liquid fruit pectin and bring back to
boil, then allow to cool in jelly jars.
V a C. liquid fruit pectin
ADDITIONAL HONEY RECIPES

8/7/2019 Patriot Armory - Making the Best of Basics
http://slidepdf.com/reader/full/patriot-armory-making-the-best-of-basics 101/188

8/7/2019 Patriot Armory - Making the Best of Basics
http://slidepdf.com/reader/full/patriot-armory-making-the-best-of-basics 102/188

8/7/2019 Patriot Armory - Making the Best of Basics
http://slidepdf.com/reader/full/patriot-armory-making-the-best-of-basics 103/188

8/7/2019 Patriot Armory - Making the Best of Basics
http://slidepdf.com/reader/full/patriot-armory-making-the-best-of-basics 104/188
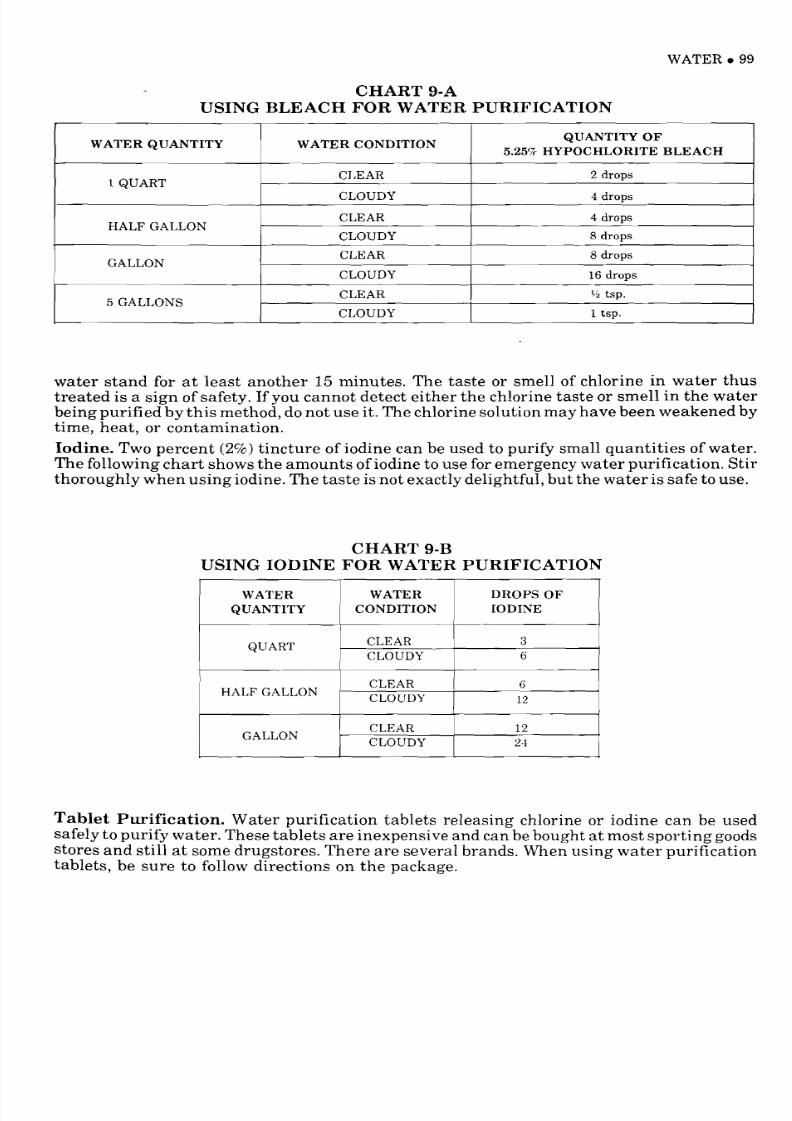
8/7/2019 Patriot Armory - Making the Best of Basics
http://slidepdf.com/reader/full/patriot-armory-making-the-best-of-basics 105/188
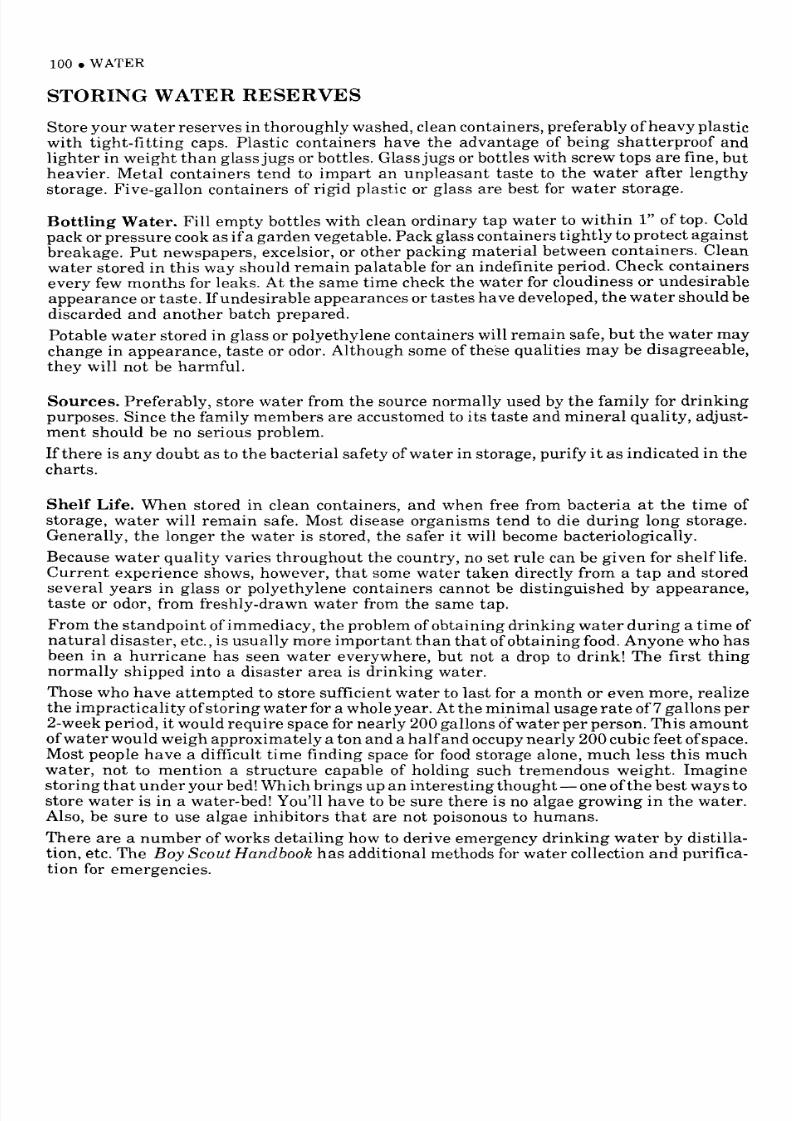
8/7/2019 Patriot Armory - Making the Best of Basics
http://slidepdf.com/reader/full/patriot-armory-making-the-best-of-basics 106/188

8/7/2019 Patriot Armory - Making the Best of Basics
http://slidepdf.com/reader/full/patriot-armory-making-the-best-of-basics 107/188

8/7/2019 Patriot Armory - Making the Best of Basics
http://slidepdf.com/reader/full/patriot-armory-making-the-best-of-basics 108/188

8/7/2019 Patriot Armory - Making the Best of Basics
http://slidepdf.com/reader/full/patriot-armory-making-the-best-of-basics 109/188
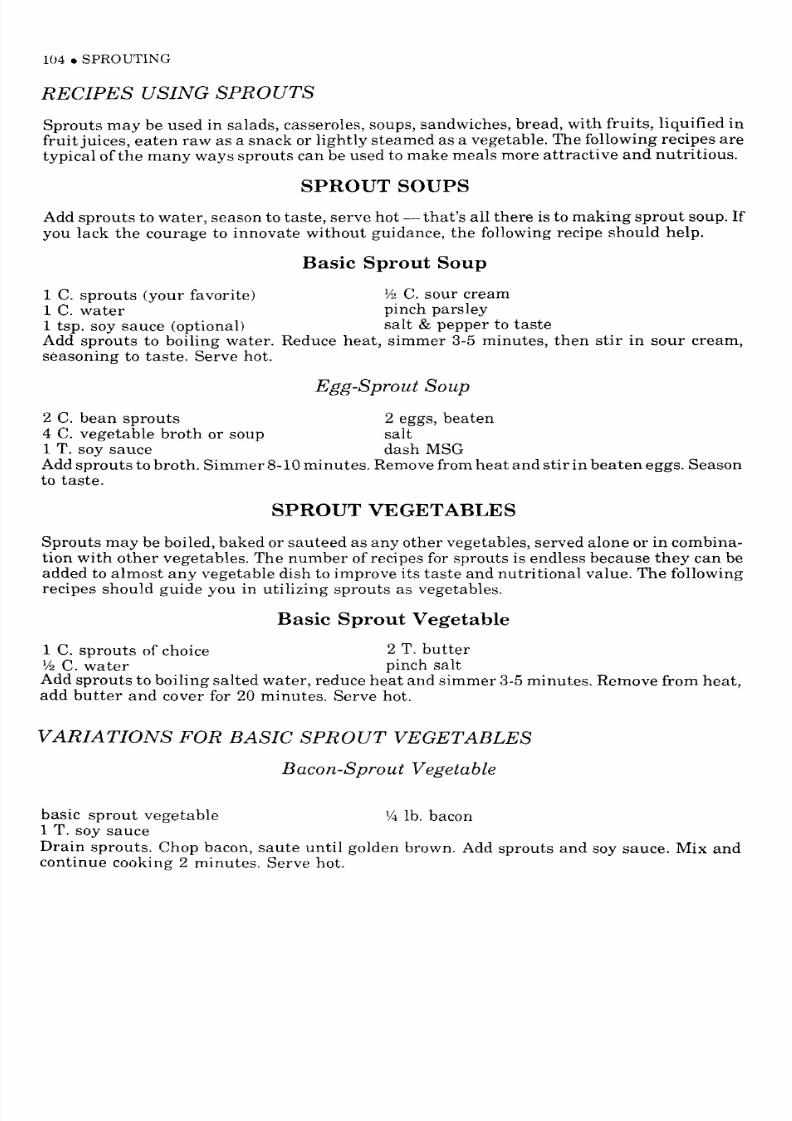
8/7/2019 Patriot Armory - Making the Best of Basics
http://slidepdf.com/reader/full/patriot-armory-making-the-best-of-basics 110/188

8/7/2019 Patriot Armory - Making the Best of Basics
http://slidepdf.com/reader/full/patriot-armory-making-the-best-of-basics 111/188

8/7/2019 Patriot Armory - Making the Best of Basics
http://slidepdf.com/reader/full/patriot-armory-making-the-best-of-basics 112/188

8/7/2019 Patriot Armory - Making the Best of Basics
http://slidepdf.com/reader/full/patriot-armory-making-the-best-of-basics 113/188

8/7/2019 Patriot Armory - Making the Best of Basics
http://slidepdf.com/reader/full/patriot-armory-making-the-best-of-basics 114/188

8/7/2019 Patriot Armory - Making the Best of Basics
http://slidepdf.com/reader/full/patriot-armory-making-the-best-of-basics 115/188

8/7/2019 Patriot Armory - Making the Best of Basics
http://slidepdf.com/reader/full/patriot-armory-making-the-best-of-basics 116/188

8/7/2019 Patriot Armory - Making the Best of Basics
http://slidepdf.com/reader/full/patriot-armory-making-the-best-of-basics 117/188

8/7/2019 Patriot Armory - Making the Best of Basics
http://slidepdf.com/reader/full/patriot-armory-making-the-best-of-basics 118/188

8/7/2019 Patriot Armory - Making the Best of Basics
http://slidepdf.com/reader/full/patriot-armory-making-the-best-of-basics 119/188

8/7/2019 Patriot Armory - Making the Best of Basics
http://slidepdf.com/reader/full/patriot-armory-making-the-best-of-basics 120/188

8/7/2019 Patriot Armory - Making the Best of Basics
http://slidepdf.com/reader/full/patriot-armory-making-the-best-of-basics 121/188

8/7/2019 Patriot Armory - Making the Best of Basics
http://slidepdf.com/reader/full/patriot-armory-making-the-best-of-basics 122/188

8/7/2019 Patriot Armory - Making the Best of Basics
http://slidepdf.com/reader/full/patriot-armory-making-the-best-of-basics 123/188
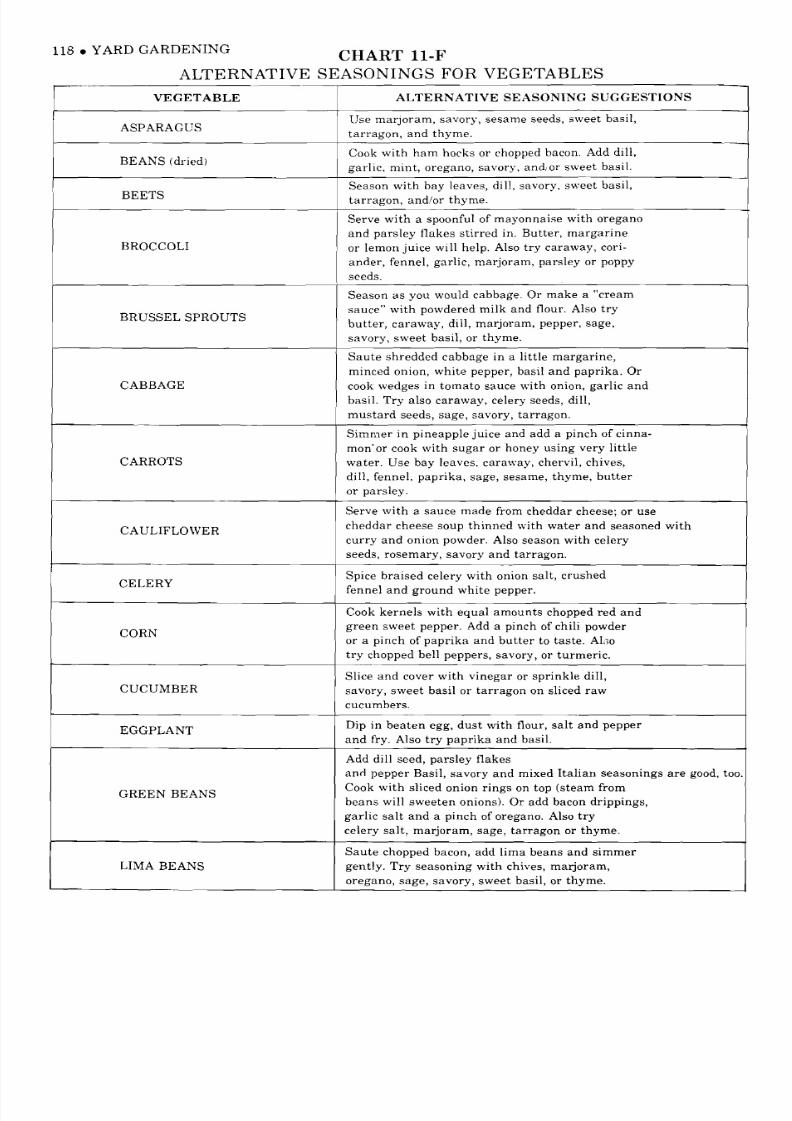
8/7/2019 Patriot Armory - Making the Best of Basics
http://slidepdf.com/reader/full/patriot-armory-making-the-best-of-basics 124/188

8/7/2019 Patriot Armory - Making the Best of Basics
http://slidepdf.com/reader/full/patriot-armory-making-the-best-of-basics 125/188
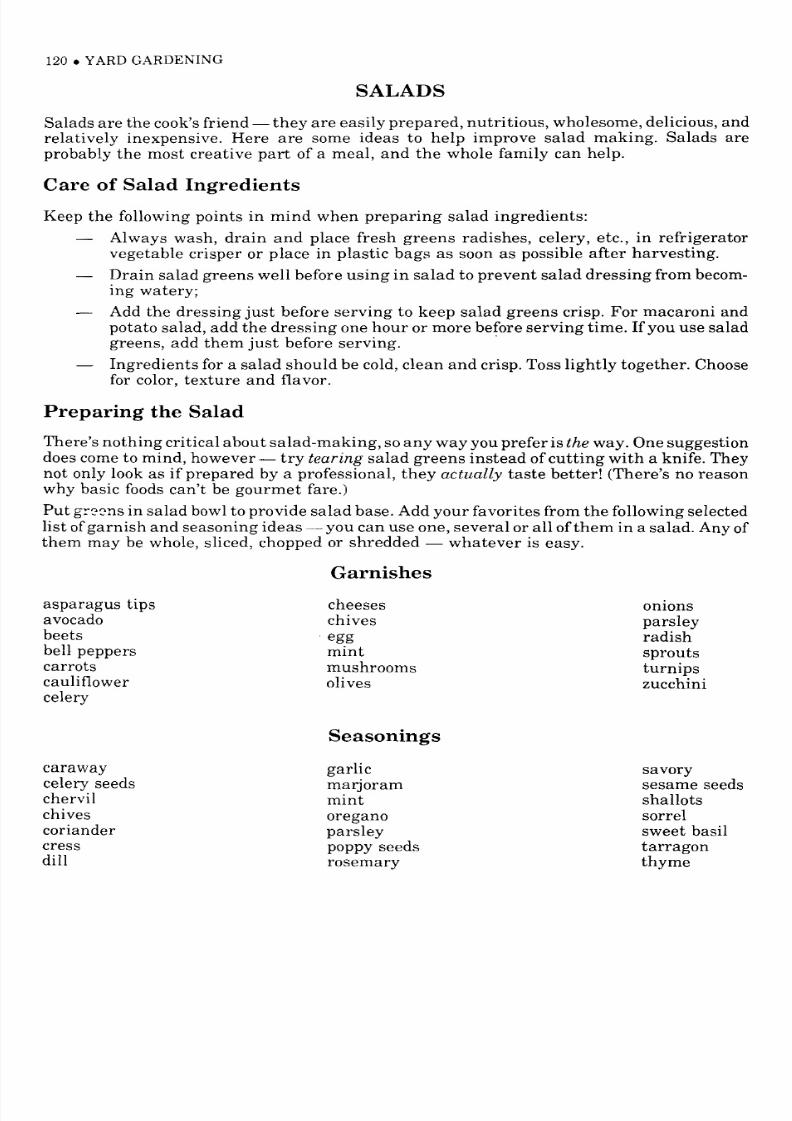
8/7/2019 Patriot Armory - Making the Best of Basics
http://slidepdf.com/reader/full/patriot-armory-making-the-best-of-basics 126/188

8/7/2019 Patriot Armory - Making the Best of Basics
http://slidepdf.com/reader/full/patriot-armory-making-the-best-of-basics 127/188

8/7/2019 Patriot Armory - Making the Best of Basics
http://slidepdf.com/reader/full/patriot-armory-making-the-best-of-basics 128/188

8/7/2019 Patriot Armory - Making the Best of Basics
http://slidepdf.com/reader/full/patriot-armory-making-the-best-of-basics 129/188

8/7/2019 Patriot Armory - Making the Best of Basics
http://slidepdf.com/reader/full/patriot-armory-making-the-best-of-basics 130/188
8/7/2019 Patriot Armory - Making the Best of Basics
http://slidepdf.com/reader/full/patriot-armory-making-the-best-of-basics 131/188
8/7/2019 Patriot Armory - Making the Best of Basics
http://slidepdf.com/reader/full/patriot-armory-making-the-best-of-basics 132/188

8/7/2019 Patriot Armory - Making the Best of Basics
http://slidepdf.com/reader/full/patriot-armory-making-the-best-of-basics 133/188

8/7/2019 Patriot Armory - Making the Best of Basics
http://slidepdf.com/reader/full/patriot-armory-making-the-best-of-basics 134/188

8/7/2019 Patriot Armory - Making the Best of Basics
http://slidepdf.com/reader/full/patriot-armory-making-the-best-of-basics 135/188

8/7/2019 Patriot Armory - Making the Best of Basics
http://slidepdf.com/reader/full/patriot-armory-making-the-best-of-basics 136/188

8/7/2019 Patriot Armory - Making the Best of Basics
http://slidepdf.com/reader/full/patriot-armory-making-the-best-of-basics 137/188

8/7/2019 Patriot Armory - Making the Best of Basics
http://slidepdf.com/reader/full/patriot-armory-making-the-best-of-basics 138/188

8/7/2019 Patriot Armory - Making the Best of Basics
http://slidepdf.com/reader/full/patriot-armory-making-the-best-of-basics 139/188

8/7/2019 Patriot Armory - Making the Best of Basics
http://slidepdf.com/reader/full/patriot-armory-making-the-best-of-basics 140/188

8/7/2019 Patriot Armory - Making the Best of Basics
http://slidepdf.com/reader/full/patriot-armory-making-the-best-of-basics 141/188

8/7/2019 Patriot Armory - Making the Best of Basics
http://slidepdf.com/reader/full/patriot-armory-making-the-best-of-basics 142/188
8/7/2019 Patriot Armory - Making the Best of Basics
http://slidepdf.com/reader/full/patriot-armory-making-the-best-of-basics 143/188

8/7/2019 Patriot Armory - Making the Best of Basics
http://slidepdf.com/reader/full/patriot-armory-making-the-best-of-basics 144/188

8/7/2019 Patriot Armory - Making the Best of Basics
http://slidepdf.com/reader/full/patriot-armory-making-the-best-of-basics 145/188

8/7/2019 Patriot Armory - Making the Best of Basics
http://slidepdf.com/reader/full/patriot-armory-making-the-best-of-basics 146/188
8/7/2019 Patriot Armory - Making the Best of Basics
http://slidepdf.com/reader/full/patriot-armory-making-the-best-of-basics 147/188

8/7/2019 Patriot Armory - Making the Best of Basics
http://slidepdf.com/reader/full/patriot-armory-making-the-best-of-basics 148/188

8/7/2019 Patriot Armory - Making the Best of Basics
http://slidepdf.com/reader/full/patriot-armory-making-the-best-of-basics 149/188

8/7/2019 Patriot Armory - Making the Best of Basics
http://slidepdf.com/reader/full/patriot-armory-making-the-best-of-basics 150/188

8/7/2019 Patriot Armory - Making the Best of Basics
http://slidepdf.com/reader/full/patriot-armory-making-the-best-of-basics 151/188

8/7/2019 Patriot Armory - Making the Best of Basics
http://slidepdf.com/reader/full/patriot-armory-making-the-best-of-basics 152/188
8/7/2019 Patriot Armory - Making the Best of Basics
http://slidepdf.com/reader/full/patriot-armory-making-the-best-of-basics 153/188

8/7/2019 Patriot Armory - Making the Best of Basics
http://slidepdf.com/reader/full/patriot-armory-making-the-best-of-basics 154/188

8/7/2019 Patriot Armory - Making the Best of Basics
http://slidepdf.com/reader/full/patriot-armory-making-the-best-of-basics 155/188

8/7/2019 Patriot Armory - Making the Best of Basics
http://slidepdf.com/reader/full/patriot-armory-making-the-best-of-basics 156/188

8/7/2019 Patriot Armory - Making the Best of Basics
http://slidepdf.com/reader/full/patriot-armory-making-the-best-of-basics 157/188

8/7/2019 Patriot Armory - Making the Best of Basics
http://slidepdf.com/reader/full/patriot-armory-making-the-best-of-basics 158/188
8/7/2019 Patriot Armory - Making the Best of Basics
http://slidepdf.com/reader/full/patriot-armory-making-the-best-of-basics 159/188

8/7/2019 Patriot Armory - Making the Best of Basics
http://slidepdf.com/reader/full/patriot-armory-making-the-best-of-basics 160/188

8/7/2019 Patriot Armory - Making the Best of Basics
http://slidepdf.com/reader/full/patriot-armory-making-the-best-of-basics 161/188

8/7/2019 Patriot Armory - Making the Best of Basics
http://slidepdf.com/reader/full/patriot-armory-making-the-best-of-basics 162/188

8/7/2019 Patriot Armory - Making the Best of Basics
http://slidepdf.com/reader/full/patriot-armory-making-the-best-of-basics 163/188

8/7/2019 Patriot Armory - Making the Best of Basics
http://slidepdf.com/reader/full/patriot-armory-making-the-best-of-basics 164/188

8/7/2019 Patriot Armory - Making the Best of Basics
http://slidepdf.com/reader/full/patriot-armory-making-the-best-of-basics 165/188

8/7/2019 Patriot Armory - Making the Best of Basics
http://slidepdf.com/reader/full/patriot-armory-making-the-best-of-basics 166/188

8/7/2019 Patriot Armory - Making the Best of Basics
http://slidepdf.com/reader/full/patriot-armory-making-the-best-of-basics 167/188

8/7/2019 Patriot Armory - Making the Best of Basics
http://slidepdf.com/reader/full/patriot-armory-making-the-best-of-basics 168/188

8/7/2019 Patriot Armory - Making the Best of Basics
http://slidepdf.com/reader/full/patriot-armory-making-the-best-of-basics 169/188

8/7/2019 Patriot Armory - Making the Best of Basics
http://slidepdf.com/reader/full/patriot-armory-making-the-best-of-basics 170/188

8/7/2019 Patriot Armory - Making the Best of Basics
http://slidepdf.com/reader/full/patriot-armory-making-the-best-of-basics 171/188

8/7/2019 Patriot Armory - Making the Best of Basics
http://slidepdf.com/reader/full/patriot-armory-making-the-best-of-basics 172/188

8/7/2019 Patriot Armory - Making the Best of Basics
http://slidepdf.com/reader/full/patriot-armory-making-the-best-of-basics 173/188

8/7/2019 Patriot Armory - Making the Best of Basics
http://slidepdf.com/reader/full/patriot-armory-making-the-best-of-basics 174/188

8/7/2019 Patriot Armory - Making the Best of Basics
http://slidepdf.com/reader/full/patriot-armory-making-the-best-of-basics 175/188

8/7/2019 Patriot Armory - Making the Best of Basics
http://slidepdf.com/reader/full/patriot-armory-making-the-best-of-basics 176/188

8/7/2019 Patriot Armory - Making the Best of Basics
http://slidepdf.com/reader/full/patriot-armory-making-the-best-of-basics 177/188

8/7/2019 Patriot Armory - Making the Best of Basics
http://slidepdf.com/reader/full/patriot-armory-making-the-best-of-basics 178/188

8/7/2019 Patriot Armory - Making the Best of Basics
http://slidepdf.com/reader/full/patriot-armory-making-the-best-of-basics 179/188

8/7/2019 Patriot Armory - Making the Best of Basics
http://slidepdf.com/reader/full/patriot-armory-making-the-best-of-basics 180/188

8/7/2019 Patriot Armory - Making the Best of Basics
http://slidepdf.com/reader/full/patriot-armory-making-the-best-of-basics 181/188

8/7/2019 Patriot Armory - Making the Best of Basics
http://slidepdf.com/reader/full/patriot-armory-making-the-best-of-basics 182/188

8/7/2019 Patriot Armory - Making the Best of Basics
http://slidepdf.com/reader/full/patriot-armory-making-the-best-of-basics 183/188

8/7/2019 Patriot Armory - Making the Best of Basics
http://slidepdf.com/reader/full/patriot-armory-making-the-best-of-basics 184/188

8/7/2019 Patriot Armory - Making the Best of Basics
http://slidepdf.com/reader/full/patriot-armory-making-the-best-of-basics 185/188

8/7/2019 Patriot Armory - Making the Best of Basics
http://slidepdf.com/reader/full/patriot-armory-making-the-best-of-basics 186/188

8/7/2019 Patriot Armory - Making the Best of Basics
http://slidepdf.com/reader/full/patriot-armory-making-the-best-of-basics 187/188

8/7/2019 Patriot Armory - Making the Best of Basics
http://slidepdf.com/reader/full/patriot-armory-making-the-best-of-basics 188/188


