
1
York University
Faculty of Science and Engineering – Faculty of Health
Life Sciences Building Research Floors
Governance and Safety Regulations (LSB – GSR)
October 2011
Contents
A. General Principles B. LSB Researchers Committee C. General Access and Safety Procedures D. Facilities and Equipment Management and Maintenance
Appendices 1. Current membership of the LSB Researchers Committee 2. LSB Researcher’s Agreement (Form) 3. Request for Access to the 3rd/4th Floors Labs in LSB 4. Current Floor Plan and Space Allocations 5. Current Equipment List 6. General Laboratory Safety Guidelines 7. Emergency Response Procedures 8. LSB Autoclave Procedures 9. General Guidelines for Using Tissue Culture Rooms in LSB 10. Carbon Dioxide Supply System Procedures 11. Guidelines for Using the Radioisotope Room in LSB 12. Guidelines for Using the NMR Facility in LSB 13. Procedures and Forms for Decommissioning Laboratories
2
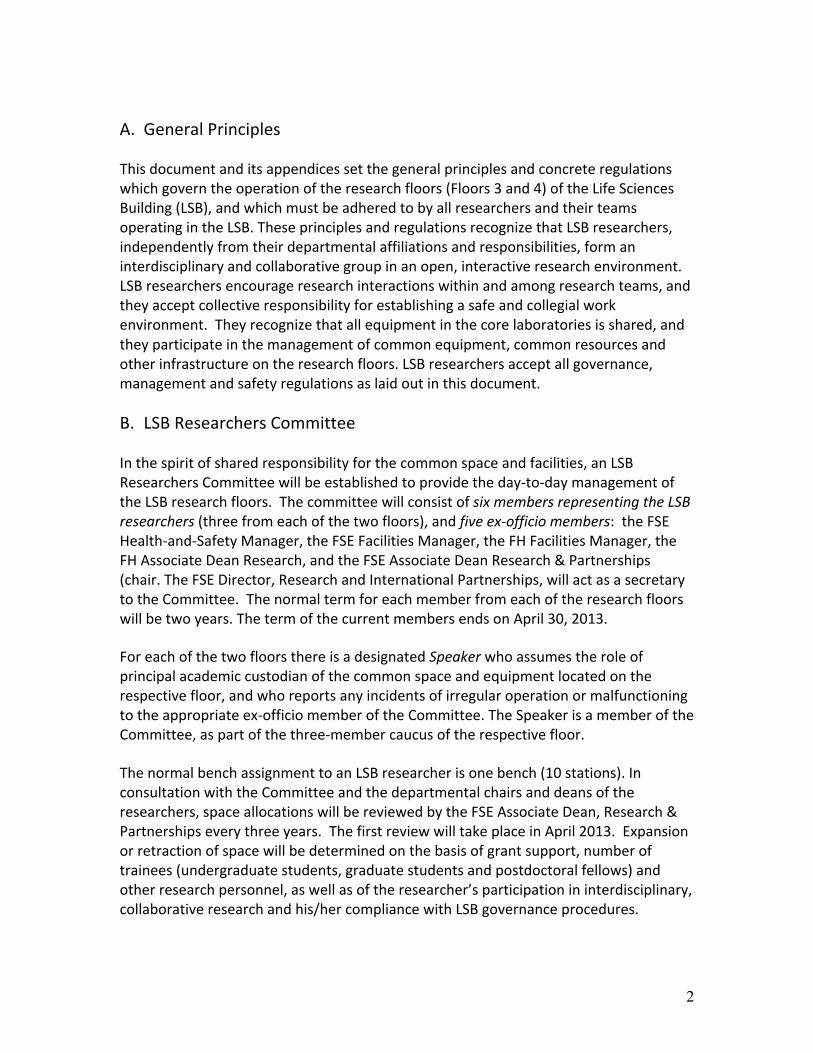
A. General Principles
This document and its appendices set the general principles and concrete regulations which govern the operation of the research floors (Floors 3 and 4) of the Life Sciences Building (LSB), and which must be adhered to by all researchers and their teams operating in the LSB. These principles and regulations recognize that LSB researchers, independently from their departmental affiliations and responsibilities, form an interdisciplinary and collaborative group in an open, interactive research environment. LSB researchers encourage research interactions within and among research teams, and they accept collective responsibility for establishing a safe and collegial work environment. They recognize that all equipment in the core laboratories is shared, and they participate in the management of common equipment, common resources and other infrastructure on the research floors. LSB researchers accept all governance, management and safety regulations as laid out in this document.
B. LSB Researchers Committee
In the spirit of shared responsibility for the common space and facilities, an LSB Researchers Committee will be established to provide the day-‐to-‐day management of the LSB research floors. The committee will consist of six members representing the LSB researchers (three from each of the two floors), and five ex-‐officio members: the FSE Health-‐and-‐Safety Manager, the FSE Facilities Manager, the FH Facilities Manager, the FH Associate Dean Research, and the FSE Associate Dean Research & Partnerships (chair. The FSE Director, Research and International Partnerships, will act as a secretary to the Committee. The normal term for each member from each of the research floors will be two years. The term of the current members ends on April 30, 2013.
For each of the two floors there is a designated Speaker who assumes the role of principal academic custodian of the common space and equipment located on the respective floor, and who reports any incidents of irregular operation or malfunctioning to the appropriate ex-‐officio member of the Committee. The Speaker is a member of the Committee, as part of the three-‐member caucus of the respective floor.
The normal bench assignment to an LSB researcher is one bench (10 stations). In consultation with the Committee and the departmental chairs and deans of the researchers, space allocations will be reviewed by the FSE Associate Dean, Research & Partnerships every three years. The first review will take place in April 2013. Expansion or retraction of space will be determined on the basis of grant support, number of trainees (undergraduate students, graduate students and postdoctoral fellows) and other research personnel, as well as of the researcher’s participation in interdisciplinary, collaborative research and his/her compliance with LSB governance procedures.
3
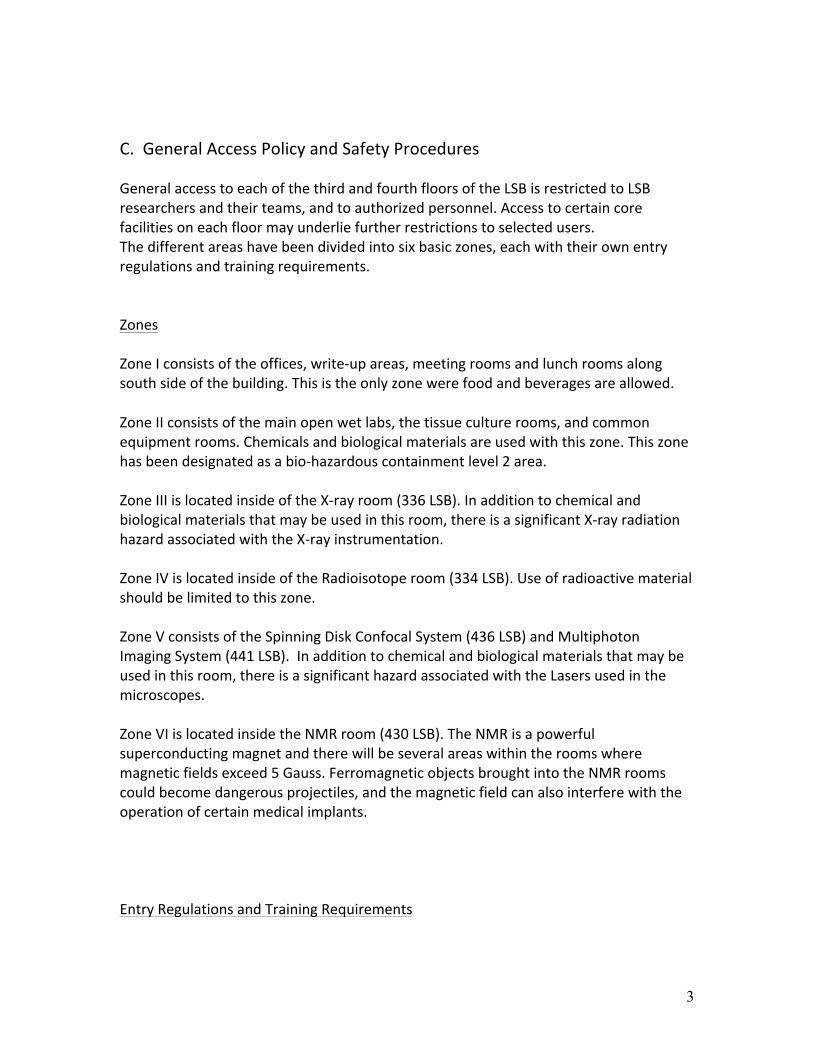
C. General Access Policy and Safety Procedures
General access to each of the third and fourth floors of the LSB is restricted to LSB researchers and their teams, and to authorized personnel. Access to certain core facilities on each floor may underlie further restrictions to selected users. The different areas have been divided into six basic zones, each with their own entry regulations and training requirements. Zones Zone I consists of the offices, write-‐up areas, meeting rooms and lunch rooms along south side of the building. This is the only zone were food and beverages are allowed. Zone II consists of the main open wet labs, the tissue culture rooms, and common equipment rooms. Chemicals and biological materials are used with this zone. This zone has been designated as a bio-‐hazardous containment level 2 area. Zone III is located inside of the X-‐ray room (336 LSB). In addition to chemical and biological materials that may be used in this room, there is a significant X-‐ray radiation hazard associated with the X-‐ray instrumentation. Zone IV is located inside of the Radioisotope room (334 LSB). Use of radioactive material should be limited to this zone. Zone V consists of the Spinning Disk Confocal System (436 LSB) and Multiphoton Imaging System (441 LSB). In addition to chemical and biological materials that may be used in this room, there is a significant hazard associated with the Lasers used in the microscopes. Zone VI is located inside the NMR room (430 LSB). The NMR is a powerful superconducting magnet and there will be several areas within the rooms where magnetic fields exceed 5 Gauss. Ferromagnetic objects brought into the NMR rooms could become dangerous projectiles, and the magnetic field can also interfere with the operation of certain medical implants.
Entry Regulations and Training Requirements

4
Zone I Entry into Zone I is restricted by card access through the passenger elevators. There are no specific training requirements for this zone.
Zone II Entry into Zone II is restricted by card access from Zone I. Access to Zone II requires WHMIS II and Biosafety training. Laboratory users must be listed within the Biosafety certificate of one of the PIs designated as part of the common certificate for the zone. Visitors that require access to Zone II to access common equipment rooms or specialized equipment rooms may not require inclusion within a Biosafety Certificate. However, access to these areas will require validation from the floor speaker for that floor.
Zone III Entry into Zone III is restricted by card access at the entry door from the corridor within Zone II. Access to Zone III requires X-‐Ray Safety training and a dosimeter badge. Users must be properly trained before operating the X-‐ray machine and approval by one of the researchers listed on the permit.
Zone IV Entry into Zone IV is restricted by card access at the entry door from the corridor within Zone II. Access to Zone IV requires Radiation Safety training and a dosimeter badge. Users must be within a research group of a PI listed on the permit. See ‘Guidelines for Using the Radioisotope Room in LSB’, found in Appendix 11.
Zone V Entry into Zone V is restricted by card access at the entry door from the corridor within Zone II. Access to Zone V requires Laser Safety training. Users must be properly trained before using the microscopes in these zones. Entry into Zone VI is restricted by card access through Zone I and Zone II. Users must be properly trained before operating the NMR. See ‘Guidelines for the NMR Room in LSB’, found in Appendix 12. Access to Zone VI will be initiated by the NMR technician in charge of the NMR facility, who would have also given training. Access Cards and Security Access Procedures An ‘Access Card’ is required to access the third and fourth floors. To get an access card and be granted access to Zone I, contact the Administrative Assistant in your department. To be granted access to Zones II-‐V, complete the ‘Request for Access to the 3rd/4th Floors of LSB’ form in Appendix 3.

5
Access to the NMR facility (Zone VI) will be initiated by the NMR technician giving the training. Submit the form to the FSE Facilities Manager or the Health and Safety Manager for processing. Inappropriate and/or unsafe conduct may result in denial of access or removal of access. D. Facilities and Equipment Management and Maintenance
Principal investigators recognize that all equipment in the core laboratories is shared, and they participate in the management of common equipment, common resources and other infrastructure on the research floors. LSB researchers accept all governance, management and safety regulations as laid out in this document. All equipment housed in the LSB research floors is owned by York University. Principal investigators will provide shared access to equipment in mutual support of their colleagues’ research programs. Principal investigators are responsible for ensuring that all members of their research groups are fully trained and competent to use any equipment within the LSB. PIs also accept a common financial responsibility for use and care of the common equipment and facilities within the LSB. They will have to provide a cost centre to which expenses for consumables and maintenance of equipment can be charged, commensurate with consumption and use.
In order to facilitate this process, an initial deposit will be required from PIs at the time of occupancy of their laboratory space in the LSB and, subsequently, at the beginning of each budget year (in May), to be consolidated with the real cost incurred by the end of the budget year. A list of common equipment and facilities will be provided, and PIs will indicate their use of each item and the size of their group. This list will be kept by the FSE Facilities Manager and circulated among all users. PIs must inform the LSB Researchers and Committee (through the Speaker of their floor and the Facilities Manager) promptly about any change in their use of common equipment, which may occur at any time during the year. Each individual piece of equipment will have its own sign-‐up sheet for scheduling (paper-‐ or web-‐based), with name of user and lab assigned so that relative use can be tracked. Only people properly trained for use of the equipment can be given sign-‐in privileges. Repairs and service will be dealt with on cost recovery basis according to use by all PIs. The LSB Researchers Committee will meet during April (before the end of the York budget year), to review the list and usage data to ensure accuracy and compliance, and then assess the cost incurred by each PI and to be charged to the cost centre provided. Relevant information on the cost centre, group size, changes in equipment use, etc. will be updated at this time and passed on to the Facilities Manager. (See below for details.) Maintenance and Repair Cost of Common Equipment and Facilities

6
Common equipment and facilities include (but are not limited to) centrifuges, PCR machines, tissue culture hoods and incubators, microscopes, imaging equipment, etc. Principal investigators who use these items and facilities will be assessed charges for use based on the size of their research groups. These charges will be used only to pay for maintenance and repairs of the common equipment. PIs will initially be charged an appropriate deposit, with the real cost to be assessed by the LSB Researchers Committee at the end of the fiscal year (April 30). The initial annual deposit for an average user of the common equipment has been set at $50 per member of the research team. Hence, the deposit required from the PI of a team of six members with an average use of common equipment would be $300. PIs who are assessed to have incurred a higher cost than the initial deposit will be charged the balance on April 30. Any surpluses will be credited against the next budget year. Cost of Commonly Provided Consumables Commonly provided Consumables include, but are not limited to, centrally supplied carbon dioxide, liquid nitrogen, and water filters. Principal Investigators who use these services will be assessed charges for use based on the size of their research groups and will be charged once a year at the end of the fiscal year (April 30). Upon occupancy of laboratory space and, subsequently, at the beginning of the fiscal year every PI will be charged a deposit commensurate with use (yes/no) and the size of their research groups (i.e., charges will increase with number of individuals in the group). At the end of the fiscal year, charges for common services will be assessed by the LSB Researchers Committee on a cost-‐recovery basis. Hence, the charge per year may be adjusted by the LSB Researchers Committee at the end of the fiscal year. Use of Specialized Equipment The specialized equipment listed below belongs to York University and will be operated on the principle that all researchers who require access will be able to use the equipment with appropriate training on the equipment, as well as appropriate safety training, and expertise. Individual PIs will be appointed as point people who will coordinate use and report to the LSB Researchers Committee on any matters related to the use of their respective equipment. An on-‐line system will be developed to allow for on-‐line booking/scheduling of specialized equipment. Access to the scheduling system will only be provided (e.g. account/password) once training has been successfully completed (Doug Reid). University-‐purchased equipment (rather than grant-‐acquired equipment) will be run on a fee-‐for-‐use basis. A fee-‐for-‐use structure will be developed by individual PIs who are responsible for oversight of that equipment with the agreement and approval of the LSB Researchers Committee.

7
NMR – Howard Hunter Imaging Facility Multi-‐photon -‐-‐ Georg Zoidl, Spinning disk confocal microscope -‐-‐ Imogen R. Coe, SIET/SVET system -‐-‐ Andrew Donini, Scott Kelly Environmental Scanning Microscope – Sylvie Morin Mass Spectrometer – K.W. Michael Siu, Derek Wilson X-‐ray diffraction – Gerald Audette, Vivian Saridakis Flow Cytometer (4th floor) – John McDermott Confocal Microscope (3rd floor) – Terry Kubiseski
APPENDICES 1. Current membership of the LSB Researchers Committee 2. LSB Researcher’s Agreement (Form) 3. Request for Access to the 3rd/4th Floors Labs in LSB 4. Current Floor Plan and Space Allocations 5. Current Equipment List 6. General Laboratory Safety Guidelines 7. Emergency Response Procedures 8. LSB Autoclave Procedures 9. General Guidelines for Using Tissue Culture Rooms in LSB 10. Carbon Dioxide Supply System Procedures 11. Guidelines for Using the Radioisotope Room in LSB 12. Guidelines for Using the NMR Facility in LSB 13. Procedures and Forms for Decommissioning Laboratories

8
1. Current membership of the LSB Researchers Committee 3rd Floor Reps: Derek Wilson (Dept. of Chemistry, FSE) Vivian Saridakis (Dept. of Biology, FSE) Chun Peng (Dept. of Biology, FSE) 4th Floor Reps: Mike Connor (School of Kinesiology & Health Science, FH) John McDermott (Dept. of Biology) Muhammed Yusaf (Dept. of Chemistry) Ex officio: Doriano D’Angelo (Facilities Manager, FSE) Tom Hodson (Facilities Manager, FH) William Gage (Associate Dean Research, FH) Brad Sheeller (Health & Safety Manager, FSE) Robert Tsushima (Assoc. Dean Research & Partnerships, FSE) (Chair) Secretary: Margaret Hough (Director, Research and International Partnerships, FSE)
9
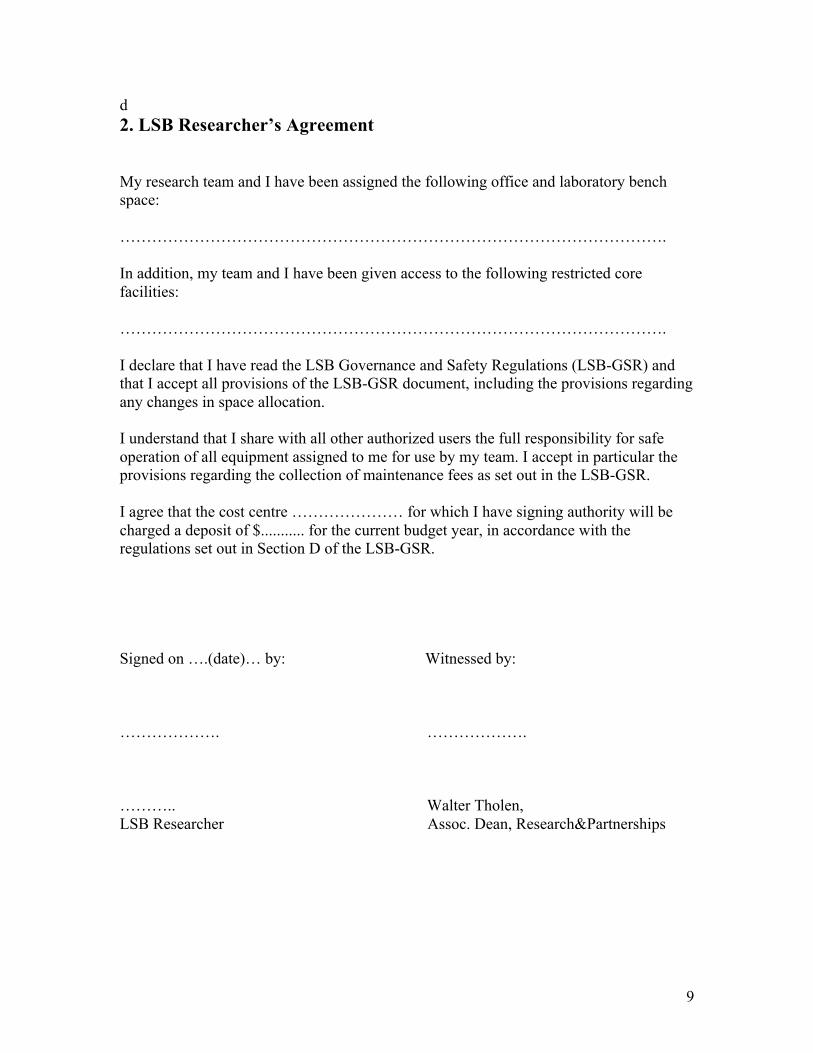
d 2. LSB Researcher’s Agreement My research team and I have been assigned the following office and laboratory bench space: …………………………………………………………………………………………. In addition, my team and I have been given access to the following restricted core facilities: …………………………………………………………………………………………. I declare that I have read the LSB Governance and Safety Regulations (LSB-GSR) and that I accept all provisions of the LSB-GSR document, including the provisions regarding any changes in space allocation. I understand that I share with all other authorized users the full responsibility for safe operation of all equipment assigned to me for use by my team. I accept in particular the provisions regarding the collection of maintenance fees as set out in the LSB-GSR. I agree that the cost centre ………………… for which I have signing authority will be charged a deposit of $........... for the current budget year, in accordance with the regulations set out in Section D of the LSB-GSR. Signed on ….(date)… by: Witnessed by: ………………. ………………. ……….. Walter Tholen, LSB Researcher Assoc. Dean, Research&Partnerships

Complete the above information and submit the form to the Facilities Manager or Health and Safety Manager.
3. Request for Access to the 3rd/4th Floors Labs in LSB
Full Name:________________________________ Employee/Student #:_______________ Department:_______________________________ Number on Access Card: ___________ Email Address: ______________________________________________________________
Contact your departmental Administrative Assistant if you require a new Access Card and/or access to Zone I (offices, write-up areas, meeting rooms and lunch rooms).
This request for access to LSB is for the: 3rd Floor 4th Floor I need access to the following location(s) on the above specified floor:
Zone II (main laboratory, tissue culture rooms and common equipment rooms)
Access to Zone II requires:
i. Completion of WHMIS II training. Training Date: ____________________
ii. Completion of Biosafety training. Attach a copy of your training certificate. **
iii. Being included on a relevant Biosafety Certificate. Cert. #: _______________ OR
I am a visitor who only requires access to use instruments/equipment.
Validated by Floor Speaker: ____________________________________
Zone III (X-ray room – 336 LSB) Access to Zone III requires access to Zone II, in addition to:
Completion of X-Ray Safety training. Training Date: ____________________
Zone IV (Radioisotope room – 334 LSB) iv. Access to Zone IV requires access to Zone II, in addition to completion of
Radiation Safety training. Attach a copy of your training certificate. **
Zone V (Laser Imaging Systems – 436 & 441 LSB) Access to Zone V requires access to Zone II, in addition to:
Completion of Laser Safety training. Training Date: ____________________
Signature of Applicant: _________________________________ Date: ________________
Signature of PI (if applicant is student): ___________________________________________
11
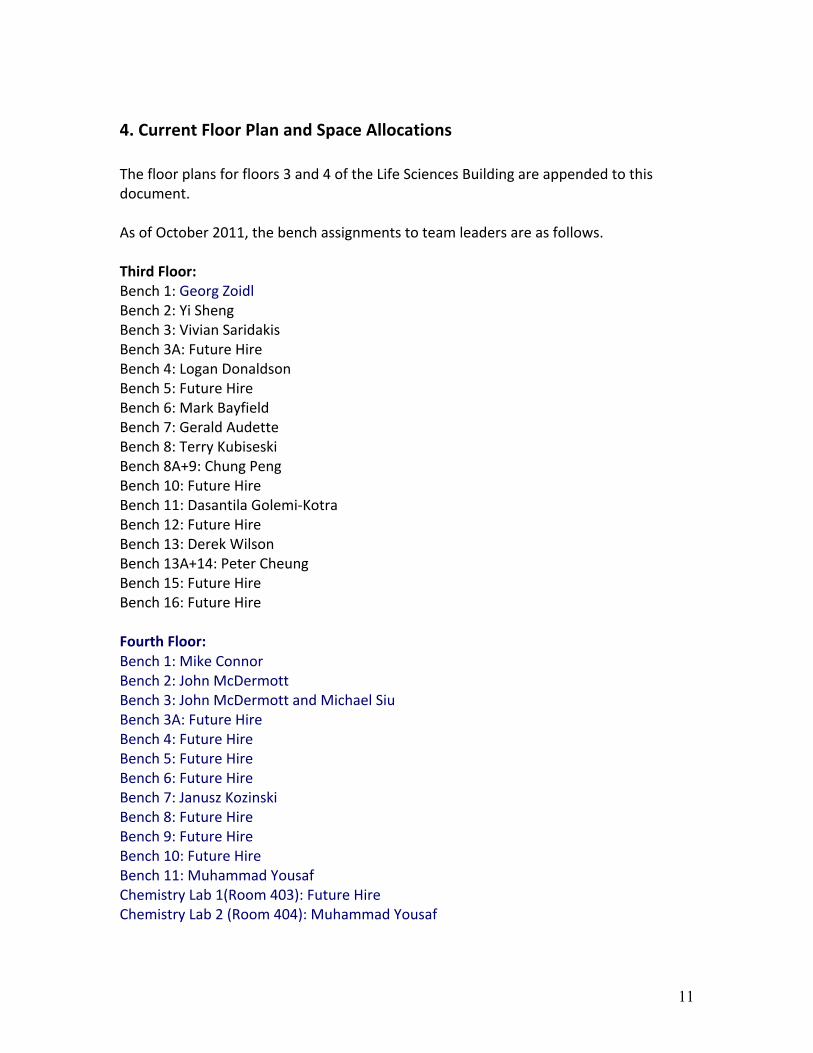
4. Current Floor Plan and Space Allocations The floor plans for floors 3 and 4 of the Life Sciences Building are appended to this document. As of October 2011, the bench assignments to team leaders are as follows. Third Floor: Bench 1: Georg Zoidl Bench 2: Yi Sheng Bench 3: Vivian Saridakis Bench 3A: Future Hire Bench 4: Logan Donaldson Bench 5: Future Hire Bench 6: Mark Bayfield Bench 7: Gerald Audette Bench 8: Terry Kubiseski Bench 8A+9: Chung Peng Bench 10: Future Hire Bench 11: Dasantila Golemi-‐Kotra Bench 12: Future Hire Bench 13: Derek Wilson Bench 13A+14: Peter Cheung Bench 15: Future Hire Bench 16: Future Hire Fourth Floor: Bench 1: Mike Connor Bench 2: John McDermott Bench 3: John McDermott and Michael Siu Bench 3A: Future Hire Bench 4: Future Hire Bench 5: Future Hire Bench 6: Future Hire Bench 7: Janusz Kozinski Bench 8: Future Hire Bench 9: Future Hire Bench 10: Future Hire Bench 11: Muhammad Yousaf Chemistry Lab 1(Room 403): Future Hire Chemistry Lab 2 (Room 404): Muhammad Yousaf

12
5. Current Equipment List [as supplied by Peter, to be adjusted/maintained by Doriano]
Room Equipment Equipment Code Quantity Confirmed User New Relocation Open Wet lab 312
FPLC fridge EQ81 3 Dasantilia - Logan - Philip Yes -20 freezer EQ 20 3 Yi Sheng(2)-Vivian Yes
4C Refrigerators EQ 36 7 Vivian (2)- Terry (2)-logan(1)-Mark(1)-Yi Sheng(1) Yes
Bench 2 Speed Vac 1 Yi Sheng Yes Bench 2 Desk top centrifuges 2 Yi Sheng Yes Bench 2 Analyst HD plate reader 1 Yi Sheng Yes Bench 2 Waterbath shaker 1 Yi Sheng Yes Bench 3 Desk top centrifuges 3 Vivian Yes Bench 3 Analyst HD plate reader 1 Vivian Yes Bench 3 Waterbath 1 Vivian Yes Bench 3 Centrifuge Allegra 25R (bench top) EQ 10 1 Vivian Yes Bench 3 Milli-q/Barnstead Nanopure water system EQ 33 1 Vivian Yes
Corridor 387 -80C Freezers EQ 23 3 Vivian- Logan-Philip
Open Wet lab 310
-20 freezer EQ 20 7 Vivian(1)-Logan(2)-Philip(1)-Mark(2)-Terry(1) Yes
Bench 4 French pressure Cell 1 Logan Yes Bench 4 CD benchtop+ computer 1 Logan Yes Bench 4 Eppendor Centrifuge 1 Logan Yes Bench 4 Spectrophotometer 1 Logan Yes Bench 4 Transilluminator 1 Logan Yes Bench 4 Milli-q/Barnstead Nanopure water system EQ 33 1 Logan Yes Bench 4 Microplate Fluorimeter 1 Logan Yes Bench 5 Barnstead Incubator L-C 1 Mark Yes Bench 5 Mini Centrifuge 1 Mark Yes Bench 5 French pressure Cell 1 Mark Yes Bench 6 FPLC +Computer 1 Philip Yes Bench 6 ITC +Computer 1 Philip Yes Bench 6 UV- Visible Spectrophotometer 1 Philip Yes Bench 6 Gel doc +Computer 1 Philip Yes Bench 6 Incubator 1 Philip Yes Bench 6 Freeze dry system 1 Philip Yes Bench 7 FPLC +OLS 1 Gerald Yes Bench 7 Centrifuge Allegra 25R (bench top) EQ 10 1 Gerald Yes Bench 7 Spectrophotometer EQ43 1 Gerald Yes Bench 7 Incubator EQ 30 1 Gerald Yes Bench 7 Milli-q/Barnstead Nanopure water system EQ 33 1 Gerald Yes Bench 8 Incubator EQ 30 1 Terry Yes
Open Wet lab 308 Ice machine EQ 28 1 Philip -20 freezer EQ 20 3 Chun(2)-Dasantila Yes Bench 9 Milli-q/Barnstead Nanopure water system EQ 33 1 Chun Yes
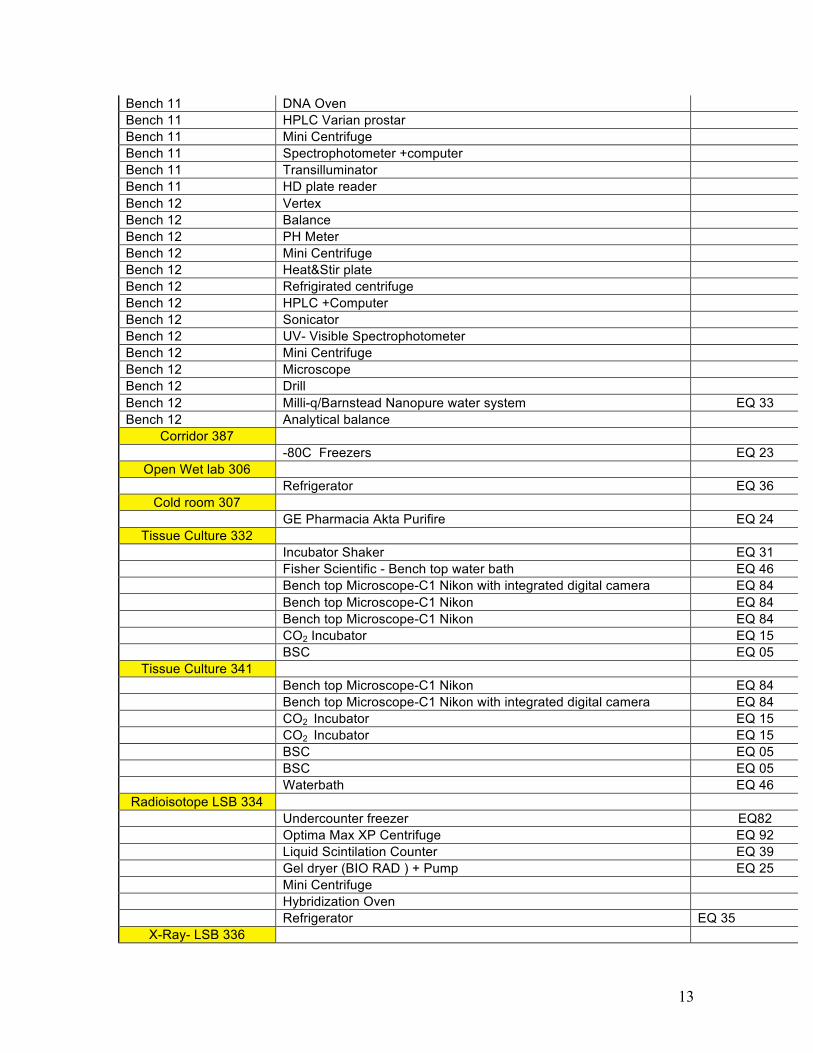
13
Bench 11 DNA Oven 1 Dasantila Yes Bench 11 HPLC Varian prostar 1 Dasantila Yes Bench 11 Mini Centrifuge 1 Dasantila Yes Bench 11 Spectrophotometer +computer 1 Dasantila Yes Bench 11 Transilluminator 1 Dasantila Yes Bench 11 HD plate reader 1 Dasantila Yes Bench 12 Vertex 1 Derek Yes Bench 12 Balance 1 Derek Yes Bench 12 PH Meter 1 Derek Yes Bench 12 Mini Centrifuge 1 Derek Yes Bench 12 Heat&Stir plate 1 Derek Yes Bench 12 Refrigirated centrifuge 2 Bench 12 HPLC +Computer 1 Derek Yes Bench 12 Sonicator 1 Derek Yes Bench 12 UV- Visible Spectrophotometer 1 Derek Yes Bench 12 Mini Centrifuge 1 Derek Yes Bench 12 Microscope 1 Derek Yes Bench 12 Drill 1 Derek Yes Bench 12 Milli-q/Barnstead Nanopure water system EQ 33 1 Derek Yes Bench 12 Analytical balance 1 Derek Yes
Corridor 387 -80C Freezers EQ 23 3 Chun-Gerald-Terry Yes
Open Wet lab 306 Refrigerator EQ 36 5 Chun(4)-Dasantila Yes
Cold room 307 GE Pharmacia Akta Purifire EQ 24 1 Dasantila Yes
Tissue Culture 332 Incubator Shaker EQ 31 Yi Sheng Yes
Fisher Scientific - Bench top water bath EQ 46 3 Chun (3) Bench top Microscope-C1 Nikon with integrated digital camera EQ 84 1 Yes Bench top Microscope-C1 Nikon EQ 84 1 Yes Bench top Microscope-C1 Nikon EQ 84 1 Chun (1) Yes CO2 Incubator EQ 15 8 Yes BSC EQ 05 4 Yes
Tissue Culture 341 Bench top Microscope-C1 Nikon EQ 84 1 Yes
Bench top Microscope-C1 Nikon with integrated digital camera EQ 84 1 Yes CO2 Incubator EQ 15 2 Yes CO2 Incubator EQ 15 6 Yes BSC EQ 05 1 Vivian Yes BSC EQ 05 3 Yes Waterbath EQ 46 1 Vivian Yes Radioisotope LSB 334
Undercounter freezer EQ82 1 Dasantilia (1) Yes Optima Max XP Centrifuge EQ 92 1 Yes Liquid Scintilation Counter EQ 39 1 Yes Gel dryer (BIO RAD ) + Pump EQ 25 1 Dasantilia (1) Yes Mini Centrifuge 1 Dasantilia (1) Yes Hybridization Oven 1 Mark(1) Yes Refrigerator EQ 35 1 Dasantila Yes
X-Ray- LSB 336

14
X -Ray Generator (20kV UPS system to be provided . Everything else has been addressed directly to NXL) EQ 71 1 Gerald (1) Yes
X Ray X Stream N2 generator EQ 72 1 Gerald (1) Yes X Ray X Stream HE compressor EQ 73 1 Gerald (1) Yes X Ray X Stream cold head support EQ 74 1 Gerald (1) Yes X Ray - AFC 11 EQ 75 1 Gerald (1) Yes Portable microscope EQ 77 1 Gerald (1) Yes Helium tank EQ 80 2 Gerald (1) Yes Helium regulator EQ 1 Gerald (1) Yes Haskris EQ 78 1 Gerald (1) Yes UPS EQ 93 2 Gerald (2) Yes light microscopes EQ 84 2 a)Gerald (1)b)Vivian (1) Yes
Bio-containment LSB 337
BioSafety Hood Kendro KS12 EQ 06 1 Dasantilia (1) Yes
Bench Top Shaker Barnstead Lab-line Model SHKE4000-7, MaxQ-4000 EQ 40 1 Dasantilia (1) Yes
LSB 337 Floor mounted shaker, Thermoelectron Corp. Model 480 EQ 41 1 Dasantilia (1) Yes LSB 337 Incubator, Barnstead Lab- Line Model 403 EQ 29 1 Dasantilia (1) Yes LSB 337 Sonicator, Biologics Inc., Model Ultrasonic 3000 EQ 91 1 Dasantilia (1) Yes LSB 337 Bench top centrifuge, Beckman Coulter Model Allegra 25R EQ 10 1 Dasantilia (1) Yes LSB 337 Fermentor 1 Logan(1) Yes Computer Lab LSB 325
Computer stations, including ;2 SGI Graphics workstations with dials and 3D stereo, SGI Octane and O2 and 5 Imac Crystal Workstations, Apple 24 Inch IMAC
EQ X 6 Vivian (6) Yes
Common Equipment Room LSB 330
Centrifuge, Beckman Avanti JE[2],J2-21,JA2 EQ 07 2 Gerald -Vivian Yes FPLC fridge EQ 81 1 Logan(1) Yes Centrifuge , Sorvall RC4 EQ 09 4 Philip-Mark(2)-Logan Yes Incubator Shaker, New Brunswick 26R, floor model EQ 32 4 a)Gerald (2)-b)Logan(2) Yes Incubator Shaker, New Brunswick 43R, floor model EQ 32 2 Vivian (2) Yes Inova 40-bench top EQ 31 1 Vivian (1) Yes
Incubator shaker EQ Z 1 Chun (1) Yes VWR Incubator plate-20"x27"x36" EQ 30 1 Vivian (1) Yes
Beckman , JLA 9.1000, JA25.5, JA16.25,JA20,JA10,JA 18.1 Rotors EQ A1 12 a)Gerald (3) - b)Vivian (3)-c)Mark(3)d)Logan(2) e)Philip(1) Yes
Inova 42 Incubator EQ 88 1 Mark(1) Yes Gel doc +computer 1 Logan(1) Yes
Common Analytical Room LSB 348
Microplate Fluorimeter, Varian Eclipse+computer EQ D1 1 Vivian Yes Microplate Fluorimeter computer EQ E1 1 Vivian (1) Yes Freeze Dry System EQ G1 1 Logan (1) Yes
Chromatography Fridge(4C) with ATKA Purifier,VWR 1331l + computer EQ 24 1 Vivian (1) Yes
Spectrophotometer, Beckman Coulter DU series 700 & DU 520 EQ 43 1 Chun (1 DU 520) - Yes Gel Dryer, Thermo + pump EQ 25 1 Philip Yes Micro plate reader EQ 89 ??? 1 Yes PCR,Applied Biosystem EQ 34 1 Yes
15
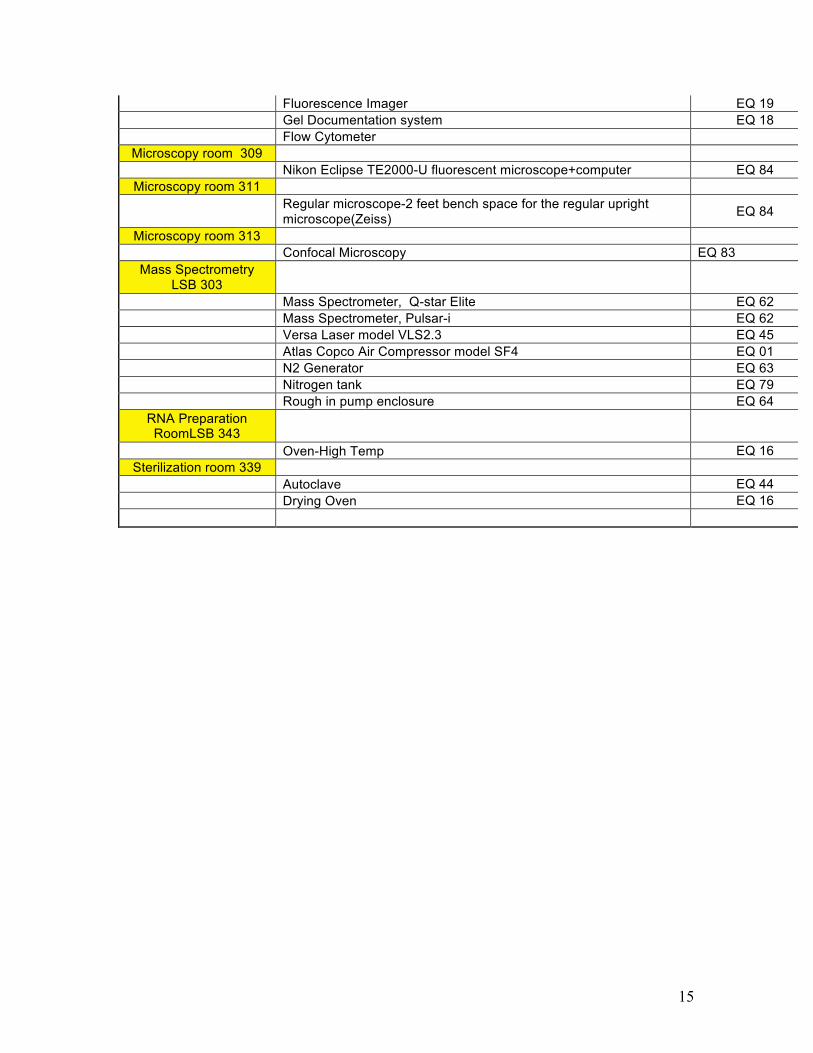
Fluorescence Imager EQ 19 2 Yes Gel Documentation system EQ 18 1 Yes Flow Cytometer 1 Microscopy room 309
Nikon Eclipse TE2000-U fluorescent microscope+computer EQ 84 1 Chun (1) Yes Microscopy room 311
Regular microscope-2 feet bench space for the regular upright microscope(Zeiss) EQ 84 1 Chun (1) Yes
Microscopy room 313 Confocal Microscopy EQ 83 1 Yes
Mass Spectrometry LSB 303
Mass Spectrometer, Q-star Elite EQ 62 1
Derek Wilson (All)
Yes Mass Spectrometer, Pulsar-i EQ 62 1 Yes Versa Laser model VLS2.3 EQ 45 1 Yes Atlas Copco Air Compressor model SF4 EQ 01 1 Yes N2 Generator EQ 63 1 Yes Nitrogen tank EQ 79 1 Yes Rough in pump enclosure EQ 64 2 Yes
RNA Preparation RoomLSB 343
Oven-High Temp EQ 16 1 Philip Yes Sterilization room 339
Autoclave EQ 44 2 Yes Drying Oven EQ 16 1 Yes
210

16
6. General Laboratory Safety Guidelines A. Introduction
A.1. Health and Safety is the first priority in all operations. Before using any hazardous materials, safety considerations always need to be taken into account.
A.2. In addition to the resources listed under the following specific topics, the Laboratory Safety Manual provides some general background.
www.yorku.ca/dohs/documents/YU_Lab_Safety_Program.pdf B. Available Safety Equipment
B.1. Emergency Safety Showers B.1.1. Emergency safety showers on the third and fourth floor are located within
the main lab room, at the south end of each fumehood grouping.
B.2. Emergency Eyewash Stations B.2.1. Emergency eyewash stations are located at most lab sinks. B.2.2. The emergency eyewash stations require weekly inspections, as outlined
in the Guidelines for Emergency Eyewash Stations and Safety Showers: www.yorku.ca/dohs/documents/Emergency_Eyewash_Stations_and_Safety_Showers.pdf
B.2.3. Inspection of eyewash stations is a task that will be assigned by the LSB Researchers Committee.
B.3. Chemical Spill Kits
B.3.1. A common chemical spill kit will be located within each of the main lab rooms.
B.3.2. Know the location of the spill kit and how to use the spill kit that has been supplied.
B.4. MSDS sheets
B.4.1. A binder is located in each room with the relevant MSDS sheets for that area.
B.4.2. A common binder will be located in the main lab that includes MSDS sheets for all chemicals being used within that area.
B.4.3. Updating of MSDS sheets will be a task assigned by the LSB Researchers Committee.
C. Safety Hazards Associated with Chemicals
C.1. Labeling Chemical Containers C.1.1. All chemical containers must be labeled. For more information on the
labeling of chemical containers, refer to the WHMIS program: www.yorku.ca/dohs/documents/WHMIS_Program.pdf

17
C.2. General Chemical Handling C.2.1. Always refer to the MSDS sheets before using a particular chemical. For
information on handling chemicals of different WHMIS classes, refer to the WHMIS Program: www.yorku.ca/dohs/documents/WHMIS_Program.pdf
C.2.2. For additional information on the ‘Handling, Using and Storing of Chemicals’, refer to SOP# FSE-02-08. www.science.yorku.ca/healthandsafety (click on SOP link)
C.3. Flammable Liquids
C.3.1. Keep flammable liquids away from sparks or open sources of ignition. C.3.2. Do not store flammable or combustible liquids with oxidizer. C.3.3. Flammable and combustible liquids need to be stored in flammable liquid
storage cabinets. C.3.4. Flammable liquid storage cabinets are located underneath all fumehood. C.3.5. Each flammable liquid storage cabinet will be assigned to the group(s)
using that fumehood. C.3.6. Dispensing to or from containers larger than 5L requires specific
grounding/bonding techniques and proper equipment.
C.4. Toxic Chemicals C.4.1. Toxic chemicals need to be stored in vented storage cabinets, especially
toxic chemicals that are volatile. C.4.2. Vented cabinets are located underneath all fumehood. C.4.3. Each vented cabinet will be assigned to the group(s) using that fumehood. C.4.4. Wear appropriate gloves and other relevant PPE when working with toxic
chemicals.
C.5. Chemical Waste Disposal C.5.1. Under no circumstance is discharge of hazardous waste allowed to sewer
system. This practice is strictly prohibited under the City of Toronto Works Departments and Water and Wastewater Services bylaws regarding discharge to municipal sewers.
C.5.2. As a reminder, a sign has been posted above lab sinks in LSB indicating that hazardous chemicals must not be poured down the sink.
C.5.3. For more information on the ‘Disposing of Hazardous Chemicals’, refer to SOP# FSE-05-08. www.science.yorku.ca/healthandsafety (click on SOP link)
D. Safety Hazards Associated with Biohazardous Materials
D.1. Organisms are classified into one of four Risk Groups based on how much potential risk to health they pose.
D.1.1. This dictates the procedures required to properly address hazards associated with biohazardous material.

18
D.1.2. This assessment is done by the Biosafety Committee and part of the Biosafety Program: www.yorku.ca/dohs/biosafety.htm
E. Safety Hazards Associated with Compressed Gas Cylinders
E.1. General Handling of Gas Cylinders E.1.1. Compressed gas cylinders are under very high pressure so there is a
significant risk if the cylinder gets damaged and/or leaks, causing asphyxiation (when released in an enclosed space) or explosion.
E.1.1.1. Depending on the gas used, there can be additional hazards associated with the properties of the gas (i.e. corrosive, flammable).
E.1.2. Always refer to the MSDS sheets before using a particular gas. For general information or information on handling gases of different hazards, refer to the Compressed Gas Cylinder Safety Program: www.yorku.ca/dohs/documents/YU_Compressed_Gas_Cylinder_Safety%20_Program.pdf
E.1.3. For additional information on the ‘Handling, Using and Storing of Compressed Gases’, refer to SOP# FSE-01-08. www.science.yorku.ca/healthandsafety (click on SOP link)
E.2. Transporting Compressed Gas Cylinders
E.2.1. Compressed gases should be transported from their storage location in 030H Petrie through the tunnel to LSB.
E.2.2. Transporting compressed gases between floors in LSB should be done by using the freight elevator at the east end of the building.
F. Laboratory Inspection and Audit
F.1. PIs or Lab Supervisors should inspect regularly (at least once a year) the areas their research group works. The inspection form is found on DOHS website under forms: www.yorku.ca/dohs/documents/lab_inspection_checklist.pdf
A copy of the completed inspection report should go to FSE HSO. F.2. In addition to occasional inspections from external regulatory agencies, the
Department of Occupational Health, the Biosafety Committee and Faculty Managers will conduct annual laboratory inspection/audit.
G. Working Alone in the Laboratory
G.1. When working alone in the lab (especially at night), notify someone else nearby or York Security of your location and working hours, so that they can check with you frequently. Refer to YU Working Alone Program for more information:
www.yorku.ca/dohs/documents/Working_Alone_Program_2011.pdf
19
7. Emergency Response Procedures 1... Introduction
1.1... In the event of an emergency, it is important to remain calm. 1.2... If assistance is required in an emergency situation, buttons or phones with
direct connection to York Security Services are located by the elevator and at the east end of the research labs. Know the location of the closest Security button.
2... First Aid
2.1... First Aid Kits 2.1.1. The main labs on the third and fourth floors are equipped with a
designated First Aid kit. 2.1.2. Know the location of your closest first aid kit.
2.2... First Aid Training 2.2.1. A trained first aider is assigned to each designated station. 2.2.2. To arrange for First Aid training contact the Health and Safety Manager.
2.3... Administering First Aid
2.3.1. First aid should be administered by the person(s) assigned to that designated first aid station.
2.3.2. Alternatively, Security Services personnel are all trained in First Aid. 2.3.3. A trained first aider is assigned to each designated station. 2.3.4. Know who the first aider is for your area.
3... Fire Emergencies
3.1... Recognition of Smoke and/or Fire 3.1.1. If there is visible smoke or fire, pull the fire alarm to evacuate the building
immediately. 3.1.2. Call 911. Then call York Security Services (ext. 33333 or 416-736-5333)
so that York Security Services can help direct Emergency vehicles to the correct location.
3.2... Evacuation Procedures
3.2.1. Leave the building in a calm and orderly fashion. Do not use the elevators. 3.2.1.1.When evacuating a building if you see someone wearing the
fluorescent orange or yellow vest, they are trained Emergency Response Wardens – please follow their instructions.
3.2.2. Go to the designated Assembly Point. 3.2.3. Know the location of Emergency Exits and the Assembly Point for LSB.

20
3.3... Using a Fire Extinguisher
3.3.1. After initiating the fire alarm to evacuate the building, if you are comfortable trying to extinguish the fire, you may use the fire extinguisher provided.
3.3.1.1. So that you are comfortable in handling a fire extinguisher and have knowledge in fighting fires, you should complete Laboratory Fire Safety training.
3.3.2. Know the location of your closest fire extinguisher. 4... Hazardous Spill Response
4.1... Hazardous Chemical Spills 4.1.1. Follow Emergency Spill Procedure:
www.yorku.ca/dohs/documents/Emergency_Spill_Procedure.pdf 4.1.2. If the spill is small enough and you are comfortable addressing the spill,
use your spill kit to clean up (neutralize/absorb) the spill.
4.2... Biological Material Spills 4.2.1. Follow Bio-hazardous Exposure and Spills Procedure:
www.yorku.ca/dohs/documents/Biological_Materials_Exposure_Spills_Response.pdf 4.2.2. Depending on type of exposure or location of spill, specific actions are
outlined in the above procedure.
4.3... Radioactive Material Spills 4.3.1. Follow procedures outlined in Radiation Safety Manual:
www.yorku.ca/dohs/documents/RadiationSafetyManual_08.pdf 4.3.2. Depending on type of exposure or location of spill, specific actions are
outlined in the above manual.
21
8. LSB Autoclave Procedures 1. Introduction
1.1. Biological materials, if handled improperly, can be hazardous to workers, the environment or other people in the community.
1.2. These guidelines are for all faculty, staff and students that need to use the autoclaves in LSB.
2. Materials and Equipment
2.1. Autoclave Bags 2.1.1. If clear, unlabelled autoclave bags are used, it must be placed and remain
inside a secondary container labeled with a biohazard symbol at all times until waste is placed into the autoclave for sterilization. Or,
2.1.2. If clear autoclave bags labeled with a biohazard symbol are used, the biohazard symbols should be defaced after the biohazard has been successfully autoclaved.
2.1.3. DO NOT use yellow or red autoclave bags to avoid confusion with regulated biomedical waste.
2.2. Biological Indicators
2.2.1. Biological monitoring of autoclave sterilization efficacy is done using biological indicator vials containing Geobacillus Stearothermophilus with a population of 1 x 10⁶ spores/unit.
2.3. Chemical Integrators
2.3.1. Class 5 chemical Integrators provide visual confirmation of adequate steam penetration into the package. Chemical Integrators are used to monitor individual packages and do not replace the need for biological indicators, which monitor the efficacy of the autoclave.
2.4. Autoclaves
2.4.1. There are autoclaves in 241 and 339 LSB. Each location has two Primus autoclaves and they are all equipped with a Primus PSS500 autoclave controller.
3. Autoclaving Biohazardous Waste NOTE: These procedures are not intended to indicate what materials are safe after being treated by autoclave, but to outline procedures to use the autoclaves in LSB. For assistance in segregating biohazardous waste, refer to the York University Biosafety Guideline: Biohazardous Waste Disposal.

22
www.yorku.ca/dohs/documents/BiohazardousWasteDisposal.pdf
3.1. Some biohazardous waste can be sterilized by steam in an autoclave. 3.1.1. If you are using an autoclave to sterilize biohazardous waste, you will
need to complete Biosafety training. 3.1.2. If you use the autoclave for sterilization but not for sterilization of
biohazardous waste (even biological materials that are not considered biohazardous should be routinely sterilized prior to disposal), consult the DOHS Autoclave Training Guide. www.yorku.ca/dohs/documents/Autoclaves_Guidelines.ppt
3.2. Autoclaves use high temperature steam in a pressurized vessel and can be hazardous if not used properly. Get trained! Do NOT operate any autoclaves without appropriate training.
3.2.1. Regardless of prior knowledge or in-class training received, hands-on training for each specific autoclave should be given. A checklist of items that should be discussed before operating any autoclave unit can be found on the last page of this document.
4. Using the Autoclaves NOTE: You should have received hands-on training before using any autoclave (see last page of this document).
4.1. General Procedures for Using the Autoclave 4.1.1. Place the infectious waste into an acceptable autoclave bag. The bag or the
container that holds the bag must be labelled with the “biohazard” symbol on it. Do not overfill the autoclave bag, and do not seal the bag. Steam must be able to circulate within the chamber to effectively destroy the biological agents.
4.1.2. Transport the package, using secondary containment, to the autoclave rooms.
4.1.3. If you are autoclaving biohazardous waste you must use a chemical integrator (see section 8 of this SOP) to confirm that sufficient exposure conditions have been met.
4.1.4. Place bag(s) on autoclavable trays to collect any liquids produced while autoclaving. Liquids to be autoclaved must also be in labeled, leak-proof containers and placed on a tray. Be careful not to overfill and loosen any caps to prevent pressure build-up within the container.
4.1.5. Use the autoclave controller (see below on using the autoclave controller) to select the cycle, time and to start the autoclave.
4.1.5.1.Liquids: Use Liquid/Slow exhaust cycle to prevent liquids from boiling over. Cycle times are 20 minutes for a litre and 5 minutes per additional litre.
4.1.5.2.Solids: Use Solid/Vacuum is the most common cycle for wrapped solid items. If Solid/Gravity cycle is an option, it is best used for unwrapped solid items. Cycle times are 15 minutes for empty

23
glassware, 30 minutes for utensils/instruments and at least 30 minutes per bag of biohazardous waste.
4.1.6. In the Autoclave Use Log Book record Name, contact information, autoclave cycle, date, time and items being autoclaved.
4.1.7. If autoclave is in alarm or has halted/stalled, make a note in the log book. Your waste has not been sterilized until it has gone through a complete cycle, so your waste will need to be autoclaved again.
4.1.8. After autoclaving, remove waste using heatproof gloves. Any remaining biohazard symbol or biohazard wording must be covered, removed or defaced (e.g. blacked out with a marker, covered with autoclave tape, or by applying stickers) to indicating the waste is no longer biohazardous.
4.1.9. Once items have cooled somewhat, 4.1.9.1.The waste bags of gel/solid materials are then placed into the
orange/red plastic waste bins (bins are labelled as ‘NON-HAZARDOUS, AUTOCLAVED WASTE ONLY’) lined with regular waste bags. Never put unautoclaved items into the bins! Bins should only be filled up to the fill line on the bin (~3/4 full) and then moved into the hallway for collection by Custodial Services.
4.1.9.2.Autoclaved liquids (that are not solids at room temperature) can be disposed into the sanitary sewer system.
4.2. Using the Primus PSS500 Autoclave Controller
4.2.1. This controller is equipped with pre-set cycles that are sufficient for most users.
4.2.1.1.After making sure the autoclave is turned on, loading your material and locking the door, select your cycle on the touchpad.
4.2.1.1.1. Cycle numbers 1-4 are selected by pressing the corresponding button [1], [2], [3], [4], cycle numbers 5-8 are selected by pressing the [ ∧ ] [1], [ ∧ ] [2], [ ∧ ] [3], and [ ∧ ] [4] respectively.
Cycle
Number Cycle Type
Sterilize Temp Sterilize Time (min)
Dry Time (min)
1 Vacuum 134°C (273°F) 15 30 2 Vacuum 134°C (273°F) 4 1 3 Vacuum 134°C (273°F) 4 30 4 Vacuum 134°C (273°F) 4 30
5 or ∧ 1 Gravity 134°C (273°F) 4 1
6 or ∧ 2 Gravity 123°C (253°F) 30 30
7 or ∧ 3 Liquid 123°C (253°F) 30 15 *
8 or ∧ 4 * Dry time in LIQUID cycles is liquid cool time. 4.2.1.2. Close the autoclave door.
4.2.1.2.1. The touchpad LED indicators (READY), (DOOR CLOSED), and (START) will light.

24
NOTE: The (READY) light will not be lit, nor will the [START] button be operative until the jacket temperature has reached 2°C (6°F) below operating temperature and the door is closed.
4.2.1.3. Press the start button on the touchpad. 4.2.1.3.1. The cycle proceeds automatically, with Operator Panel
indicator lights and LCD display monitoring phases and conditions throughout the cycle.
4.3. Procedures for Alarms/Warnings
4.3.1. Should an alarm, timeout or other error occur, a message will appear on the touchpad LCD screen. In addition a buzzer will sound, if it is a door or door gasket related alarm.
4.3.1.1. Refer to the following table for alarms, timeouts and loss of power. In all cases the load may be compromised and will need to be run through the autoclave cycle again.
Warning Shown on
Display/Printout Condition Solutions
Audible Alarm
Display: DOOR NOT CLOSED Printout: "DOOR NOT CLOSED"
Door not closed during cycle
Press [1] (ABORT) – Advances to Exhuast Phase Press [2] (RETRY) – Checks if problem still exists Press [3] (Ignore) – Ignores problem (not recommended). If problem continues, call maintenance technician.
Audible Alarm
Display: GASKET ERROR Printout: "DOOR GASKET ERROR"
Door gasket not sealed during cycle
Audible Alarm
Display: OVER TEMPERATURE Printout: "!OVER TEMPERATURE!"
Chamber temperature exceeds the preset limit
Press [START] to retry. If problem persists, press [ADV] to end cycle and call maintenance technician. Audible
Alarm
Display: LOW TEMPERATURE Printout: "!UNDER TEMPERATURE!"
Chamber temperature is below the preset limit
Timeout Printout: "TIMEOUT: STEAM TO CHAMBER RETARDED"
There are different timeout errors when setpoint/parameters are not reached in any phase of the cycle.
The cycle auto-advances to cycle completion. Call maintenance technician. Timeout Printout: "TIMEOUT: IN
AIR REMOVAL"
Timeout Printout: "TIMEOUT: IN POST VACUUM"
Loss of Power
Display: ERROR – LOAD MAY BE COMPRISED Printout: "POWER FAILURE DETECTED"
Power interruption during cycle.
If power fluctuation, cycle auto-advances when power is restored. If no power, call x 22401.

25
5. Monitoring Efficiency of Autoclaves
5.1. Chemical Integrators 5.1.1. Class 5 chemical integrators must be used to monitor steam penetration in
loads that contain biohazardous waste. 5.1.2. Chemical integrators must be used in each package to immediately
identify problems with the load or within each package. 5.1.3. To properly use the chemical integrator:
5.1.3.1. Place chemical integrator strip inside the autoclave bag and process load,
5.1.3.2. After cycle completion, check the chemical integrator to see if it shows the package has been approved/passed/safe.
5.1.3.3. If the package has been approved/passed/safe it can be placed in autoclave bins.
5.1.3.4. Indicate in Log Book. 5.1.4. If the chemical integrator shows the package has not been
approved/passed/safe then adjust the package to allow for better steam penetration and autoclave the package again. If the chemical integrator still shows the package has not been approved/passed/safe then take the autoclave out of service and contact a lab technician and/or the contact the Health, Safety and Compliance Manager for the Faculty of Science and Engineering (ext. 20770) and/or the Biosafety Officer for the Department of Occupational Health and Safety (ext. 44745).
5.2. Biological Indicators
5.2.1. In addition to monitoring of individual packages, biological indicators must be used at least every 6 operating days to verify that the autoclave will kill spores.
5.2.1.1. Take two biological indicator vials containing Geobacillus Stearothermophilus spores with a population of 1x10⁶ spores/unit and label one as the Bio-Indicator (BI) and label one as the Control (C).
5.2.1.2. Place BI in a secondary container (i.e. jar, plastic baggie, flask) so it can be kept clean and easily retrieved. Place BI in a load (in the upright position) with materials to be autoclaved and process the load. Do not autoclave the Control (C).
5.2.1.3. Once the sterilization is complete, remove BI from the autoclave and allow to cool for 10 minutes. The chemical indicator on the label changes from blue to black when exposed to steam.
5.2.1.4. Take both indicator vials (BI & C) and activate the media in both vials by gently crushing the glass ampoule within the plastic tube.
5.2.1.5. Place both indicator vials in an incubator (in the upright position) and incubate immediate at 55-60°C.

26
5.2.1.6. Examine the indicators at regular intervals (i.e. 8, 12, 18, 24 hours) for any colour change. There should be a colour change in the control vial (showing spore growth) and no colour change in the autoclaved vial (showing adequate sterilization).
5.2.1.7. Record results in Daily Autoclave Use Log Book. 5.2.2. If a colour change occurs in the indicator before the end of 24 hours, take
the autoclave out of service and contact the Health, Safety and Compliance Manager for the Faculty of Science and Engineering (ext. 20770) and/or the Biosafety Officer for the Department of Occupational Health and Safety (ext. 44745).

27
LSB Hands-on Autoclave Training Checklist Associated Risks Heat burns – from hot materials or autoclave walls and door Steam burns – from residual steam after opening autoclave door Explosions – from autoclaving chemicals or from expansion of liquids in sealed
containers During a hands-on training session, I was shown: � how to prepare materials to allow for steam penetration (i.e. loosen lids, vent
bags, etc.).
� to use secondary containers and temperature sensitive tape. � how to load the autoclave, leaving sufficient room for steam circulation. � what cycles (gravity, steam) to use for different materials (solids, liquids) and
how to determine the appropriate exposure time for the load. � how to select the cycle and operate the autoclave controller. � where to log autoclave use and the information required. � How to slowly open the autoclave after cycle completion to release residual
steam and allow pressures in liquids to stabilize.
� how to correctly remove materials from autoclave (i.e. use heat resistant gloves).
� how to verify temperature/pressure have been attained for the desired time when autoclaving biohazardous waste (i.e. chemical integrators).
� where to put autoclaved materials while they cool. � where to put autoclaved materials after they have cooled (i.e. in the red
‘Autoclave Materials’ bins). I, , have been shown how to correctly use and been given recommendations associated with using the autoclaves in 241 and 339 LSB. Signature of trainee: ________________________________ Date: _____________ Name of person giving Hands-on training: _____________________________________ Signature of person giving Hands-on training: __________________________________
28
9. General Guidelines for Using Tissue Culture Rooms in LSB A. Introduction
A.1. Improper handling of biohazardous materials can have an adverse effect on employees, students, the community and the environment.
A.1.1. This document is not intended to provide procedures on material handling in the tissue culture room. These procedures should be generated by individual research groups.
A.1.1.1. For guidelines on material handling, refer to the Guidelines in the Biosafety Program: www.yorku.ca/dohs/biosafety.htm
A.2. Work with material that requires a Biosafety Cabinet (BSC) should be performed in the tissue culture rooms (332, 341 and 439 LSB).
A.2.1. This document is not intended to provide direction on what material should be used in a biosafety cabinet or a tissue culture room. For more information on the risk assessment and certification process refer to the Biosafety Program Manual: www.yorku.ca/dohs/documents/York_University_Biosafety_Manual.pdf
B. Equipment Use in Tissue Culture Rooms
B.1. Biosafety Cabinets B.1.1. The biosafety cabinets within the tissue culture rooms in LSB are Class II
biosafety cabinets. B.1.2. The biosafety cabinets will be assigned to individual research groups by
the LSB Research Users Committee. B.1.3. For guidelines on using a biosafety cabinet, refer to Chapter 9 of the
Public Health Agency of Canada's Laboratory Biosafety Guidelines: www.phac-aspc.gc.ca/publicat/lbg-ldmbl-04/ch9-eng.php
B.2. Incubators B.2.1. Incubators will be shared among all research groups that use the tissue
culture room. B.2.2. Incubators are supplied with carbon dioxide through the building
pipelines. B.2.2.1. For more information on the ‘Carbon Dioxide Supply System
Procedures’ refer to this document in Appendix 10.
B.3. Centrifuge B.3.1. Centrifuges will be shared between all researcher groups that use the
tissue culture room. B.4. Other Equipment
B.4.1. The transportation of equipment in and out of the tissue culture rooms should be limited as much as possible.

29
B.4.1.1. Equipment commonly used in the tissue culture room should be dedicated to use in the tissue culture room.
B.4.2. Equipment that leaves the tissue culture room must be thoroughly disinfected.
C. Biohazardous Waste Treatment
C.1. Those use biohazardous materials must adhere to proper procedures for treatment of biohazardous waste.
C.1.1. For guidelines on segregating and treating biohazardous waste, refer to the Biosafety Guideline: Biohazardous Waste Disposal.
www.yorku.ca/dohs/documents/BiohazardousWasteDisposal.pdf
C.2. For biohazardous waste that can be treated by using an autoclave, one of the autoclaves in LSB may be used. Hands-on training is required before operating an autoclave.
C.2.1. For procedures on using the autoclaves in LSB and a hands-on training checklist, refer to appendix 8.
D. Inspection and Audits
D.1. As part of the Biosafety program, members of the Biosafety Committee will regularly inspected the tissue culture rooms while inspecting the main lab rooms.

30
10. Carbon Dioxide Supply System Procedures A. Introduction
A.1. Incubators in the tissue culture rooms are provided with carbon dioxide gas through a centralized piping system.
A.2. The centralized piping system is supplied carbon dioxide by gas cylinders connected to a manifold system, located in 093 LSB.
B. Gas Cylinders and Manifold System
B.1. Gas Cylinders B.1.1. Up to 16 carbon dioxide gas cylinders can be connected to the manifold
system at one time. B.1.1.1. There are two banks of up to 8 cylinders in each bank. One bank
on the left side and one bank on the right side. B.1.1.2. In each bank the cylinders are connected to one pipe that leads
through a main shut-off into the manifold system. B.1.2. Use only non-siphoning high pressure cylinders. B.1.3. The cylinders need to be secured in place while connected to the manifold
system.
B.2. Manifold System B.2.1. For each bank of cylinders there are 3 operating lights. There are 3 lights
on the left side and 3 lights on the right side. B.2.1.1. The three operating lights are:
IN USE – when the bank is feeding gas, this green light is illuminated. READY – when the bank is connected to full cylinders that have been opened and the line is charged/pressurized, this yellow light is illuminated. EMPTY – when the bank of cylinders has emptied, this red light is illuminated.
B.2.2. When one bank of cylinders runs out, the operating light for that bank will change to EMPTY.
B.2.3. If the bank of cylinders on the opposite side of the manifold are full and the READY light was on, the manifold system will feeding gas from that bank and the operating light for that bank will change to IN USE.
B.2.4. The LCD screen displays pressure readings in psi. B.2.4.1. There are 5 different pressure readings shown on the display:
LIN – is the pressure of the gas exiting the manifold into the building supply piping. LEFT – is the pressure of the left bank of cylinders RIGHT – is the pressure of the right bank of cylinders

31
INT – is the pressure of the intermediate area (within the manifold) EMER – is the pressure in the emergency reserve, which is not being used (pressure should read 0000).
B.2.5. If any errors occur (i.e. both READY lights are on but neither bank is IN USE, both EMPTY lights are on but both banks are full, both banks are feeding gas) and/or an error message is being displayed on the LCD screen, contact the Health and Safety Manager. If it requires immediate attention contact the installation company: Class 1 Inc at 1-800-242-9723.
B.2.6. For additional information on using the manifold system, refer to the Operator’s Manual sitting on top of the manifold system.
C. Replacing Empty Cylinders with Full Cylinders
C.1. Training Requirements C.1.1. Compressed Gas Cylinder training is required to handle the gas cylinders
or use the manifold system. C.1.2. Anyone assigned to change the cylinders should have received hands-on
training in changing cylinders and using the manifold system. C.1.2.1. Contact Health and Safety Manager for hands-on training.
C.2. Replacing Empty Cylinders
C.2.1. Close all cylinders on the depleted bank. C.2.2. Very S-L-O-W-L-Y loosen (allow pressure to disipate) and remove the
pigtail connection from the empty cylinders. C.2.3. Remove empty cylinders and replace protective cap. These empty
cylinders should be transported to the empty cylinder cage in Petrie (030A). C.2.4. Place and secure full cylinders into position using the chain. C.2.5. Remove protective caps from full cylinders. With the valve outlet pointed
away from people, SLOWLY open each cylinder valve slightly for a split second to blow out any dirt or contaminants.
C.2.6. Connect pigtails to cylinder valves and tighten with a wrench. C.2.7. SLOWLY turn on each cylinder valve until each cylinder is fully on. You
should see the EMPTY light change to READY. C.2.8. Check connections using a leak detector solution like Snoop or Big Blu.
C.3. Notification Light and Responsibility for Replacing Cylinders
C.3.1. In each of the tissue culture rooms is an indicator light that notifies users that the cylinders need to be changed. However, the person assigned the task of replacing cylinders should check the manifold system on a regular basis.
C.3.2. The replacing of empty cylinders is a task that will be assigned by the LSB Researchers Committee.
D. Monitoring Oxygen Levels

32
D.1. Oxygen Sensor D.1.1. A sensor in the room monitors oxygen levels to make sure they are at least
between 19.5 and 23.5% of the ambient air. D.1.1.1. Ideally oxygen levels should be about 21%. D.1.1.2. Even oxygen levels close to specified limits (19.5-23.5%) can be
dangerous.
D.2. Alarm D.2.1. If the alarm is audible then do not enter the room and evacuate area
immediately. D.2.2. Contact security at ext 33333 or 416-736-5333.

33
11. Guidelines for Using the Radioisotope Room in LSB 1.. Introduction
1.1.. All work using radioactive materials in LSB should be limited to Room 334 LSB, as much as possible.
1.2.. Every radioisotope permit holder must ensure that workers using this room comply with all safety practices stipulated in the York University Radiation Safety Program:
www.yorku.ca/dohs/documents/RadiationSafetyManual_08.pdf 1.3.. The Radiation Safety Committee will oversee that York University Radiation
Safety Program applies to this room. 1.4.. A radioisotope permit holder will be assigned oversight of the radioisotope
records. The permit holder with oversight will be assigned by the LSB Researchers Committee.
2.. Access Restrictions
2.1.. Card Access 2.1.1. Access to this room is through card access only. Access card is not
transferrable.
2.2.. Access Requirements 2.2.1. To be granted card access, users must be able to show proof (e.g.,
certificate of training) of completion of the Radiation Safety training. 2.2.2. Users should wear their dosimeter badges when entering the radioisotope
room. 2.2.3. Food and drinks are not to be brought into the room.
2.3.. Limitations on Number of Users
2.3.1. A maximum of 5 persons are allowed to work in the room at one time. 2.3.2. Each P.I. is to identify and mark their specific work area/bench
3.. Usage Log 3.1 A radioisotope usage log must be posted in the room. The log should indicate the date
of use, name of the user, radioisotope, quantity and name of permit holder, 4.. Storage of Radioisotopes and Waste 4.1 All radioactive stock solutions are to be kept in secured/locked containment and
marked with radiation warning sign. 4.2 Radioactive Waste:
34
4.2.1 Radioactive waste is to be stored in clearly marked disposal containment. 4.2.2 Radioactive waste is to be emptied frequently. Do not accumulate
excessive waste in the room.
5.. Equipment Notes:
• All equipment used for radioisotope work must be labeled with radiation warning tape.
• Equipment brought into the radioisotope room should remain in the room and not transported in and out.
• Equipment that leaves the radioisotope room must be free from contamination and verified by wipe test or checking with a radiation detector.
5.1.. Scintillation Counter
5.1.1. Users of scintillation counter must record their usage in the log book. 5.1.2. If there is a spill or possible contamination of the counter, report to the
Radiation Safety Officer and the permit holder with oversight.
5.2.. Fumehood 5.2.1. All manipulations of volatiles (radioactive and non-radioactive)
undertaken in the radioisotope room must be performed in the designated fumehood inside the room.
5.2.2. Fumehoods should not be used for storage. However, if certain materials are to be temporarily left in the fumehood, they must be labeled as to their content and the name of the owner.
5.3.. Radiation Detector
5.3.1. An appropriate functioning radiation detector must be maintained and present in the radioisotope room.
6.. Contamination Check and Wipe Test
6.1.. Contamination Monitor 6.1.1. At the end of using radioactive materials, the user must do a
contamination check using a radiation detector before leaving the area. If contamination is detected, the user must immediately clean the area and recheck to ensure that the area has been decontaminated
6.2.. Wipe Test
6.2.1. Wipe test must be done at the end of radioisotope work or within the week when radioisotopes have been used.
6.2.2. Wipe test records must be kept in the room for inspection.
35
7.. Inspection and Audits
7.1.. The laboratory will be inspected regularly by the radioisotope permit holder(s) and members of the Radiation Safety Committee.
7.2.. Weekly wipe test audits will be done on random locations/equipment throughout
the room. A radioisotope permit holder (assigned by the LSB research Users Committee) will oversee the wipe test audits.

36
12. Guidelines for Using the NMR Facility in LSB
1) Access to spectrometer time and management of facility
A user committee will be established consisting of 1 representative from each user group, and "independent" Chair who is knowledgeable about instrumentation but not a direct stakeholder.
· The User committee will establish standard and equitable blocks of time for each major user group - using a transparent scheduling system such as exists at other institutions (e.g. http://www.nanuc.ca/nmr/schedules.php, system used at U of A).
·A technical support person will maintain the instrument, monitor access and use of the instrument and report to the user committee.
A record of use (either hard-copy or on-line) will be established which all users will be required to use, so that appropriate charges can be levied and problems with use quickly addressed. The technical support person will monitor and maintain the record of use.
2) Cost recovery.
The NMR will be run on a cost-recovery basis (at least to the extent that the necessary 35-50K annually that the machine requires for basic functioning will be recovered). Rates will be established by the user committee based on norms in the field.
For instance, user fees at University of Toronto
http://nmr.uhnres.utoronto.ca/ikura/nmrsuite/nmruser_info/User_fees_IkuraNMR.pdf
at University of Alberta http://www.nanuc.ca/nmr/rates.php Current external users to NMRs in Chemistry at York are charged at $100/hr. Since the new NMR has been selected specifically for sensitivity which will be attractive to some external customers, cost recovery from external sources should be pursued. The technical support person will be responsible for soliciting external users and also for ensuring charge backs on the equipment are regularly submitted and received.. The internal rate will be set by the users committee and is expected to be in the range of $5/hr as is common at other institutions (e.g. Queens University, University of Toronto). Researchers will pay for their own solvents, samples, NMR tubes, etc. Potential for upgrades will depend on revenue generation (as is currently the case for the 2 NMR machines in Chemistry). Alternatively upgrades may be viable through CFI infrastructure.

37
3) Operations Mandatory training is required on the machine before any individual will be provided access. Training may vary depending on end use (i.e. chemical studies, biological studies etc.) Each individual group may end up developing their own SOP. The Users committee will establish appropriate training schedules and requirements for different users. Mandatory training is provided by technical person and is recorded. 4) Ferromagnetic Materials Needs to be added: No magnetic tools, etc. [similar to existing documents on fMRI] 5) Quenching of the Magnet Needs to be added [similar to existing documents on fMRI] 6) Emergency Shut-Down Procedures Needs to be added [similar to existing documents on fMRI]
38
13. Procedures and Forms for Decommissioning Laboratories (Excerpts taken from Section 14 of York’s Laboratory Safety Manual - http://www.yorku.ca/dohs/documents/YU_Lab_Safety_Program.pdf) Notification and Inspection The laboratory supervisor shall inform the Faculty Health and Safety Officer (HSO) and DOHS of completion of the decommissioning. The Faculty HSO, DOHS and the vacating Faculty member will perform a final inspection of the laboratory at that time. Should a laboratory be vacated without proper decommissioning, laboratory supervisors shall be responsible for the cost of decommissioning services Biological Materials Bio-hazardous waste must be segregated and disposed of properly. For more information on Bio-hazardous Waste Disposal on the DOHS website: http://www.yorku.ca/dohs/documents/BiohazardousWasteDisposal.pdf Any surfaces contaminated by bio-hazardous materials must be decontaminated appropriately. Chemicals All waste chemicals must be properly labeled and sealed prior to disposal. Under no circumstances are chemical agents to be disposed of in regular waste bins. If you have bottles of unknown chemicals, contact the FSE Health and Safety Manager for assistance with disposal. Radioactive Materials Radioisotope laboratories must be decommissioned following strict procedures outlined in the Radiation Safety Program, section 7, available on the DOHS website: http://www.yorku.ca/dohs/documents/RadiationSafetyManual.pdf. The Radiation Safety Officer in DOHS (ext. 55491) must be notified prior to vacating the lab. Equipment Refrigerators, autoclaves, ovens, freezers, incubators, fume hoods, centrifuges, and any other laboratory equipment must be emptied and decontaminated. If lasers or x-ray machines are to be disposed of or transferred to another campus location, DOHS must be notified at ext. 55491. Fixtures Lab bench tops, fume hood work surfaces, storage cabinets and shelves, and any other work surfaces suspected of contamination shall be decontaminated. Personal Effects Signs, posters, textbooks, personal items, and other non-University property shall be removed.

39
COMPLETED LABORATORY DECOMMISSIONING (Form)
I, ____________________________________________________, have notified the Department of Occupational Health and Safety and the Health and Safety Officer in my home Faculty that the following laboratories and related workplaces that are under my charge have been properly decommissioned in accordance with the York University Laboratory Decommissioning Procedure. Laboratory building and room number(s):______________________________________ Other room number(s):_____________________________________________________ Printed name:___________________________________________________________ Signed:_________________________________________________________________ Dated:__________________________________________________________________ Upon completion of laboratory decommissioning and final laboratory inspection by the Department of Occupational Health and Safety and the Faculty Health and Safety Officer, please submit copies of this form to: Dean of Faculty
Department Chair
Faculty Executive Officer
Faculty Health and Safety Officer


