I N S T R U C T I O N A I D - J A Z Z
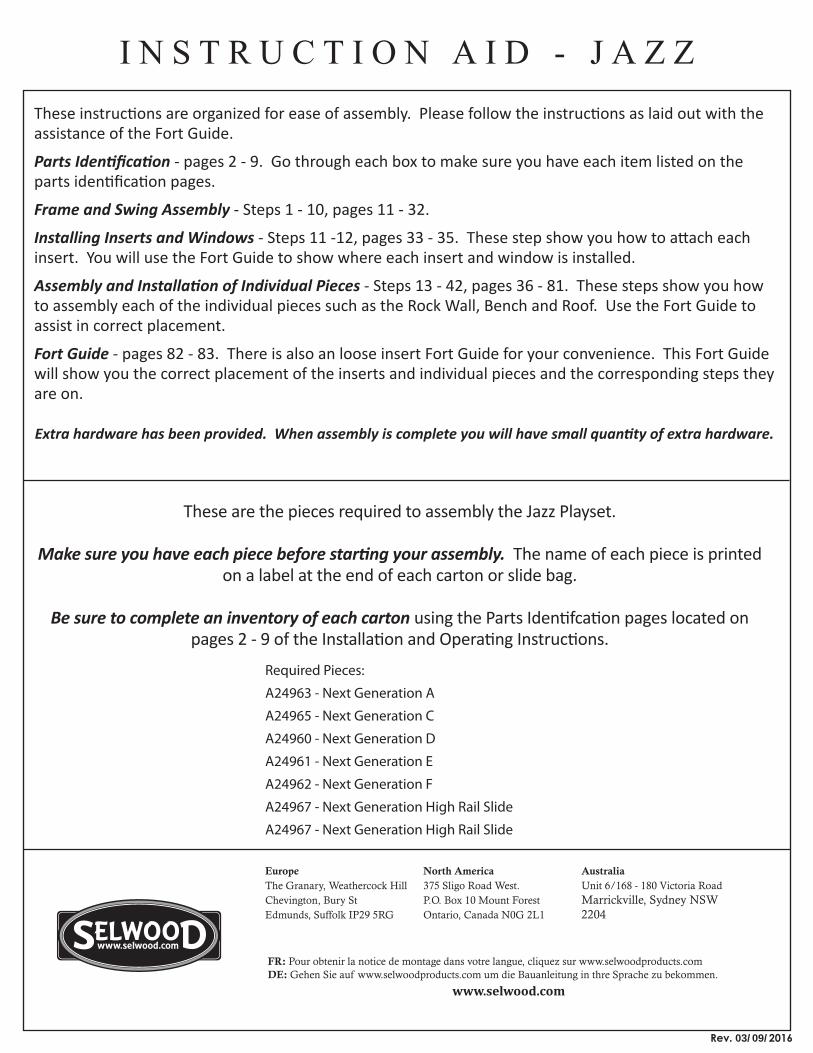
Required Pieces:
A24963 - Next Generation A
A24965 - Next Generation C
A24960 - Next Generation D
A24961 - Next Generation E
A24962 - Next Generation F
A24967 - Next Generation High Rail Slide
A24967 - Next Generation High Rail Slide
These are the pieces required to assembly the Jazz Playset.
Make sure you have each piece before starting your assembly. The name of each piece is printed on a label at the end of each carton or slide bag.
Be sure to complete an inventory of each carton using the Parts Identifcation pages located on pages 2 - 9 of the Installation and Operating Instructions.
Rev. 03/09/2016
FR: Pour obtenir la notice de montage dans votre langue, cliquez sur www.selwoodproducts.comDE: Gehen Sie auf www.selwoodproducts.com um die Bauanleitung in thre Sprache zu bekommen.
www.selwood.com
EuropeThe Granary, Weathercock Hill Chevington, Bury St Edmunds, Suffolk IP29 5RG
North America375 Sligo Road West.P.O. Box 10 Mount ForestOntario, Canada N0G 2L1
AustraliaUnit 6/168 - 180 Victoria RoadMarrickville, Sydney NSW 2204
These instructions are organized for ease of assembly. Please follow the instructions as laid out with the assistance of the Fort Guide.
Parts Identification - pages 2 - 9. Go through each box to make sure you have each item listed on the parts identification pages.
Frame and Swing Assembly - Steps 1 - 10, pages 11 - 32.
Installing Inserts and Windows - Steps 11 -12, pages 33 - 35. These step show you how to attach each insert. You will use the Fort Guide to show where each insert and window is installed.
Assembly and Installation of Individual Pieces - Steps 13 - 42, pages 36 - 81. These steps show you how to assembly each of the individual pieces such as the Rock Wall, Bench and Roof. Use the Fort Guide to assist in correct placement.
Fort Guide - pages 82 - 83. There is also an loose insert Fort Guide for your convenience. This Fort Guide will show you the correct placement of the inserts and individual pieces and the corresponding steps they are on.
Extra hardware has been provided. When assembly is complete you will have small quantity of extra hardware.
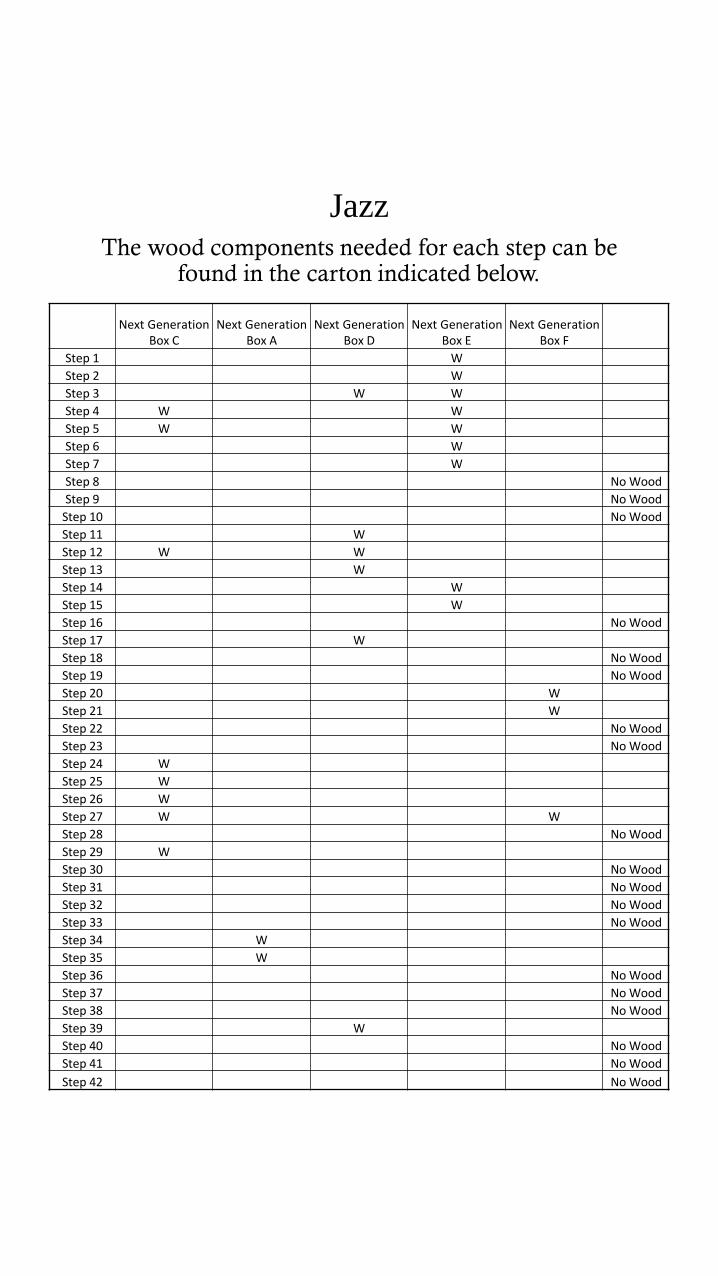
The wood components needed for each step can be found in the carton indicated below.
Jazz
Next Generation Box C
Next Generation Box A
Next Generation Box D
Next Generation Box E
Next Generation Box F
Step 1 W
Step 2 W
Step 3 W W
Step 4 W W
Step 5 W W
Step 6 W
Step 7 W
Step 8 No Wood
Step 9 No Wood
Step 10 No Wood
Step 11 W
Step 12 W W
Step 13 W
Step 14 W
Step 15 W
Step 16 No Wood
Step 17 W
Step 18 No Wood
Step 19 No Wood
Step 20 W
Step 21 W
Step 22 No Wood
Step 23 No Wood
Step 24 W
Step 25 W
Step 26 W
Step 27 W W
Step 28 No Wood
Step 29 W
Step 30 No Wood
Step 31 No Wood
Step 32 No Wood
Step 33 No Wood
Step 34 W
Step 35 W
Step 36 No Wood
Step 37 No Wood
Step 38 No Wood
Step 39 W
Step 40 No Wood
Step 41 No Wood
Step 42 No Wood
82 www.selwood.com
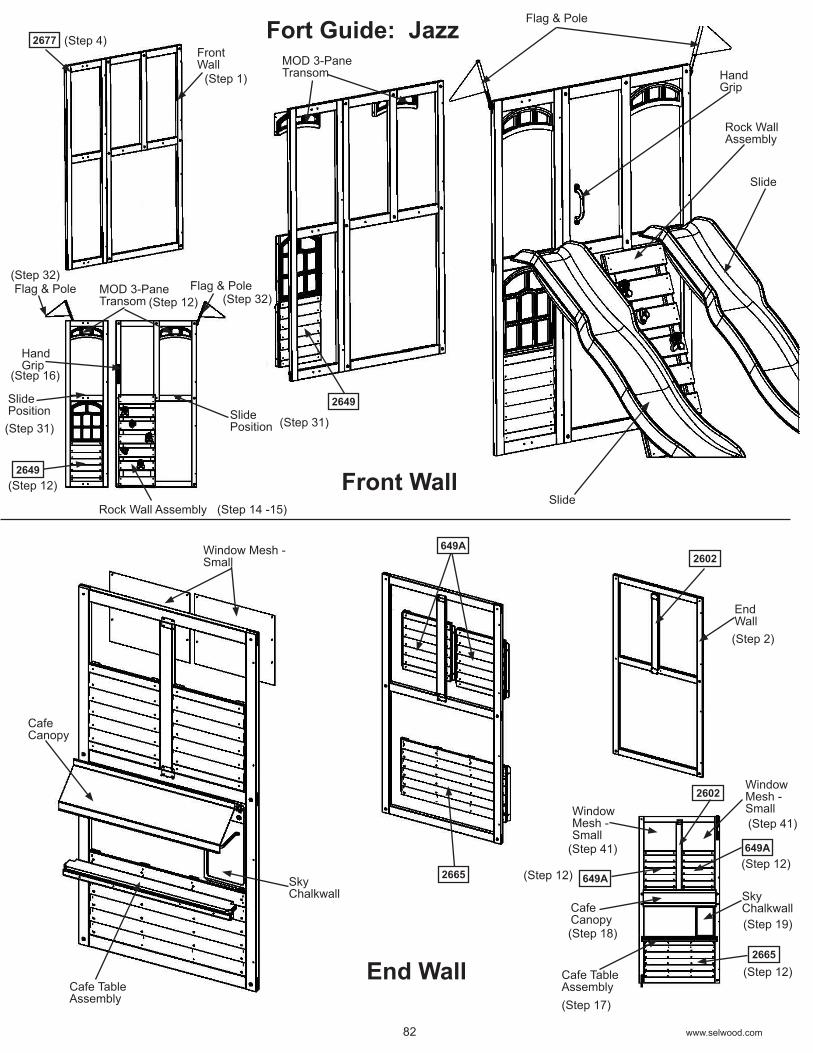
Fort Guide: Jazz
Front Wall
End Wall
2677
2602
FrontWall
2665
EndWall
649A
2602
Flag&Pole
Flag&Pole
MOD3-PaneTransom
2649
MOD3-PaneTransom
2649
Slide
Flag&Pole
SlidePosition
WindowMesh-Small
WindowMesh-Small
CafeCanopy
RockWallAssembly
RockWallAssembly
HandGrip
HandGrip
SkyChalkwall
CafeTableAssembly
CafeCanopy
SkyChalkwall
CafeTableAssembly
649A
649A
2665
WindowMesh-Small
Slide
SlidePosition
(Step4)
(Step1)
(Step32)
(Step12) (Step32)
(Step16)
(Step31)
(Step12)
(Step14-15)
(Step31)
(Step2)
(Step41)
(Step12)(Step12)
(Step12)
(Step41)
(Step18)
(Step17)
(Step19)
83 www.selwood.com
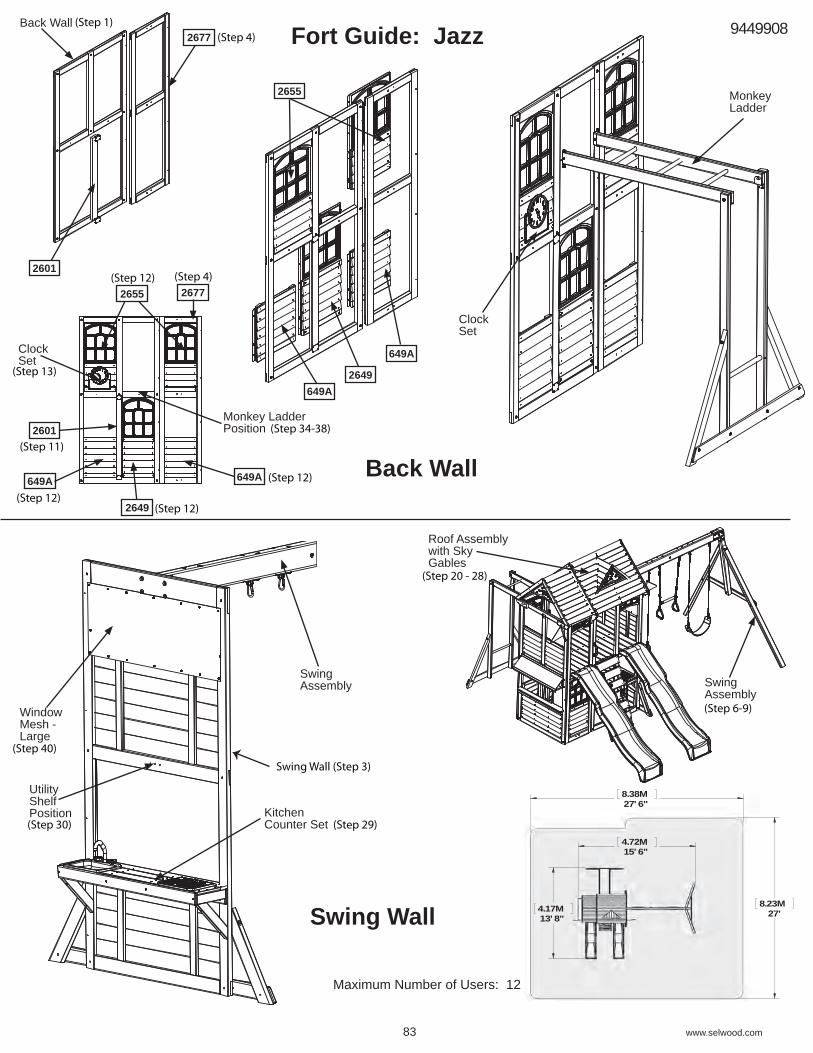
Back Wall
Swing Wall
Roof Assembly with Sky Gables
Fort Guide: JazzBack Wall
Maximum Number of Users: 12
Window Mesh - Large
Swing Assembly Swing
Assembly
Kitchen Counter Set
Utility Shelf Position
2677
649A
649A
649A
8.23M27'
8.38M27' 6"
4.17M13' 8"
4.72M15' 6"
JAZZ
Monkey Ladder
Monkey Ladder Position
2601
2677
Clock Set
Clock Set
2655
2655
2649
2649649A
2601
9449908(Step 1)(Step 4)
(Step 12) (Step 4)
(Step 13)
(Step 11)
(Step 34-38)
(Step 12)(Step 12)
(Step 12)
(Step 40)
(Step 30)
(Step 20 - 28)
(Step 29)
Swing Wall (Step 3)
(Step 6-9)


