
Kaalintaada iyo kumbiyuuterka – SOMIT >>> Baro database local loo sameey
Xuquuqda waa xifdisan tahay ka faaideyso > >> www.Somalicomputer.com
Install WordPress locally computer Talaaboyinkaan Qaad step by step Every time when I start a new blog or a Website using WordPress , I like to have a local copy of it in my computer for easy access and to make any changes or to find errors in my computer itself than finding and correcting it online. So for that purpose I use Wamp Server. Now this Tutorial will tell you step by step procedure to install, configure the wampserver and include WordPress in it and start creating your website in the localhost without the need of an Internet Connection.] Mar kasta waxaa muhiin ah markaan rabno inaan samayna website kuna smayna wordpress ah Blog , waxaan jeclahay inaan kobi ku sameeyo siada ay iigu fududaan lahayd inaan galo computerkayga ama aan wax ka bedbedelo waxaan halkaan idiinkuga soo tabinaayaa casharao talaabo talaabo ah , sida aad computerkaad u galin lahayd wampserver iyadoo aad raacinayso barnaamishka wordpress oo si sahlan aad ugu samayso websiye quruxbadan laakiin waxaan ku samaynaynaa waxa loo yaqaano local host oo ah website aan internet ku xirnaeyn oo kumbiyuuterkaada kaliya ku eg adigoo aan u baahanaynin inaad internet ku xiran tahay.
Installing WordPress
Requirements First what we need to do this?

Kaalintaada iyo kumbiyuuterka – SOMIT >>> Baro database local loo sameey
Xuquuqda waa xifdisan tahay ka faaideyso > >> www.Somalicomputer.com
1. Windows Operating System (preferably Windows Xp - it is what used in this tutorial) 2. WordPress (http://wordpress.org/latest.zip) 3. Wamp Server (http://www.wampserver.com/en/download.php)
Installing WordPress in any windows using WampServer Step by Step Procedure:
1. Download the Latest Version of Wampserver (As of this writing it is of Version 2.0i) from http://www.wampserver.com/en/download.php (Approximately 16 MB)
2. Double Click the Downloaded wampserver file.
Kaalintaada iyo kumbiyuuterka – SOMIT >>> Baro database local loo sameey
Xuquuqda waa xifdisan tahay ka faaideyso > >> www.Somalicomputer.com
.
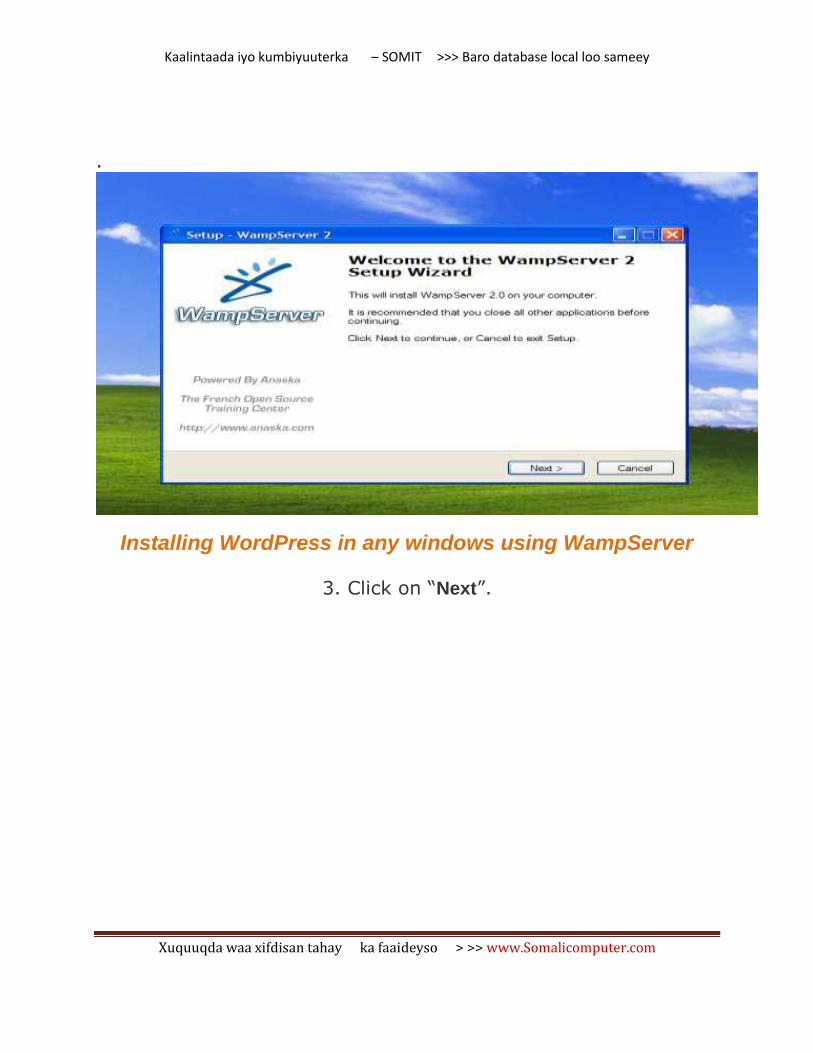
Installing WordPress in any windows using WampServer
3. Click on “Next”.

Kaalintaada iyo kumbiyuuterka – SOMIT >>> Baro database local loo sameey
Xuquuqda waa xifdisan tahay ka faaideyso > >> www.Somalicomputer.com
4. Waxaad oranaysaa halkaan waan aqbalay dooro
Select “I accept the agreement” and press “Next”.
Halkaas Tik sii

Kaalintaada iyo kumbiyuuterka – SOMIT >>> Baro database local loo sameey
Xuquuqda waa xifdisan tahay ka faaideyso > >> www.Somalicomputer.com
5. The Default path for the install of Wamp Server 2 is “C:\wamp”.
You can change if you want by clicking the “Browse” button or leave it as such and press “Next”.

Kaalintaada iyo kumbiyuuterka – SOMIT >>> Baro database local loo sameey
Xuquuqda waa xifdisan tahay ka faaideyso > >> www.Somalicomputer.com
6. Select the Additional Icons (If you want) and press “Next”.

Kaalintaada iyo kumbiyuuterka – SOMIT >>> Baro database local loo sameey
Xuquuqda waa xifdisan tahay ka faaideyso > >> www.Somalicomputer.com
Installing WordPress in any windows using WampServer
7. Click “Install” to continue with the installation.

Kaalintaada iyo kumbiyuuterka – SOMIT >>> Baro database local loo sameey
Xuquuqda waa xifdisan tahay ka faaideyso > >> www.Somalicomputer.com
8. Please wait until the setup installs the Wampserver2 in your
computer. 9. Please choose your default browser to which the wamp server
will be associated. But if you are not surewhat you have to do, then just click “Open”.

Kaalintaada iyo kumbiyuuterka – SOMIT >>> Baro database local loo sameey
Xuquuqda waa xifdisan tahay ka faaideyso > >> www.Somalicomputer.com
10.Halkaan fiiro gaar ayeey ubaahantahay oo ah waxa uu ku furi doonaa internet Explorer kaliya haduu ku jiro laakiin hadaad
haysato firefox-mozila kaas default noqon doona haka welwelin laakiin hadii interexplorer kaliya ku jira marka kaasaa default kuu
noqon doona waxaad dooranaysaa unblock oo ha iga xanibin “Unblock” the Windows Security Alert if it asks you.

Kaalintaada iyo kumbiyuuterka – SOMIT >>> Baro database local loo sameey
Xuquuqda waa xifdisan tahay ka faaideyso > >> www.Somalicomputer.com
11. Just leave the default values as such for the “PHP Mail Parameters” and
click “Next”.

Kaalintaada iyo kumbiyuuterka – SOMIT >>> Baro database local loo sameey
Xuquuqda waa xifdisan tahay ka faaideyso > >> www.Somalicomputer.com
12. Click “Finish” to exit the setup (Make sure that the “launch wampserver
now” option is checked)

Kaalintaada iyo kumbiyuuterka – SOMIT >>> Baro database local loo sameey
Xuquuqda waa xifdisan tahay ka faaideyso > >> www.Somalicomputer.com
13. Now you will see a “speedometer like icon” on the notification area of the
taskbar
14. Single click on the wampserver icon, and select Apache –> httpd.conf
(This is the main Apache HTTP server configuration file. It contains the configuration directives that give the
server its instructions)

Kaalintaada iyo kumbiyuuterka – SOMIT >>> Baro database local loo sameey
Xuquuqda waa xifdisan tahay ka faaideyso > >> www.Somalicomputer.com
15. The file will be opened in notepad. Go to Edit –> find or just press “Ctrl
+f”.

Kaalintaada iyo kumbiyuuterka – SOMIT >>> Baro database local loo sameey
Xuquuqda waa xifdisan tahay ka faaideyso > >> www.Somalicomputer.com
16. Type “mod_rewrite” in the find what box and click “Find”. It will find the
word in that file and highlight it for you. 18.Click “Cancel” in the find Window and Just remove the “#” symbol present
at the start of that mod_rewrite line. (This is to “switch on” the mod_rewrite rule which will then only allow
you to have pretty permalinks in

Kaalintaada iyo kumbiyuuterka – SOMIT >>> Baro database local loo sameey
Xuquuqda waa xifdisan tahay ka faaideyso > >> www.Somalicomputer.com
WordPress)
17. Now “Save” the file and close it. Wampserver is Ready.
18. Now Download Latest Stable copy of WordPress (As of this writing it is
WordPress 2.8.4) from http://www.wordpress.org/latest.zip

Kaalintaada iyo kumbiyuuterka – SOMIT >>> Baro database local loo sameey
Xuquuqda waa xifdisan tahay ka faaideyso > >> www.Somalicomputer.com
19. After downloading, extract the files.
20. Single click the wampserver icon and select “www directory”. A folder will
open.
SOMIT

Kaalintaada iyo kumbiyuuterka – SOMIT >>> Baro database local loo sameey
Xuquuqda waa xifdisan tahay ka faaideyso > >> www.Somalicomputer.com
Installing WordPress in any windows using WampServer
21. Copy and paste the WordPress files in to that folder.
24. Now Again Single click the wampserver icon and select “PhpmyAdmin”
.

Kaalintaada iyo kumbiyuuterka – SOMIT >>> Baro database local loo sameey
Xuquuqda waa xifdisan tahay ka faaideyso > >> www.Somalicomputer.com
How can i create adate base in laclhost
1. Now Again Single click the PhPmyadmin icon and select “Localhost;
2. click the Datebase icon and select “Databases;

Kaalintaada iyo kumbiyuuterka – SOMIT >>> Baro database local loo sameey
Xuquuqda waa xifdisan tahay ka faaideyso > >> www.Somalicomputer.com
3. click the Datebase icon and select “Create;
4. click the Users icon and select “Create;
5. click the Add User icon and select “Careate;

Kaalintaada iyo kumbiyuuterka – SOMIT >>> Baro database local loo sameey
Xuquuqda waa xifdisan tahay ka faaideyso > >> www.Somalicomputer.com
5. click the User name and write “ any name example wadani
and host select Local Host
6. click the Password click “ Generate

Kaalintaada iyo kumbiyuuterka – SOMIT >>> Baro database local loo sameey
Xuquuqda waa xifdisan tahay ka faaideyso > >> www.Somalicomputer.com
7. click the check box “ Create date base with the name and grant all
privilage
8. click the check box “ Check All
9. click the Add user “ Add user
10. You have added new user “ Succesful

Kaalintaada iyo kumbiyuuterka – SOMIT >>> Baro database local loo sameey
Xuquuqda waa xifdisan tahay ka faaideyso > >> www.Somalicomputer.com
“ Finished


