
Battery Operated Wireless Video Surveillance System
A Project Report
submitted in partial fulfilment of the
requirements for the Degree of
Master of Engineering
in
Faculty of Engineering
by
M Naga Raju
Under the guidance of
Prof. Bharadwaj Amrutur
Department of Electrical Communication Engineering
Indian Institute of Science, Bangalore
Bangalore – 560 012 (INDIA)
June 2013


Acknowledgements
I take this opportunity to express my profound gratitude to my Guide Prof Bharadwaj Amrutur
for his exemplary guidance, monitoring and constant encouragement throughout the course of
this thesis. The help and guidance given by him time to time shall carry me a long way in the
journey of life on which I am about to embark. I am thankful for my friends and Lab-mates.
Lastly, I thank almighty, my parents, brother, sisters and friends for their constant encour-
agement.
i
Abstract
Work in this project involves the Streaming Video From the Battery operated Device via Wi-Fi
channel. A System like this can used without Installation, plug and play Video surveillance.
BeagleBoard-xM used as an Embedded platform to, collects Video stream, Compression and
Transmission over Wi-Fi channel. GStreamer Pipeline used For collecting Video stream, Com-
pression and Transmission. Video compression done on DSP side of the BeagleBoard-xM. In
Wi-Fi Network, Repeater or Base station collects transmitted Video and sends to the Server.
Server connected to The Base station display and saves Video stream.
The main aim of this project is to build the Battery Operated System, which used as a Video
Surveillance System without Installation for a short duration.
ii

Contents
Acknowledgements i
Abstract ii
1 Introduction 1
1.1 Overview . . . . . . . . . . . . . . . . . . . . . . . . . . . . . . . . . . . . . 1
1.2 Why BeagleBoard-xM as Embedded Platform ? . . . . . . . . . . . . . . . . . 1
1.3 System Architecture . . . . . . . . . . . . . . . . . . . . . . . . . . . . . . . . 2
1.4 Existing Battery Power Video System . . . . . . . . . . . . . . . . . . . . . . 3
1.5 Report outline . . . . . . . . . . . . . . . . . . . . . . . . . . . . . . . . . . . 4
2 System Integration on Server and Client 5
2.1 Building Angstrom Distribution . . . . . . . . . . . . . . . . . . . . . . . . . 5
2.2 DSPLink . . . . . . . . . . . . . . . . . . . . . . . . . . . . . . . . . . . . . 6
2.3 Using DSP . . . . . . . . . . . . . . . . . . . . . . . . . . . . . . . . . . . . 7
2.4 USB Video Camera Connection to BeagleBoardxM . . . . . . . . . . . . . . . 8
2.5 WiFi Connection to BeagleBoardxM . . . . . . . . . . . . . . . . . . . . . . 9
2.6 Power supply Circuit . . . . . . . . . . . . . . . . . . . . . . . . . . . . . . . 10
2.7 Using MQTT Protocol for Sending messages from Clients to Server . . . . . . 11
2.7.1 MQTT Protocol(Message Queue Telemetry Transport) . . . . . . . . . 11
2.8 System Prototype . . . . . . . . . . . . . . . . . . . . . . . . . . . . . . . . . 13
3 Streaming The Video using GStreamer 14
3.1 Streaming The Video using JPEG CODEC . . . . . . . . . . . . . . . . . . . . 14
3.2 Streaming The Video using H264 CODEC . . . . . . . . . . . . . . . . . . . . 15
4 Network Architecture 18
4.1 Steps to configure D-Link(DSL-2750U) as Base station . . . . . . . . . . . . . 19
4.2 Steps to configure NetGear(WGR619) as Repeater . . . . . . . . . . . . . . . 19
5 Power Management On BeagleBoard-xM 21
5.1 Dynamic Frequency Scaling . . . . . . . . . . . . . . . . . . . . . . . . . . . 22
5.2 Disable Unused modules on The Board . . . . . . . . . . . . . . . . . . . . . 22
iii
CONTENTS iv
6 Results 24
6.1 Video compression and Bandwidth . . . . . . . . . . . . . . . . . . . . . . . . 24
6.2 CPU load and Video compression . . . . . . . . . . . . . . . . . . . . . . . . 25
6.3 Power Consumption . . . . . . . . . . . . . . . . . . . . . . . . . . . . . . . . 25
7 Conclusion 26
8 Future Work 27
A Measuring TPS65950 Power consumption Using I2C 28
B Sample C code for MQTT client PUBLISH /Subscribe Data 30
Bibliography 33
List of Tables
4.1 Network IP Address . . . . . . . . . . . . . . . . . . . . . . . . . . . . . . . . 20
6.1 Compression and Bandwidth . . . . . . . . . . . . . . . . . . . . . . . . . . . 24
6.2 CPU load and Compression . . . . . . . . . . . . . . . . . . . . . . . . . . . . 25
6.3 BeagleBoard-xM Power Consumption . . . . . . . . . . . . . . . . . . . . . . 25
v
List of Figures
1.1 The Battery Operated Wireless Video Surveillance System Architecture . . . . 2
1.2 NETGEAR - VueZone battery-powered Video system . . . . . . . . . . . . . . 3
2.1 System Architecture on Server and Client . . . . . . . . . . . . . . . . . . . . 5
2.2 DM3730 software architecture . . . . . . . . . . . . . . . . . . . . . . . . . . 7
2.3 Microsoft Life camera . . . . . . . . . . . . . . . . . . . . . . . . . . . . . . 9
2.4 USB Asus_N10 WiFi Dongle . . . . . . . . . . . . . . . . . . . . . . . . . . . 9
2.5 Power Supply circuit . . . . . . . . . . . . . . . . . . . . . . . . . . . . . . . 11
2.6 MQTT Basic Concept . . . . . . . . . . . . . . . . . . . . . . . . . . . . . . . 12
2.7 Client Side Prototype . . . . . . . . . . . . . . . . . . . . . . . . . . . . . . . 13
3.1 GStreamer JPEG CODEC . . . . . . . . . . . . . . . . . . . . . . . . . . . . 15
3.2 GStreamer H264 Codec . . . . . . . . . . . . . . . . . . . . . . . . . . . . . . 16
4.1 Network Architecture . . . . . . . . . . . . . . . . . . . . . . . . . . . . . . . 18
vi
Chapter 1
Introduction
Battery operated Video Surveillance System useful in a situation, like College cultural events,
Political party meeting and etc., where there is no need of installation, plug and play Video
surveillance needed for short duration. Wi-Fi Wireless channel can used to Video stream.
1.1 Overview
BeagleBoard-xM connected to Video camera and Wi-Fi network used as Embedded platform.
Wi-Fi Network created by Network Modems, configured as Repeater Base station and a Re-
peater.
1.2 Why BeagleBoard-xM as Embedded Platform ?
The BeagleBoard-xM[1] has a DM3730 DaVinci digital media processor measure a faster CPU
core (clocked at 1GHz ), RAM (512MB), TMS320C64x+ (the core of SoC, 800 MHz up to
720p @30 fps) for accelerated video and audio decoding, and an Imagination Technologies
PowerVR SGX530GPU provide accelerated 2D and 3D rendering that supports OpenGL ES
2.0 , on-board Ethernet jack, and 4 port USB hub. The BeagleBoard-xM lacks the on-board
NAND and therefore requires the OS and other data to be stored on a micro-SD card. More Over
the BeagleBoard-xM is a low-power open-source hardware single-board computer produced by
1
1.3 System Architecture 2
Texas Instruments.
DSP on BeagleBoard-xM can useful running Complex Video Algorithms, like motion detection
based transmission.
1.3 System Architecture
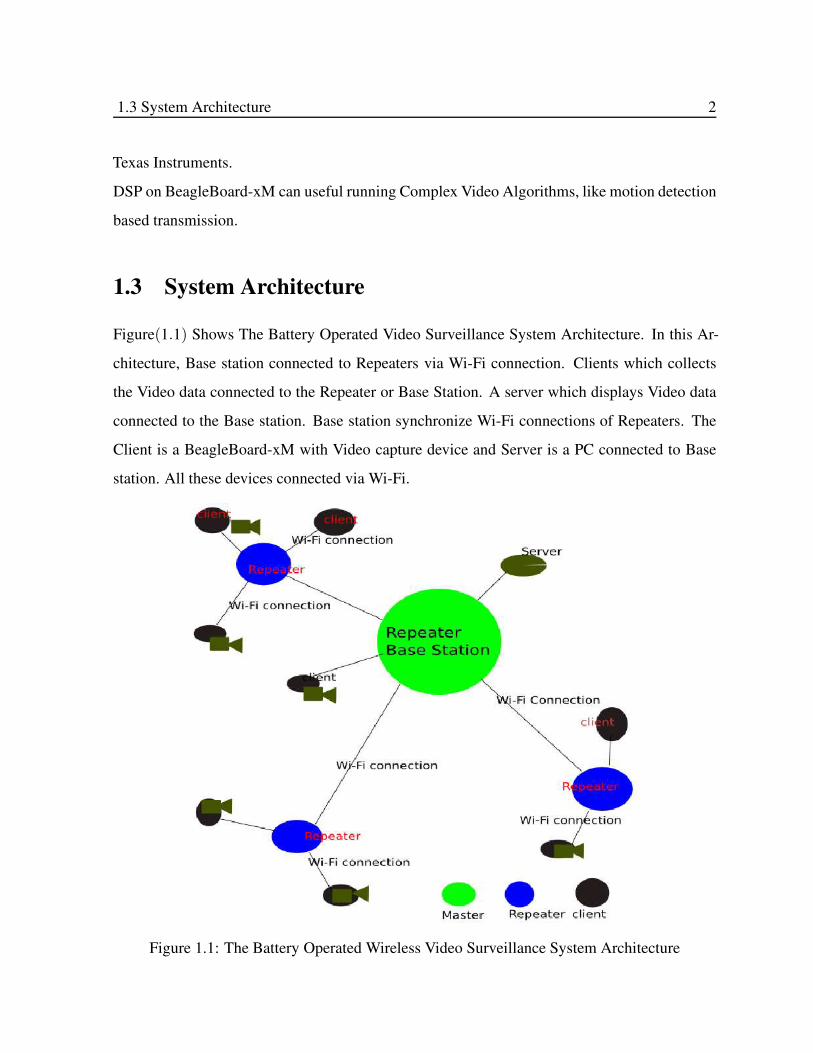
Figure(1.1) Shows The Battery Operated Video Surveillance System Architecture. In this Ar-
chitecture, Base station connected to Repeaters via Wi-Fi connection. Clients which collects
the Video data connected to the Repeater or Base Station. A server which displays Video data
connected to the Base station. Base station synchronize Wi-Fi connections of Repeaters. The
Client is a BeagleBoard-xM with Video capture device and Server is a PC connected to Base
station. All these devices connected via Wi-Fi.
Figure 1.1: The Battery Operated Wireless Video Surveillance System Architecture
1.4 Existing Battery Power Video System 3
1.4 Existing Battery Power Video System
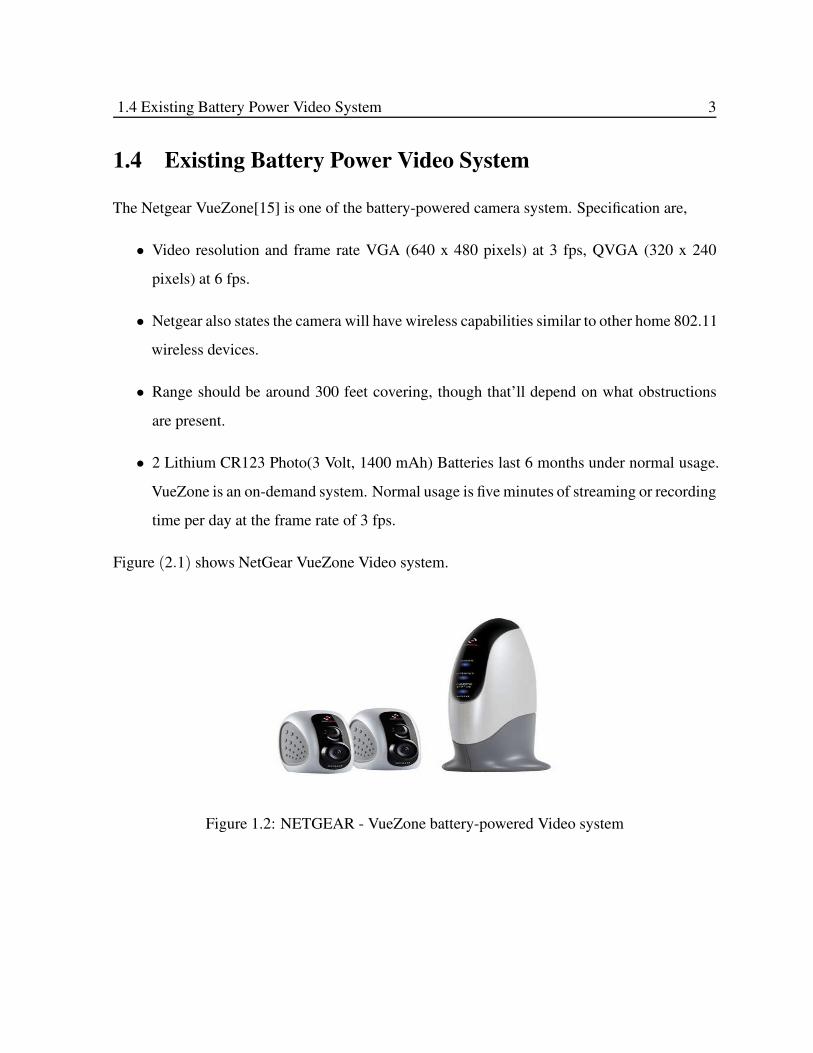
The Netgear VueZone[15] is one of the battery-powered camera system. Specification are,
• Video resolution and frame rate VGA (640 x 480 pixels) at 3 fps, QVGA (320 x 240
pixels) at 6 fps.
• Netgear also states the camera will have wireless capabilities similar to other home 802.11
wireless devices.
• Range should be around 300 feet covering, though that’ll depend on what obstructions
are present.
• 2 Lithium CR123 Photo(3 Volt, 1400 mAh) Batteries last 6 months under normal usage.
VueZone is an on-demand system. Normal usage is five minutes of streaming or recording
time per day at the frame rate of 3 fps.
Figure (2.1) shows NetGear VueZone Video system.
Figure 1.2: NETGEAR - VueZone battery-powered Video system
1.5 Report outline 4
1.5 Report outline
• In Chapter 2, the System Integration on Server and Client is presented.
• In Chapter 3, the Streaming the Video using GStreamer is presented.
• In Chapter 4, the Network Architecture is presented.
• In Chapter 5, the Power Management on BeagleBoard-xM is presented.
• In Chapter 6, presents Results.
• In Chapter 7, contains Conclusion.

Chapter 2
System Integration on Server and Client
Figure (2.1) shows the System Integration on Server, Client. On Client Camera, Wi-Fi Dongle
connected to BeagleBoard-xM USB ports. BeagleBoard-xM which running Angstrom Linux
Figure 2.1: System Architecture on Server and Client
Distribution on-it. With the help of the GStreamer Plug-in collects Video stream from the
camera, compress on DSP or ARM Cortex A8 processor and Transmit to Wi-Fi channel using
USB Wi-Fi Dongle.
2.1 Building Angstrom Distribution
The Angstrom is a Linux Distribution for a variety of embedded devices. All Angstrom binaries
are built using Open Embedded. Following Document described the steps necessary to set up
an environment where you can build[5] images and packages yourself.
• Step 1
5

2.2 DSPLink 6
get the setup scripts:
$ git clone git://github.com/Angstrom-distribution/setup-scripts.git
• Step 2
If System is a behind firewall proxy, have a look at the oebb.sh file, it has built-in proxy
handling.
$ MACHINE=beagleboard ./oebb.sh config beagleboard
$ MACHINE=beagleboard ./oebb.sh update
$ MACHINE=beagleboard ./oebb.sh bitbake virtual/kernel
Above Commands build the Linux kernel.
• Step 3
Following command will build Angstrom Linux consoleimage.
$ MACHINE=your_machine ./oebb.sh bitbake consoleimage
Angstrom distribution , Linux Kernel and packages can build by using Narcissus[10]. Narcissus
on-line tool to create ’rootfs’ images for Various embedded devices.
BeagleBoard-xM uses the SD Card to Boot Up and Running Console Image[2]. For this SD
Card formatted into Two Partitions, FAT32 partition for booting and Linux partition for the root
file system. Copy the MLO, uboot.bin and uImage into the first partition (the FAT32 one) of
SD card. Do it in this strict order, since MLO must be in the first sectors of the card. Copy the
Angstrom Image and Modules of BeagleBoard-xM into other partition.
2.2 DSPLink
BeagleBoard-xM has an ARM cortex A8 processor (1 GHz) and an C64x DSP (800 MHz) The
ARM will have Linux running on it and the DSP will have a DSP-BIOS running on it. For
inter-processor communication we have used DSPLink[9]. DSPLink is foundation software for
the interprocessor communication across the GPP-DSP boundary. It provides a generic API that
abstracts the characteristics of the physical link connecting GPP and DSP from the applications.
DSPLink provides a subset of the following services to its clients.

2.3 Using DSP 7
• ROC Basic processor control.
• Inter Processor Communication building blocks.
Figure(2.2) shows BeagleBoard-xM software architecture[13].
Figure 2.2: DM3730 software architecture
TI DSPLink modules build during the Build process of the Kernel-module for BeagleBoard-
xm. These modules are installed using OPKG.
$ opkg –force-depends install ti-dsp_link_XXXXX.ipk
2.3 Using DSP
To use DSP on BeagleBoard-xM memory should be allocated at the time of boot up process[3].
This can be done by modifying the boot parameter in the uEnv.txt on the boot partition of the
SD Card. One of the following lines needed to add uEnv.txt file.
2.4 USB Video Camera Connection to BeagleBoardxM 8
’mem=99M@0x80000000 mem=128M@0x88000000’ for 256MB ram devices, ’mem=99M@0x80000000’
for 128MB RAM device , ’mem=99M@0x80000000 mem=384M@0x88000000’ for 512MB
RAM devices, For BeagleBoard-xM.
uEnv.txt[3]
mpurate=800 dvimode=1280x720MR-16@60 vram=12MB bootargs=console=ttyO2,115200n8
console=tty0 root=/dev/mmcblk0p2 rootwait ro vram=$vram mem=99M@0x80000000 mem=384M@0x88000000
omapfb.mode=dvi $dvimode fixrtc buddy=$buddy mpurate=$mpurate optargs="mem=99M@0x80000000
mem=128@0x88000000"
U-Boot will allocate the memory for the kernel and DSP at the time of booting. The DSP
side applications can run in the memory allocated to the DSP.
Following modules are required to run application on DSP.
(i) DSPLink
(ii) Cmemk
(iii) lpm
(iv) sdmak
DSPLink module is an API for Interprocess communication. Cmem module allocates memory
for DSP applications at runtime. Lpm (Local Power Manager) module for switch ON and OFF
the DSP. Inserting of modules done automatically at the time of boot up. lsmod command used
to check whether the modules are properly loaded or not.
2.4 USB Video Camera Connection to BeagleBoardxM
The USB Video camera can be easily Interfaced with BeagleBoard-xM with the help of Linux
Universal Video Class(UVC) drivers. Figure(2.3) show Microsoft life high-quality 720p HD
Wide-screen video camera.
2.5 WiFi Connection to BeagleBoardxM 9
Figure 2.3: Microsoft Life camera
UVC modules build during the build process of kernel modules for BeagleBoard-xM. Else
these modules are available On-line On Angstrom distribution package browser[11]. The mod-
ules are installed on BeagleBoard-xM by using opkg command.
$opkg –force-depends install kernel-module-uvcvideo.ipk
2.5 WiFi Connection to BeagleBoardxM
USB ASUS N10 dongle used to interface BeagleBoard-xM with the Wi-Fi. Figure(2.4) shows
ASUS N10 dongle with USB2.0 interface and supports Network Standard IEEE802.11b, IEEE802.11g.
Figure 2.4: USB Asus_N10 WiFi Dongle
Kernel module r8712u required to use ASUS N10 with BeagleBoard-xM. r8712u Modules
2.6 Power supply Circuit 10
build during the build process of kernel modules for BeagleBoard-xM. Else these modules are
available Online On Angstrom distribution package browser[11]. The modules are installed on
BeagleBoard-xM by using opkg command.
$opkg –force-depends install kernel-module-r8712u.ipk
Copy of r8712u firmware required in system path ‘lib/firmware/rtlwifi/ ‘for working module.
Steps to Configure Wi-Fi Connection
• Start Wi-Fi, load the module
$ifconfig wlan0 up
• Scan for available connections and list them
$iwlist wlan0 scan
• Connect to the network "WLAN"
$iwconfig wlan0 essid "NavNetwork"
• Set an IP Address.
$ifconfig wlan0 192.168.1.12 up
2.6 Power supply Circuit
BeagleBoard-xM needed Regulated 5V Supply with minimum current 1.0A. Lithium-Ion bat-
tery(7.4v /1600mApH) connected to SMPS circuit LM2576, gives regulated supply to BeagleBoard-
xM. LM2576[14] switching mode 5v regulator that generates power supply of 15 Watts maxi-
mum from input voltage 6V-40V range. Figure(2.5) shows the power supply circuit.

2.7 Using MQTT Protocol for Sending messages from Clients to Server 11
Figure 2.5: Power Supply circuit
2.7 Using MQTT Protocol for Sending messages from Clients
to Server
Theft control system can implemented on BeagleBoard-xM using Accelerometer and MQTT
protocol. MQTT protocol running on BeagleBoard-xM used to send message to server.
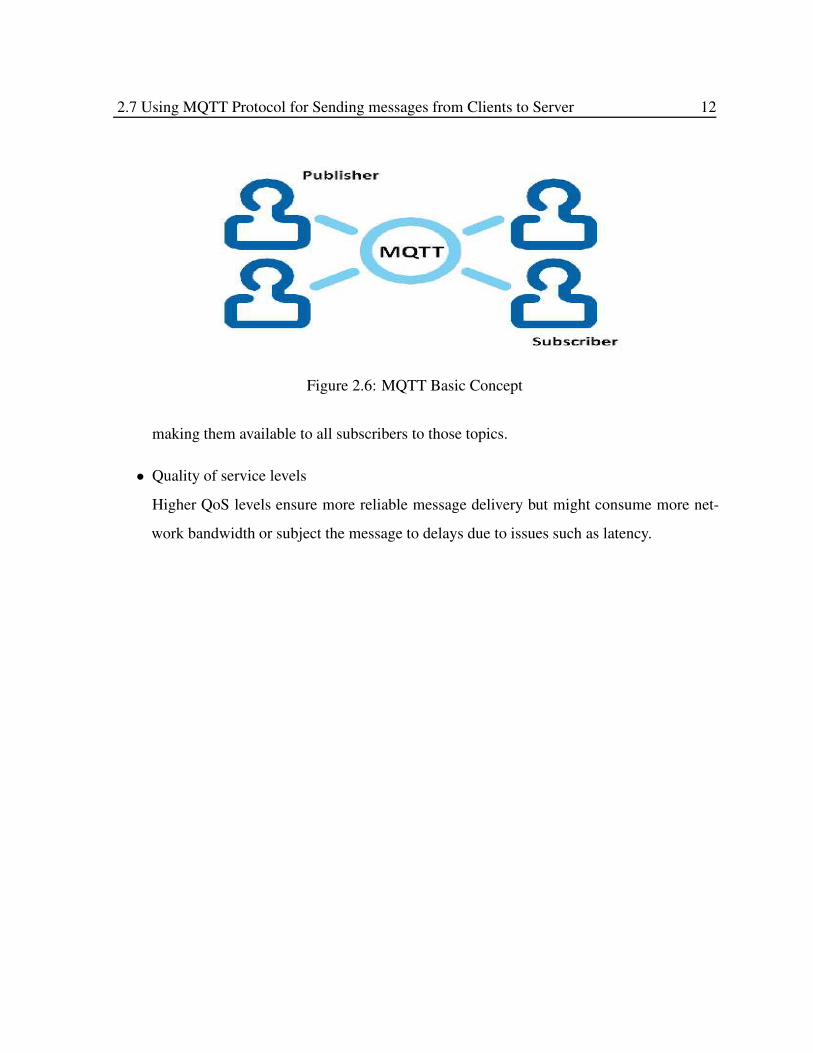
2.7.1 MQTT Protocol(Message Queue Telemetry Transport)
MQTT is an extremely simple and lightweight messaging protocol. Ideal for constrained
networks like, low bandwidth, high latency, data limits, and fragile connections. It’s pub-
lish/subscribe architecture is designed to be open and easy to implement, with up to thousands of
remote clients capable of being supported by a single server. Designed specifically for remote
devices with little memory or processing power Minimal . Developed by IBM. Figure(2.6)
shows Basic concepts of MQTT.
Basic concepts of MQTT
• User name and password sent with a CONNECT packet available with mqttv3.1 version.
• Publish/subscribe
Clients can subscribe to topics that certain to them and thereby receive whatever messages
are published to those topics. Alternatively, clients can publish messages to topics, thus
2.7 Using MQTT Protocol for Sending messages from Clients to Server 12
Figure 2.6: MQTT Basic Concept
making them available to all subscribers to those topics.
• Quality of service levels
Higher QoS levels ensure more reliable message delivery but might consume more net-
work bandwidth or subject the message to delays due to issues such as latency.

2.8 System Prototype 13
2.8 System Prototype
Figure(2.7) shows Client BeagleBoard-xM Integration Prototype.
Figure 2.7: Client Side Prototype

Chapter 3
Streaming The Video using GStreamer
GStreamer[6] is a Pipeline-based Multimedia framework written in the C programming lan-
guage with the type system based on G object. Most of the media player(VLC, KM) uses
GStreamer Plug-ins. GStreamer allows a programmer to create a variety of media-handling
components, including simple audio playback, audio and video playback,recording, streaming
and editing. The pipeline design serves as a base to create many types of multimedia appli-
cations such as video editors, streaming media broadcasters and media players . GStreamer
processes media by connecting a number of processing elements into a Pipeline. Each element
is provided by a plug-in[7].
In this system Streaming The Video using GStreamer done by two Video CODEC.
• JPEC CODEC
• H264 CODEC
3.1 Streaming The Video using JPEG CODEC
The following GStreamer Pipeline commands used to stream Video over Wi-Fi using UDP
Protocol. Figure(3.1) shows GStreamer Pipeline on BeagleBoard-xM and Host PC.
• On BeagleBoard-xM, GStreamer Pipeline to capture the Video, Encode using JPEG and
14

3.2 Streaming The Video using H264 CODEC 15
Figure 3.1: GStreamer JPEG CODEC
transmission.
$ gst-launch v4l2src device=/dev/video0 ! video/x-raw-yuv,framerate=15/1, width=320,
height=240 ! ffmpegcolorspace ! jpegenc ! rtpjpegpay ! udpsink host=192.168.1.7
port=5000
• On HOST PC, GStreamer Pipeline to receive the Video stream from port, Decode JPEG
and sink into Display and File.
$ gst-launch -v udpsrc port=5000 caps=‘application/x-rtp, media=(string)video, clock-
rate=(int)90000, encoding-name=(string)JPEG, payload=(int)96, ssrc=(uint)2811678232,
clock-base=(uint)1185357600, seqnum-base=(uint)9888 ‘! rtpjpegdepay ! jpegdec ! ffm-
pegcolorspace ! tee name=my_videosink ! ffmpegcolorspace ! videorate ! video/x-raw-
yuv,framerate=15/1 ! ffmpegcolorspace ! Jpegenc ! avimux ! filesink location=video1.avi
my_videosink. ! queue ! Ximagesink
3.2 Streaming The Video using H264 CODEC
Video Streaming using H264 CODEC done by using TI GStreamer plug-in[8]. H264 is a stan-
dard for video compression, and is currently one of the most commonly used formats for the
recording, compression, and distribution of high definition video.
The TI GStreamer (gst-dmai) plug-in uses the Davinci Multimedia Application Interface to sim-
plify application use of the TI Davinci DM3730[13] hardware accelerators and DSP. GStreamer

3.2 Streaming The Video using H264 CODEC 16
is run as an application on the ARM processor and through the use of DMAI is able to interact
with the DSP or acceleration modules to acquire, render or transform audio and video streams.
DMAI also provides portability of the code from one processor to another with minimal code
changes.
GStreamer Pipeline runs on The BeagleBoard-xM captures the Video stream, encodes it in
H.264 and transmits it using RTP. To Encode Video into H264 format BeagleBoard-xM uses
DSP with the help of TI GStreamer.
GStreamer Pipeline command running on the Host PC receives RTP packets of the compressed
video stream and decode it,then save the video stream into a File and display it on the screen.
Figure (3.2)shows GStreamer Pipeline architecture on BeagleBoard-xM and Host system.
Figure 3.2: GStreamer H264 Codec
• Pipeline capture the video, Encode and Stream on BeagleBoard-xM.
$ gst-launch -v v4l2src device=/dev/video0 video/x-raw-yuv, width=640, height=480,framerate= f raction
ffmpegcolorspace TIVidenc1 codecName=h264enc engineName=codecServer rtph264pay
pt=96 udpsink host=192.168.0.5 port=5004
Make a note of caps= ‘application/x-rtp, media=(string)video ................ ‘string and pass
this string in client below A simple RTP client to decodes H.264 and display on HOST
machine.
• Pipeline to receive the RTP Video stream, Display and store into file.

3.2 Streaming The Video using H264 CODEC 17
$ gst-launch -v udpsrc port=5004 caps= ‘application/x-rtp, media=(string)video, clock-
rate=(int)90000, encoding-name=(string)H264, sprop-parameter-sets=(string) ‘Z0KAHukBQHpCAAAH0AAB1MAI
,aM48gA==‘, payload=(int)96, ssrc=(uint)2819279014, clock-base=(uint)2790818537, seqnum-
base=(uint)59390 ‘rtph264depay ffdec_h264 ffmpegcolorspace tee name=my_videosink
ffmpegcolorspace videorate video/x-raw-yuv,framerate=5/1 ffmpegcolorspace jpegenc
avimux filesink location=video.avi my_videosink. queue ximagesink sync=false
Chapter 4
Network Architecture
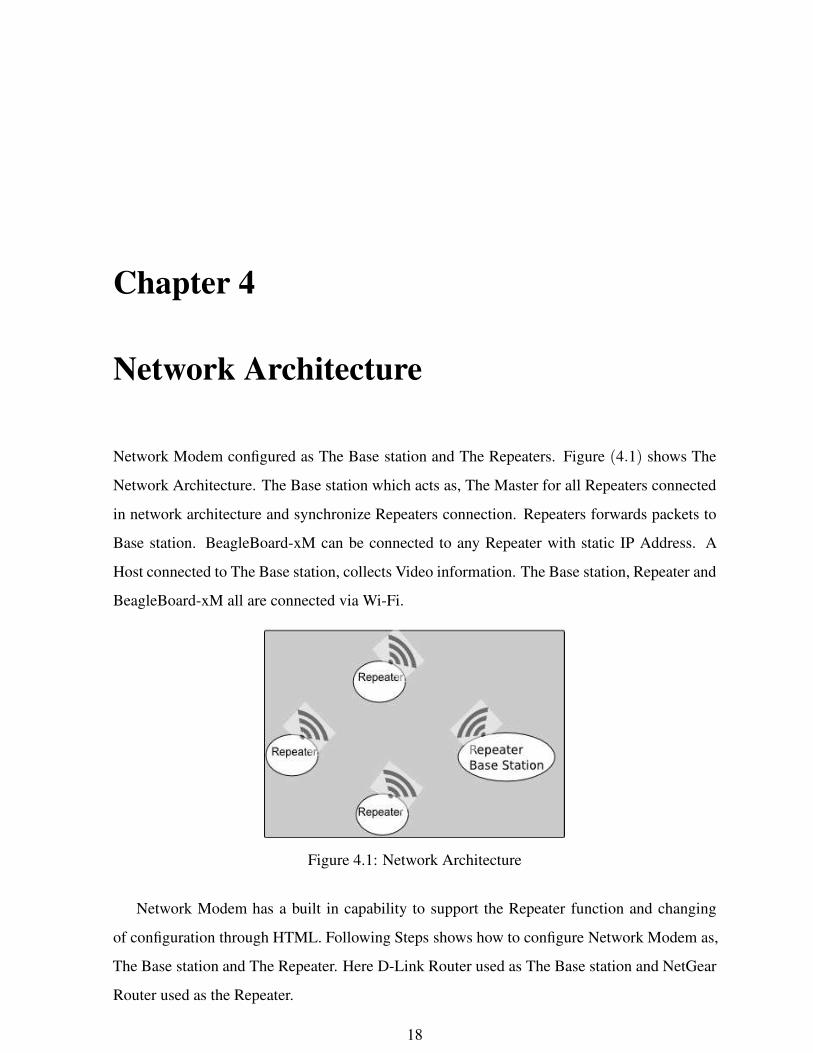
Network Modem configured as The Base station and The Repeaters. Figure (4.1) shows The
Network Architecture. The Base station which acts as, The Master for all Repeaters connected
in network architecture and synchronize Repeaters connection. Repeaters forwards packets to
Base station. BeagleBoard-xM can be connected to any Repeater with static IP Address. A
Host connected to The Base station, collects Video information. The Base station, Repeater and
BeagleBoard-xM all are connected via Wi-Fi.
Figure 4.1: Network Architecture
Network Modem has a built in capability to support the Repeater function and changing
of configuration through HTML. Following Steps shows how to configure Network Modem as,
The Base station and The Repeater. Here D-Link Router used as The Base station and NetGear
Router used as the Repeater.
18

4.1 Steps to configure D-Link(DSL-2750U) as Base station 19
4.1 Steps to configure D-Link(DSL-2750U) as Base station
• Connect to D-Link via Wi-Fi or LAN.
• Login into HTML Page 192.168.1.1 .
• In Wireless/Basic menu change the settings SSID to ‘NavNetwork ‘, Enable Wireless,
Enter Wireless-Guest/Virtual Access Points as NetGear .
• In Wireless/Wireless Bridge menu change the settings Bridge restrict to Enable, Enter the
Remote Repeater(NetGear) Mac Address.
• In Wireless/Advanced change the settings Channel to 8, protocol, mode 802.11b/g and
Save&apply.
4.2 Steps to configure NetGear(WGR619) as Repeater
• Connect to NetGear via Wi-Fi or LAN.
• Login into HTML default page.
• In Wireless menu, change the setting SSID to NETGEAR, Channel to 8, mode to 802.11b/g
Options same as Base station.
• In LAN Setup menu, change IP address to 192.168.1.2 because 192.168.1.1 assign to
Base station.
• In Wireless Repeating function menu, Enable Wireless Repeater function, enter The Base
station MAC Address and Save&apply.

4.2 Steps to configure NetGear(WGR619) as Repeater 20
Device IP Address Port
Base station 192.168.1.1 –
Repeaters 192.168.1.2-192.168.1.5 –
BeagleBoard-xM 192.168.1.10-192.168.1.255 above 5004
Table 4.1: Network IP Address
Table(4.1) shows the Static IP Address assign to Devices in Network Architecture.

Chapter 5
Power Management On BeagleBoard-xM
BeagleBoard-xM support a rich set of Power Management Techniques[12].
• Dynamic Voltage Scaling
• Dynamic Frequency Scaling
• Clock Gating
• Disable Unused modules on The Board.
TPS65950 Power Management IC(PMIC) on the Board, which provides several key func-
tions on the BeagleBoard-xM.
– Main Core Voltages
– Peripheral Voltages
– Power Sequencing
The various components in the TPS65950 are controlled from the ARM Processor via the I2C
interface. Dynamic Voltage Scaling controlled by Smart Reflex Technologies with help of
TPS65950. Smart Reflex technologies is an advanced, multi-level and multi-parameter power
management approach multiple processing cores and functional blocks. Clock Gating con-
trolled by The kernel. I2CBus 1 is used to Interact the TPS65950.
21

5.1 Dynamic Frequency Scaling 22
5.1 Dynamic Frequency Scaling
BeagleBoard-xM has support of Dynamic Frequency Scaling from command line and changing
registered frequency values.
• Command to set Available Frequencies.
$ cat /sys/devices/system/cpu/cpu0/cpufreq/scaling_available_frequencies
300000 600000 80000
$ echo 600000 > /sys/devices/system/cpu/cpu0/cpufreq/scaling_setspeed
• Command to Set Auto Frequency scaling, Auto Frequency Scaling sets Frequency of
ARM Processor depends on Requirement.
$ cat /sys/devices/system/cpu/cpu0/cpufreq/scaling_available_governors
ondemand userspace
$ echo ondemand > /sys/devices/system/cpu/cpu0/cpufreq/scaling_governor
5.2 Disable Unused modules on The Board
On BeagleBoard-xM we are not using Serial Port, DVI-D port, Ethernet port, Audio Jacks. So
disable power supply of these modules saves the power.
Example, TPS65950 AUX_3v3 LDO Provides Power Supply Rail to D5 Power LED, DVI-D,
RS232 Level converter and RS232 Line Divider. AUX_3v3 supply can be turned off by Activat-
ing GPIO1 on TPS65950. This Activating of GPIO1 on TPS65950 Done by I2C communication
between Processor and TPS65950 PMIC.
• Command to set the GPIO.1 on TPS65950.
$i2c -f -y 1 0x49 0x000000a4 0x02

5.2 Disable Unused modules on The Board 23
– 0x49 Chip Address of TPS65950
– I2CBUS ID
– 0x000000a4 SetGPIODATAOUT1 Register Address
– 0x02 Value to Set GPIO.1 on TPS65950
Command Test can Done by Verifying D5 power LED on Board, RS232 Communication.
• Command to RESET GPIO.1 on TPS65950 $i2c -f -y 1 0x49 0x000000a5 0x02
– x49 Chip Address of TPS65950
– 0x000000a5 Clear GPIODATAOUT1 Register Address
– 0x02 Value to Set GPIO.1 on TPS65950
Disable AUX3_3 reduces Power Consumption of 120mA.
Chapter 6
Results
Streaming the Video Over Wi-Fi Network architecture.
• Resolution 640 * 480.
• Frame-rate 30 fps.
• Compression JPEG/H.264.
• Range around 30m covering.
• Lithium-Ion Battery (7.4v, 1600mApH) Drained out for 2 Hours.
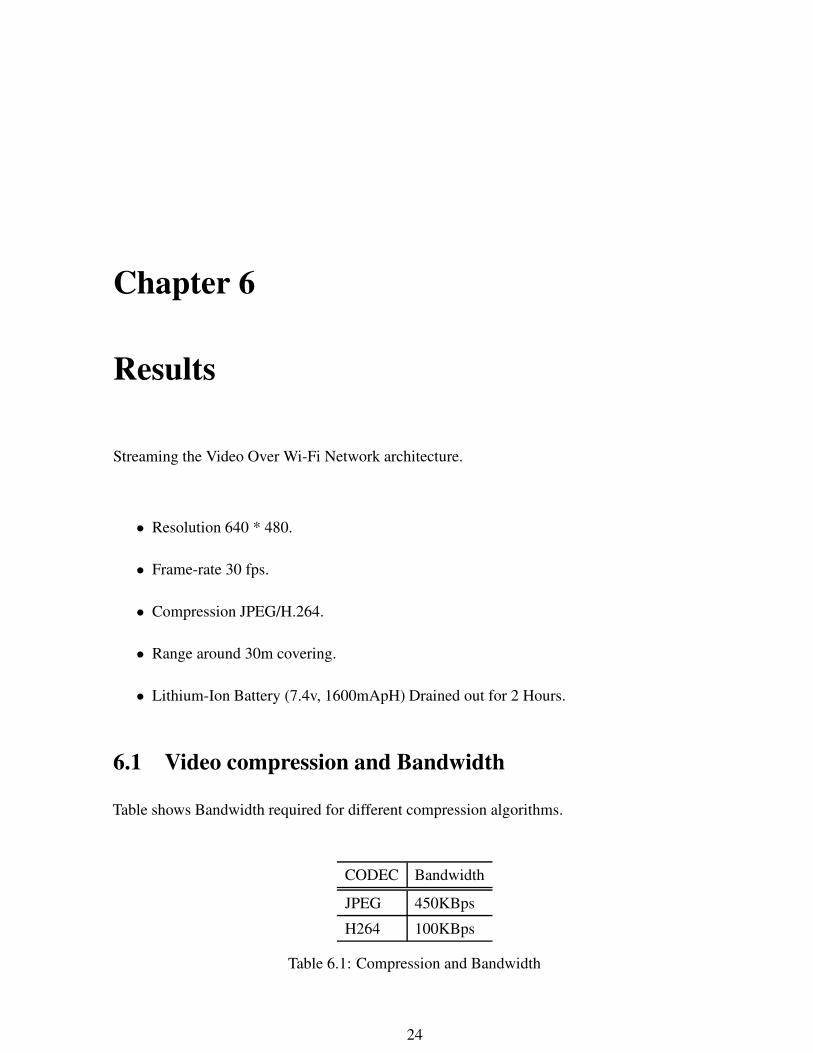
6.1 Video compression and Bandwidth
Table shows Bandwidth required for different compression algorithms.
CODEC Bandwidth
JPEG 450KBps
H264 100KBps
Table 6.1: Compression and Bandwidth
24

6.2 CPU load and Video compression 25
6.2 CPU load and Video compression
Table shows ARM cortex A8 CPU load for different compression algorithms.
CODEC gstlaunch CPU% System Memory% DSPLink CPU%
JPEG 92.7 8.7 0.0
H264 47.9 9 0.3
Table 6.2: CPU load and Compression
6.3 Power Consumption
Table (6.3)shows power consumption BeagleBoard-xM from.The table shows total power drawn
from source, power consumed by processors. Remaining power consumed by USB port.
Power Drawn Power Drawn From Source(W) Processor Drawn Power(W)
During Boot Up 4.056 0.987
SSH, Camera, Wi-Fi connection to BB-xM 4.056 0.9
During JPEG CODEC running 5.478 1.172
During H.264 CODEC running 5.67 1.289
Table 6.3: BeagleBoard-xM Power Consumption
Lithium-Ion Battery (7.4v, 1600mApH) Drained out for 2 Hours. Disable of AUX3_3 sup-
ply reduces 0.6 Watt Power consumption.

Chapter 7
Conclusion
Prototype of Battery Operated Wireless Video Surveillance System developed. It can stream
Video over Wi-Fi channel. DSP side of BeagleBoard-xM Used For the Compression H264
CODEC. H264 CODEC Compression shows reduction in Bandwidth compare to JPEG CODEC.
The system can be easily operated for 2 Hours with the use of Lithium-Ion batteries.
To reduce the Power consumption, Suspending the Board in between the process will not
work. There is a Bug related to board, USB modules are not Resume state after Resuming from
suspend state .
For example , The Board connected to Wi-Fi network, Suspending the Board for 2 sec using
RTC.
$ rtcwake -d /dev/rtc0 -m mem -s 2
After coming out suspend state, the Board is not Resuming Previous USB state Wi-Fi connec-
tion to network.
According to Power calculation most of the power consumed by RF communication USB
Wi-Fi Dongle. Using of Low power 802.11n protocol USB dongle useful for both power and
range.
26
Chapter 8
Future Work
• Using Mesh Network protocol for Wireless connection.
• Battery operated Network Router.
• Motion Activated recording and alerts .
• Power Optimization.
• Theft control For BeagleBoard-xM.
• Battery charge level update to Server.
27
Appendix A
Measuring TPS65950 Power consumption
Using I2C
V_Bat is main power rail to TPS65950 Power Management IC. V_Bat connected to R13 resistor
on Board. There are two pairs of resistors provided on the TPS65950 that measure the voltage
on either side of R13. This Two pair of resistors connected to Channel 3 and Channel 5 inputs
of ADC on TPS65950.
• turn on MADC and connect the ADC pins
$ i2cset -y -f 1 0x4a 0x00 0x01 CTRL1 MADCON MADC software power On. When
set to 1 MADC is powered. $ i2cset -y -f 1 0x48 0xbb 0x08
• set which ADCs to read/average
$ i2cset -y -f 1 0x4a 0x06 0x28 SW2SELECT_LSB selects the channel 3 and 5(0010
1000)
$ i2cset -y -f 1 0x4a 0x07 0x00 SW2SELECT_MSB nothing
$ i2cset -y -f 1 0x4a 0x08 0x28 SW2AVERAGE_LSB selects the channel 3 and 5(0010
1000)
$ i2cset -y -f 1 0x4a 0x09 0x00 -SW2AVERAGE_MSB
• start read and get results
$ i2cset -y -f 1 0x4a 0x12 0x20 CTRL_SW1 This register allows the start of an SW1
28
29
software conversion.
$ i2cget -y -f 1 0x4a 0x3d w reads GPCH3_LSB & MSB channel 3 GP conversion result
register(ADIN3) .
$ i2cget -y -f 1 0x4a 0x41 w reads GPCH5_LSB & MSB channel 5 GP conversion result
register (ADIN5).

Appendix B
Sample C code for MQTT client
PUBLISH /Subscribe Data
#include “stdio.h ”
#include “stdlib.h ”
#include “string.h ”
#include “MQTTClient.h ”
#define ADDRESS “192.168.1.18 ”
#define CLIENTID “surviellace1”
#define TOPIC “accelerometer-data ”
#define QOS 1
#define TIMEOUT 10000L
volatile MQTTClient_deliveryToken deliveredtoken;
void delivered(void *context, MQTTClient_deliveryToken dt)
{
printf(“Message with token value %d delivery confirmed ”, dt);
deliveredtoken = dt;
}
30

31
int msgarrvd(void <em>context, char *topicName, int topicLen, MQTTClient_message *message)
{
int i;
char payloadptr;
char payload[200];
printf(“Message arrived ”);
printf(“topic: %s ”, topicName);
printf(“message: ”);
payloadptr = message->payload;
for(i=0; i<message->payloadlen; i++)
{ putchar(*payloadptr++);
}
putchar(‘’);
MQTTClient_freeMessage(&message);
MQTTClient_free(topicName);
return 1;
}
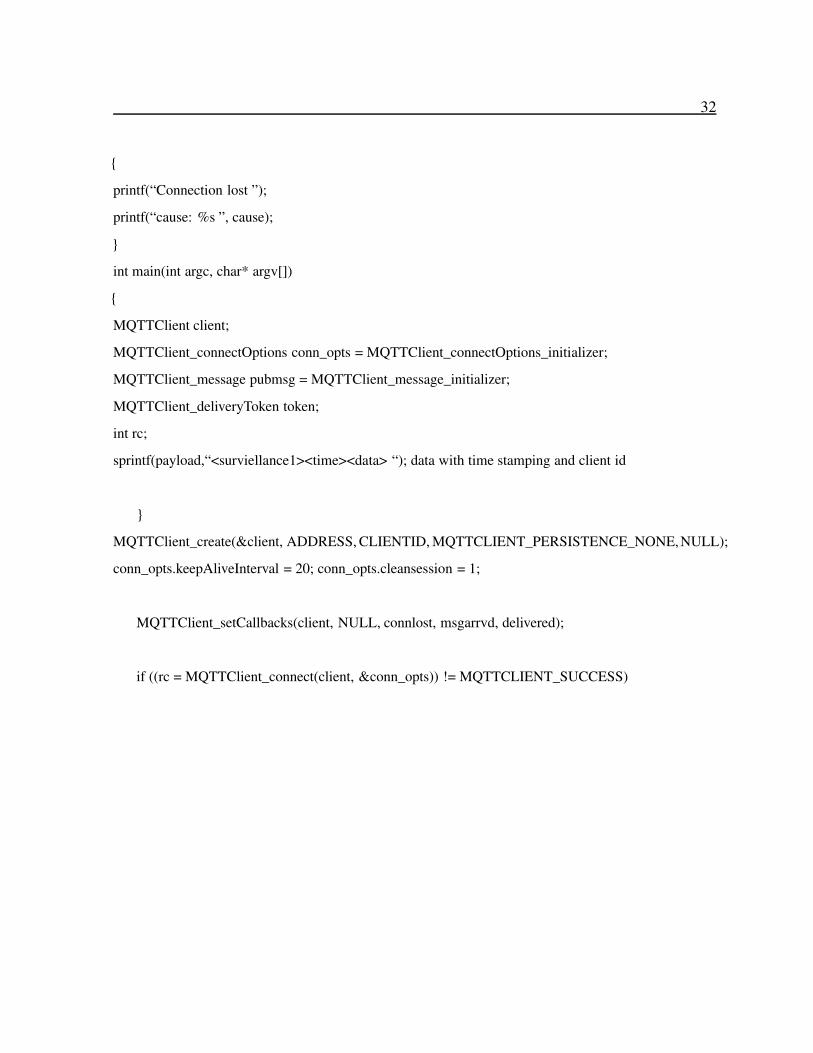
void connlost(void *context, char *cause)
32
{
printf(“Connection lost ”);
printf(“cause: %s ”, cause);
}
int main(int argc, char* argv[])
{
MQTTClient client;
MQTTClient_connectOptions conn_opts = MQTTClient_connectOptions_initializer;
MQTTClient_message pubmsg = MQTTClient_message_initializer;
MQTTClient_deliveryToken token;
int rc;
sprintf(payload,“<surviellance1><time><data> “); data with time stamping and client id
}
MQTTClient_create(&client, ADDRESS, CLIENTID, MQTTCLIENT_PERSISTENCE_NONE,NULL);
conn_opts.keepAliveInterval = 20; conn_opts.cleansession = 1;
MQTTClient_setCallbacks(client, NULL, connlost, msgarrvd, delivered);
if ((rc = MQTTClient_connect(client, &conn_opts)) != MQTTCLIENT_SUCCESS)

33
{
printf(“Failed to connect, return code %d ”, rc);
exit(-1);
}
pubmsg.payload = PAYLOAD;
pubmsg.payloadlen = strlen(PAYLOAD);
pubmsg.qos = QOS;
pubmsg.retained = 0;
deliveredtoken = 0;
MQTTClient_publishMessage(client, TOPIC, &pubmsg, &token);
printf(“Waiting for publication of %s on topic %s for client with ClientID: %s ”, payload, TOPIC, CLI-
ENTID);
while(deliveredtoken= token);
MQTTClient_disconnect(client, 10000);
MQTTClient_destroy(&client);
return rc;
}

Bibliography
[1] BeagleBoard-xM Hard warehttp://beagleboard.org/hardware-xM
[2] BeagleBoard for Beginners http://elinux.org/BeagleBoardBeginners.
[3] Project report submitted by Anand satpute https://sites.google.com/site/anandiisc1/home
[4] Booting Linux on the BeagleBoard-xM http://www.ibm.com/developerworks/library/l-beagleboard-
xm/
[5] Developers cite for Angstrom Distribution http://www.angstrom-distribution.org/building-angstrom
[6] GStreamer Developers Information http://gstreamer.freedesktop.org/
[7] GStreamer Plug-ins writers guide http://gstreamer.freedesktop.org/data/doc/gstreamer/head/pwg/html/
[8] TI GStreamer Plug-in http://processors.wiki.ti.com/index.php/DMAI_GStreamer_Plug-In
[9] DSPLink TI Wiki page http://processors.wiki.ti.com/index.php/Category:DSPLink
[10] On-line Angstrom distribution build Process http://narcissus.angstrom-distribution.org/
[11] Online Package browser for BeagleBoard-xM Angstrom http://www.angstrom-
distribution.org/repo/
[12] power optimization http://processors.wiki.ti.com/index.php/AM335x_Power_Management_User_guide
[13] DM3730 architecture information http://www.ti.com/product/dm3730
[14] TPS65950 Technical data information http://www.ti.com/product/tps65950
[15] NetGear Vue Zone Battery operated system http://www.vuezone.com/learn-more/what-it-does
34


