A User’s Guide to the Windows Forensic Environment Brett Shavers
A User’s Guide to the Windows Forensic Environment January 2011

A User’s Guide to the Windows Forensic Environment Brett Shavers
A User’s Guide to the Windows Forensic Environment January 2011
The author and contributors make no claims as to specific software licensing agreements mentioned in this paper. It is up to
the individual user to read and understand the appropriate use of each application, particularly since the authors have no control over
licensing with the programs listed, including the Windowsi operating system.
Additionally, forensic soundness must be tested by the examiner, using the same environments in which to use their tools in
the field/lab. No guarantees can be made by the author or contributors as to the forensic soundness of any program as that is a duty of
each examiner to determine with all software applications and hardware to be used.
All software noted is copyrighted by its respective developer/owner/company.

A User’s Guide to the Windows Forensic Environment Brett Shavers
A User’s Guide to the Windows Forensic Environment January 2011
Introduction
First off, giving credit where credit is due for WinFE and WinFE as built by WinBuilder;
Troy Larson, Senior Forensic Examiner of Microsoft©, created the Windows Forensic Environment (WinFE) by
making two subtle, yet significant, changes in the Windows Pre-installed Environment (WinPE) registry. Nuno Brito for
developing the WinBuilder application for WinPE building. ChrisR for developing the Win7PEii build for Winbulder
(along with several older administrators and Yahoouk JFX). And Royal Meirer for writing the script that implements
Troy Larson‟s registry modifications. A combination of outstanding individuals equally a superb method of building a
WinFE.
Regarding the registry modifications, these two modifications resulted in a major addition in WinPE‟s potential
use as a forensic tool. The Windows Forensic Environment has been referred to as Windows FE and WinFE (and even
Windows Forensic Edition). For simplicity, in this guide WinFE will be used as its name. When the term “WinPE” is
used, it is explicitly used to signify the Microsoft build that is not forensically sound, therefore, not WinFE.
This guide was not written to discredit any other system of booting into a forensic operating environment, or to
compete with any other system. As with any utility, the more you have available, the more issues you can overcome. As
there is a time and place for any tool, a WinFE disc can sit quietly next to your favorite Linux forensic distro until needed.
Understandably, Linux forensic distributions can accomplish most of what WinFE can, although in a different visual
manner and using different software applications. The point of WinFE is that your current Windows programs can be
used, in an environment that you may be using everyday already.
It is intended that this guide be an introduction to WinFE to supplement the tools forensic examiners use, not
replace them. The multitude of Linux forensic boot discs should be maintained using an additional option of a Windows
Based boot disc for situations that call for its use. With community involvement and support, WinFE has evolved into
much more than a forensic boot disc, and is living up to its name as being a complete Windows Forensic Environment.
Although much as been written online on how to create a WinFE disc, little has been written as to what a forensic
examiner can do with it. This guide is an attempt to fill that gap.

A User’s Guide to the Windows Forensic Environment Brett Shavers
A User’s Guide to the Windows Forensic Environment January 2011
Chapter 1 - The WinFE
Windows Forensic Environment Defined
Before defining WinFE, it may be best to define WinPE, at least with Microsoft‟s definitioniii:
“Windows® Preinstallation Environment (Windows PE) 3.0 is a minimal Win32® operating system with limited services,
built on the Windows® 7 kernel. It is used to prepare a computer for Windows installation, to copy disk images from a
network file server, and to initiate Windows Setup.
Windows PE is not designed to be the primary operating system on a computer, but is instead used as a standalone
preinstallation environment and as an integral component of other Setup and recovery technologies, such as Setup for
Windows 7, Windows Deployment Services (Windows DS), the Systems Management Server (SMS) Operating System (OS)
Deployment Feature Pack, and the Windows Recovery Environment (Windows RE).”
Windows Forensic Environment, aka Windows FE, aka WinFE, can be defined as a forensically safe, bootable
operating system; a customized WinPE environment that has been configured to not auto-mount hard drives in order to
preserve the integrity of the data (“write blocked”). The configuration consists of registry modifications to prevent the
auto-mounting of drives and also includes the removal of the bootfix.bin file to prevent inadvertently booting the
computer to the host operating system. (Bootfix.bin provides for the “press any key to boot to CD” and the removal of
this particular file allows for direct booting to the CD).
WinPE can be customized to the user's intended purpose, by the useriv. A customized WinPE will remain “PE”
until the registry modifications have been made, at which point, PE has become forensic. A minor point in the use of
forensically sound in regards to data collected by WinFE. In this guide, forensic as it applies to WinFE is that WinFE is
not auto-mount the hard drives, nor make any changes to the data contained on the hard drives, therefore, increasing the
weight of evidence. Should the user manipulate the mounting of hard drives and change data, it certainly can still be
considered evidence, but the weight of that evidence starts sliding down the scale of reliability. The intention of using any
forensic software or hardware is to prevent electronic evidence from losing any reliability, so know your tools through
personal testing. After all, you haven‟t used a boot disc before without testing it…have you?

A User’s Guide to the Windows Forensic Environment Brett Shavers
A User’s Guide to the Windows Forensic Environment January 2011
Chapter 2 - How to Use WinFE
Imaging and Data Collection
In the most basic (and arguably most important) use of WinFE is that of forensic acquisition. After all, it is a
forensically sound bootable operating system. And not unlike any other forensic bootable environment, imaging can be
simply conducted by booting the evidence/custodian machine to WinFE and attaching a storage drive through any USB
port for imaging. This is the same process used since the beginning of computer forensics with imaging using modified
floppy boot discs. As long as the suspect/custodian machine can be booted to either USB or CD, WinFE has a place to
easily image.
Imaging speeds with WinFE will probably never match the speeds hardware imaging devices such as the
HardCopy Prov. However, given a large number of computers and a limited supply of hardware imaging devices, imaging
multiple computers will be faster with multiple WinFE booted environments. A stack of WinFE boot discs surely can
image dozens of machines faster than any other system that requires removing hard drives from various types of
computers and attaching to write blockers or hardware imaging devices. Given that WinFE either contains all the drivers
you need for imaging nearly any Windows system or that you can add drivers on the fly, acquisition problems diminish.
Transfer speeds can be increased with WinFE by using eSATA or USB 3.0 cards (add the drivers to WinFE that you need
for the cards you use and you have greatly increased acquisition speeds).
Data collection, as it relates to electronic discovery, does not always imitate forensic imaging collection in
criminal investigations. Typically, user-created files are simply copied from a custodian computer onto external media.
These files consist of basic word processing documents, spreadsheets, email, and the like. Although forensic imaging
may not be the most widely method used to collect this data, WinFE does have a place to ensure a forensic collection of
specific files from media without having to image the entire media. This is not to say that file copying programs cannot
copy files and maintain all metadata, but that if the most secure method of copying files is needed, WinFE can provide for
it.
A custodian computer can be booted to WinFE and from the forensically sound environment, the desired user-
created files that would have been simply copied while the computer was running, can now be logically imaged (with
FTK Imagervi as an example) in the most forensically sound manner possible. Additionally, booting into the WinFE
allows avoiding Administrator privilege issues typically found in corporate environments. The only additional time
needed is that time it takes the computer to boot to WinFE.
Remote data collection in electronic discovery legal matters is possible with WinFE using remote desktop that is
included with the WinBuilder WinFE or through 3rd
party applications such as TeamViewervii
if internet connectivity
A User’s Guide to the Windows Forensic Environment Brett Shavers
A User’s Guide to the Windows Forensic Environment January 2011
exists on the custodian machine. As long as the custodian is able to boot to a WinFE USB/CD that is provided beforehand
as well as plug in an external drive, remote access will allow for any number of data collection functions to be possible.
Obviously, the data collector will not be able to see the physical computer from which files are to be copied or
hard drives to be imaged, but the physical computer can be interrogated through utilities such as WinAuditviii
to identify
the computer being targeted for collection. Given that many collections may not occur due to the costs involved, this
method will enable capturing data that would otherwise not be collected with a substantial cost savings.
Being connected remotely to a WinFE booted custodian machine which has an external drive connected allows
for a near complete examination of the custodian machine, limited only by the types of software used. Even with
software protection devices (USB dongles), if provided to the local site, full versions of forensic tools such as X-Ways
Forensics can be run and processes conducted. Some of these process include (with or without a software dongle…):
Collection of specified user-created files (*.doc, *.pst, etc…) onto external media connected to the machine,
Forensic image of any hard drives attached to the machine onto external media,
Keyword searches/index searches,
Exporting of individual files or folders,
Hash comparisons, and
Virtually anything that can be done onsite, can be accomplished remotely, in a forensically sound environment.
Although this method would not be advised in a criminal investigation (you don‟t want the suspect booting the
suspect computer…), in civil matters, IT staff will be more than proficient to boot their local machines to WinFE and
completing the remote connection. This can virtually eliminate a large expense of data collection due to travel related
costs.
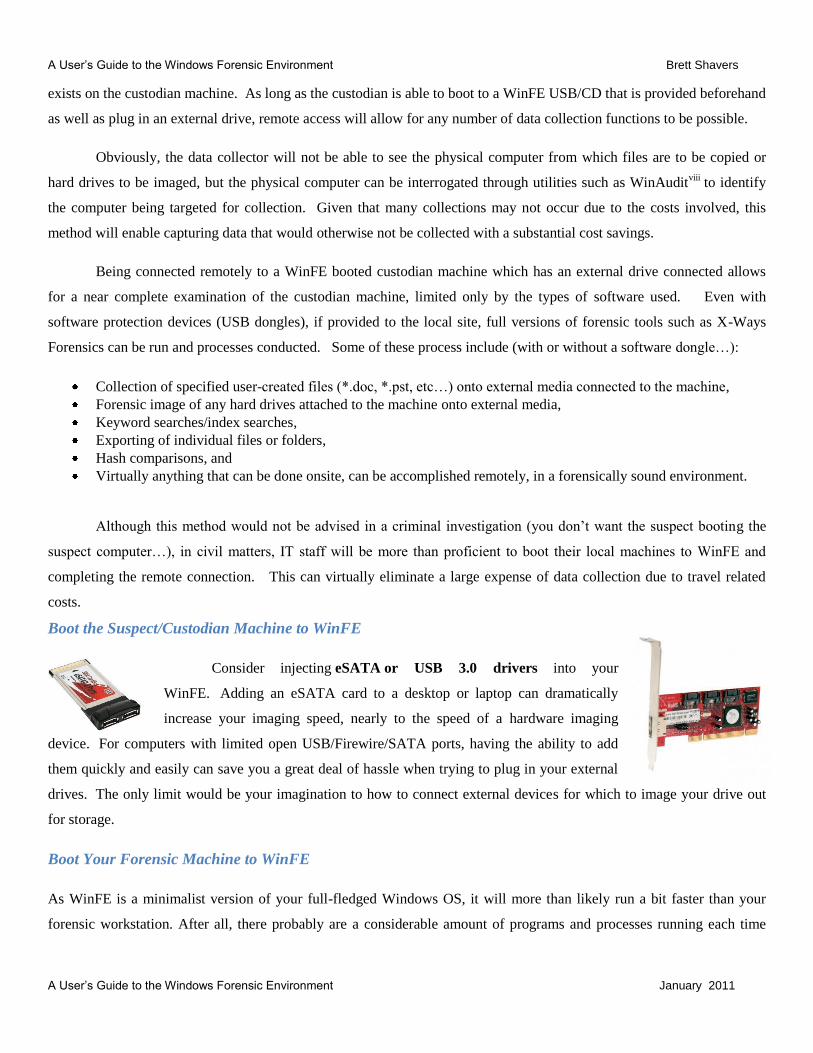
Boot the Suspect/Custodian Machine to WinFE
Consider injecting eSATA or USB 3.0 drivers into your
WinFE. Adding an eSATA card to a desktop or laptop can dramatically
increase your imaging speed, nearly to the speed of a hardware imaging
device. For computers with limited open USB/Firewire/SATA ports, having the ability to add
them quickly and easily can save you a great deal of hassle when trying to plug in your external
drives. The only limit would be your imagination to how to connect external devices for which to image your drive out
for storage.
Boot Your Forensic Machine to WinFE
As WinFE is a minimalist version of your full-fledged Windows OS, it will more than likely run a bit faster than your
forensic workstation. After all, there probably are a considerable amount of programs and processes running each time

A User’s Guide to the Windows Forensic Environment Brett Shavers
A User’s Guide to the Windows Forensic Environment January 2011
your forensic machine is on, many of which you don‟t need but are slowing up your machine (and giving one more reason
for Windows or a program to crash when you really don‟t need it to crash). An option for using your imaging tools with
WinFE and using your forensic machine would be to boot your forensic machine to WinFE and connect your evidence
drive (you can use a write blocker or not), and image to your storage device or
network. This would allow using your trusted hardware at the fastest possible
use of your OS (WinFE).
Another option is to place a clean storage drive in your forensic machine,
boot to WinFE, and image the suspect/custodian drive (with or without a
hardware write blocker) to the sterile hard drive in your forensic machine. This
may be an option when the suspect/custodian machine does not allow connecting
any devices or perhaps you want to limit the number of devices connected
through USB/SATA and image directly to an internal drive.
Triage/Preview
In this guide, a “triage” and “preview” are considered as the same function. No matter how one may interpret
different definitions of these two terms, the actual process of looking at the evidence without conducting a full analysis is
very similar, if not identical, in practice.
As with any forensically sound booted system, nearly any utility can be used to interrogate the media, which
includes the ability to conduct keyword searches, viewing of graphic files, or any number of limited analysis processes.
The primary difference between WinFE and other types of bootable media is that Windows based programs can be used.
As many agencies and corporations use Windows as their primary operating system, the number of persons that are able
to use WinFE is greatly increased. Given scripting or batch file writing skills, a triage can be conducted in a near
automated process to fulfill the needs of the triage/preview.
A limitation of conducting a triage/preview is that of the tool used. Some utilities cannot see the physical drive,
in which case, the evidence drive will need to be placed online in a READONLY mode and assigned a drive letter using
DiskPartix. Triage/Previewing is beyond the scope of this guide and mentioned only as a topic of consideration of WinFE
usage.
Analysis
WinFE is limited on the types of forensic applications that can run without issues of missing dependent files. As
a forensic analysis platform, WinFE is not intended to replace your Windows OS on your forensic machine.
However, there are some processes you can perform with WinFE in a limited fashion, which can help prioritize drives for
analysis, or perhaps even be enough of a limited analysis to forego a full analysis. As an example, the program Field

A User’s Guide to the Windows Forensic Environment Brett Shavers
A User’s Guide to the Windows Forensic Environment January 2011
Searchx, a law enforcement only software, can be used within WinFE to search a computer hard drive for illicit images
(among other items). If illicit images were found, that information may be enough to assist suspect interviews and obtain
admissions or confessions. More importantly, this type of scenario could be applied to missing person investigations
where time is of the essence and perhaps the information needed can be obtained forensically and without modifying the
evidence quickly and onsite.
Surreptitious Collection
In certain government agencies, the collection of data from computers may take on a whole new meaning with
WinFE. Given court orders (criminal cases or national security), keyloggers and other monitoring software/hardware can
be installed surreptitiously on suspect computer systems. In addition to this ability, WinFE can allow for the imaging of
a computer without leaving any telltale trace that any programs were run at all. For ultimate simplicity, WinFE can
be installed to a bootable flash drive and an image can be saved onto the same flash drive. A suspect computer can be
booted to a flash drive with WinFE, an imaging program run from
within WinFE, and the image saved to the flash drive. The computer
does not need disassembly, only one USB port is needed, and only one
item (the WinFE flash drive) is used. This reduces the risk of
inadvertently leaving items behind, disturbing items when unnecessary, and consolidating gear. Several USB flash drives
are 256GB (such as from www.kingston.com) and higher, more than enough for the vast majority of desktop computers
and laptops.

A User’s Guide to the Windows Forensic Environment Brett Shavers
A User’s Guide to the Windows Forensic Environment January 2011
Chapter 3 – Building the WinFE
Building WinFE with the Command Line
Building a basic WinFE ISO can be done quickly through use of a command shell. A previously written set of
instructions (The Nearly Perfect Boot CDxi) gives greater detail in using batch files to build a WinFE ISO, therefore, not
repeated in this guide. It is of note to mention that the resulting WinFE builds with both the command line/batch file
method and the WinBuilder method described in this guide are substantially different in appearance but their use in
forensic acquisitions remains the same. The screen captures on the following page show the differences in appearance
and features between the basic WinFE build and the WinBuilder WinFE build. As can be seen in Figure 1, the basic
WinFE consists of a command shell to run installed programs whereas in Figure 2, a typical Windows Explorer shell
allows for the commonly expected Windows desktop to be seen.
A basic WinFE build consists of a minimal build, such as not having an Explorer shell and other standard
Windows OS features. Applications typically used in the basic build are mostly portable applications without having the
need of extensive dependent files installed in the operating system. An example would be FTK Imager Litexii
.
Applications requiring additional Windows system files require the manual injection of those files into the build.
Although the basic build is quite limited as to the varied types of programs that can be installed and run from it, it is quick
to build and boots older machines with less RAM as compared to a fully packed WinFE disc where many programs may
be loaded into RAM. For the vast majority of WinFE uses, the basic build fits this need, after all, for a bootable forensic
environment to image, this basic build works well.
A WinBuilderxiii
WinFE build not only includes an Explorer shell, but also many other features in a complete
Windows installation. More applications can run in this type of build due to the inherent dependent files installed
automatically through the WinBuilder process. Some of these features include desktop icons, a start menu, audio, remote
desktop, and other features selected by the user prior to the building with WinBuilder. Details of using WinBuilder follow
in the next chapter. In the event that a forensic analysis may be conducted using a booted WinFE disc, the WinBuilder
WinFE build may be the best option as it allows for more programs to run with minimal effort of installation.

A User’s Guide to the Windows Forensic Environment Brett Shavers
A User’s Guide to the Windows Forensic Environment January 2011
Figure 1: Basic WinFE build
Figure 2: WinBuilder WinFE build
A User’s Guide to the Windows Forensic Environment Brett Shavers
A User’s Guide to the Windows Forensic Environment January 2011
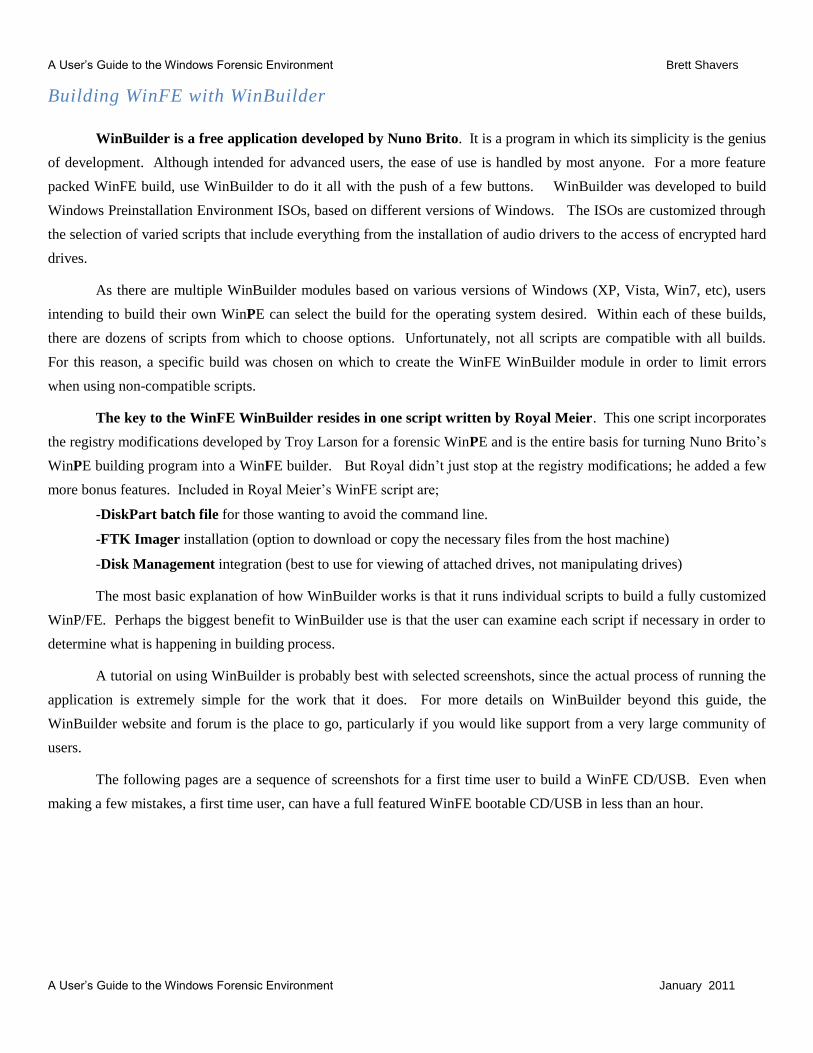
Building WinFE with WinBuilder
WinBuilder is a free application developed by Nuno Brito. It is a program in which its simplicity is the genius
of development. Although intended for advanced users, the ease of use is handled by most anyone. For a more feature
packed WinFE build, use WinBuilder to do it all with the push of a few buttons. WinBuilder was developed to build
Windows Preinstallation Environment ISOs, based on different versions of Windows. The ISOs are customized through
the selection of varied scripts that include everything from the installation of audio drivers to the access of encrypted hard
drives.
As there are multiple WinBuilder modules based on various versions of Windows (XP, Vista, Win7, etc), users
intending to build their own WinPE can select the build for the operating system desired. Within each of these builds,
there are dozens of scripts from which to choose options. Unfortunately, not all scripts are compatible with all builds.
For this reason, a specific build was chosen on which to create the WinFE WinBuilder module in order to limit errors
when using non-compatible scripts.
The key to the WinFE WinBuilder resides in one script written by Royal Meier. This one script incorporates
the registry modifications developed by Troy Larson for a forensic WinPE and is the entire basis for turning Nuno Brito‟s
WinPE building program into a WinFE builder. But Royal didn‟t just stop at the registry modifications; he added a few
more bonus features. Included in Royal Meier‟s WinFE script are;
-DiskPart batch file for those wanting to avoid the command line.
-FTK Imager installation (option to download or copy the necessary files from the host machine)
-Disk Management integration (best to use for viewing of attached drives, not manipulating drives)
The most basic explanation of how WinBuilder works is that it runs individual scripts to build a fully customized
WinP/FE. Perhaps the biggest benefit to WinBuilder use is that the user can examine each script if necessary in order to
determine what is happening in building process.
A tutorial on using WinBuilder is probably best with selected screenshots, since the actual process of running the
application is extremely simple for the work that it does. For more details on WinBuilder beyond this guide, the
WinBuilder website and forum is the place to go, particularly if you would like support from a very large community of
users.
The following pages are a sequence of screenshots for a first time user to build a WinFE CD/USB. Even when
making a few mistakes, a first time user, can have a full featured WinFE bootable CD/USB in less than an hour.

A User’s Guide to the Windows Forensic Environment Brett Shavers
A User’s Guide to the Windows Forensic Environment January 2011
Figure 3
Copy your programs to the folder shown above. Run Pstart
xiv within that folder to configure the Pstart menu.
The programs in this folder will be accessible outside of a booted WinFE environment, such as on a running
custodian machine (much like a „live side‟ utility).
All programs copied to the Portable-Pstart folder will be accessible from your WinFE CD/USB on a live running
system, much like a dual purpose disc (forensic bootable environment as well as a “live” side).

A User’s Guide to the Windows Forensic Environment Brett Shavers
A User’s Guide to the Windows Forensic Environment January 2011
Figure 4
Ensure you point to a valid source such as a Windows 7 install disc or you will receive an error and the building
will stop.

A User’s Guide to the Windows Forensic Environment Brett Shavers
A User’s Guide to the Windows Forensic Environment January 2011
Figure 5
Each option can be accessed by clicking the small arrow. The more that is added, the larger your ISO will be, so
best is to choose only those things you know you will need on your WinFE. Although there are many features you can
add, the basic and most important premise is the WinFE script that will prevent the auto-mounting of drives. This feature
is hard coded and not able to be changed to prevent an inadvertent building of WinPE instead of a WinFE.

A User’s Guide to the Windows Forensic Environment Brett Shavers
A User’s Guide to the Windows Forensic Environment January 2011
Figure 6
There are multiple options to choose from. Be aware that some features may not work together with another.
Trial and error may be necessary to find the build that suits your need and doesn‟t error during the build process. Given
your skill in writing scripts, you can even create your own customized script for WinBuilder if it doesn‟t exist already.
A User’s Guide to the Windows Forensic Environment Brett Shavers
A User’s Guide to the Windows Forensic Environment January 2011
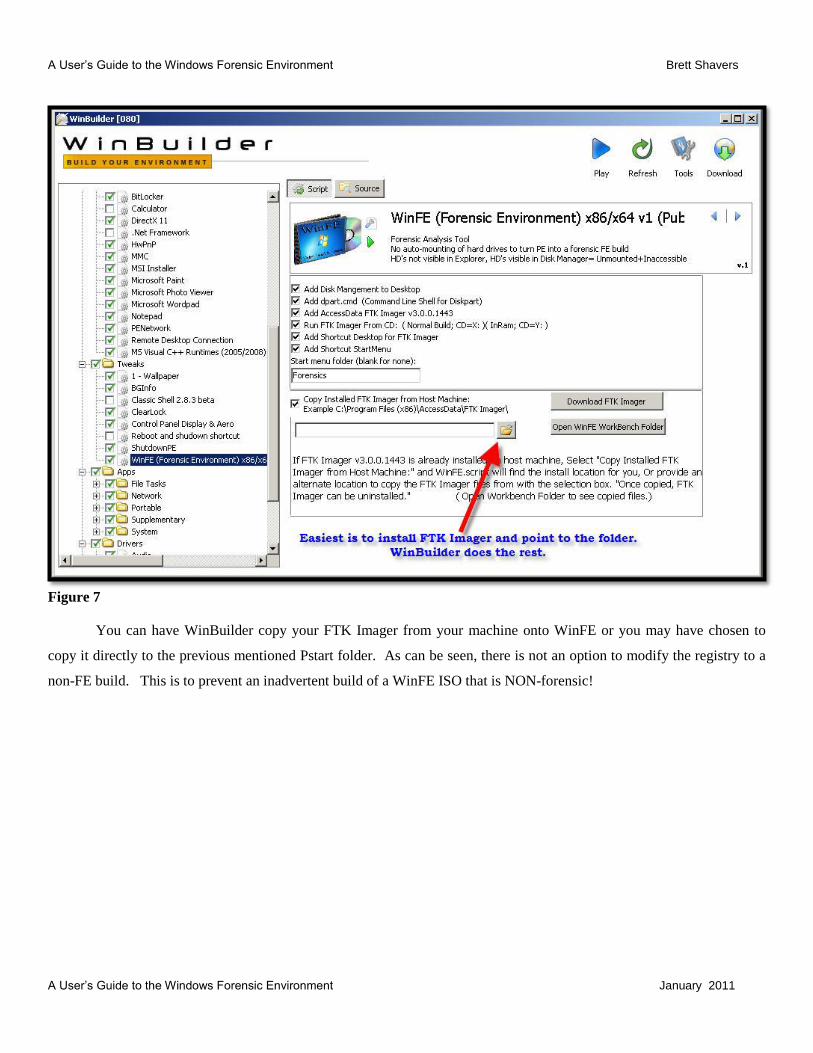
Figure 7
You can have WinBuilder copy your FTK Imager from your machine onto WinFE or you may have chosen to
copy it directly to the previous mentioned Pstart folder. As can be seen, there is not an option to modify the registry to a
non-FE build. This is to prevent an inadvertent build of a WinFE ISO that is NON-forensic!

A User’s Guide to the Windows Forensic Environment Brett Shavers
A User’s Guide to the Windows Forensic Environment January 2011
Figure 8
If you also want a bootable USB flash drive with WinFE, point the above folder to your USB. Once WinBuilder
completes the build, you will be given the option to format the USB, make bootable, and copy WinFE to it.

A User’s Guide to the Windows Forensic Environment Brett Shavers
A User’s Guide to the Windows Forensic Environment January 2011
Figure 9
Click the bigger blue arrow and let WinBuilder run! It may take some time depending upon how many features
you have chosen. If an error stops the build, you can determine where the error occurred through the log file and can
adjust a setting that may have caused the error, then just restart the build. For WinBuilder support, visit http://reboot.pro
online for forums and WinBuilder information.

A User’s Guide to the Windows Forensic Environment Brett Shavers
A User’s Guide to the Windows Forensic Environment January 2011
Figure 10
WinBuilder will run through all scripts selected. Once completed, you will have a WinFE ISO to be burned onto
a CD and/or a bootable WinFE on a USB flash drive.
Before any real case use, test your WinFE. Make sure the registry modifications are correct, and test WinFE on
a real test system. Results of some testing is included further into this guide and on several related websites, but be sure to
conduct your own personal tests to validate forensic soundness, just like every other forensic utility.
A User’s Guide to the Windows Forensic Environment Brett Shavers
A User’s Guide to the Windows Forensic Environment January 2011
Chapter 4 - Software in WinFE
Generally, most portable software should be able to function in WinFE, whether it is the basic build or the
WinBuilder build of WinFE. However, there are additional programs that may not have been designed as a portable
application, but will still run in WinFE as if it were portable. These software applications may need additional dependent
files to be installed into WinFE, which will take time and testing to ensure proper functioning.
The following list is a selection of software known to work in the WinFE environment, although there are dozens
of other programs that will work equally as well, but just not listed. The selection of software for your WinFE will be
based on what you plan to do with it. If intended for simply imaging, then a selection of imaging applications may be all
that is needed. However, if you want to have a nearly full forensic capability on your keychain at all times, you might
want to have a fully featured build with multiple applications to conduct more intensive analysis on a given situation.
X-Ways Forensics http://www.x-ways.net Evidor http://www.x-ways.net FTK Imager http://www.accessdata.com Encase http://www.guidancesoftware.com Field Search http:www.justnet.org/Pages/fieldsearch.aspx PStart http://www.pegtop.de/start/
WinAudit http://www.pxserver.com/WinAudit.htm
RegRipper http://www.RegRipper.net
ProDiscover http://www.techpathways.net
Folder2ISO http://www.trustfm.net/
WinRAR http://rarlabs.com
IEF http://www.jadsoftware.com
TeamViewer Portable http://www.teamviewer.com
Free Commander http://www.freecommander.com/
Nirsoft http://www.nirsoft.net
Of the above software, X-Ways Forensics is one forensic application that is fully capable of conducting nearly
every aspect of forensic processes on a WinFE booted machine without having to bring the evidence drives ONLINE.
This includes imaging, triage/preview, and forensic analysis. X-Ways Forensics has the capability to not only index a
drive for keyword searching, but also data carving, display of over 270 file types through its viewer, export of
files/folders, hashing and de-duping, creation of reports, and tagging of evidence files. A triage/preview is only limited by
the goals of the responder/examiner when onsite and using WinFE coupled with X-Ways Forensics.
Other software, such as Encasexv
, ProDiscoverxvi
, Evidorxvii
, FTK Imager, and Internet Evidence Finder (IEF)xviii
are also capable of accessing the physical drive. Software not able to access the physical drive will need to have the
evidence drive placed online in a READONLY mode and assigned a drive letter through the use of DiskPart.
Some of these tools include RegRipper and Field Search. When using tools such as these, it is suggested that the evidence
drives be those that were not intended to be imaged initially, such as a consent search. This is due to the drive having a
modification when brought online to a READONLY status. Whereas consent searches on computers are at times

A User’s Guide to the Windows Forensic Environment Brett Shavers
A User’s Guide to the Windows Forensic Environment January 2011
conducted on a live machine using specific search utilities, a consent search can now be run on a WinFE booted machine,
which will substantially reduce the data being changed on the drive. The only change will be the previously mentioned
changes when volumes are placed in a READONLY mode. As compared to searching a live system where hundreds or
thousands of files may be touched and modified, the WinFE method will only change 4 bytes of non-user data. So the
choice for consent searches can be a live search, where countless files are accessed and modified, or a search with a
booted WinFE system where only 4 bytes are changed.
Two recently released updates to software having a big impact on the usefulness of WinFE are FTK Imager v3.0
and Internet Evidence Finder v4. Both of these applications add features to a WinFE booted machine that are well worth
the time to include on a WinFE build.
FTK Imager v.3.0 from Accessdata, known for being one of the most popular and commonly used forensic
imaging utilities, now has the ability to mount a forensic image as a physical and logical drive letter. The major impact
this has on WinFE is having access to a forensic image for analysis on the WinFE booted system. As an example,
rather than bringing an evidence drive online and assign a drive letter (thereby causing a 4-byte change), a drive can be
imaged and the newly created image subsequently mounted as a drive letter. This will allow access to other utilities that
cannot access a physical drive, such as RegRipper or Field Search. Of course, when imaging time is limited, such as
during a consent search, bringing the evidence drive online in a READONLY state may be the most reasonable choice.
Internet Evidence Finder (IEF) by JadSoftware has been a favorite among examiners during the recent years.
In 2011, an updated version has been released that is portable based, which is certainly useful in the WinFE booted
system. Internet Evidence Finder can run against the physical drive (no need to bring the evidence drive online) with
recovered data being saved to an external drive. With IEF, it is possible to boot a suspect/custodian machine to
WinFE and search the drive for web-based email, chat history, and Internet activity immediately without imaging.
This may be of importance in cases where time is of the essence, such as a missing person investigation and
webmail/chat/Internet use is of immediate informational value.

A User’s Guide to the Windows Forensic Environment Brett Shavers
A User’s Guide to the Windows Forensic Environment January 2011
Figure 11: Internet Evidence Finder in WinFE, is able to access the physical drives attached to the system, making it a
great tool in a forensically sound environment.
A User’s Guide to the Windows Forensic Environment Brett Shavers
A User’s Guide to the Windows Forensic Environment January 2011
Chapter 5 -Forensic Soundness
The following information is based solely on tests conducted by the author. As with ANY software or hardware
used in forensic processes, it is up to the individual examiner to ensure the tools work as intended. Any application can be
used beyond their intended purpose which may lessen their usefulness. Other software applications may be used beyond
their intended purpose without affecting their forensic soundness.
WinFE is not unlike any other software application or operating system where it is up to the user to determine the
usefulness of the tool. After all, one of the worst answers to give regarding whether a program works as intended is,
“because the manual said so”. The best answer is usually, “because I personally tested it”.
Forensic Soundness of the Registry Modifications
The registry modifications; this is where it all rests with WinFE, afterall, any WinPE can boot to a CD or USB,
but it is the disabling the auto-mounting of the hard drives which is the key. The specific registry keys and method of
modifying each key is detailed in “The (Nearly) Perfect Boot CD”, but listed below as well.
HKLM\WinFe\ControlSet001\Services\MountMgr /v NoAutoMount /t REG_DWORD /d 1 /f HKLM\WinFe\ControlSet001\Services\partmgr\Parameters /v SanPolicy /t REG_DWORD /d 3 /f
With the WinBuilder application using the WinFE registry script, these modifications are made during the
automated build of a WinFE ISO. Both of these changes can be confirmed by opening the registry on the running WinFE
to ensure the changes have been made to the WinFE registry. This is simply done by booting to the newly created
WinFE CD and opening the registry with any registry application, including RegEdit, to ensure the keys exist as listed
above.
Testing the effectiveness of these changes should be done by conducting actual booting and imaging of physical
machines to determine if any changes are made to the original media. The use of virtual machines for testing may not
always be the best method to test the forensic soundness of WinFE. Test your tools on the physical media similar to what
you may expect to encounter (hard drives, external drives, flash drives, etc…).
Based on personal tests, the WinFE ISO with the registry modifications suggested by Troy Larson of Microsoft is
forensically sound when used appropriately with DiskPart. Multiple physical systems were tested in which booting to
WinFE did not affect the integrity of the host system‟s physical hard drives. Hash values of media taken before booting
to WinFE matched the hash values after imaging with WinFE. Tests were conducted on various Windows and Linux
operating systems.
It is of interest to note that a non-Windows hard drive, that is, a hard drive not having a disk signature through
being previously connected to Windows may have a disk signature written to the drive when booted with WinFE. At
least one comment on an Internet blog mentions this occurrence. What is more interesting is that several personal tests

A User’s Guide to the Windows Forensic Environment Brett Shavers
A User’s Guide to the Windows Forensic Environment January 2011
consisting of non-Windows OS drives did not have any changes written to the disks when booted and imaged using
WinFE. Nonetheless, whether or not a disk signature is written to the disk is a known occurrence that can be tested and
verified. The writing of a disk signature (4 bytes…) to a hard drive certainly will not alter, delete, or add system or user
files to the hard drive. Also, considering the multitude of non-Windows forensic boot discs available, the examiner can
choose the best forensic bootable OS to use in each given situation.
Accessing Hard Drives
When a system is booted to the Windows Forensic Environment, hard drives are not automatically mounted
during or after booting. Access to the drives also cannot be accomplished without the use of forensic tools (the use of
Explorer does not allow access or viewing of the hard drives). Simply booting into WinFE will allow for forensic utilities
such as FTK Imager to access to the attached hard drives to allow for imaging or previewing without writing any data to
the evidence drives. In order to use applications that cannot see the physical hard drives, the use of DiskPart is needed to
bring the hard drives online as well as the volumes of the hard drives. It is at this point the examiner needs to be
aware of the activity DiskPart can have on the drives.
Before being able to create an image, a destination to which to store a forensic image must be chosen, that
destination drive must be placed online, the READONLY attributes removed from that drive, the volume placed online
and READONLY attributes removed, and a drive letter assigned. The use of DiskPart allows this to be done quickly and
easily without affecting the evidence drive. Once the destination drive is ready, imaging can be conducted.
The WinBuilder WinFE incorporates basic Windows disk management controls, such as “Computer
Management”. Access to hard drives, to include placing drives online/offline, is possible using these applications.
However, it is strongly recommended that any disk management be conducted using DiskPart for several reasons.
First and foremost is that it works. It is easy to use and difficult to make errors. DiskPart is command line, which some
may find unattractive, but it is a very powerful utility with a great ease of use. There are also only a few commands
necessary to use.
In order to save data from your evidence drive, you must have a destination/target drive. Since WinFE does not
auto-mount any drives, you will have to bring your target drive online and remove the READONLY status. This does not
affect your evidence drive. The steps to bring a destination drive online in the command shell of DiskPart are below;
> diskpart (to run DiskPart) > list disks (to see the media connected to the system) > select disk “N” (where “N” is number of your destination drive) > online disk (to bring the disk online) > attributes disk clear READONLY (to allow writing to the disk) > list volume (in order to choose the volume on the destination disk to write) > select volume “V” (where “V” is the volume number to your destination disk) > attributes volume clear READONLY (to allow writing to the volume) > assign letter=Z (any letter you choose, to which your image will be written)
A User’s Guide to the Windows Forensic Environment Brett Shavers
A User’s Guide to the Windows Forensic Environment January 2011
From here, forensic imaging software can create an image of the evidence drive to the destination drive (in the
above example, to the “Z” drive). The evidence drive does not need to be placed into any READONLY/readwrite mode
as it is seen and accessible through the forensic application.
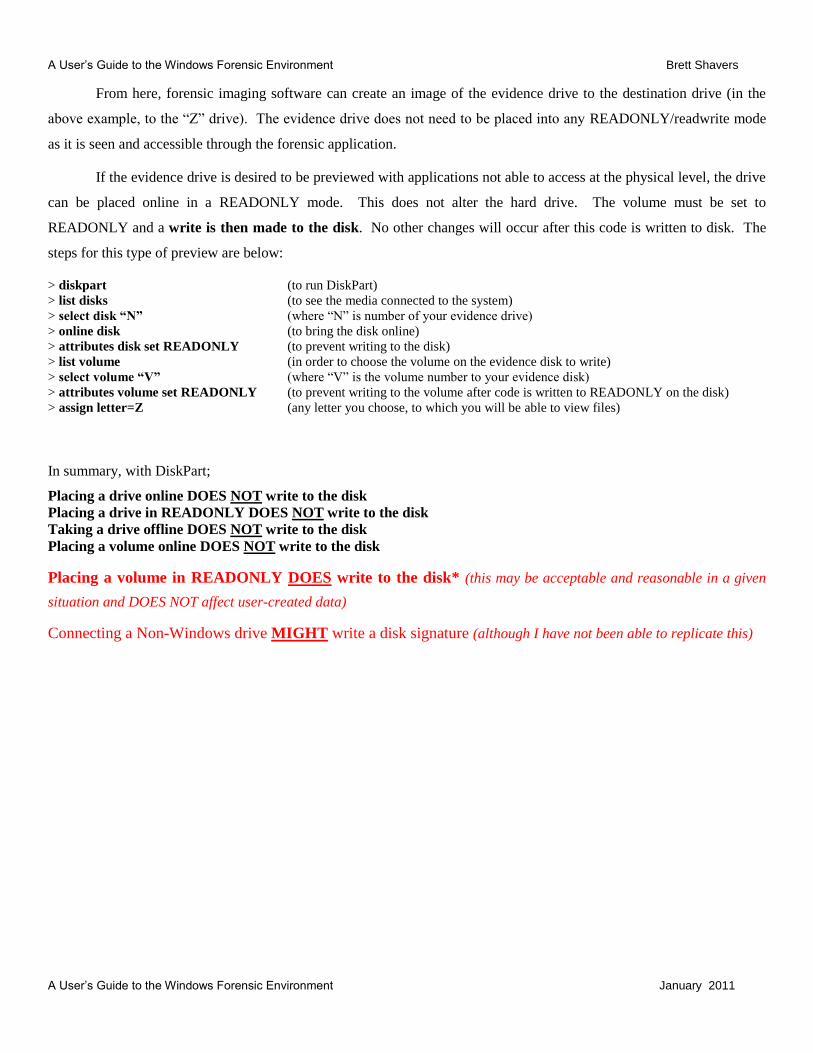
If the evidence drive is desired to be previewed with applications not able to access at the physical level, the drive
can be placed online in a READONLY mode. This does not alter the hard drive. The volume must be set to
READONLY and a write is then made to the disk. No other changes will occur after this code is written to disk. The
steps for this type of preview are below:
> diskpart (to run DiskPart) > list disks (to see the media connected to the system) > select disk “N” (where “N” is number of your evidence drive) > online disk (to bring the disk online) > attributes disk set READONLY (to prevent writing to the disk) > list volume (in order to choose the volume on the evidence disk to write) > select volume “V” (where “V” is the volume number to your evidence disk) > attributes volume set READONLY (to prevent writing to the volume after code is written to READONLY on the disk) > assign letter=Z (any letter you choose, to which you will be able to view files)
In summary, with DiskPart;
Placing a drive online DOES NOT write to the disk
Placing a drive in READONLY DOES NOT write to the disk
Taking a drive offline DOES NOT write to the disk
Placing a volume online DOES NOT write to the disk
Placing a volume in READONLY DOES write to the disk* (this may be acceptable and reasonable in a given
situation and DOES NOT affect user-created data)
Connecting a Non-Windows drive MIGHT write a disk signature (although I have not been able to replicate this)
A User’s Guide to the Windows Forensic Environment Brett Shavers
A User’s Guide to the Windows Forensic Environment January 2011
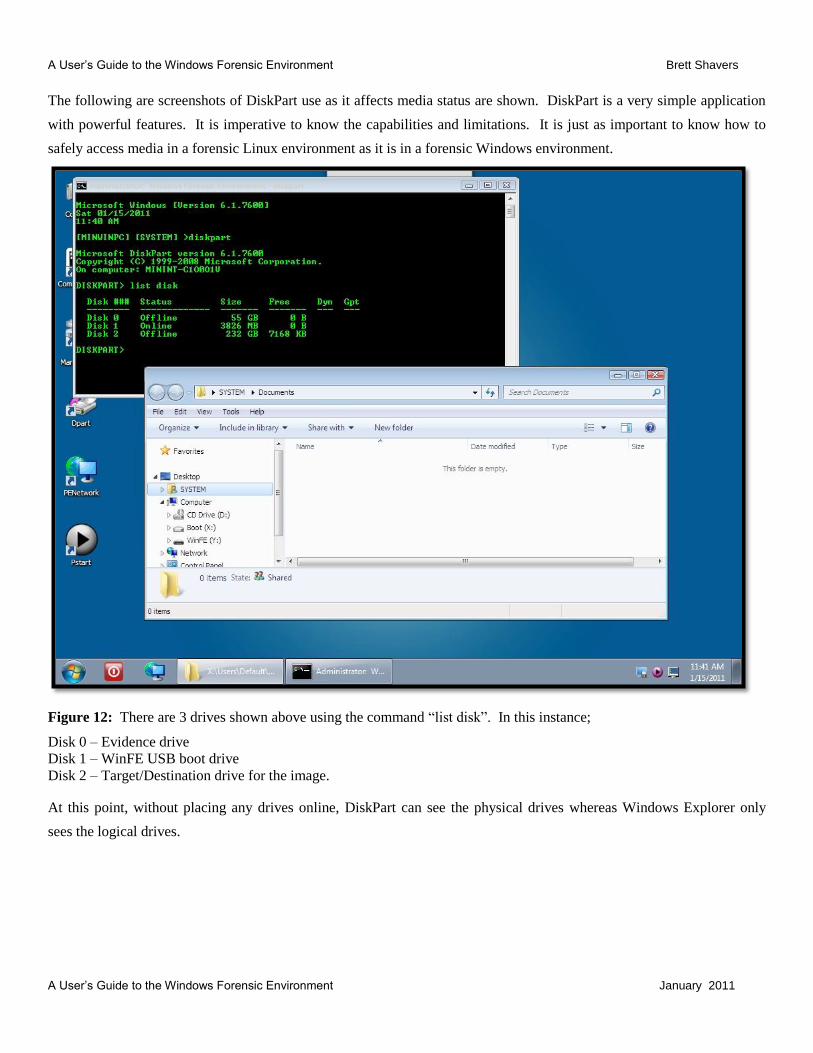
The following are screenshots of DiskPart use as it affects media status are shown. DiskPart is a very simple application
with powerful features. It is imperative to know the capabilities and limitations. It is just as important to know how to
safely access media in a forensic Linux environment as it is in a forensic Windows environment.
Figure 12: There are 3 drives shown above using the command “list disk”. In this instance;
Disk 0 – Evidence drive
Disk 1 – WinFE USB boot drive
Disk 2 – Target/Destination drive for the image.
At this point, without placing any drives online, DiskPart can see the physical drives whereas Windows Explorer only
sees the logical drives.

A User’s Guide to the Windows Forensic Environment Brett Shavers
A User’s Guide to the Windows Forensic Environment January 2011
Figure 13: Although Disk Management can see the physical and logical drives, it is strongly recommended NOT to use
anything other than DiskPart through the command line to manipulate any of the drives connected to the system. In the
above screenshot, Disk Management sees Disk 0 (evidence drive) and Disk 2 (target drive), both offline and inaccessible
without forensic utilities. Disk Management also sees the logical WinFE drive of “Y”, which is the USB device used to
boot this system.

A User’s Guide to the Windows Forensic Environment Brett Shavers
A User’s Guide to the Windows Forensic Environment January 2011
Figure 14: The above is an example of placing the evidence drive ONLINE, set to READONLY, and assigned a drive
letter. In this manner, software not able to access the physical drive can access the logical drive. Tools such as Field
Search could be used at this point on drive “C”. Again, there is a minor write to the drive, but when compared to
conducting the same search on a running computer, this is the least intrusive you can be without removing the hard
drive and attaching a write blocker. The situation will dictate a reasonable method, which may be based upon time
available, access to the hard drive, consent of the owner, or other factors known at the time. The DiskPart command of
“REMOVE” will remove the mount point. The DiskPart command of “REMOVE” will remove the drive letter
assignment, un-mounting the volume.
An important point to make when setting READONLY to a disk is that the READONLY attribute change will
stay set until removed, which will affect booting the system if the setting is not cleared. A consent search is a good
example of setting the evidence drive ONLINE, READONLY, and assign a drive letter. If, at any time during the consent
search, contraband is found, the drive can be seized as is, without making an additional change back to its original setting.
A User’s Guide to the Windows Forensic Environment Brett Shavers
A User’s Guide to the Windows Forensic Environment January 2011
However, if contraband is not found and the system will remain with the owner, then (in DiskPart) REMOVE the
drive letter and ATTRIBUTES VOLUME CLEAR READONLY will bring the drive back to the original state. Failure to
clear the READONLY attribute will most likely create a blue screen upon booting to the drive.
Although the 4-byte change is unavoidable in this consent search scenario, an alternative is to search the computer while it
is running with search utilities and that method will surely cause not only numerous changes to the drive and files, but can
cause evidence issues if it becomes seized evidence.
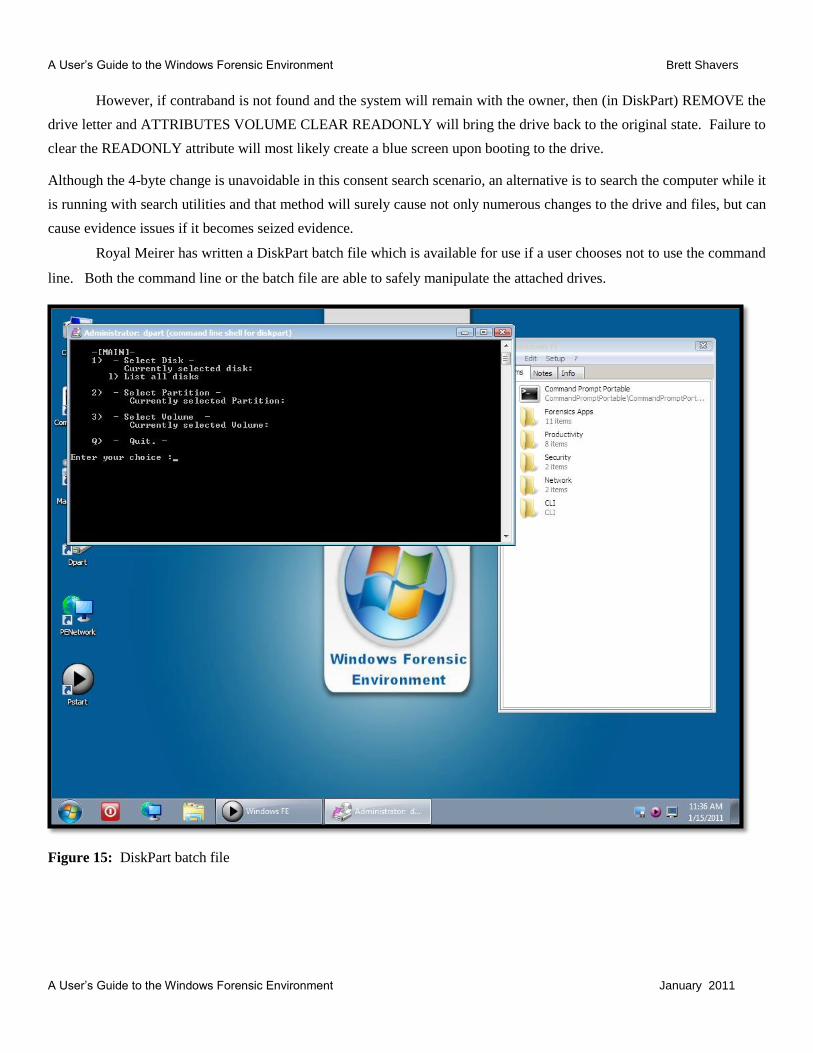
Royal Meirer has written a DiskPart batch file which is available for use if a user chooses not to use the command
line. Both the command line or the batch file are able to safely manipulate the attached drives.
Figure 15: DiskPart batch file

A User’s Guide to the Windows Forensic Environment Brett Shavers
A User’s Guide to the Windows Forensic Environment January 2011
Figure 16: The WinFE system seen above are the drives that are assigned upon boot (WinBuilder WinFE version).
Drive letter “X” is your WinFE operating system files and drive letter “Y” contains the programs you copied into the
Pstart folder prior to building the WinFE. All files on the Y drive are accessible on a live Windows machine (ie, the “live
side” of WinFE).

A User’s Guide to the Windows Forensic Environment Brett Shavers
A User’s Guide to the Windows Forensic Environment January 2011
Testing
In personal testing of WinFE, using Windows and Linux (Ubuntu) operating systems, no changes were found to
have been made when booted to WinFE and images created of the evidence drives. In each test, the evidence drives were
wiped with DOD passes of secure wiping prior to installing the respective operating systems. Each drive was imaged via
a hardware write blocker and verified. Each drive was then placed into a computer system, booted to WinFE, and imaged
with two separate imaging utilities (FTK Imager 3.0 and X-Ways Forensics 15.8). The images (hardware write blocked
prior to being booted to WinFE and WinFE write blocked) were compared via hash values. No drive hash values changed
with the WinFE imaging process.
Attempts to change the hash were made by bringing the evidence drive online (ONLINE DISK) and setting the
evidence drive to readonly (ATTRIBUTES DISK SET READONLY). None of these settings changed the hash values of
the drives. This included non-Windows operating systems such as Linux in which there were no changes to the drives.
Attempts to create files and delete files on the evidence drives were also negative.
However, placing a volume in readonly and assigning a drive letter DID change the hash value of the images.
This is an expected outcome, a documented occurrence, and does not affect any user-created data on the evidence drives.
Given a specific situation (such as the previously described consent search scenario), this may be a better alternative than
other means, less intrusive, with a great amount of time savings to simply boot to WinFE to conduct a search.

A User’s Guide to the Windows Forensic Environment Brett Shavers
A User’s Guide to the Windows Forensic Environment January 2011
Conclusion
WinFE is just a forensic boot disc. Two simple changes to the registry of the basic WinPE created by Troy
Larson are all it is. But, the impact of forensic acquisition took a huge leap forward with such an introduction to the
forensic community of WinFE that it is much more than just an imaging utility.
I would not foresee the development of WinFE to stagnant anytime soon, nor would I see its use decline. In fact,
I‟d expect just the opposite. WinBuilder is a prime example of taking WinFE to a new level of usefulness. The ease of
using Windows in a forensic environment is something that will be hard to exceed in terms of usefulness. Given that
building a WinFE disc is extremely simple and quick, personal validation on a self-built utility is more sound that
downloading another utility in which the user has no idea on its background, build, or customizations.
Linux based boot discs are here to stay, as are the forensic floppy discs. But, this is another tool to add to your
forensic toolbox; the Windows Forensic Environment. As with any forensic utility, there is a time and place for
everything and no one tool can do everything. WinFE should be part of your arsenal for those times nothing else will do
as good as job for what you need. And truly, you don‟t have to leave the office without it.

A User’s Guide to the Windows Forensic Environment Brett Shavers
A User’s Guide to the Windows Forensic Environment January 2011
References and Credits
Certainly, without Troy Larson‟s ingenious modification of WinPE, there would not be a WinFE. Additionally,
because of input from others such as Colin Ramsden, Nuno Brito, and Royal Meier, the development of WinFE from a
command shell OS has grown into a full-fledged forensic environment, simple to build, flexible to use, and very powerful.
Thanks to all of you!
Some additional resources for WinFE include;
Troy Larson How to Build Windows FE (Forensic Environment) with the Windows Preinstallation Environment 2.1, 03-2008 Microsoft‟s Windows Forensic Environment, CTIN, 04-2009
Hackin9 Windows FE A Windows-PE Based Forensic Boot CD, Marc Remment, 06-2009
Brett Shavers The (Nearly) Perfect Boot CD, 04-2010 Windows Forensic Environment Blog and Forum, http:winfe.wordpress.com, 05-2010 Bootable Forensic Media & Windows Forensic Environment.ppt, 10-2010
Software Noted
WinBuilder http://www.winbuilder.net X-Ways Forensics http://www.x-ways.net Evidor http://www.x-ways.net FTK Imager http://www.accessdata.com Encase http://www.guidancesoftware.com Field Search http:www.justnet.org/Pages/fieldsearch.aspx PStart http://www.pegtop.de/start/ WinAudit http://www.pxserver.com/WinAudit.htm RegRipper http://www.RegRipper.net ProDiscover http://www.techpathways.net Folder2ISO http://www.trustfm.net/ WinRAR http://rarlabs.com TeamViewer Portable http://www.teamviewer.com Free Commander http://www.freecommander.com/ Nirsoft http://www.nirsoft.net
IEF http://www.jadsoftware.com
A User’s Guide to the Windows Forensic Environment Brett Shavers
A User’s Guide to the Windows Forensic Environment January 2011
i http://www.microsoft.com
ii http://reboot.pro/12427/
iii http://technet.microsoft.com/en-us/library/cc766093(WS.10).aspx
iv http://technet.microsoft.com/en-us/library/cc709665(WS.10).aspx and http://support.microsoft.com/kb/916902
v http://www.voomtech.com/
vi http://www.accessdata.com
vii http://www.teamviewer.com
viii http://www.pxserver.com/WinAudit.htm
ix http://support.microsoft.com/kb/300415
x http://www.justnet.org/Pages/fieldsearch.aspx
xi whttp://www.forensicfocus.com/downloads/WinFE.pdf
xii http://www.accessdata.com
xiii http://reboot.pro
xiv http://www.pegtop.de/start/
xv http://www.guidancesoftware.com
xvi http://www.techpathways.net
xvii http://www.x-ways.net
xviii http://www.jadsoftware.com


