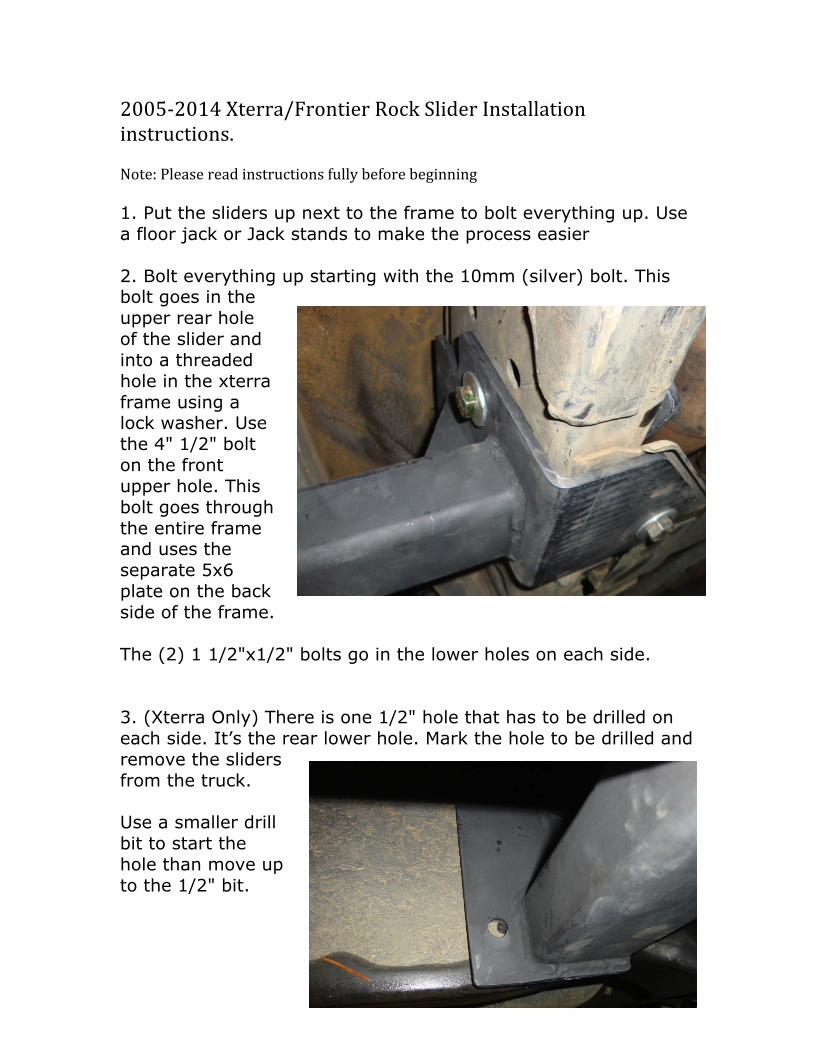
2005-‐2014 Xterra/Frontier Rock Slider Installation instructions. Note: Please read instructions fully before beginning 1. Put the sliders up next to the frame to bolt everything up. Use a floor jack or Jack stands to make the process easier 2. Bolt everything up starting with the 10mm (silver) bolt. This bolt goes in the upper rear hole of the slider and into a threaded hole in the xterra frame using a lock washer. Use the 4" 1/2" bolt on the front upper hole. This bolt goes through the entire frame and uses the separate 5x6 plate on the back side of the frame. The (2) 1 1/2"x1/2" bolts go in the lower holes on each side. 3. (Xterra Only) There is one 1/2" hole that has to be drilled on each side. It’s the rear lower hole. Mark the hole to be drilled and remove the sliders from the truck. Use a smaller drill bit to start the hole than move up to the 1/2" bit.

4. (Xterra Only) After the hole is drilled. Repeat steps 1 and 2 5. Put the final bolt in the hole you just drilled. It uses the nut with the handle on it to get it inside the frame. After installing this you can simply bend over the handle. (This step completes the Xterra Installation)
Frontier: Installation for the Frontier sliders is almost identical to the Xterra with just a couple exceptions. Skip steps 3 and 4 (No holes need to be drilled) 6. Once the front and rear legs have been installed with the previous steps, we move to the center support. The L shaped bracket attached to the slider will have 3 holes in it. There is a slightly smaller L shaped bracket that comes unattached that will fit inside the frame and on top of the attached bracket. All of the holes in the two brackets should line up with each other. In the lower holes insert the (2) ½”x1 ½” bolts from the bottom up using a fender washer on both sides and a lock washer and nut on the top. Insert (1) ½”x4” bolt from the outside of the frame bracket through the outer bracket, the truck frame, and the inner bracket. Tighten all the bolts and recheck.


